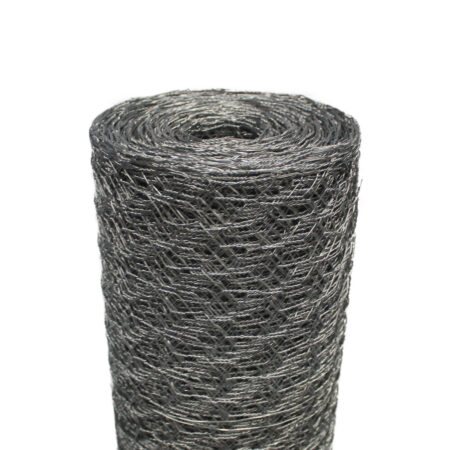
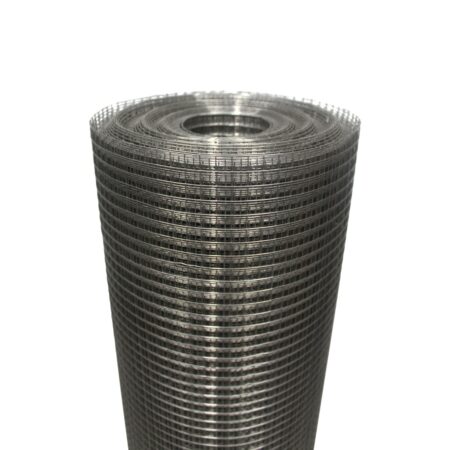
Weld Mesh
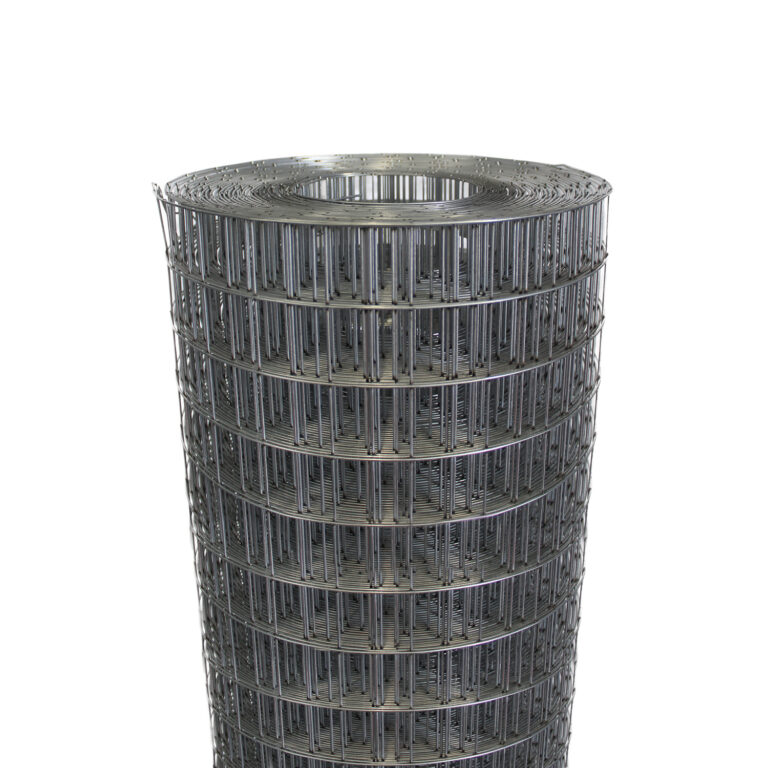
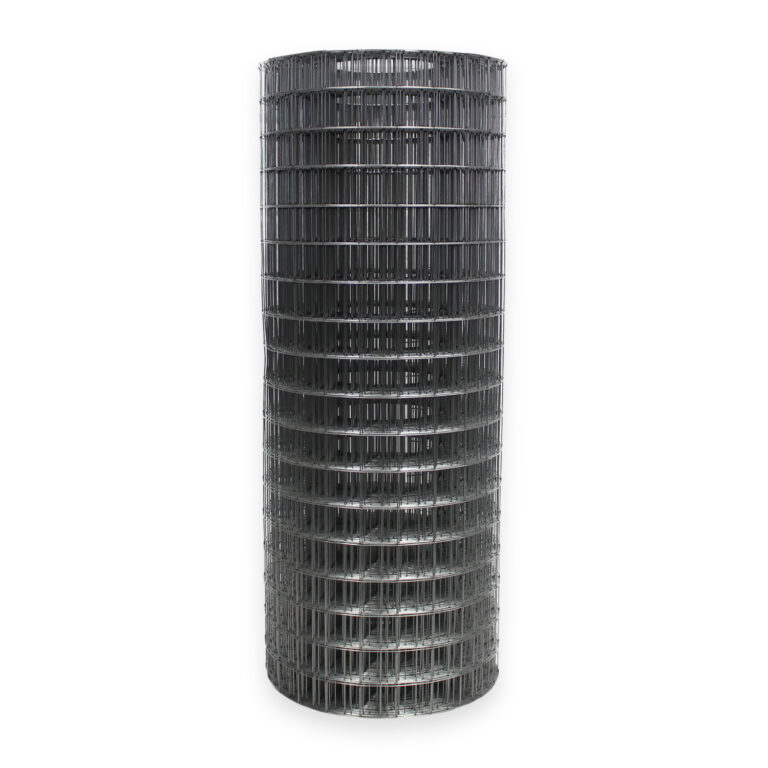

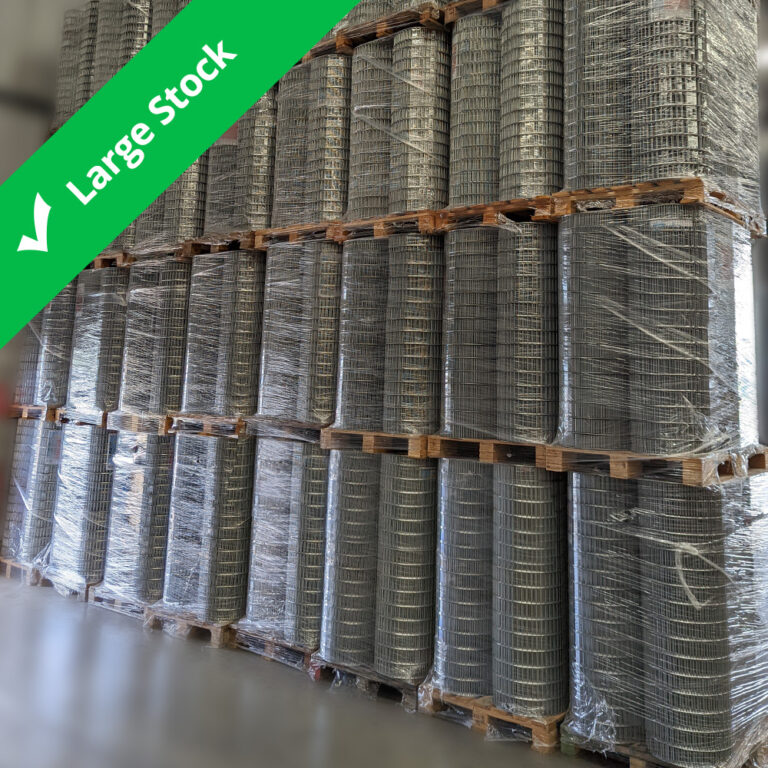
Full range of galvanised welded wire mesh rolls for perimeter fencing, boundary demarcation, pet enclosures, gardening.
Key info:
- Weather and corrosion-resistant
- European made and economy options
Related: All Wire Mesh, Dog Fencing
Scroll for more details

Helpful Wire Mesh Information
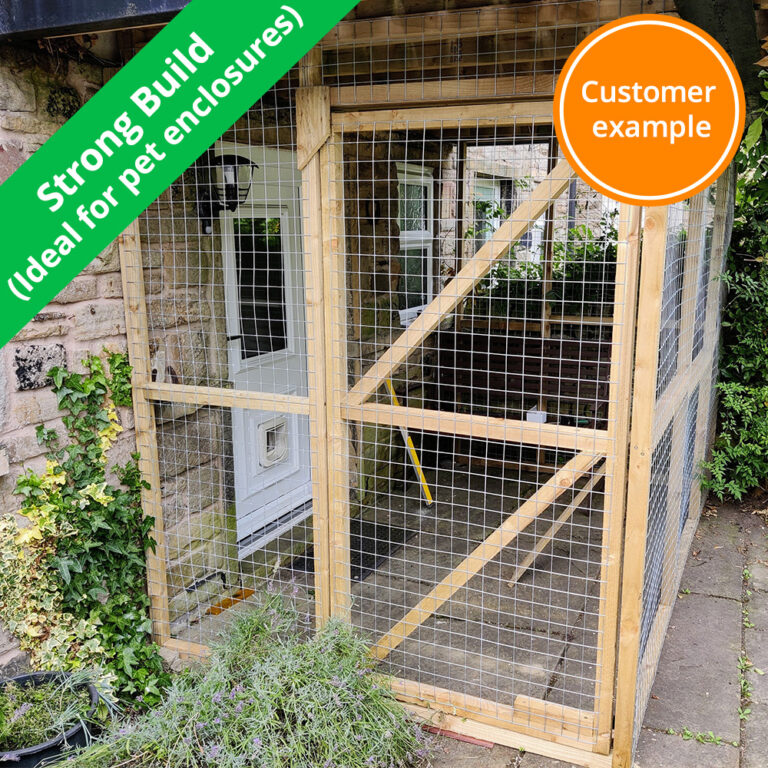
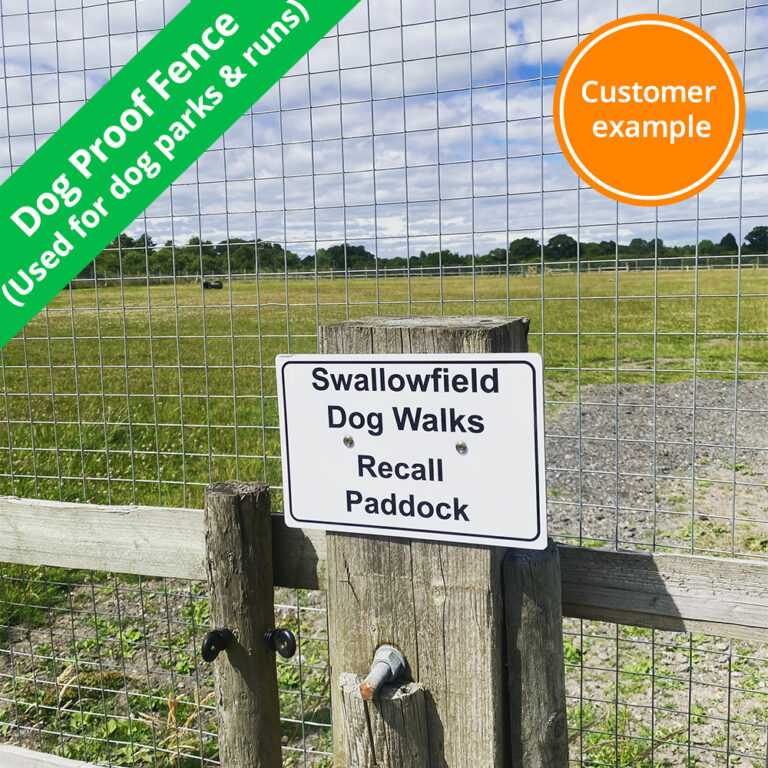
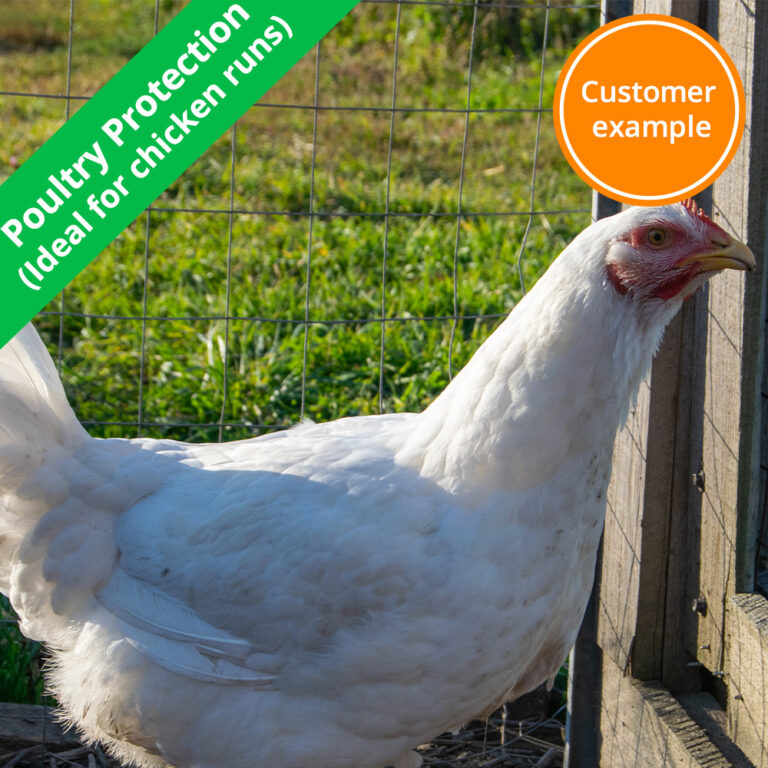
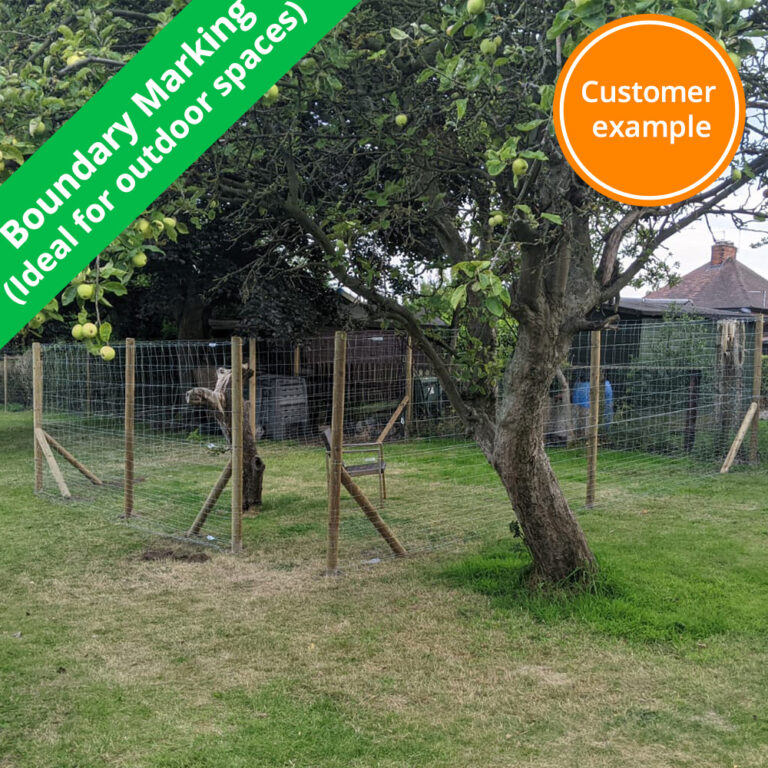
Customer Images
Grading
| Type | Method | Properties |
| BUDGET | Steel wires are galvanised before welding, then the mesh is hot-dipped again to create the second layer of galvanisation. | Heavily galvanised after manufacture for longevity. Lower degree of uniformity and straightness. |
| STANDARD (Made in Europe) |
Pre-galvanised wires are welded together to create the final product. | Strong weld points. Uniform & regular weld mesh. Smooth finish. Good corrosion resistance. |
| PREMIUM (Made in Europe) |
Uses a double method: pre-galvanised steel wires are assembled to create the final product which is then hot dipped again in a very thick layer of zinc. | Best quality for professional use. Increased abrasion & corrosion resistance – can withstand harsher conditions. Longer lifespan. |
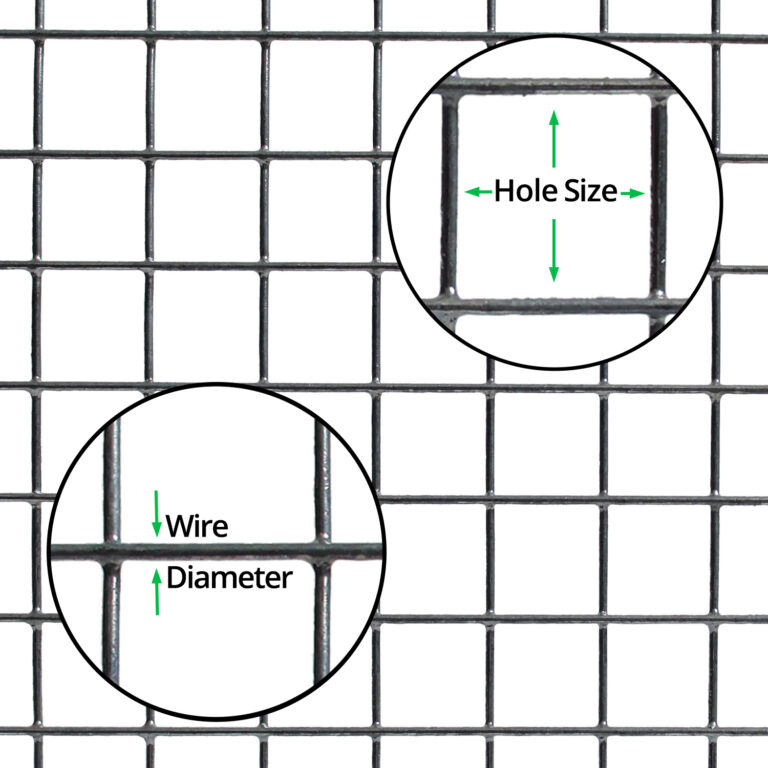
Size & Applications
| Hole Size | Use For: |
| 50mm x 50mm | Dog pens / Fox protection / General boundary fencing |
| 25mm x 25mm | Fox protection / Cat enclosures / Garden fencing |
| 19mm x 19mm | Rat & Squirrel protection |
| 13mm x 25mm | Bird protection / Small animal enclosures |
| 13mm x 13mm | Fruit cages / Bird protection |
| 6mm x 6mm | Rodent protection |
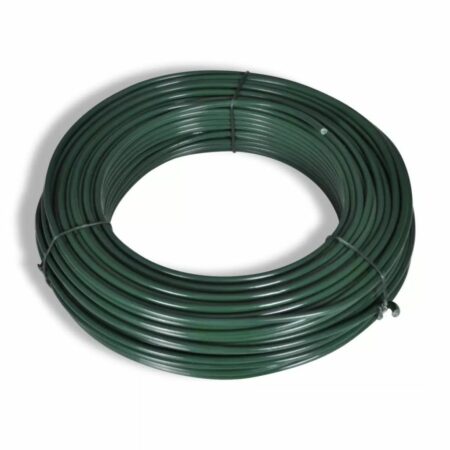
Attachments
| Attach to: | How to: |
| Wood/ Wooden Posts (Staples) |
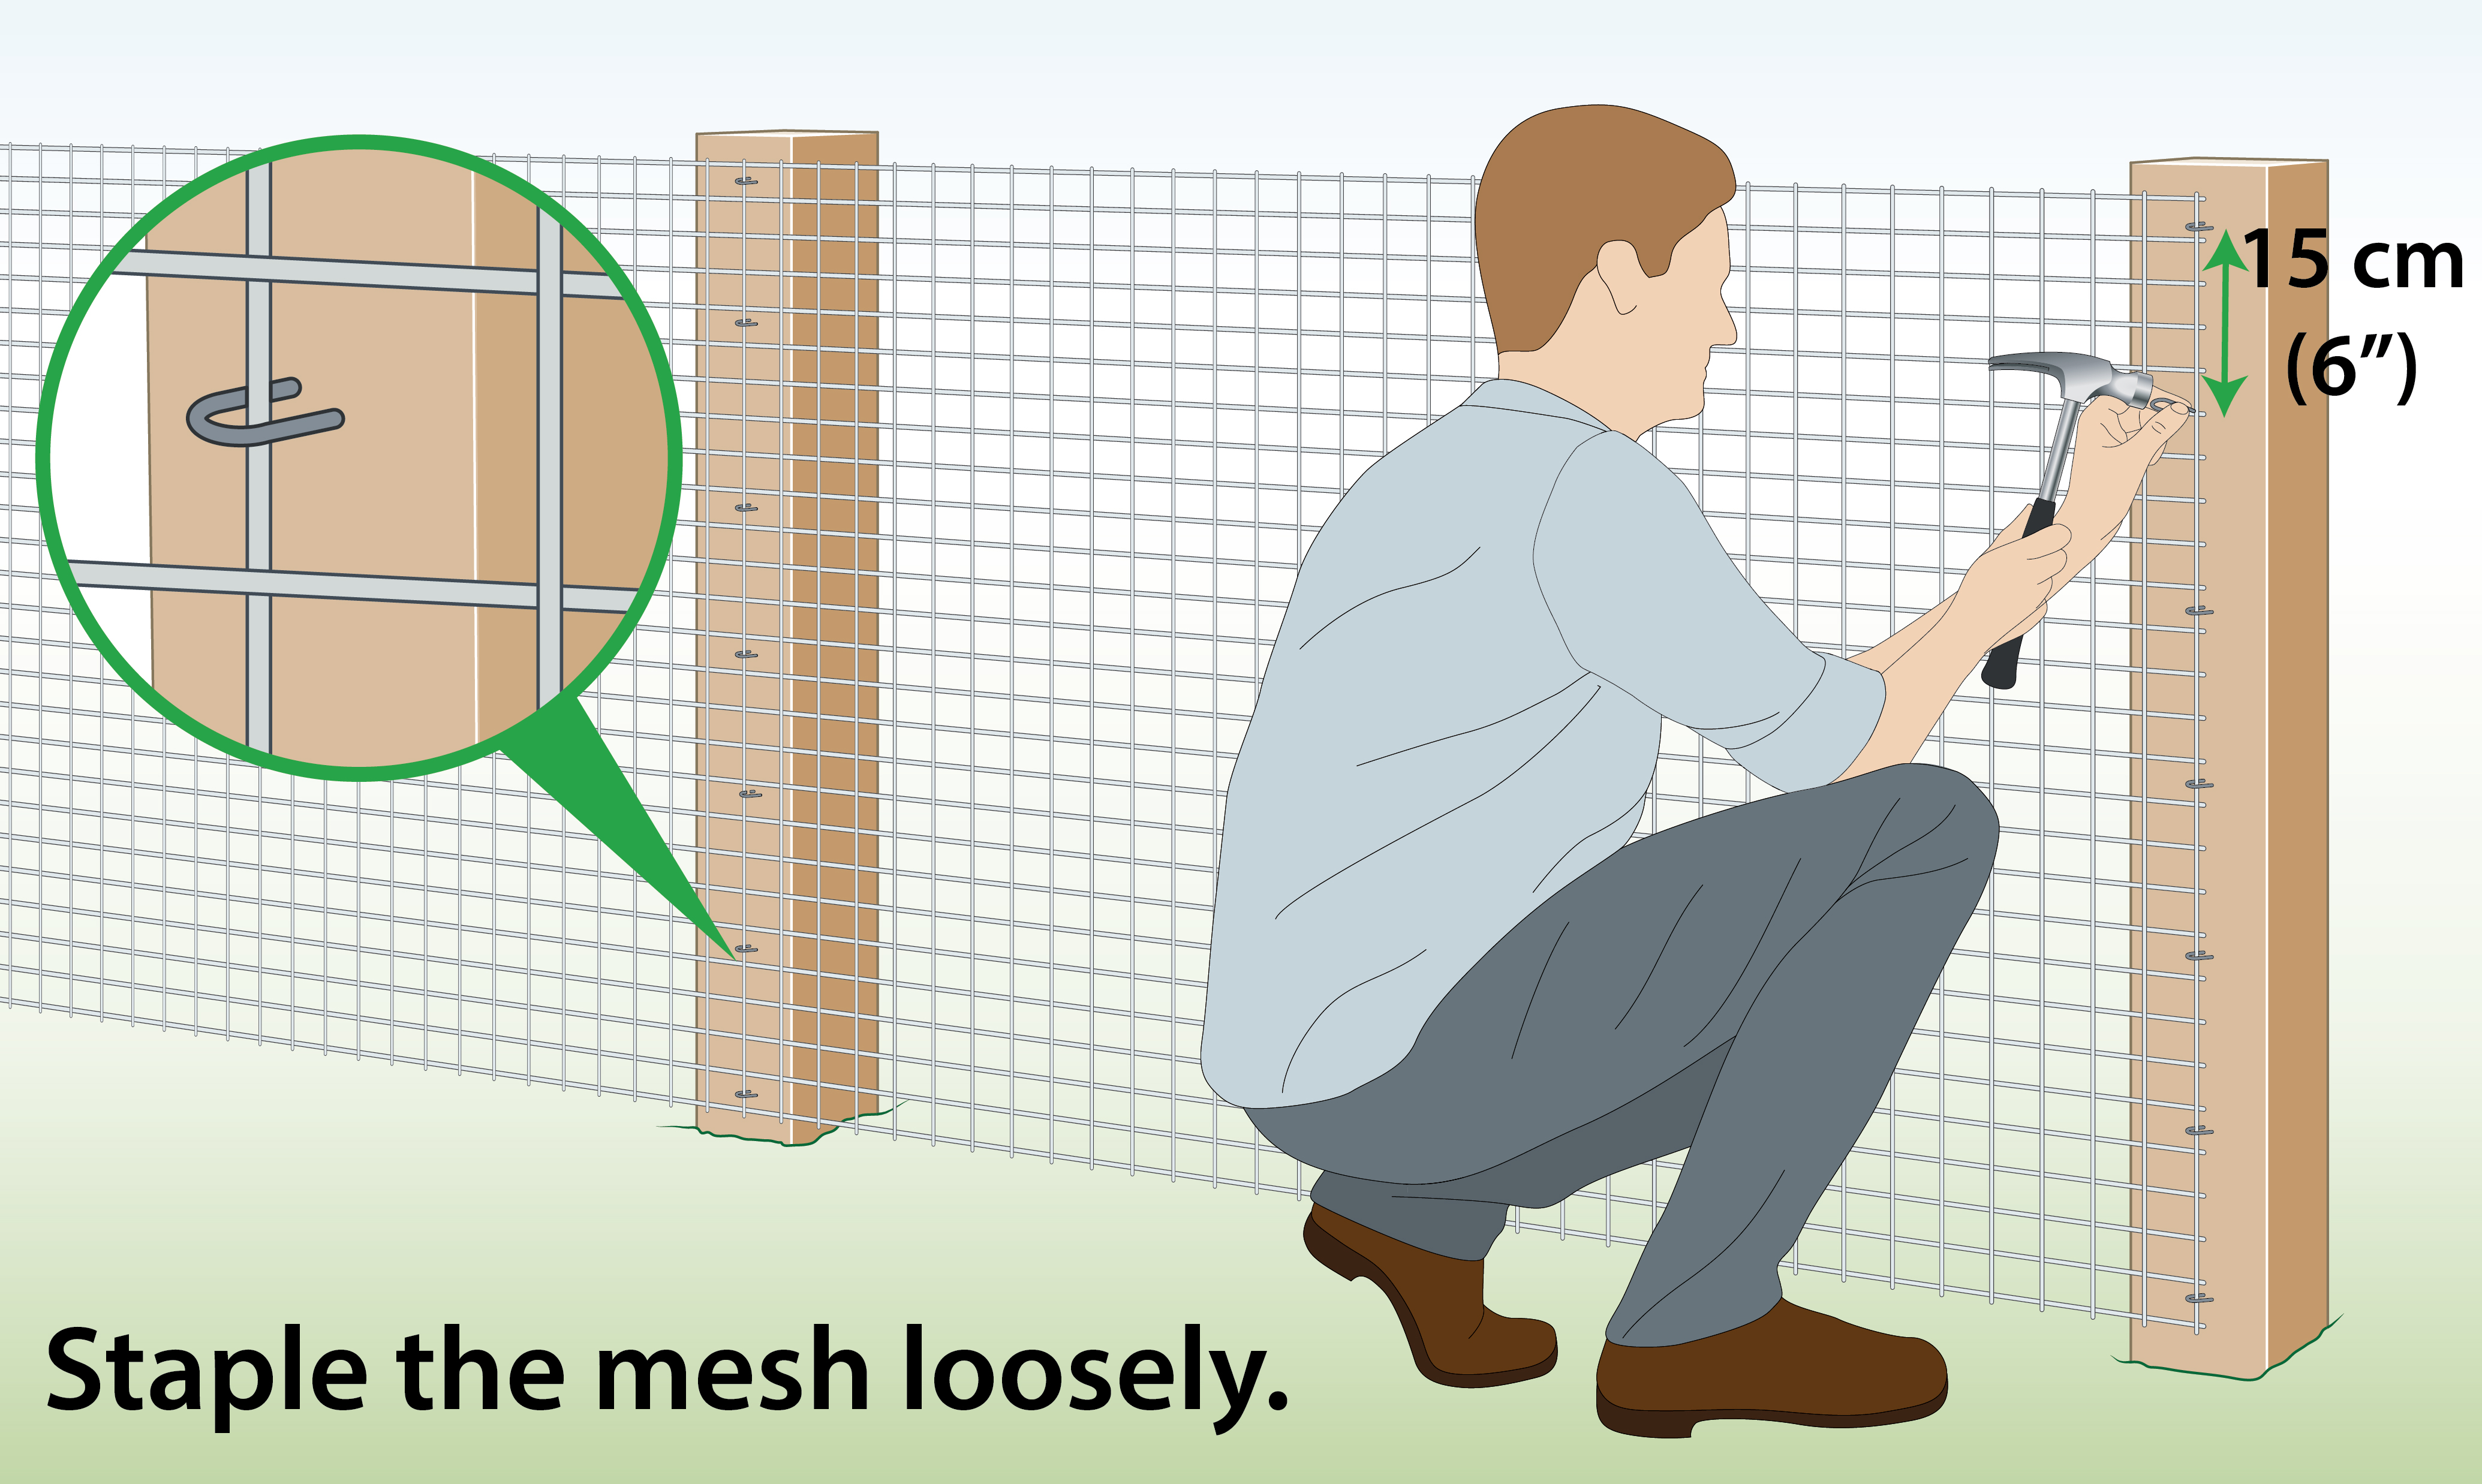 |
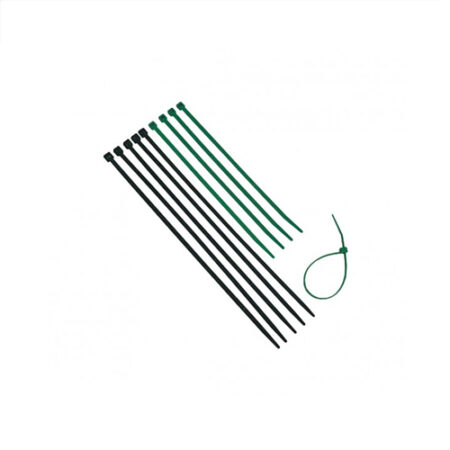
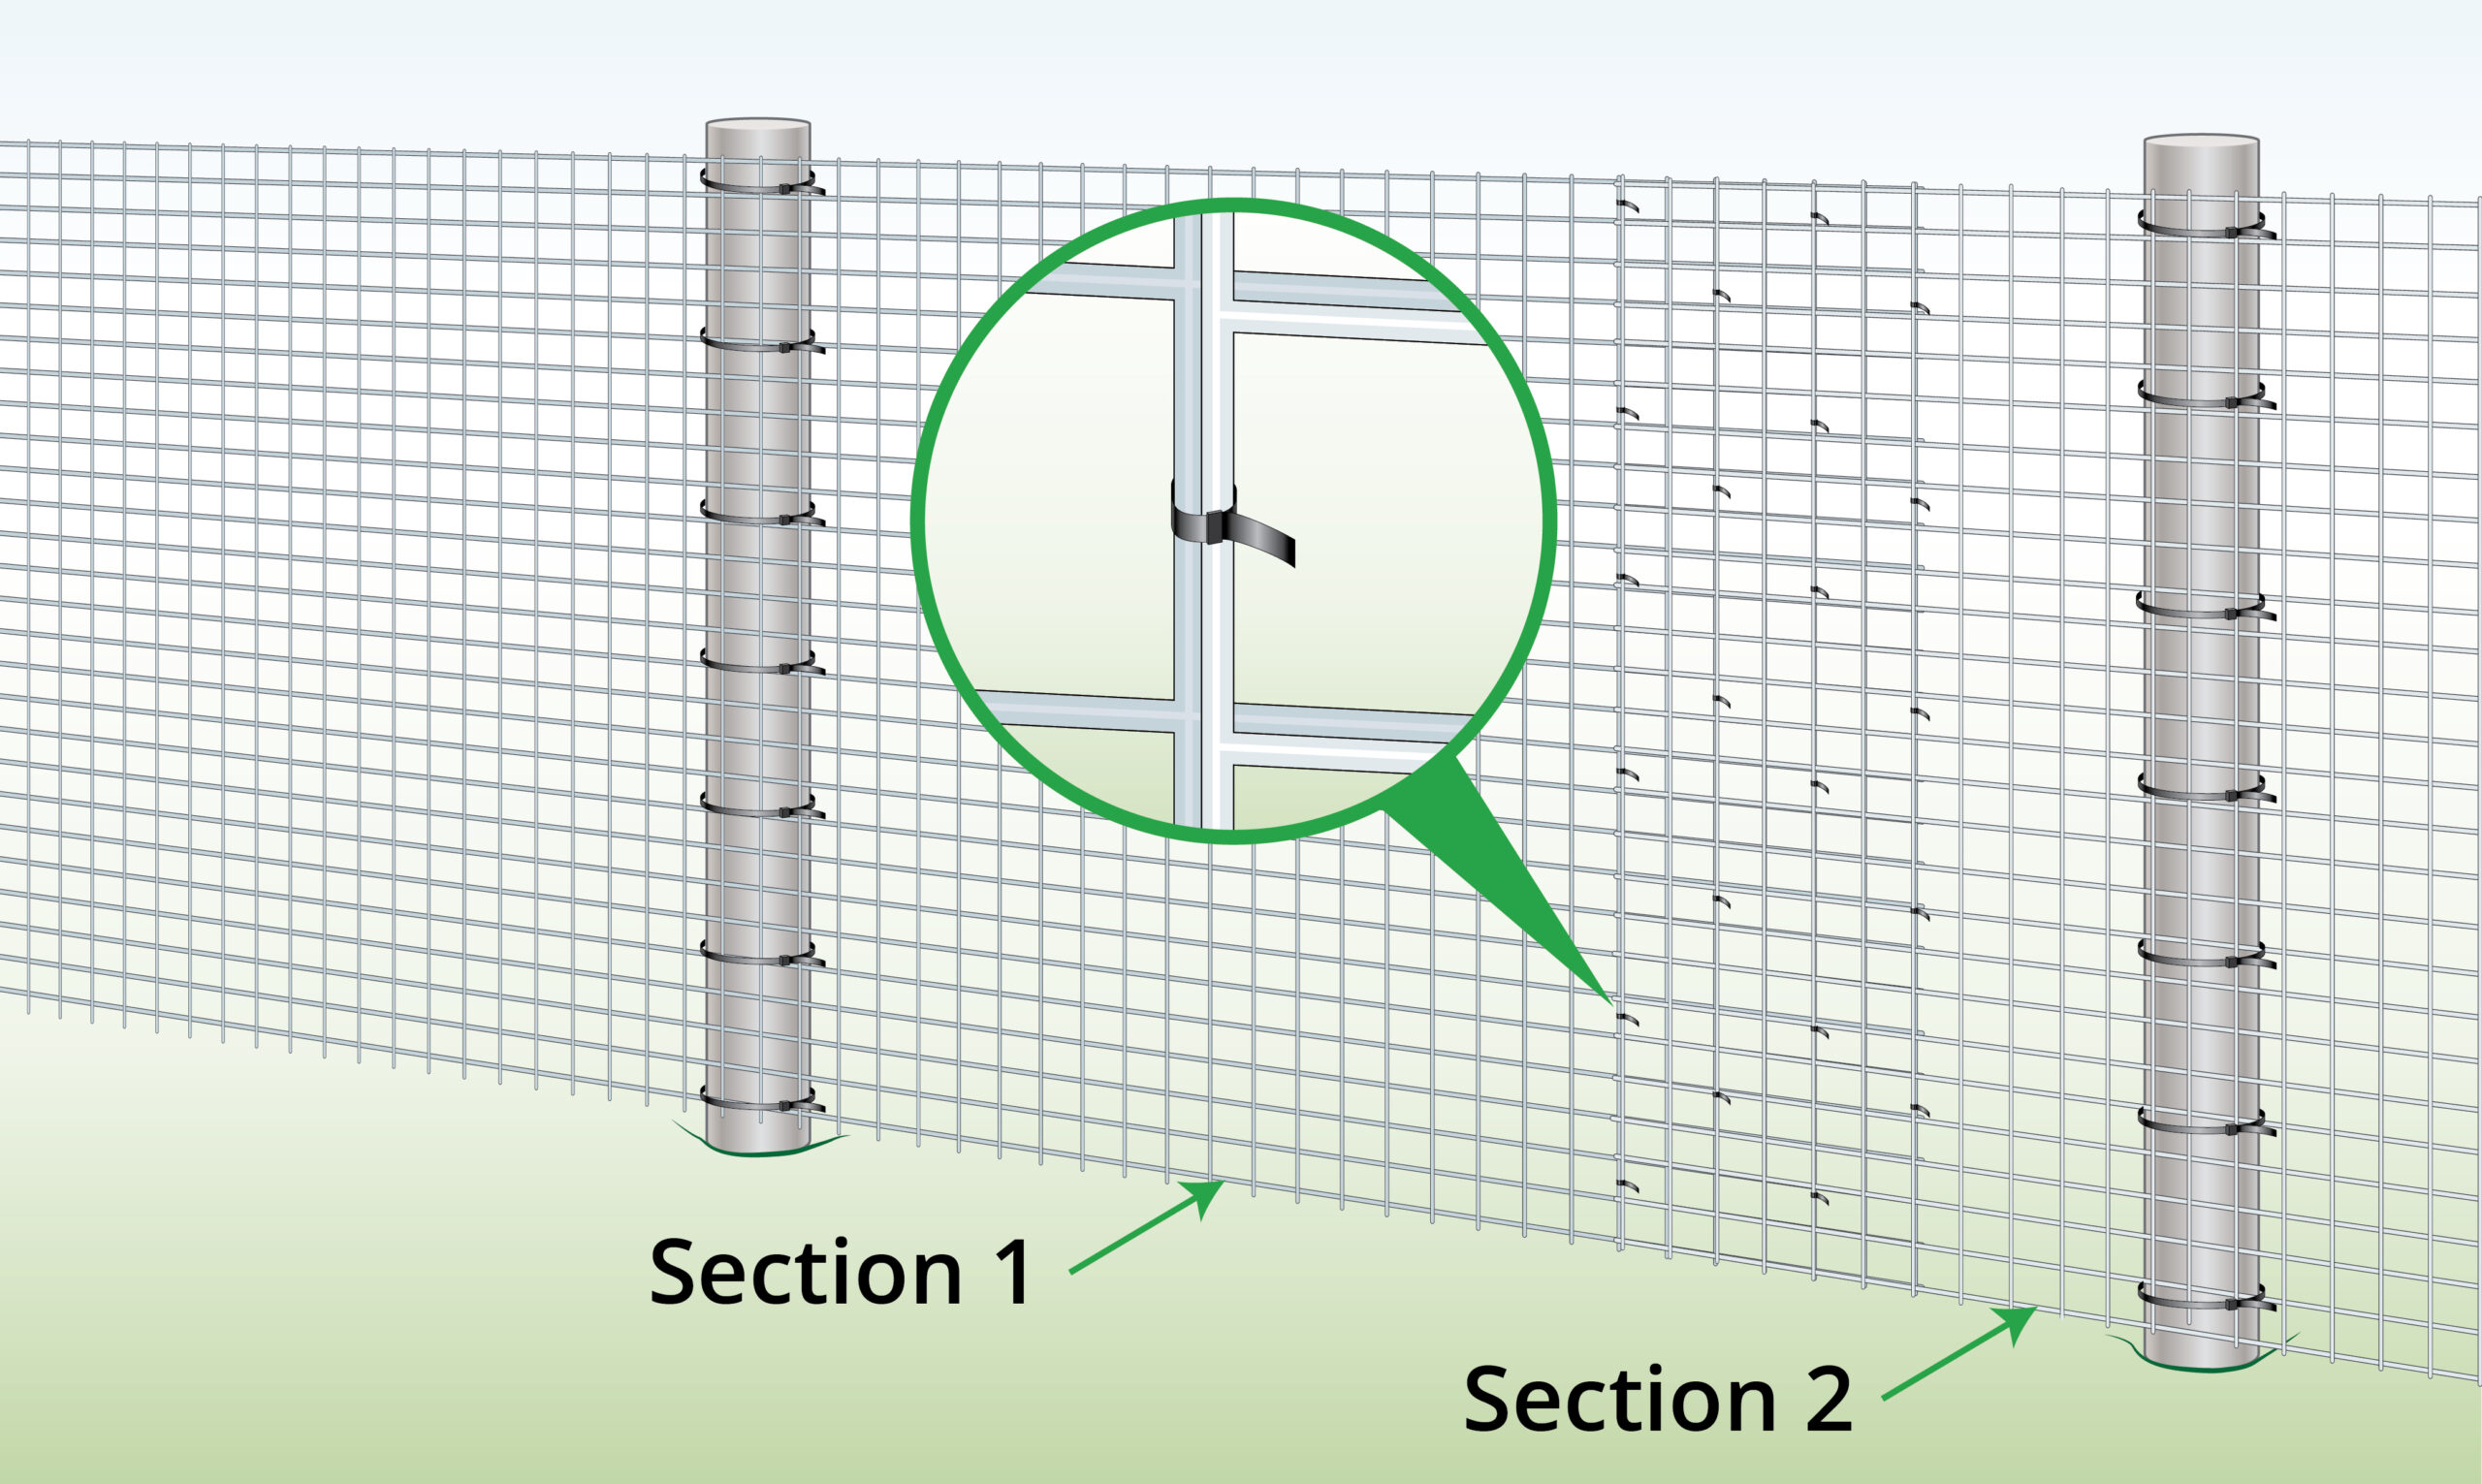
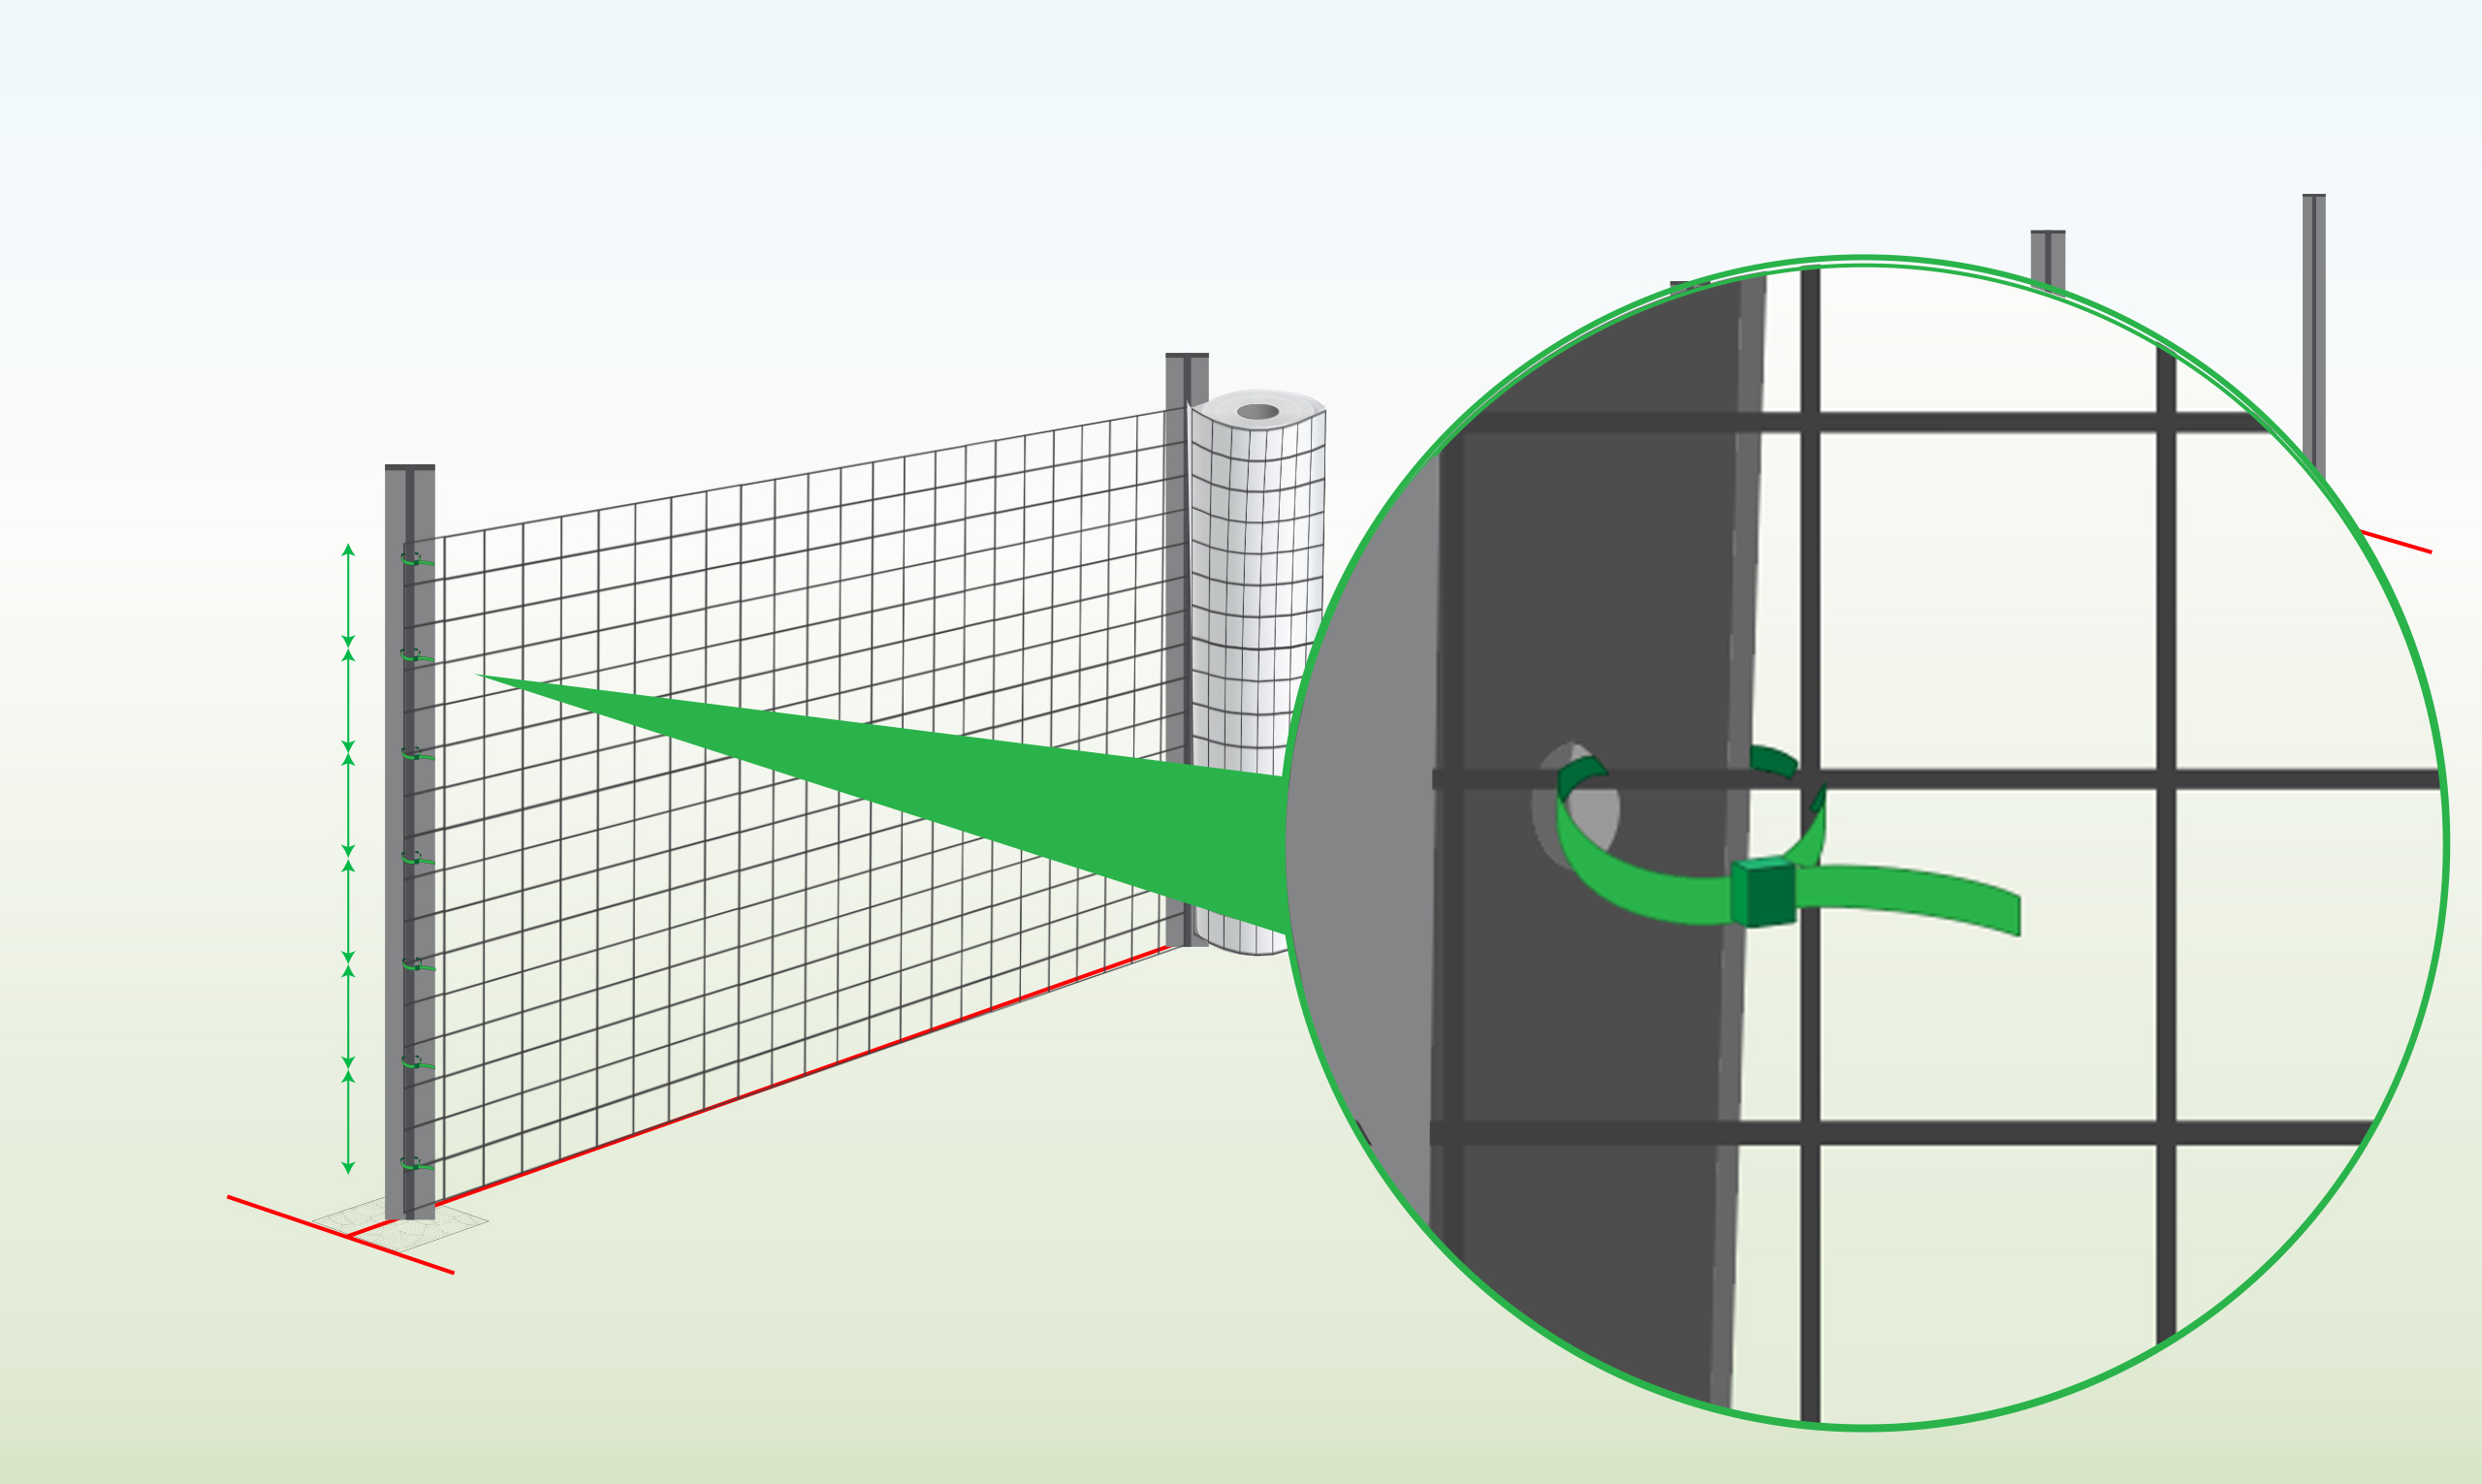
| Metal/ Metal Posts (Cable ties) |
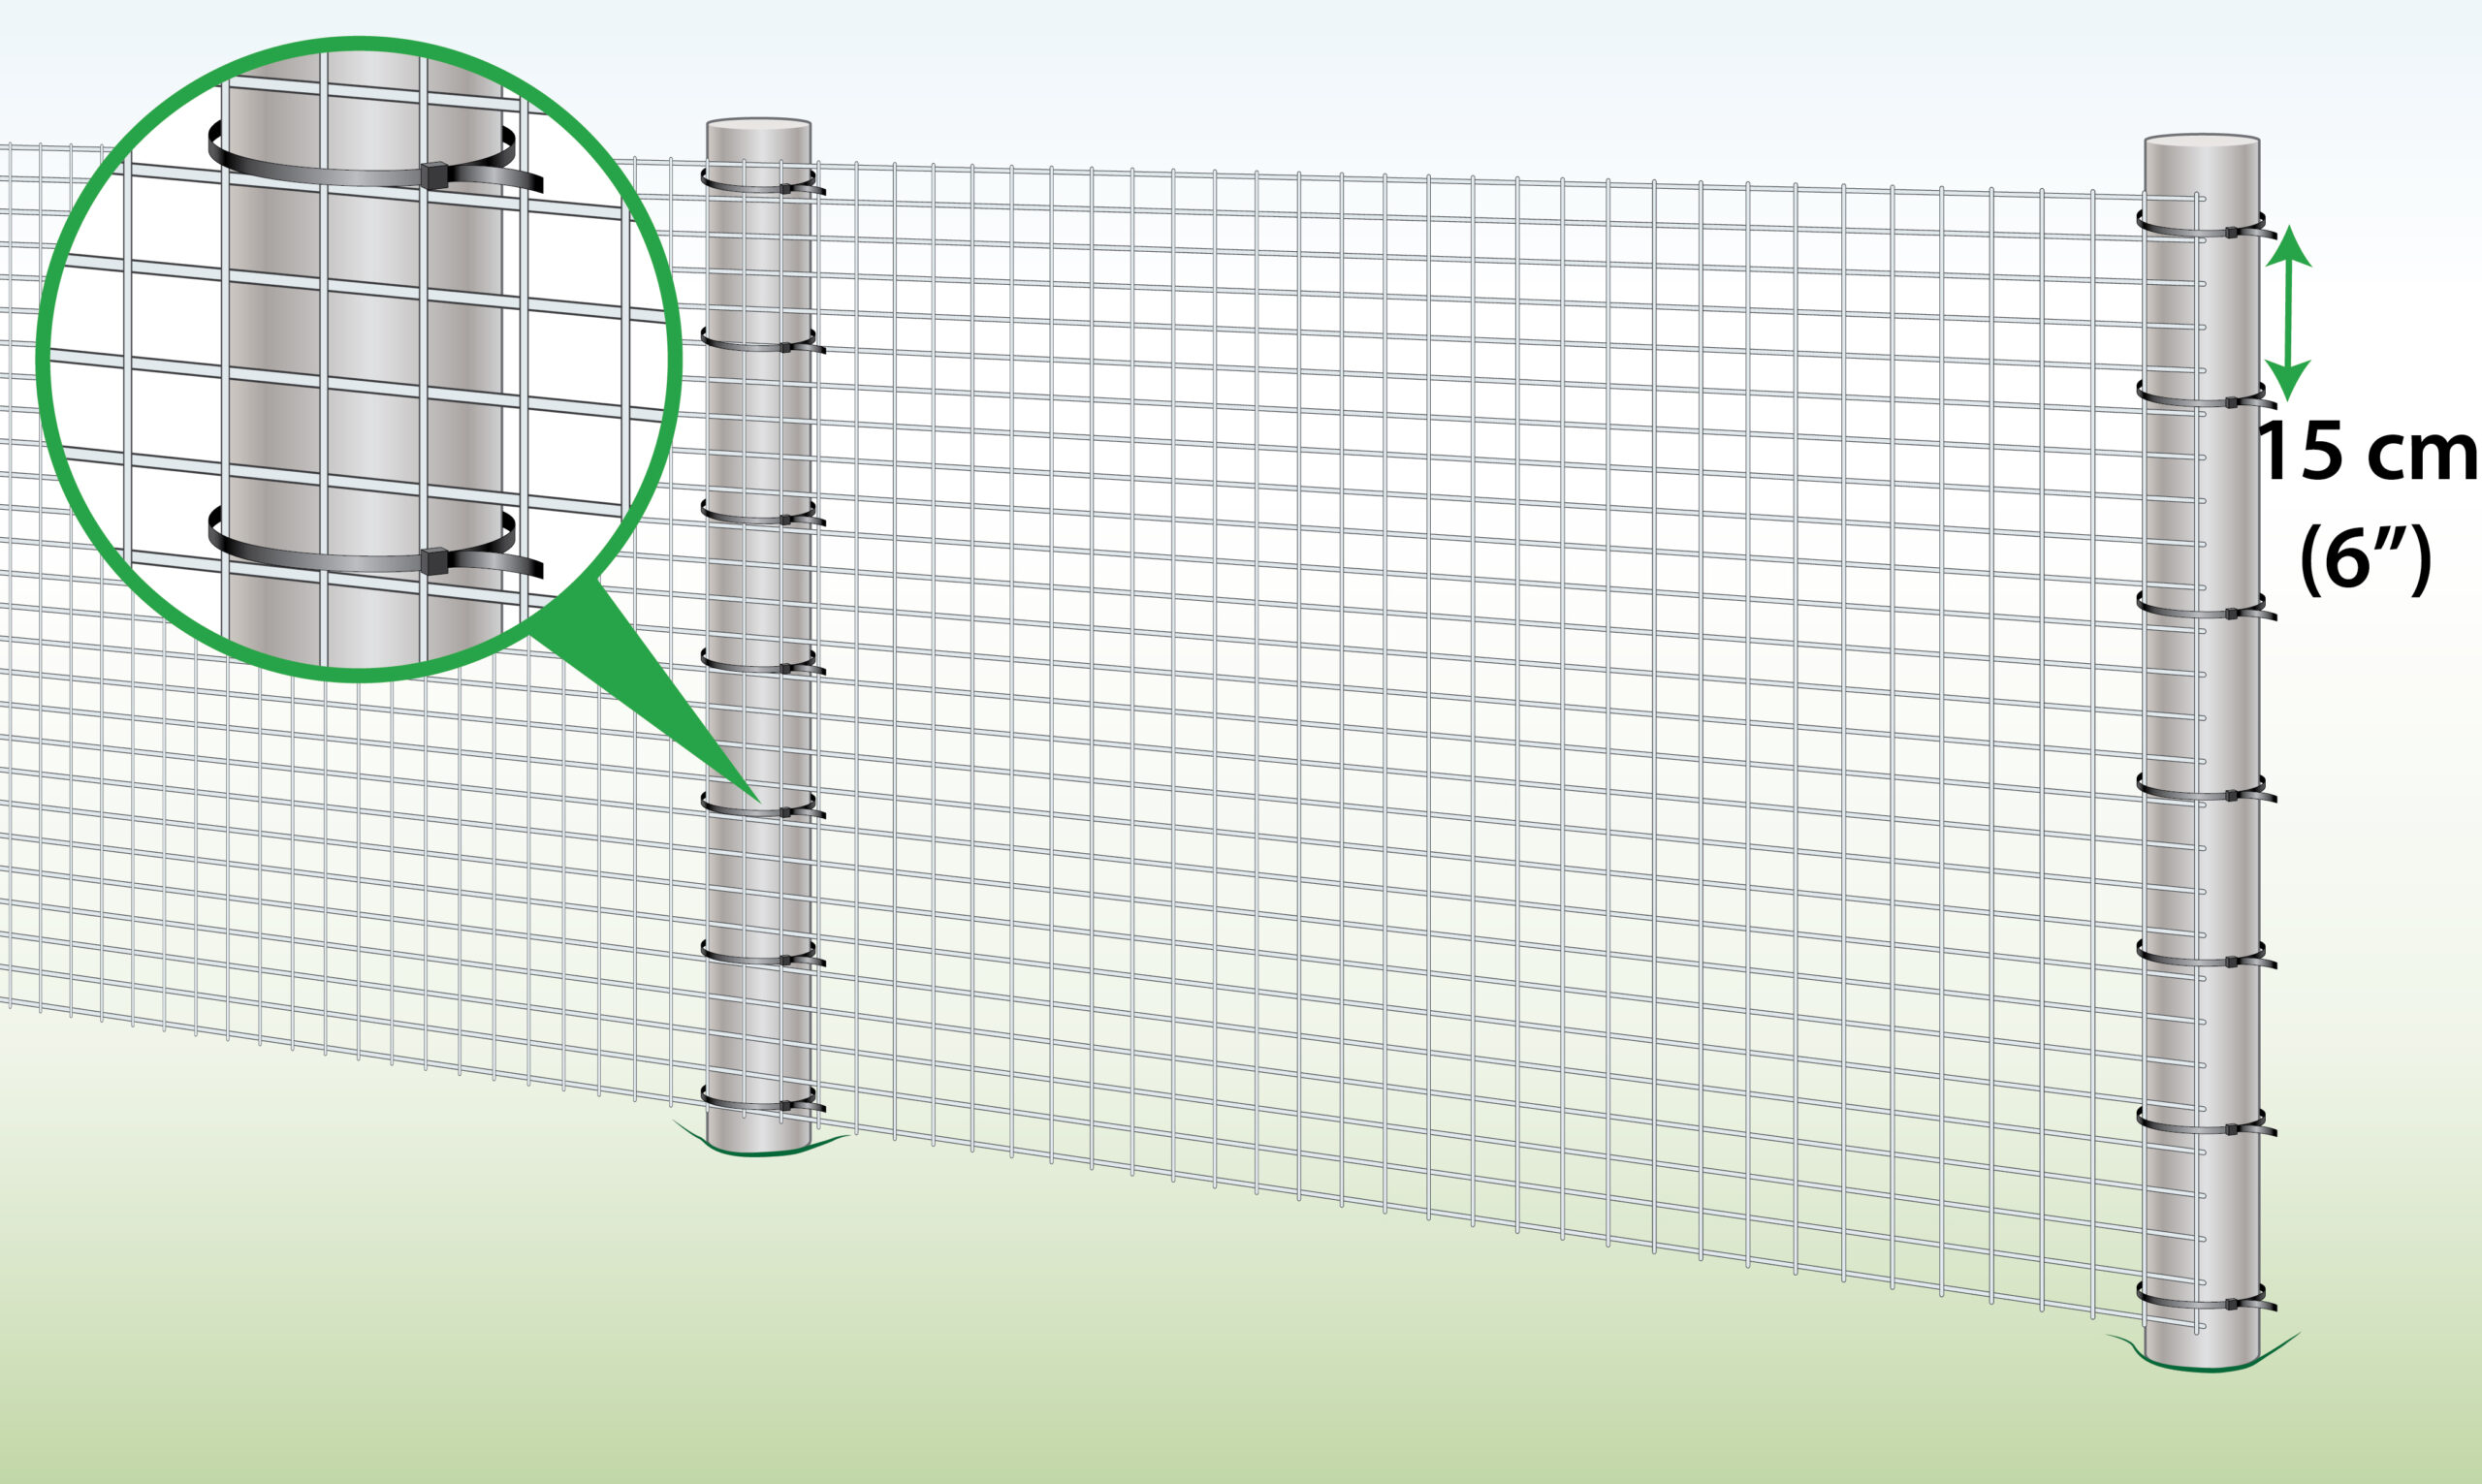 |
| Concrete Posts | 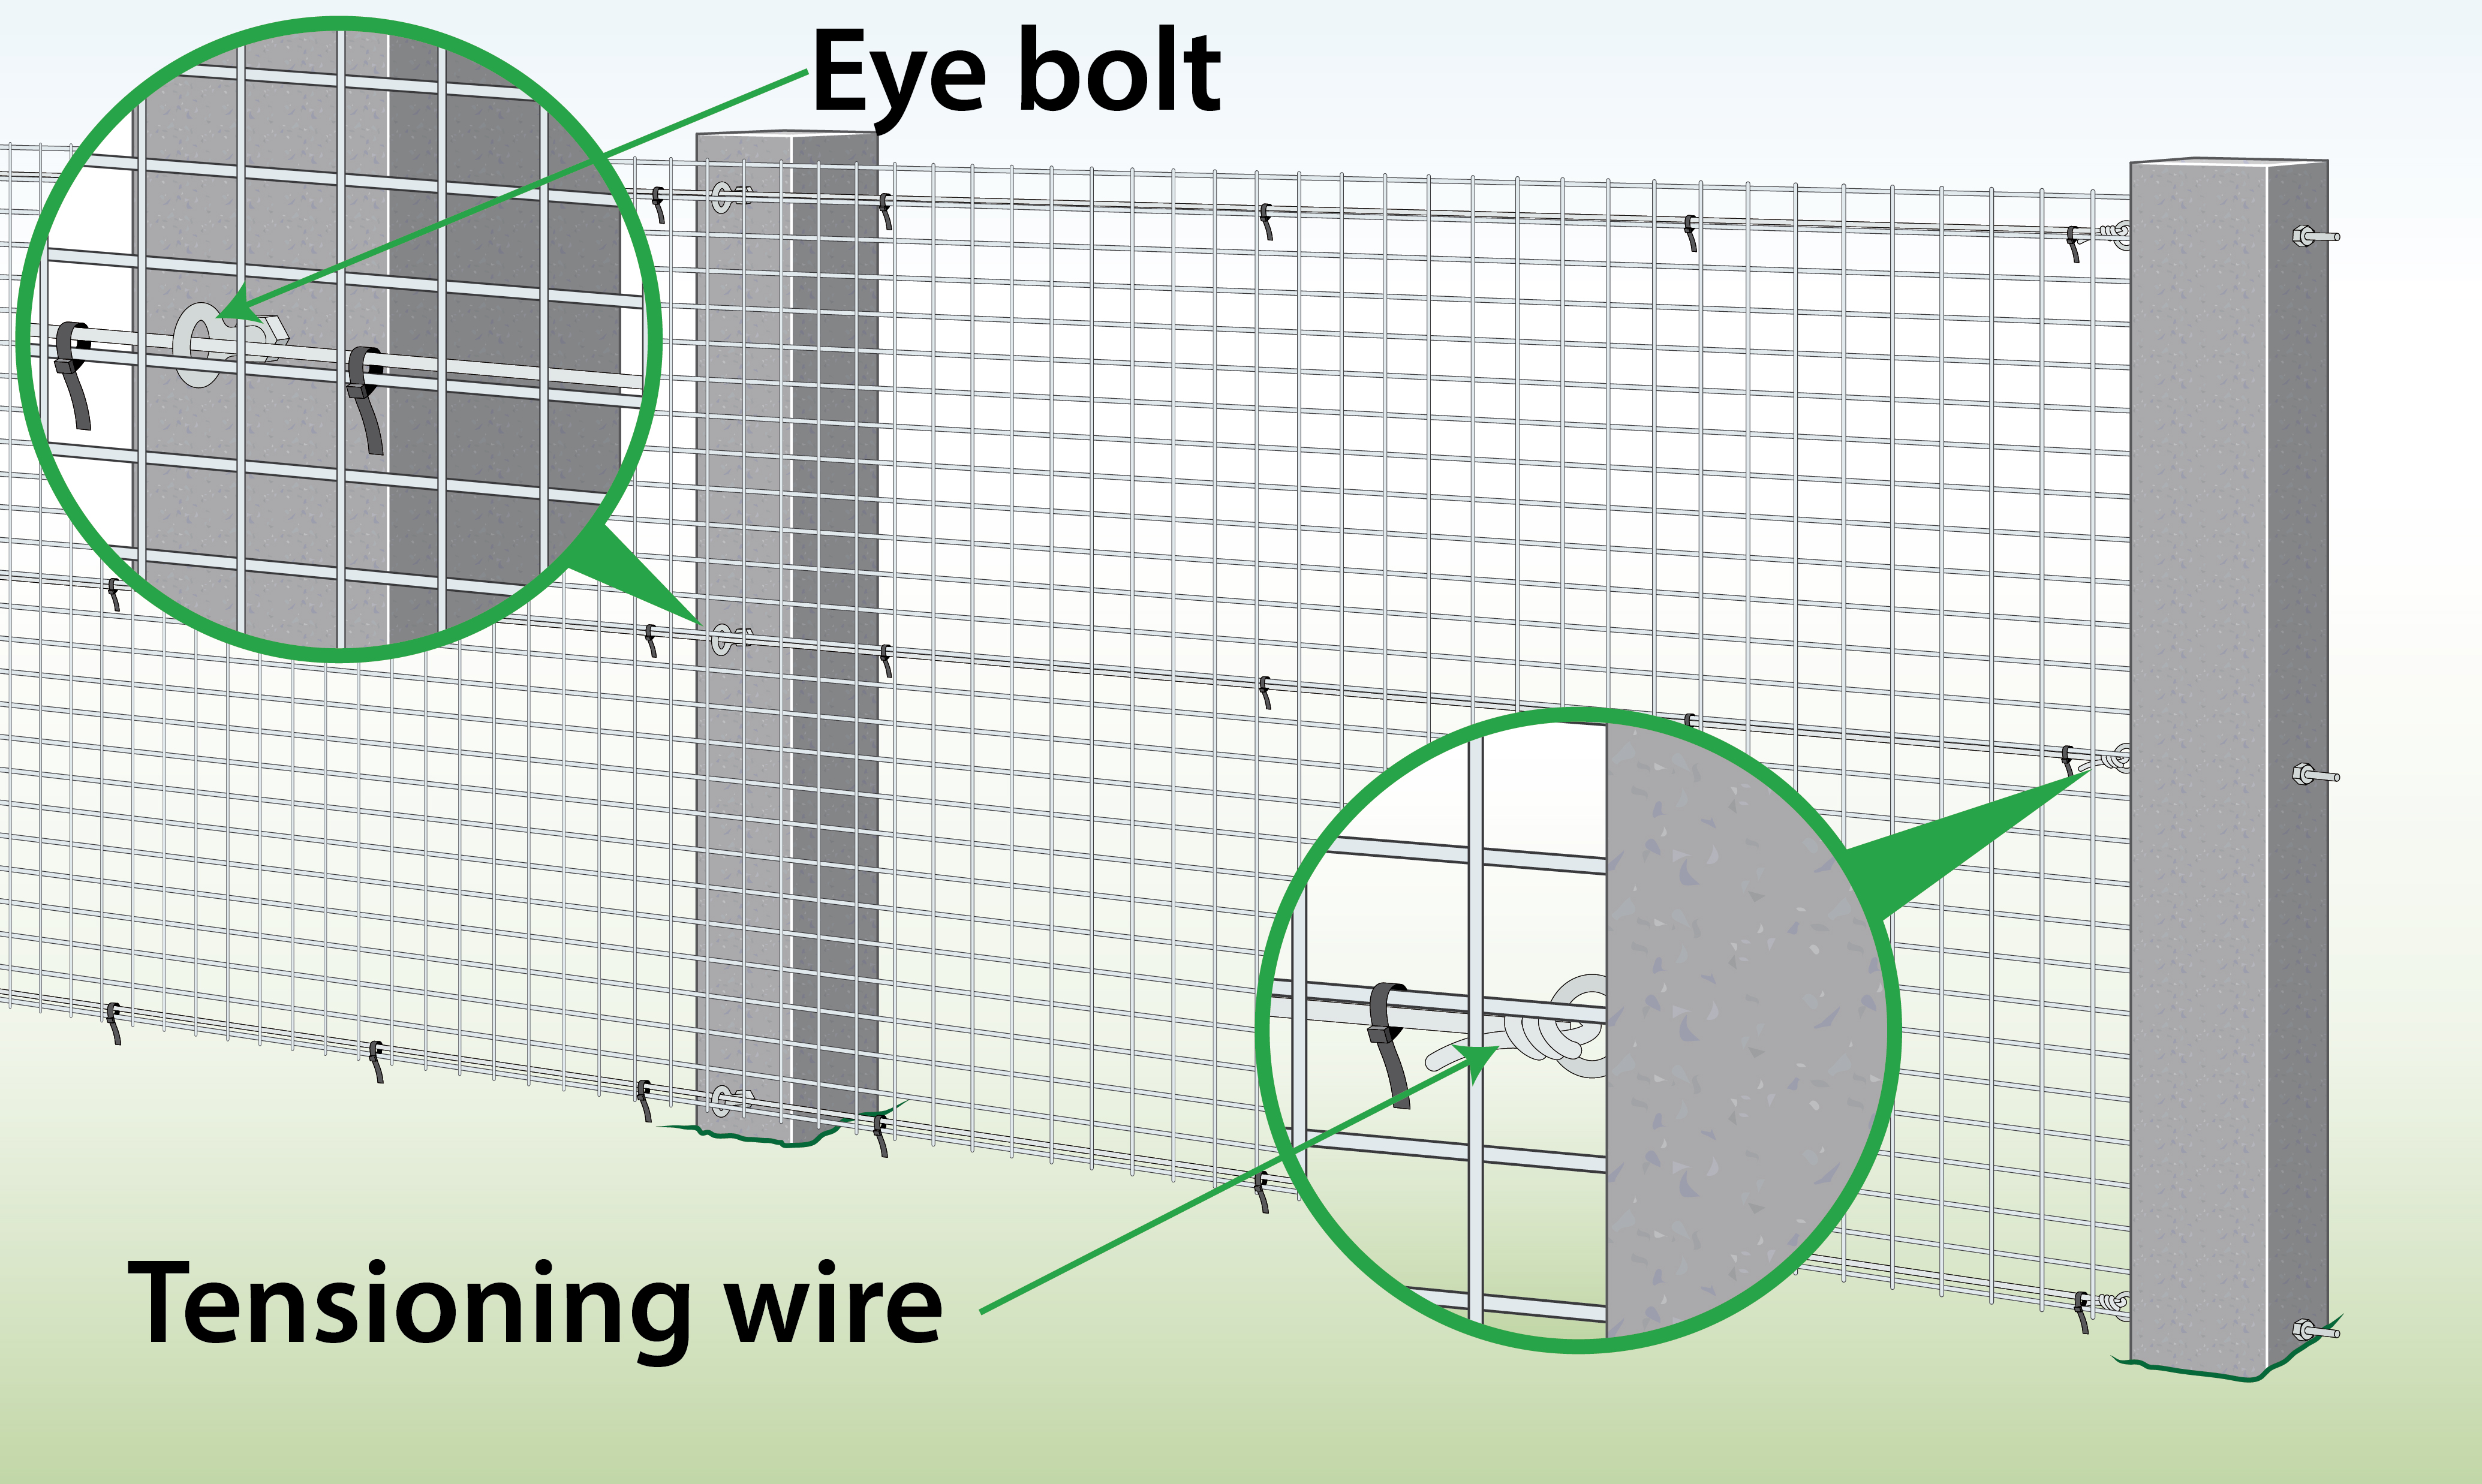 |
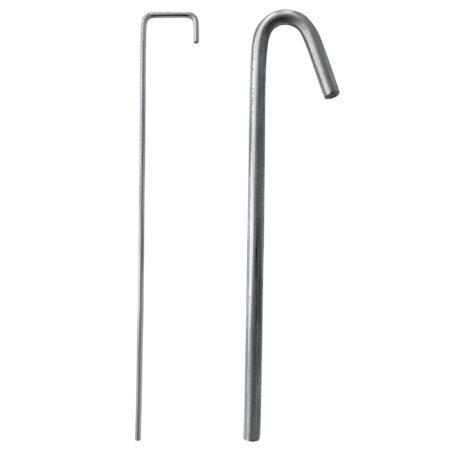
| Soil
(Pegs) |
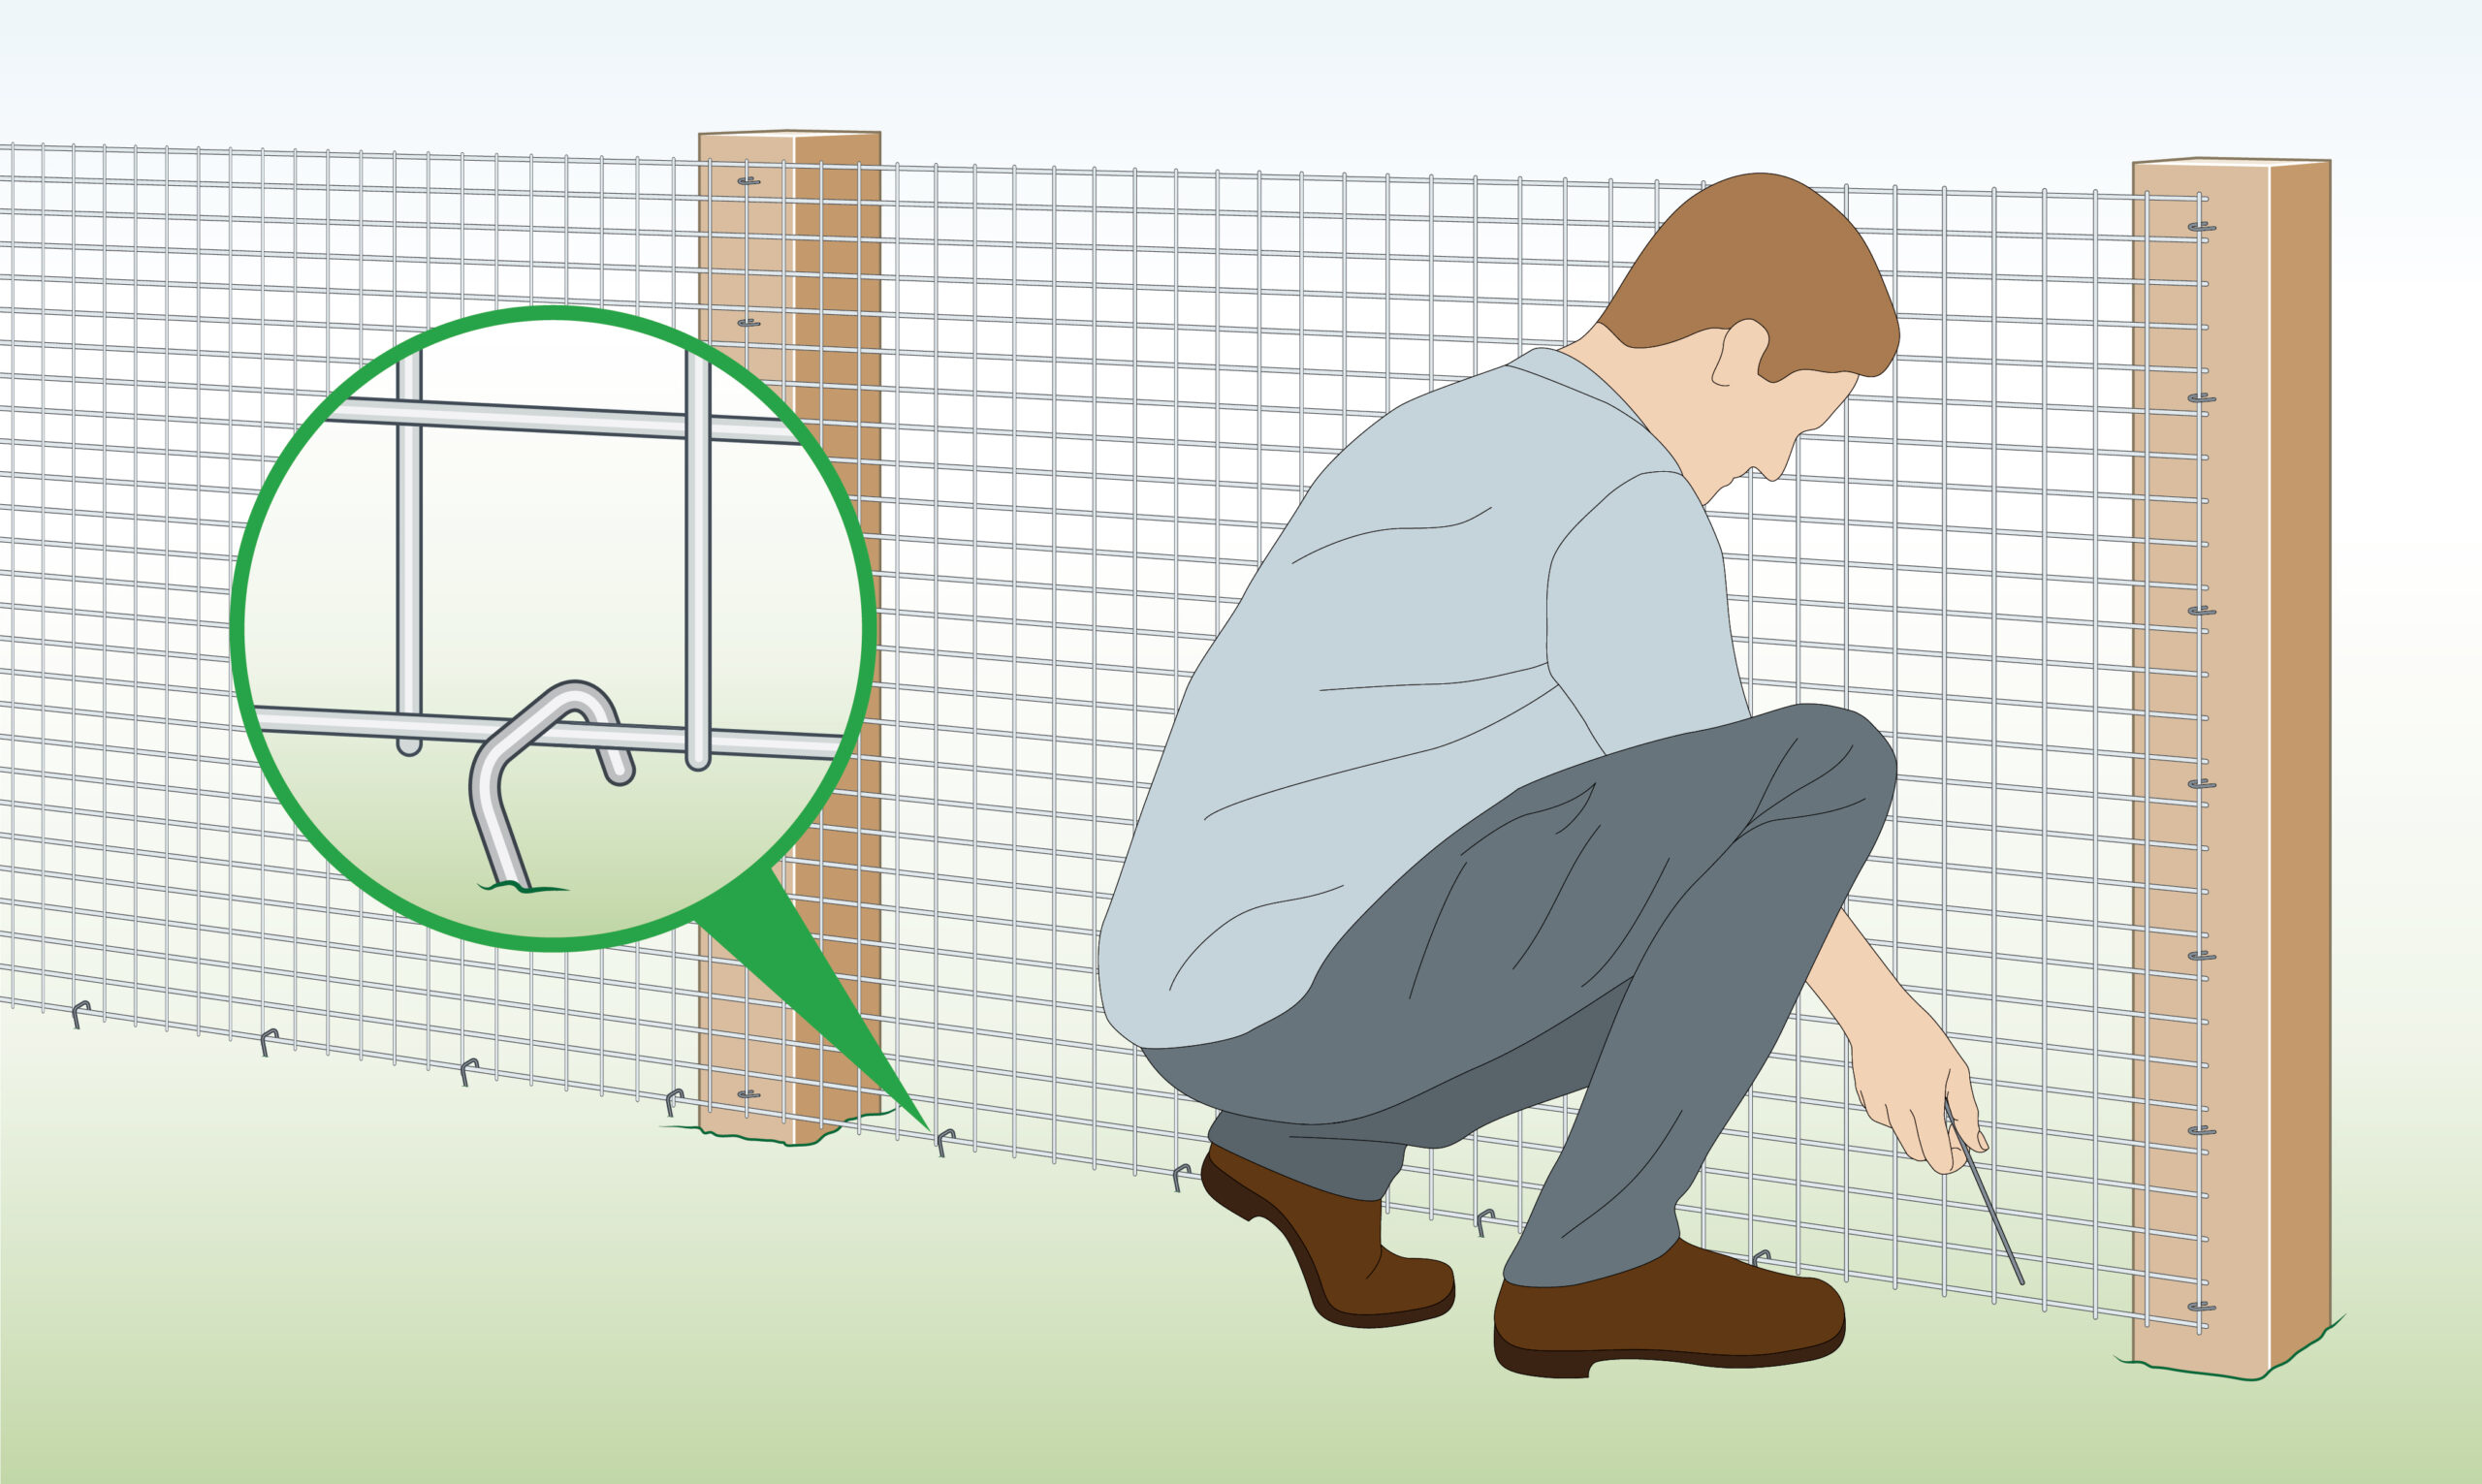 |
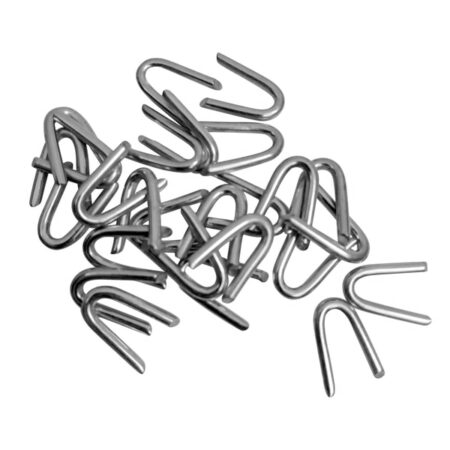
| Wire Fence
|
 |
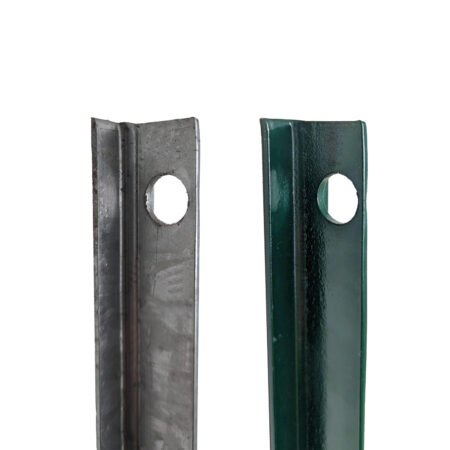
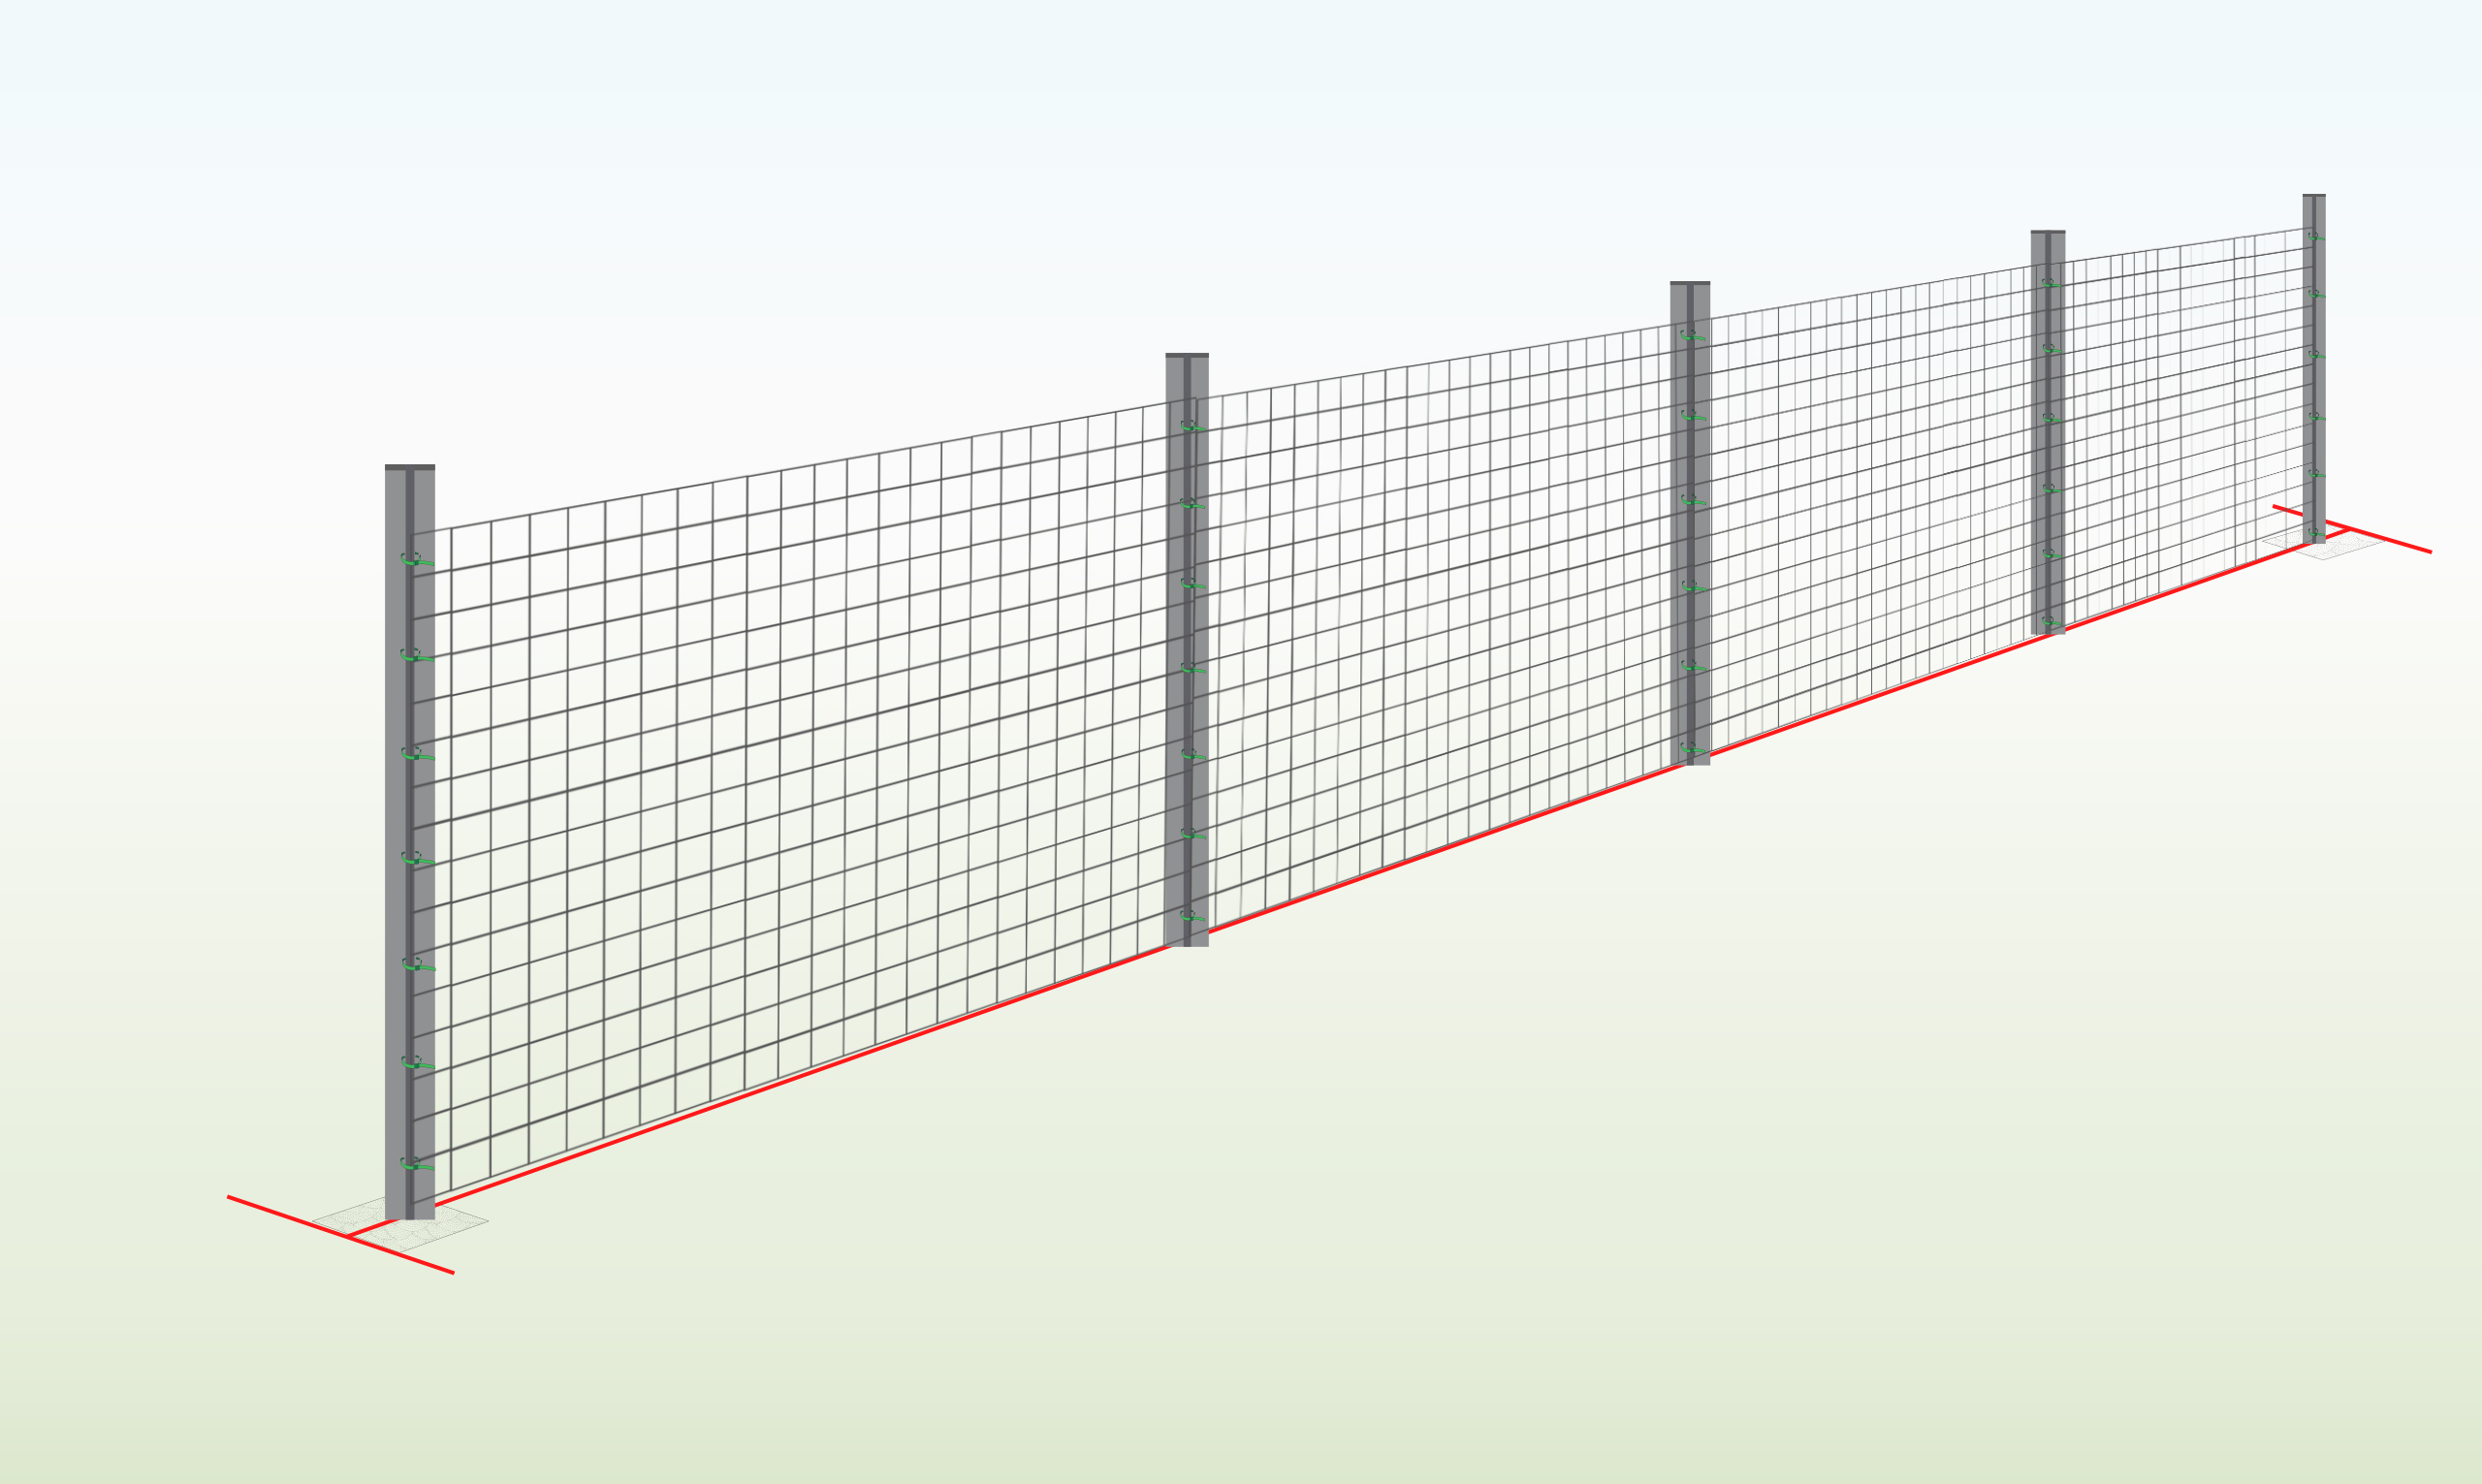
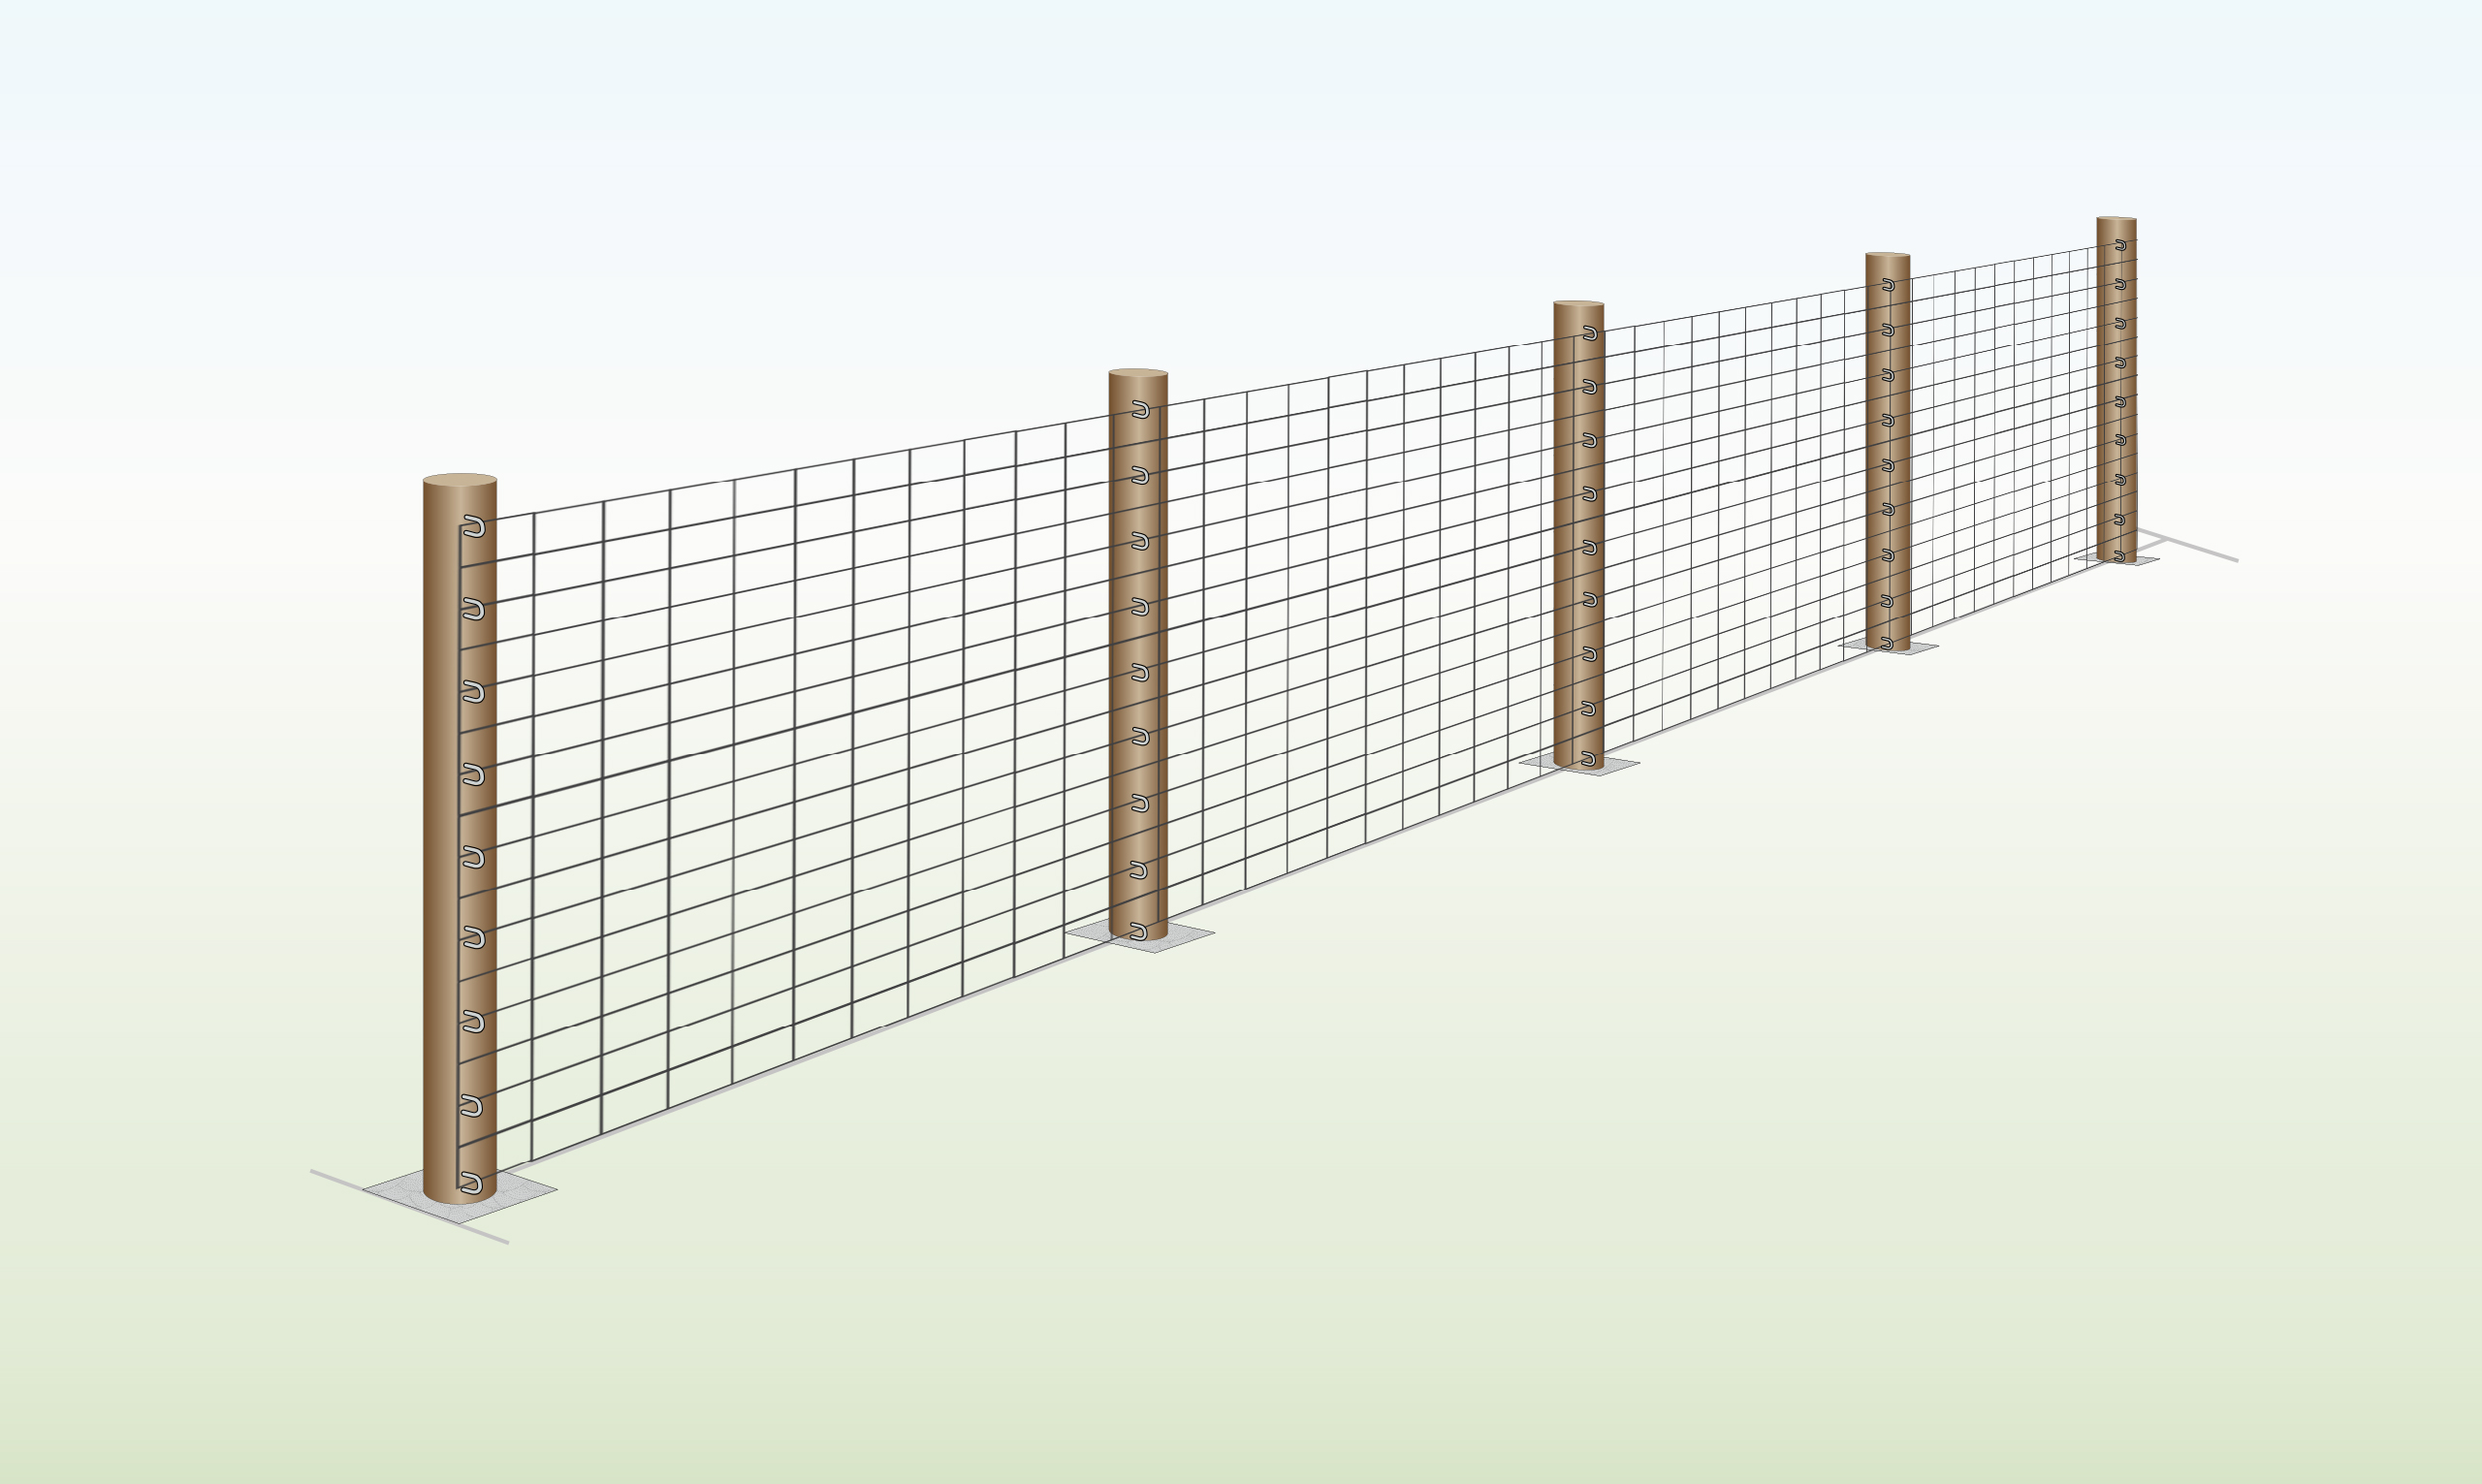
Installation
T Posts
Wooden Posts
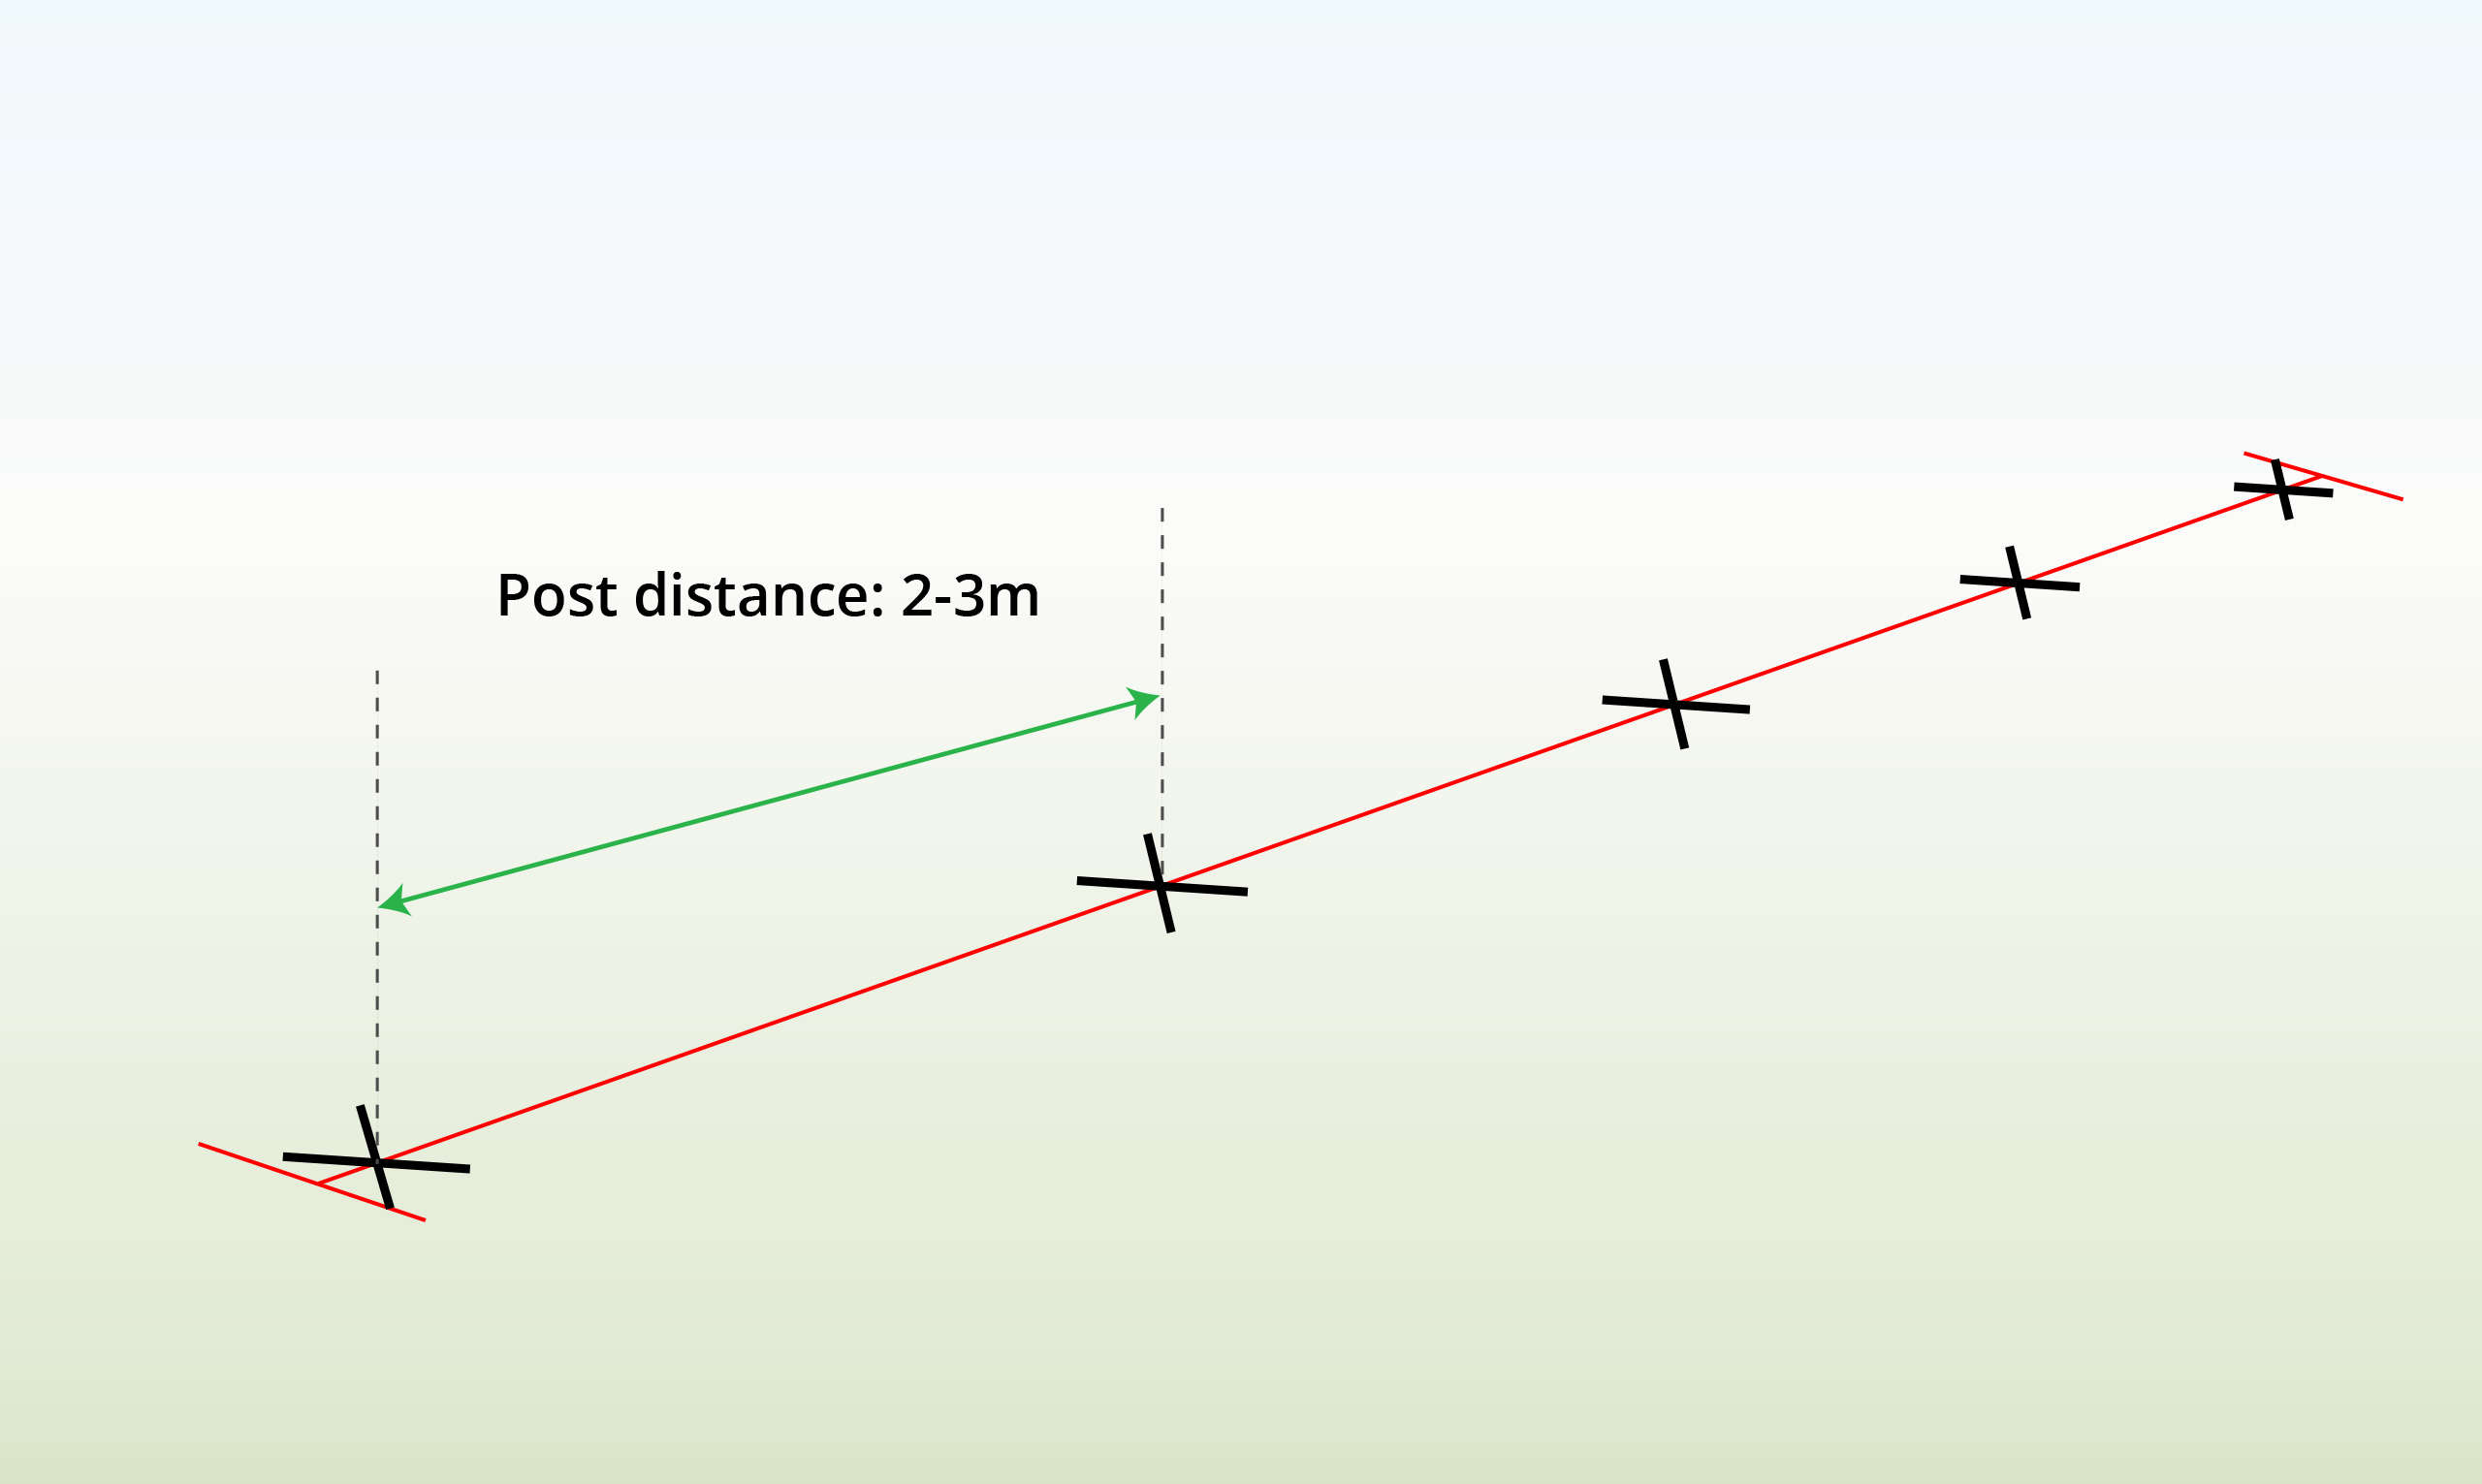
| Step 1 – Mark Area
|
Mark a line between the two end posts.
|
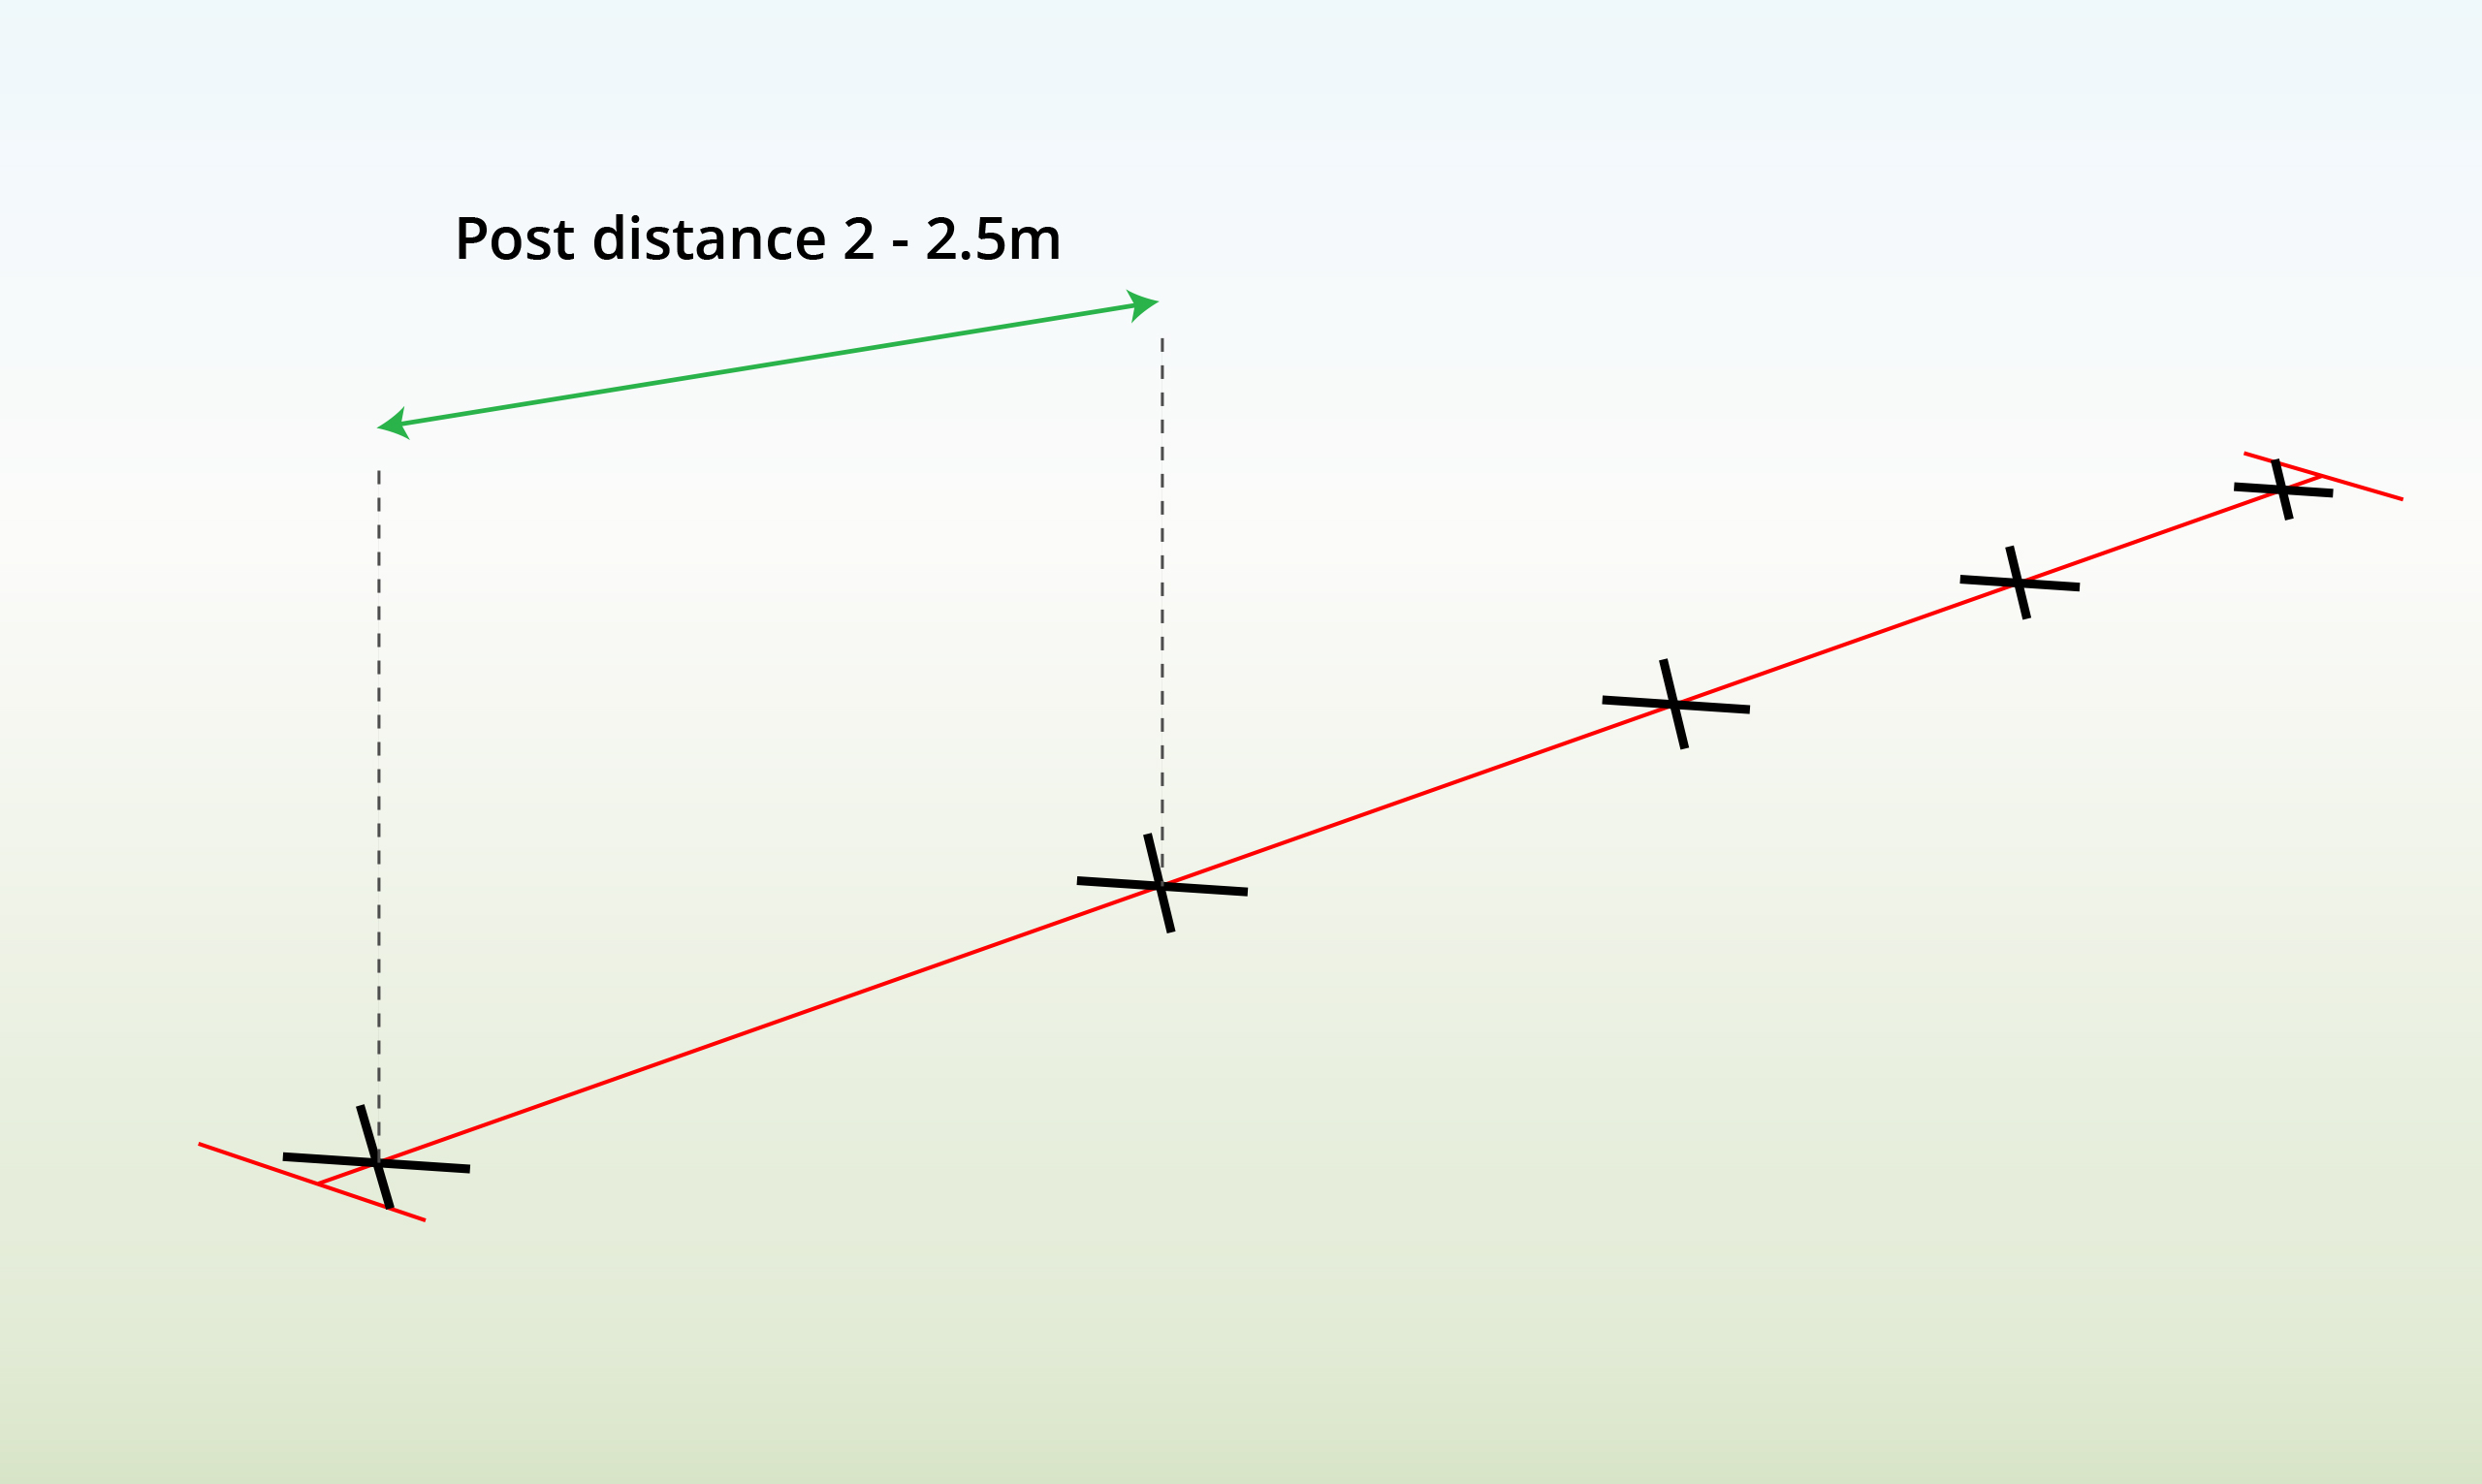
| Step 2 – Measure Post Distance
|
The distance between the posts should be 2-3 meters.
|
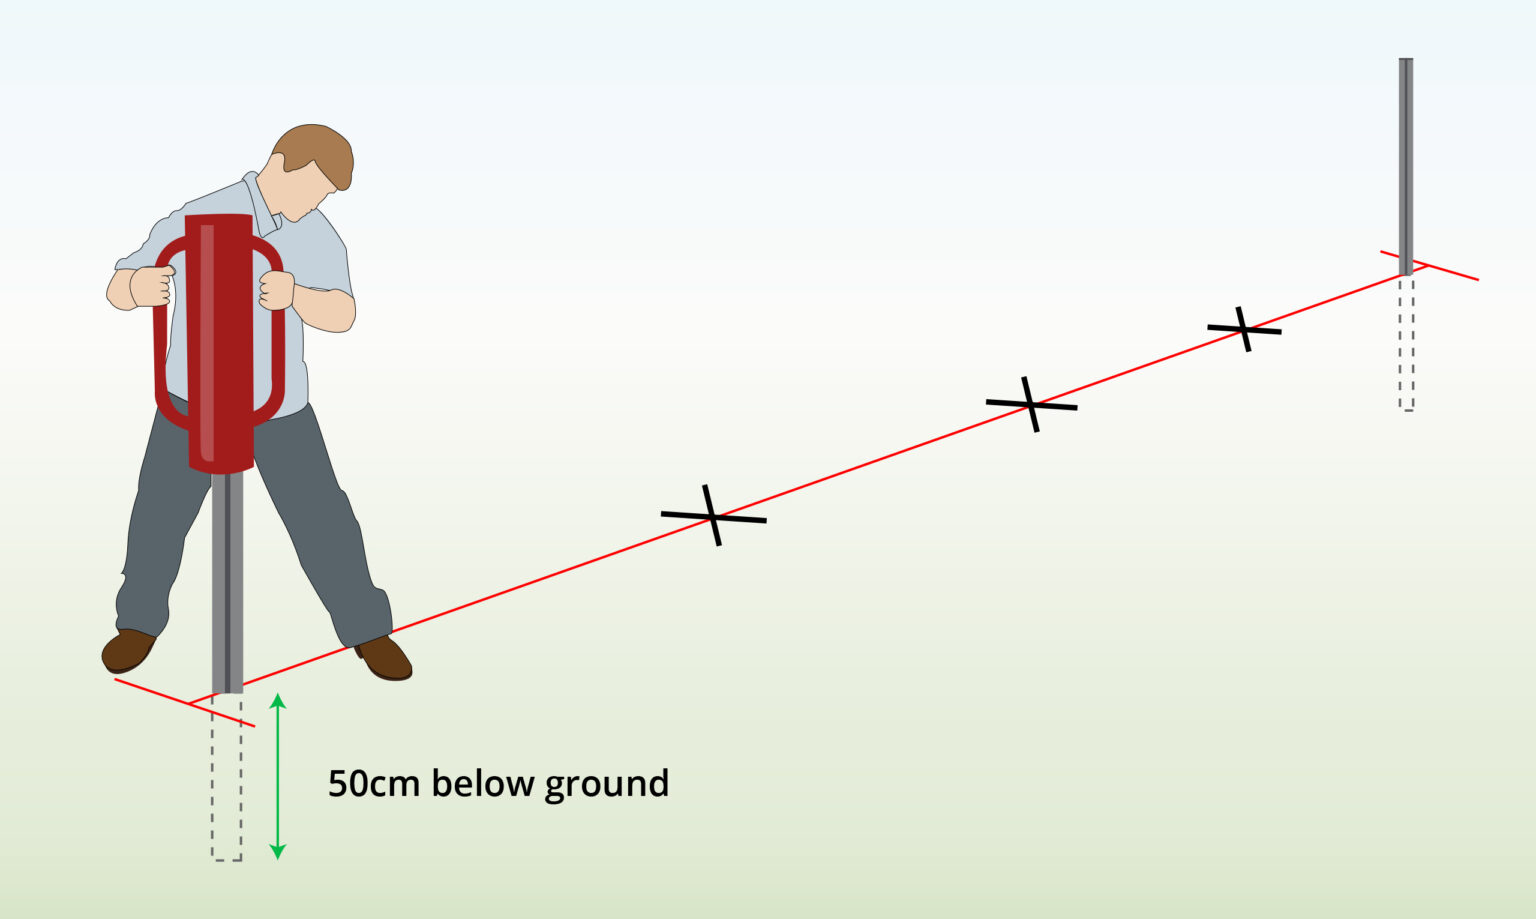
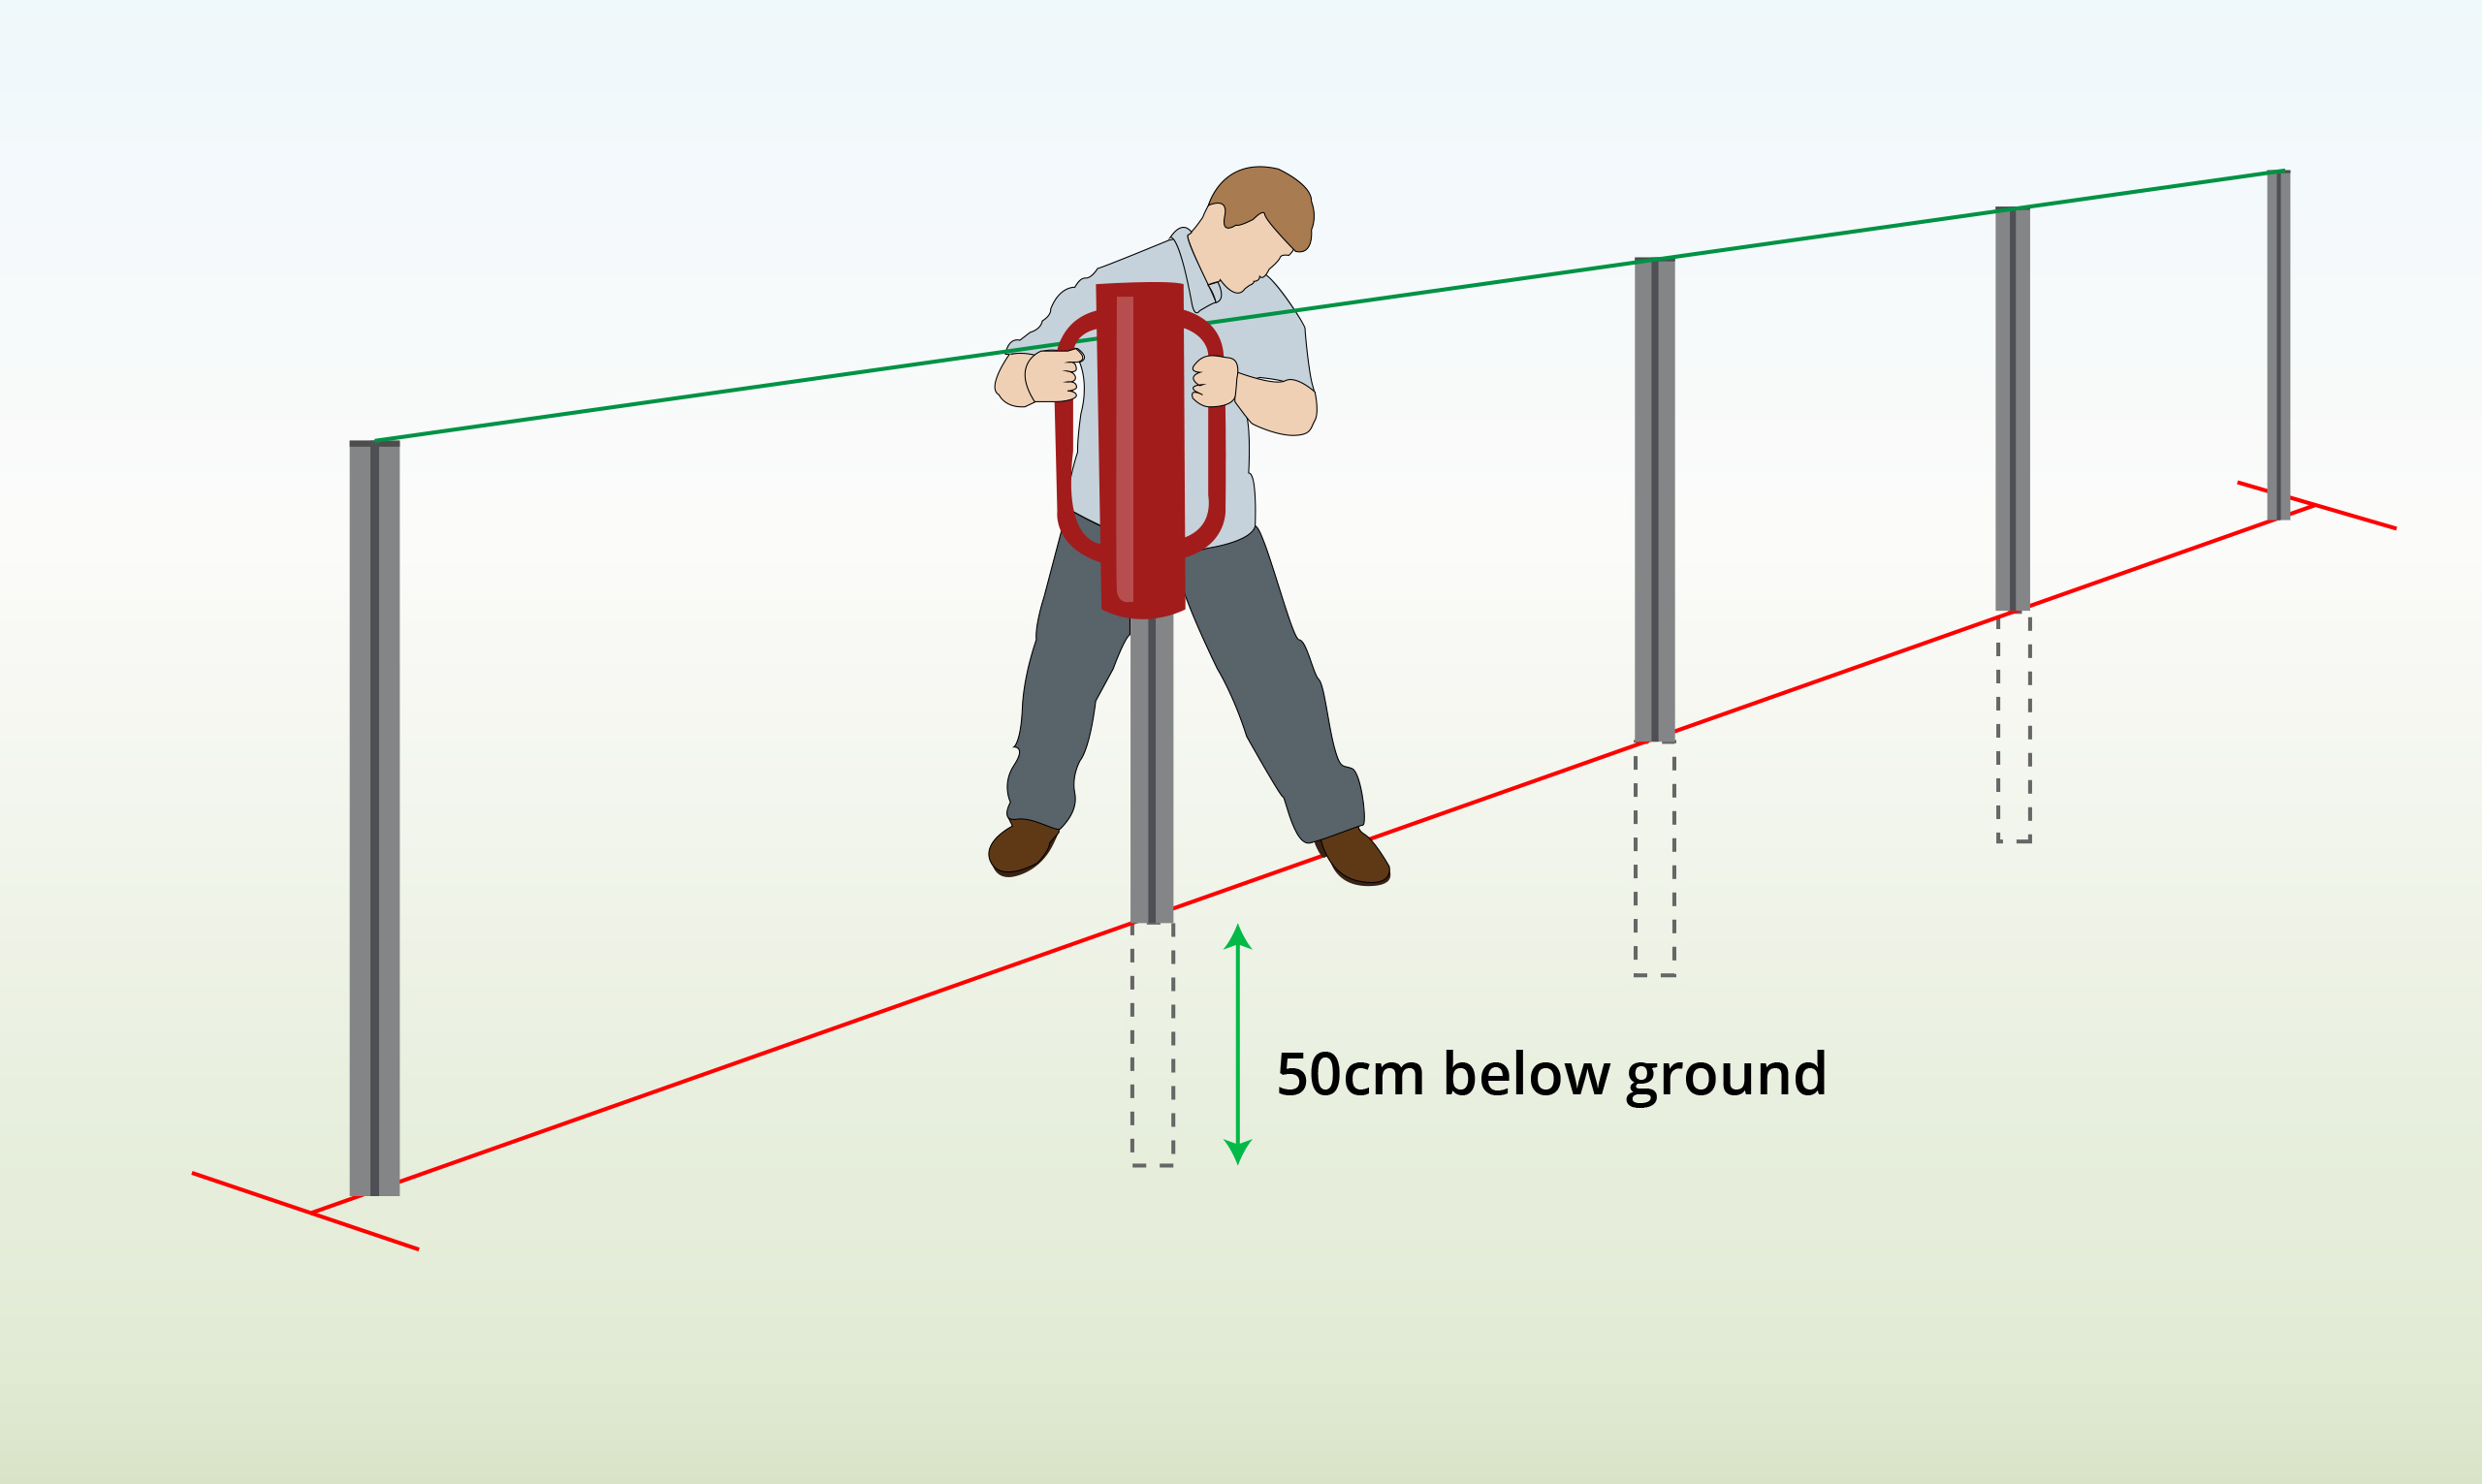
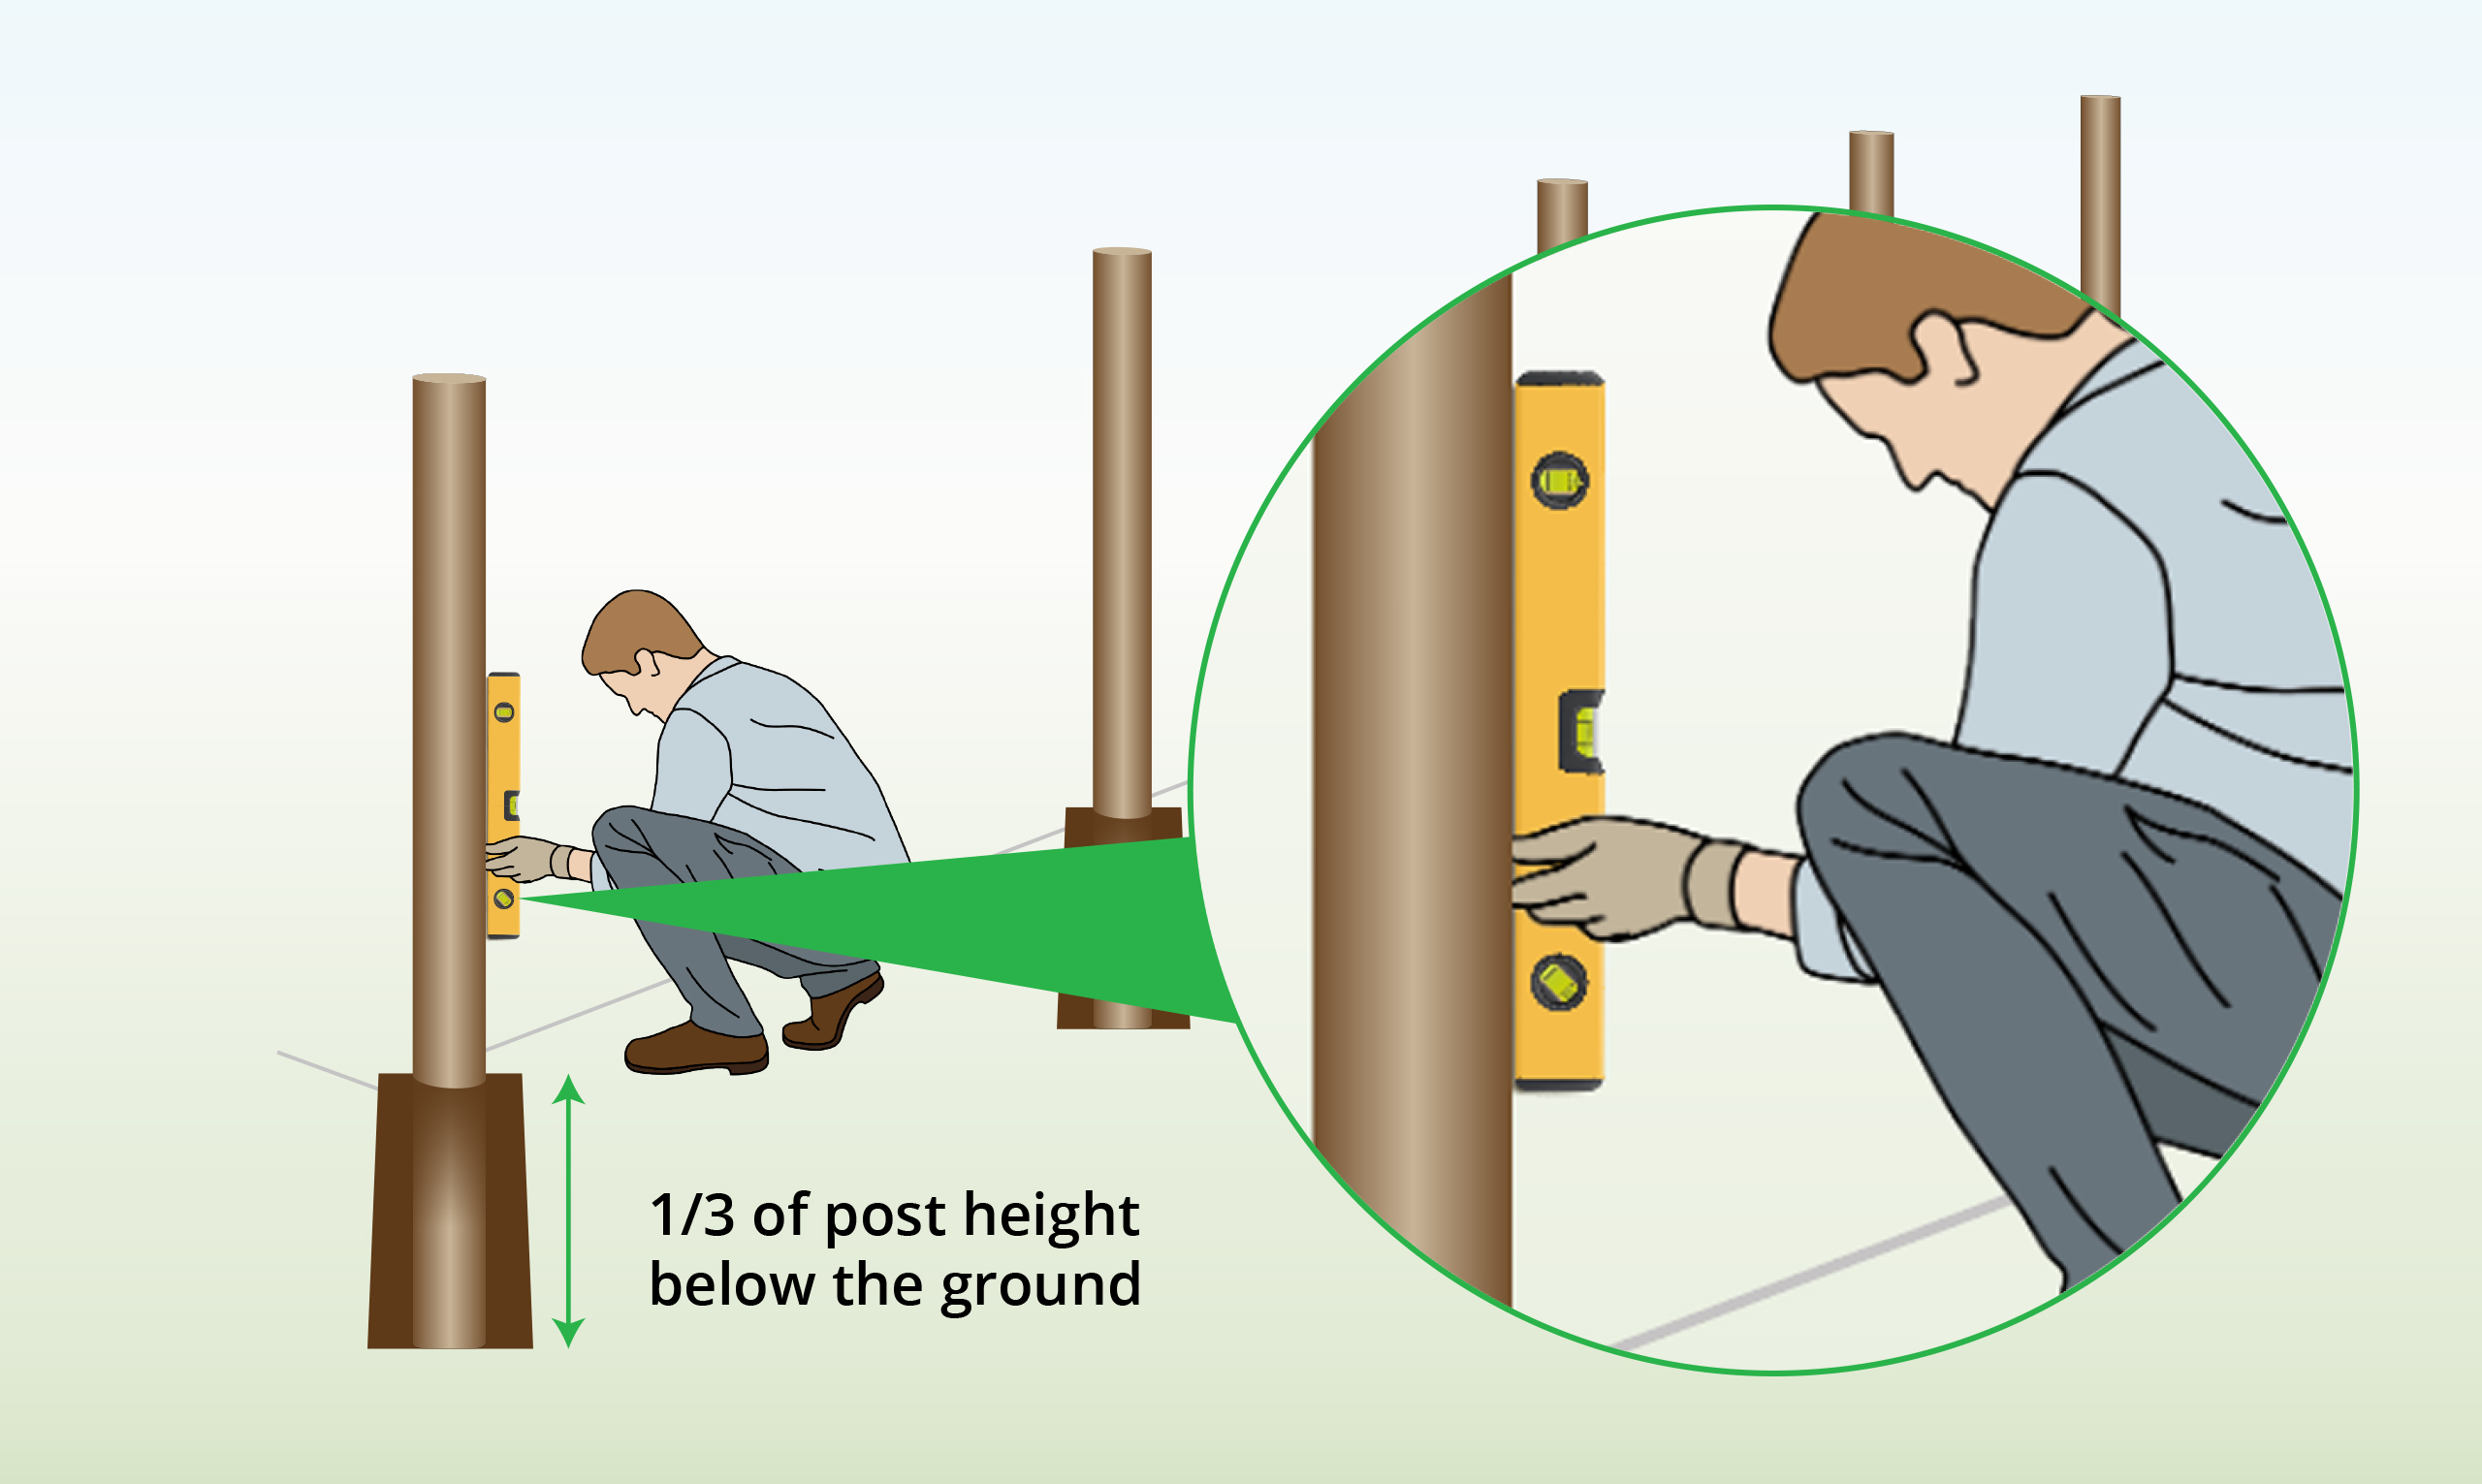
| Step 3 – Install End Posts
|
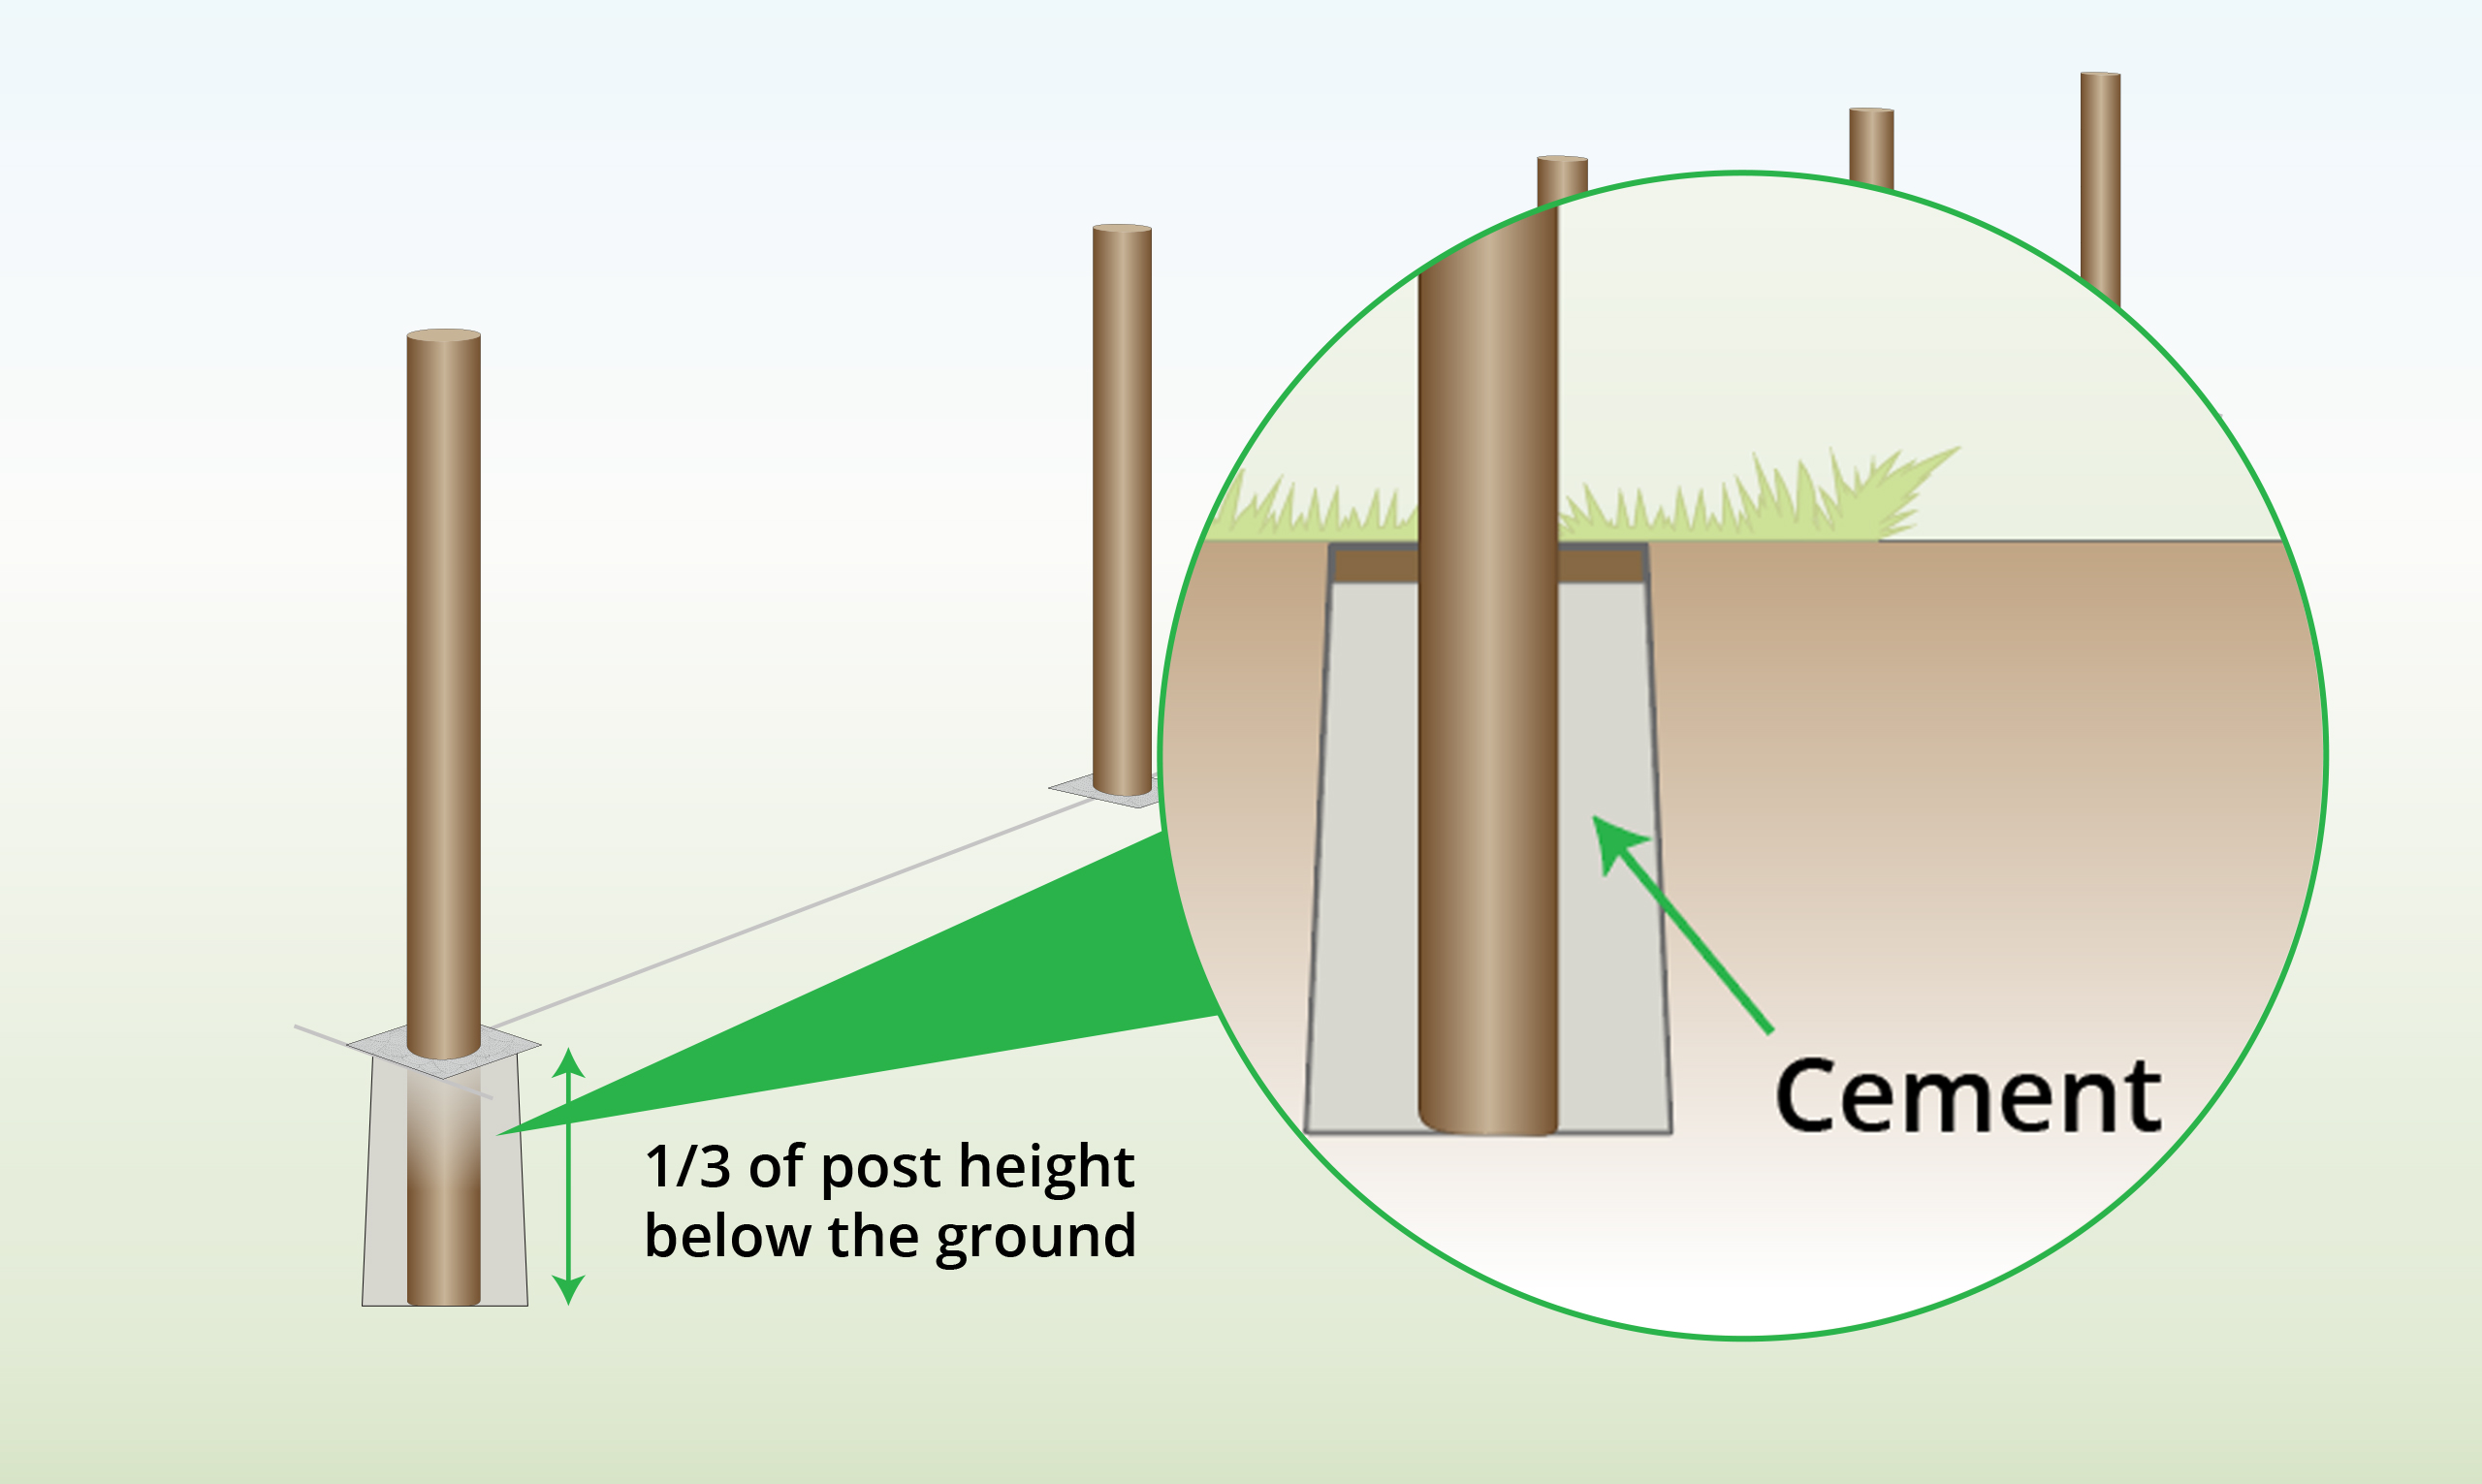
Using a post driver or mallet, drive the posts 50cm into the ground.
Ensure the posts are facing the same direction.
|
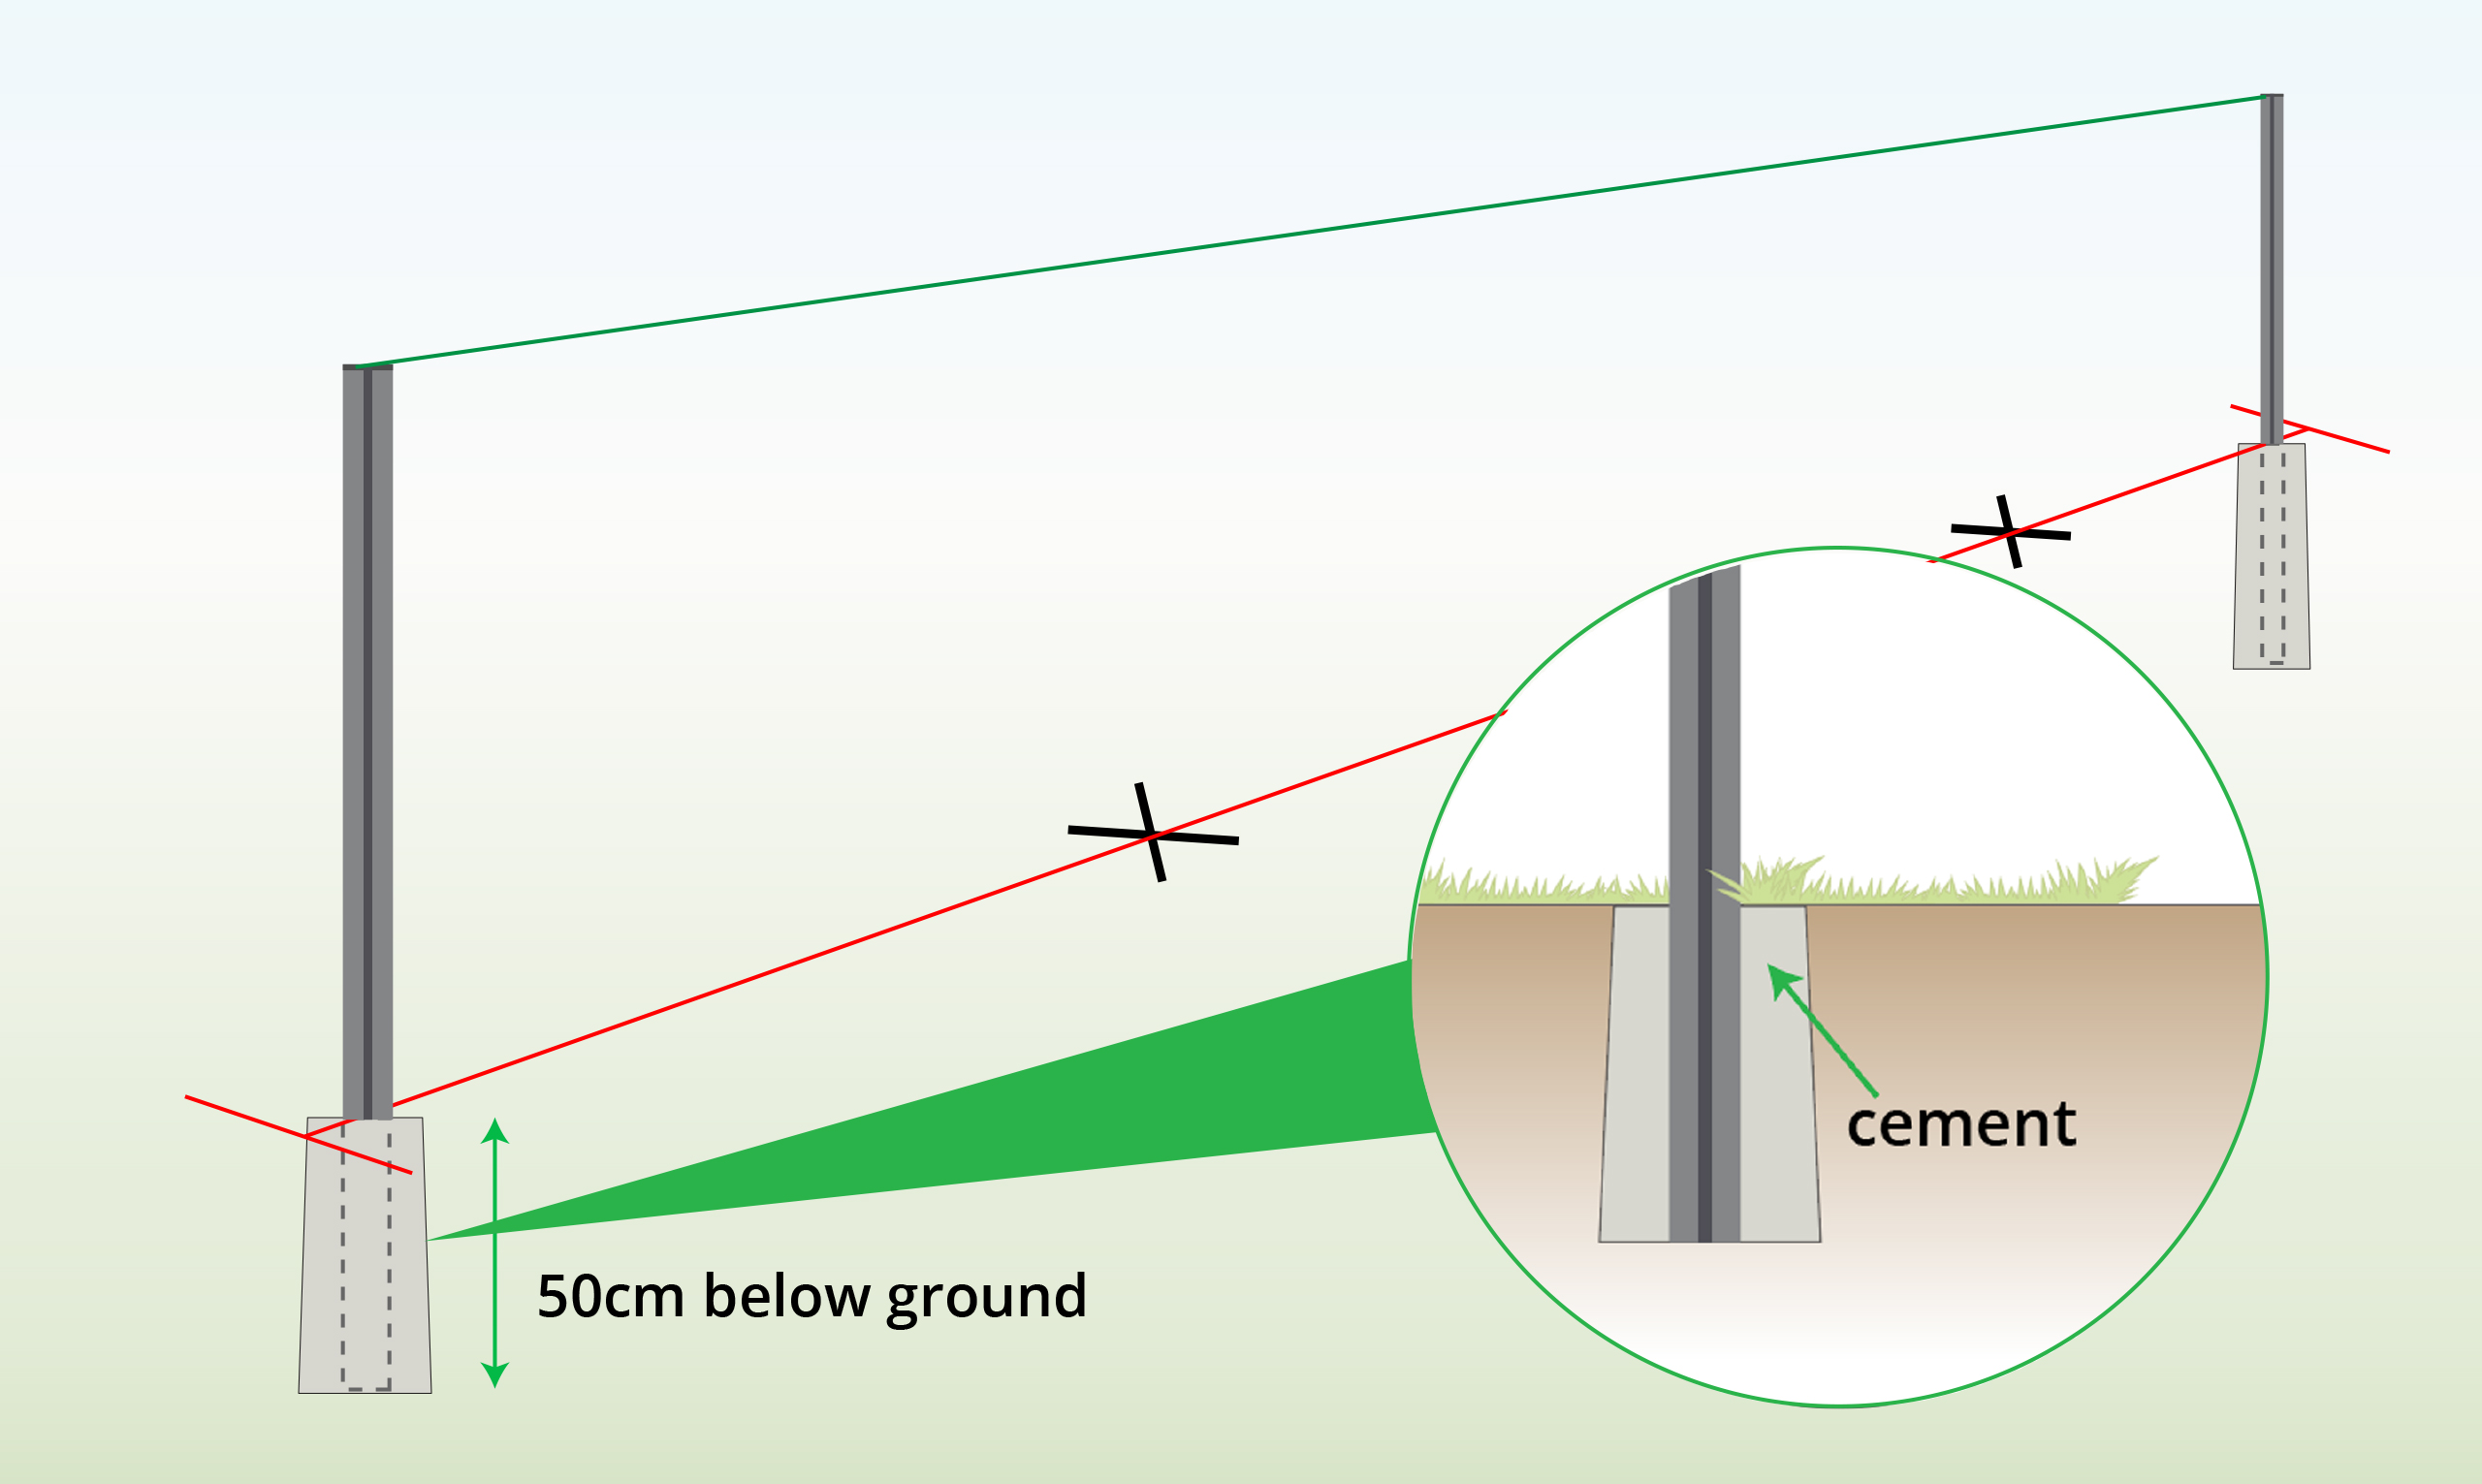
| Step 4 – Set in Concrete (Optional)
|
Optional: For a stronger fence, you can set the posts in concrete.
|
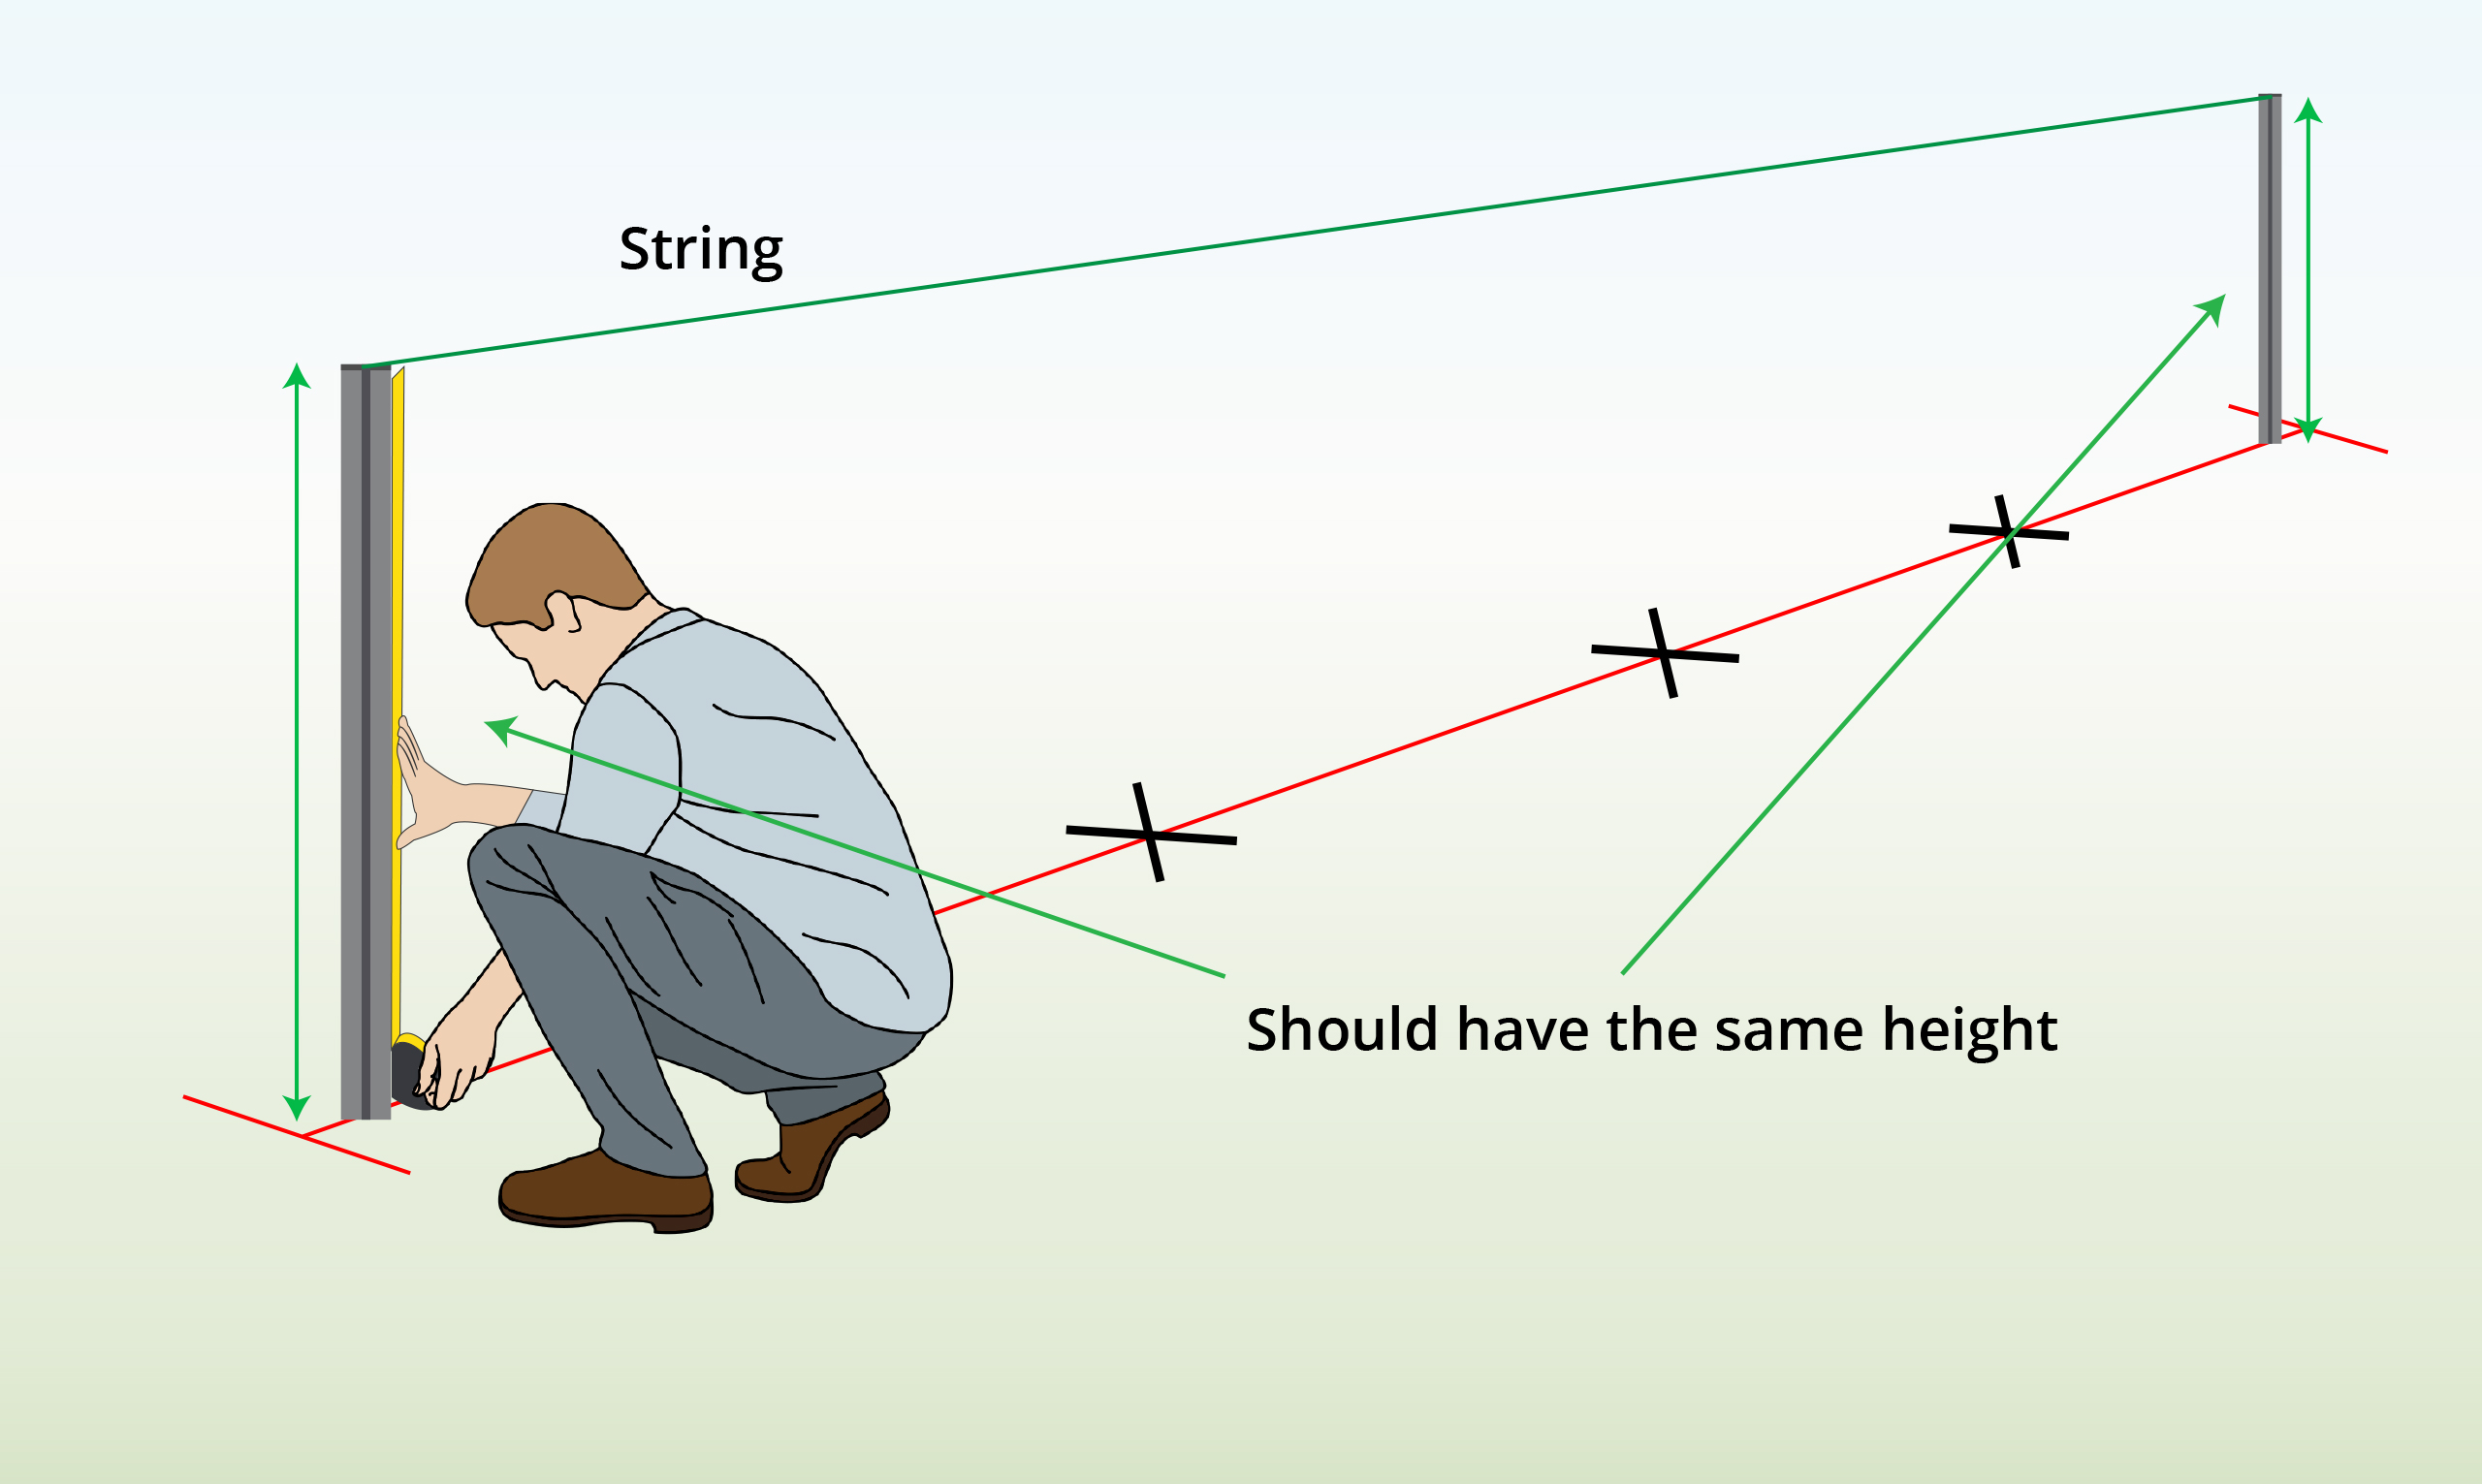
| Step 5 – Check for Same Height
|
Secure a string between the end posts and check the height is the same using a spirit level.
|
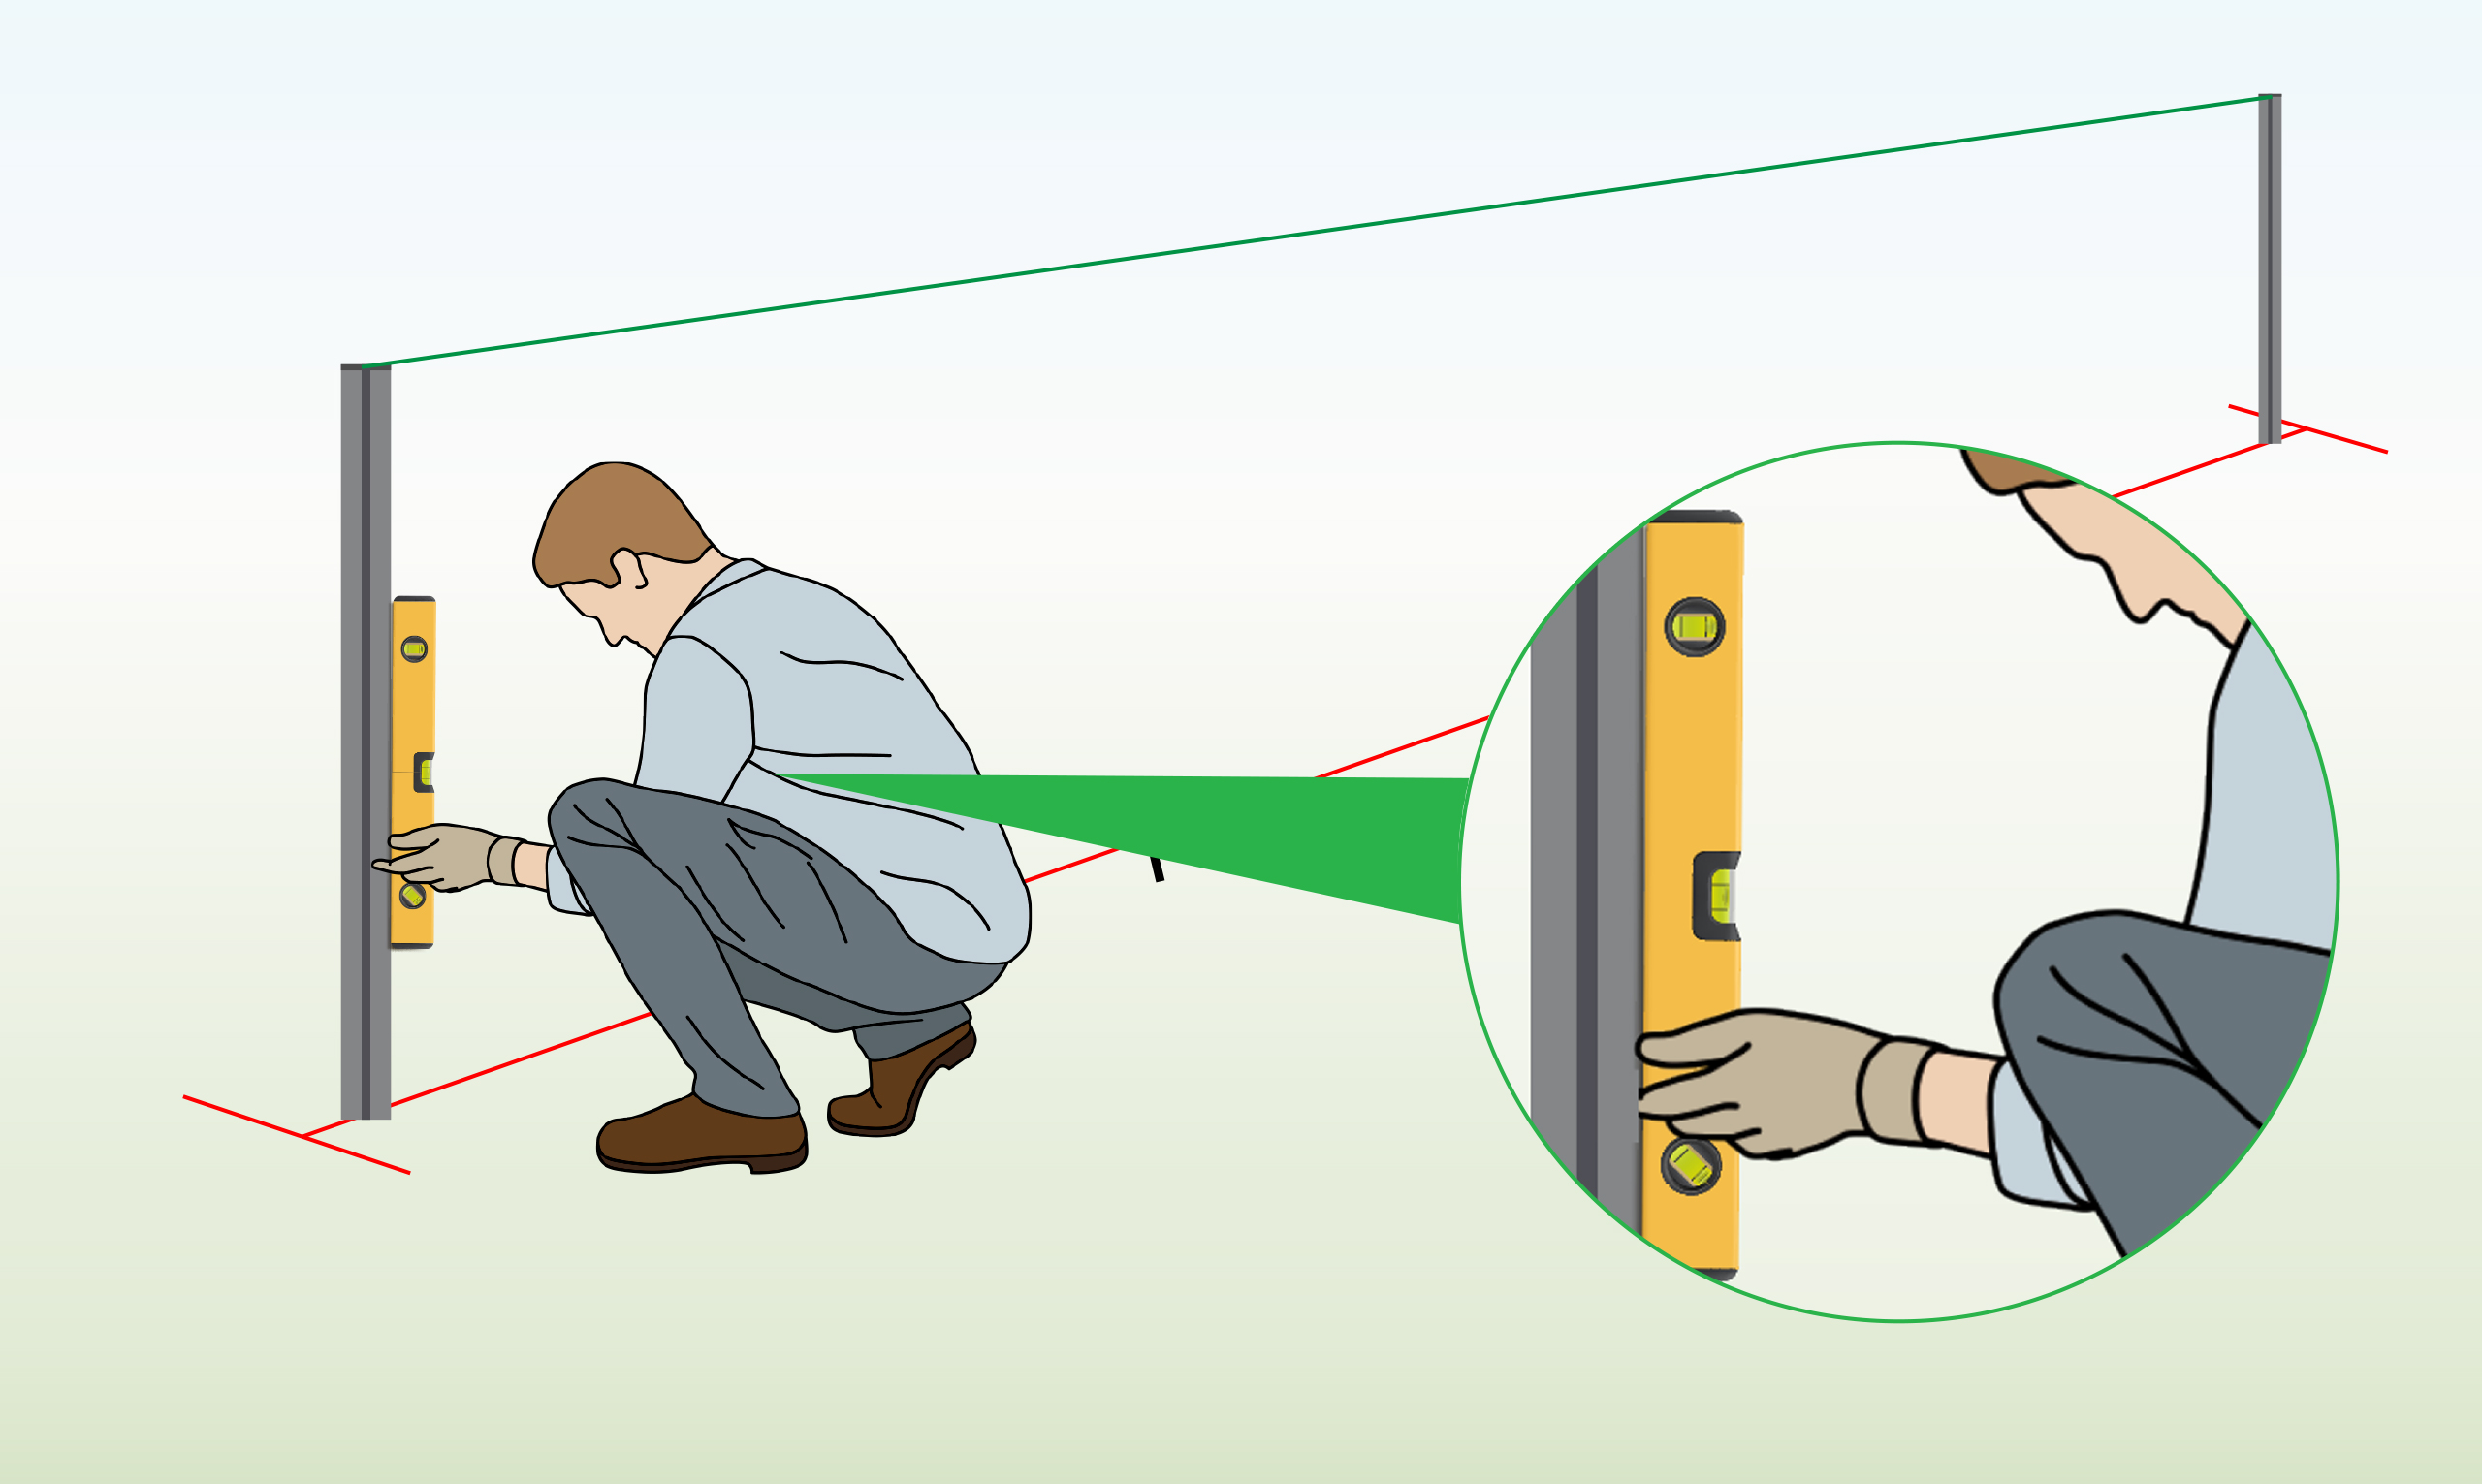
| Step 6 – Check for Straightness
|
Verify the posts are perfectly straight using a spirit level
|
| Step 7 – Install Middle Posts
|
To install the middle posts, repeat steps 3 – 6.
|
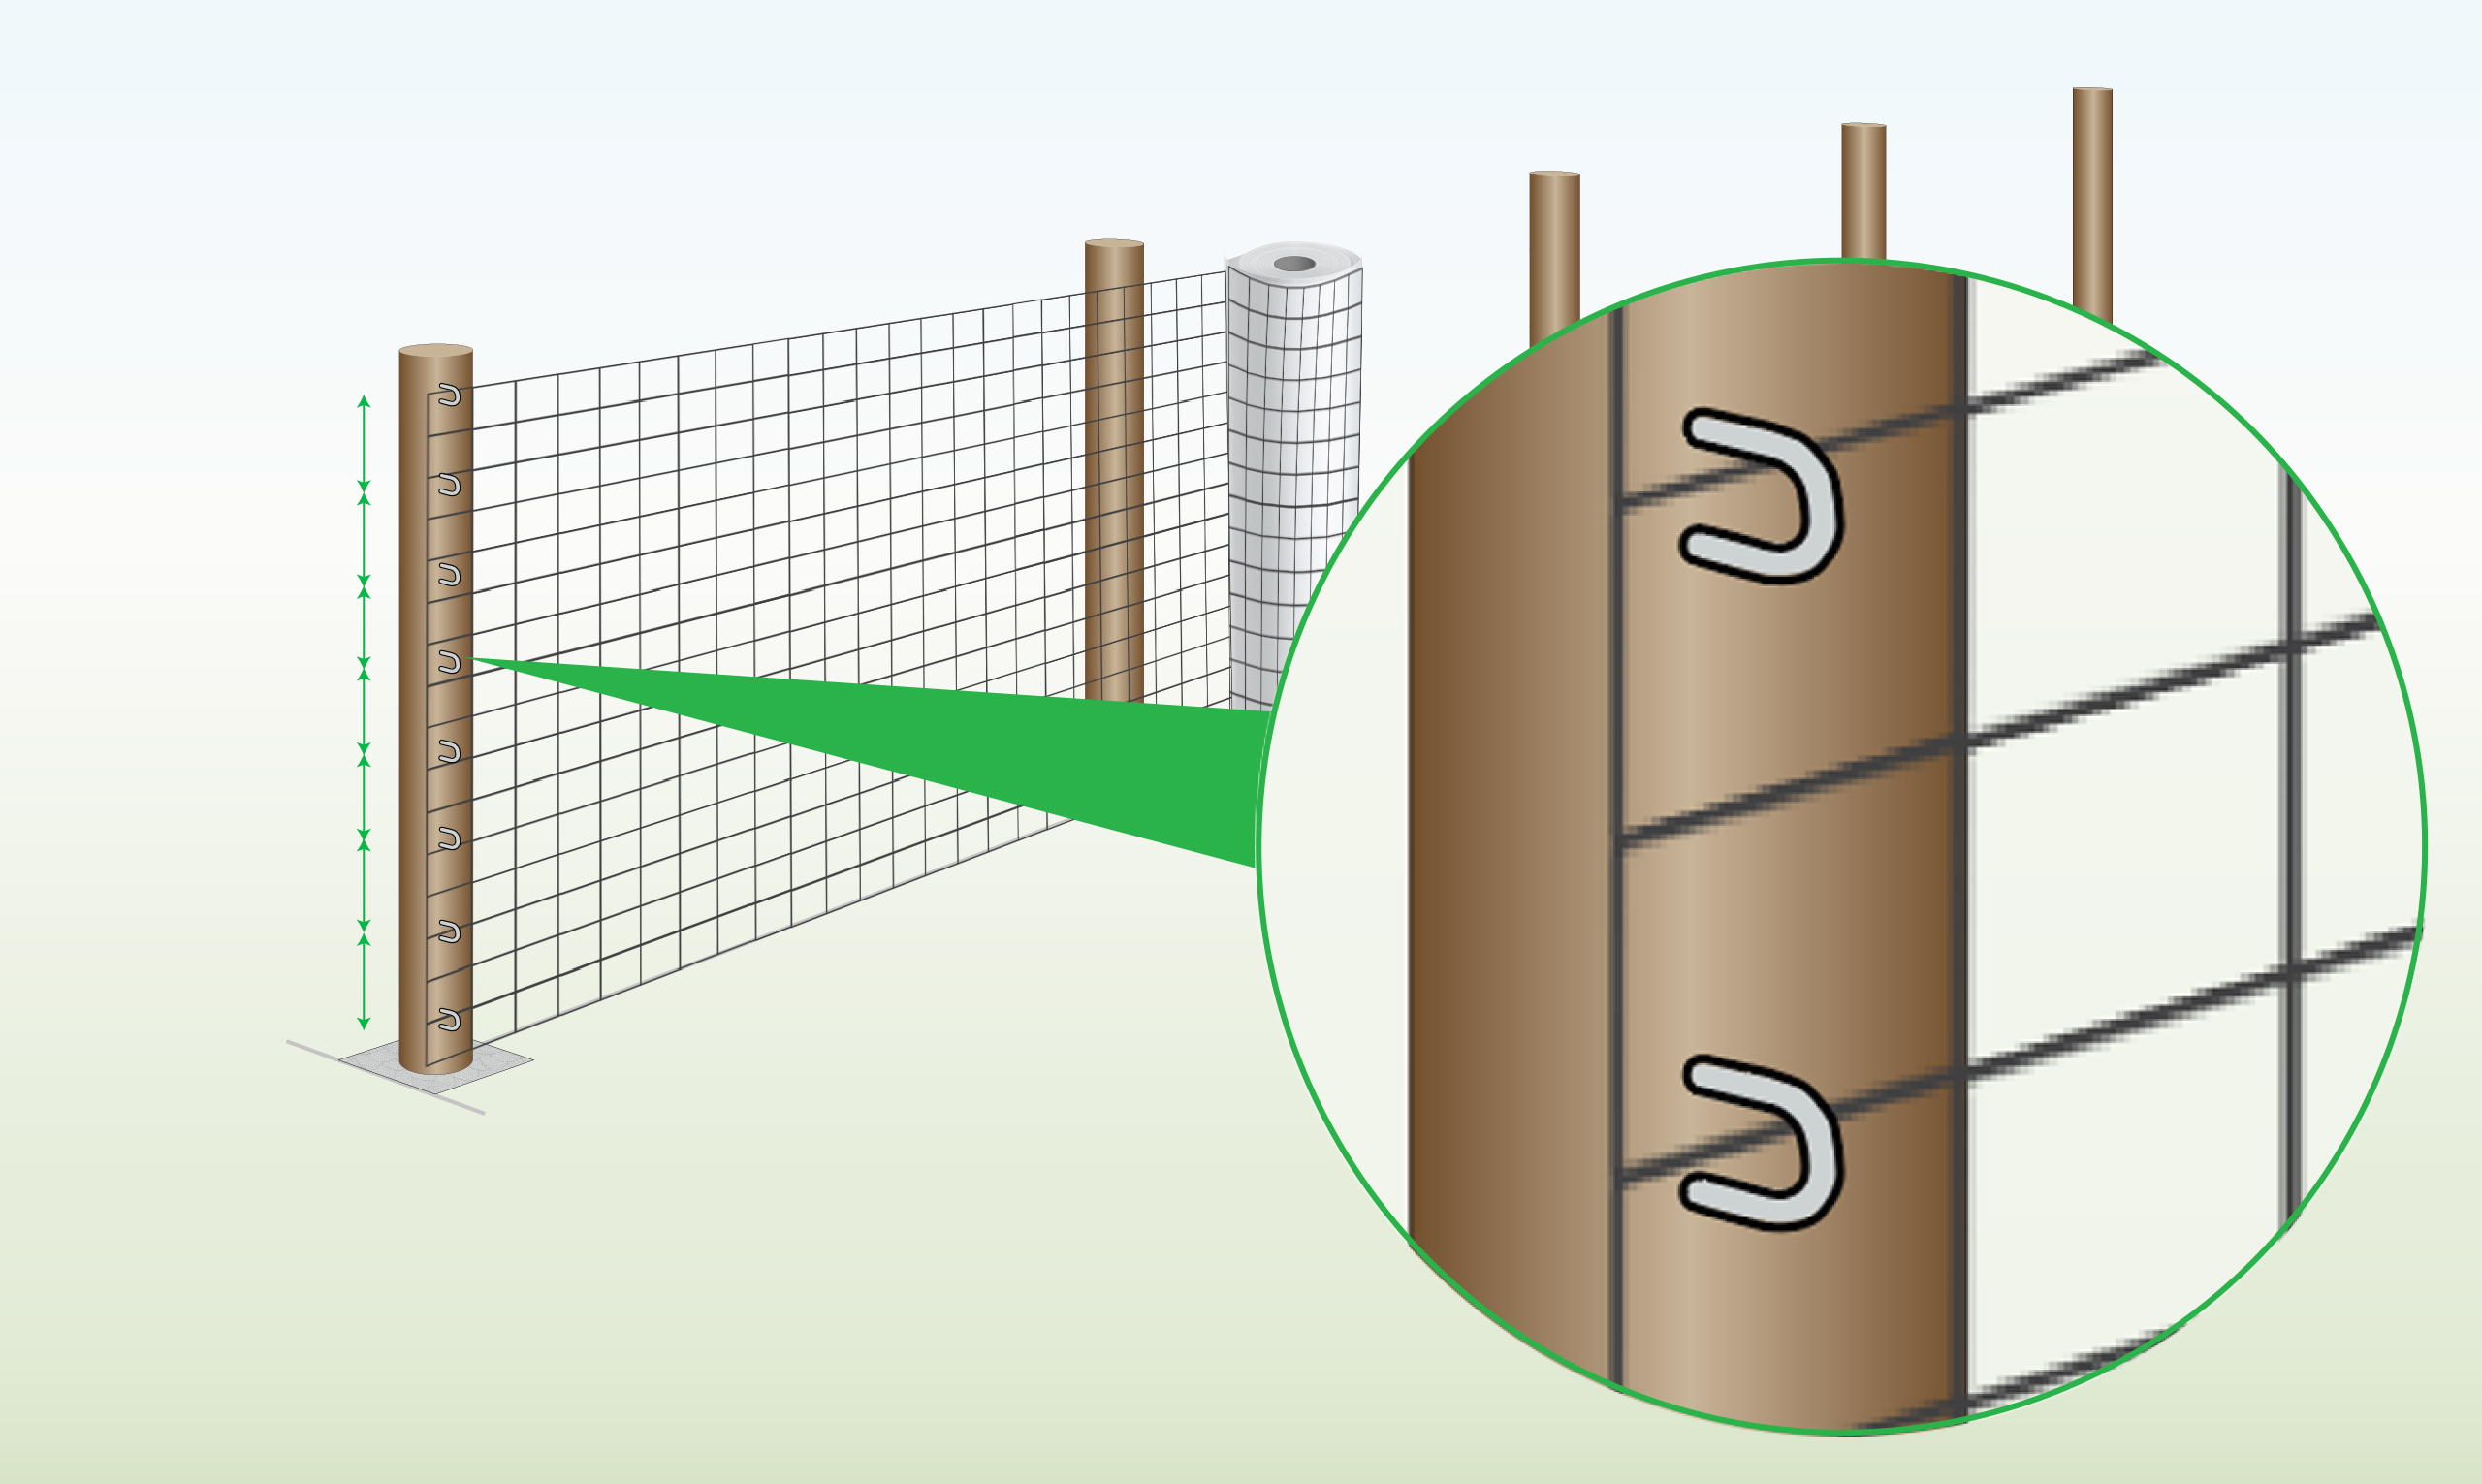
| Step 8 – Attach Mesh to End Post
|
Attach the mesh to the post using cable ties then unroll the mesh to the next post
|
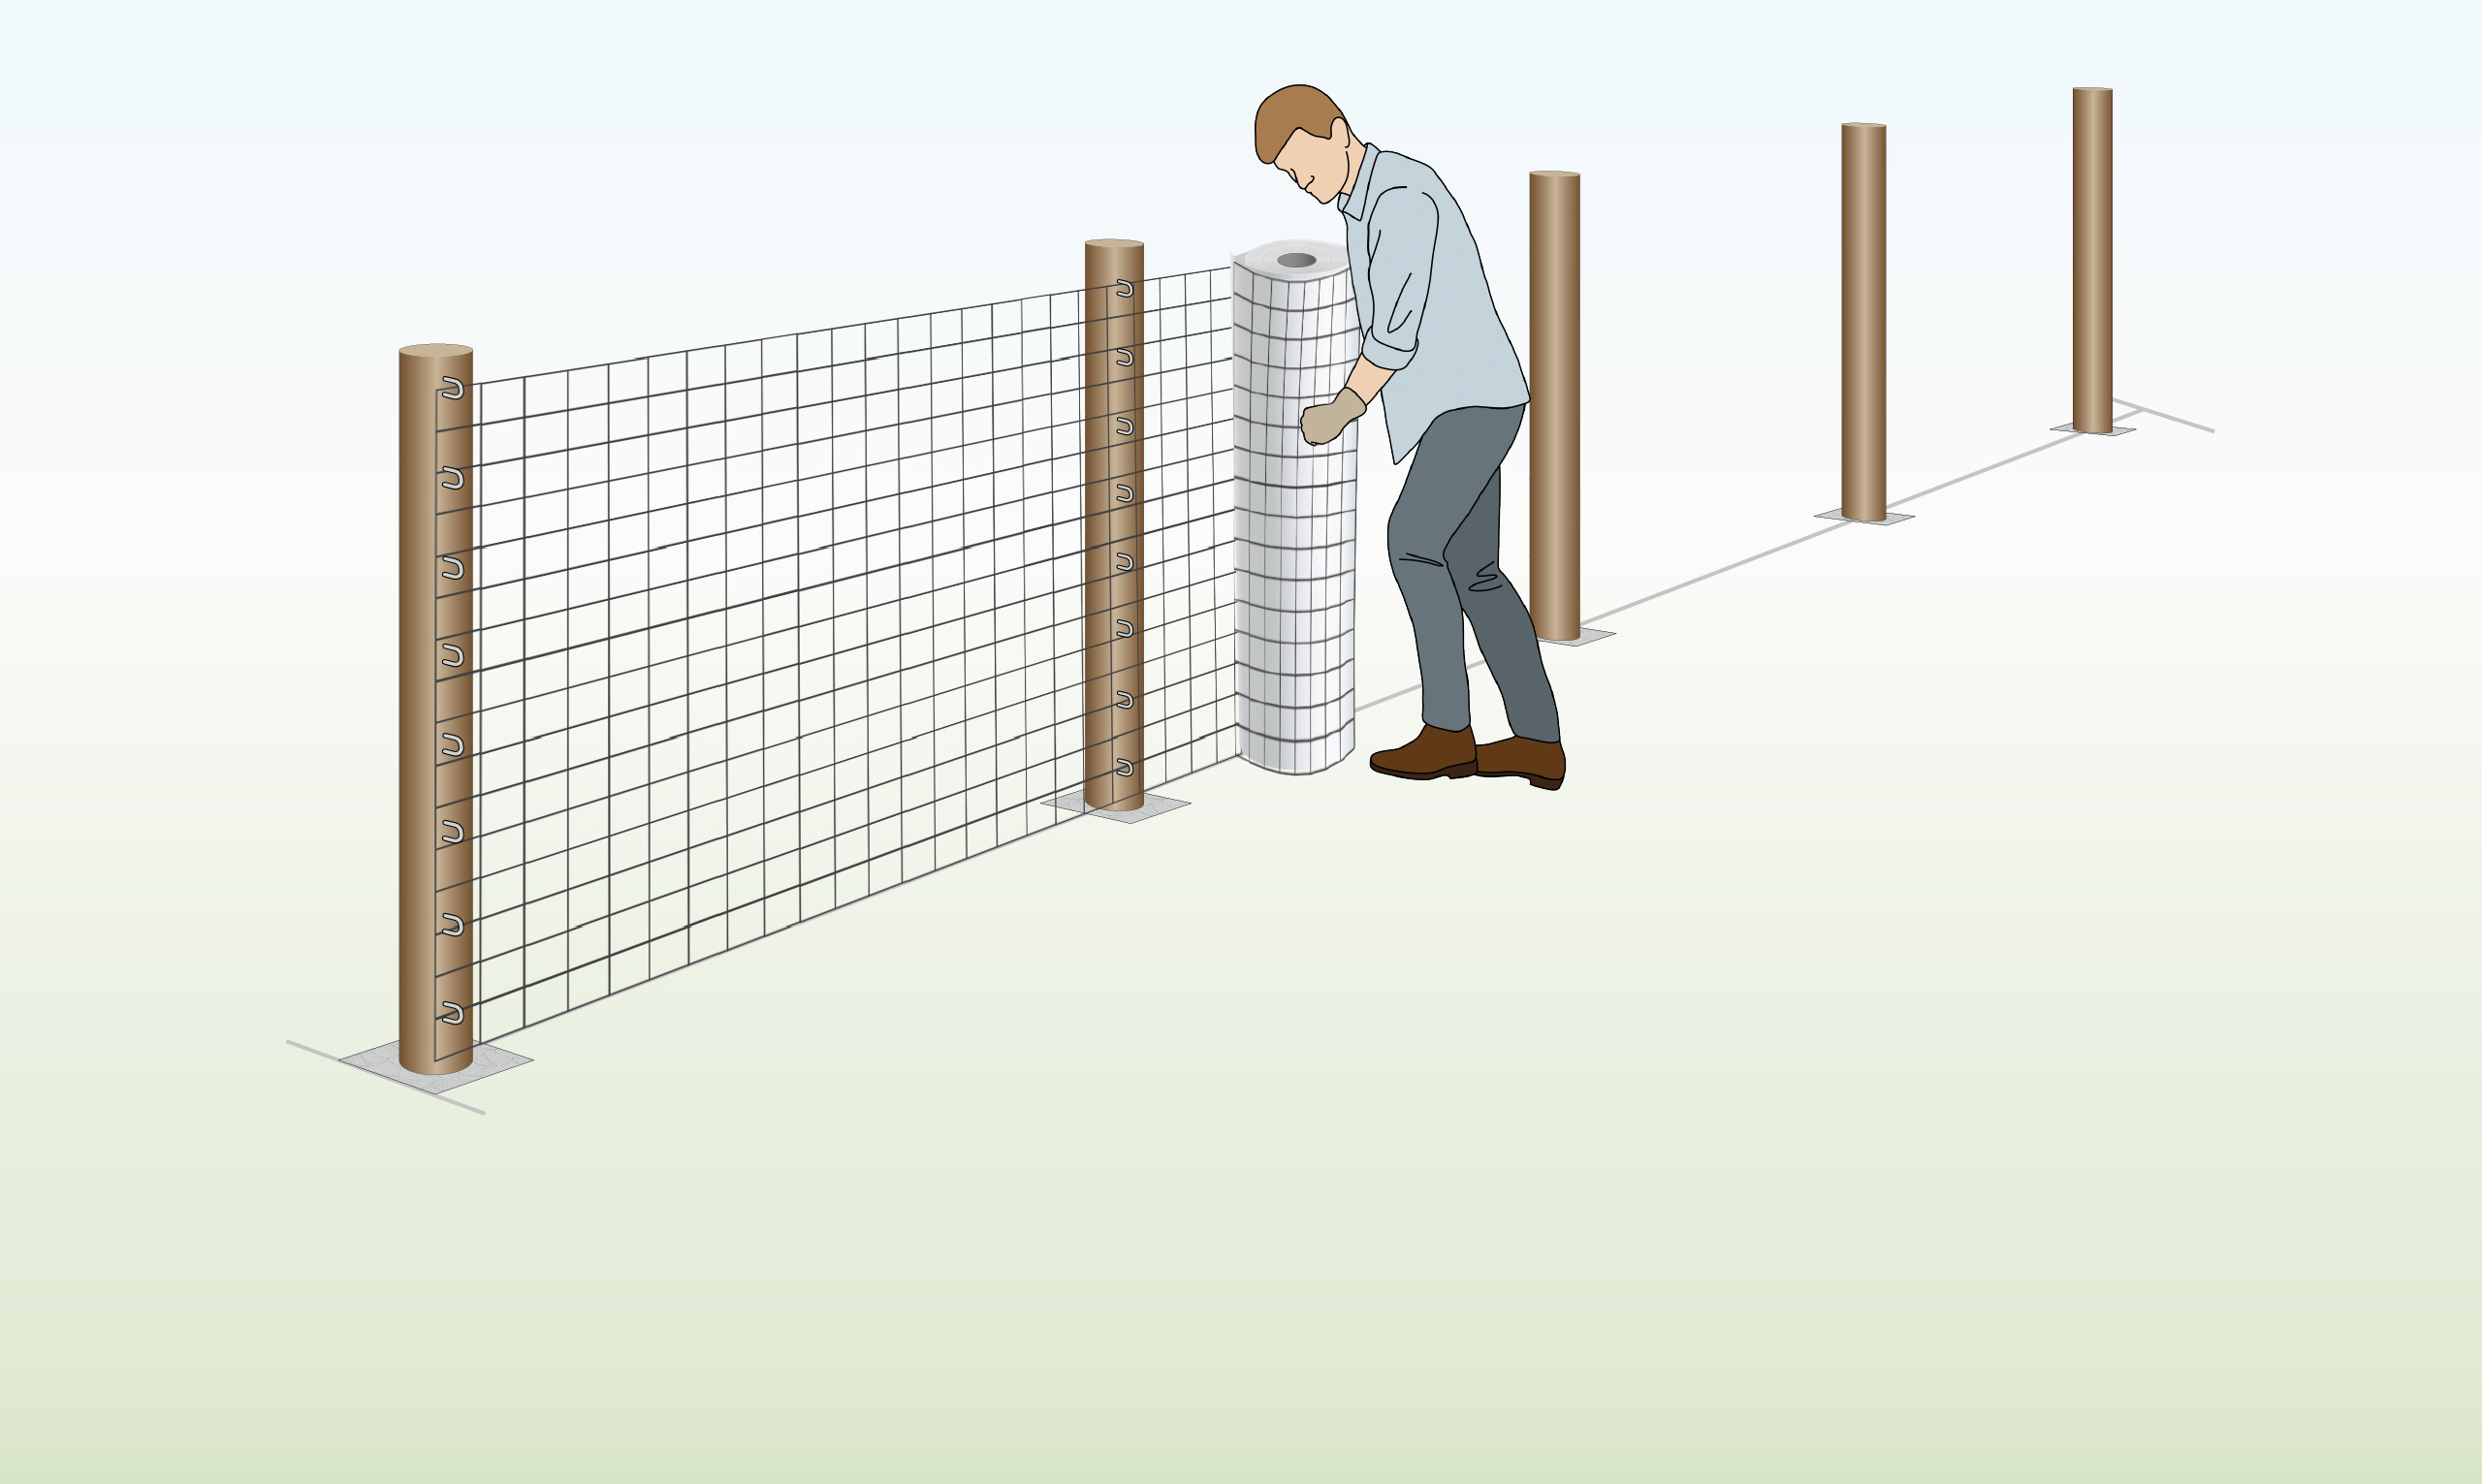
| Step 9 – Attach Mesh to Remaining Posts
|
Secure the remaining portion of the mesh by repeating the process outlined in step 8.
|

Gauges Explained
The diameter or thickness of the wire is referred to as the gauge (g.). The lower the gauge the thicker the wire.
Our weld mesh rolls come in:
- 10g. = 3mm dia.
- 12g. = 2.5mm dia.
- 14g. = 2mm dia.
- 15g. = 1.8mm dia.
- 16g. = 1.6mm dia.
- 19g. = 1mm dia.
- 22g. = 0.7mm dia.
- 23g. = 0.6mm dia.
FAQs
What is galvanised steel?
This is the process by which steel is coated in zinc to protect against corrosion, rust and the elements.
Would I be able to cut this with scissors?
Weldmesh rolls are designed to be stronger and more rigid. Use wire cutters to shorten them to size. A sharp pair of scissors could only cut the lightweight wires (19g, 22g, 23g).
How flexible is the product?
Moderately flexible. The squares are welded at each joint to add strength, which does make it more rigid. For a product that can be more easily moulded around animal coops or into unusual shapes, try chicken wire.
What would you recommend I attach this to in order to make a fence?
Metal fence posts, set in concrete, will offer the best support. Alternatively, wooden posts, while less sturdy, are easier to plant and attach the welded mesh to.
Downloadable PDFs
Specification
- Economy Welded Wire Mesh Specification
- Prime Welded Wire Mesh Specification
- Super Prime Welded Wire Mesh Specification