Show video
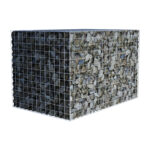
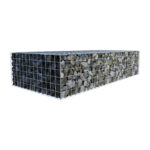
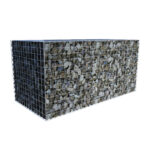
Galfan coated
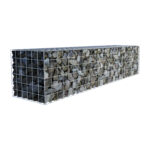
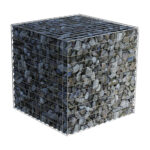
45cm
45cm
45cm
3mm (10g)
£15.99 inc. VAT
Buy high-quality, BBA approved Gabion baskets made to last up to 120 years. Cost-effective, robust and easy to install, they are a great solution for commercial and domestic landscaping through to gabion retaining walls.


| All of our Gabions have been tested and certified to the following standards | |
| BBA Certified | Yes – BBA certificate number: 05/4215 Certification Body: BBA |
| Gabion Quality Standard |
– conforms to BS EN 10223-8:2413 |
| Accurate Zinc Coating |
– conforms to BS EN 10244-2:2009 |
| Wire Tolerances Standard |
– conforms to BS EN 10218-2:2012 |
| Hole Size (Aperture) Standard |
– conforms to BS EN 10218-2:2012 Certification Body: British Standards Institution |
| Corrosion Resistance Standard |
– conforms to BS EN 10244-2:2009 |
| Abrasion Resistance Standard |
– conforms to BS EN 60229:2008 |
| PVC Coating Standard |
– conforms to BS EN 10245-1:2011 & BS EN 10245-2:2011 |
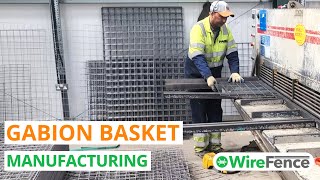
All our gabion baskets are manufactured in-house at our Burton-on-Trent warehouse. Built to the highest industry standards, our premium wire mesh and protective coatings deliver a 50-to-120-year lifespan. Fully BBA tested, certified, and ISO-compliant, they provide long structural reliability for retaining wall applications. Please read below for detailed product information.

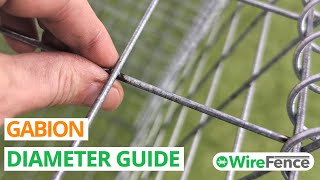


| Wire Diameter | Use For: |
| 3mm | Standard wire thickness for walls up to 5m. Low-cost option. Will result in minor bulges when filled with rocks. Suitable if architectural, straight edge finish is not required. |
| 4mm | 5m+ high & free-standing walls. Use for seating or surfaces that will be walked on. Will give an architectural, straight edge finish when filled carefully with interlocking rocks. |
| 5mm | 5m+ high walls & free-standing walls. Use for seating or surfaces that will be walked on. Best for an architectural, uniform and precise finish. For use in public parks. Can be used with rounded stone fill. |
| Galfan Coated | PVC Coated | |||||
| 3mm Wire Diameter | 4mm Wire Diameter | 5mm Wire Diameter | 3.2mm Wire Diameter | 4.3mm Wire Diameter | 2mm Hexagonal Mattress | |
| Furniture: can be walked on | ||||||
| Furniture: can be sat on | ||||||
| Fences: tall / thin structures | ||||||
| Freestanding wall | ||||||
| Planters | ||||||
| Landscaping: no bulges when filled with irregularly shaped rocks | ||||||
| Landscaping: no bulges when filled with rounded rocks | ||||||
| Retaining walls (up to 5m) | ||||||
| Retaining walls (5m and over) | ||||||
| Public leisure areas | ||||||
| Cladding (up to 4m) | ||||||
| Cladding (over 4m) | ||||||
| Erosion control | ||||||
| Erosion control: river beds | ||||||
| Erosion control: reservoirs beds | ||||||
| Erosion control: canals beds | ||||||
| Sea Defence | ||||||
| GENERAL | ||||||
| Delivered as | Flat packed in small to large truck depending on order quantity | |||||
| Delivered with | Delivered with FREE tying wire | |||||
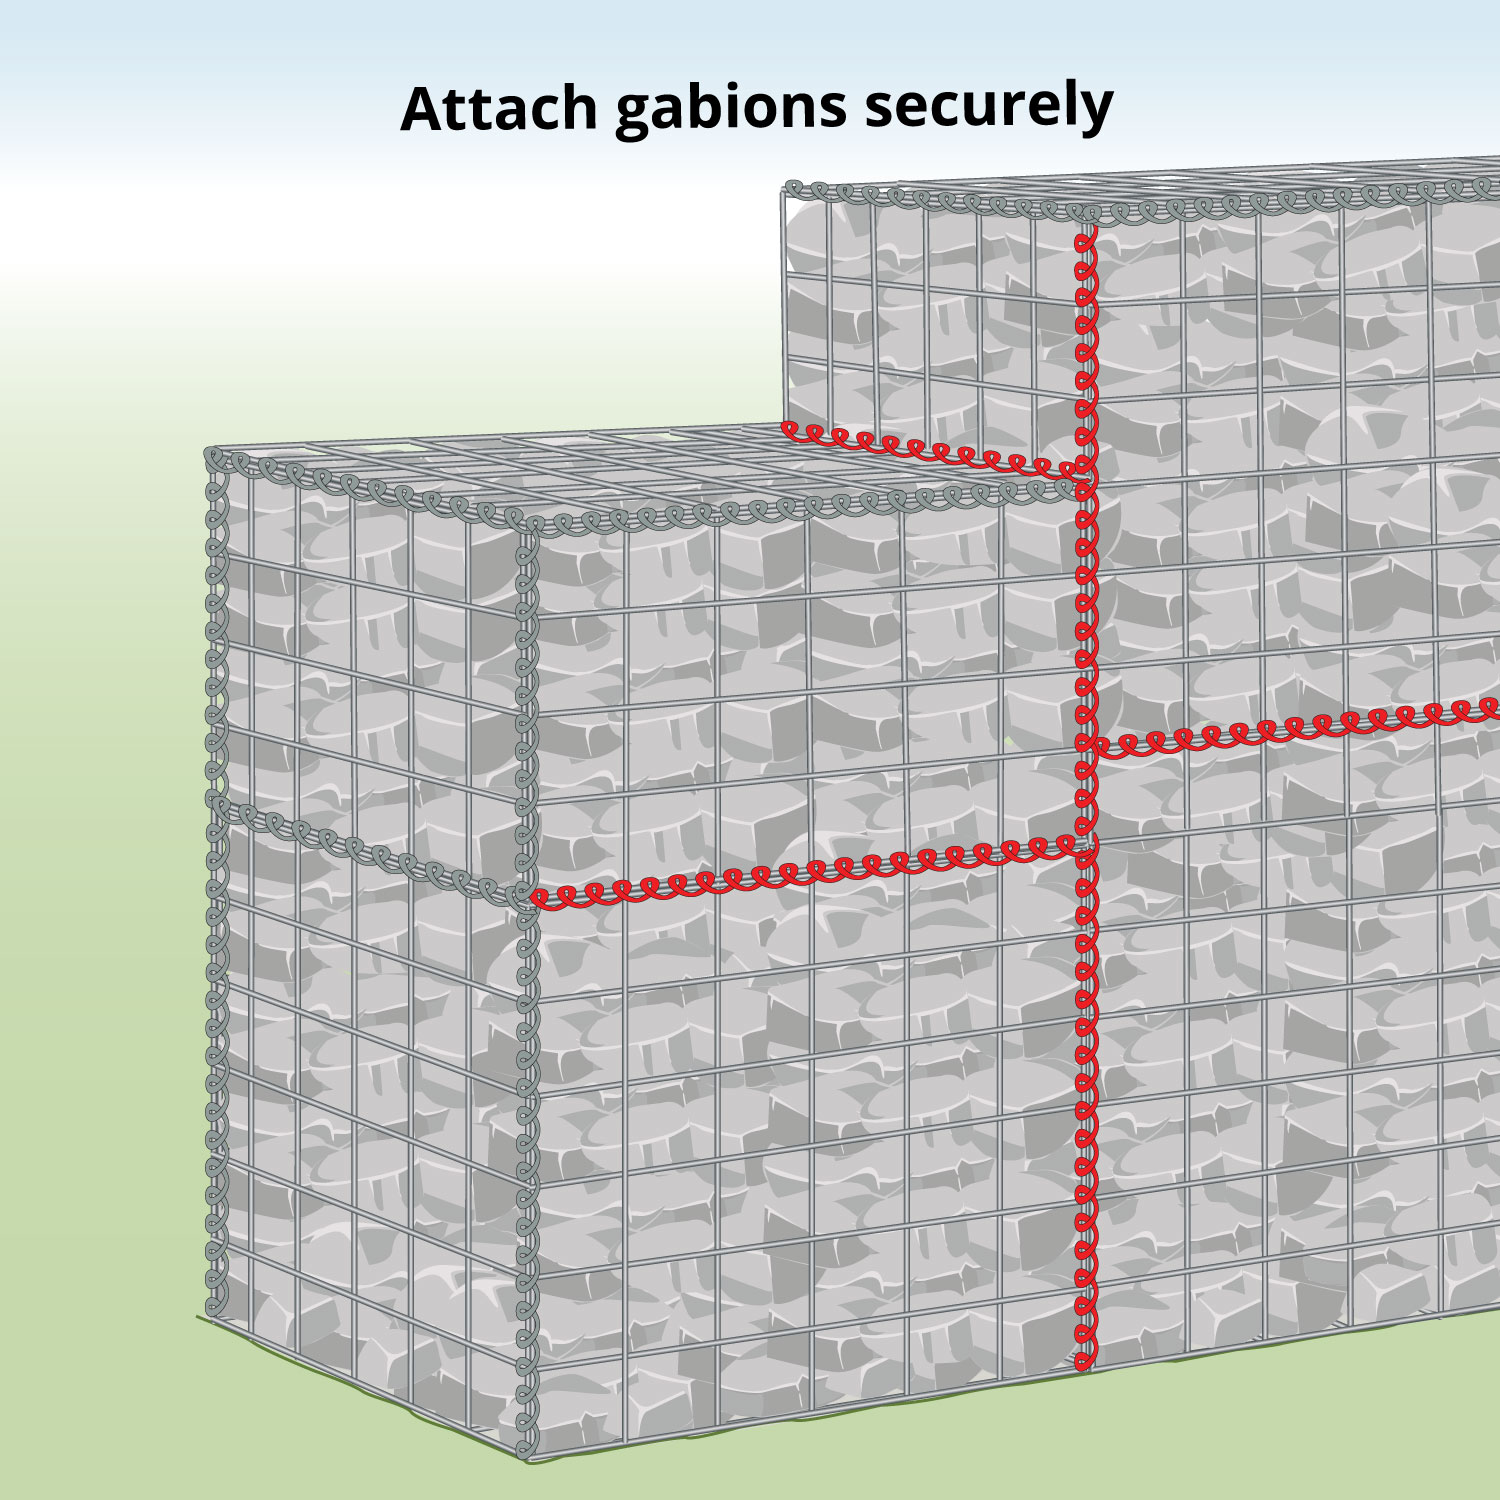
| Also available | Helicals for quicker assembly of the 4 vertical corners (ordered separately) | |||||
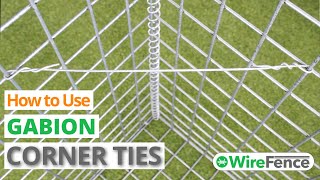
| Also available | Corner ties to prevent bulging (ordered separately) | |||||
| Made in UK | Yes | |||||
| Conforms to British manufacturing standard | BS EN 10223-8:2013 | |||||
| Certificate of conformity | Yes – download | |||||
| CONSTRUCTION | ||||||
| Mesh Hole Size | 75mm x 75mm | 75mm x 75mm | 75mm x 75mm | 75mm x 75mm | 75mm x 75mm | 60mm x 80mm |
| Mesh Material | Galfan coated steel | Galfan coated steel | Galfan coated steel | Galfan & PVC coated | Galfan & PVC coated | Galfan & PVC coated |
| Mesh Construction | Welded | Welded | Welded | Welded | Welded | Woven |
| Mesh panels joined together by | Stainless steel C Clips | |||||
| STRENGTH & ENVIRONMENT | ||||||
| Tensile strength range | 540-770 N/mm² | 540-770 N/mm² | 540-770 N/mm² | 540-770 N/mm² | 540-770 N/mm² | 350 to 500N/mm² |
| Corrosion resistance | Yes, conforms to British standard BS EN 10244-2:2009 | |||||
| Abrasion resistance | Conforms to EN 60229:2008 | |||||
| Life Expectancy | 50 – 100 years | 50 – 100 years | 50 – 100 years | 120 years |
120 years |
120 years |
| Suited to Environments | C2 – C4 | C2 – C4 | C2 – C4 | C2 – C5 | C2 – C5 | C2 – C5 |
| ROCKS / FILLING / INSTALLATION | ||||||
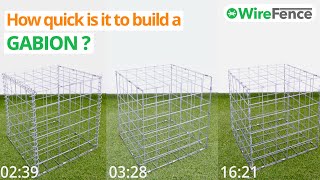
| Speed of installation | 2-5 mins each | |||||
| Experience required to install | None – Watch Video | |||||
| Speed up installation | Helicals (ordered separately) – use on 4 vertical corners instead of tying wire. Can also be used to attach the cages together | |||||
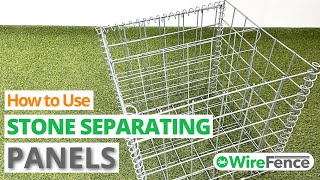
| Save money | Stone separating panel (ordered separately) – allows you to backfill the cages with cheaper stone or rubble | |||||
| Prevent bulging | Corner ties (ordered separately) – will brace the corners of the baskets together reducing bulging caused by rocks putting pressure on the metal panels | |||||
| Rock size required | Minimum 80mm x 80mm | |||||
| Requires angular, interlocking rocks | ||||||
| Can be filled with crushed concrete | ||||||
| Can fill with rounded rocks | ||||||
Installation Guidelines
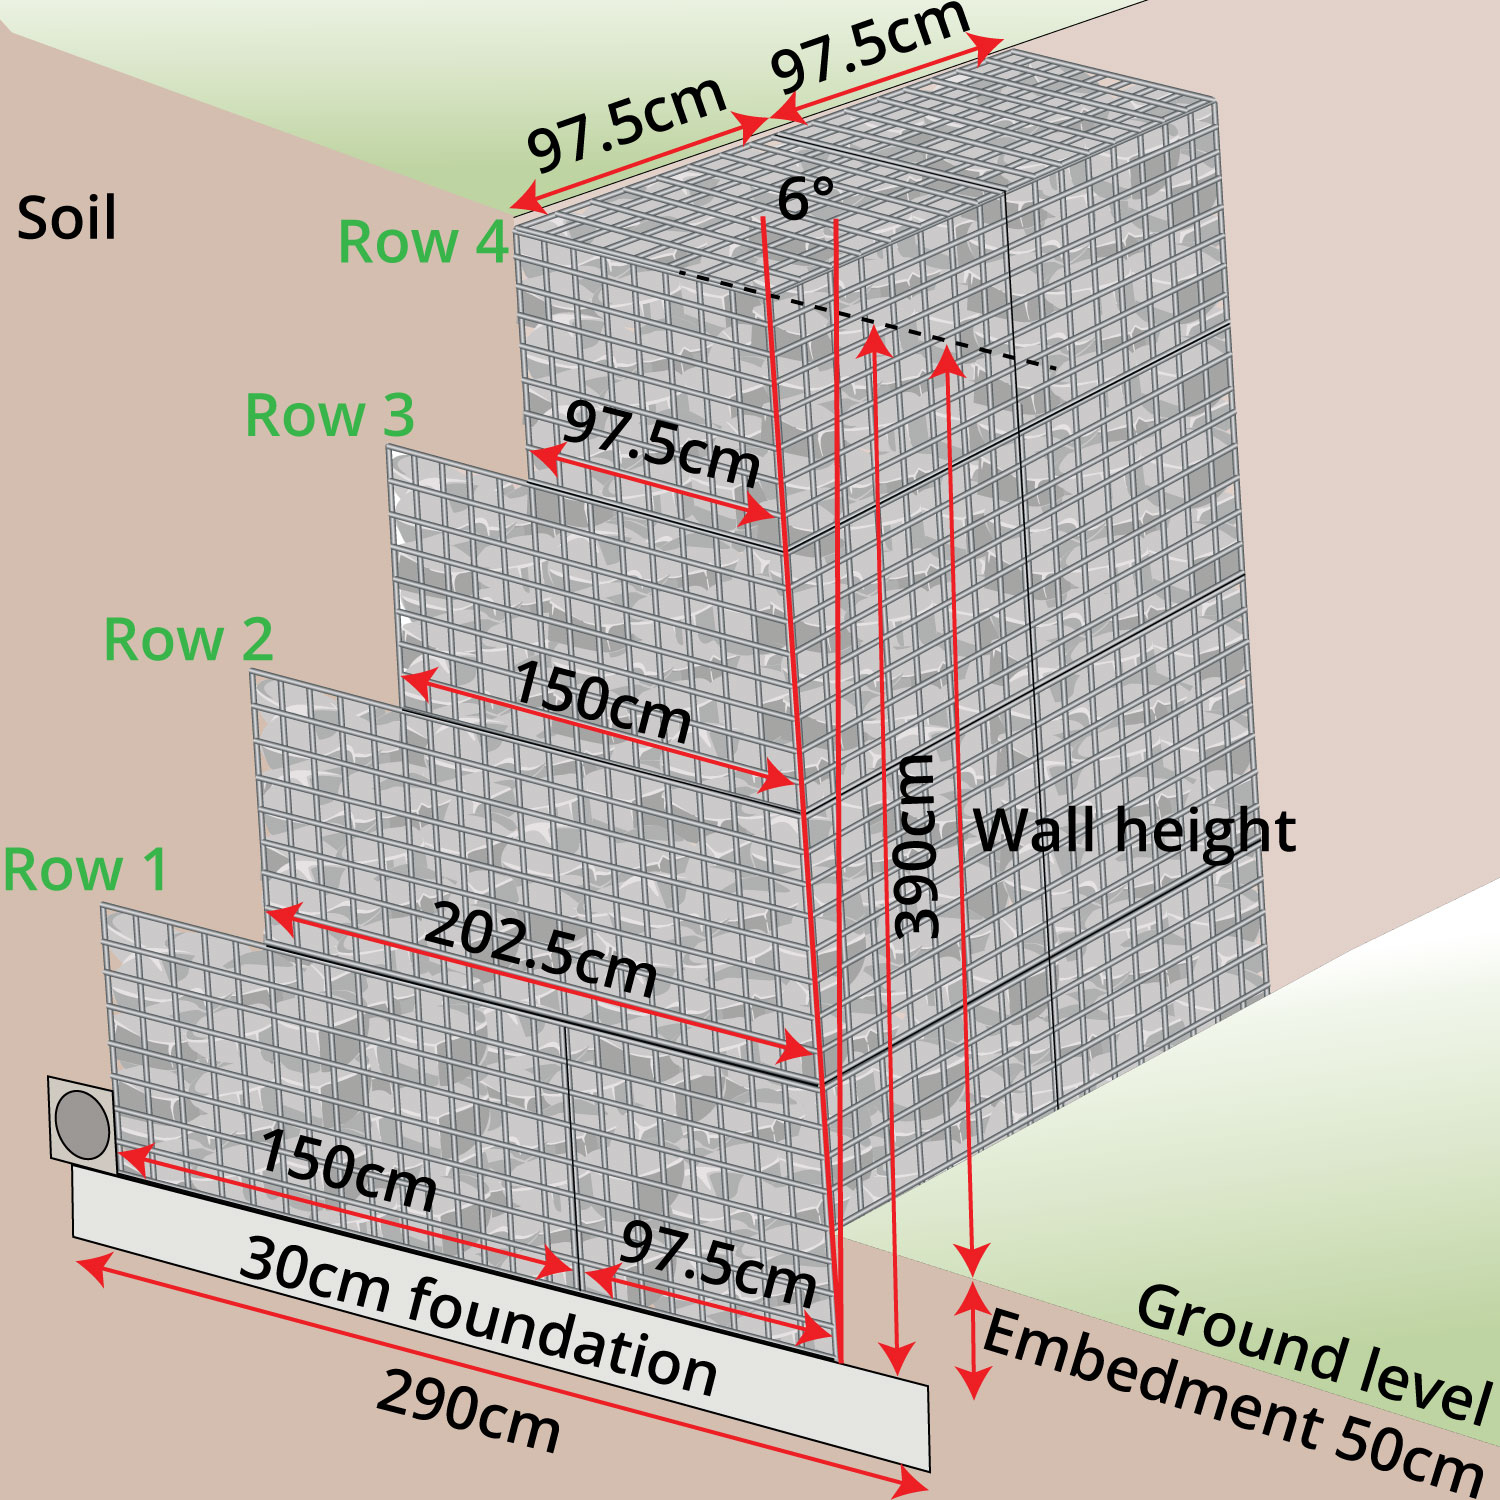
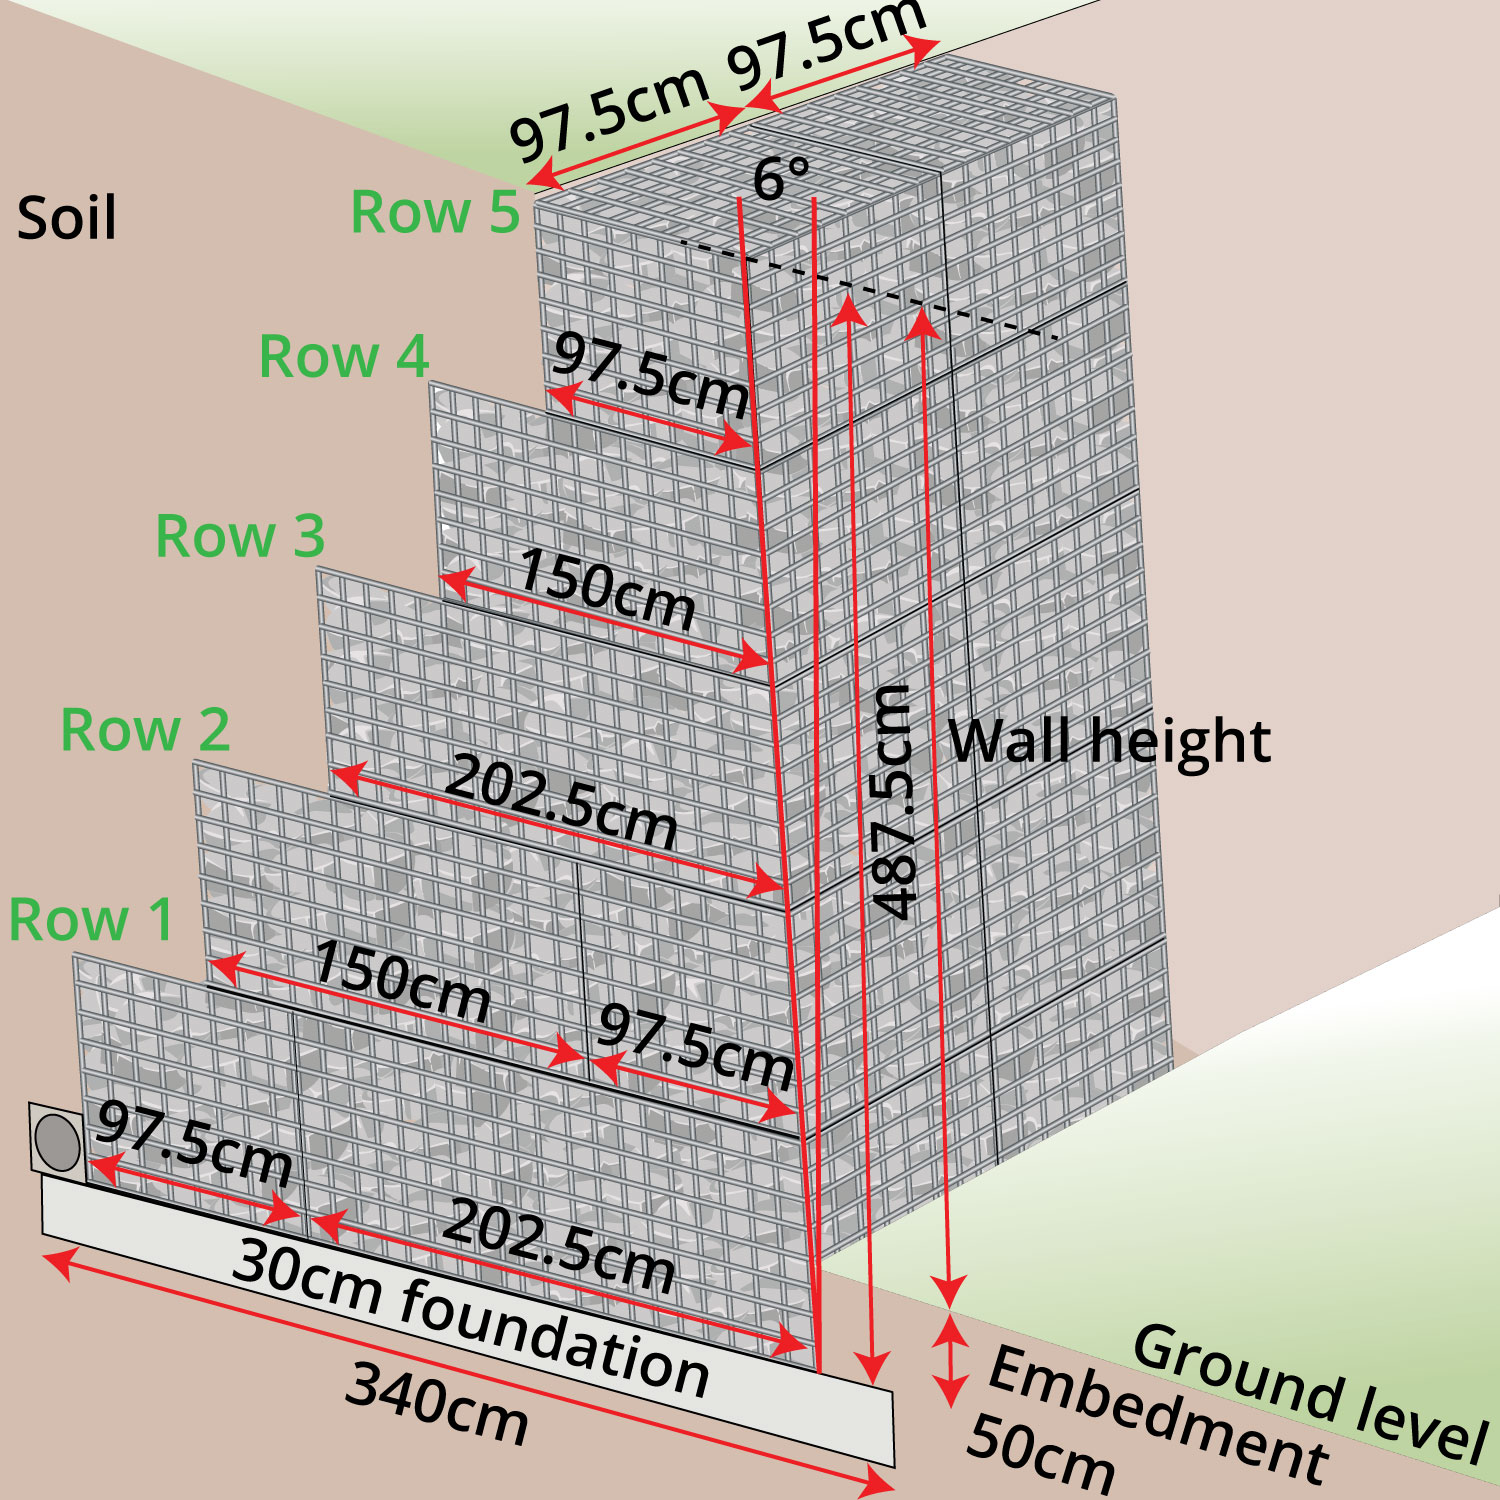
Retaining Wall Design
Freestanding Wall Design
| Height & Loads | |
|
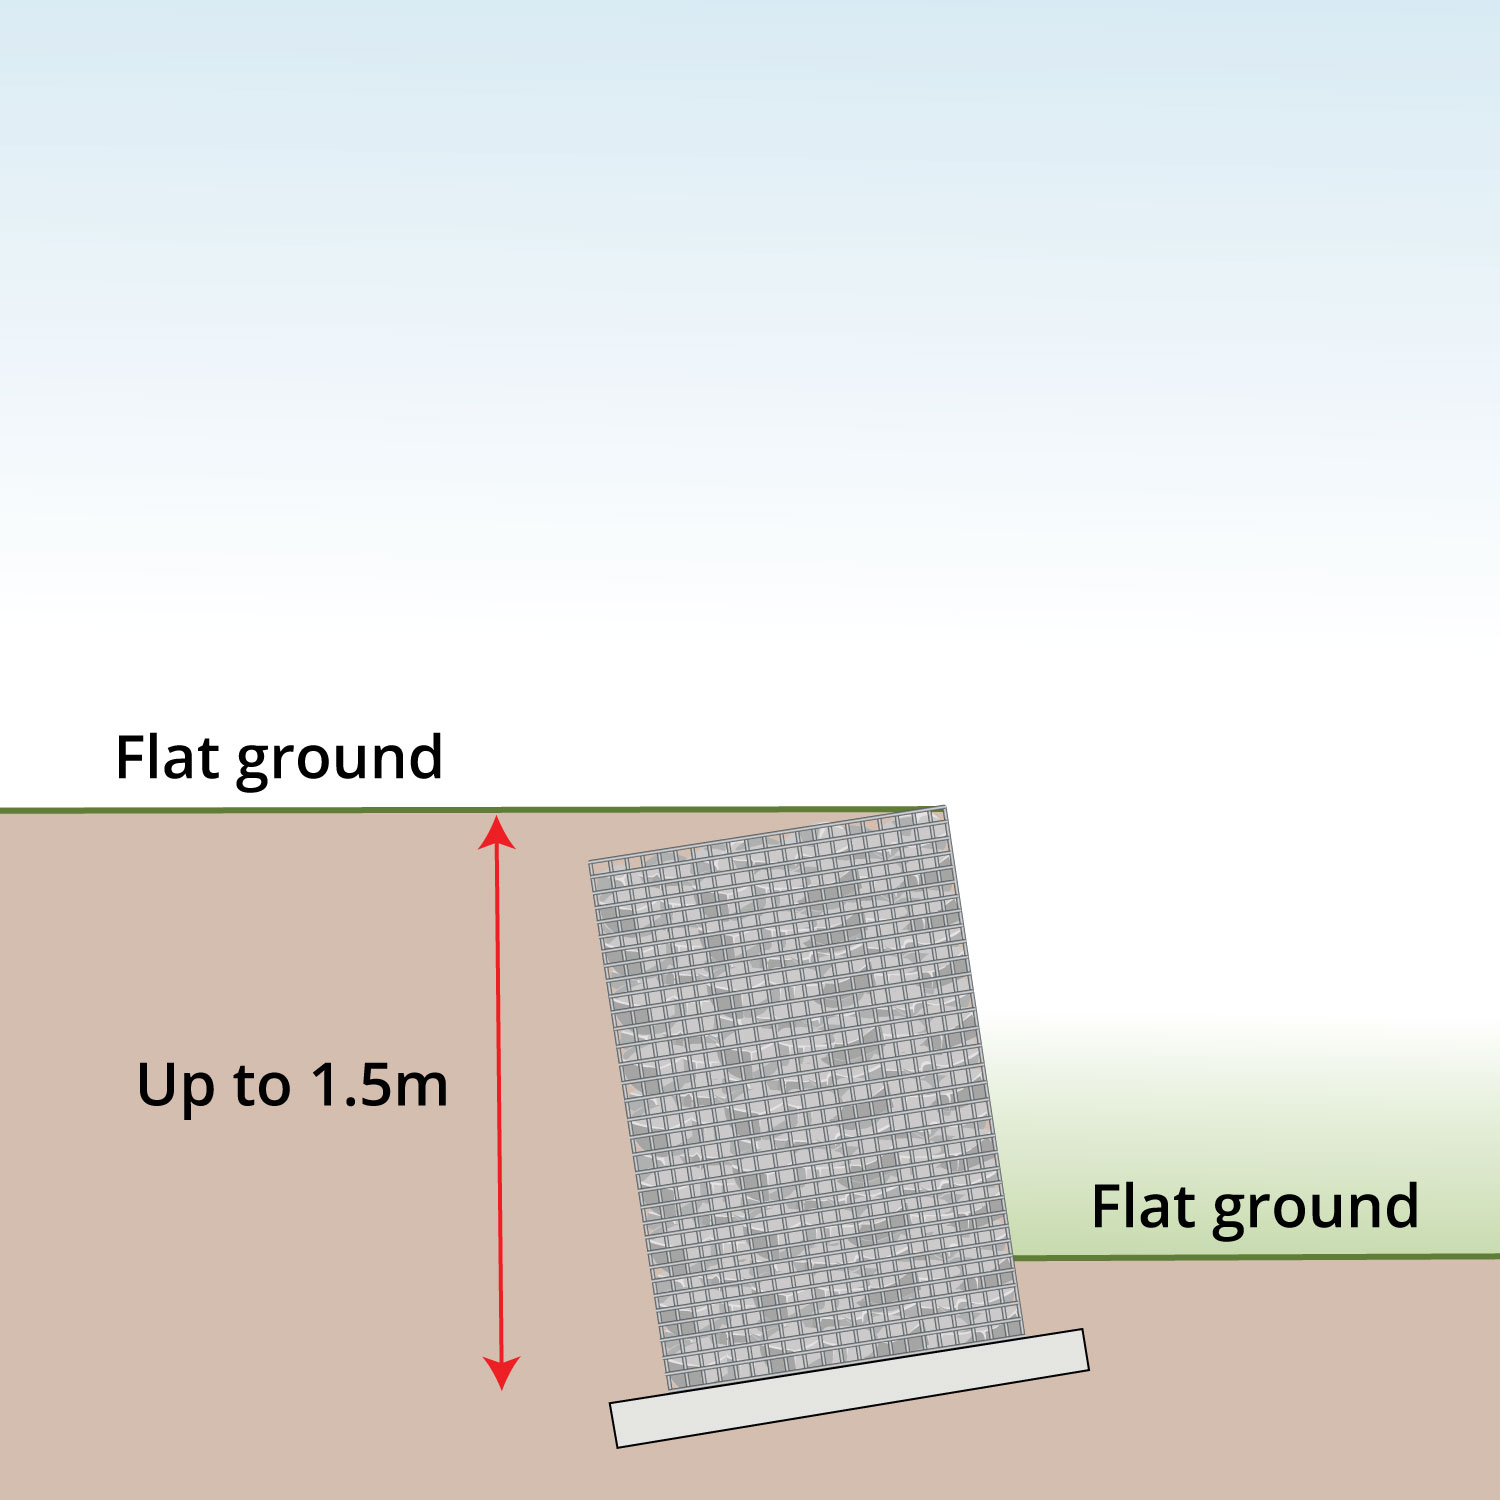
1.5m or Less & Low Loads
|
A retaining wall does not require an engineer’s calculation when it meets the following criteria
|
|
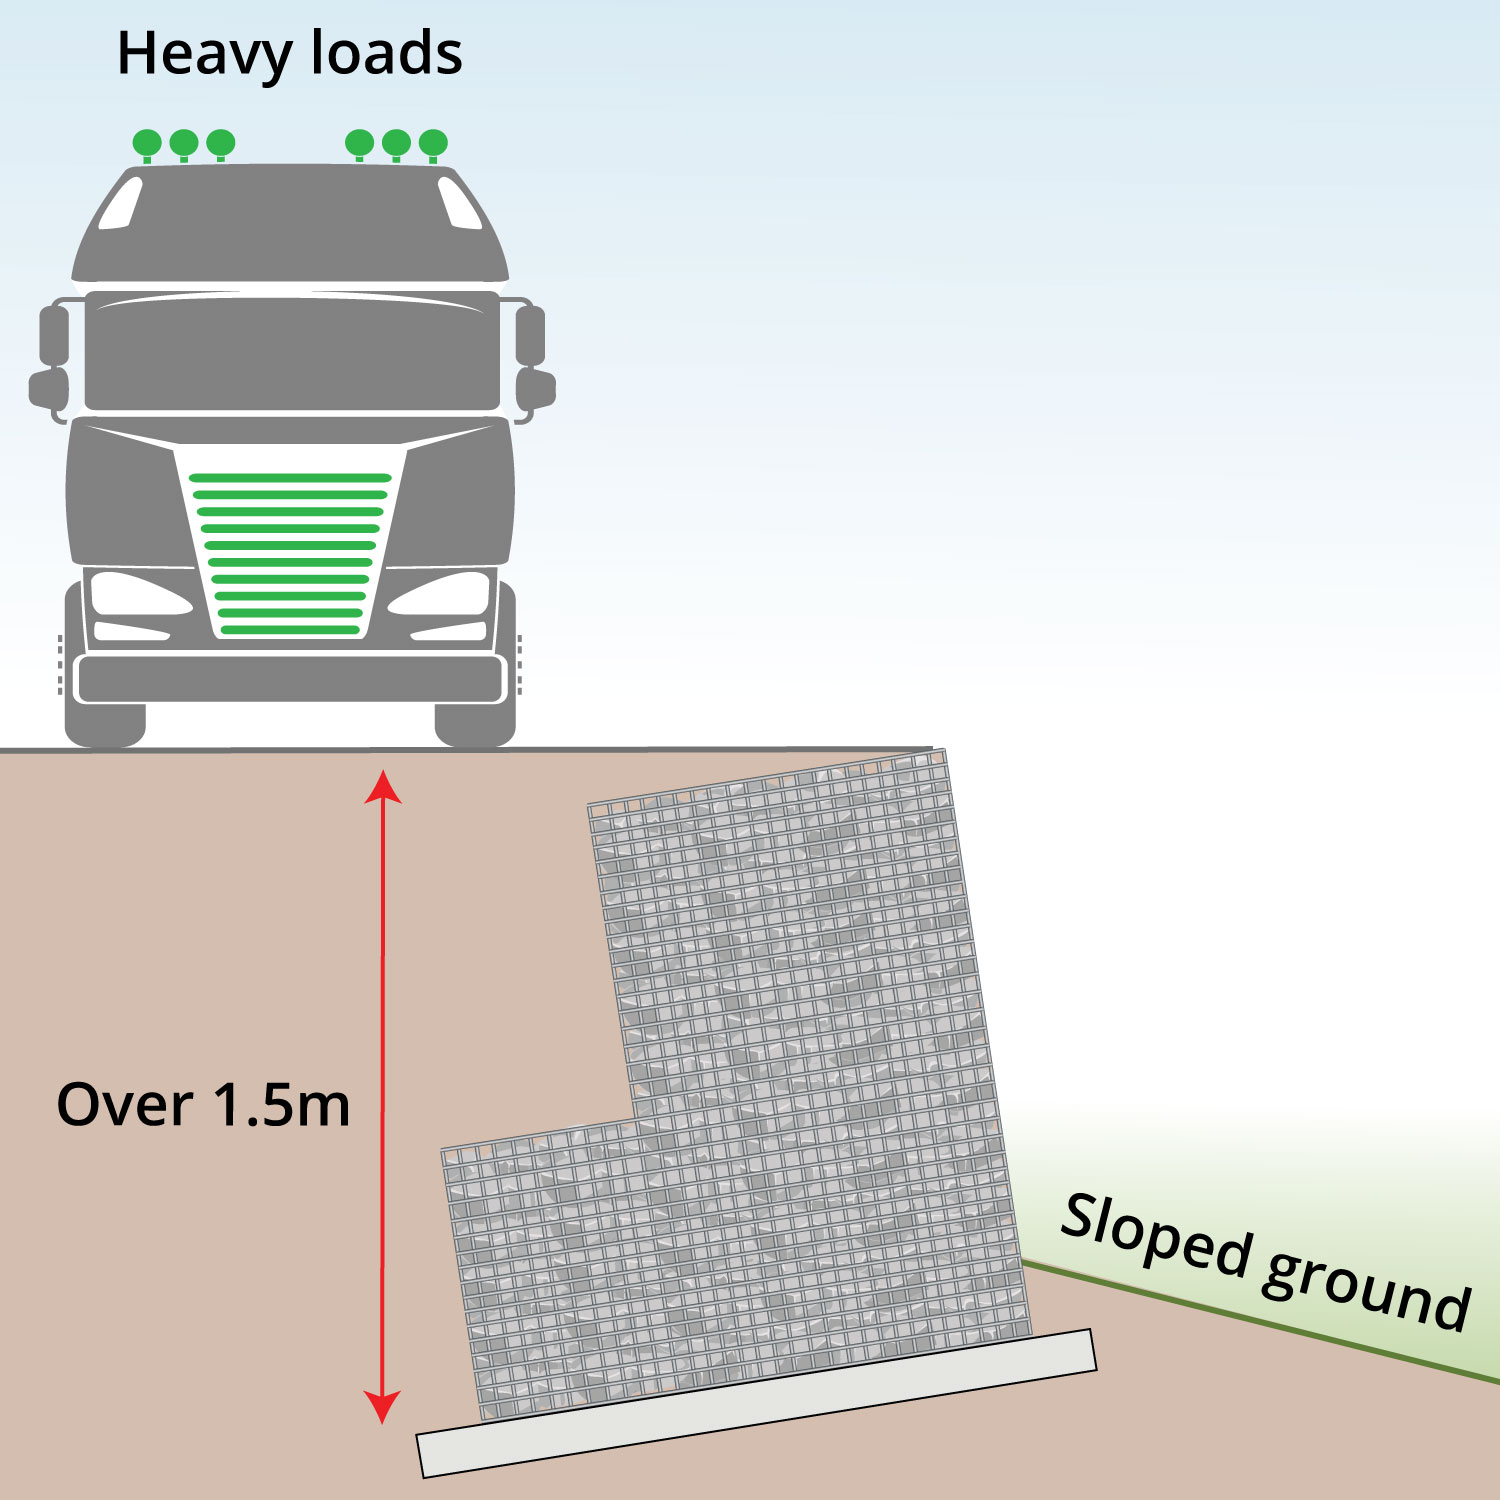
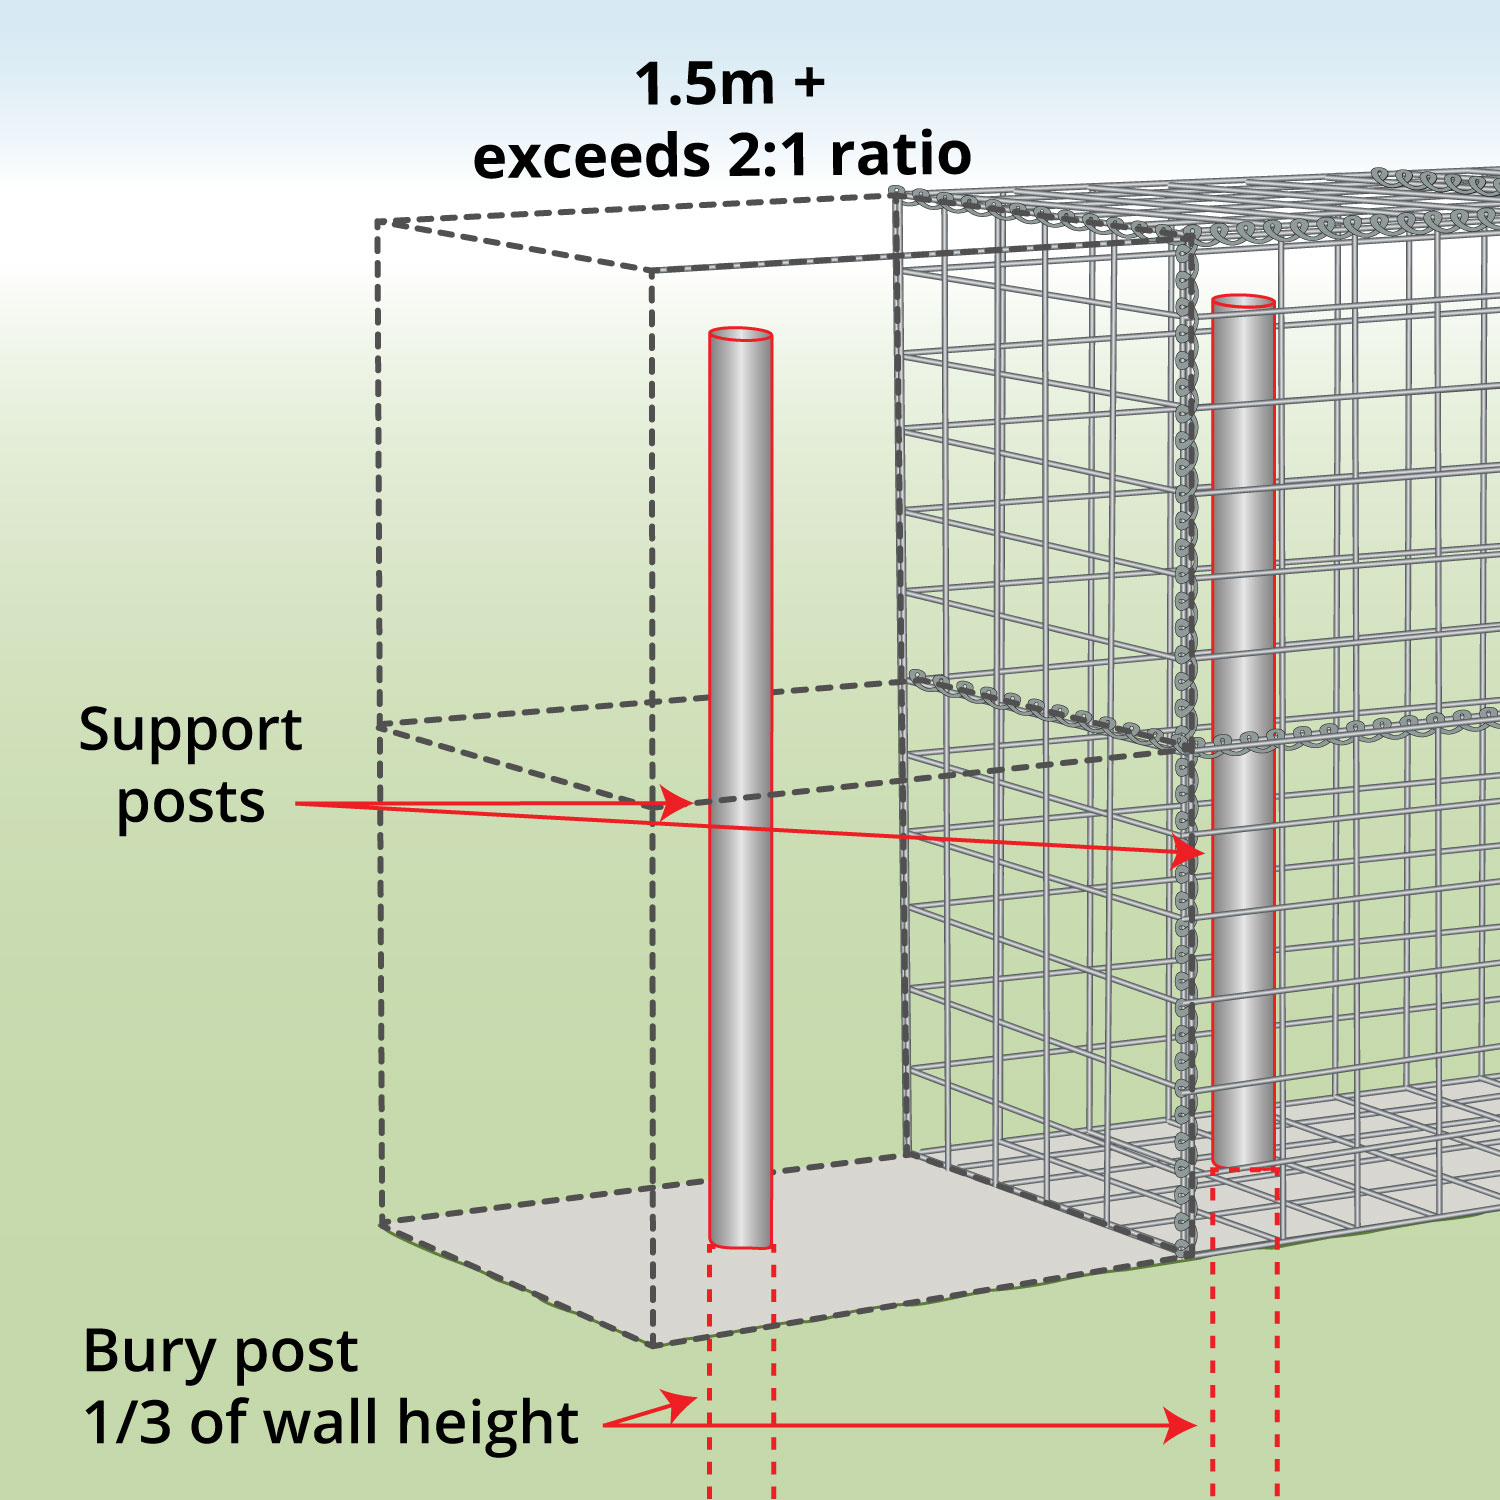
1.5m+ or Large Loads
|
A retaining wall does require an engineer’s calculation when it meets the following criteria
|
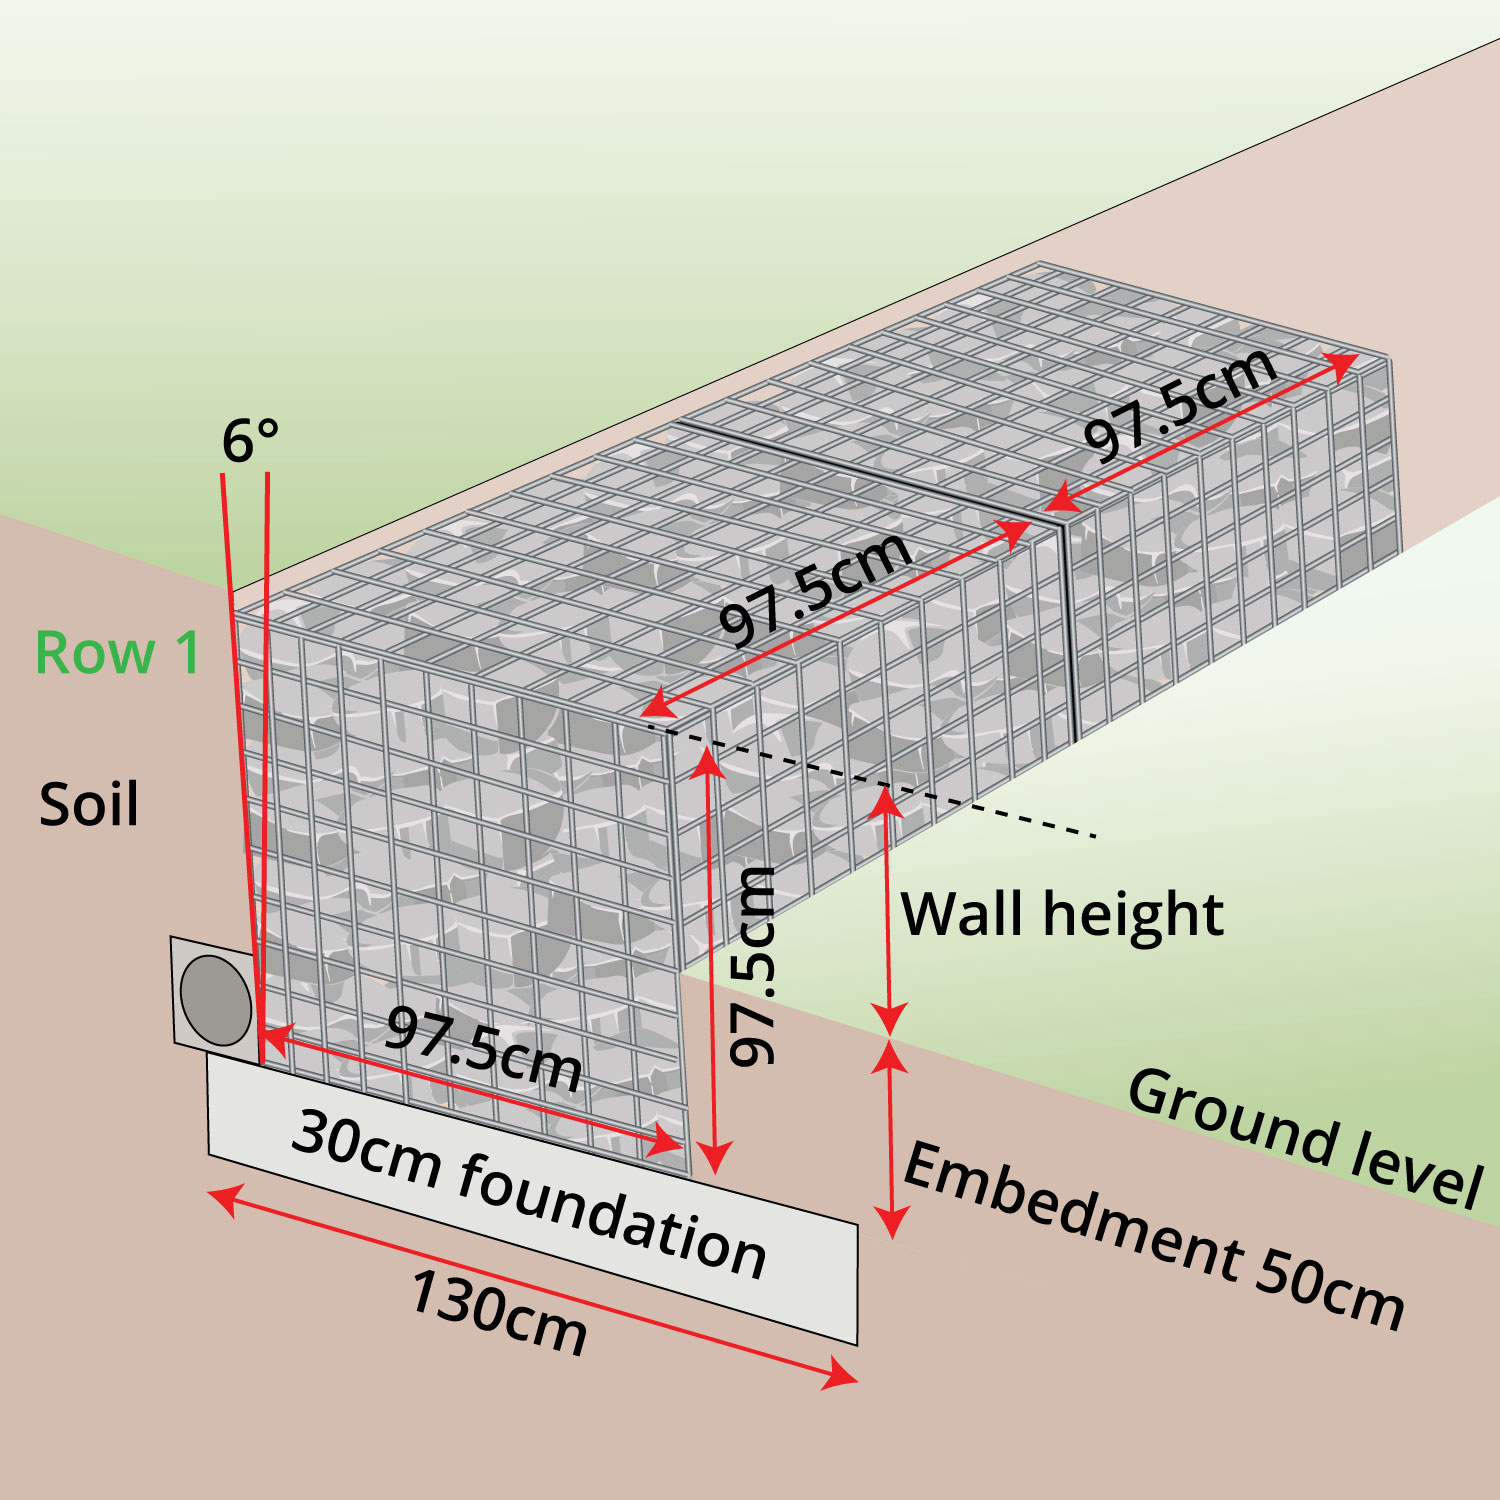
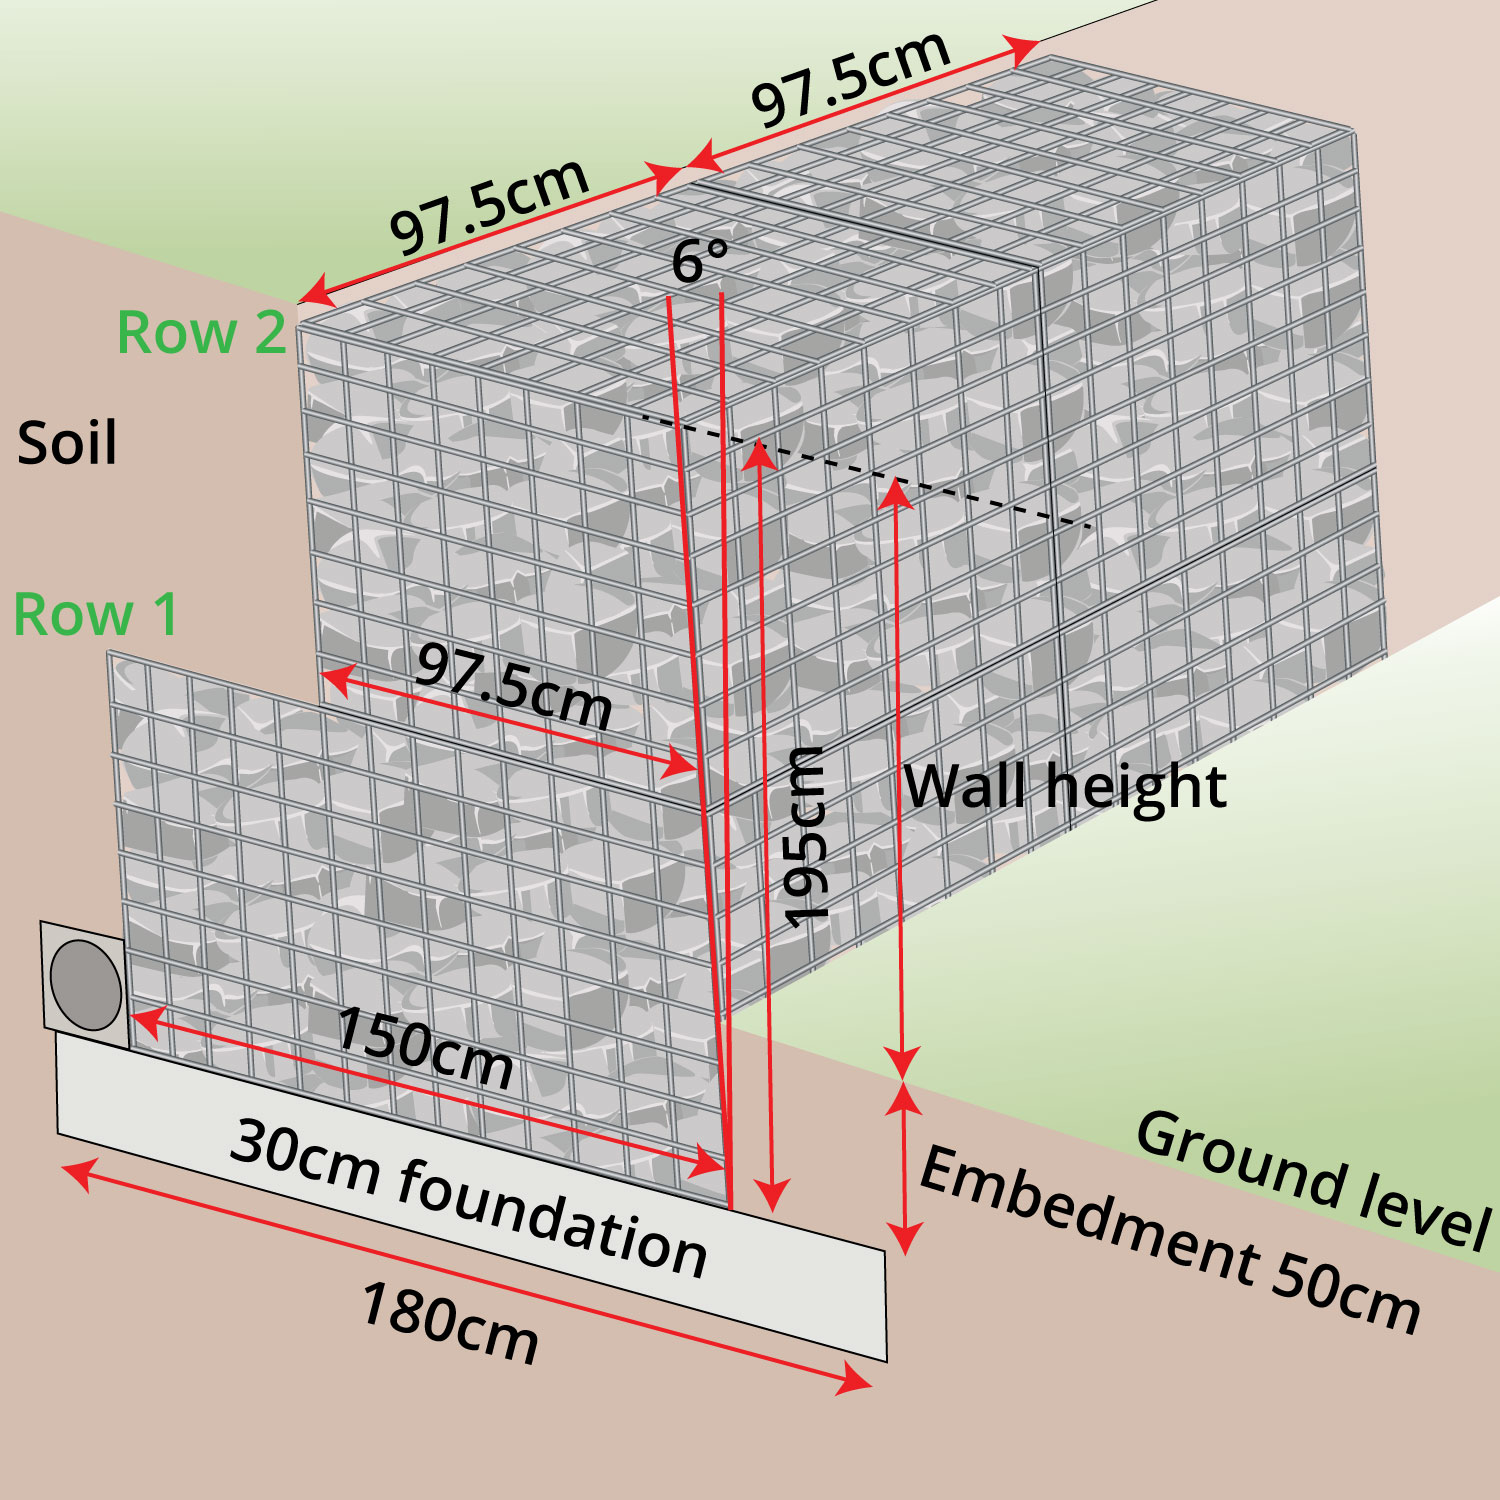
| Foudations | |
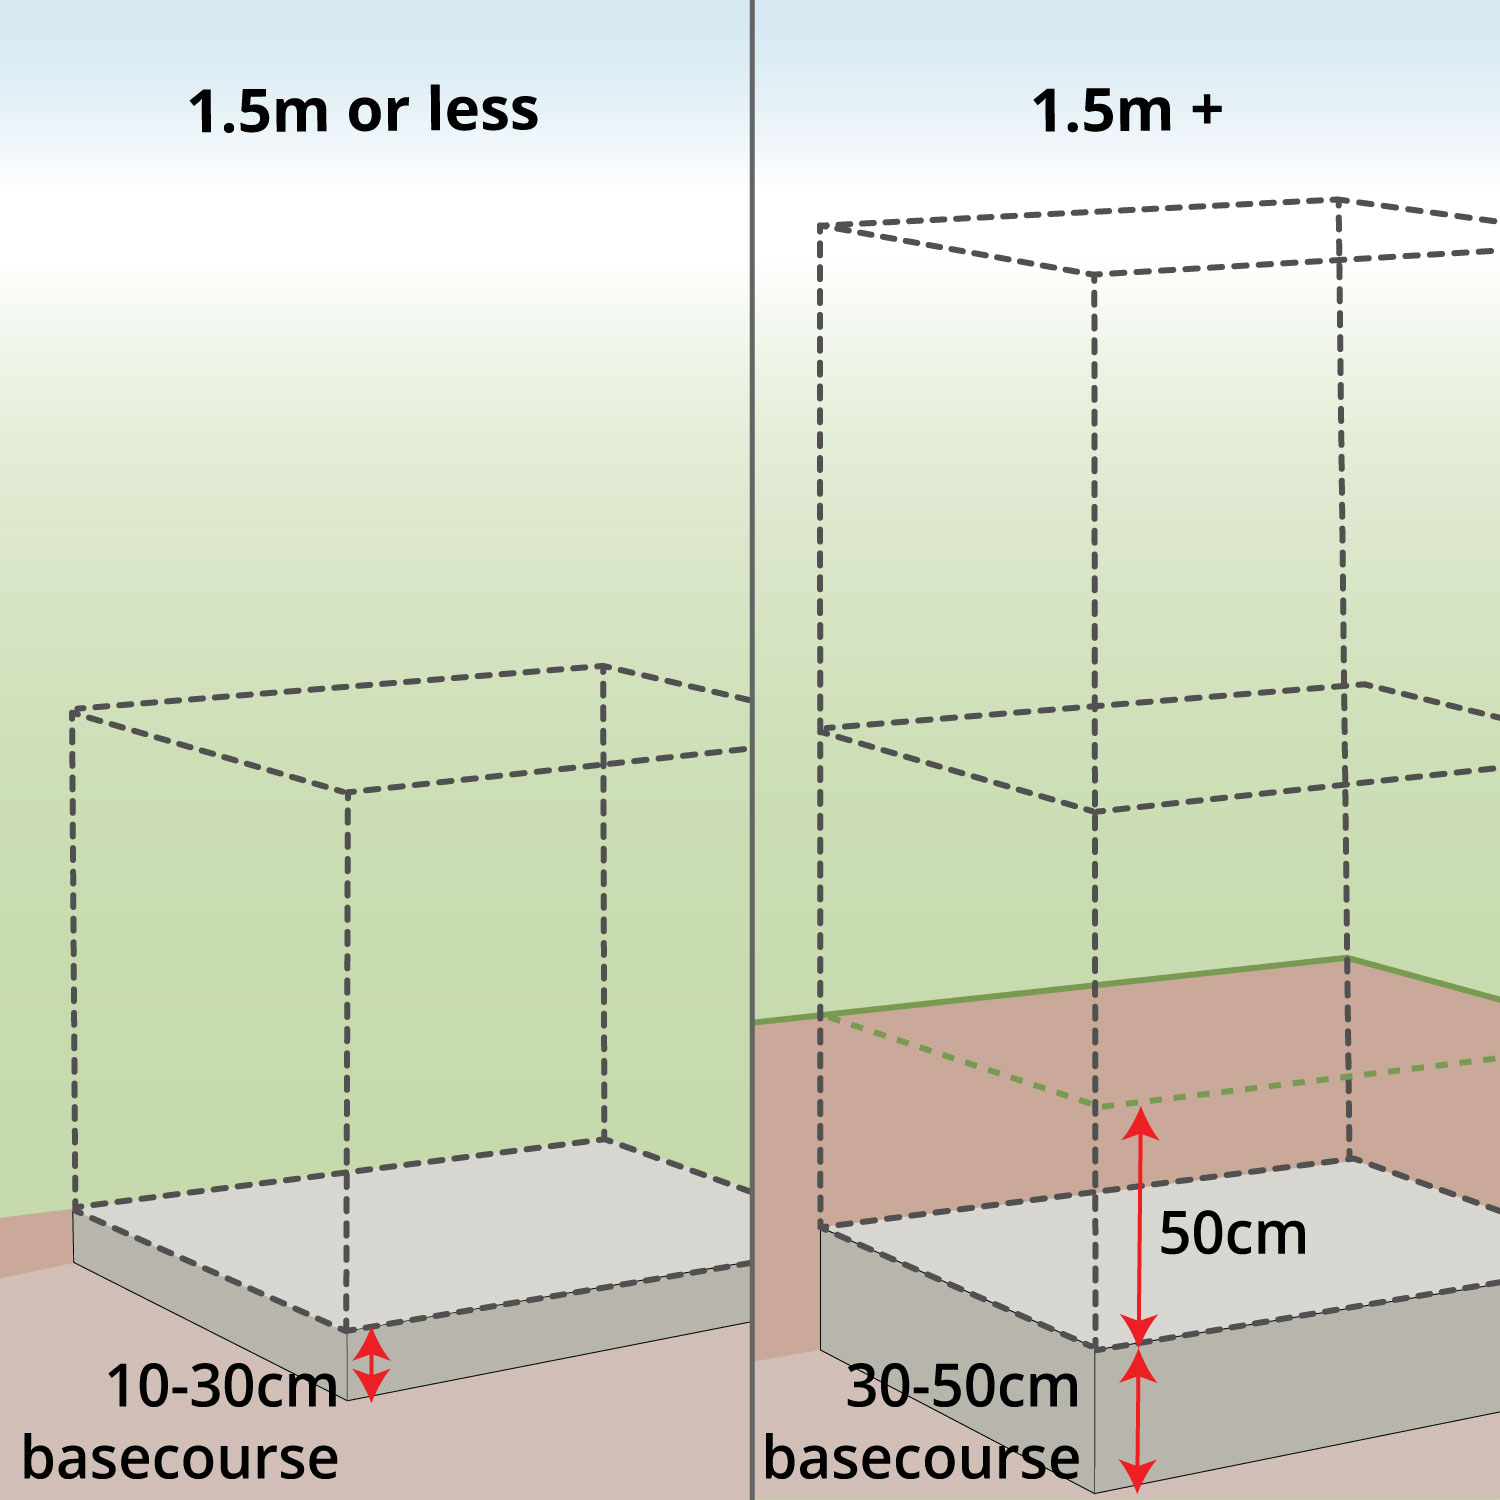
| Basecourse
|
1.5m or less & low loads
show image
1.5m+ or large loads Show Image
|
|
Stability |
|
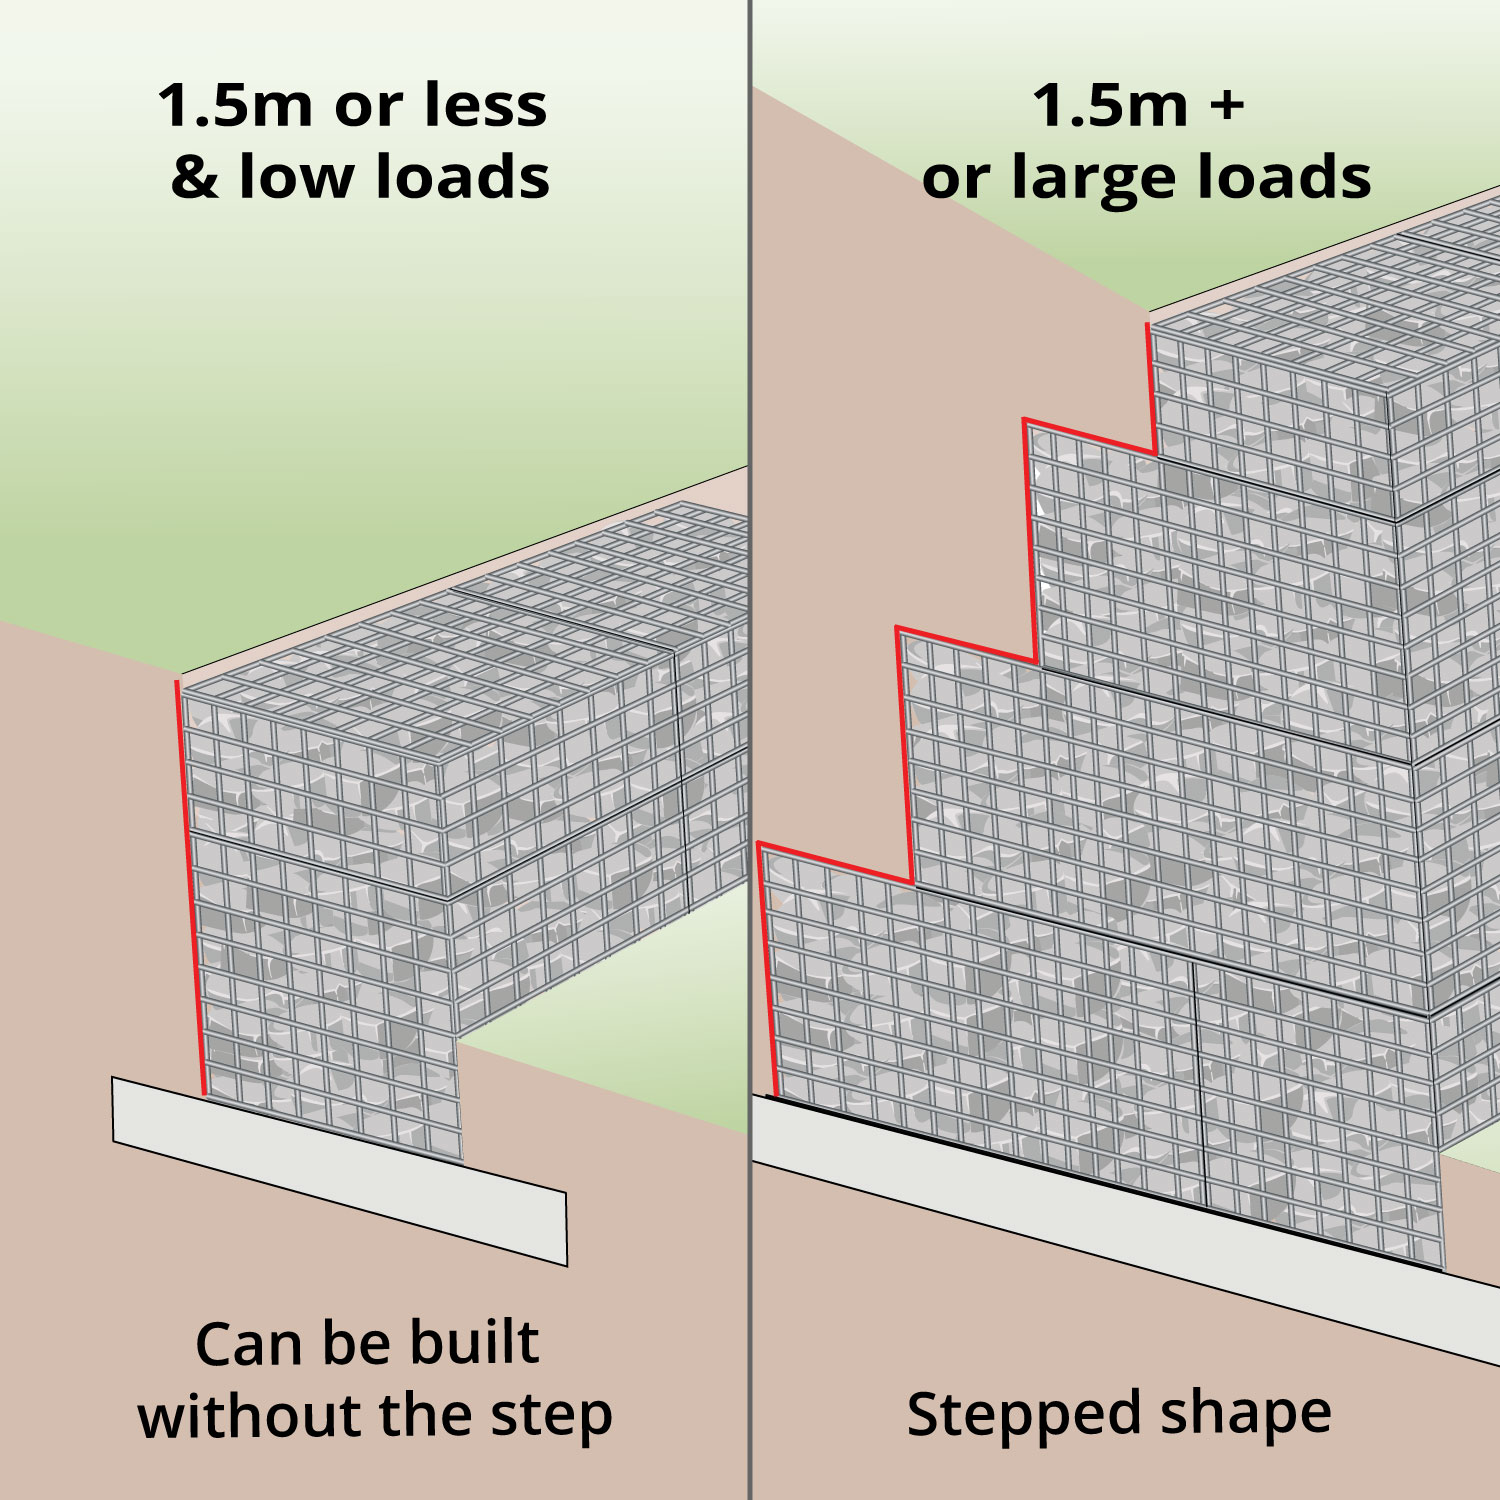
| Shape
|
1.5m or less & low loads Show Image
1.5m+ or large loads Show Image
|
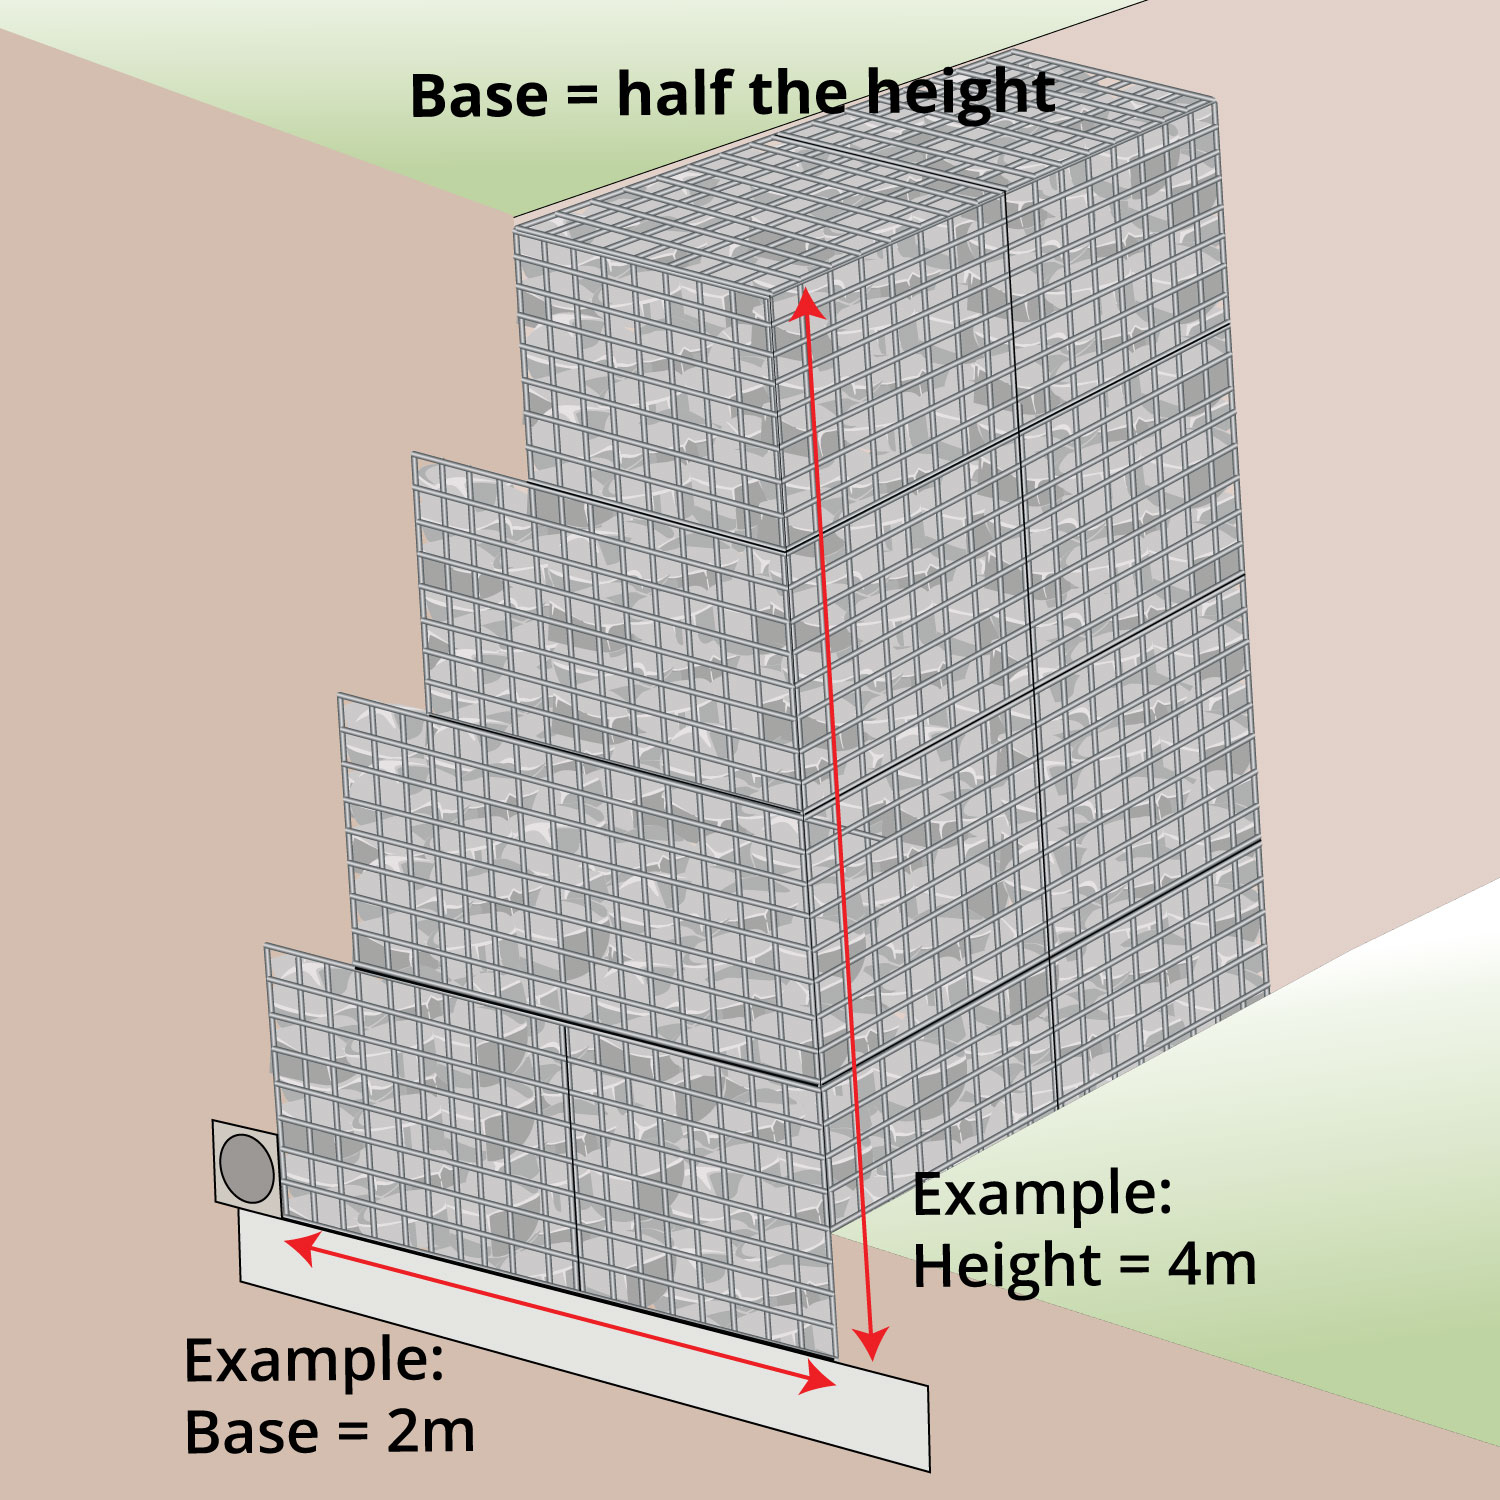
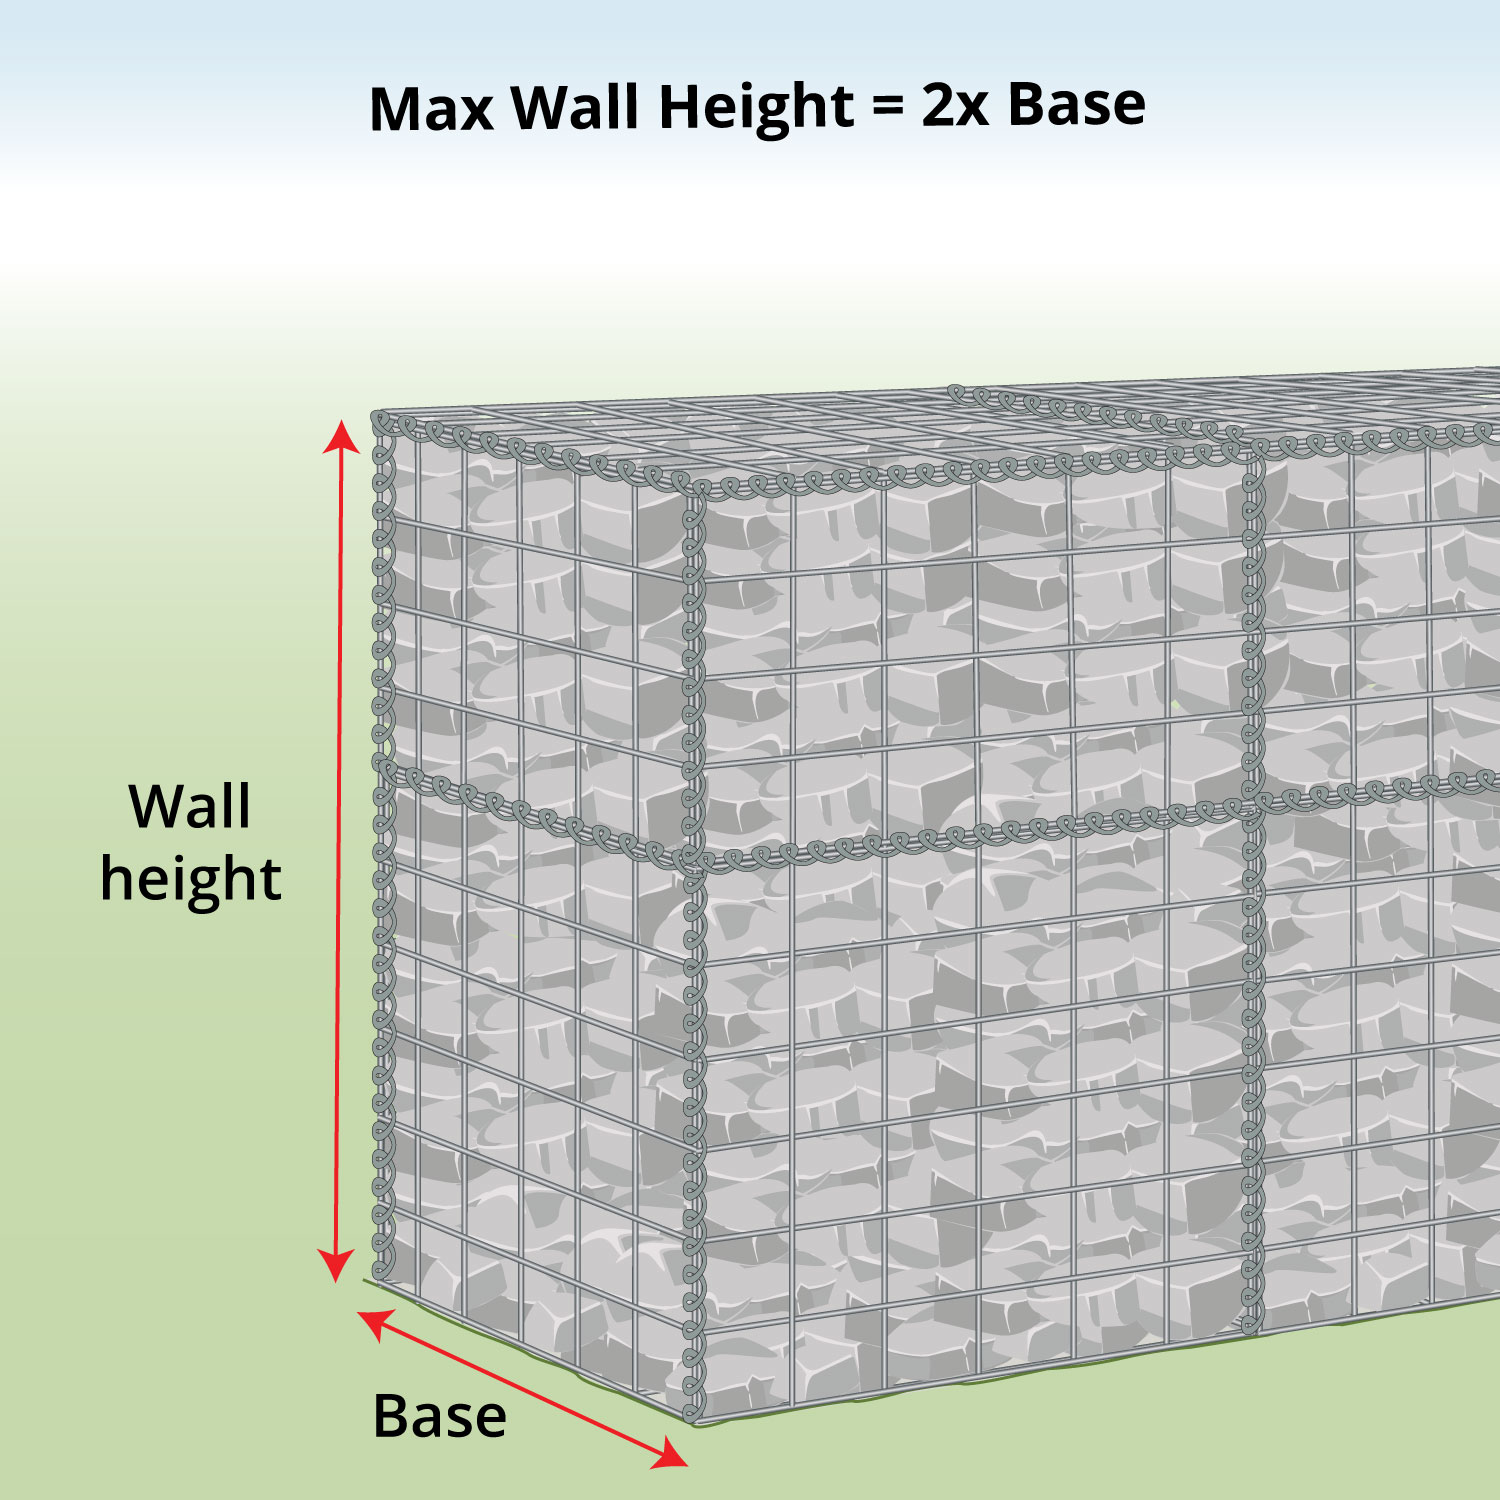
| 2:1 Ratio
|
1.5m or less or low loads
Show Image
1.5m+ or large loads Show Image
|
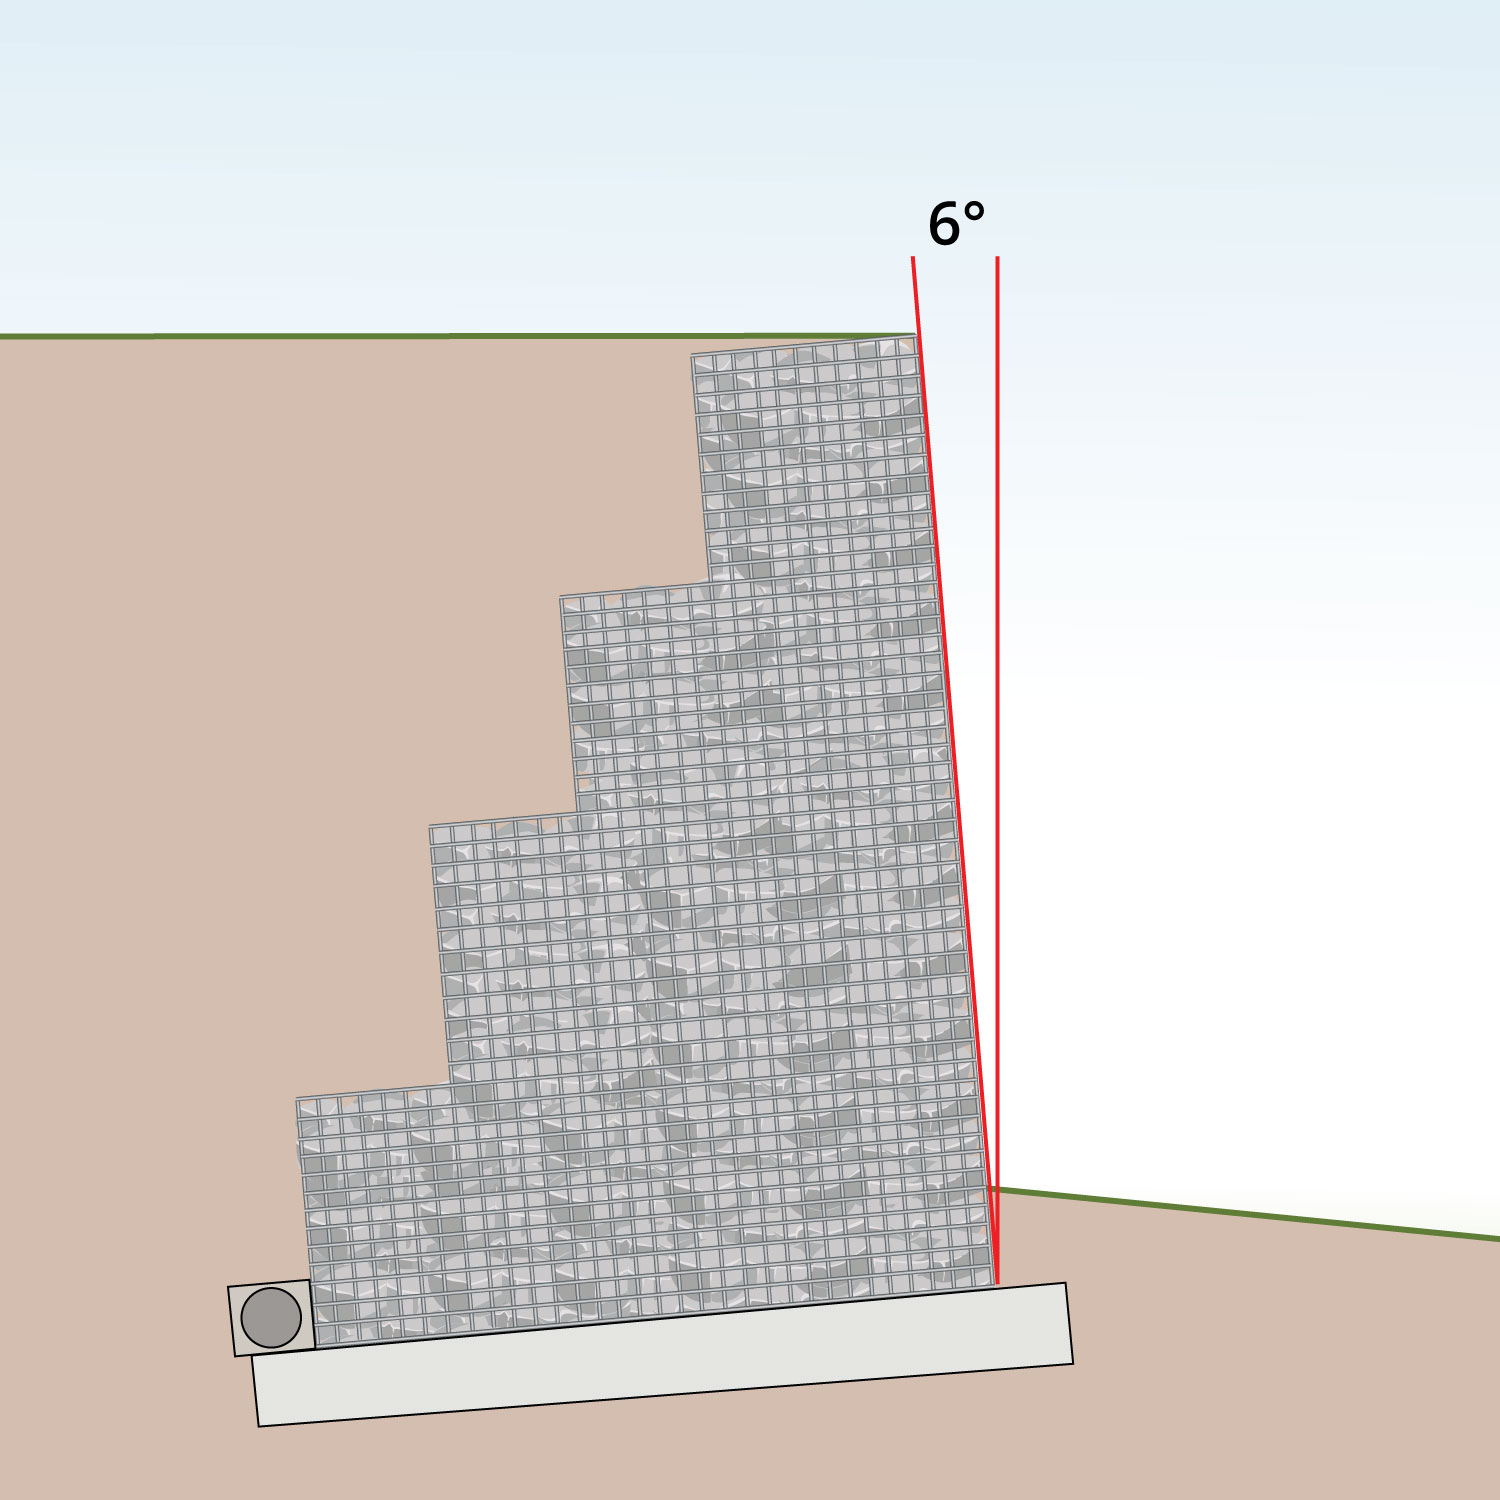
| 6 Degree Slope
|
1.5m or less & low loads
show image
1.5m+ or large loads Show Image
|
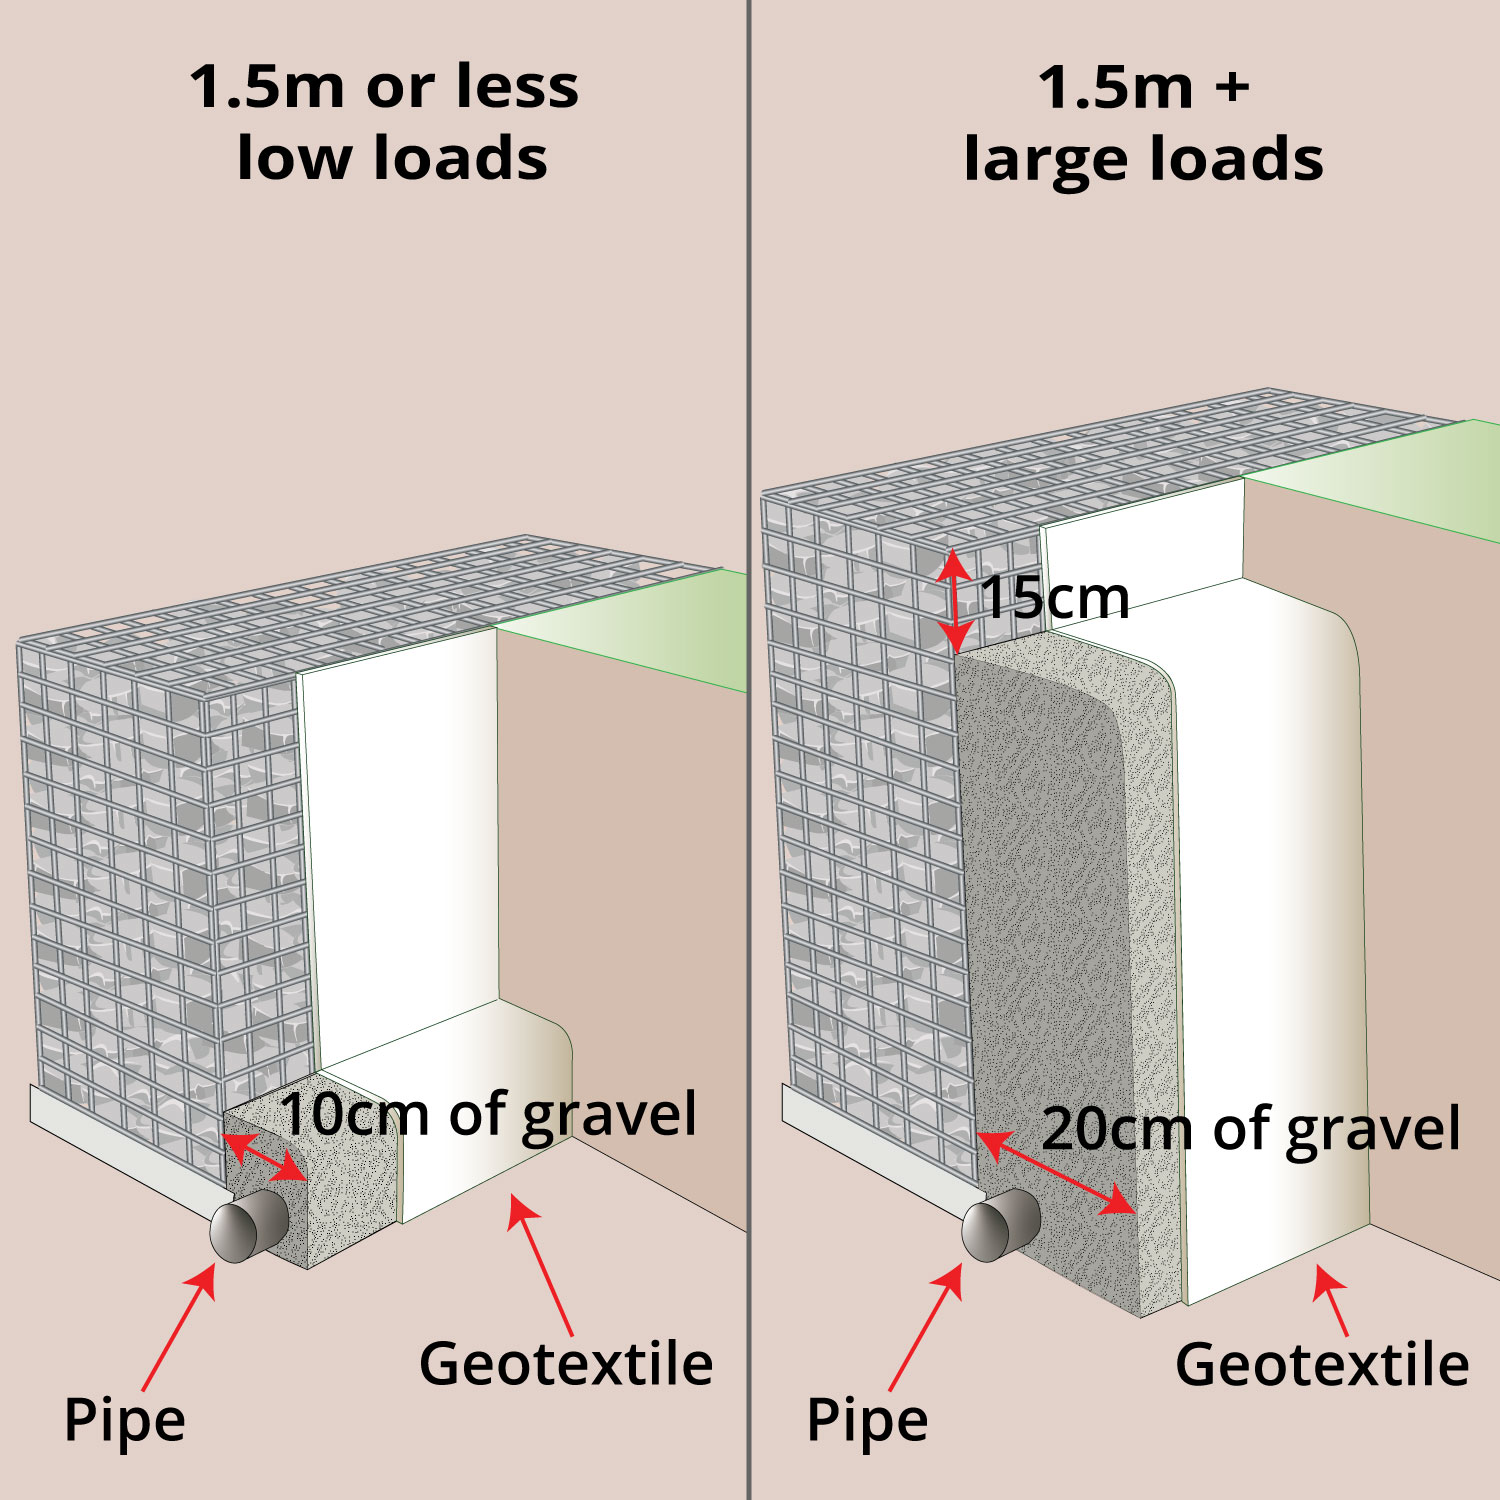
| Drainage | |
| Geotextile
|
1.5m or less & low loads
show image
1.5m+ or large loads Show Image
|
| Basket Dimensions (cm) | Volume (m3) | Bulk Bags of Stone Required | Weight of Stone Required (kg) | ||
| 45 | 45 | 45 | 0.09 | 1 | 164 |
| 97.5 | 45 | 45 | 0.20 | 1 | 197 |
| 97.5 | 97.5 | 45 | 0.42 | 1 | 770 |
| 97.5 | 97.5 | 97.5 | 0.92 | 2 | 1,668 |
| 150 | 45 | 45 | 0.30 | 1 | 546 |
| 150 | 97.5 | 45 | 0.66 | 2 | 1,185 |
| 150 | 97.5 | 97.5 | 1.43 | 3 | 2,567 |
| 202.5 | 45 | 45 | 0.41 | 1 | 738 |
| 202.5 | 97.5 | 45 | 0.89 | 2 | 1,599 |
| 202.5 | 97.5 | 97.5 | 1.93 | 4 | 3,465 |
The following questions have been carefully curated and answered by our customer service team members, Joy and Erno. They have also been checked by our founder John. They are the most commonly asked questions by our customers. We hope they are useful, but please get in touch if you need further assistance – we are more than happy to help.
You may also find our gabion learning hub useful. It is packed full of videos to help you understand everything you need to know about gabions.
How many helicals do I need?
Watch Video
You will need x4 helicals so that you can connect the corners of your gabion basket. Select x5 if you wish to use a helical to close the lid. However, most people use the free tying wire included with every order to close the lid.
Helicals are sold in lengths of 1m or 67.5cm. If the height of your cage does not match, you will need to cut the helical to size so that it fits correctly.
What accessories do I need for my gabions?
On every product page, we have added a ‘Frequently Bought Together’ section outlining the accessories that you might want to accompany your basket. They include the following:
How are gabion baskets delivered?
They are delivered flat-packed and shrink-wrapped. In order to install them, simply remove the shrink wrapping, unfold and connect the corners together.
How much stone do I need to fill the gabions?
To calculate the exact amount of stone you need, please visit our gabion stone calculator.
What wire thickness do I need?
Watch Video
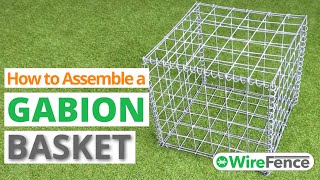
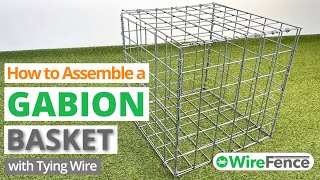
How do I assemble a gabion cage?
Watch Video
Very easy. No DIY experience is necessary. The cages are delivered flat-packed. To put them together, simply lift up the corners and attach them using helicals. It takes approx 2-5 mins to complete. Watch the video above, or we have a blog showing you how to assemble a gabion.
What is Galfan-coated wire?
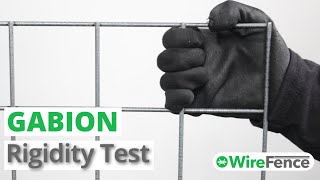
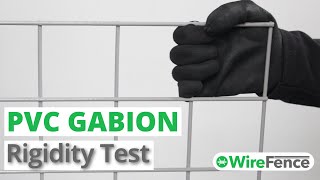
Galfan wire mesh is often referred to as ‘triple life’. This refers to the corrosion and abrasion resistance of the coating being approximately three times the strength of standard galvanised coating. Our entire range of cages have been Galfan-coated to BS EN standards, ensuring a long lifespan.
How long will your range of gabion baskets last?
In normal environmental conditions, you can expect 50 to 100 years if the gabion meets the British Manufacturing standards for abrasion (EN 60229:2008) and corrosion protection (BS EN 10244-2:2009). There are a lot of cheaper products entering the market which are made with inferior materials, offering far less corrosion resistance and a much shorter lifespan. They would not be suited to larger and more critical construction jobs, such as retaining walls and preventing erosion.
How do I fill my gabion basket?
Do I need a Civil Engineer for my gabion wall?
If your gabion wall construction meets the following criteria, you will not require civil engineering:
You will need a Civil Engineer’s calculations if your structure meets the following criteria:
If in doubt, we recommend that you double-check your project with a Civil Engineer.
How do I construct a curved gabion wall or bench?
Watch Video
Simply place the gabions at an angle to each other and use a panel to fill the gap between them. Watch the video above or read these step-by-step instructions. It is possible to make any curved shape you want. Take a look at the following example case studies
What is a gabion?
A gabion is a square or rectangular metal cage manufactured using steel wire. Often referred to as a gabion basket or gabion cage, they are traditionally used by landscapers and to stop erosion.
Almost a decade of selling gabions
We have been supplying gabions to the market since 2018, and we know our stuff. The product information on this page is based on almost a decade of hands-on experience. When we write a ‘how-to’ article or produce a video, it is always based on real-world experience. We don’t just write from behind a desk without actually using the products. You can find examples of this on our gabion blog, video hub and gabion playlist on our YouTube channel. We do this so that you can be sure the product information is accurate and reliable.
Customer projects
Please also find our customer case studies. You will find everything from customers who have built retaining walls to residential landscaping projects, public seating areas. outdoor classrooms, decking areas, and even a backdrop to Dezeen’s annual award ceremony.
Our gabions have appeared on TV
Our gabions have also been featured on ITV’s Love Your Garden, hosted by Alan Titchmarsh in 2021 and 2023, as well as last year’s BBC Gardens World Spring Fair. helping Plumpton College win the Visitors’ Choice Best Showcase Garden Award.

Wire Fence is part of the Super Magic Bean group - VAT Registered: 344 7643 83 - Company Registration No: 11290483