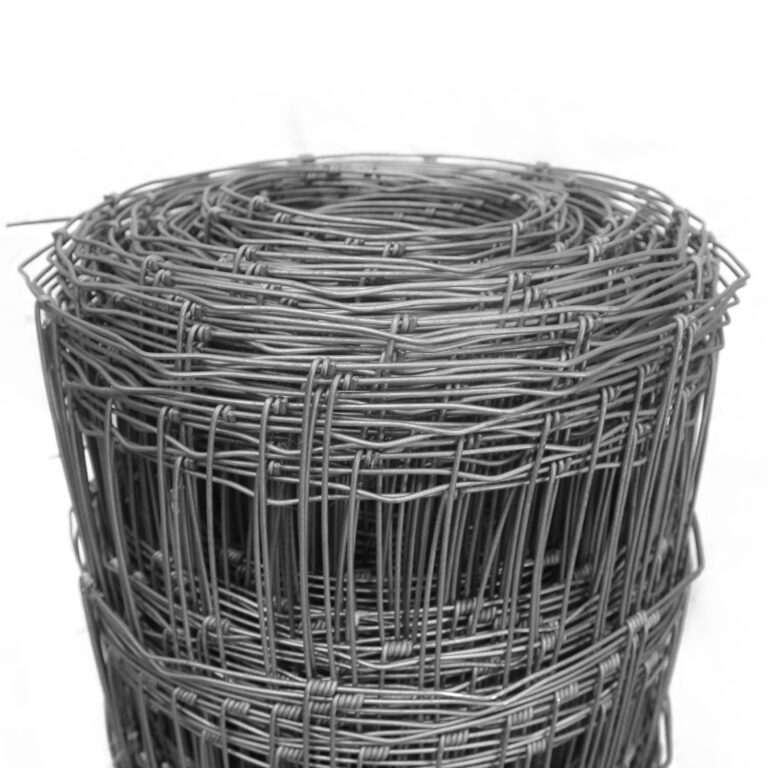
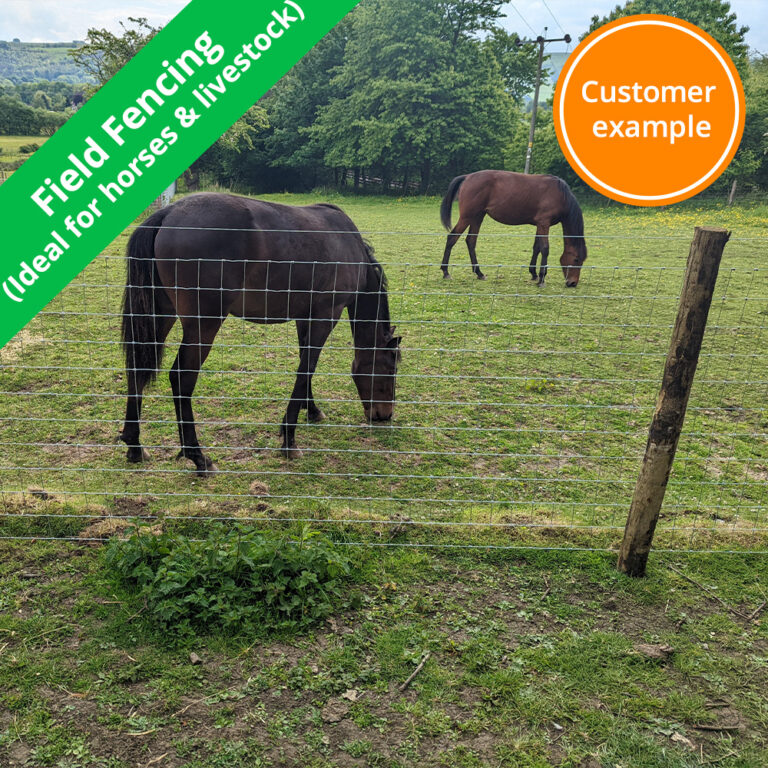
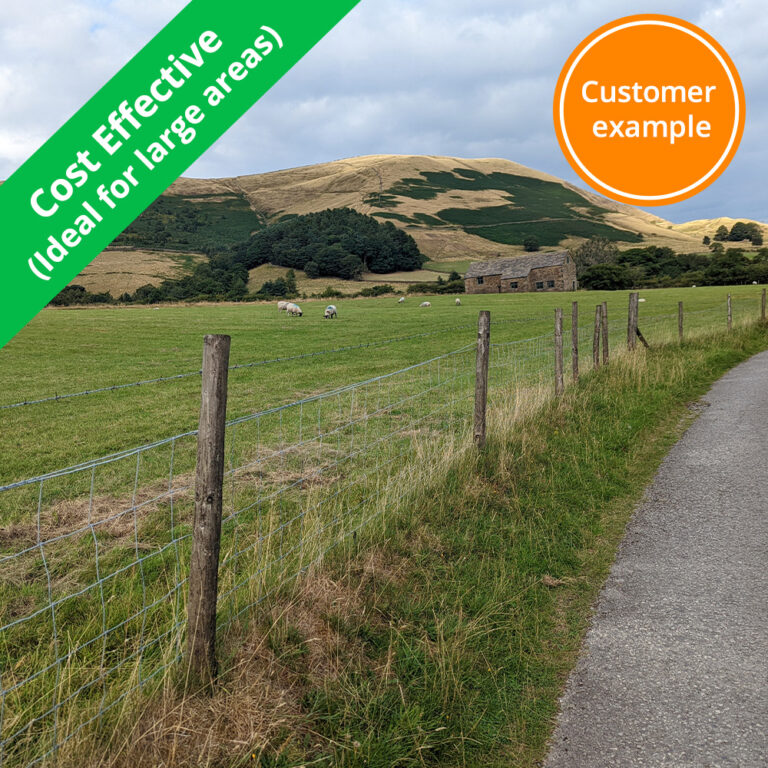
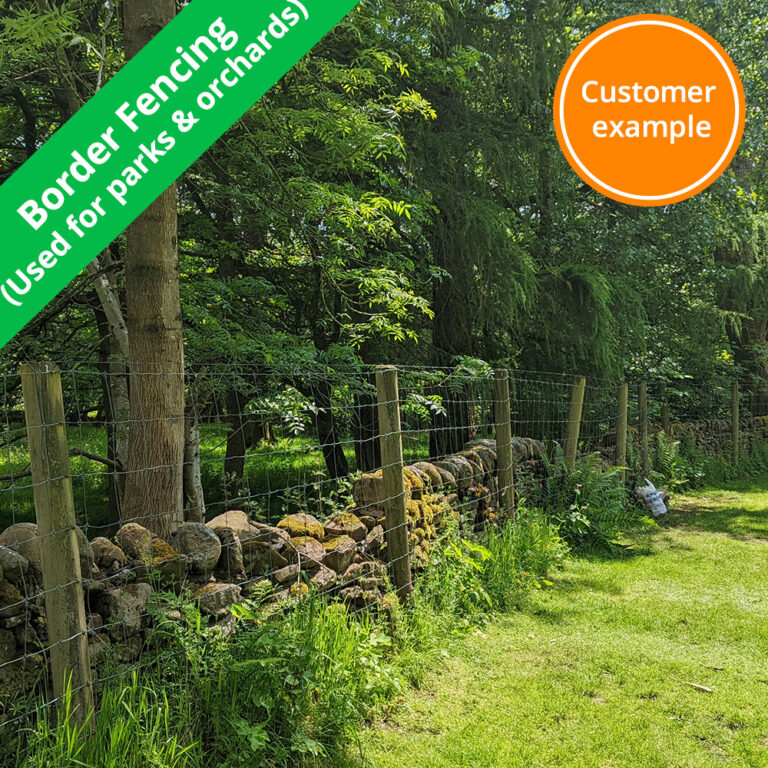
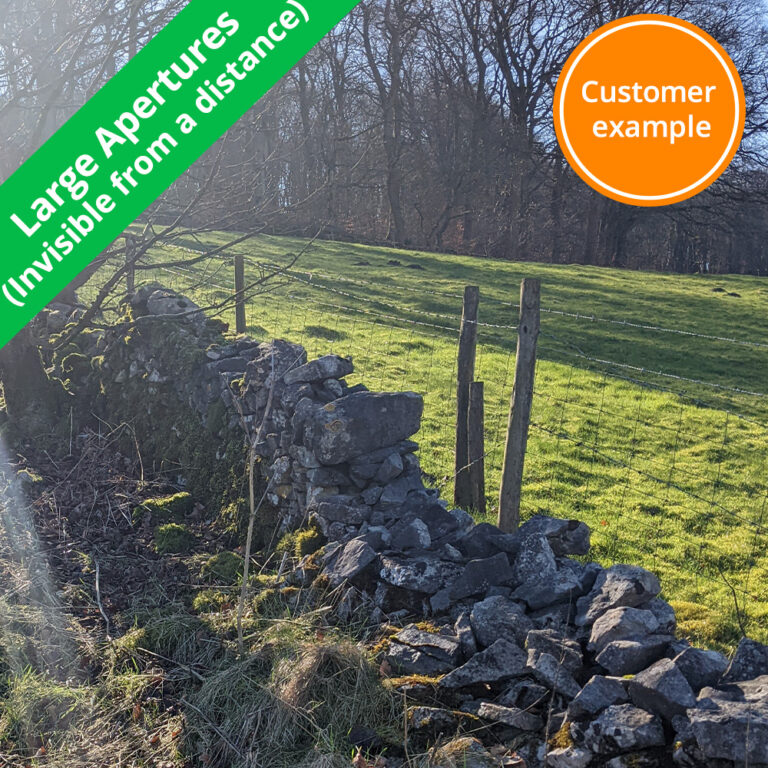
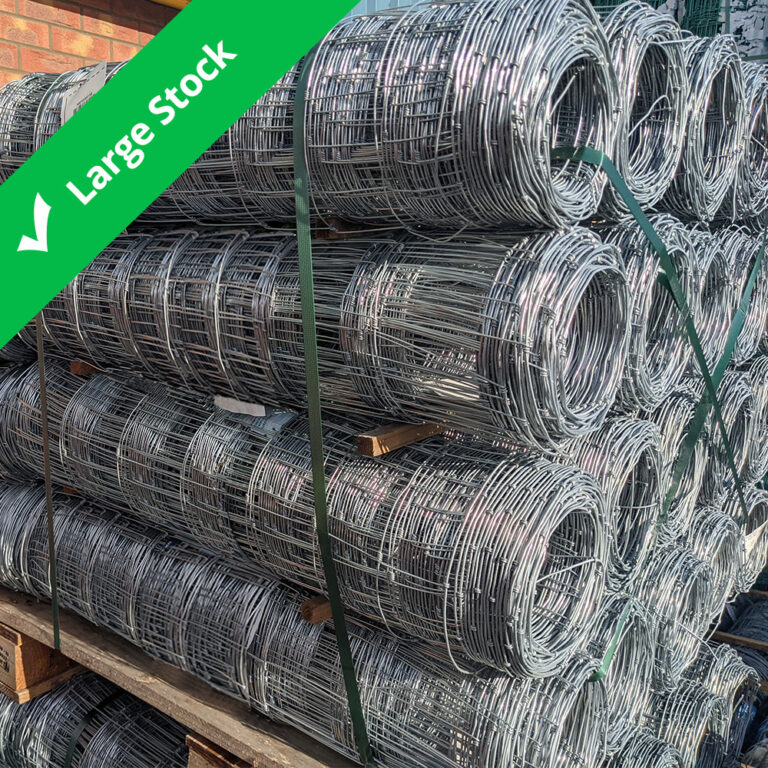
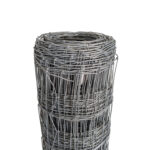
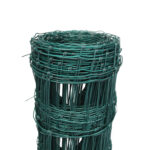
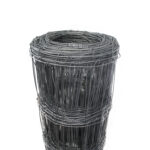
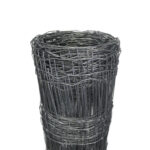
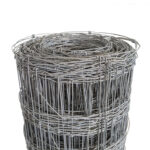
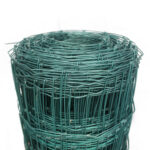
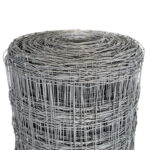
Stock wire fencing available in mild steel and high tensile options. An effective, economical method of separating and protecting livestock, dividing fields and creating boundaries.
Manufactured in Europe, conforms to BS EN standards
Next day delivery
Image
Config
Material
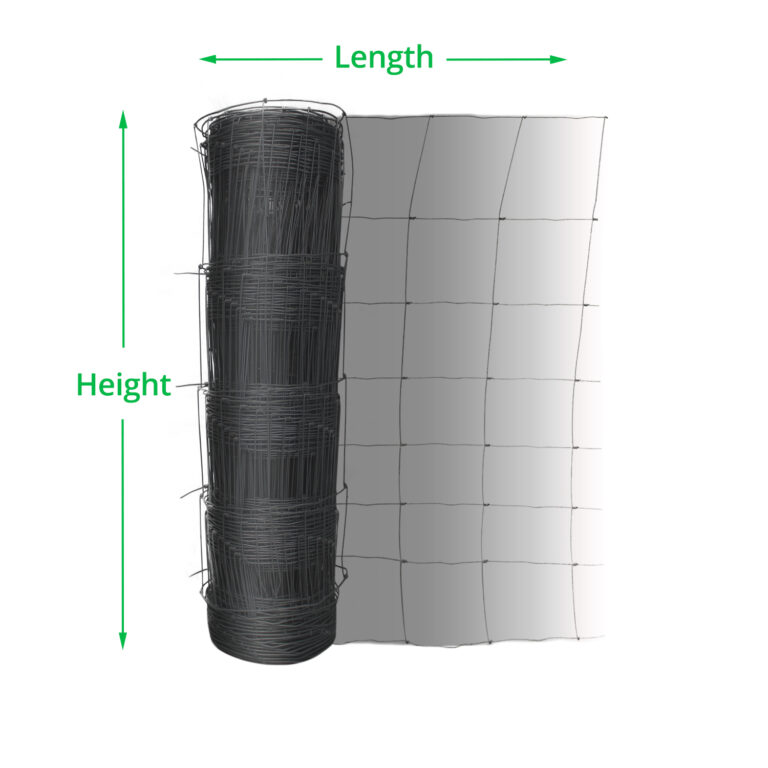
Length
Height
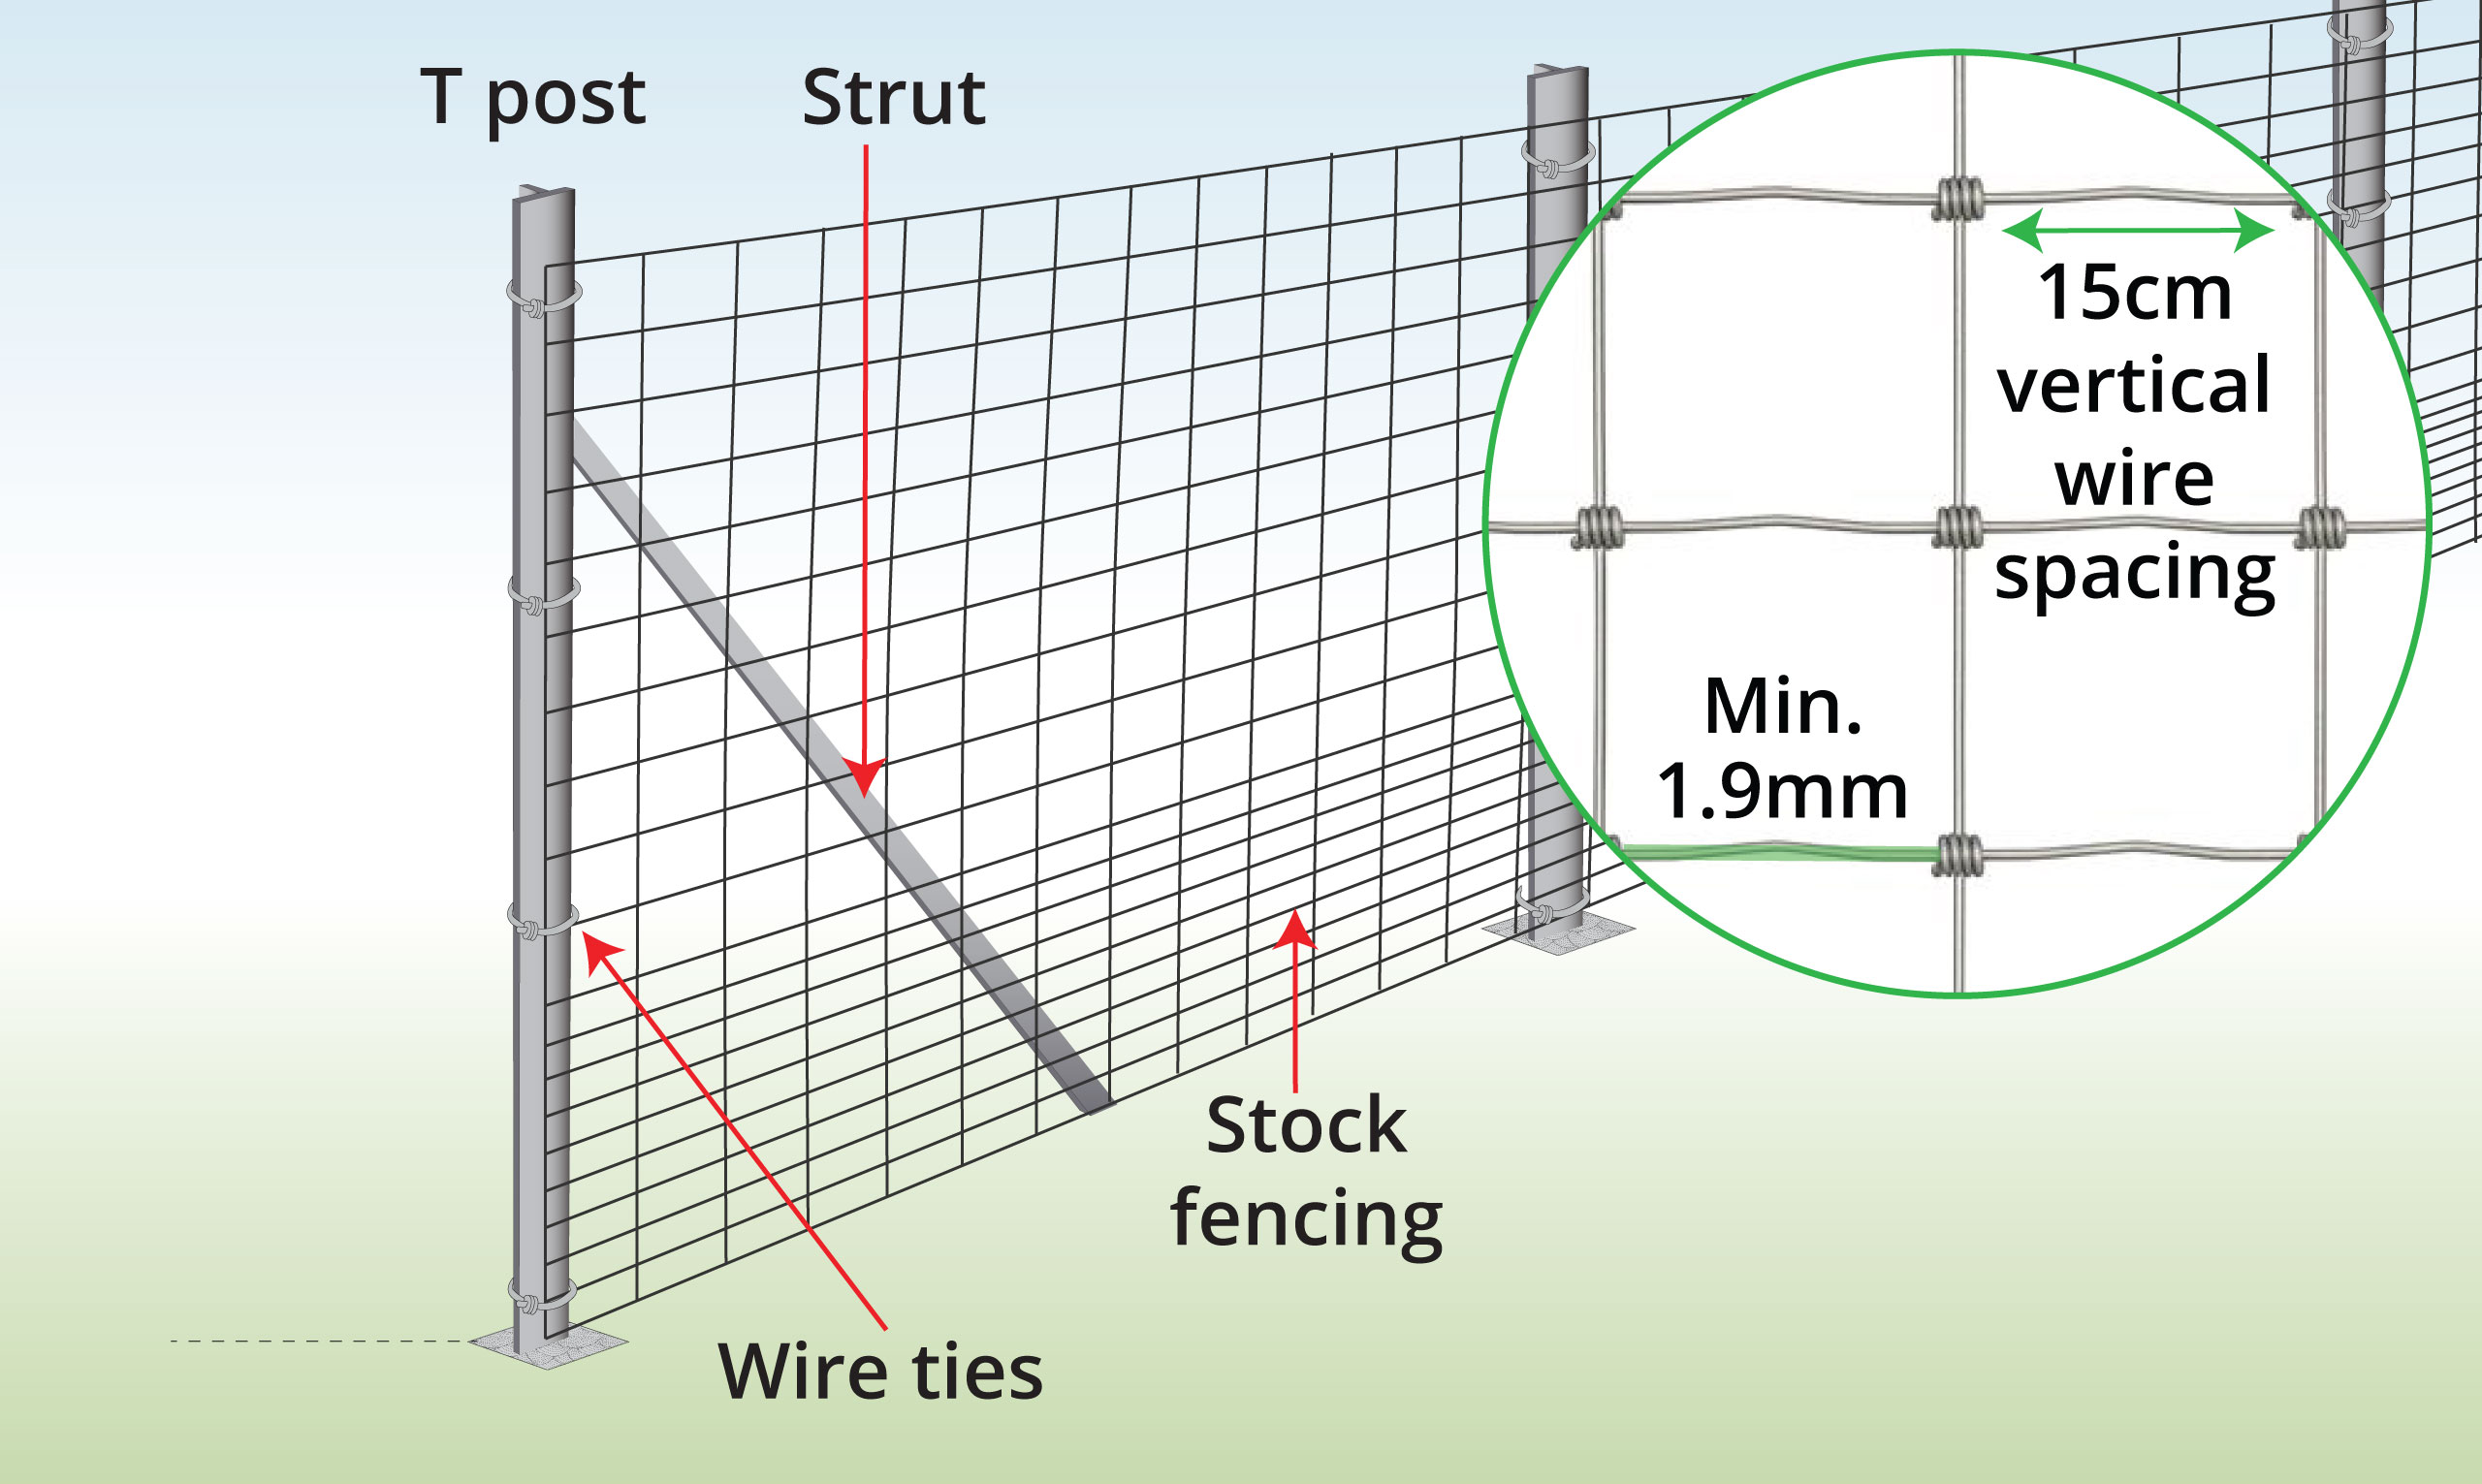
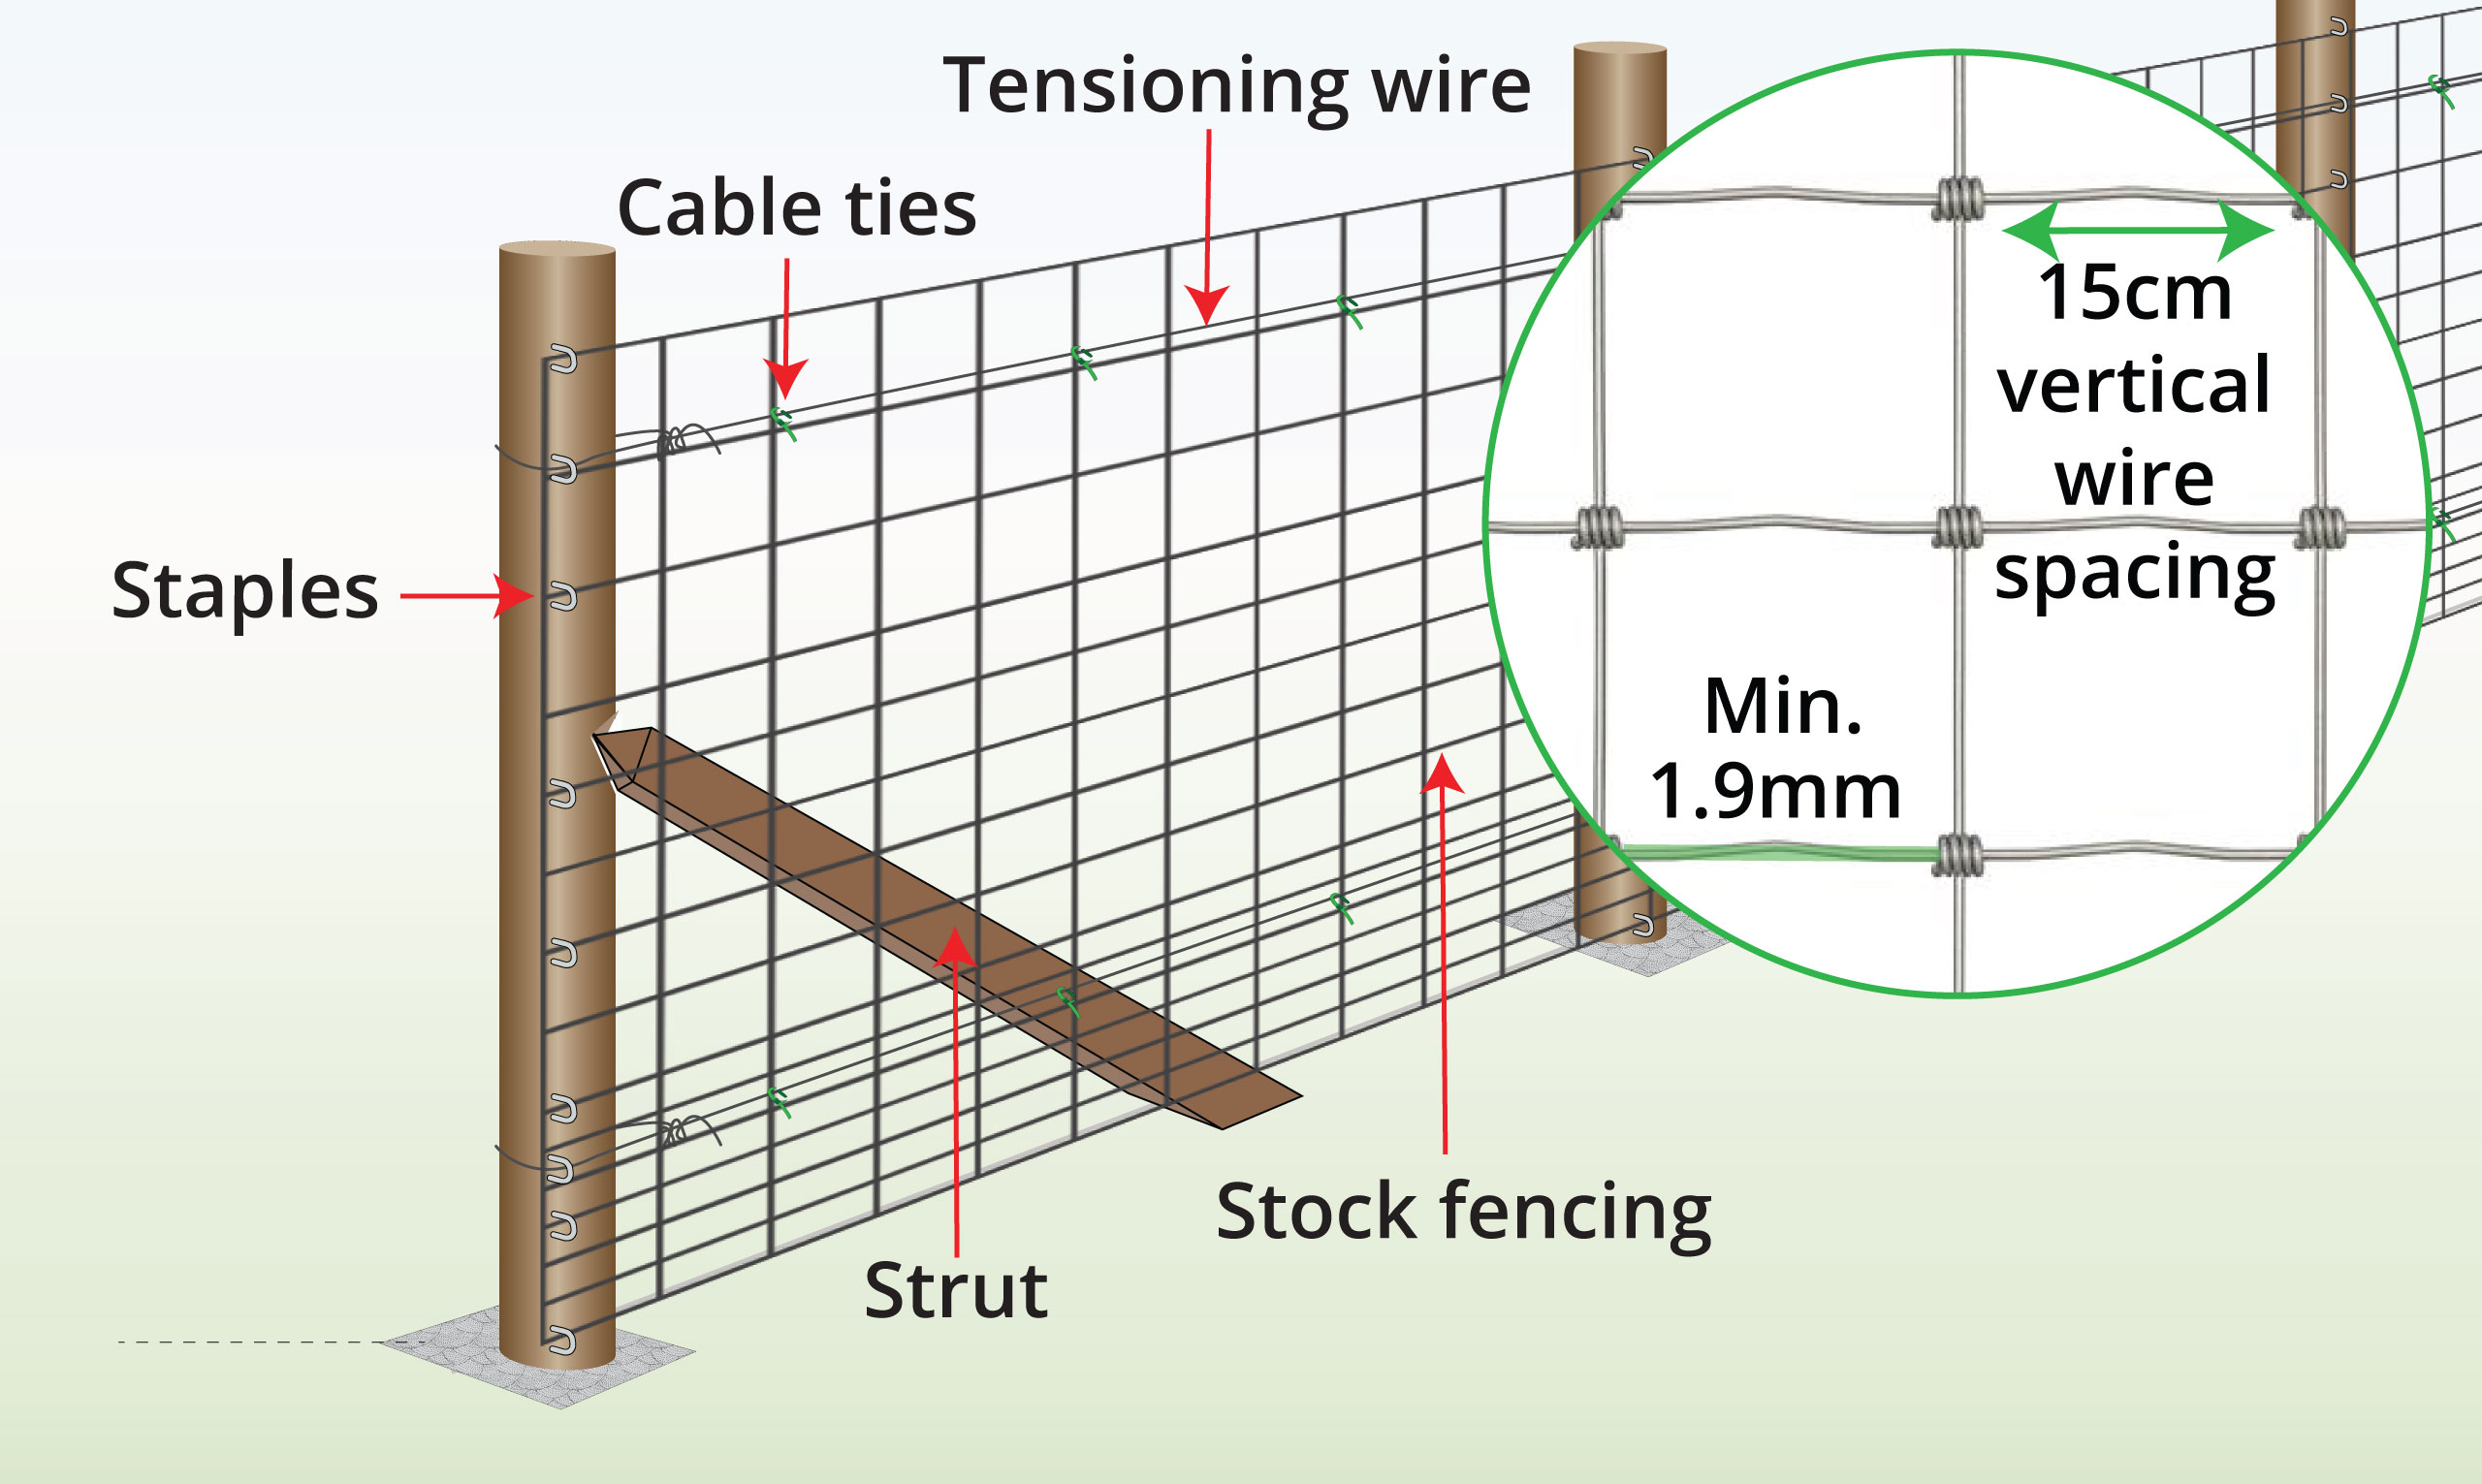
Vertical Wire Spacing
Line Wires
Quantity
Price
Add to Cart
Attach the roll to the first post, stretch it tight and secure it to the other end posts. Lastly attach it to the intermediate posts.
Watch video
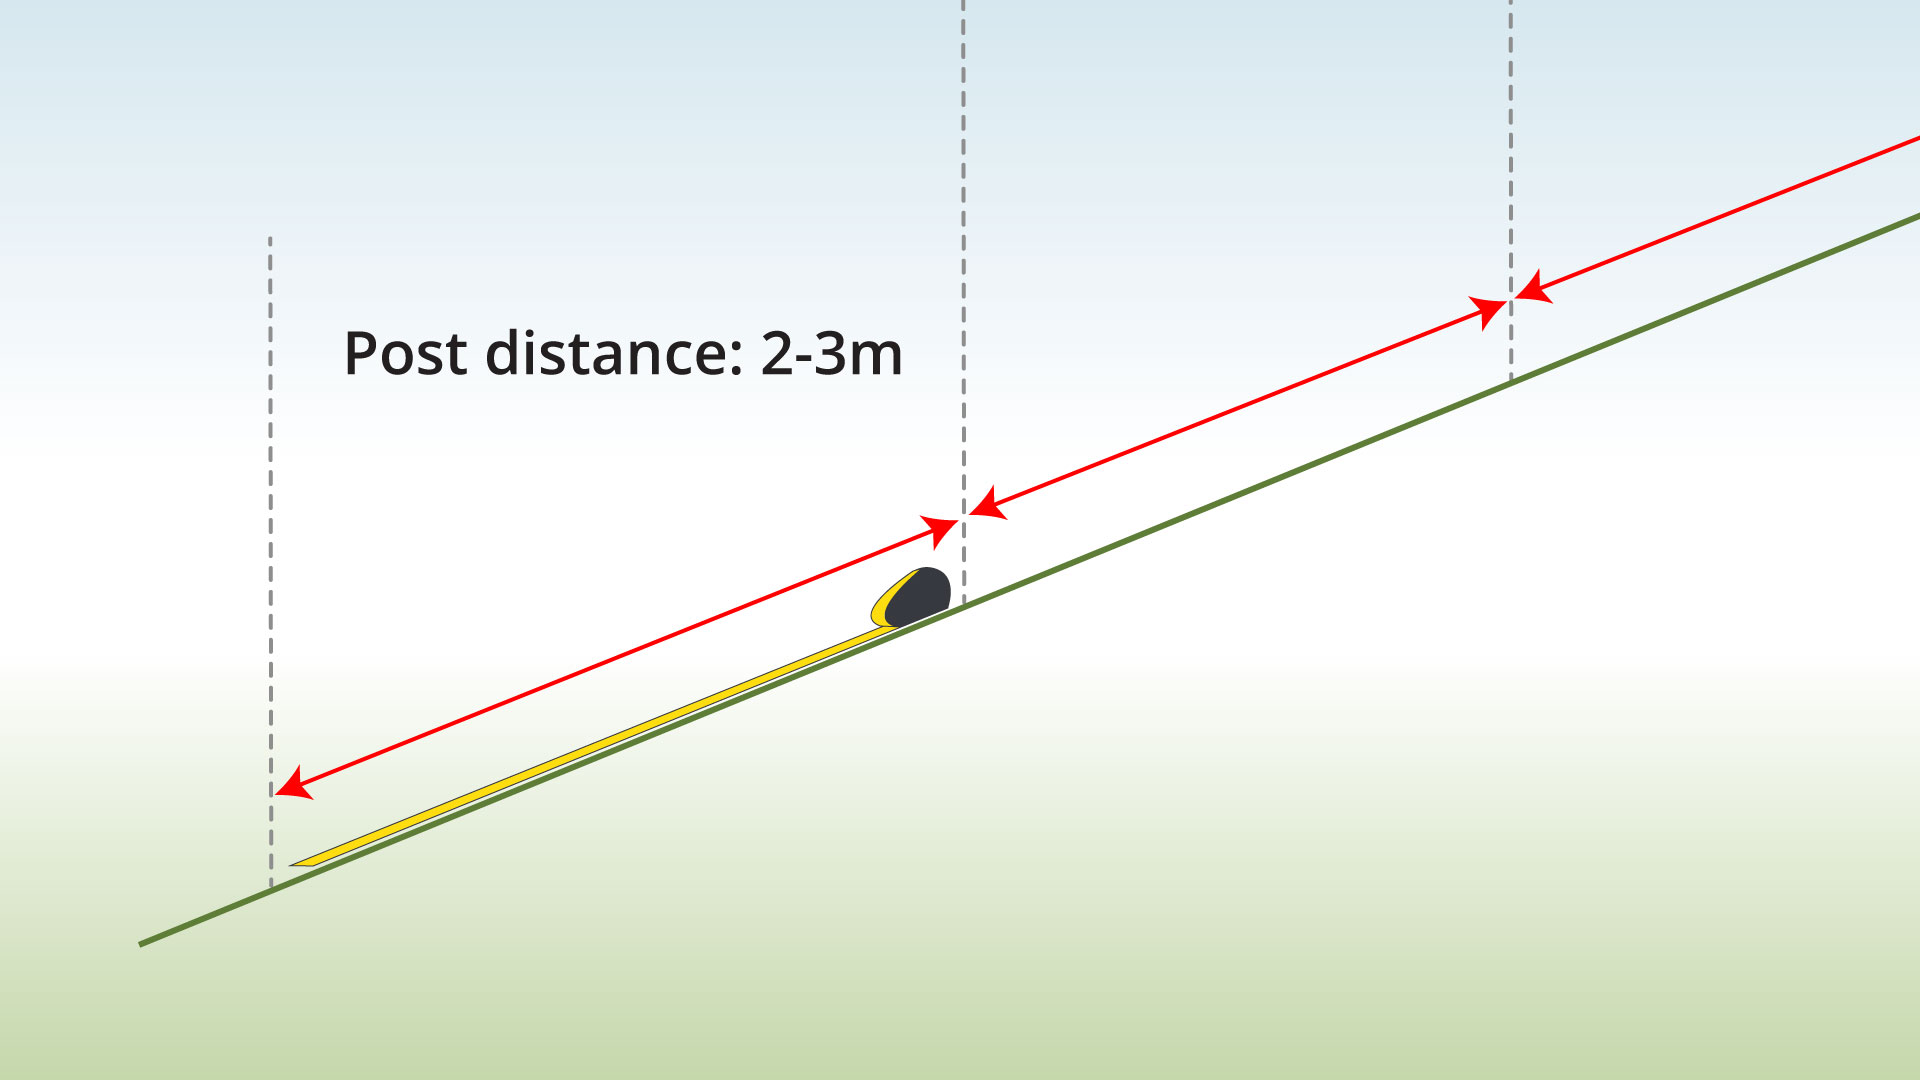
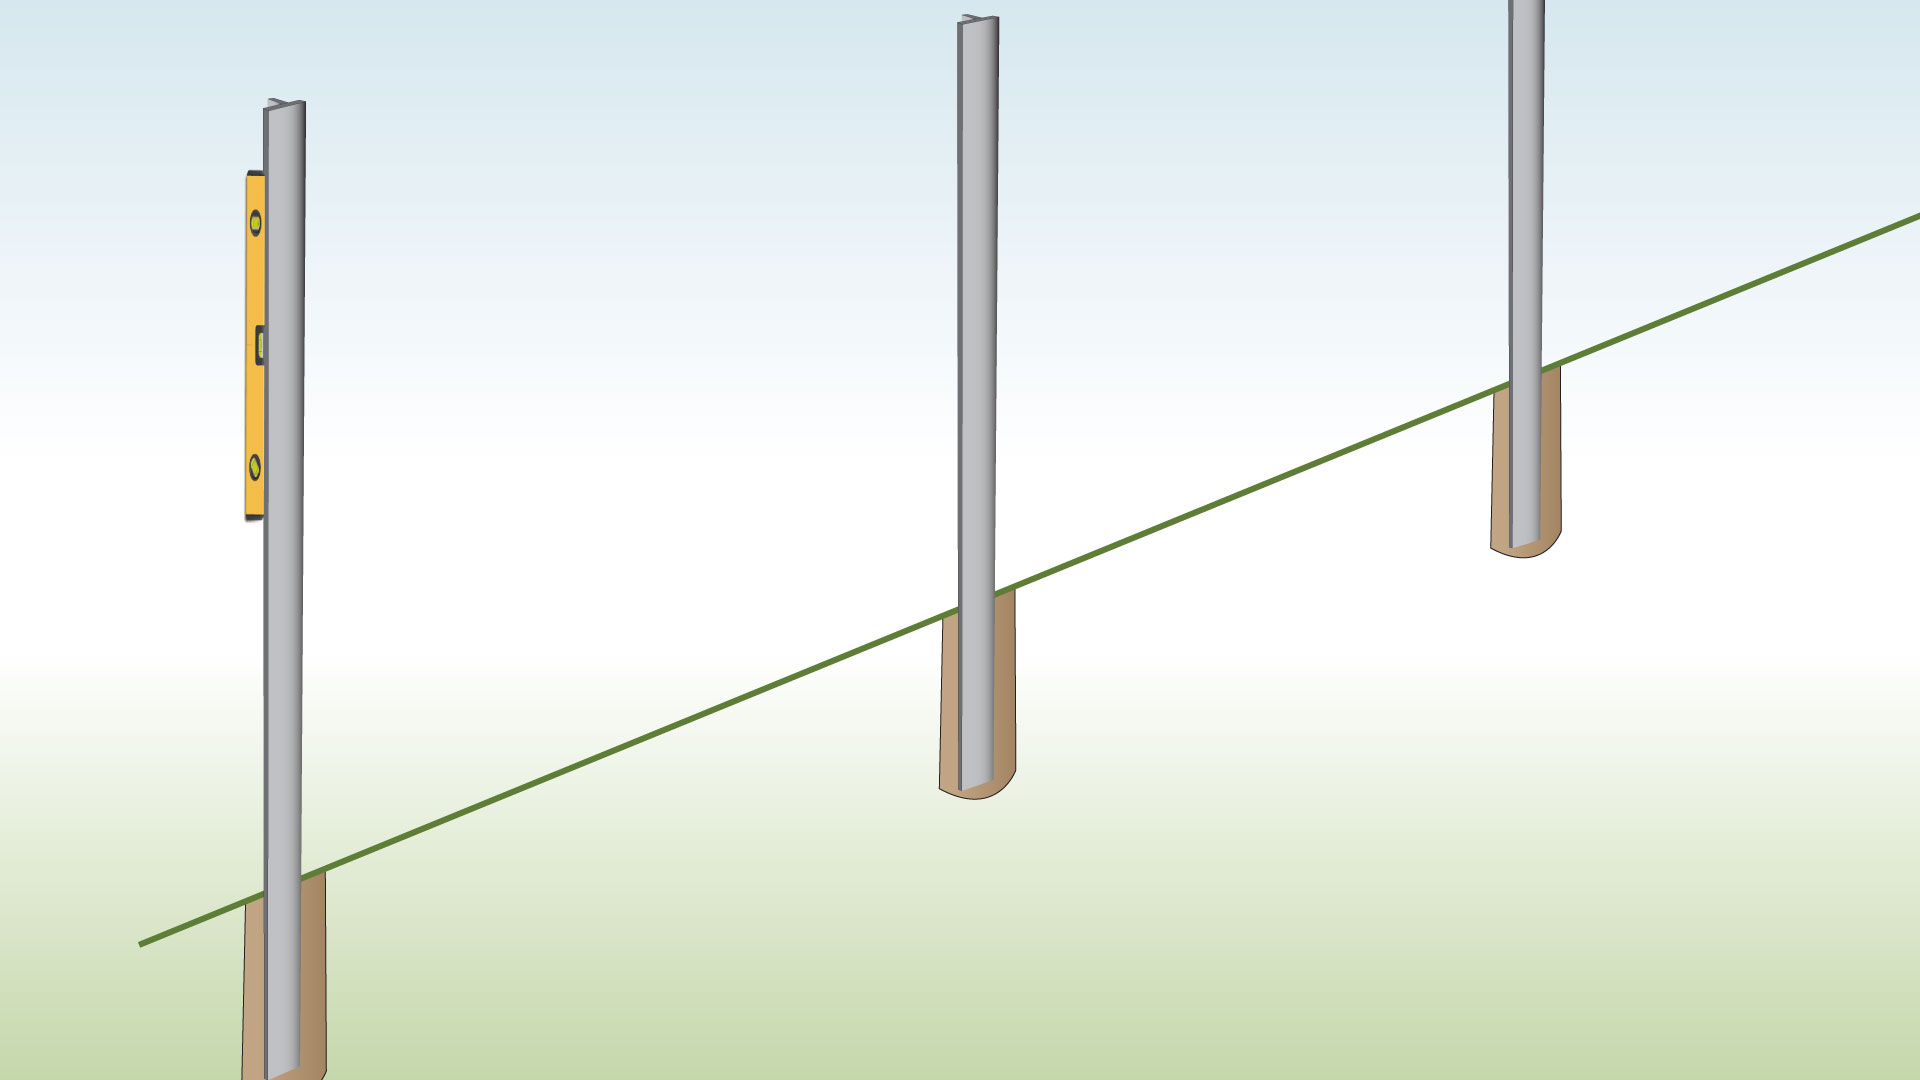
Step 1 – Measure & Mark Post Distance
To install, begin by measuring and marking where each post will go, spacing them 2-3 m apart.
Step 2 – Dig the Holes
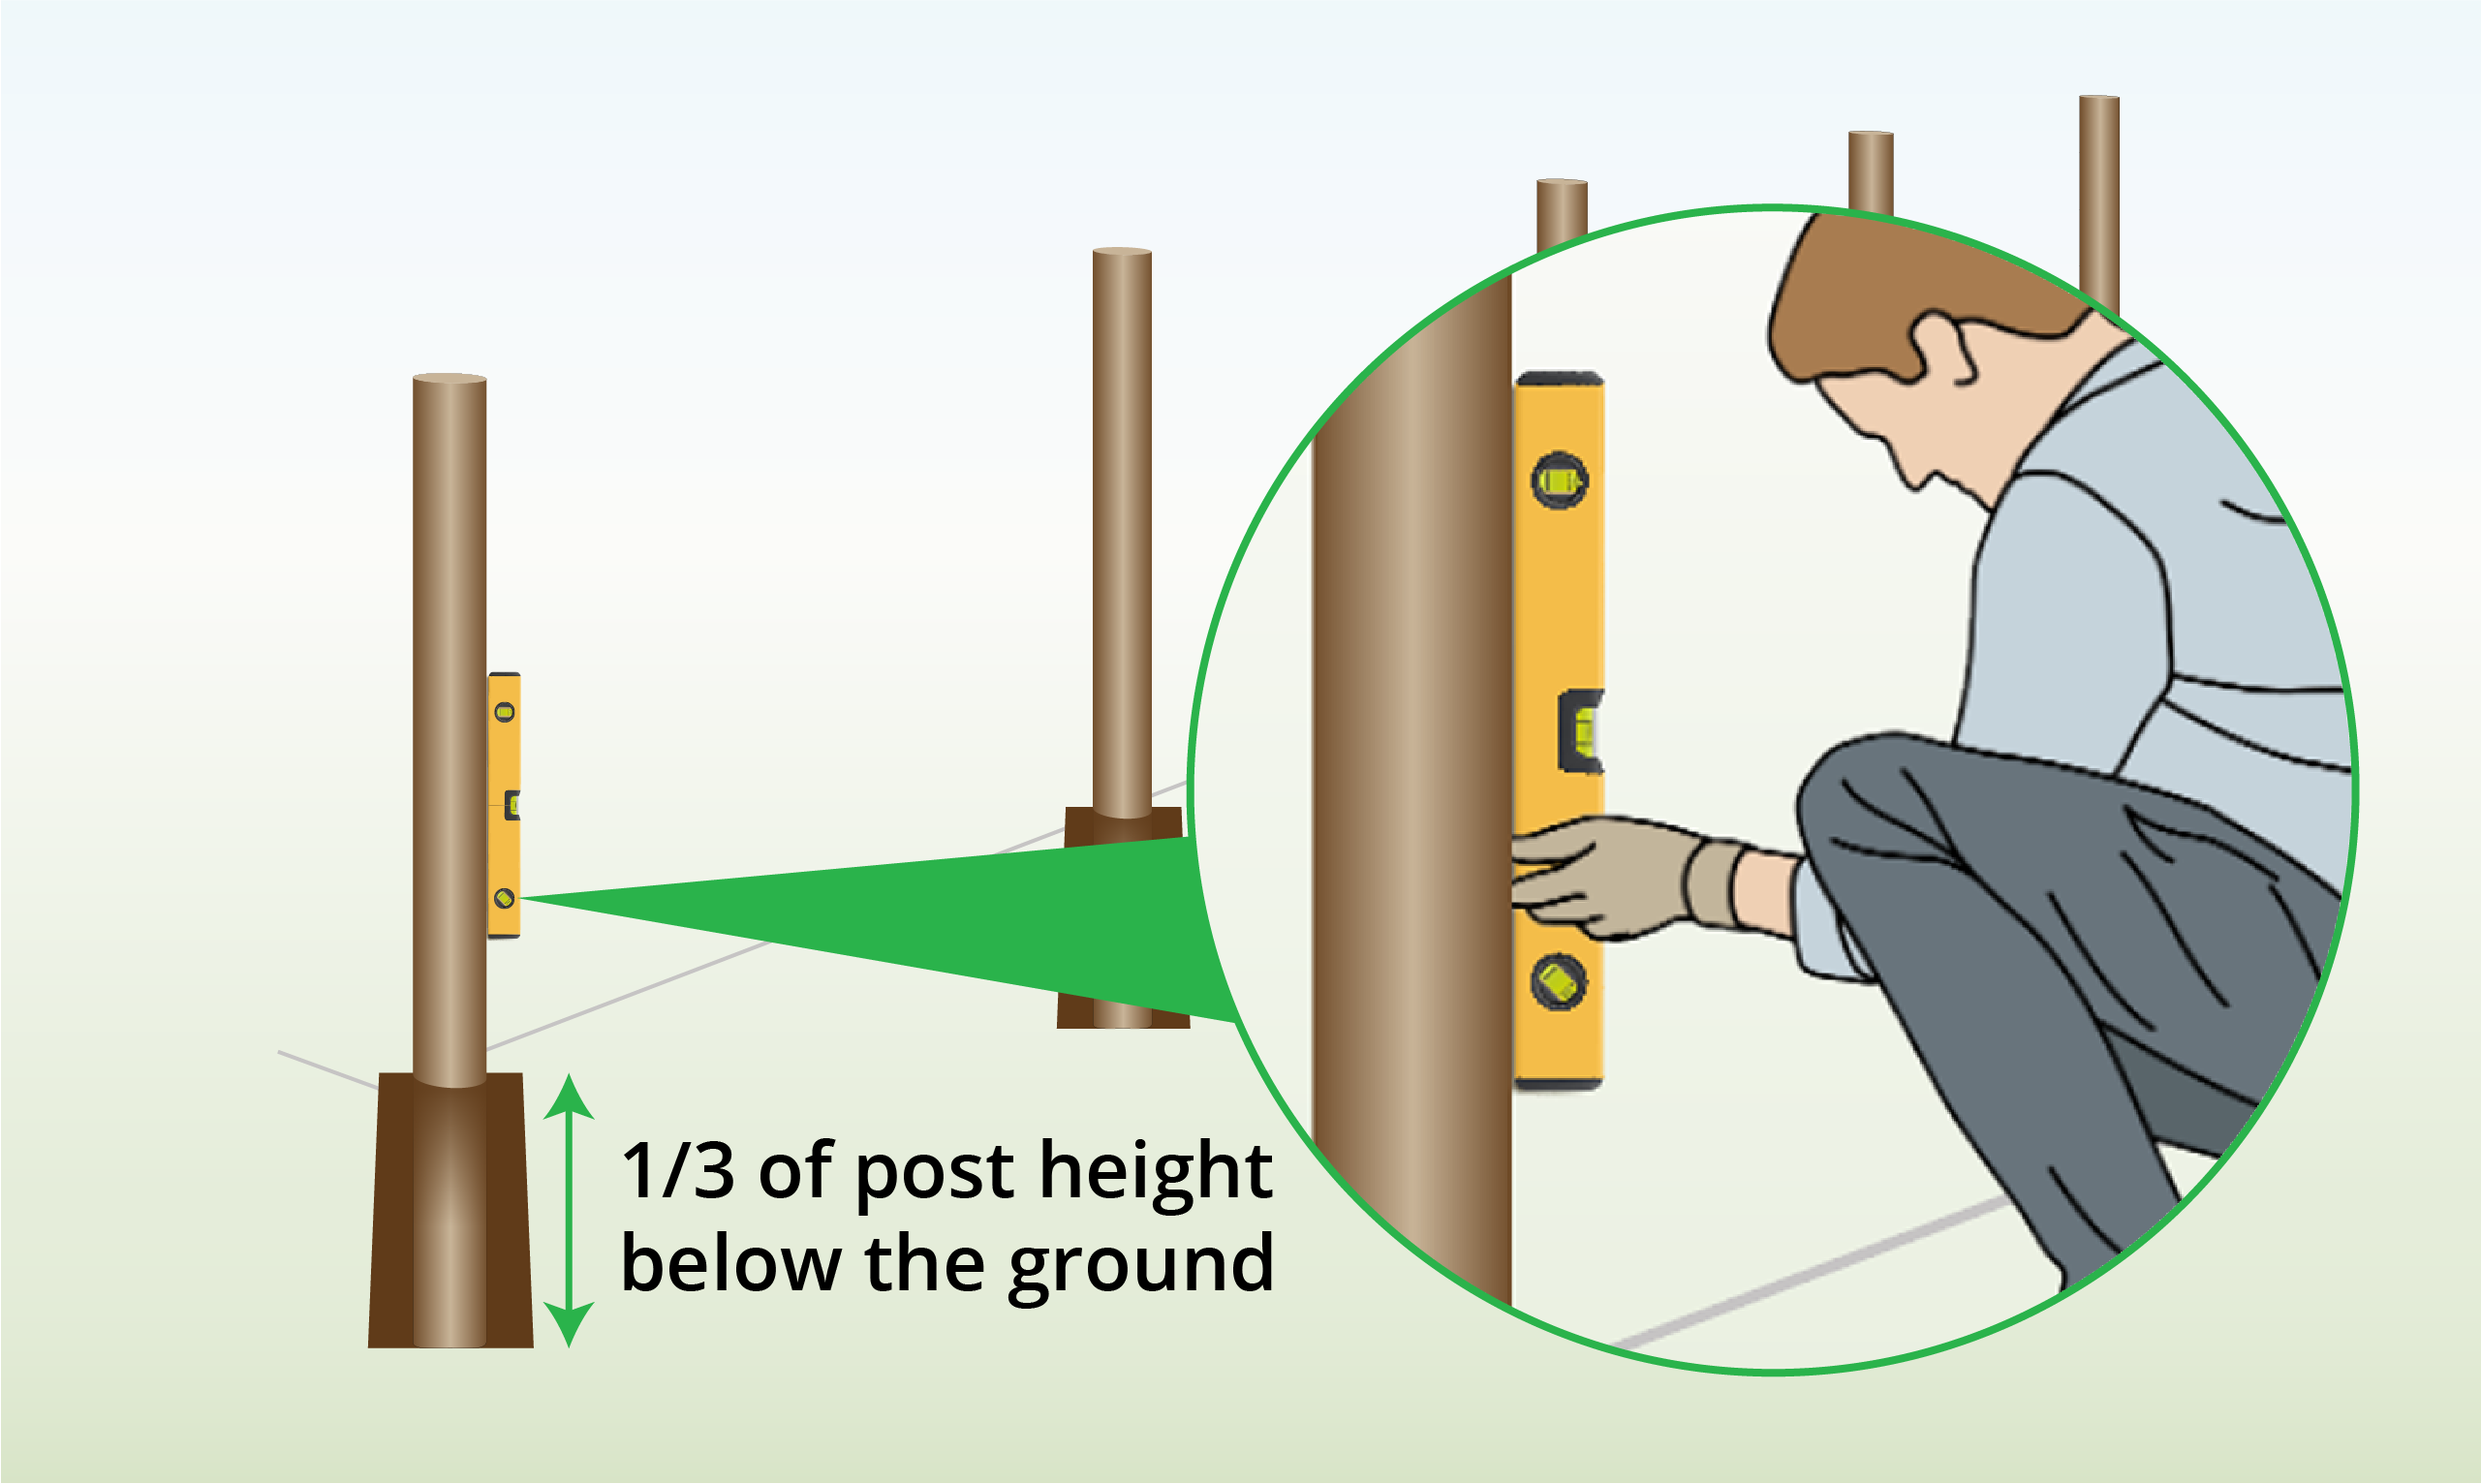
Next, dig the holes and set the posts in place, ensuring the flat sides face outwards and the posts remain straight.
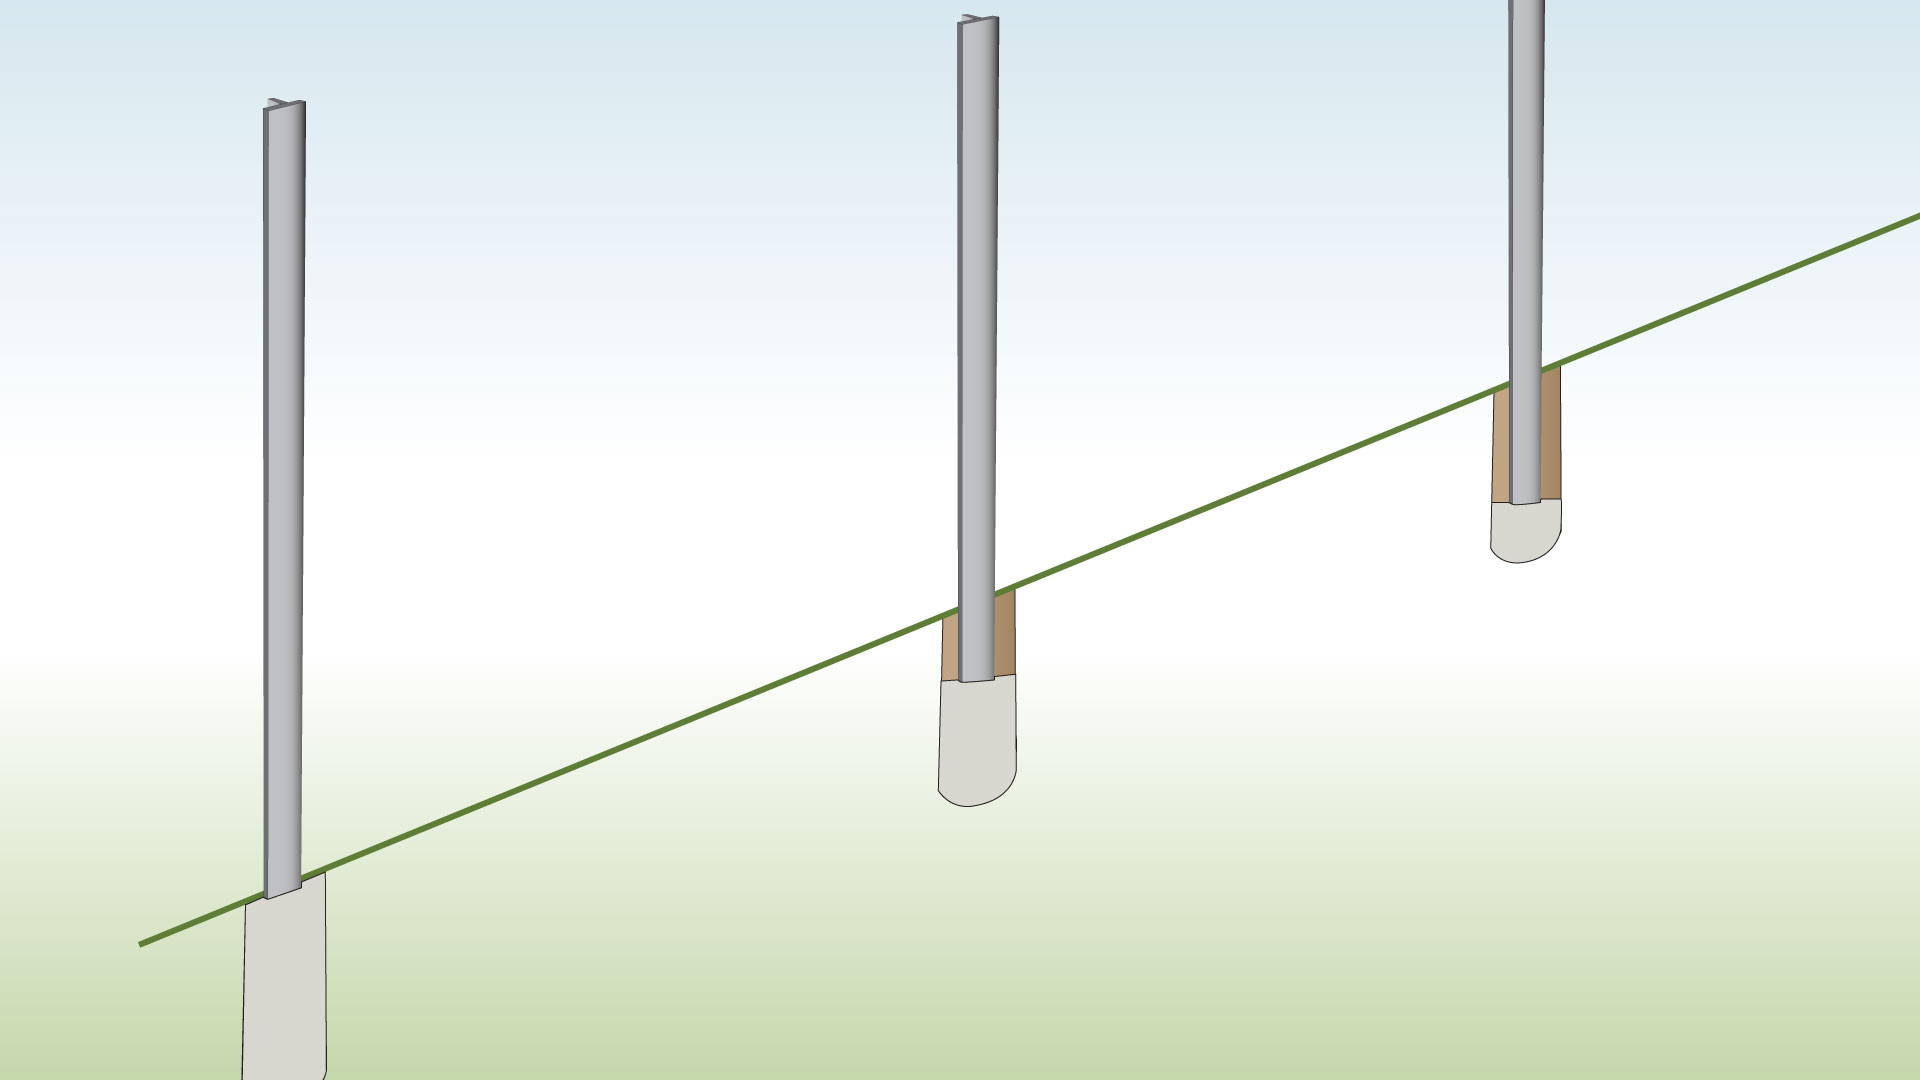
Step 3 – Set Posts in Concrete
Stabilise the posts by fixing them in concrete.
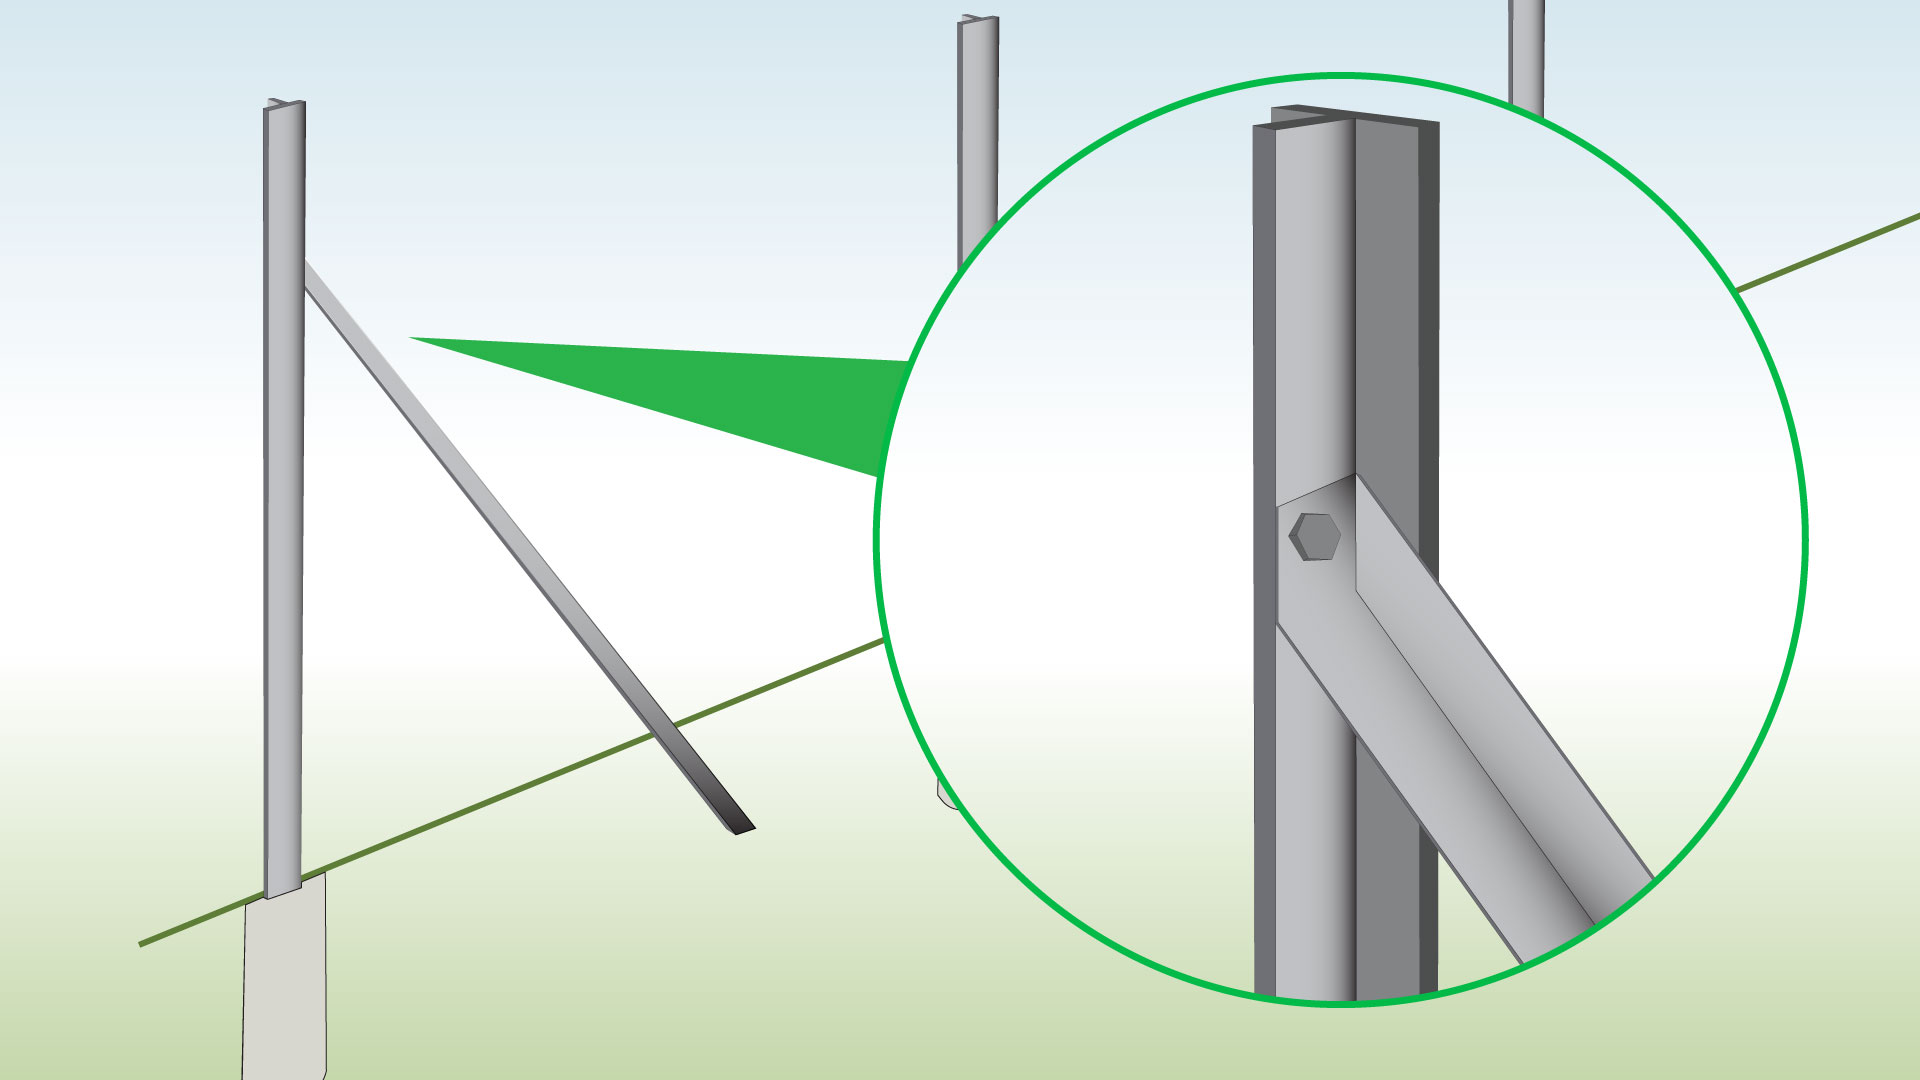
Step 4 – Install Reinforcement Struts
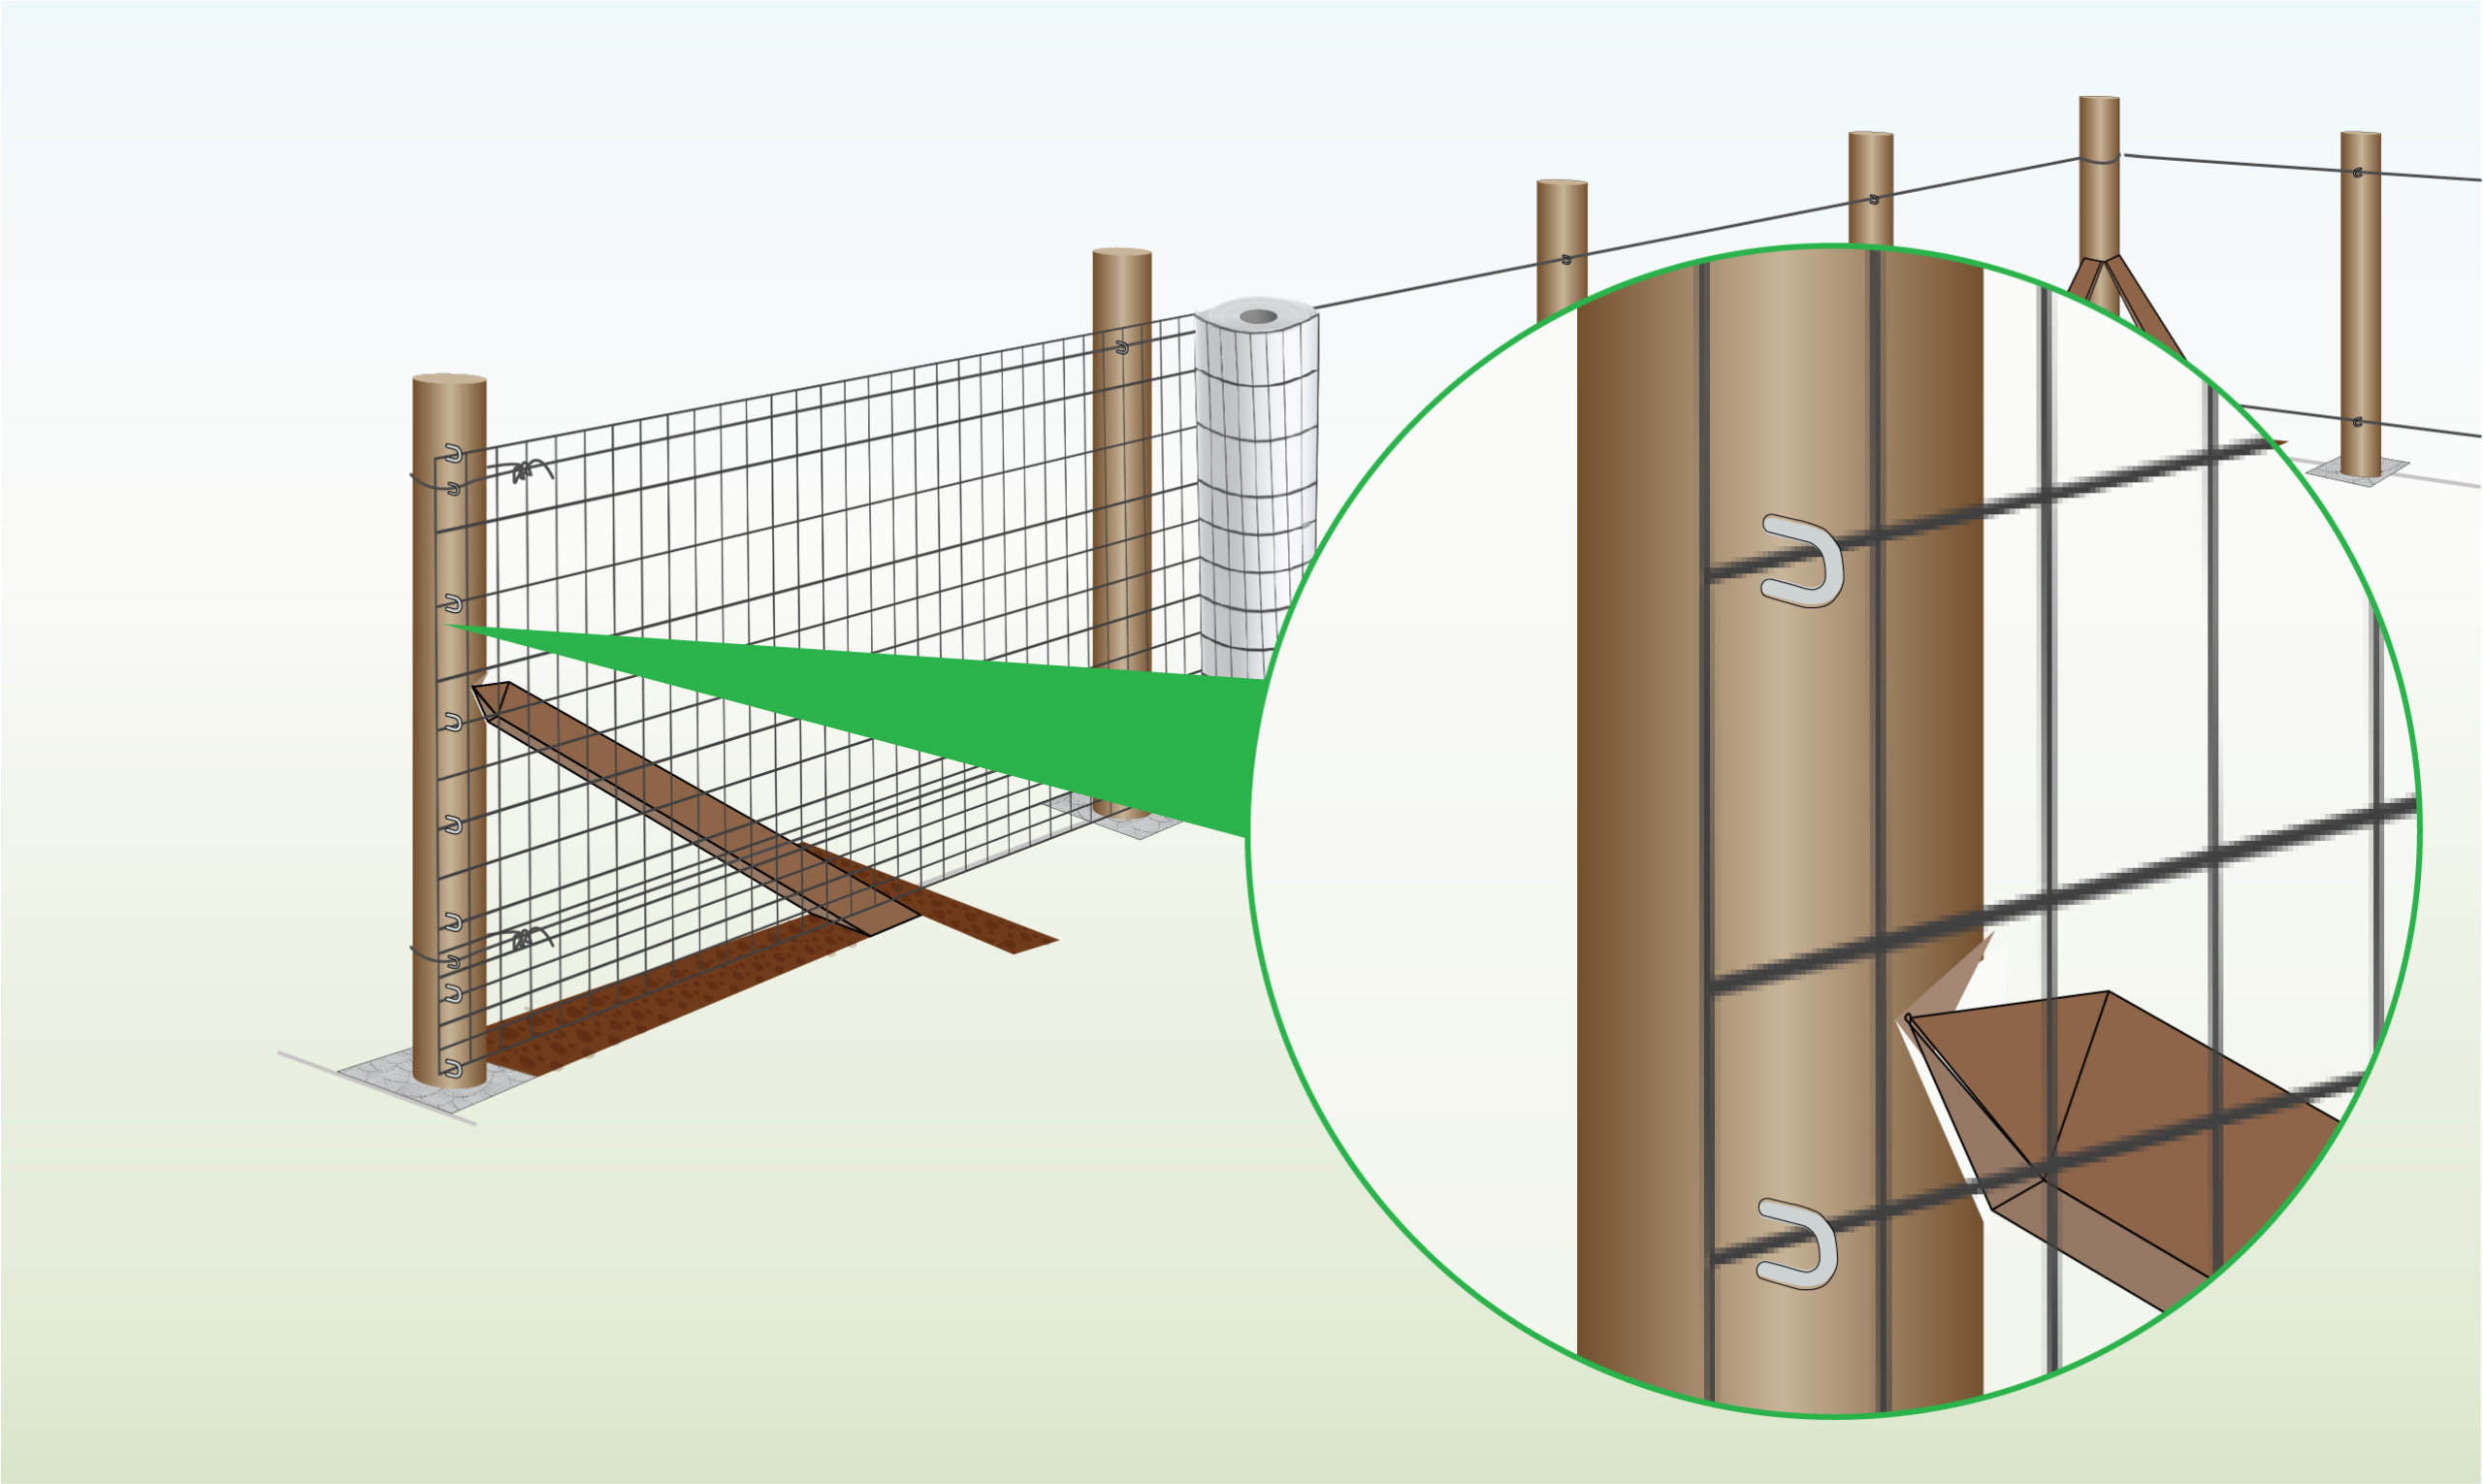
Attach the reinforcement strut by matching its hole with the second hole from the top of the T post.
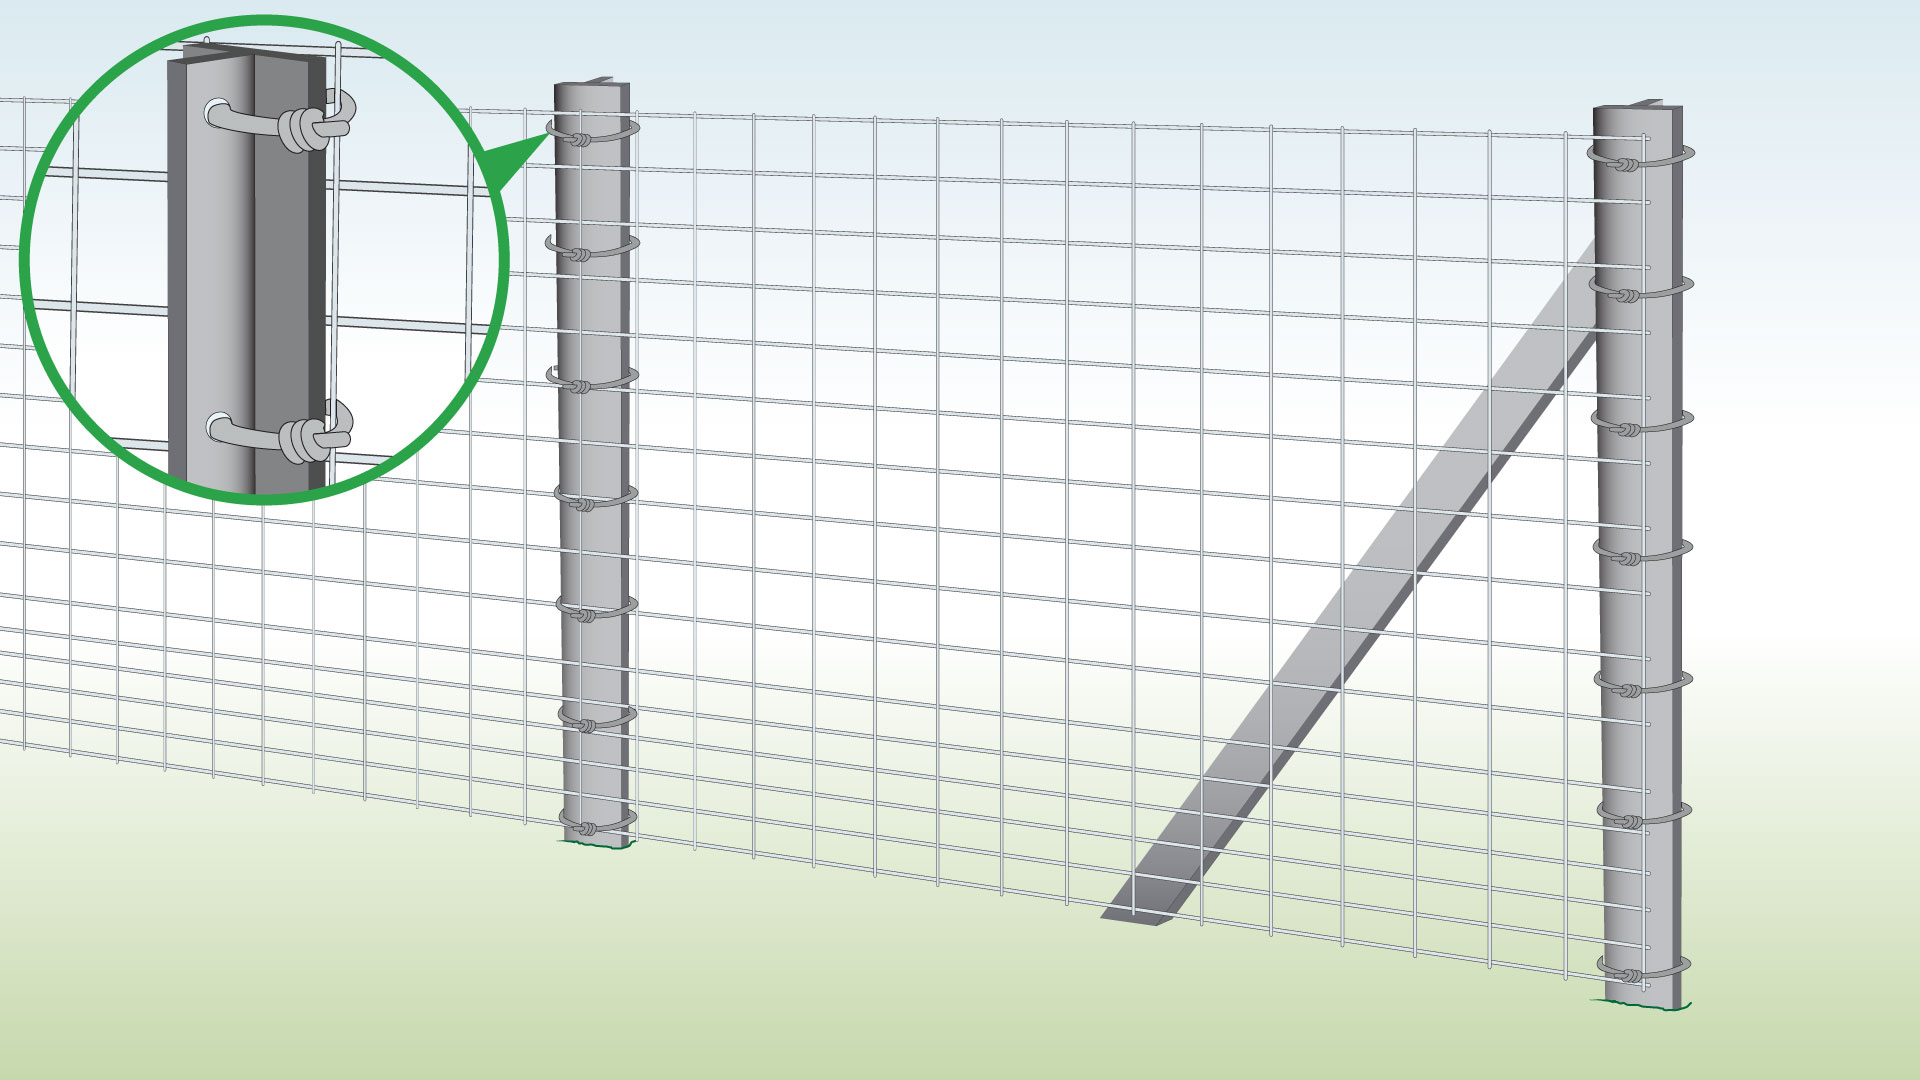
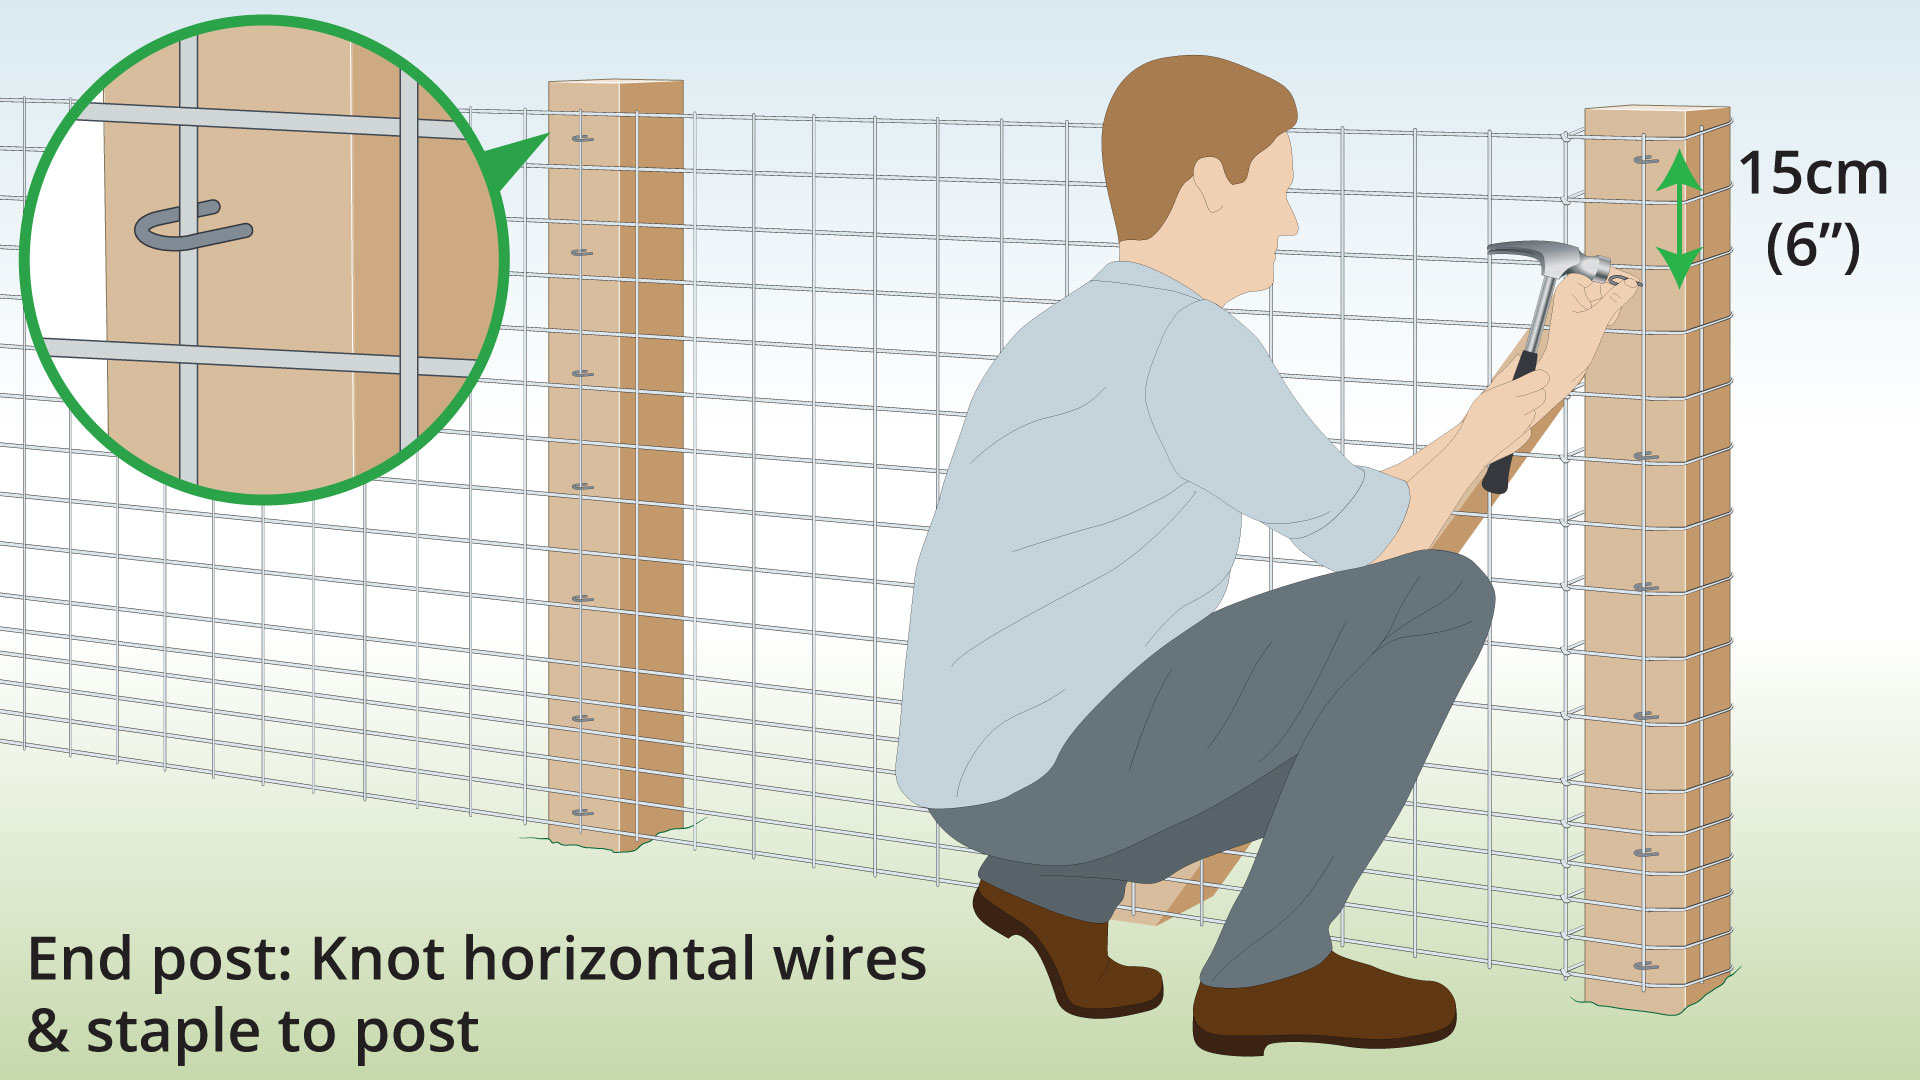
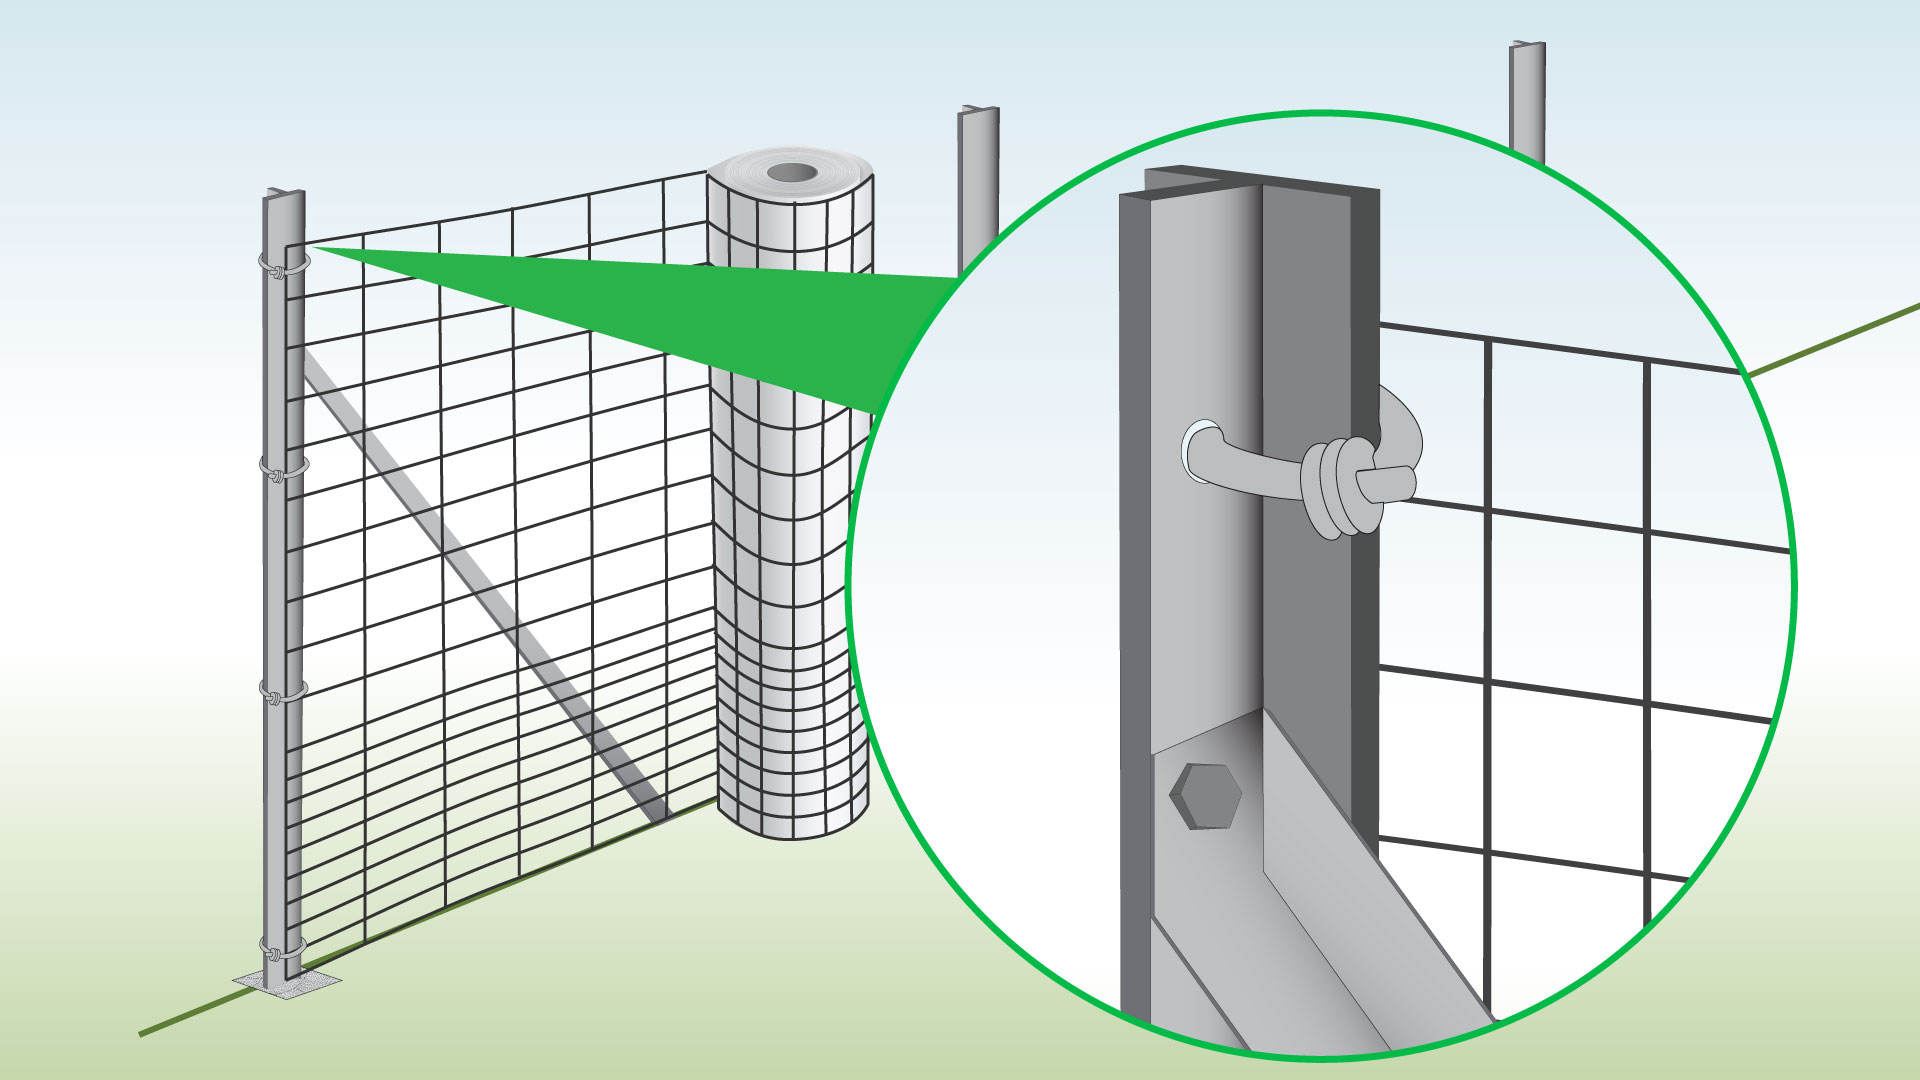
Step 5 – Secure fencing to First Post
Fasten the roll to the end post with wire ties.
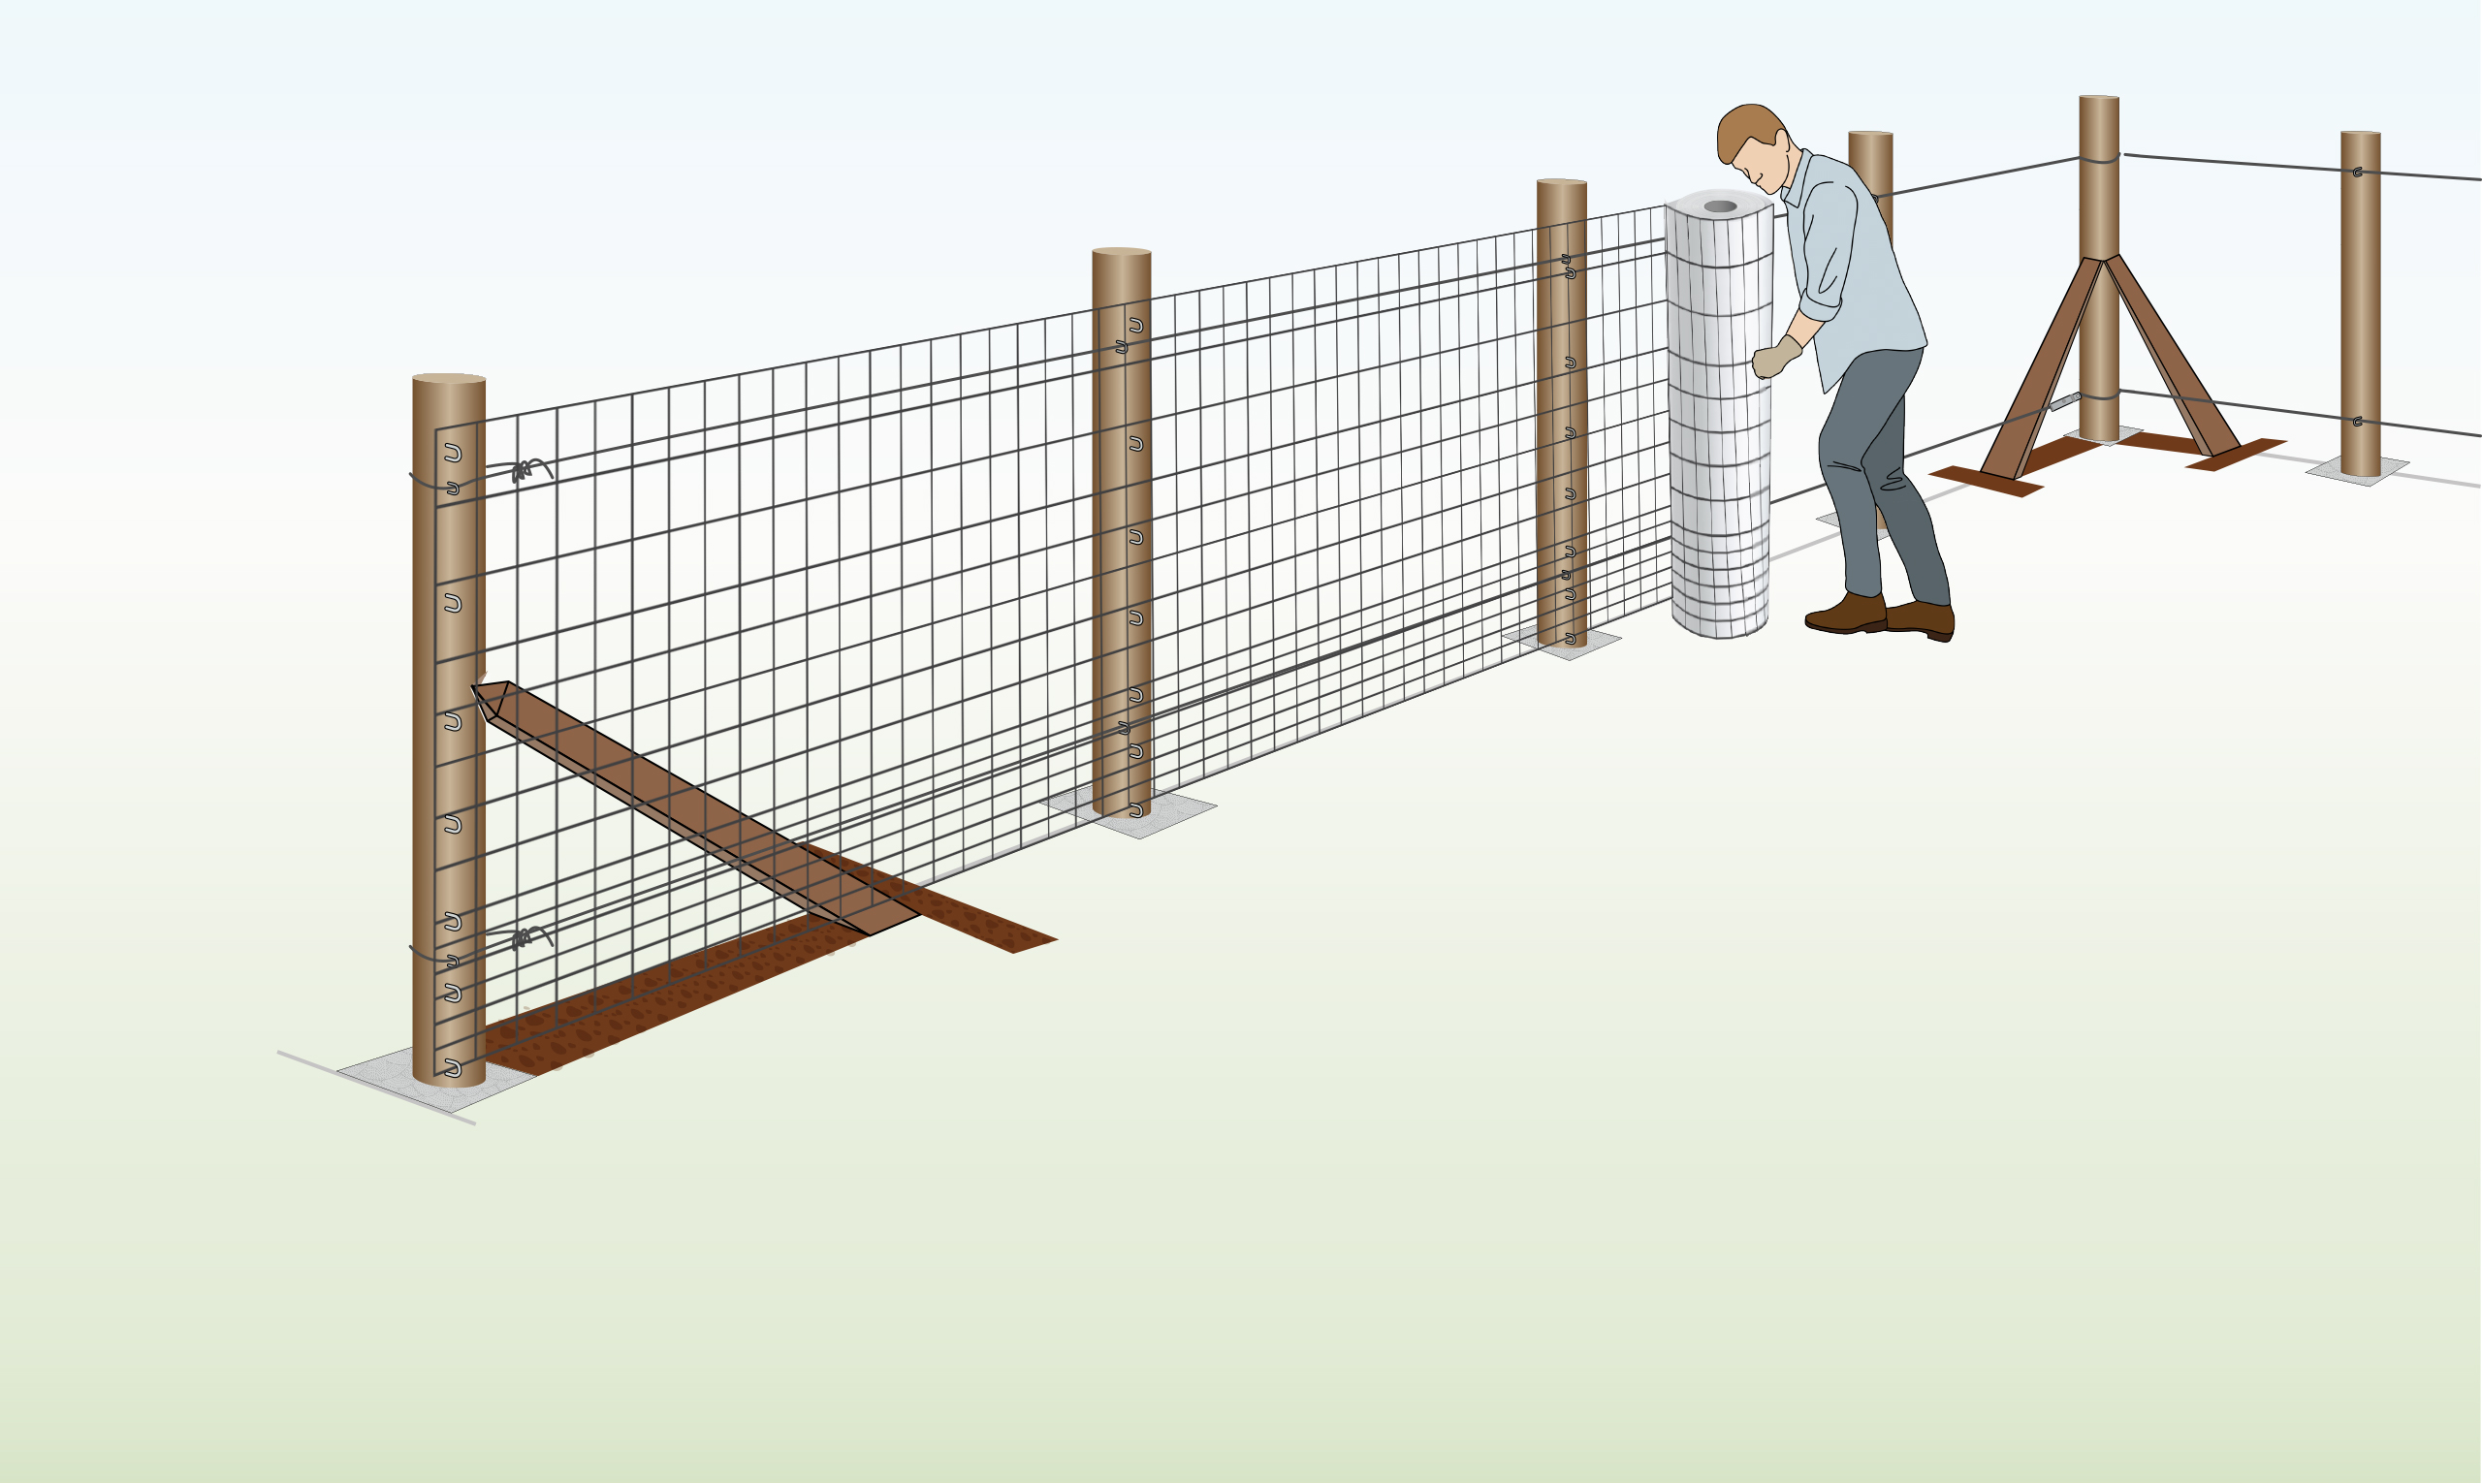
Step 6 – Stretch It Tight
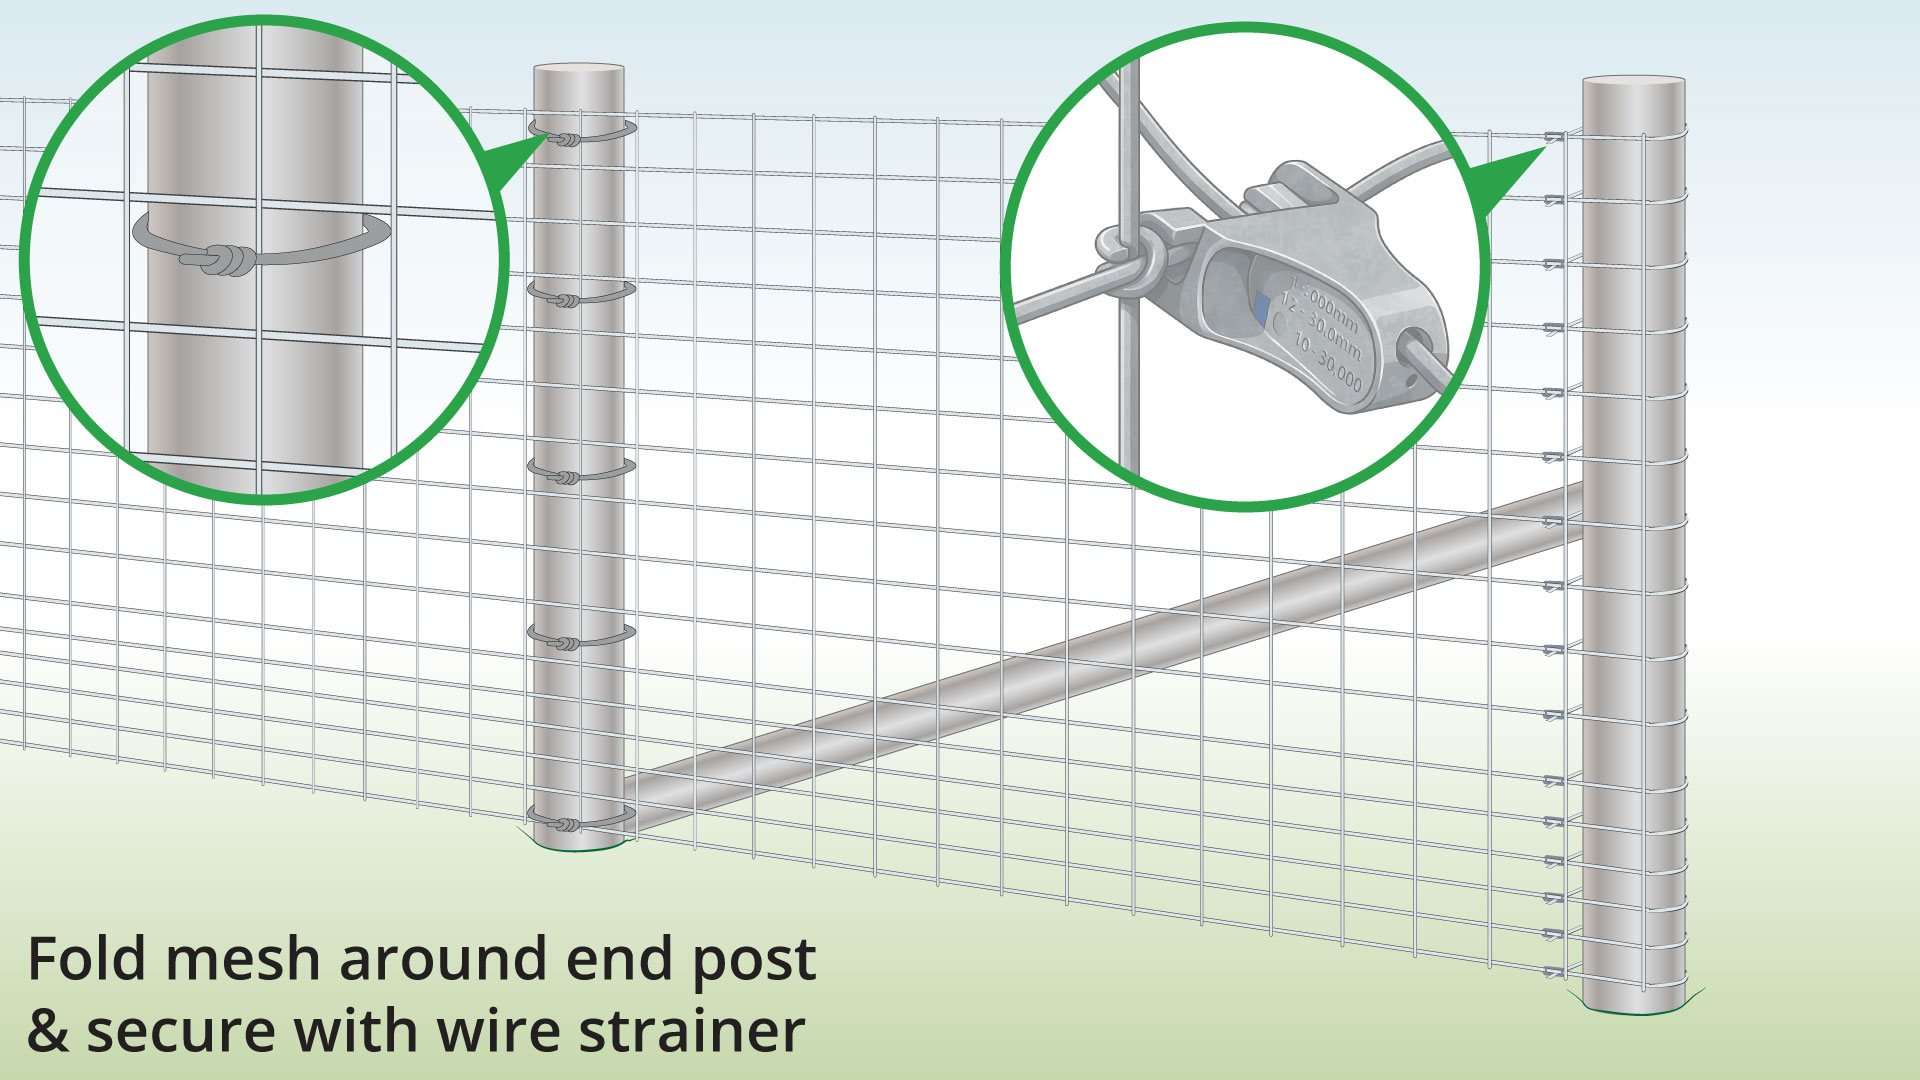
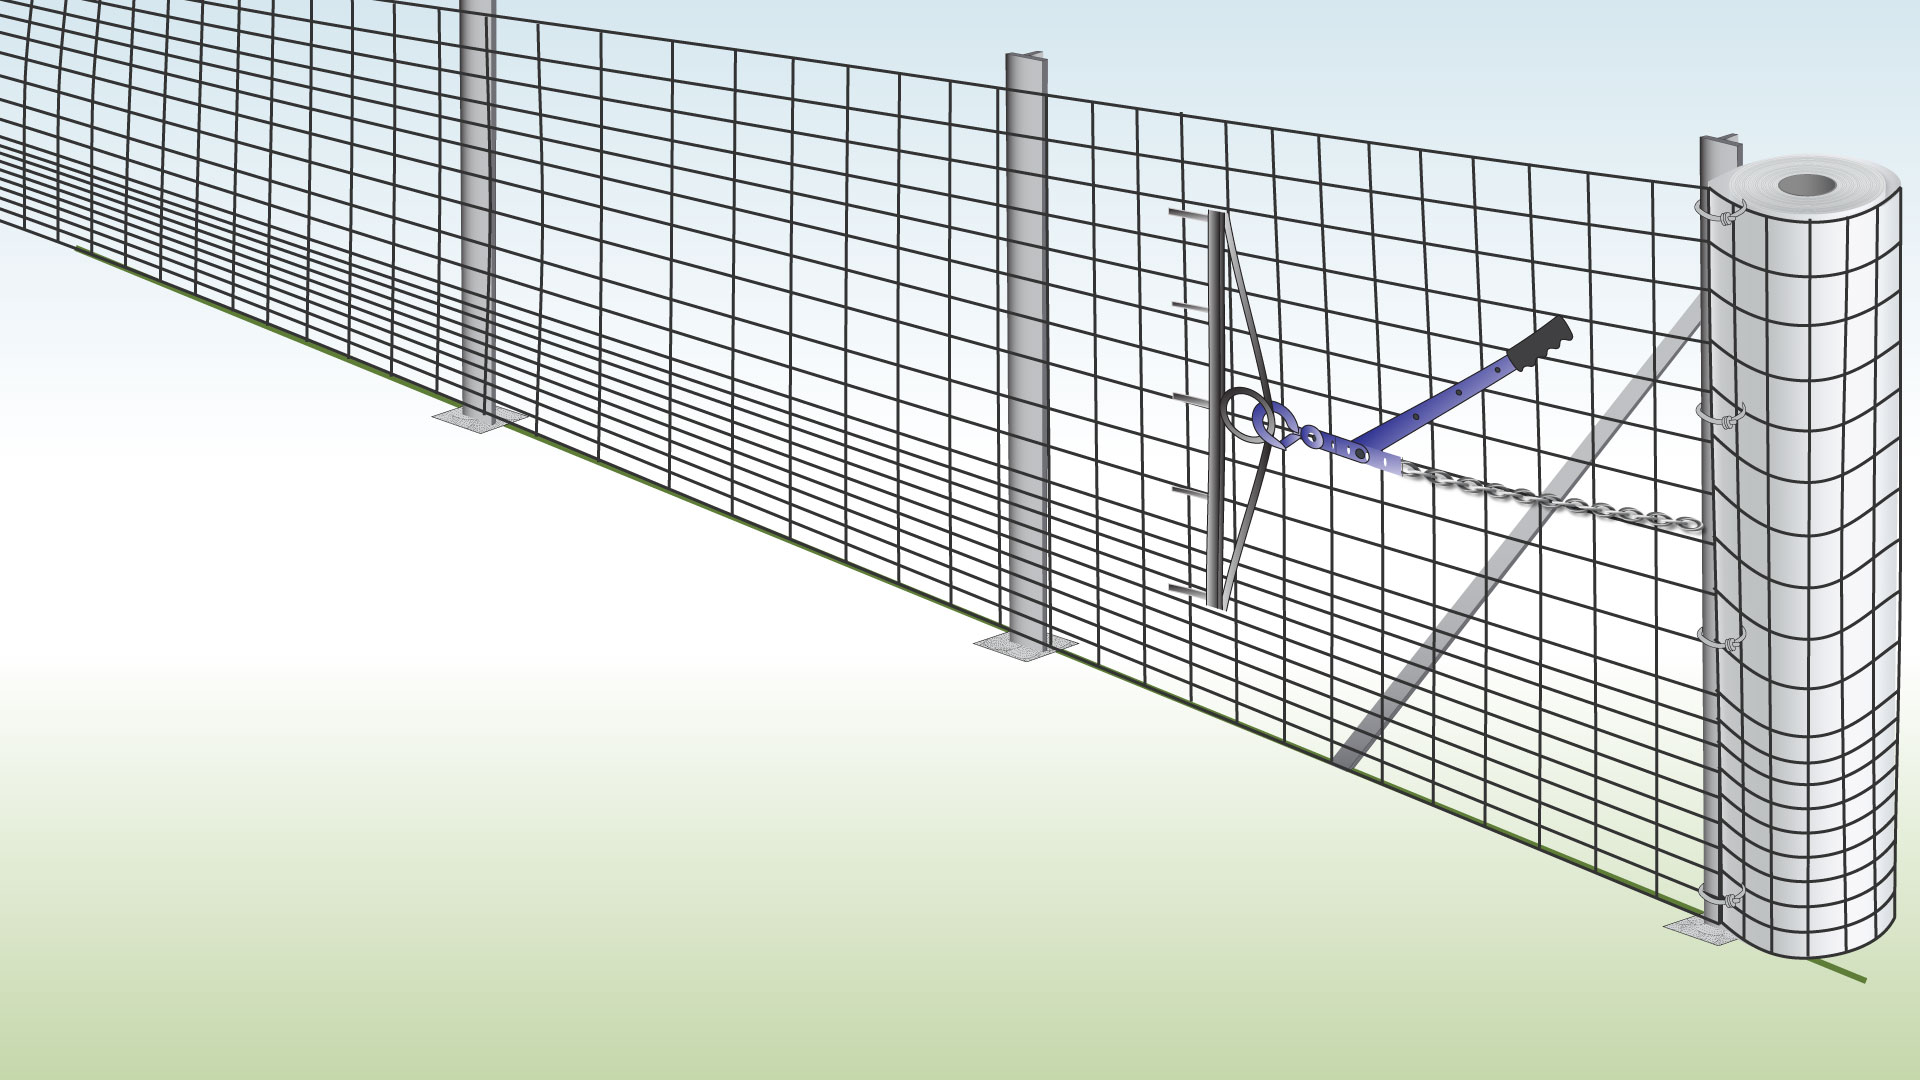
Roll out the fence towards the opposite end, keeping it taut between the end posts.
Trim any extra length, attach it to the end post as you did before, and then release the tension.
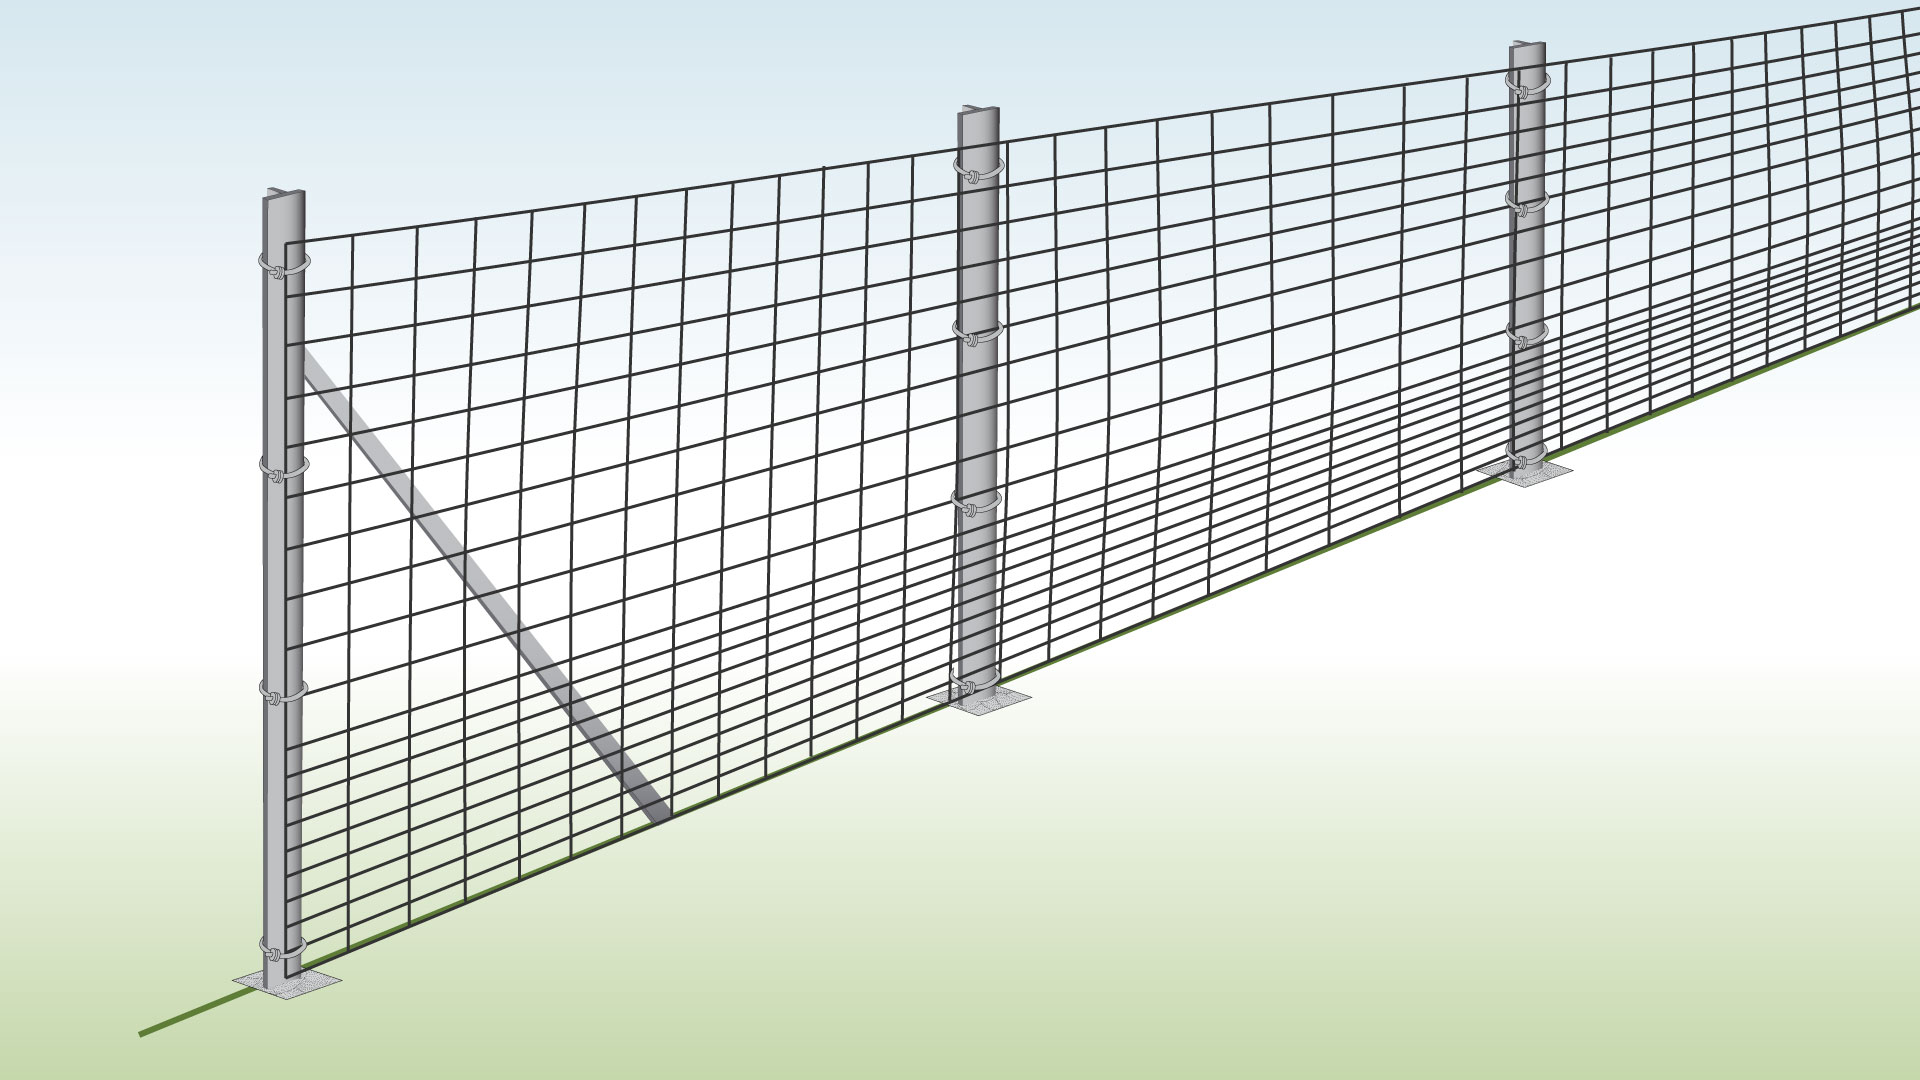
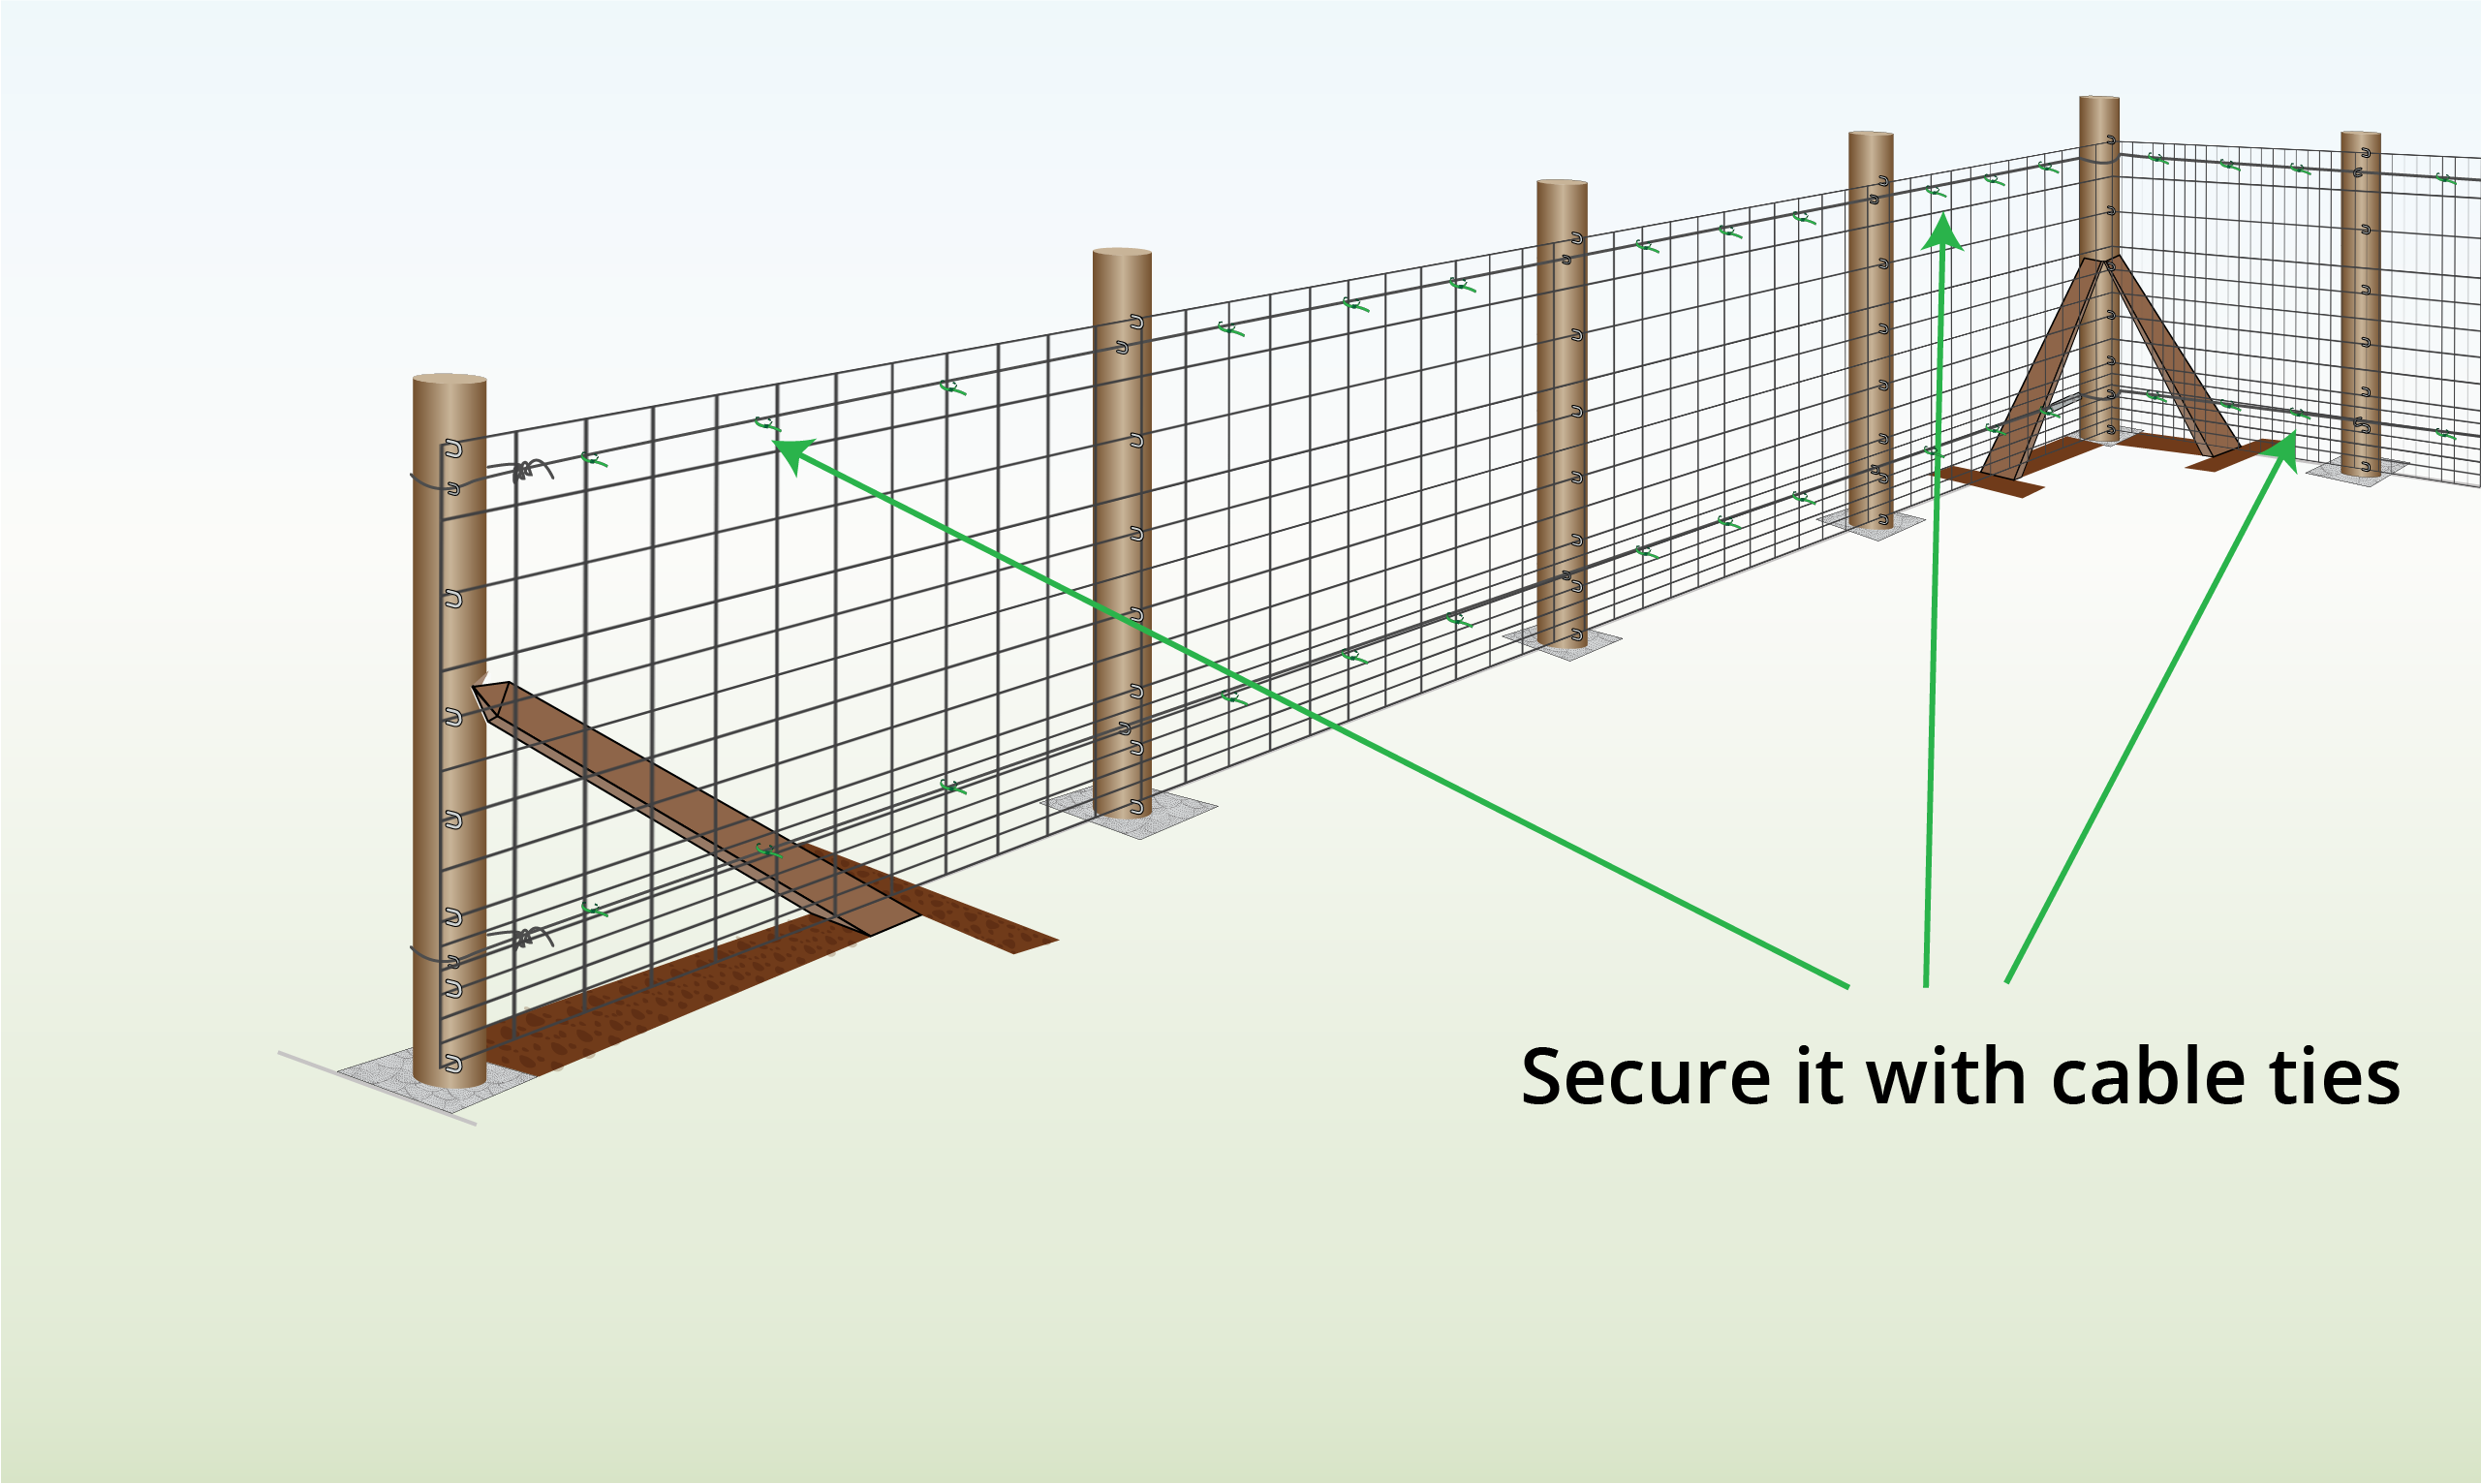
Step 7 – Secure to Middle Posts
Secure to the intermediate posts using the same wire ties.
To Do
Explanation
Completed Installation
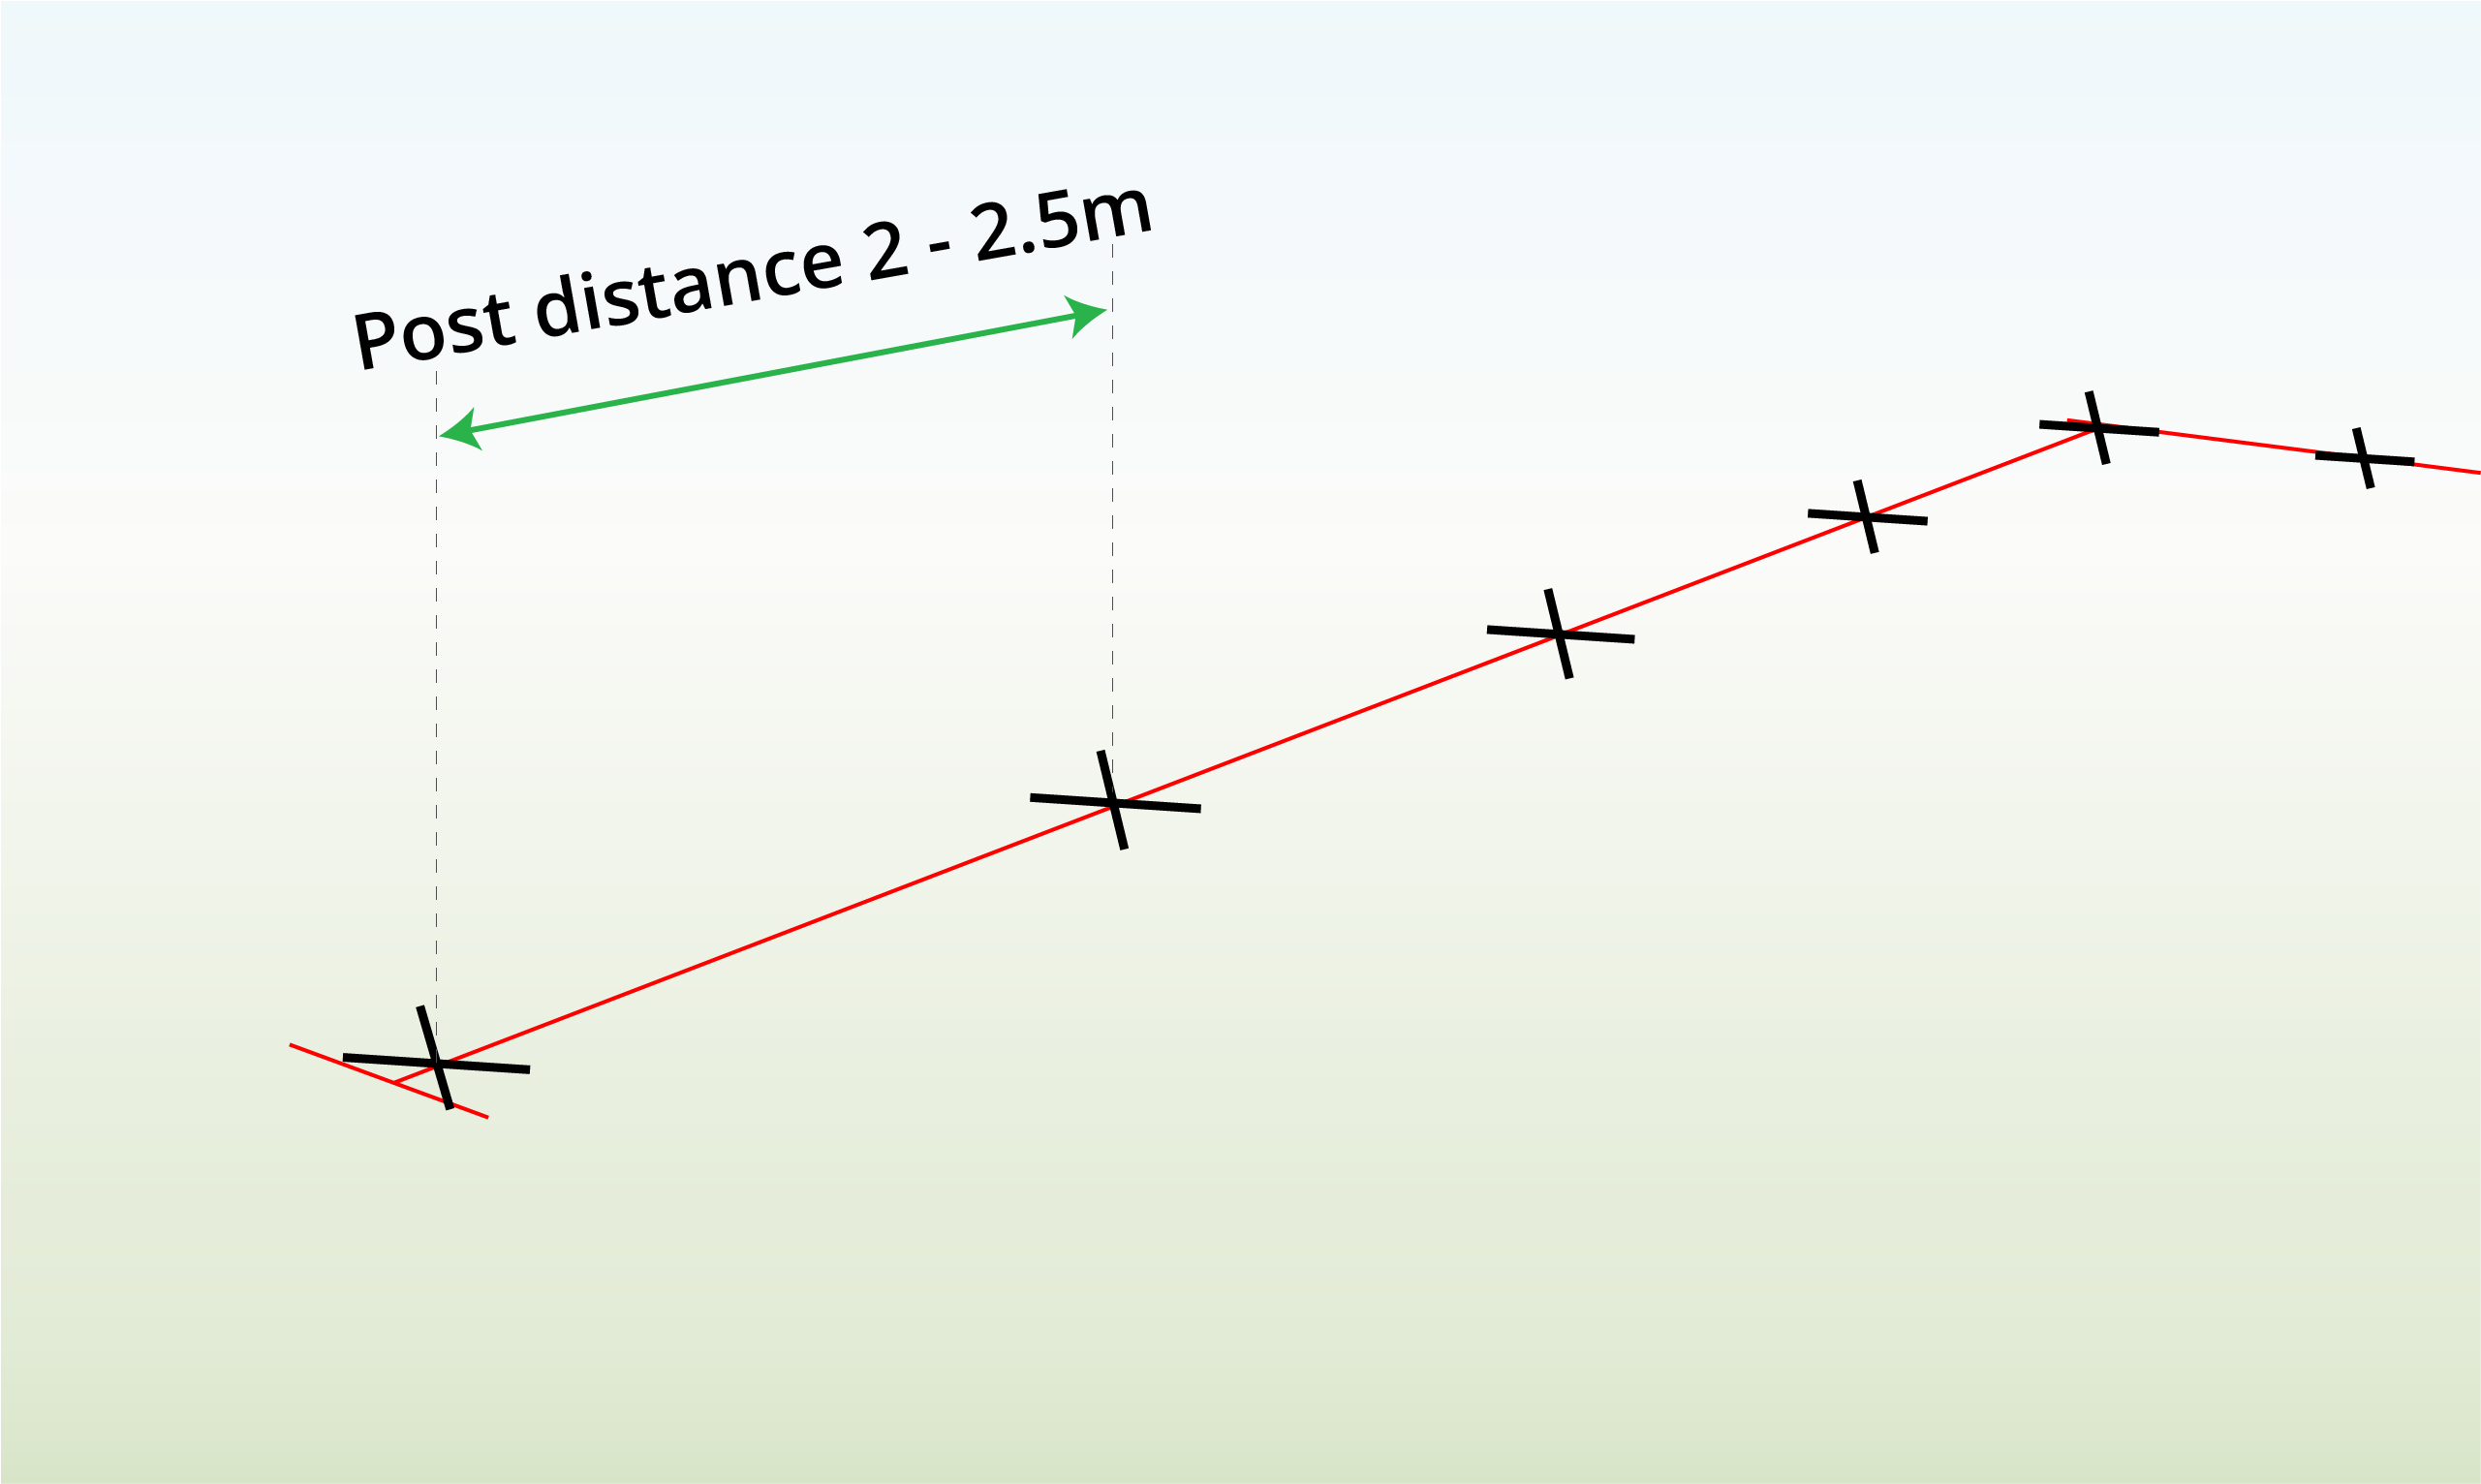
Set posts 2–2.5 m apart in concrete, bracing end and corner posts.
Add tension wire, then attach the stock fence to the posts, finishing with a strand of barbed wire.Watch video
Step 1 – Mark the Post Location
Mark the post locations, ensuring a spacing of 2-2.5 metres between each post.
Step 2 – Dig Holes
Dig a hole for the posts. The hole should be approx. one-third of the length of the post.
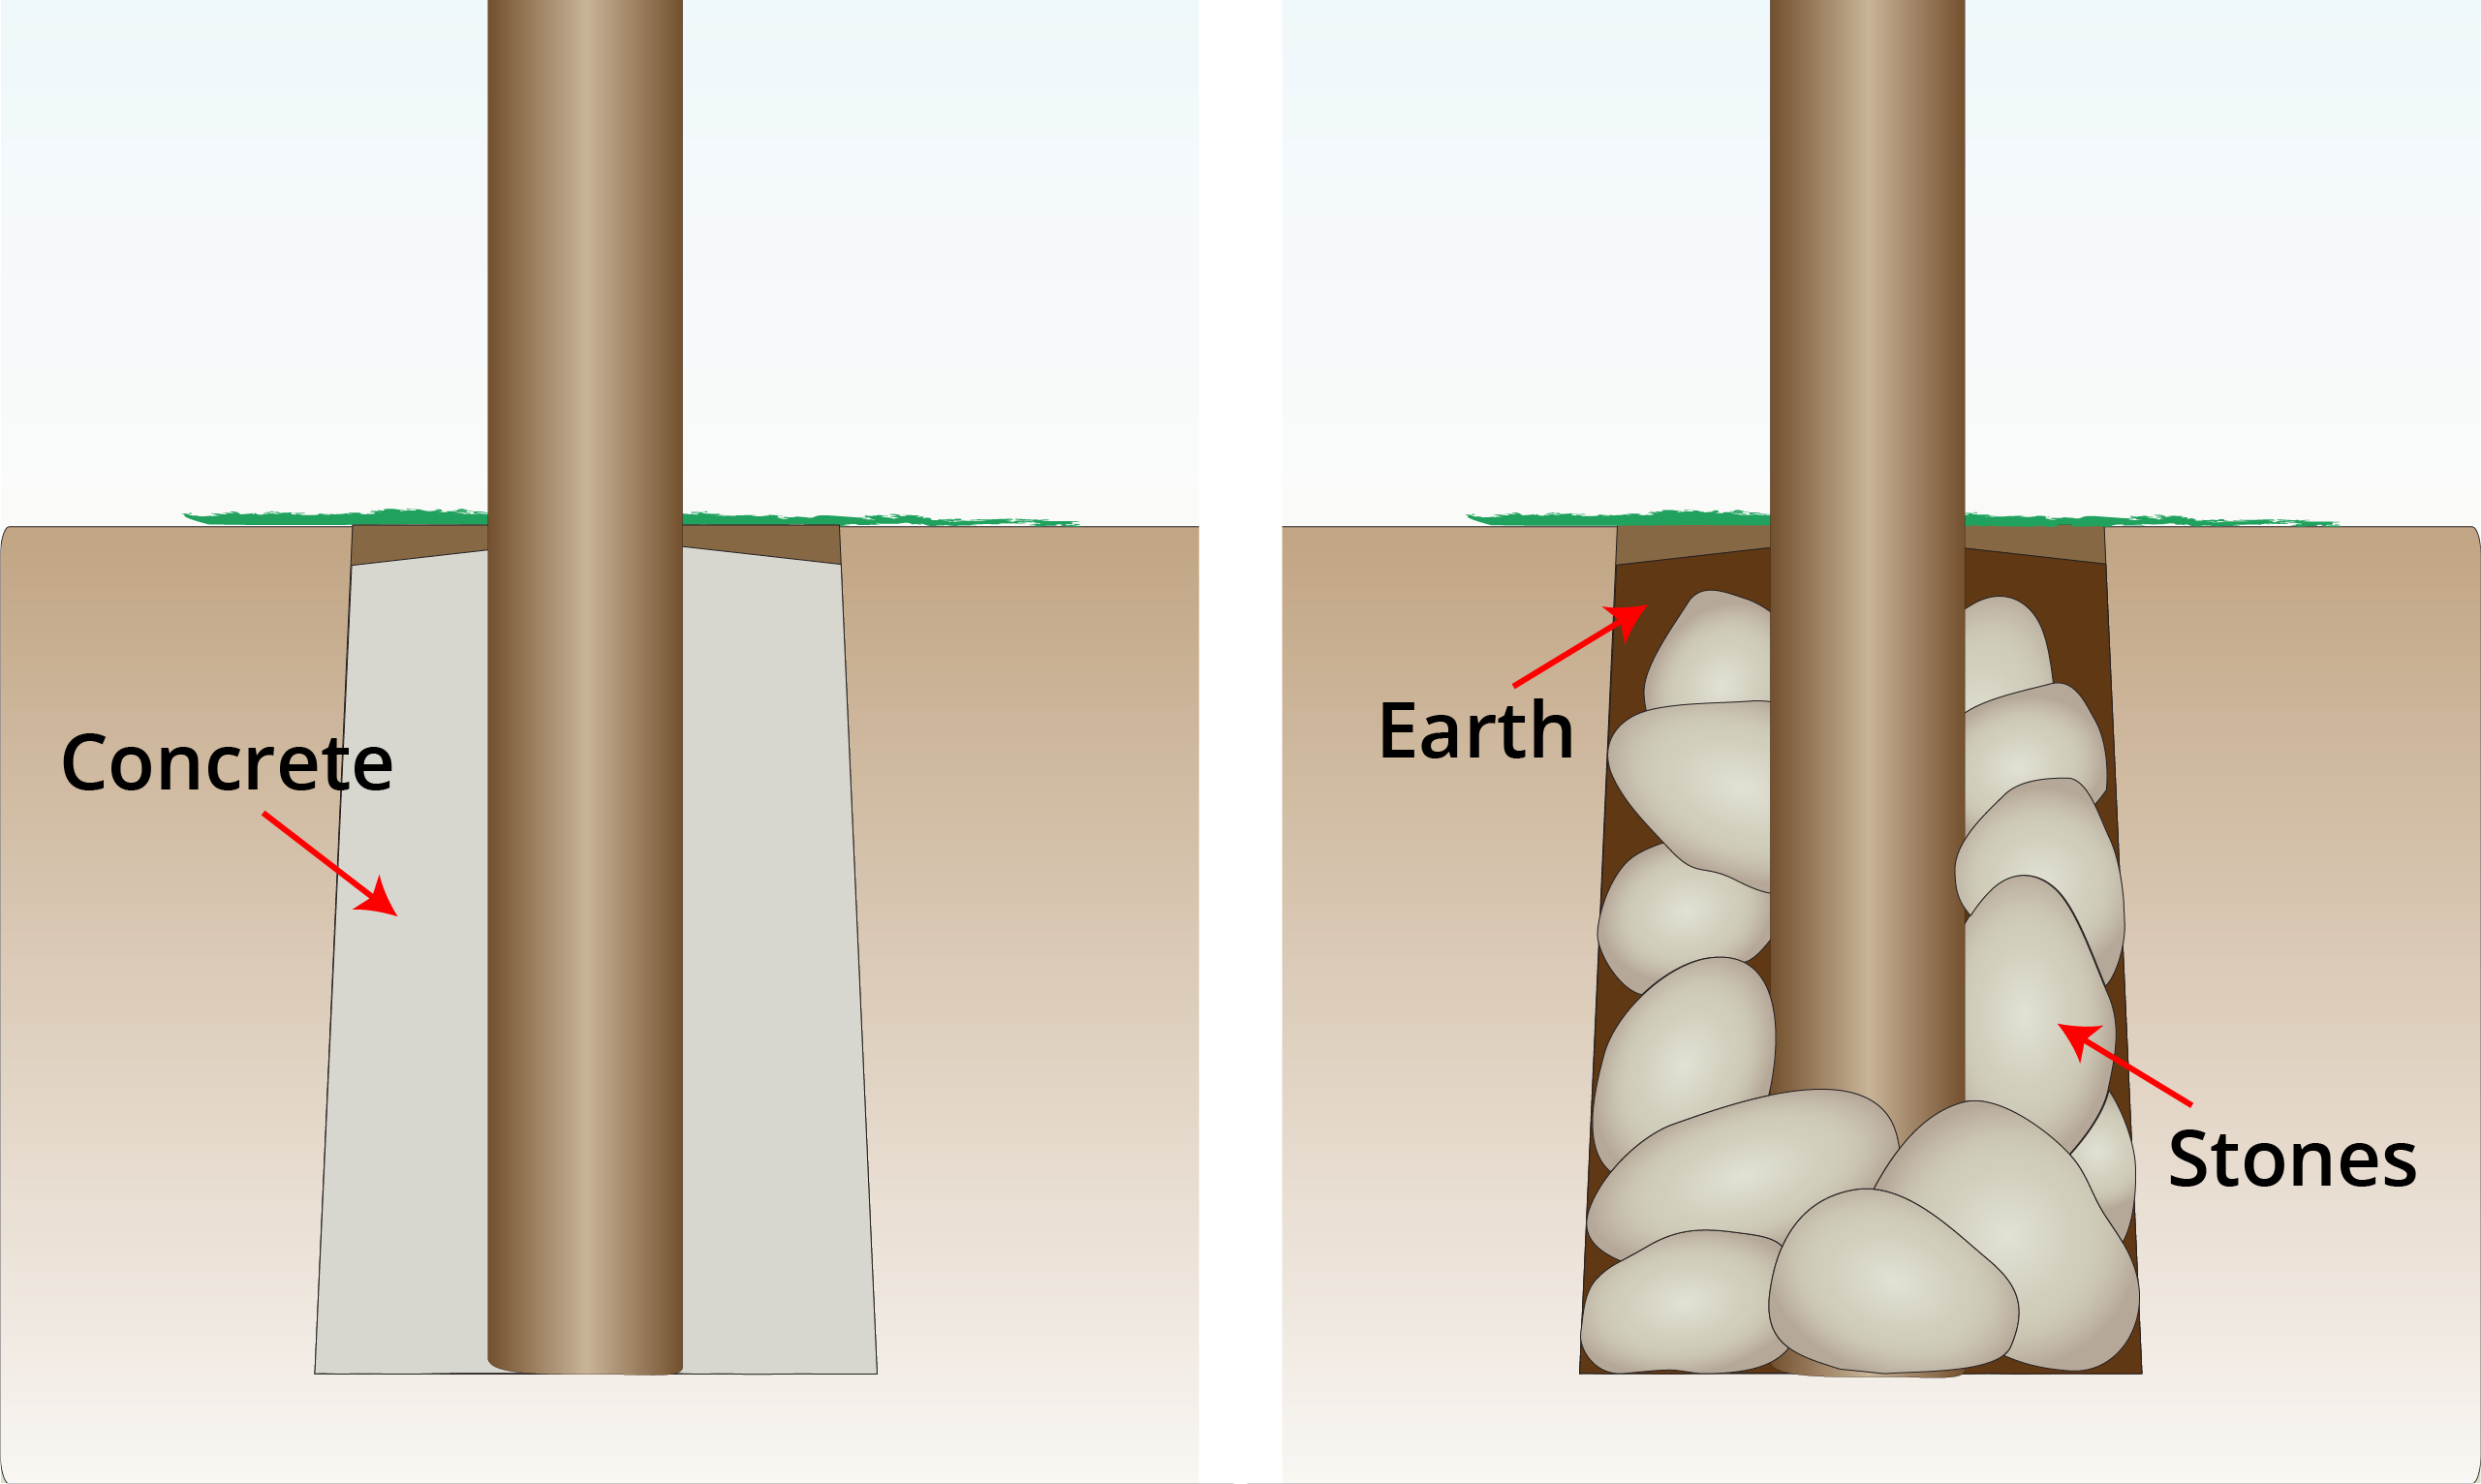
Step 3 – Position Upright Posts
With Concrete: Pour concrete into the holes, put the poles into the wet concrete and allow at least 1 day for the concrete to set. Cover the top of the hole with dirt.
Without Concrete: Place them in the middle of the holes, then fill the holes with large stones to hold the poles in place. Then add earth until tight and compact.
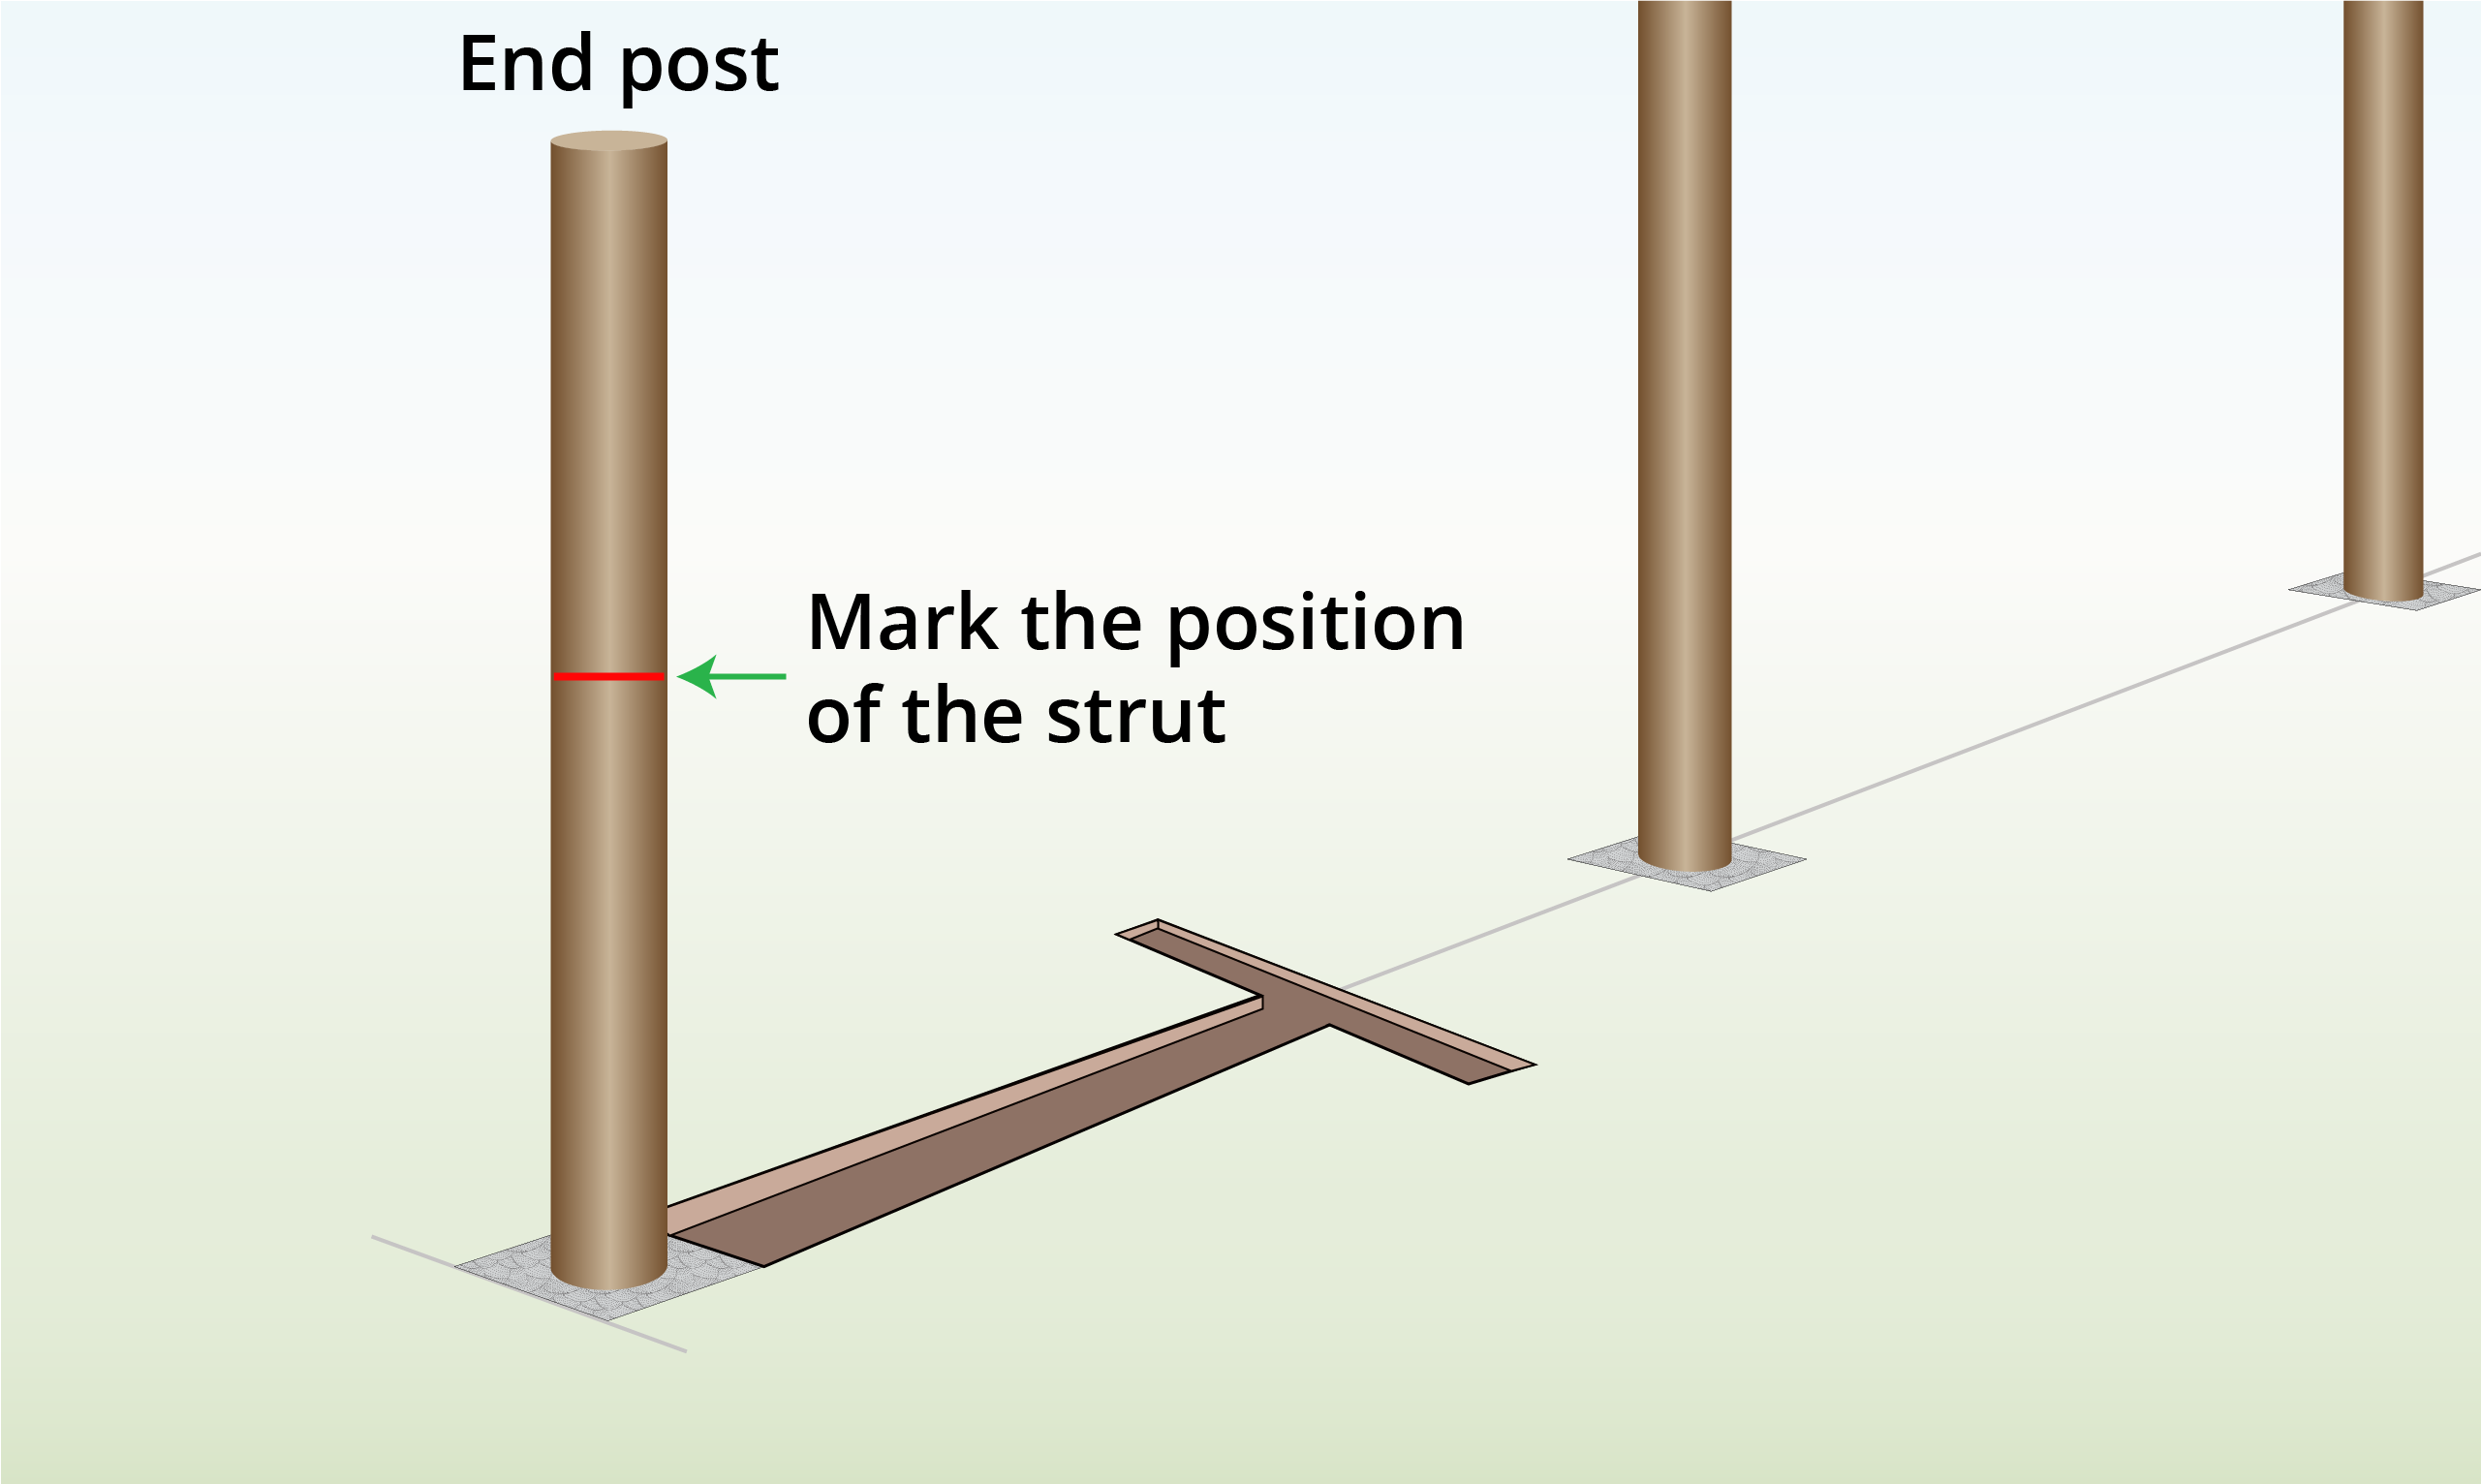
Step 4a – Dig Trench for End Posts
Mark the end posts halfway off the ground. Dig a T-shaped trench about 30cm deep.
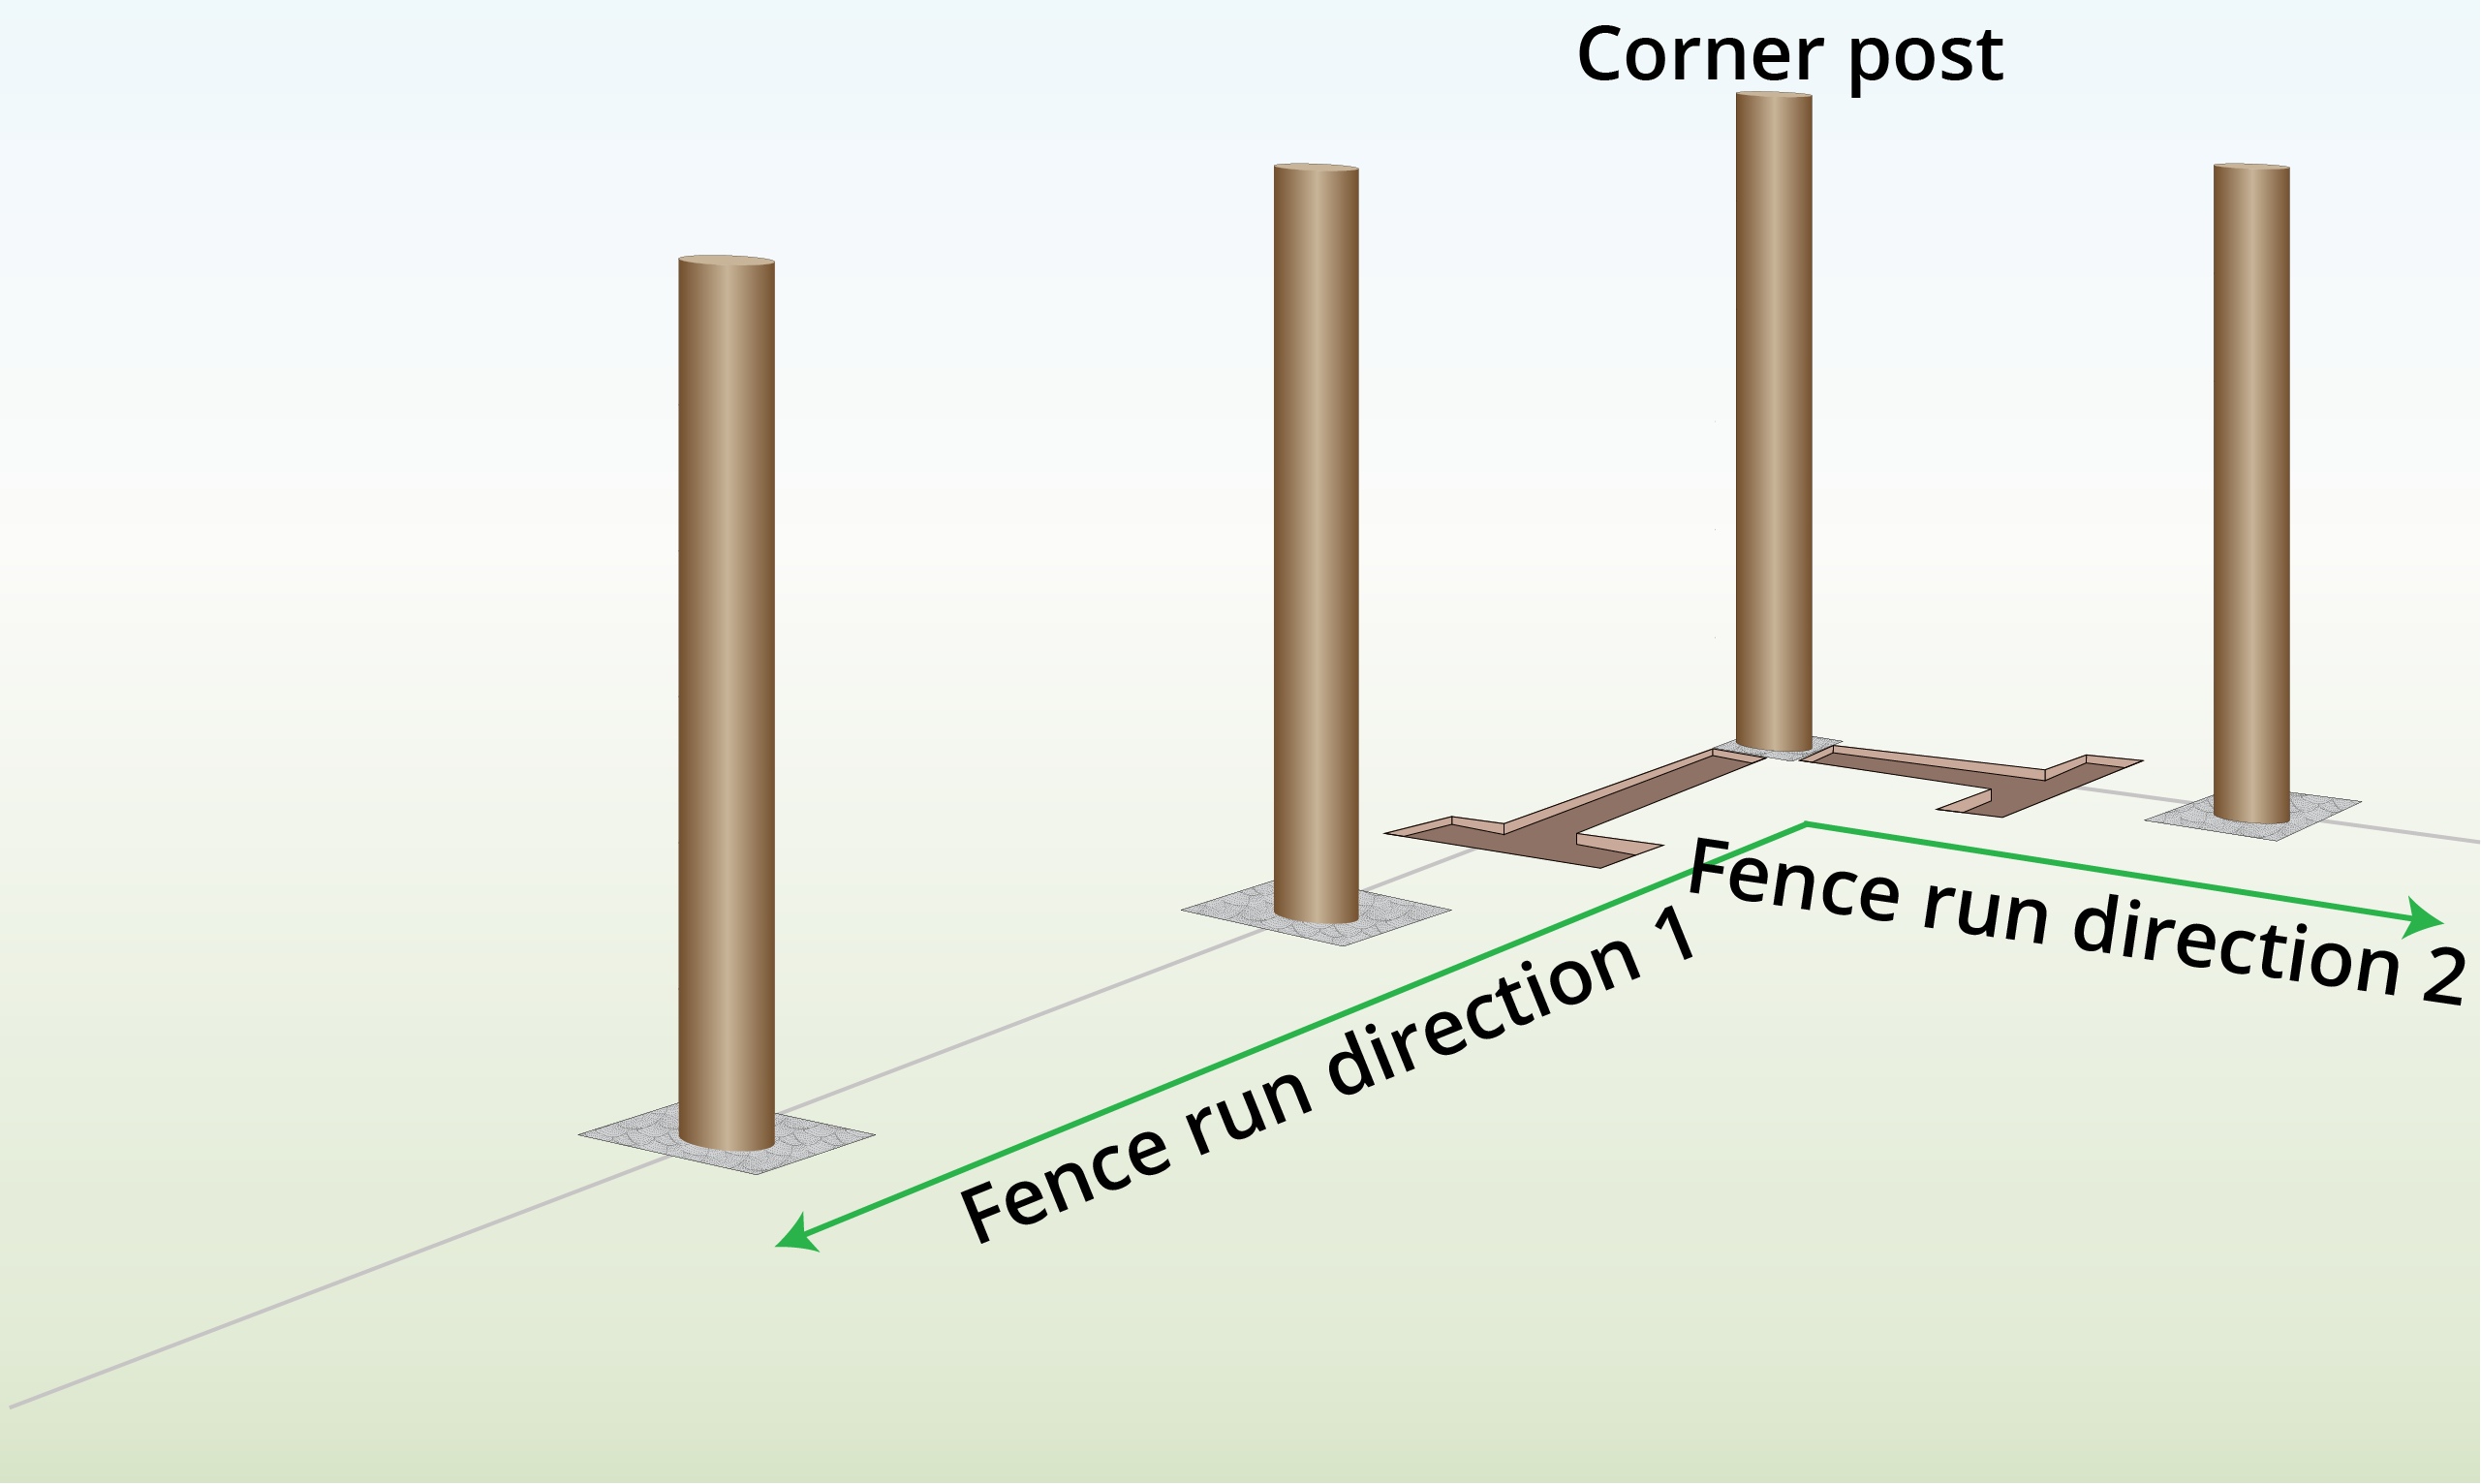
Step 4b – Dig Trench for Corner Posts
Repeat step 4a for corner posts. Dig a trench for each run.
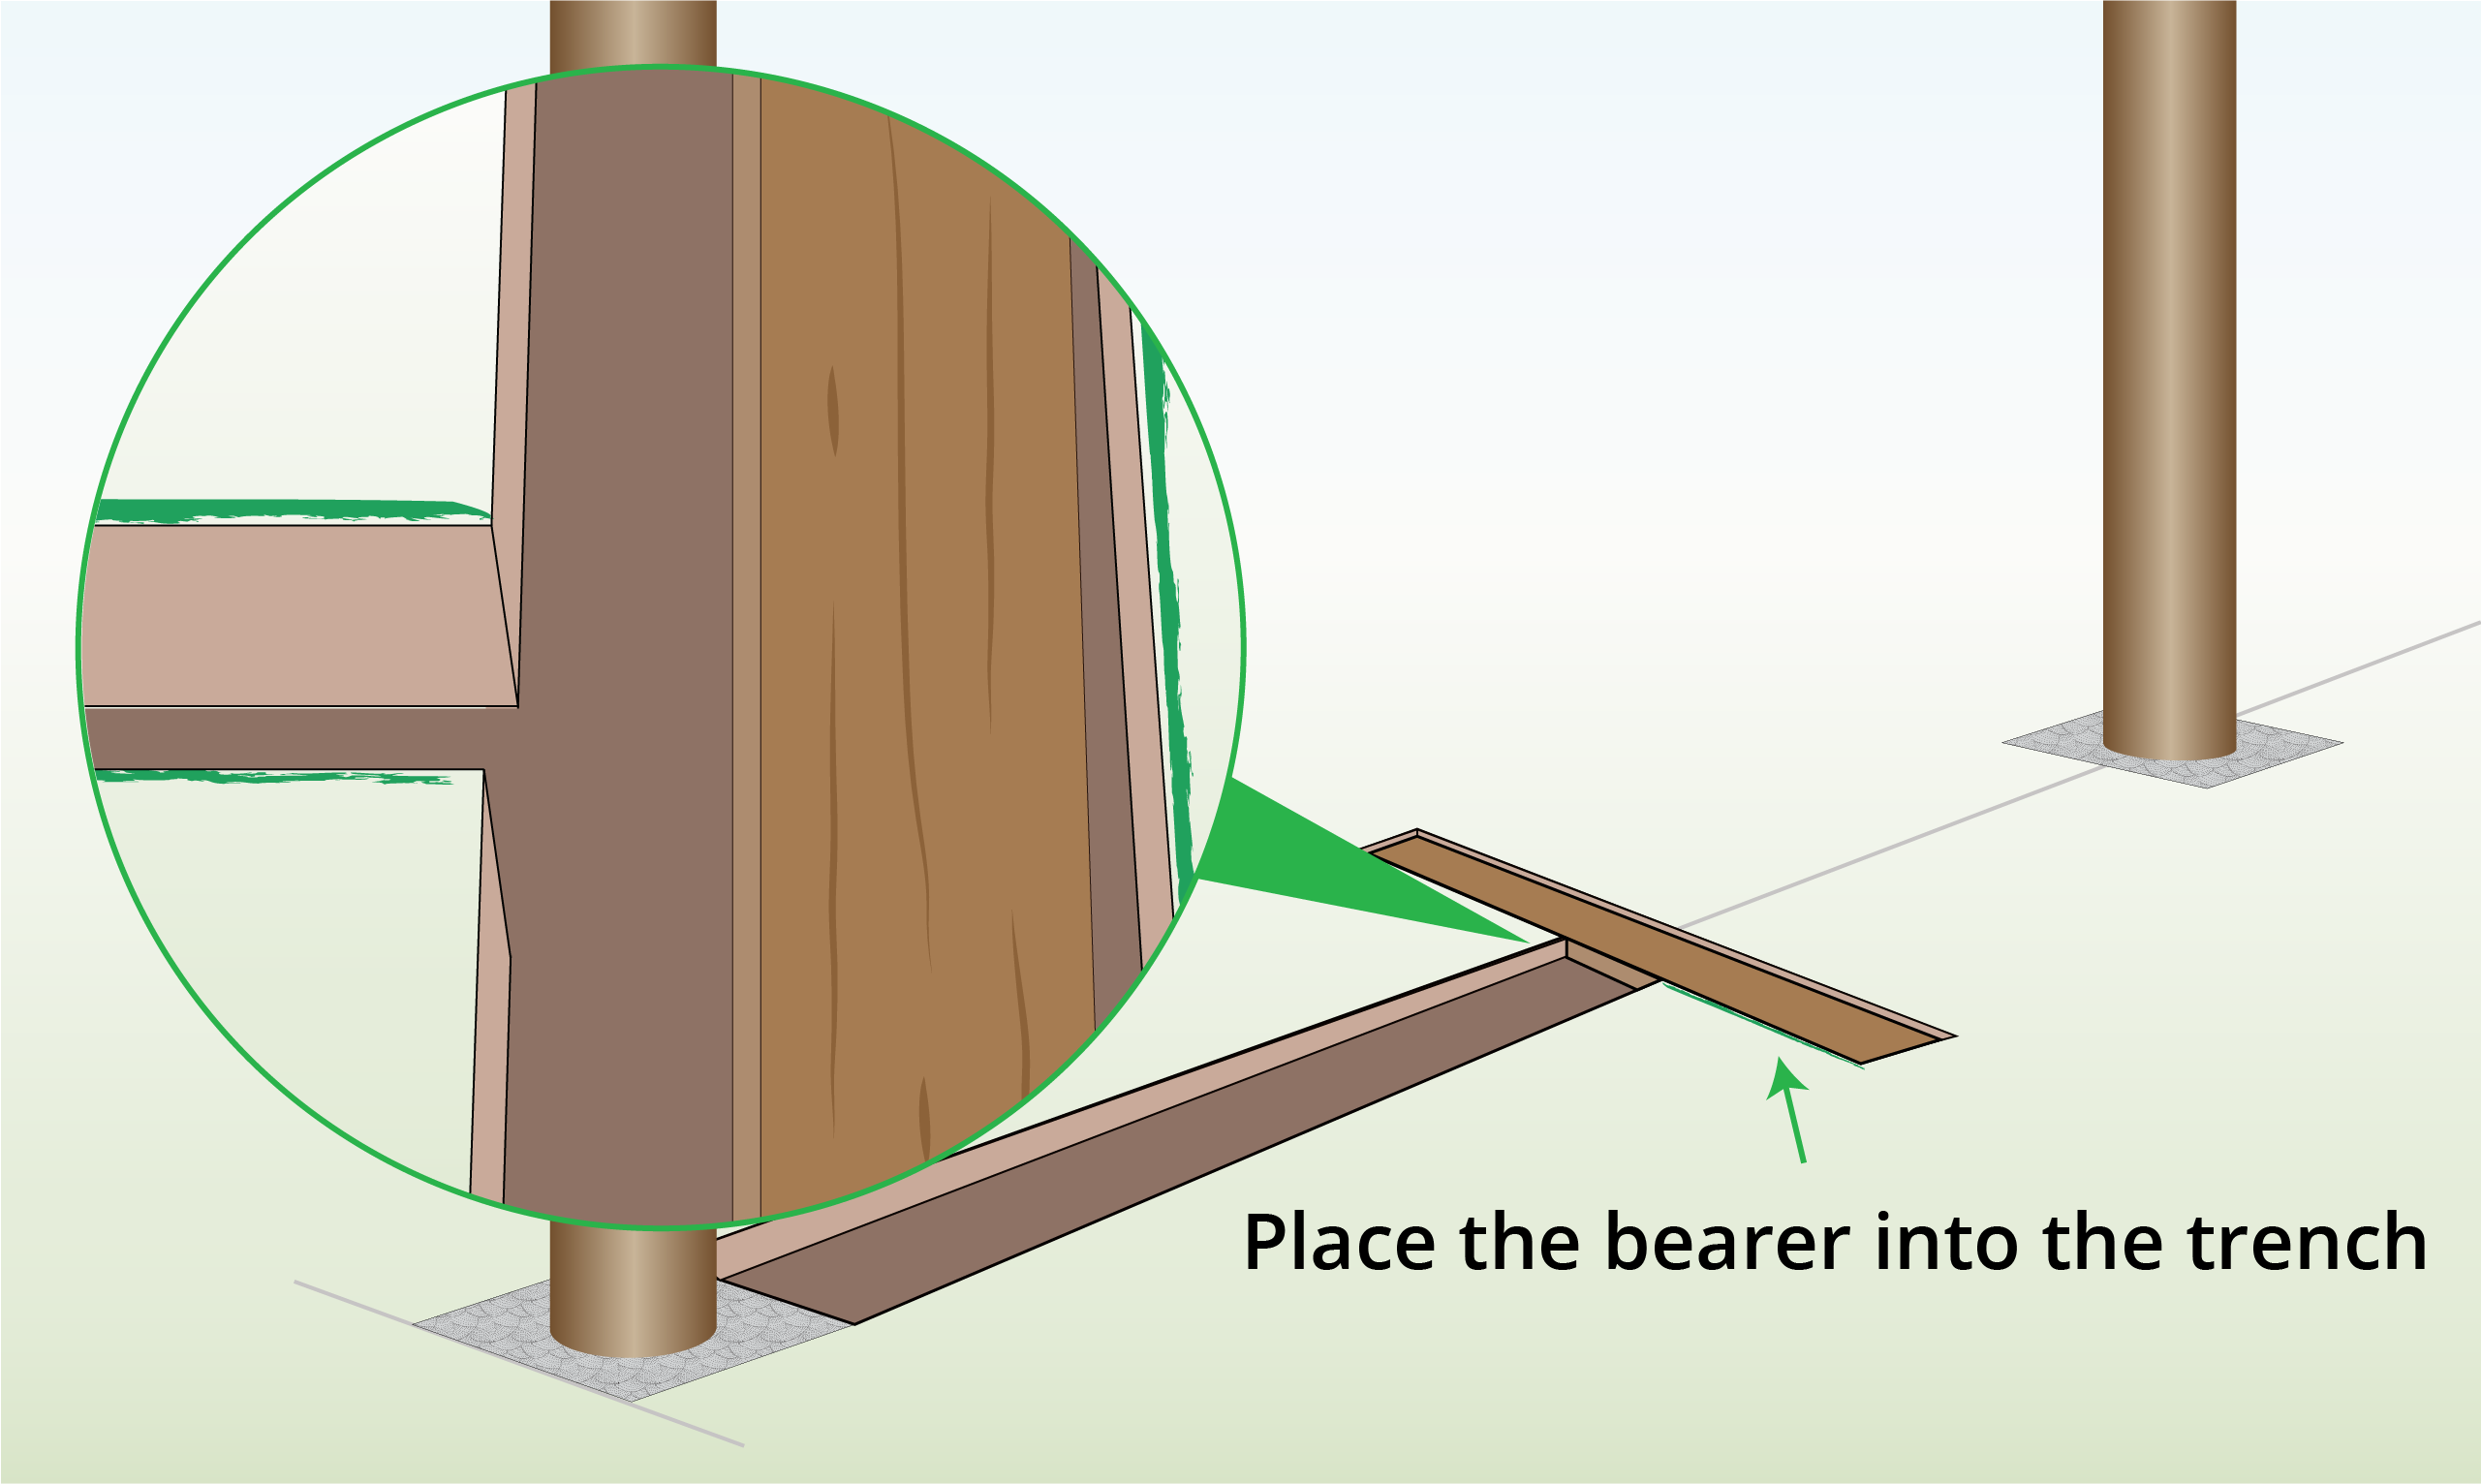
Step 5 – Cut & Position Bearers
Place a 1ft long piece of wood or stone into the trench. This will be your bearer; it will stop the strut from slipping, providing support for the ends & corners posts.
Step 6 – Cut Notches
Cut a shallow notch in the end post
Note: It is vital to ensure the notch is shallow; this keeps the post strong and doesn’t expose the untreated core of the post.
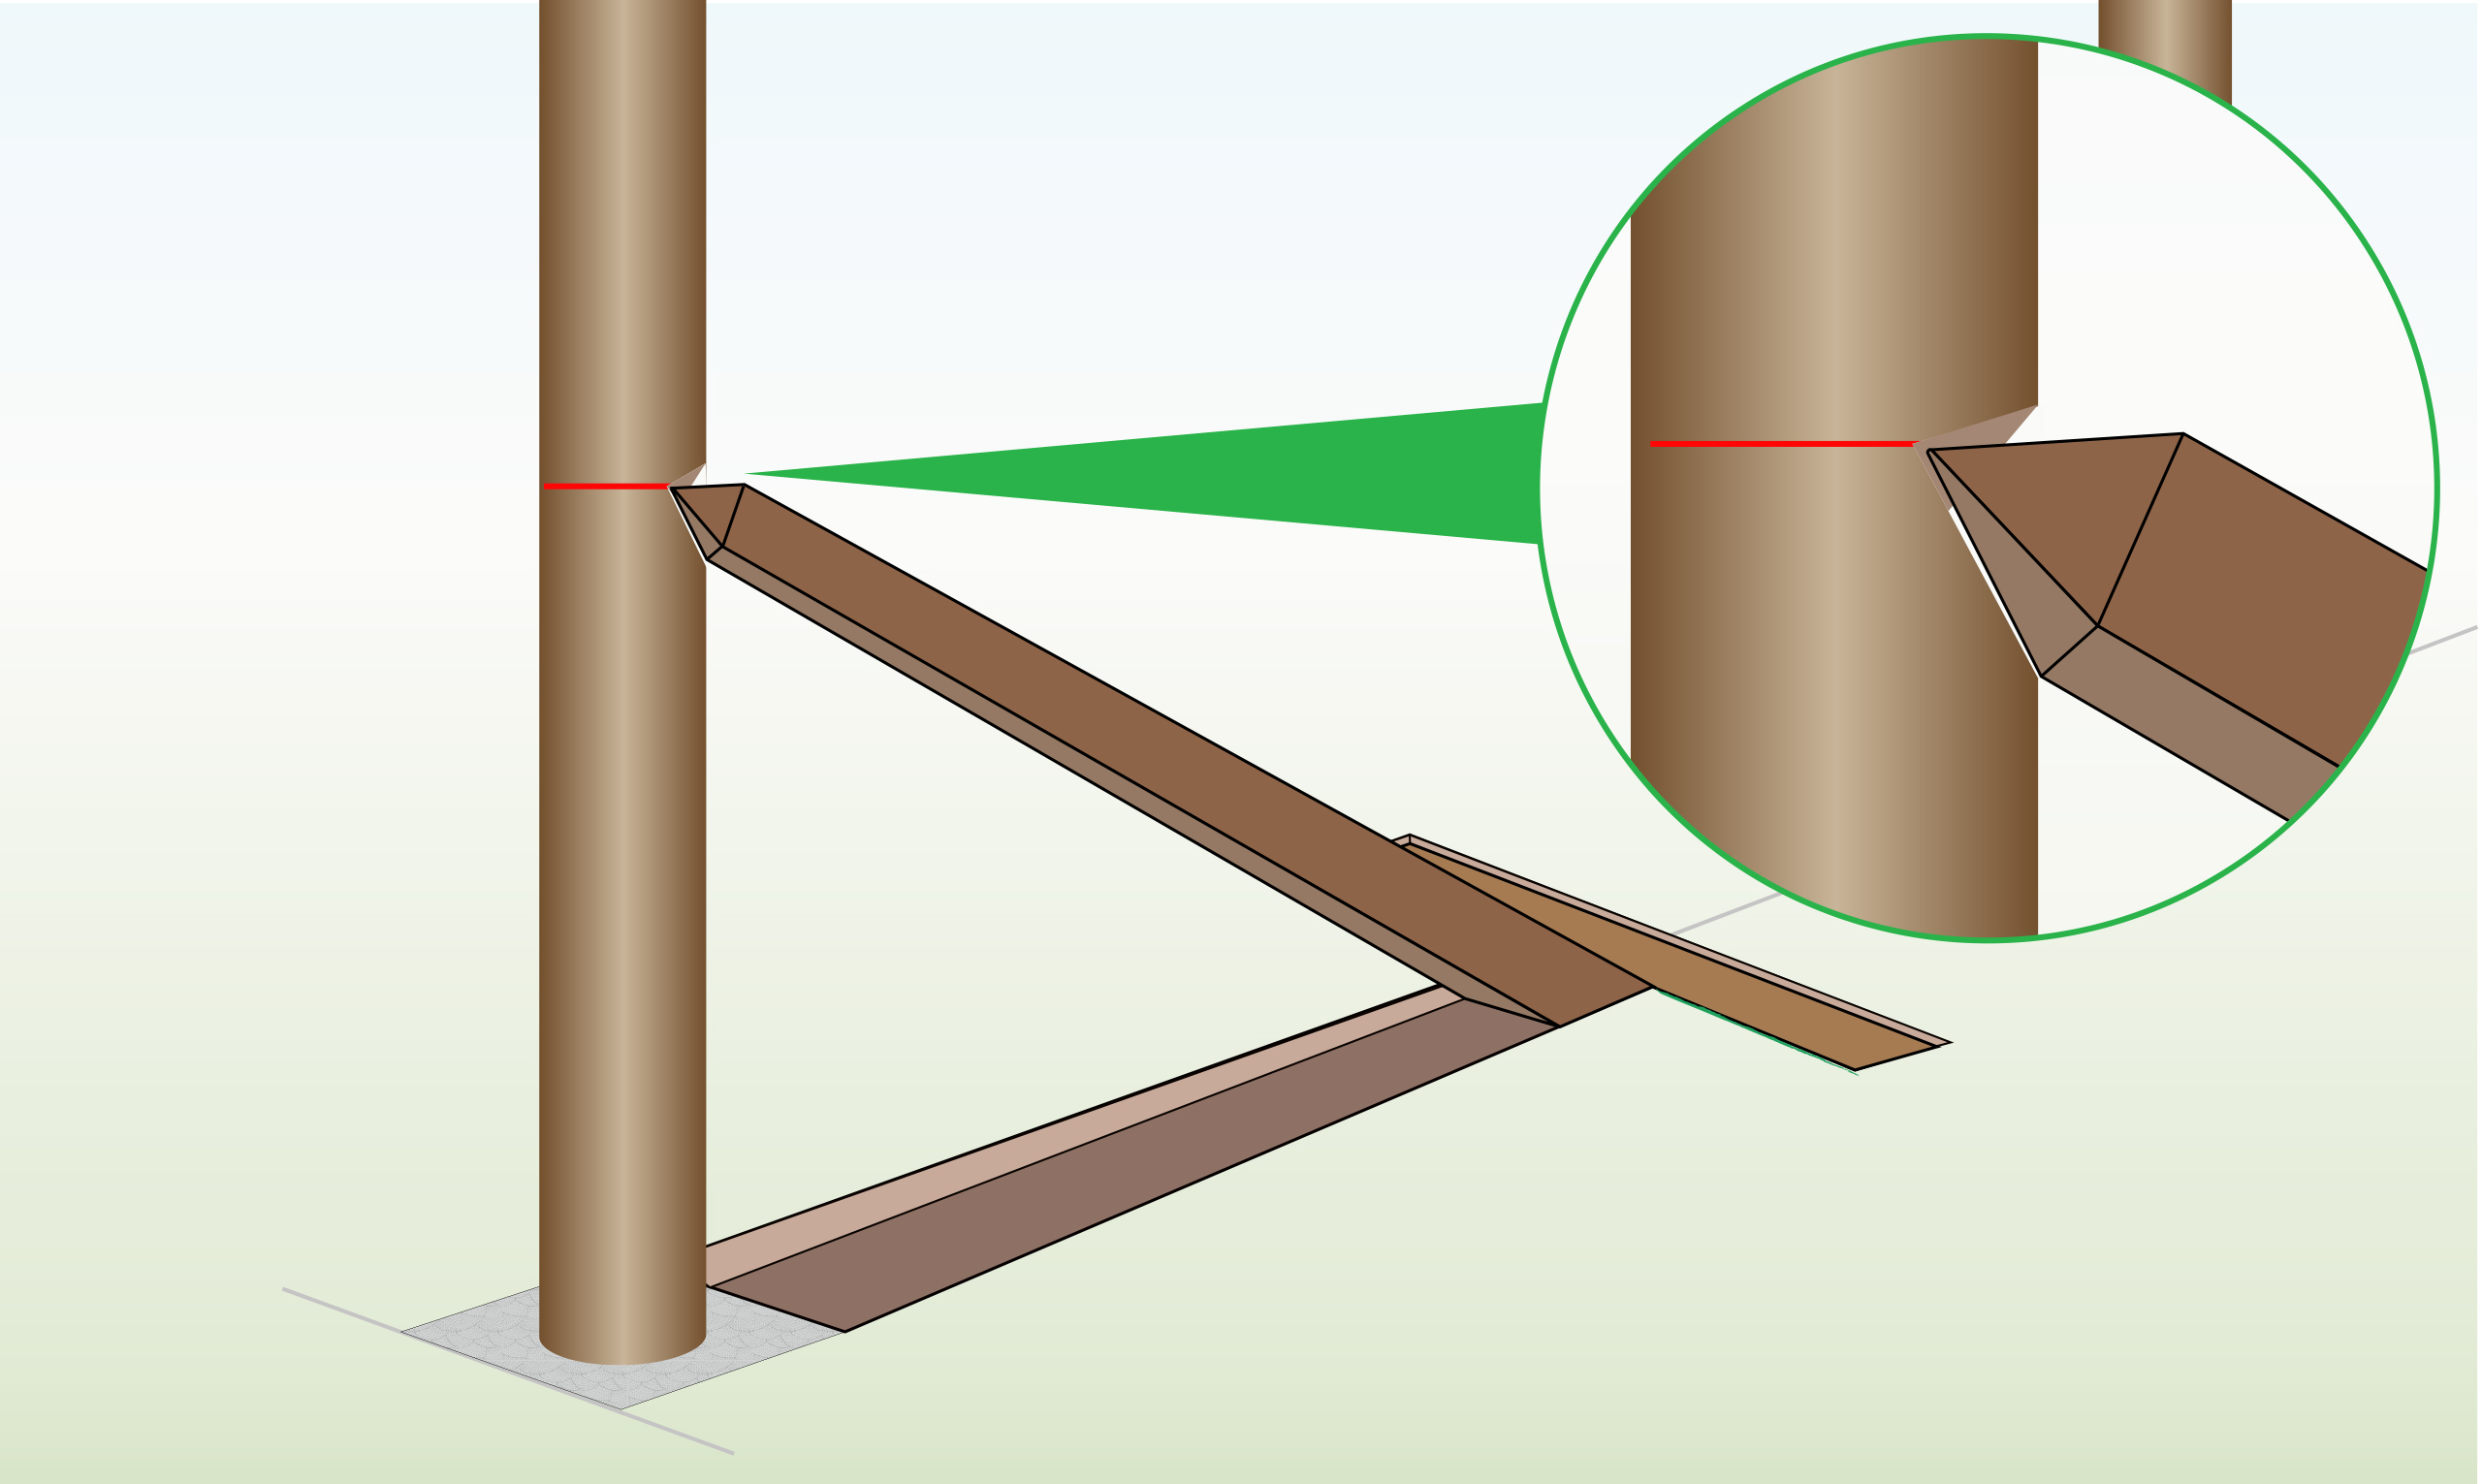
Step 7 – Attach the Strut Post
Shape the end of the strut to fit the notch in the post.
Place the sharpened end into the notch and the other end into the trench.
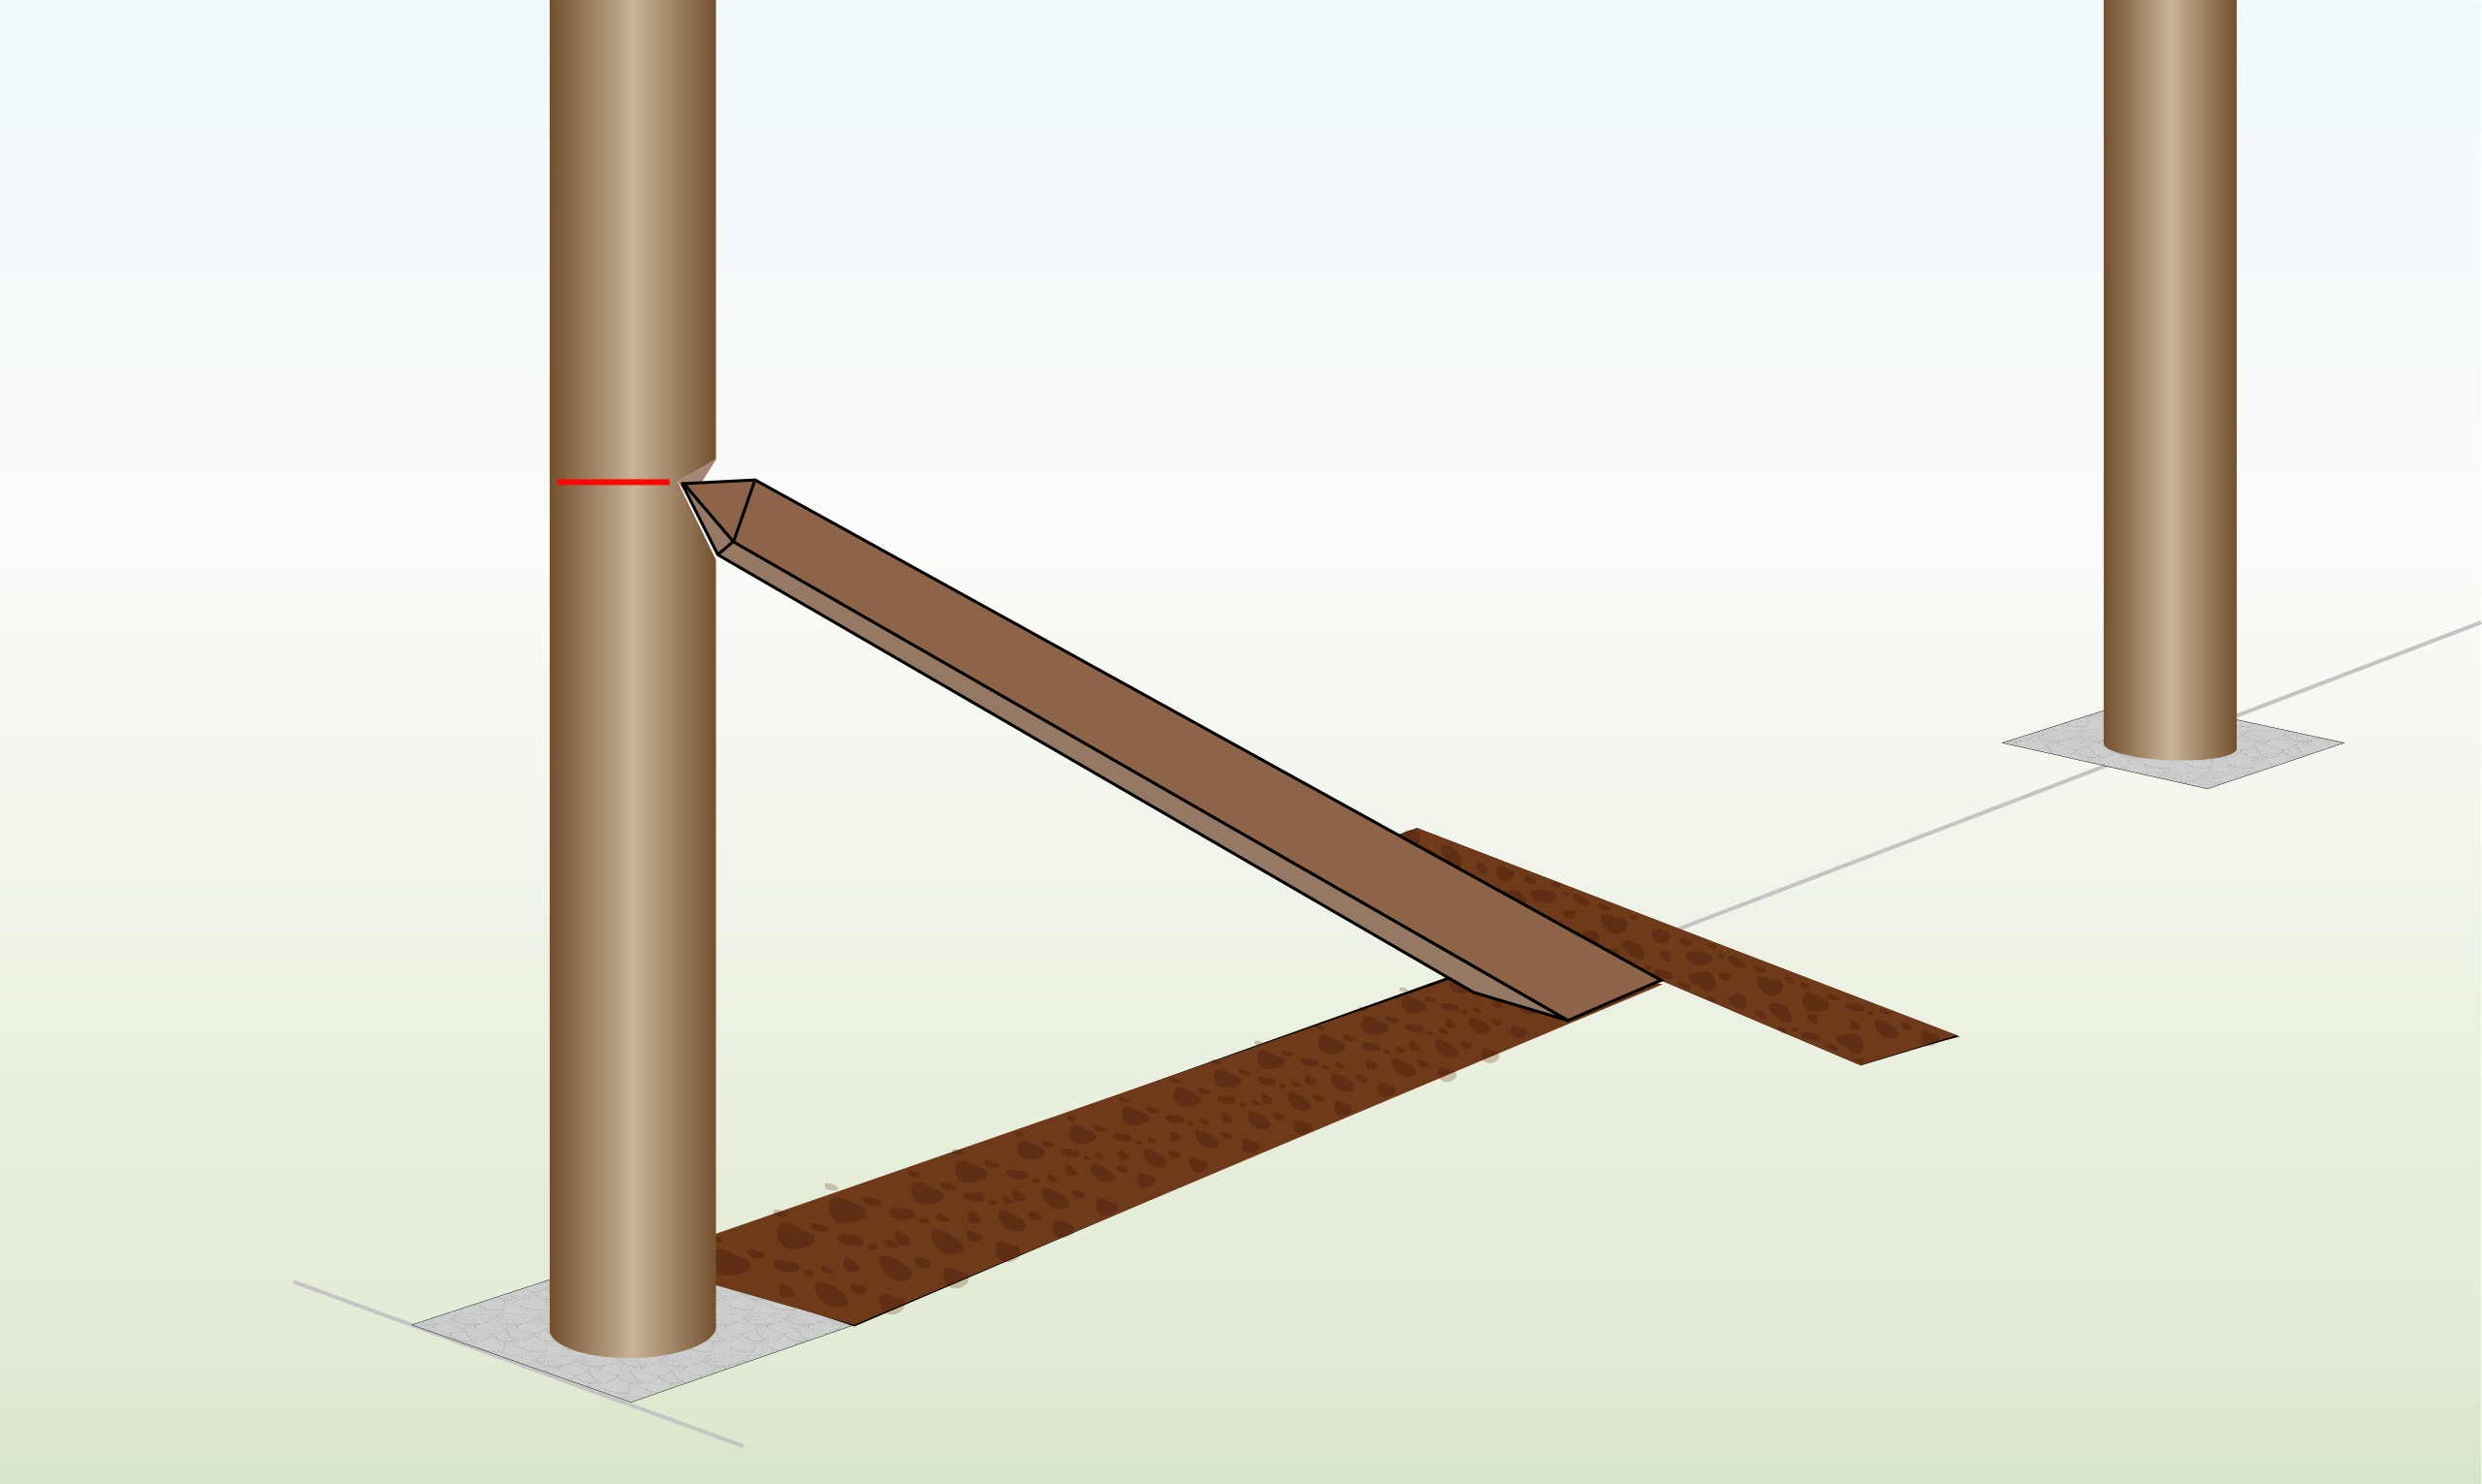
Step 8 – Secure Strut
Wedge the strut in between the bearer and the strainer post – it should be a tight fit.
Cover the trench with earth and stomp it down.
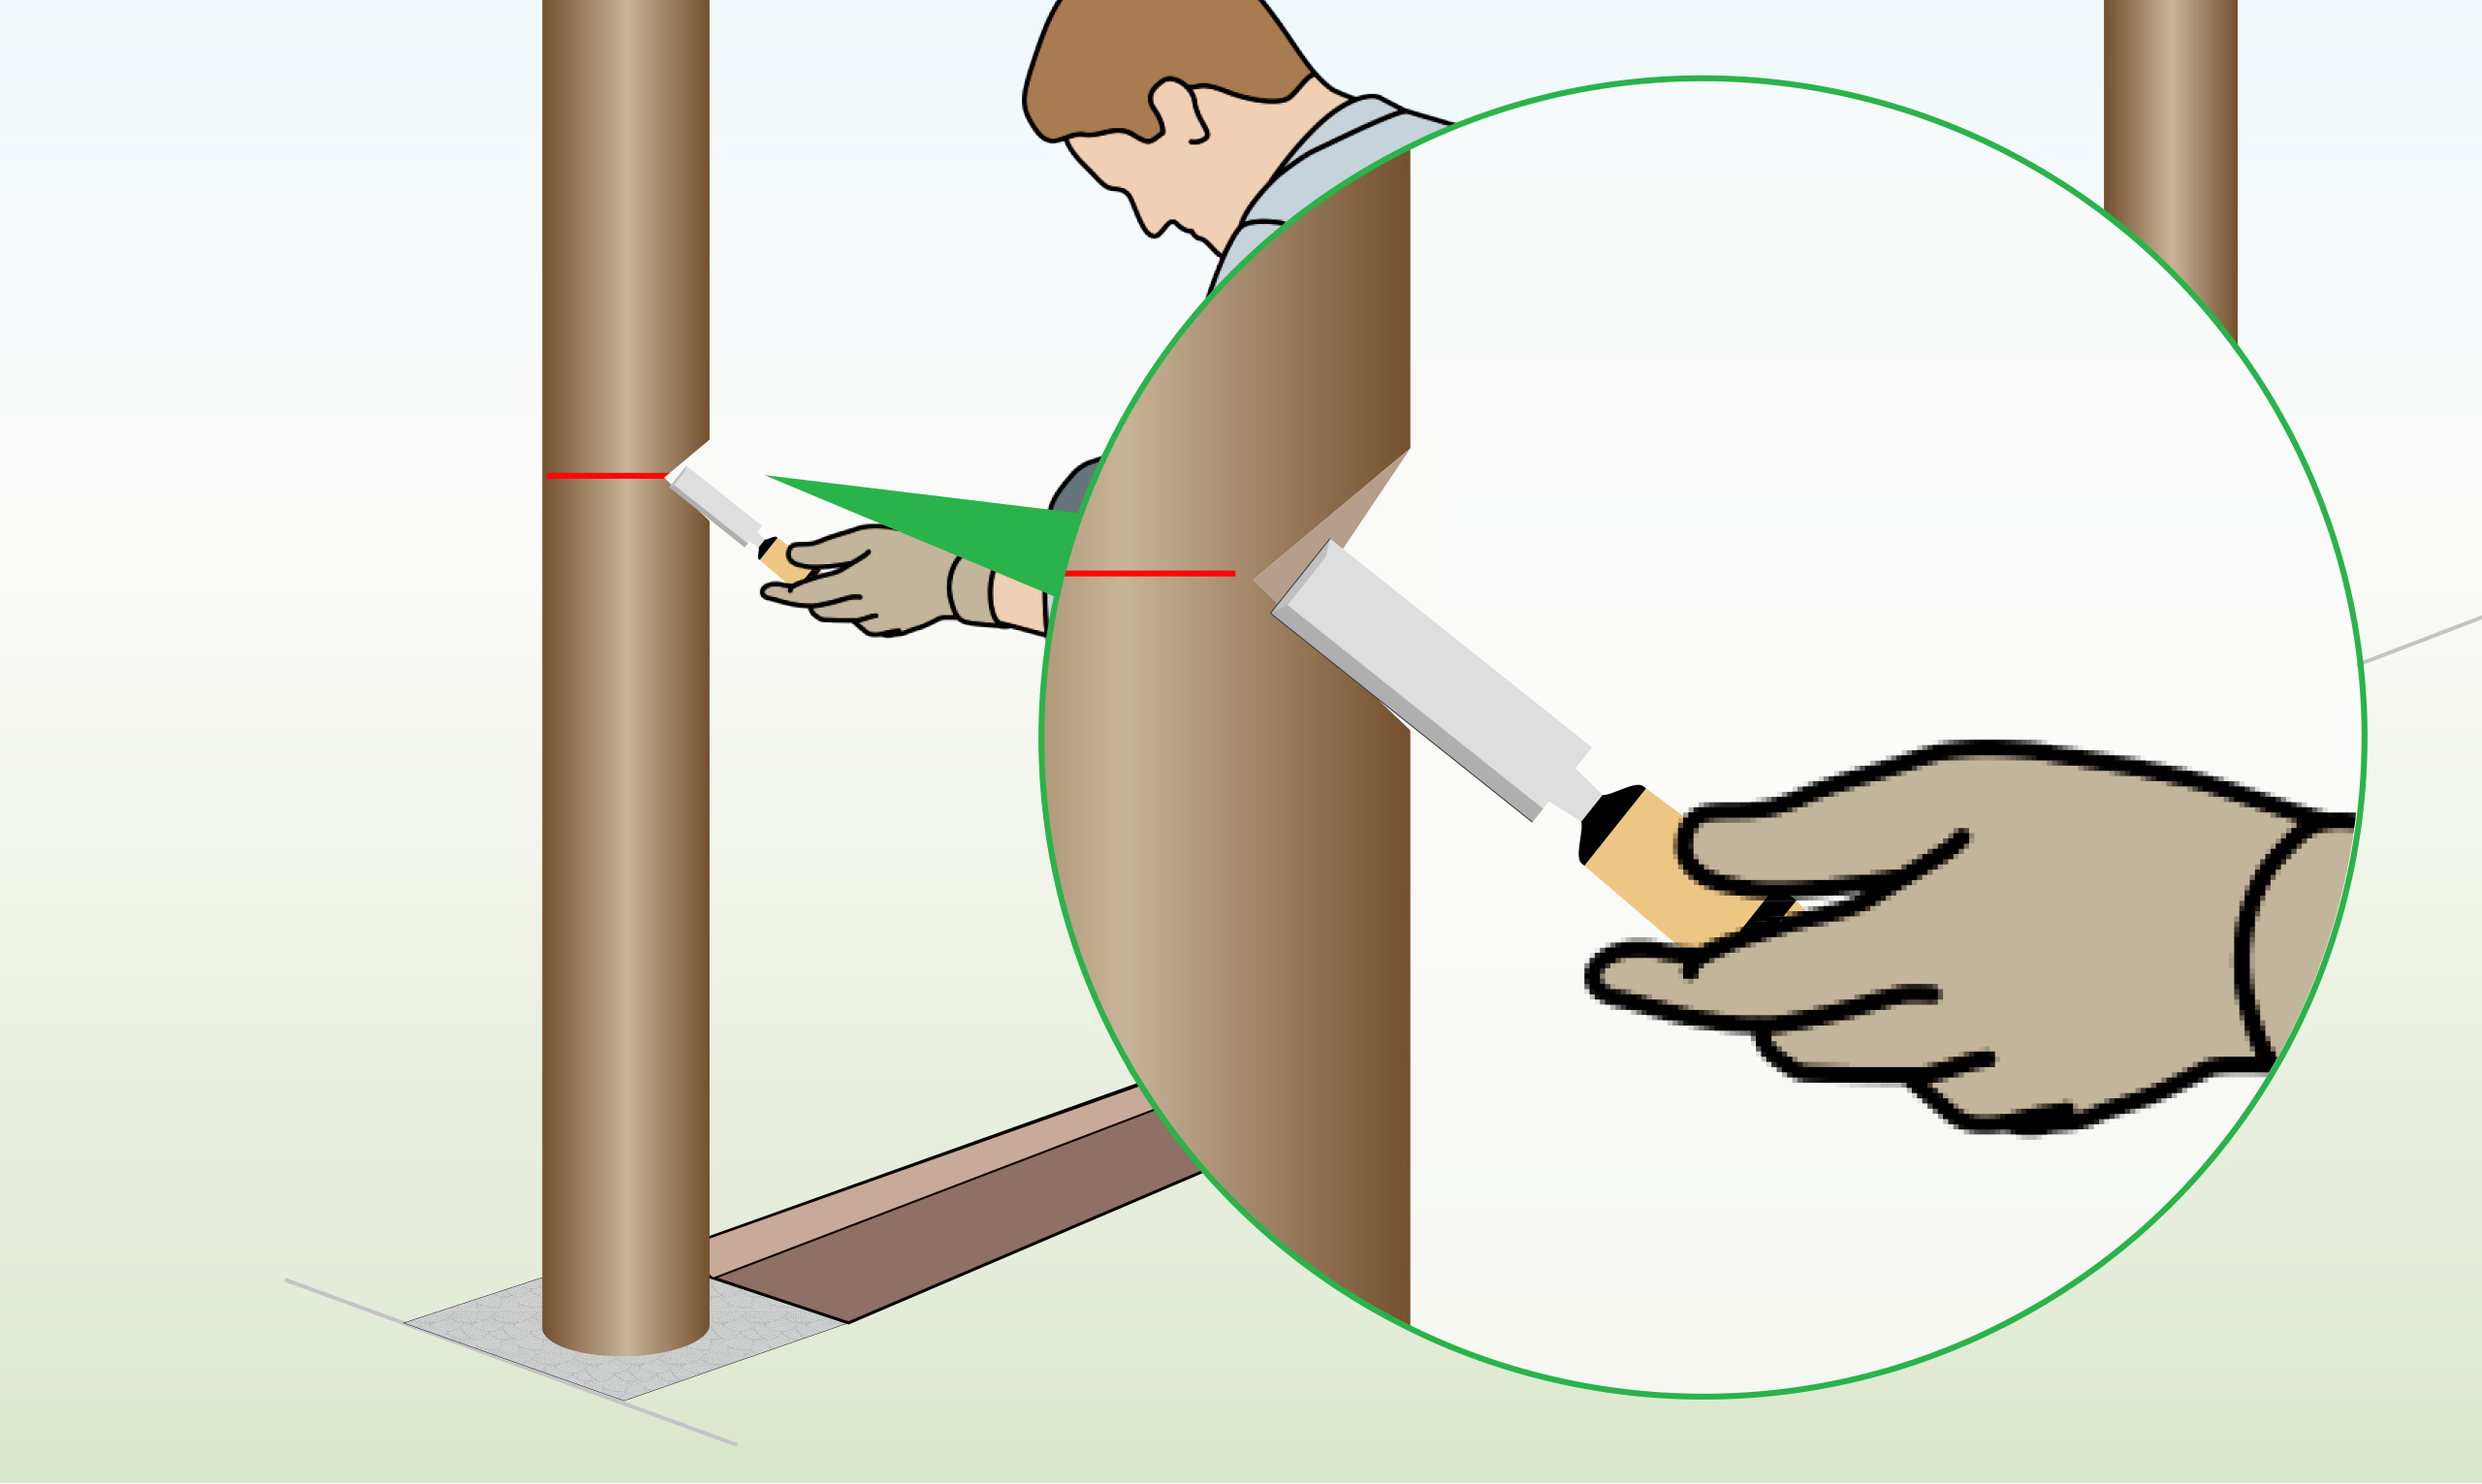
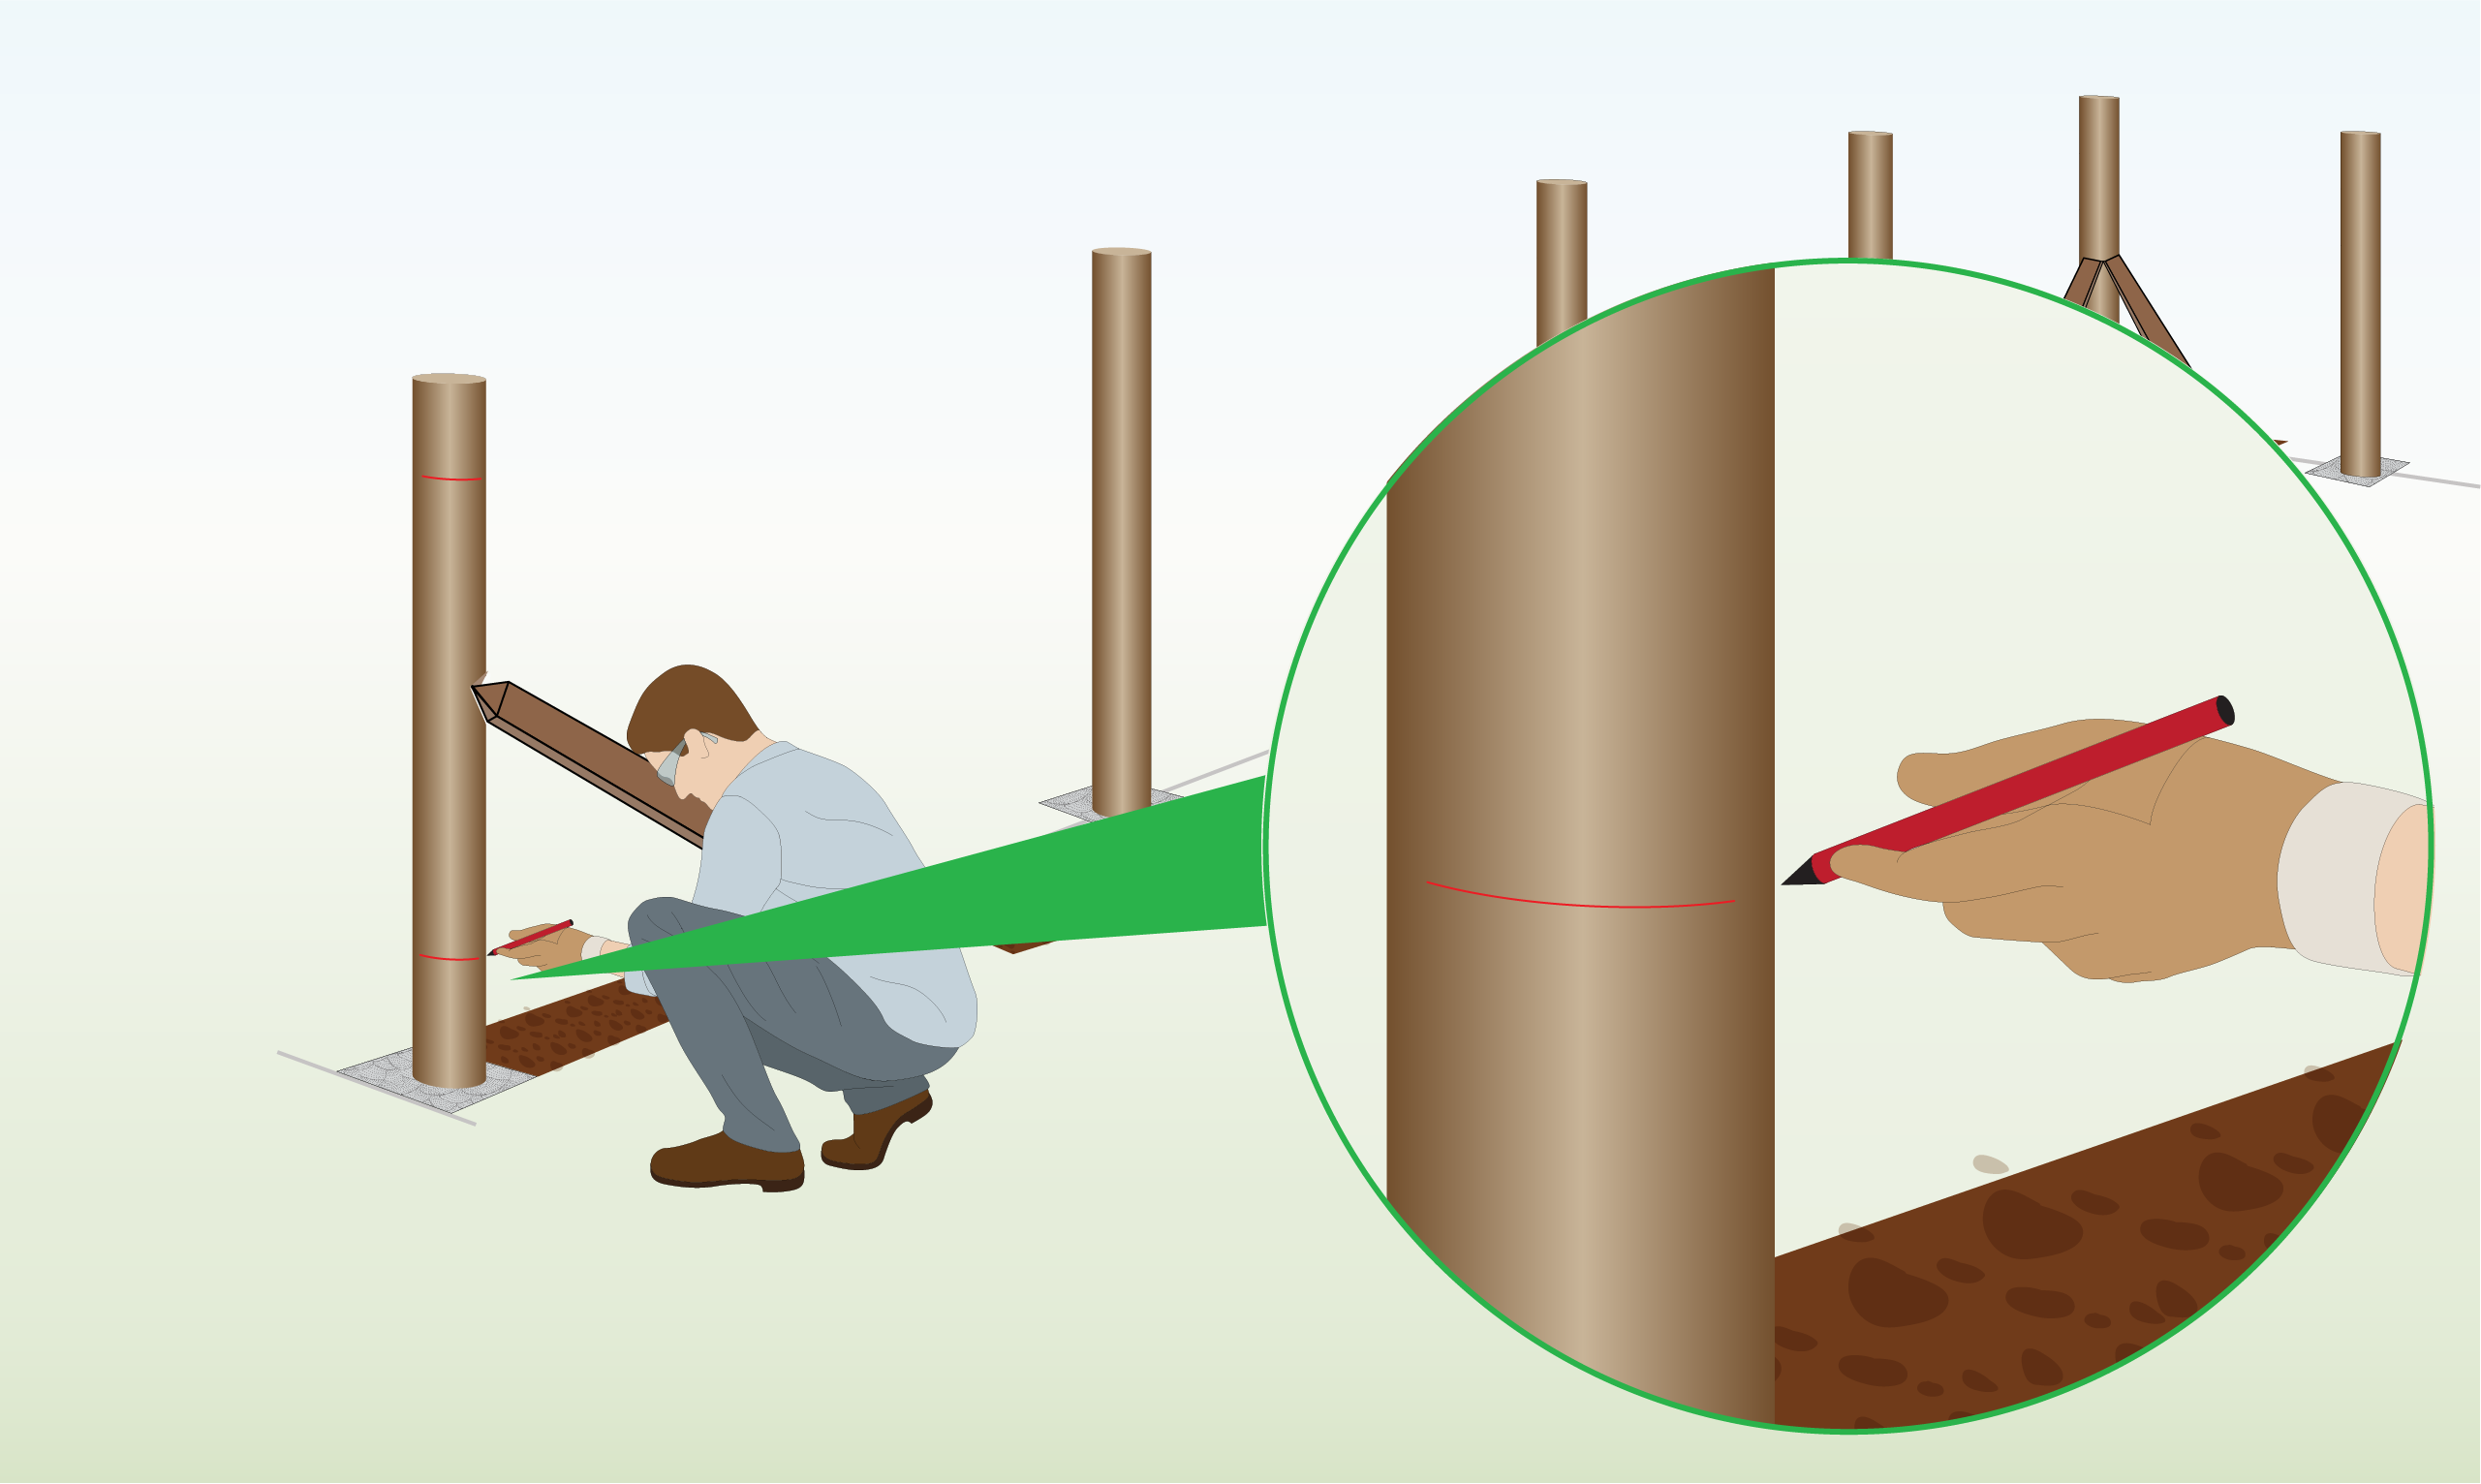
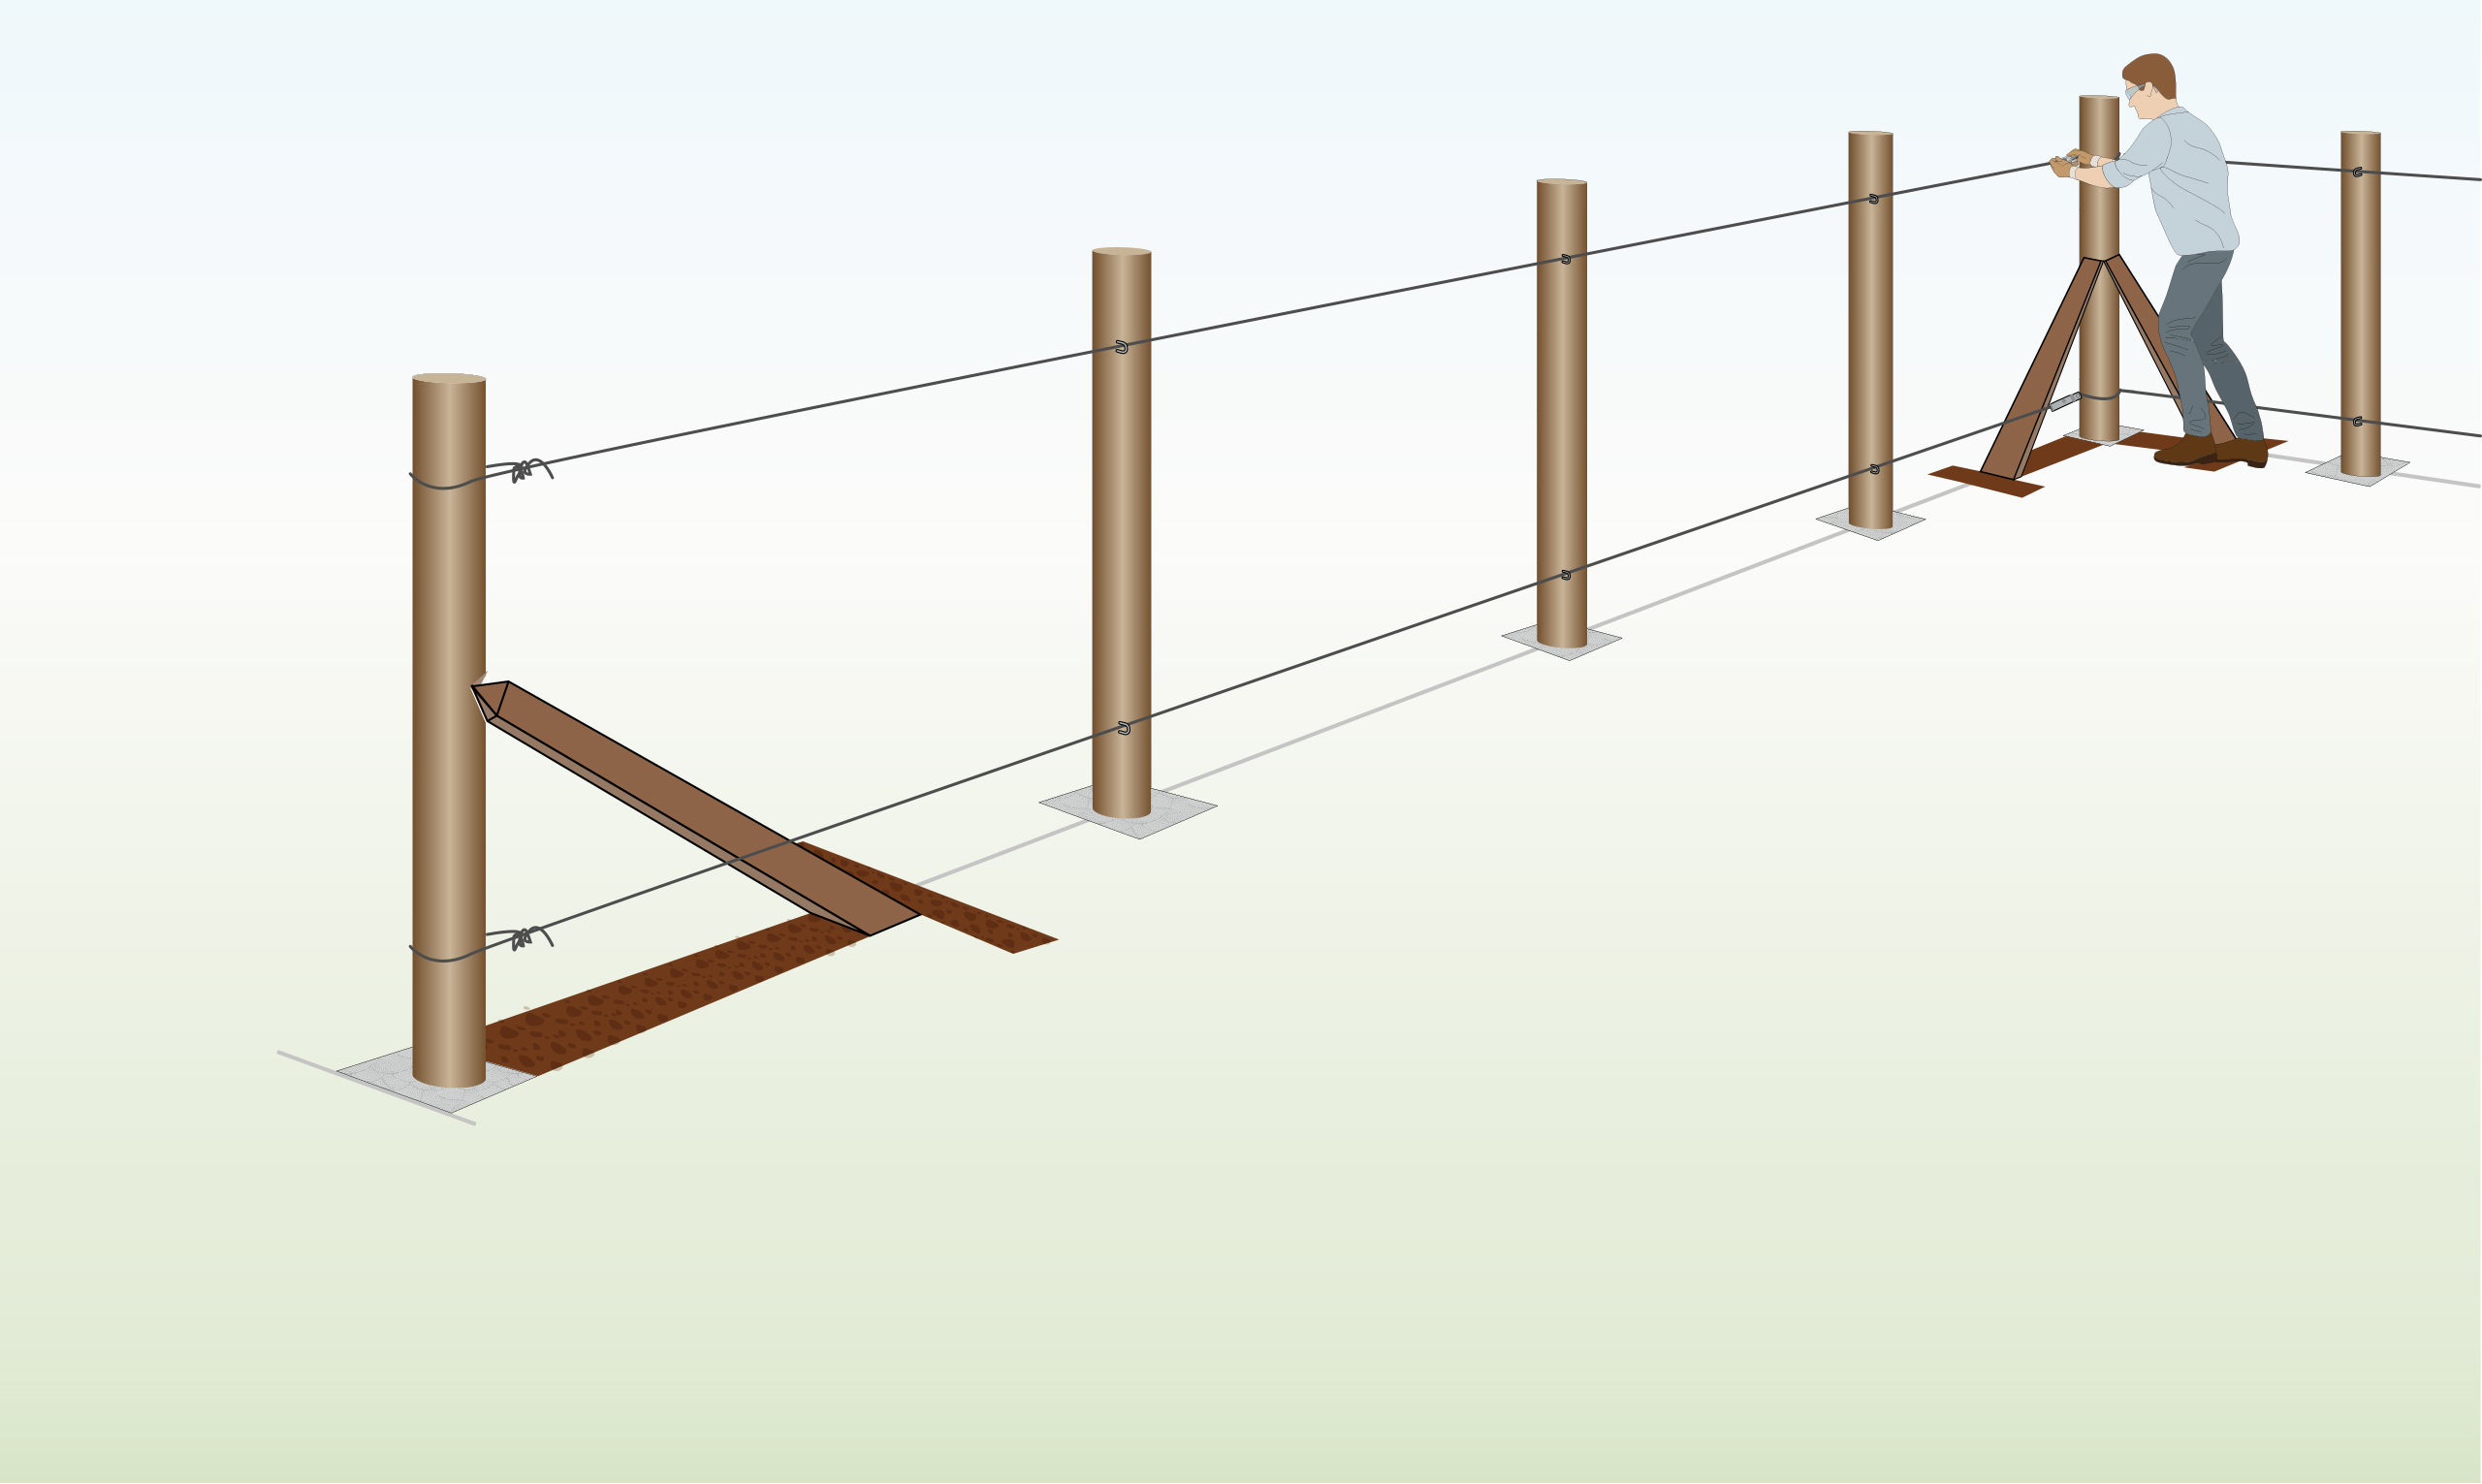
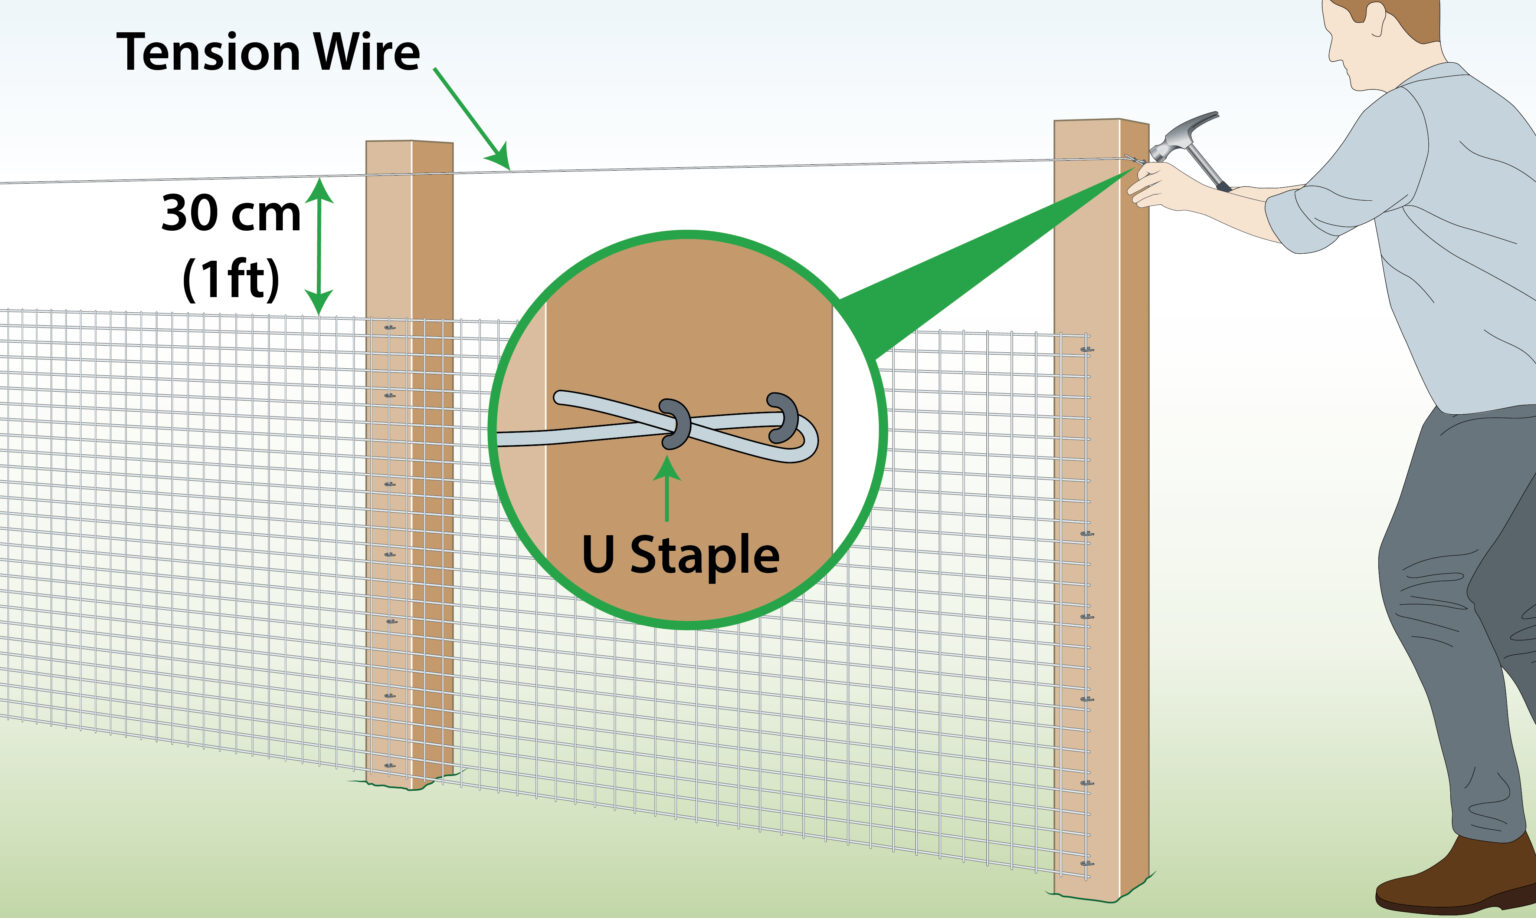
Step 9 – Mark Tension Wire Location
Mark the location for the tension wire on your posts.
– 2 lines are enough for heights up to 1.2 metres. Place at the top and bottom
– 3 lines are needed above 1.2 metres in height. Place at the top, middle and bottom
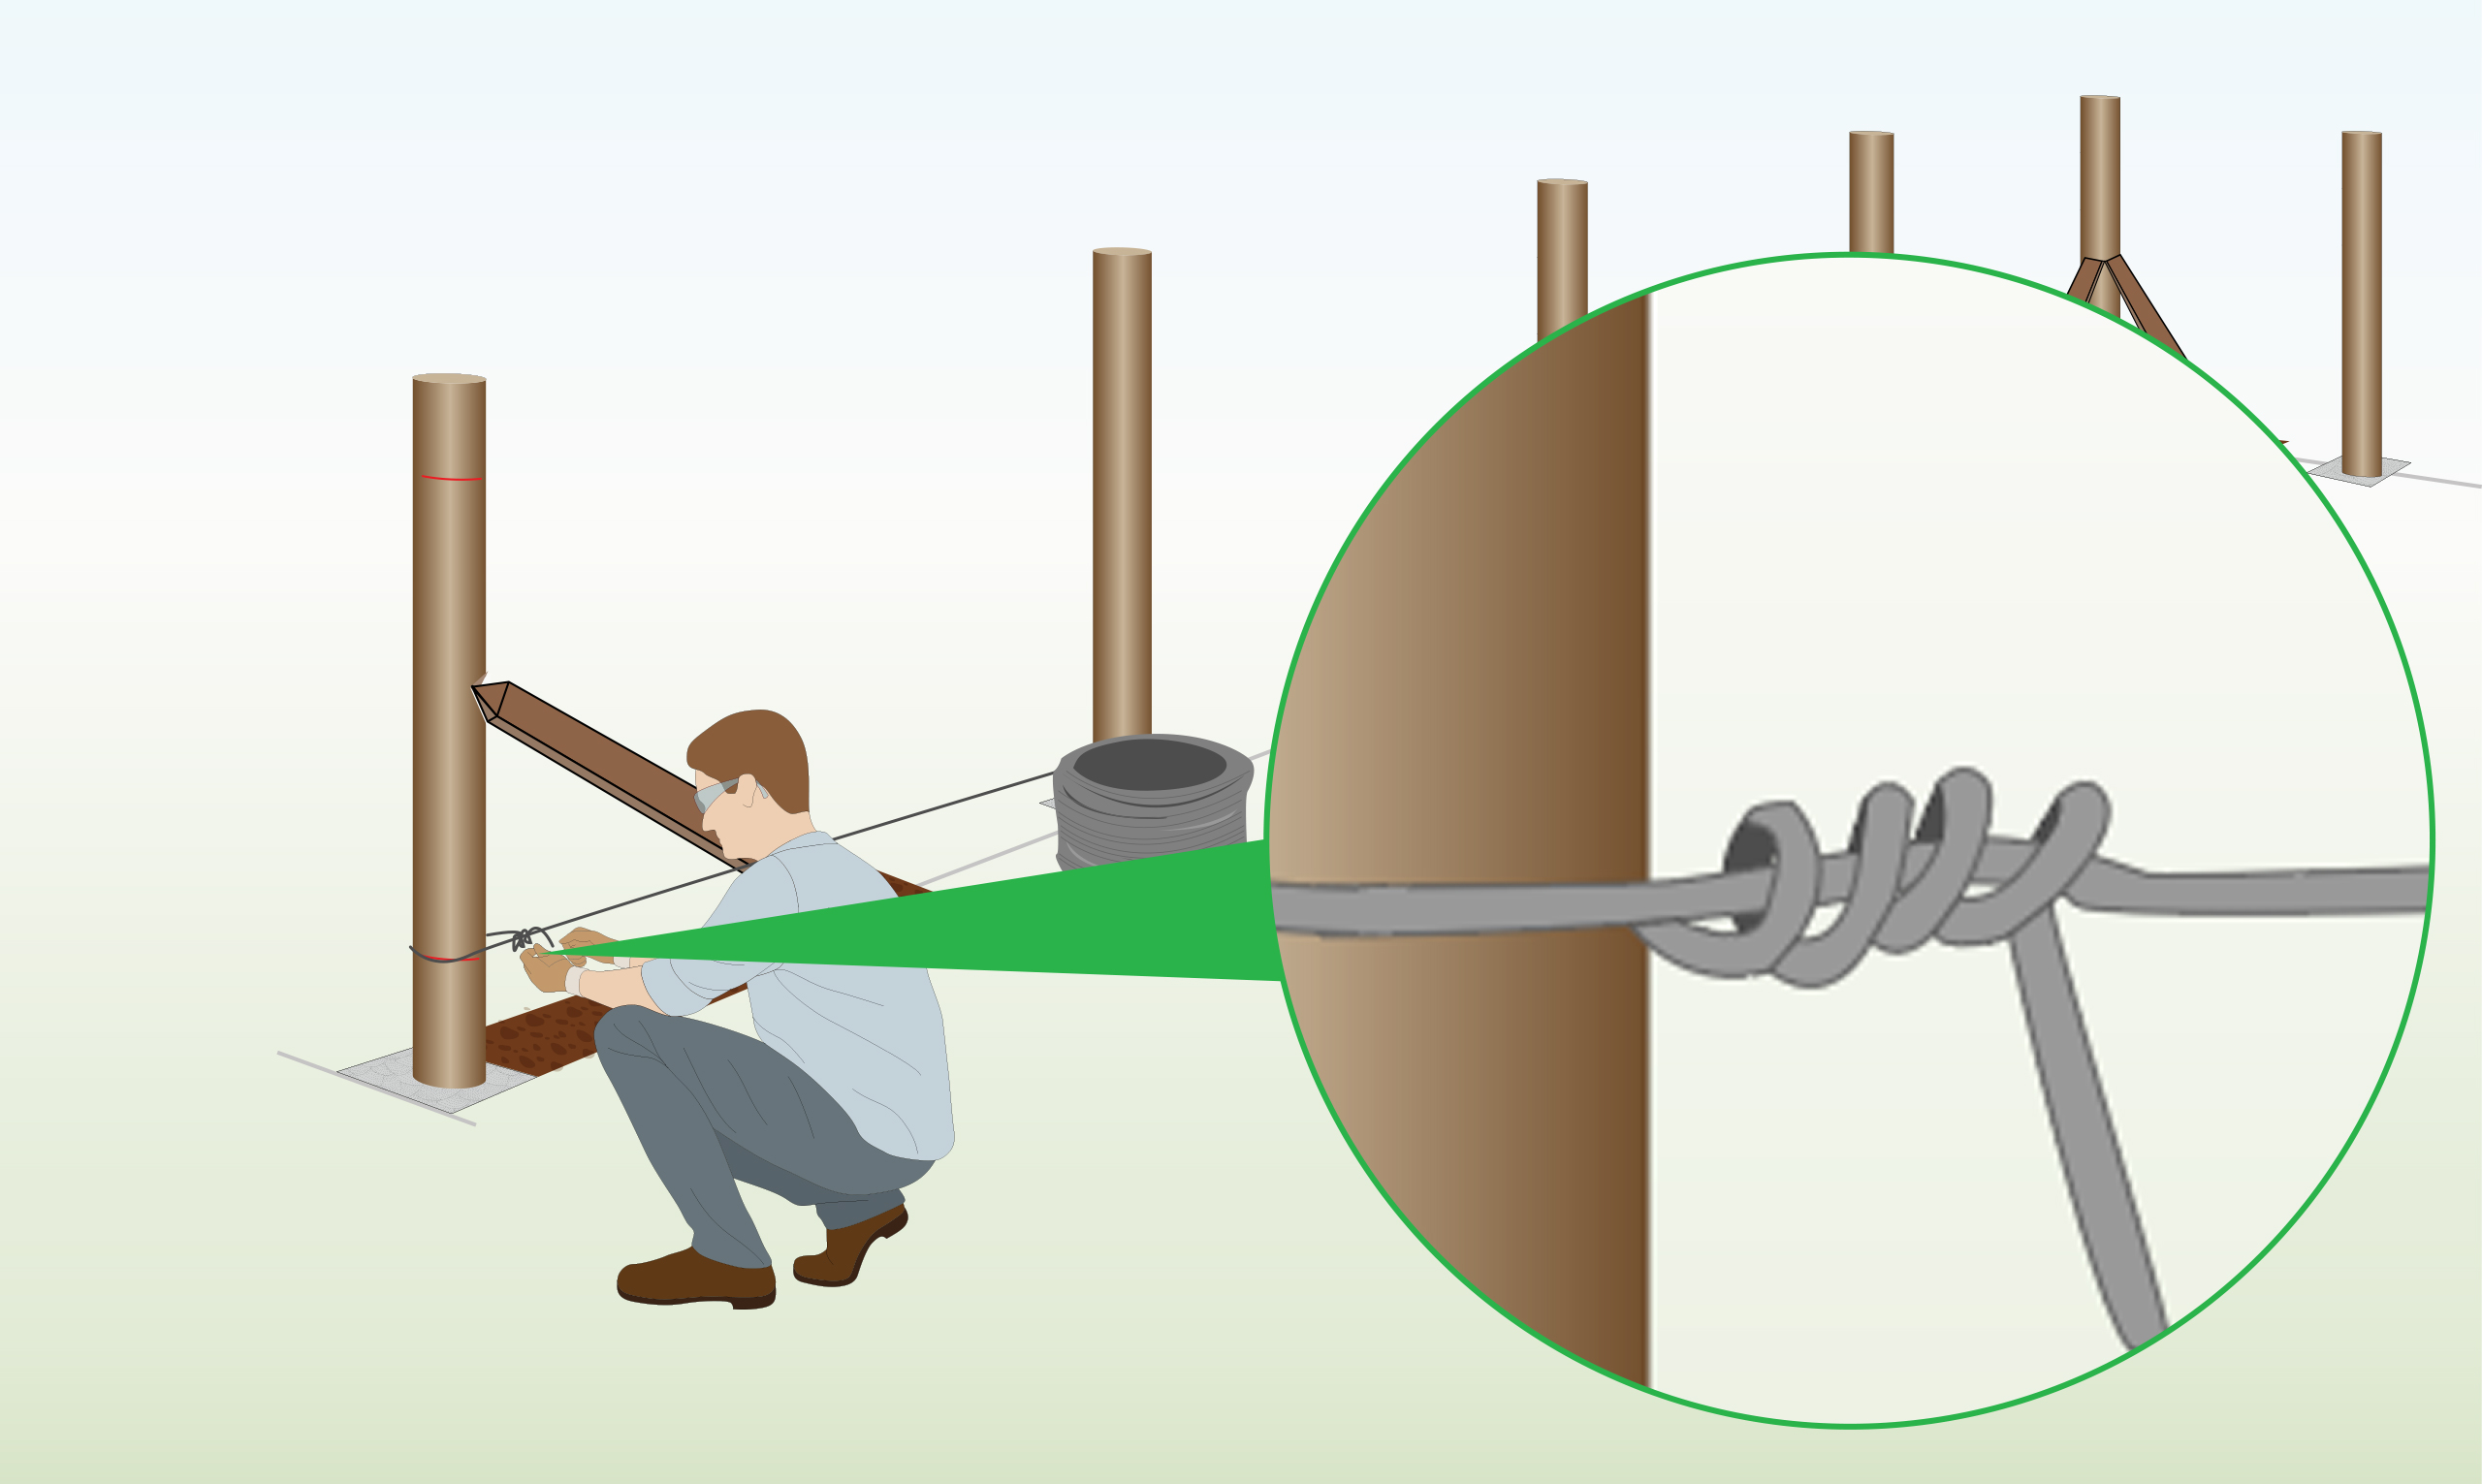
Step 10 – Attach Wire to First Post
Attach the tension wire to the first post by looping it around the post, and wind it around itself 4-5 times.
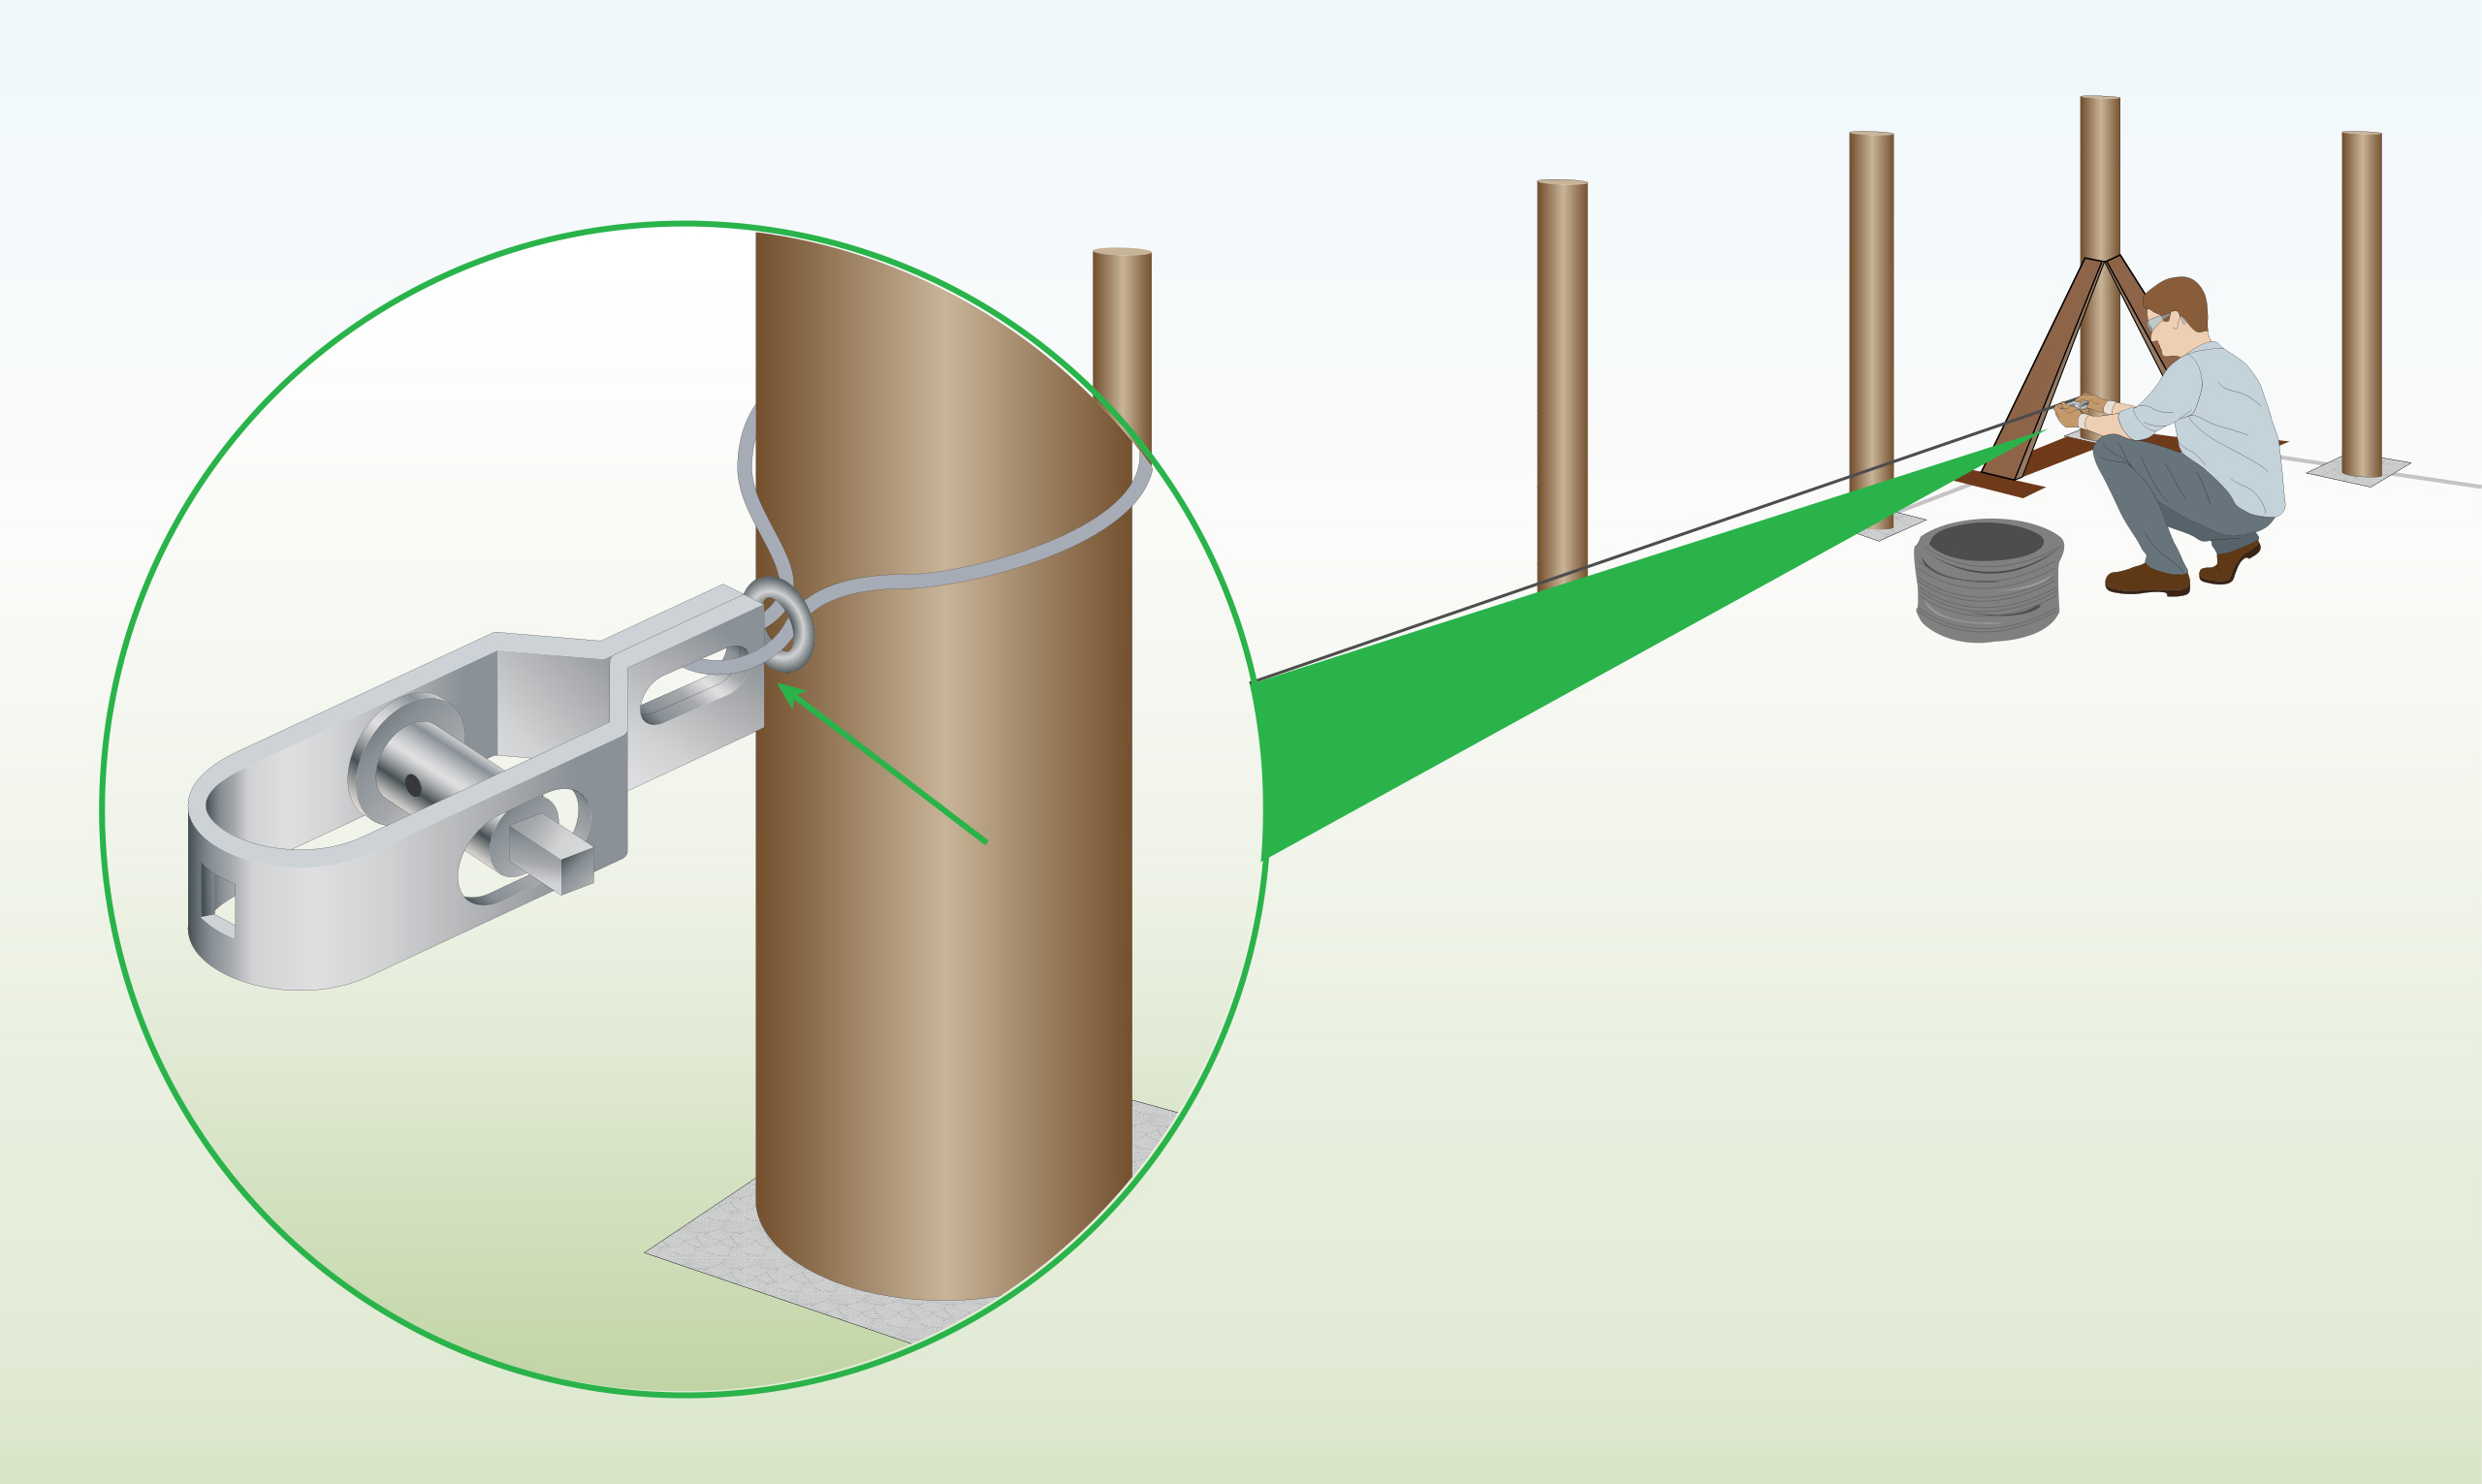
Step 11 – Secure Radisseur to Last Post
Attach a radisseur to the last post
Note: skip ahead to step 14 if you don’t have a radisseur.
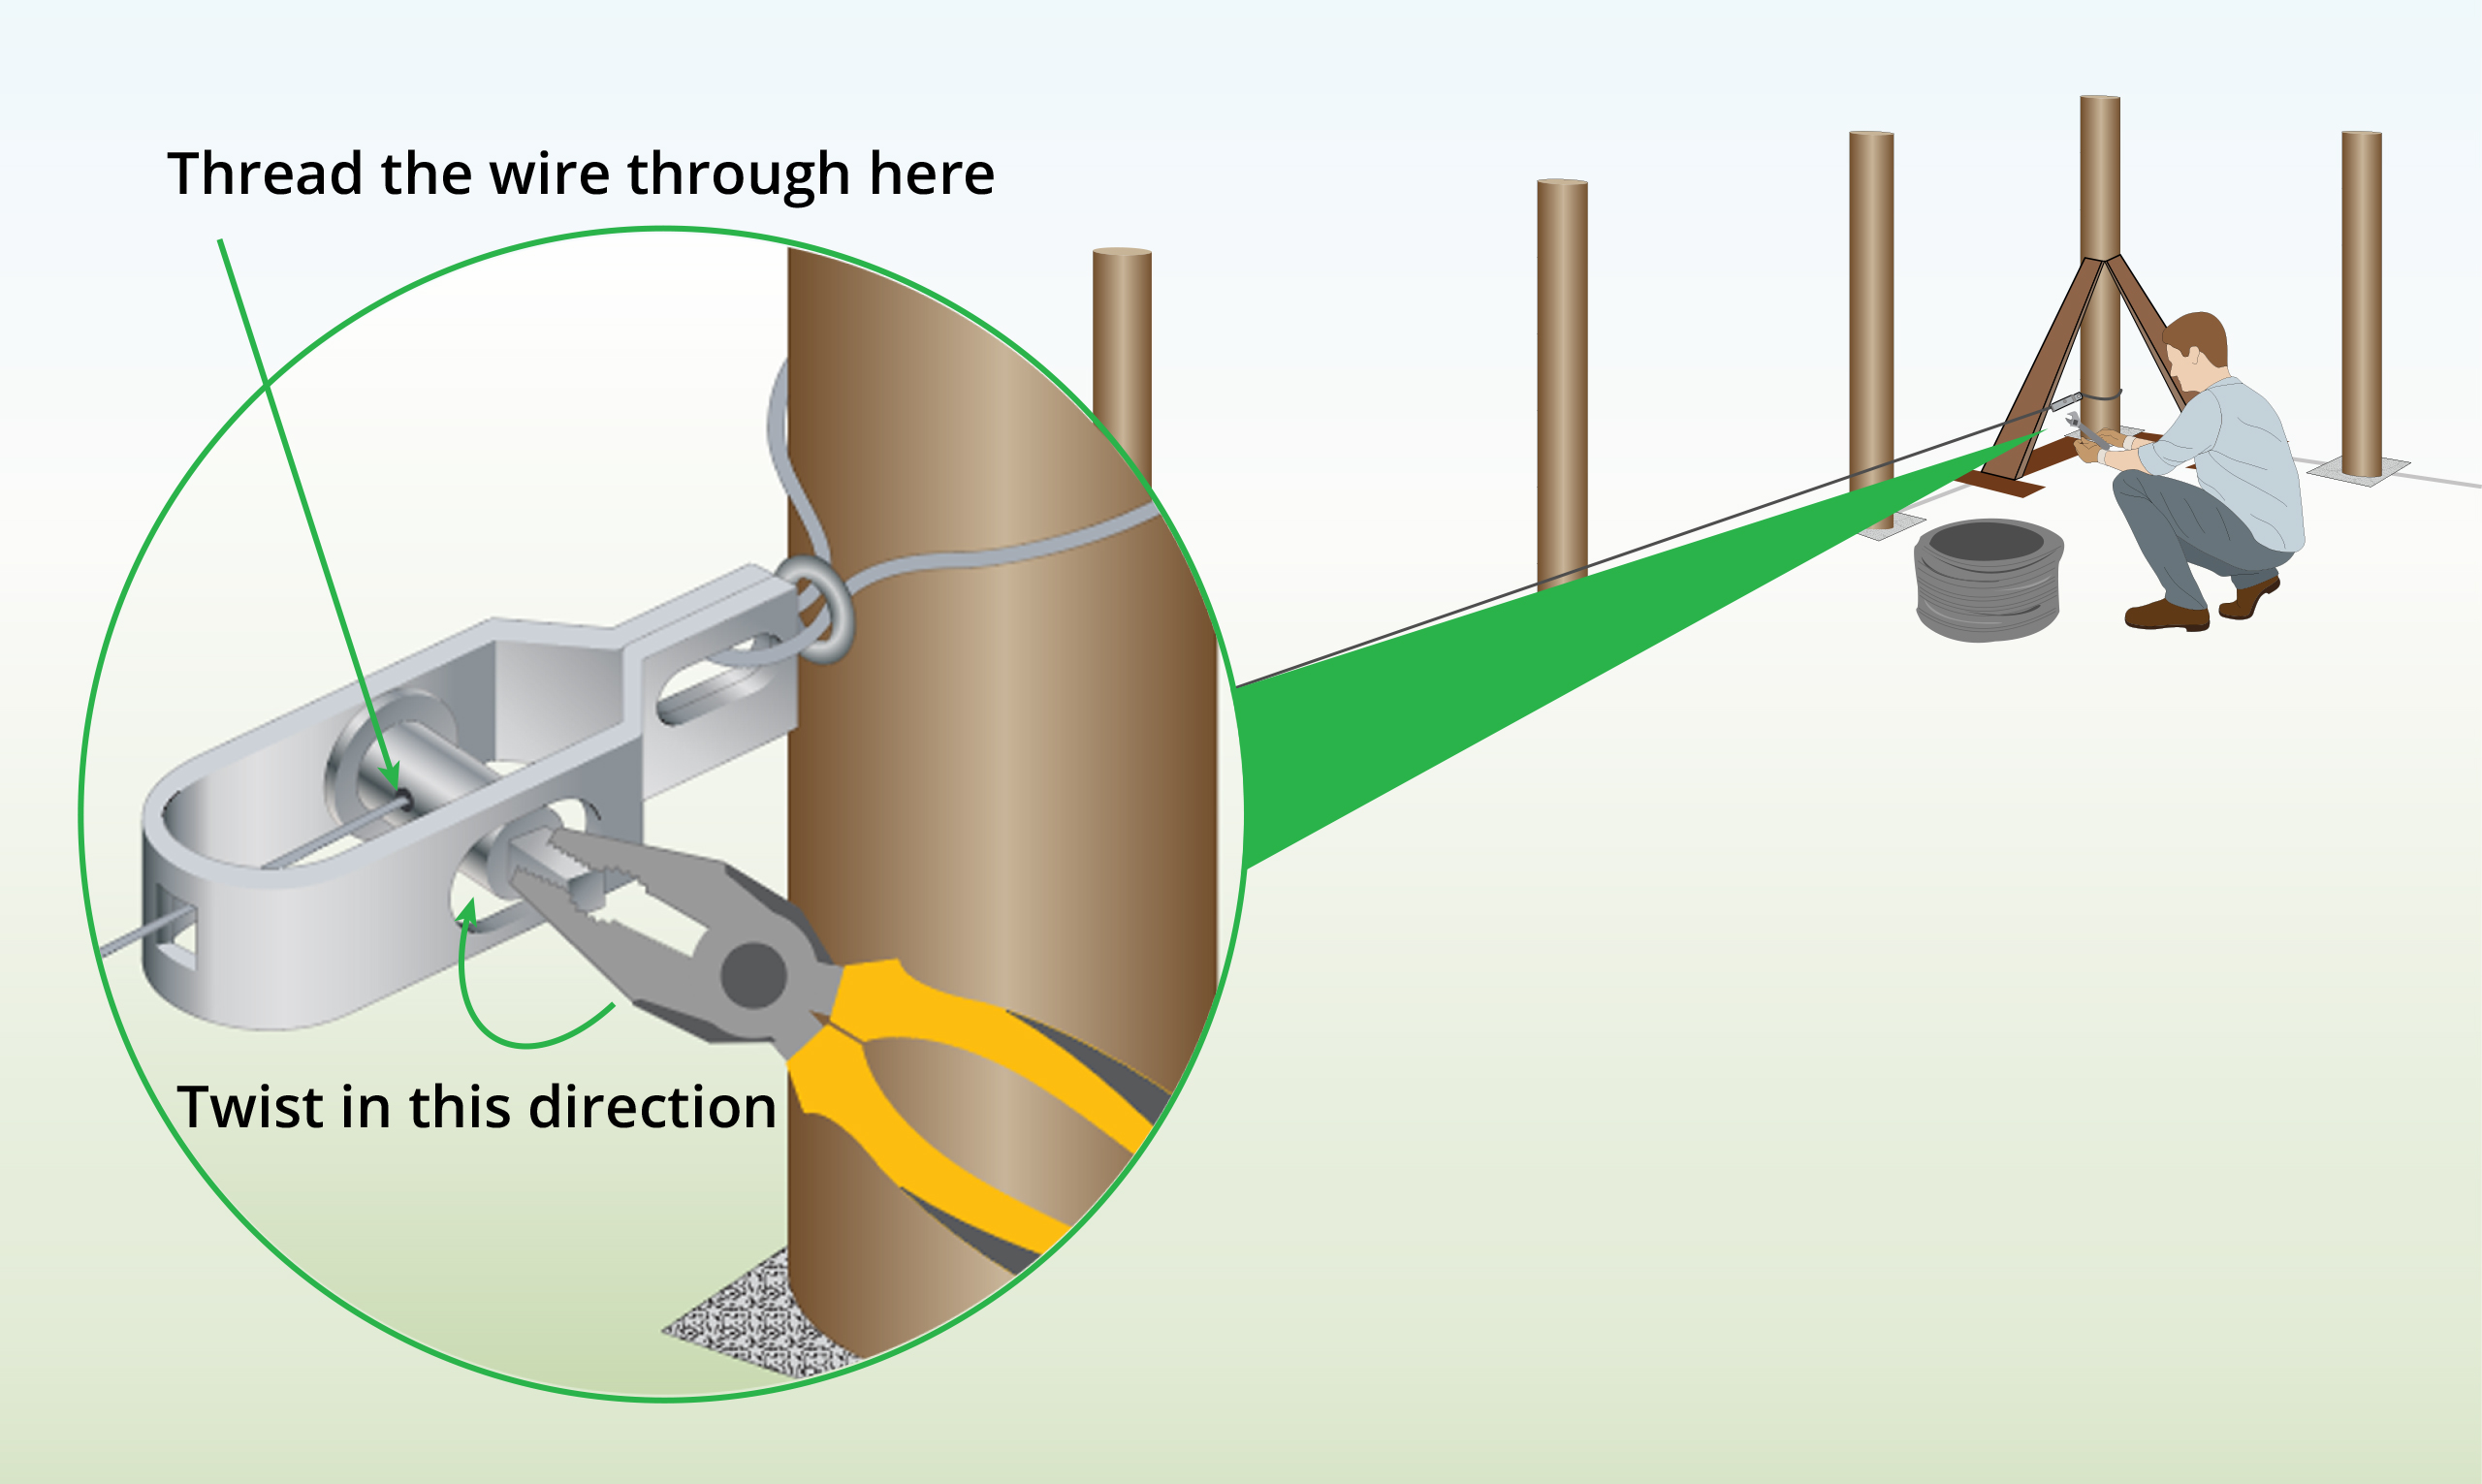
Step 12 – Secure Wire to Radisseur
Pull the tension wire from the first post to the last post then pass it through the hole located at the centre of the radisseur.
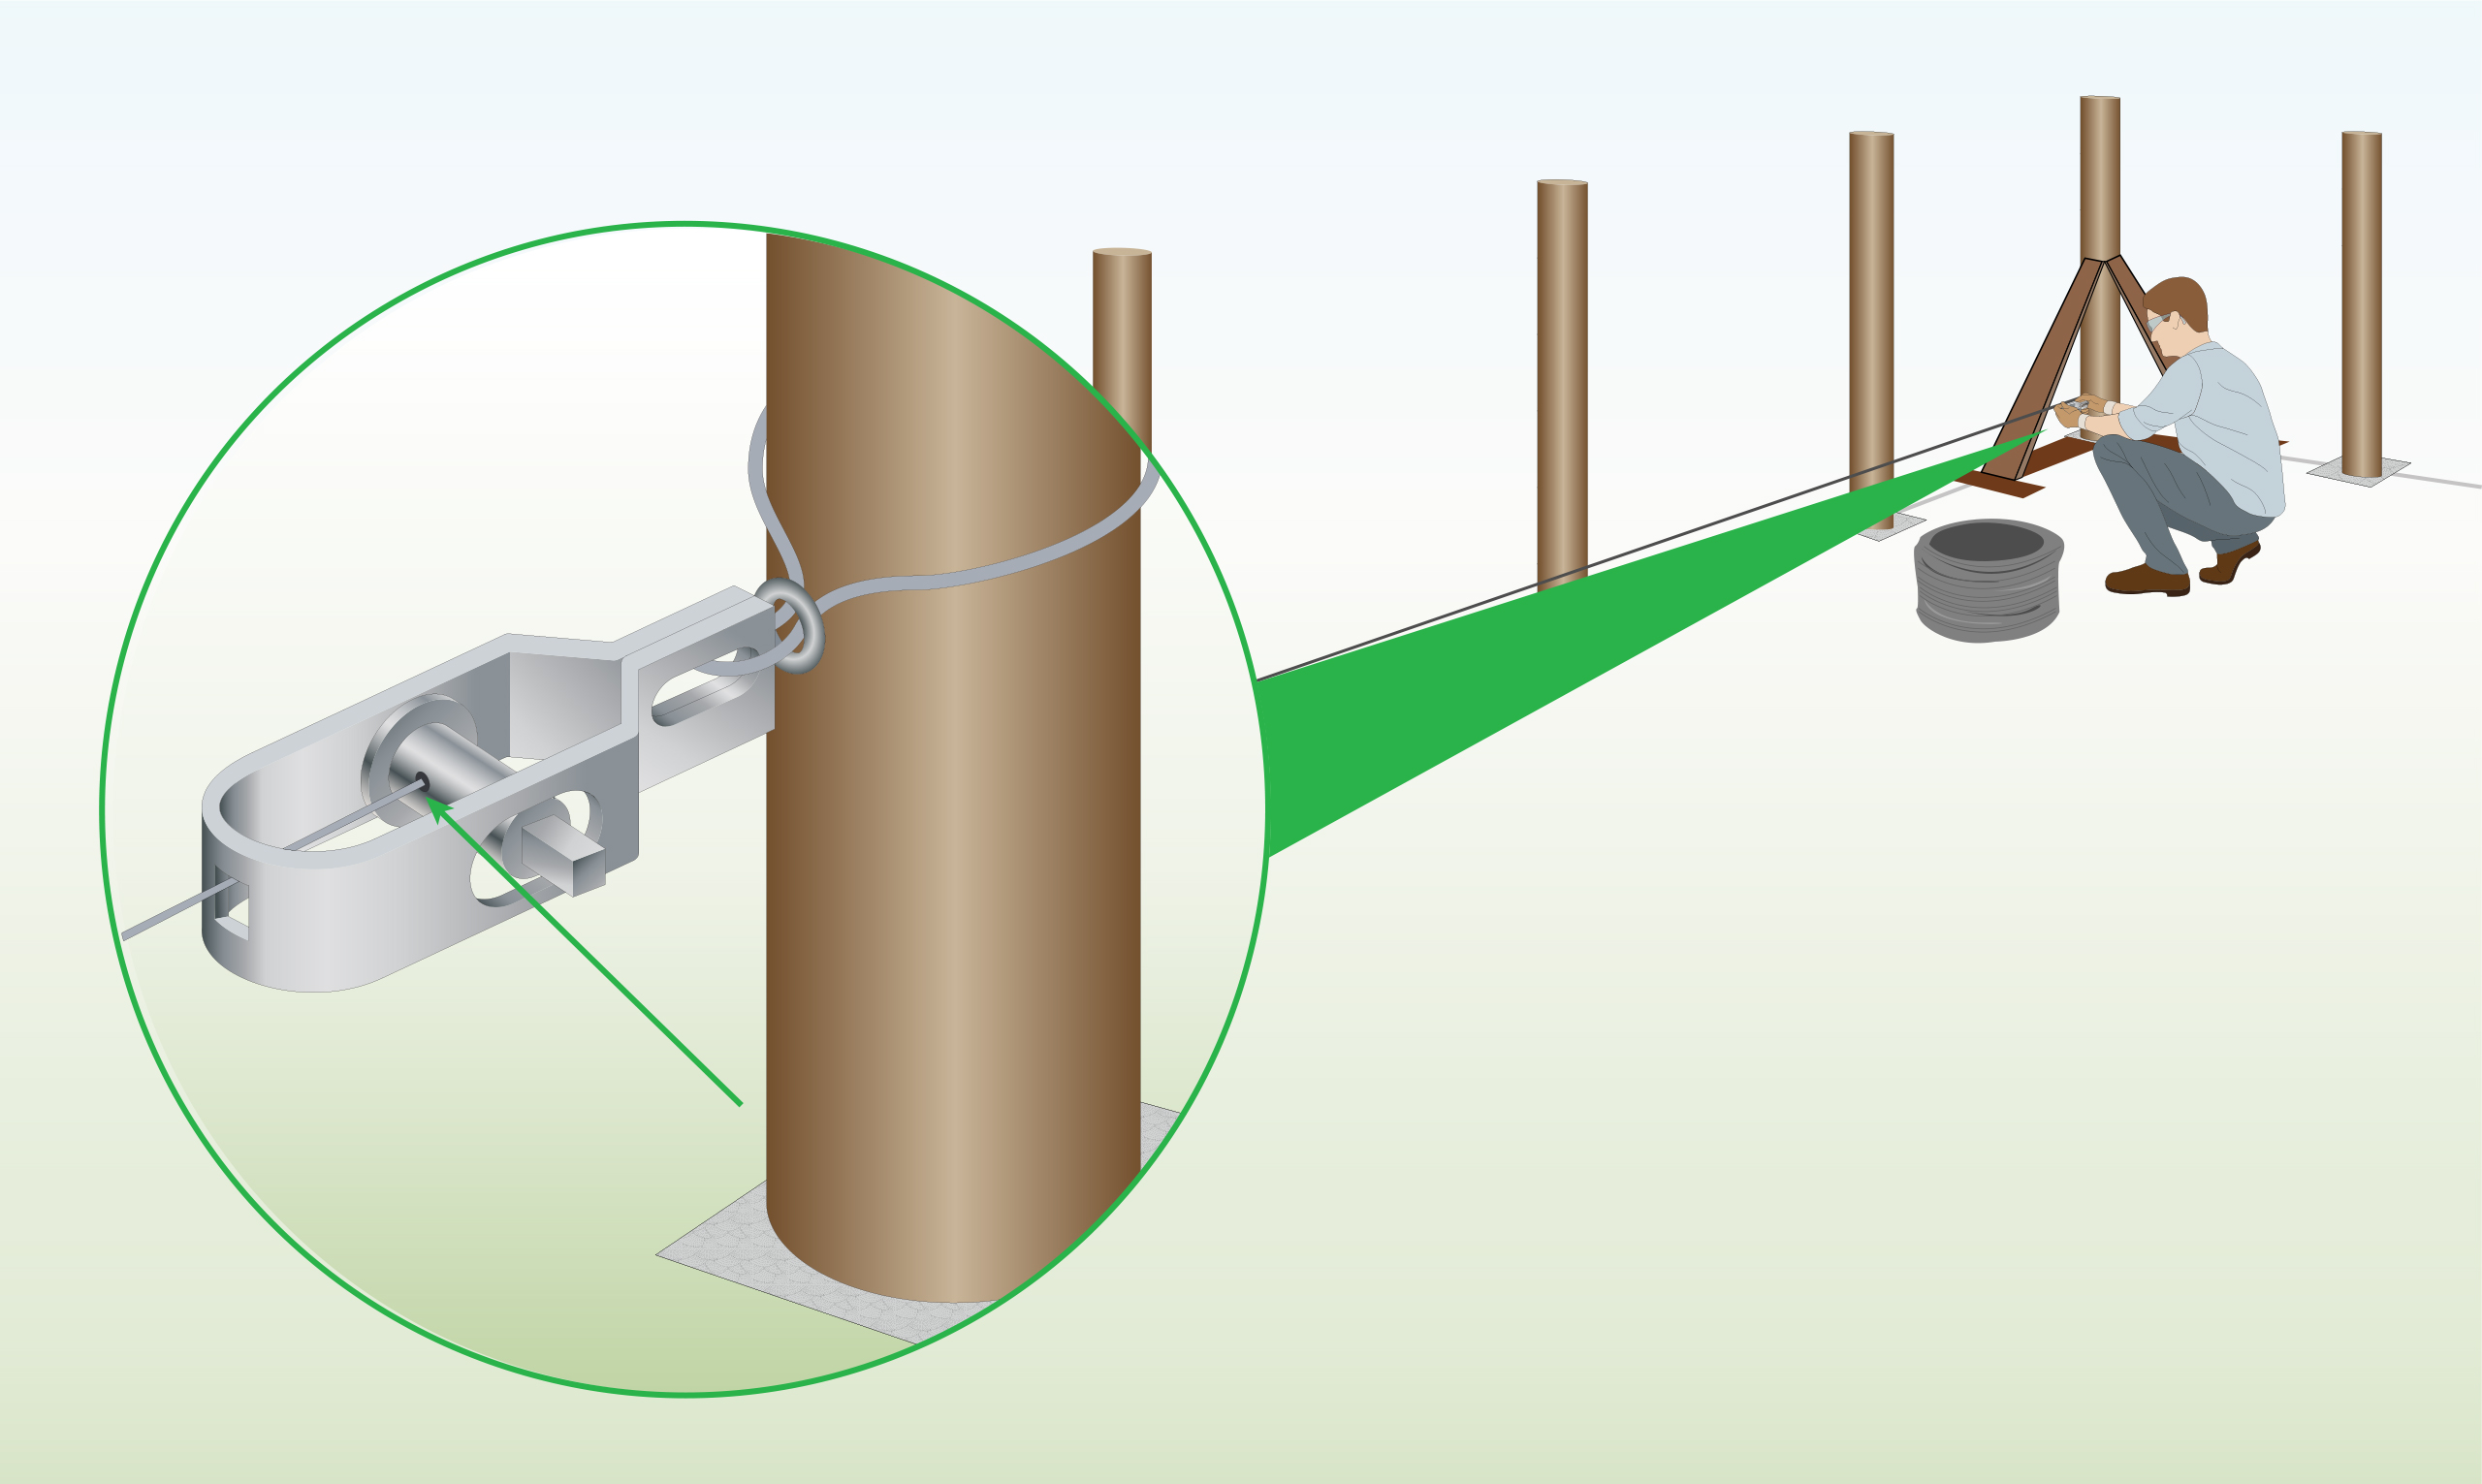
Step 13 – Tension the Wire
Use pliers to turn the pin on the radisseur in a clockwise direction until the wire is tight/strained.
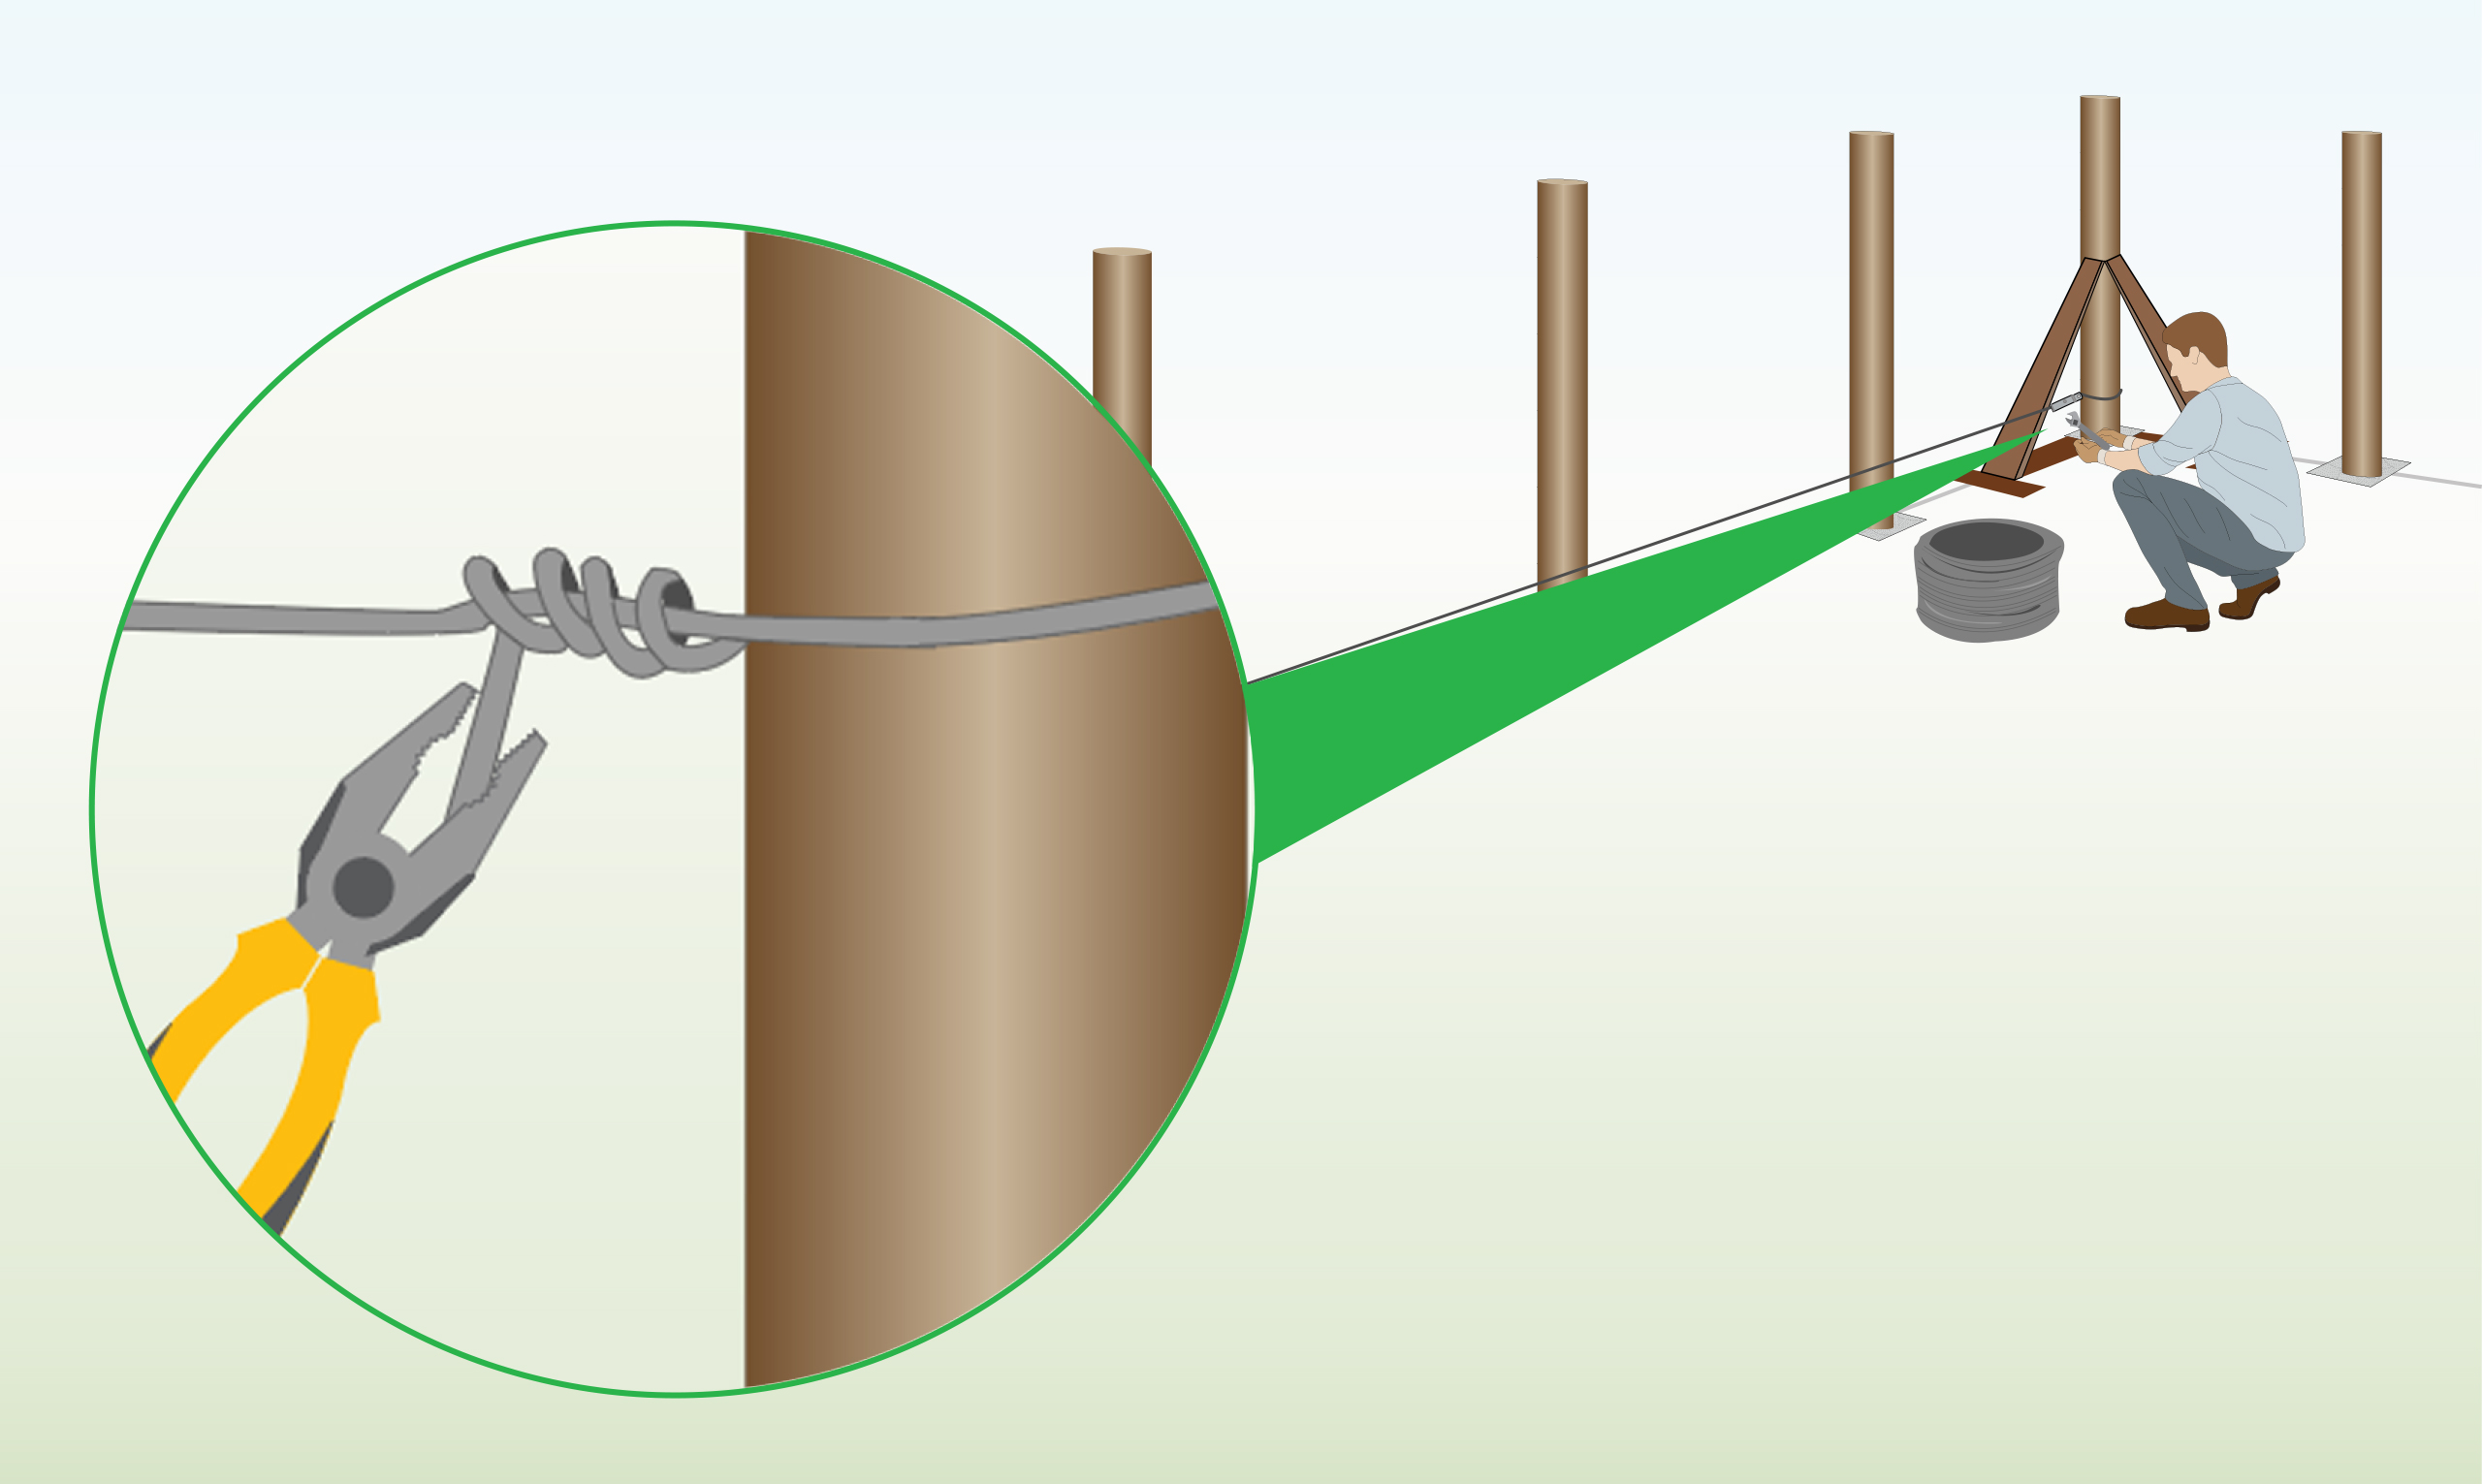
Step 14 – Tension Without Radisseur
If you do not have a raddiseur, you can twist the tension wire around itself 4-5 times.
This approach will lead to reduced tension in contrast to using a radisseur.
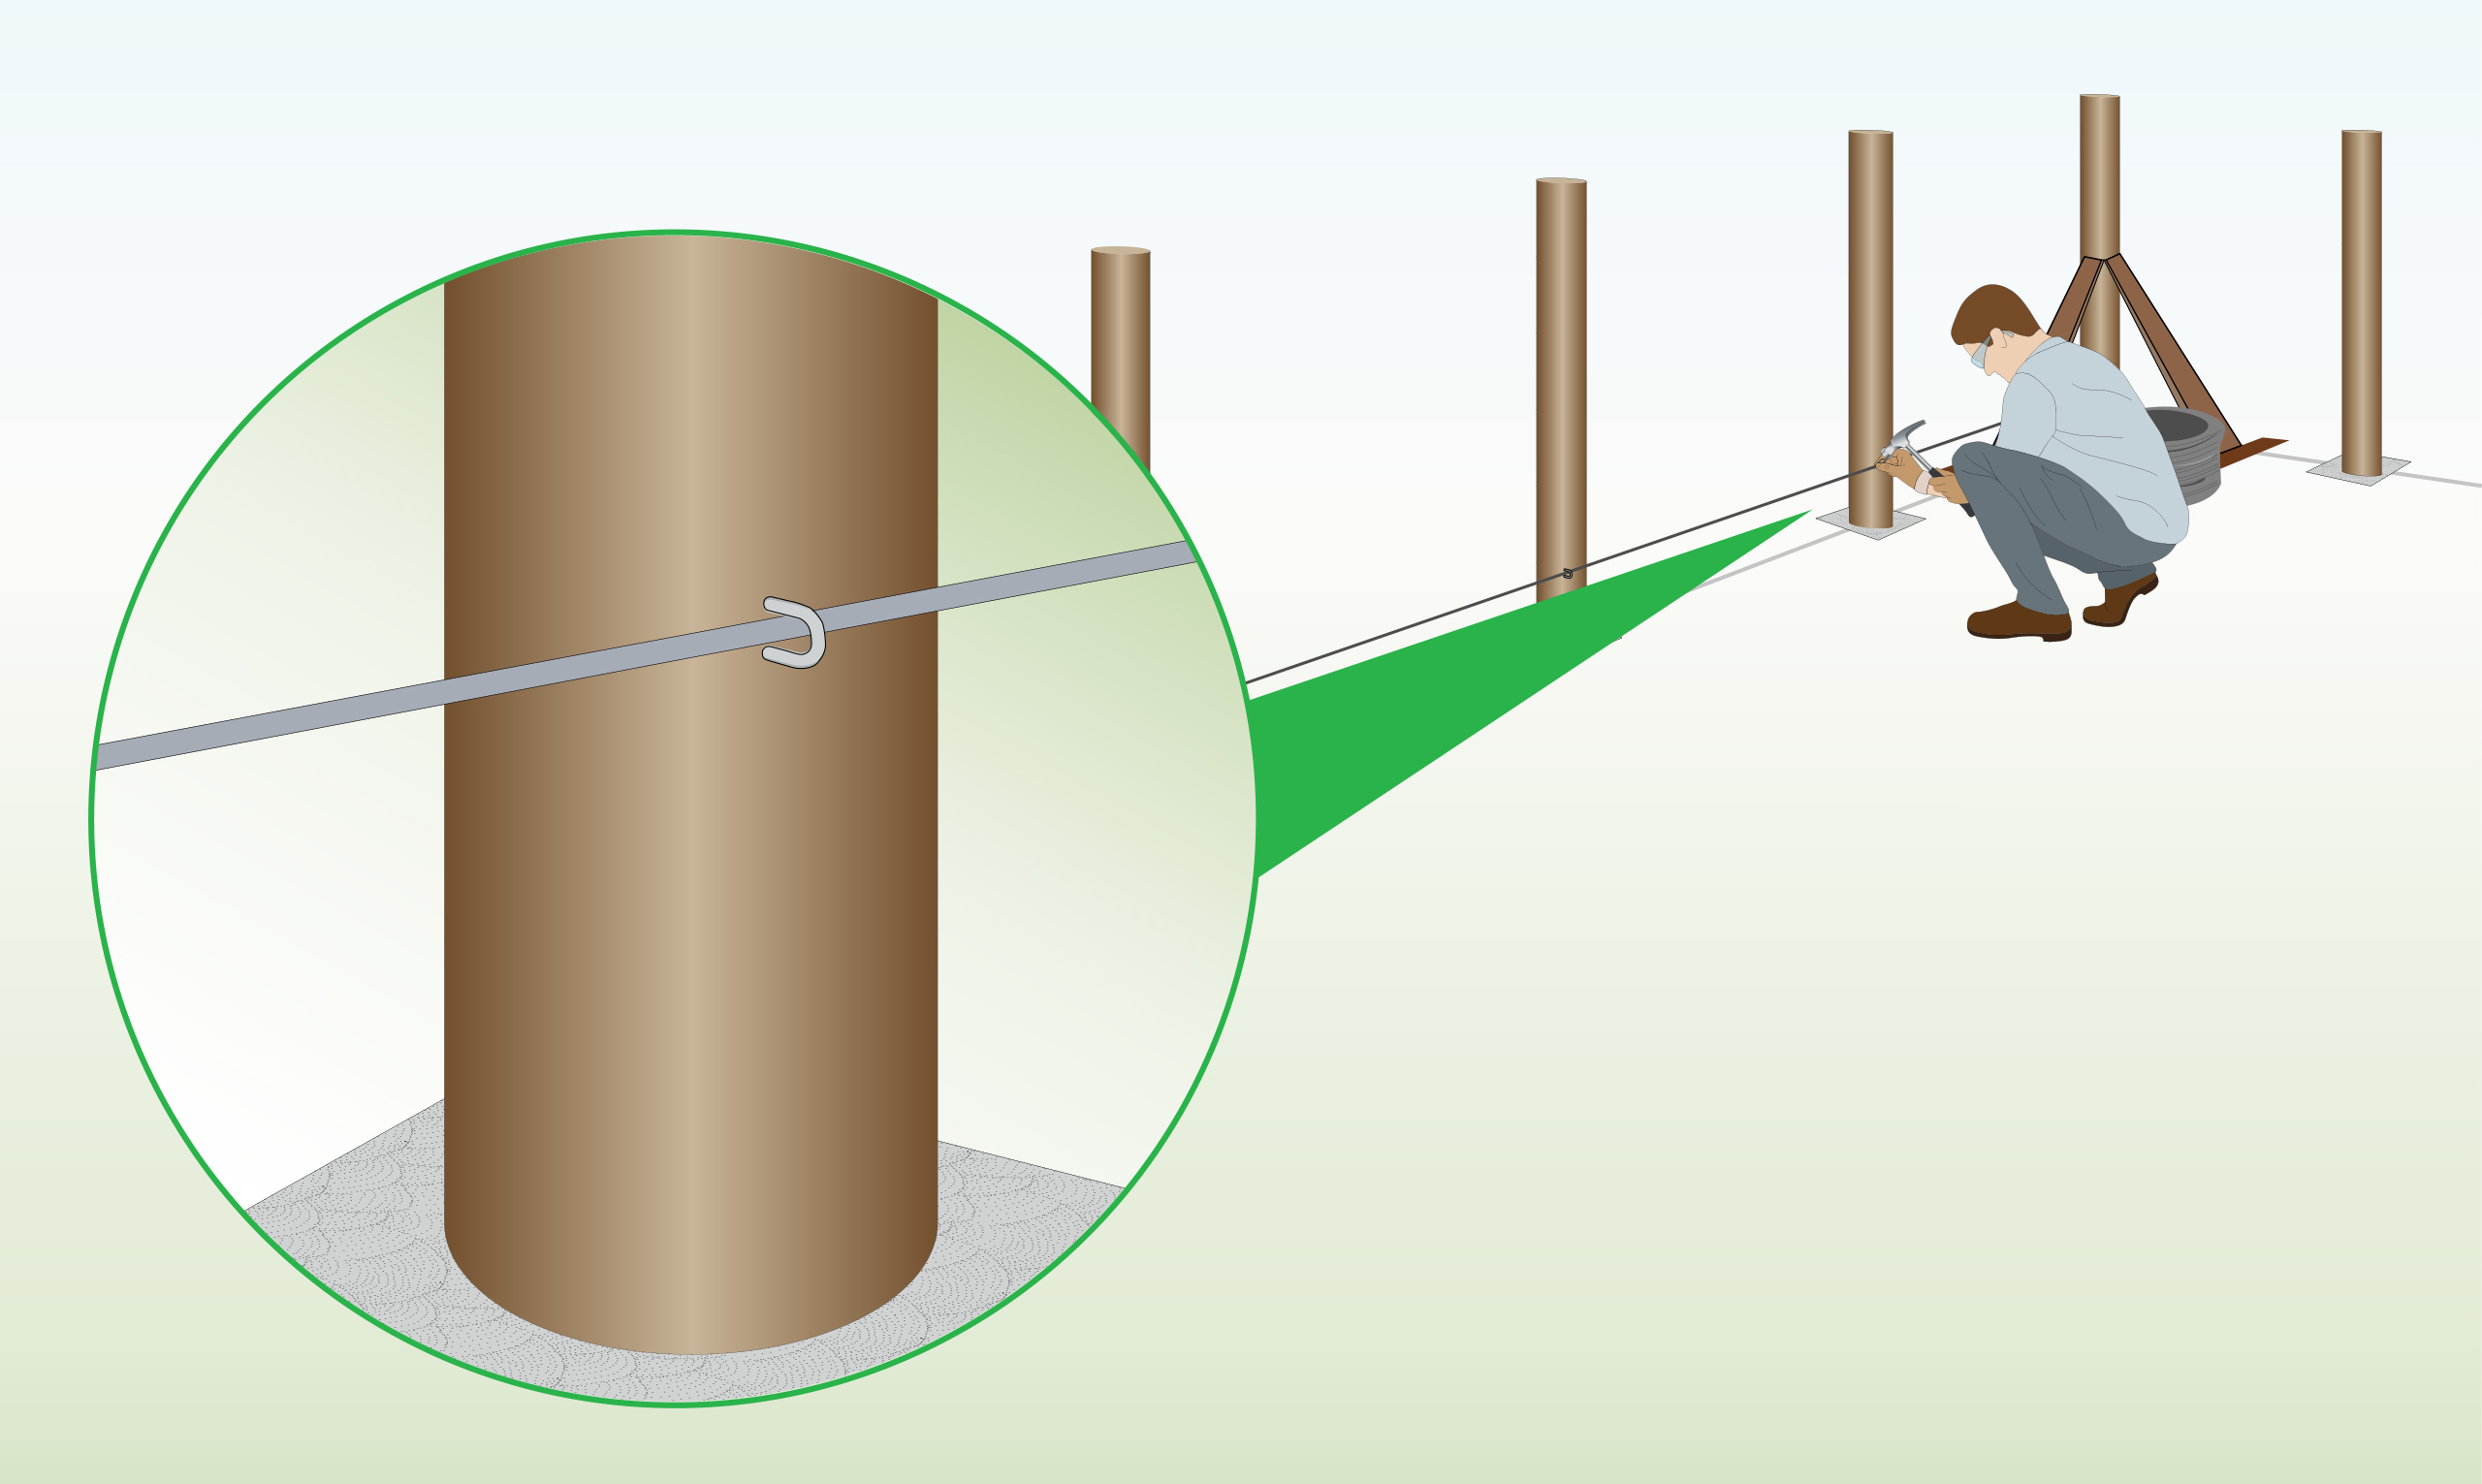
Step 15 – Secure to Middle Posts
Secure the wire to the middle posts with staples, leaving a small space to accommodate some movement.
Step 16 – Repeat Steps 11-15
Attach the remaining tension lines by following steps 11-15.
Step 17 – Attach Mesh to End Post
Attach to the first post using staples. The pull taut and attach to the second post
Step 18 – Attach Mesh to Posts
Continue to pull taut past each post, then attach with staples.
Step 19 – Secure to Tension Wire
Fasten the tensioning wire to the fence at multiple points to keep the tension.
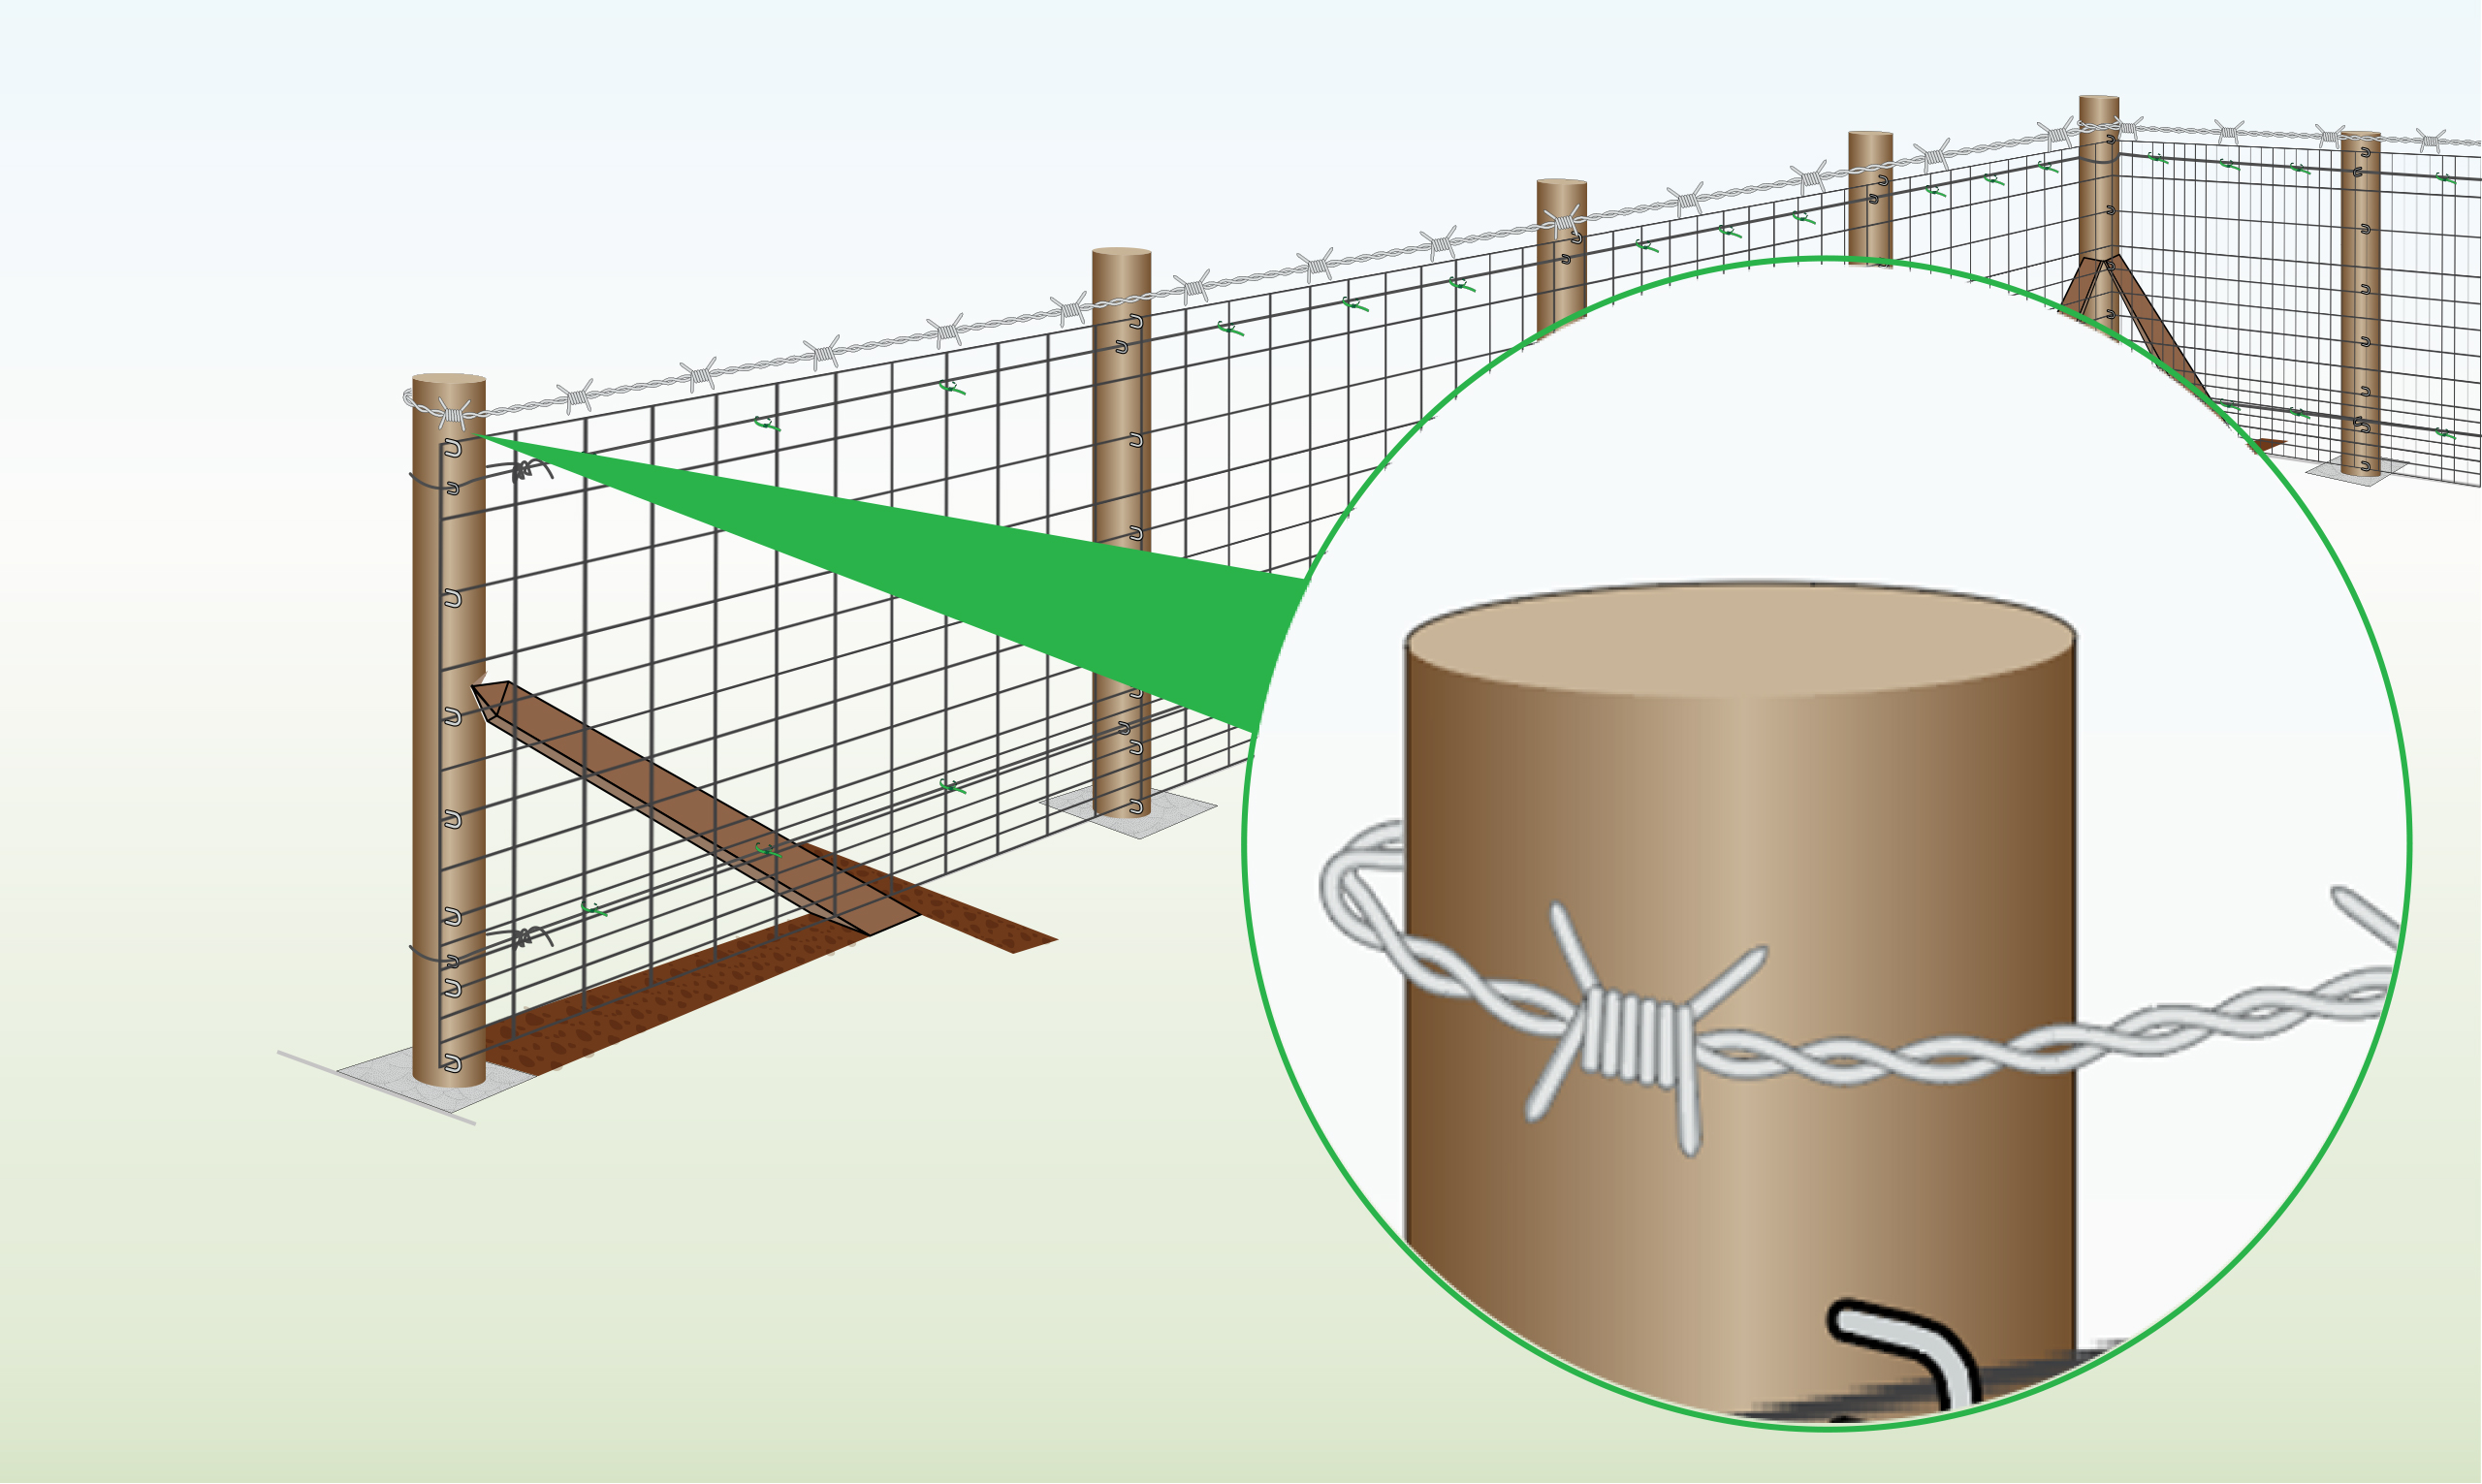
Additional Step – With Barbed Wire
For applications where climbing may occur or where animals may push against the barrier, you can install barbed wire.