25m (82ft)
1m (3.2ft)
100mm x 50mm
PVC coated
£248.99 inc. VAT


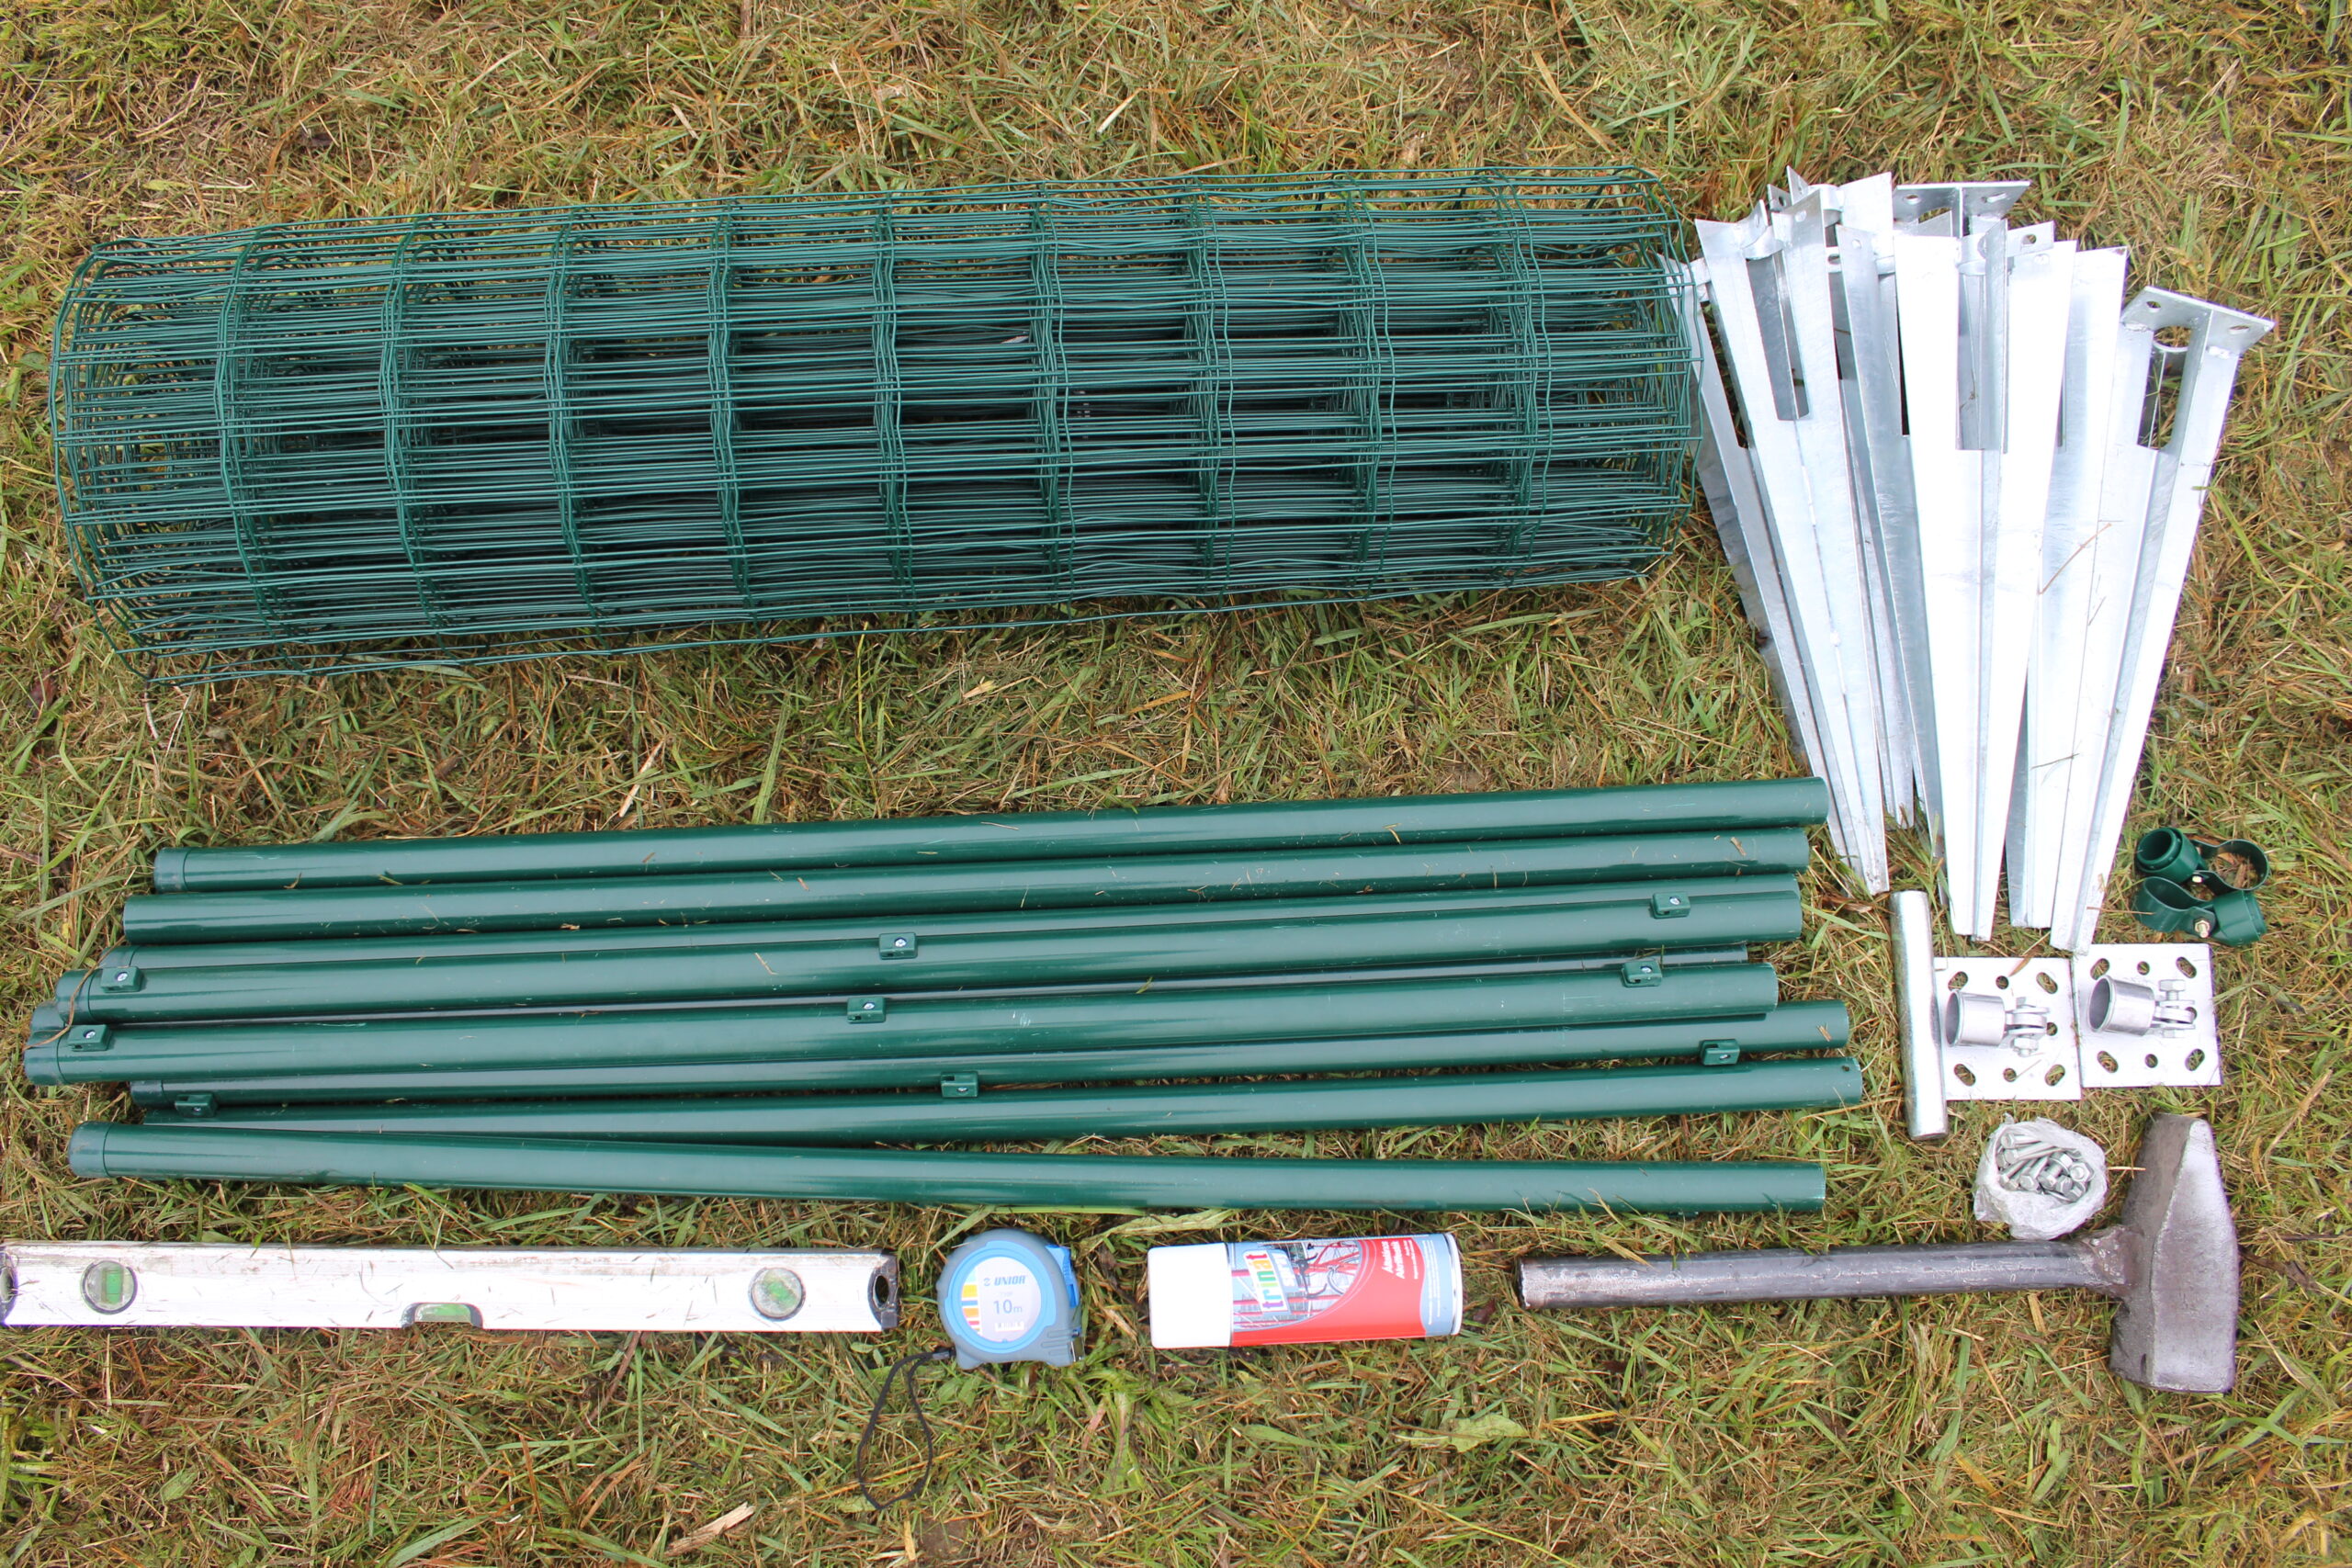
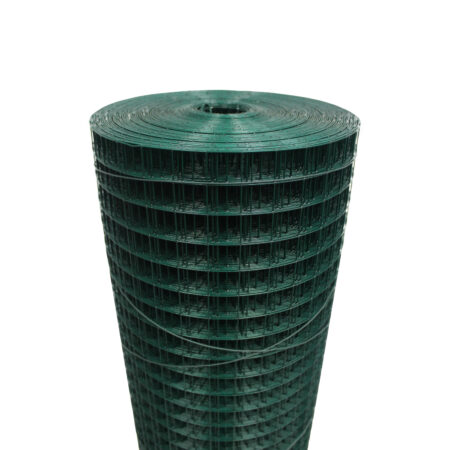
PVC coated wire mesh fence often used in garden projects and as a boundary fencing. Comes ready to install, with all posts and accessories included. Available in 15m and 25m lengths.
| General | |
| Delivered as | Roll of mesh in a box with all accessories & posts included |
| Easy to install | |
| Experience required | |
| Kit Includes | |
| PVC coated wire mesh fence | |
| Upright posts | |
| Angle posts | |
| Post spikes | |
| Angle post plates | |
| Strut clamps | |
| Post driver | |
| Fence clips | |
| Screws | |
| Post caps | |
| Bolts | |
| Hex nuts | |
| Washers | |
| Hammer | |
| Screwdriver | |
| Ratchet | |
| Wire cutters | |
| Pliers | |
| Mesh Specification | |
| Material | Green PVC coated metal |
| Mesh Construction | Welded |
| Hole size | 100mm x 50mm |
| Wire diameter | 1.7mm |
| Wire diameter with PVC coating | 2.1mm |
| Roll height | 1m |
| Roll length | 15m / 25m |
| Can wires be bent |
– With pliers
|
| Can wires be cut |
– With wire cutters
|
| Protective gloves required for handling | |
| Post Specification | |
| Post material | PVC coated metal |
| Post diameter | 34mm |
| Post height | 1.15m |
| Needs to be placed in pre-dug holes | |
| Needs to be set in concrete | |
| Strength & environment | |
| Weather proof | |
| Corrosion resistant | |
| Stability |
– Very good
|
| Installation & maintenance | |
| Easy to install | |
| People required to install | 2 |
| Weight | 30kg / 44kg |
| Kit includes all accessories | |
| Kit includes all tools | |
| Can be painted |
– With spray paint or any paint suitable for plastic & metal
|
| Treat cut ends with | Galvanising spray paint |
| Appearance | |
| Colour | Green |
| PVC coating | Smooth & even |
| Blends into environment | |
| Applications | |
| Garden border fencing | |
| Temporary fencing & barrier | |
| Plant support | |
| Crop protection | |
| Footpath border | |
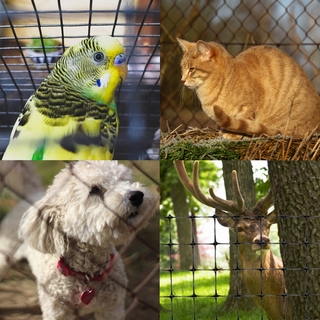
| Dog proofing |
– Just as a barrier/deterrent. For dogs prone to digging, chewing & climbing, see dog fencing options here
|
| Deer proofing |
– Just as a barrier/deterrent. For stronger protection, see our deer proof options here
|
| Cat proofing |
– Hole size is too large. For cat proofing, see suitable options here
|
| Rodent proofing |
– Hole size is too large. See rodent proof mesh here
|
| Badger proofing |
– Wire too thin. See badger fencing here
|
| Fox proofing |
– Hole size is too large. See fox proof options here
|
| Bird proofing |
– See anti bird netting here
|
| Rabbit proofing |
– Hole size is too large, see rabbit proof fence here
|
| Poultry fencing |
– Hole size is too large, see suitable netting here
|
| To Do | Explanation |
| Tools you will need | Sledge hammer; measuring tape; spirit level; some colourful string; spray paint; ratchets and a screwdriver. |
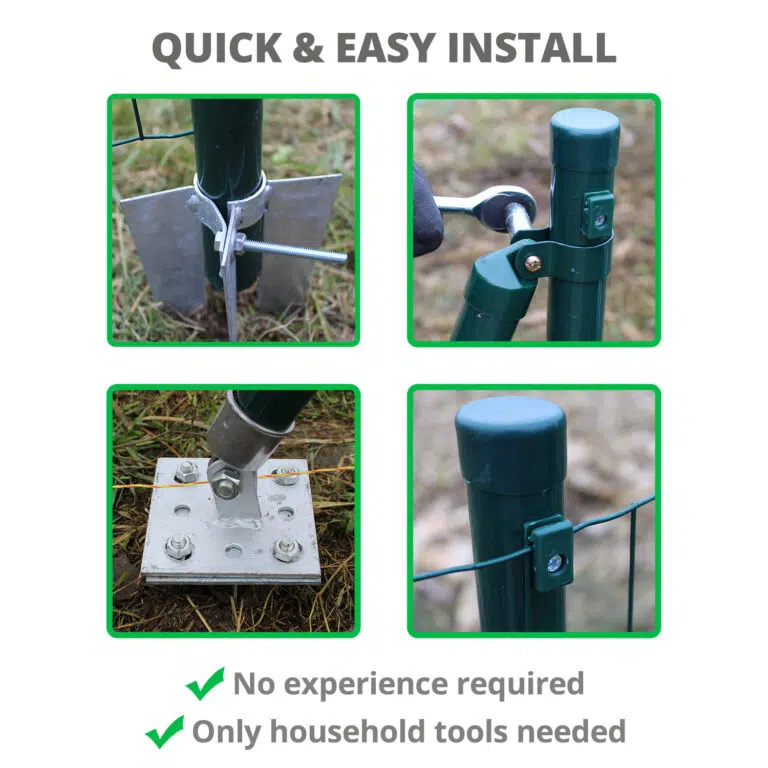
| Step 1 – Preparation
|
Gather and lay out the PVC coated wire mesh fence kit and the tools you will need. |
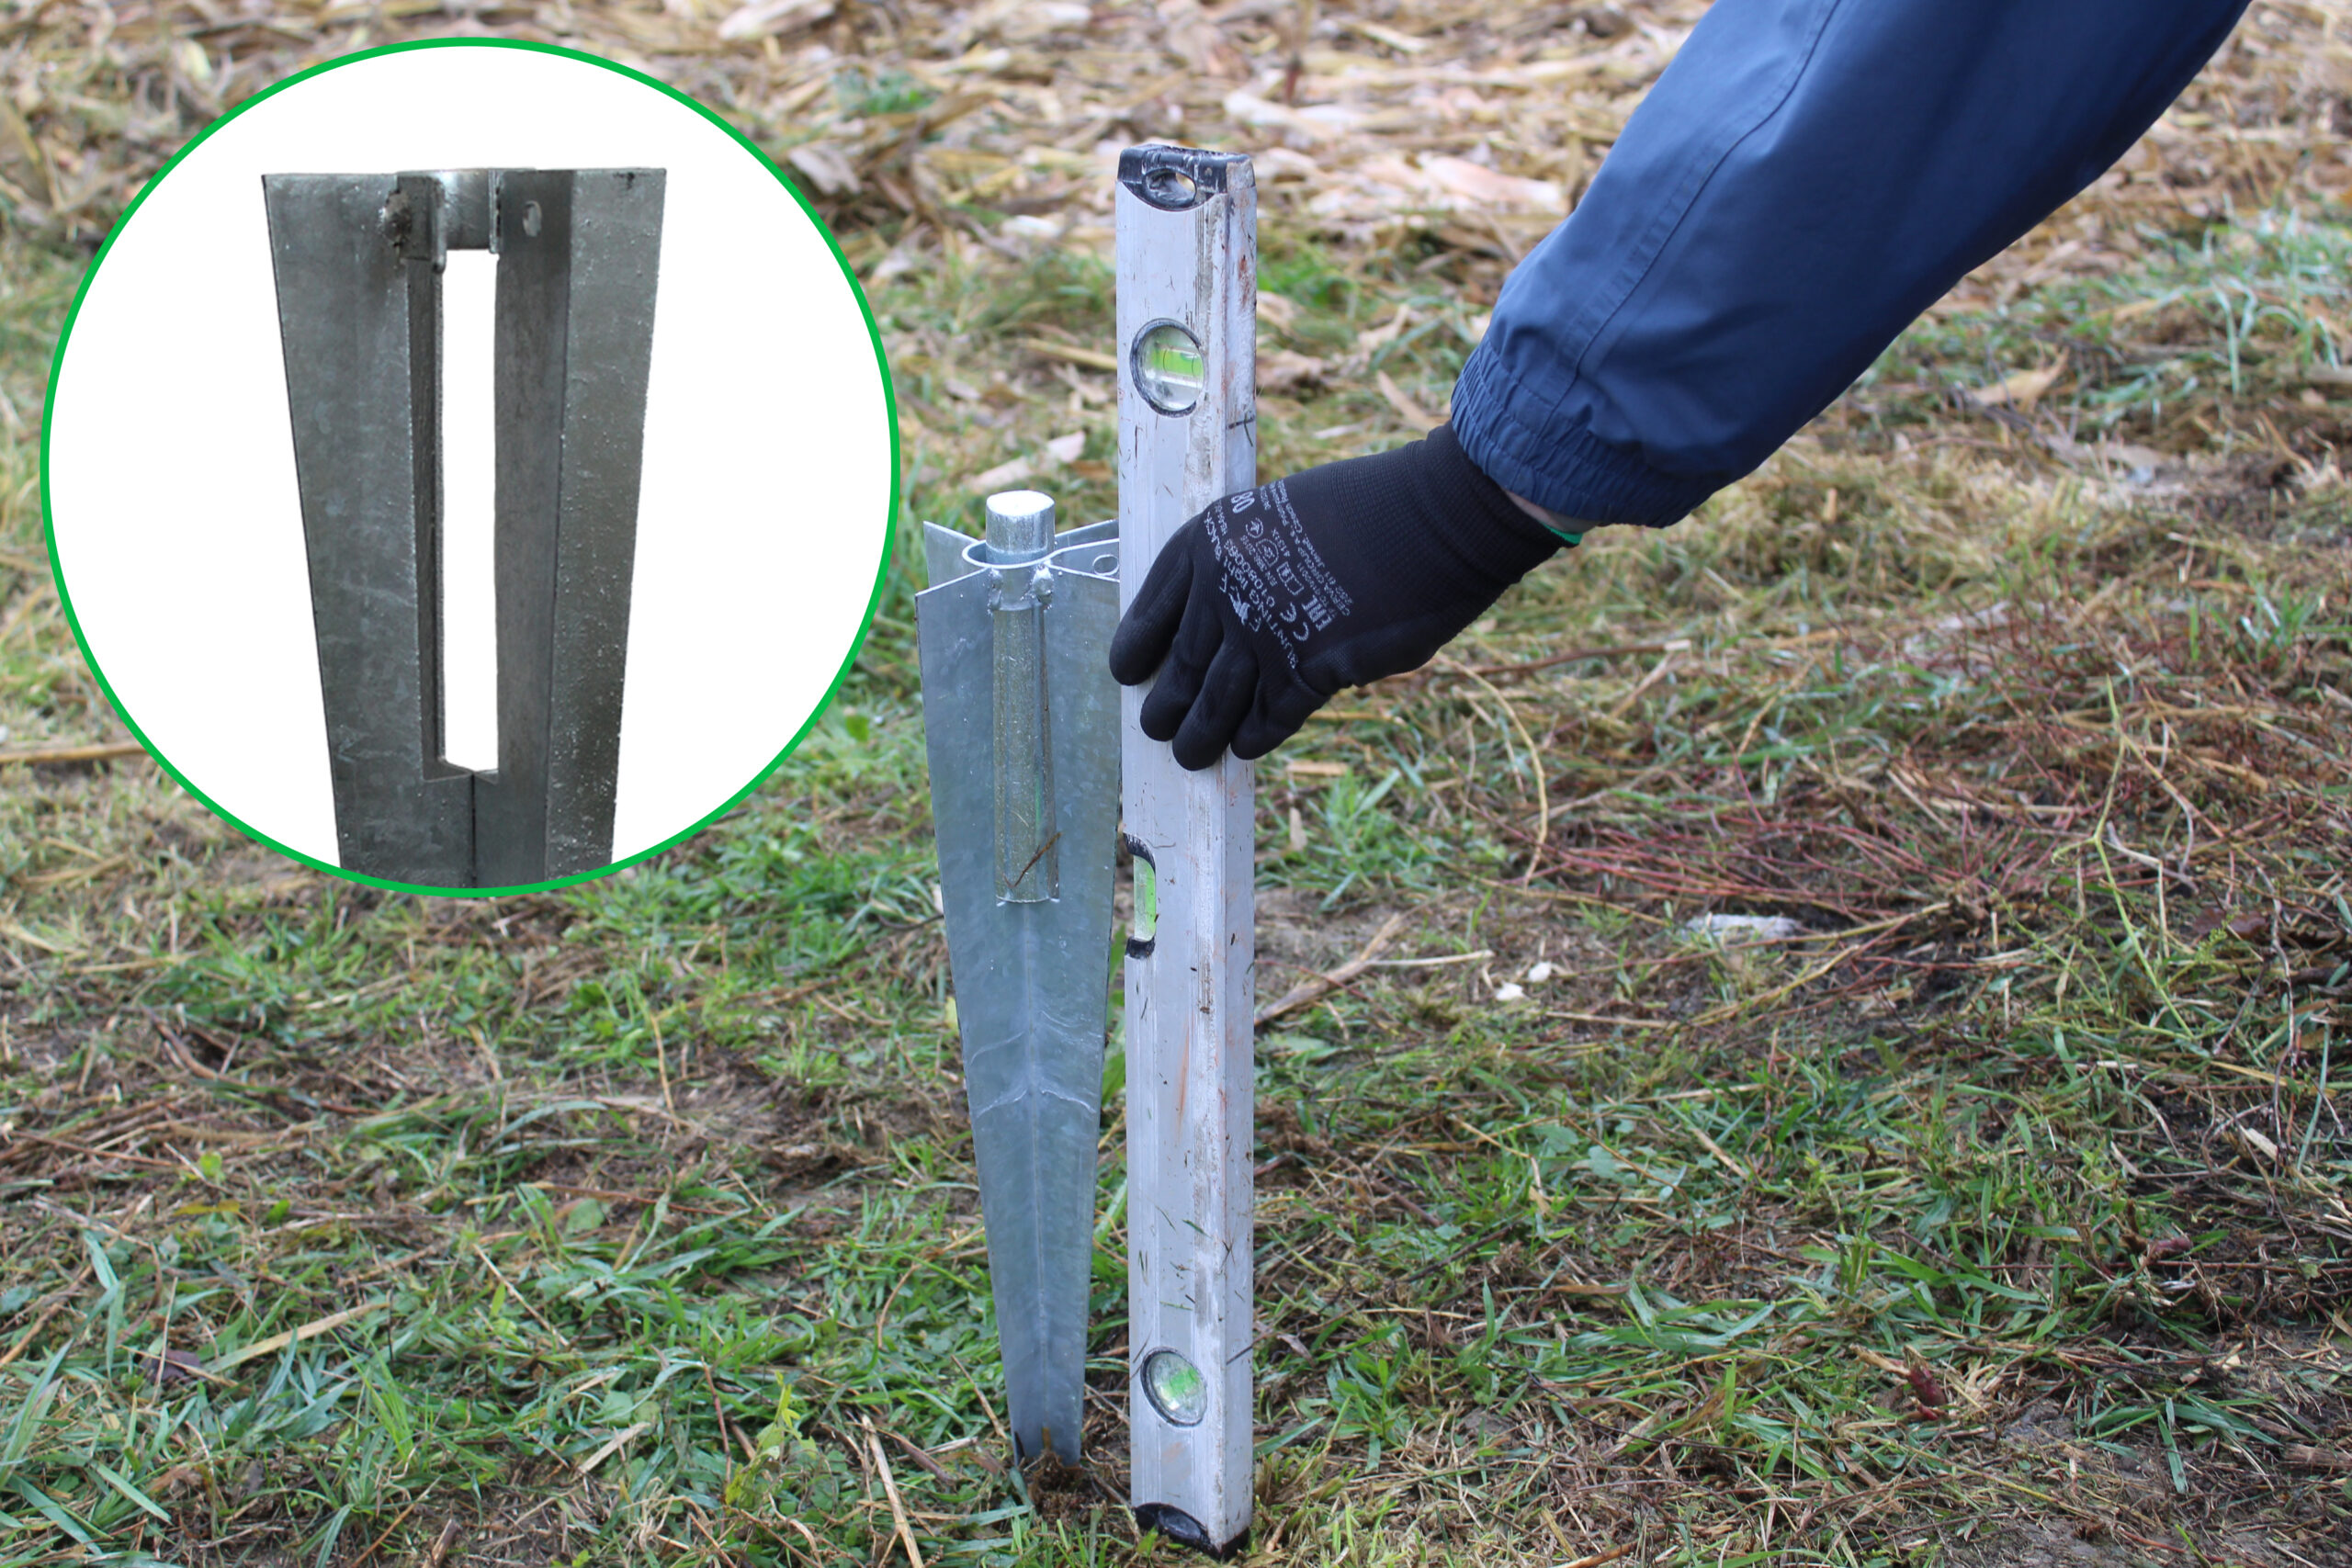
| Step 2 – Mark first post’s location
|
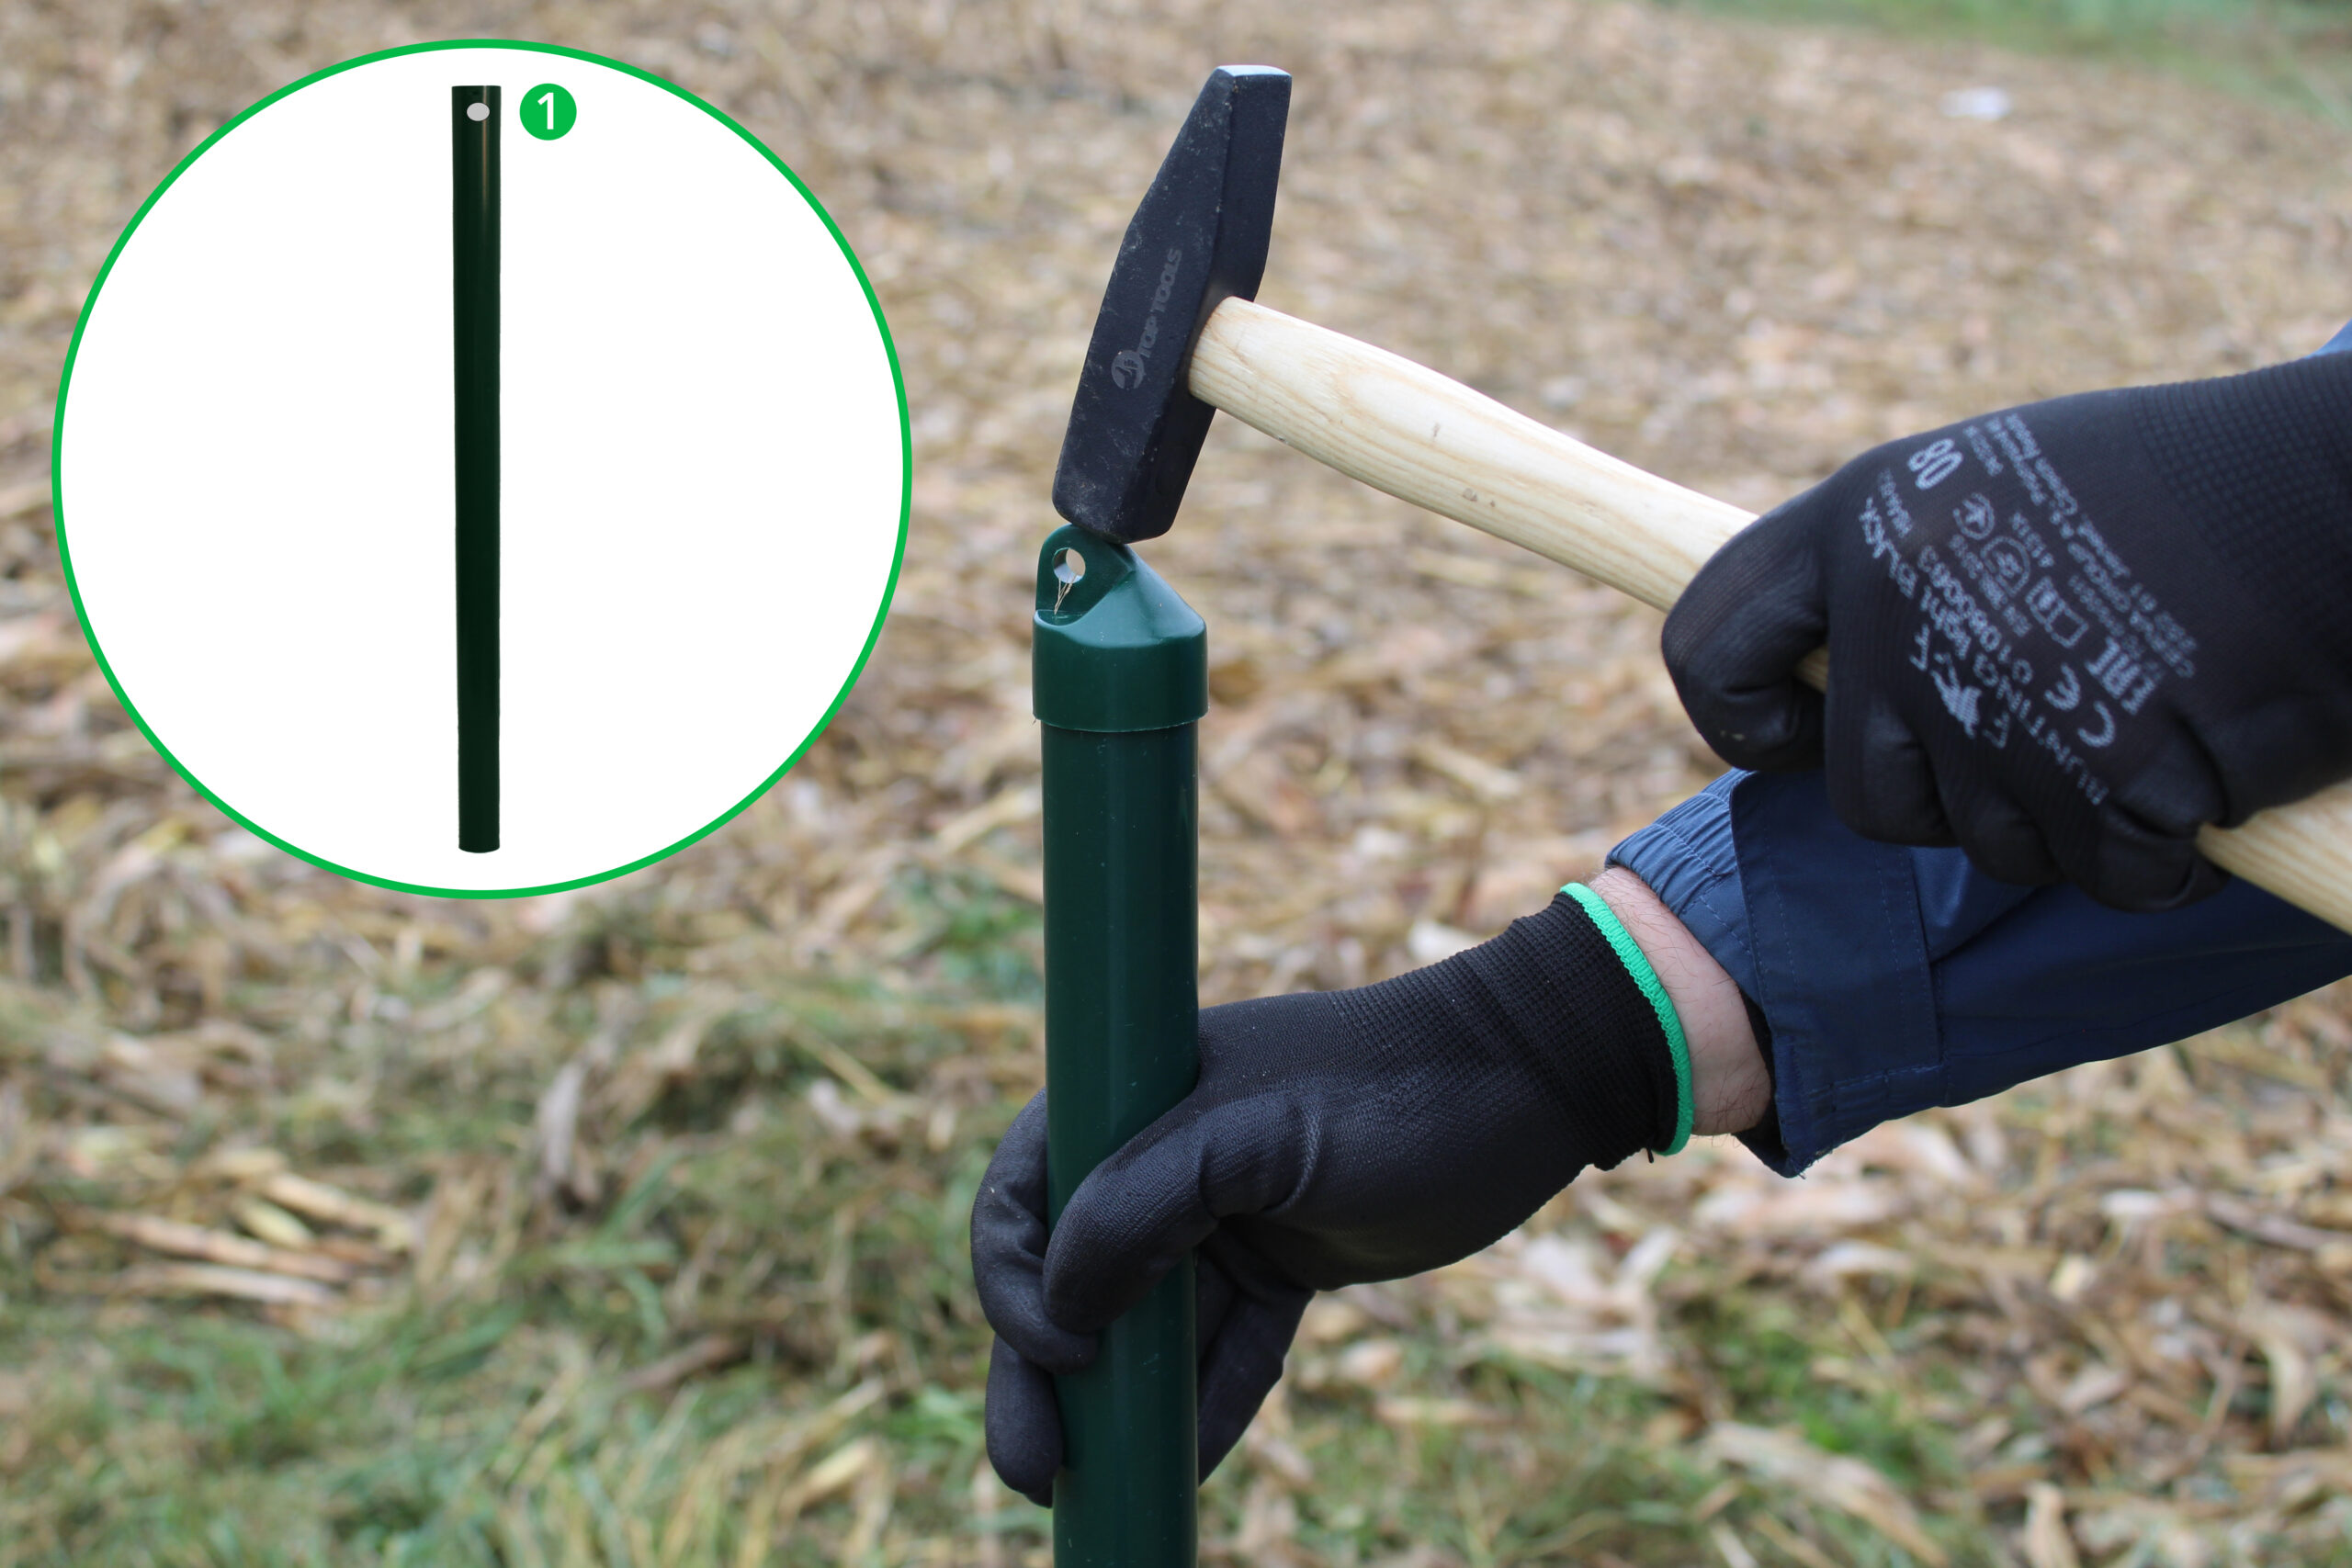
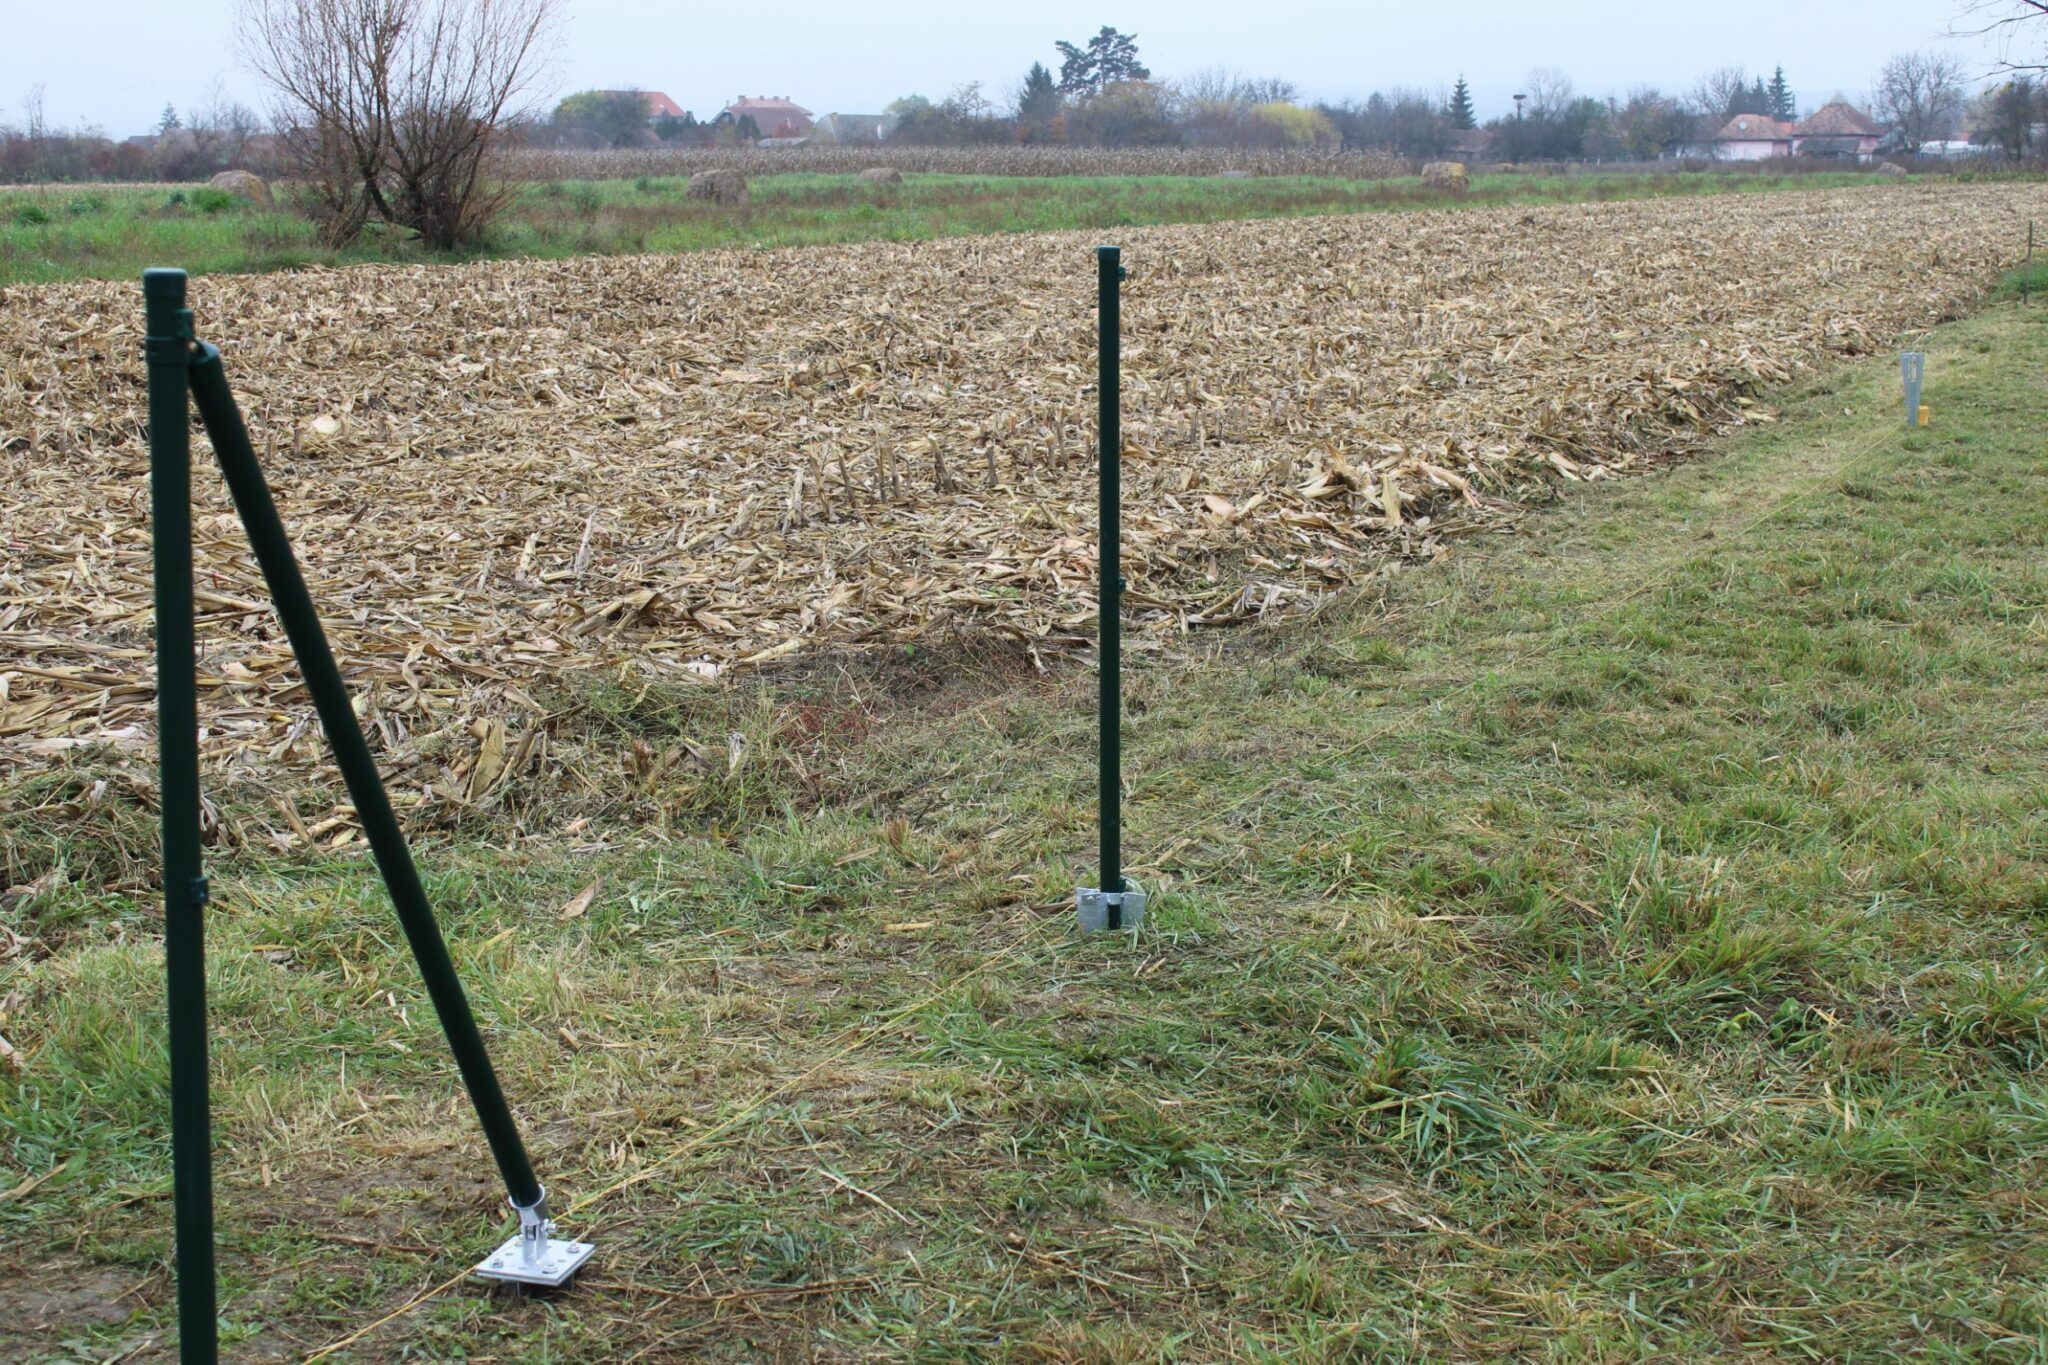
Choose the location for your first post and stick a post spike into the ground.
Insert the post driving tool into the post spike’s hole. |
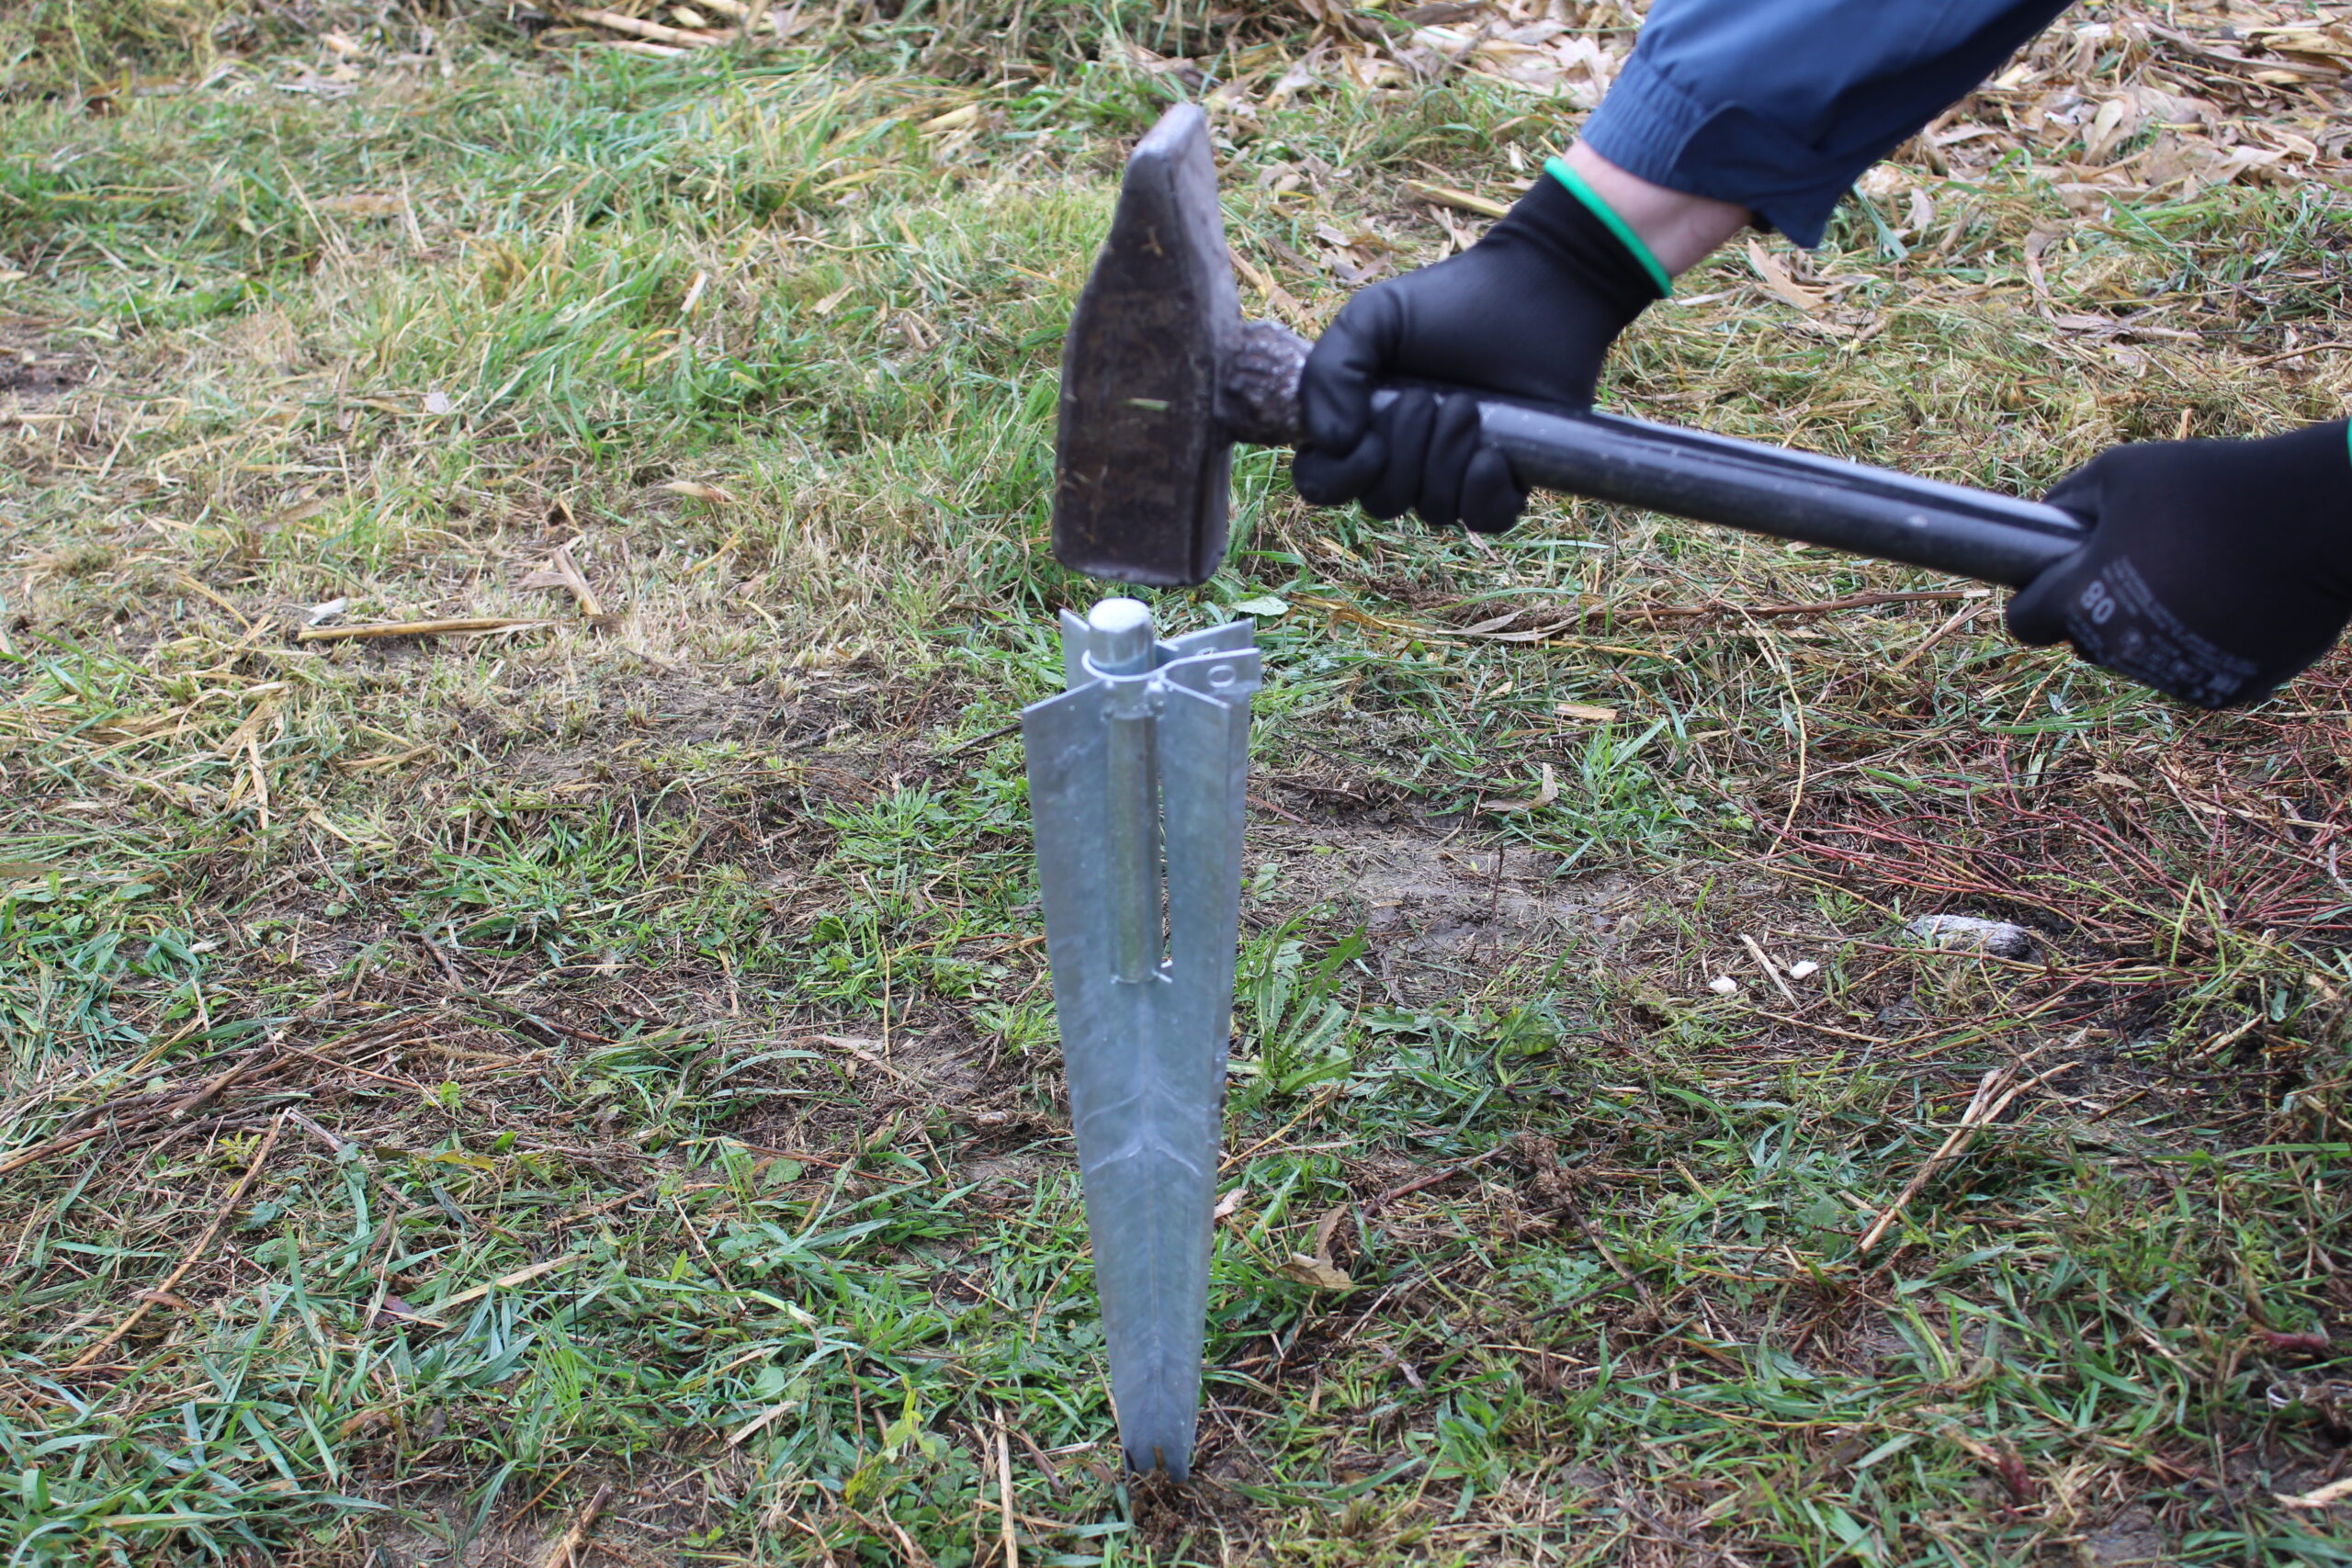
| Step 3 – Hammer first post spike in
|
Start hammering the post spike in deeper, hitting the post driving tool and not the spike itself. |
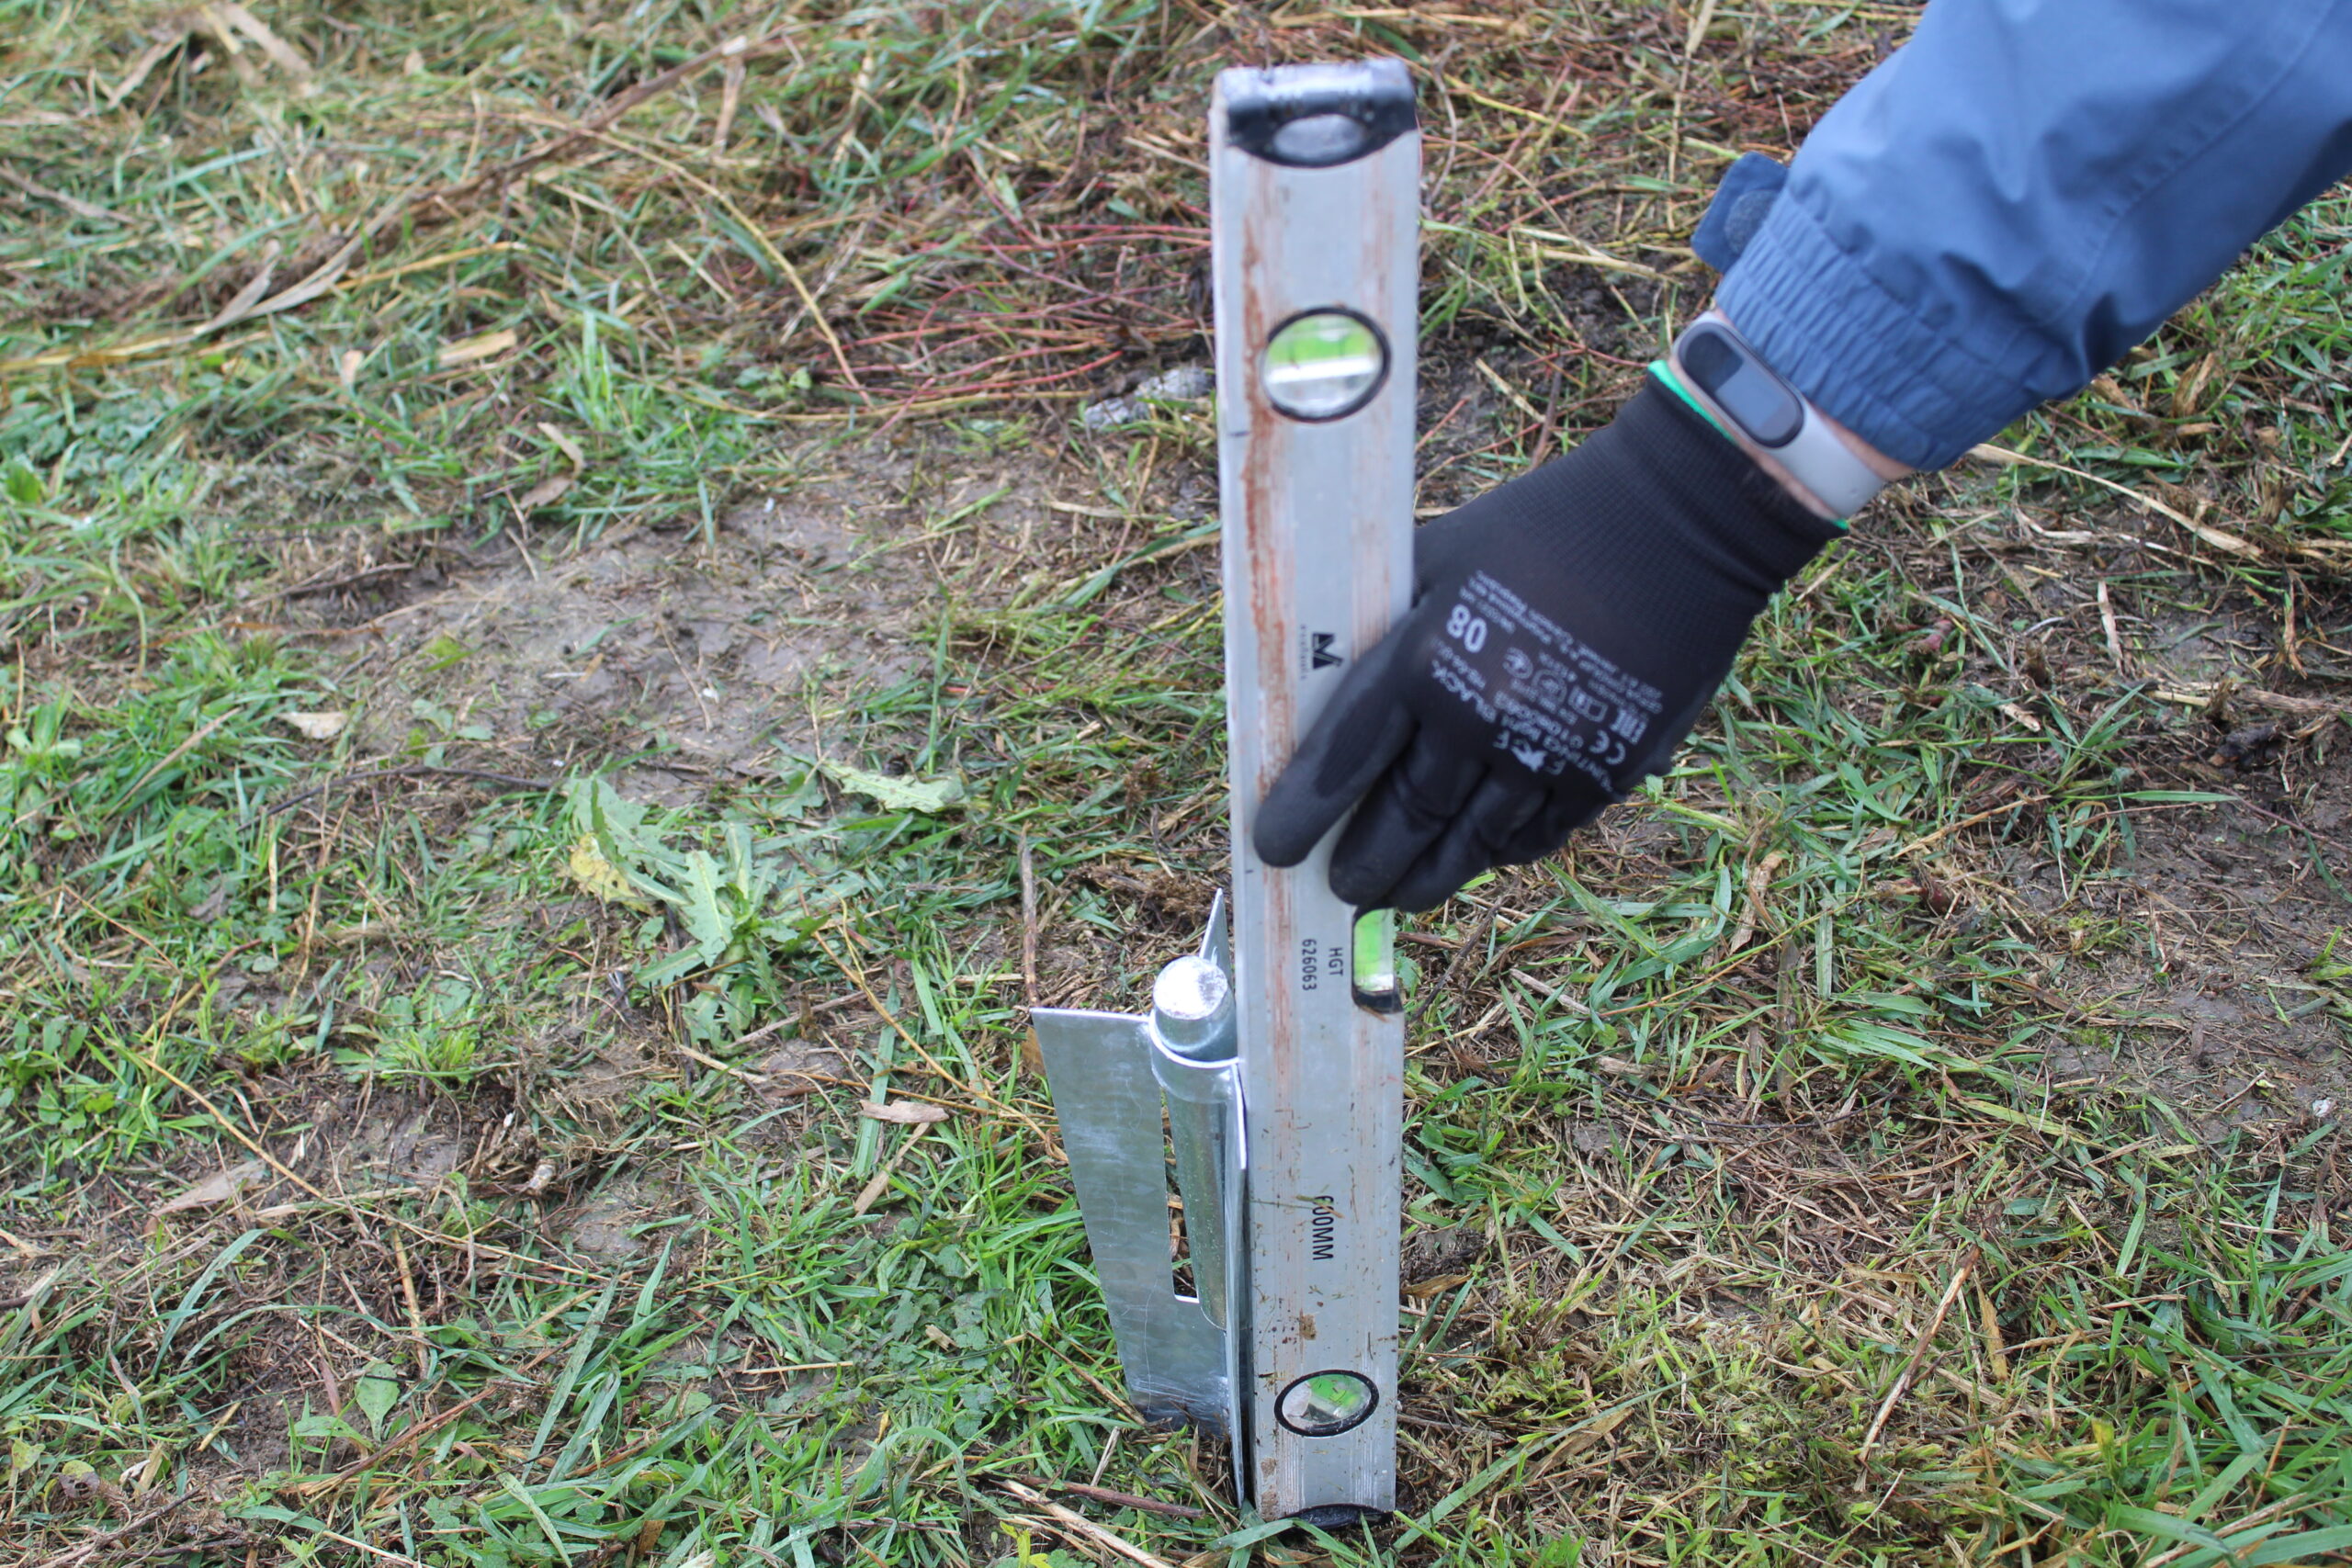
| Step 4 – Make sure it’s straight
|
Stop periodically and use a spirit level to make sure the post spike is straight on all sides. |
| Step 5 – Adequate post spike height
|
Hammer the post spike until it is level with the ground. |
| Step 6 – Add first post to the spike
|
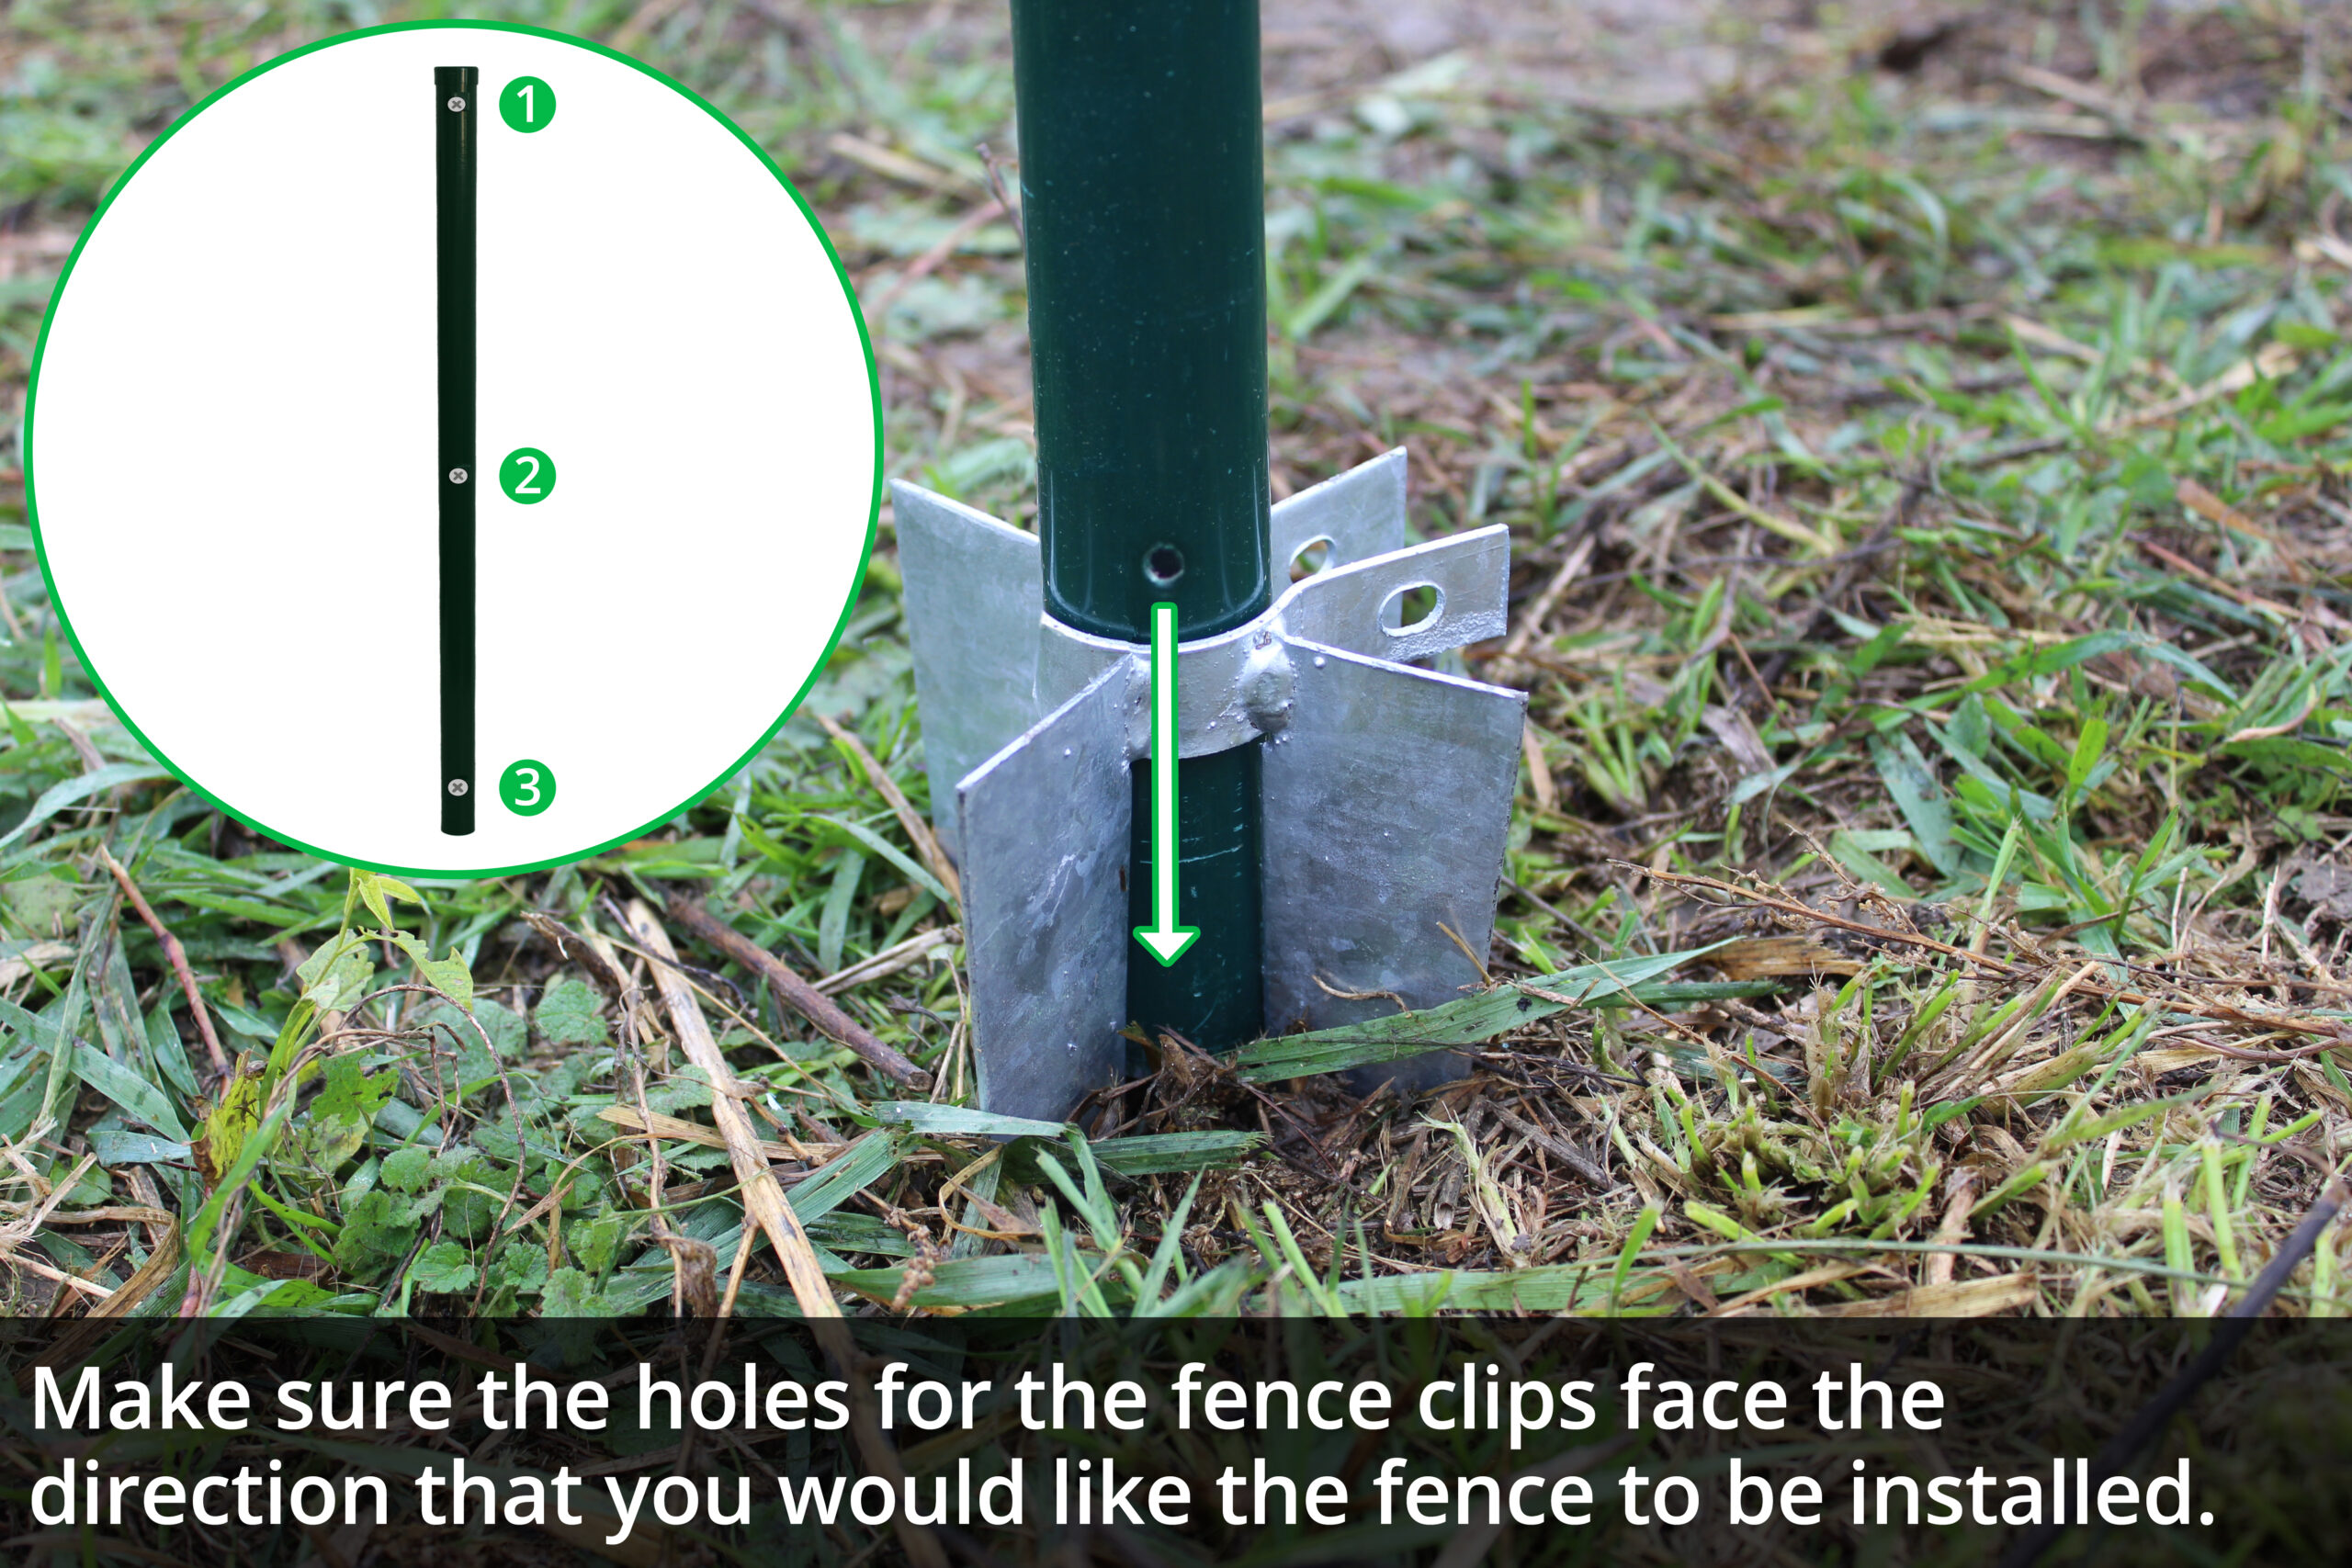
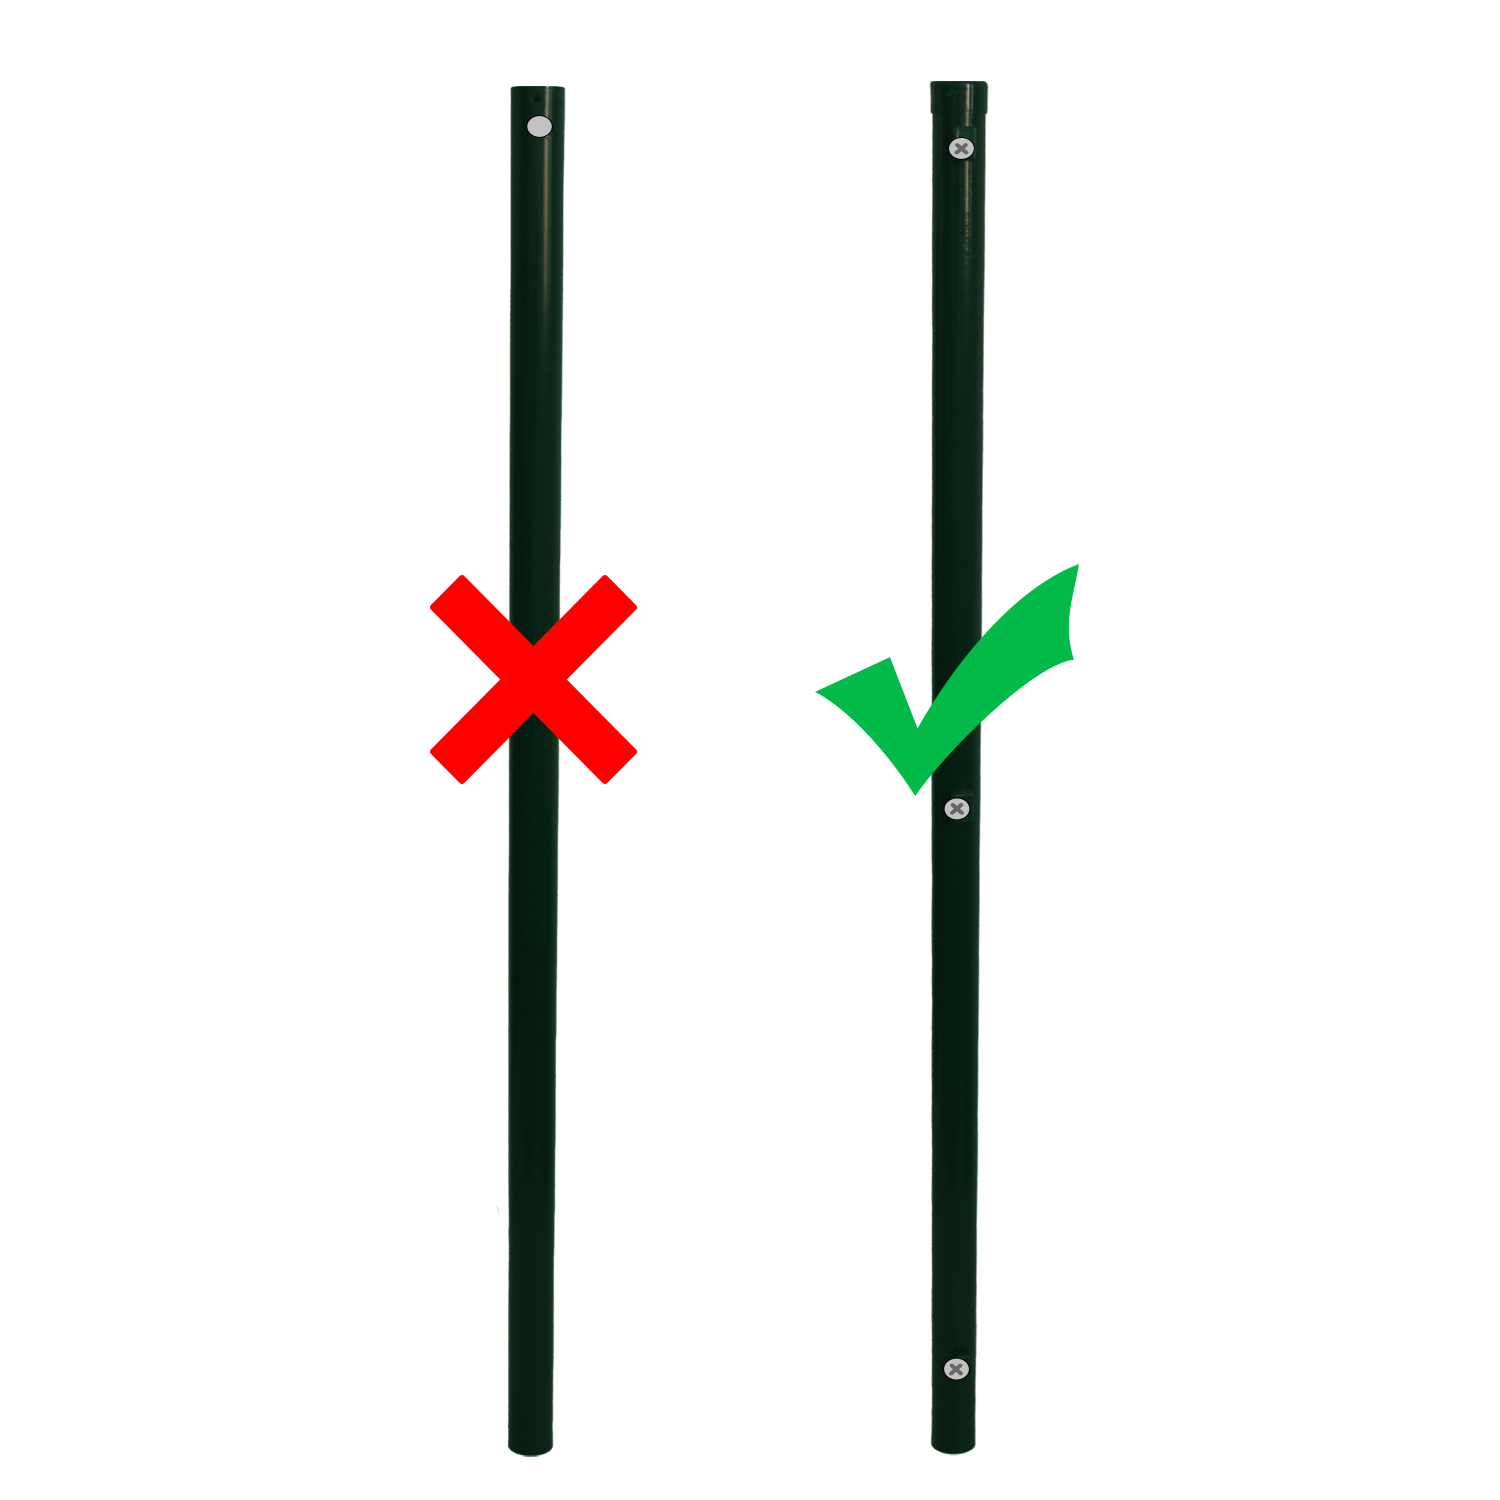
Slot the first upright post into the post spike.
The upright posts have 3 holes on one side. |
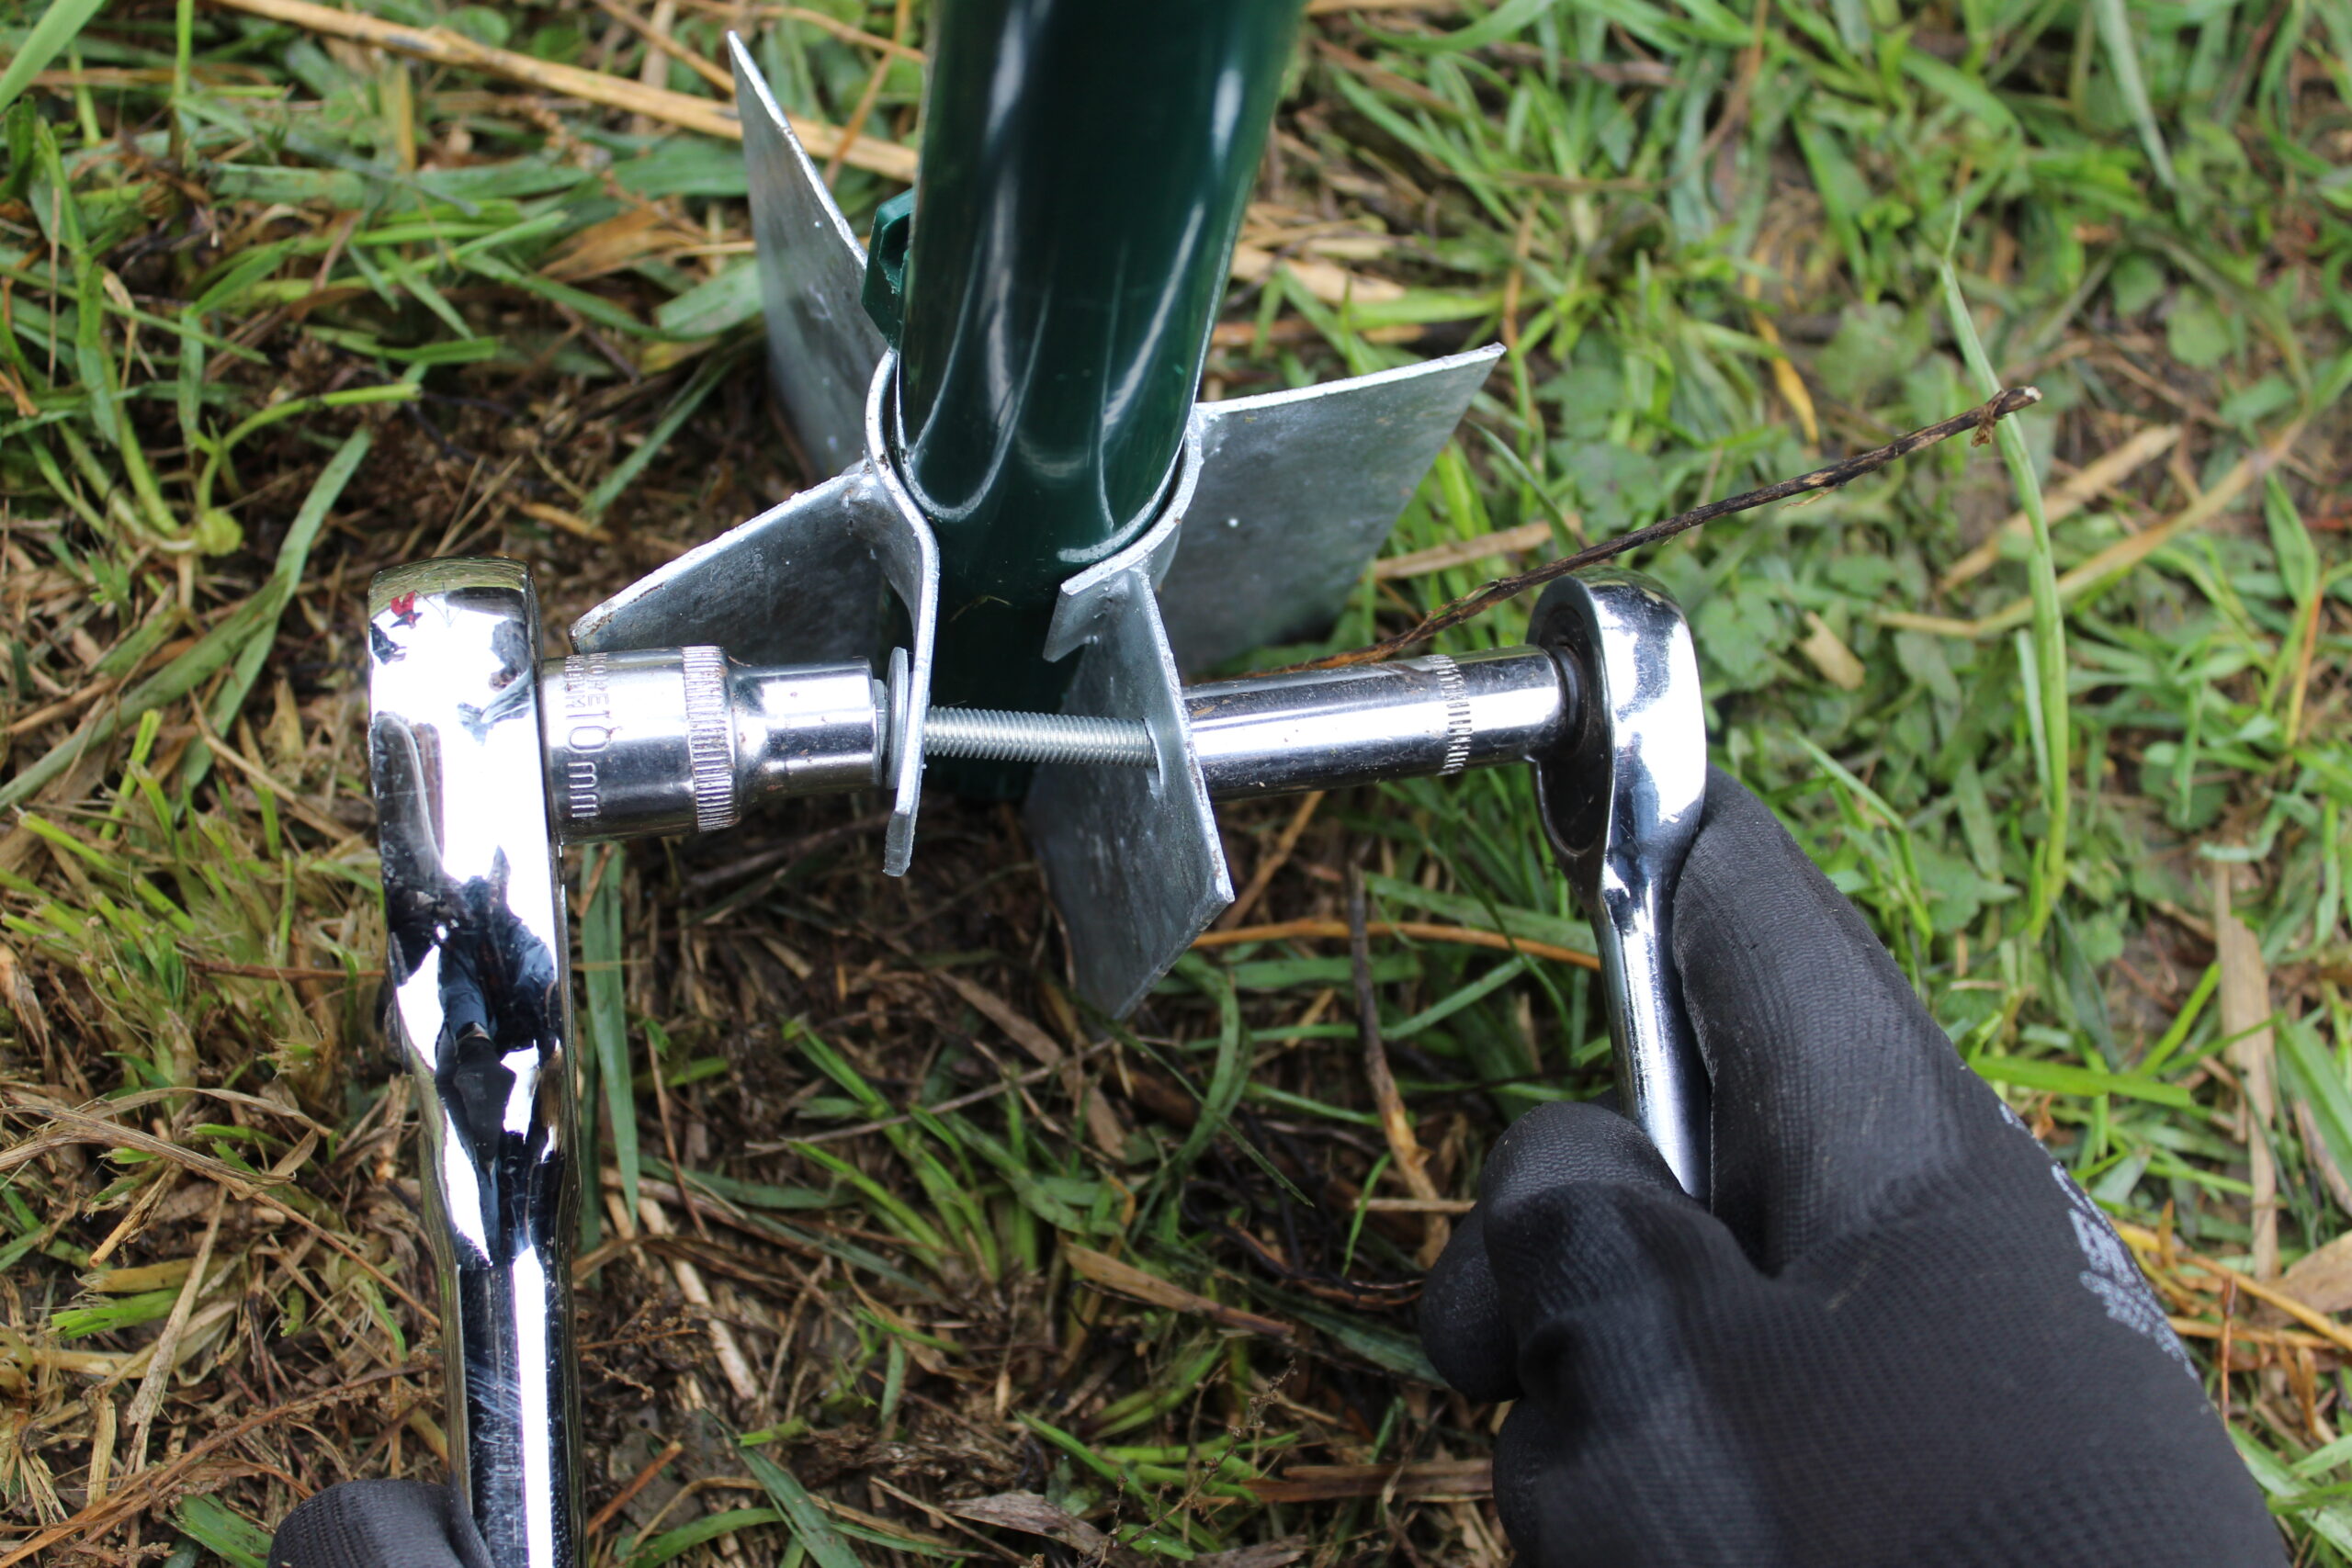
| Step 7 – Secure post
|
Push a bolt through the holes of the post spike and add a washer and a hex nut to the outer end.
Use ratchets to tighten it around the post. |
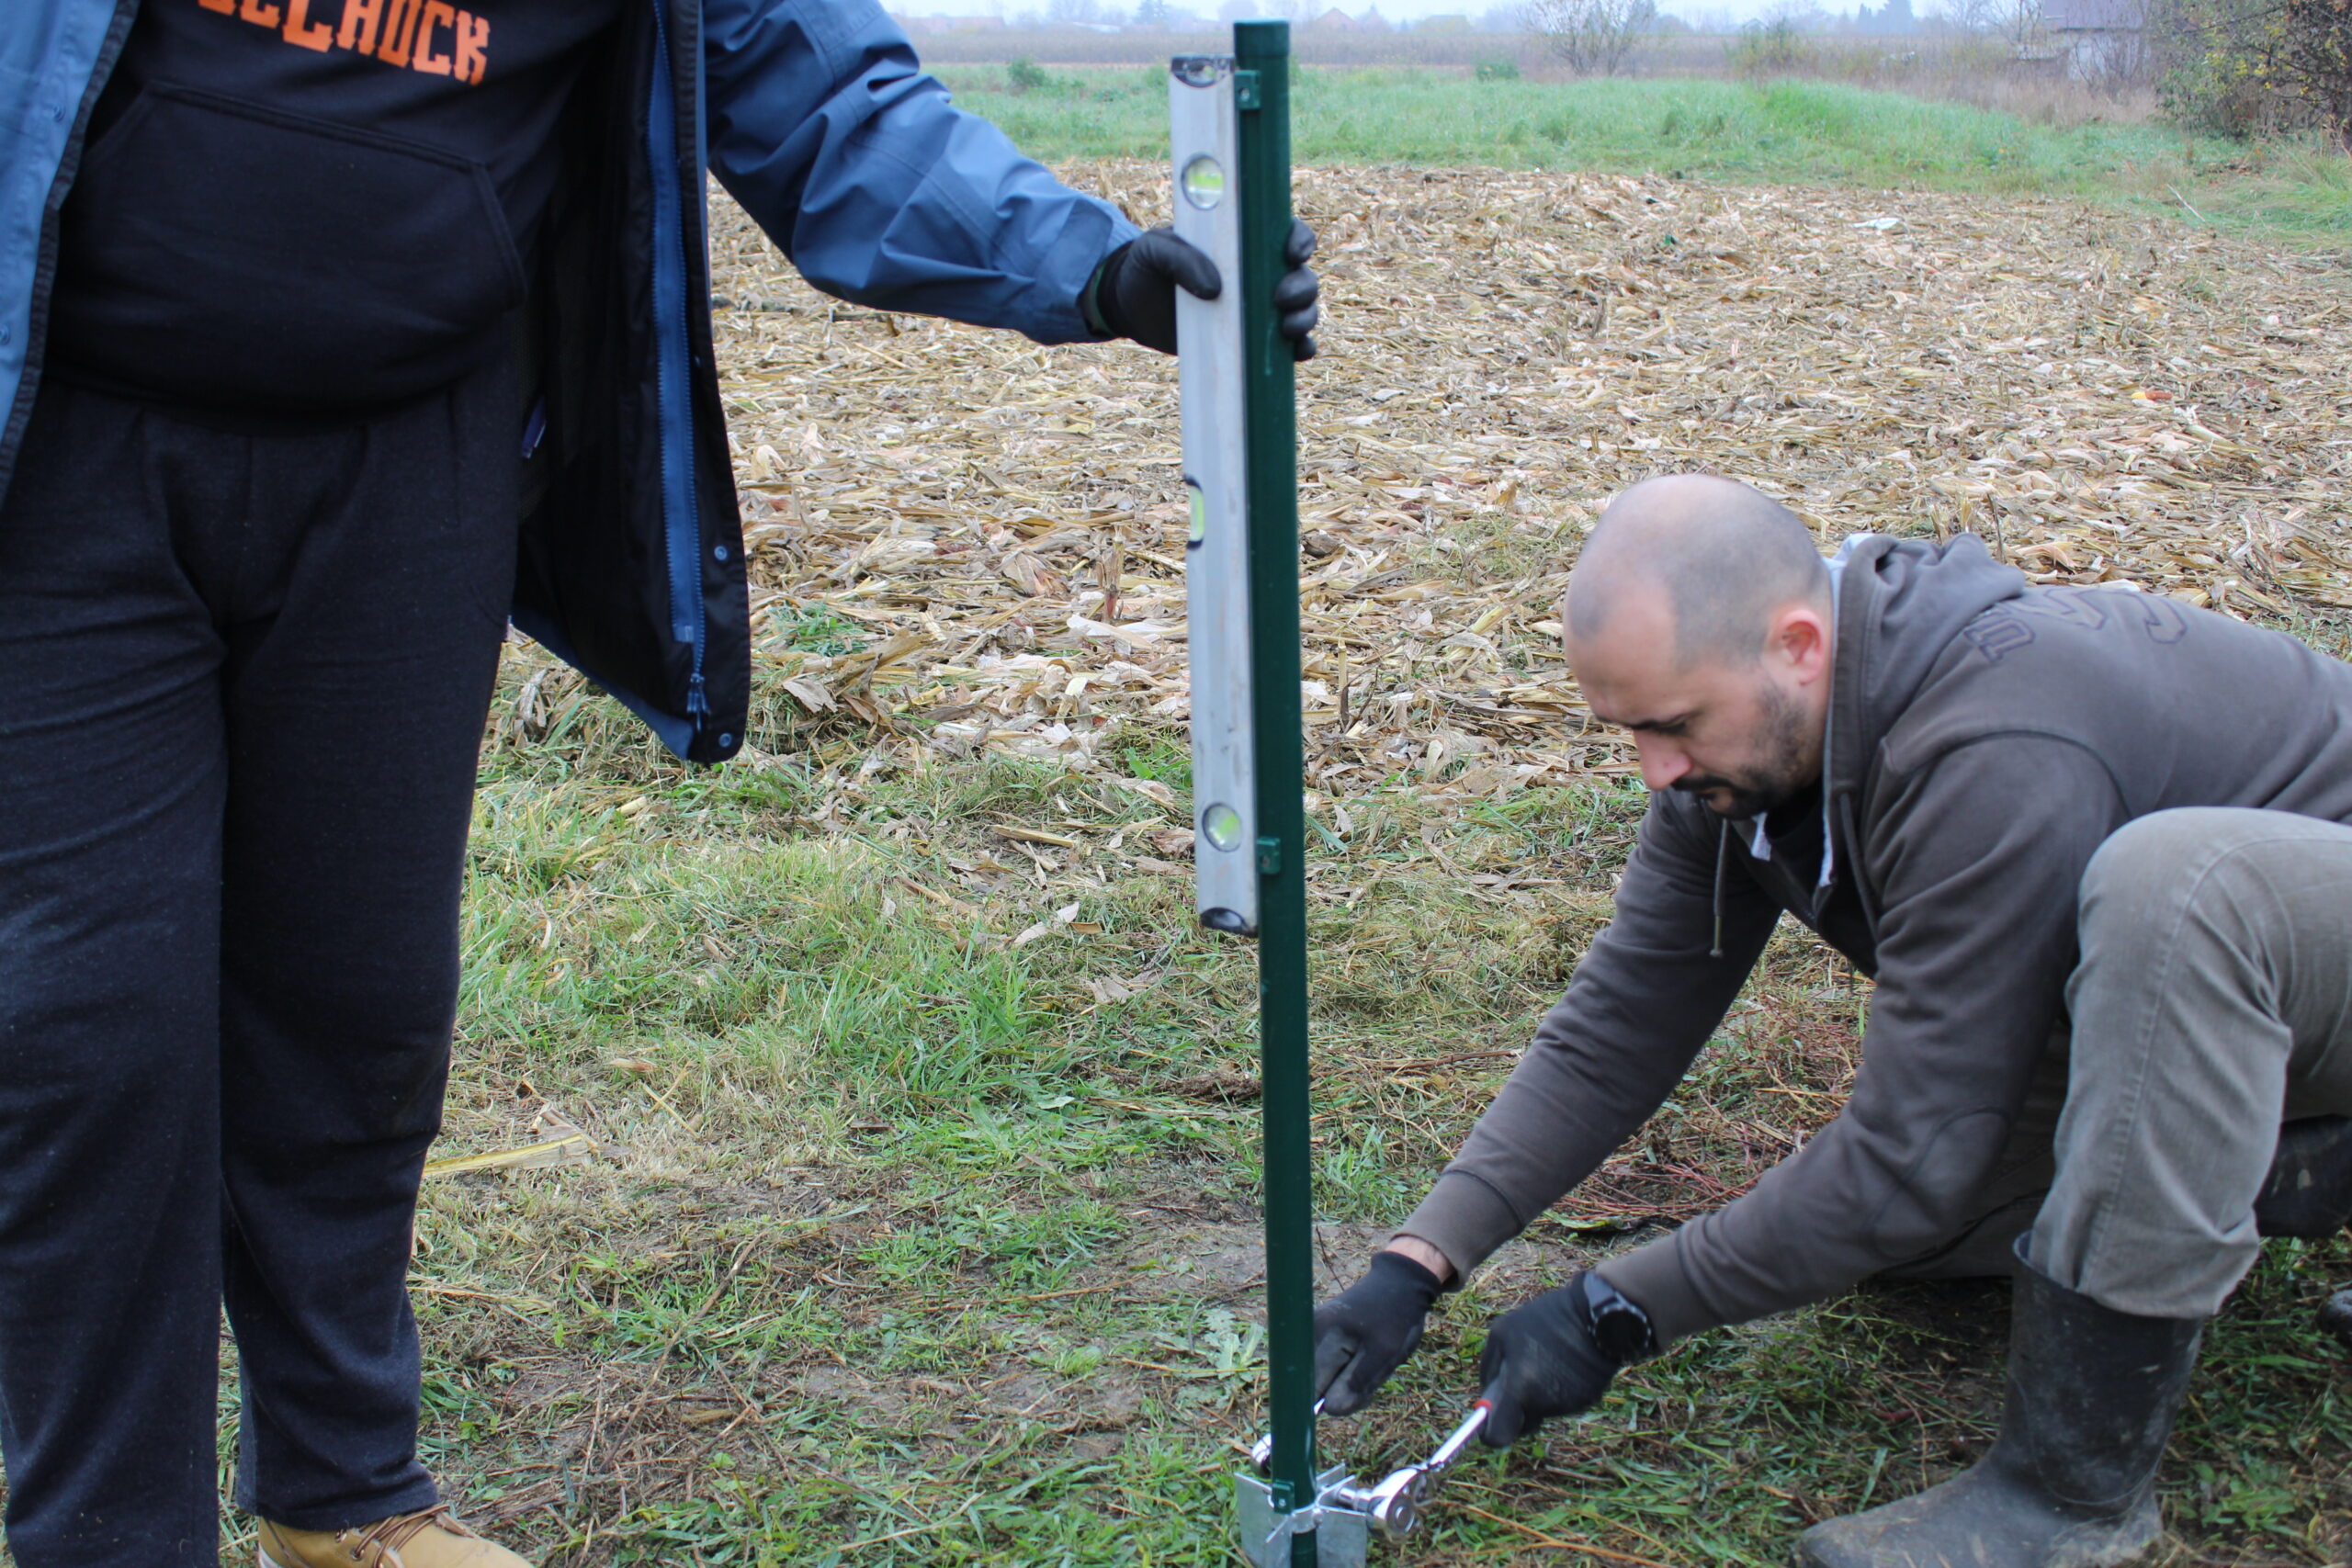
| Step 8 – Check for straightness
|
Make sure the post stays completely straight on all sides as you tighten the bolt. |
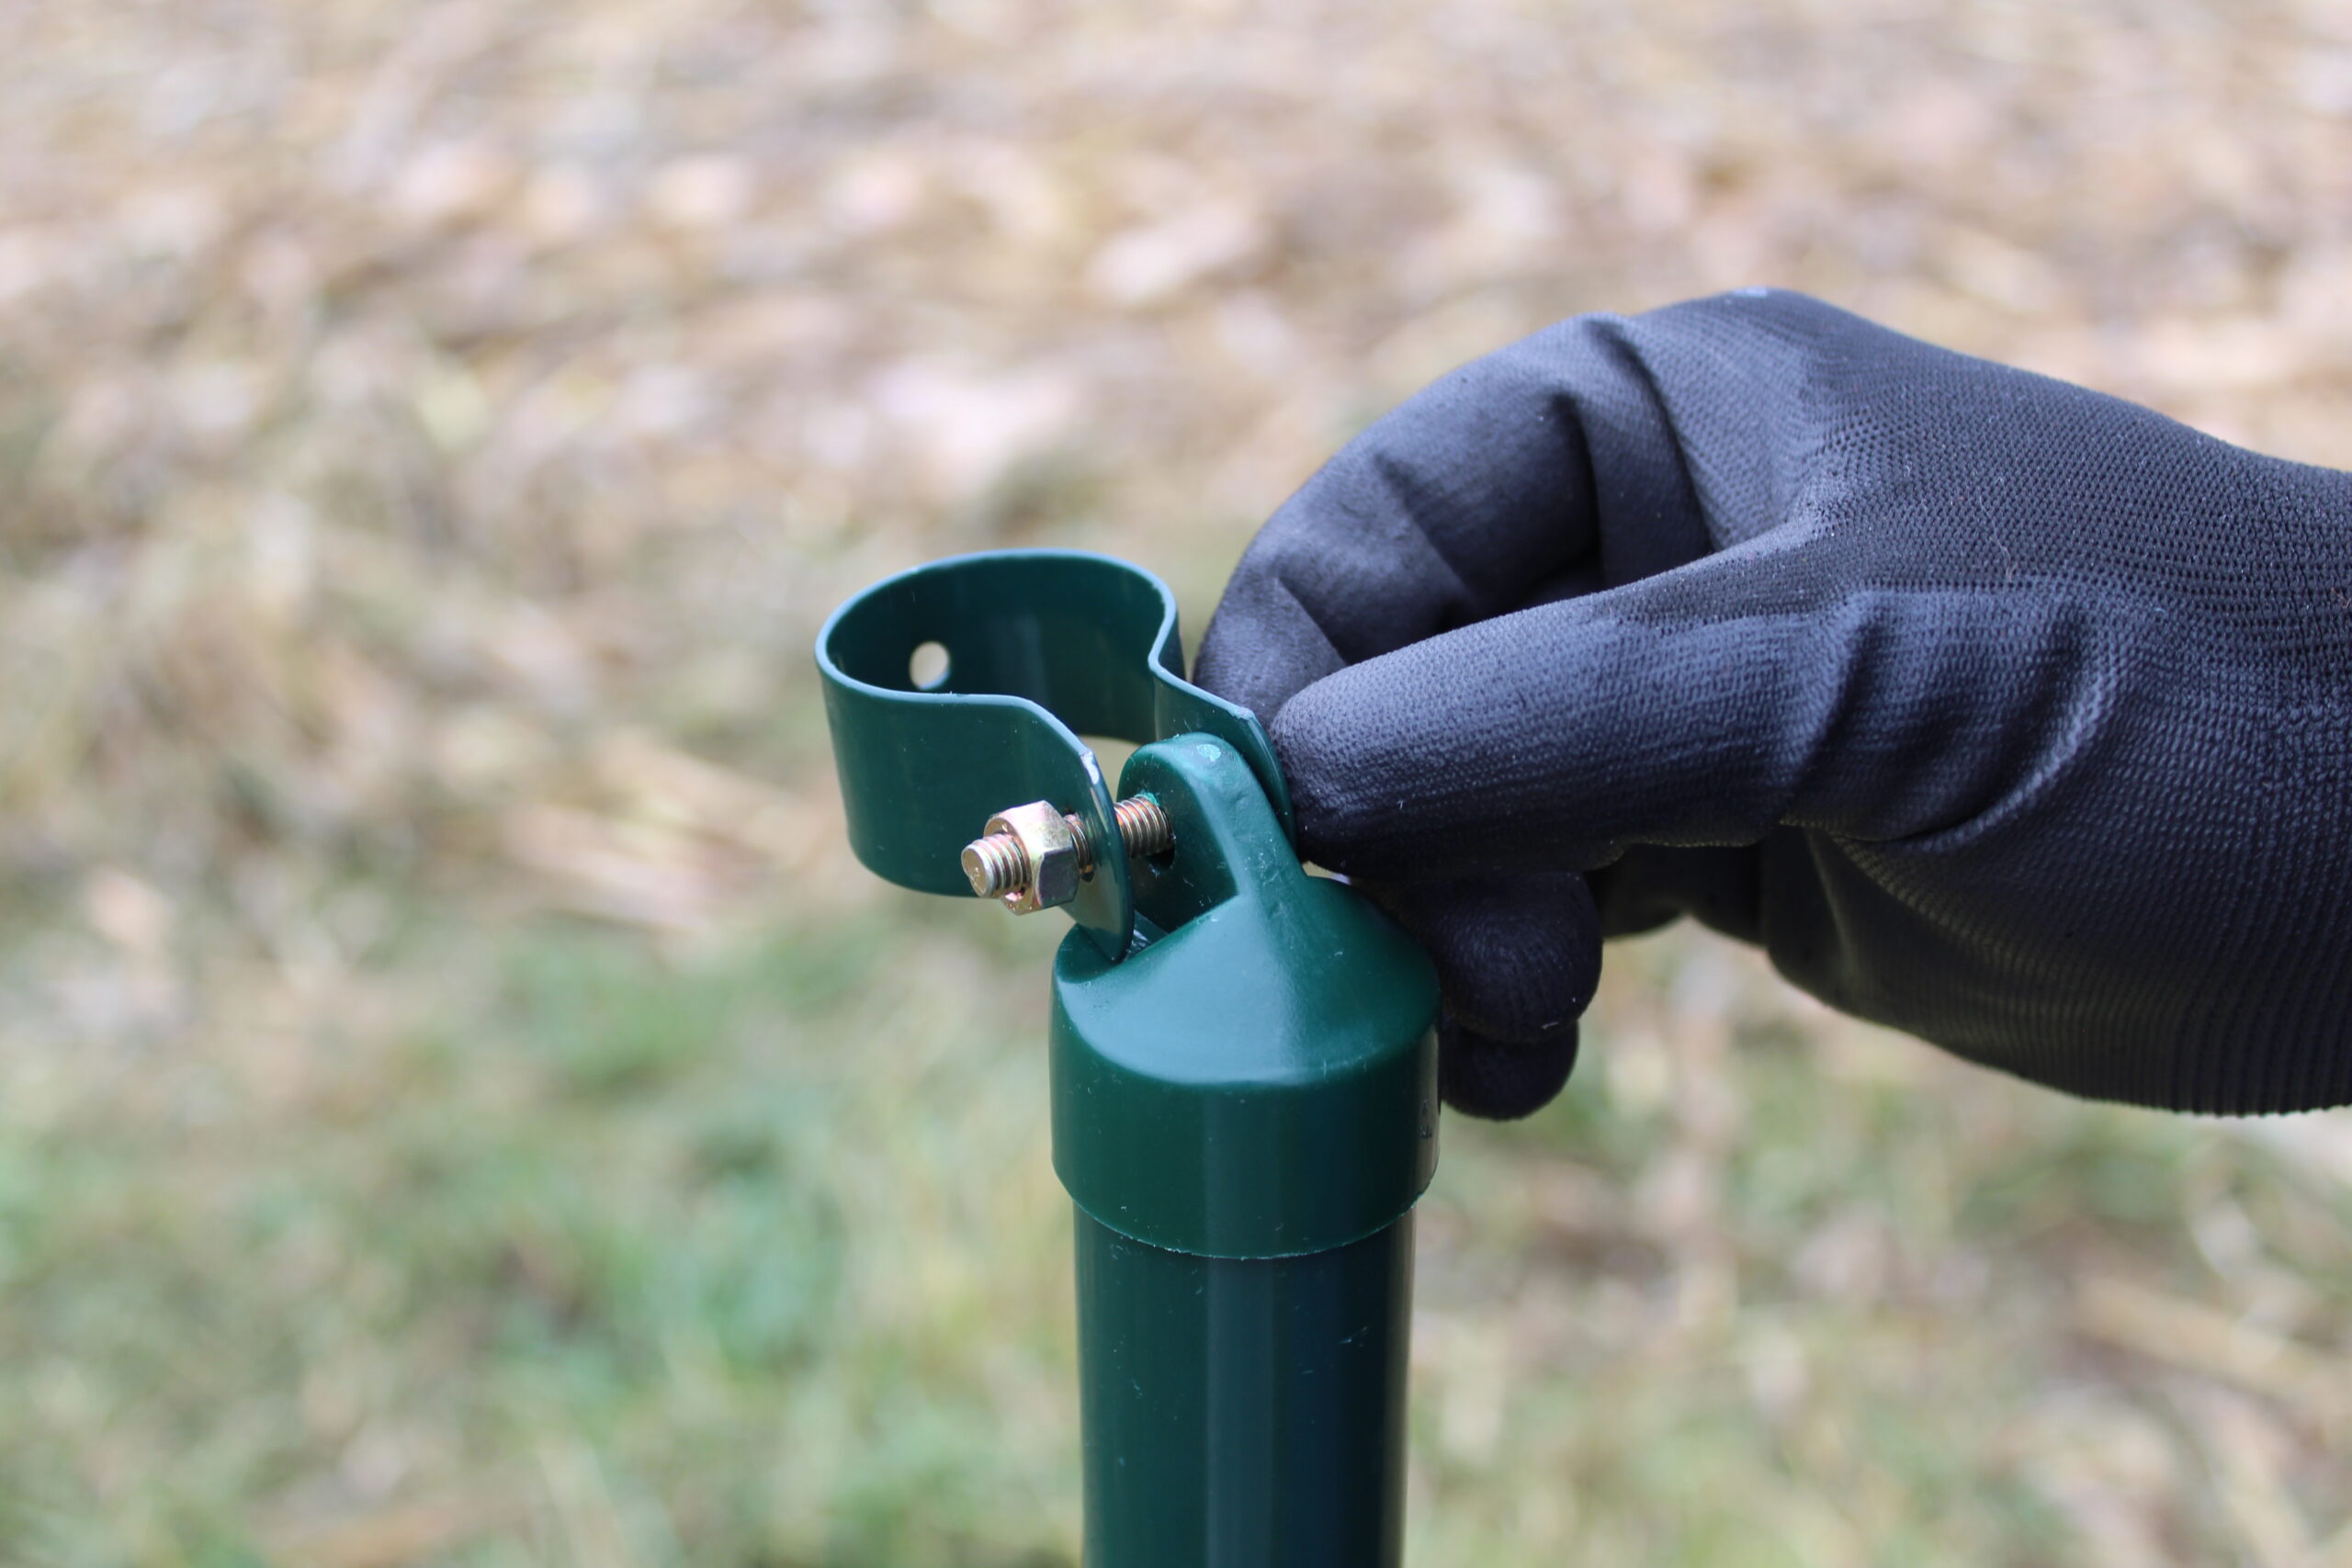
| Step 9 – Add post cap to angle post
|
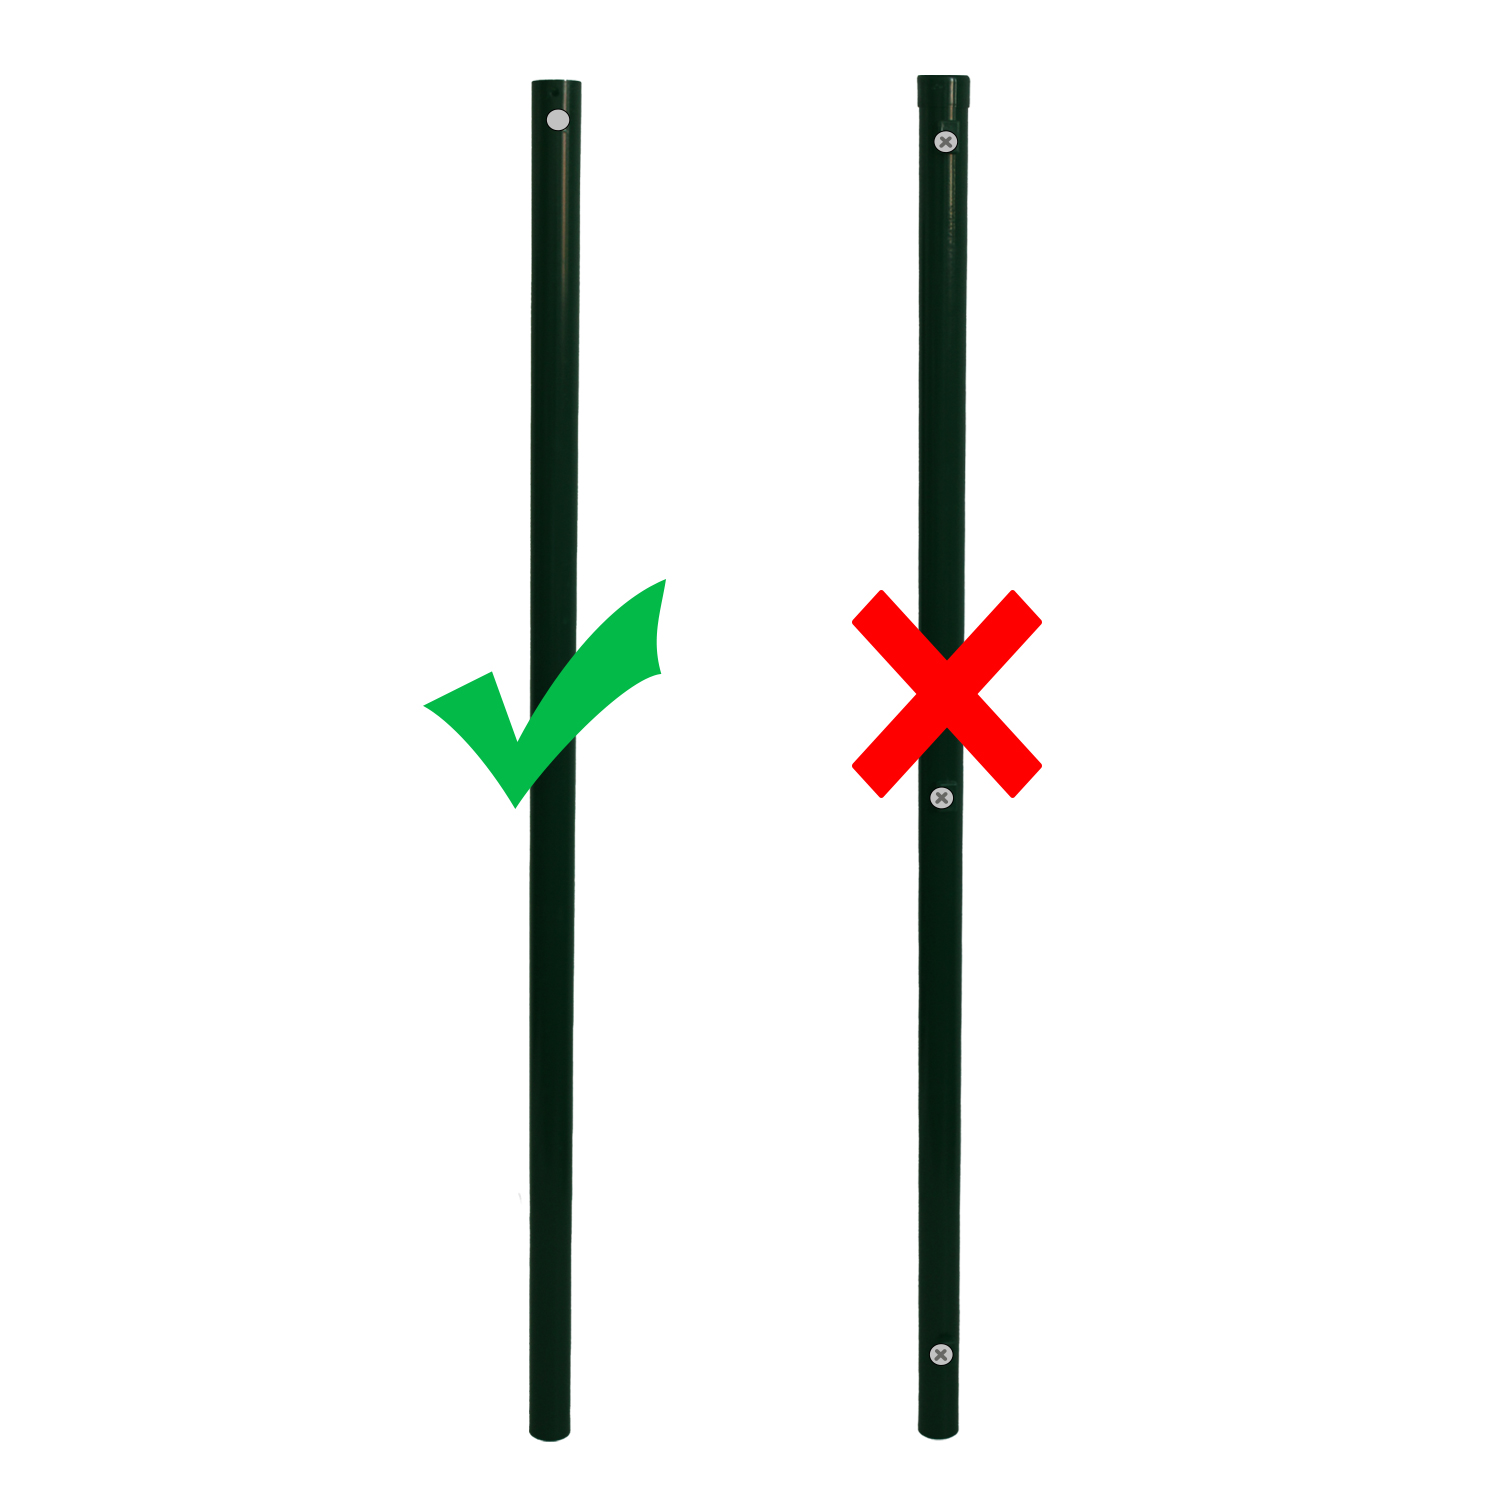
Take one of the angle posts and add the post cap by gently hammering it on.
The angle posts have 1 hole at one end (which can be used to secure the post cap in with a screw). |
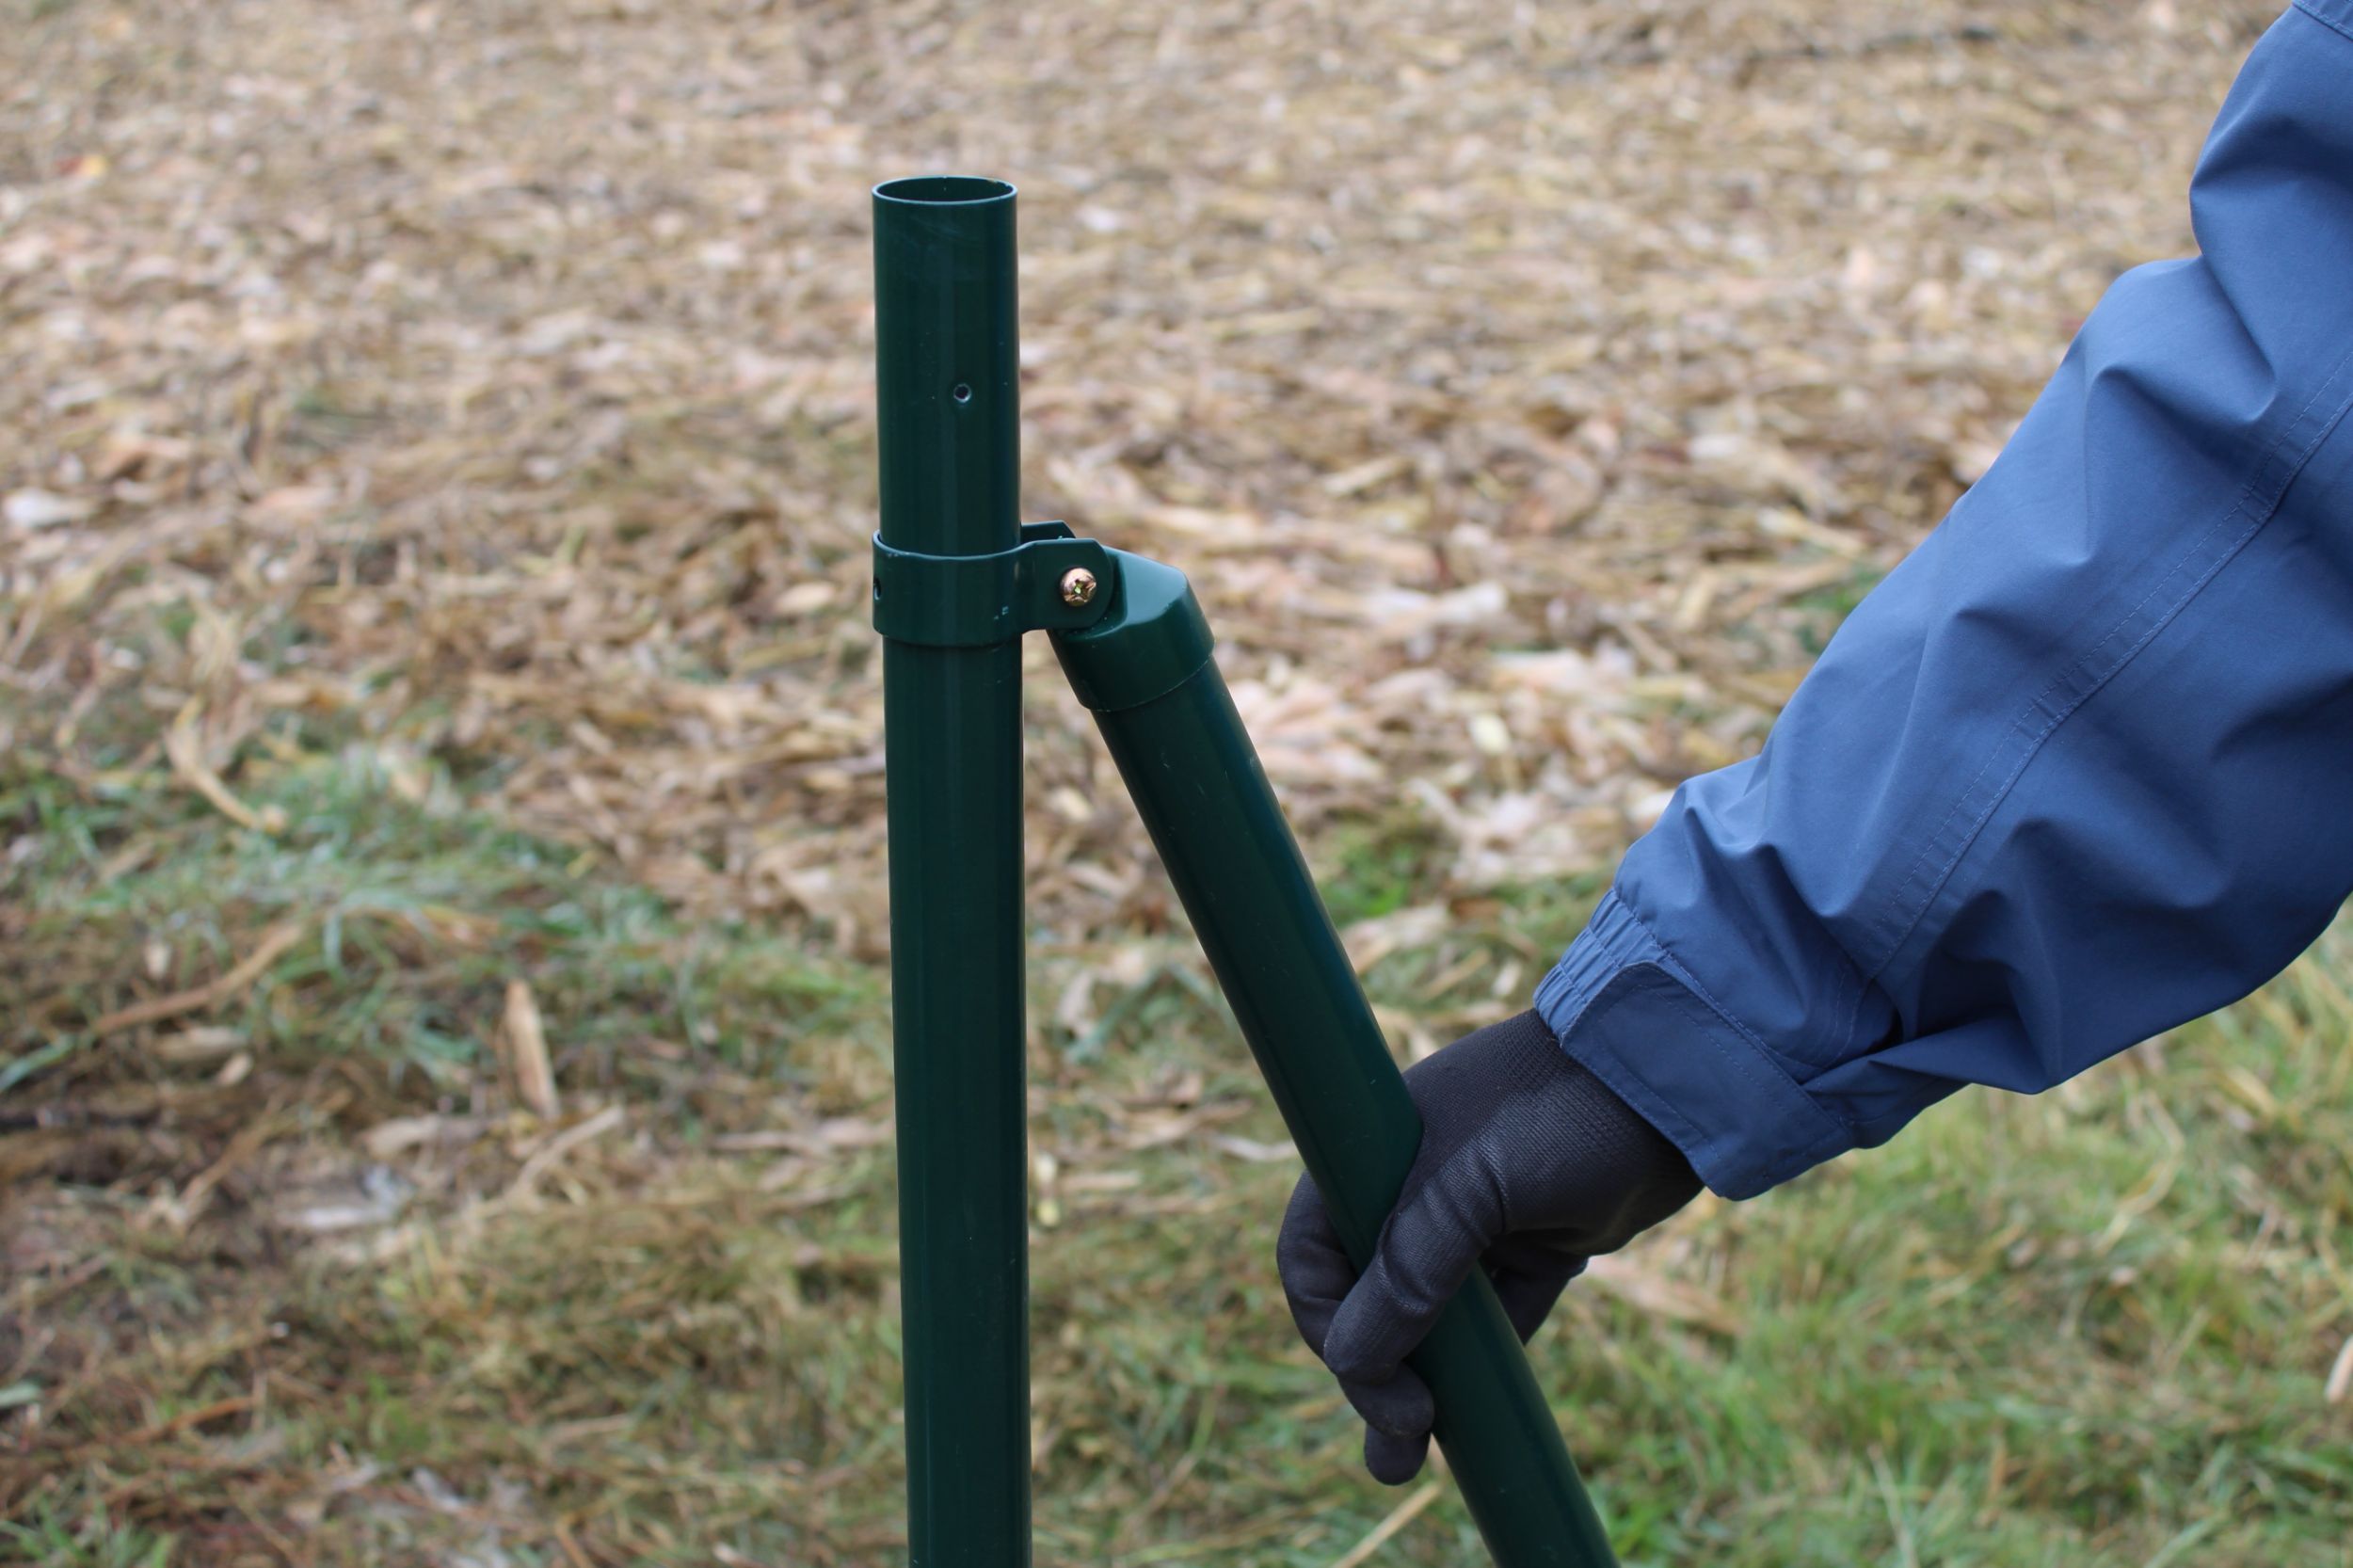
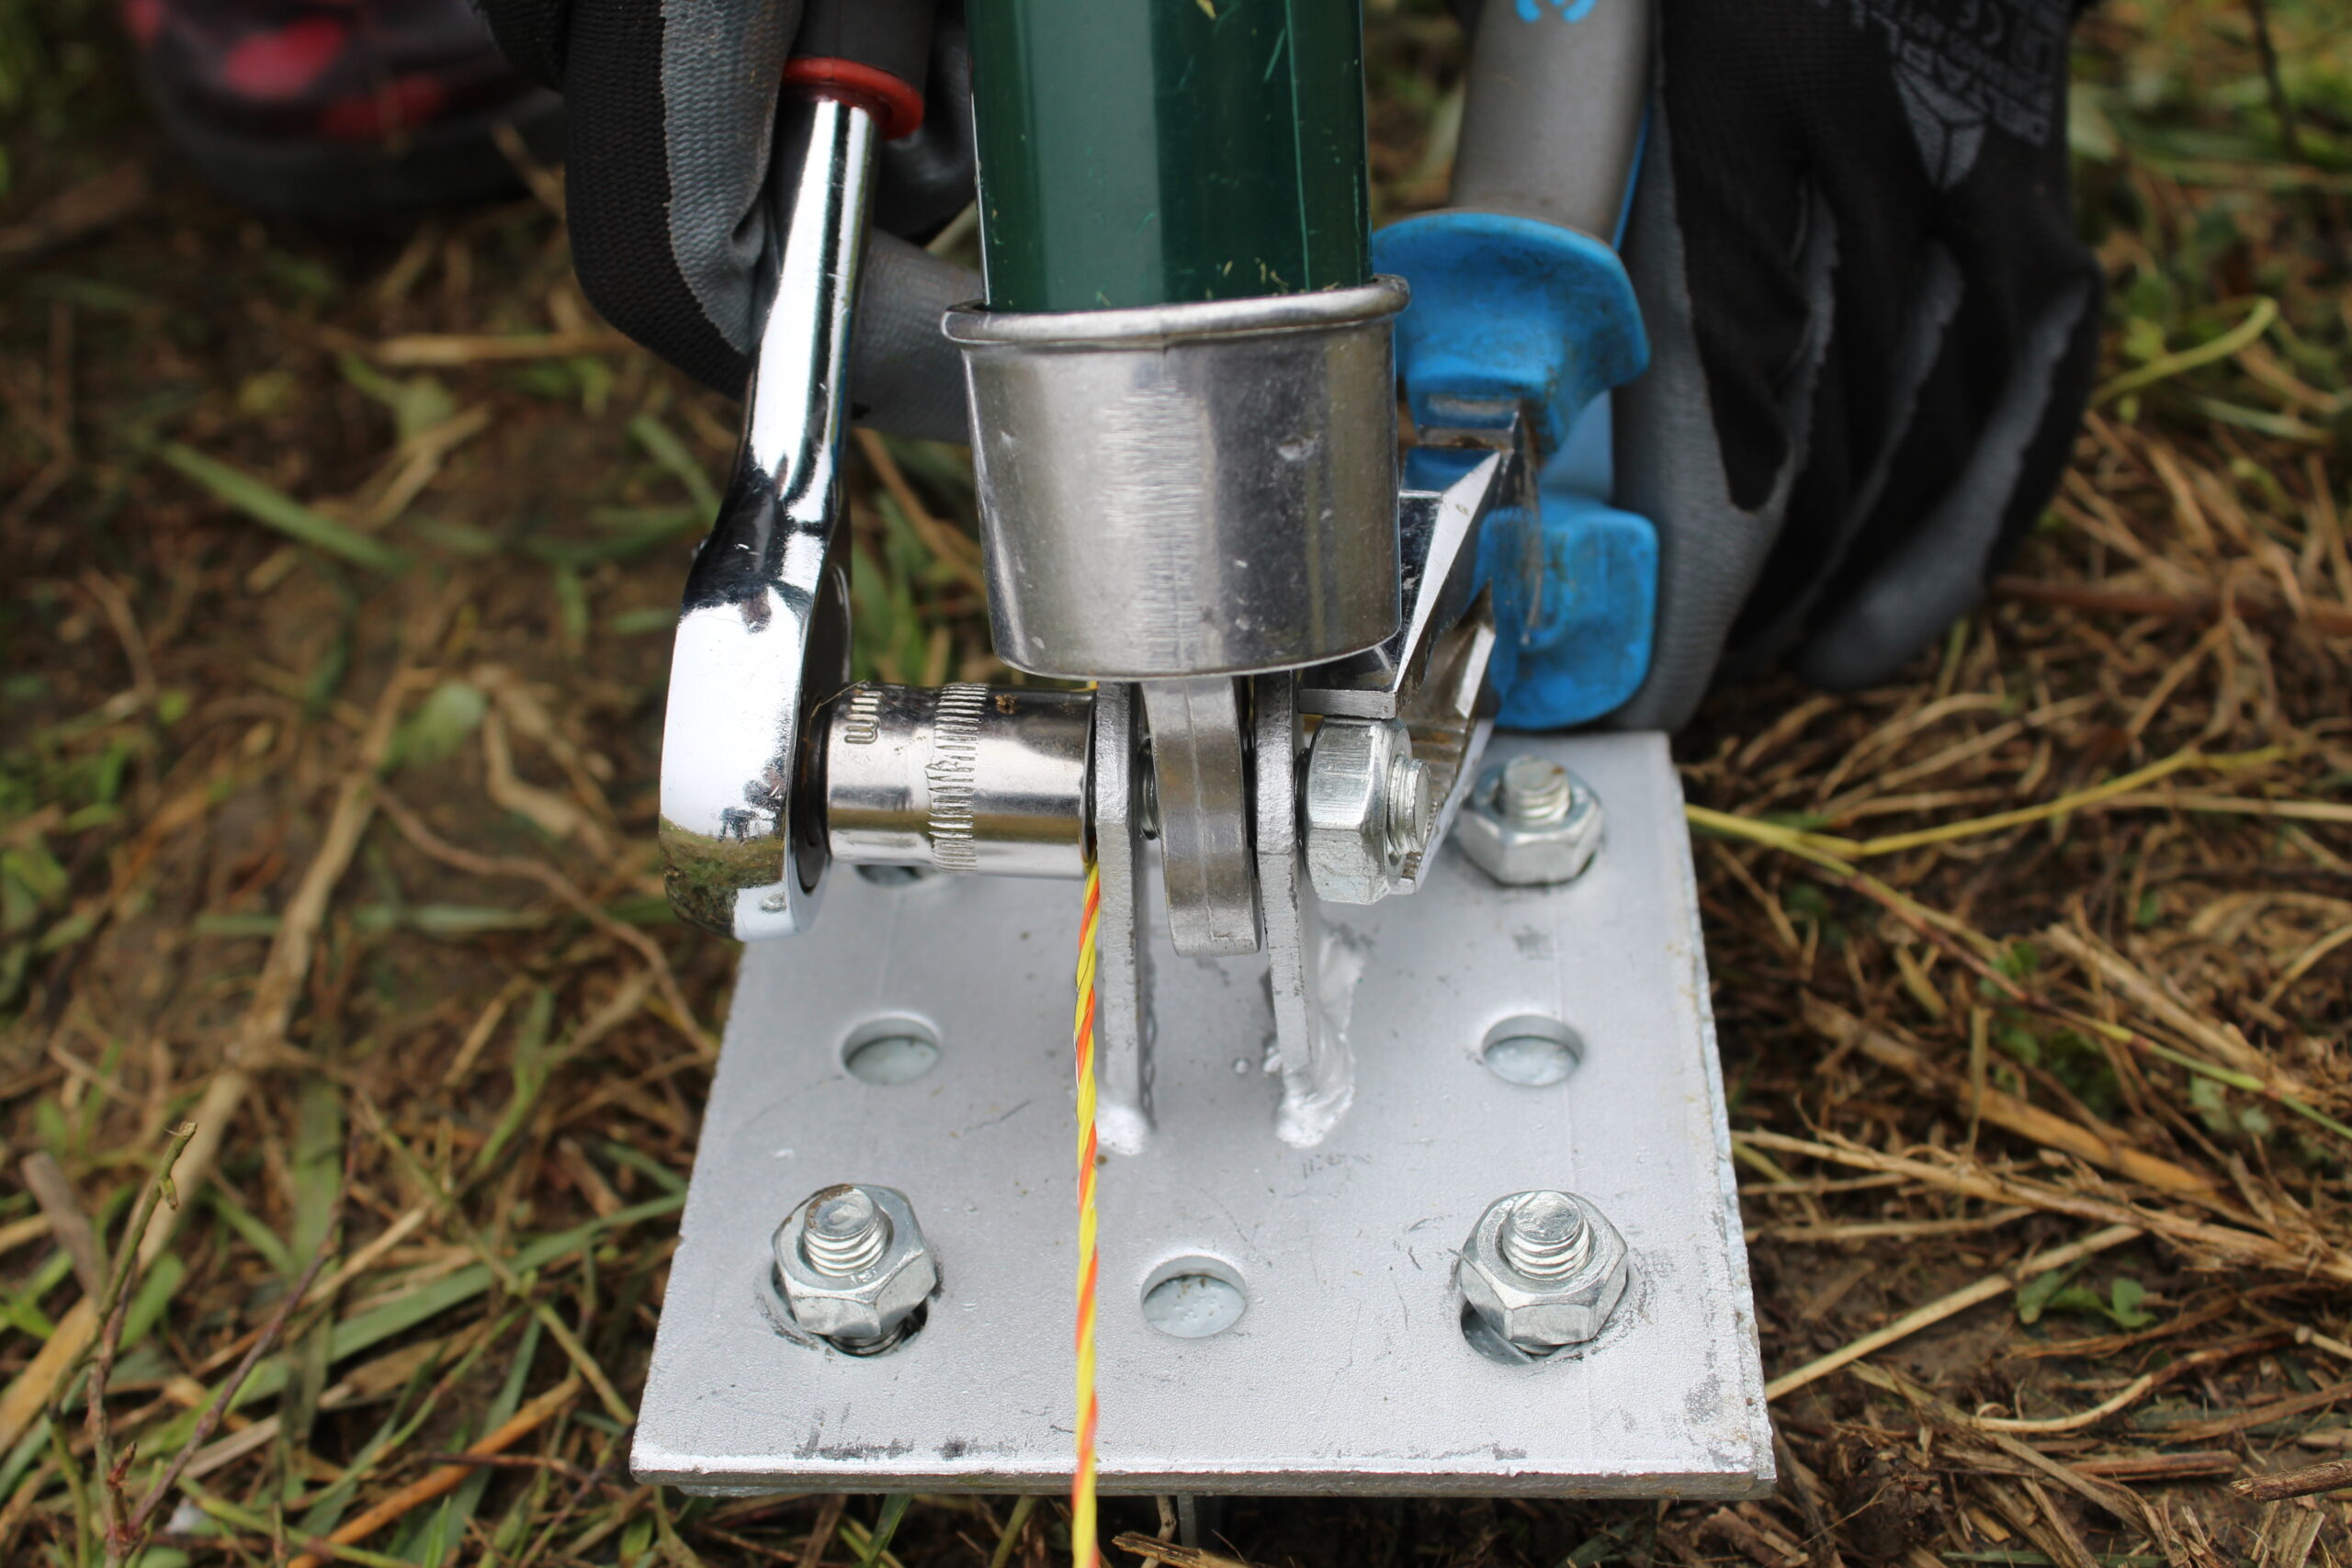
| Step 10 – Attach strut clamp
|
Attach the strut clamp to the post cap using a bolt and a hex nut. |
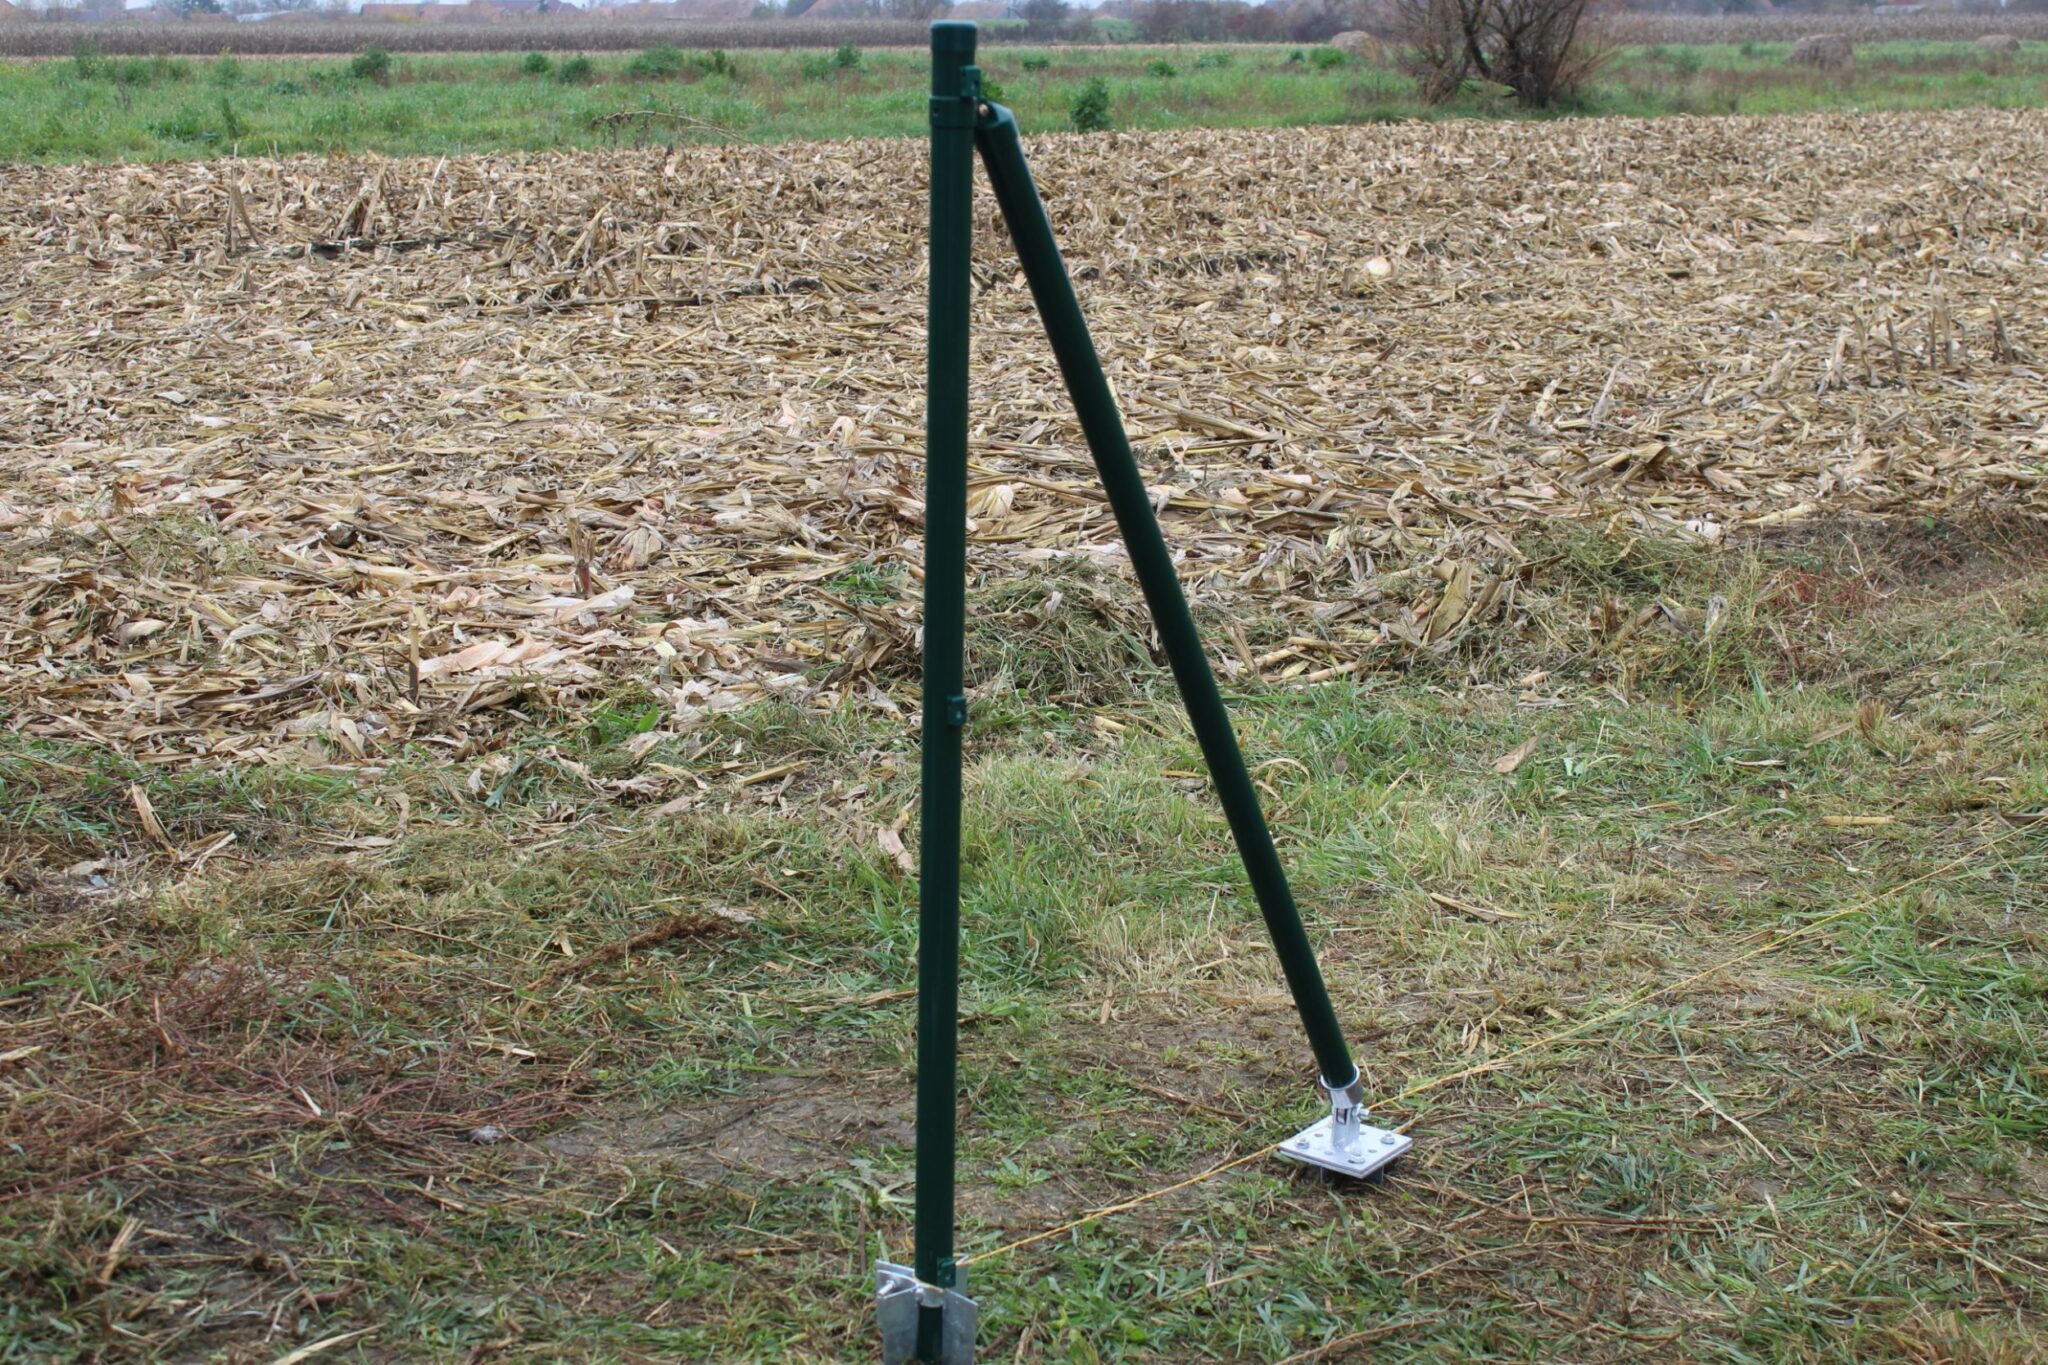
| Step 11 – Slot angle post onto the first post
|
Slot the clamp onto the upright end post. |
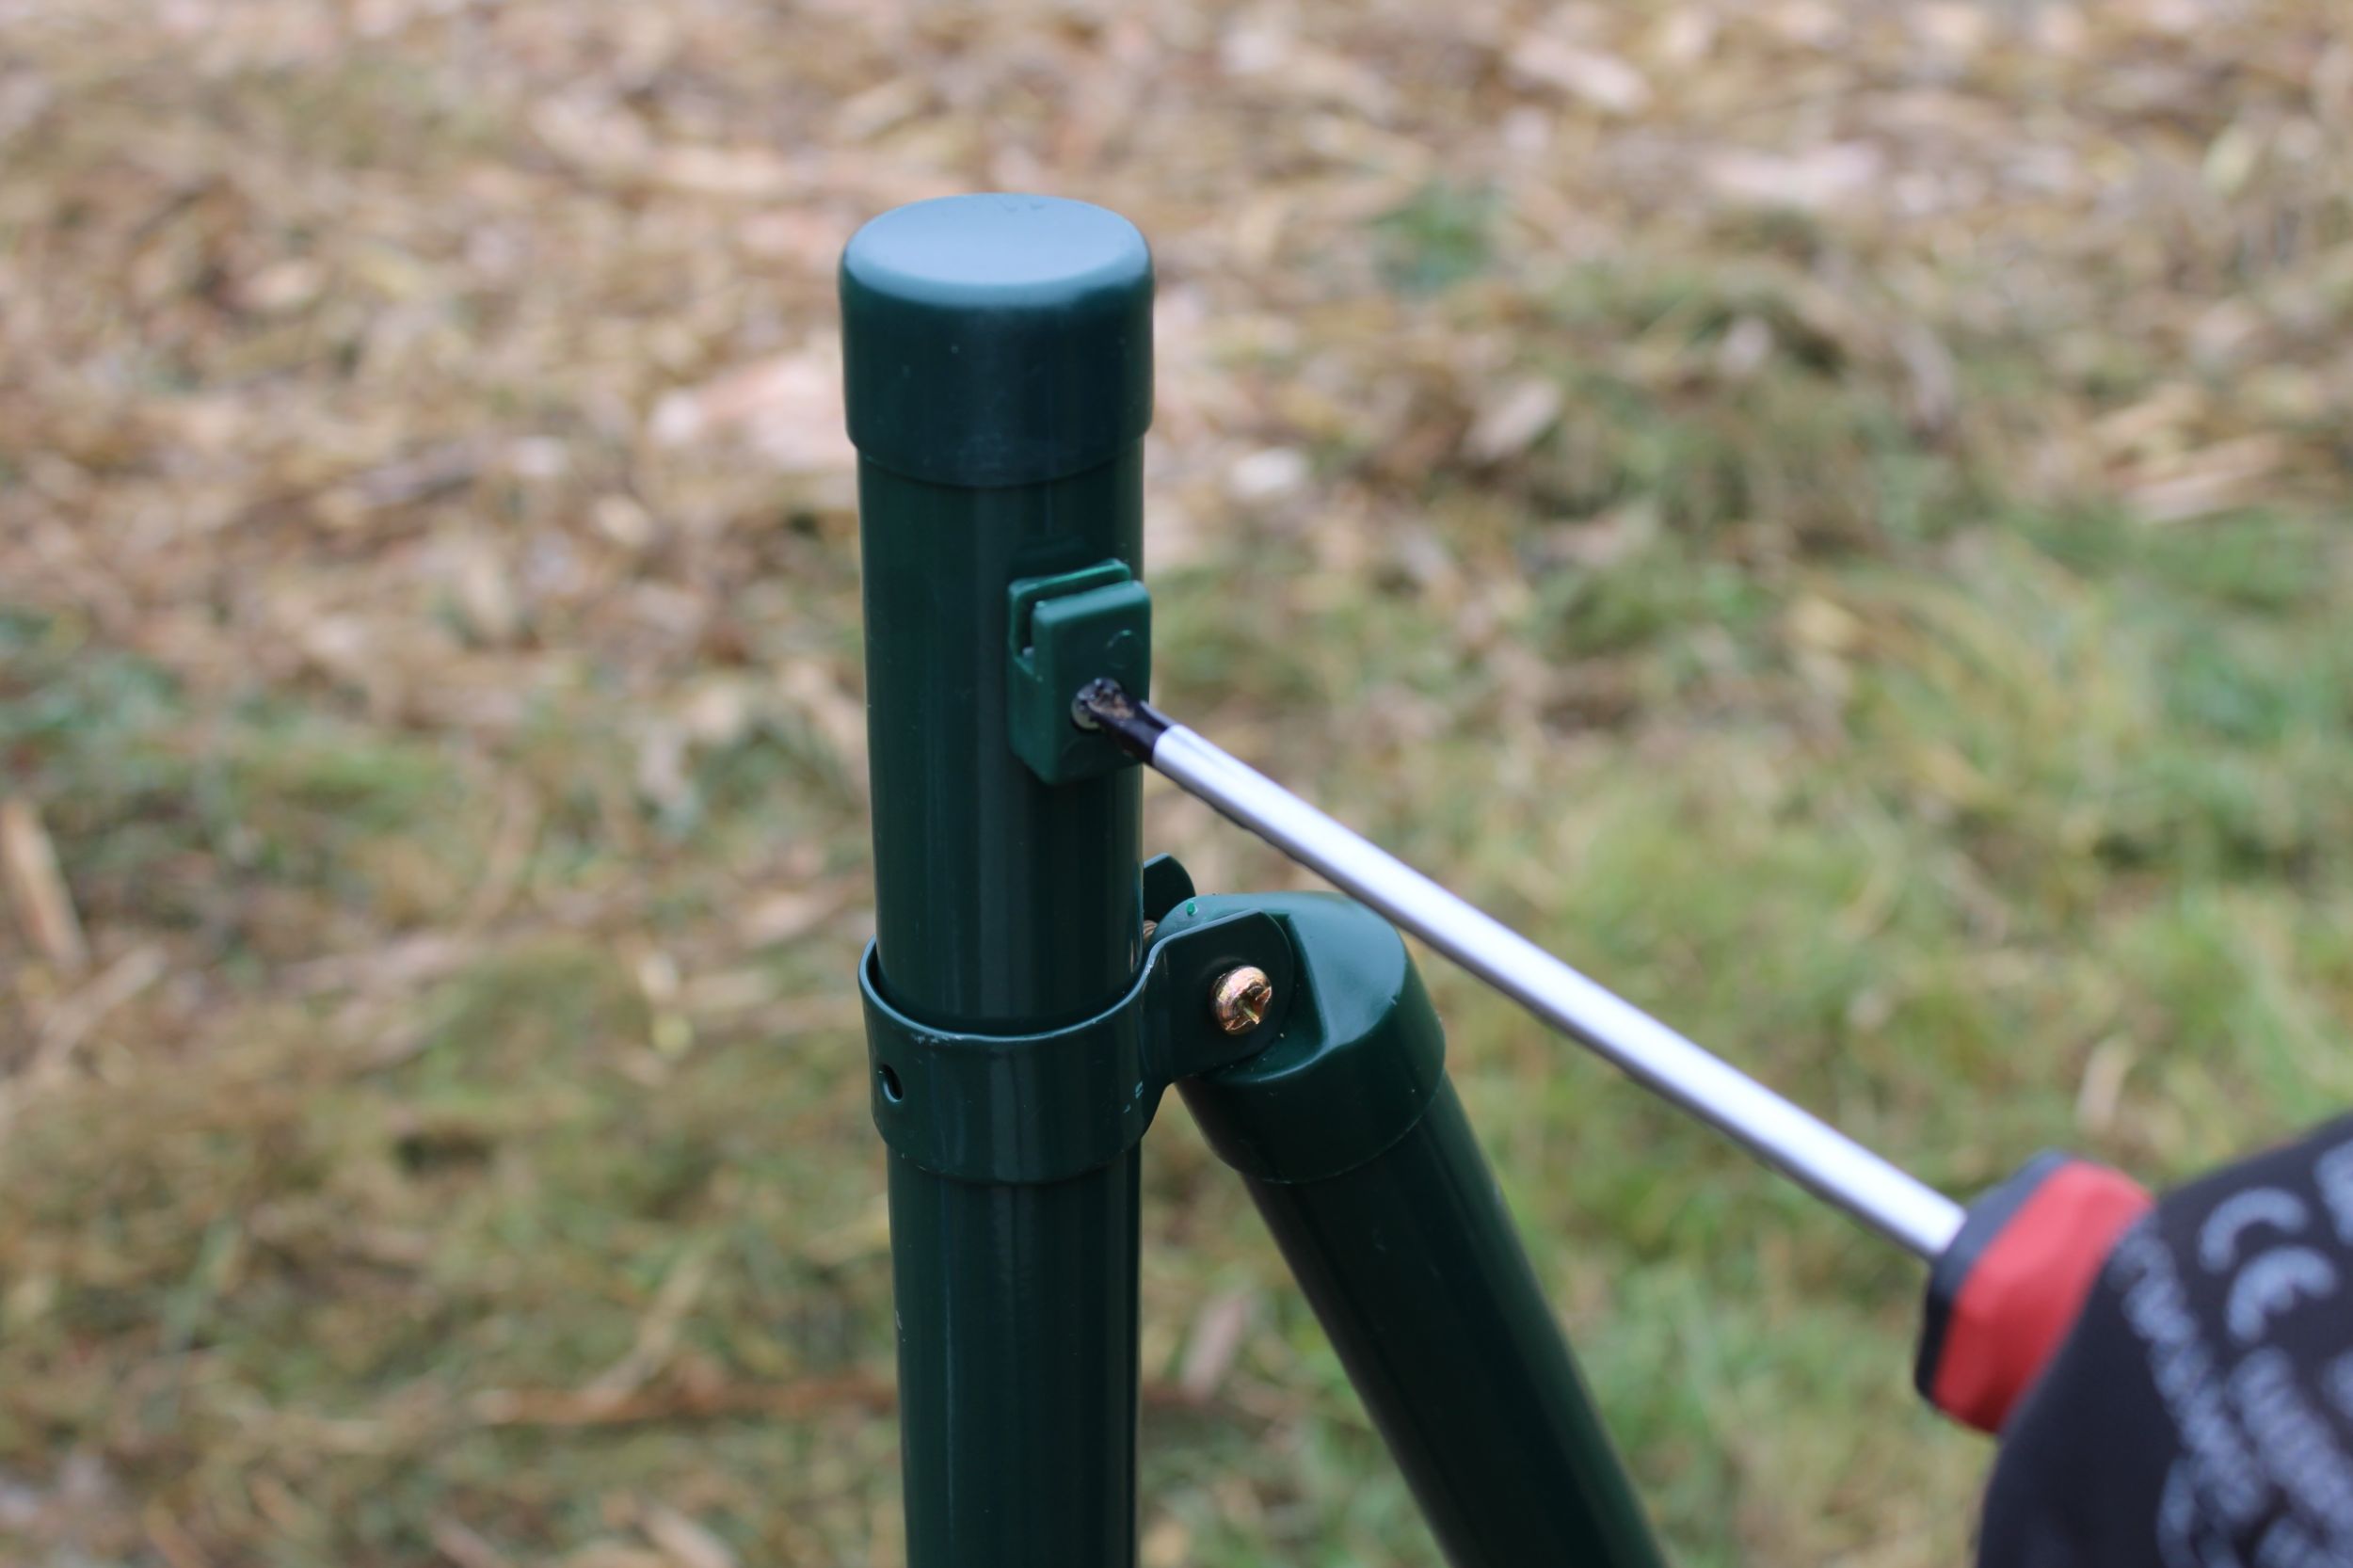
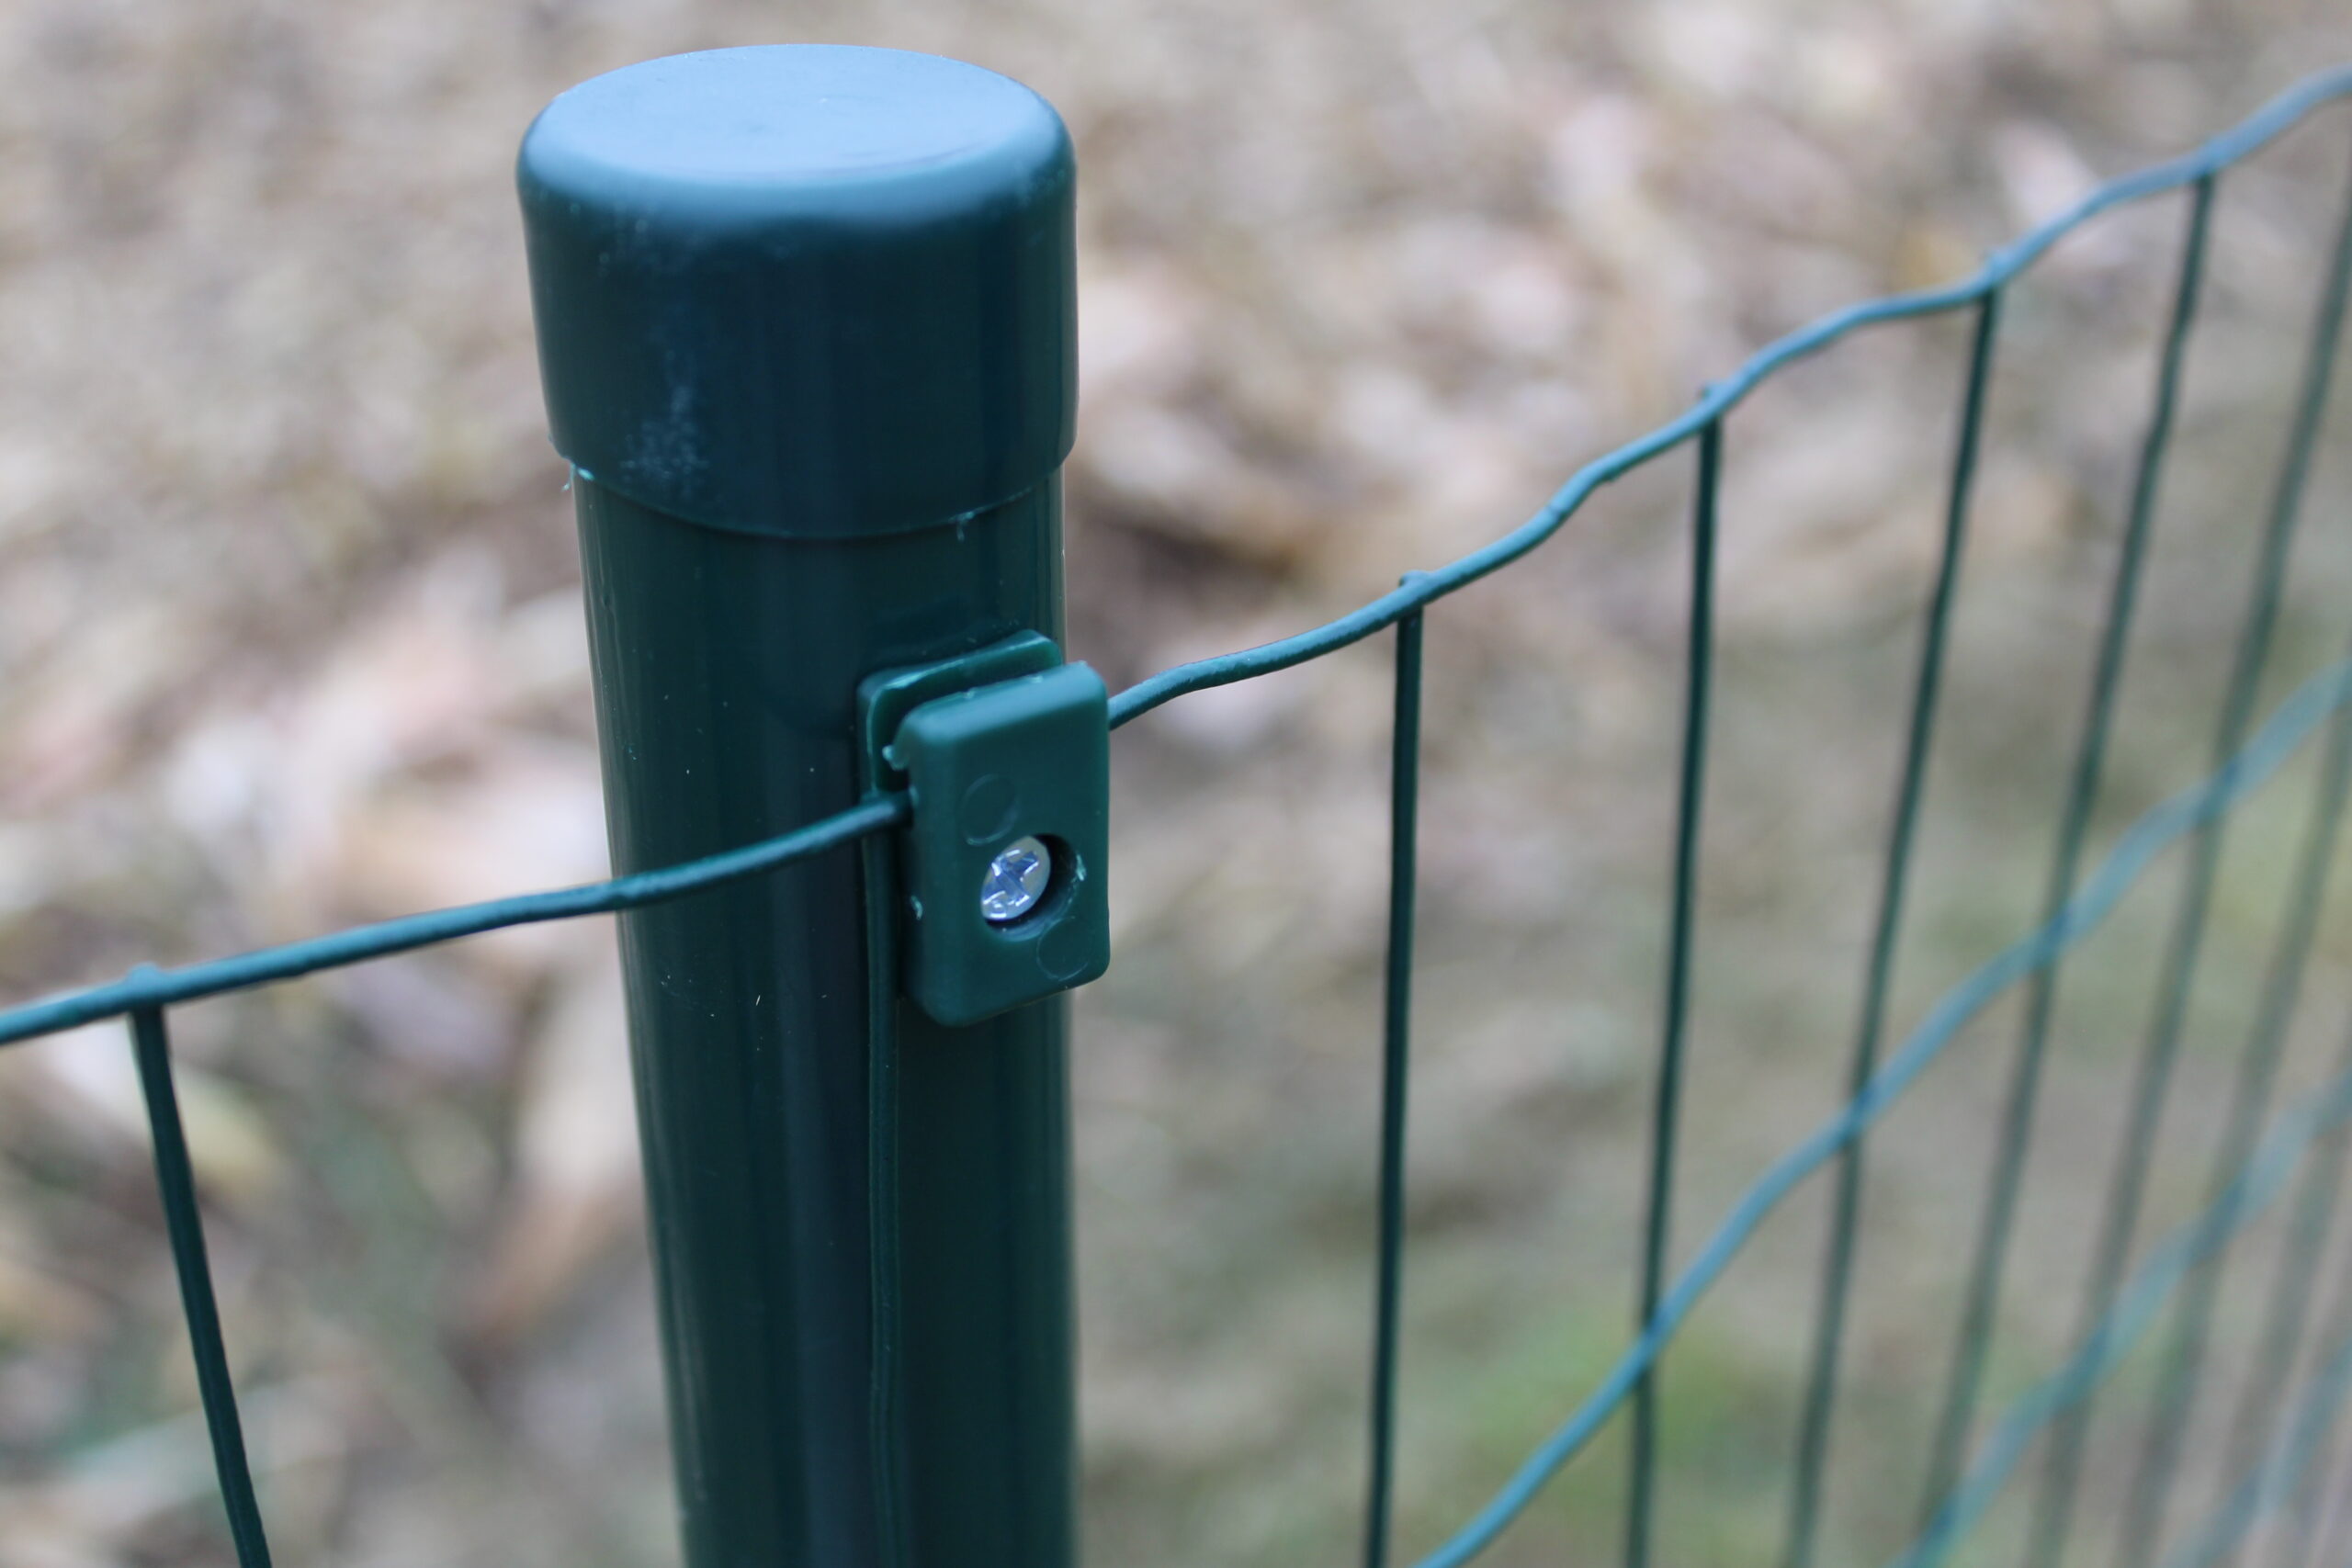
| Step 12 – Add fence clips
|
Screw the fence clips on and add the post cap to the end post. |
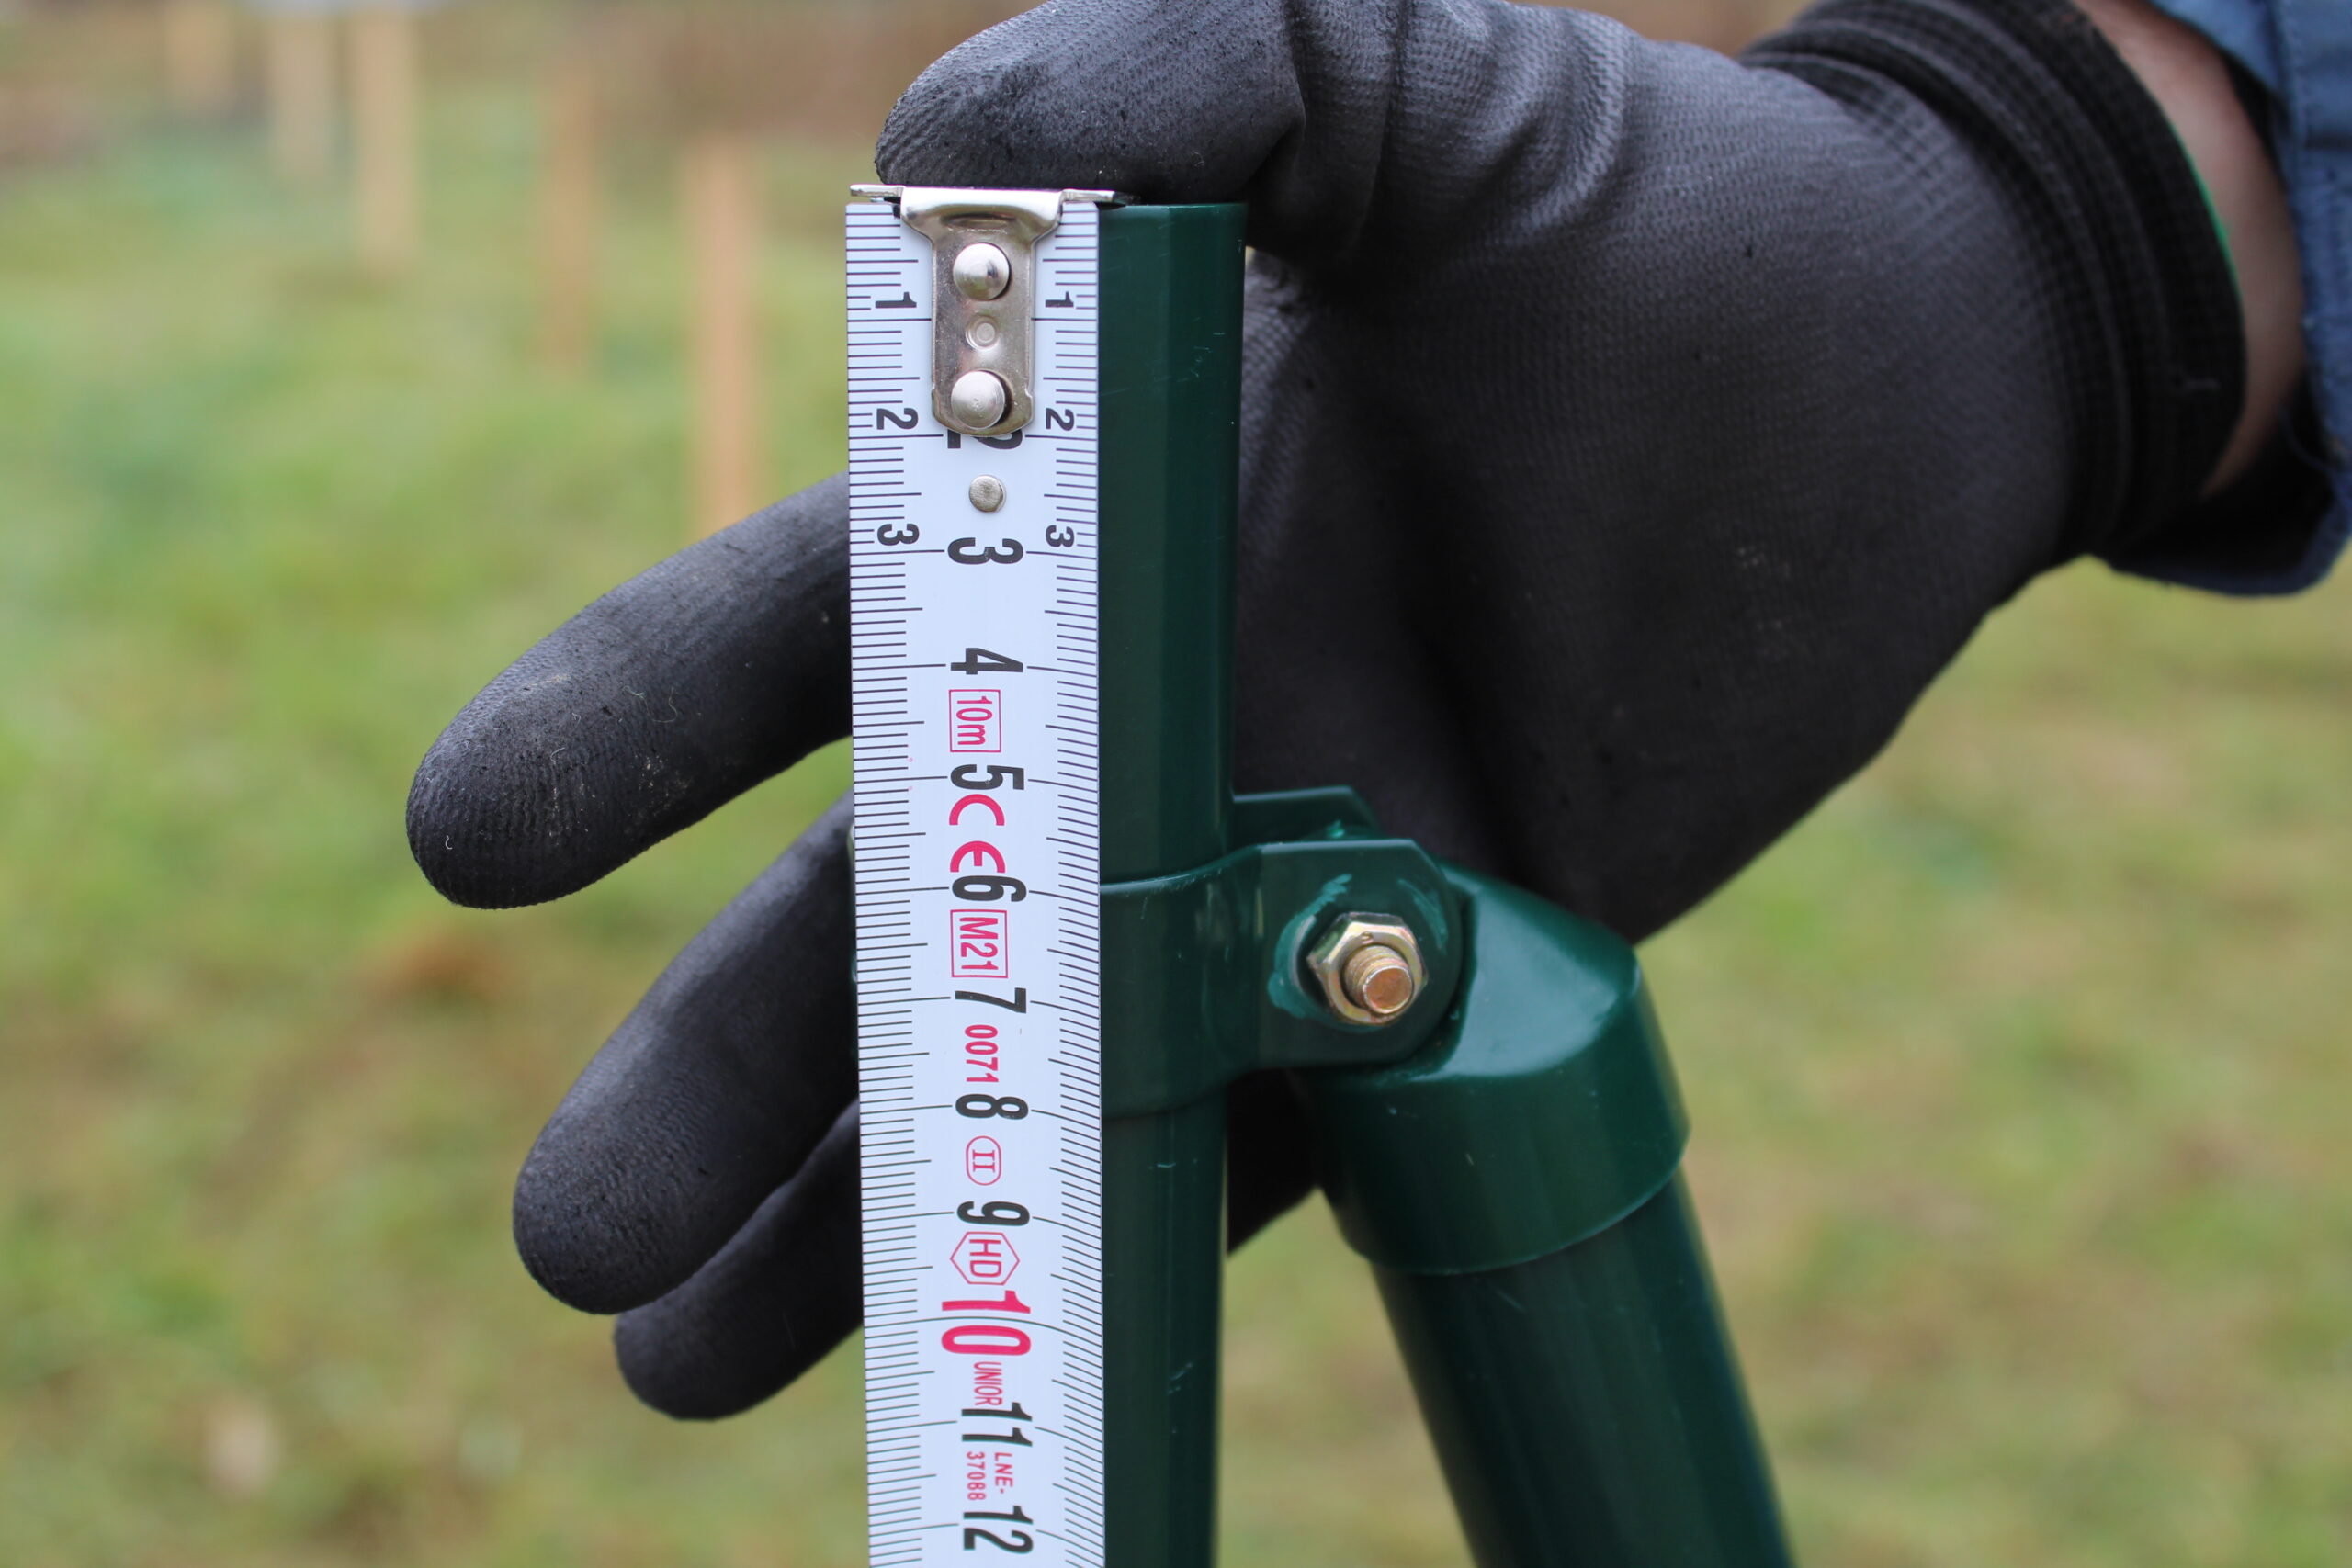
| Step 13 – 6cm distance from the top of the post
|
Hold the clamp at a 6cm distance from the top of the end post. |
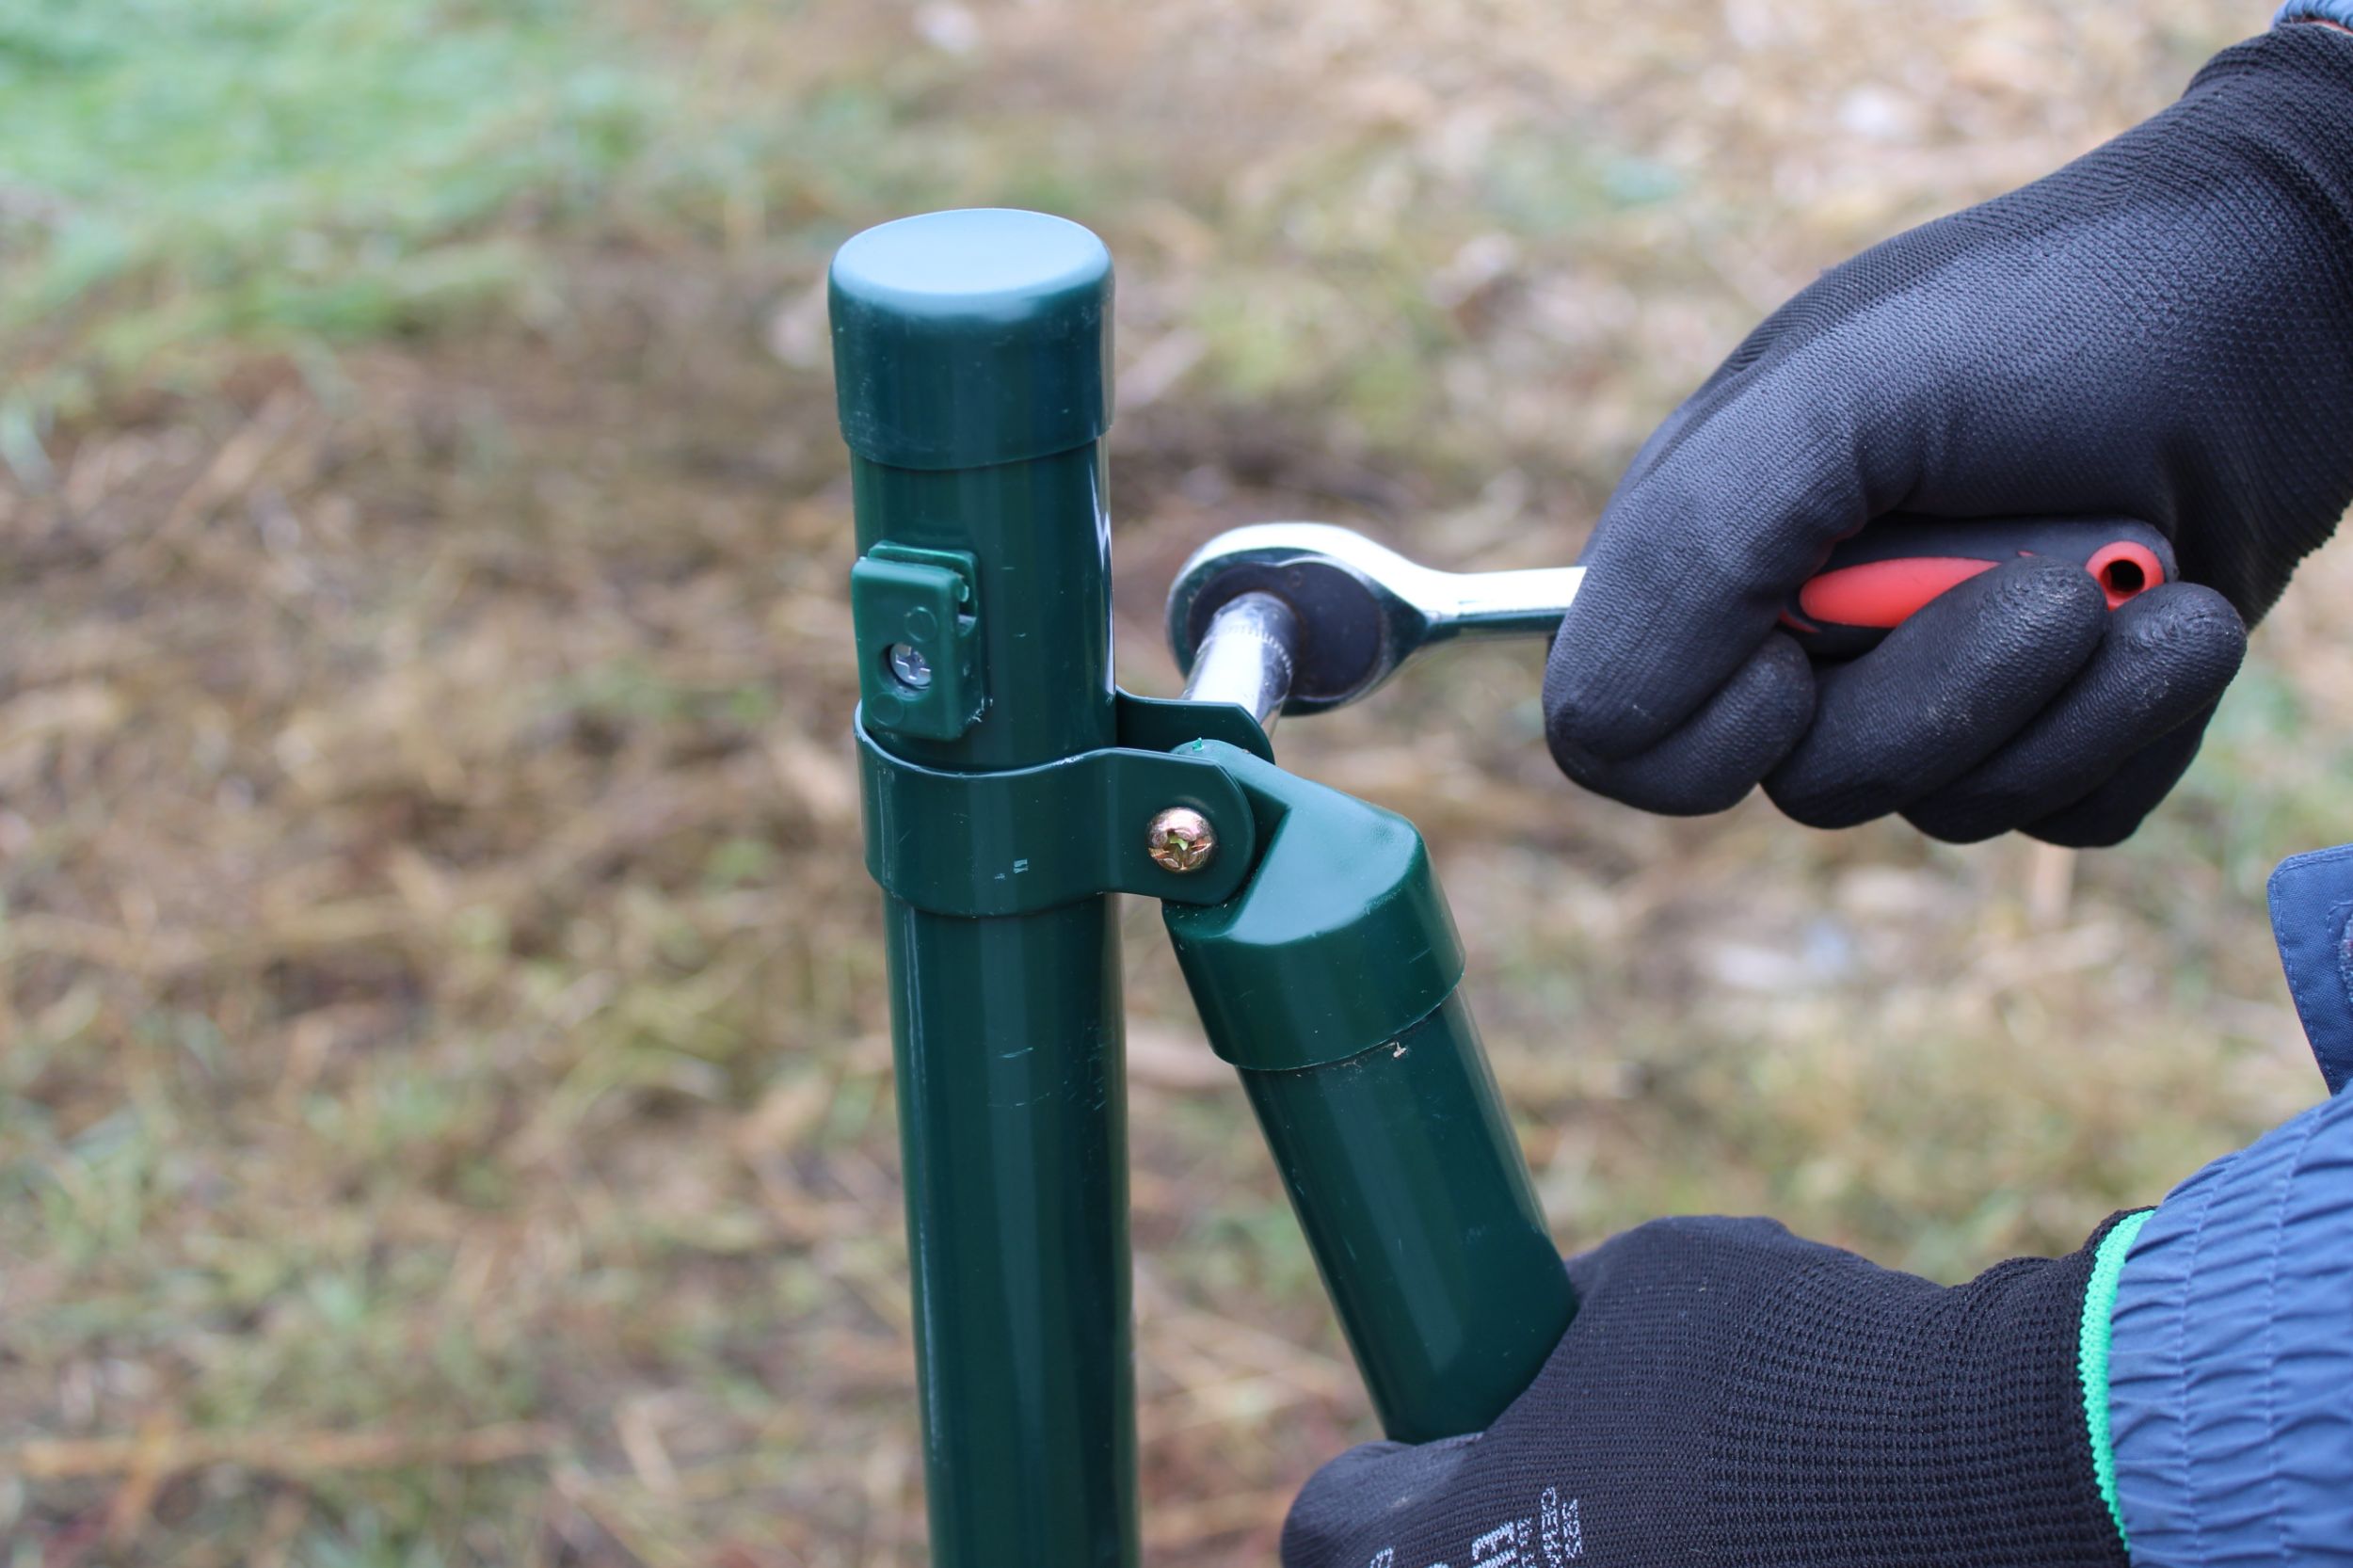
| Step 14 – Fix the angle post into place
|
Tighten the bolt with a ratchet until it’s secure. |
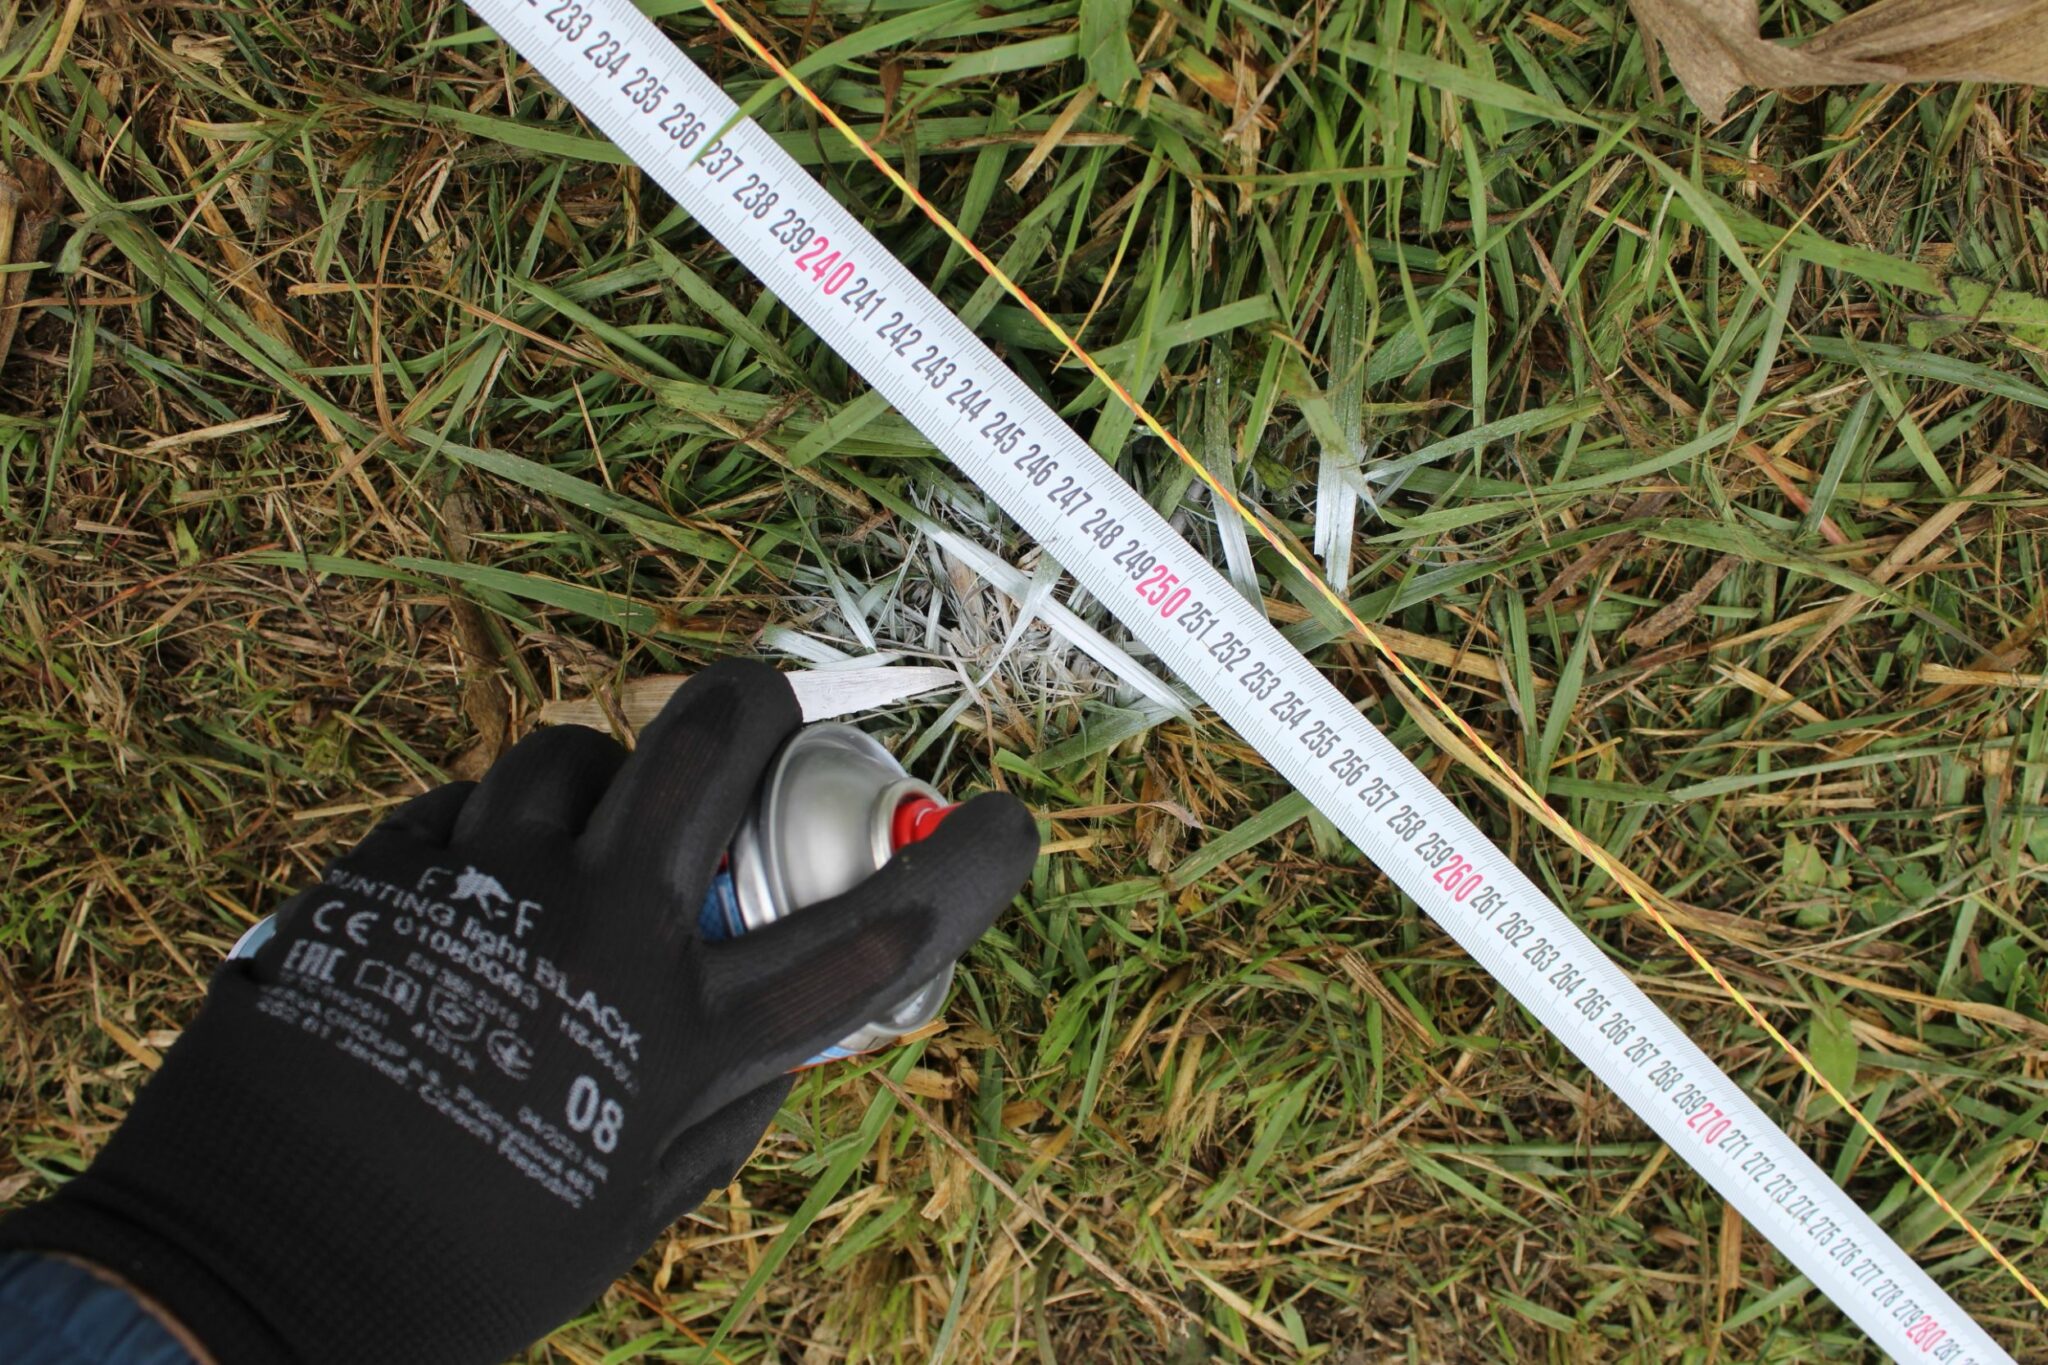
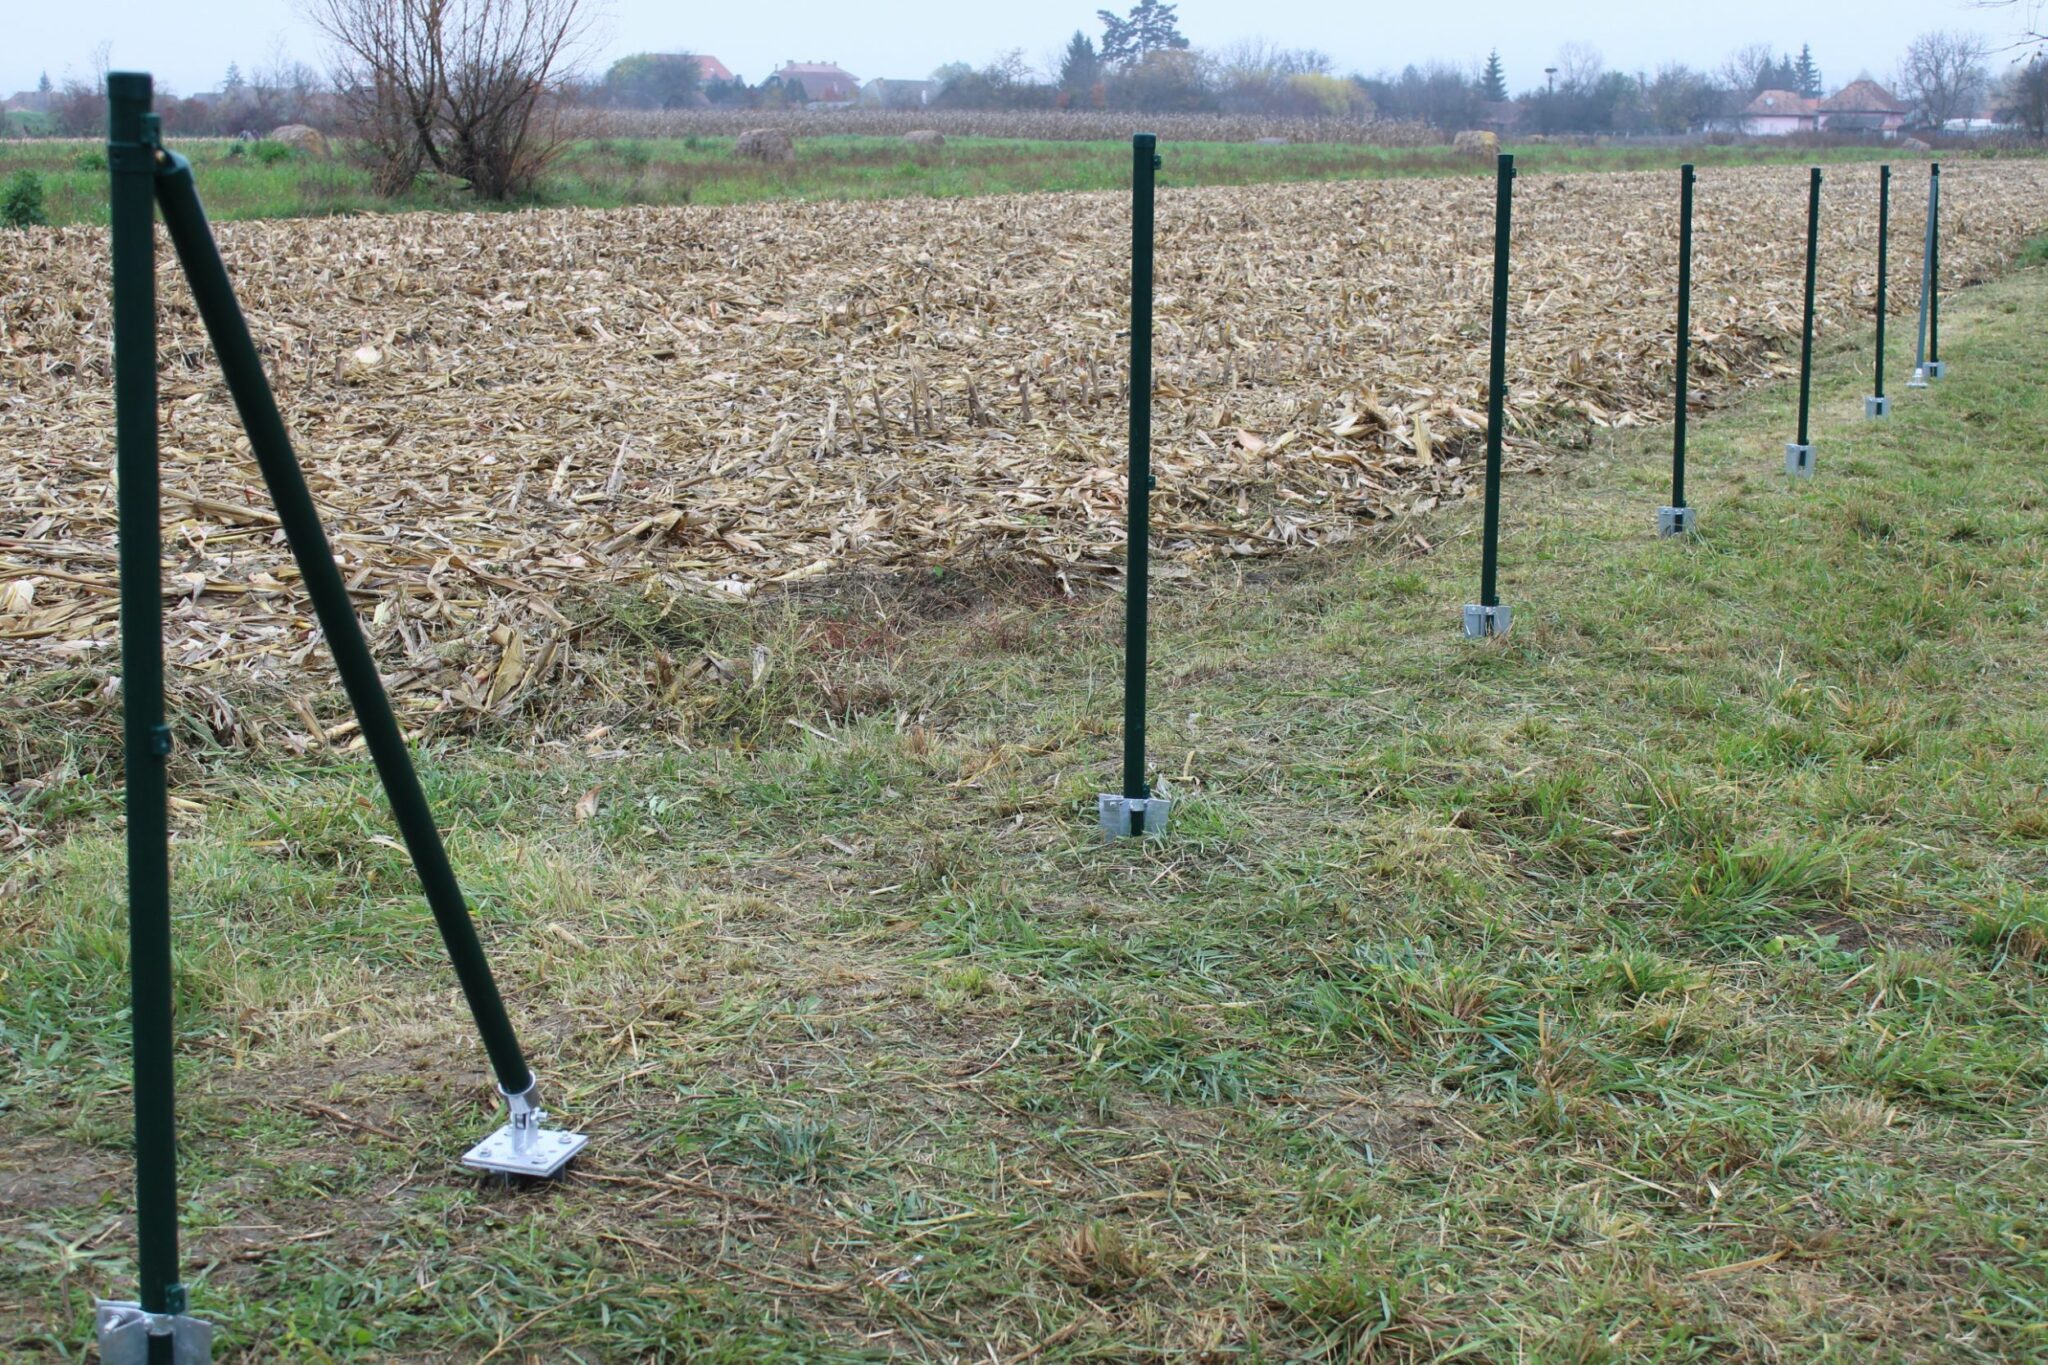
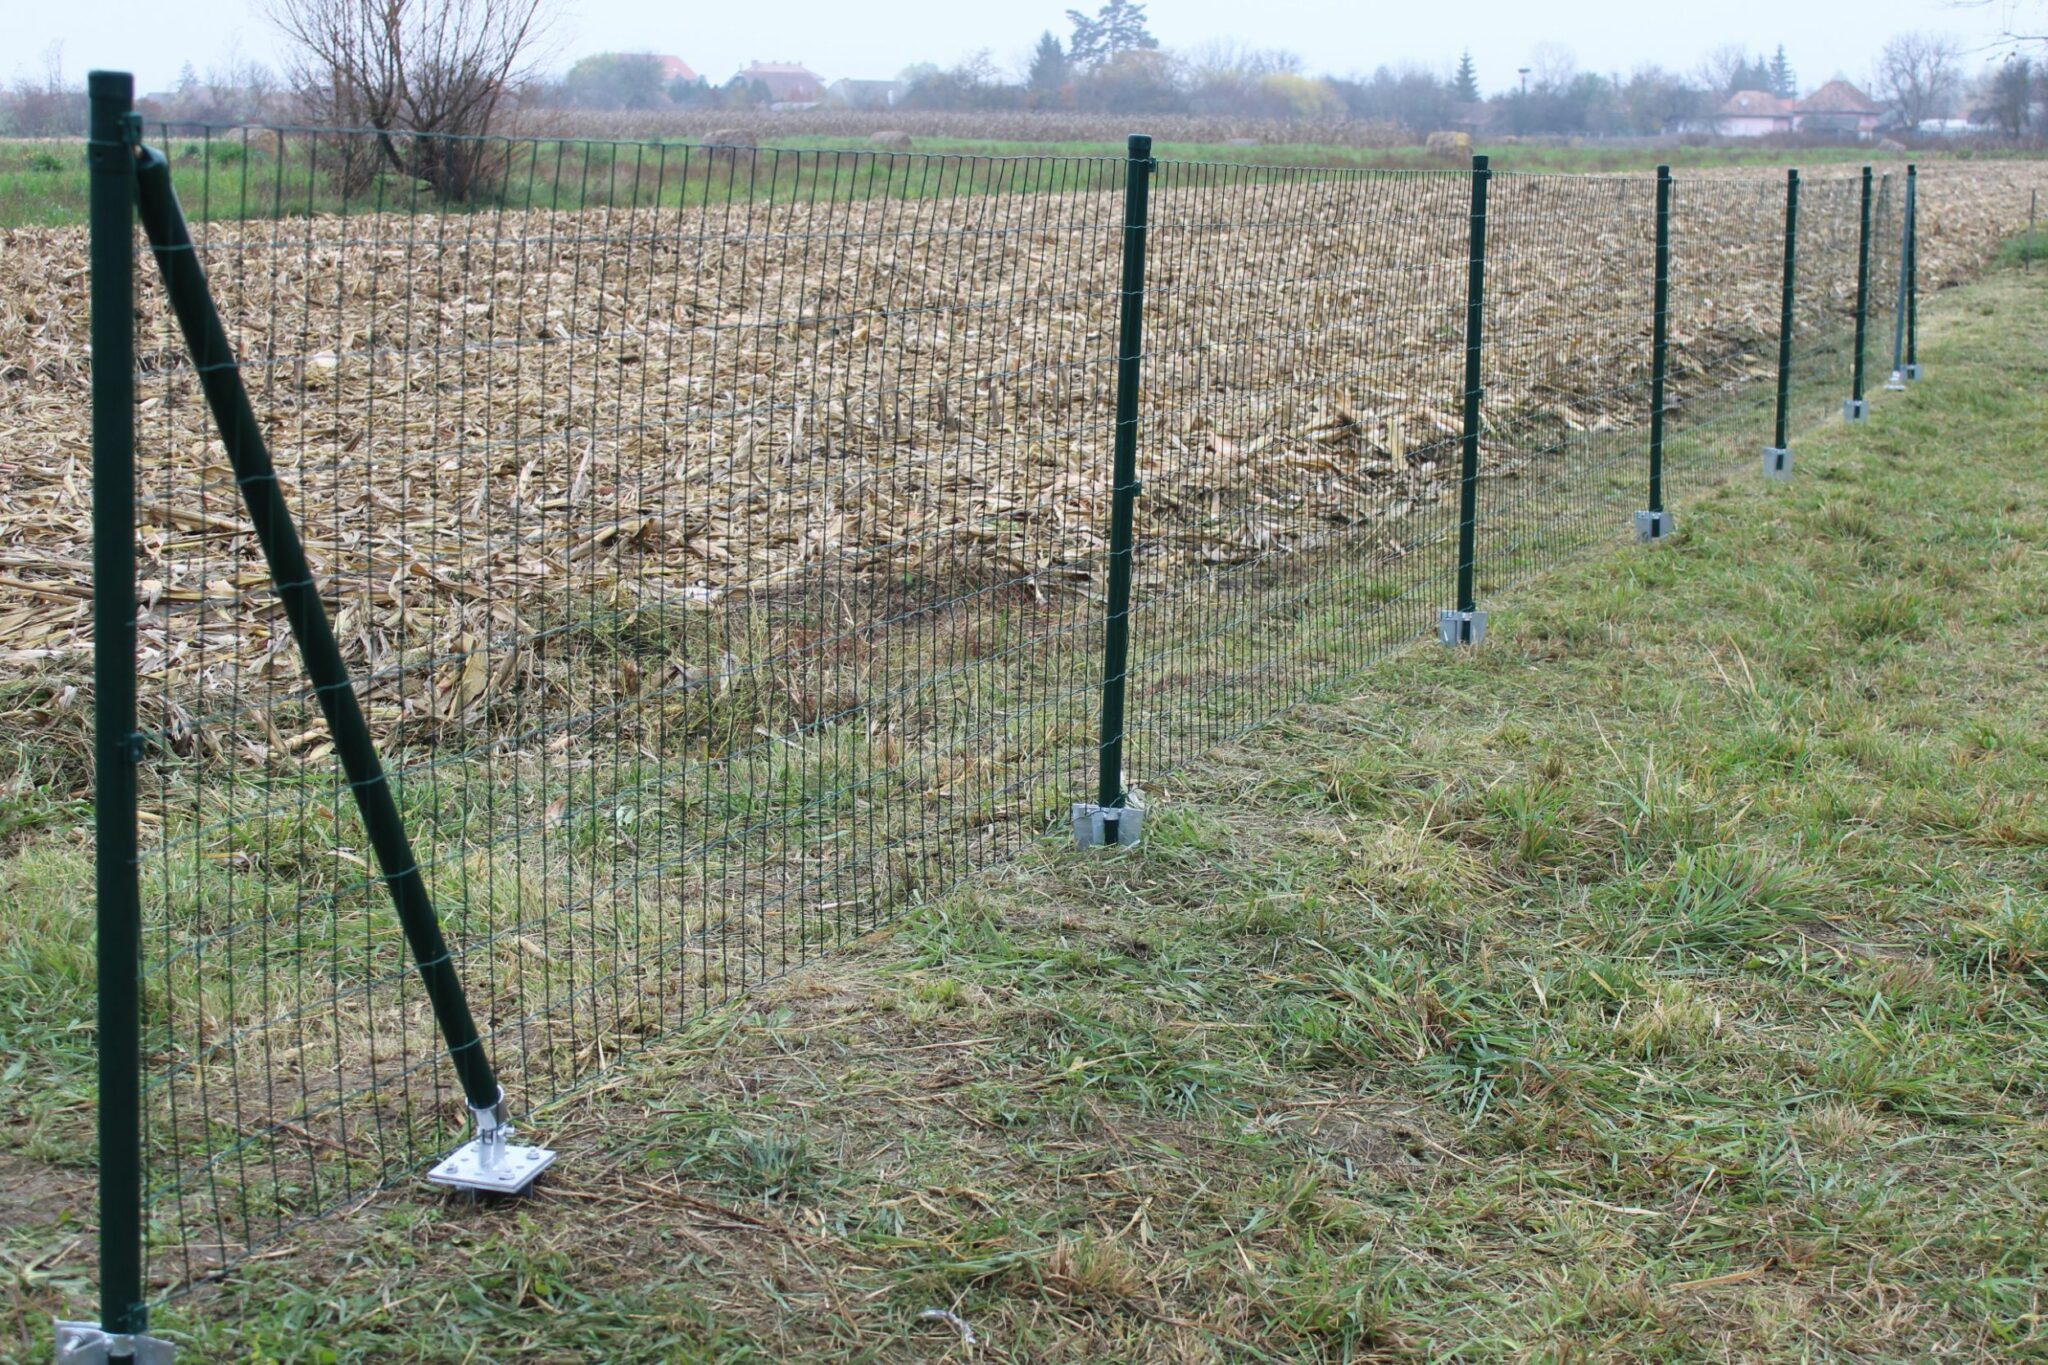
| Step 15 – Measure out the run
|
Use a tape measure to measure and mark the end of your run (15m or 25m, depending on the length of your fence). |
| Step 16 – Mark the run
|
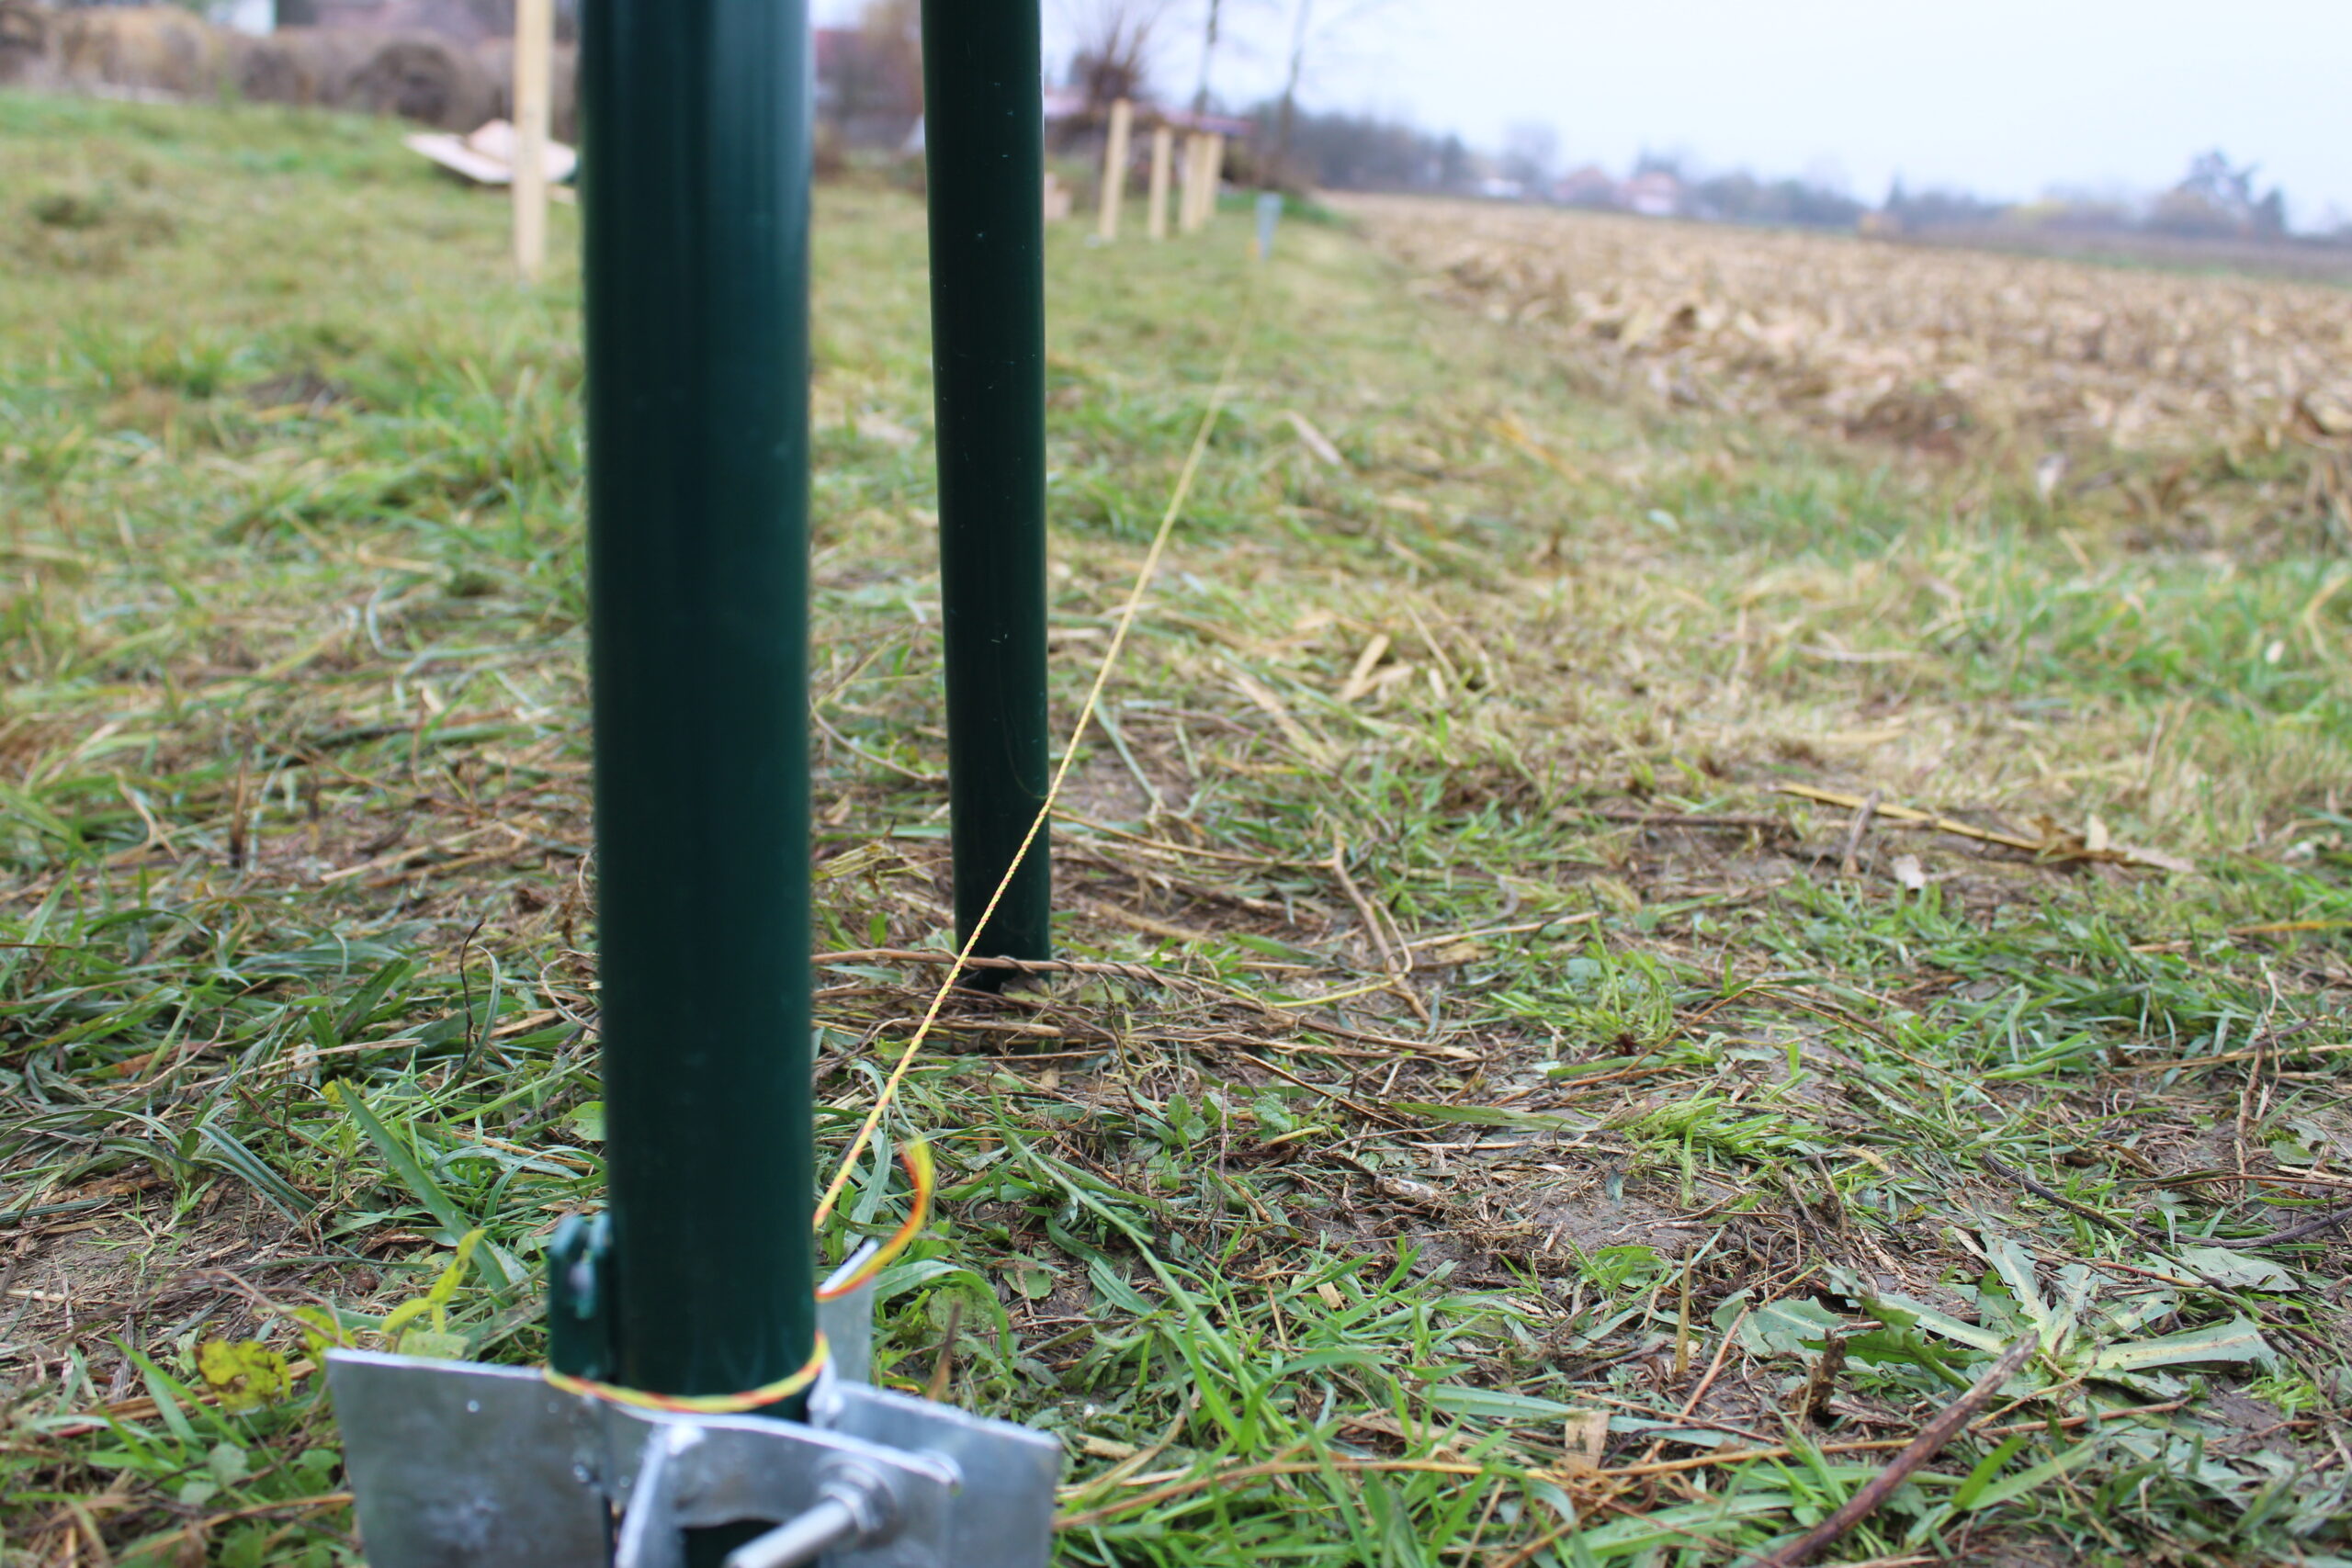
Tie a colourful string to the first post and the location of your last end post.
This will help mark the run where your intermediate posts will be and also make sure you can hammer the post spikes in at the same height. |
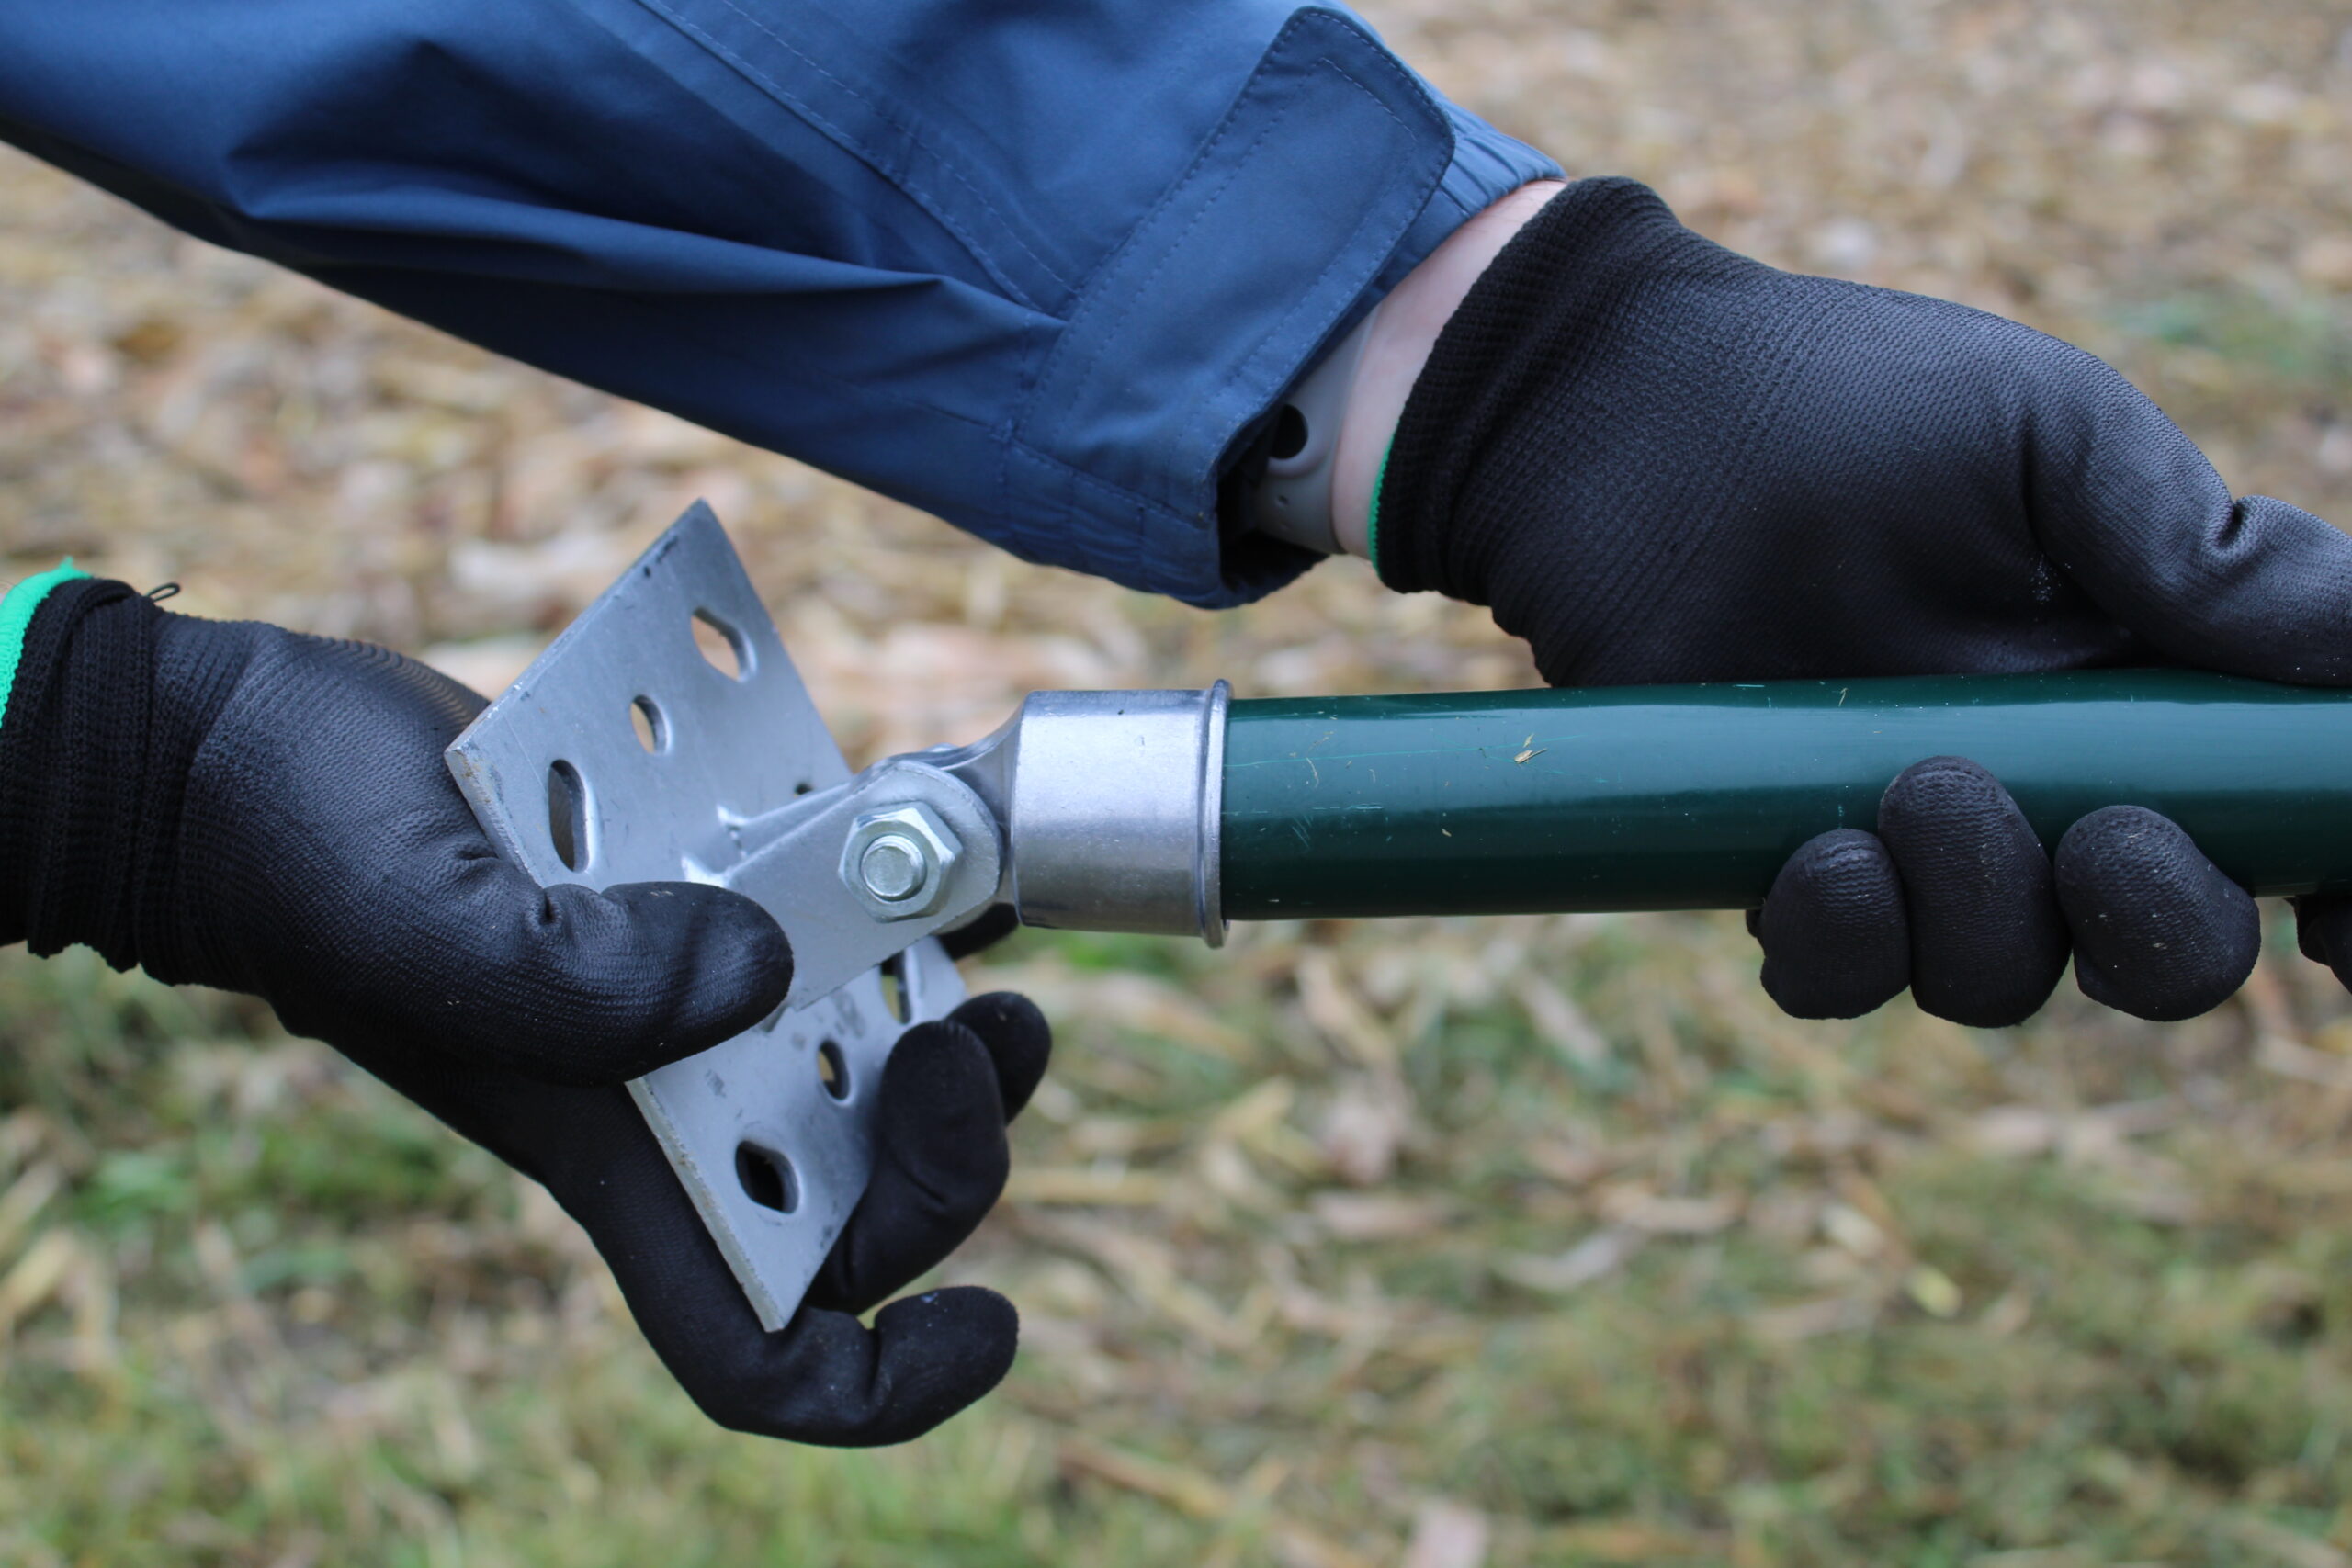
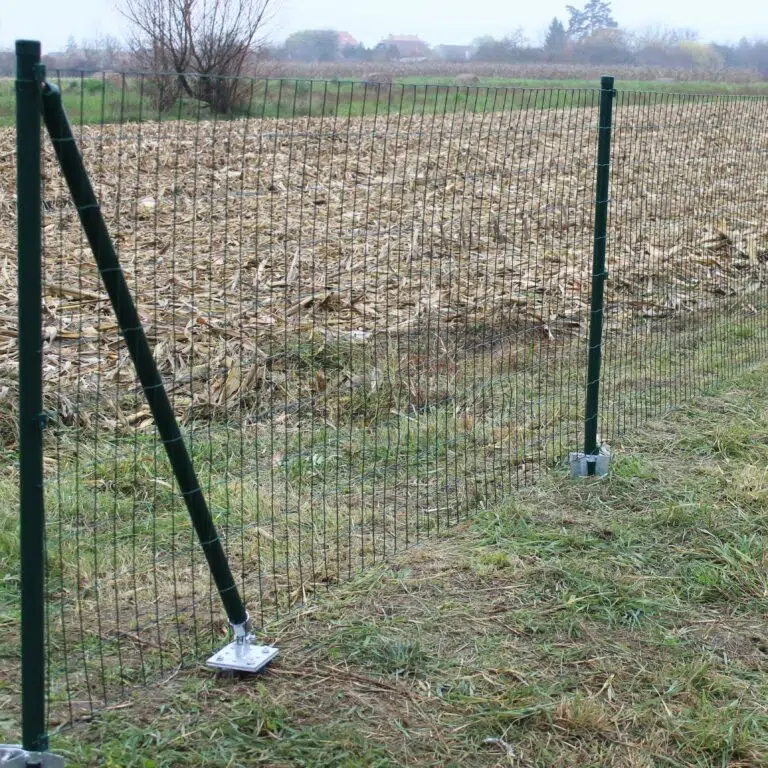
| Step 17 – Add angle post plate
|
Push the bottom of the angle post into the angle post plate, making sure they’re connected securely. |
| Step 18 – Hammer in post spike for the angle post
|
Hammer the post spike into the ground at the same height as the spike in step 5. |
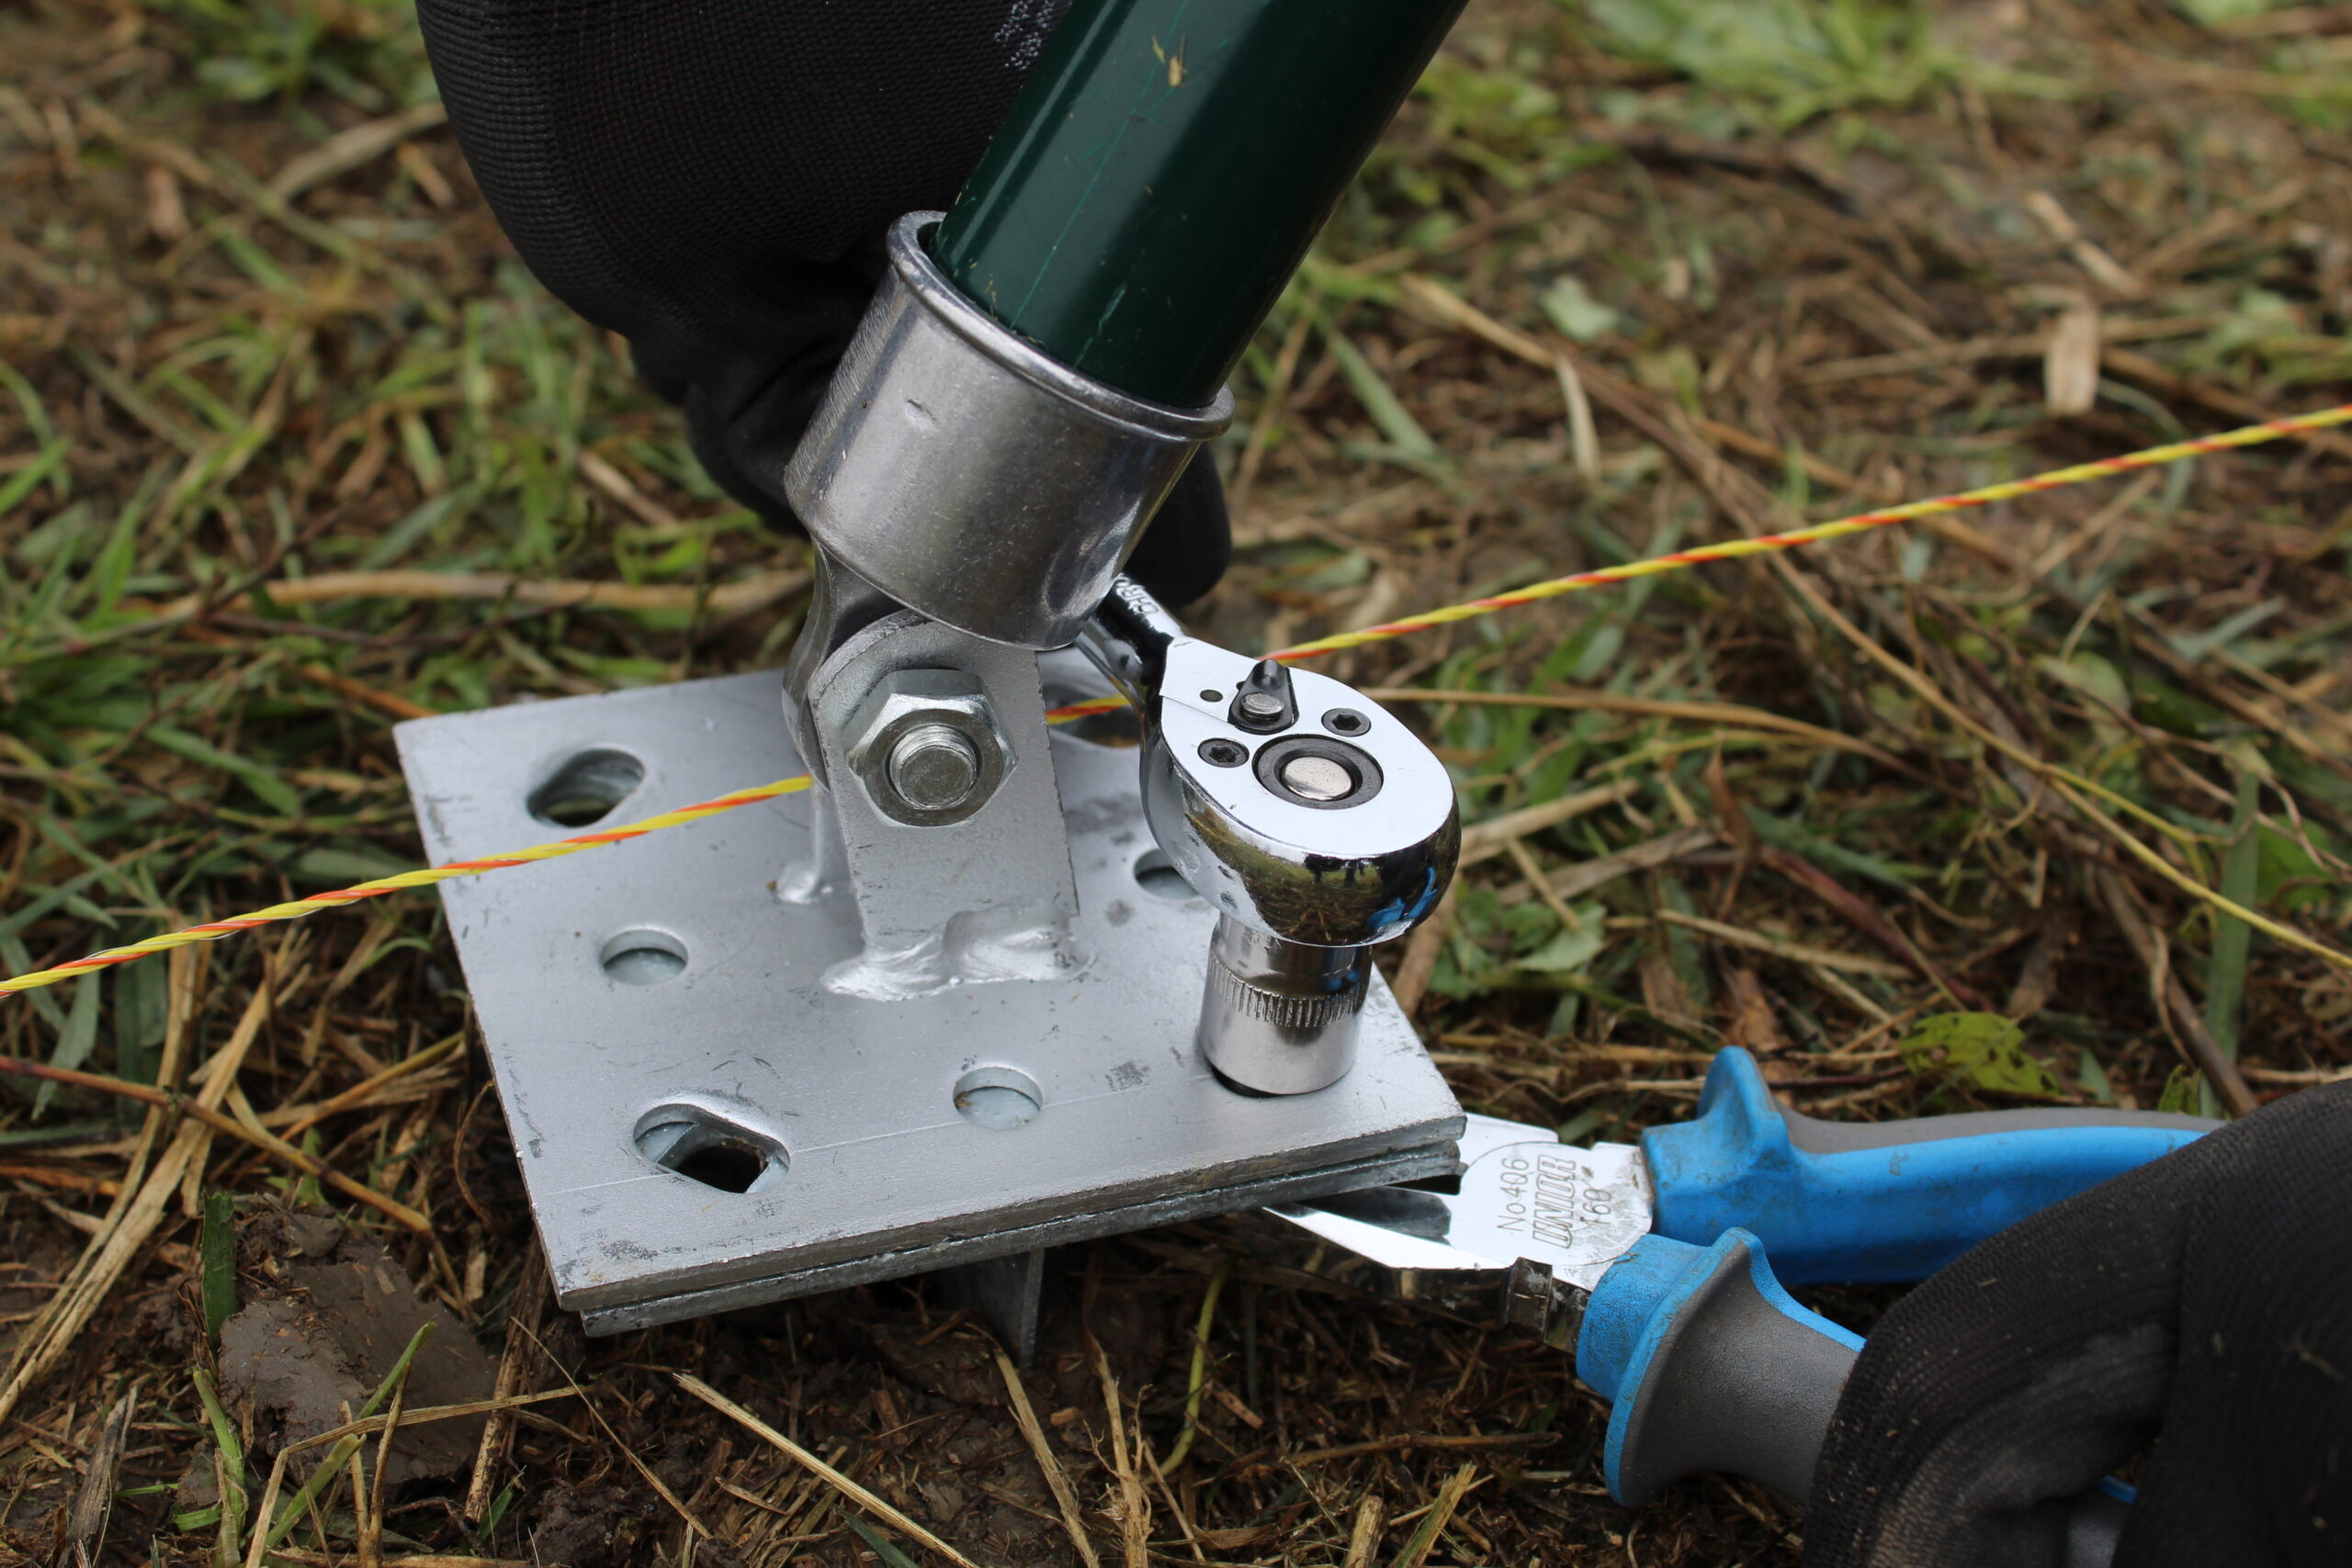
| Step 19 – Connect the plates
|
Attach the angle post plate to the post spike plate with bolts and hex nuts. |
| Step 20 – Secure the angle post plate
|
Tighten the nuts on the angle post plate. |
| Step 21 – First post & angle post position
|
Your first post and the angle post should now be in place. |
| Step 22 – Mark the spots for the intermediate posts
|
Measure 2.5m distances from the first end post and mark the spots for your intermediate posts along the run. |
| Step 23 – Add intermediate posts
|
Repeat Steps 2-8 with your intermediate posts. |
| Step 24 – Add end post & angle post
|
At the end of your run, repeat Steps 2-21 to fix in your other end post and angle post. |
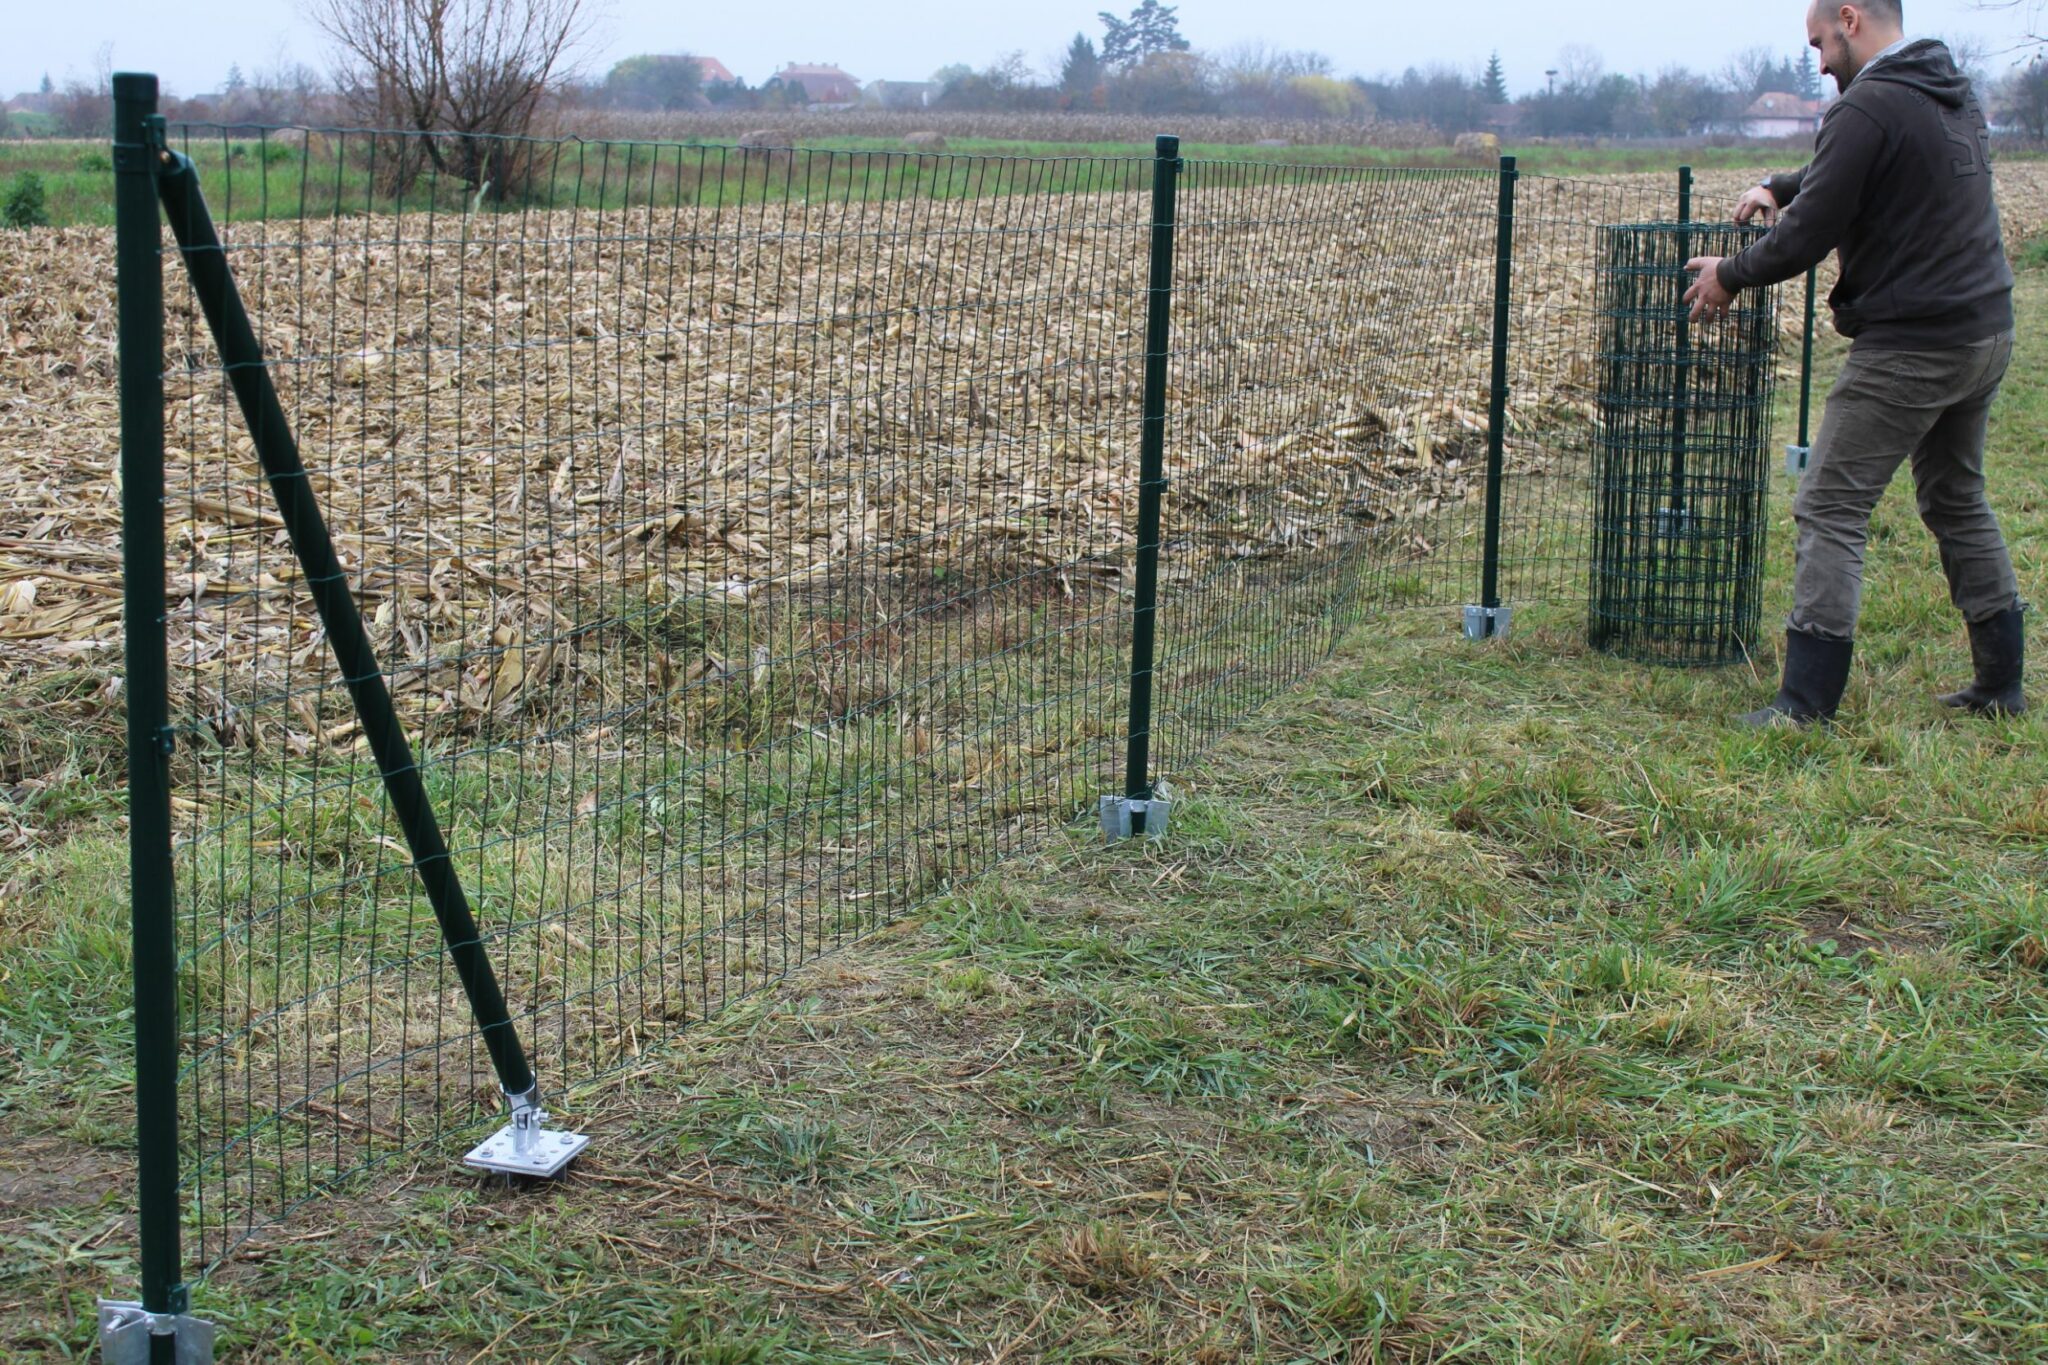
| Step 25 – Unroll the mesh fence
|
Unroll the mesh next to the posts.
You can clip it onto the first post to help it stay put as you unroll its other end. |
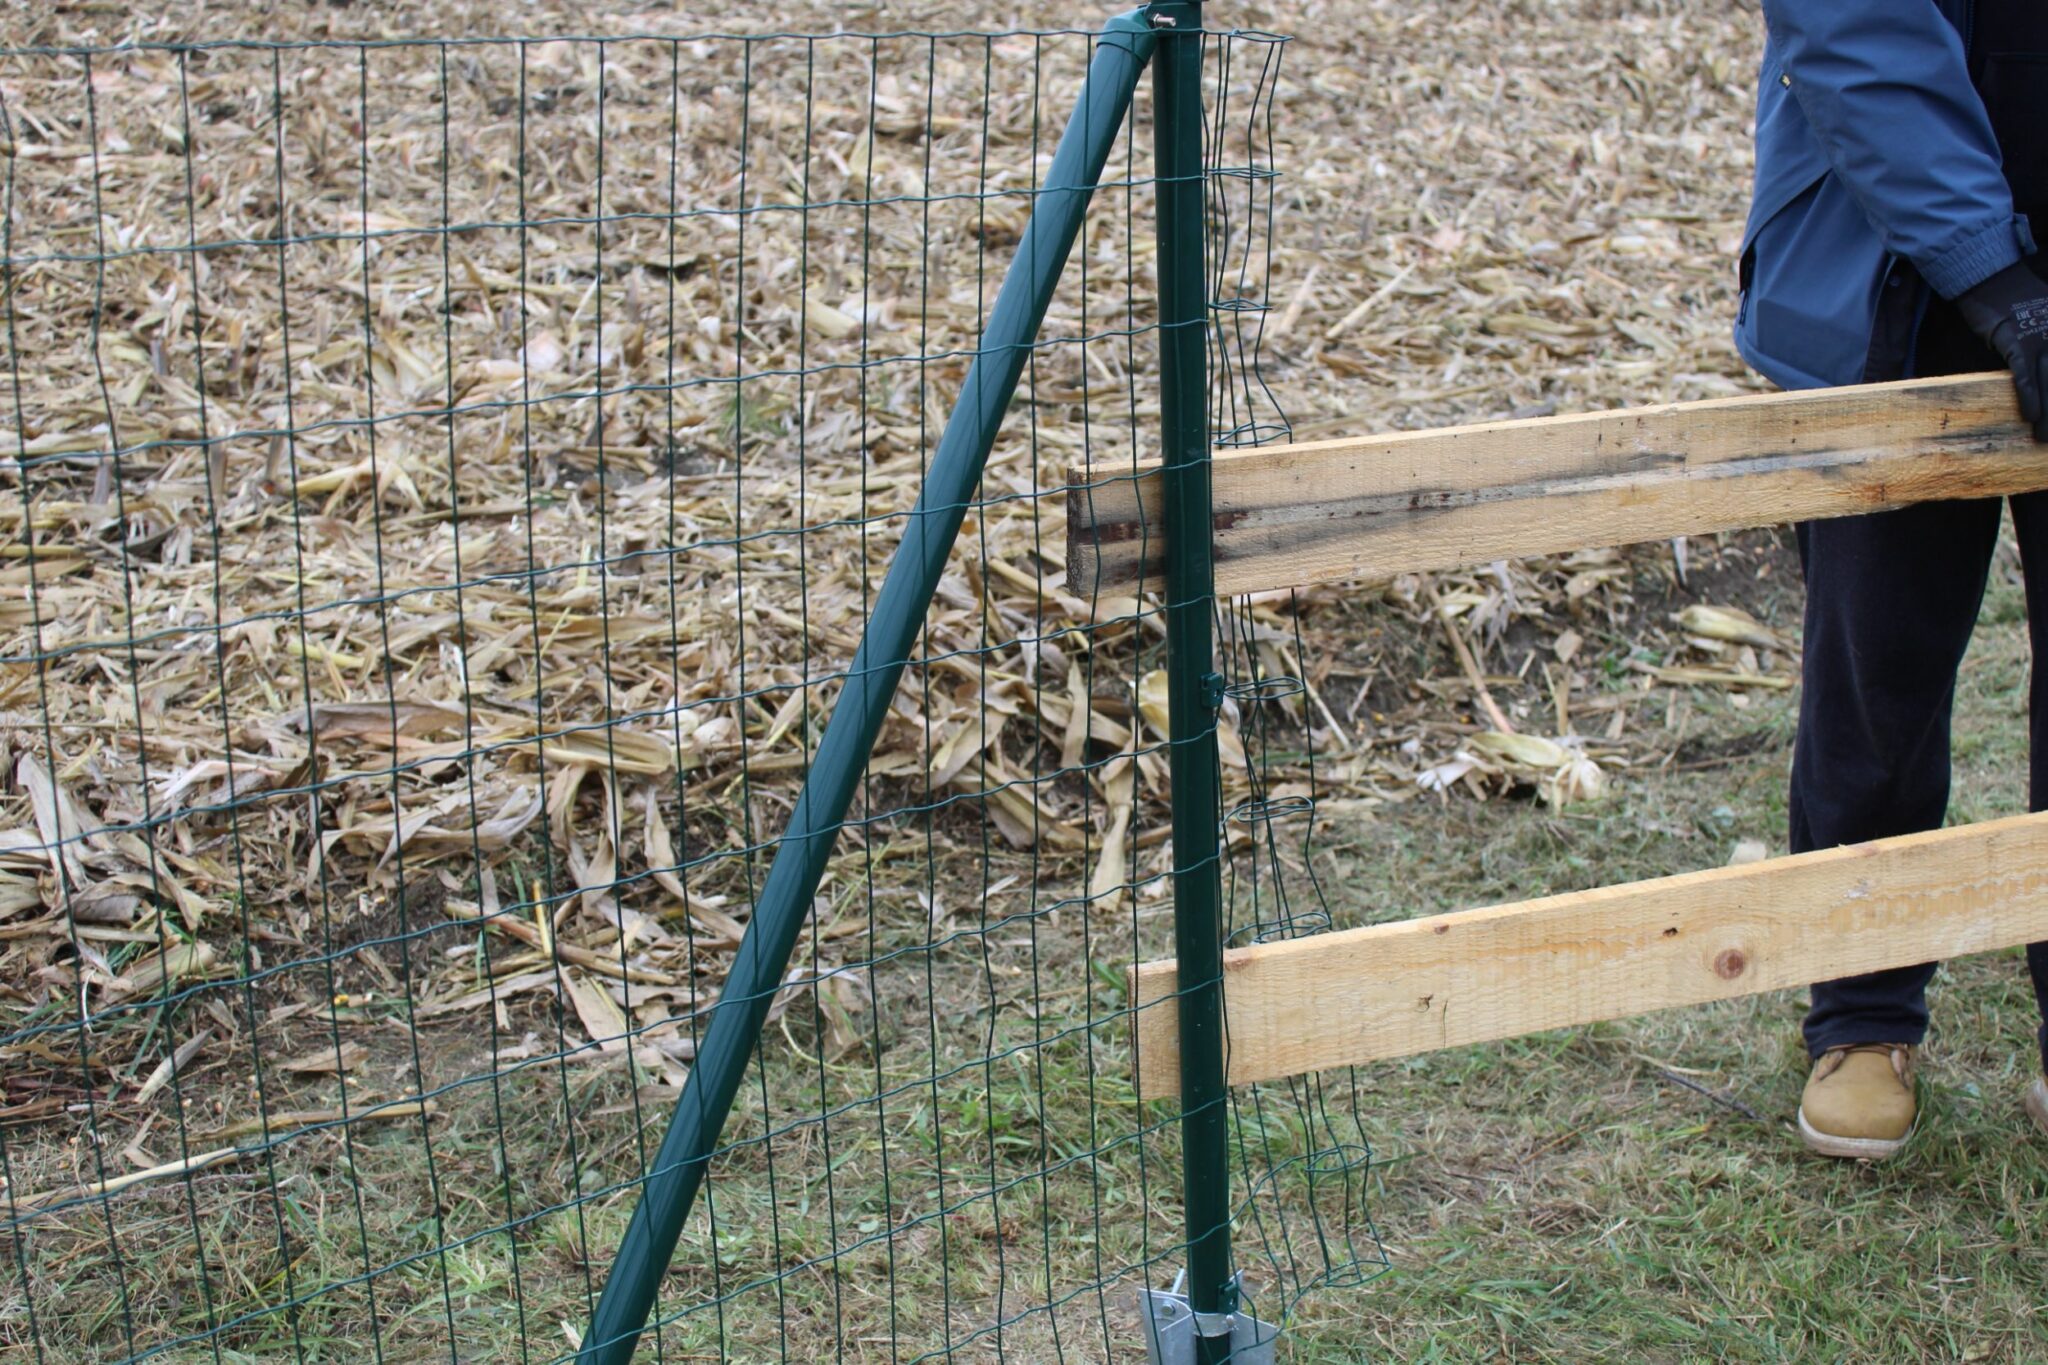
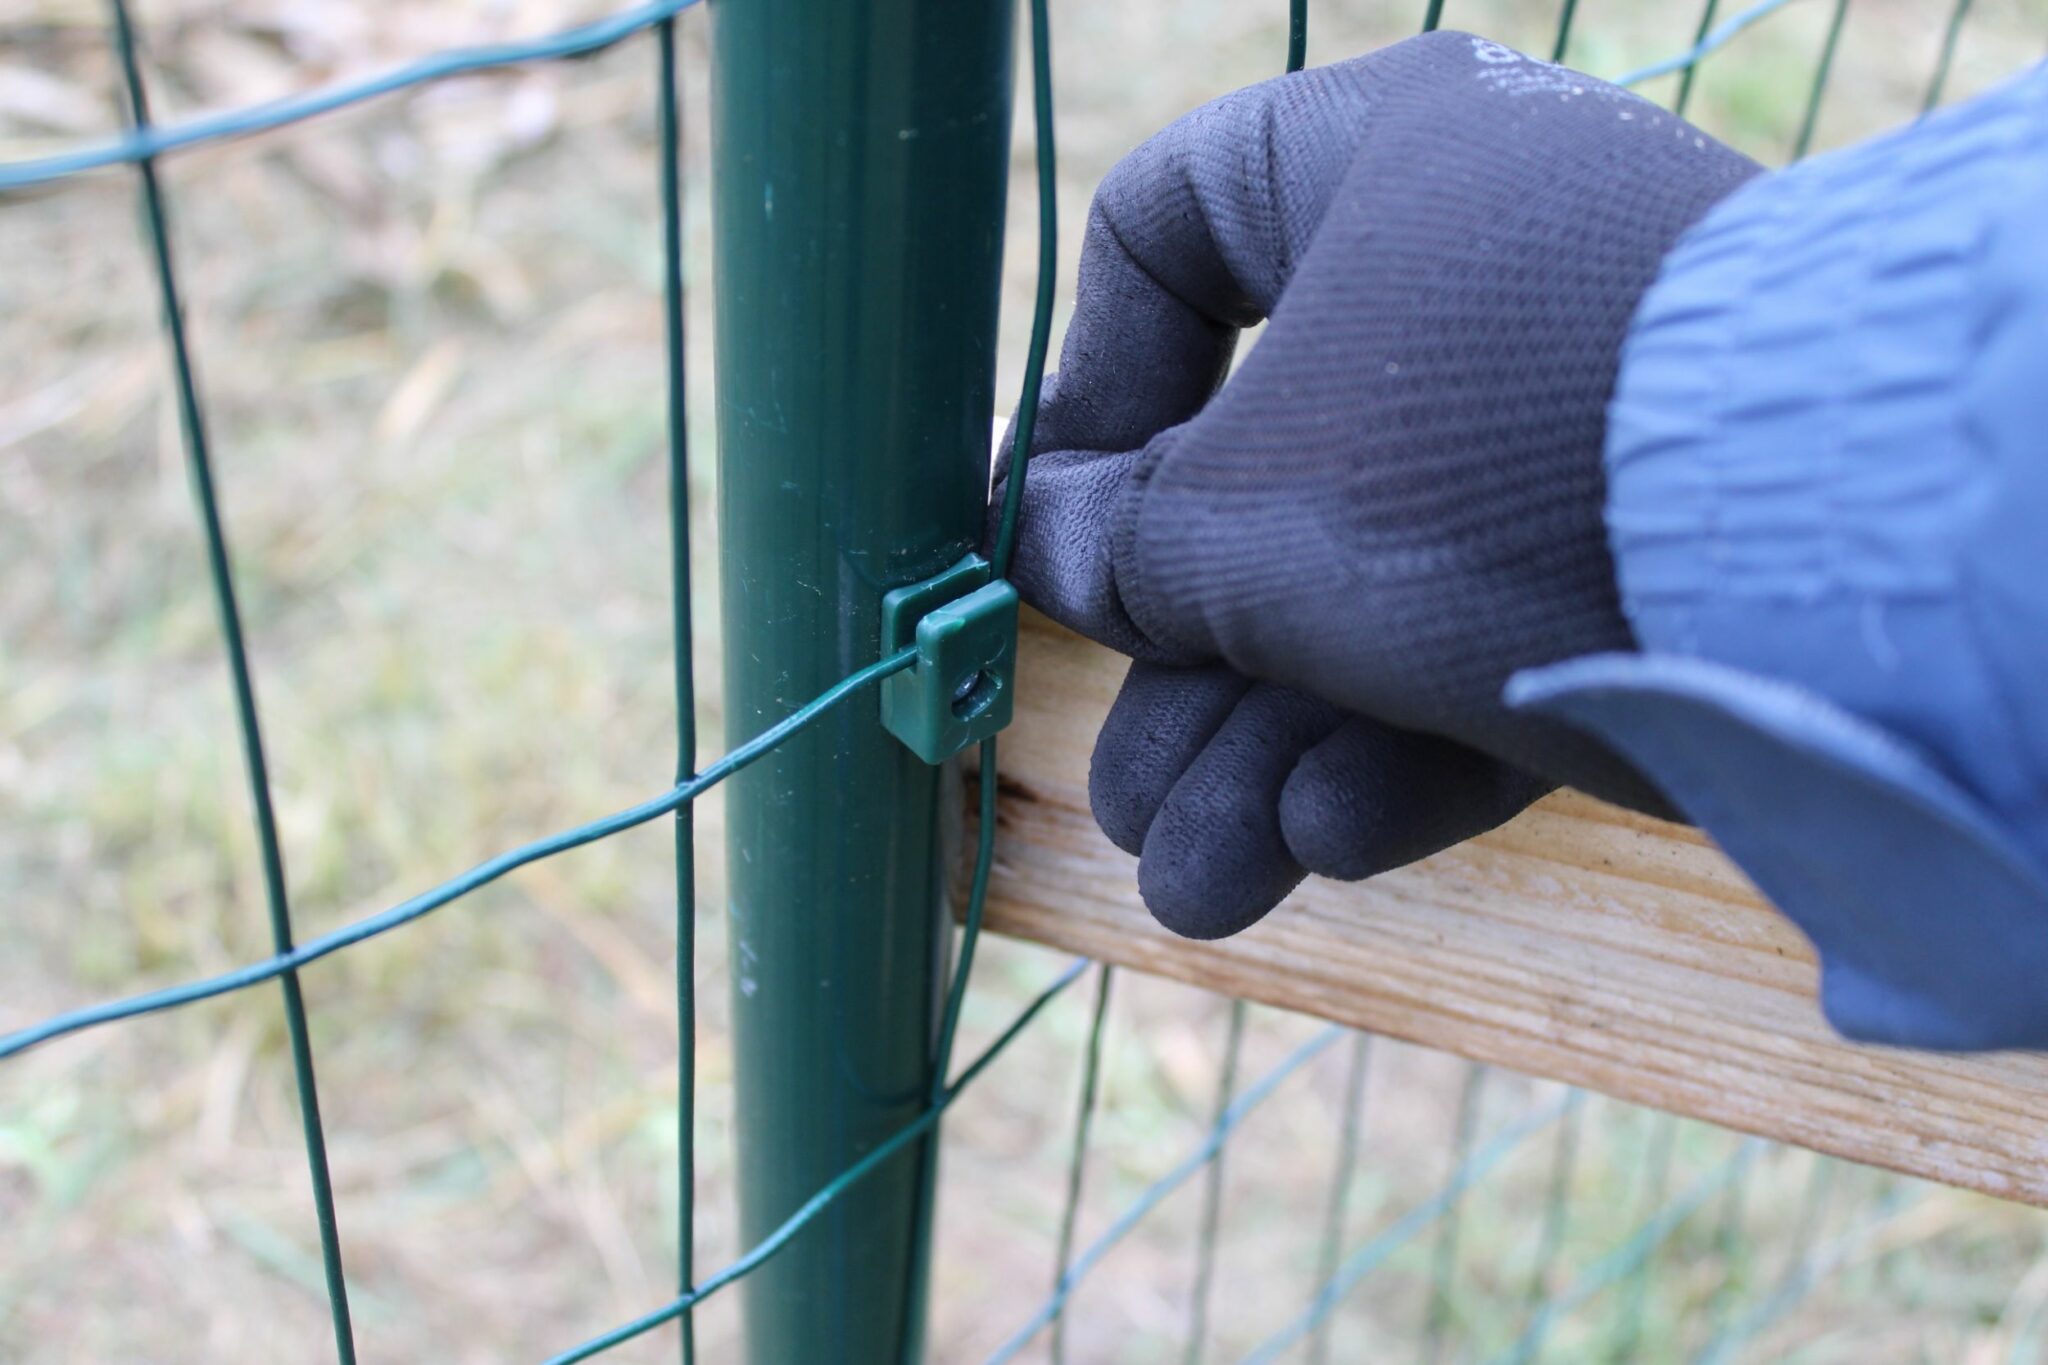
| Step 26 – Tension the mesh
|
To easily tension the fence, slot two wooden planks into the holes at the end and use the leverage they give you to fold the mesh gently back onto the post. You can use the same technique to adjust the fence at every intermediate post, not just the end post |
| Step 27 – Clip wires onto the end post
|
When it’s taut enough, lock the fence into place by slotting it into the mesh clips. |
| Step 28 – Clip fence in
|
Make sure the fence is clipped into every mesh clip (3x per post) at the holes that are in the same row under each other. |
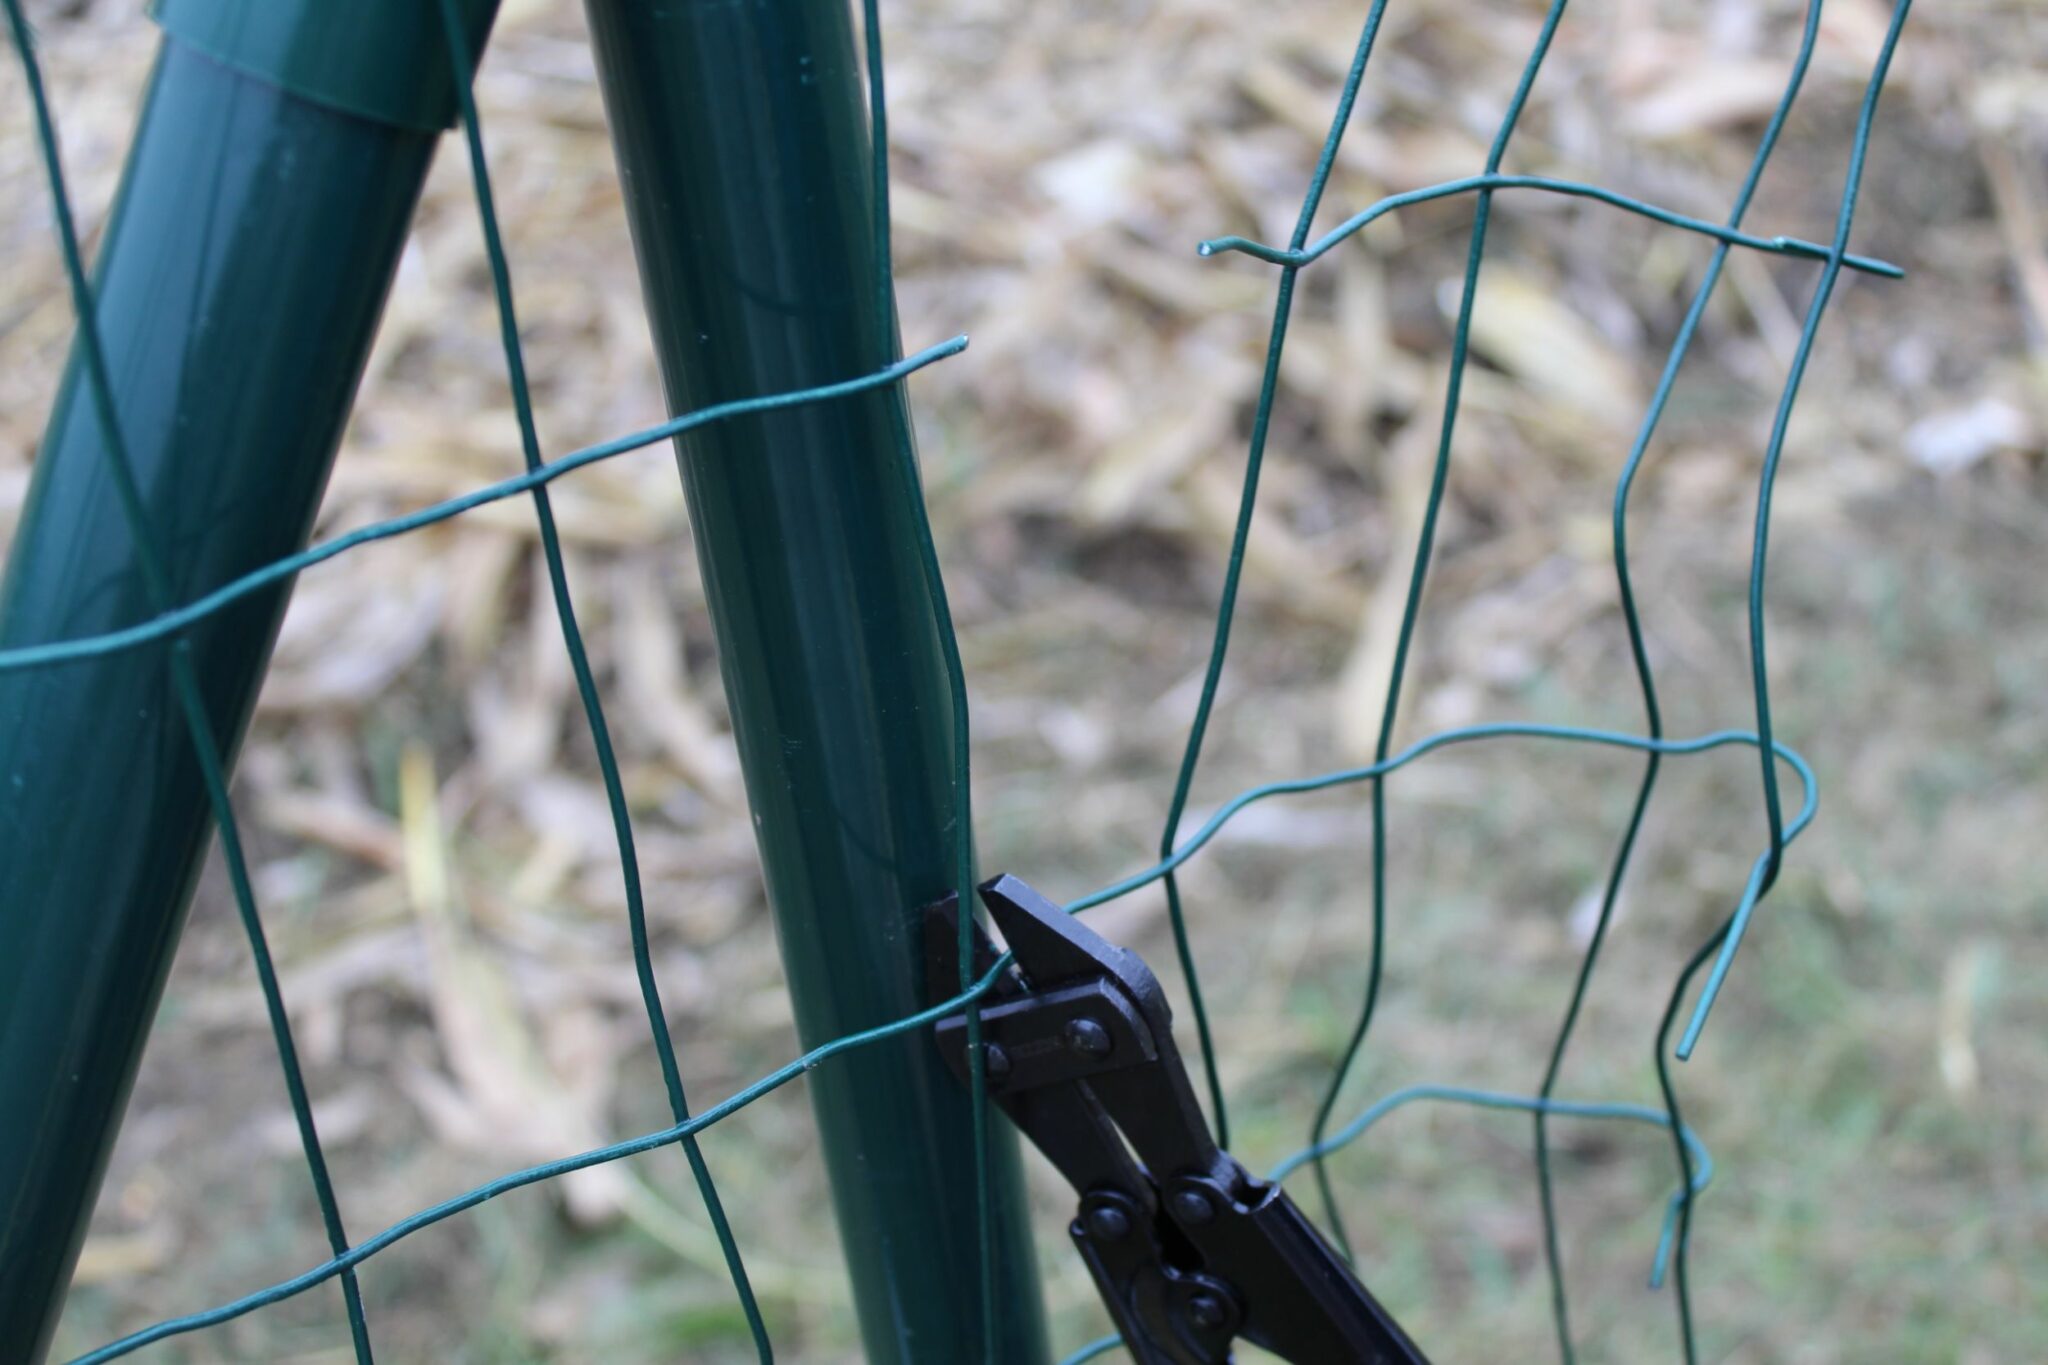
| Step 29 – Cut excess wire
|
Cut down any wires that are hanging off at the ends using wire cutters. |
| Step 30 – You’re done!
|
The fence should now be done and looking sharp. |
|
All fence post spikes should be level, resulting in a straight fence.
|

|
|
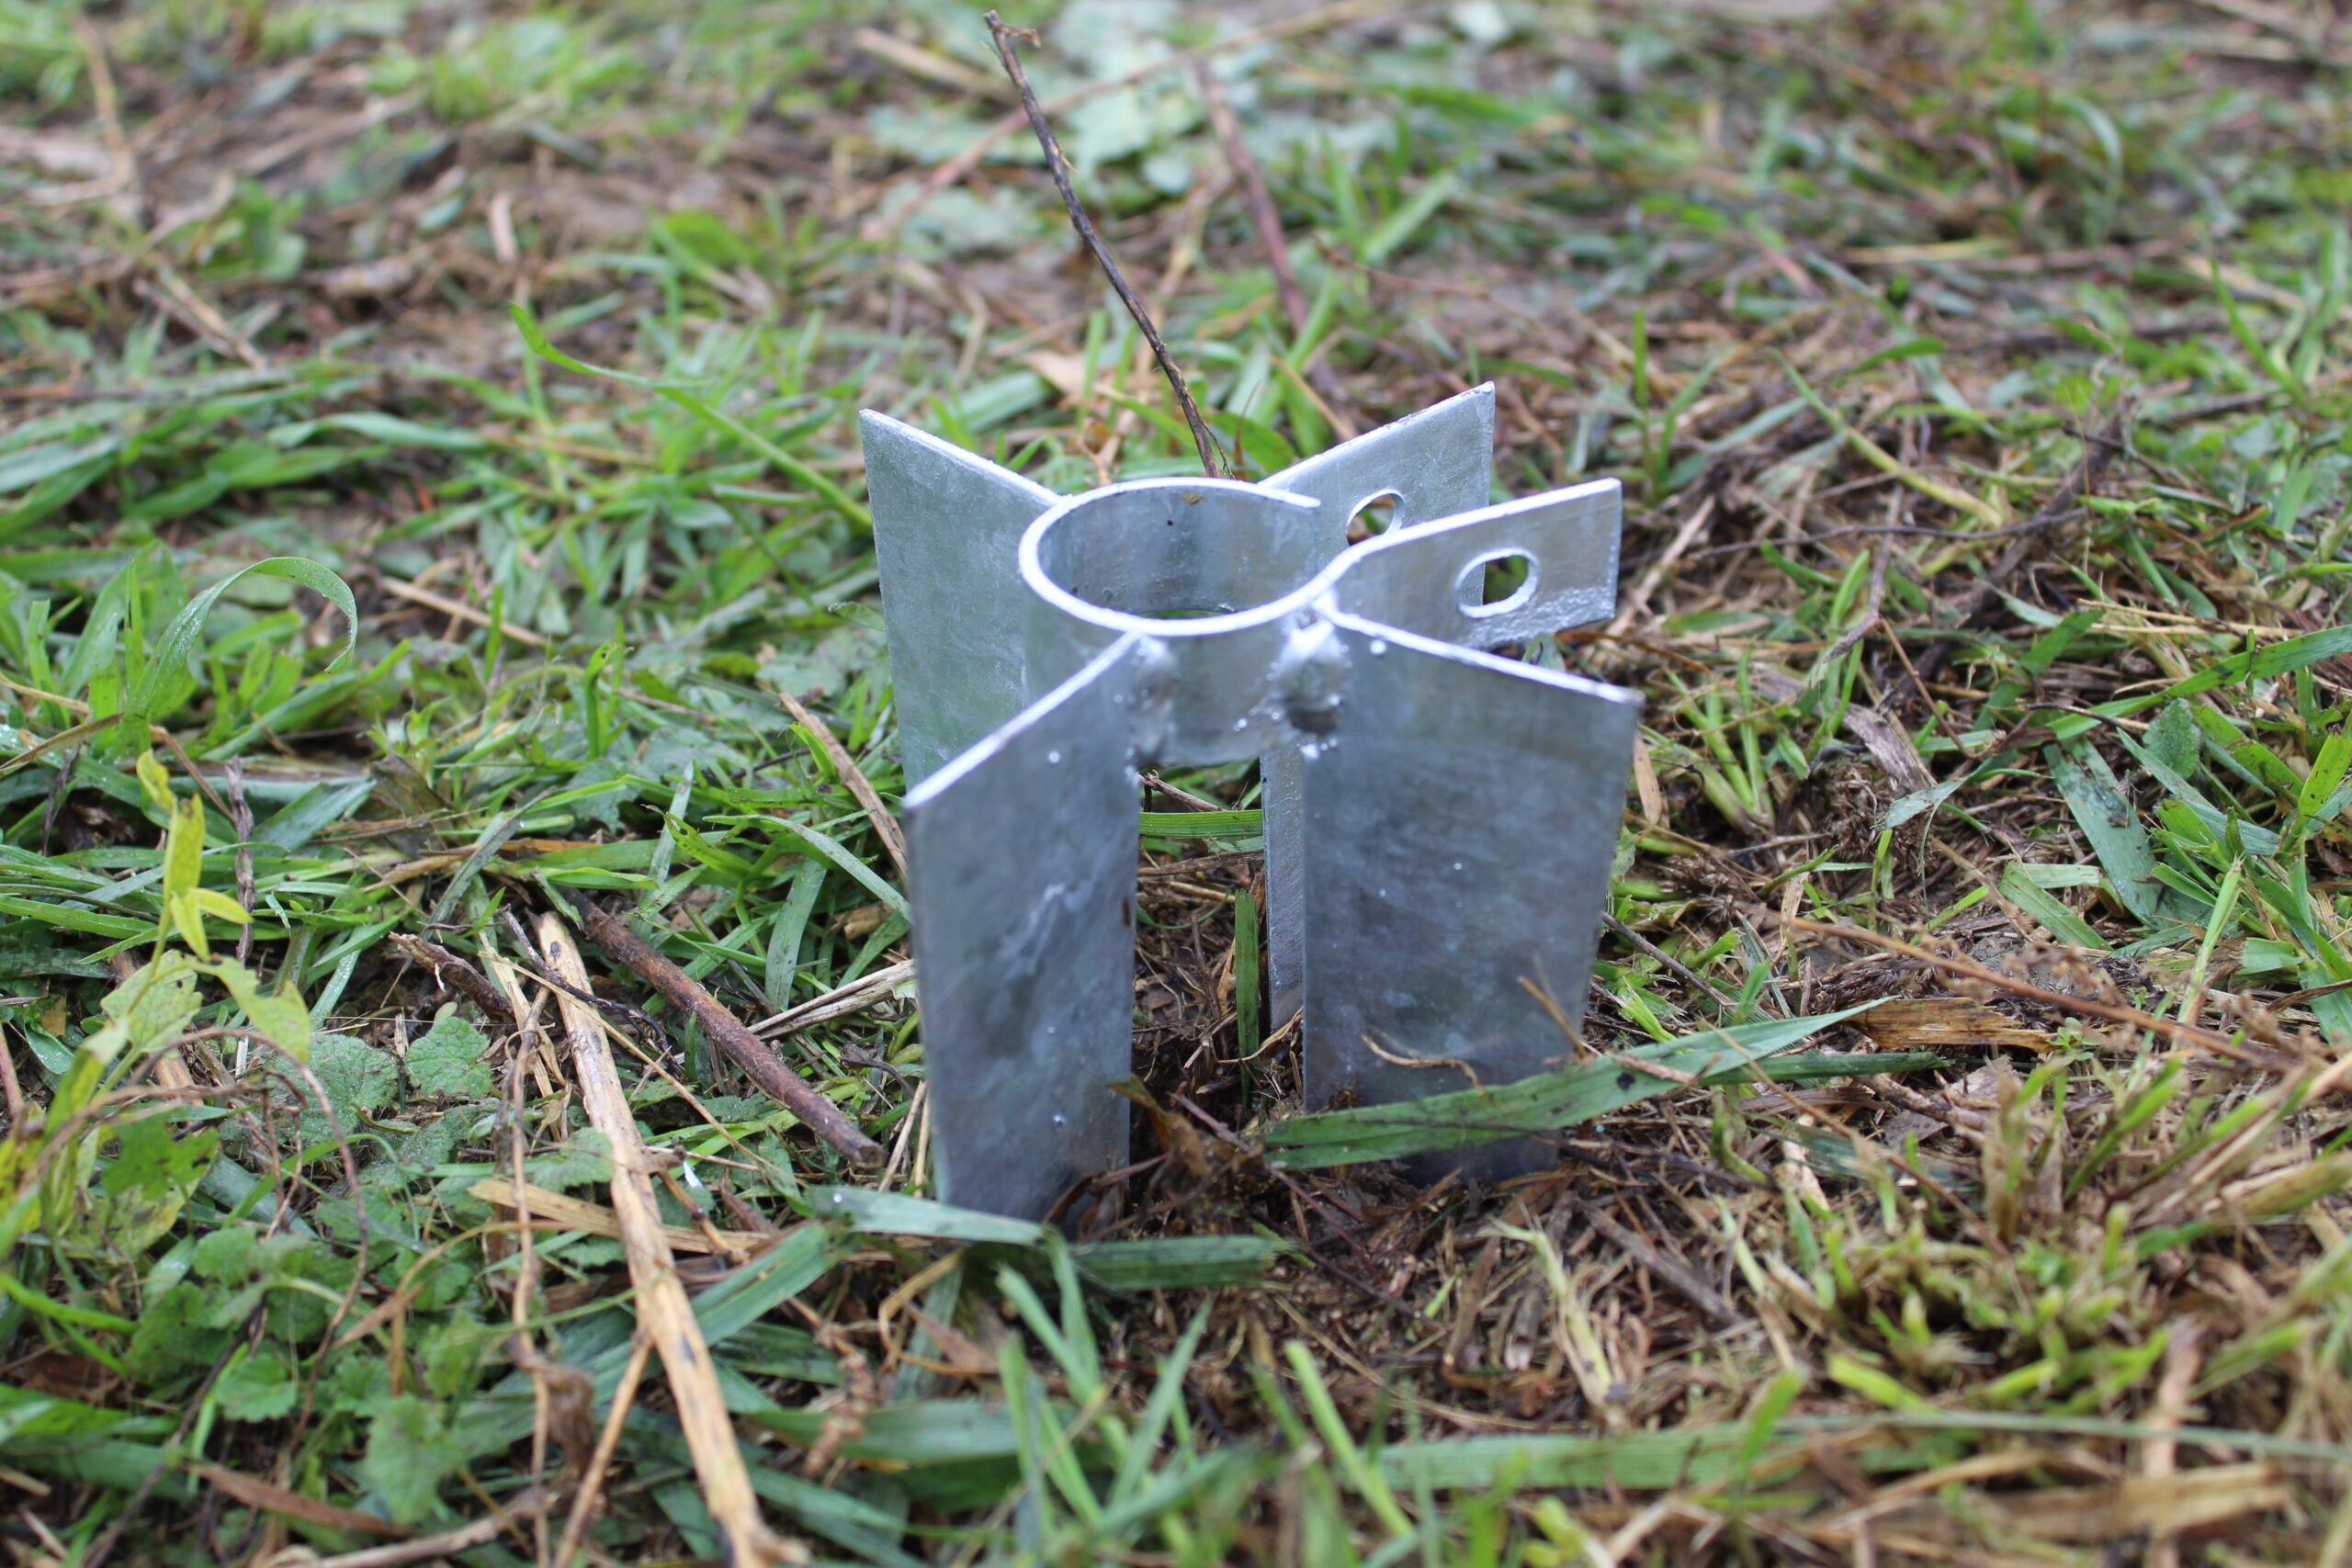
The upright posts have 3 holes on one side (for the fence clips)
|
|
|
The angle posts have 1 hole at one end (to fix the strut clamp in more securely)
|
|

Wire Fence is part of the Super Magic Bean group - VAT Registered: 344 7643 83 - Company Registration No: 11290483