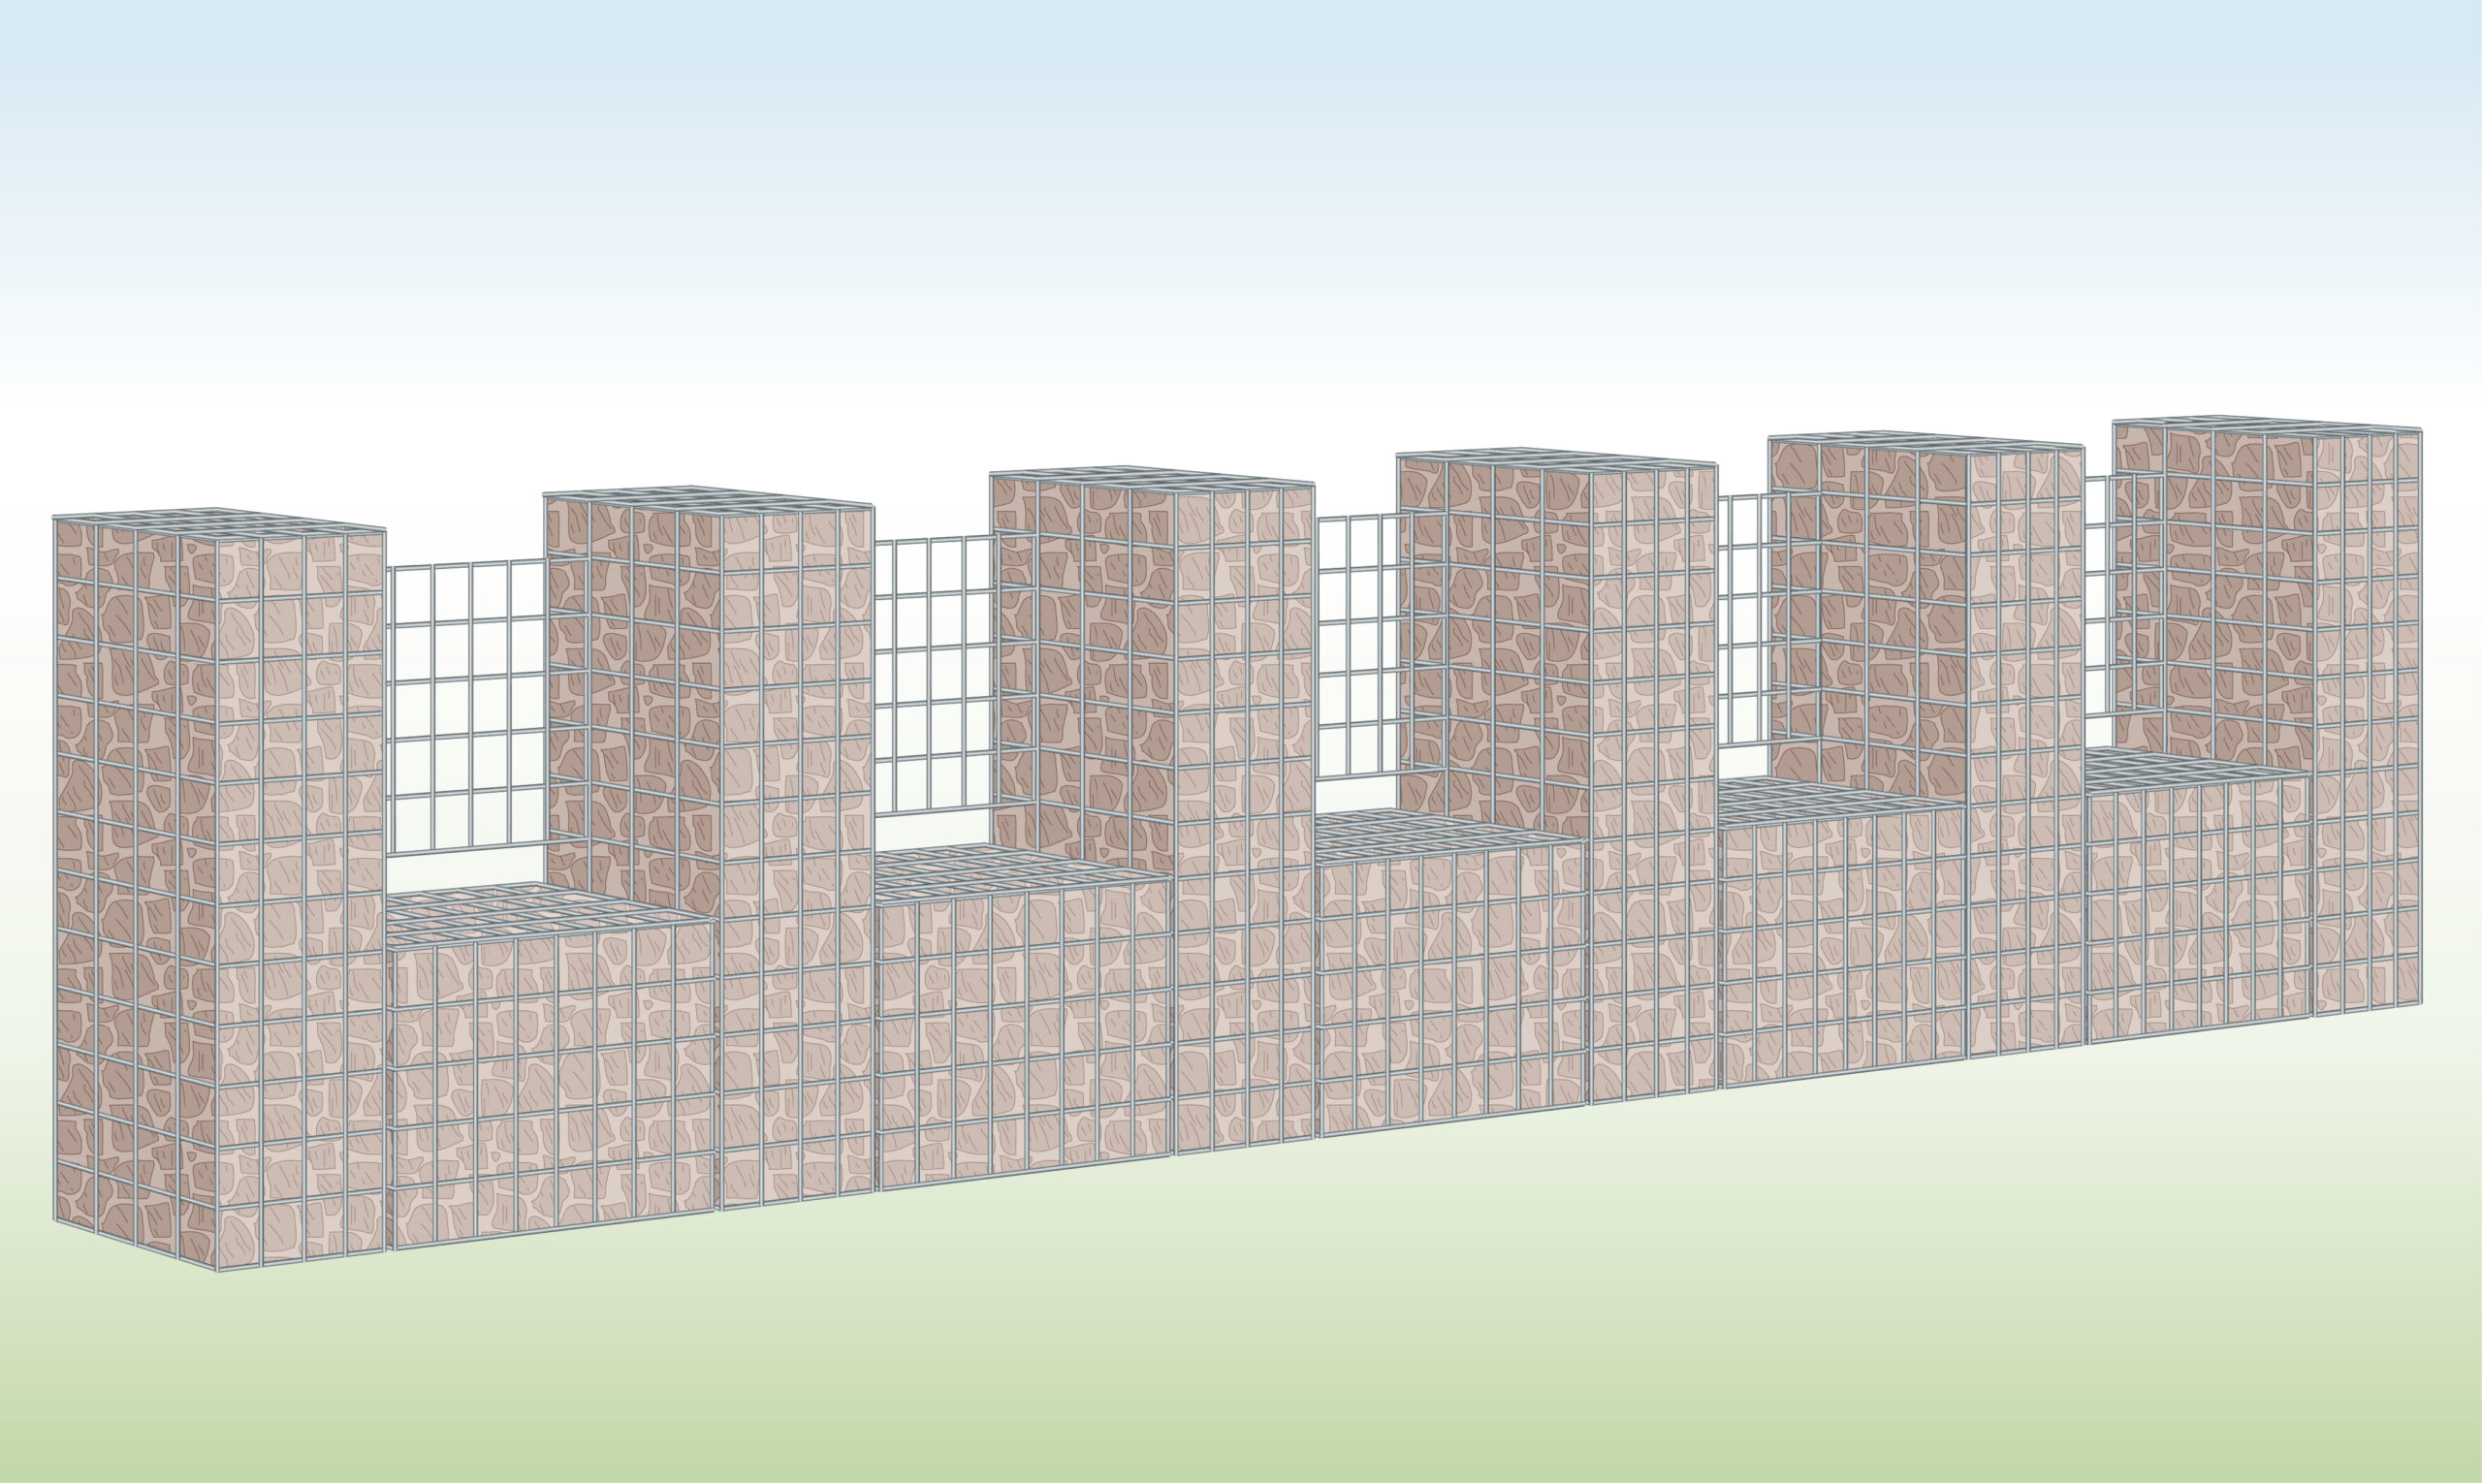
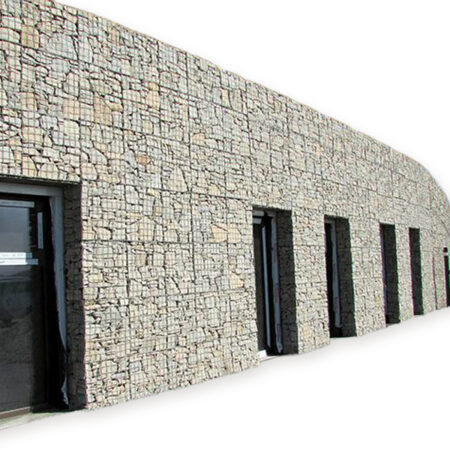
Gabion Trellis Wall


Gabion trellis wall kits include all equipment and instructions required to build a decorative gabion wall.
Also available, 1m wall and 2m gabions wall kits
- Easy to install, no DIY experience necessary
- Manufactured in the UK, to BS EN standards
No products were found matching your selection.


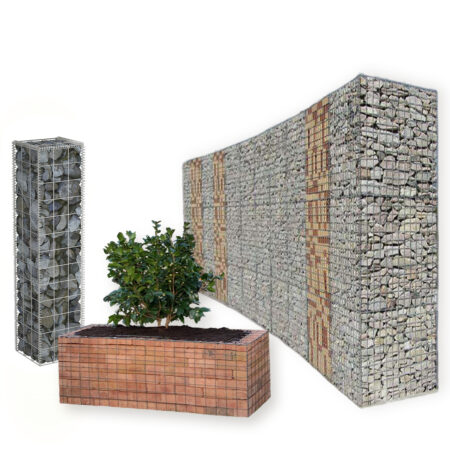
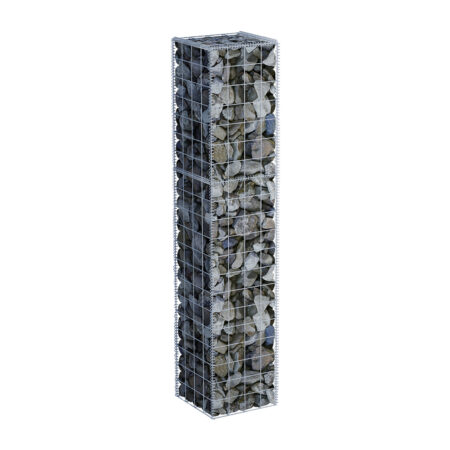
Customer Images
Gabion Kit Includes
| Included | Explanation |
| Full Installation Instructions |
– download
|
| Gabion Baskets |
– Depending on the size of your chosen trellis wall, you will have a minimum of 3 gabions (2 columns and 1 midsection for the single unit) and a maximum of 11 gabions (6 columns and 5 midsections for the quintuple unit)
|
| Trellis Panel(s) |
– You will receive 1x panel to fit between the columns
|
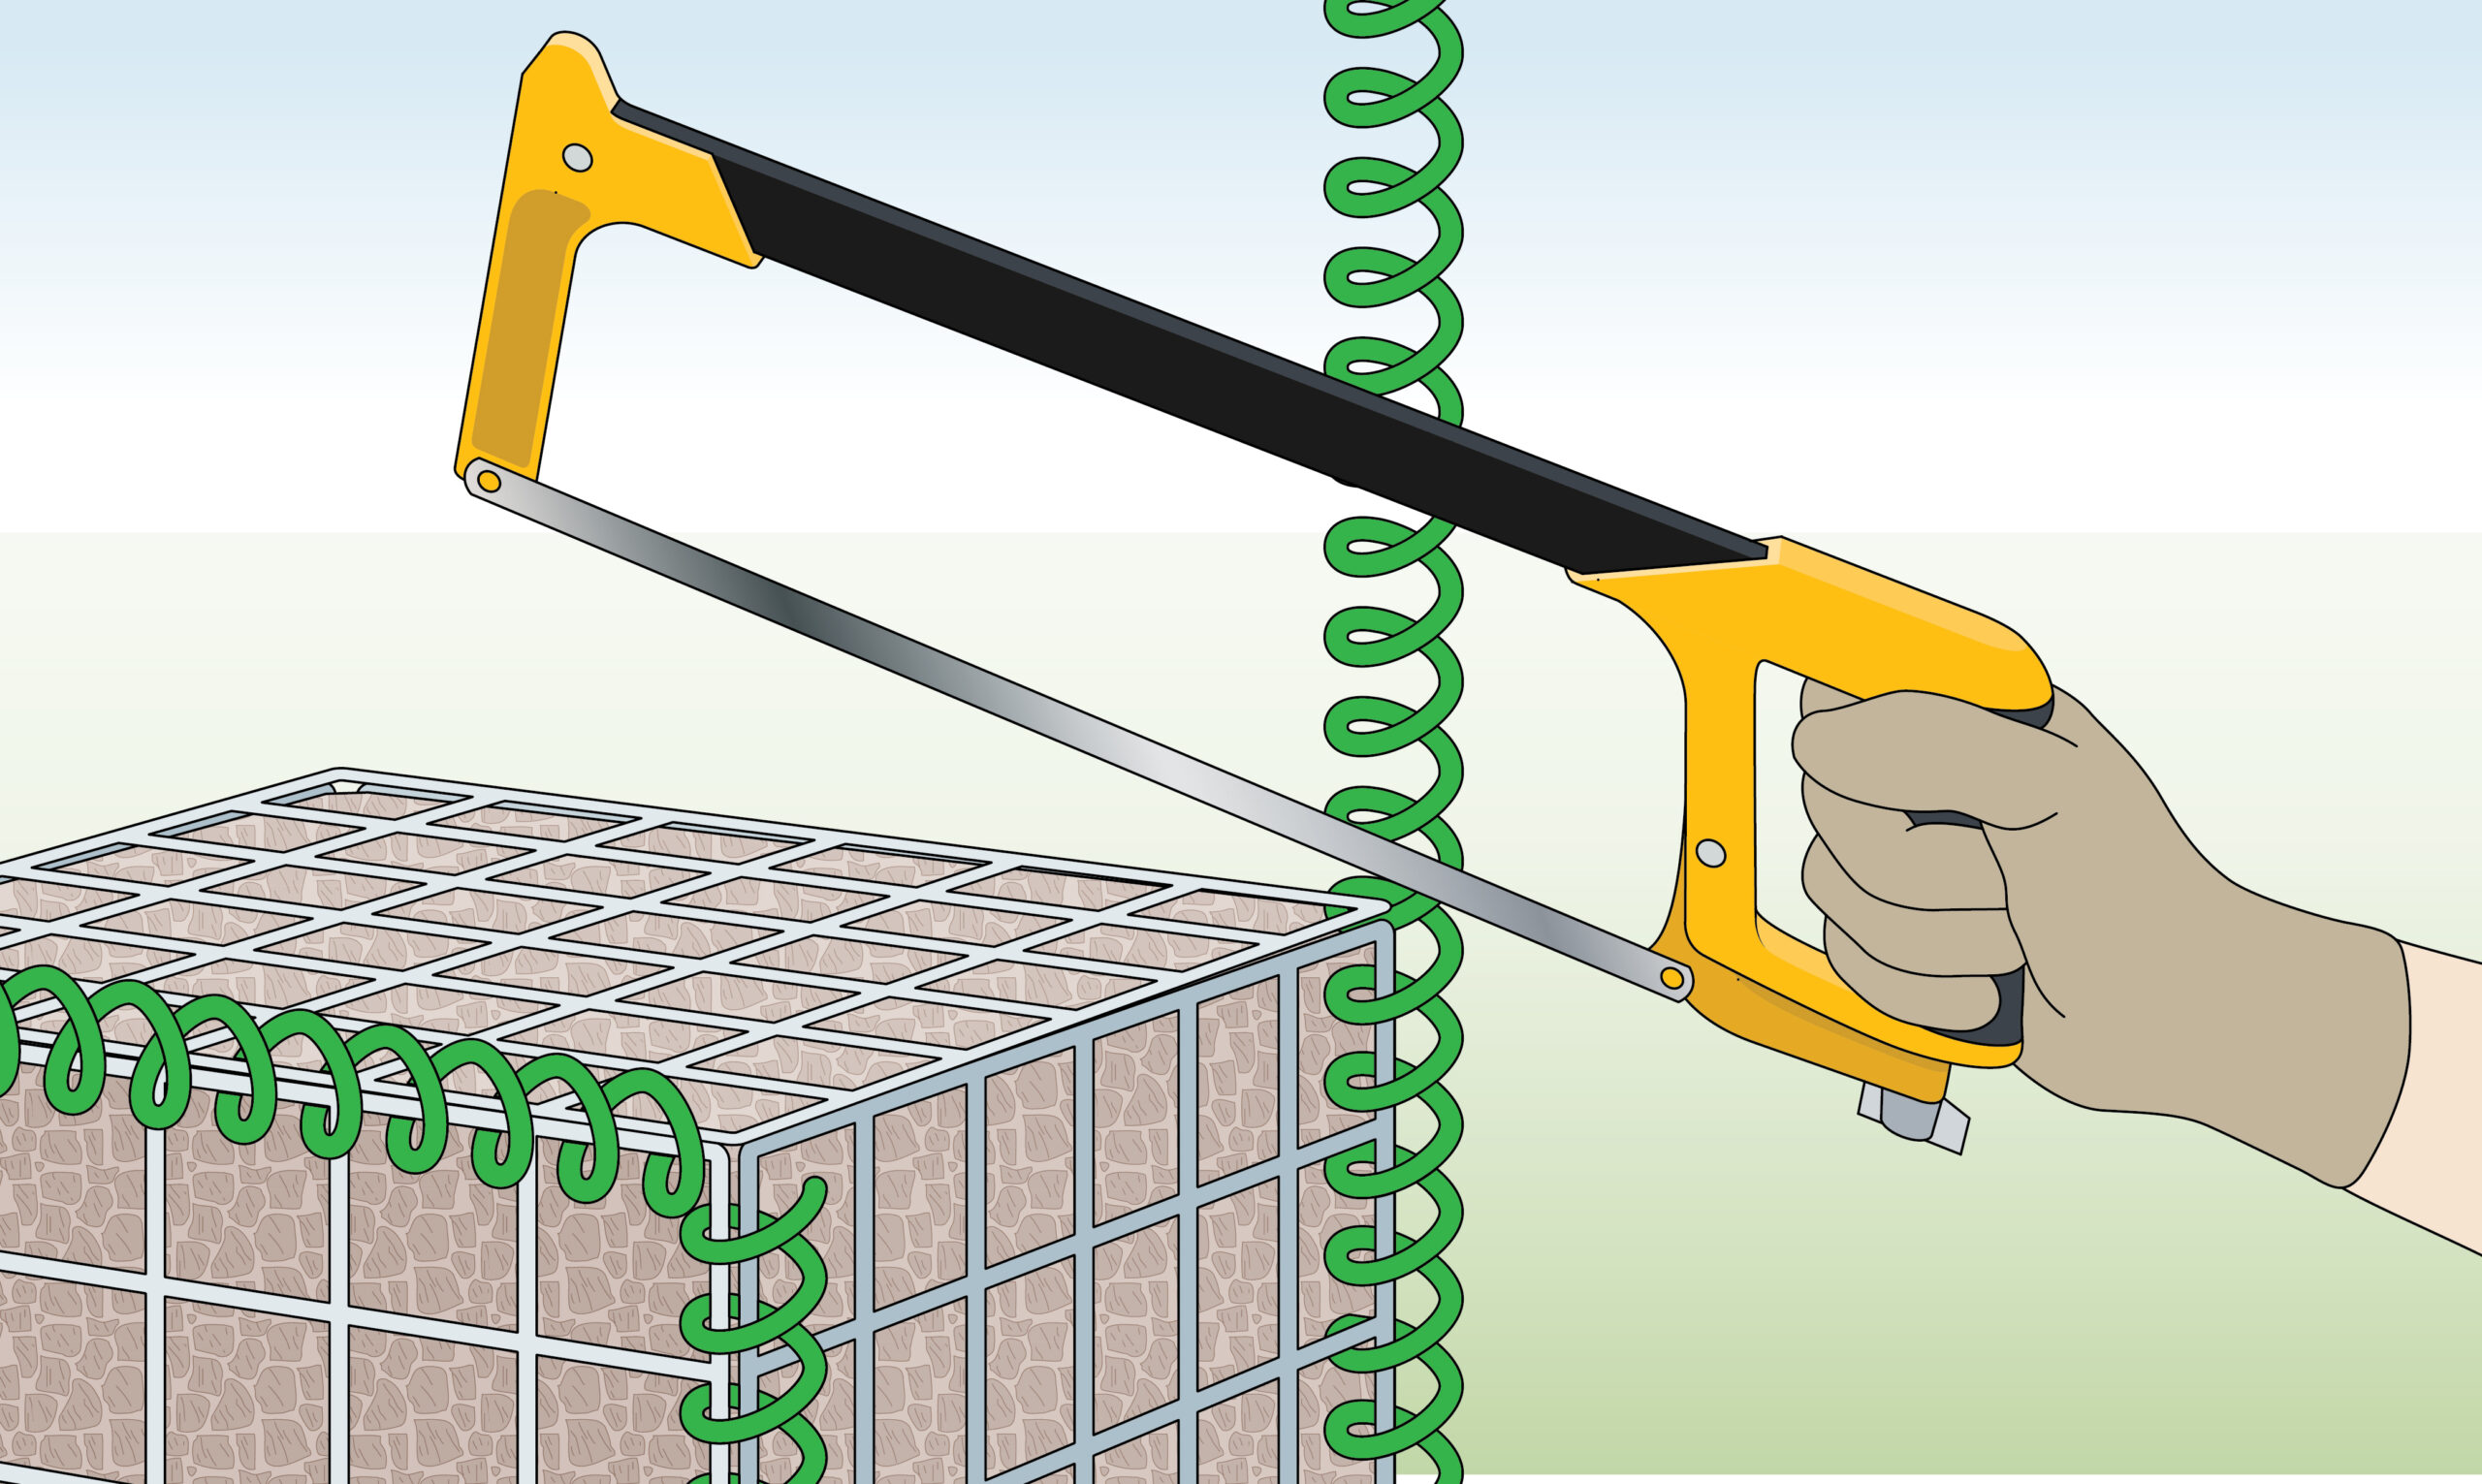
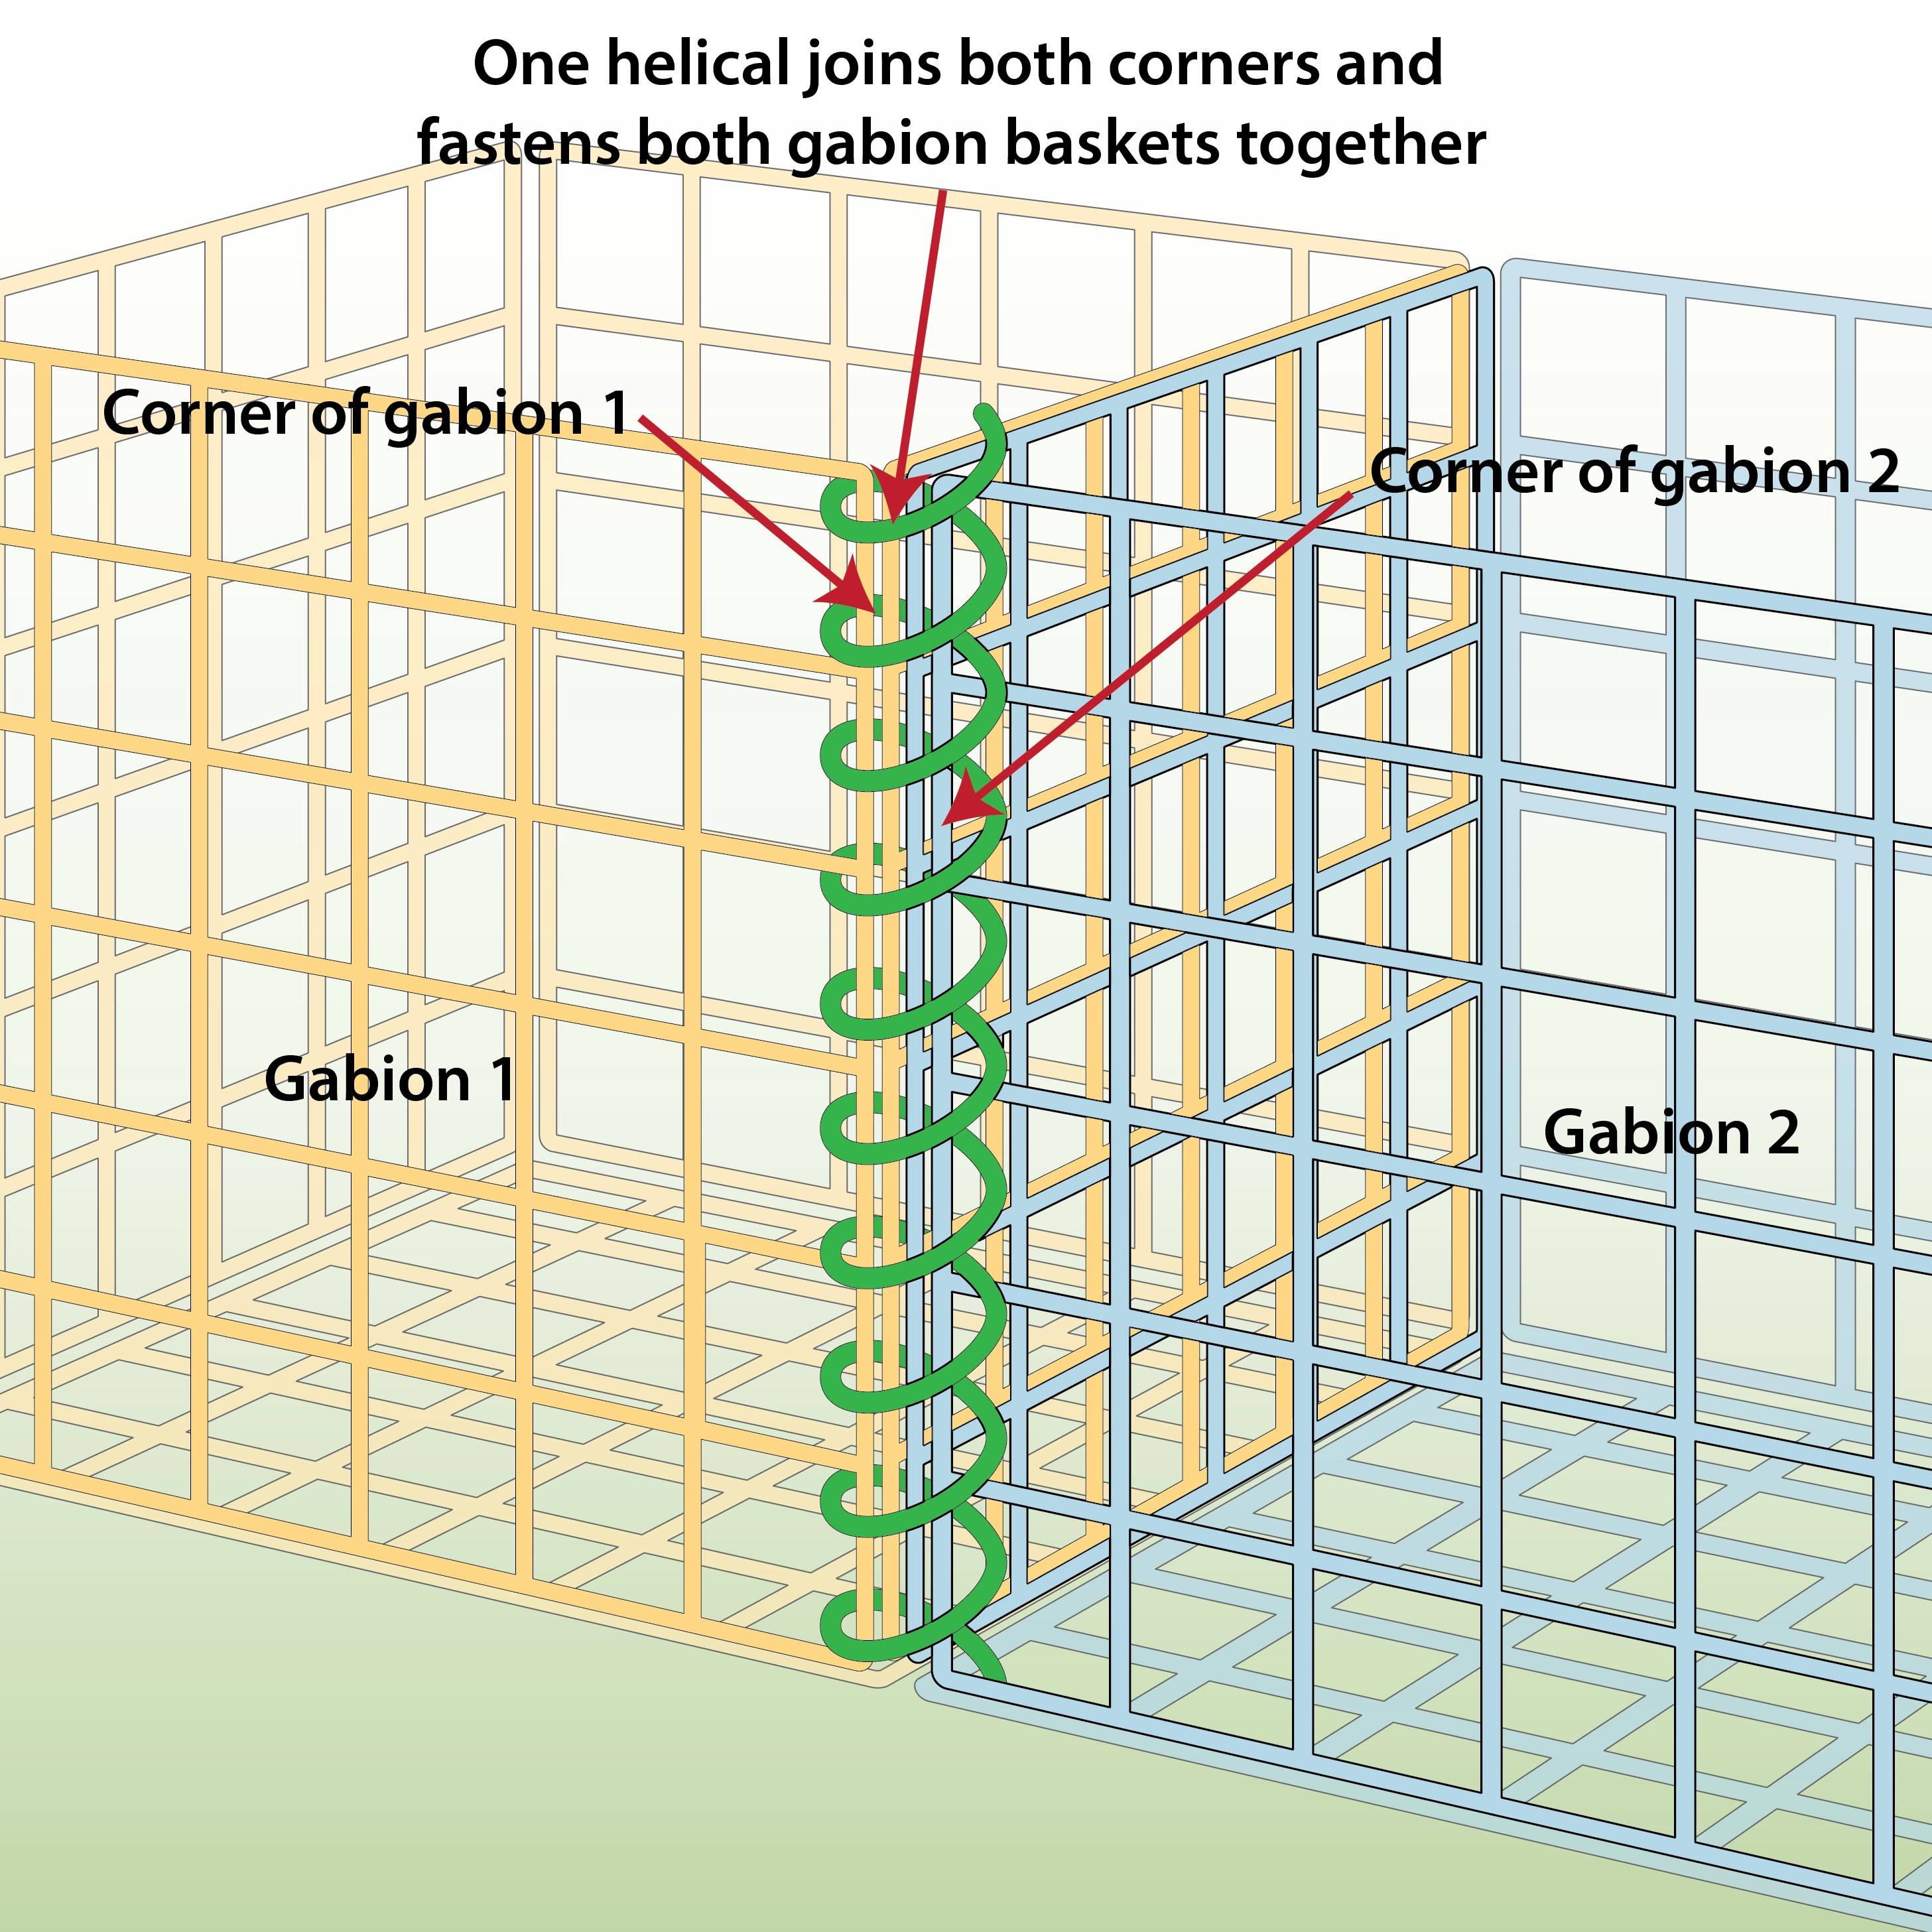
| Helicals |
– Helicals will be included so you can attach the corners and lids for all gabion baskets in your order. Helicals are 1m long so if your gabion baskets are under 1m, you will need to cut the helicals to size with a hacksaw or bolt cutters
|
| Geotextile | If required, geotextile is ordered separately. |
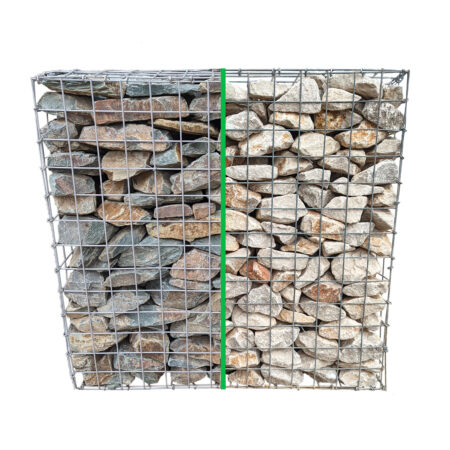
| Stone separating panels | If required, stone separating panels can be ordered separately |
| Stones | If required, Gabion stone provided separately Jump to quantity guide |
| Tools required (not supplied) | You may need a spade and some gravel if you are installing on soft ground. You will also need a hacksaw or bolt cutters to trim the helicals. |
Gabion Wall Overview
| Galfan Coated | PVC Coated | ||
| 4mm Wire Diameter | 5mm Wire Diameter | 4.3mm Wire Diameter | |
| Freestanding wall | |||
| Retaining wall | |||
| Can be walked on | |||
| Can be sat on | |||
| No bulges when filled with rocks | |||
| Residential areas | |||
| Public leisure area | Best | ||
| Delivered as | Flat packed, strapped to a wood pallet with option of small or large truck | ||
| Can wires be cut | Yes – with a good bolt cutter | ||
| Made in UK | Yes | ||
| Conforms to British manufacturing standard | BS EN 10223-8:2013 | ||
| Certificate of conformity | Yes – download | ||
| Construction | |||
| Mesh Hole Size | 75mm x 75mm | 75mm x 75mm | 75mm x 75mm |
| Mesh Material | Galfan coated steel | Galfan coated steel | Galfan coated steel with PVC coating |
| Mesh Construction | Welded | Welded | Welded |
| Mesh panels joined together by | Stainless steel C Clips | ||
| Strength and environment | |||
| Tensile strength range | 540-770 N/mm² | 540-770 N/mm² | 540-770 N/mm² |
| Corrosion resistance | Yes, conforms to British standard BS EN 10244-2:2009 | ||
| Abrasion resistance | Yes, conforms to EN 60229:2008 | ||
| Life Expectancy | 50 – 100 years | 50 – 100 years | 120 years |
| Suited to Environments | C2 – C4 | C2 – C4 | C2 – C5 |
| Rocks / Filling / Installation | |||
| Speed of installation | 2-5 mins each | ||
| Experience required to install | Easy install | ||
| Rock size required | Minimum 80mm x 80mm | ||
| Requires angular, interlocking rocks | No – these commercial grade gabions can be filled with any shape of stone without bulging. | ||
| Can be filled with crushed concrete | |||
| Can fill with rounded rocks | |||
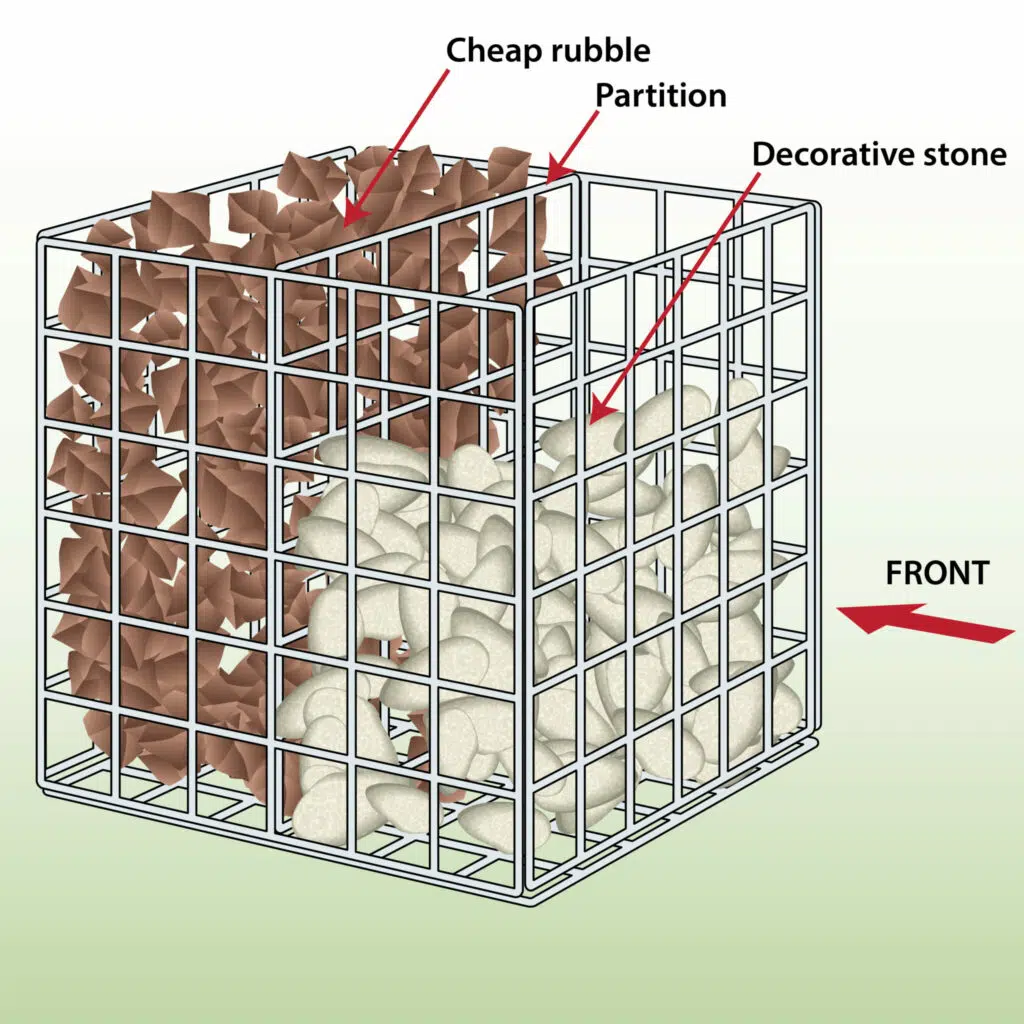
| Save money | Stone separating panel (ordered separately). Allows you to backfill the cages with cheaper stone or rubble | ||
Installation Instructions
| To Do | Explanation |
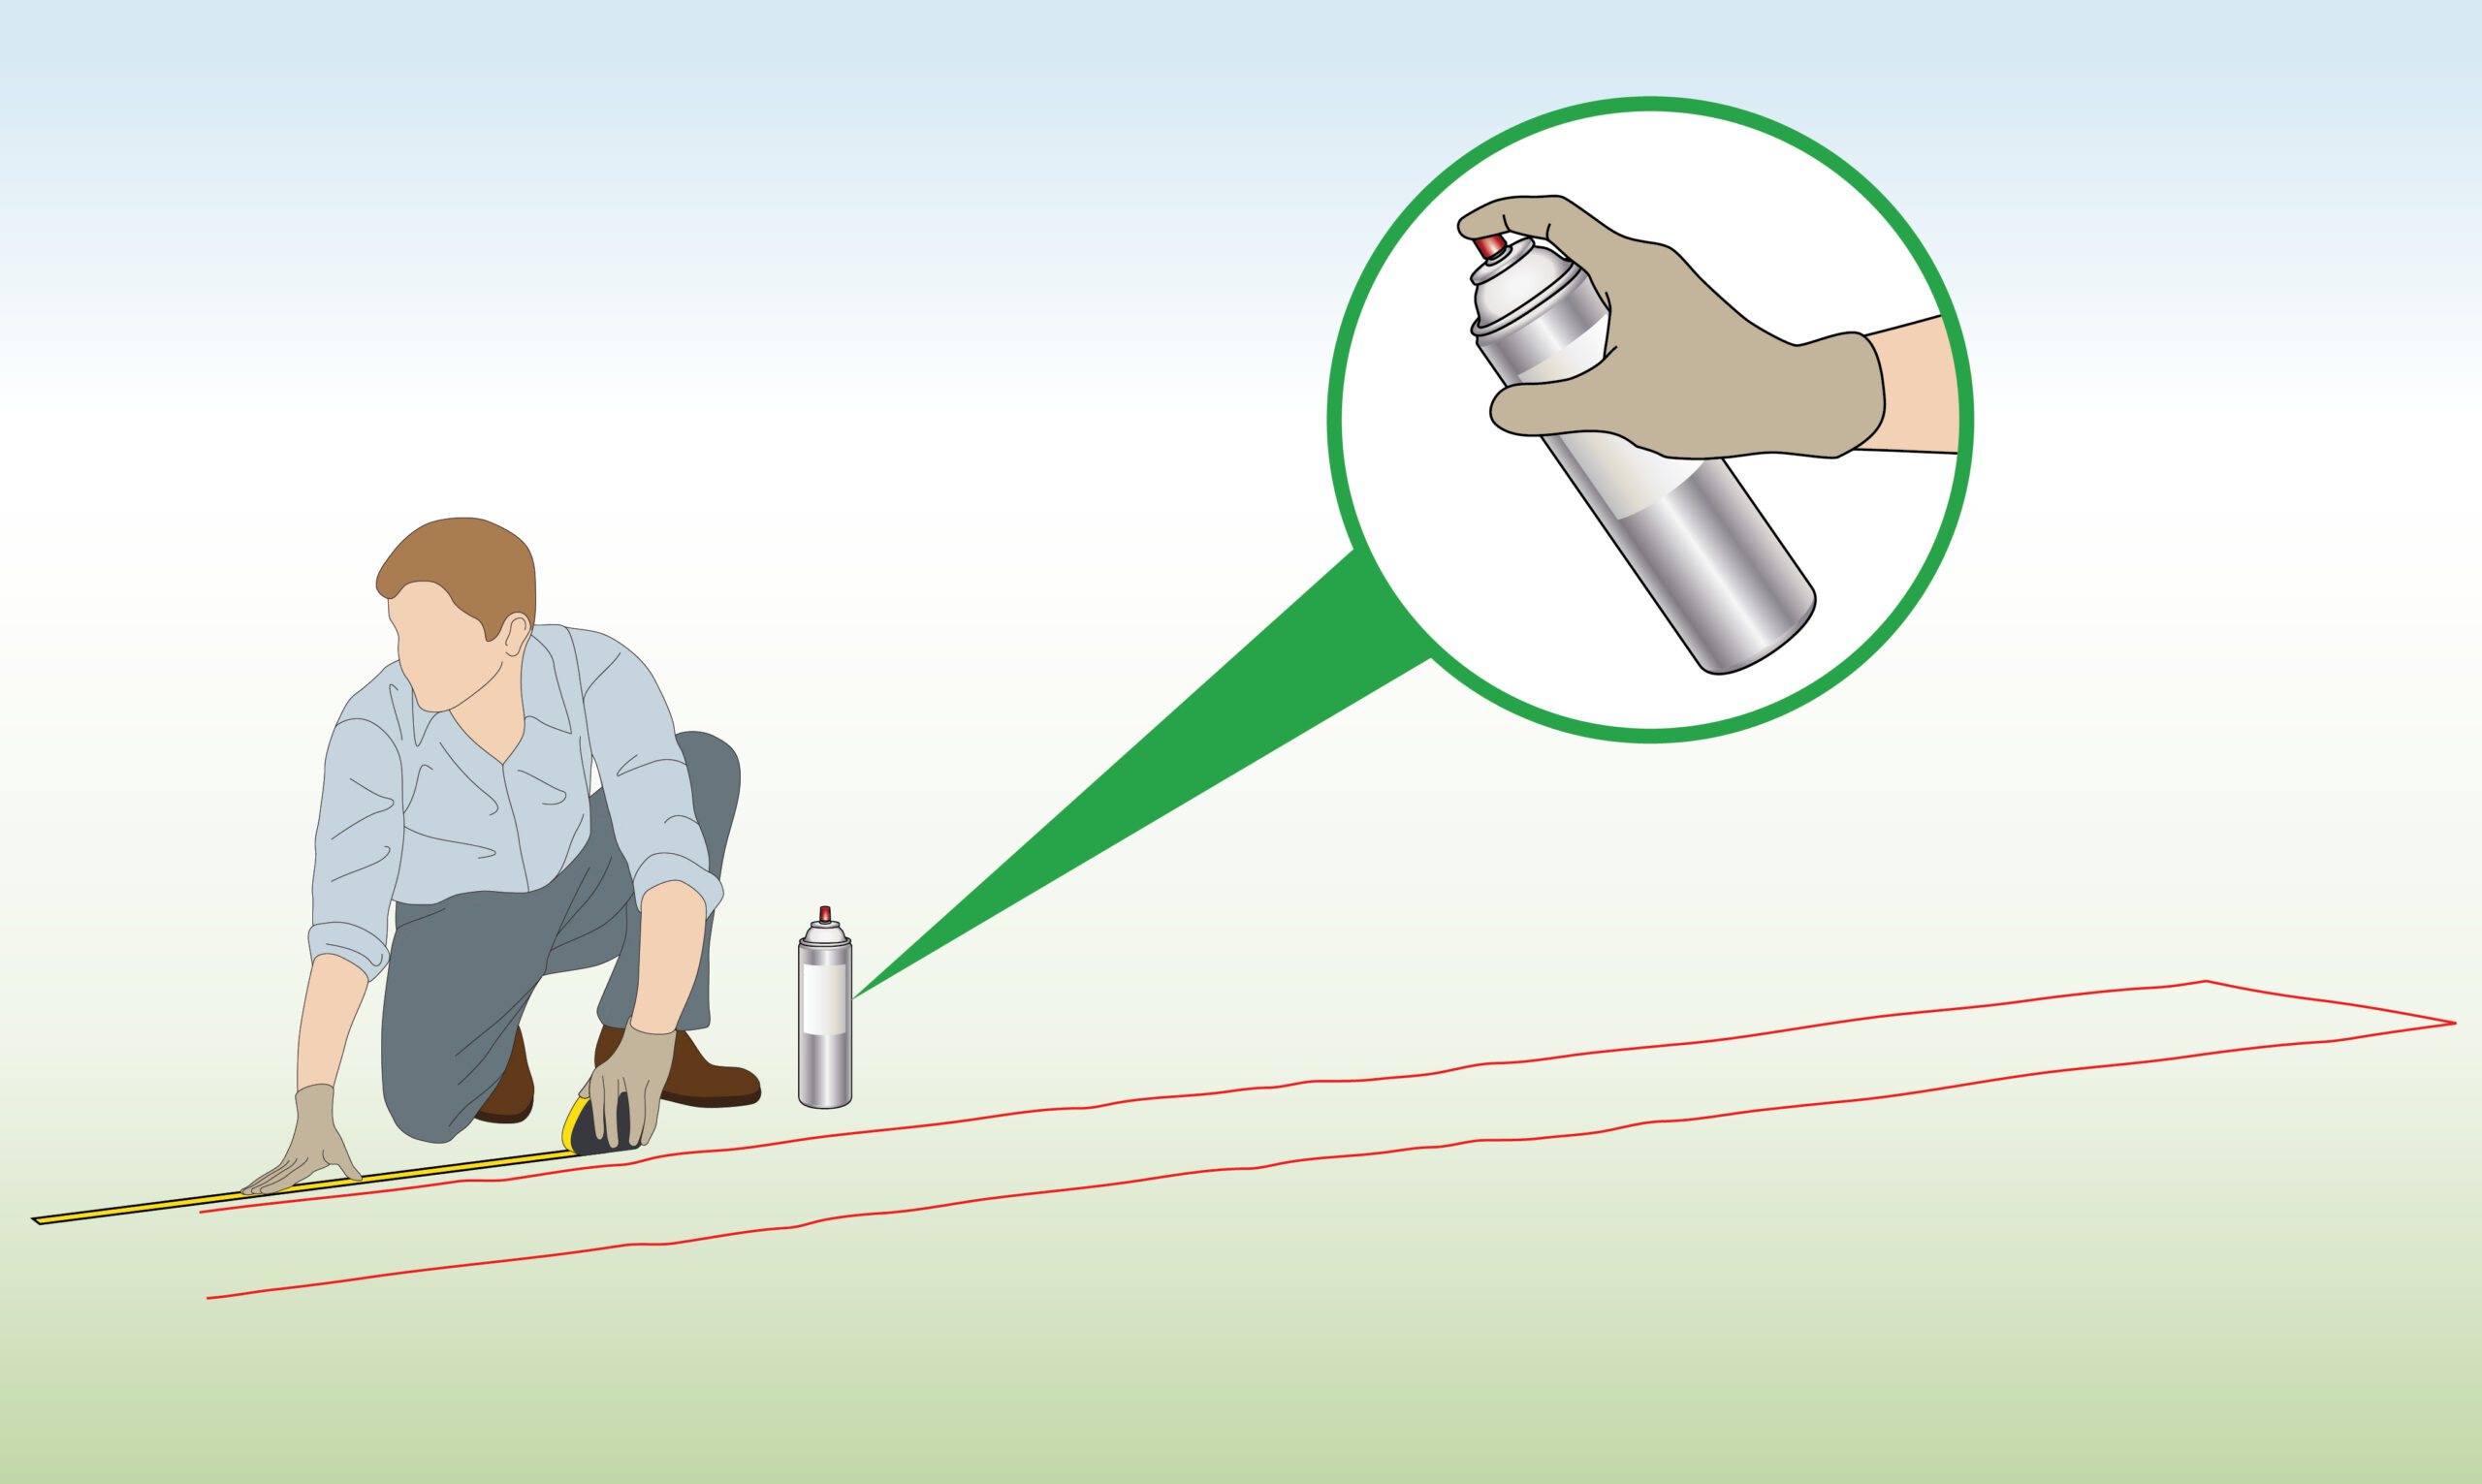
| Step 1 – Identify Location
|
Mark the location where you plan to construct your wall. |
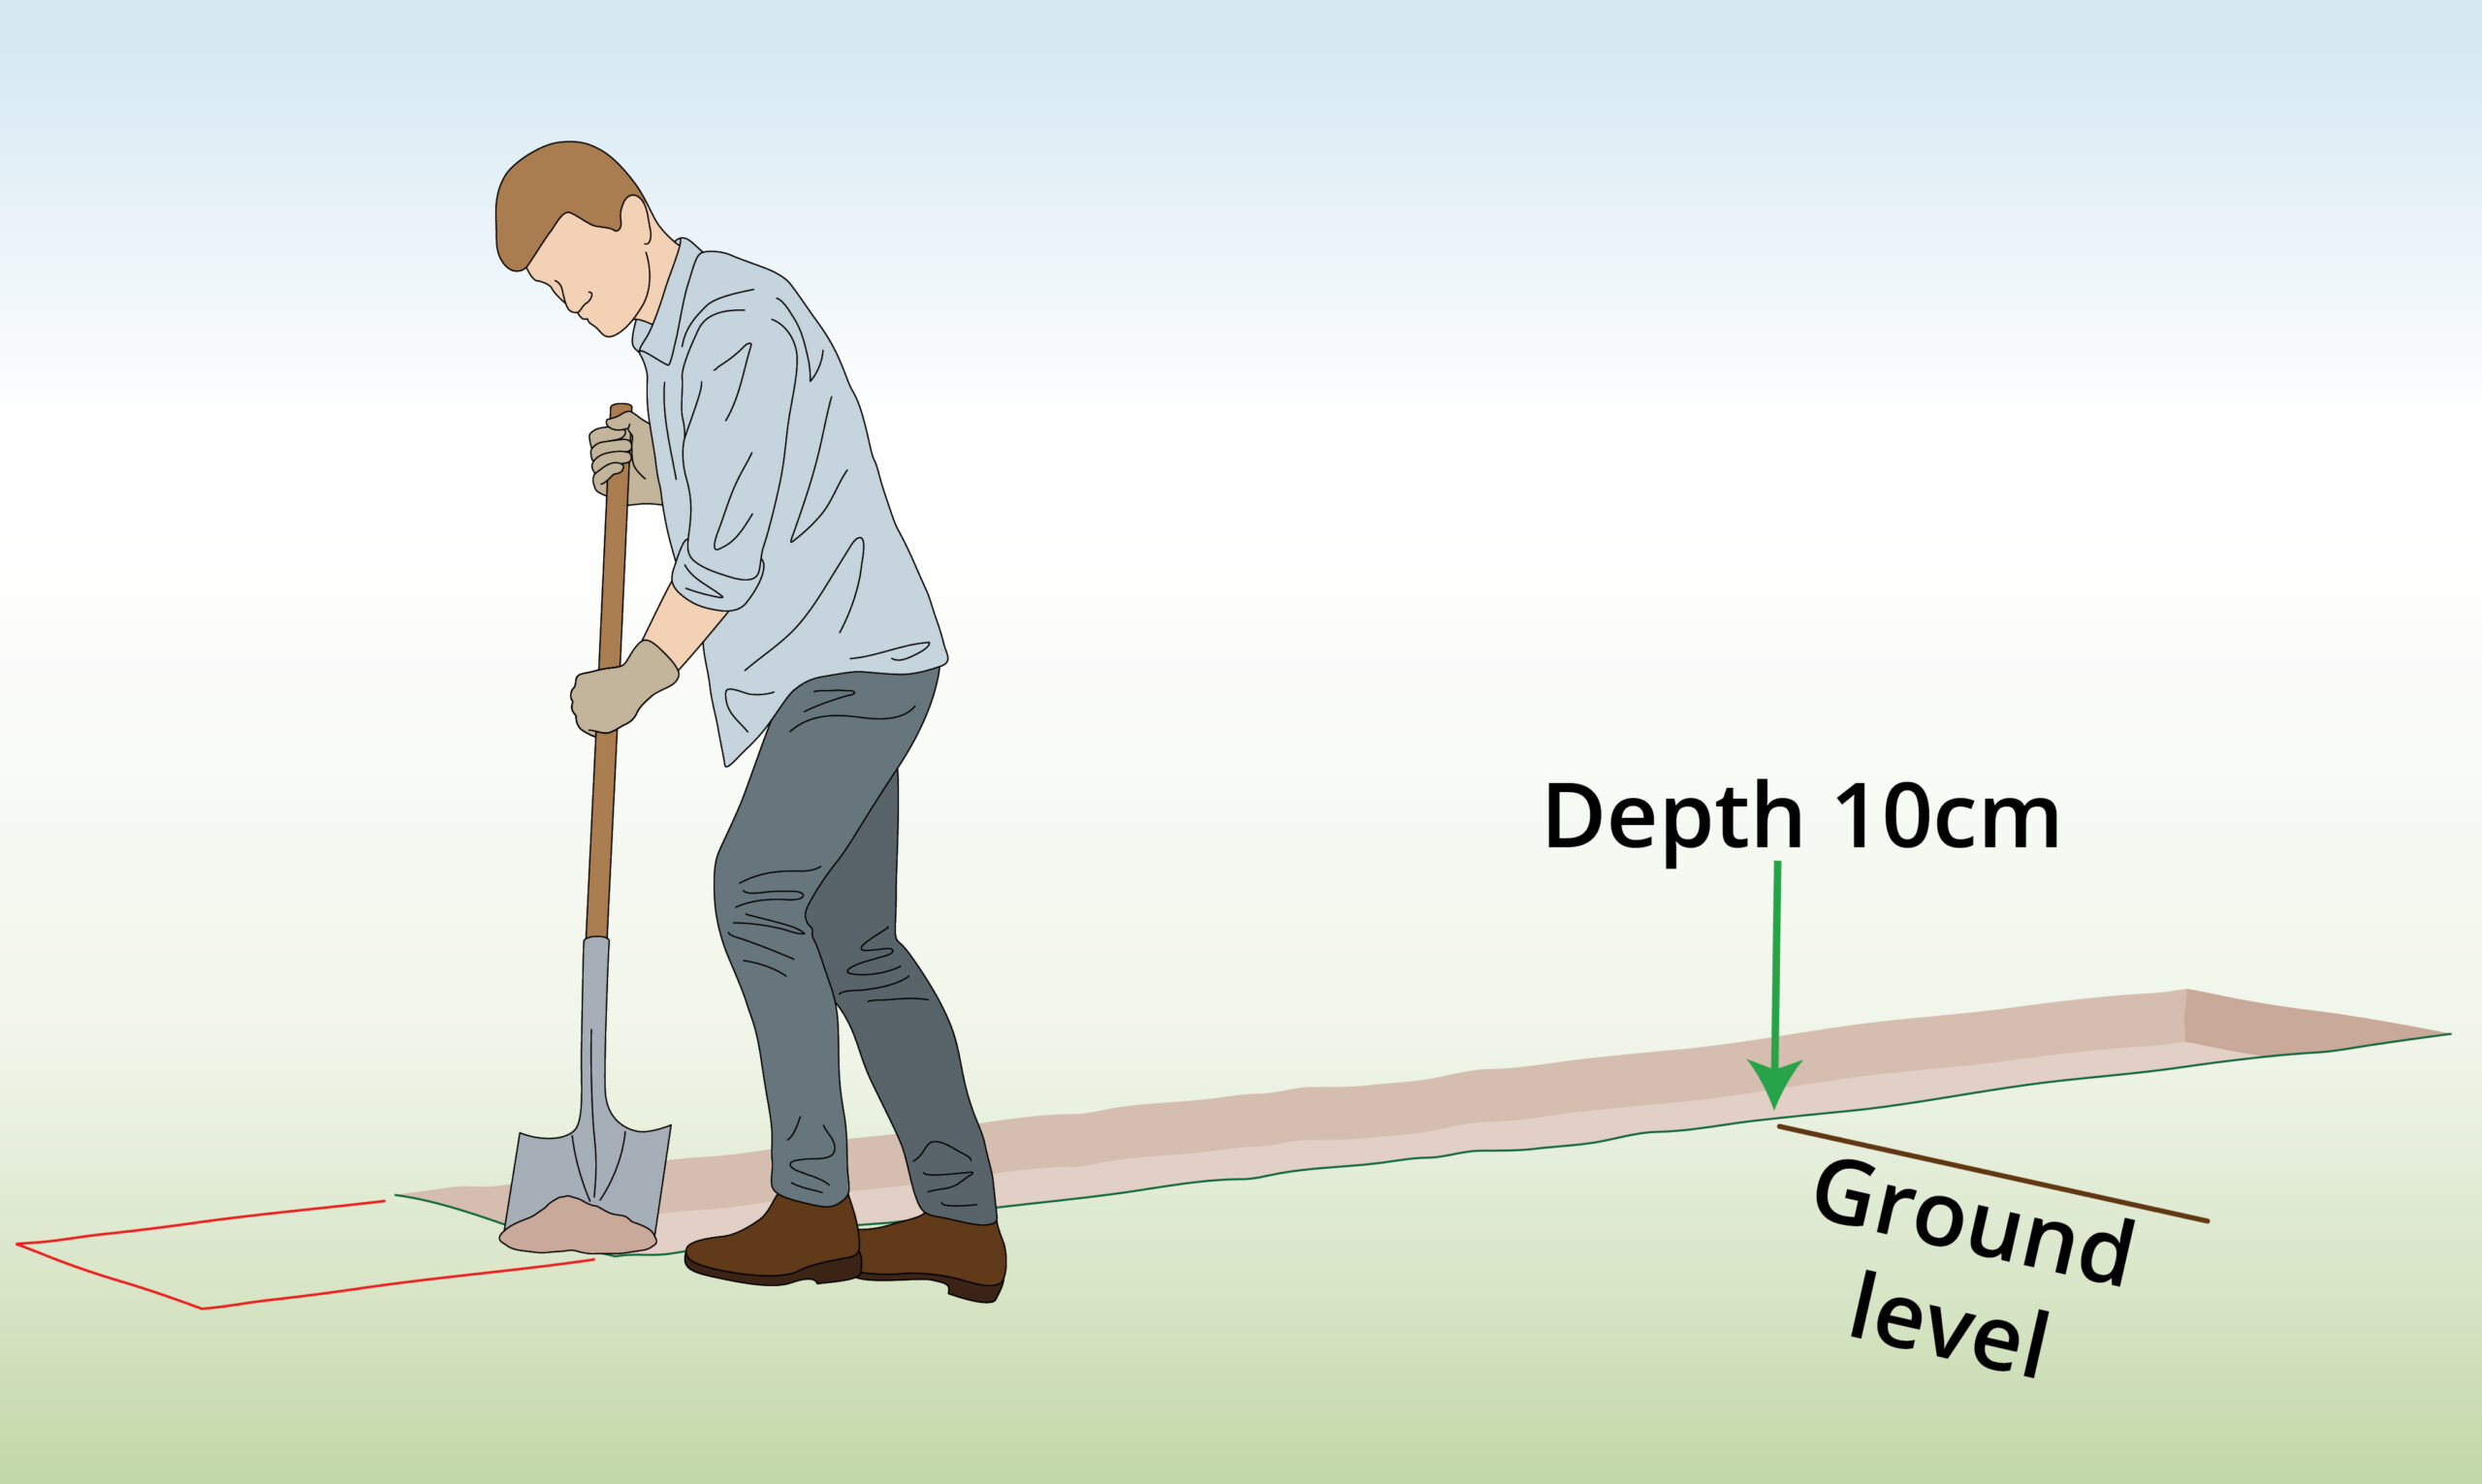
| Step 2 – Dig
|
Dig 10cm or until the ground is firm. Gabion walls lower than 1m are often placed directly on the ground but it will be more stable if placed on firm ground such as clay instead of the topsoil. |
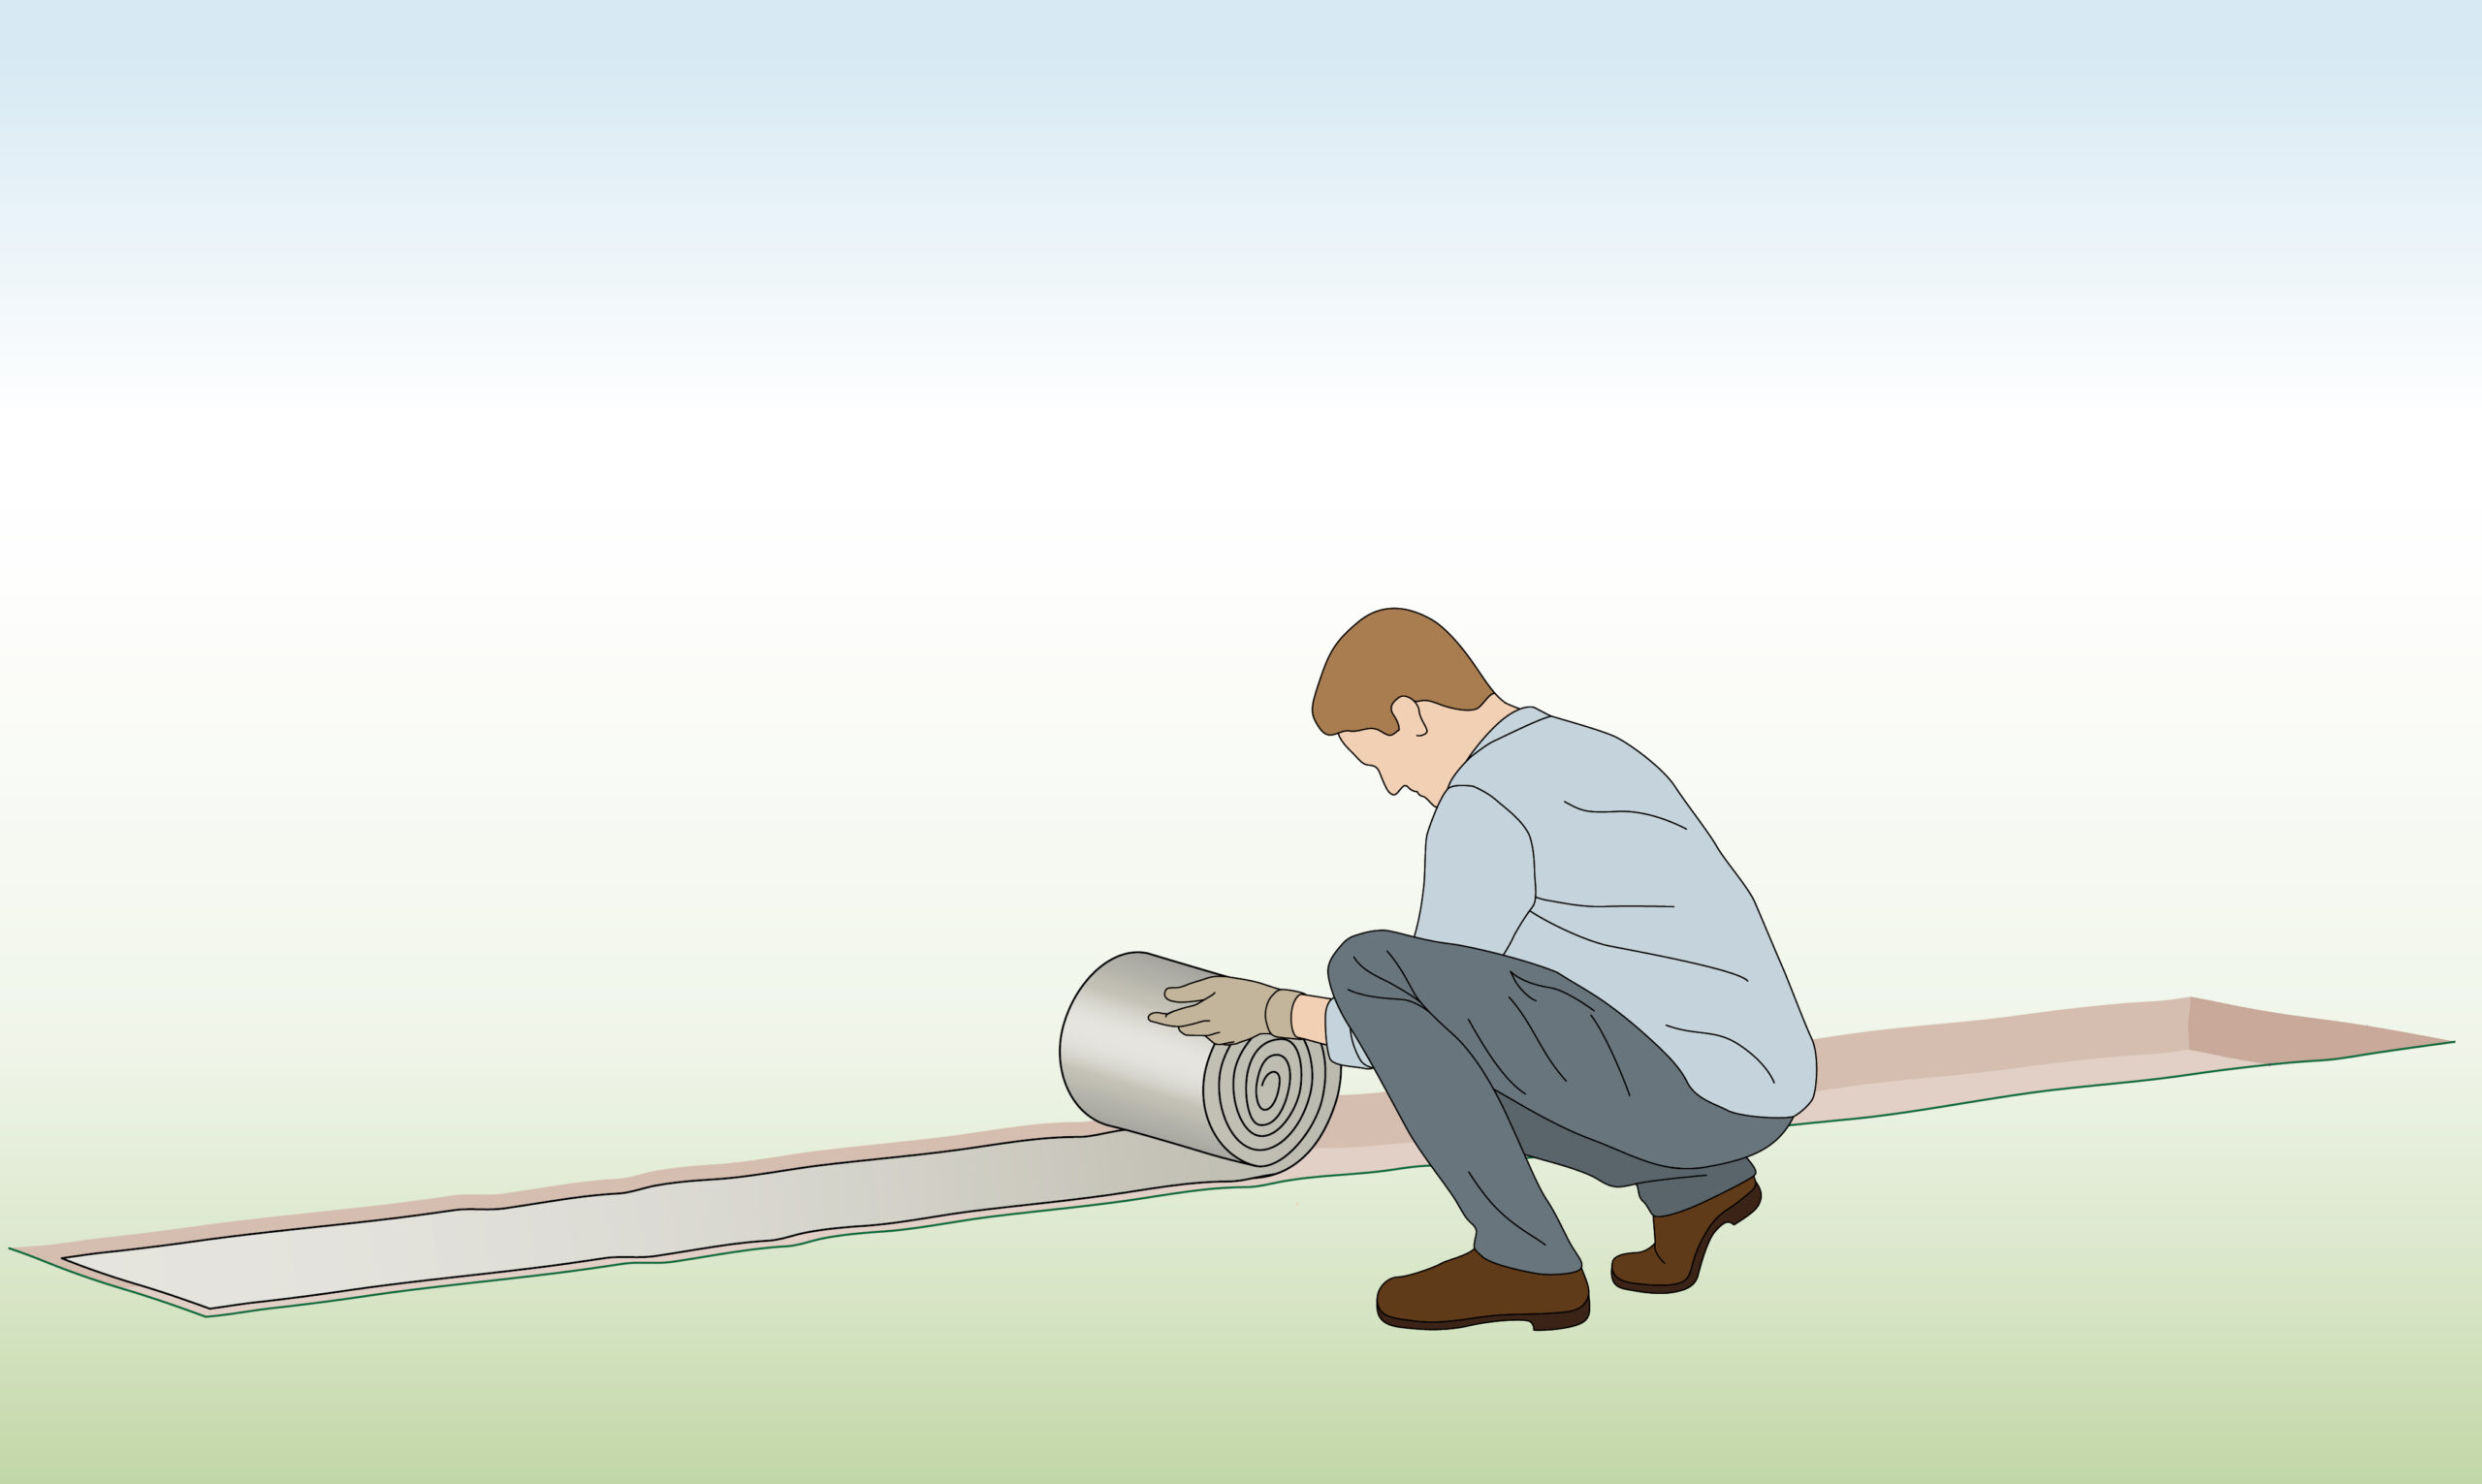
| Step 3 – Add Geotextile / Weed Block
|
Place a layer of geotextile or weed mat to prevent weeds from growing up and through your gabions. |
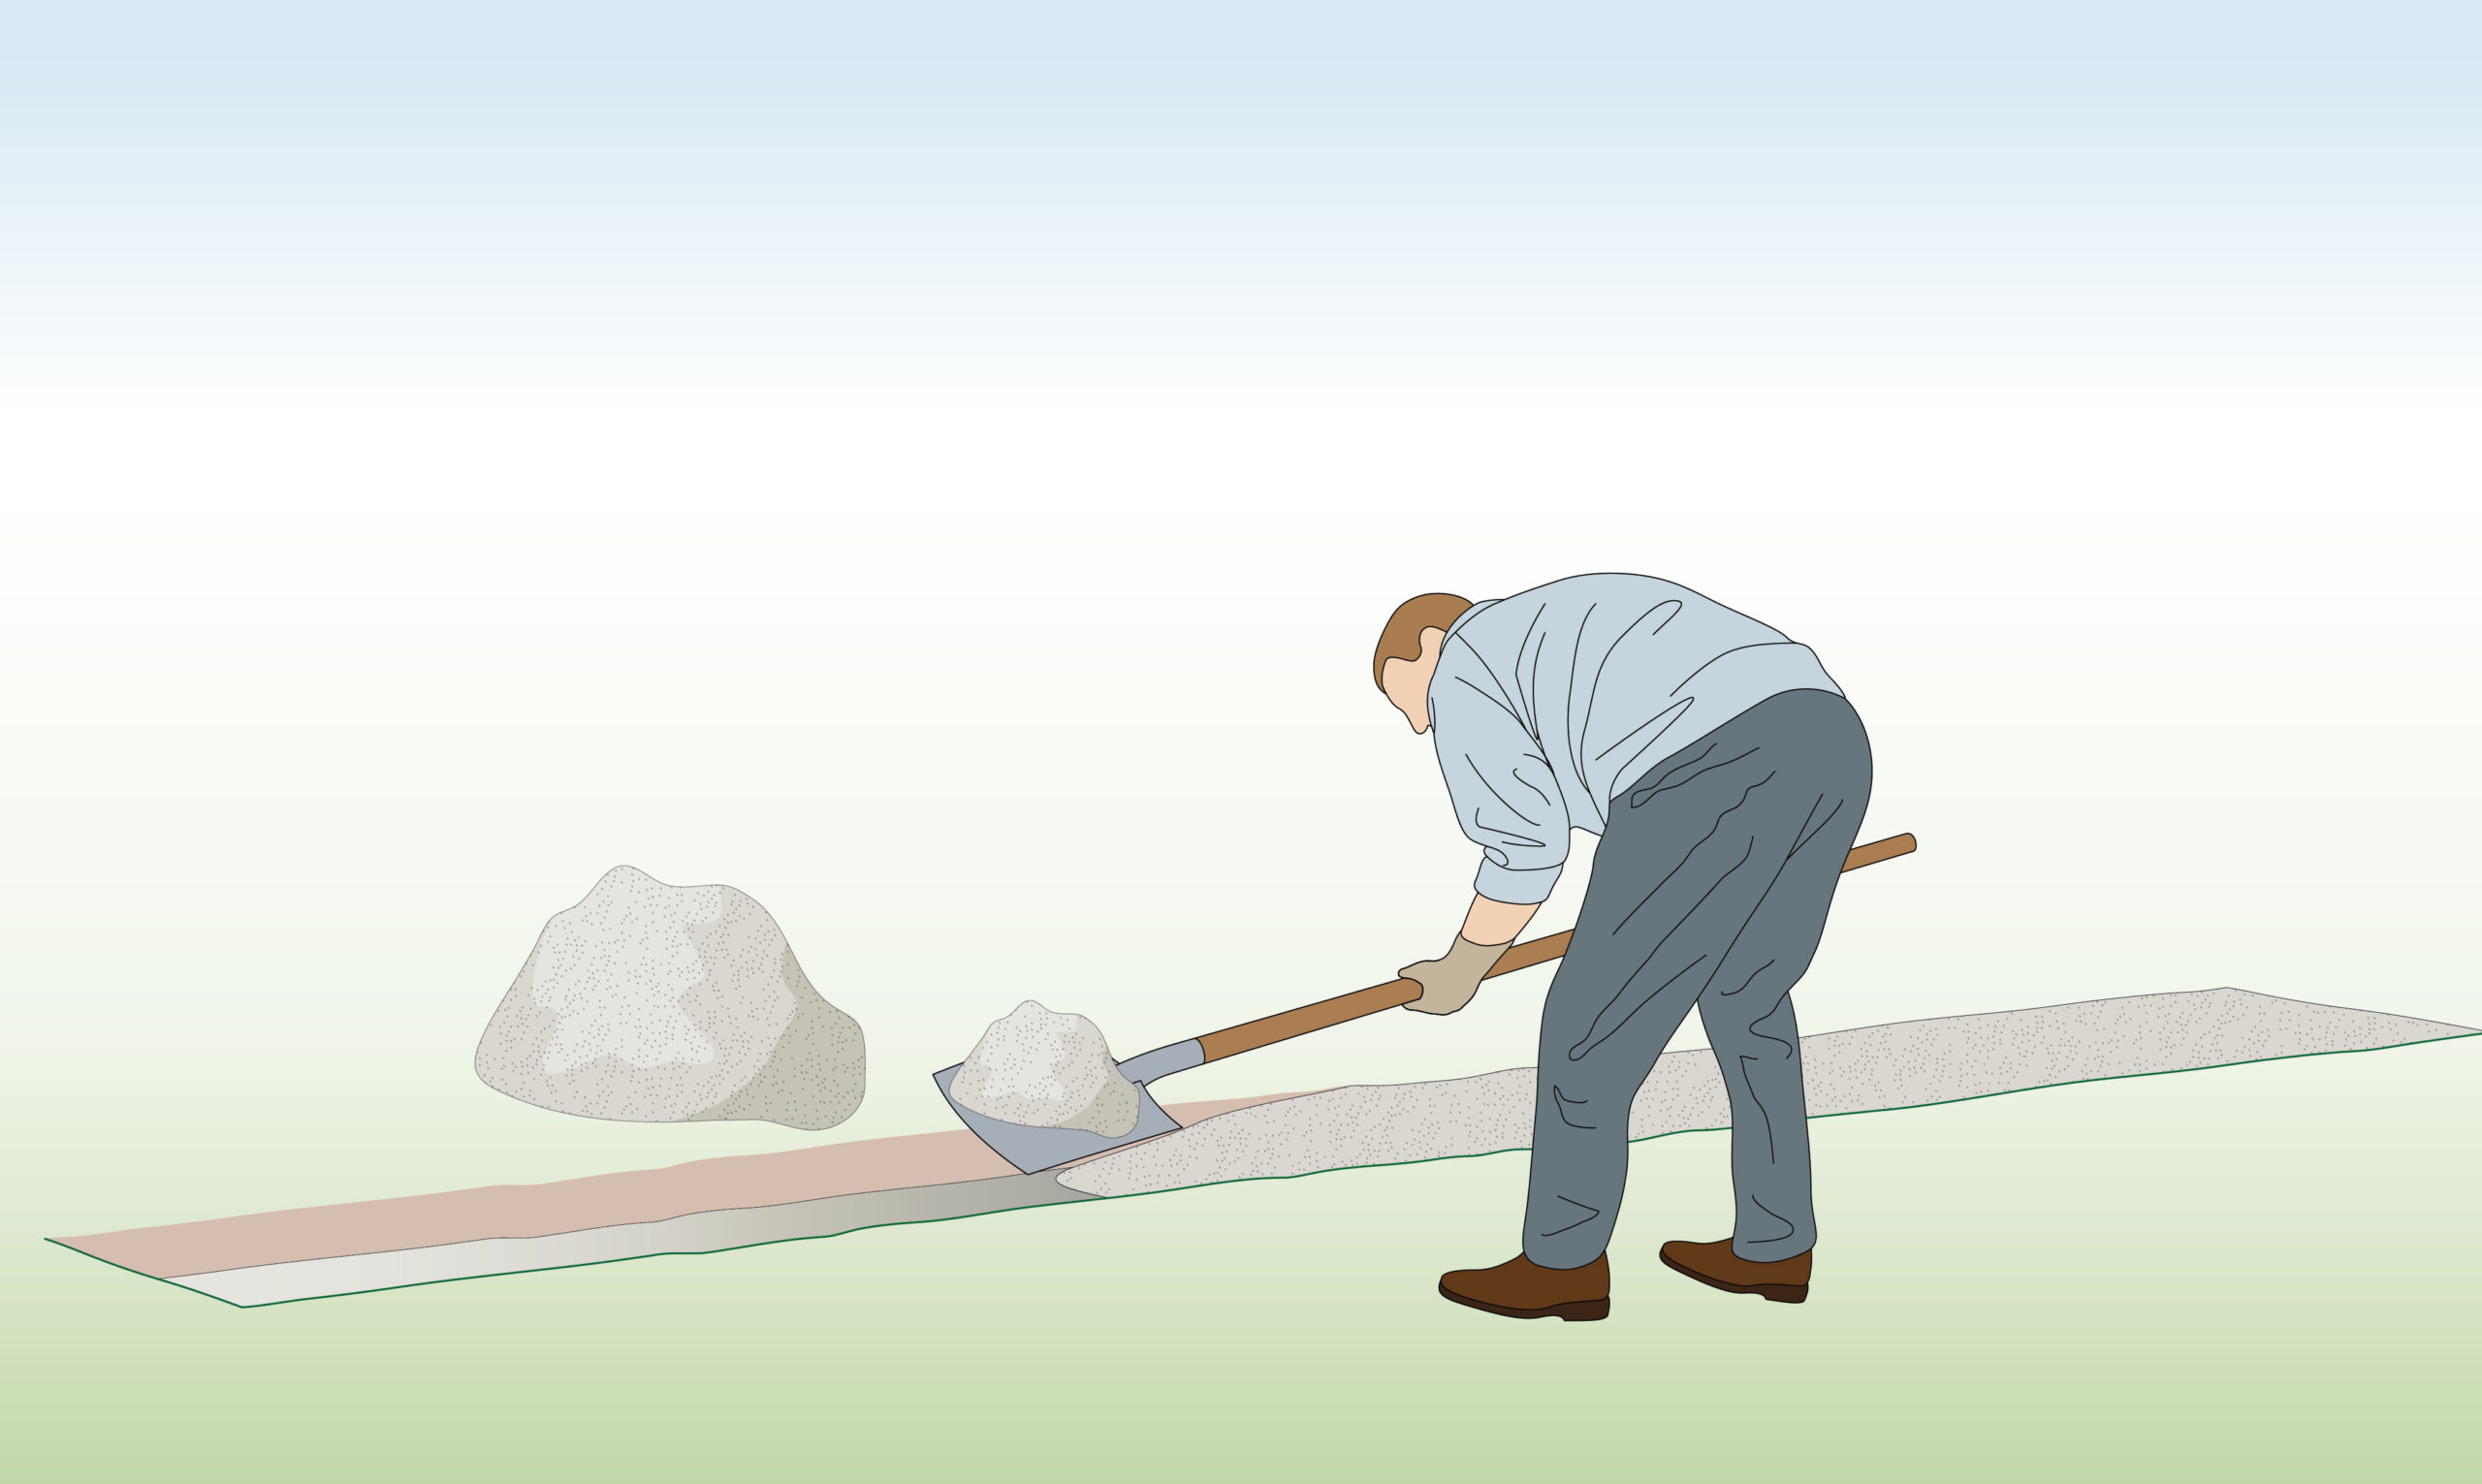
| Step 4 – Add Gravel
|
Add a 10cm layer of gravel or basecourse into your hole. |
| Step 5 – Compact Gravel
|
Walk and stomp on the gravel to make it compact. |
| Optional – Concrete Foundation | Most low-level gabion walls do not require a foundation but if you have a large amount of groundwater or the soil is weak, it may be needed. |
| Step 6 – Unpack Kit
|
Unpack your gabion trellis kit. |
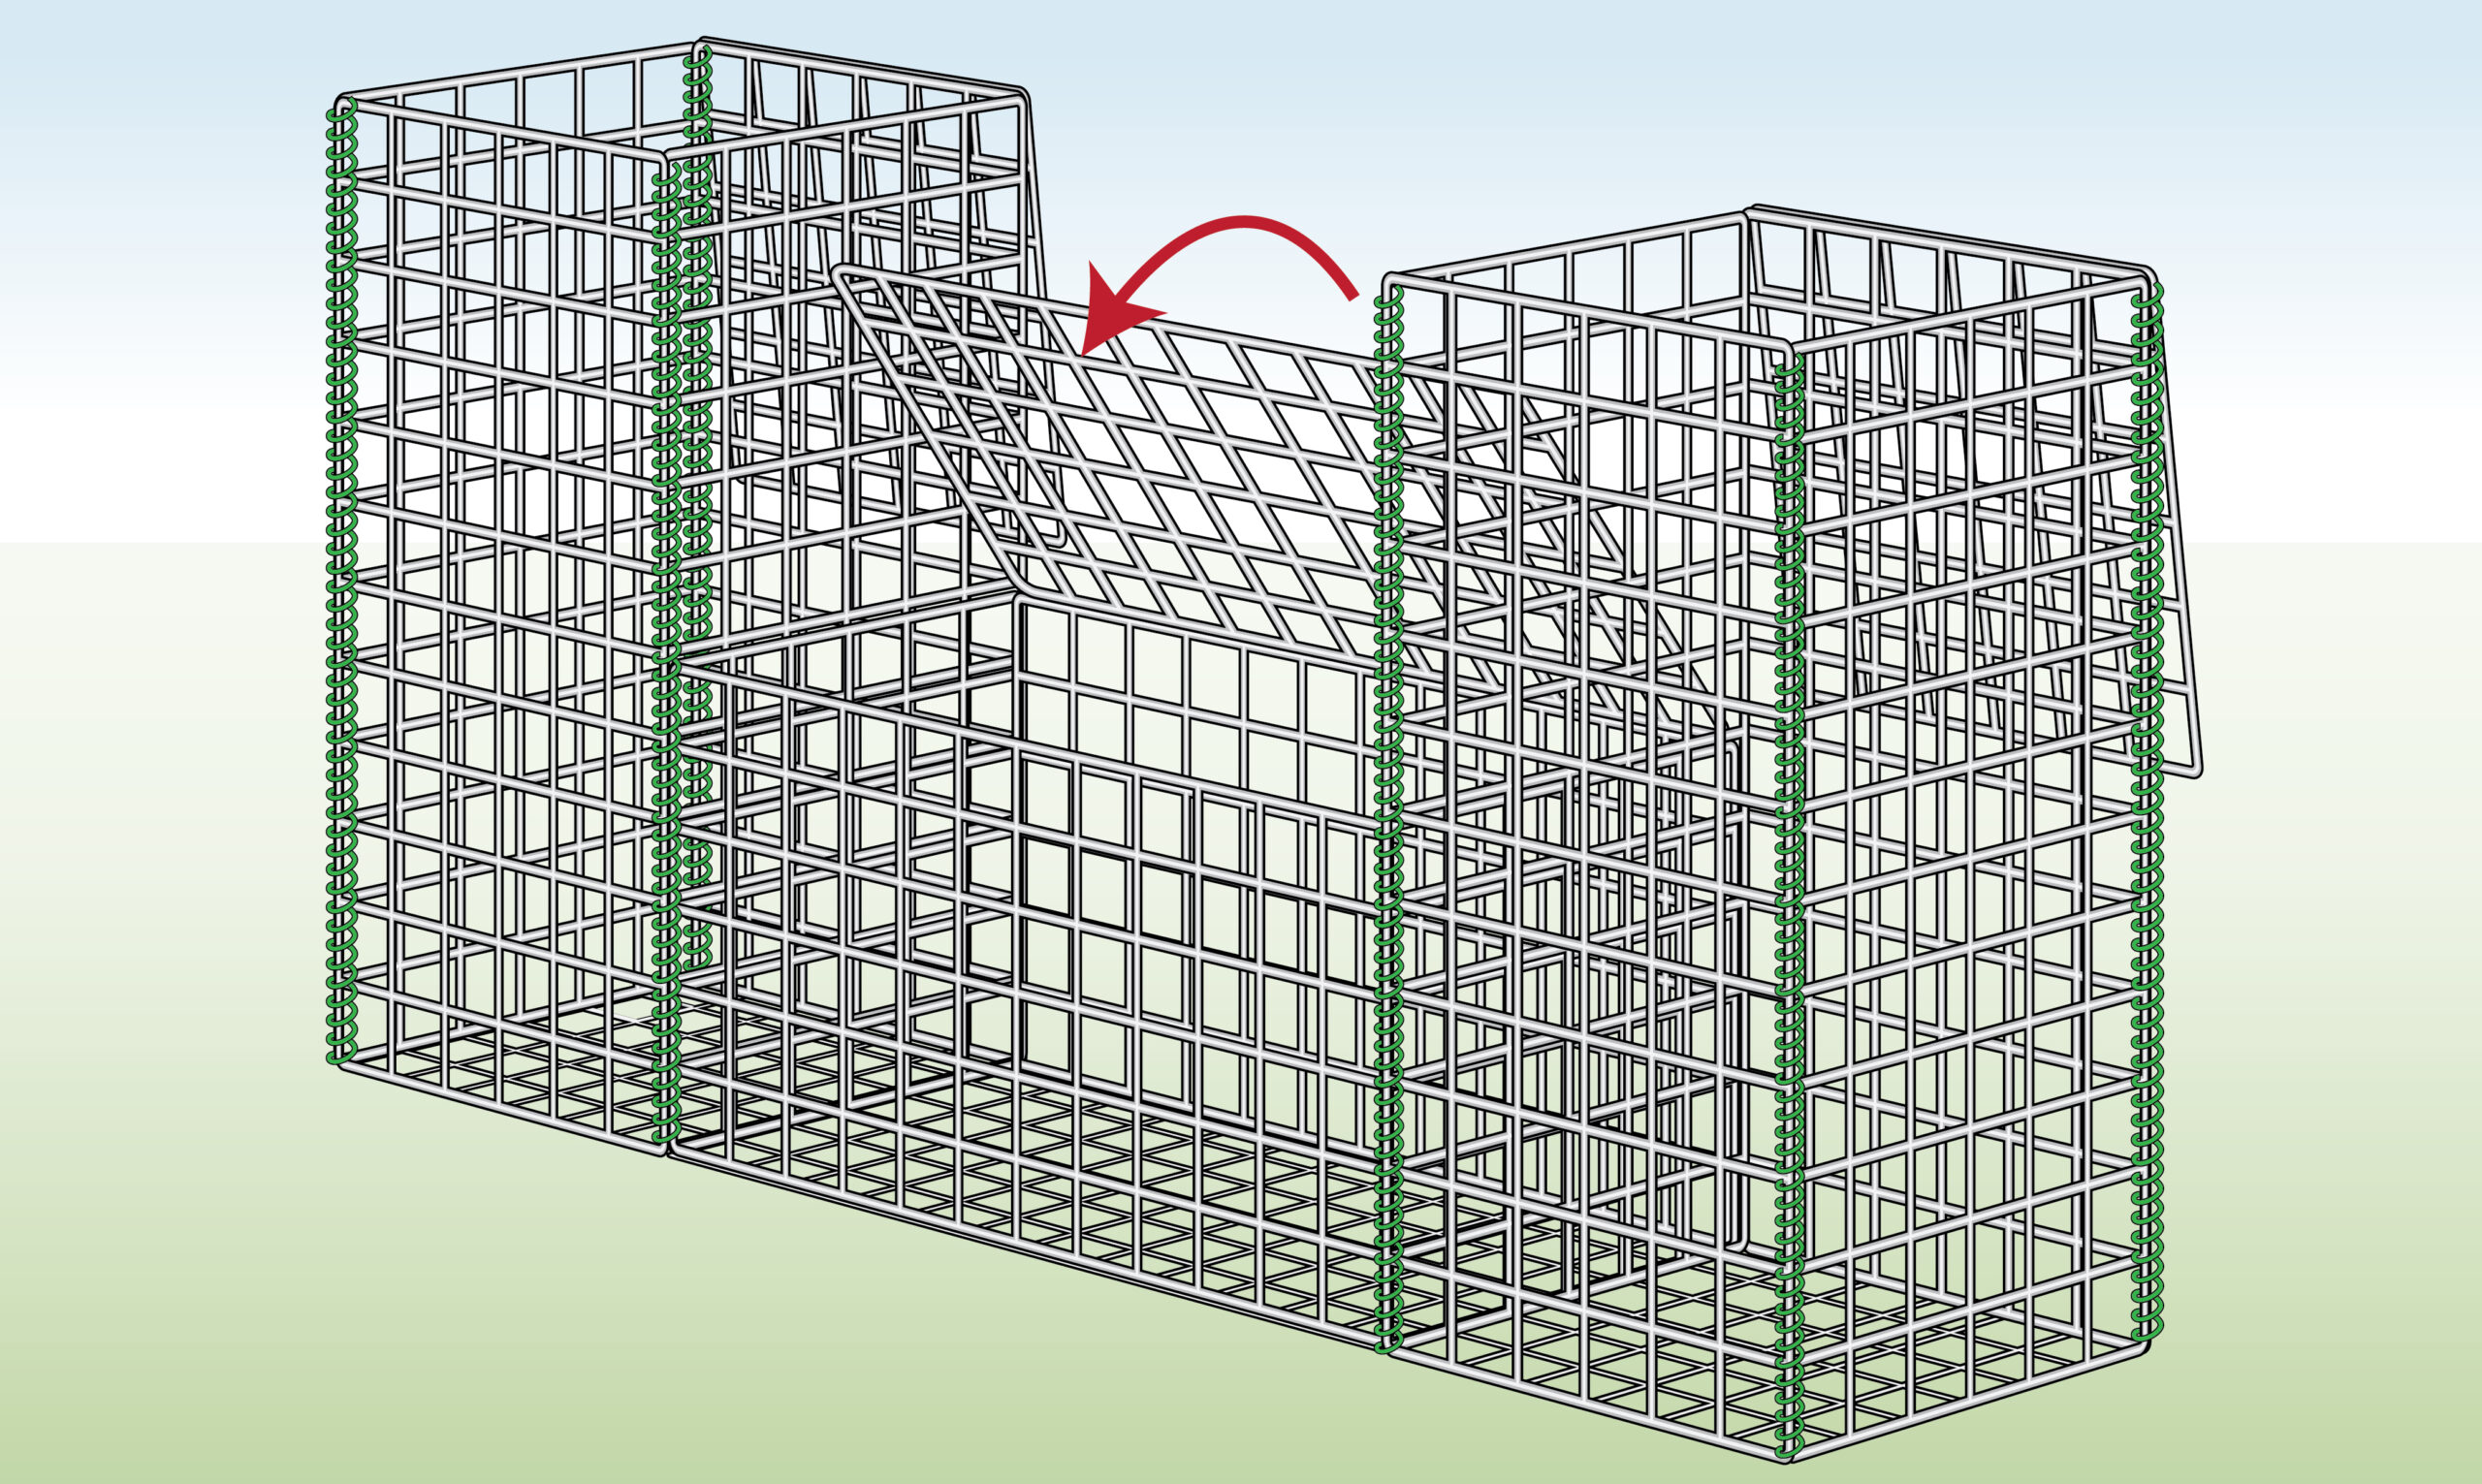
| Step 7 – Unfold Baskets
|
Unfold the baskets and lift up their sides, front and back. Leave the lids hanging backward. |
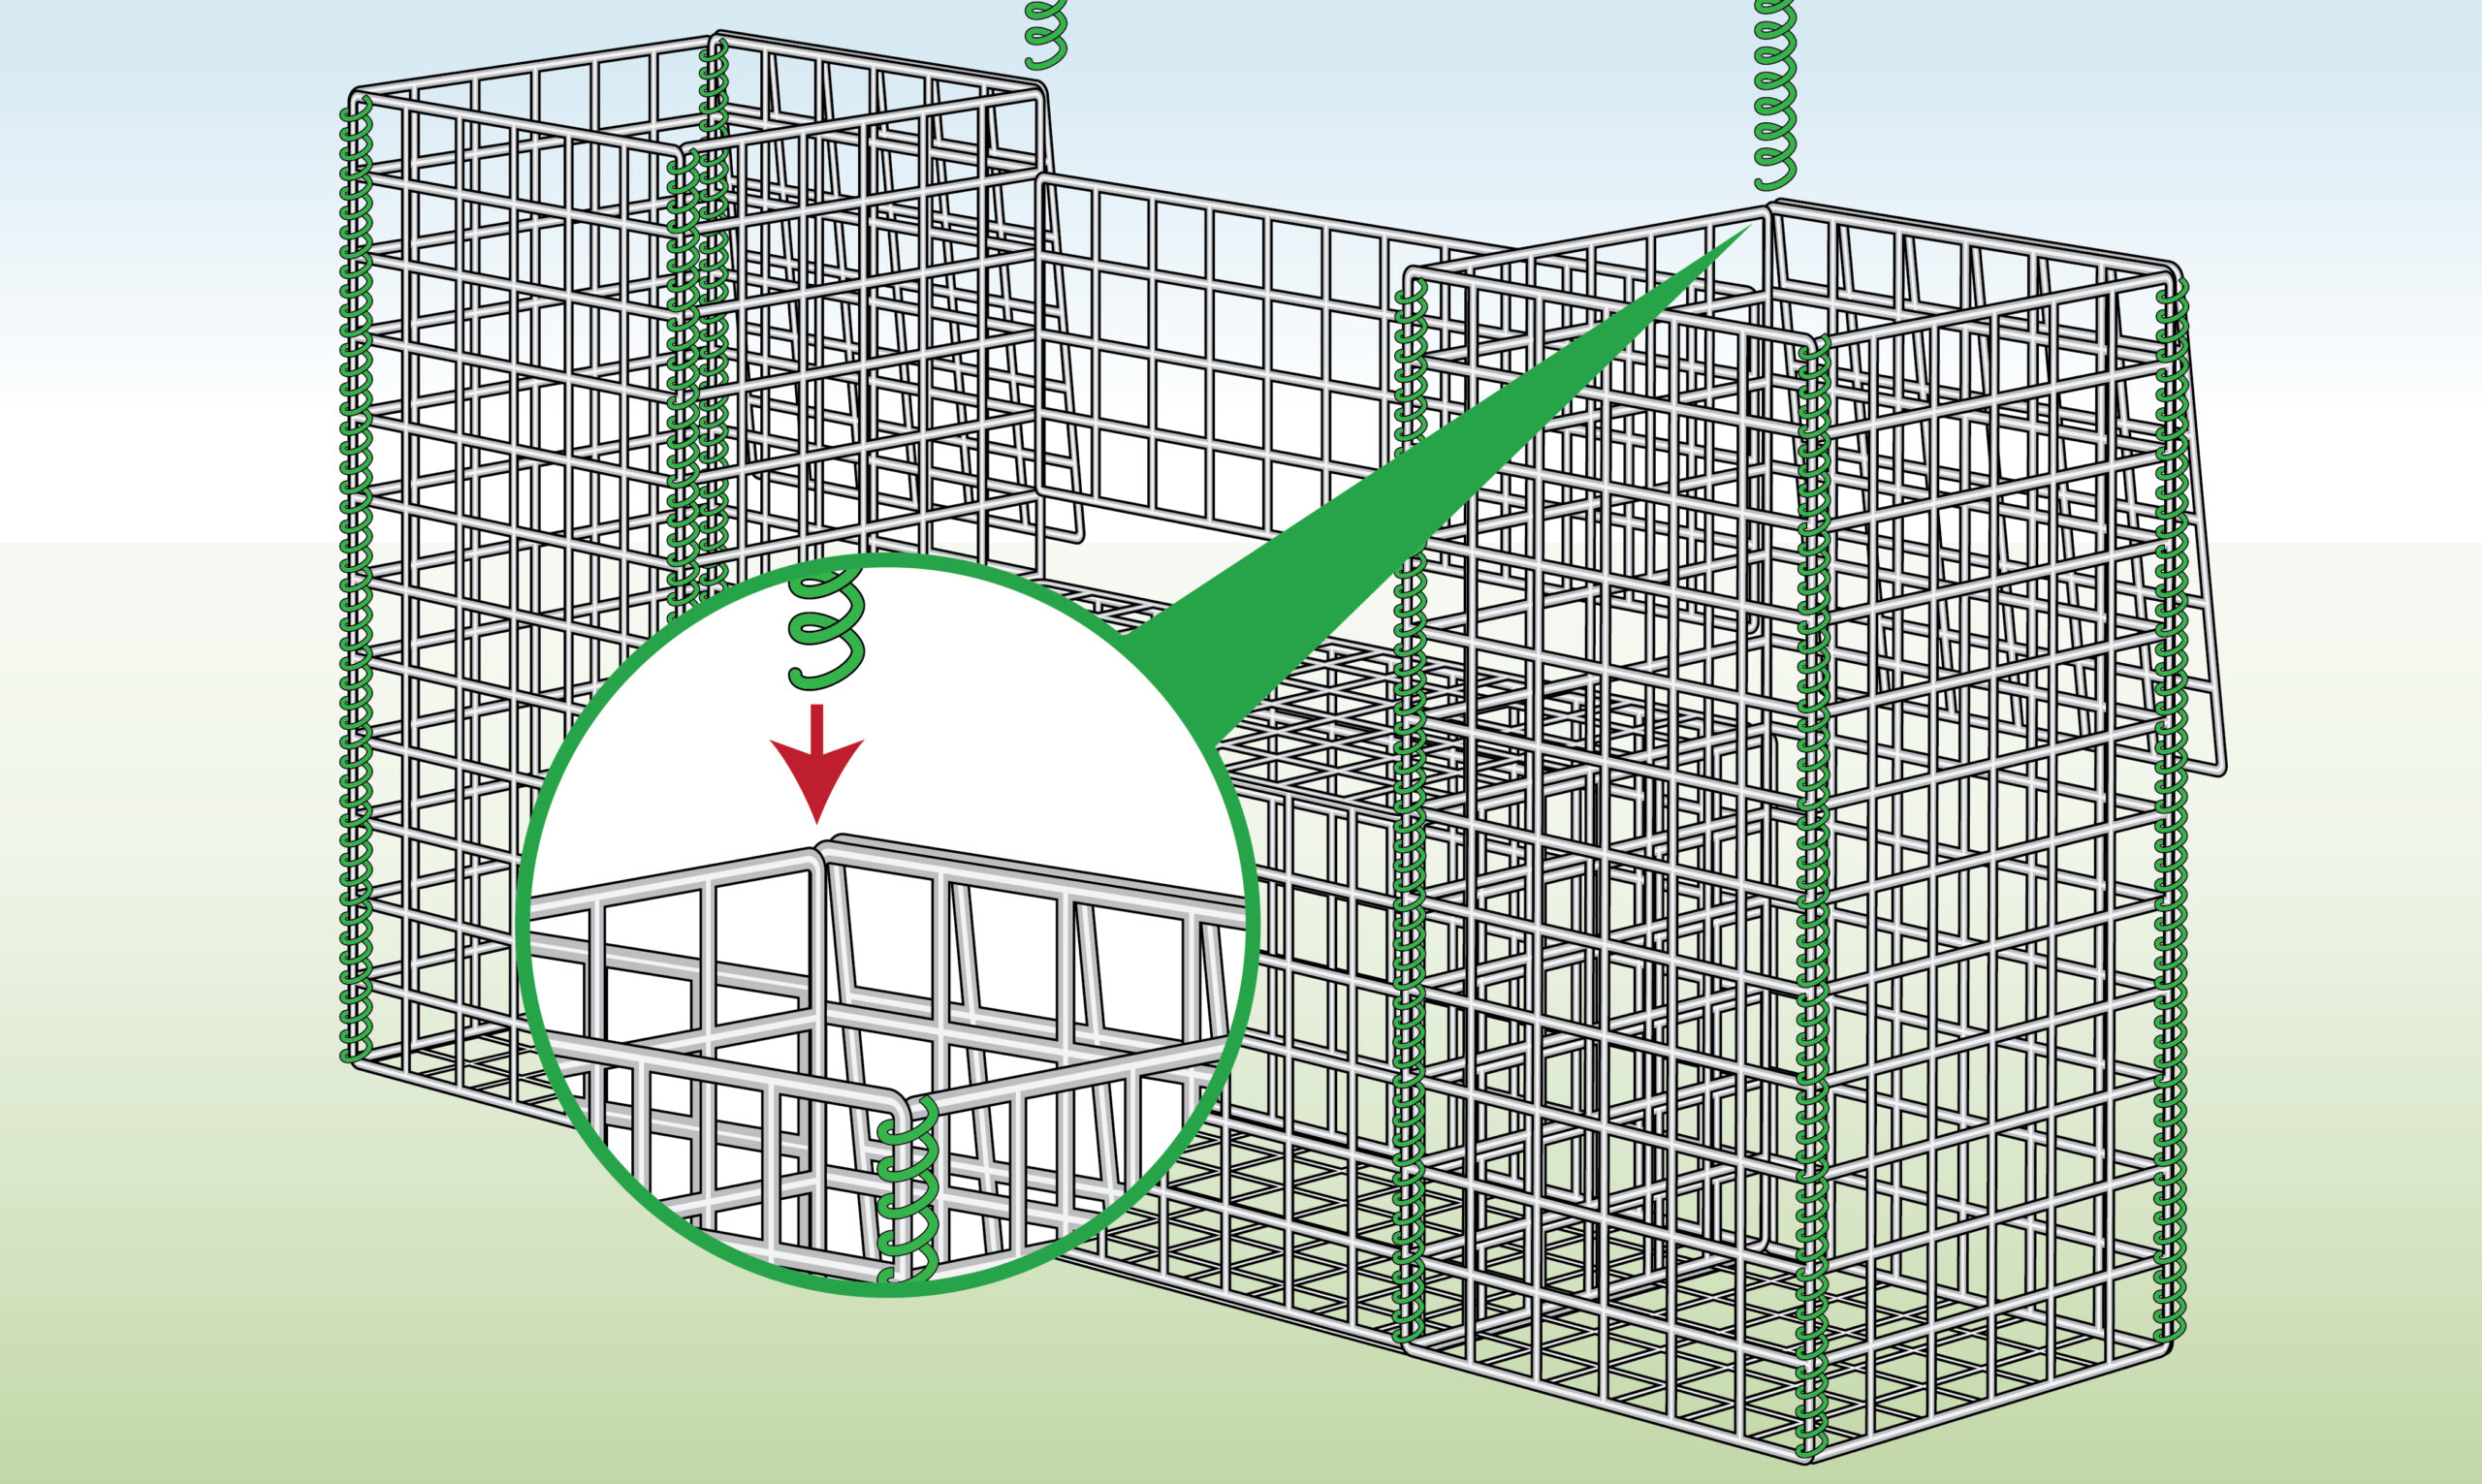
| Step 8 – Connect Outer Corners
|
Twist the helicals around the mesh holes to connect three corners of the gabion columns.
A single helical will connect the column basket to the midsection basket like this. |
| Step 9 – Close Lid
|
Close the lid of the midsection but don’t secure it yet. |
| Step 10 – Connect Trellis Panel
|
Holding the trellis panel in place, attach the final corners so the helical connects both the panel and the corners together.
Additional tying wire will be supplied in case you would like to strengthen this connection. |
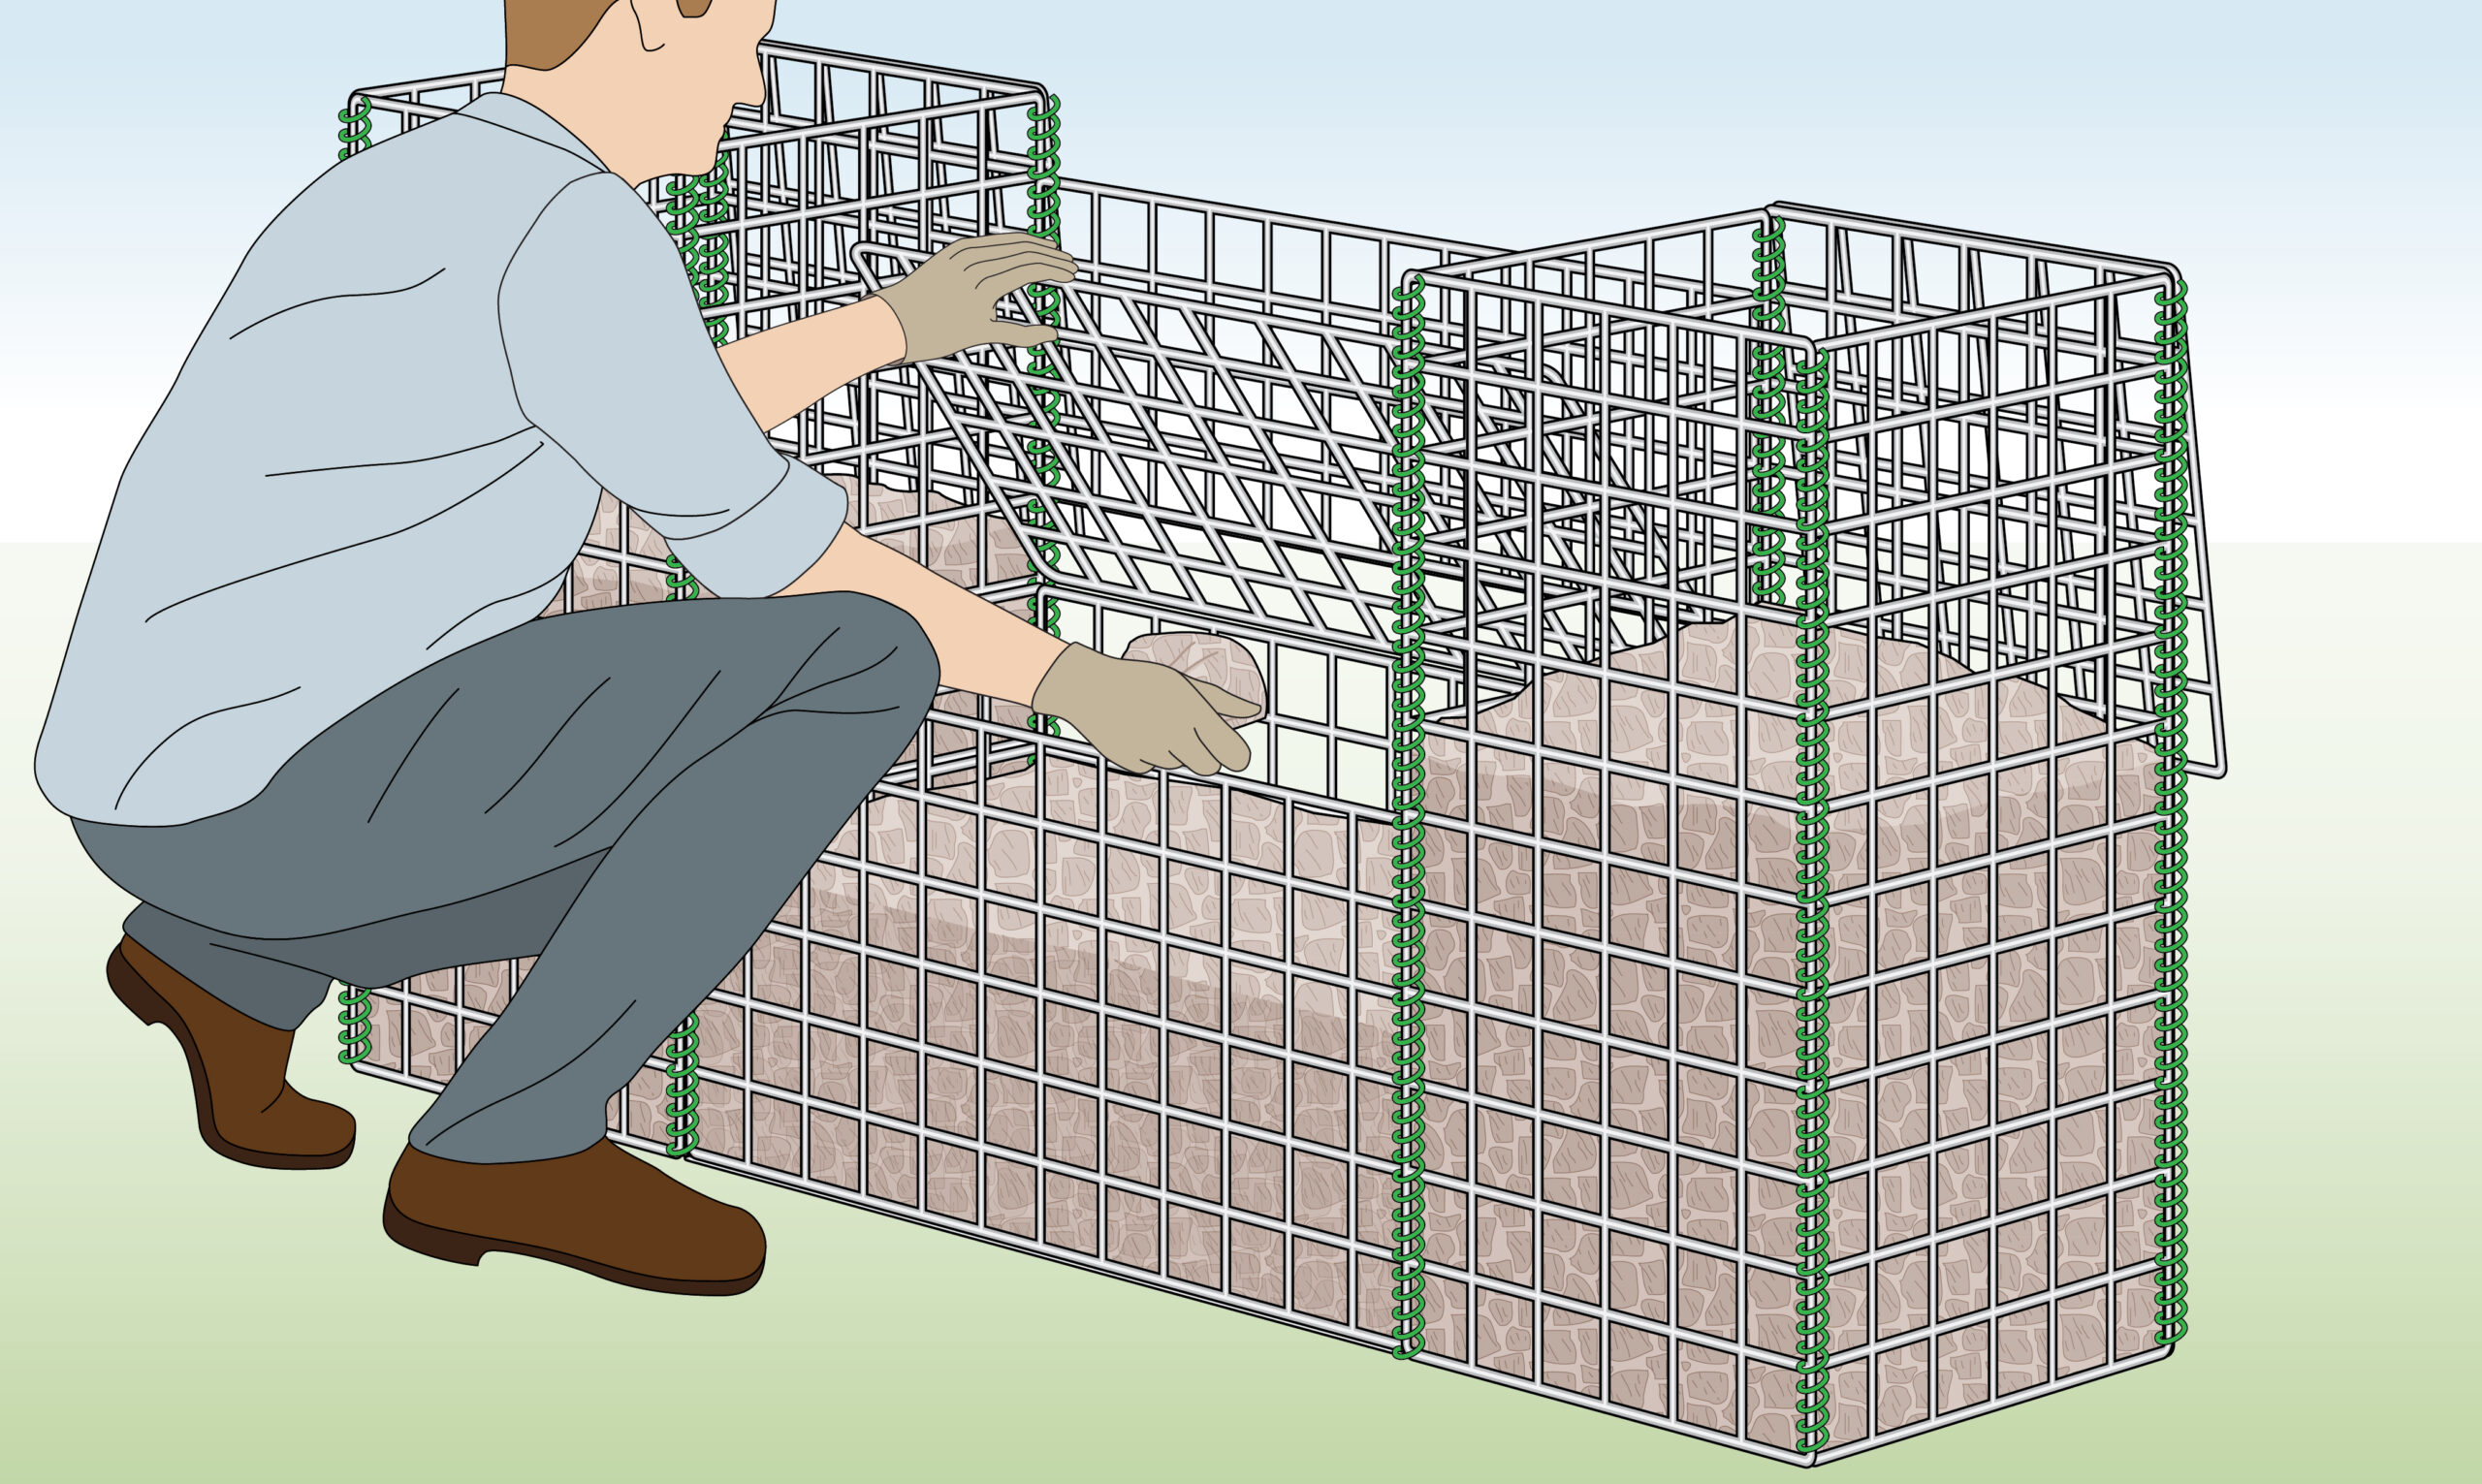
| Step 11 – Fill with Stone
|
Start filling up your gabions with your desired type of stone. |
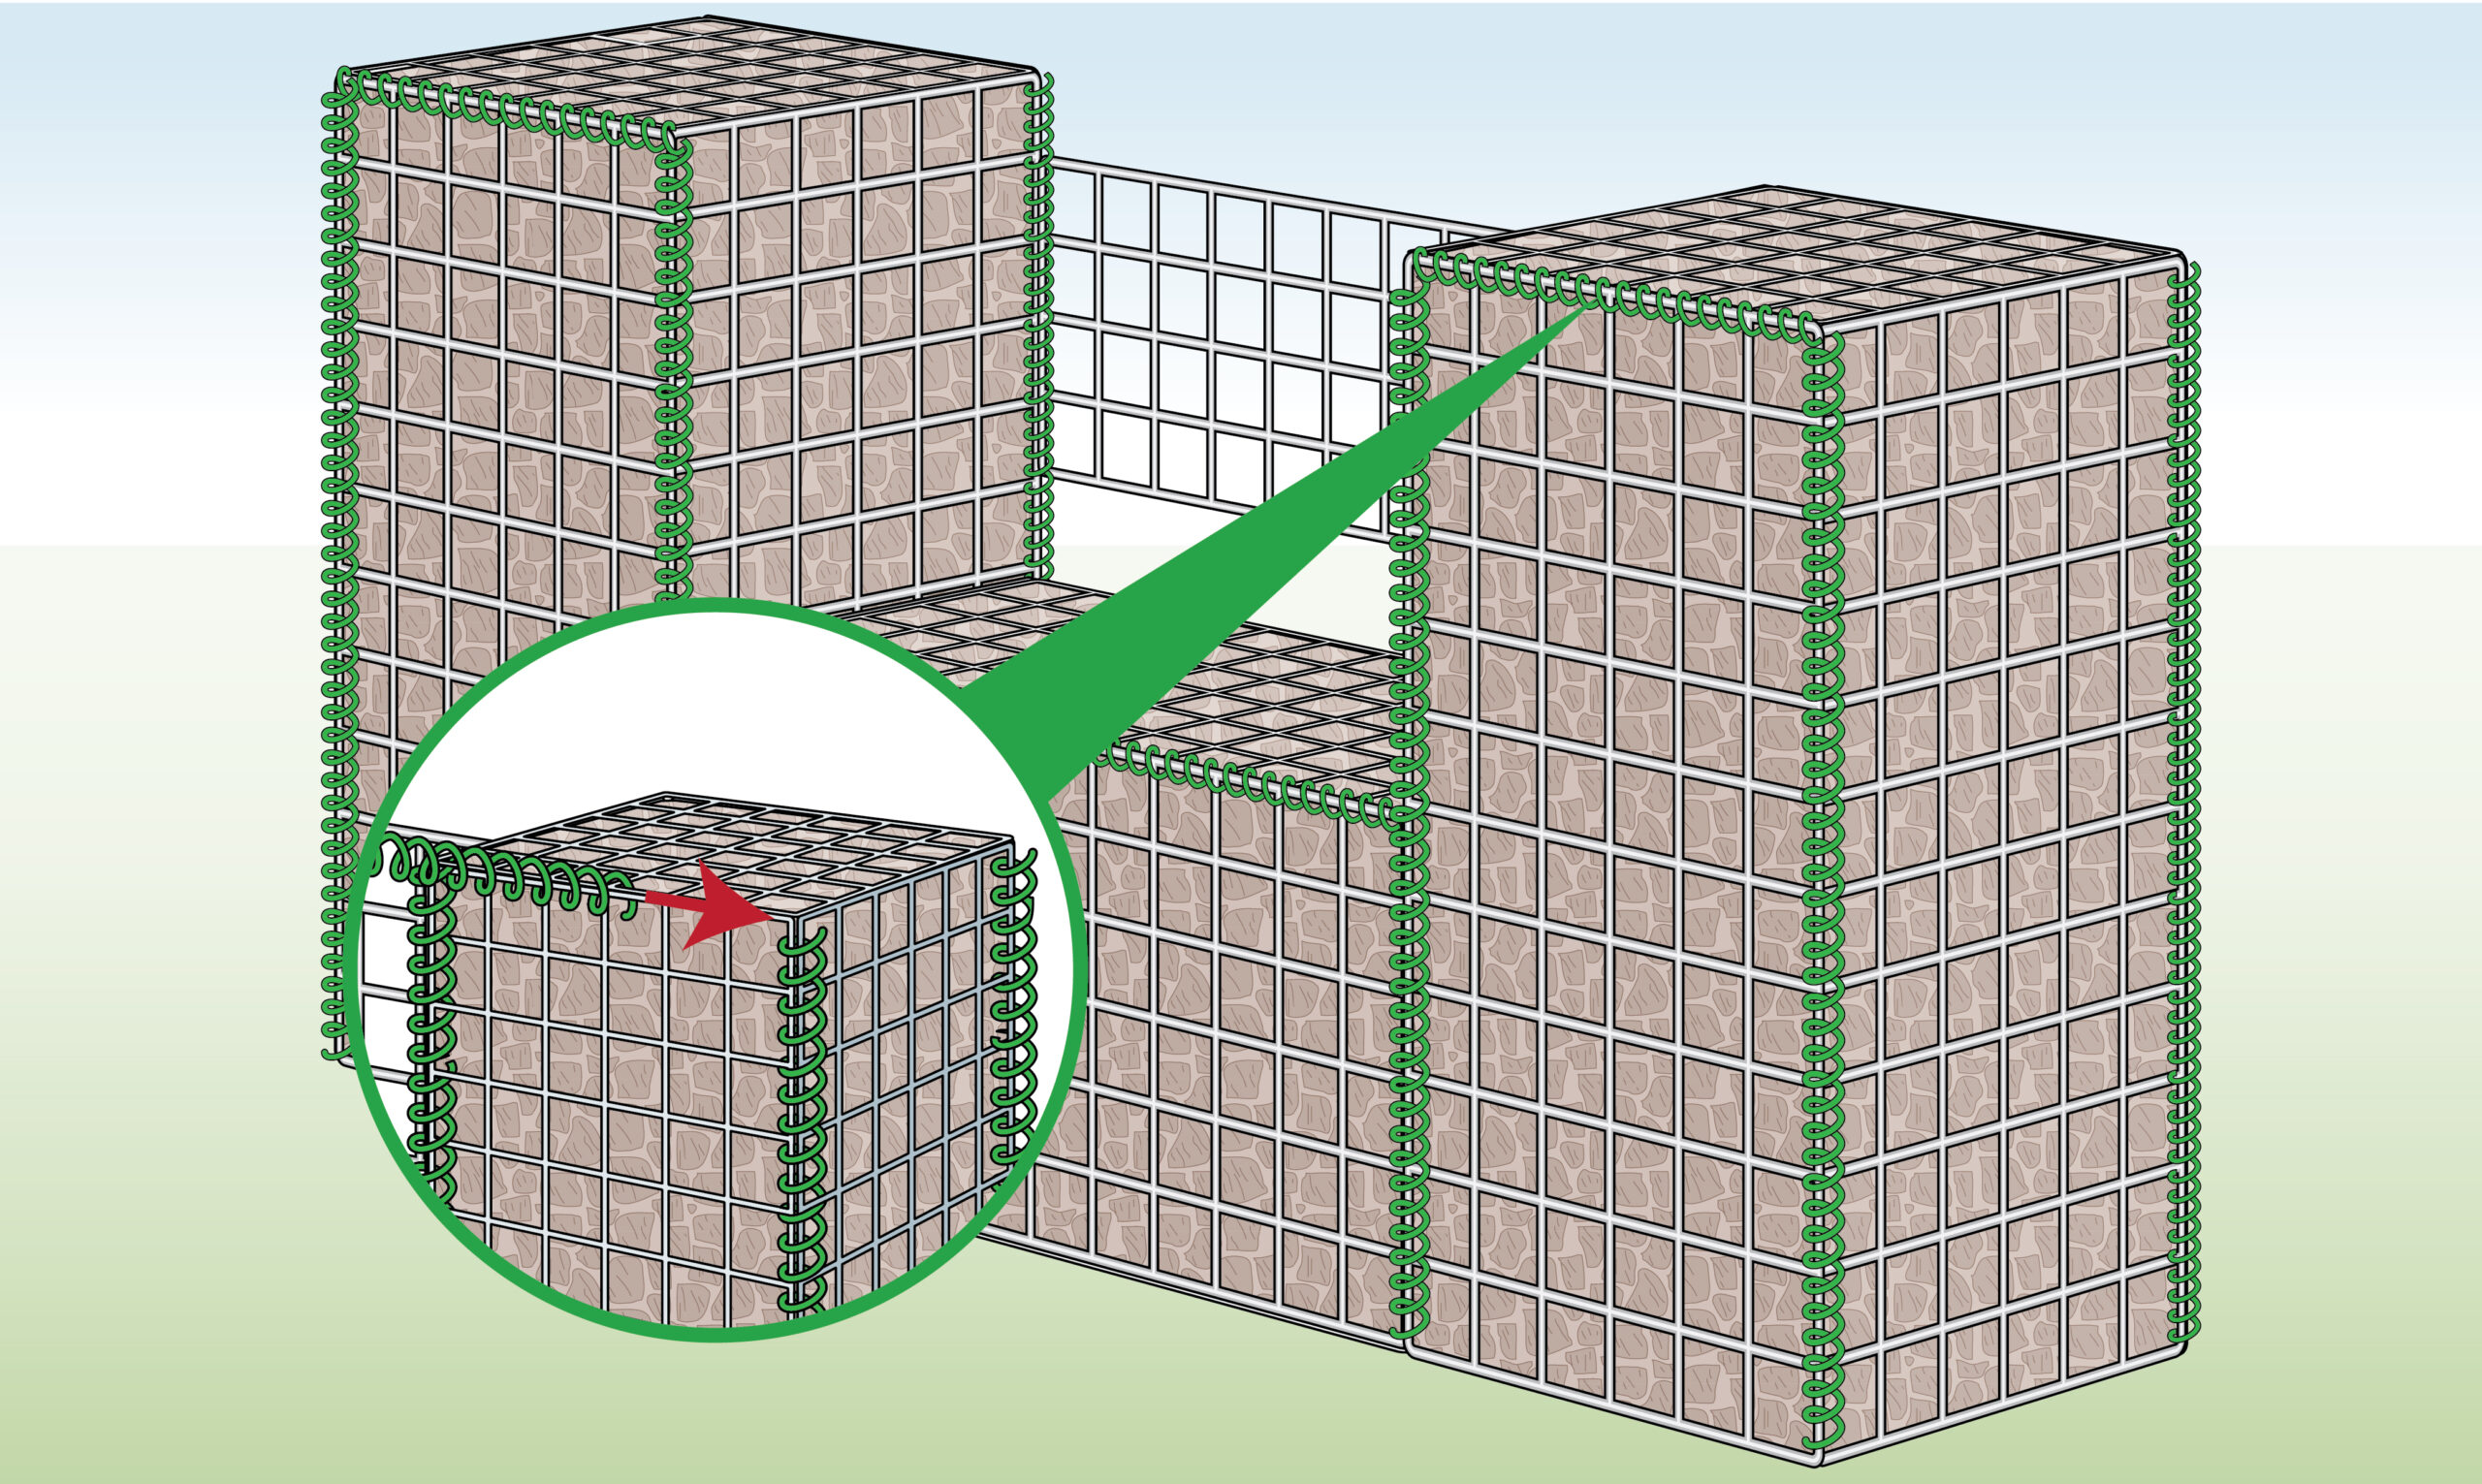
| Step 12 – Attach Lids
|
When the gabions are filled to the top with rocks, close the lids and attach them with helicals at the front. |
| Step 13 – Cut Helicals
|
Once the helicals are in place, cut the excess lengths with a hacksaw or bolt cutters. You can use these offcuts for the other sides of the lids if you wish. |
| Step 14 – Rinse and Repeat
|
If your wall is longer than a single unit (2x columns & 1x midsection), repeat the steps until you’re done with the whole structure. |
Calculate Stone Quantity
- Use the guide below to calculate the amount of stone that you need to fill your gabion wall
- You can use stone separating panels to reduce the amount of decorative rocks required and save money
| Gabion Wall Dimensions (cm) | Bulk Bags of Granite Stone Required | Bulk Bags of Limestone Required | ||
| 142.5cm | 22.5cm | 97.5cm | 1 | 1 |
| 262.5cm | 22.5cm | 97.5cm | 1 | 1 |
| 382.5cm | 22.5cm | 97.5cm | 2 | 2 |
| 502.5cm | 22.5cm | 97.5cm | 2 | 2 |
| 622.5cm | 22.5cm | 97.5cm | 2 | 2 |
| 157.5cm | 30cm | 97.5cm | 1 | 1 |
| 285cm | 30cm | 97.5cm | 2 | 2 |
| 412.5cm | 30cm | 97.5cm | 2 | 2 |
| 540cm | 30cm | 97.5cm | 3 | 3 |
| 667.5cm | 30cm | 97.5cm | 3 | 3 |
| 187.5cm | 45cm | 97.5cm | 2 | 2 |
| 330cm | 45cm | 97.5cm | 3 | 3 |
| 472.5cm | 45cm | 97.5cm | 3 | 4 |
| 615cm | 45cm | 97.5cm | 4 | 4 |
| 757.5cm | 45cm | 97.5cm | 5 | 5 |


