45cm
22.5cm
45cm
Galfan coated
£29.85 inc. VAT


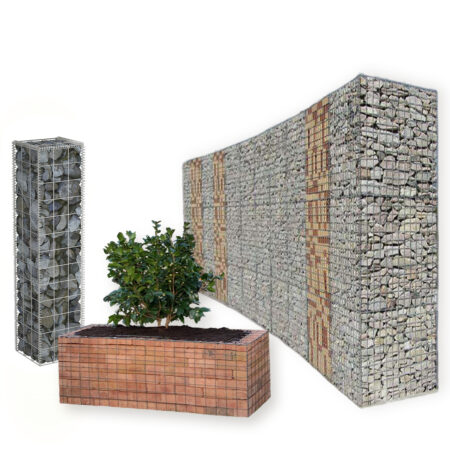
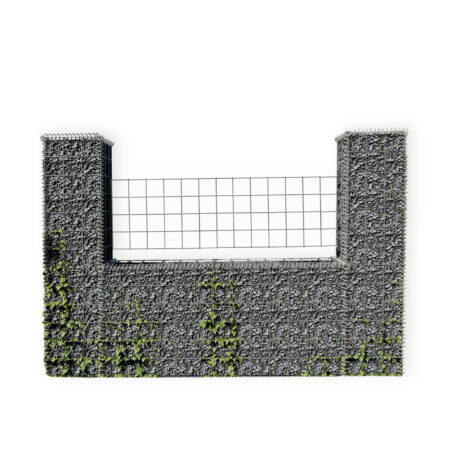
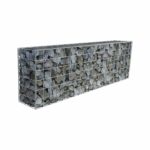
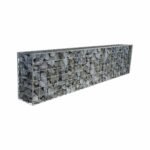
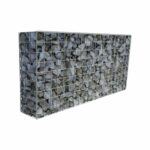
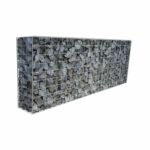
Gabion cladding is used to improve the appearance of unsightly buildings and structures, creating an aesthetic facade. Very low maintenance compared to other cladding types.
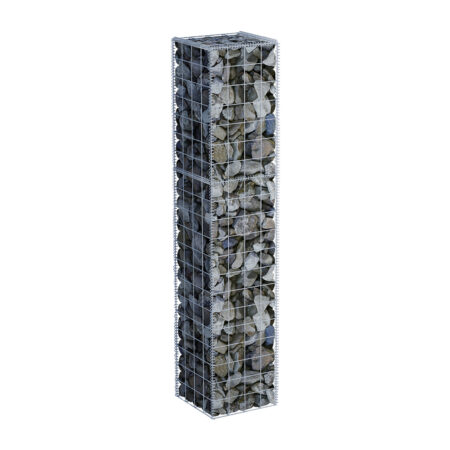
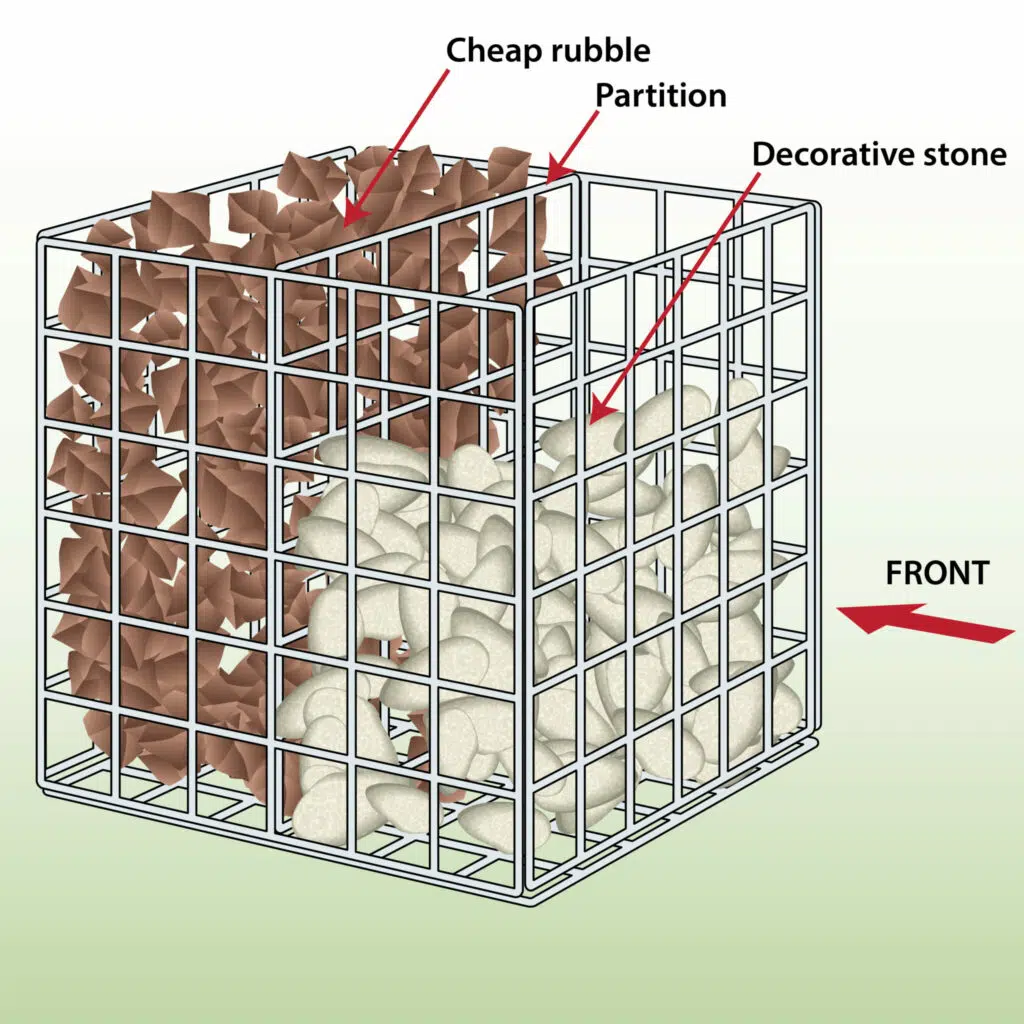
You can also make your own custom-sized gabions.


| Galfan Coated | ||
| 4mm Wire Diameter | 5mm Wire Diameter | |
| Cladding system up to 4m | ||
| Cladding system over 4m | ||
| Fire resistant | ||
| Acoustic barrier | ||
| Wind and weather barrier | ||
| Weatherproof | ||
| Zero / low maintenance Gabion cladding is made of metal and filled with stone, making it very low maintenance when compared to other types of cladding. It is weatherproof, fireproof, and does not require lacquering or any regular maintenance. | ||
| Size can be customised | ||
| Delivered as | Flat packed in small to large truck depending on order quantity | |
| Can wires be cut | Yes – with a good bolt cutter | |
| Made in UK | Yes | |
| Conforms to British manufacturing standard | BS EN 10223-8:2013 | |
| Certificate of conformity | Yes – download | |
| Construction | ||
| Mesh hole size | 75mm x 75mm | 75mm x 75mm |
| Mesh material | Galfan coated steel | Galfan coated steel |
| Mesh construction | Welded | Welded |
| Mesh panels joined together by | Stainless steel C Clips | |
| Strength and environment | ||
| Tensile strength range | 540-770 N/mm² | 540-770 N/mm² |
| Corrosion resistance | Yes, conforms to British standard BS EN 10244-2:2009 | |
| Abrasion resistance | Conforms to EN 60229:2008 | |
| Life expectancy | 50 – 100 years | 50 – 100 years |
| Suited to Environments | C2 – C4 | C2 – C4 |
| Rocks / Filling / Installation | ||
| Speed of installation | 2-5 mins each | |
| Experience required to install | Easy install | |
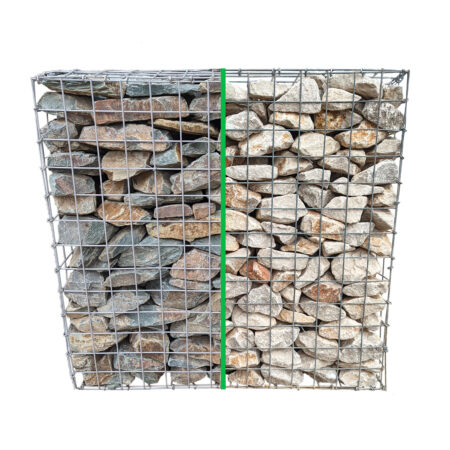
| Rock size required | Minimum 80mm x 80mm | |
| Requires angular, interlocking rocks | ||
| Can be filled with crushed concrete | ||
| Can fill with rounded rocks | ||
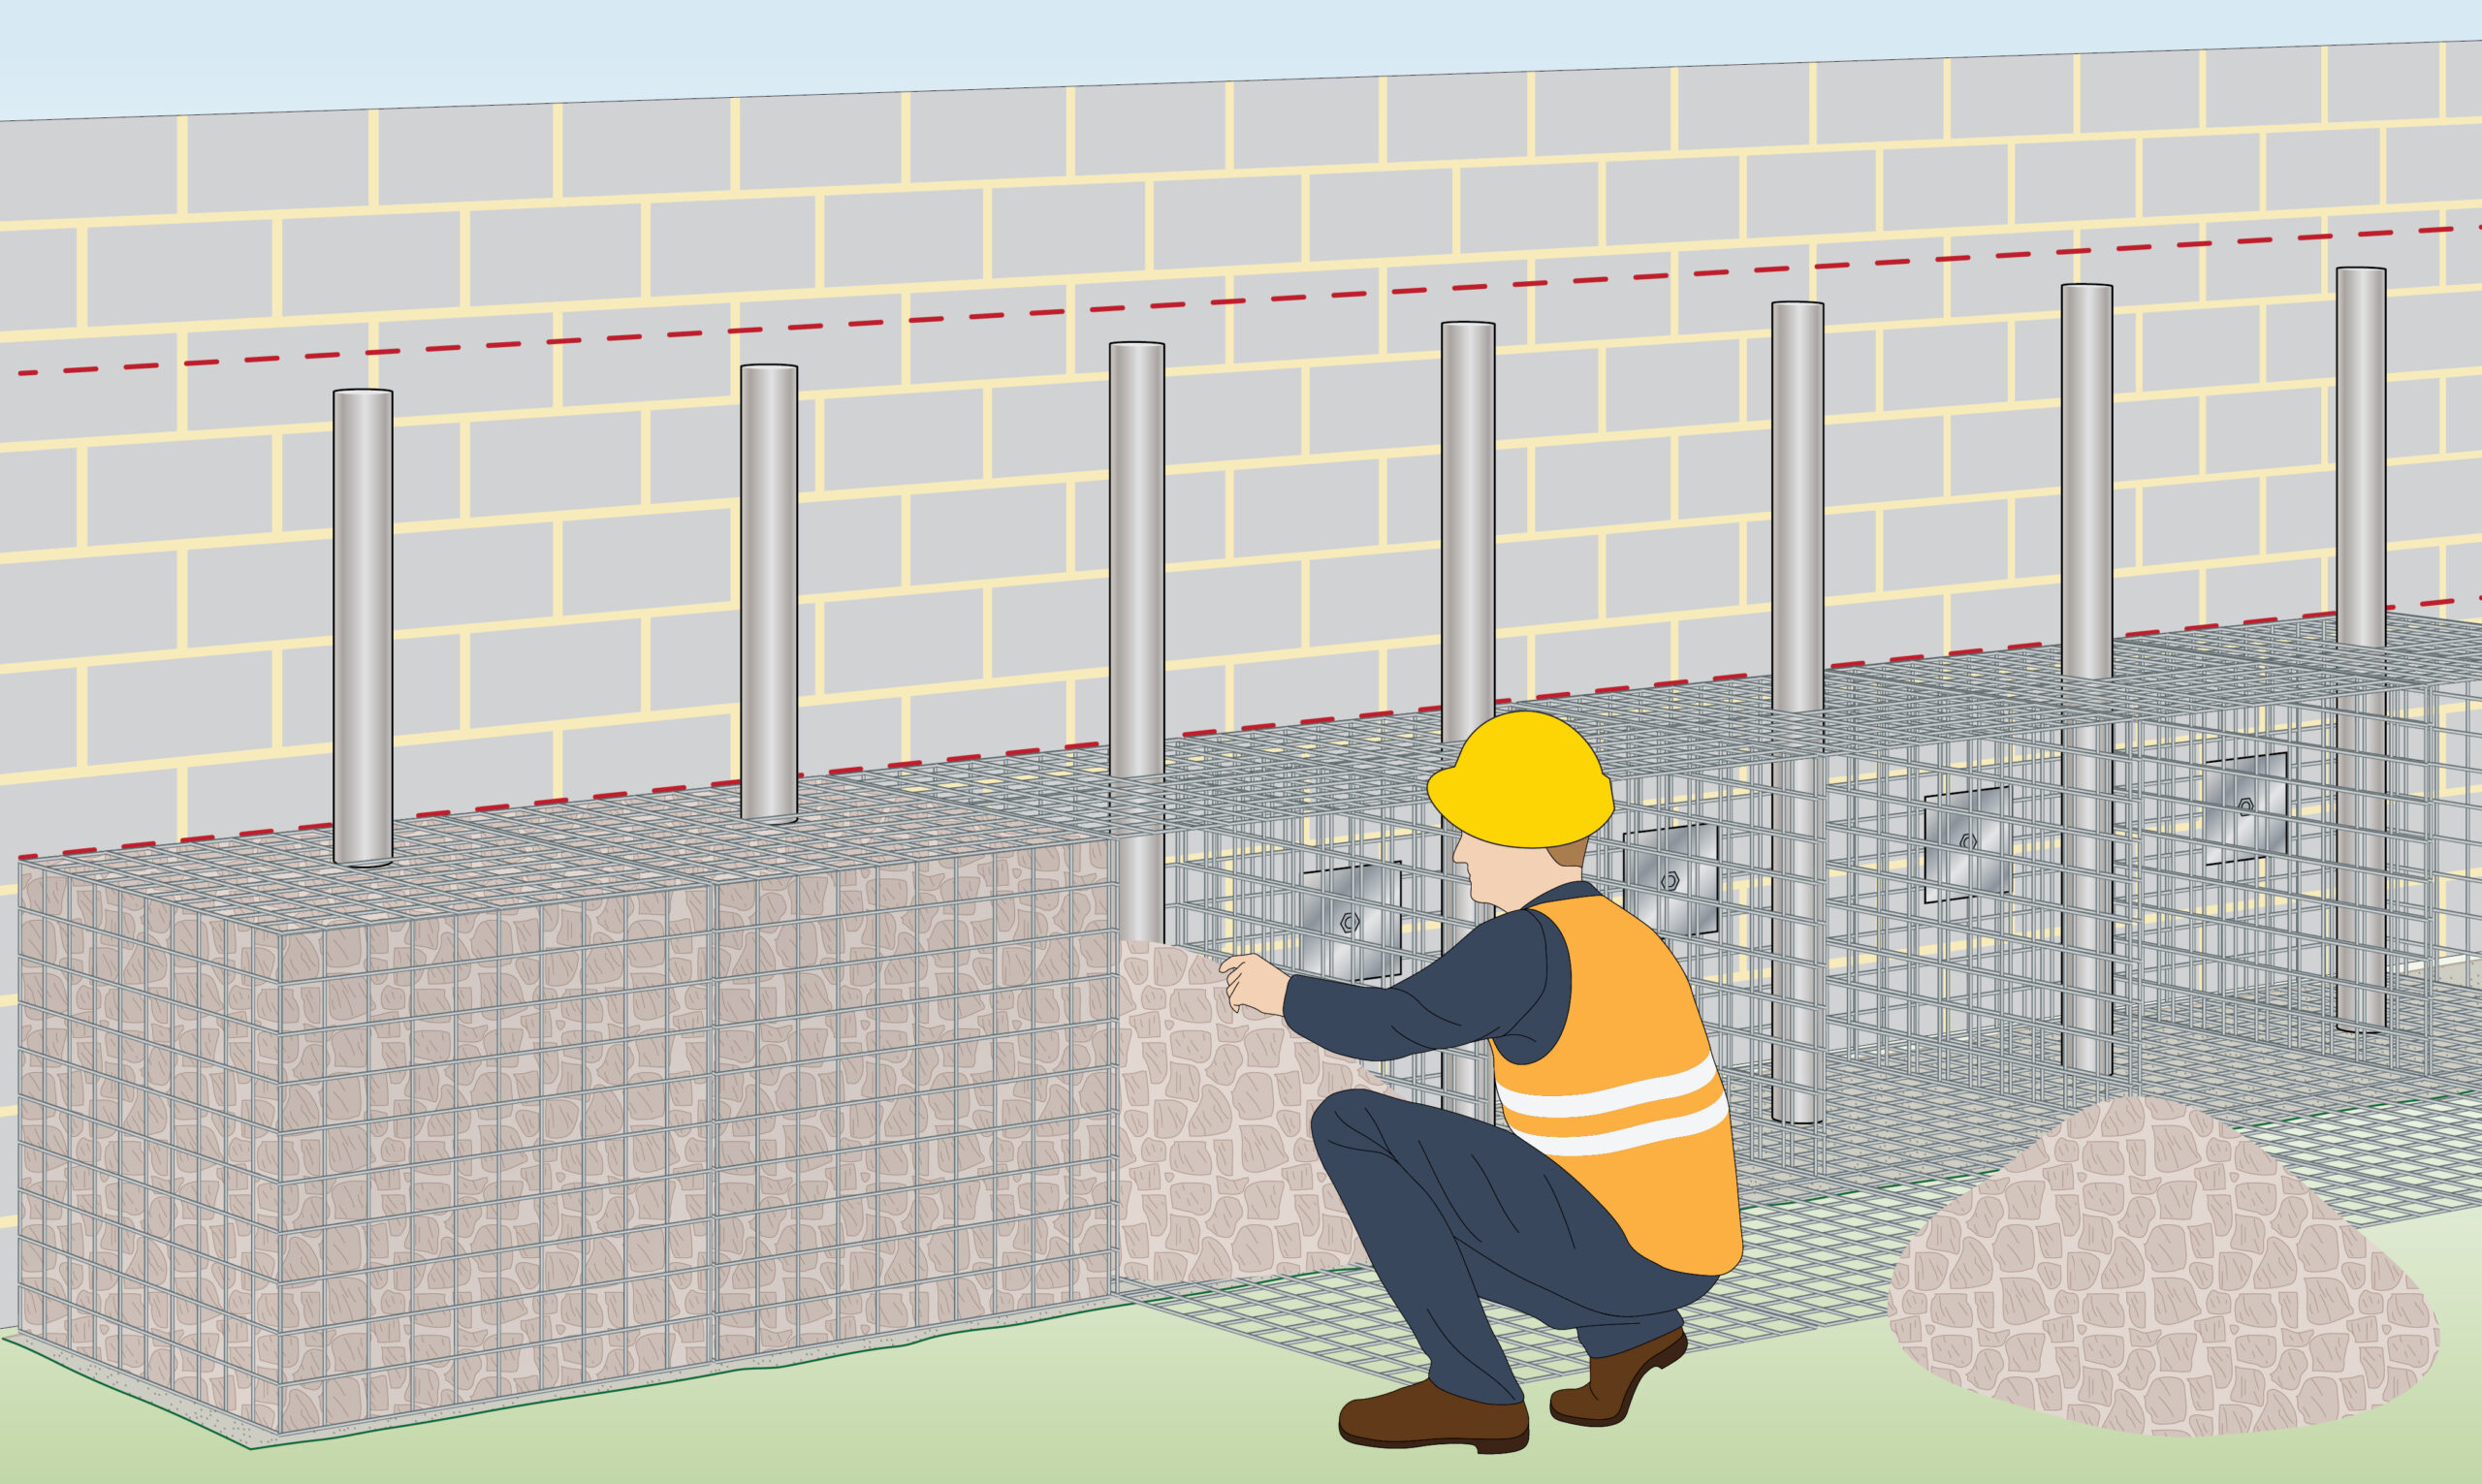
With Support Posts Please find instructions for installing gabion cladding with an extra level of stability. This technique tends to be used in public areas or cladding over 4 meters tall.
Attach to Wall Please find instructions for attaching gabion cladding directly to the wall/structure. This technique is used when the object you are attaching to has been assessed for its suitability to hold the weight of the gabion cladding. Consult an engineer if you are unsure.
| To Do | Explanation |
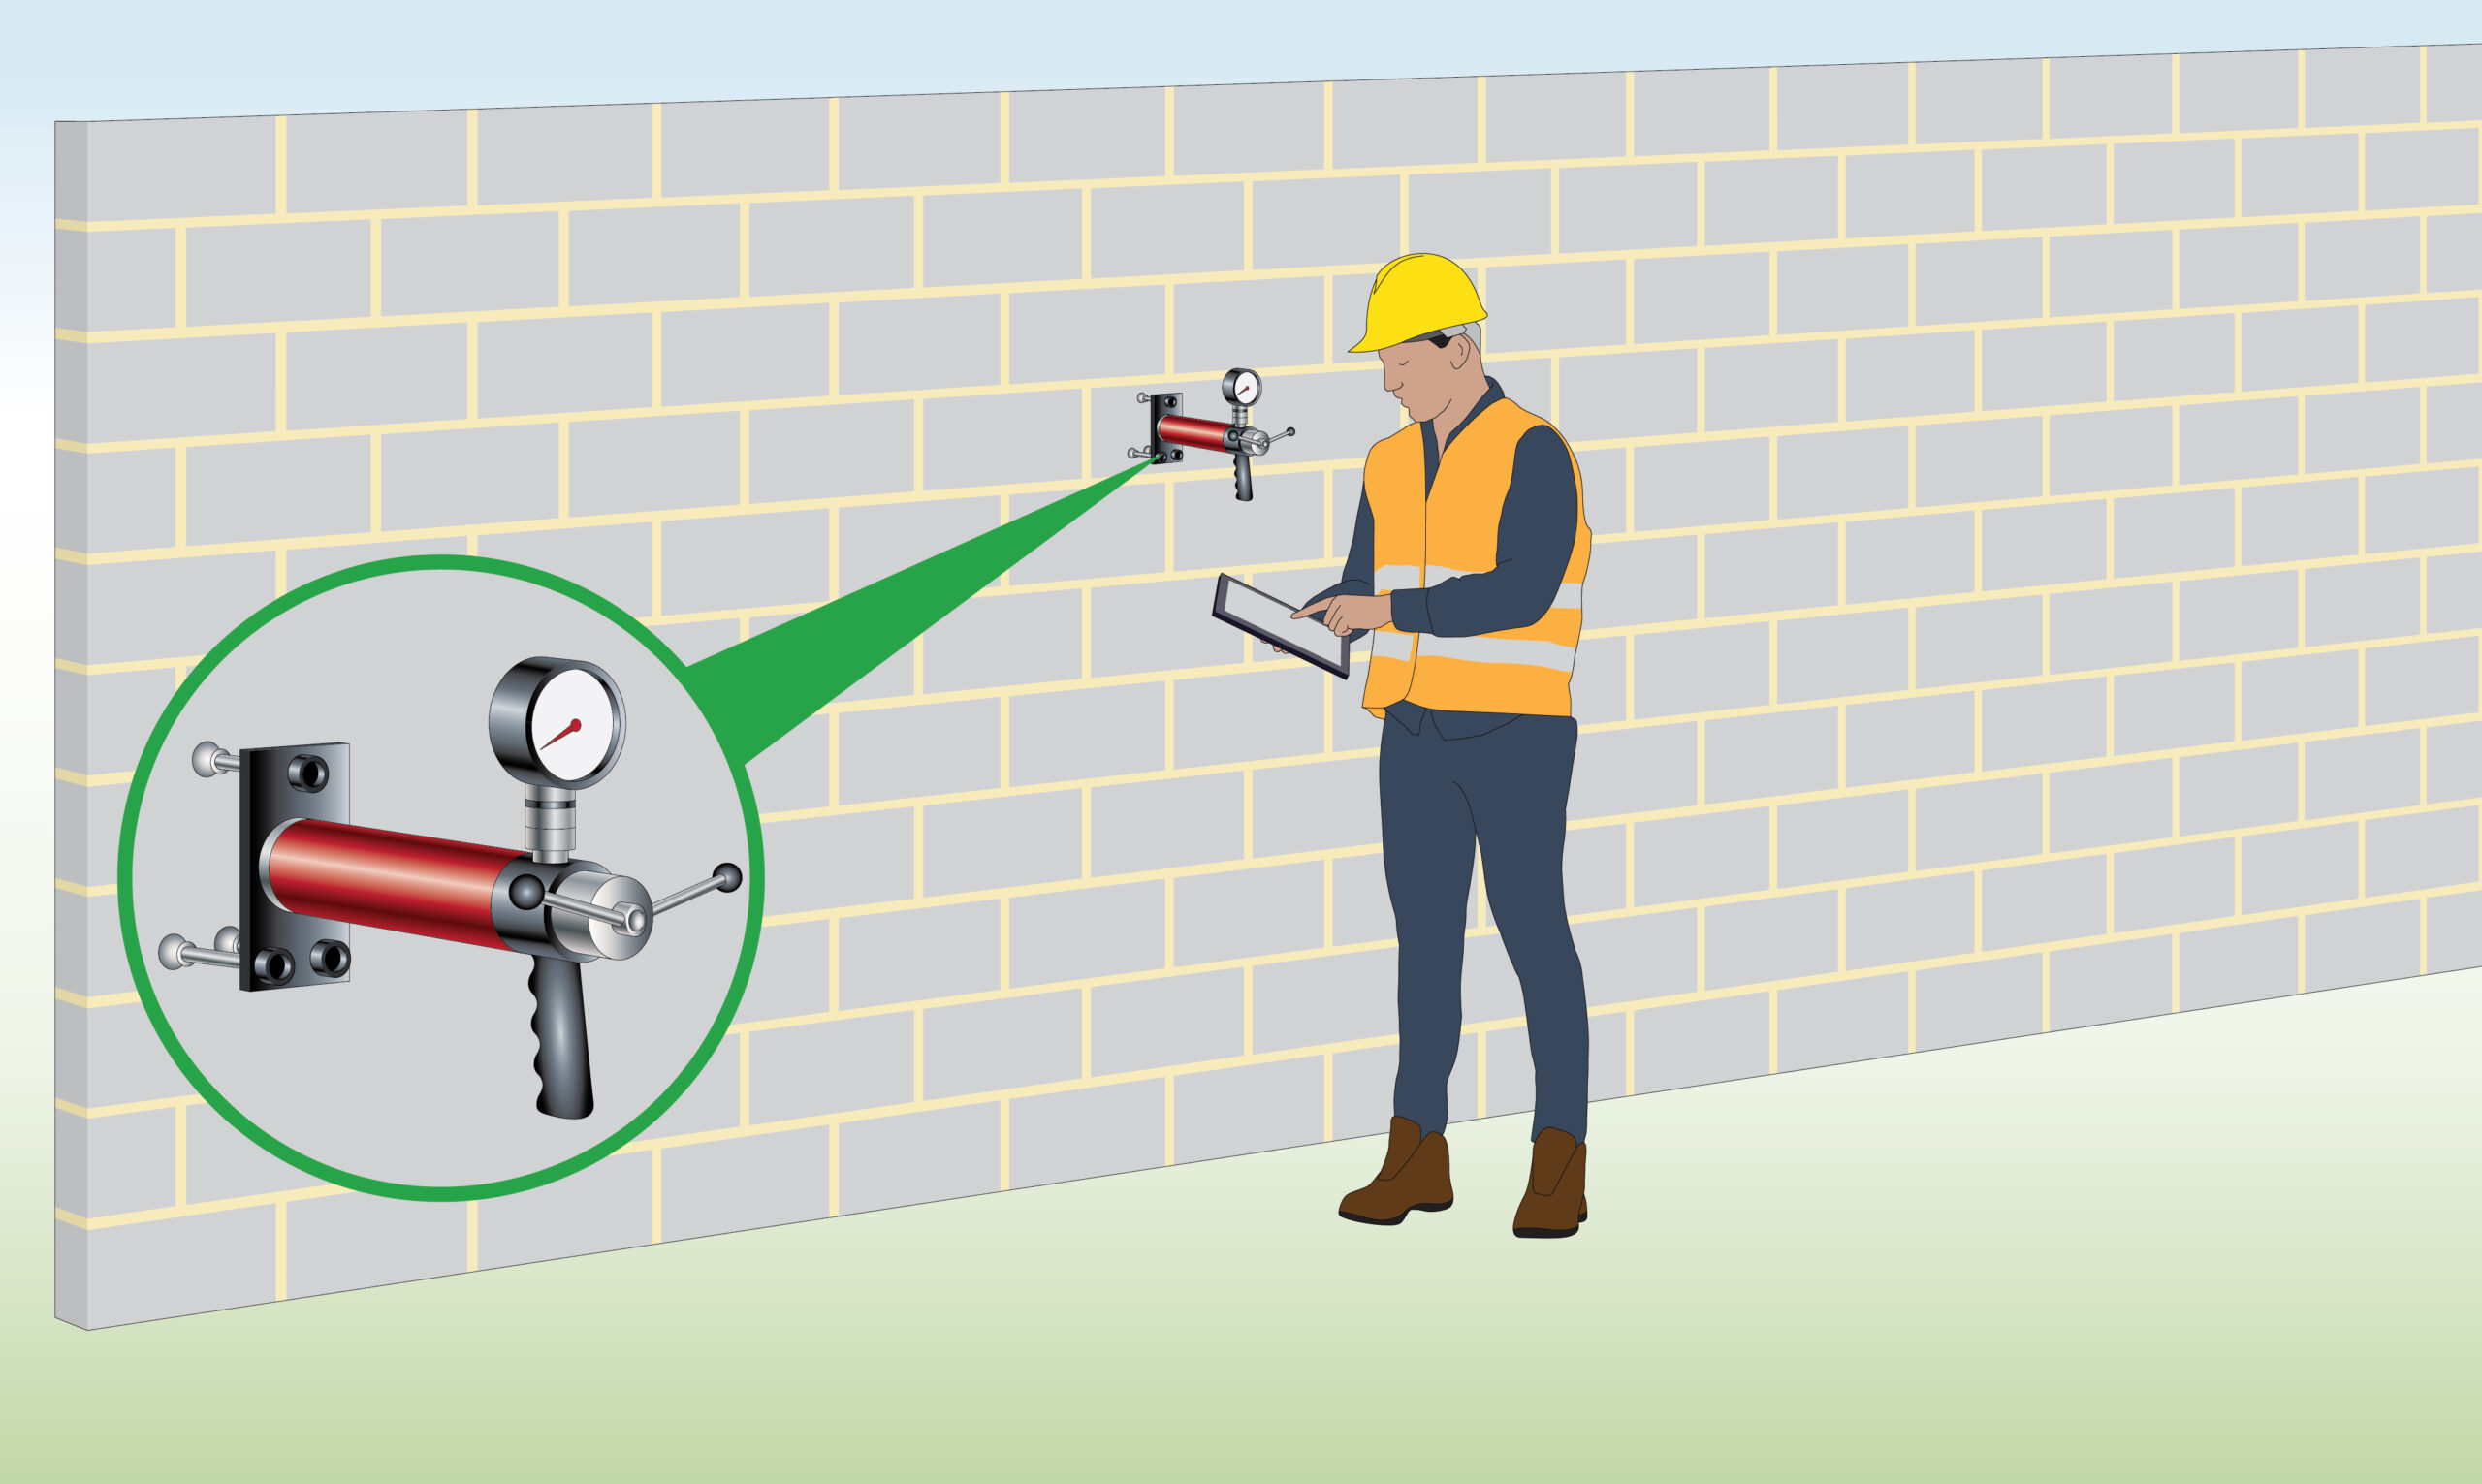
| Step 1 – Assess the strength of the structure
|
Assess the structure where you are intending to attach the cladding to ensure it can hold the weight of the gabions. If you are unsure, have an Engineer test the structure using a tension testing tool. |
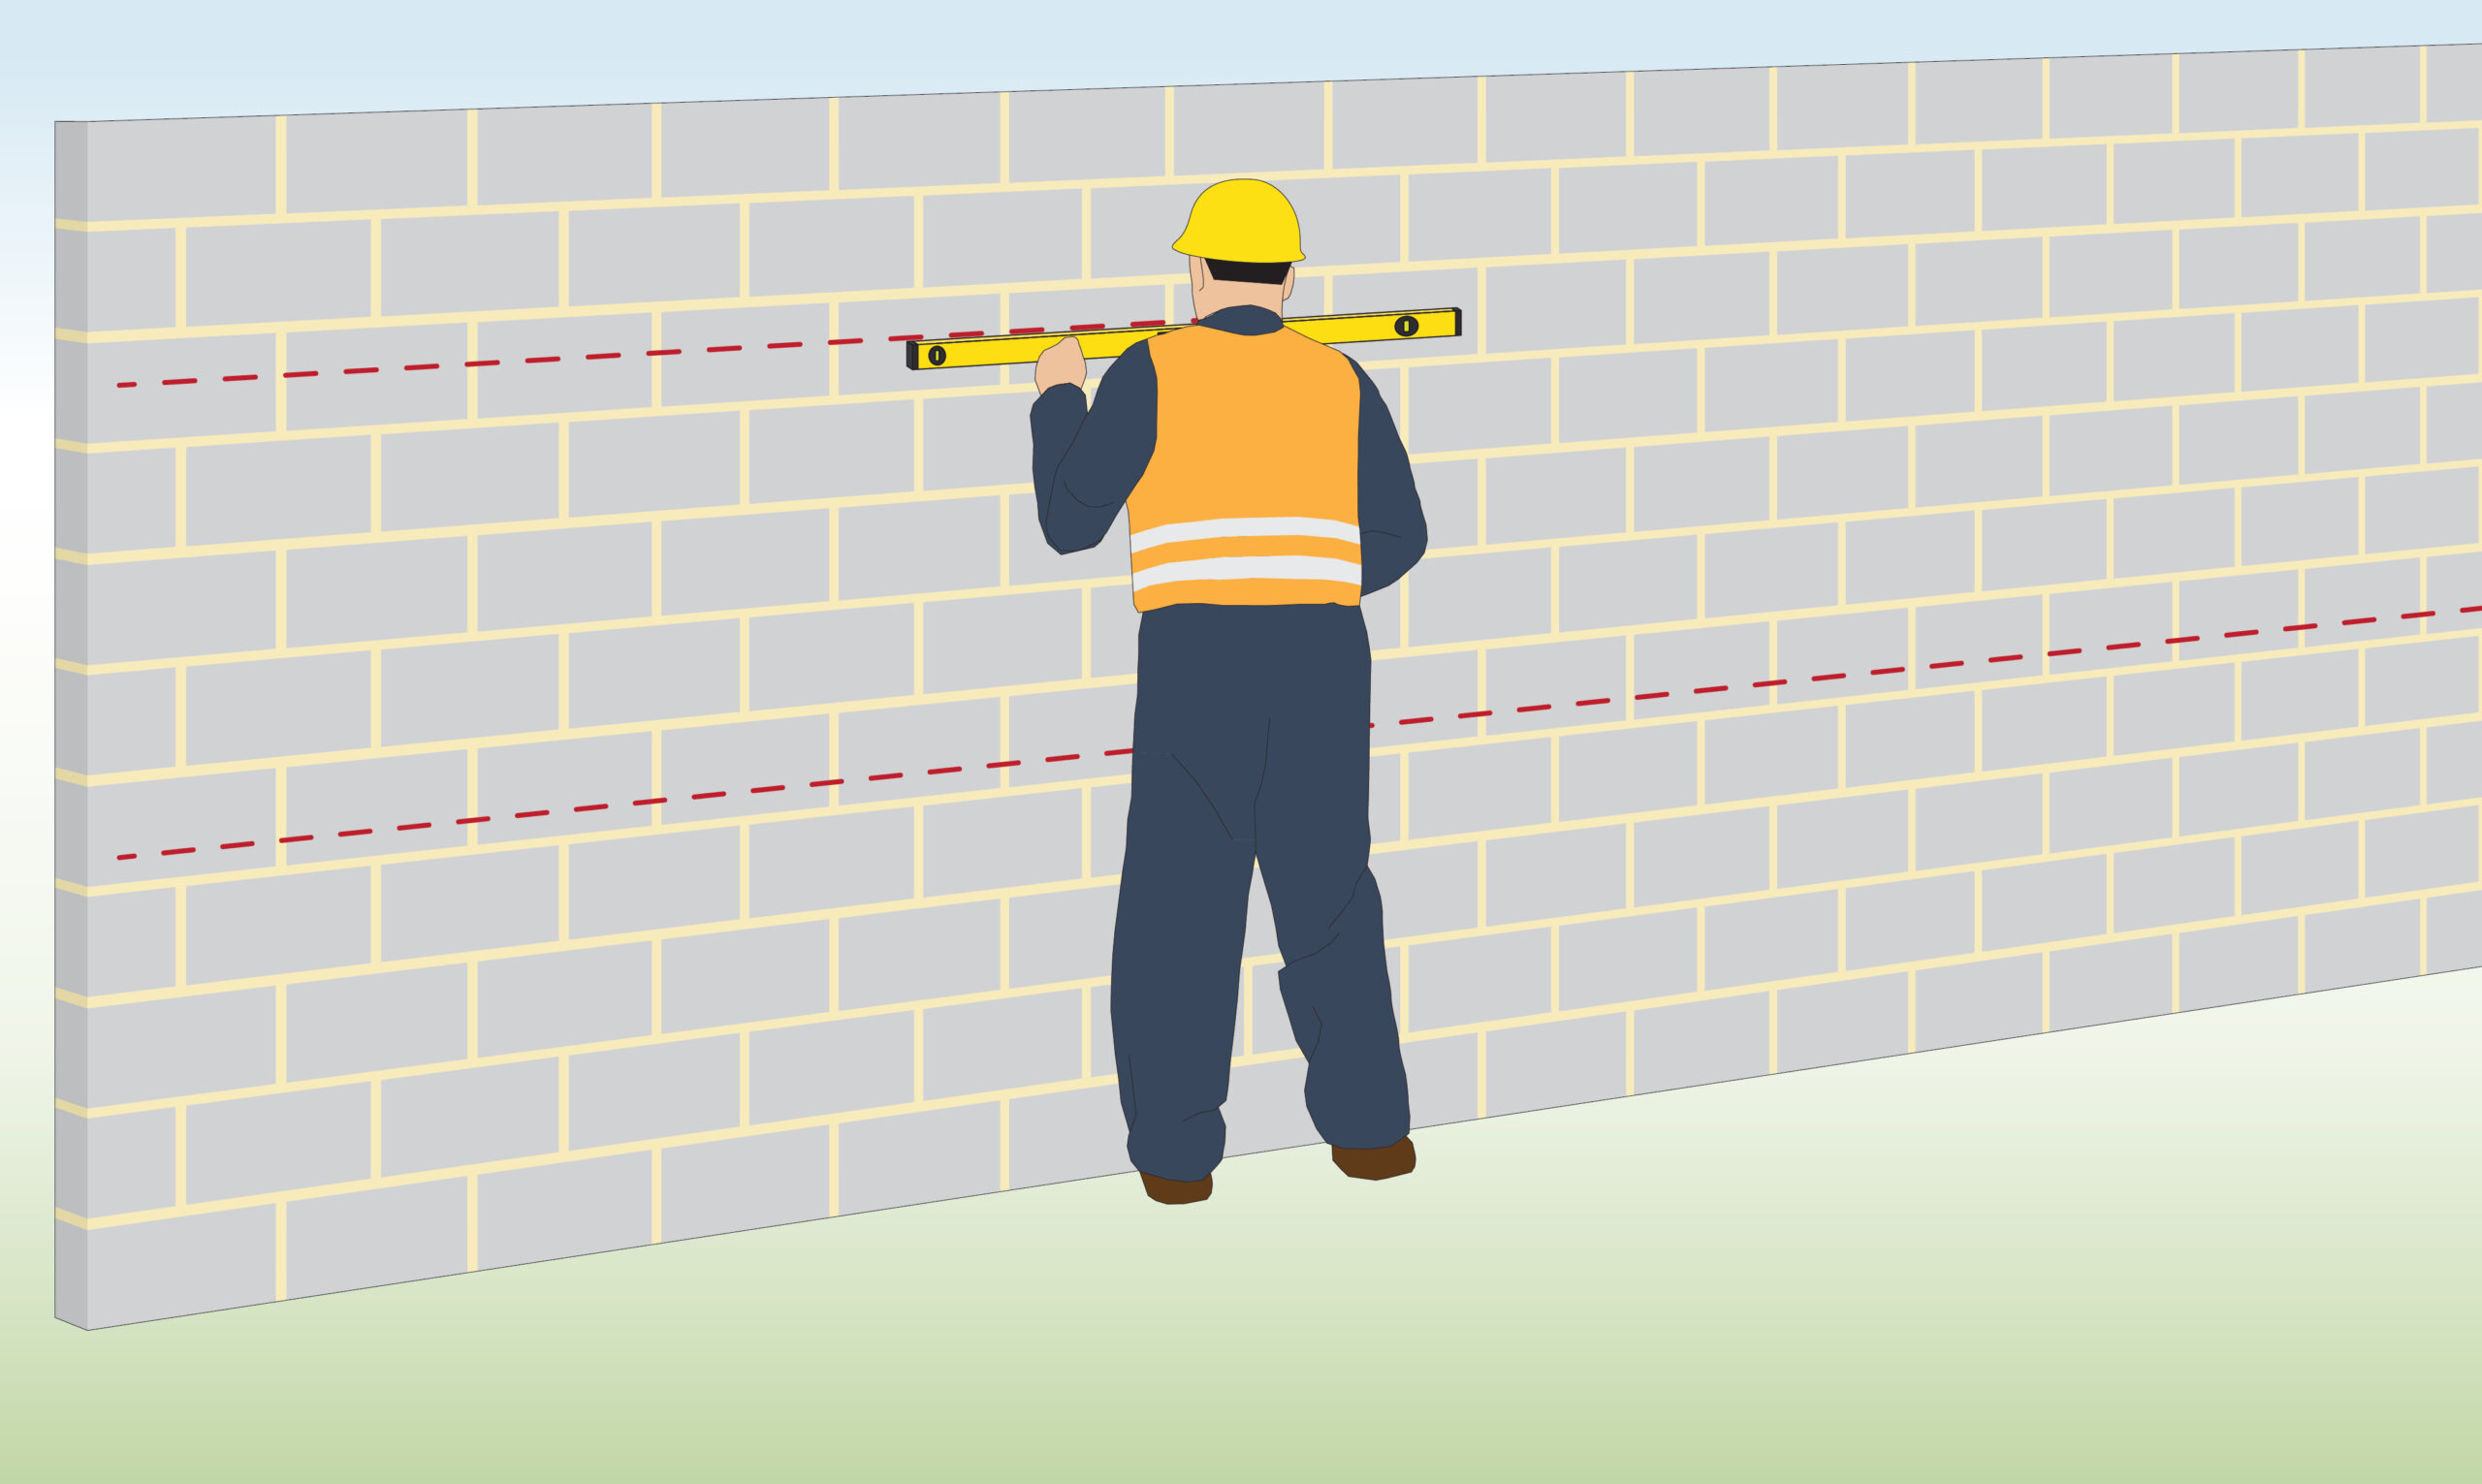
| Step 2 – Mark area
|
Mark the exact location where you plan to install the gabions. Use a spirit level or laser level to ensure it is straight. |
| Step 3 – Assemble the baskets |
Assemble the baskets required for the first row (download instructions). |
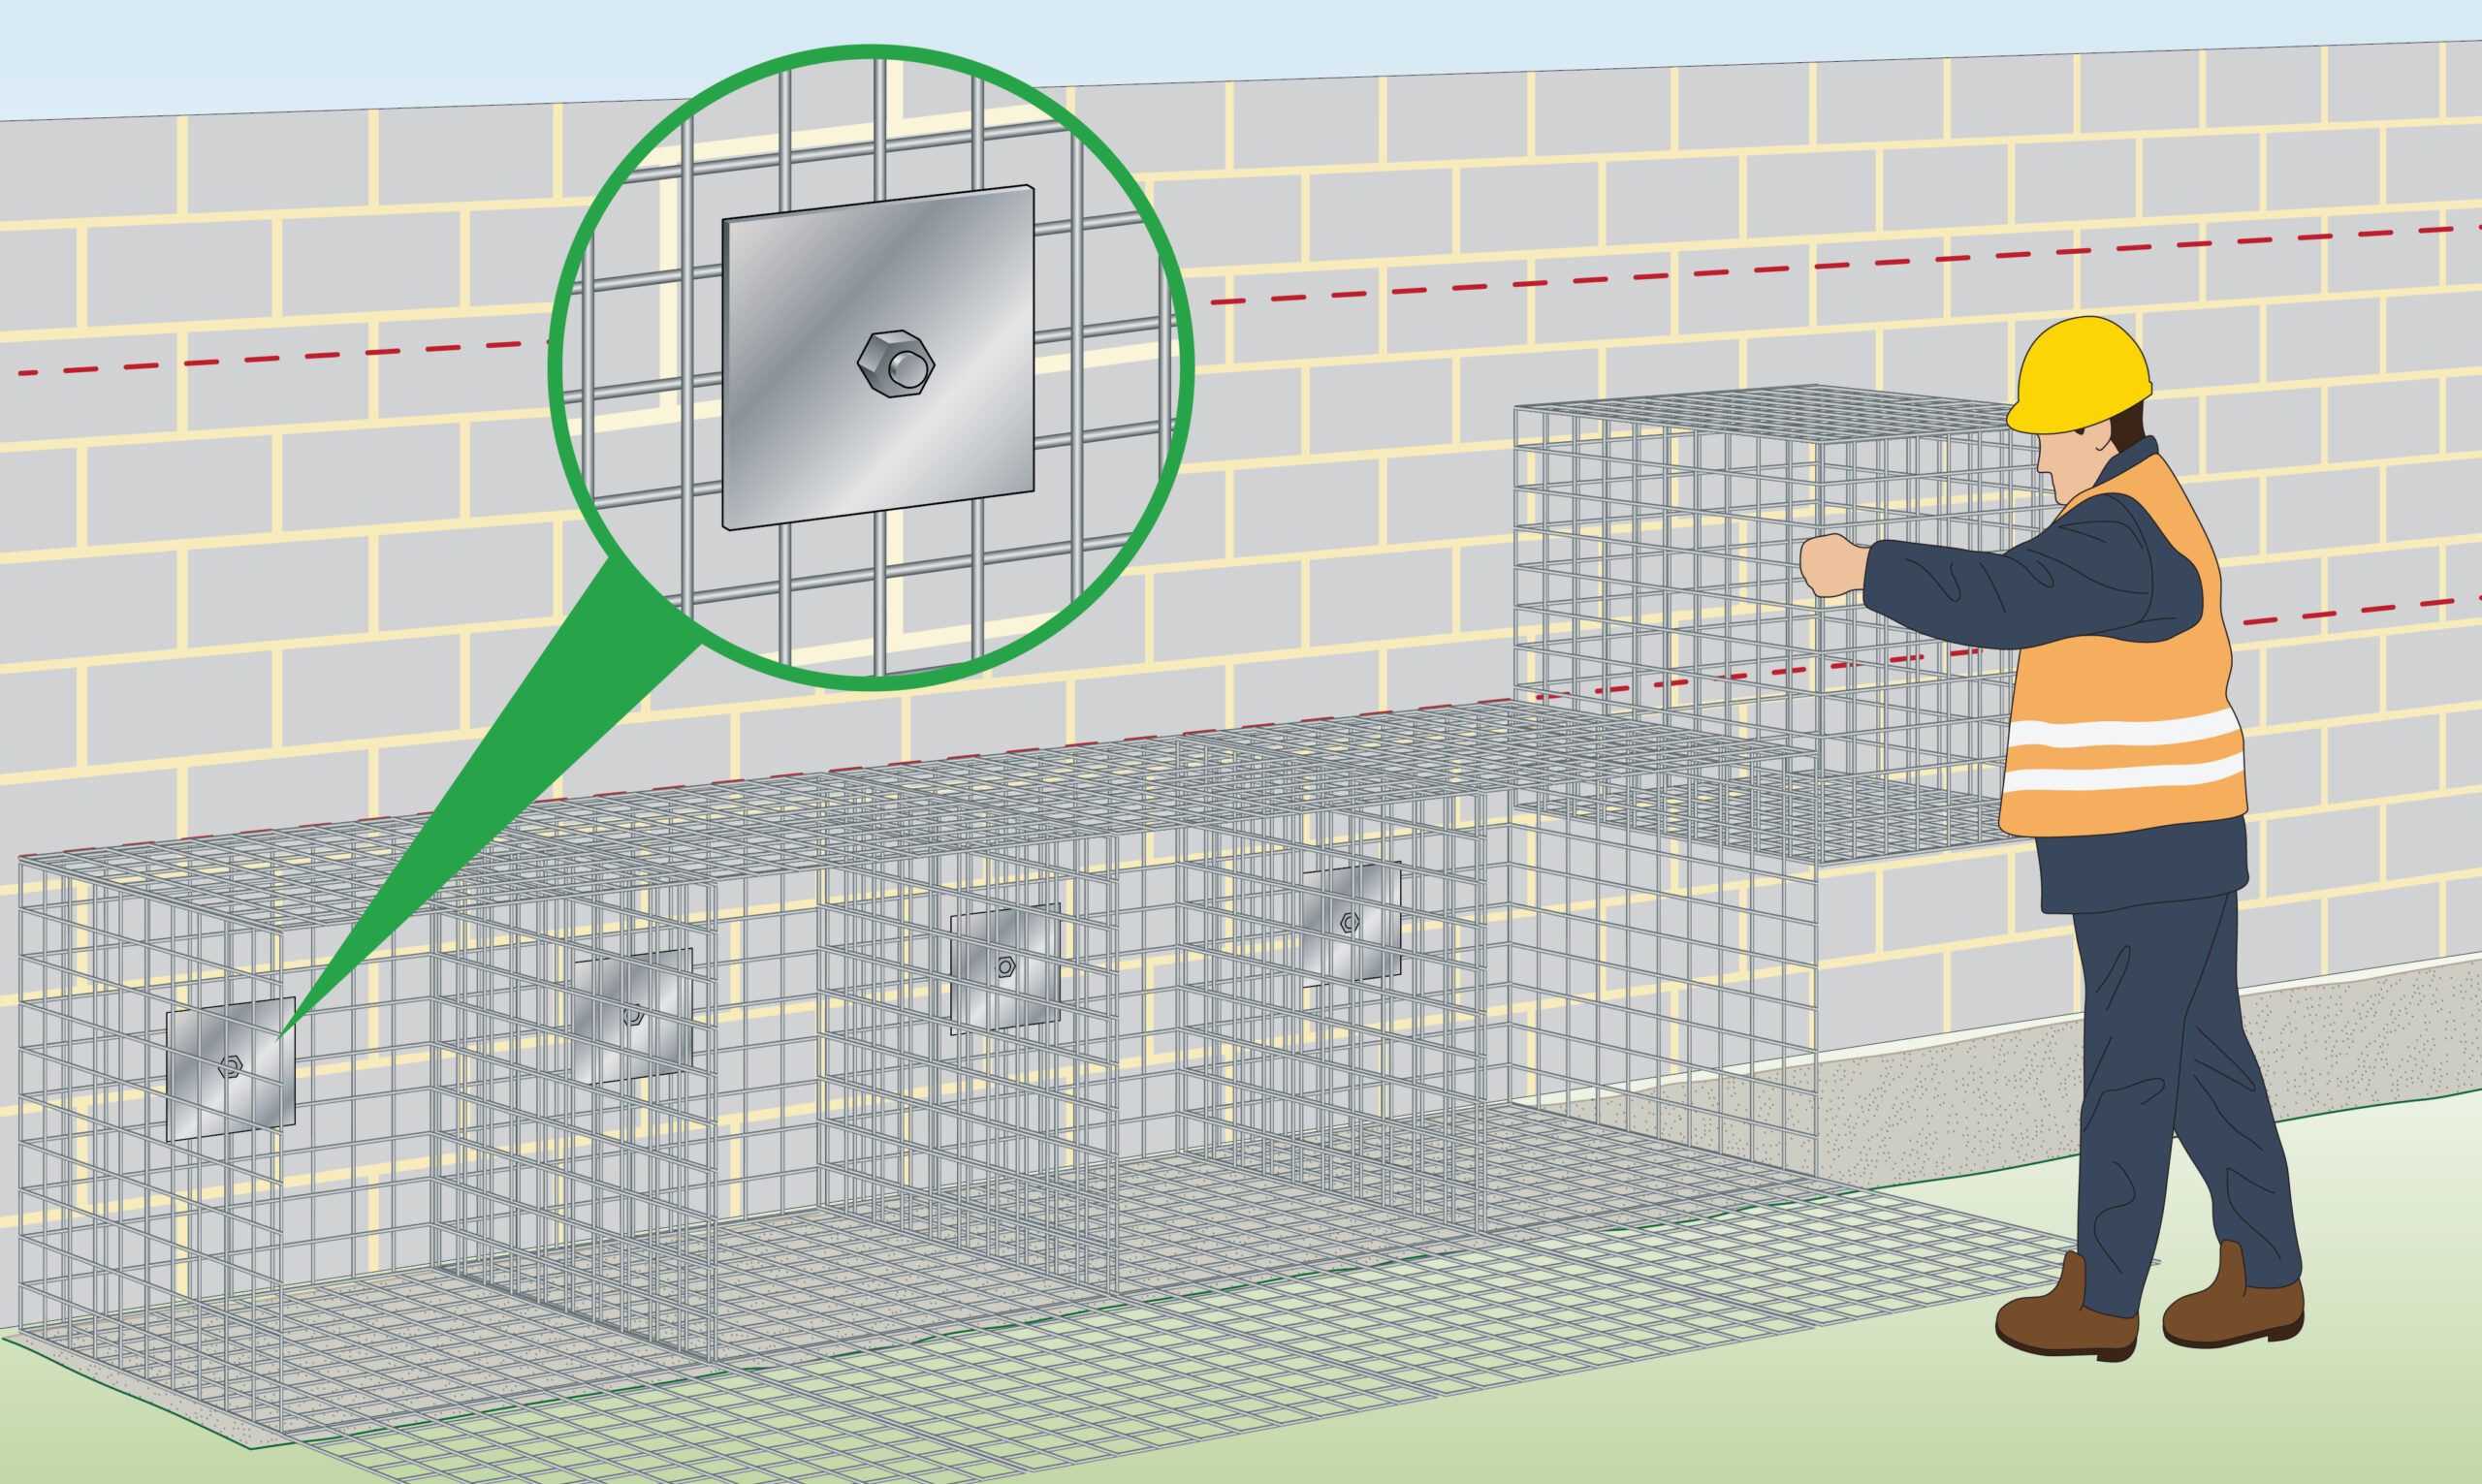
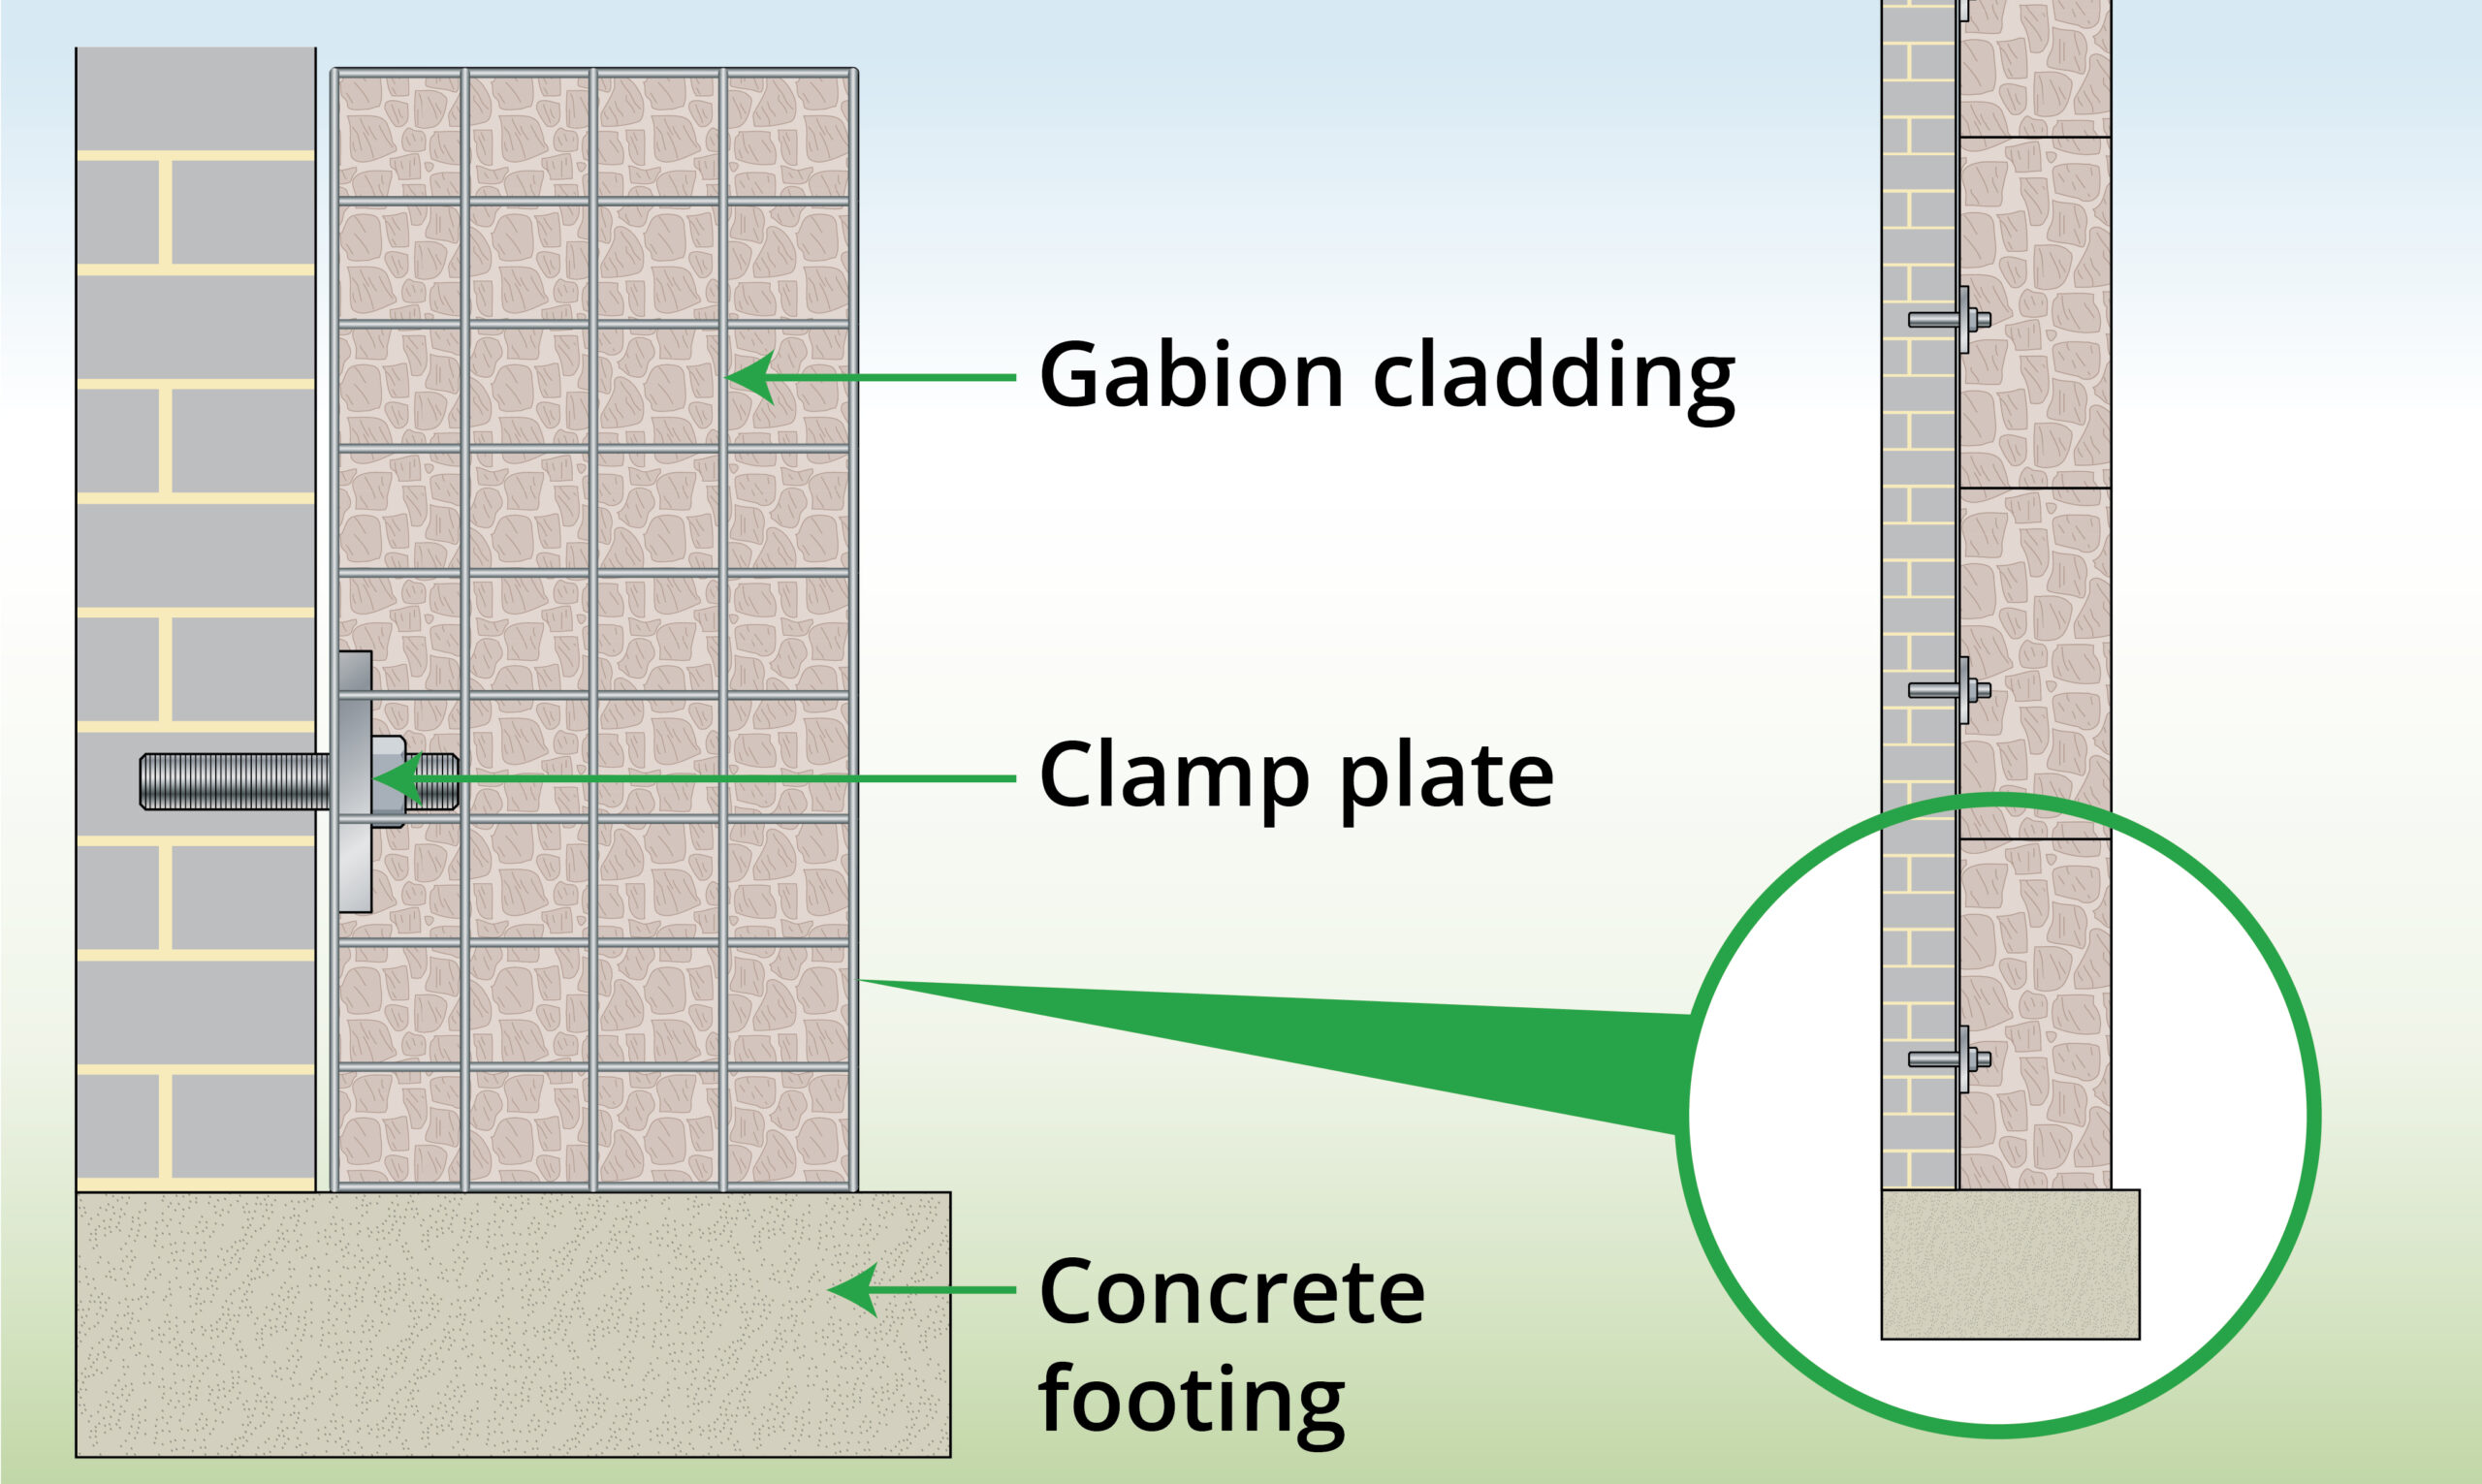
| Step 4 – Attach to the wall
|
Pin the first row to the wall using clamp plates. |
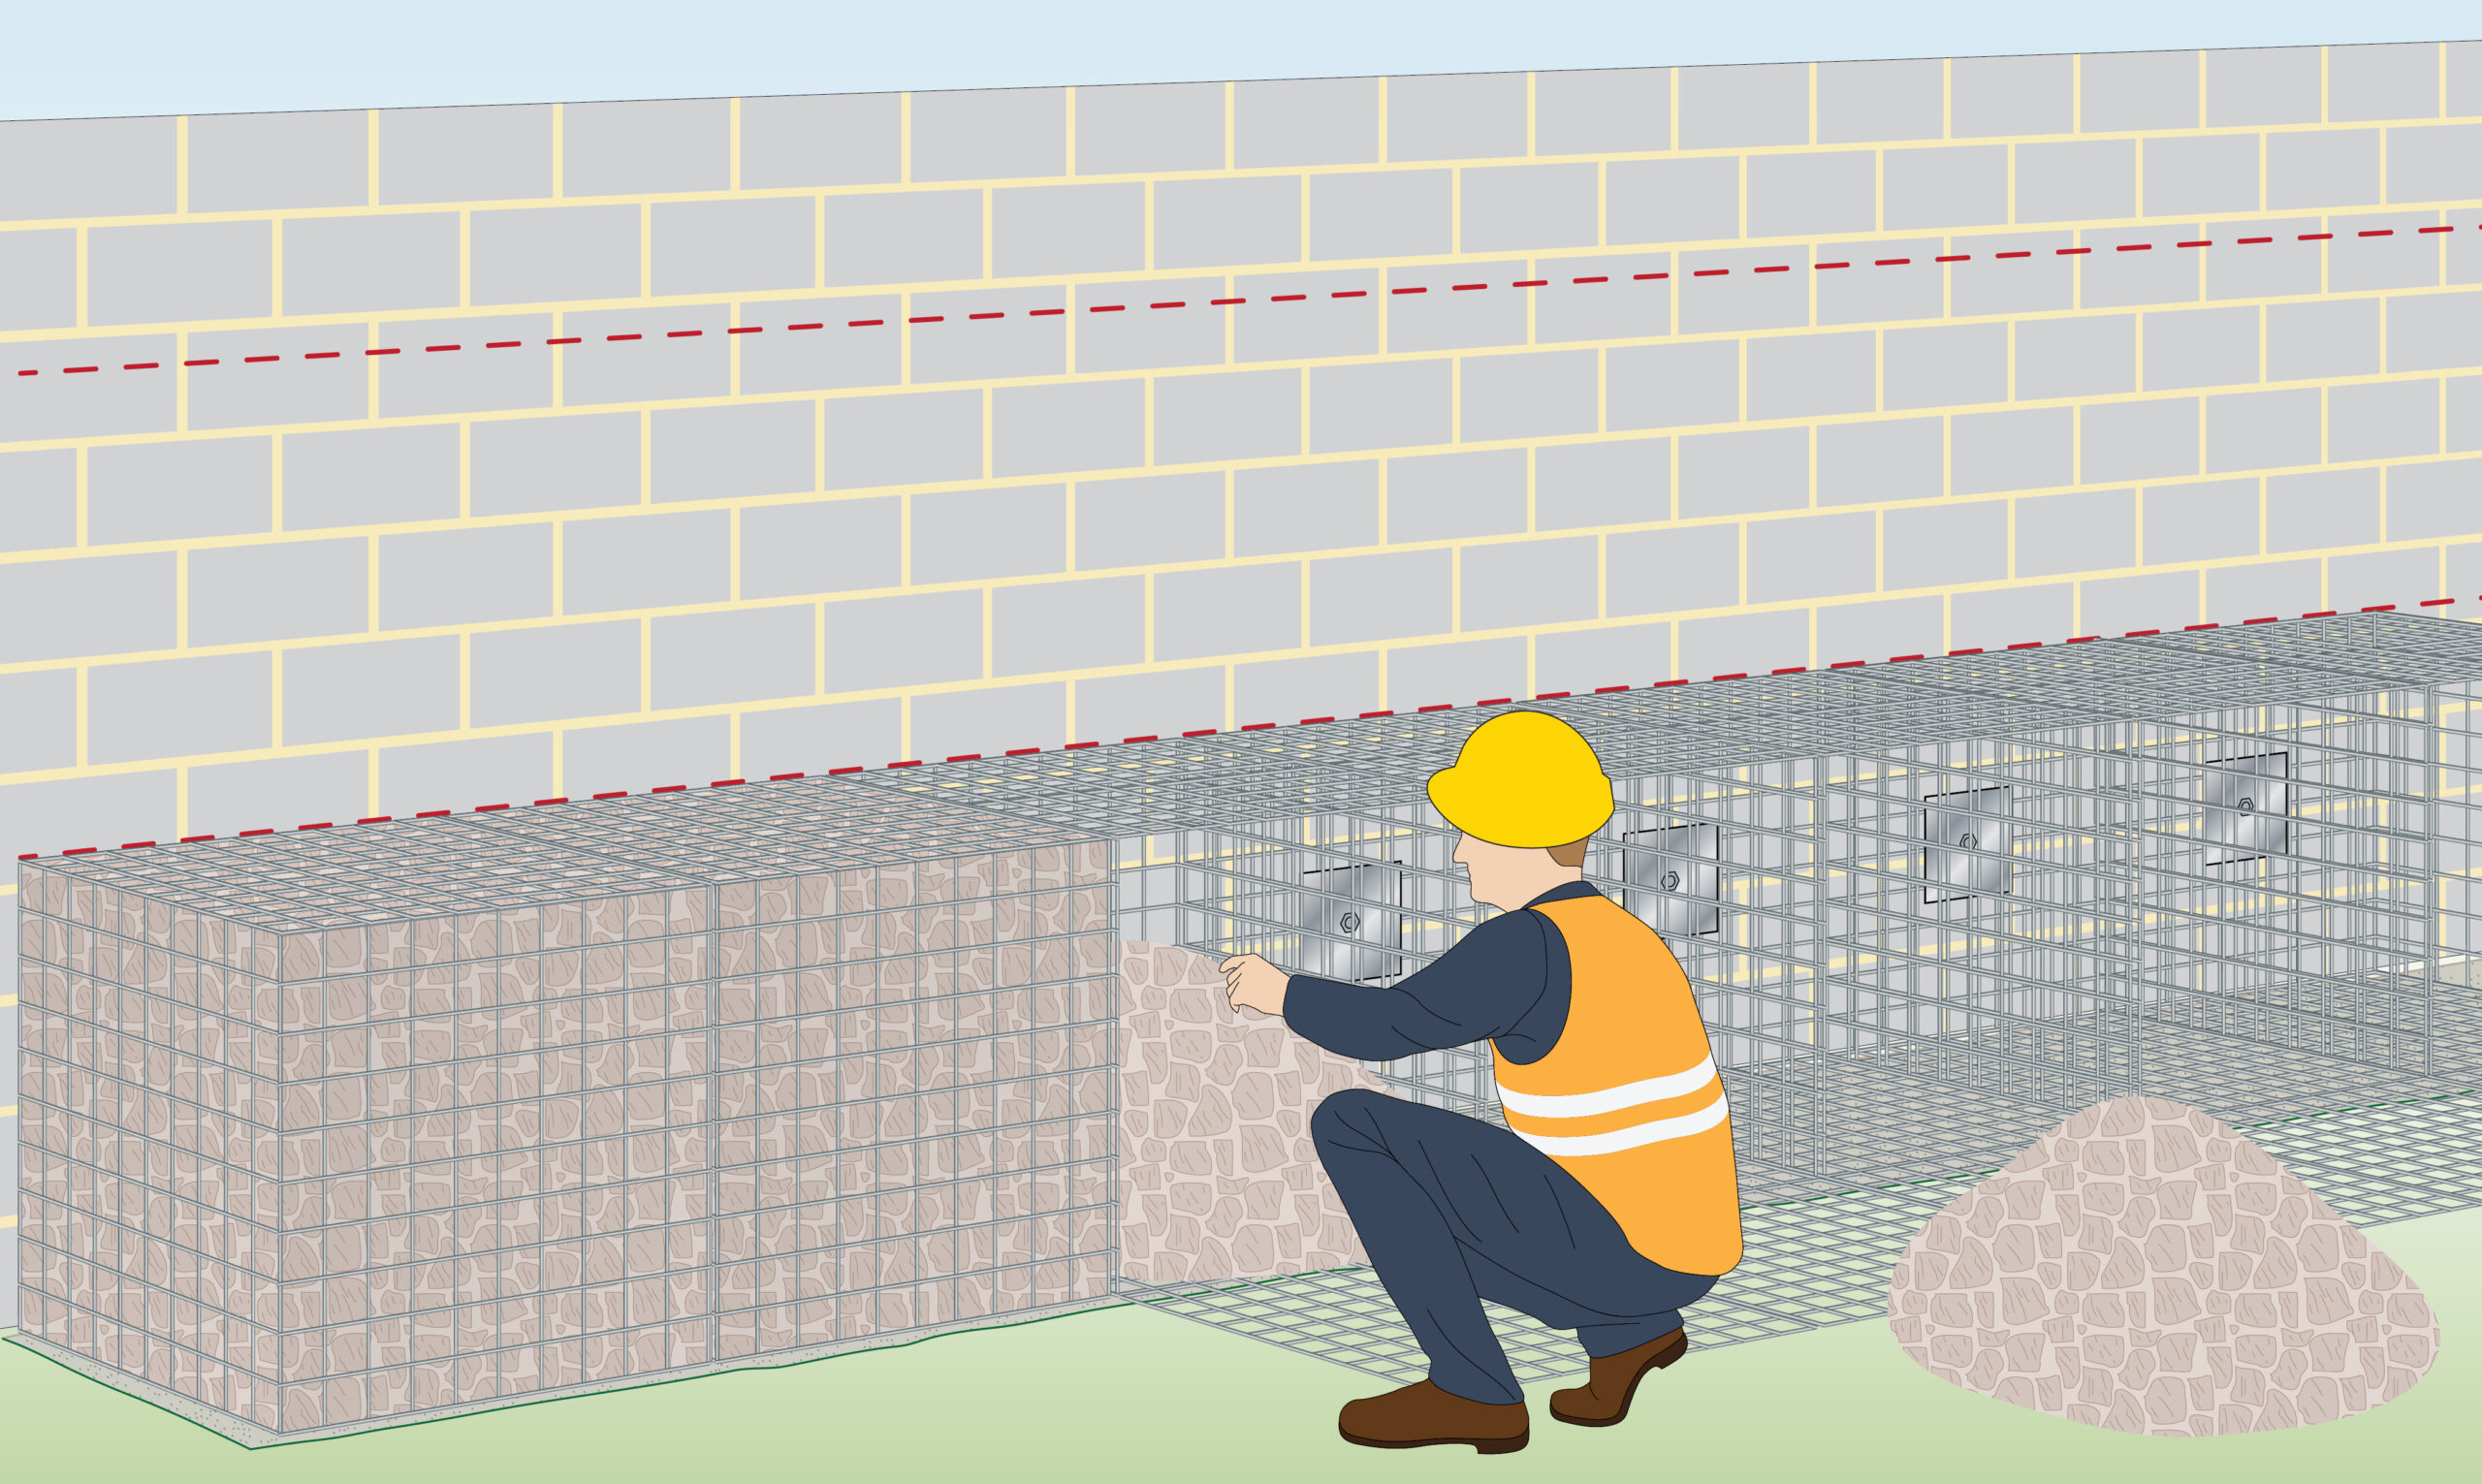
| Step 5 – Fill the gabions
|
Fill with your choice of stone. |
| Step 6– Repeat steps
|
Repeat steps 3-5 for each row. |
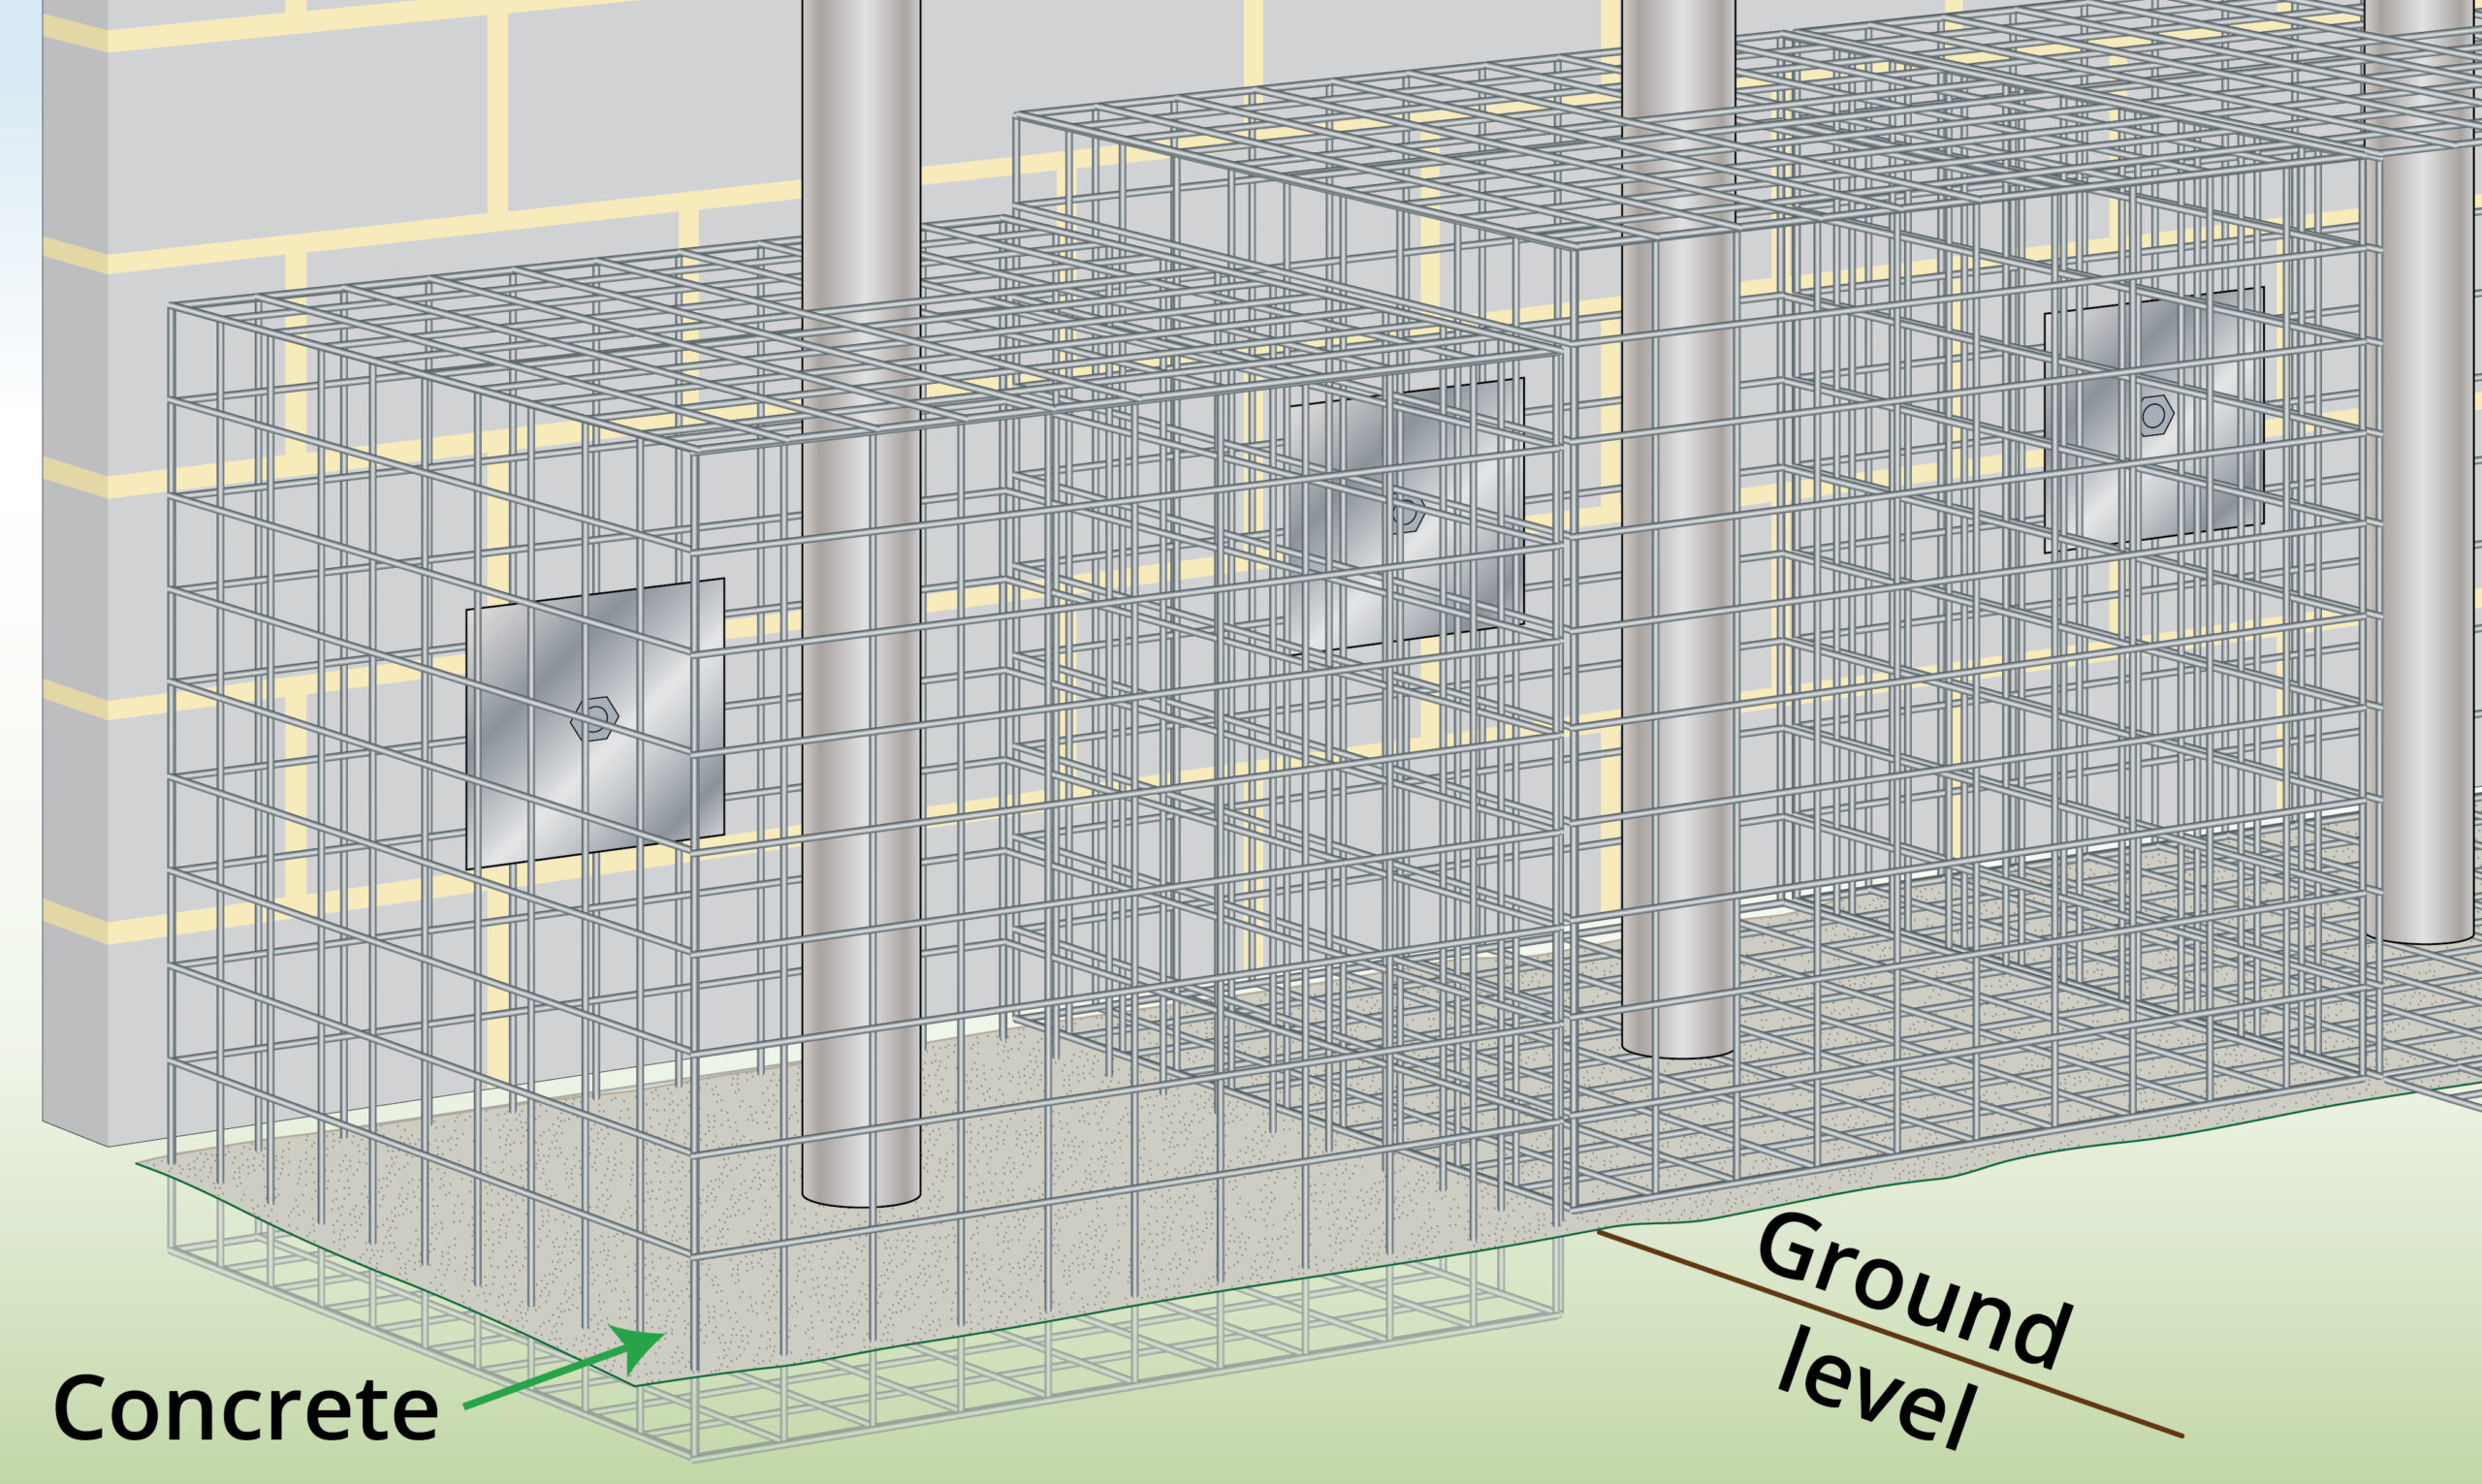
| Optional Step 1 – Set gabions into the ground
|
For added stability, you can install the first row into the ground/concrete. You can also insert beams through the baskets. |
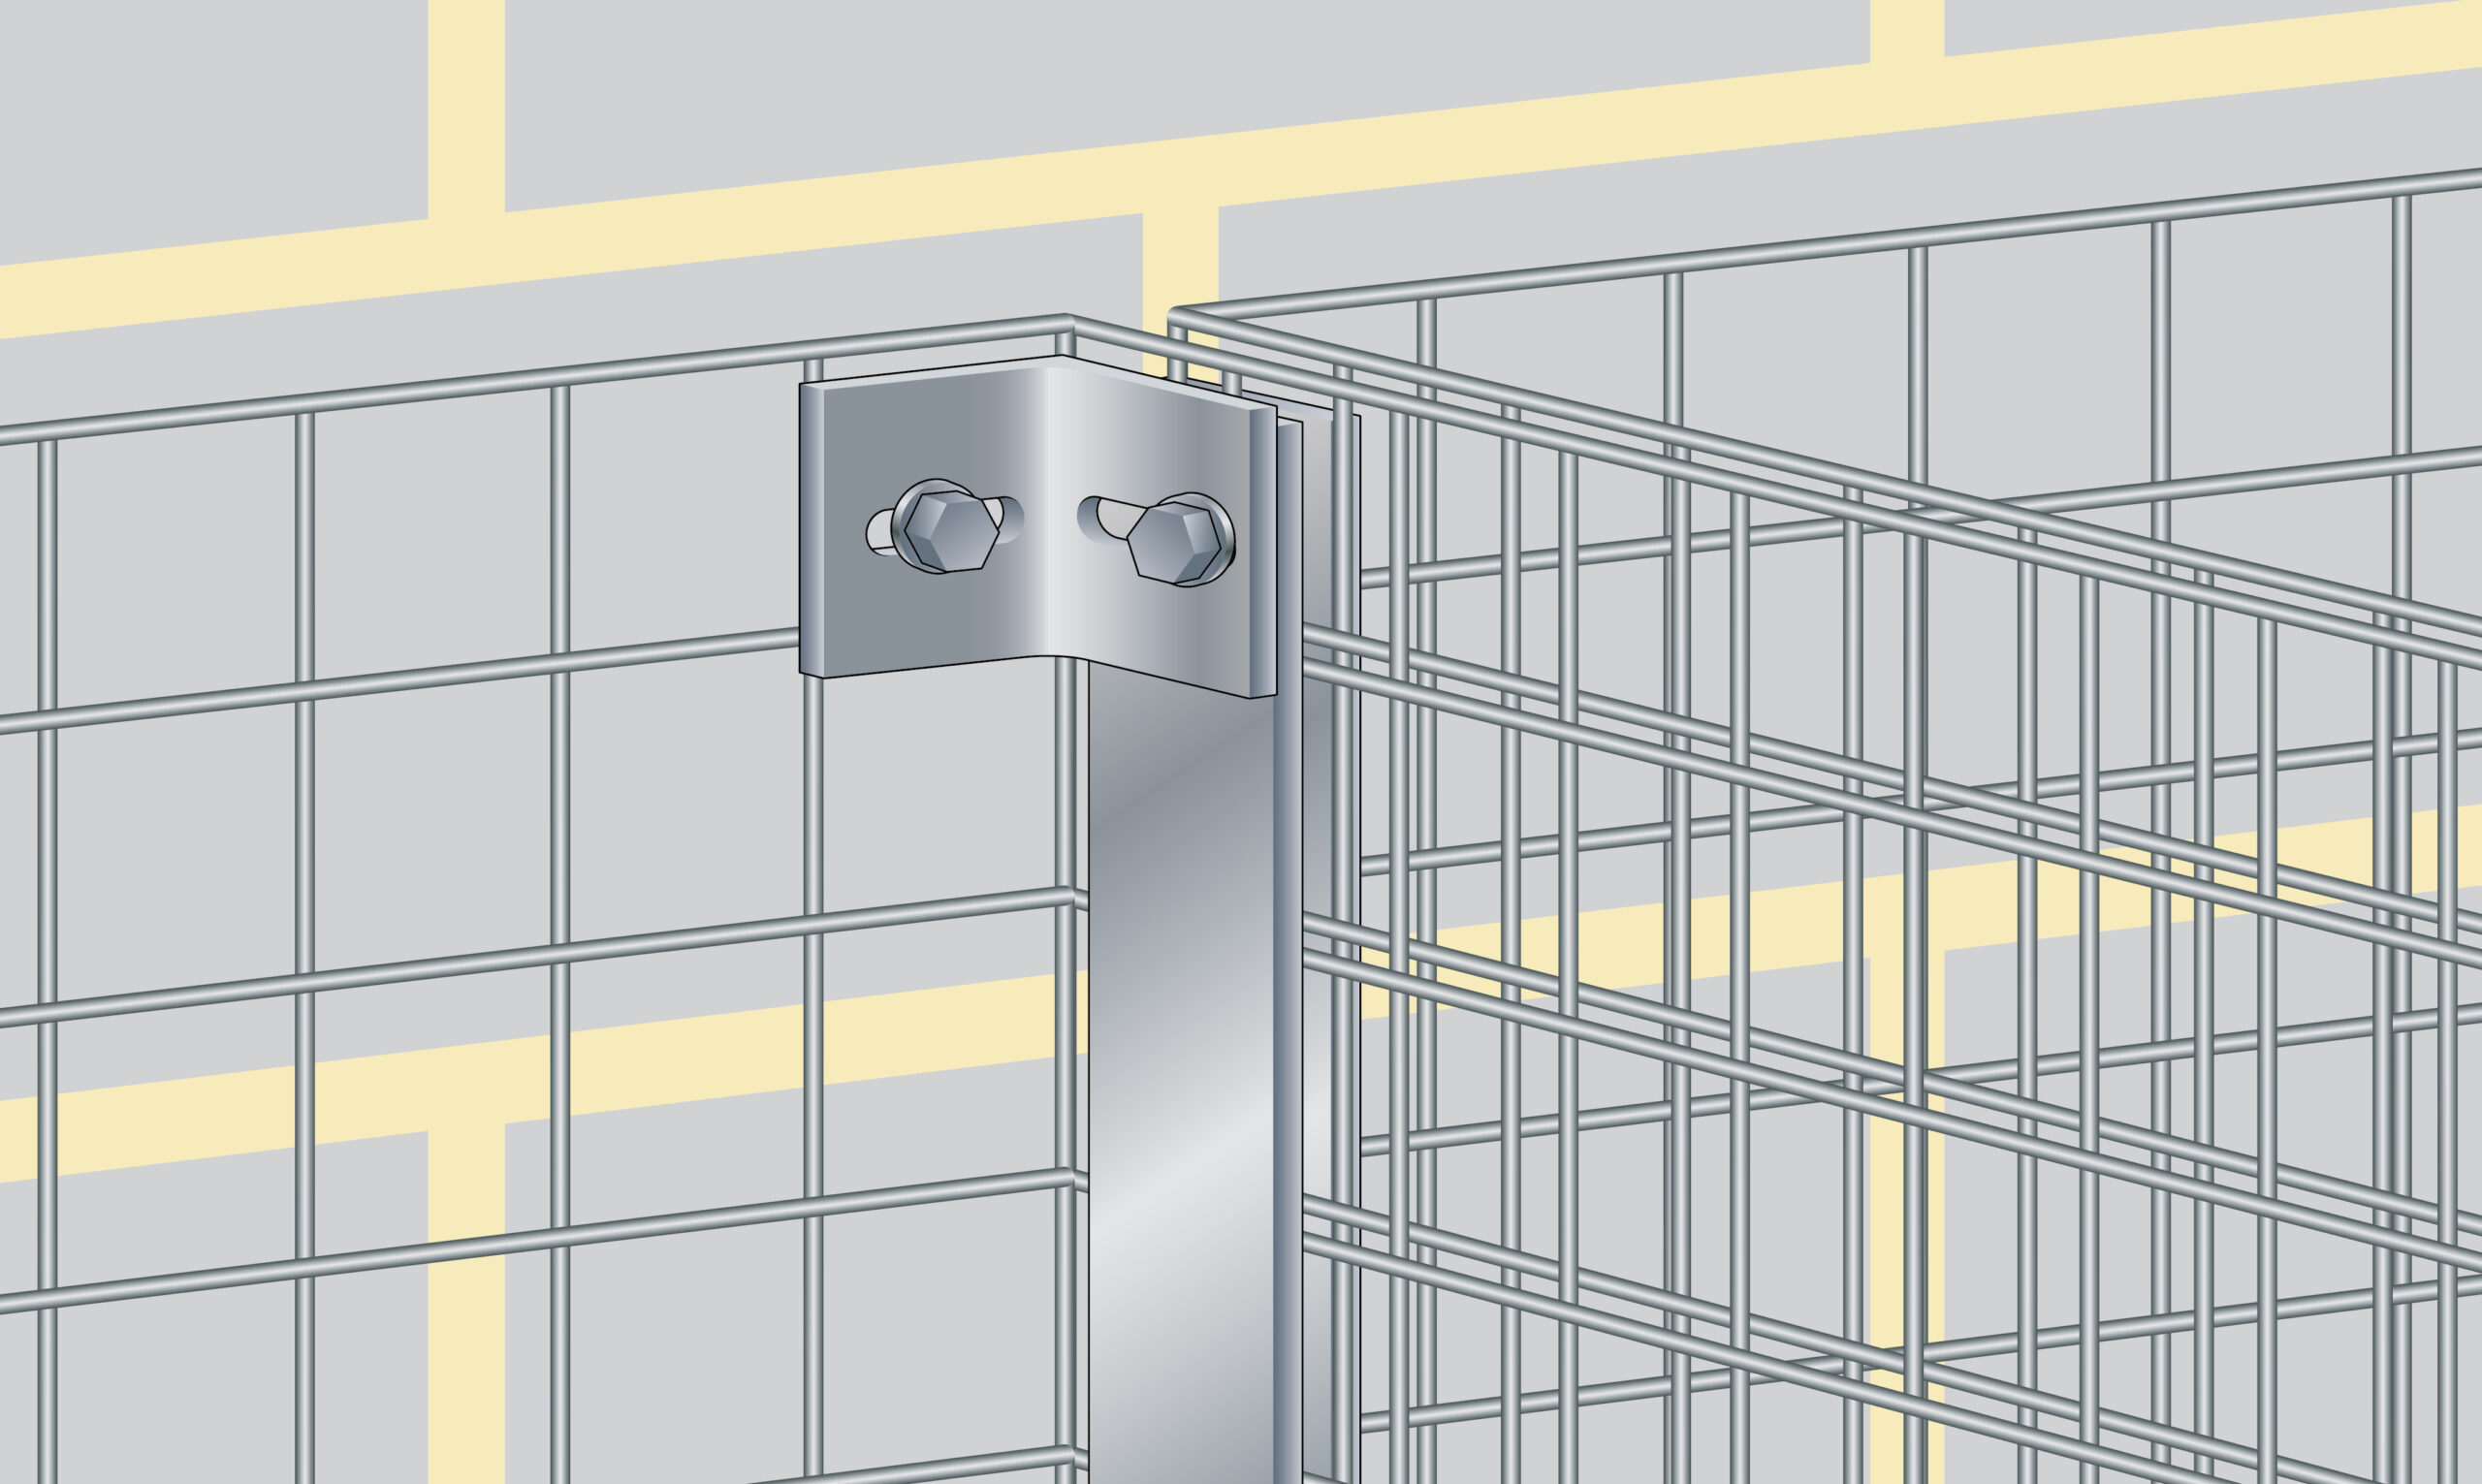
| Optional Step 2– Angle section and clamp
|
For added stability, you can also install an angle section and clamp bar. |
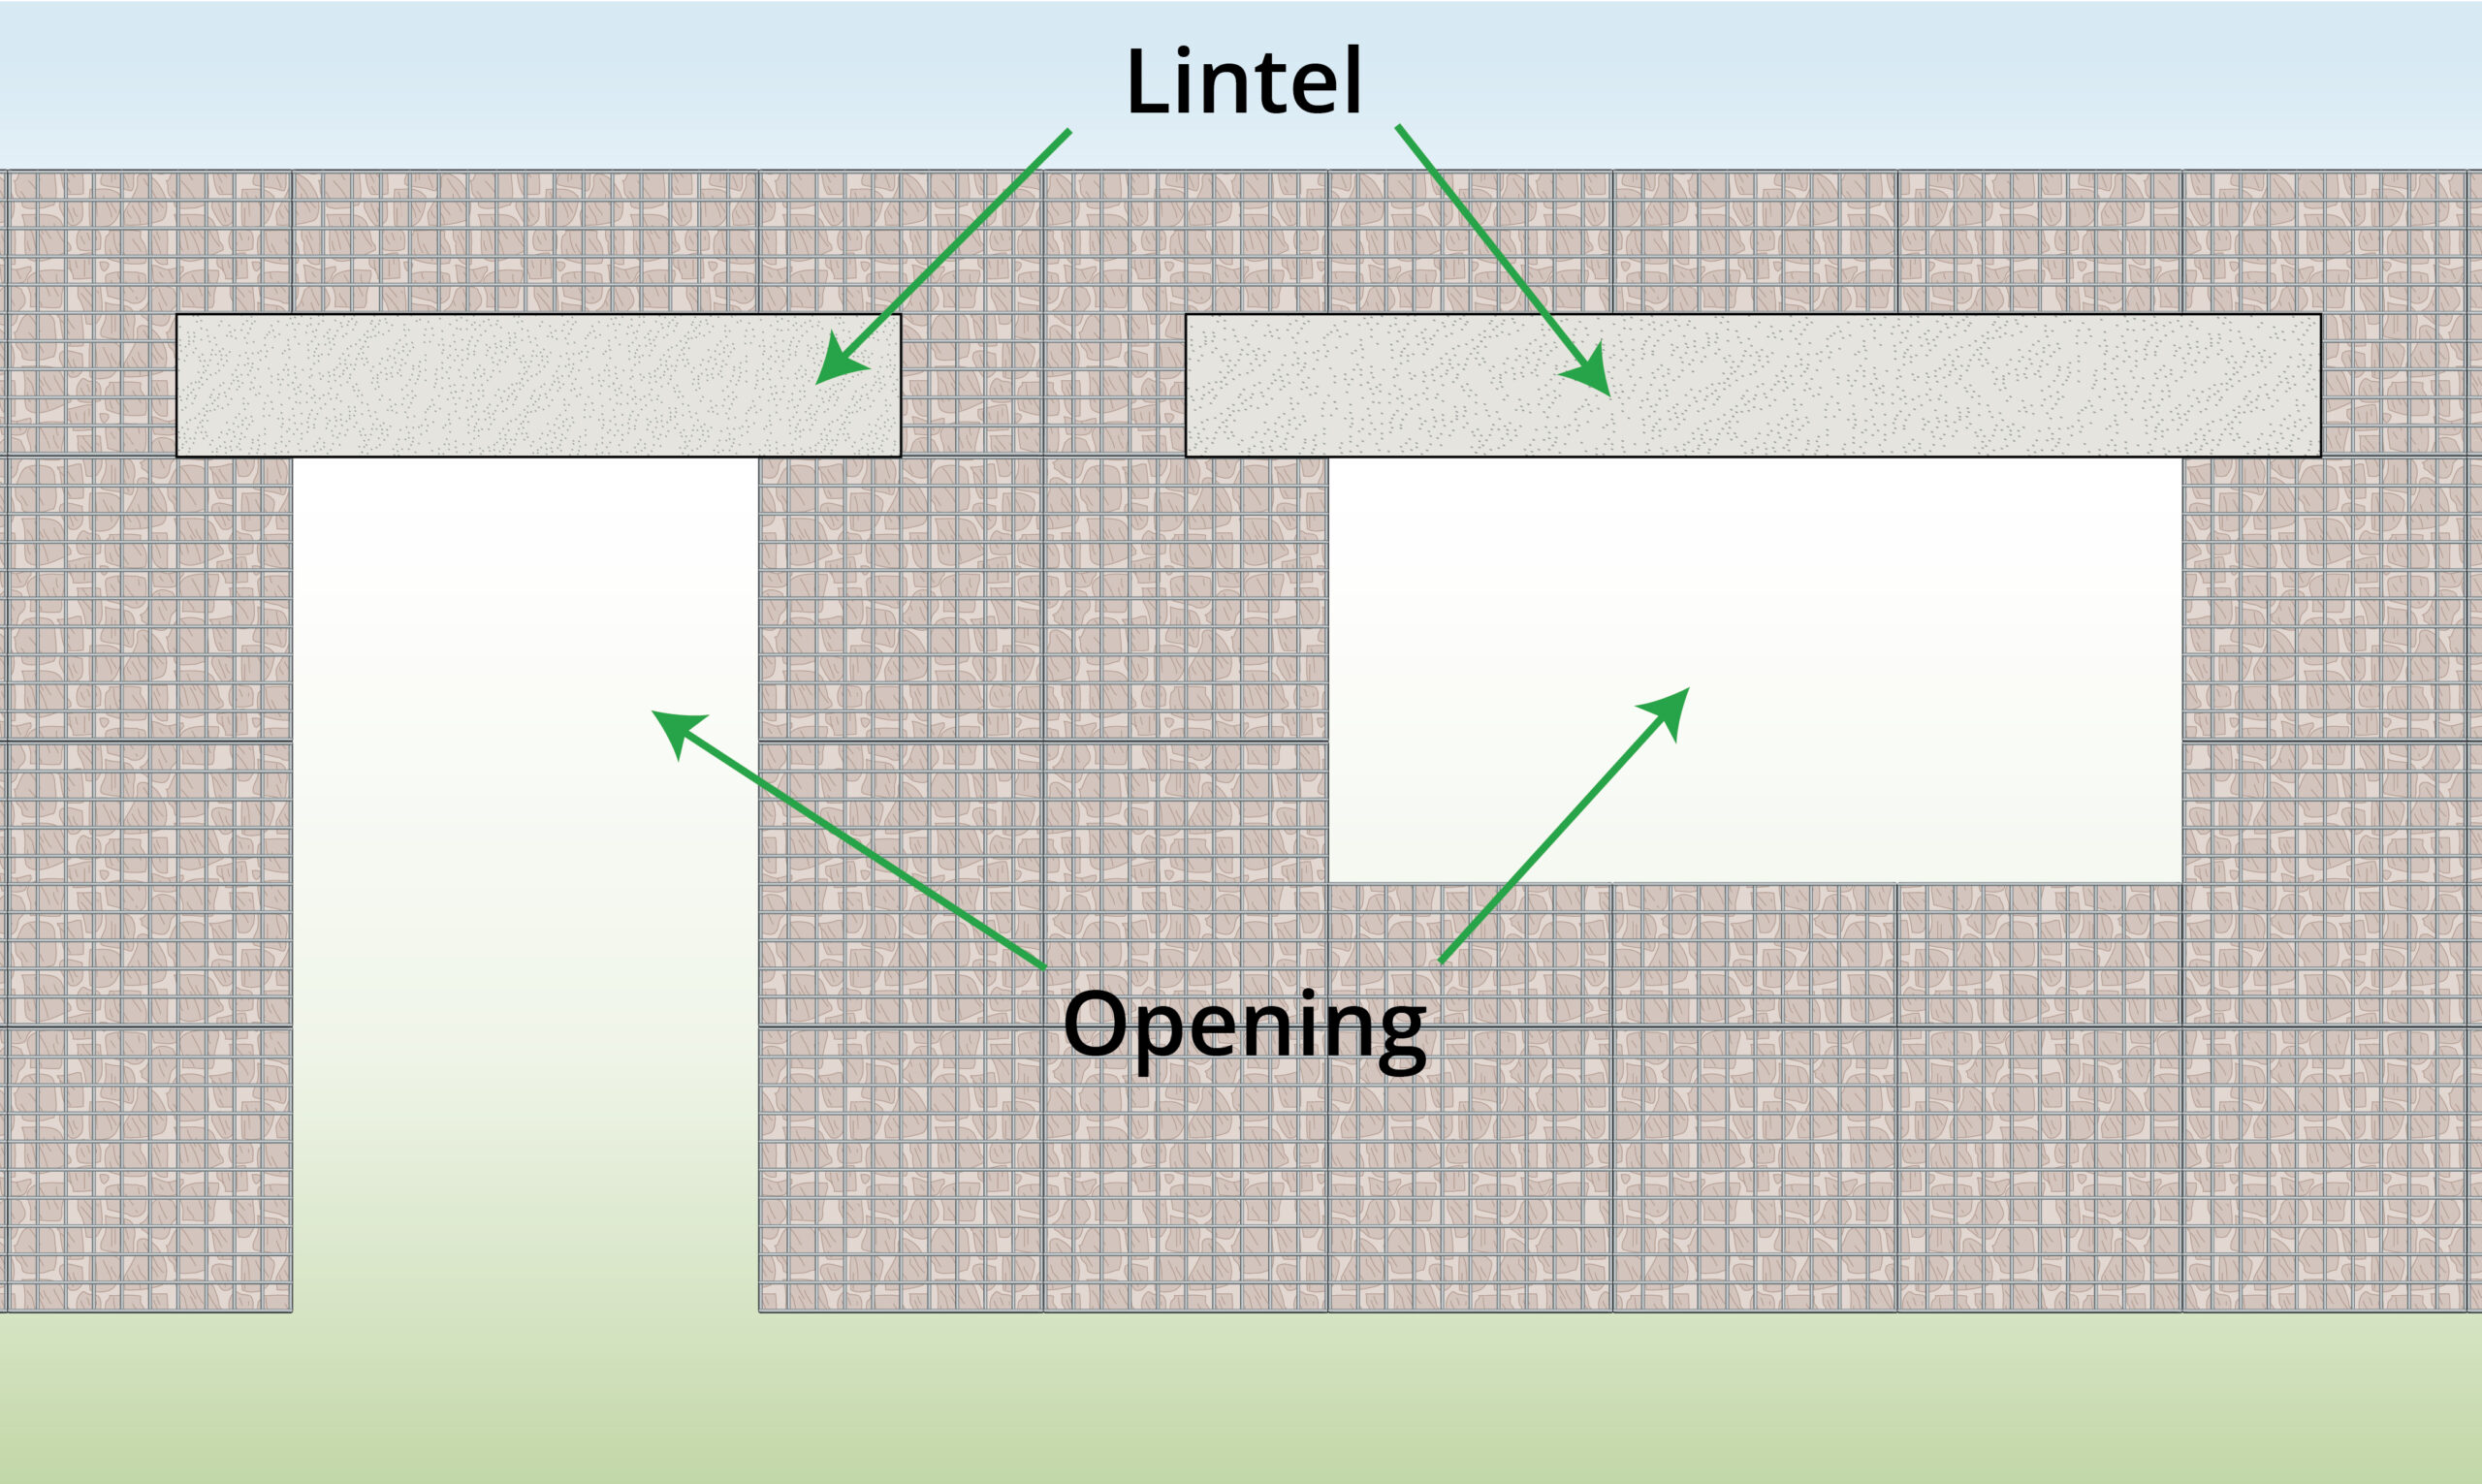
| Optional Step 3 – Add an opening
|
Where an opening in the cladding is required for doors or windows, a suitable lintel will be required. |
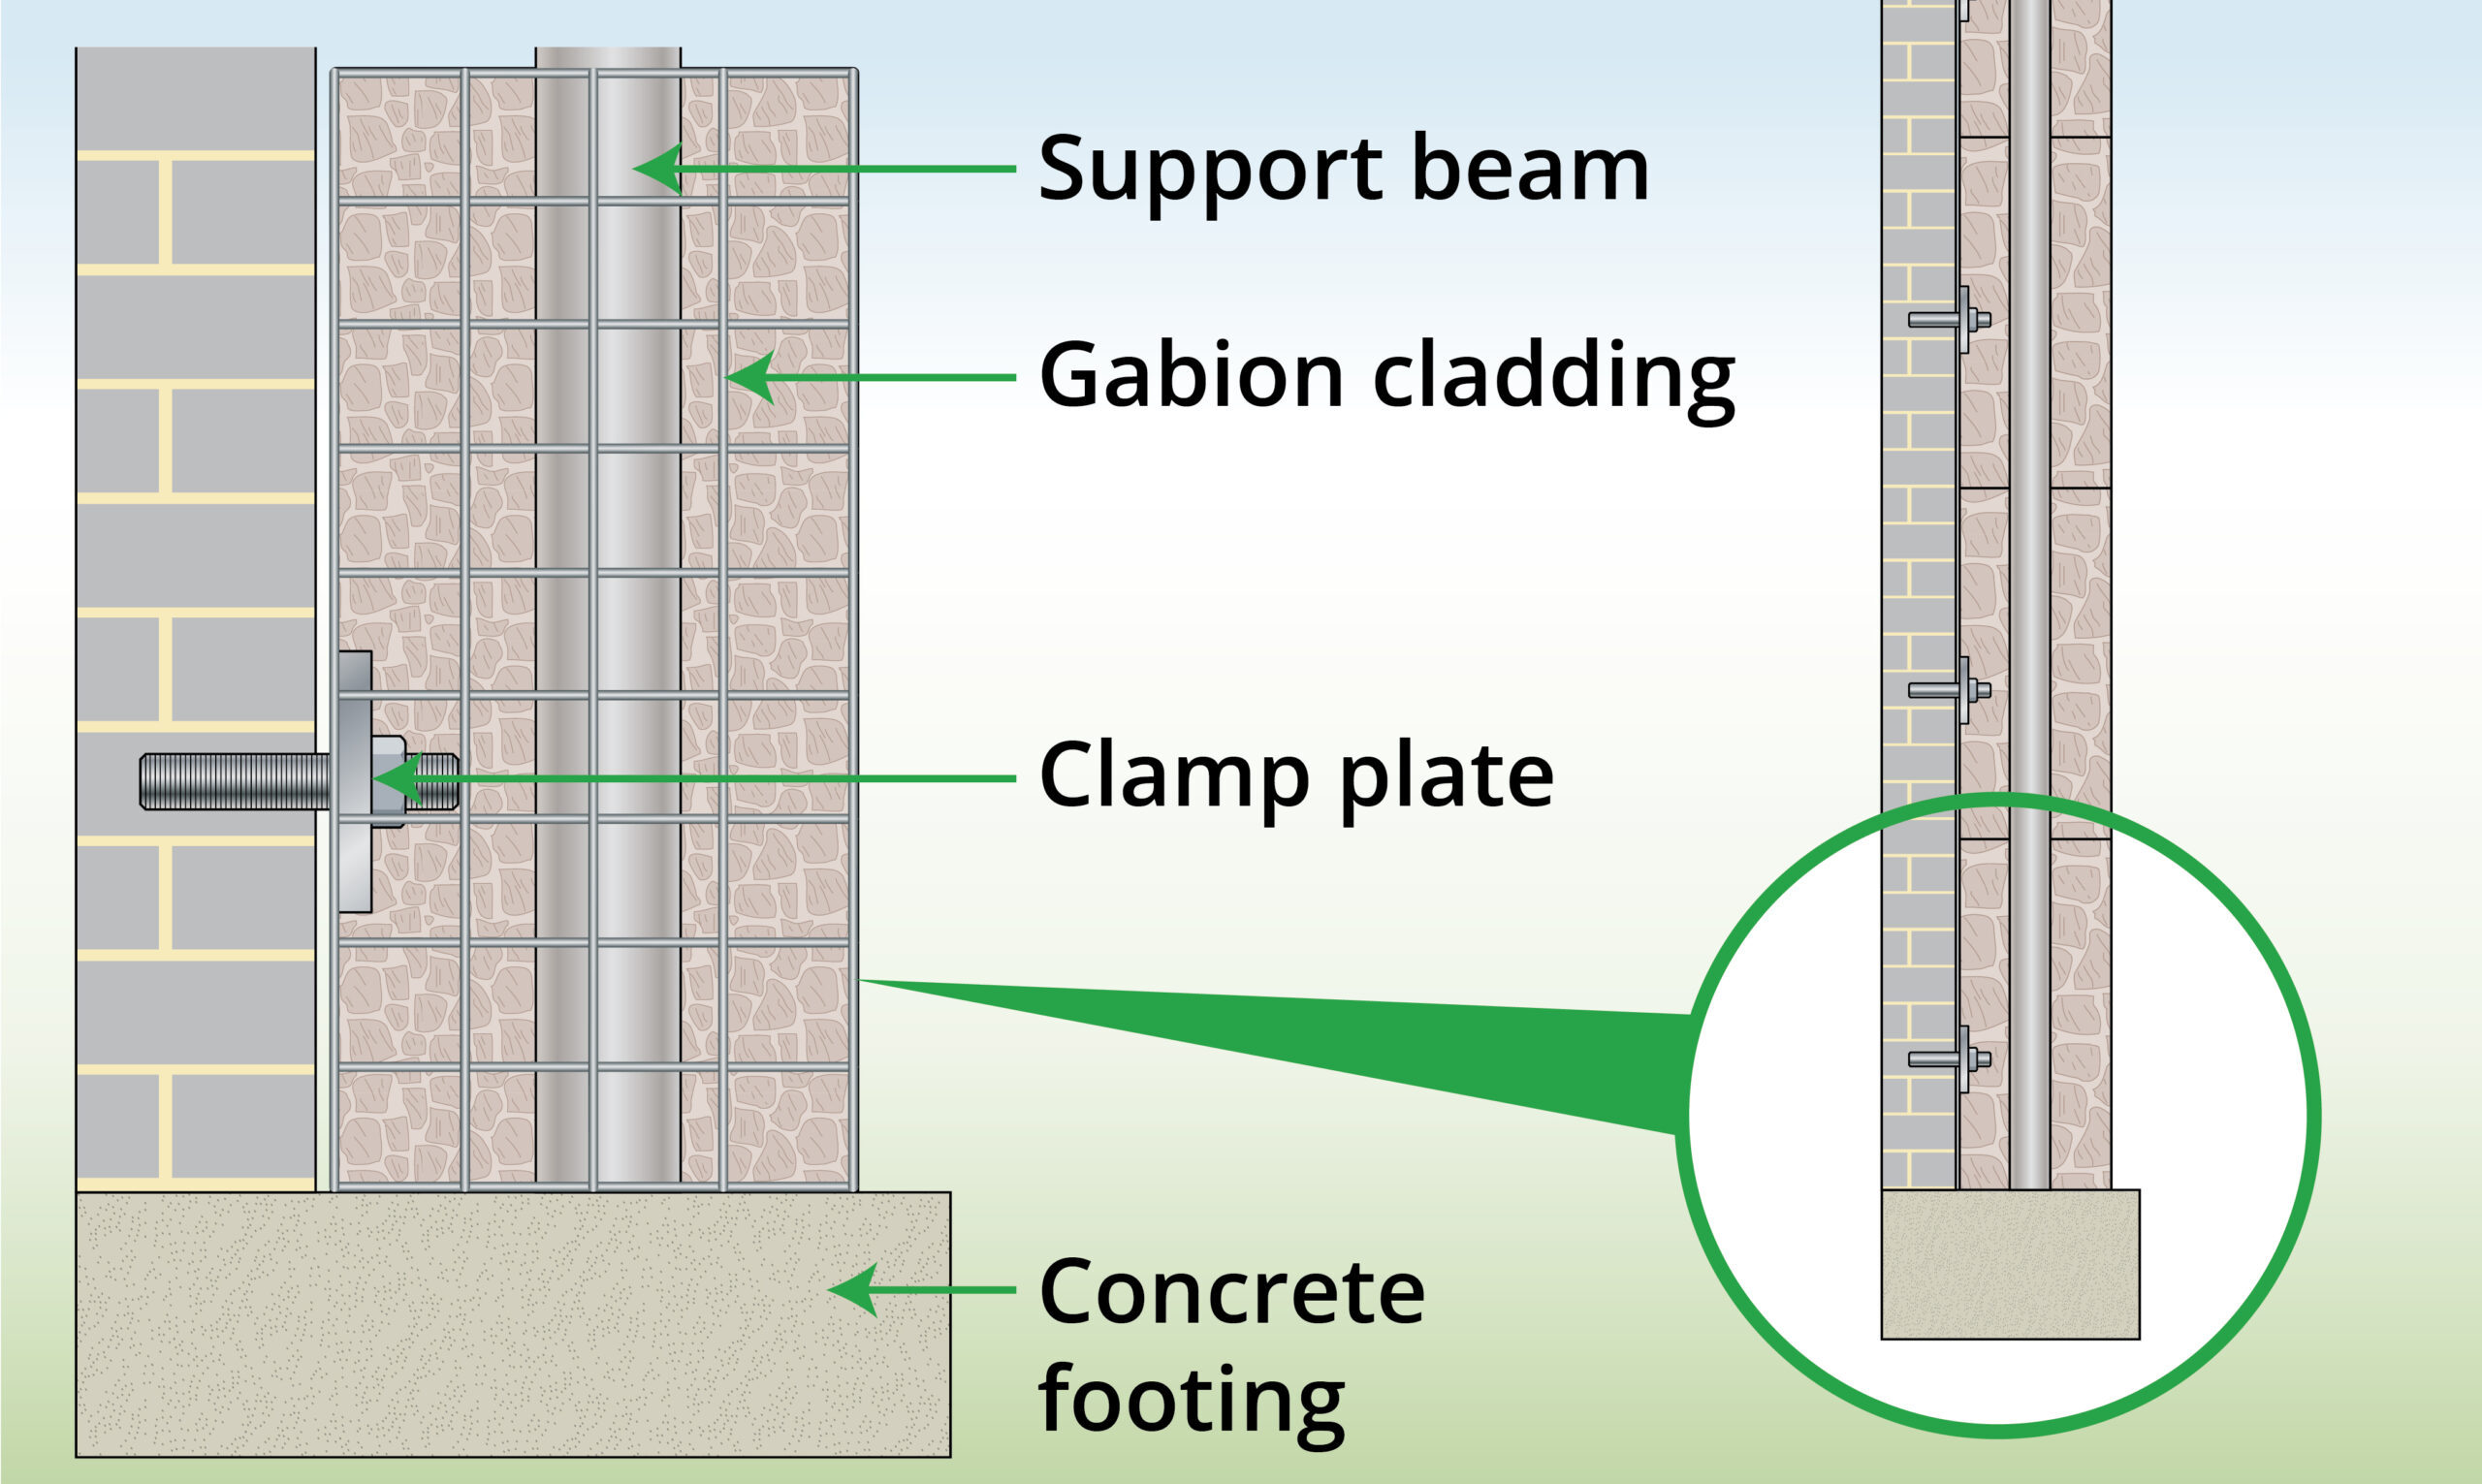
|
Anatomy of a typical installation
|
|
| To Do | Explanation |
| Step 1 – Assess the strength of the structure
|
Assess the structure where you are intending to attach the cladding to ensure it can hold the weight of the gabions. If you are unsure, have an Engineer test the structure using a tension testing tool. |
| Step 2 – Mark the area
|
Mark the exact location where you plan to install using a spirit level or laser level to ensure it is straight. |
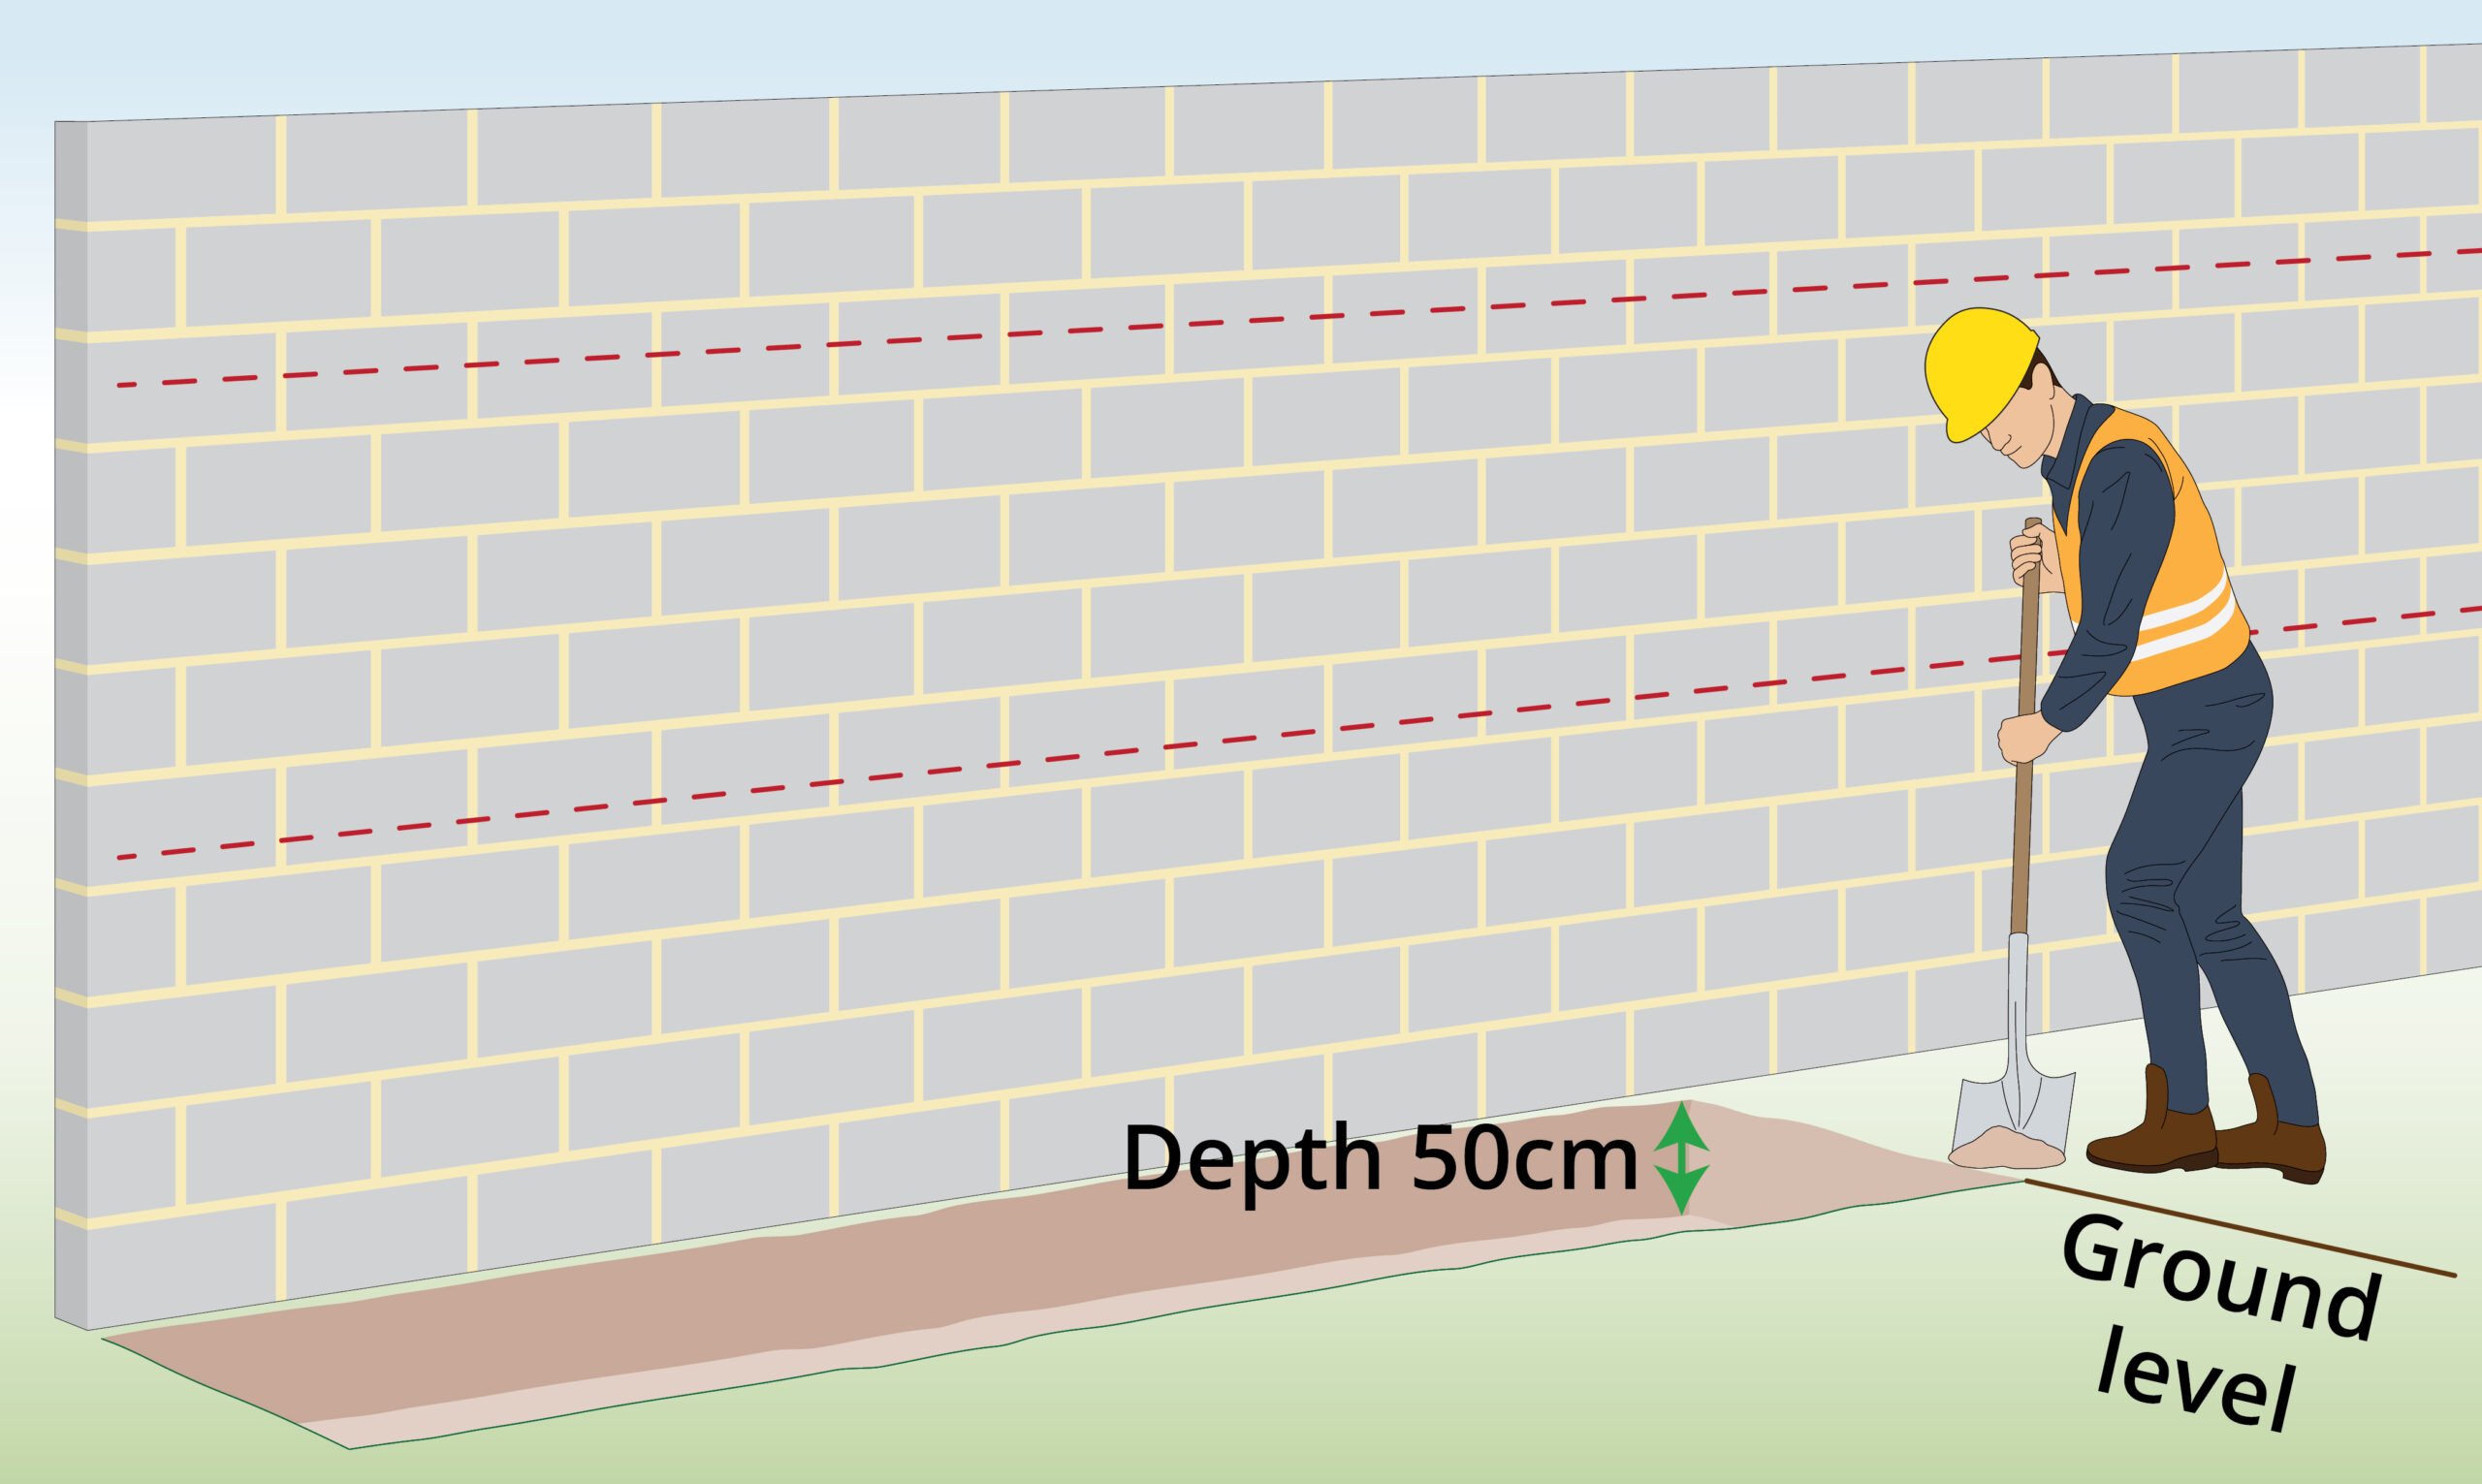
| Step 3 – Dig
|
Dig a trench directly under the location of the cladding. This is where your support beams will be located.
The depth of the trench should be a minimum of 50cm but it is advised that you check with an Engineer before digging. |
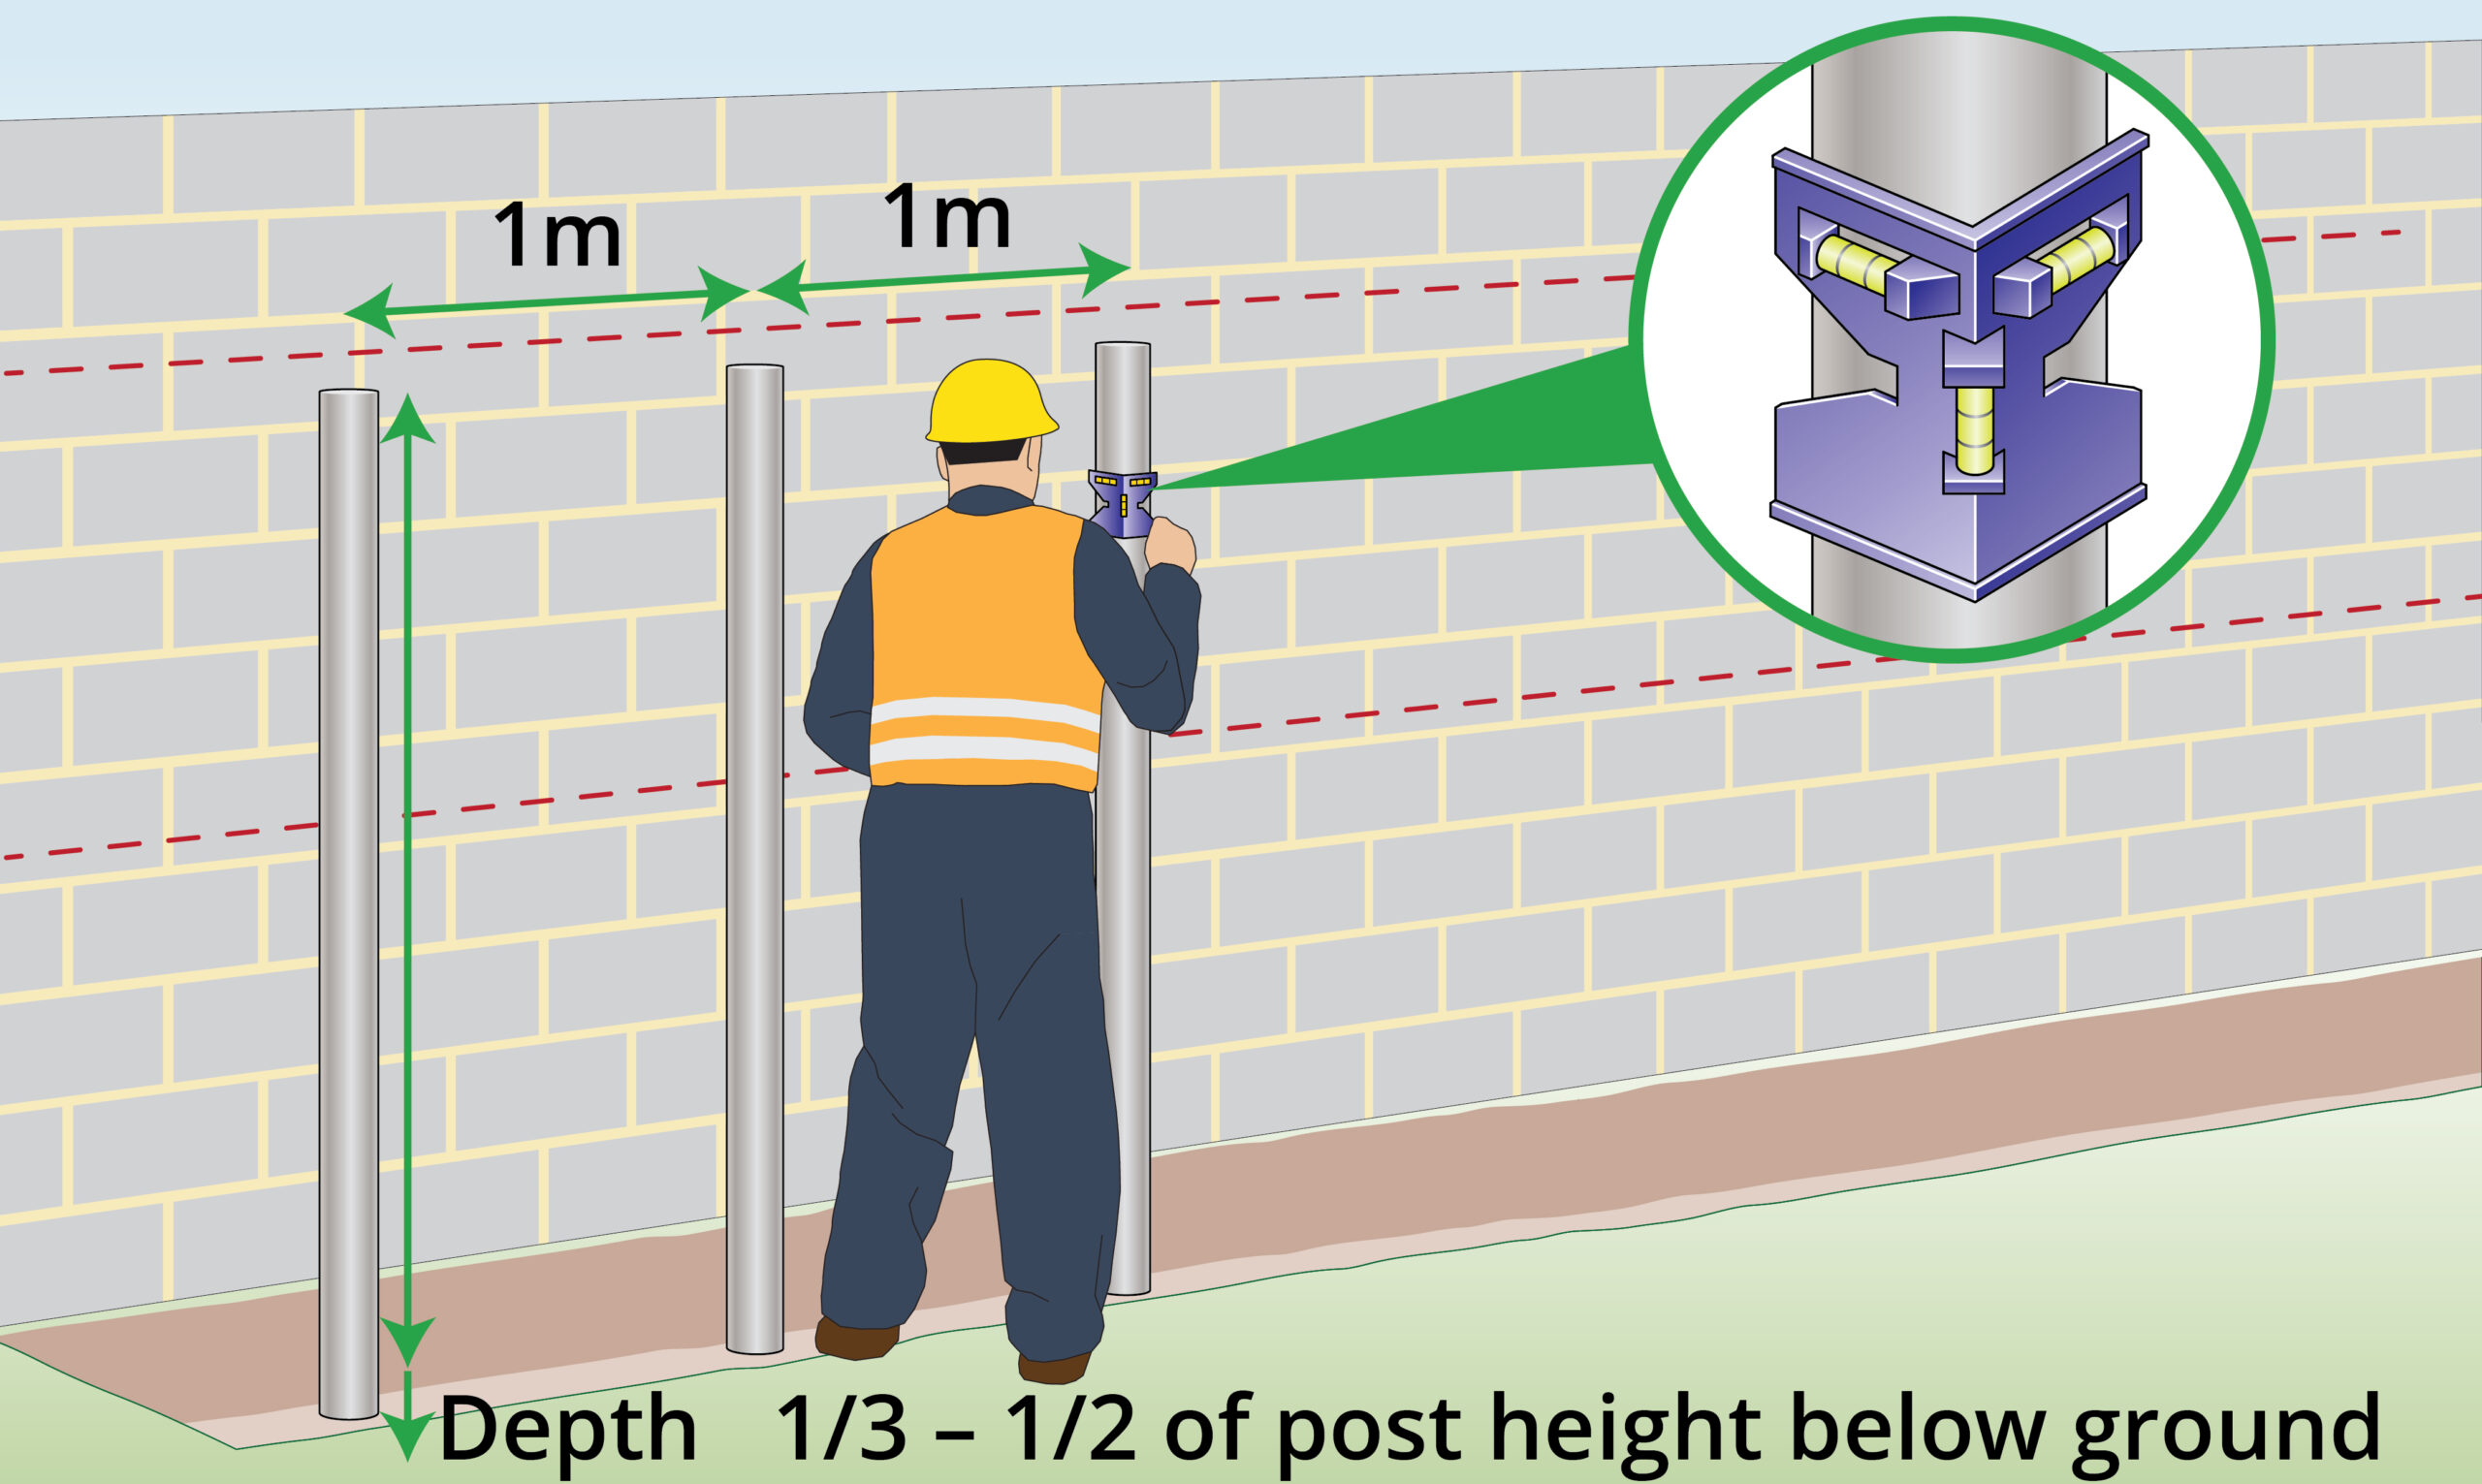
| Step 4 – Install support beams
|
Using a spirit level, place the support beams at 1m intervals directly under the location where the baskets will be installed. |
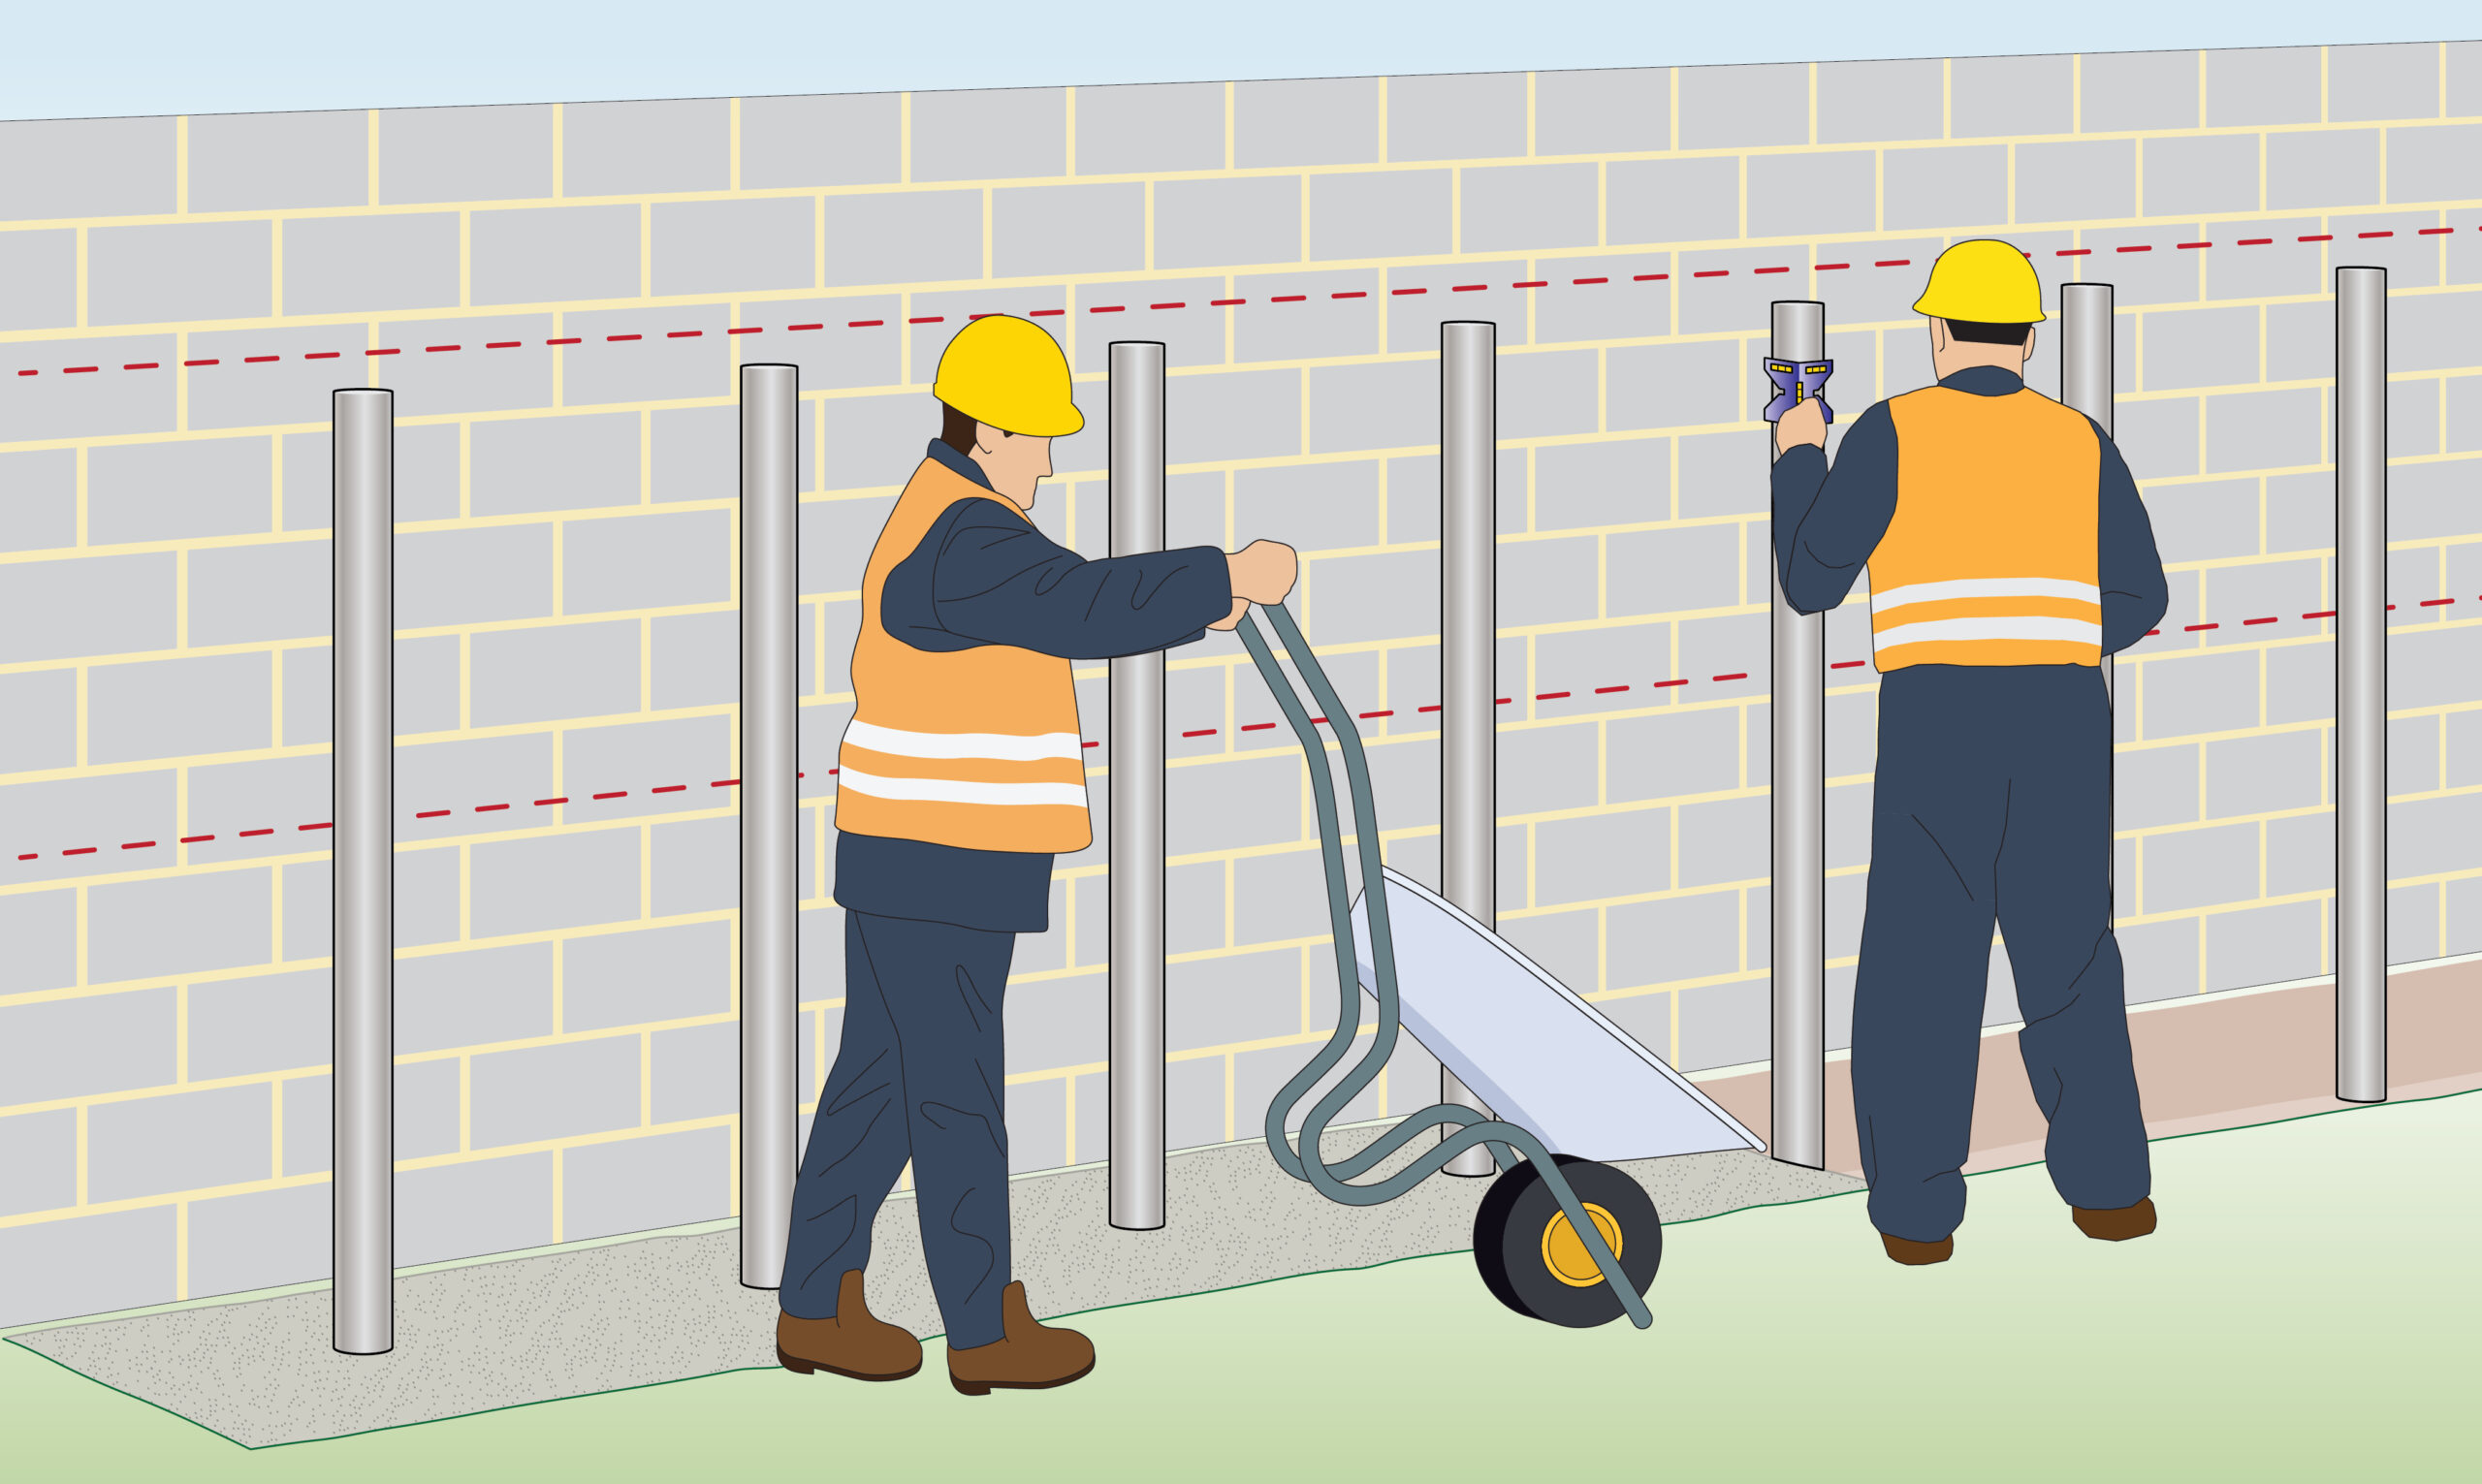
| Step 5 – Concrete foundation
|
Pour in your concrete to set the beams in place. Use a spirit level to ensure your posts stay vertical. |
| Step 6 – Assemble the baskets |
Assemble the baskets required for the first row (download instructions). |
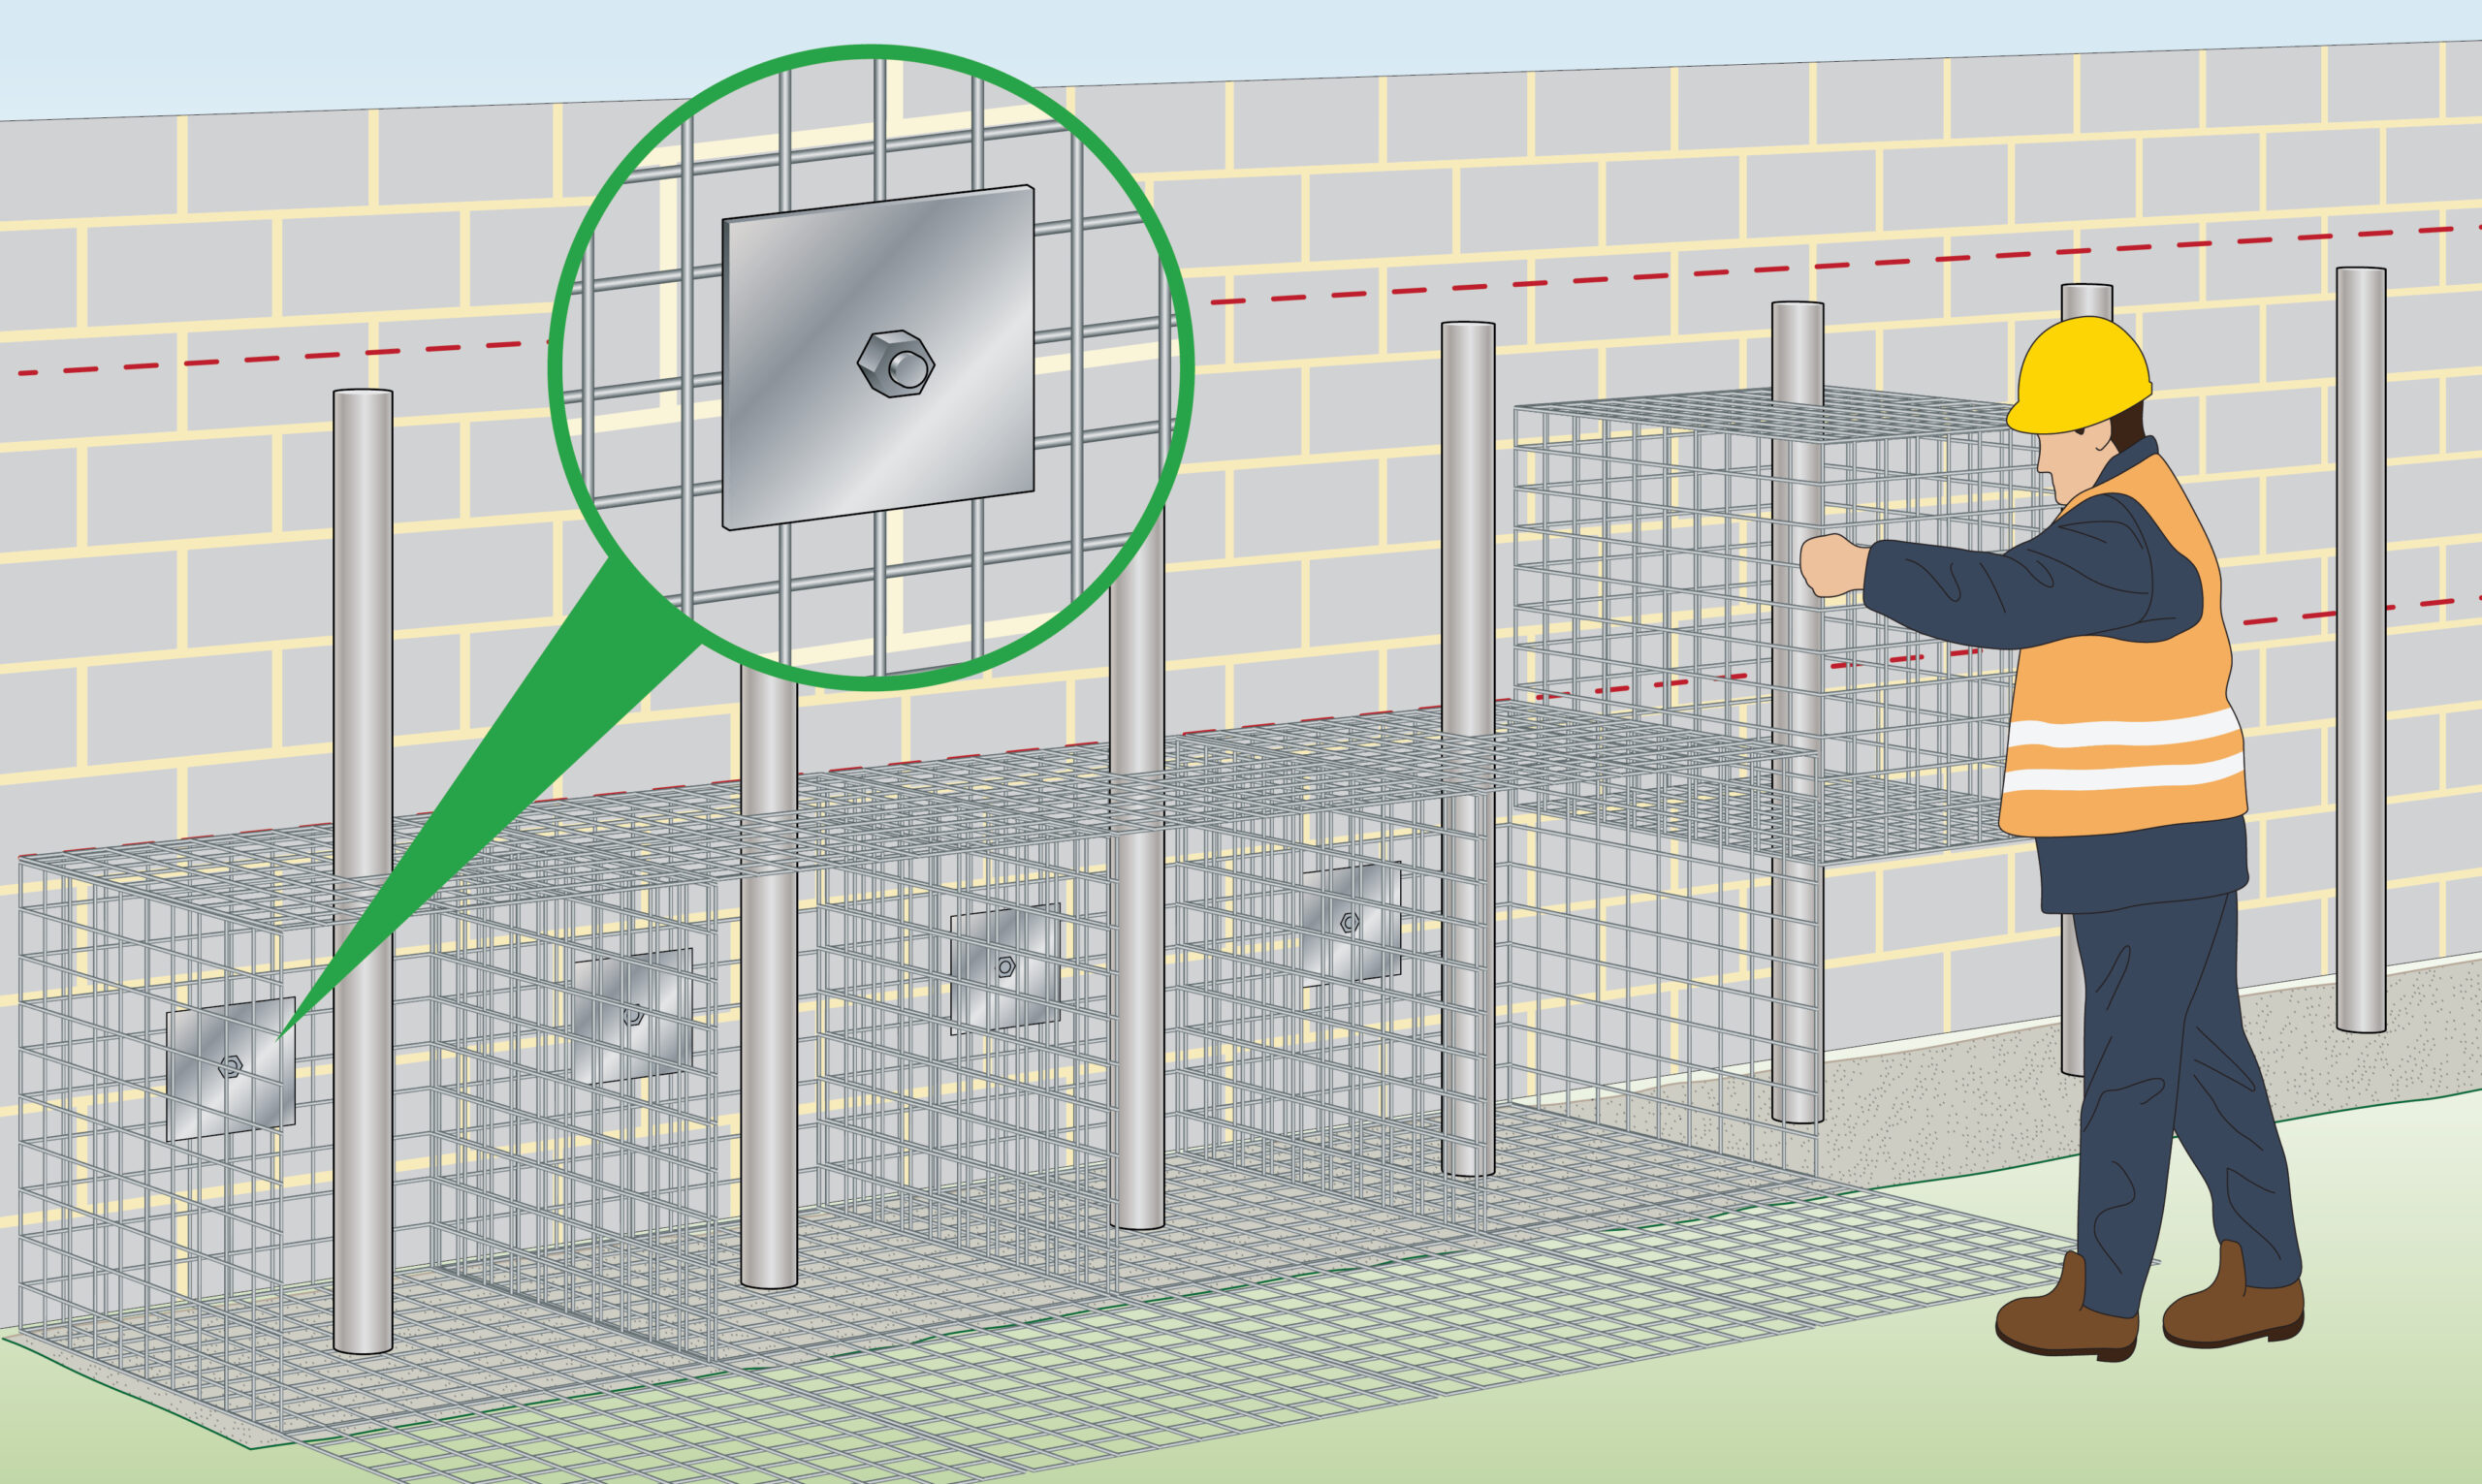
| Step 7 – Attach to wall
|
Place the cages on top of the beams. If the diameter of your support beams is larger than the 75mm x 75mm holes in the mesh, then you can use bolt cutters to create a bigger hole.
Use an industrial clamp plate or comparable hardware to attach the gabion to the wall once they are in place |
| Step 8 – Fill with stone
|
Fill the baskets with your choice of stone |
| Step 9 – Repeat steps
|
Repeat steps 6-8 for each row |
| Optional Step 1– Set into the ground
|
For added stability, you can install the first row into the ground/concrete |
| Optional Step 2– Angle section and clamp
|
For added stability, you can also install an angle section and clamp bar |
| Optional Step 3 – Add an opening
|
Where an opening is required for doors or windows a suitable lintel will be required. |
|
Anatomy of a typical installation
|
|
| Gabion Wall Dimensions (cm) | Bulk Bags of Granite Stone Required | Bulk Bags of Limestone Required | ||
| 45cm | 22.5cm | 45cm | 1 | 1 |
| 97.5cm | 22.5cm | 45cm | 1 | 1 |
| 150cm | 22.5cm | 45cm | 1 | 1 |
| 202.5cm | 22.5cm | 45cm | 1 | 1 |
| 45cm | 22.5cm | 67.5cm | 1 | 1 |
| 97.5cm | 22.5cm | 67.5cm | 1 | 1 |
| 150cm | 22.5cm | 67.5cm | 1 | 1 |
| 202.5cm | 22.5cm | 67.5cm | 1 | 1 |
| 45cm | 30cm | 45cm | 1 | 1 |
| 97.5cm | 30cm | 45cm | 1 | 1 |
| 150cm | 30cm | 45cm | 1 | 1 |
| 202.5cm | 30cm | 45cm | 1 | 1 |
| 45cm | 30cm | 67.5cm | 1 | 1 |
| 97.5cm | 30cm | 67.5cm | 1 | 1 |
| 150cm | 30cm | 67.5cm | 1 | 1 |
| 202.5cm | 30cm | 67.5cm | 1 | 1 |
|
50% Filled with Stone
|
 |

Wire Fence is part of the Super Magic Bean group - VAT Registered: 344 7643 83 - Company Registration No: 11290483