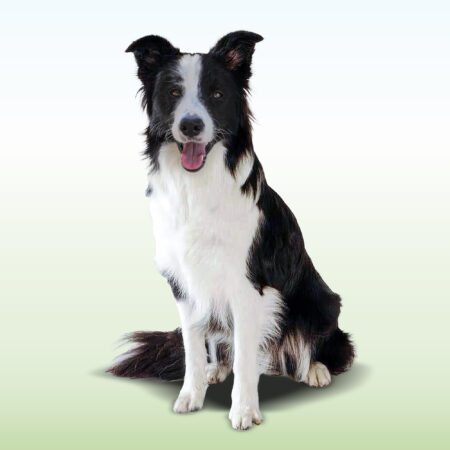
Dog Fence
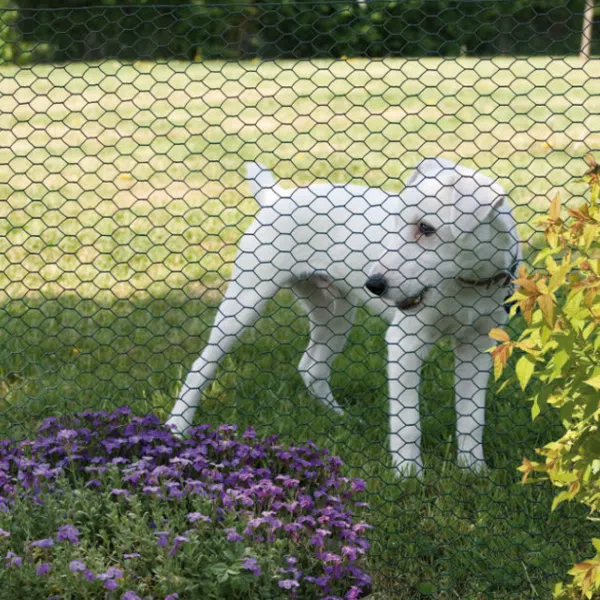
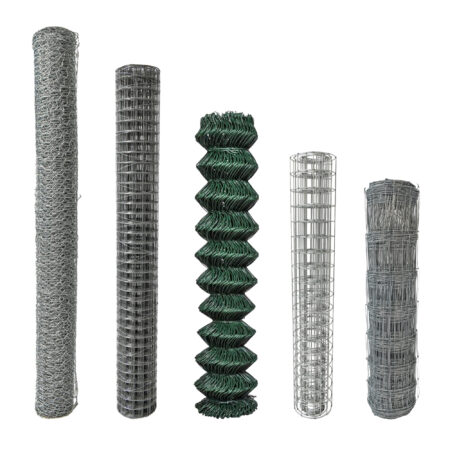
Dog mesh fencing suitable for building garden fencing for dogs, enclosures, pens, and security boundaries. Cost-effective options for large areas available as well as British Kennel Standard dog proof fencing.

Helpful Dog Fence Information
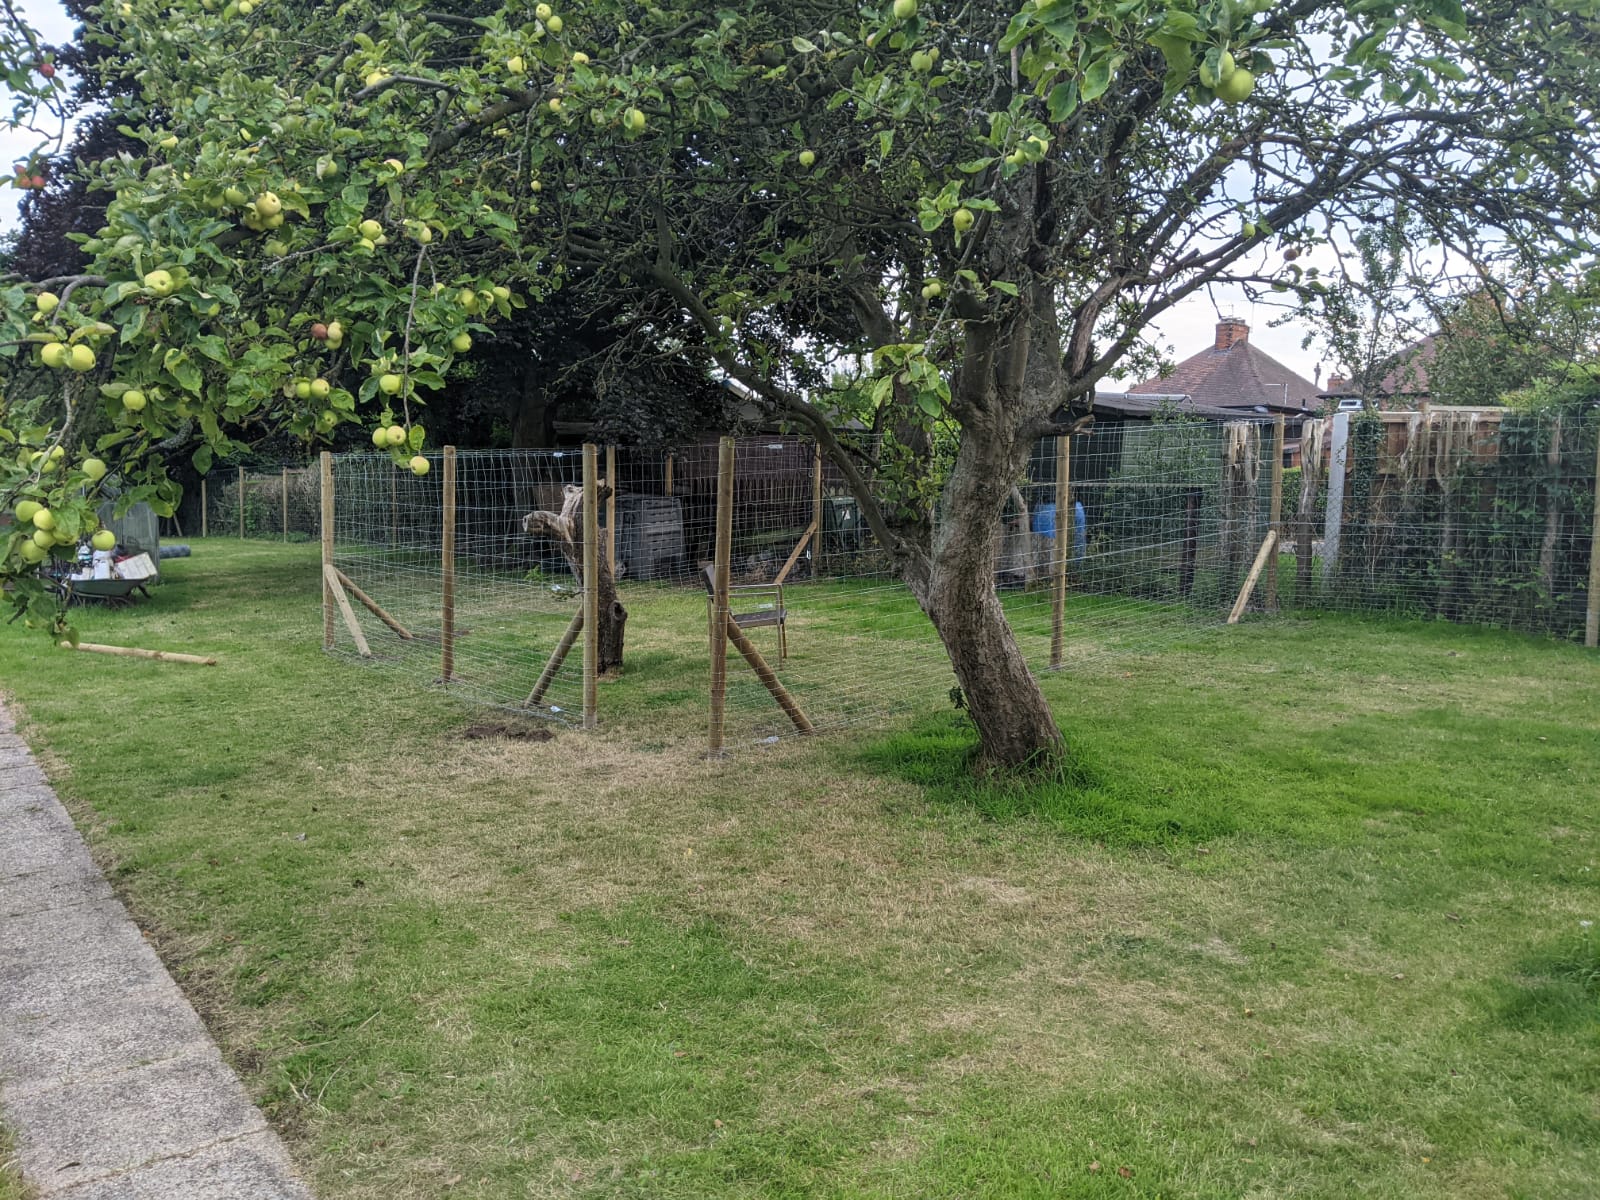
Customer Projects
Compare Dog Fences
-
Dog Proof Fence
Strongest -
Dog Deterrent Fence
Best Price
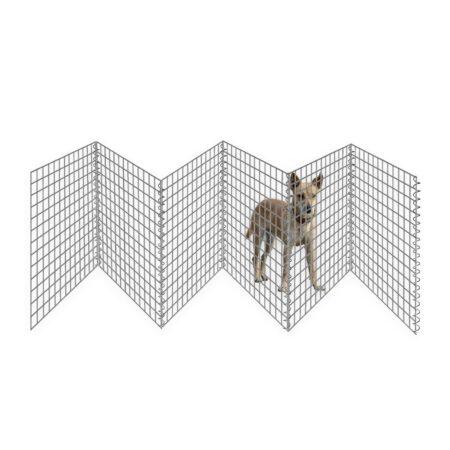
| Good for energetic and determined dogs that attempt to get through boundaries by jumping, digging, climbing or chewing. This is a required option for commercial kennels | |||
| Wire Mesh | Chain Link | Wire Panels | |
| View Products | View Products | View Products | |
| Best suited to: | |||
| High jumping breeds |
– select 1.8m (6ft) – 2.4m (8ft) for the very highest jumpers |
||
| Powerful breeds |
– select 2.5mm+ options to keep out the most powerful breeds |
||
| Good climbers | – choose 25mm x 25mm mesh hole size if your canine is good at climbing and has small paws. 50mm x 50mm is suitable to prevent most paws sliding into mesh holes. | ||
| Diggers | |||
| Very small breeds | |||
| Small breeds | |||
| Medium breeds | |||
| Large breeds | |||
| Very large breeds | |||
| Financial | |||
| Cost | ££ | £££ | ££ |
| Discounts for multi purchase | – viewable on product pages & automatically calculated for you during checkout | ||
| Minimum qty available to purchase | 6m | 12.5m | 1.8m |
| Jumping: prevents jumping over? | |||
| Very small breeds | |||
| Small breeds | |||
| Medium breeds | |||
| Large breeds | |||
| Very large breeds | |||
| Max height available | 2.7m (8.8ft) | 2.4m (7.8ft) | 1.8m (6ft) |
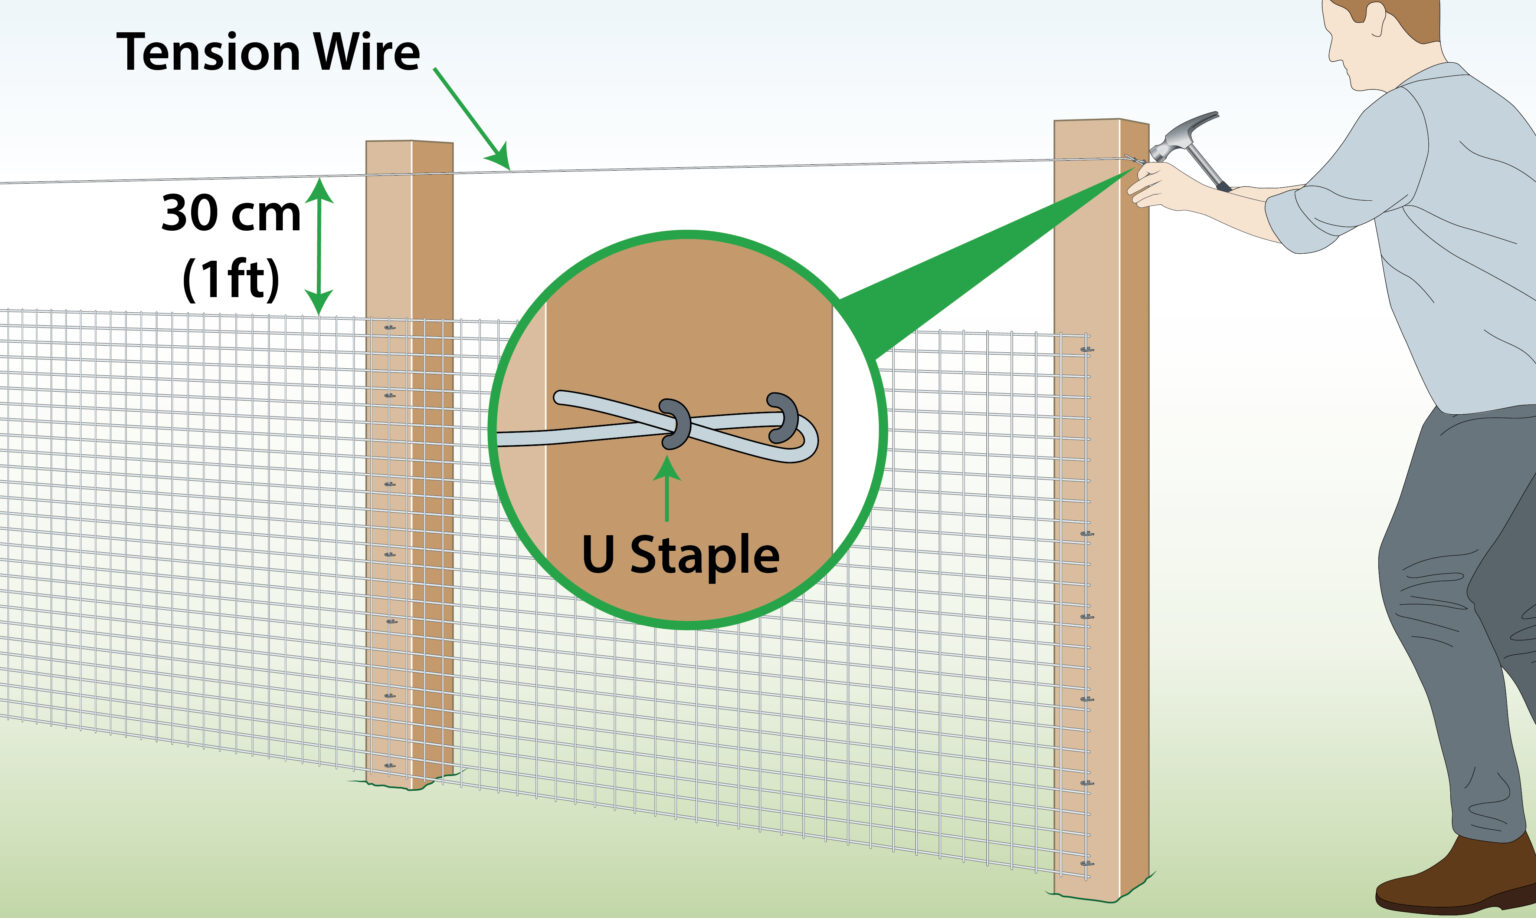
| Increase height | Add extra height using tension wire (view instructions) | ||
| Climbing: prevents climbing over? | |||
| Very small breeds | |||
| Small breeds | |||
| Medium breeds | |||
| Large breeds | |||
| Very Large breeds | |||
| Smallest hole size available | 13mm x 13mm | 50mm x 50mm | 13mm x 13mm |
| Strength: prevents pushing over or chewing through wire? | |||
| Very small breeds | |||
| Small breeds | |||
| Medium breeds | |||
| Large breeds | |||
| Very large breeds | |||
| Applications | |||
| Suited to indoors | |||
| Suited to outdoors |
– the edges of the mesh may scratch indoor surfaces
|
||
| Run or exercise area | |||
| Partition off driveways | |||
| Portable: good for caravan, camping, etc | |||
| Kennels and enclosures | |||
| General | |||
| Delivered as | Roll | Roll | Panel |
| Made in | EU | EU | EU |
| Conforms to British Manufacturing Standards | BS EN 10218-2:2012 & BS EN 10244-2:2009 | BS EN 1461:2009 | |
| Construction | |||
| Maximum height availability | 2.7m (8.8ft) | 2.4m (7.8ft) | 1.8m (6ft) |
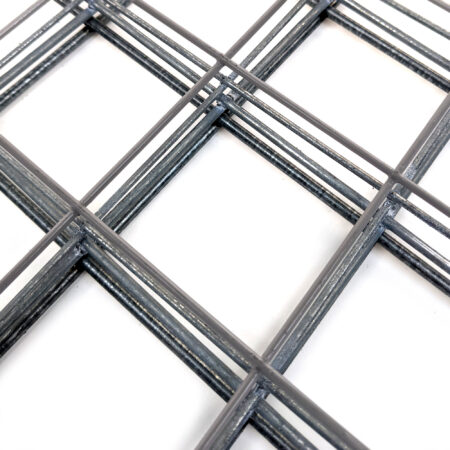
| Mesh material | Galvanised steel | Galvanised steel or PVC coated | Galvanised steel or PVC coated |
| Mesh construction | Welded | Twisted | Welded |
| Hole size available | 13mm x 13mm+ | 50mm x 50mm | 25mm x 25mm+ |
| Wire diameter (gauge) | 2mm+ | 2mm+ | 2mm+ |
| Smooth edge | – prevents canines from injuring themselves on sharp edges | ||
| Length | Can be joined together to create any length required | ||
| Colour | Grey | Grey or green | Grey or green |
| Strength & environment | |||
| Corrosion resistant | |||
| Abrasion resistance | Very high | ||
| Suited to Environments | C2-C4 | C2-C4 | C2-C4 |
| Installation & maintenance | |||
| Speed of installation | Quick | Long | Quick |
| Experience required to install | Medium | High | Low |
| Can be installed with wooden posts? | |||
| Can be installed with metal posts? | |||
| Can stand alone without posts? | |||
| Join together using | U Staples | Radisseurs & tension wire | U Staples |
| Cut using | Wire / bolt cutters | Unloop chainlink | Wire / bolt cutters |
| Requires protective glove for handling | |||
| Installation instructions | |||
| Appearance | |||
| General look | Metal mesh | Green or grey diamond mesh | Metal mesh |
| Invisible from a distance | |||
| Can be disguised | Yes, can easily be covered by climbing plants up the mesh or using garden screening | ||
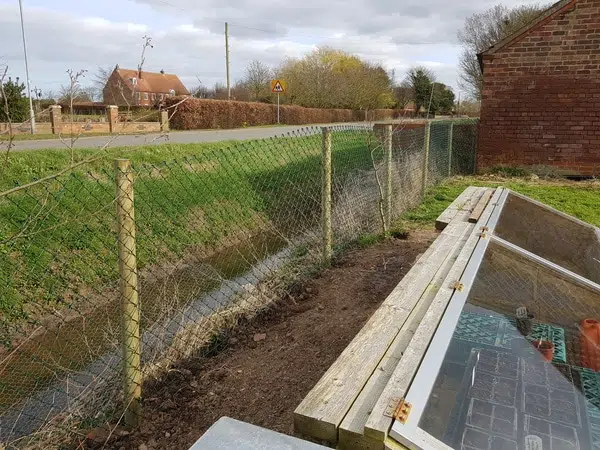
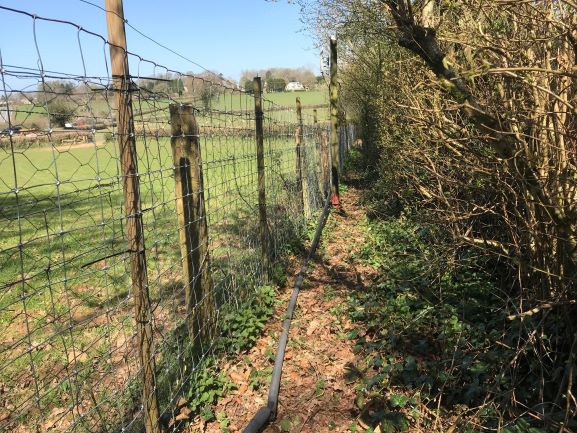
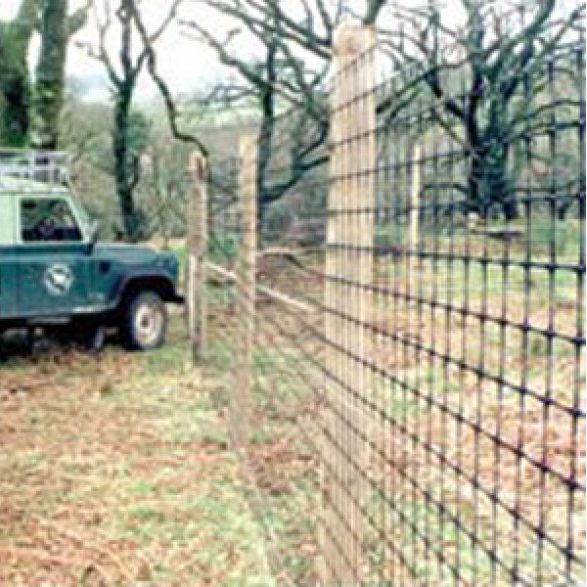
| Example installation |
View Image |
View Image |
View Image |
| Also stops? | |||
| Rabbits | |||
| Foxes | |||
| Cats | |||
| Deer | |||
| Pigs, sheep, etc | |||
| View all animal and pet fencing | |||
| Good for obedient and well-trained dogs that do not try to dig, chew or jump over boundaries and/or pets that are supervised at all times. Most economical. | ||
| Garden Border Fence | PVC Chicken Wire | |
| View Products | View Products | |
| Best suited to: | ||
| High jumping breeds | ||
| Powerful breeds | ||
| Good climbers | ||
| Diggers |
– see digging prevention products (download installation guide)
|
|
| Very small breeds | ||
| Small breeds | ||
| Medium breeds | ||
| Large breeds | ||
| Very large breeds | ||
| Please note | This fencing offers an economical way to deter dogs from entering or escaping. If your pet is determined to escape artist see dog proof fencing | |
| Financial | ||
| Cost | £ | ££ |
| Discounts for multi purchase |
– viewable on product pages & automatically calculated for you during checkout
|
|
| Minimum qty available to purchase | 25m | 6m |
| Jumping: prevents dogs jumping over? | ||
| Very small breeds | ||
| Small breeds | ||
| Medium breeds | ||
| Large breeds | ||
| Very large breeds | ||
| Max height availability | 1.8m (6ft) | 1m (3.5ft) |
| Increasing the height | Add extra height using tension wire (download instructions) | |
| Climbing: prevents climbing over? | ||
| Very small breeds | ||
| Small breeds | ||
| Medium breeds | ||
| Large breeds | ||
| Very large breeds | ||
| Smallest hole size available | 100mm x 75mm | 13mm x 13mm |
| Strength: prevents pushing over or chewing through wire? | ||
| Very small breeds | ||
| Small breeds | ||
| Medium breeds | ||
| Large breeds | ||
| Very large breeds | ||
| Dog size does not always translate into chewing or ability. Please consider your canine’s strength before purchasing. If unsure, select mesh that has 2mm+ wire diameter | ||
| Applications | ||
| Suited to indoors |
– PVC coating provides a smooth finish so they wont scratch indoor surfaces
|
|
| Suited to outdoors | ||
| Run or exercise area | ||
| Partition off driveways / areas | ||
| Portable: good for caravan, camping, etc |
– see Freestanding Dog Barrier
|
|
| Kennels & enclosures | ||
| General | ||
| Delivered as | Roll | Roll |
| Made in | EU | Far East |
| Conforms to British Manufacturing Standards | BS EN standards | |
| Construction | ||
| Maximum height availability | 1.8m (6ft) | 1m (3.5ft) |
| Mesh material | PVC coated steel | PVC coated steel |
| Mesh construction | Welded | Twisted |
| Mesh hole size | 100cm x 75mm | 13mm x 13mm+ |
| Wire diameter (gauge) | 2.2mm inc PVC coating | 1mm – 1.6mm |
| Length | Can be joined together to create any length required | |
| Colour | Green | Green |
| Strength & Environment | ||
| Corrosion resistant | ||
| Abrasion resistance | Medium | |
| Installation & Maintenance | ||
| Speed of installation | Quick | Quick |
| Experience required to install | Easy | Easy |
| Can be installed with wooden posts? | ||
| Can be installed with metal posts? | ||
| Can stand alone without posts? | ||
| Join together using | U staples | U staples |
| Cut using | Wire Clippers | Wire Clippers |
| Ease of repair | Difficult | Easy |
| Installation instructions | Download | Download |
| Appearance | ||
| General look | Green garden mesh | Green garden mesh |
| Invisible from a distance | ||
| Can be disguised | Yes, can easily be covered by climbing plants up the mesh or using garden screening | |
| Also stops? | ||
| Rabbits |
– see rabbit fencing |
|
| Foxes |
– see fox proof fencing |
|
| Cats | ||
| Deer | ||
| Pigs, sheep, etc | ||
| View all animal and pet fencing | ||
Size chart
| Size | Length/Weight | Breed |
 |
Extra Small 61cm (L) x 16cm (W) 0.4kg – 4.5kg |
Yorkshire Terrier, Chihuahua, Pomeranian, etc |
 |
Small 76cm (L) x 54cm (W) 4.9kg-11kg |
Dachshund, Pug, Boston Terrier, French BD, etc |
 |
Medium 91cm (L) x 61cm (W) 11kg – 18kg |
Beagle, Scottish Terrier, Welsh Corgis, etc |
 |
Large 107cm (L) x 71cm (W) 18.5kg – 32kg |
Boxer, Bassett Hounds, Bull Terrier, Collie, etc |
 |
Extra Large 122cm (L) x 76cm (W) 23kg – 41kg |
Bloodhound, Labrador & Golden Retriever, German Shepherd, etc |
Attachments
| Attach to: | How to: |
| Wood/ Wooden Posts(Staples) |
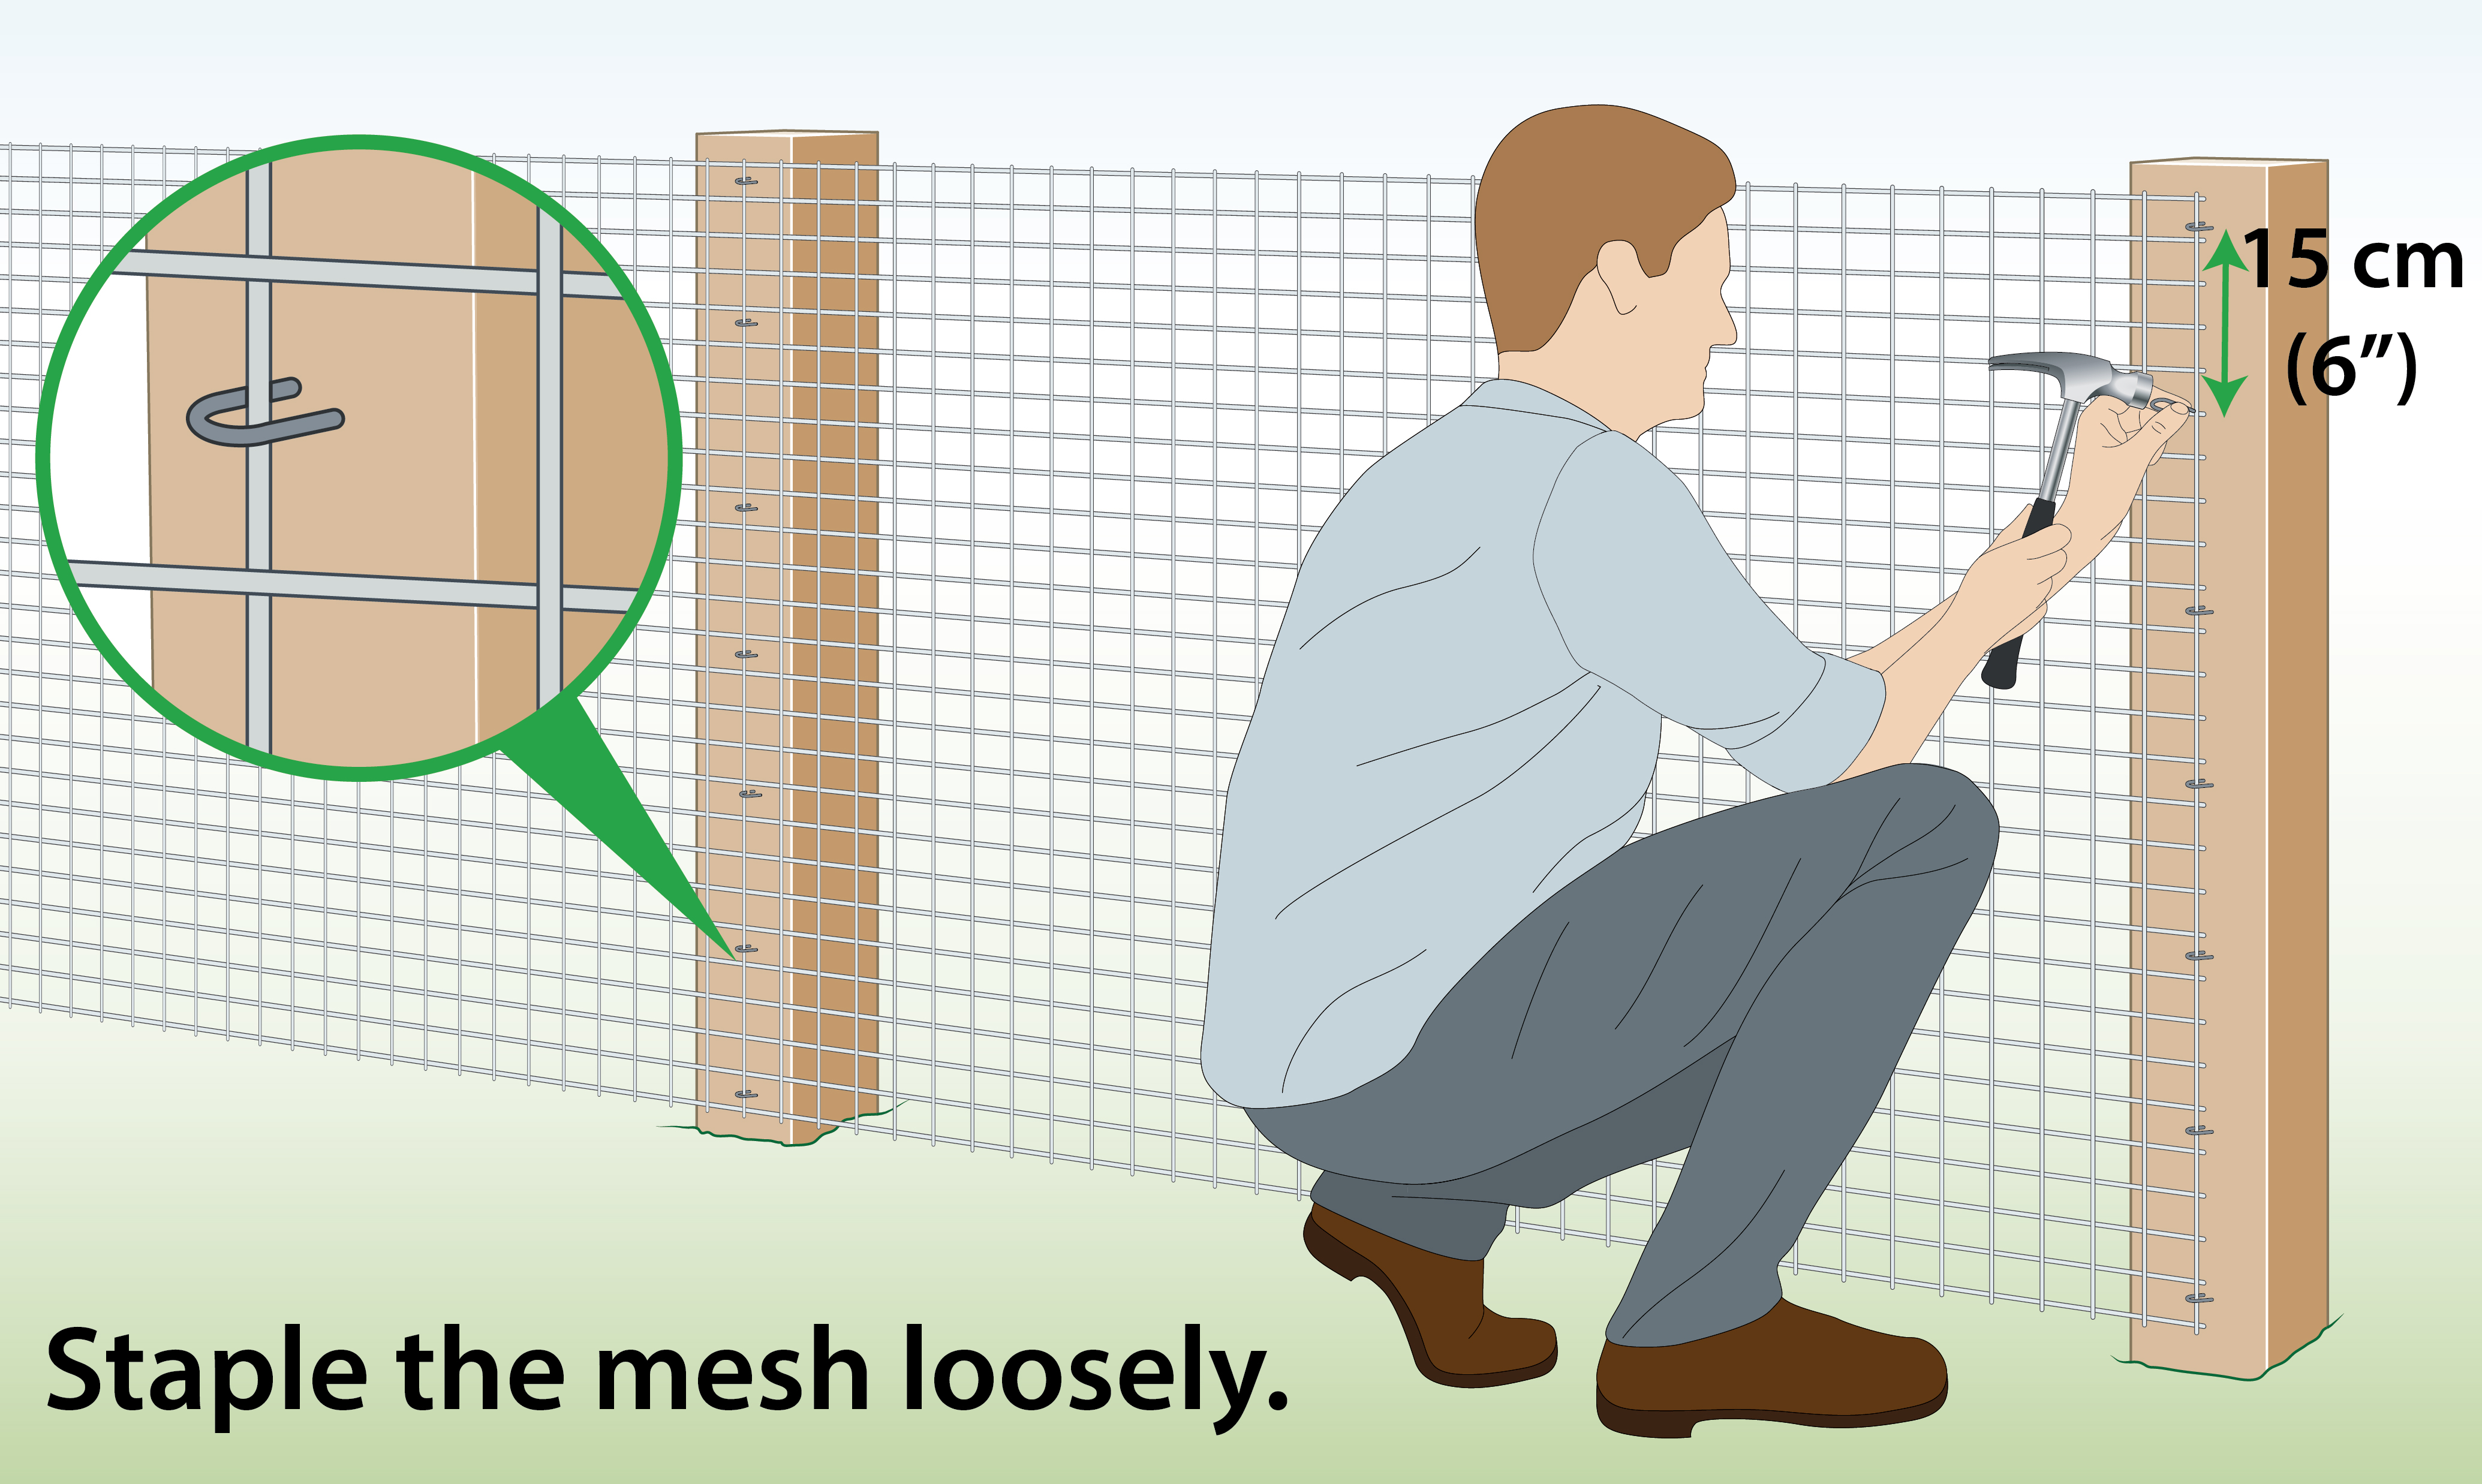 |
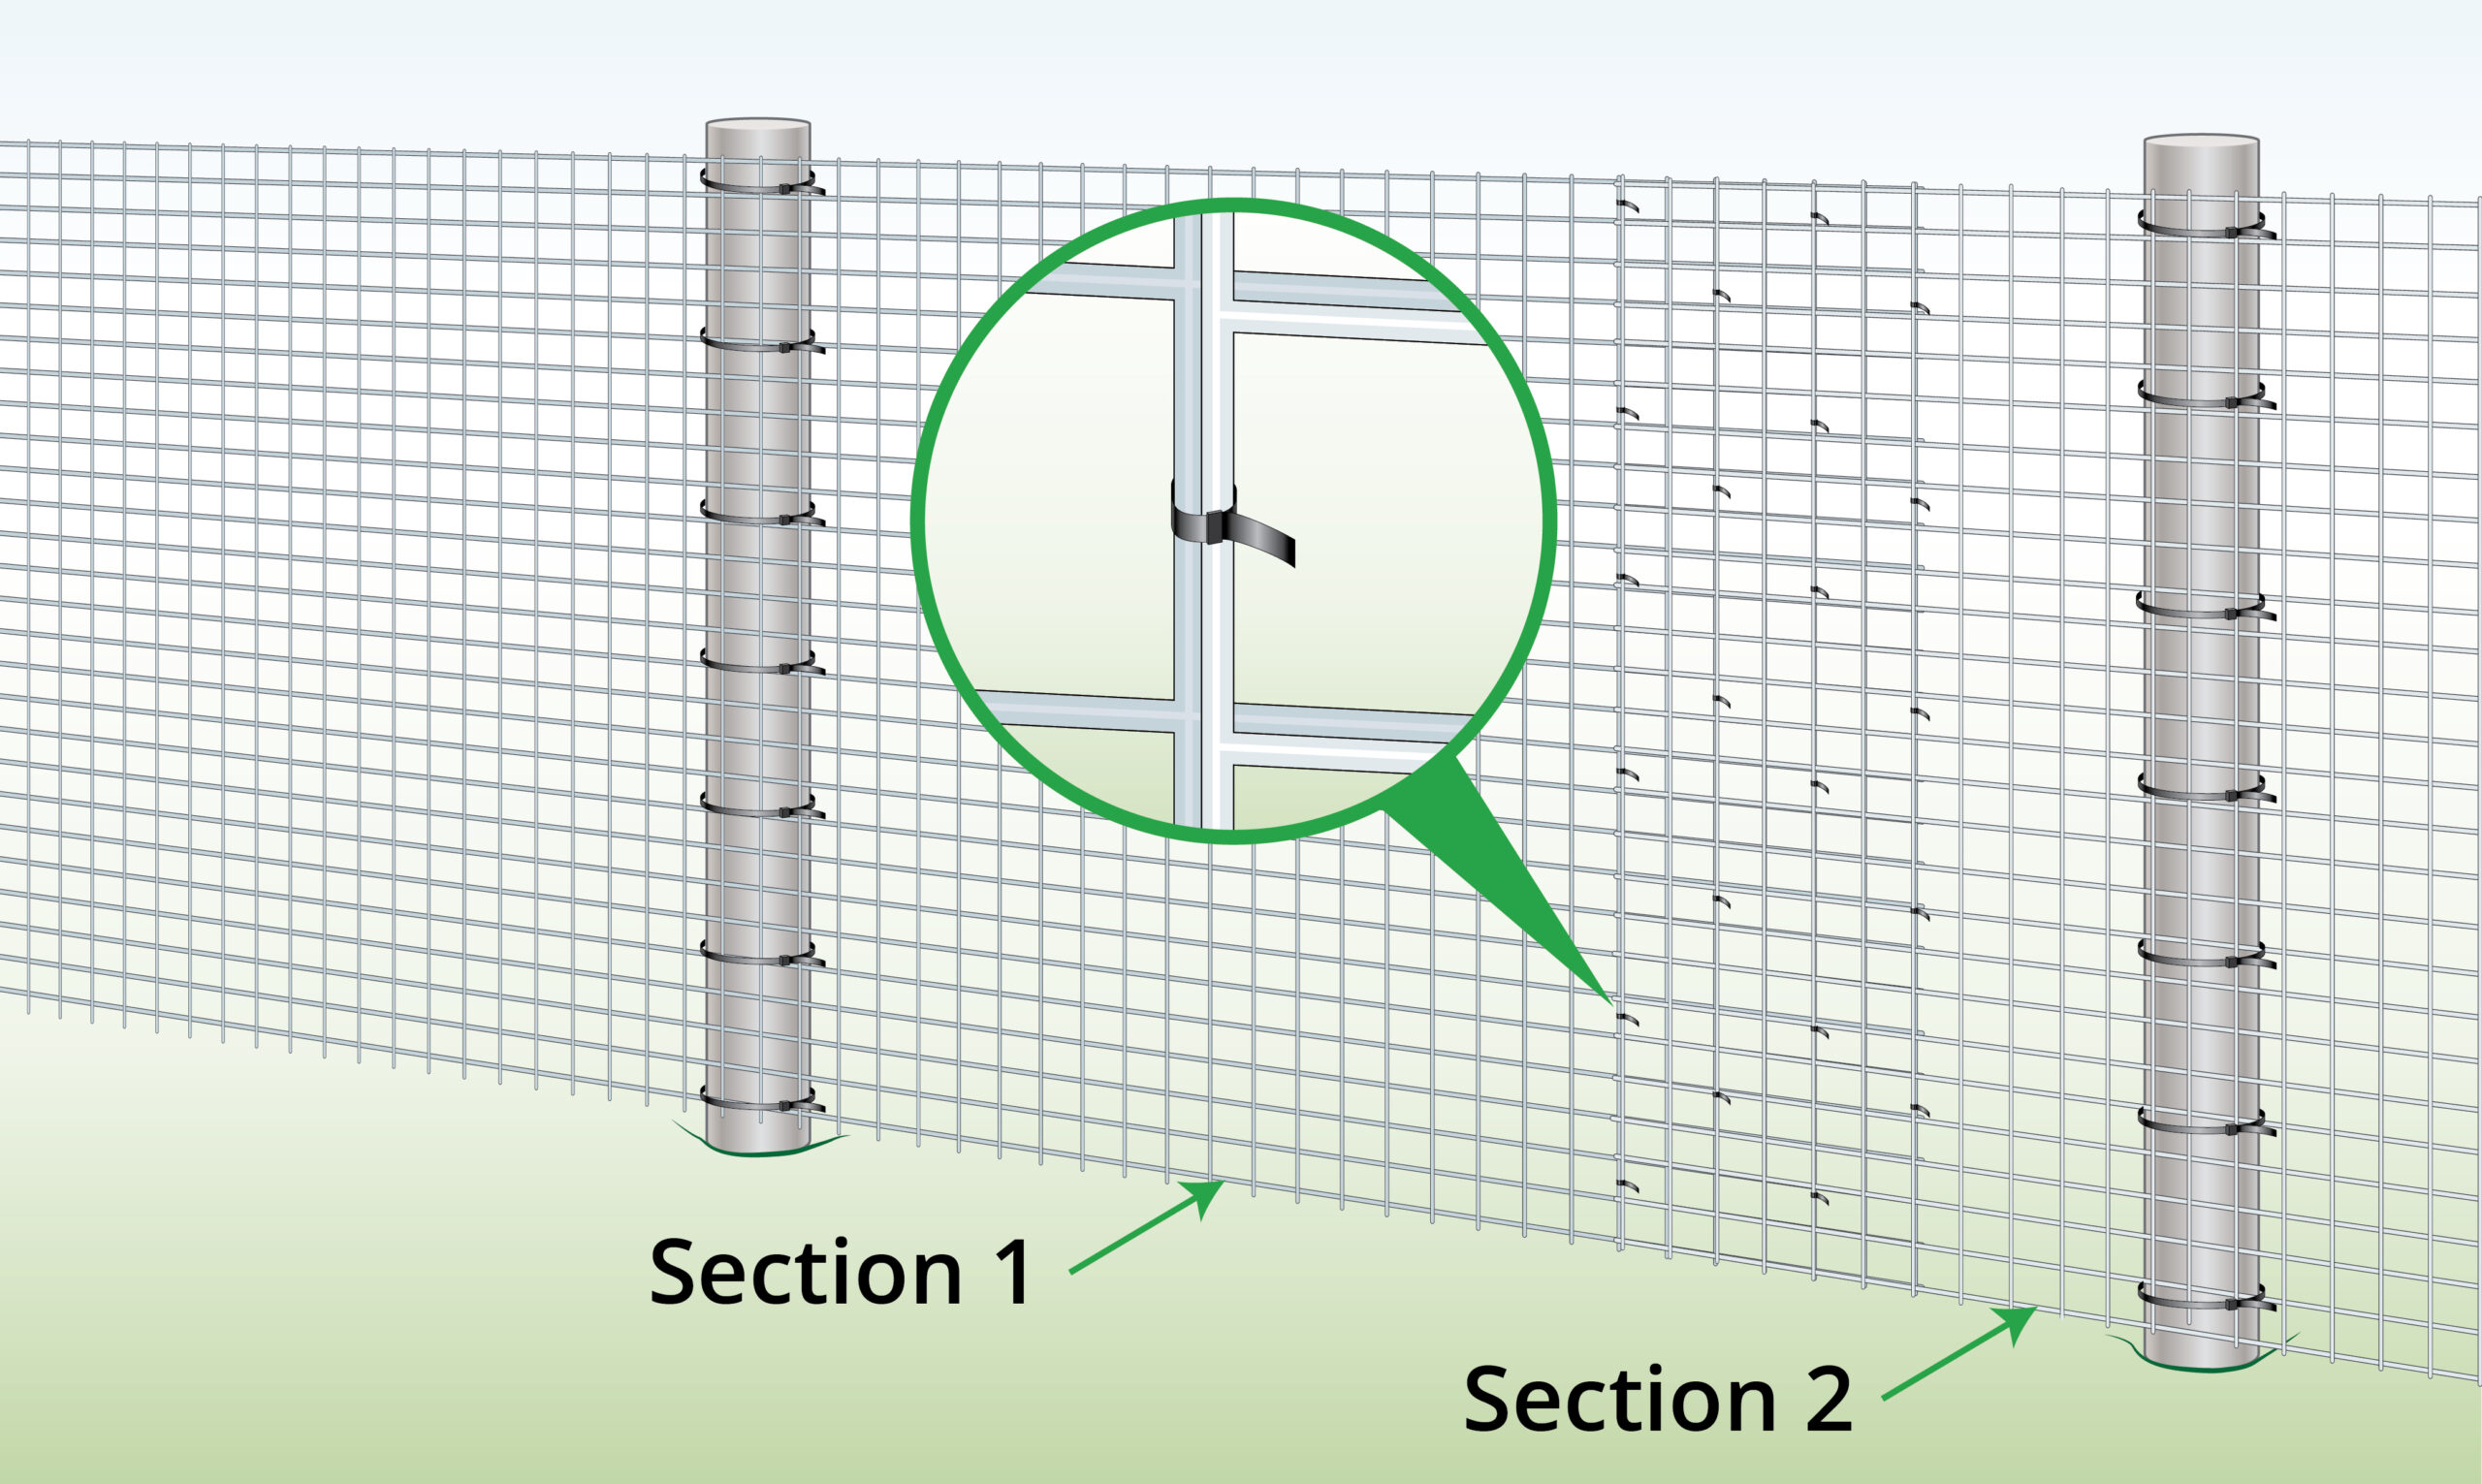
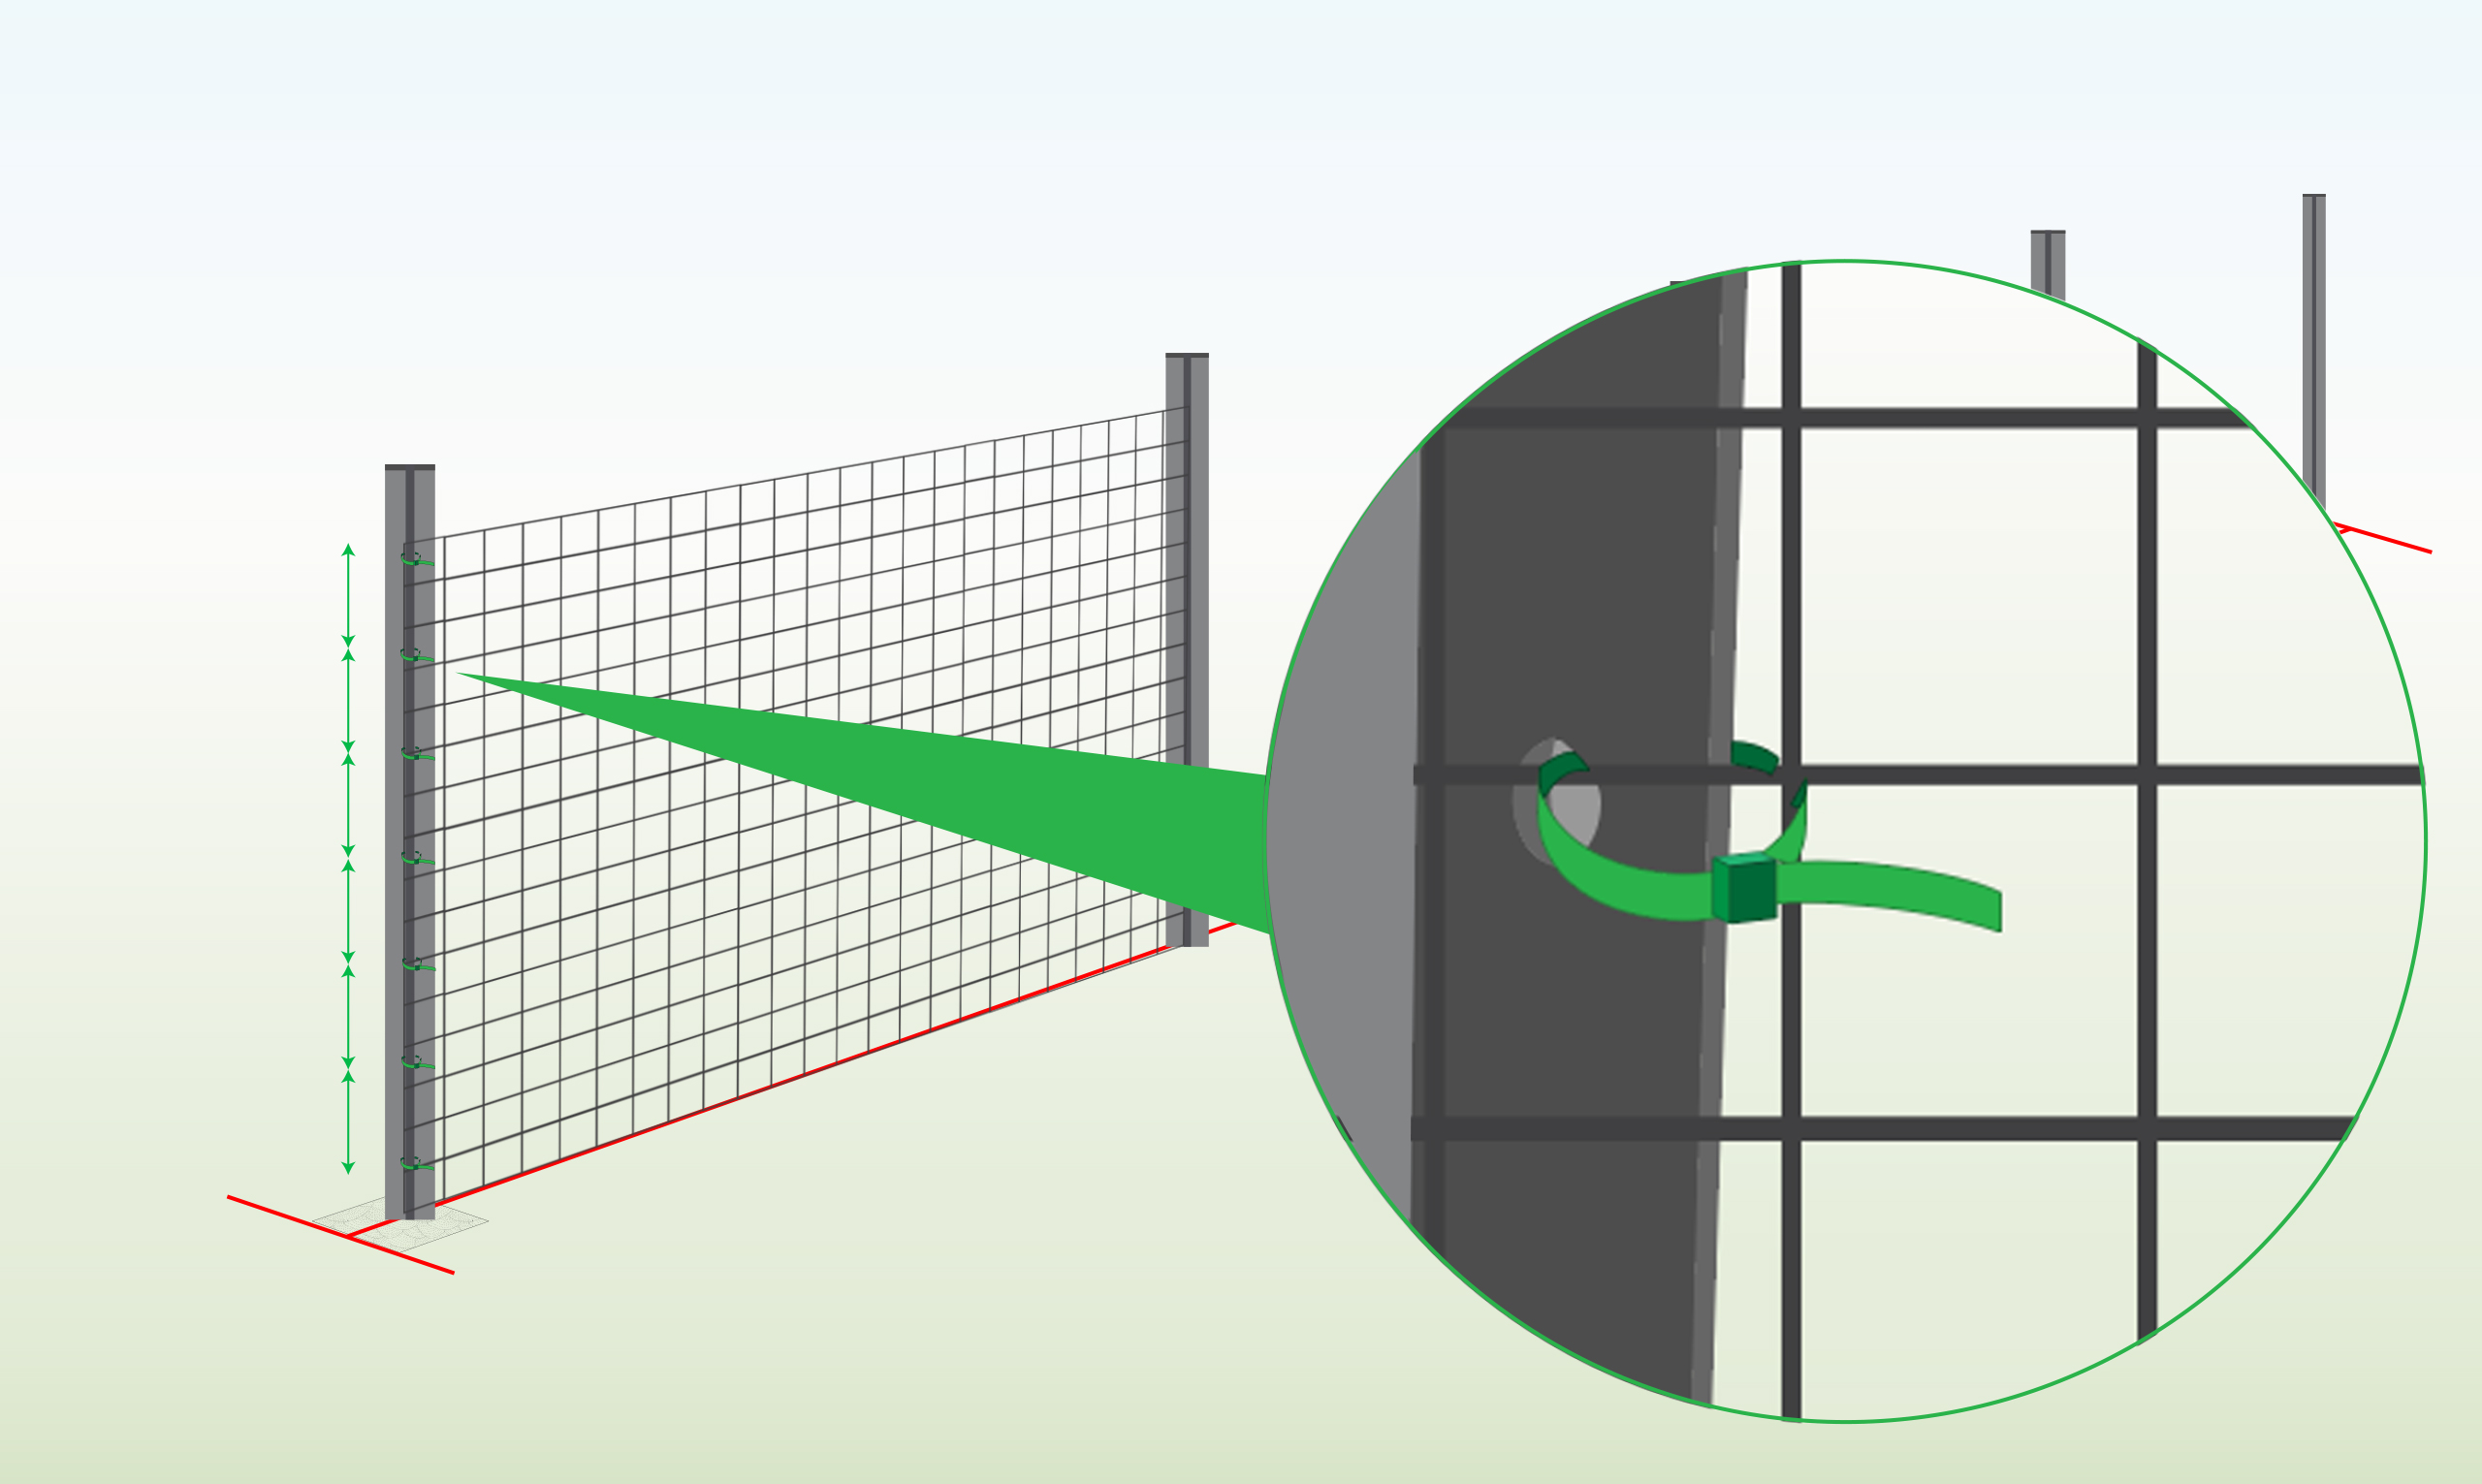
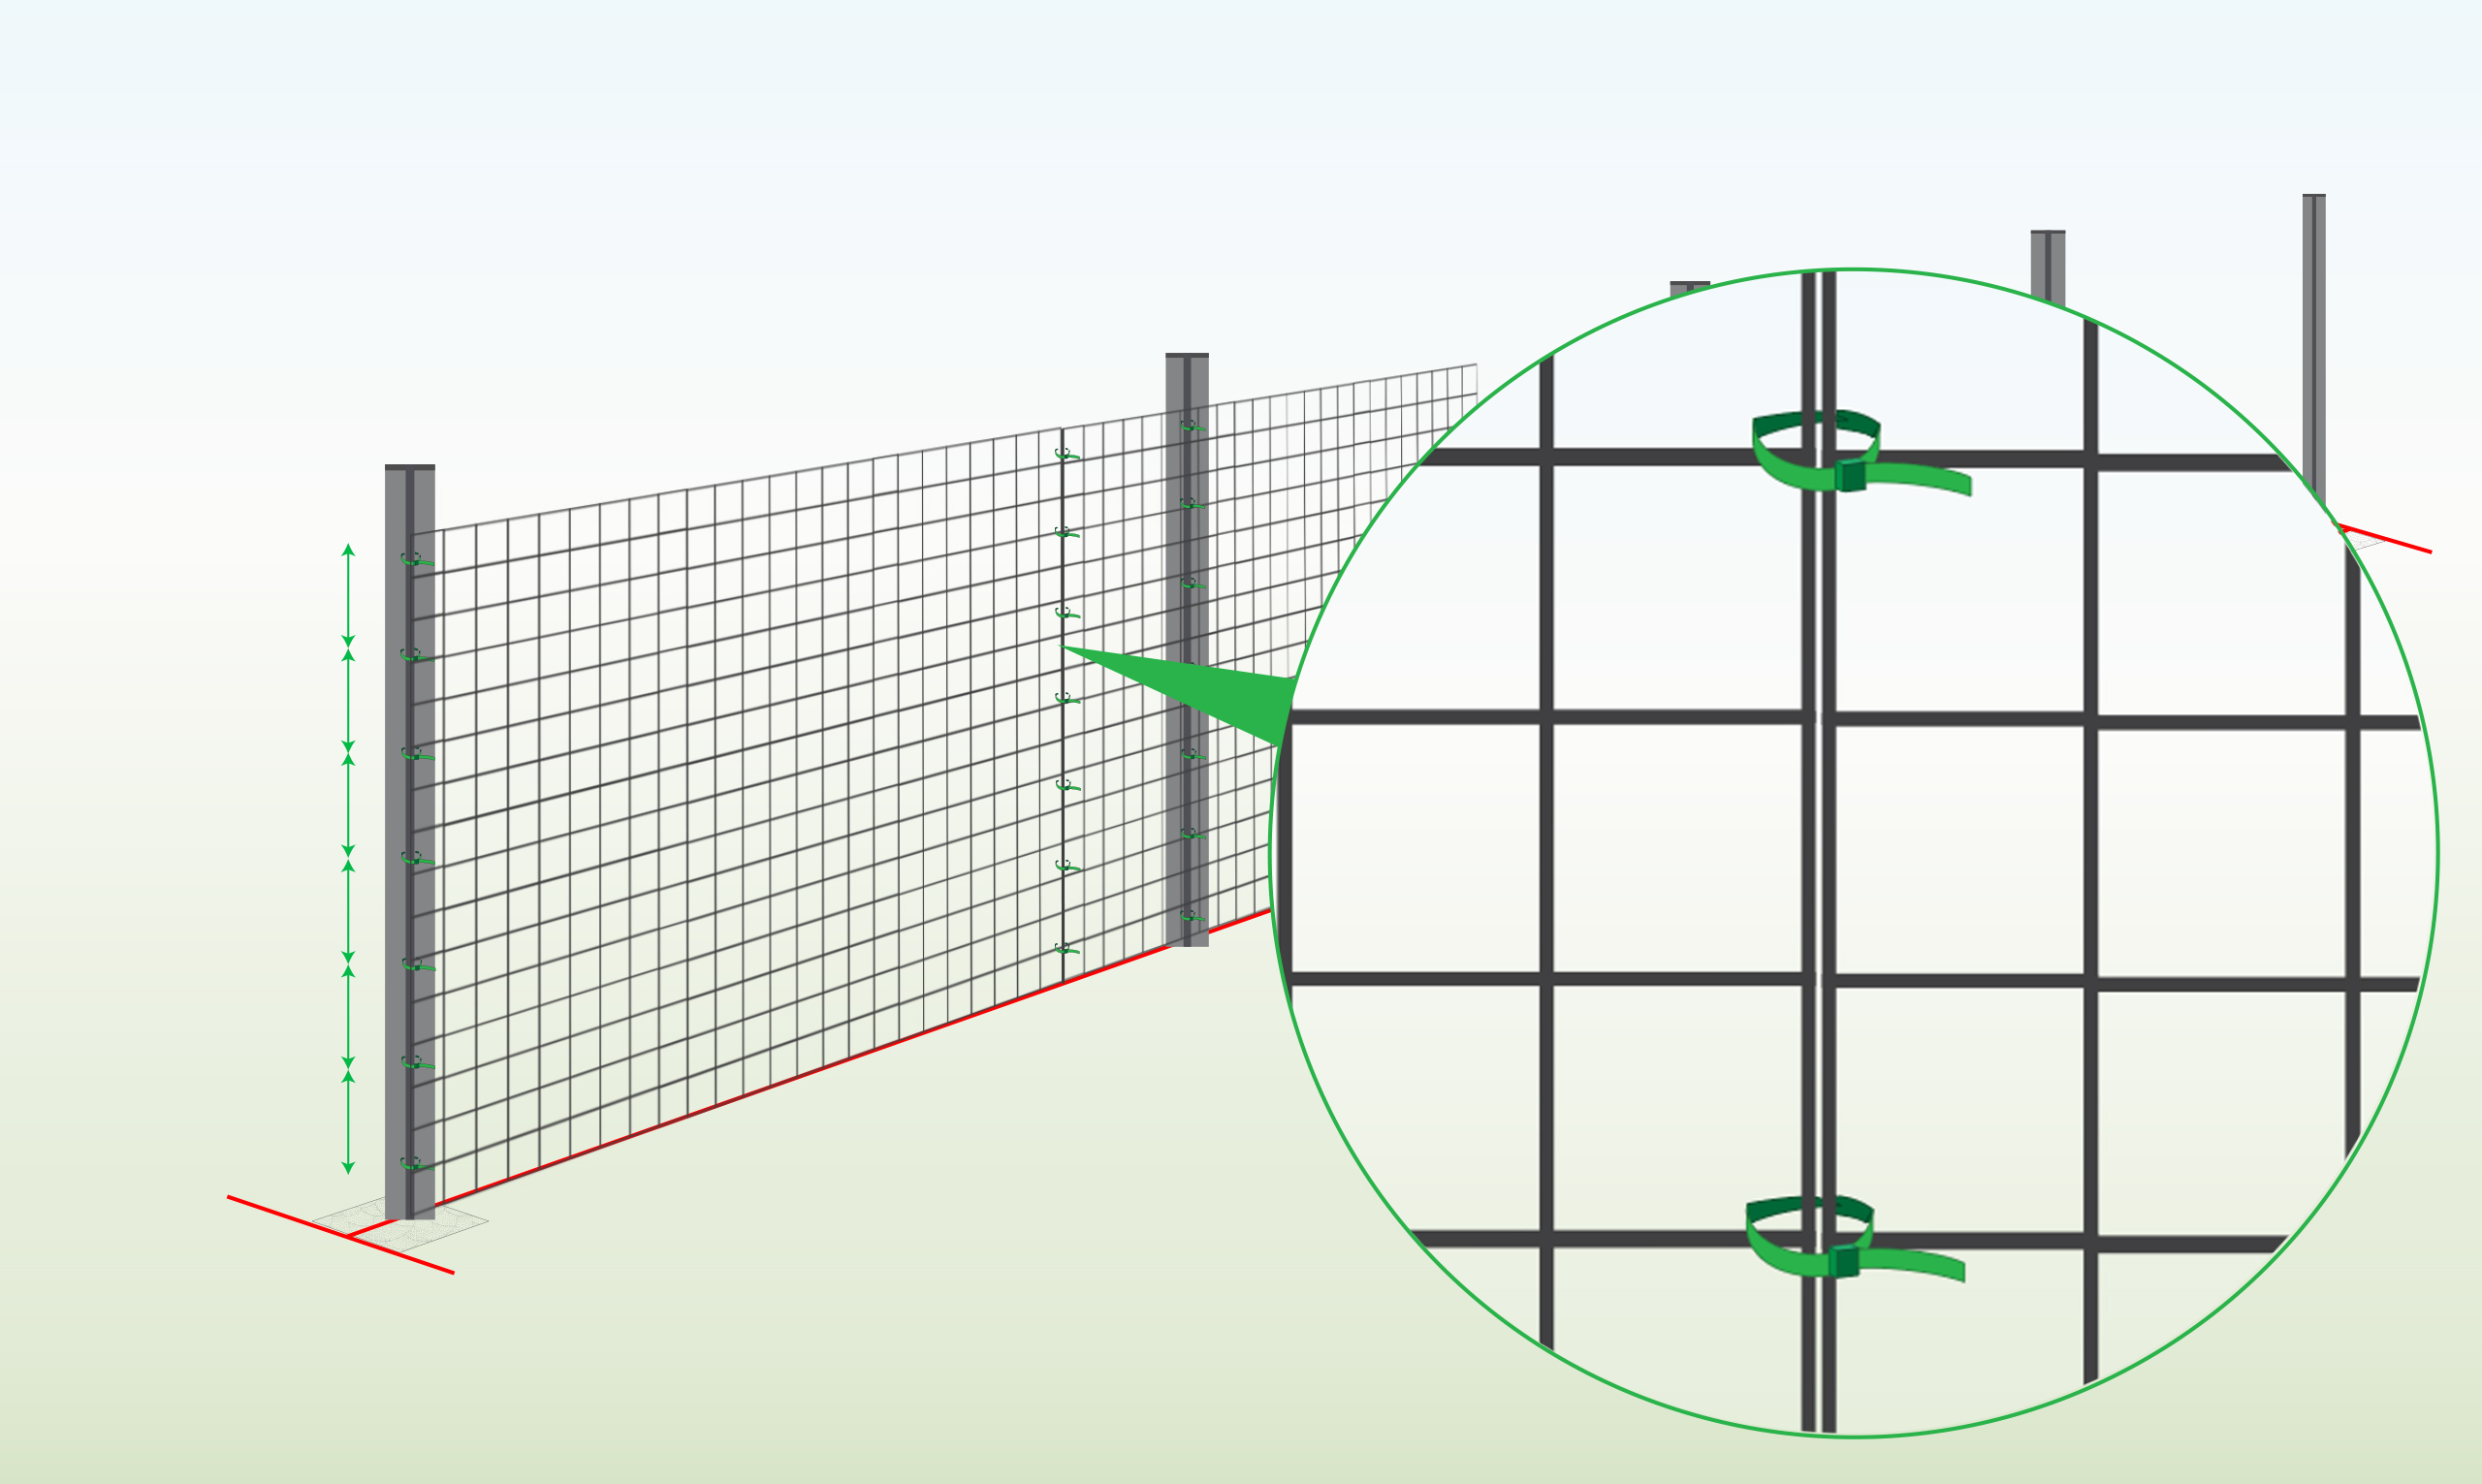
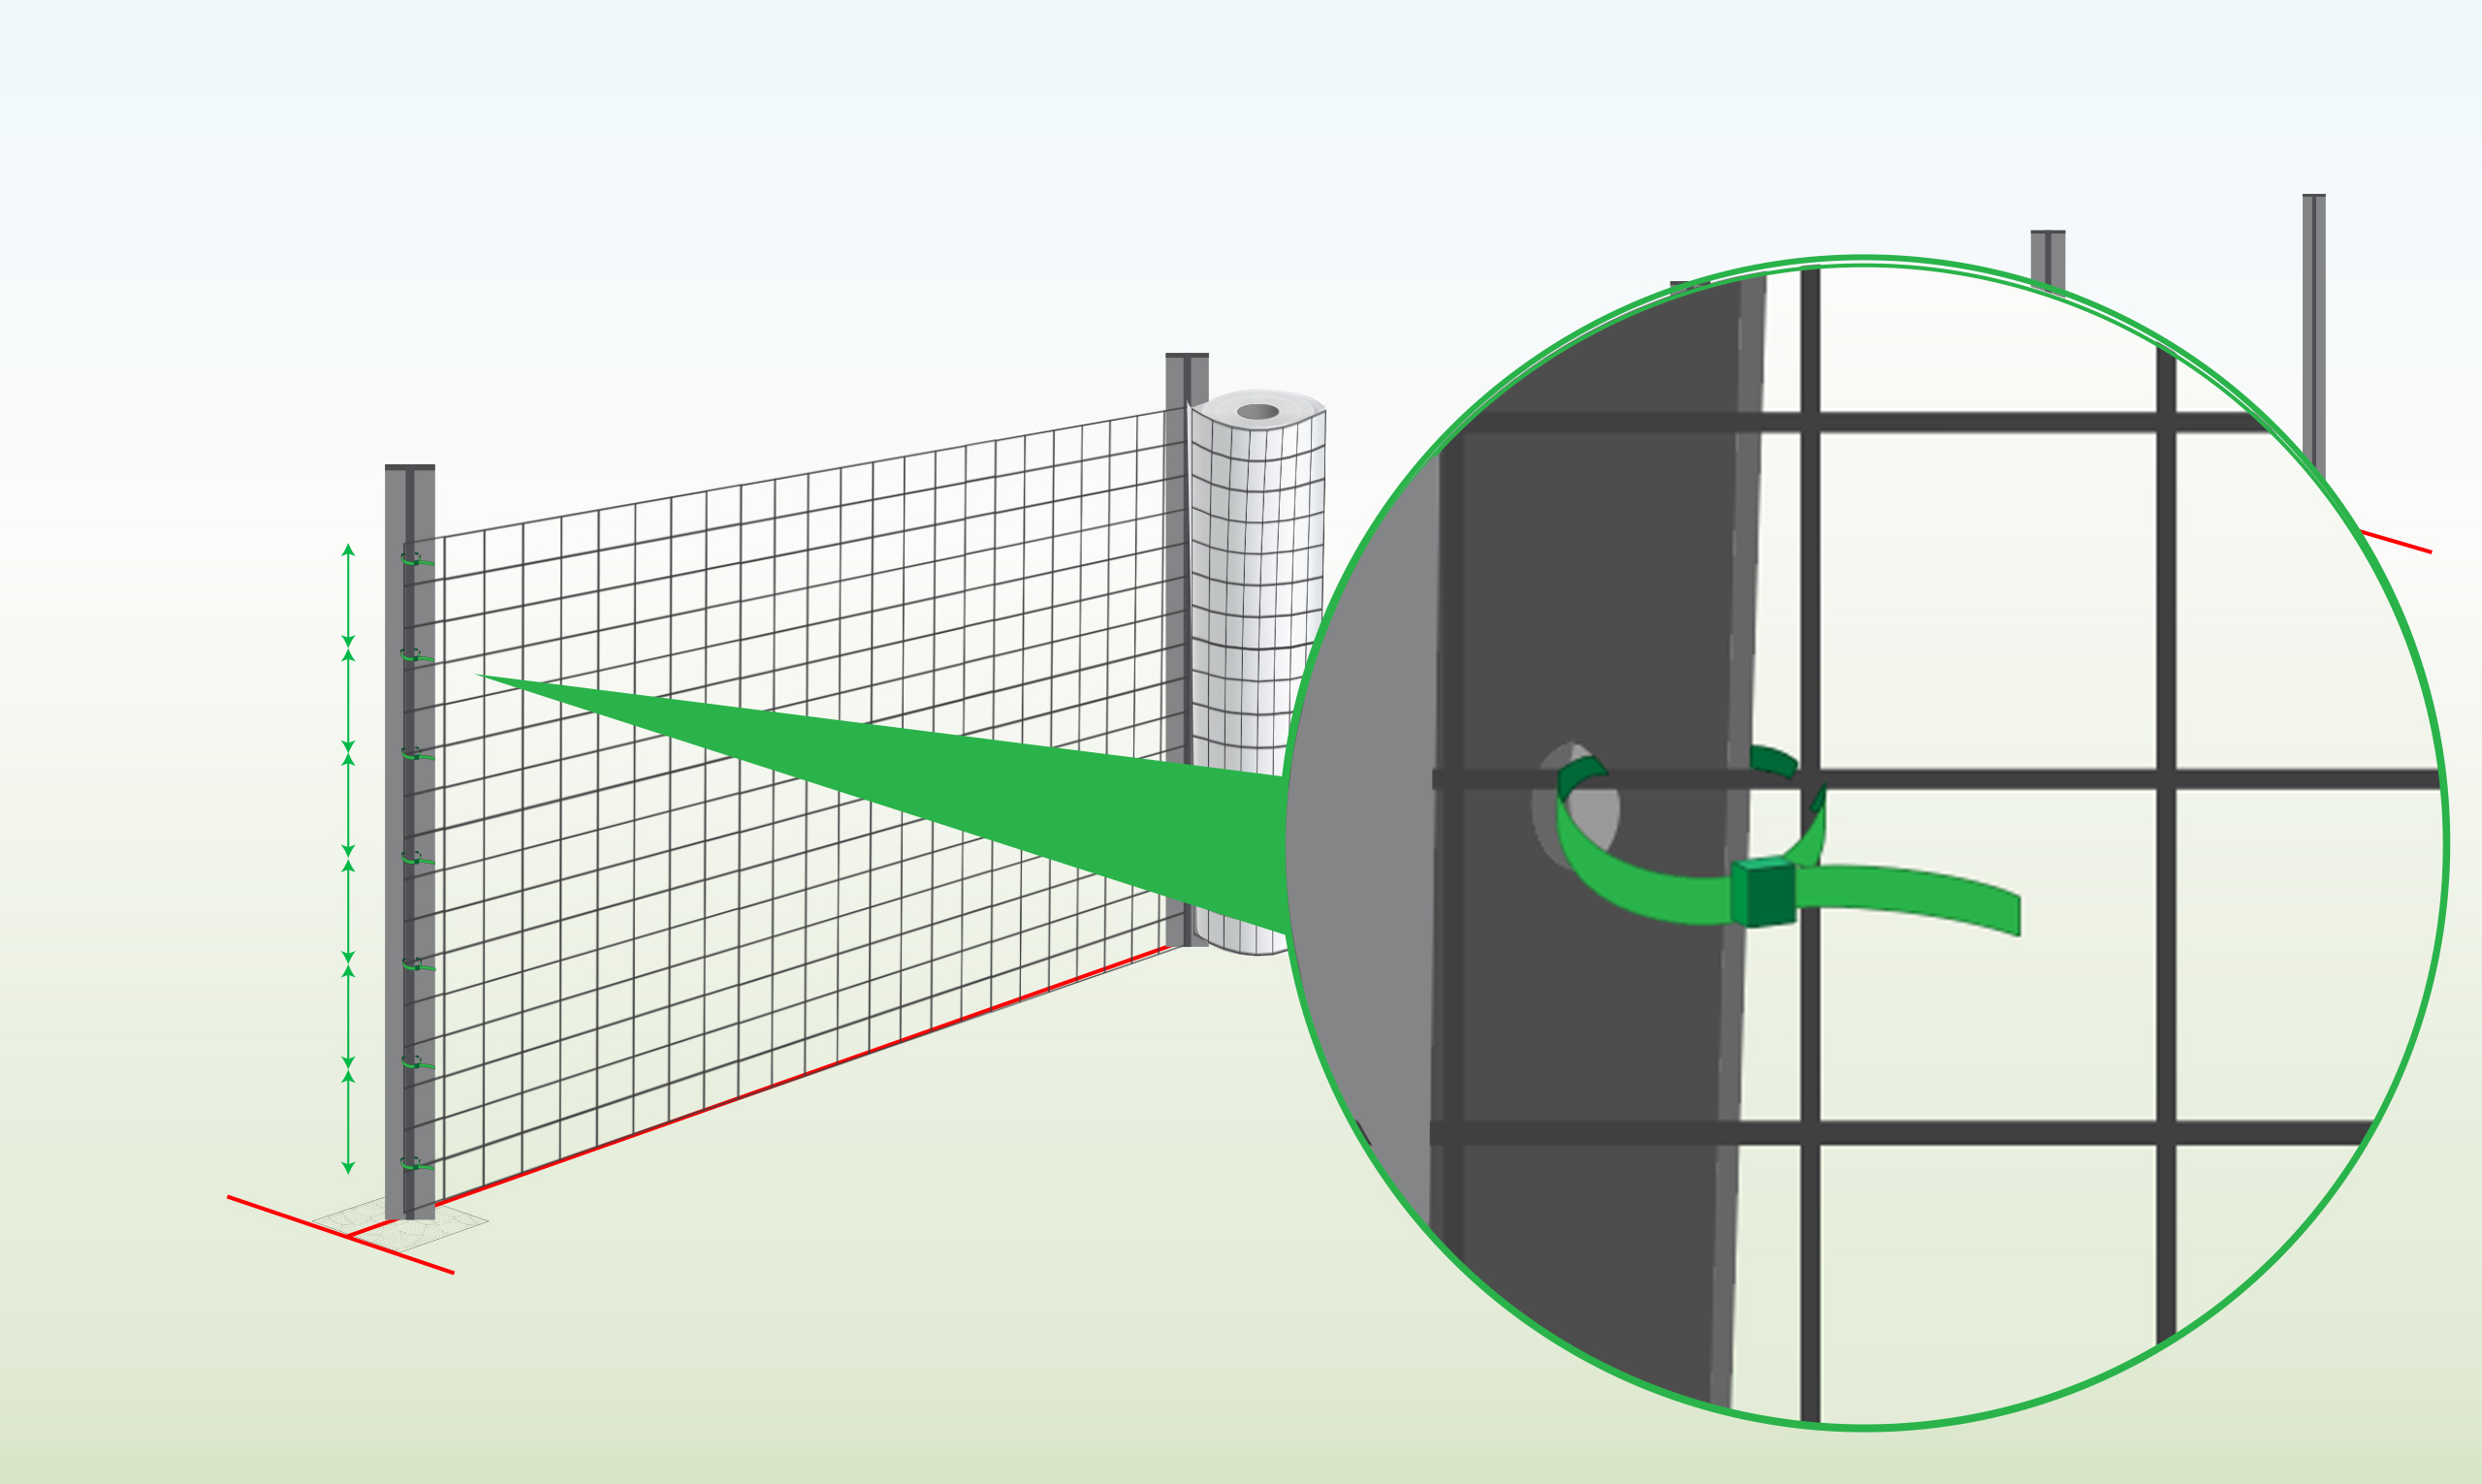
| Metal/ Metal Posts(Cable ties) |
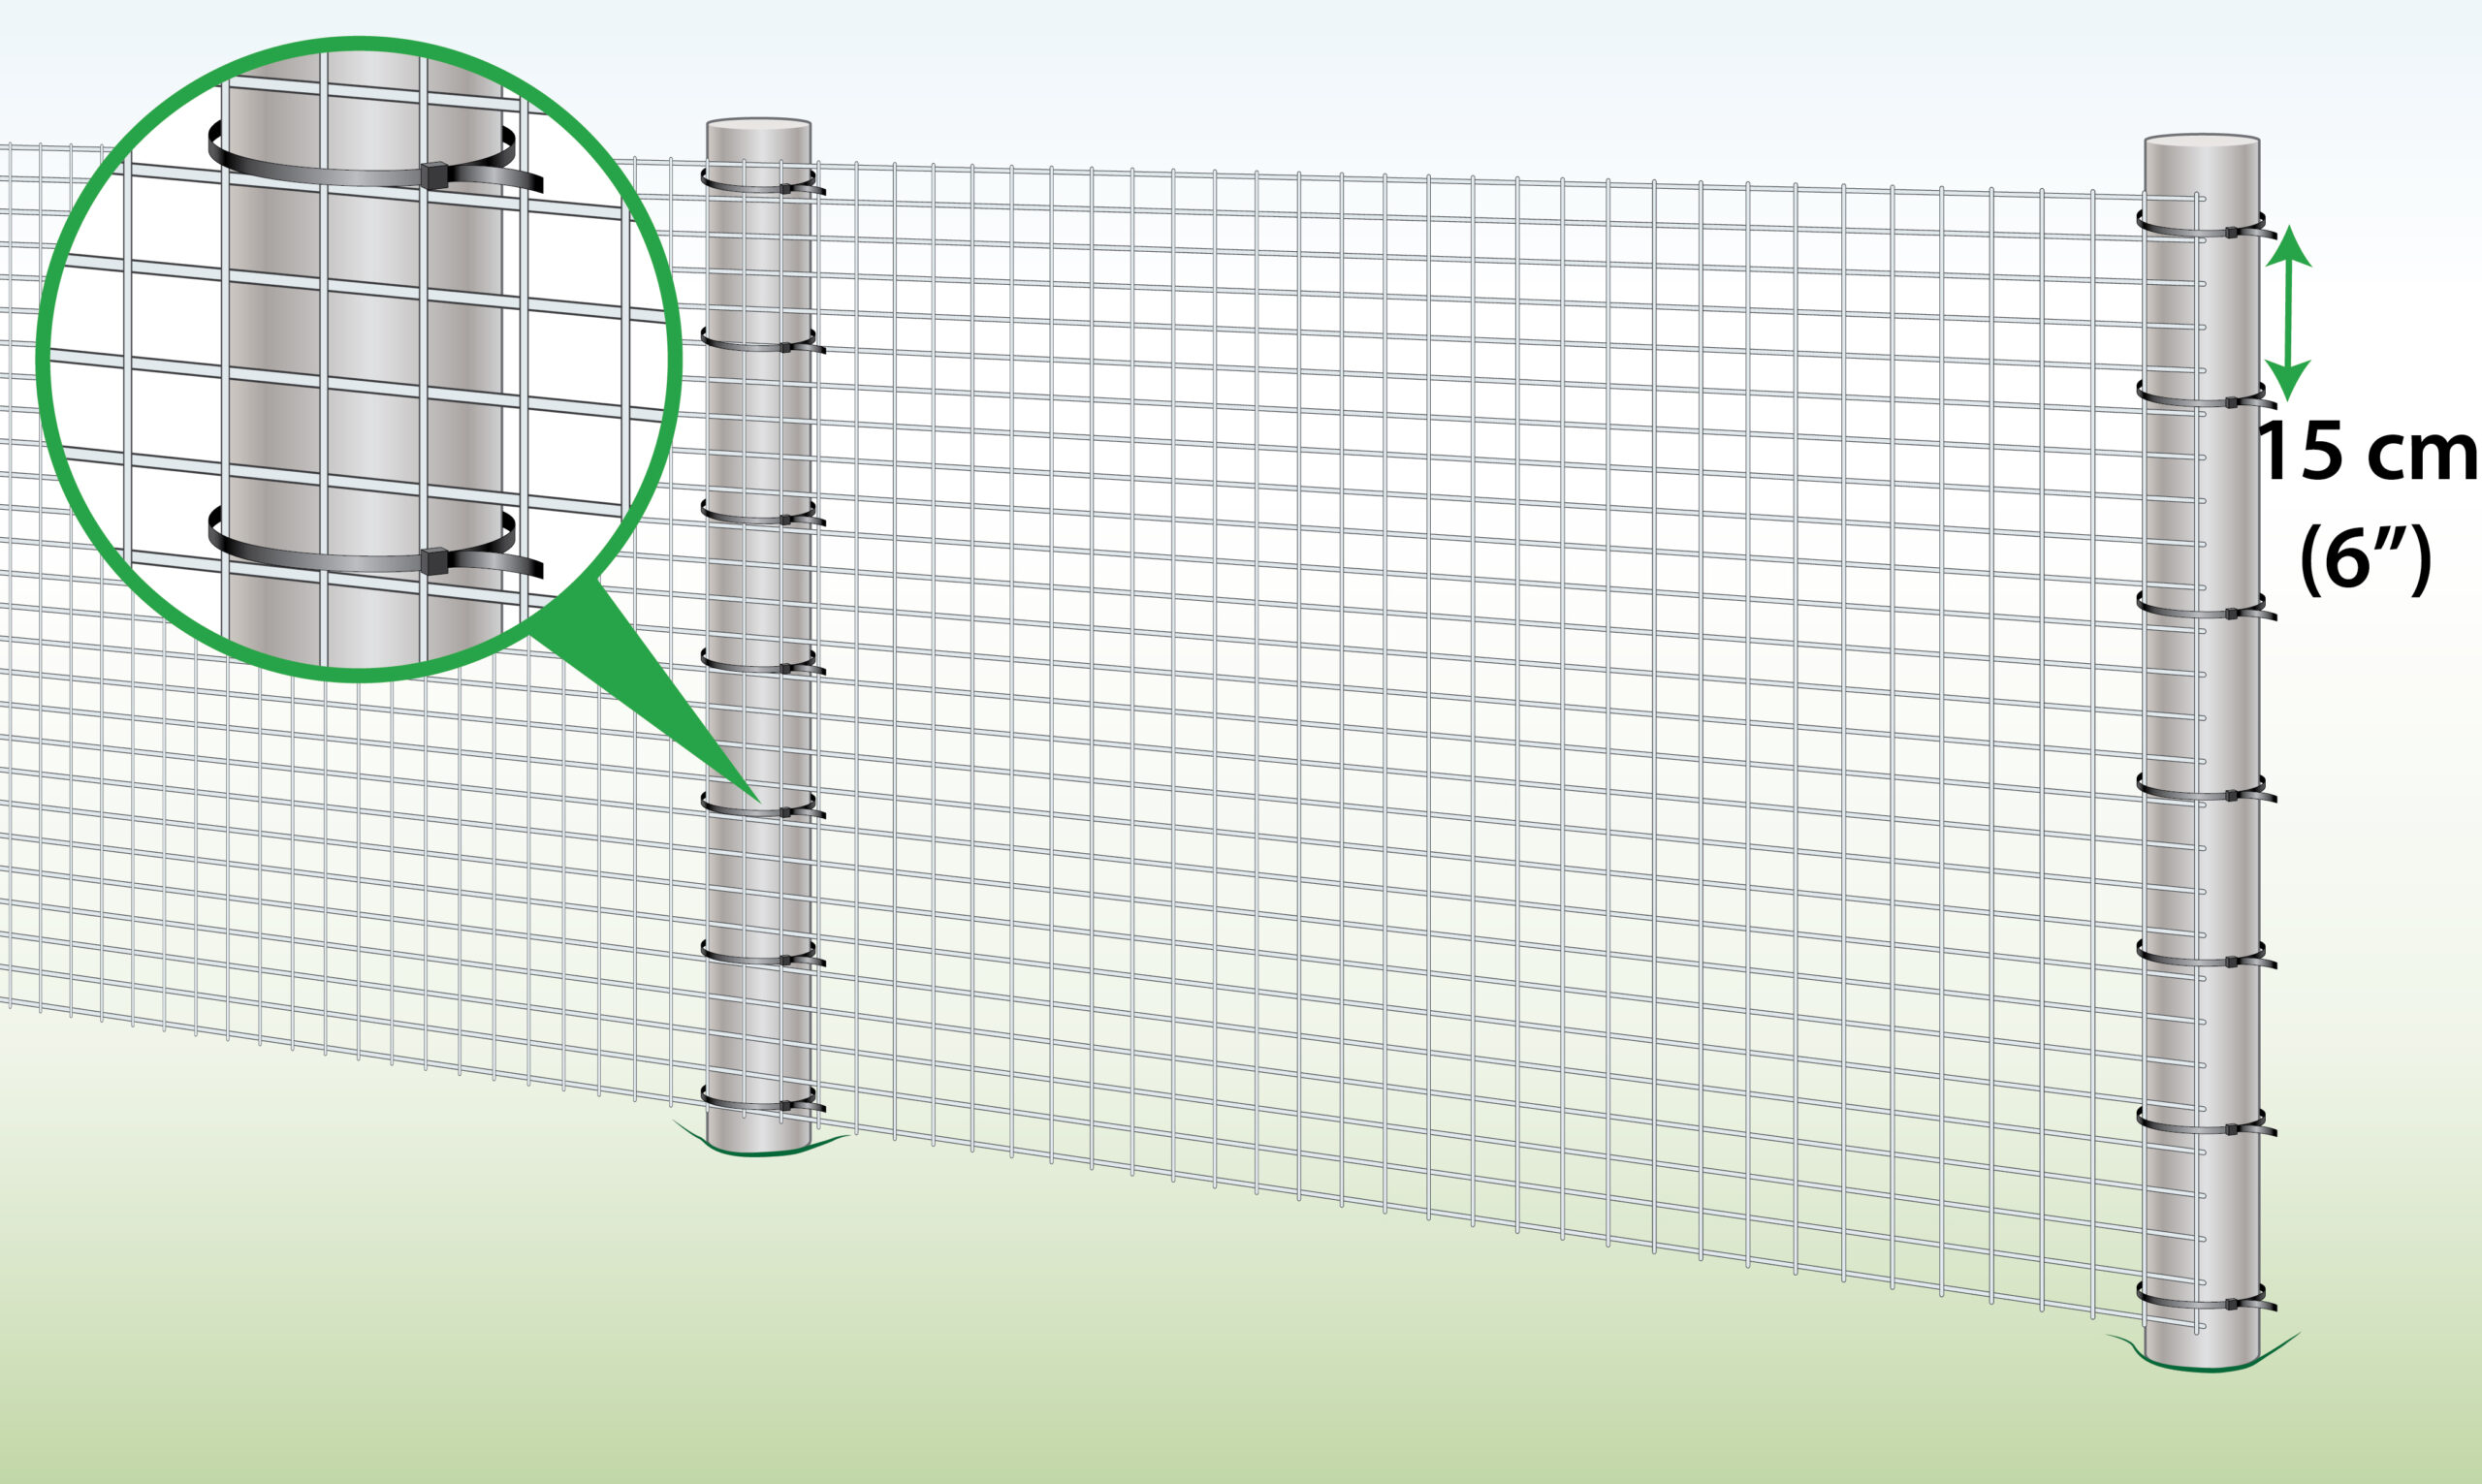 |
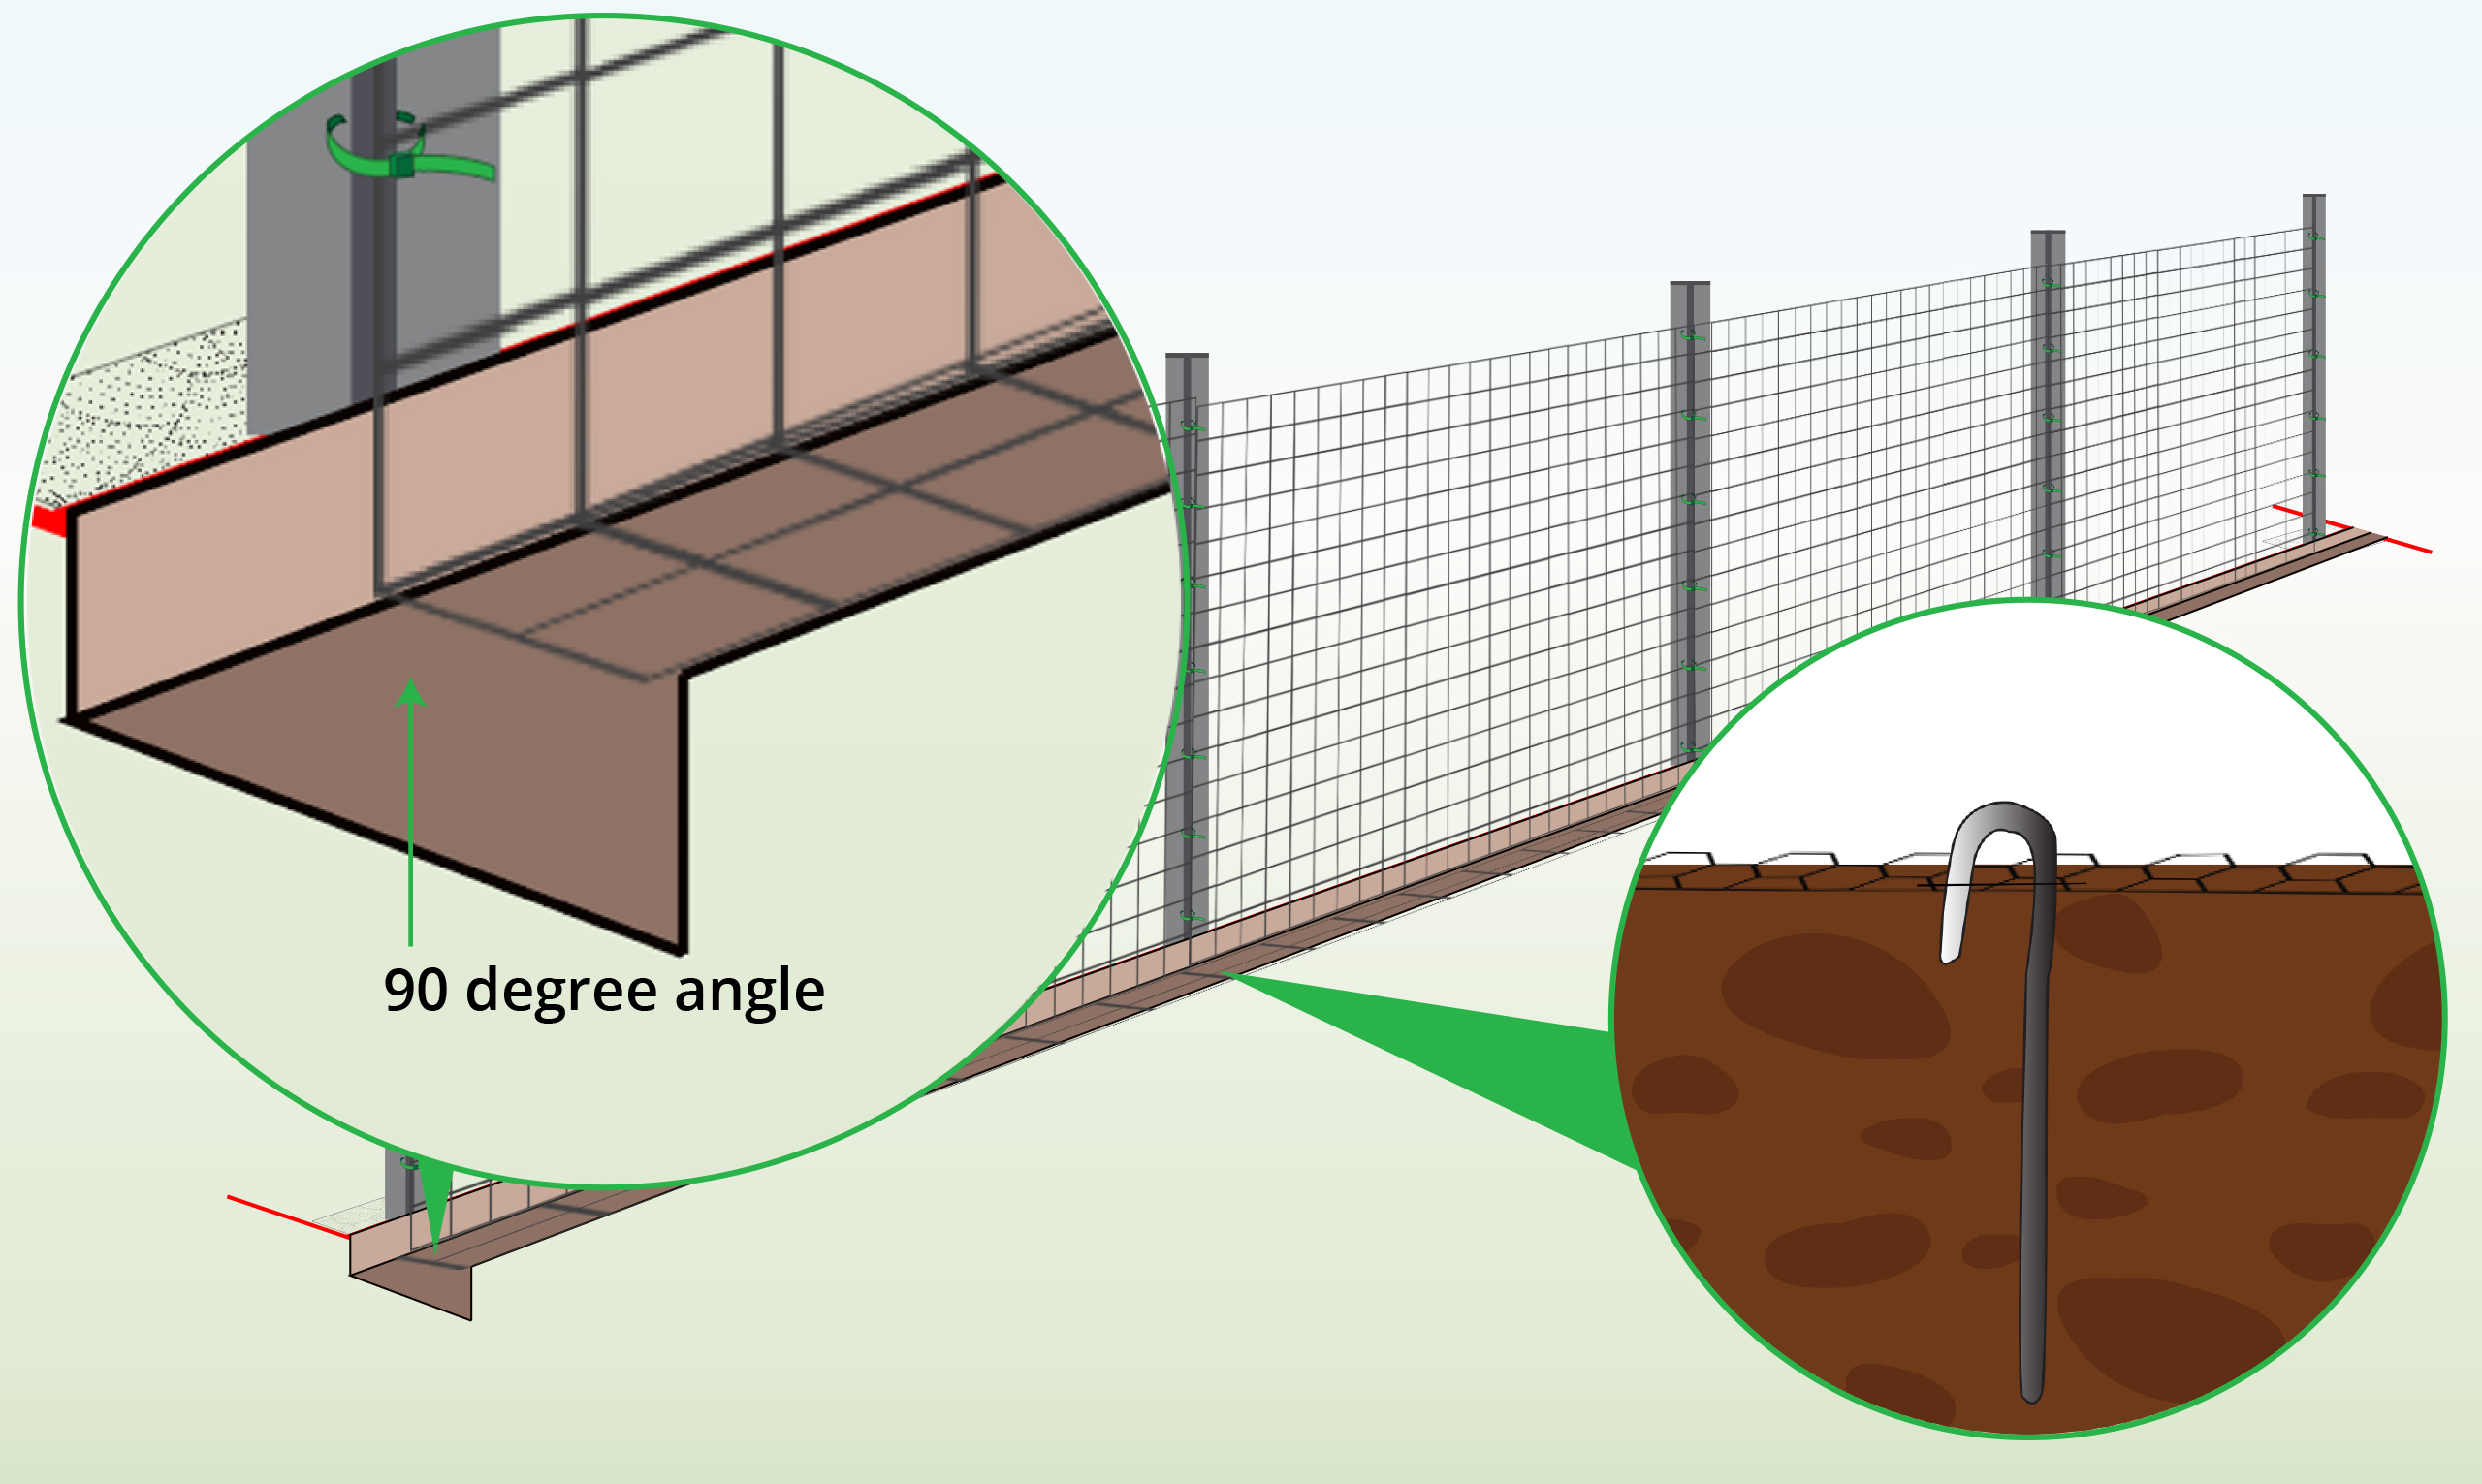
| Concrete Posts | 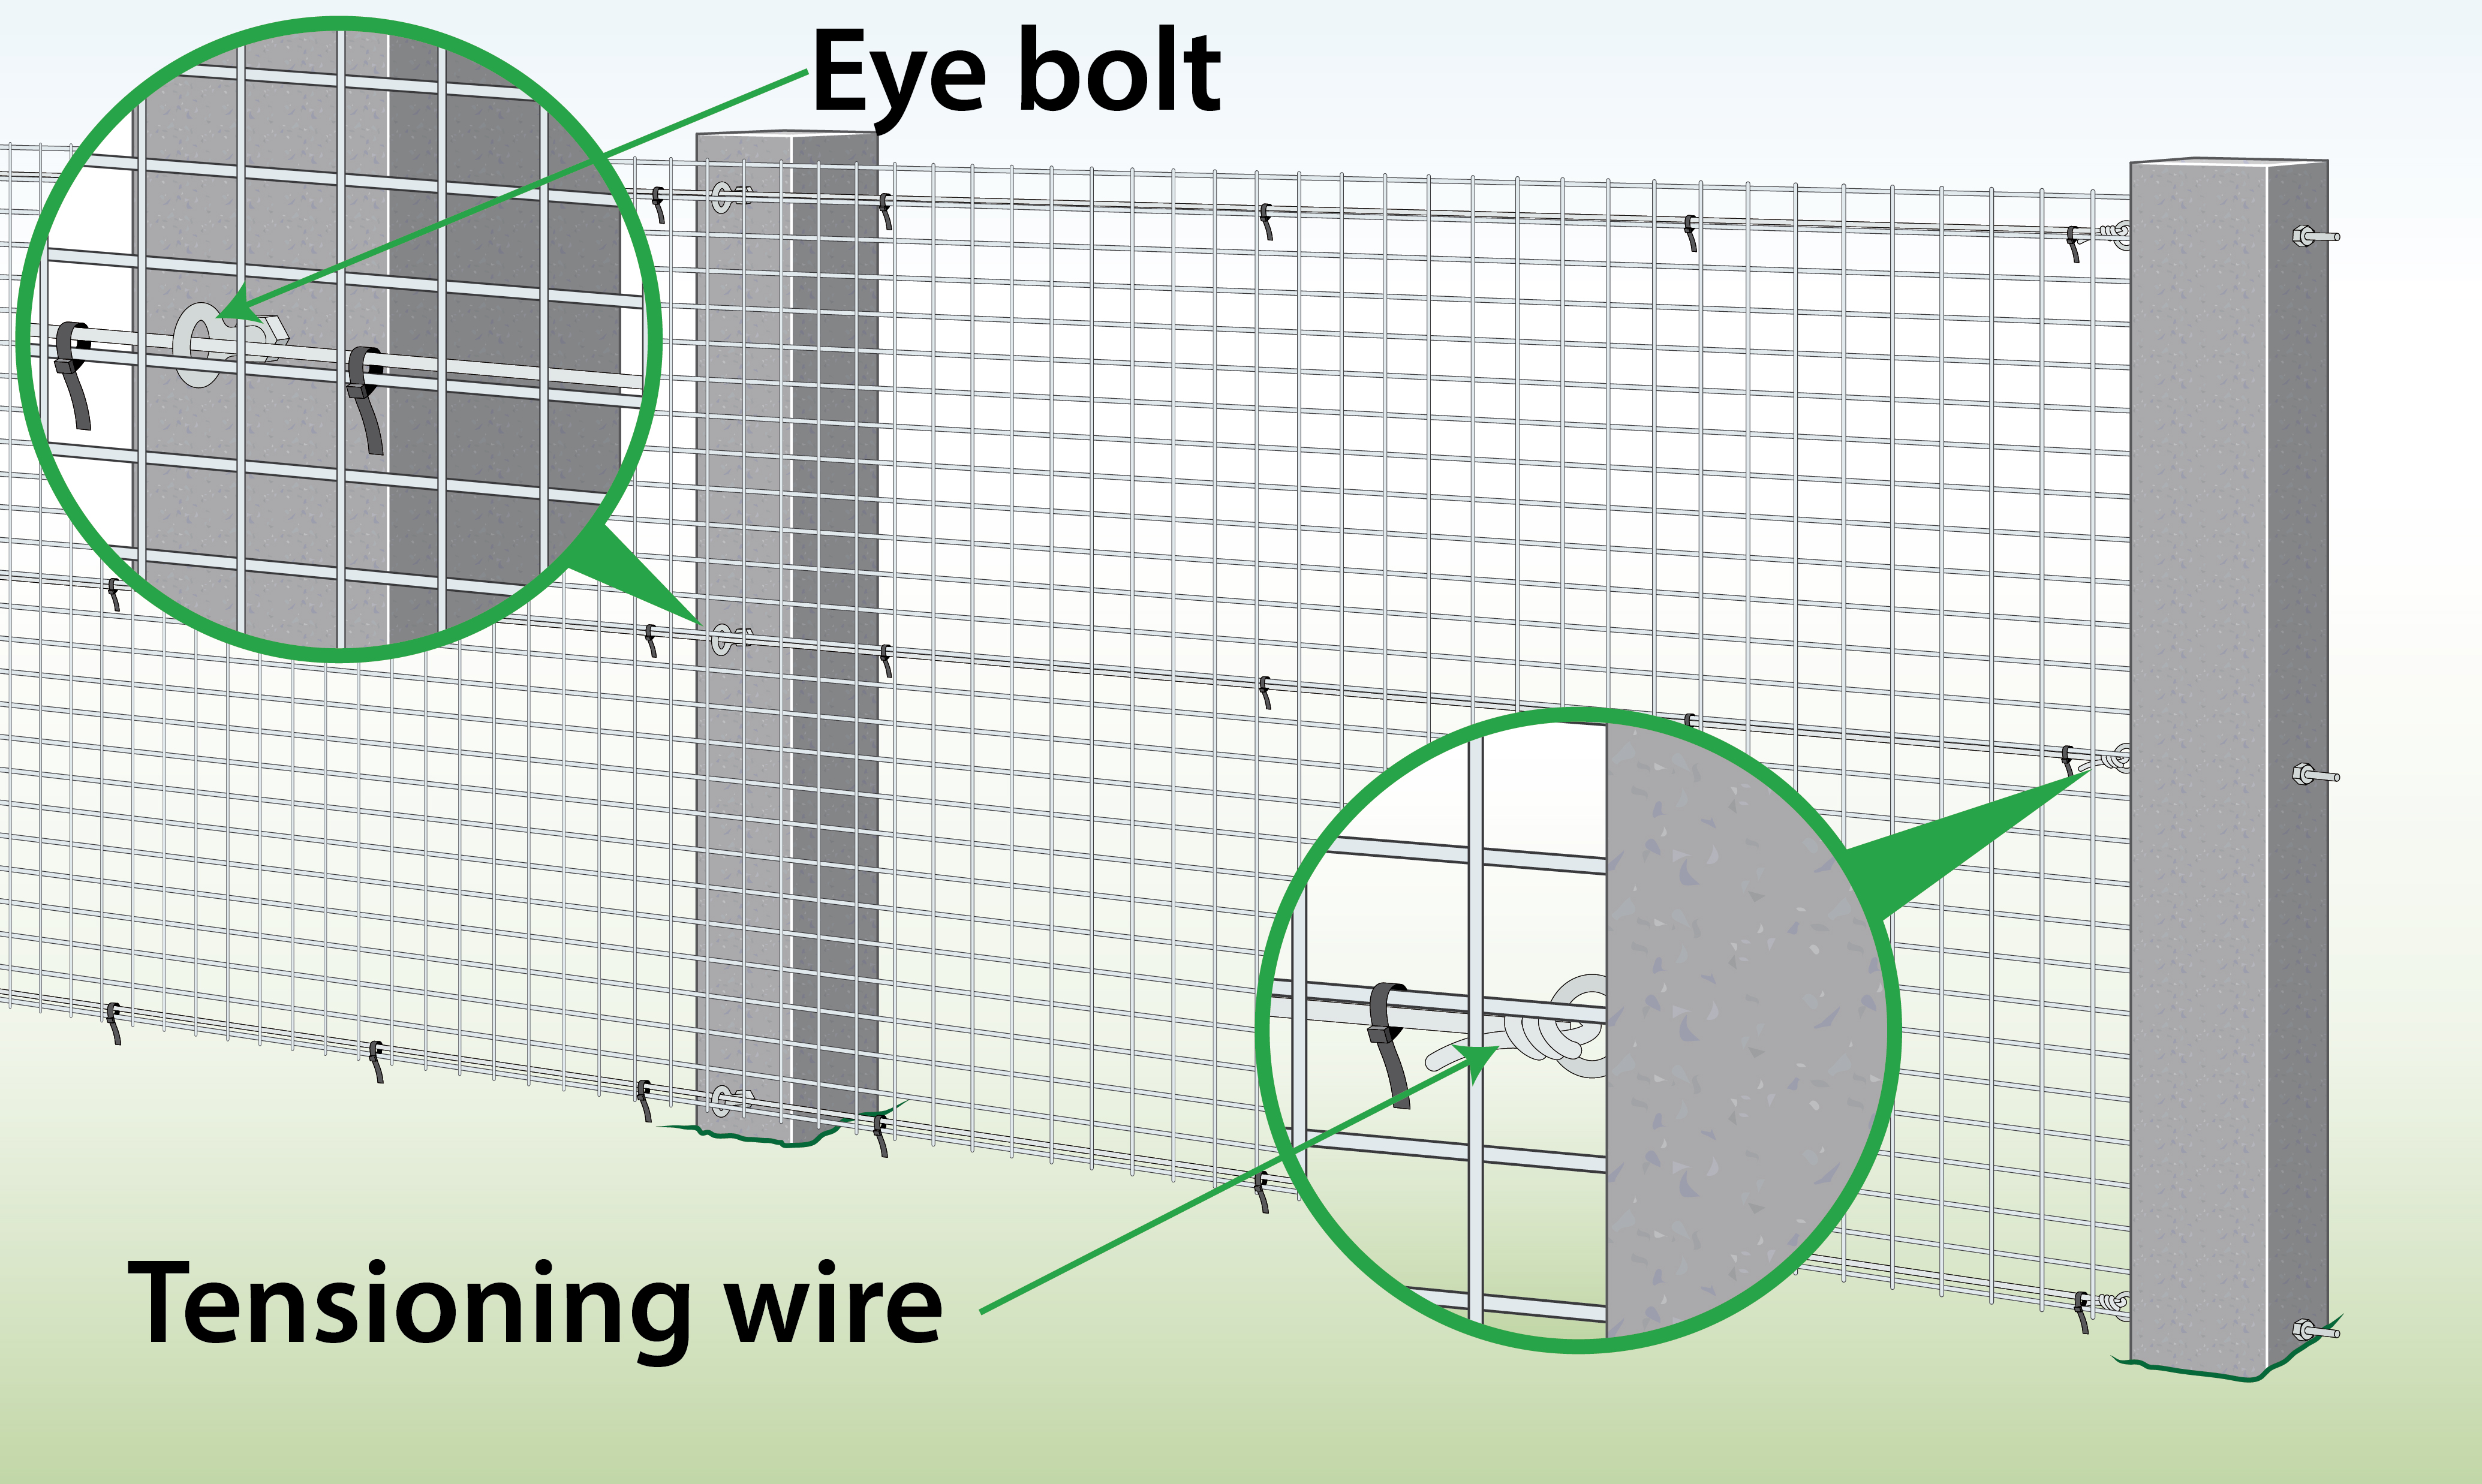 |
| Soil
(Pegs) |
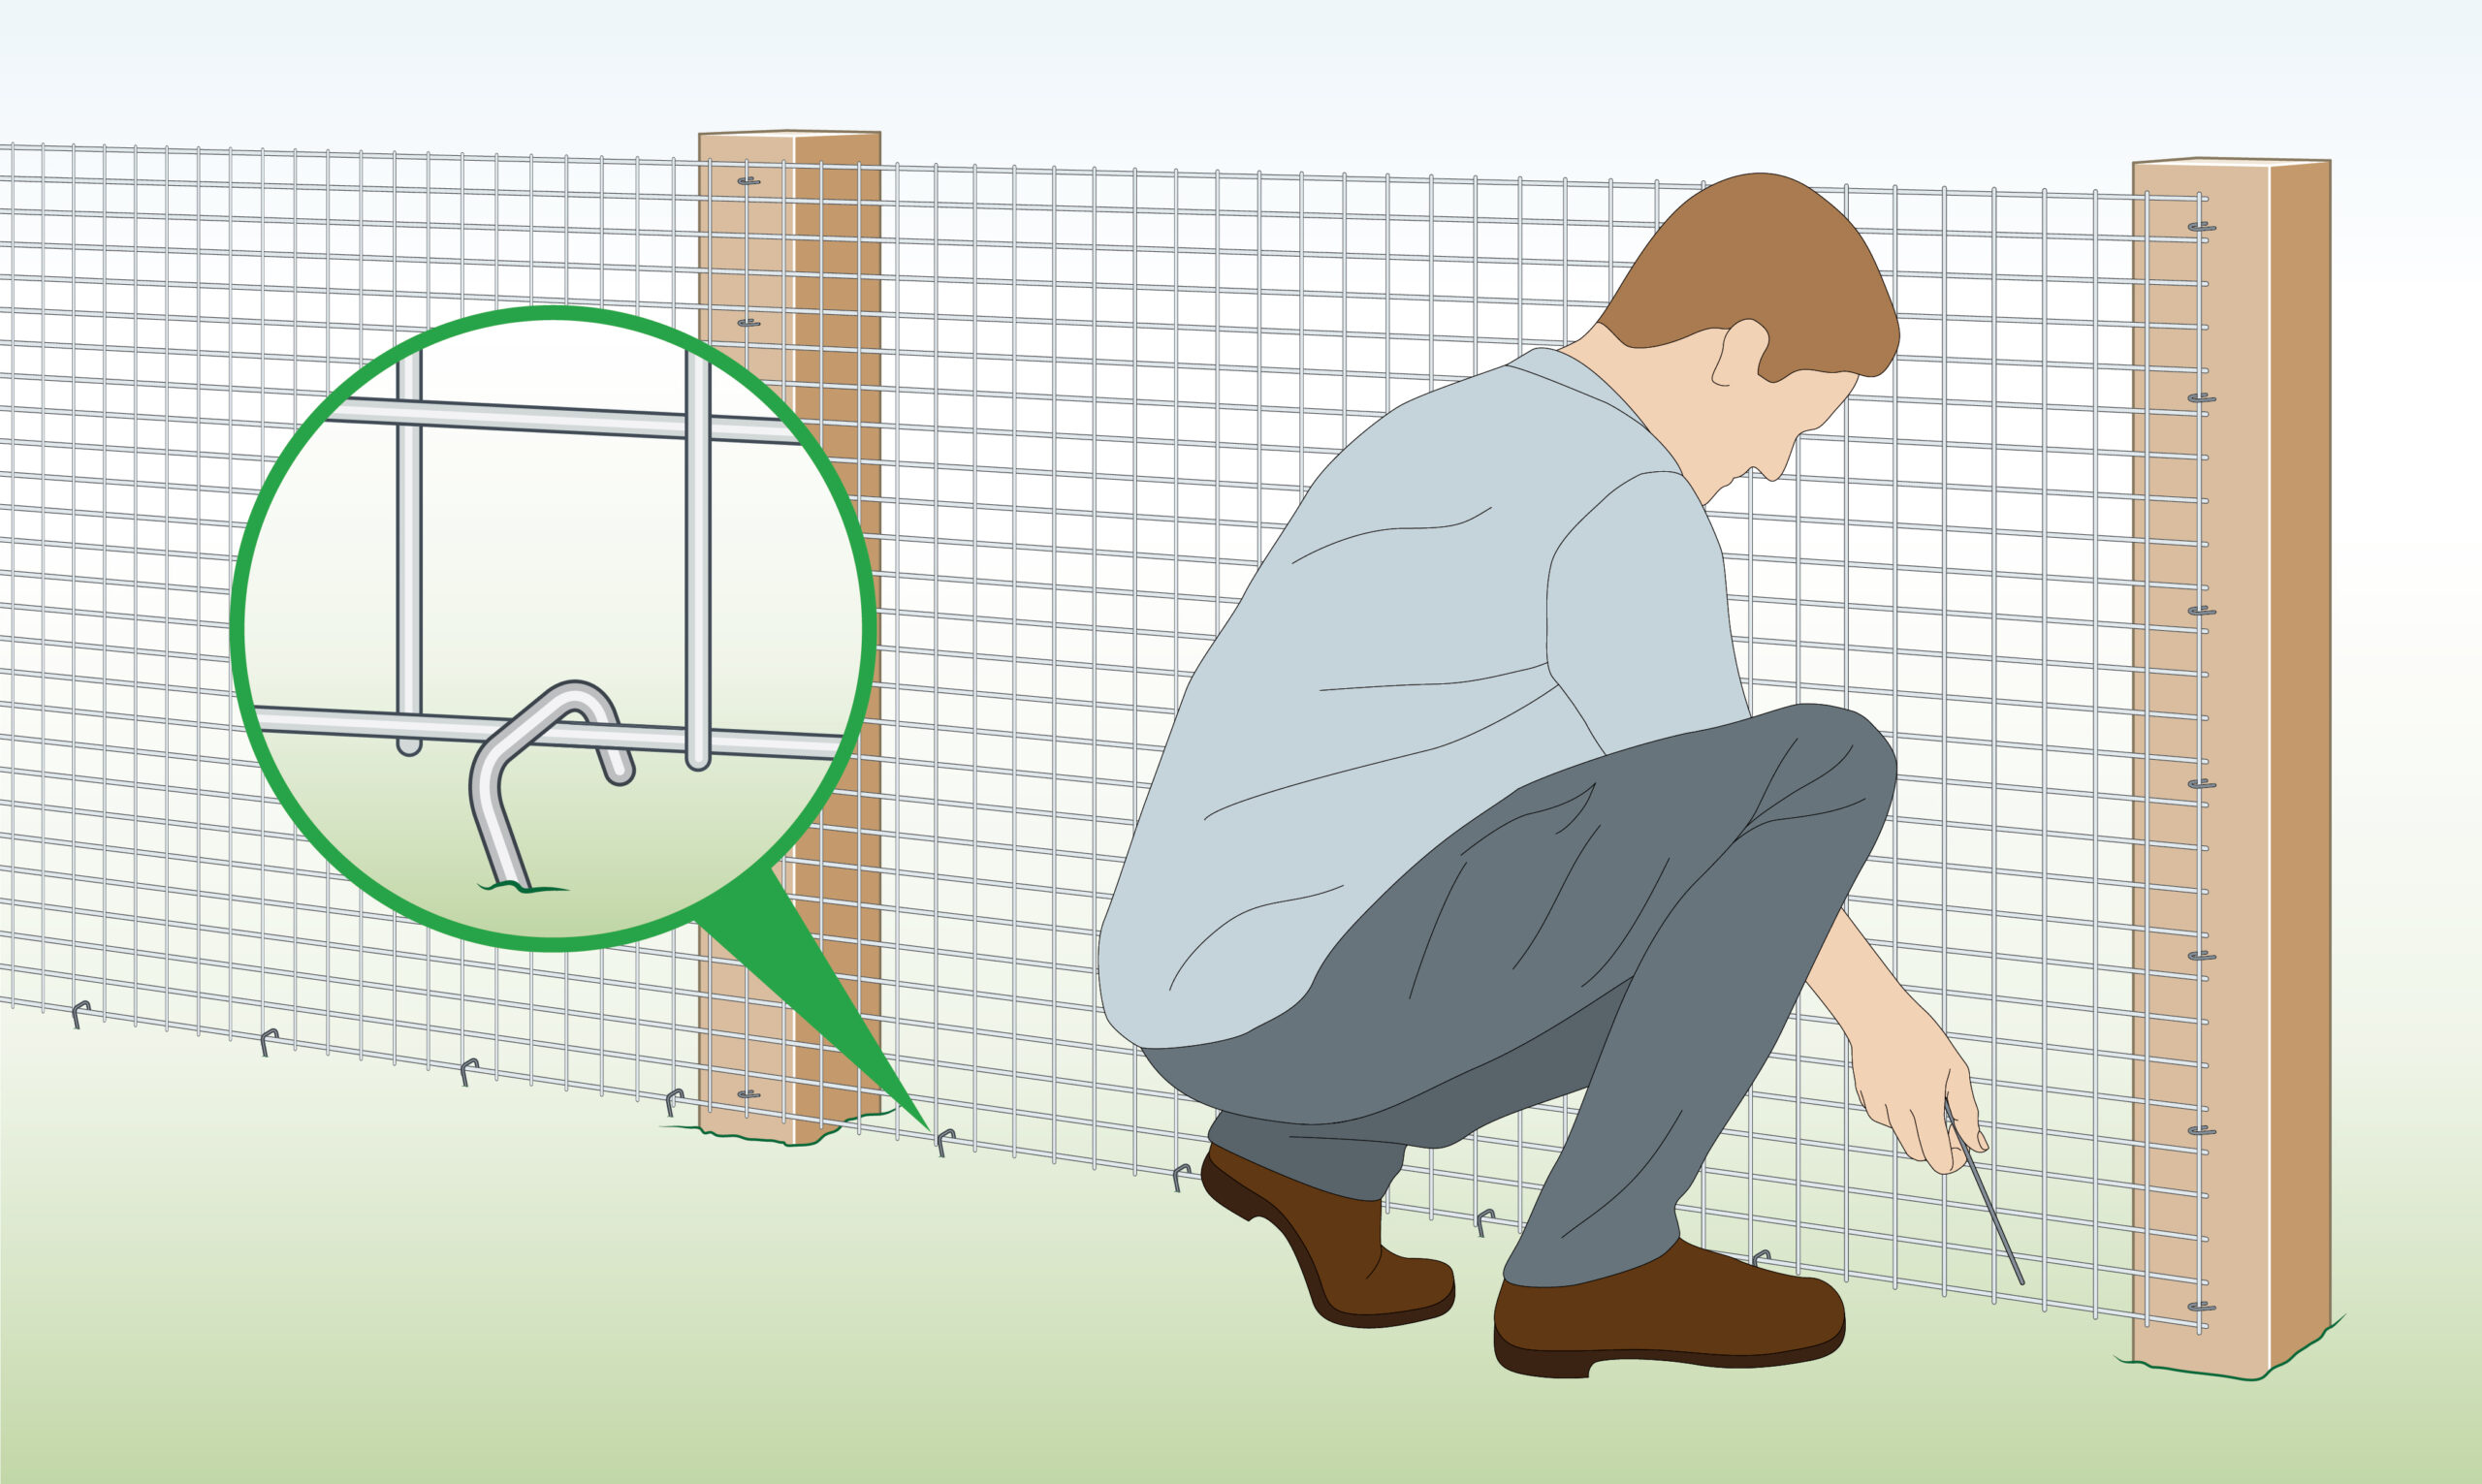 |
| Wire Fence
|
 |
Installation Instructions
With Panels
For Small Dogs
For Large Dogs
| To Do | Explanation |
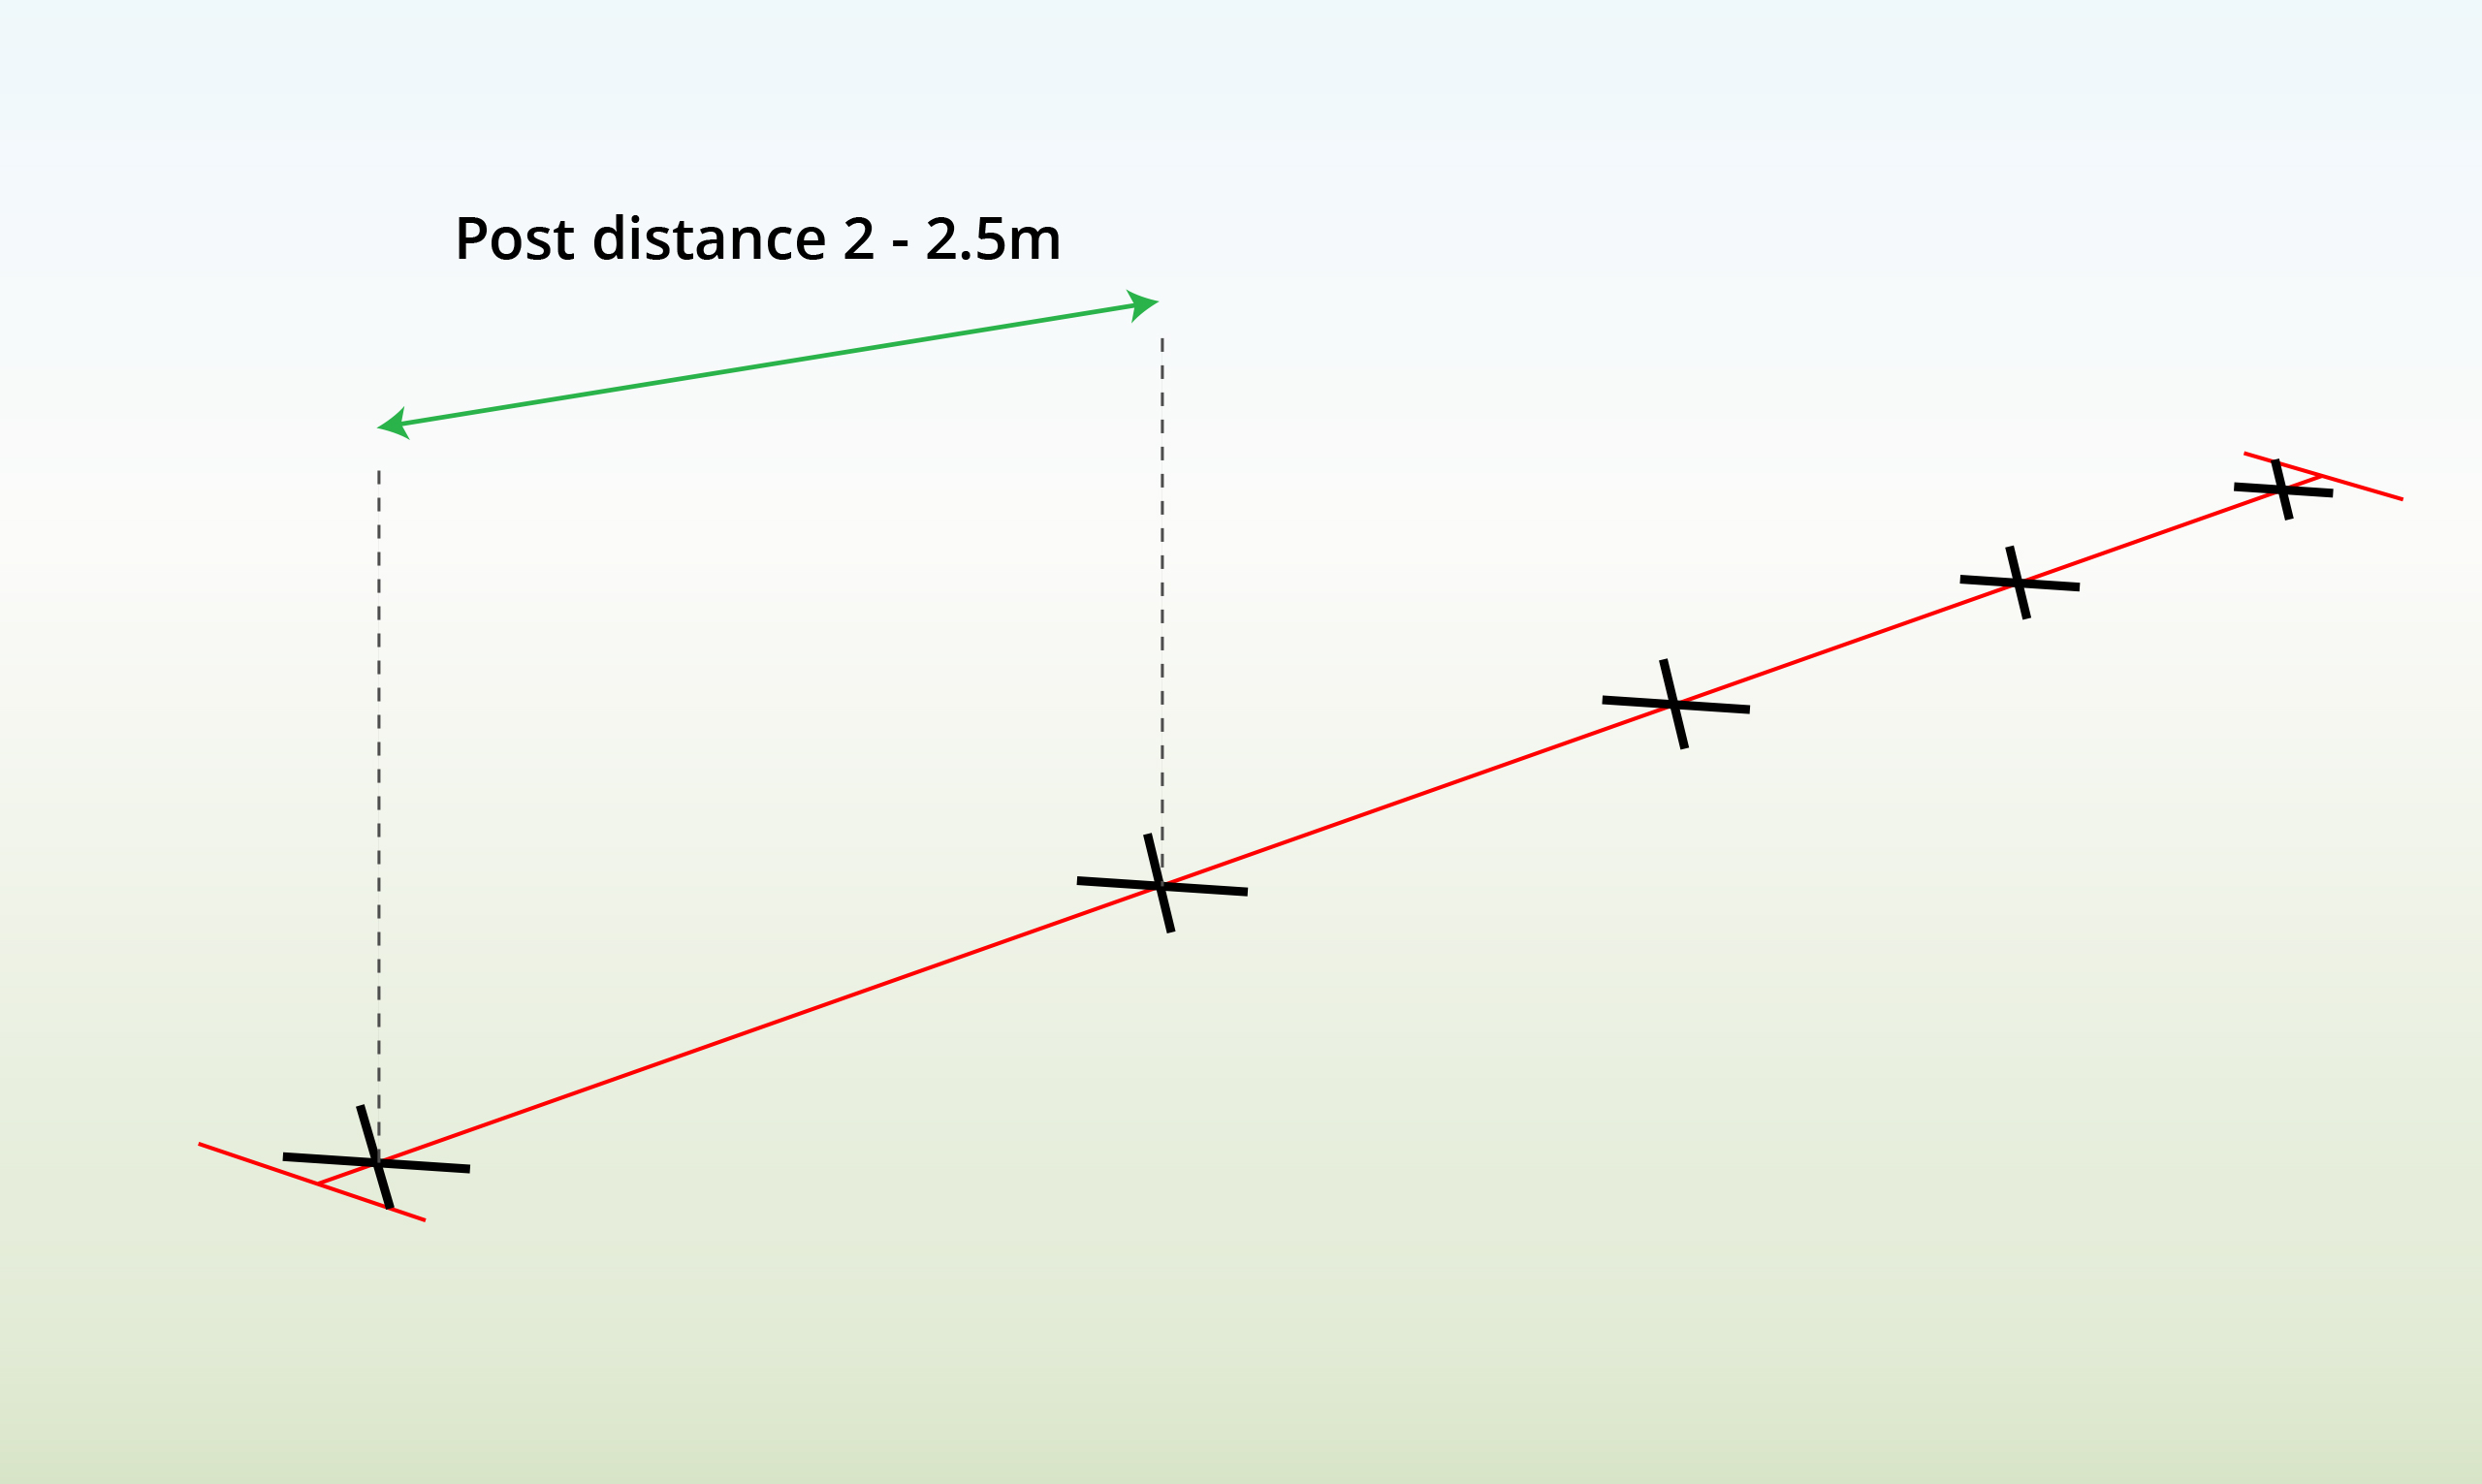
| Step 1 – Mark the Location
|
Create a straight line to outline the fence between the two end posts. |
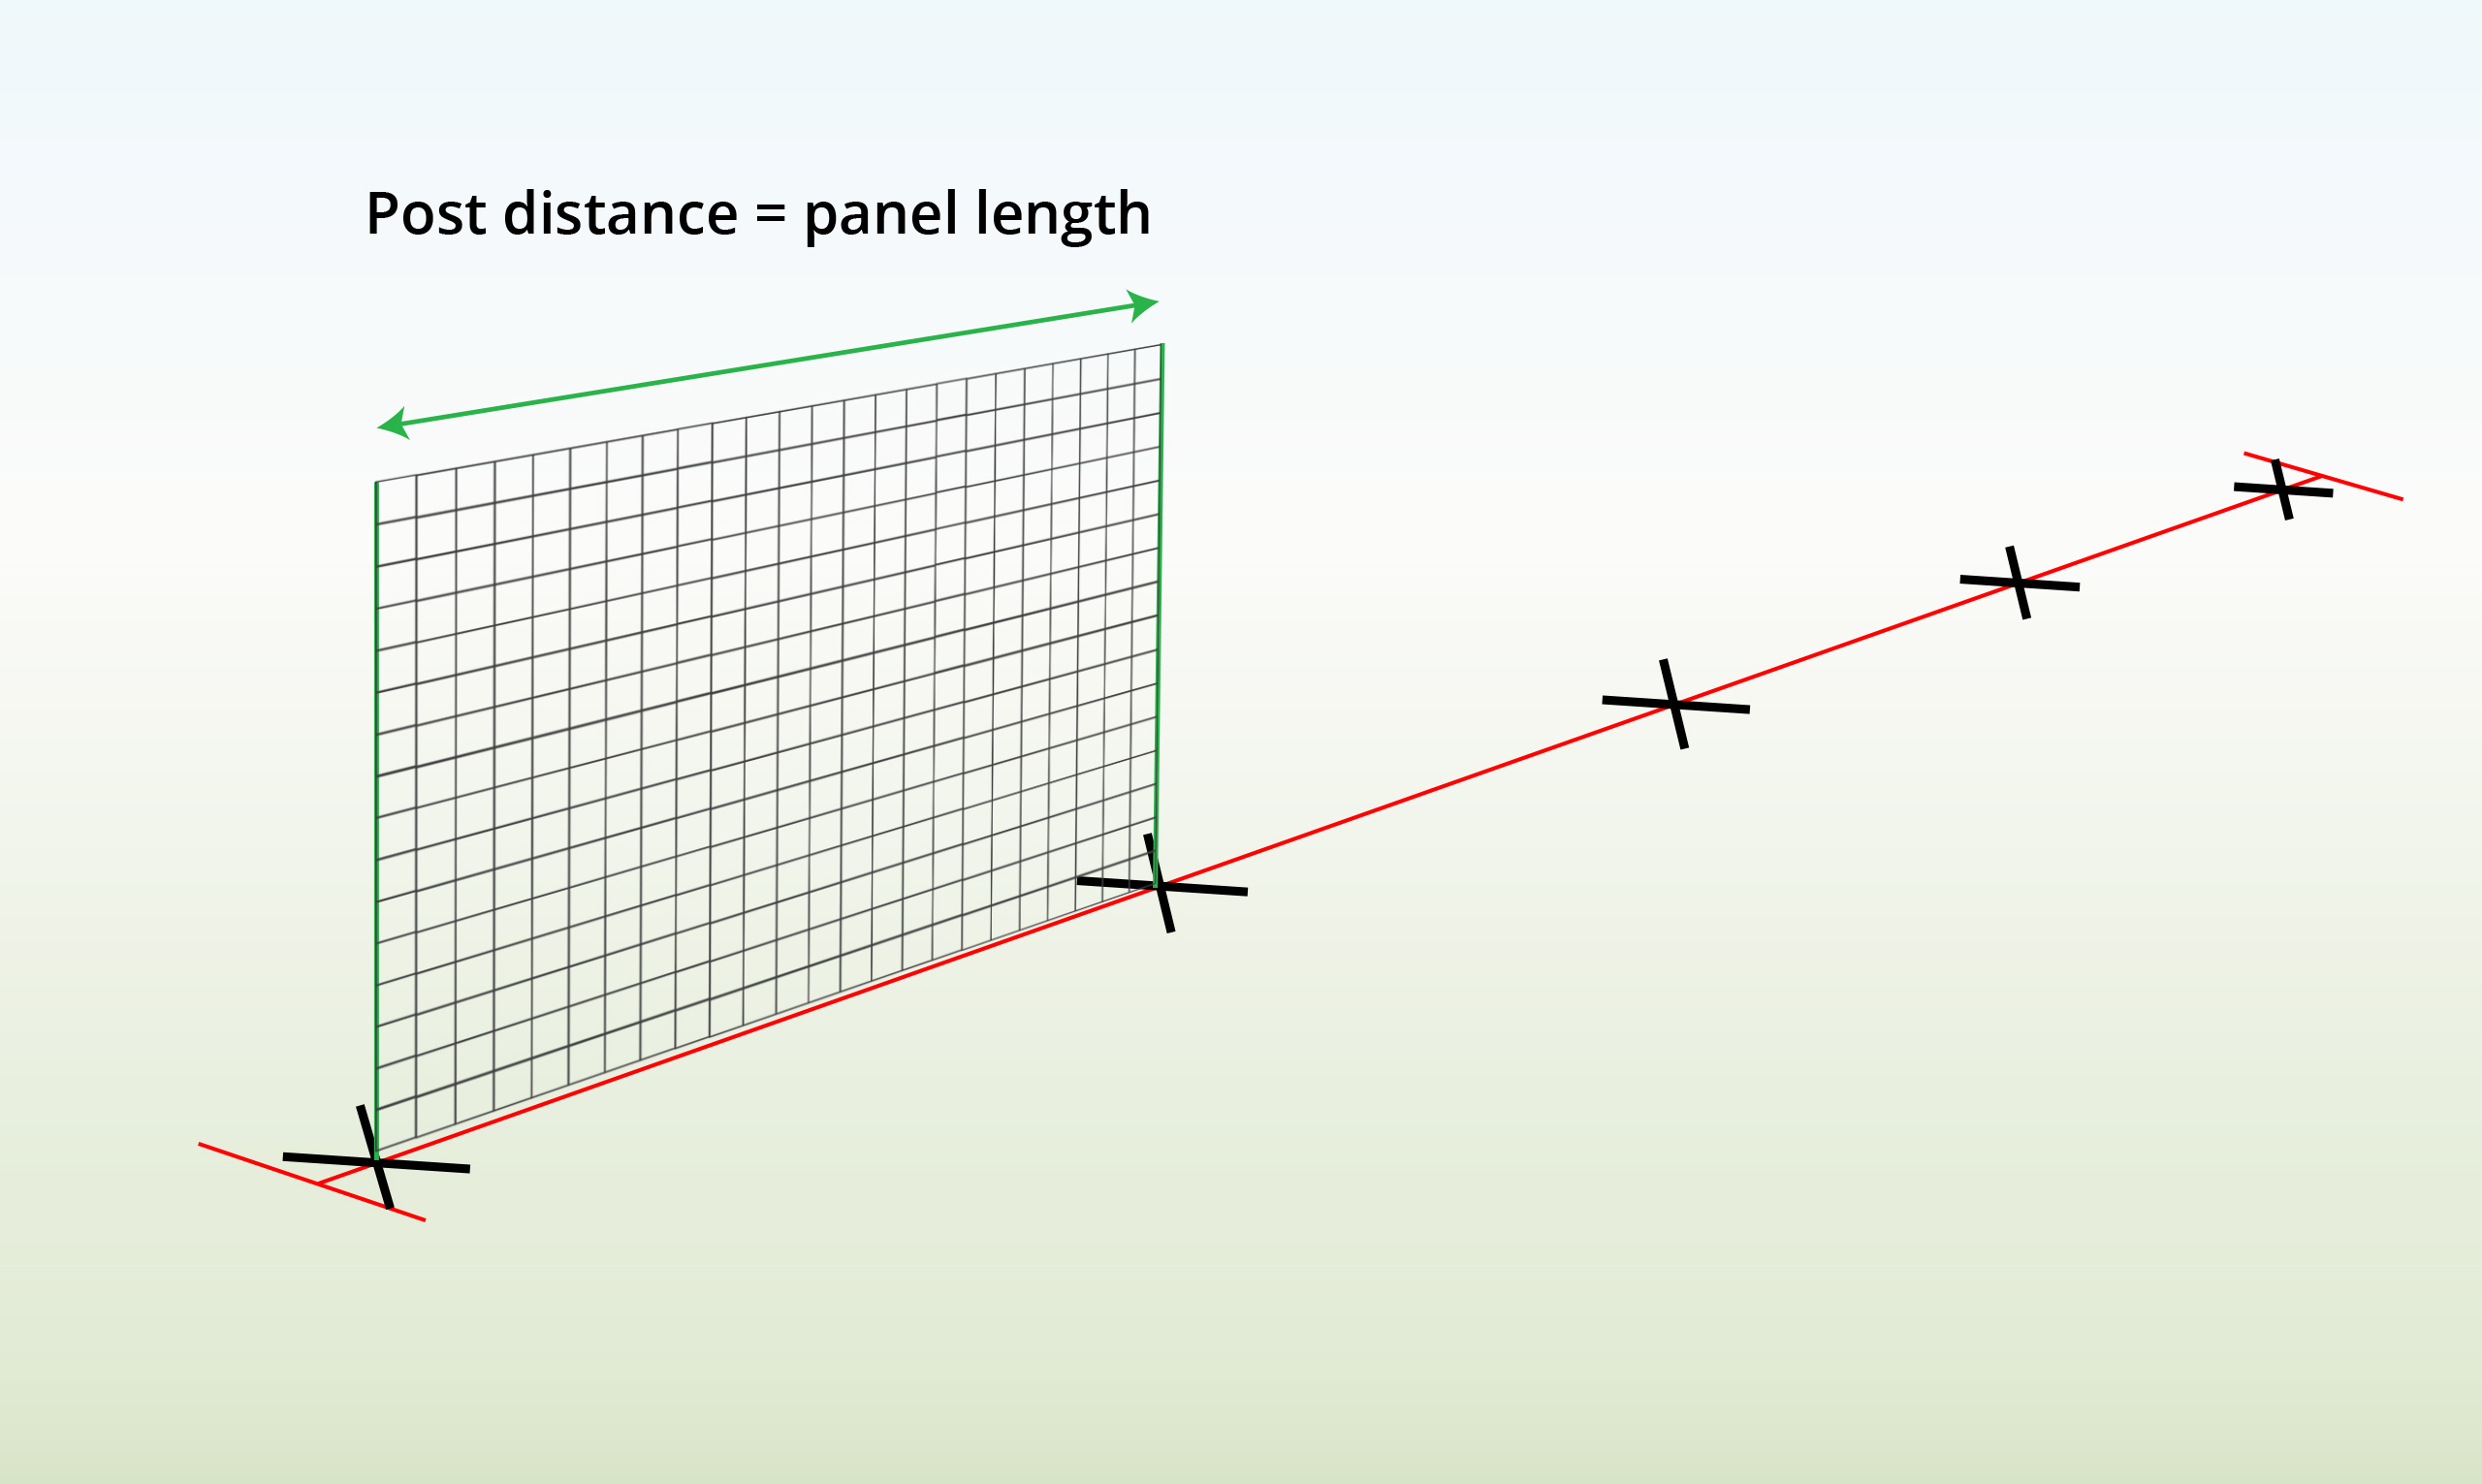
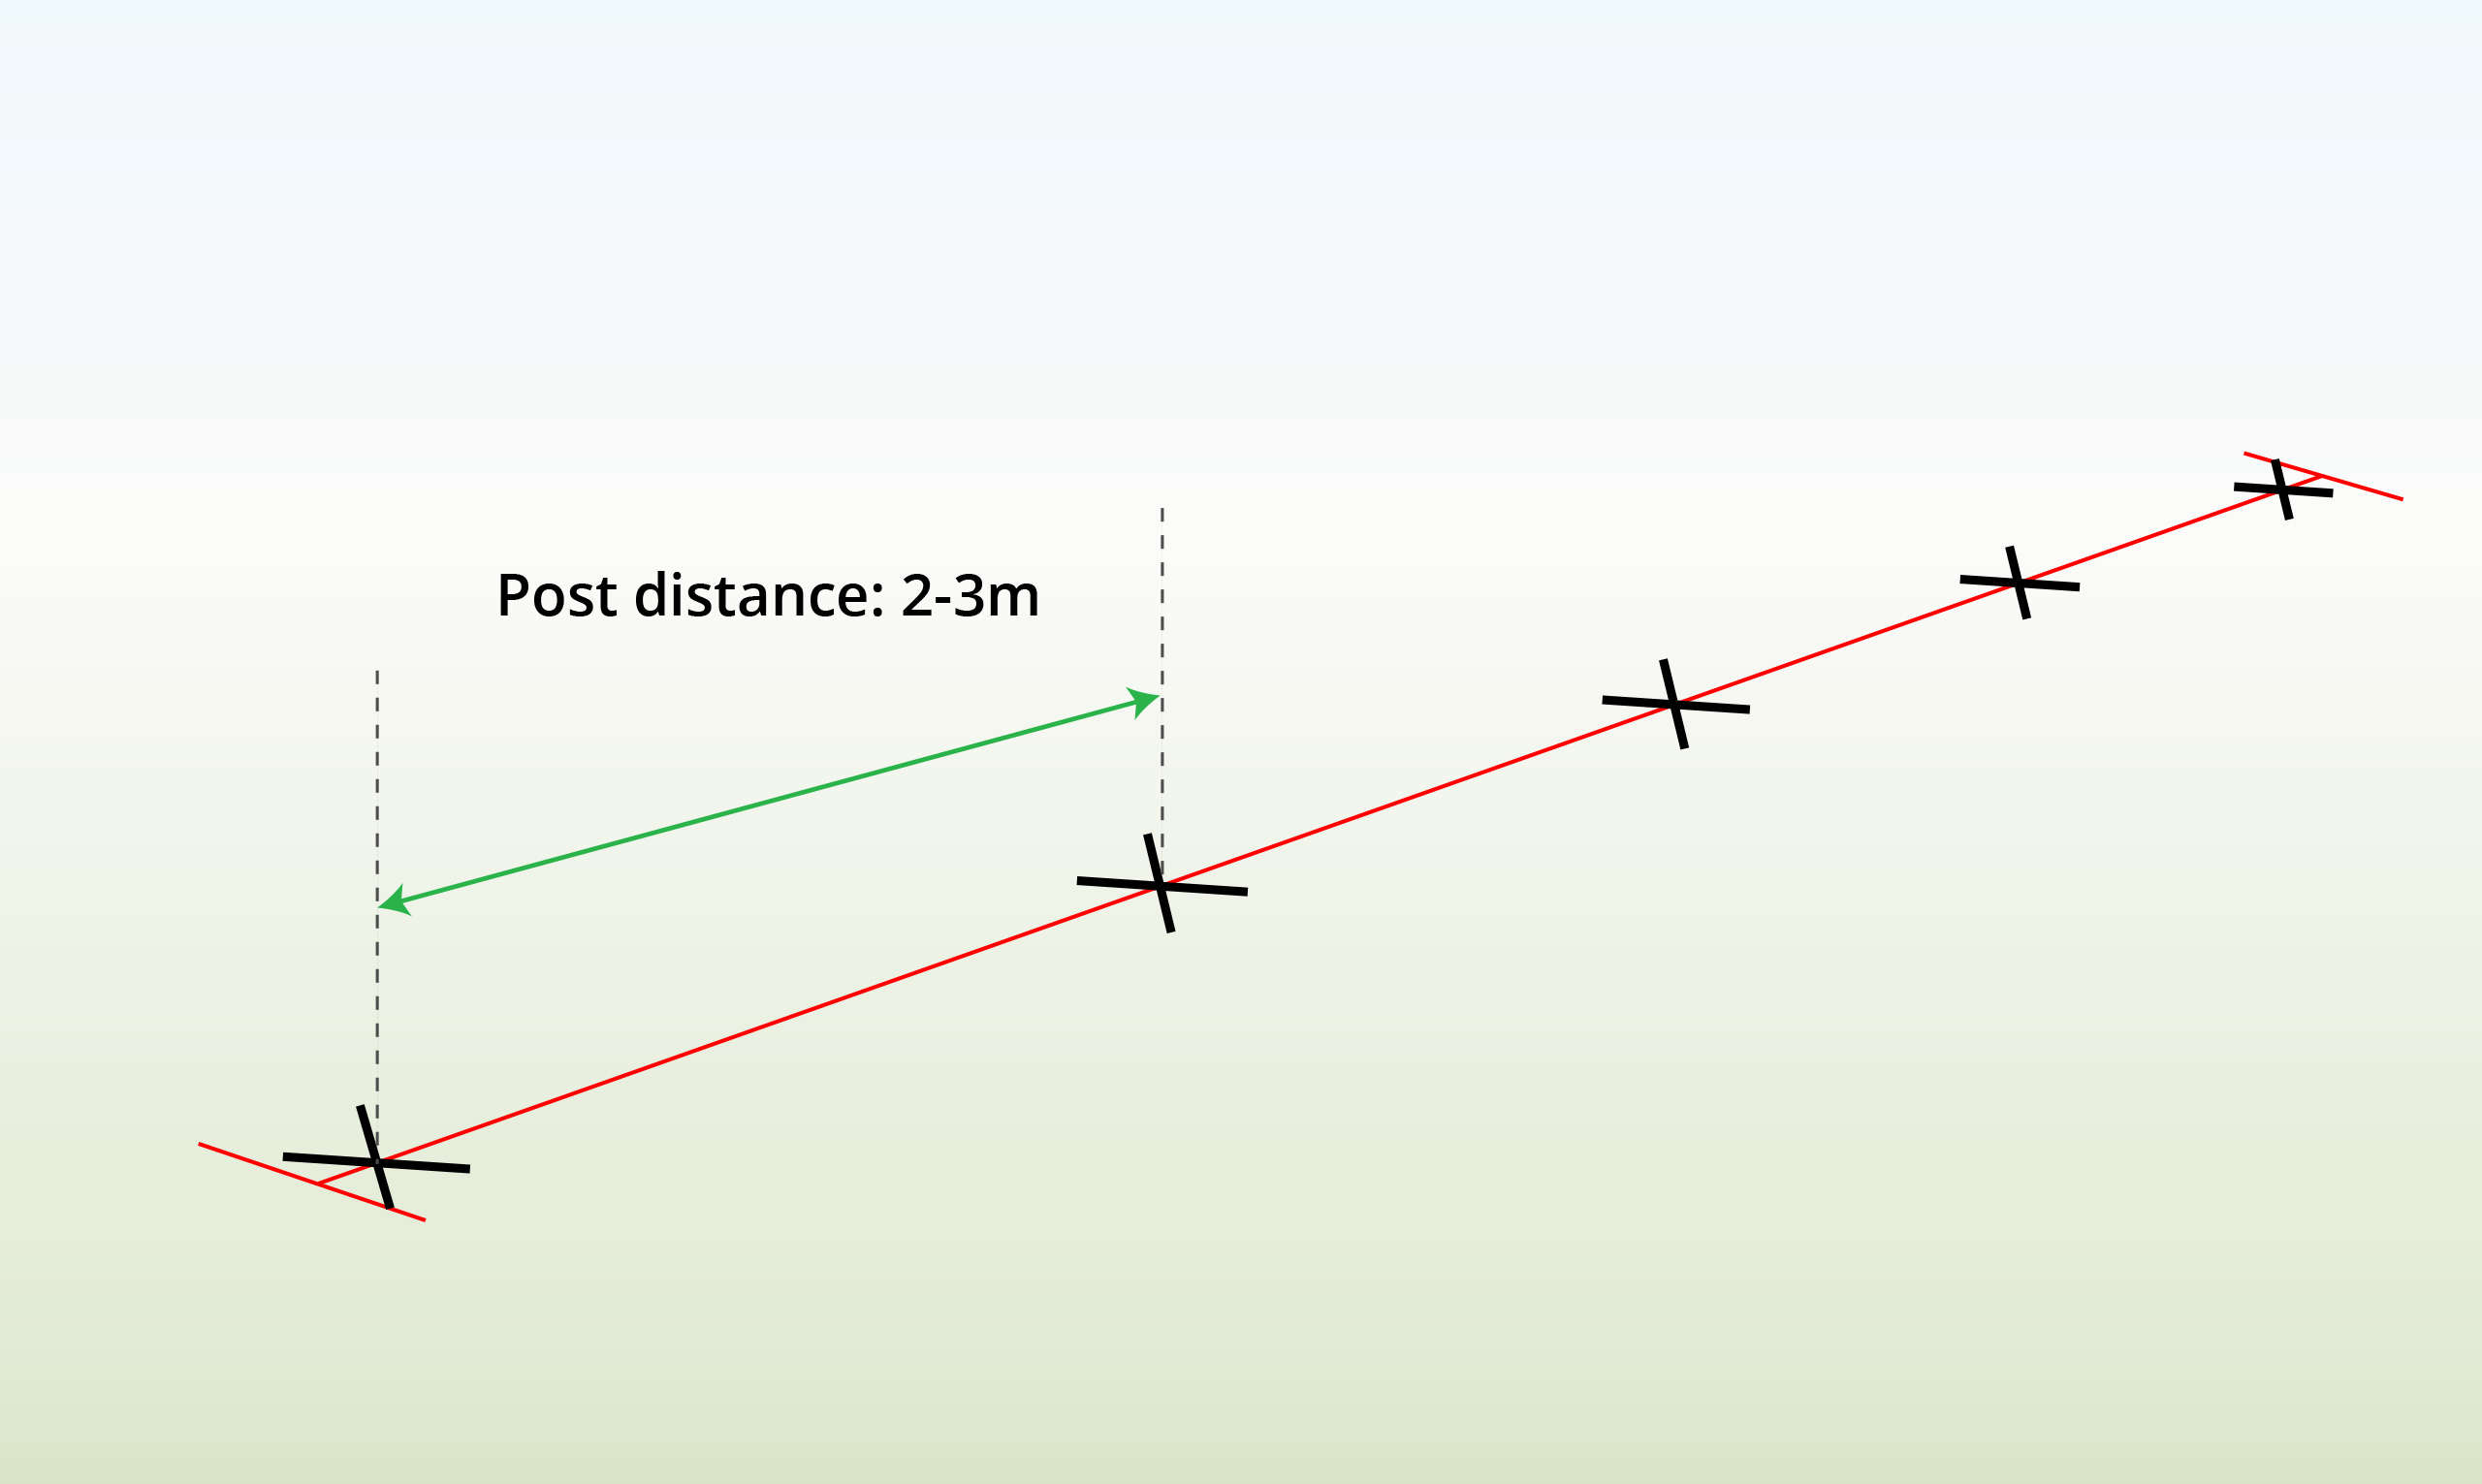
| Step 2 – Measure Post Distance
|
Use your panels to measure the post distance. |
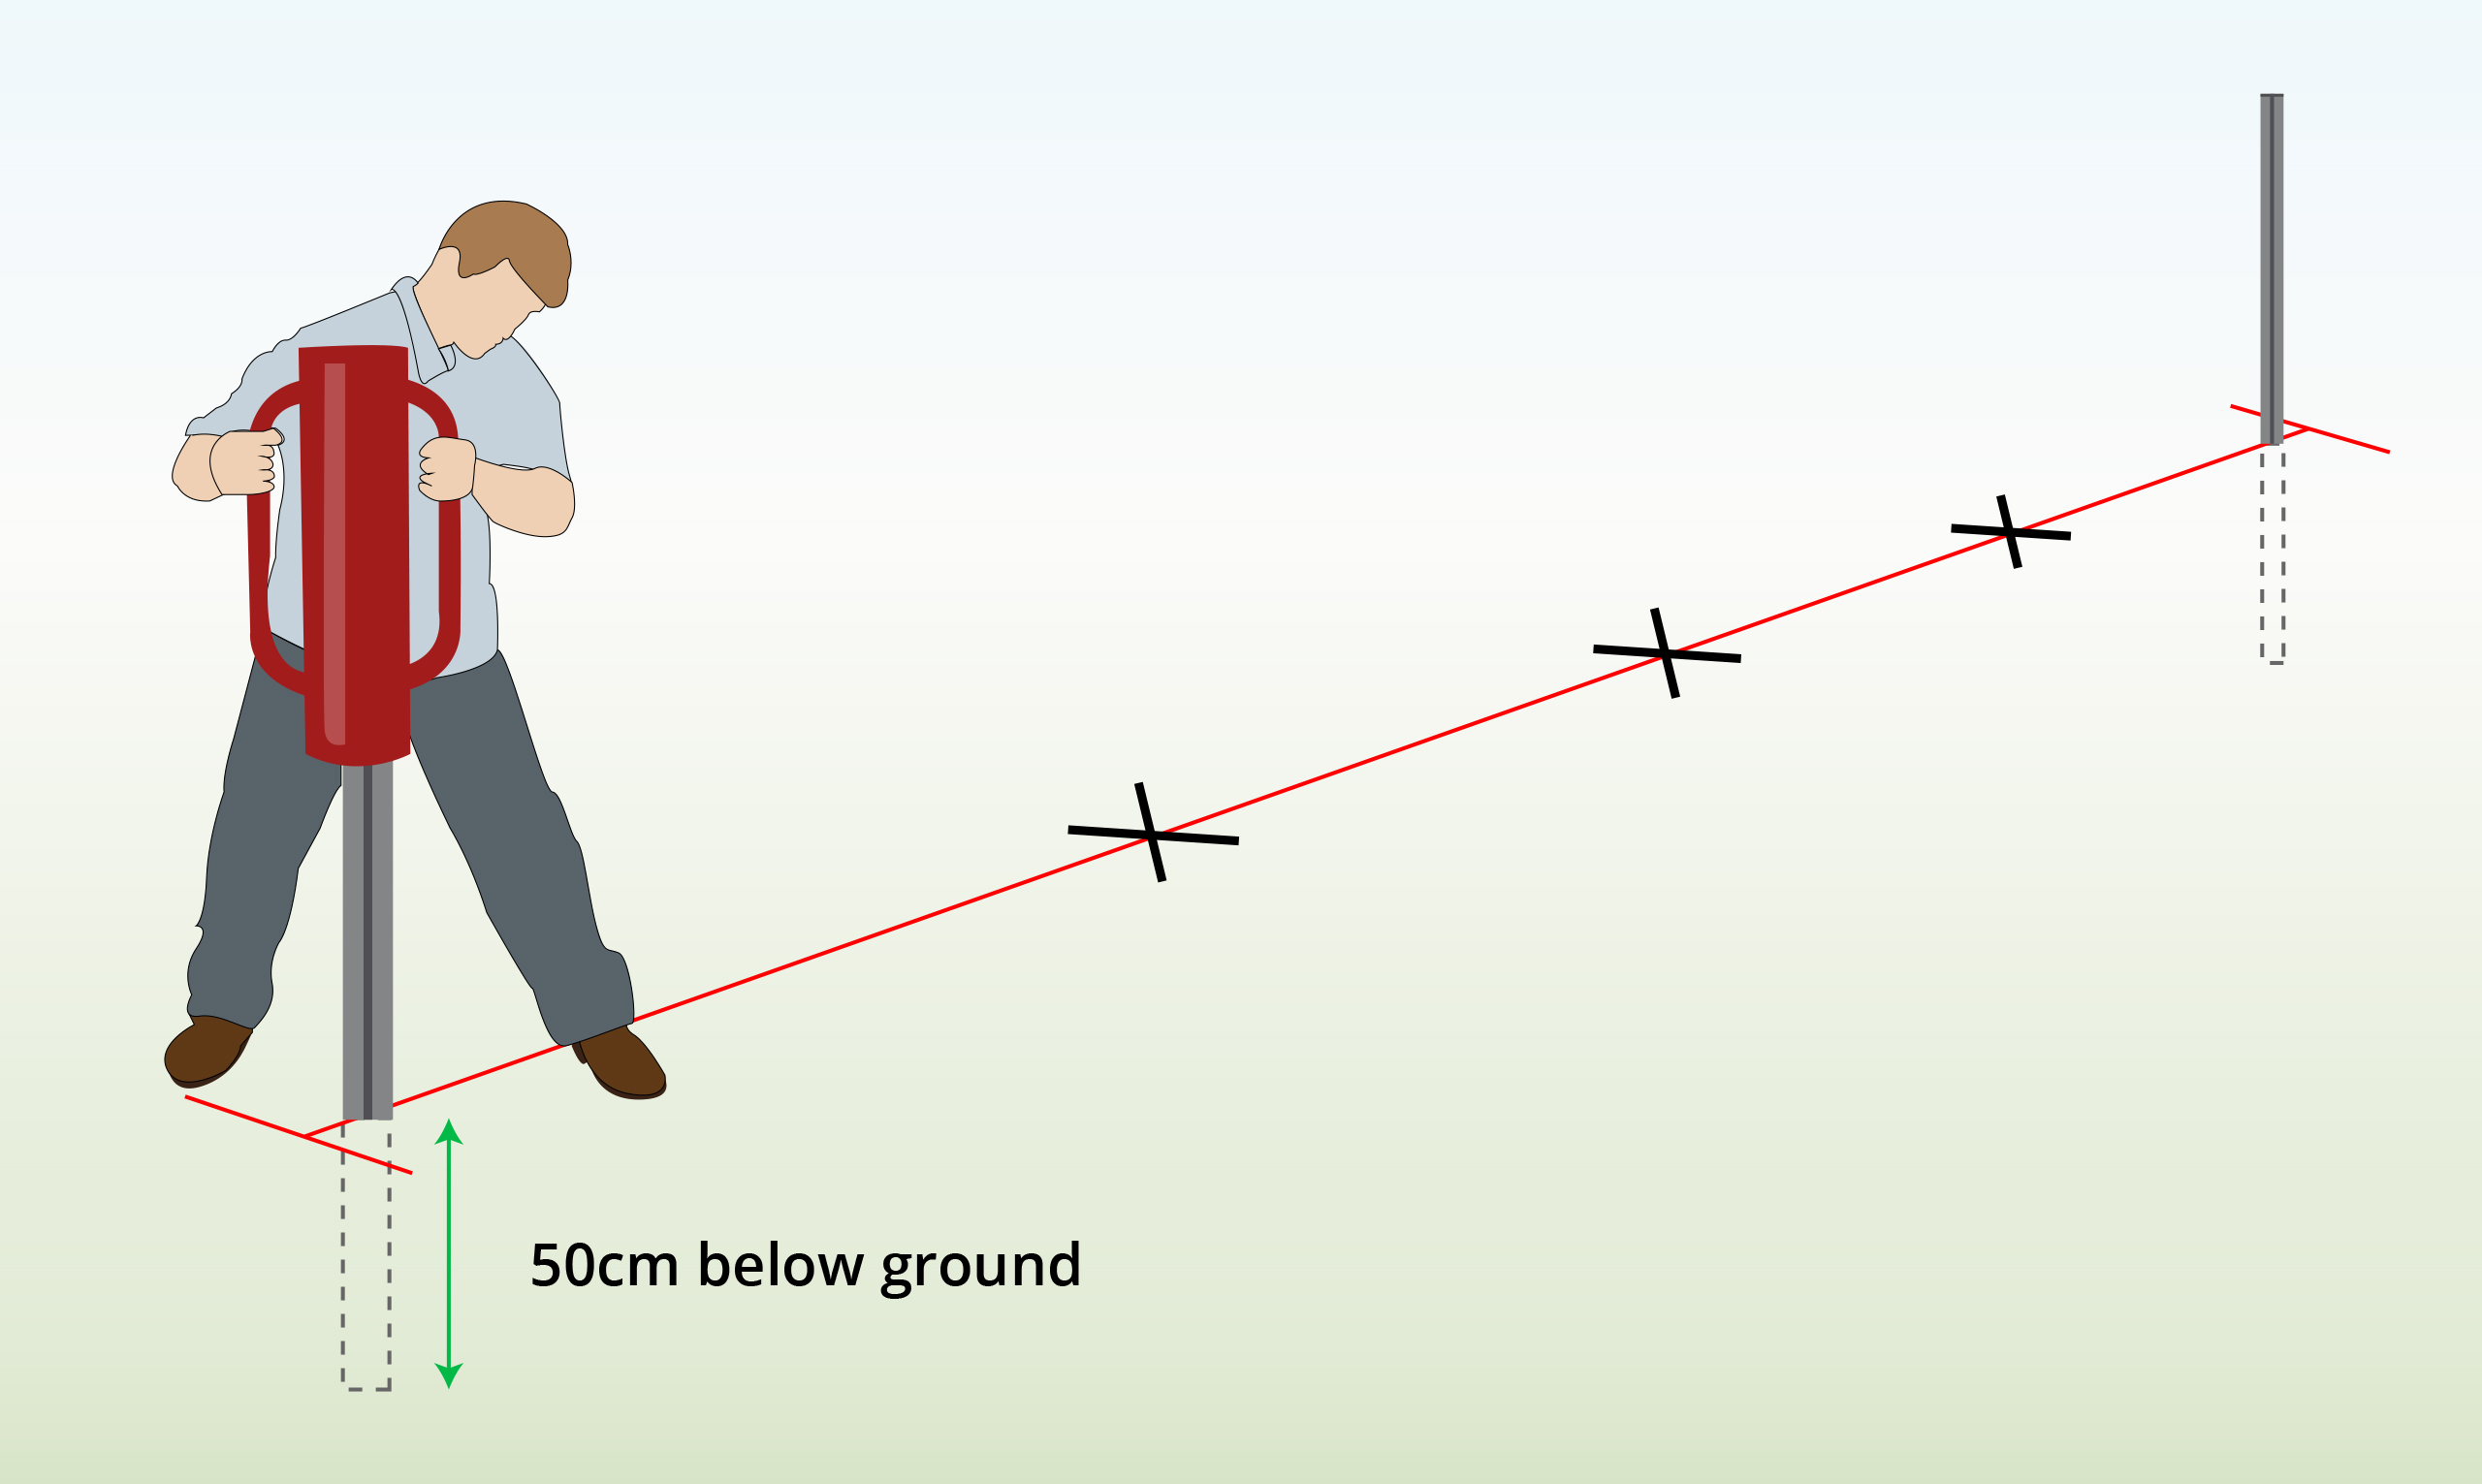
| Step 3 – Install End Posts
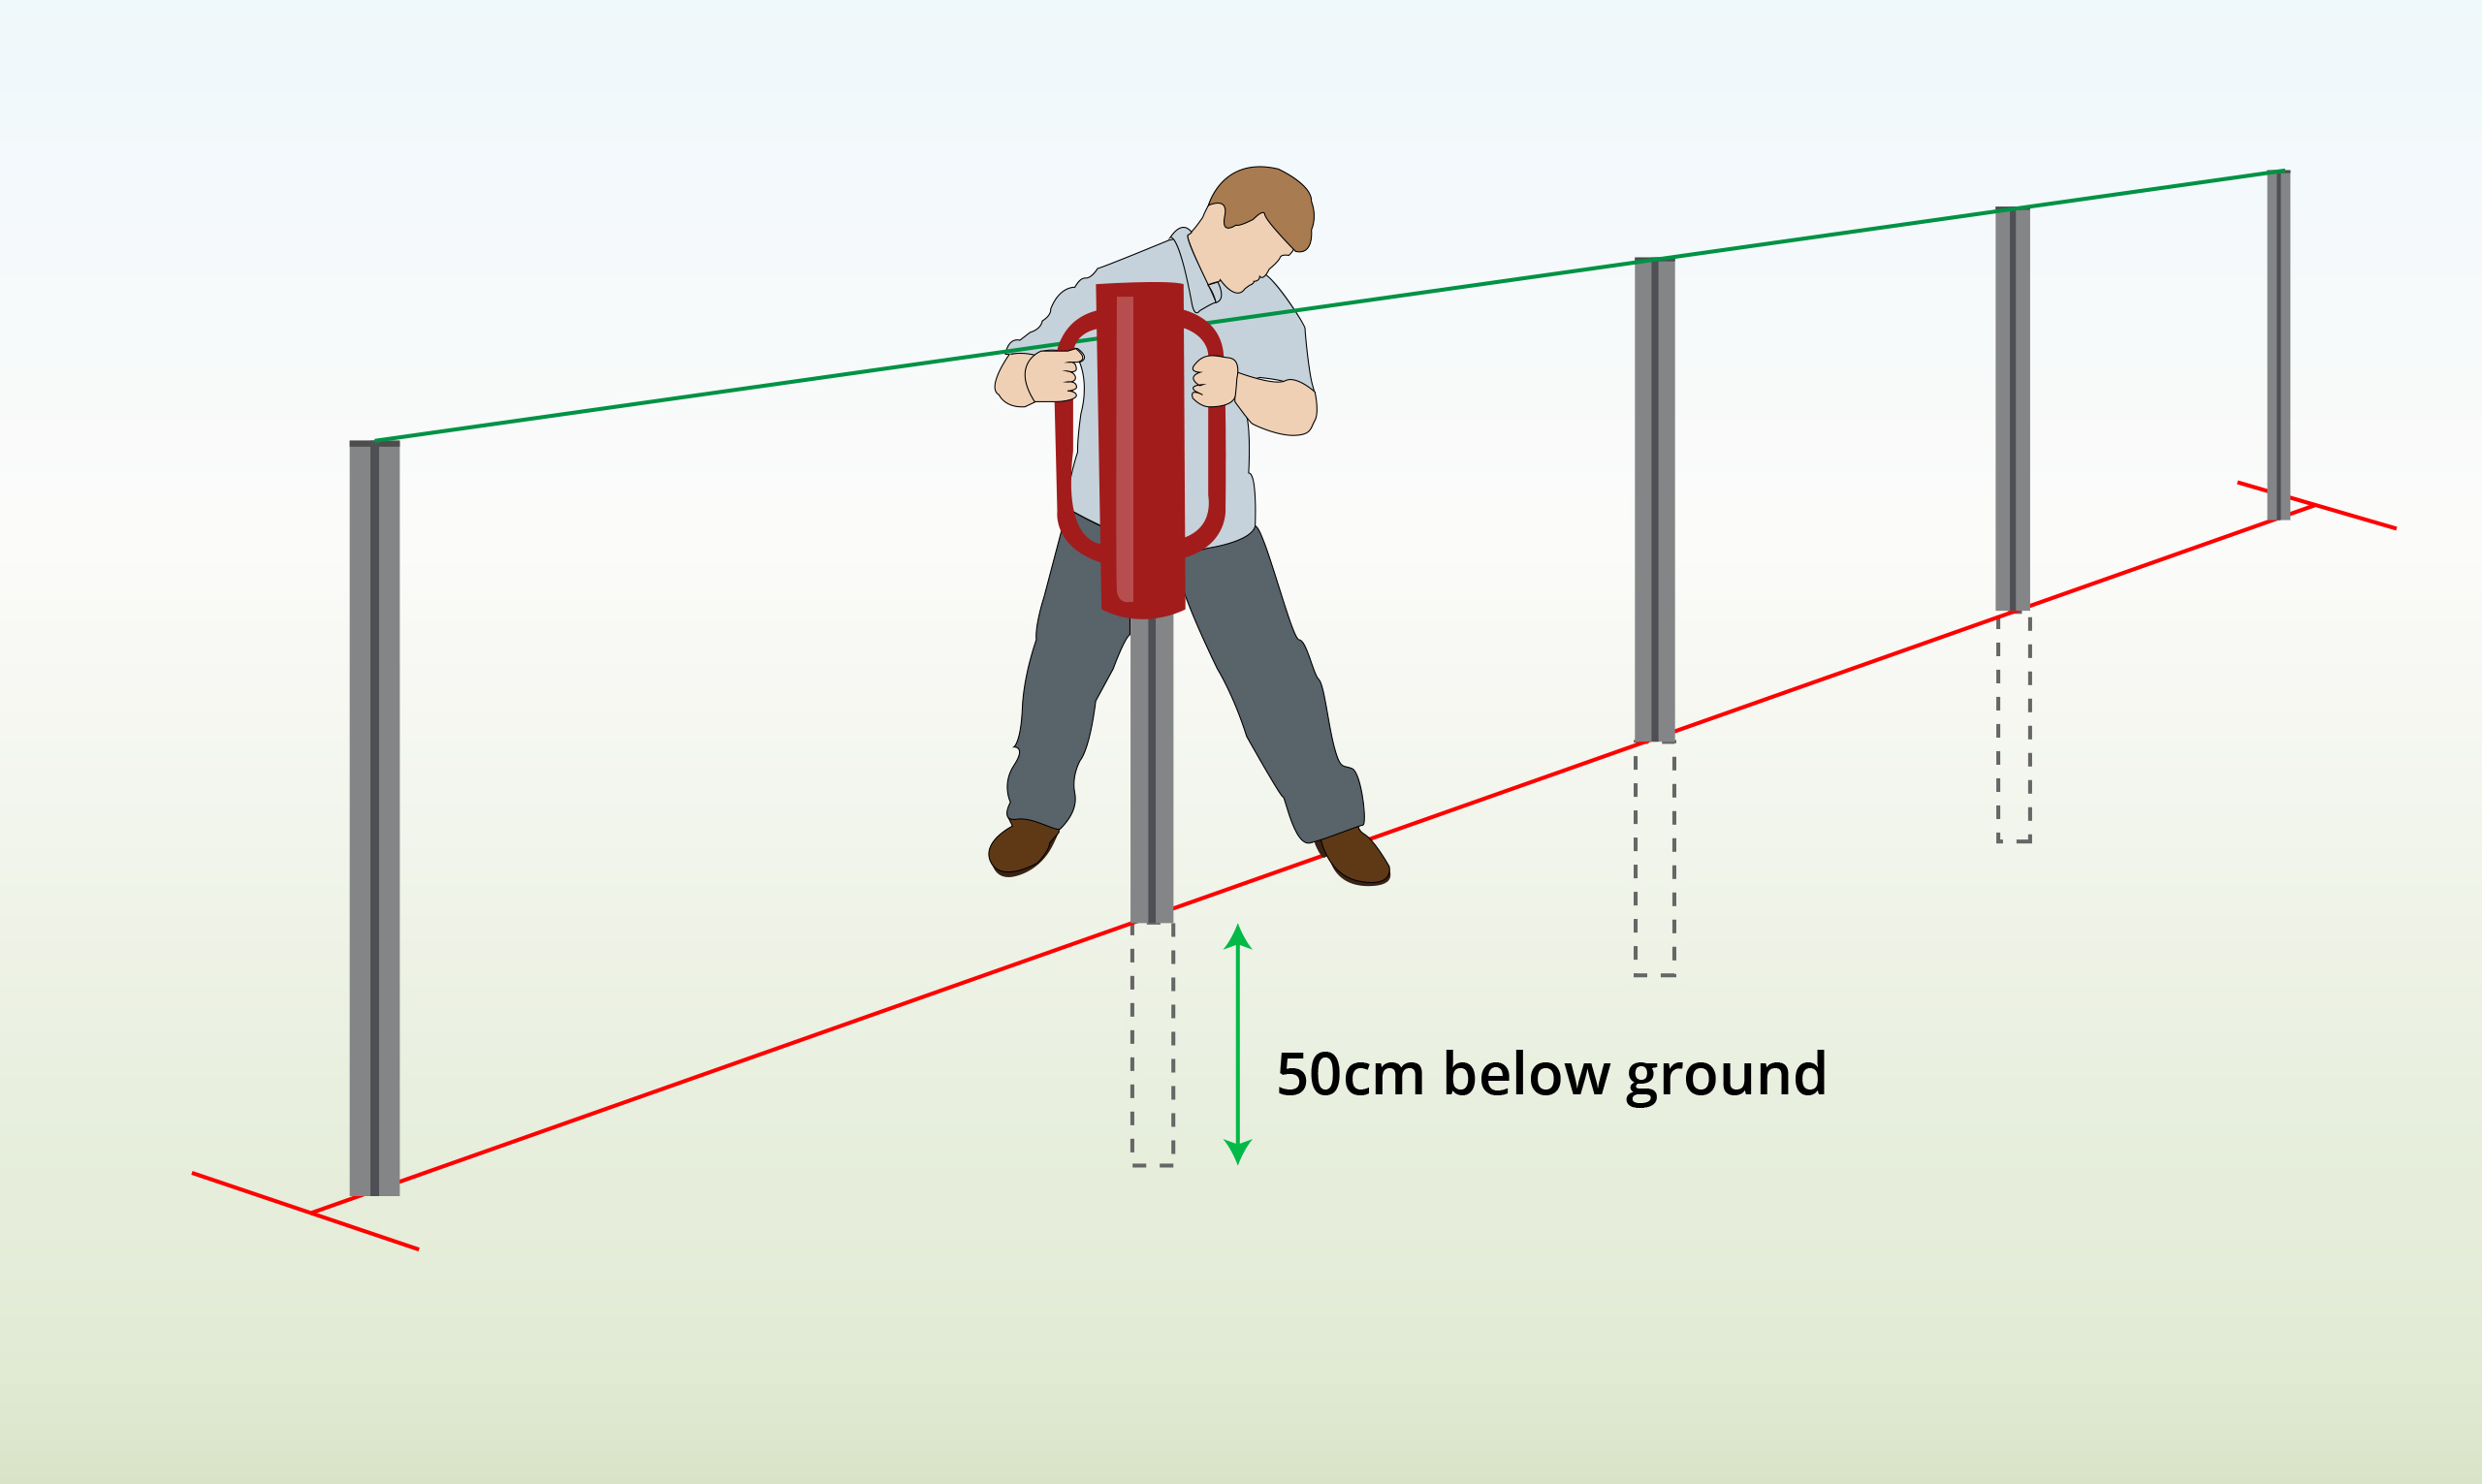
|
Use a post driver or mallet to sink the end posts 50cm into the ground.
Make sure the end posts are pointing in the same direction. |
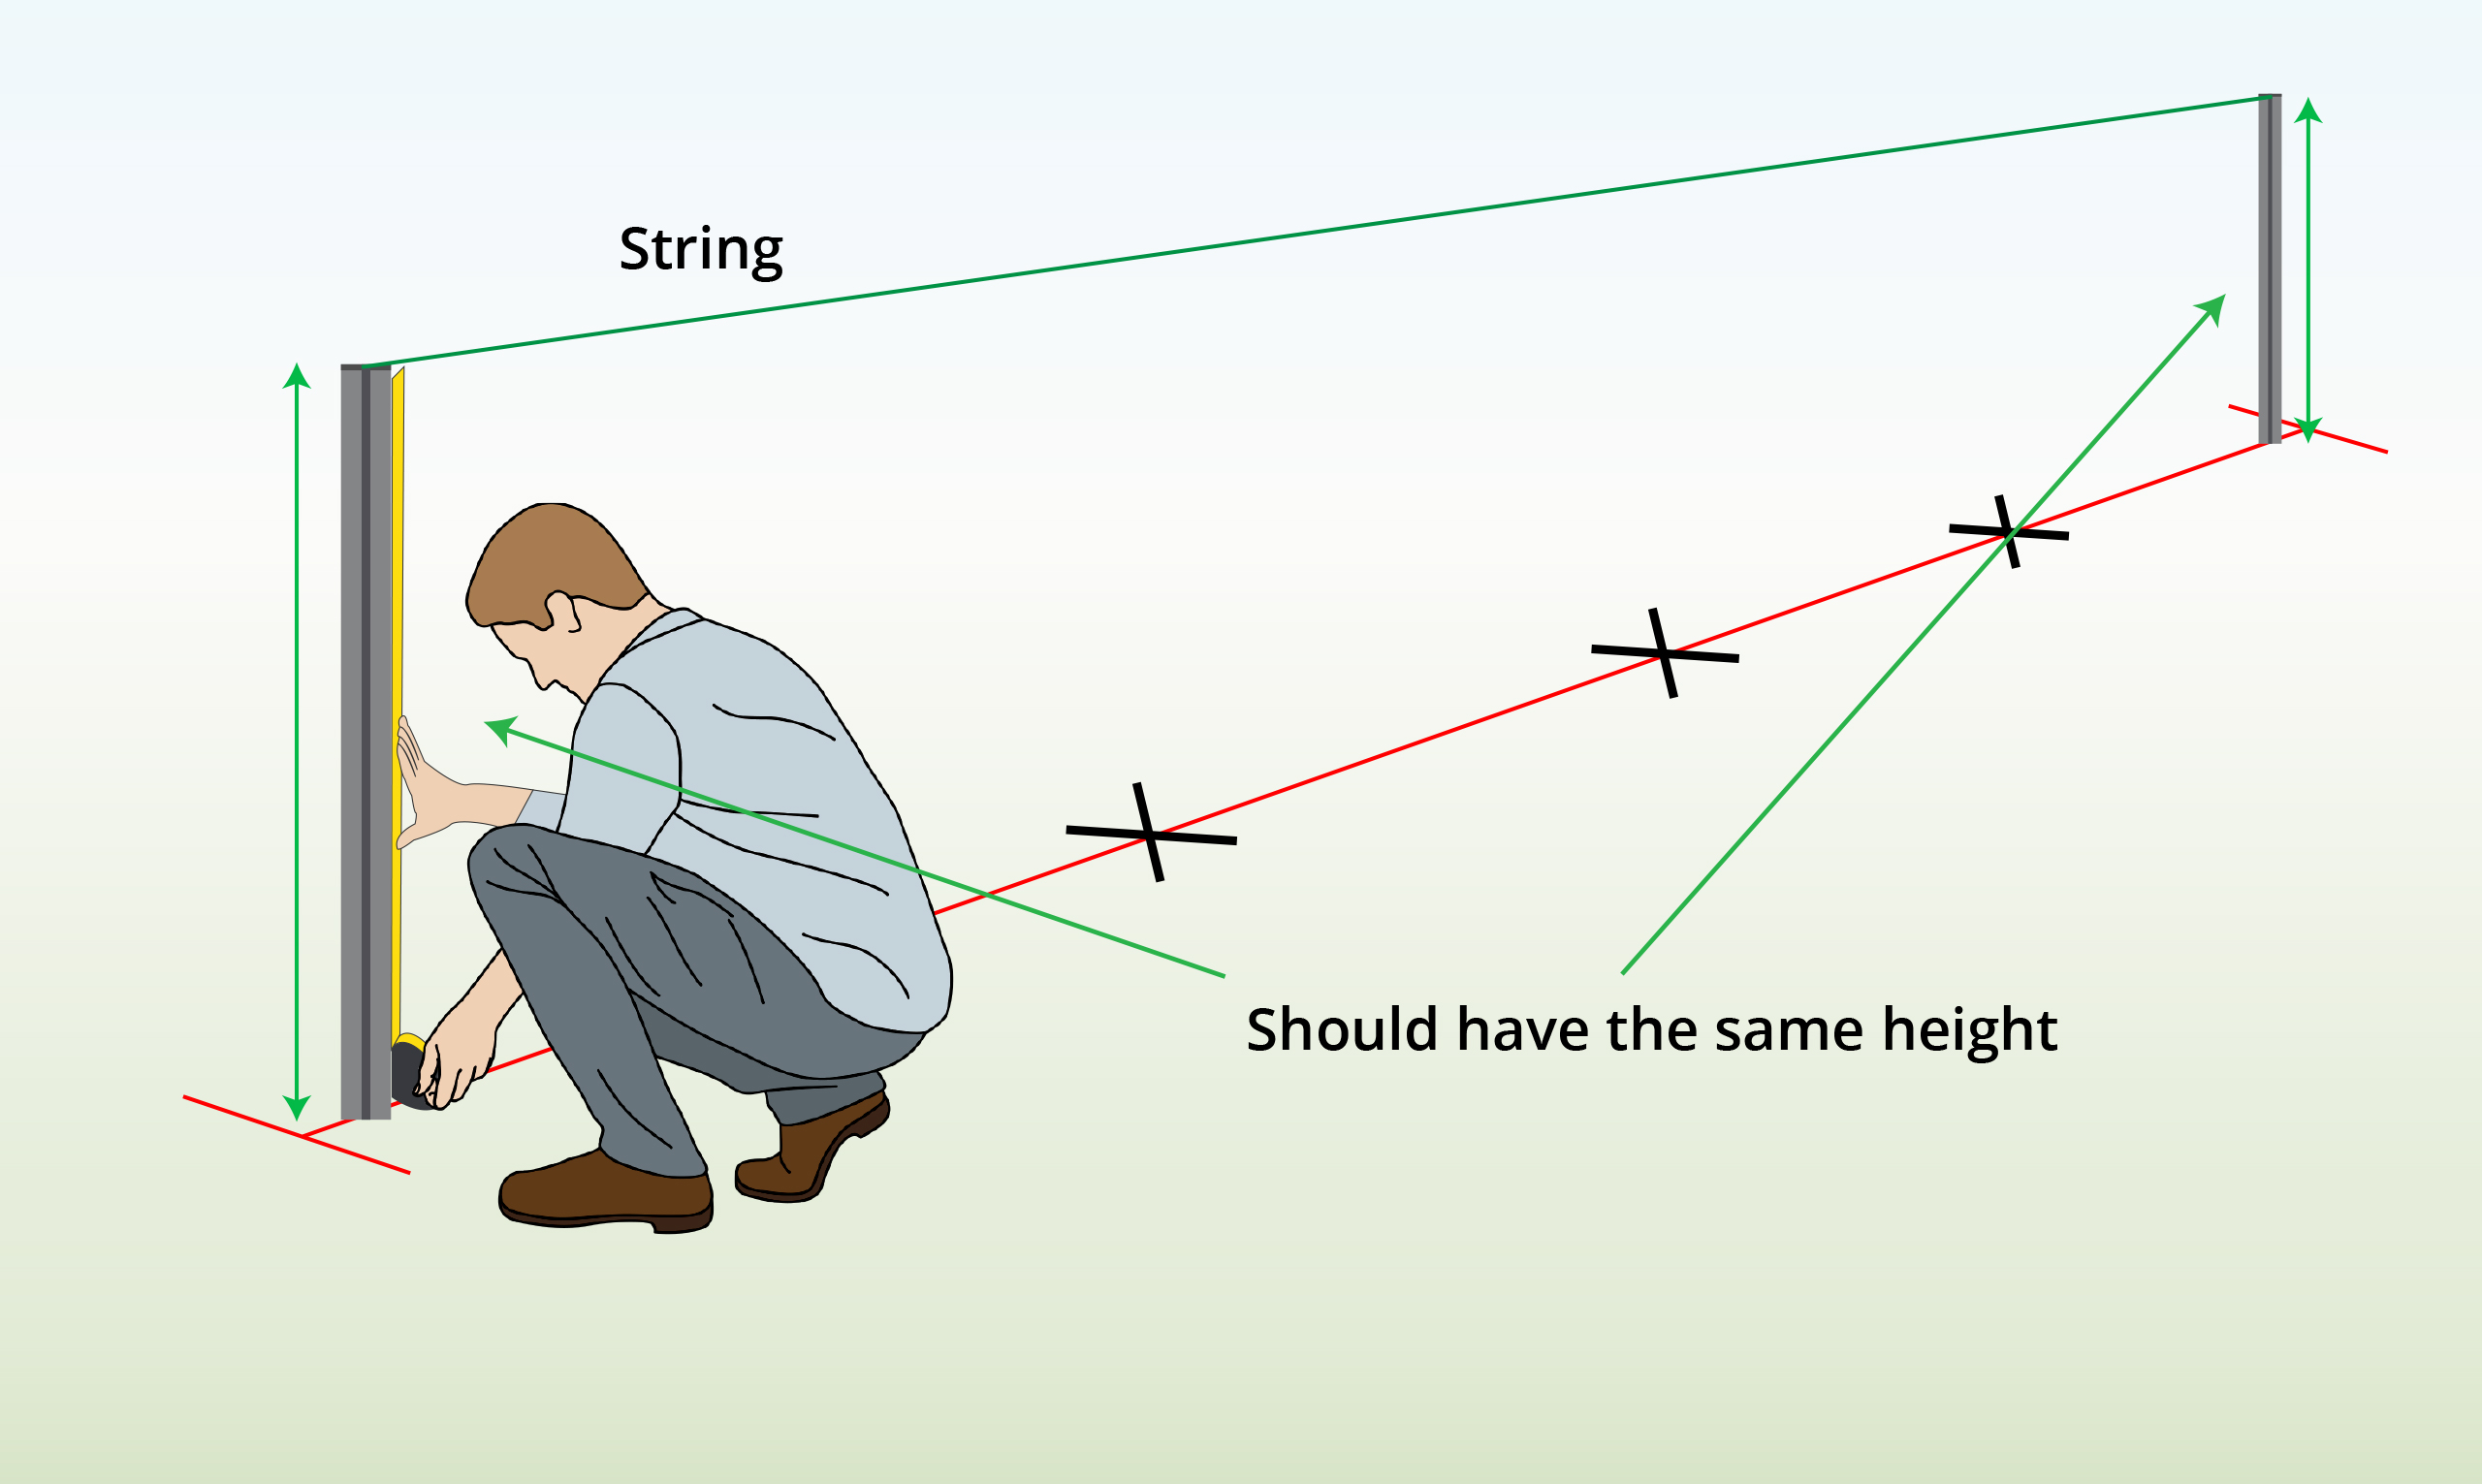
| Step 4 – Check for Same Height
|
Attach a string across the end posts, and check the height of their installation using a tape measure. |
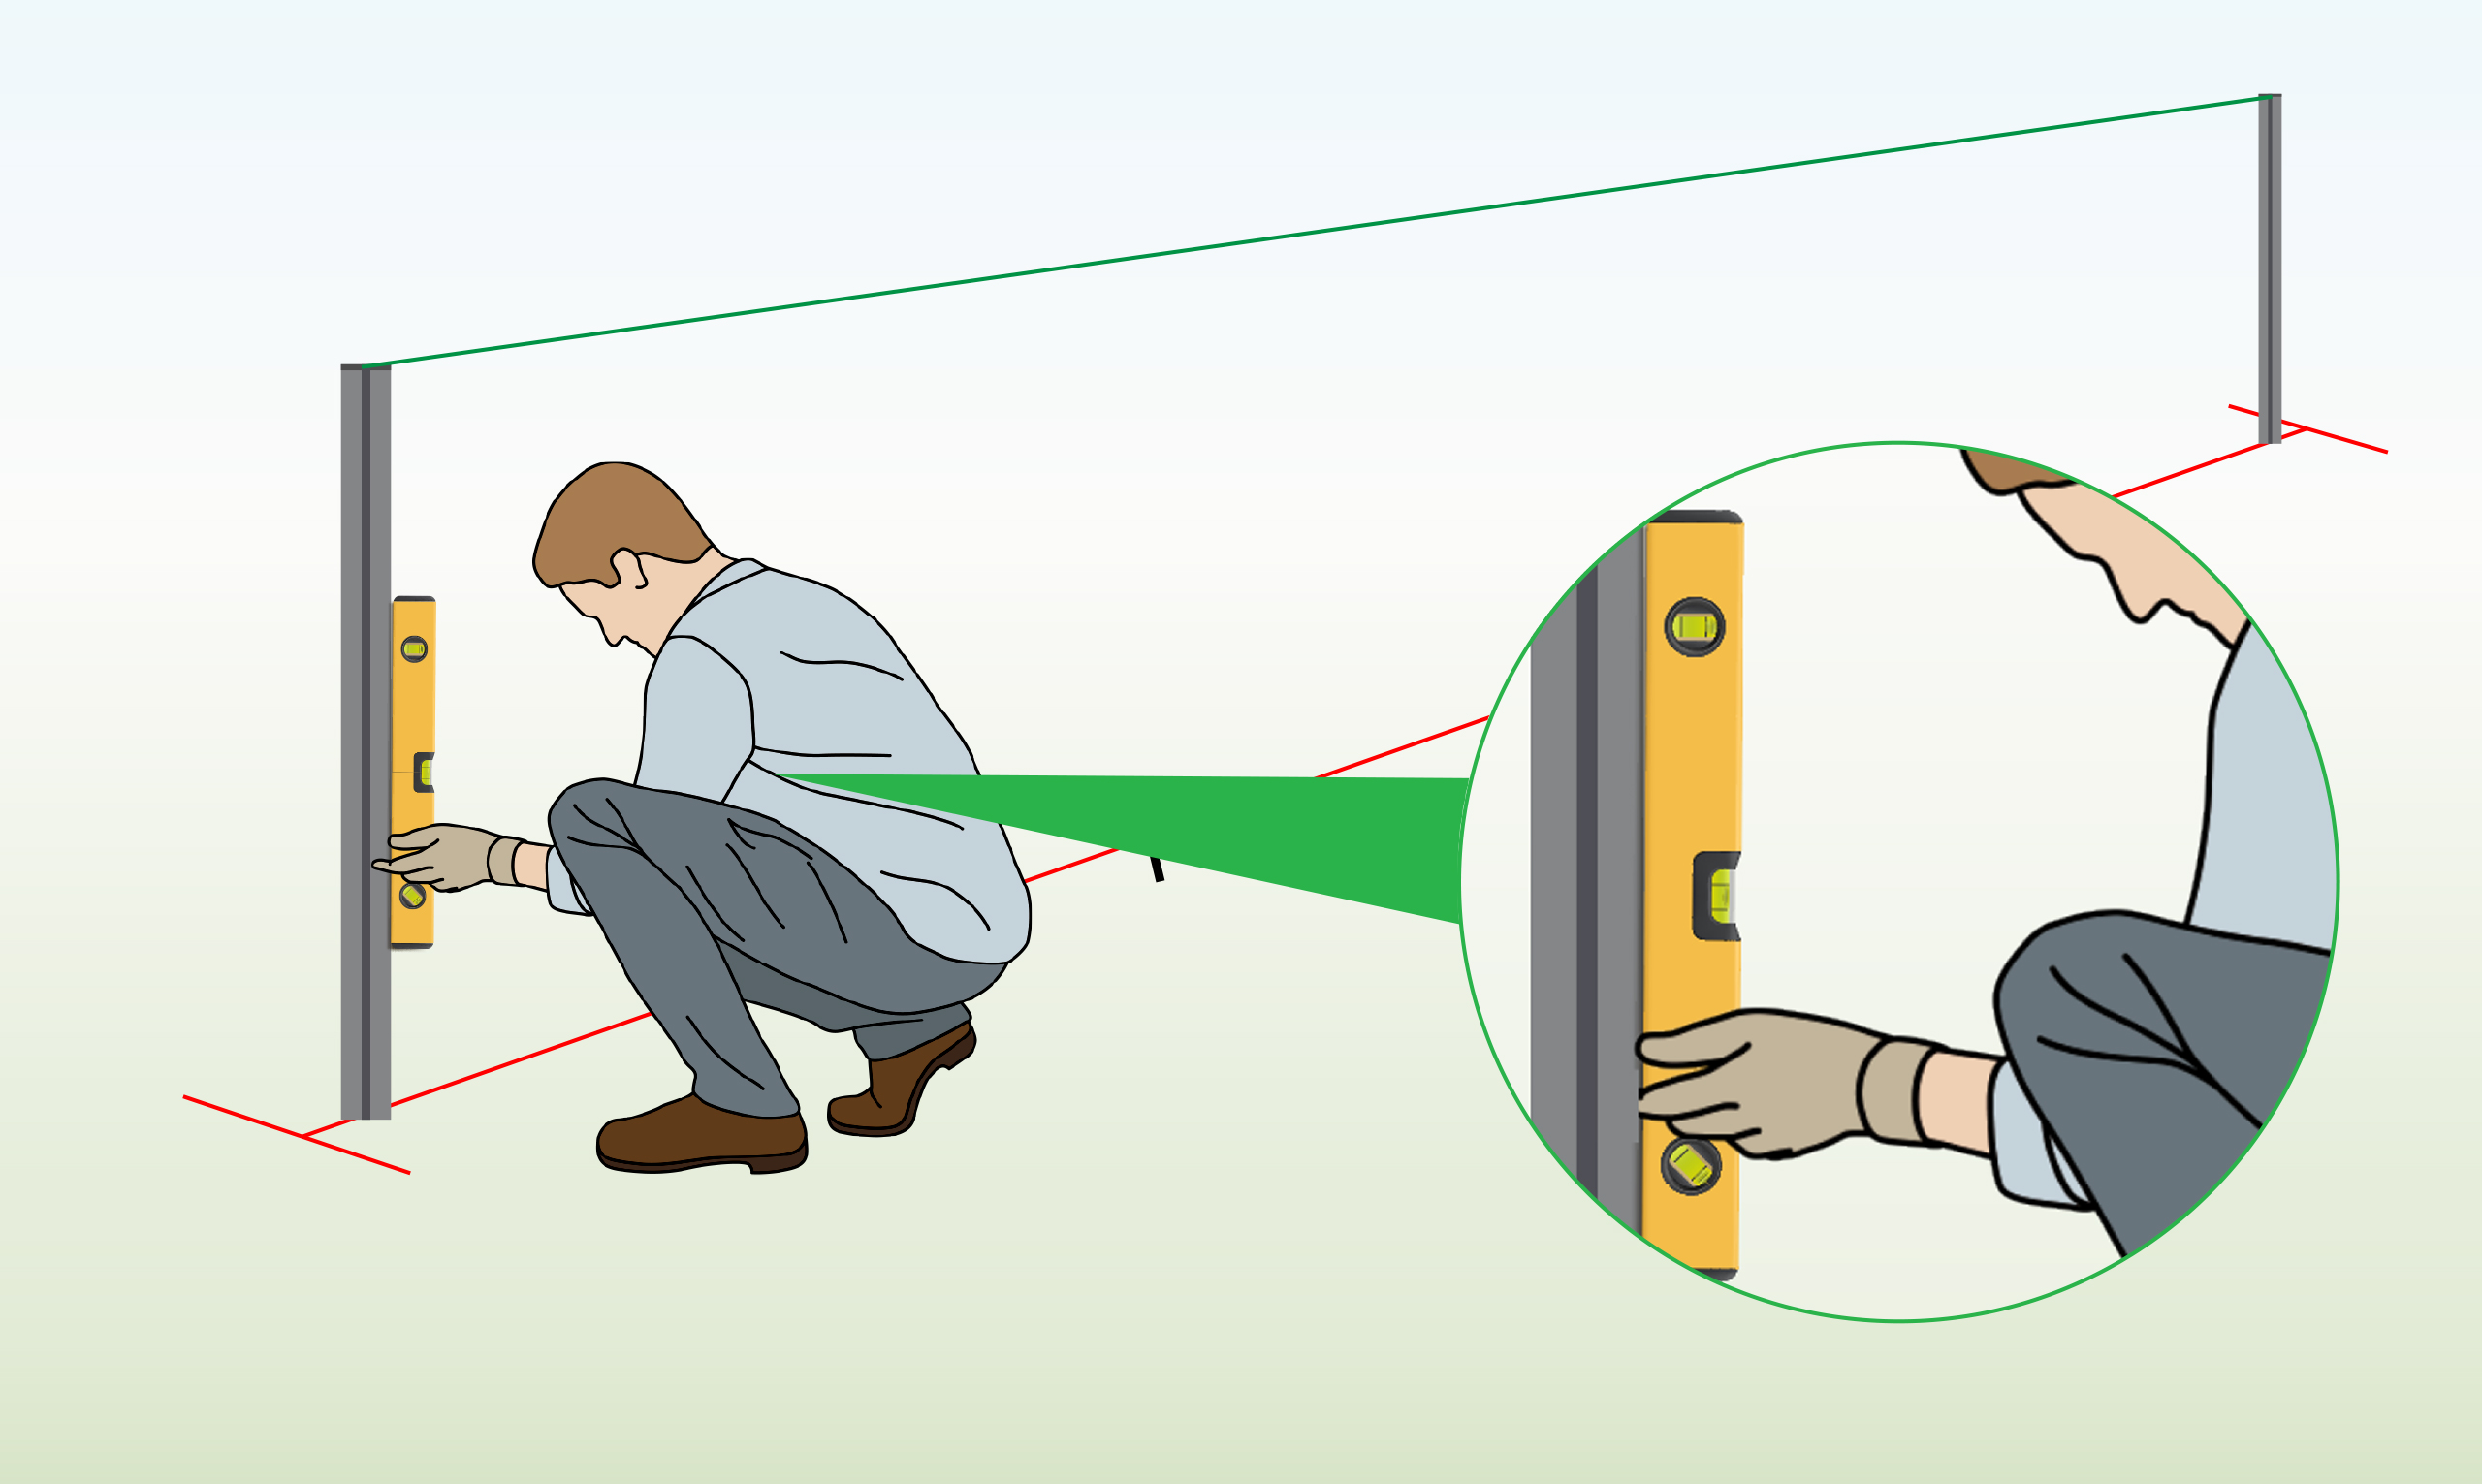
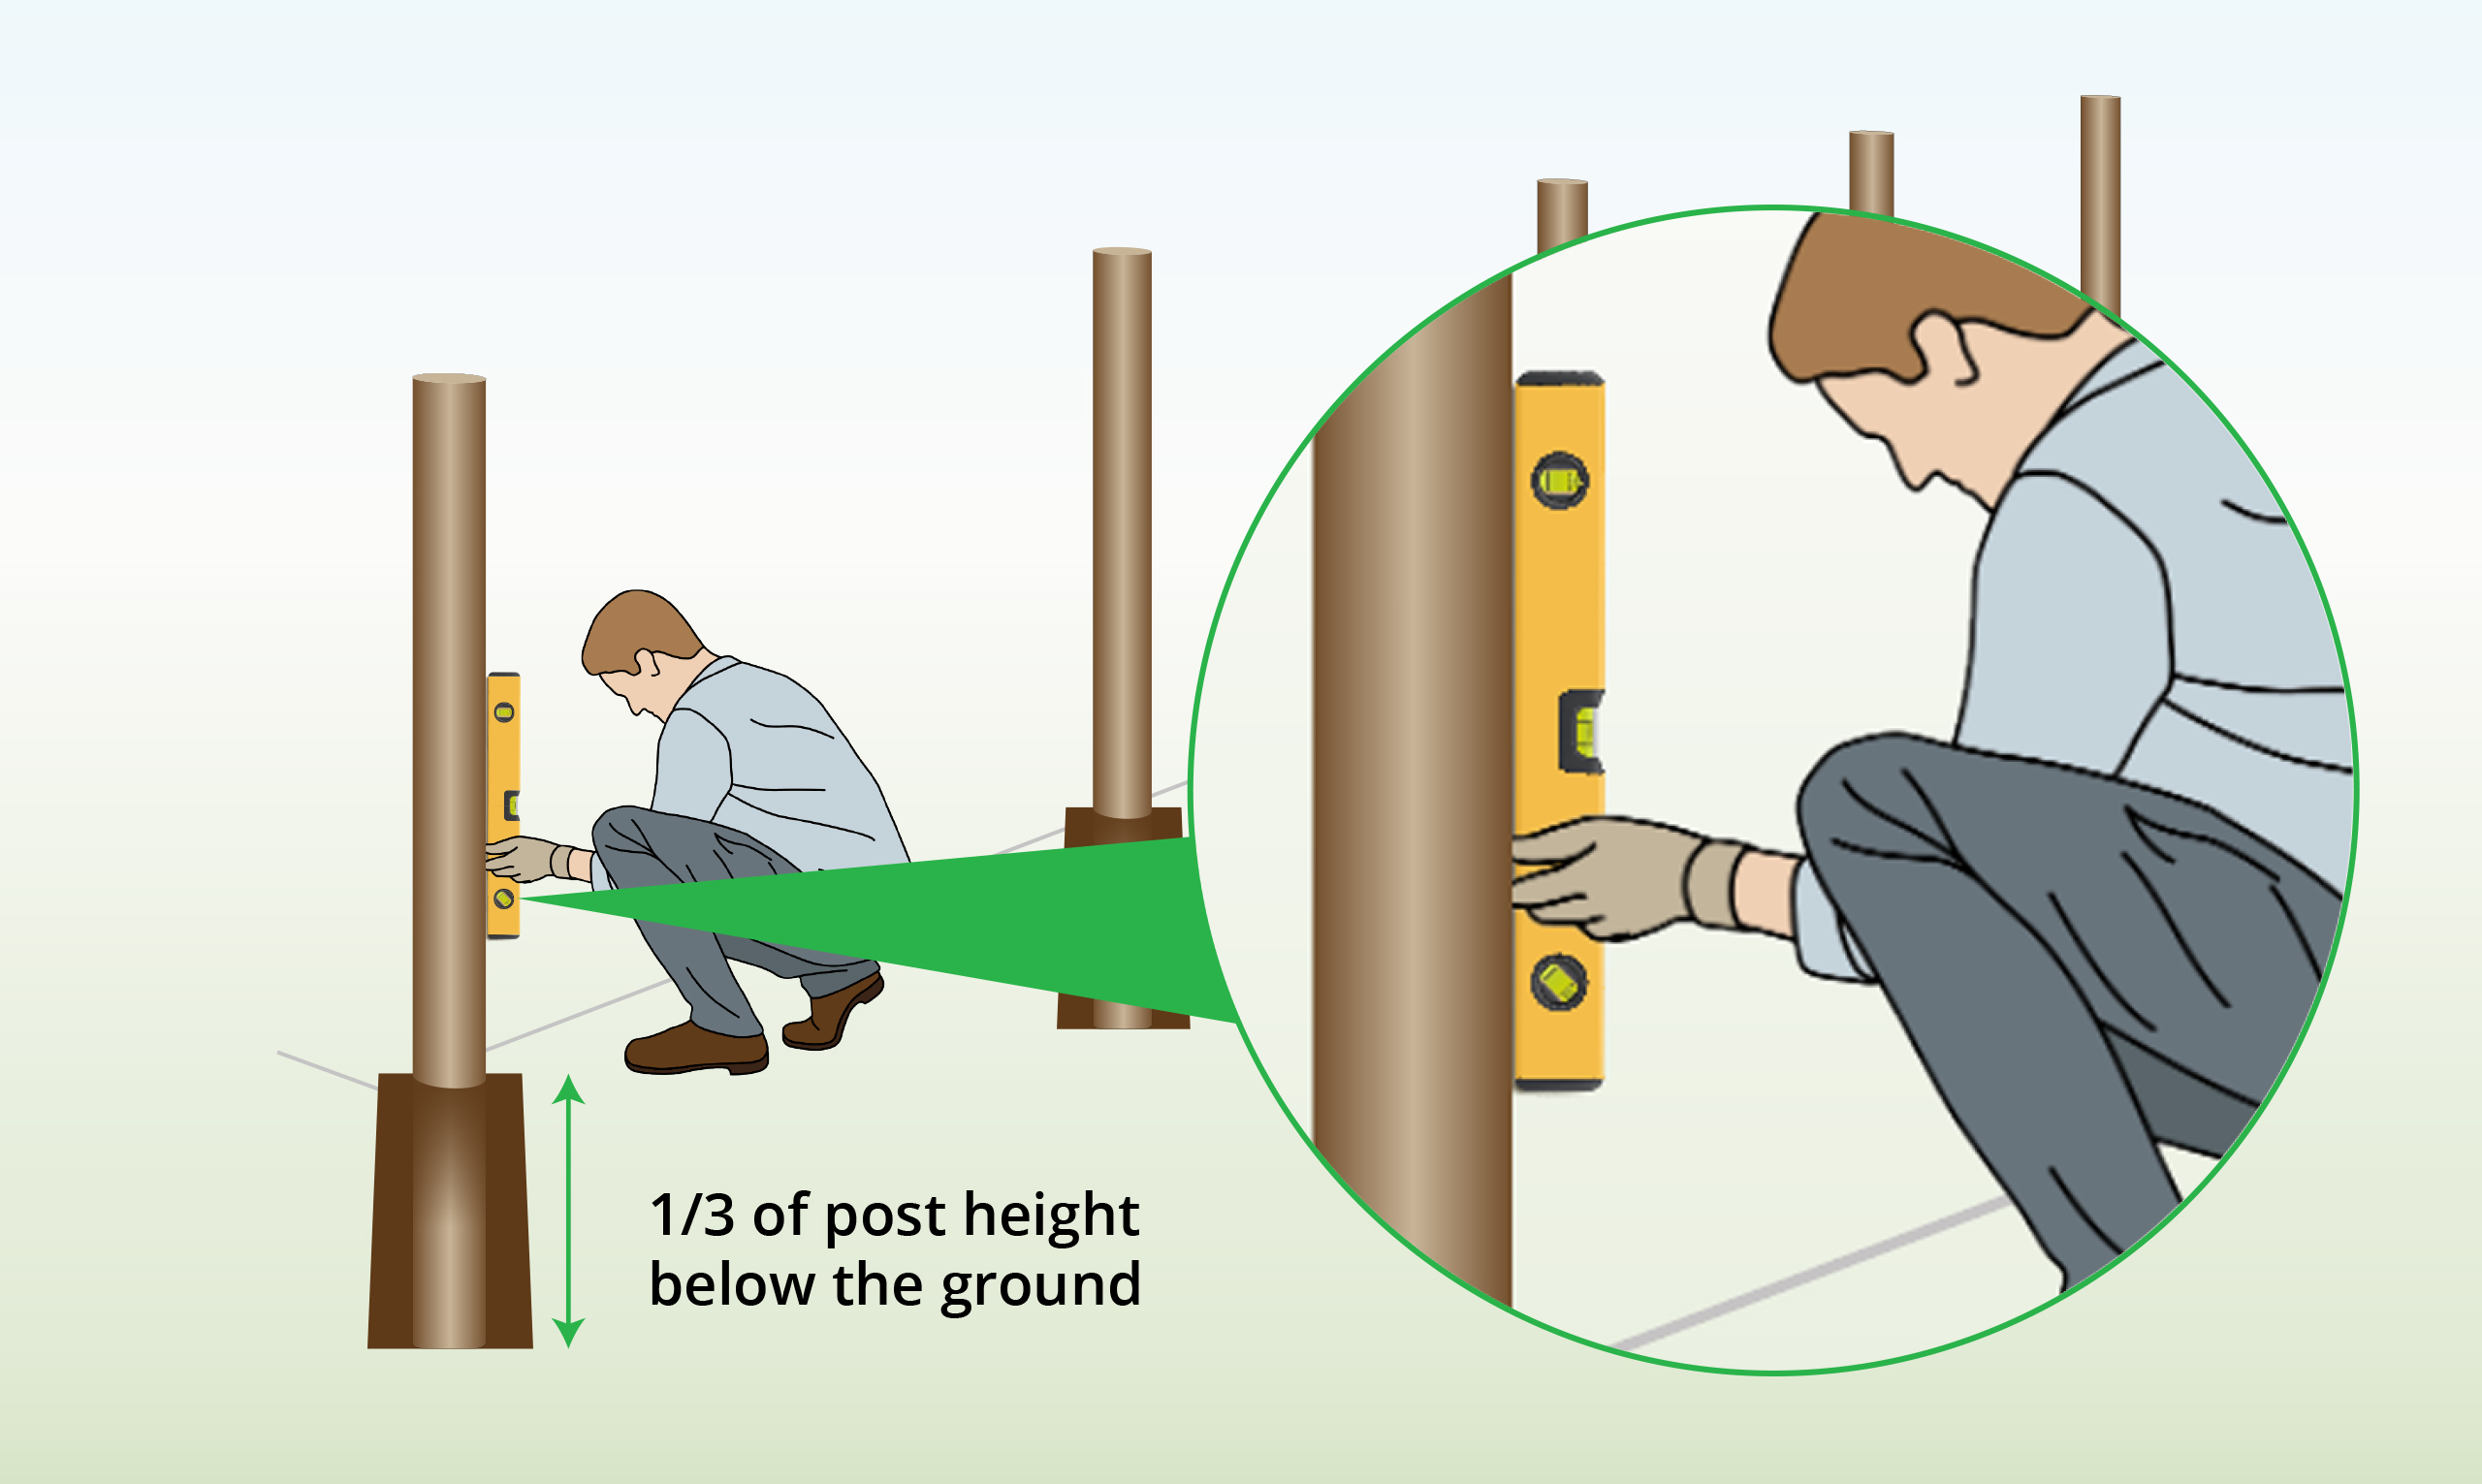
| Step 5 – Check for Straightness
|
Ensure that the posts have been installed completely straight by using a spirit level. |
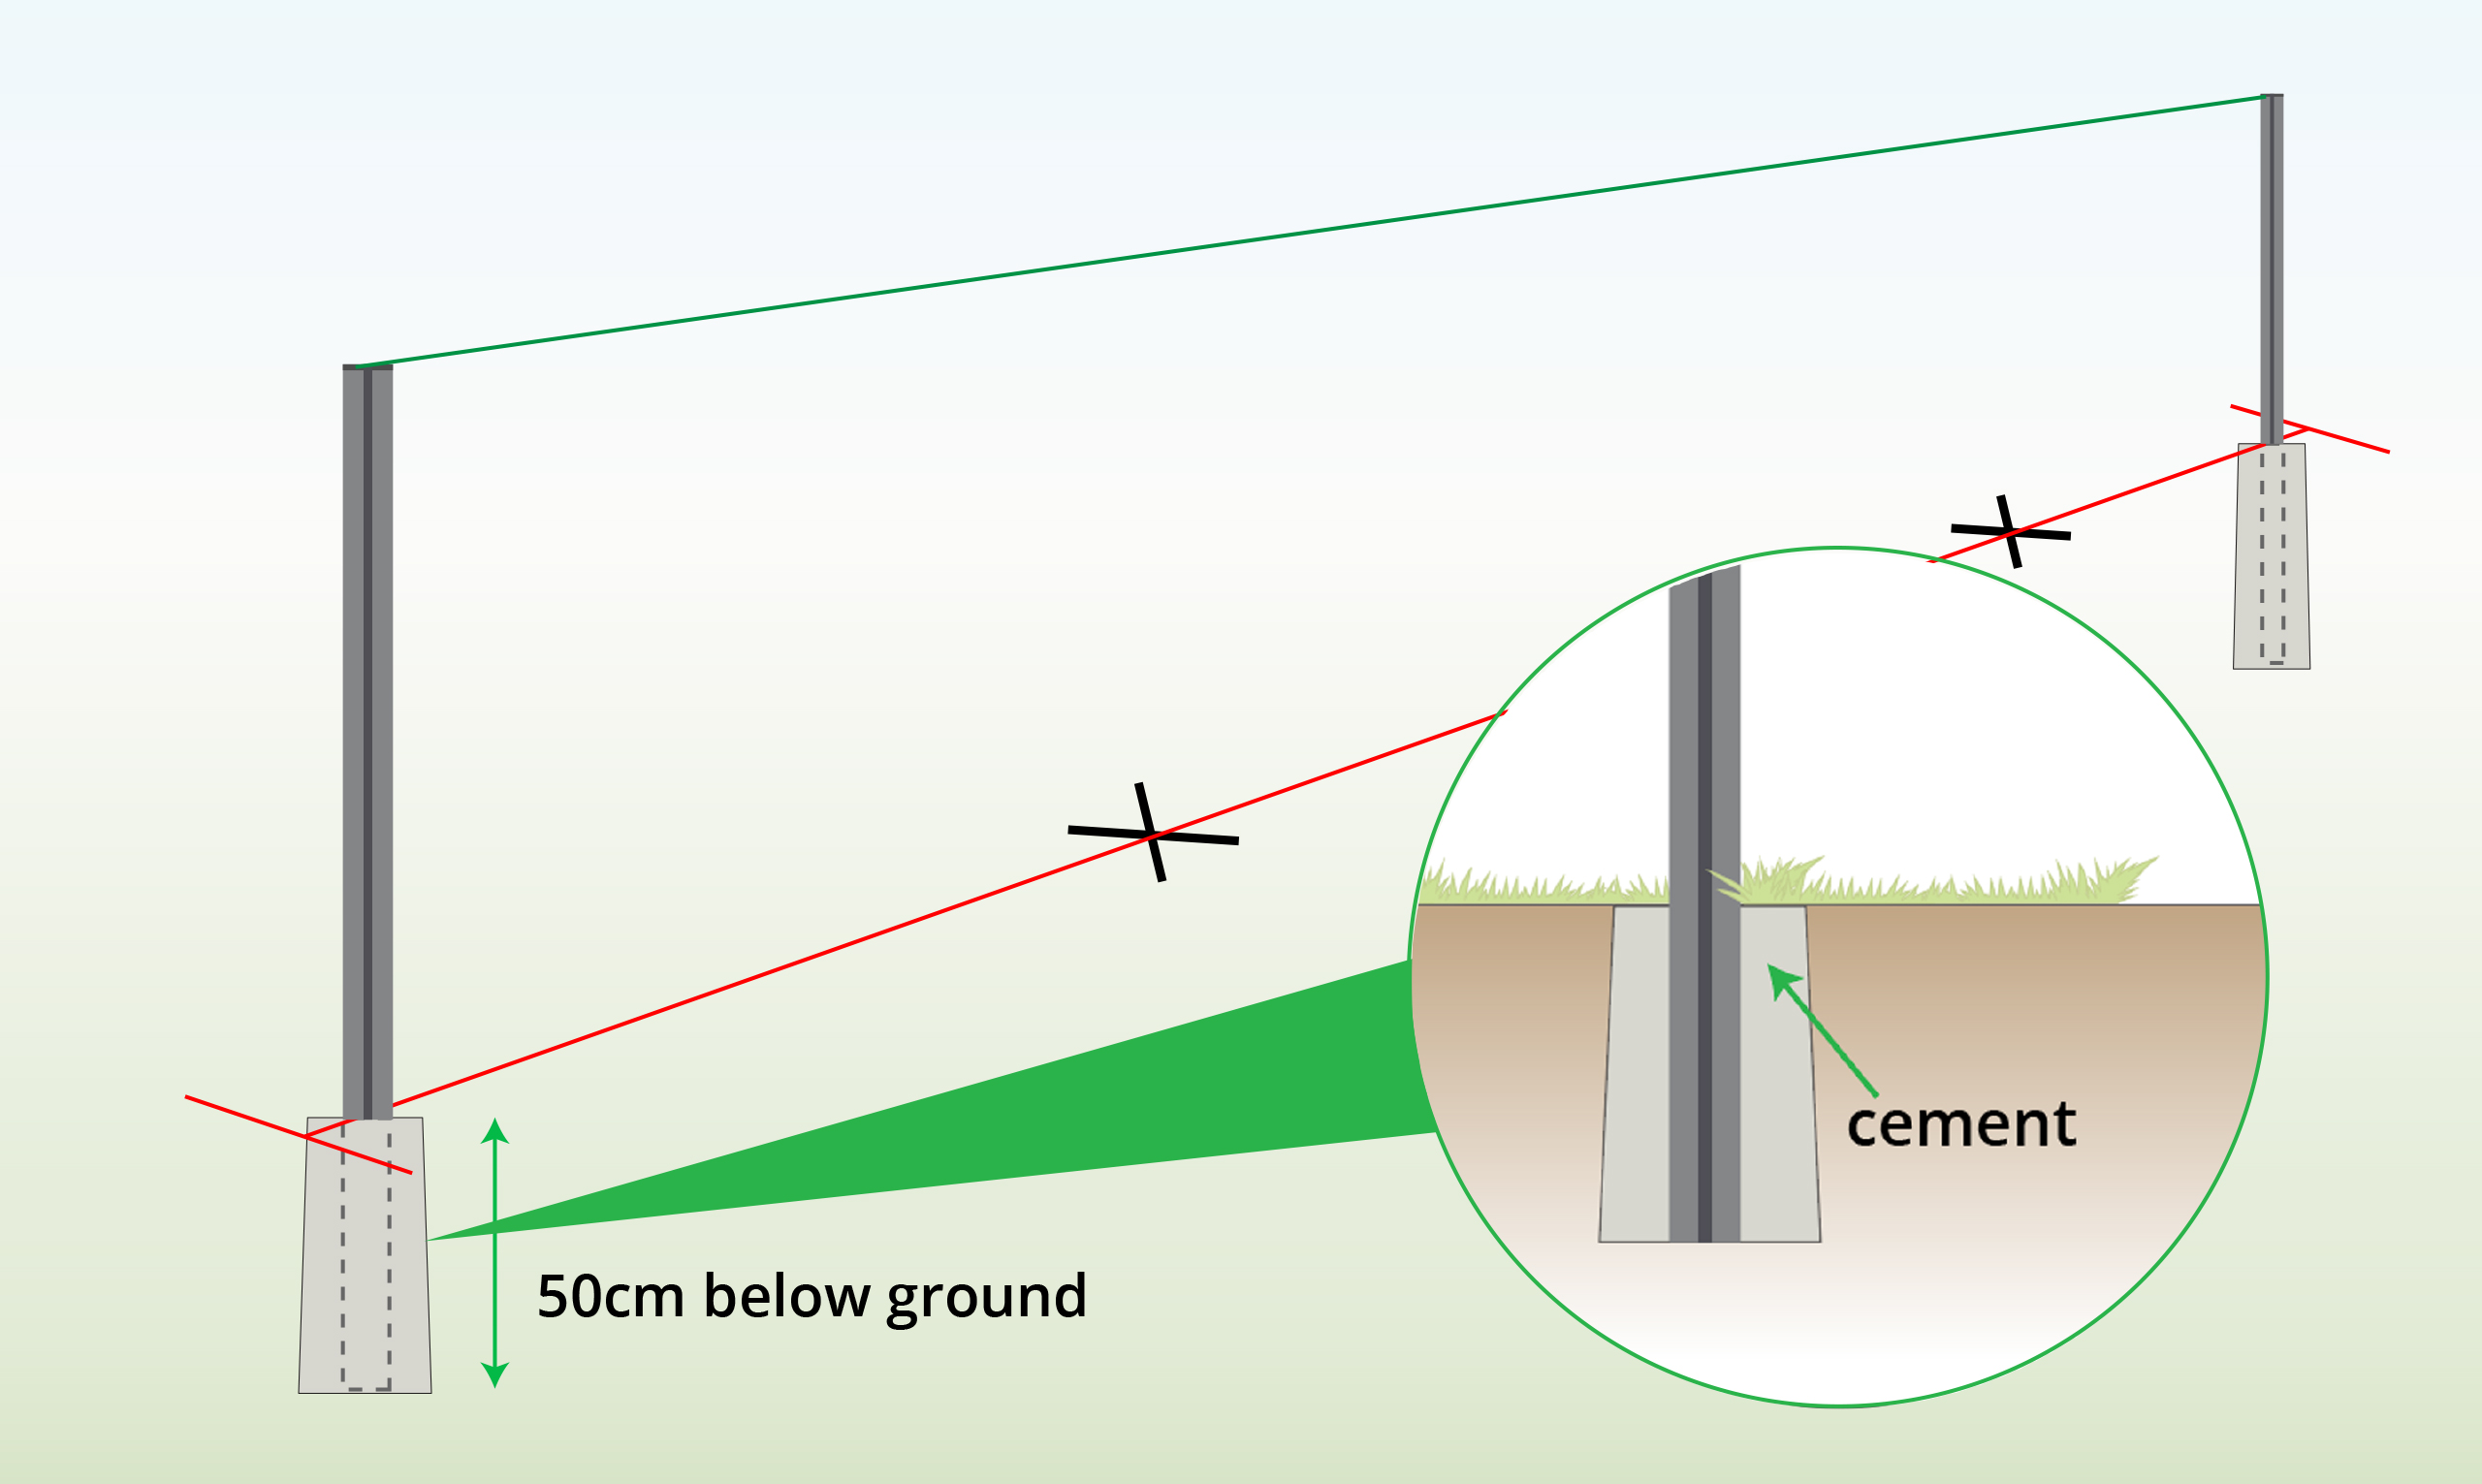
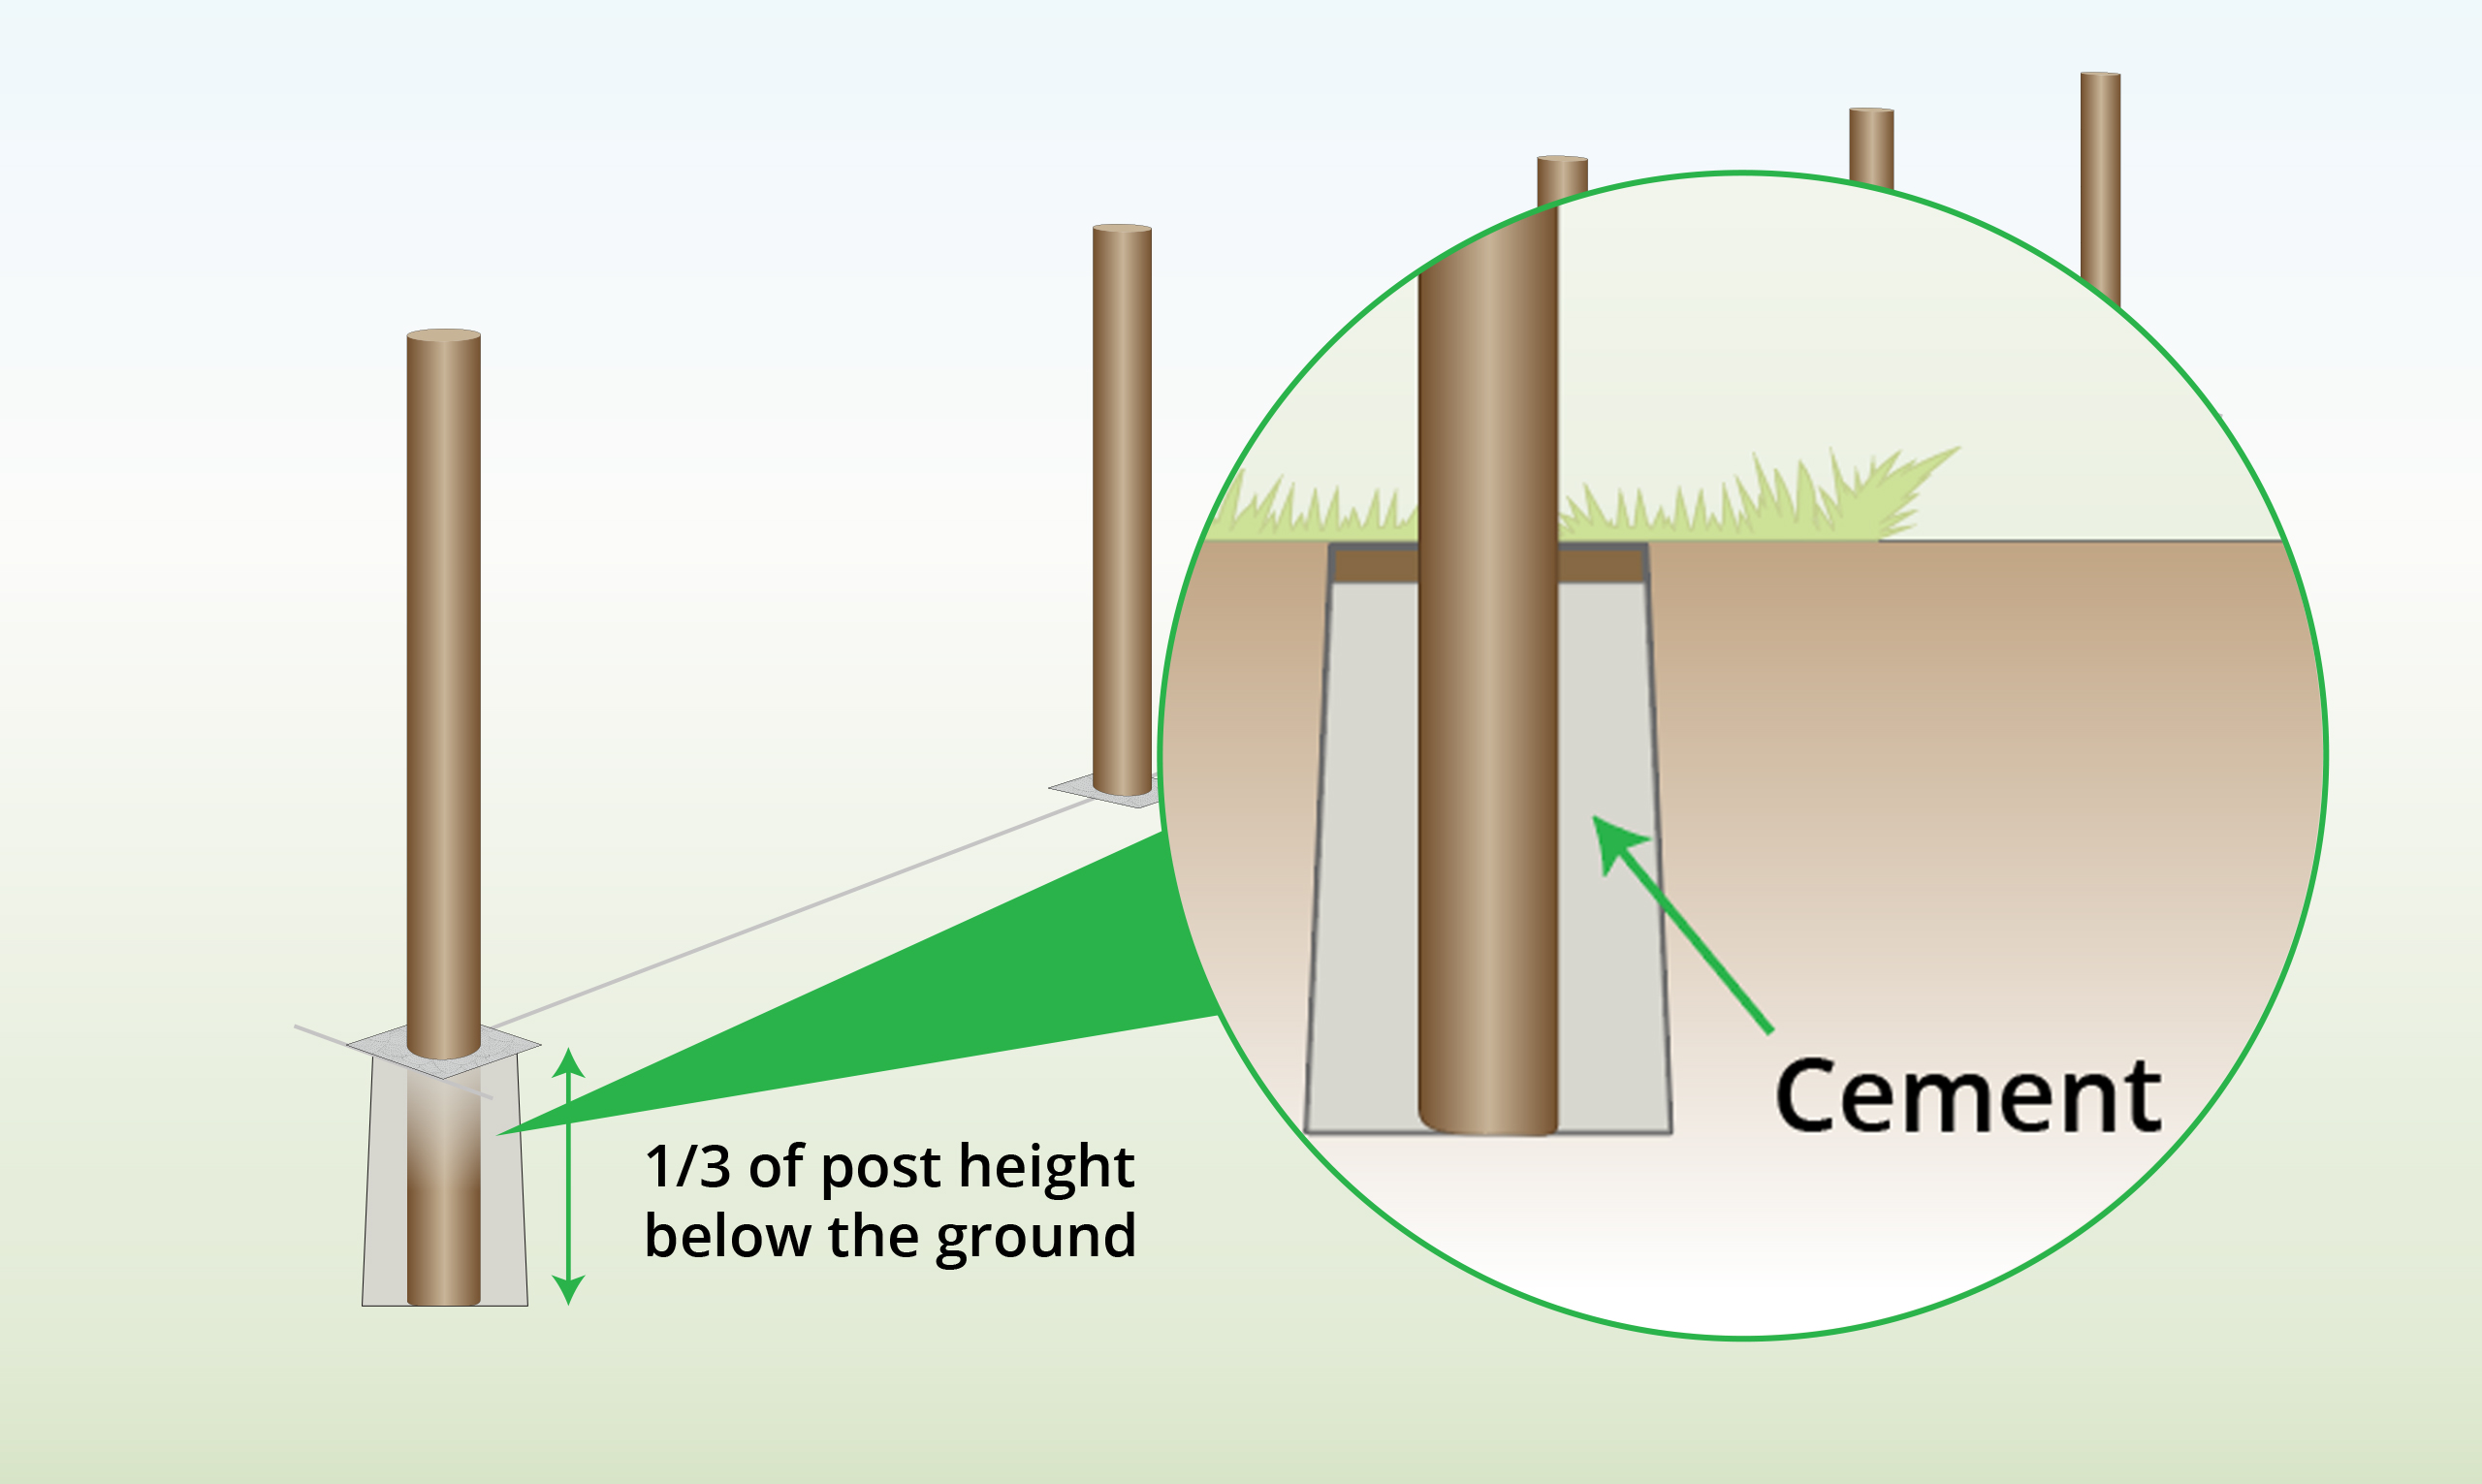
| Step 6 (Optional) – Set in Concrete
|
For a sturdier and more reliable fence, enhance its stability by setting your posts in concrete.
This involves digging a 50cm hole and pouring cement to create a foundation for the posts. |
| Step 7 – Install Middle Posts
|
Follow steps 3 through 5 to install the middle posts.
|
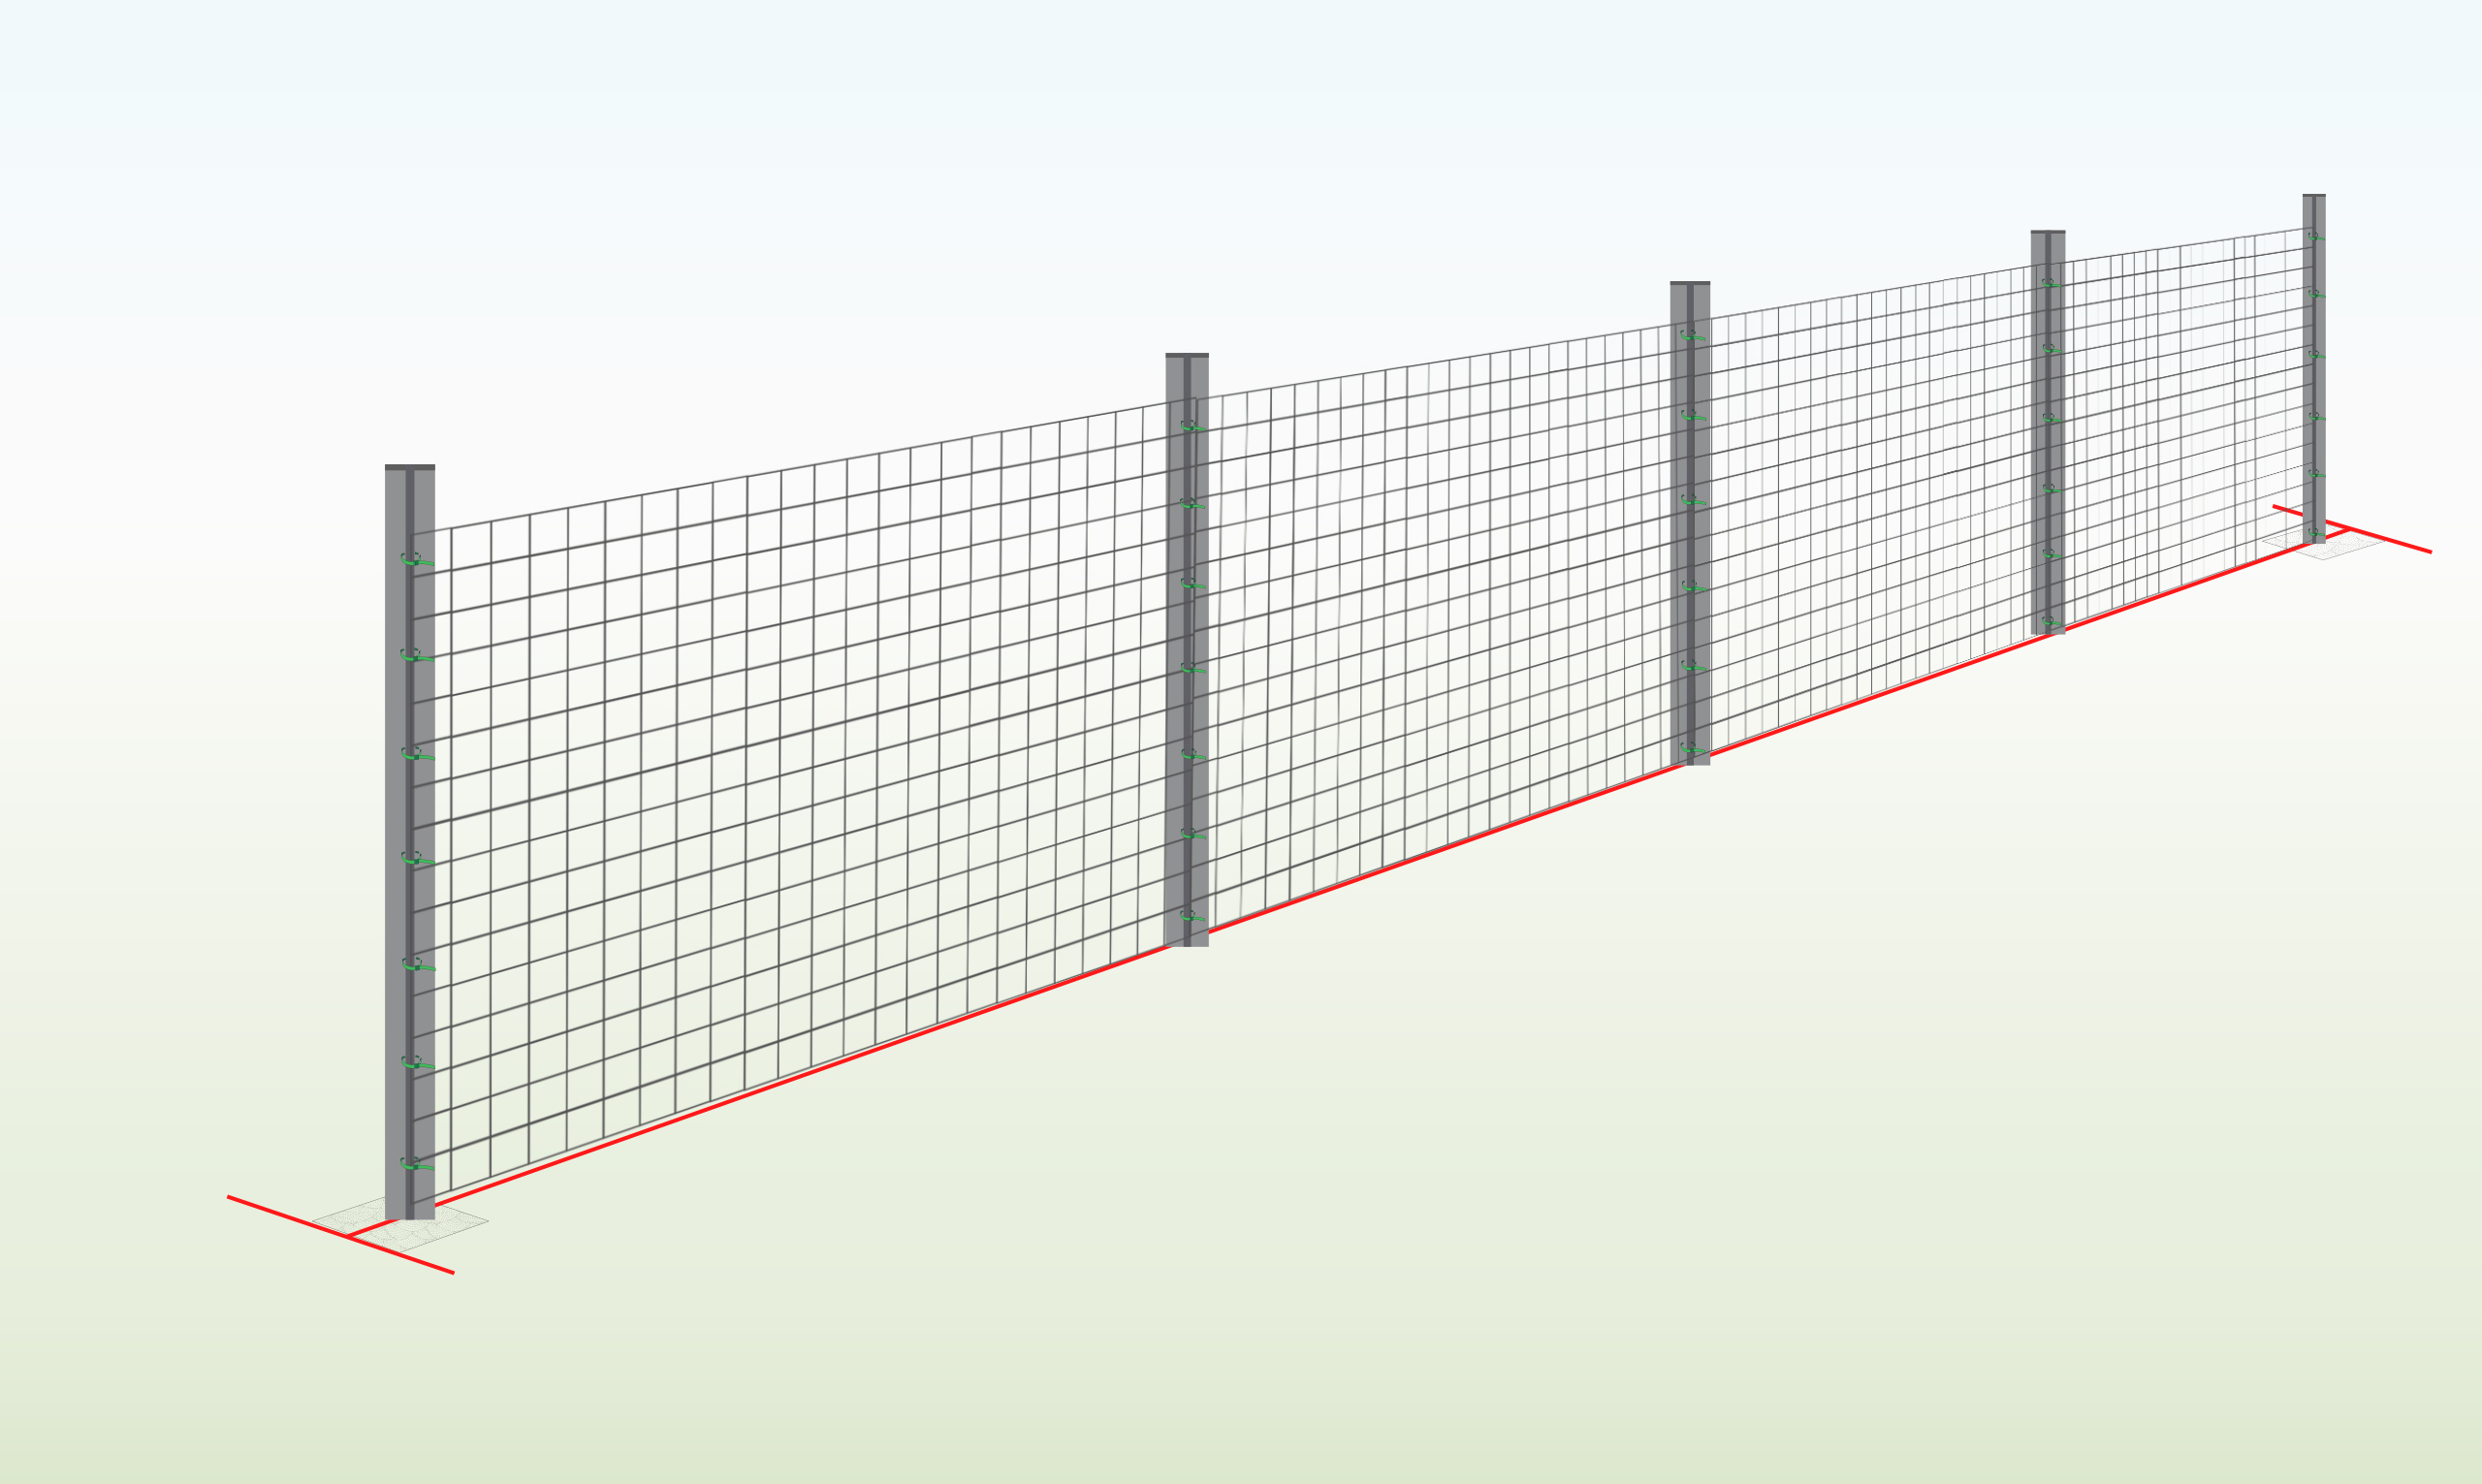
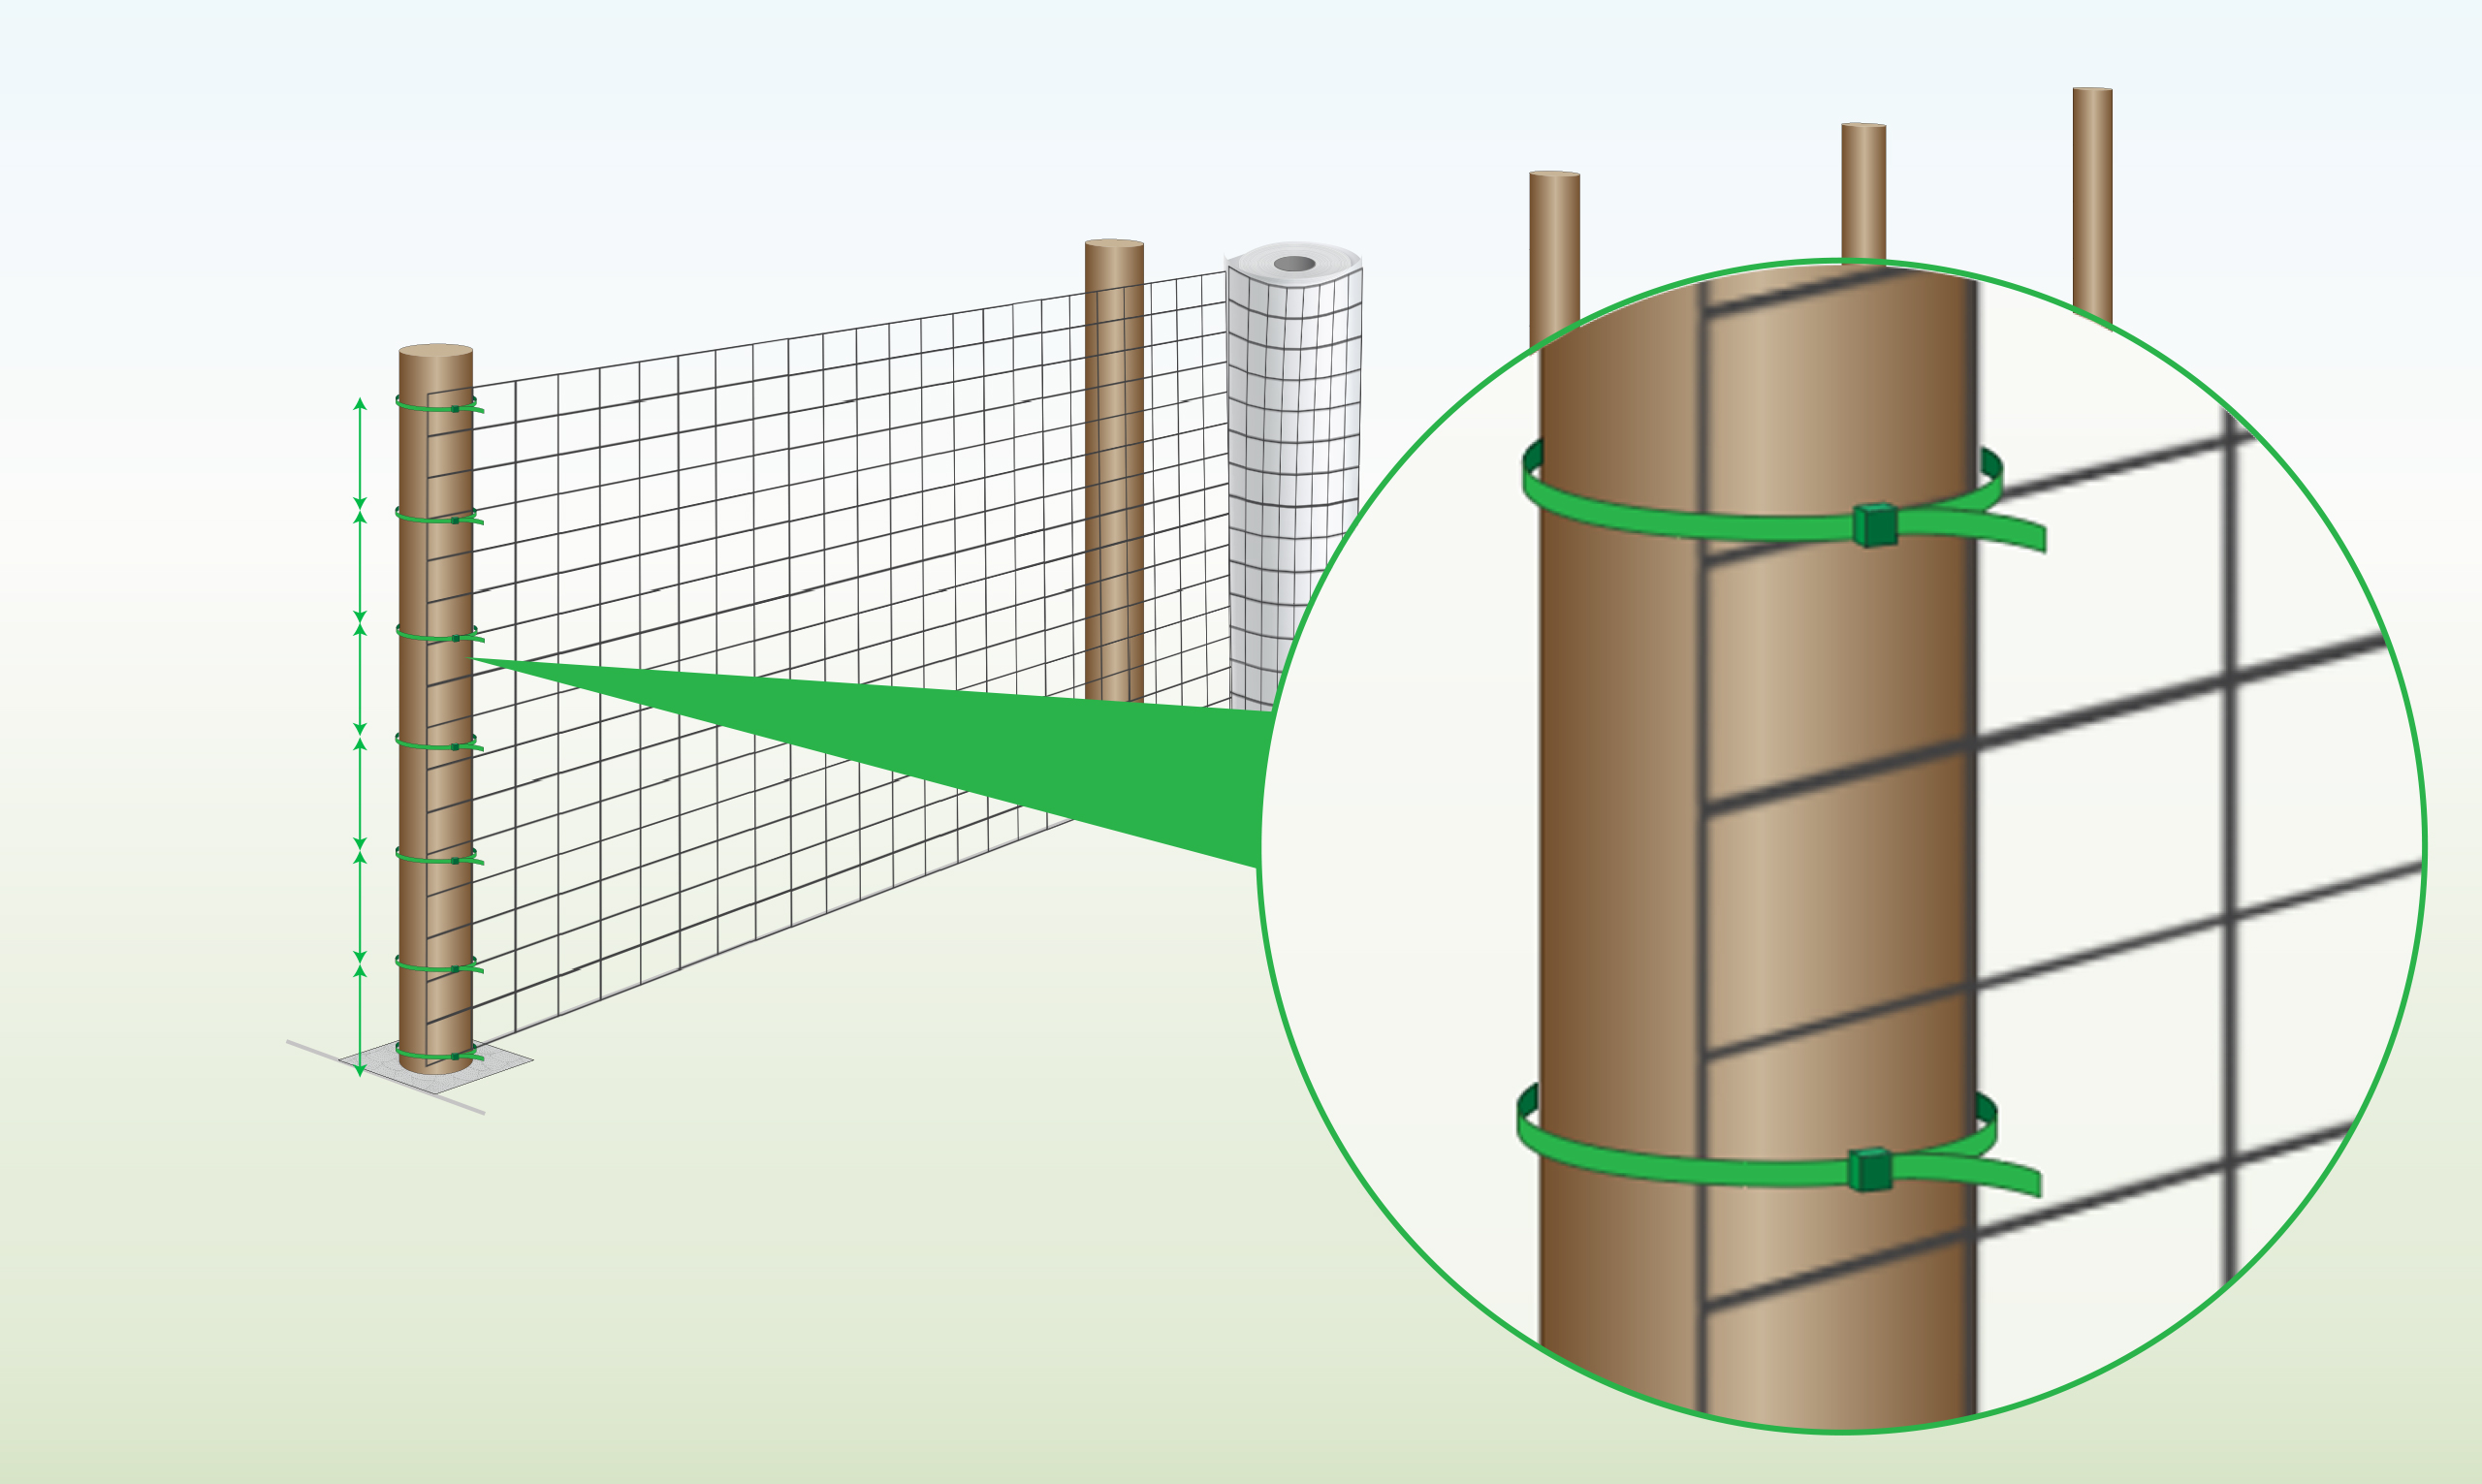
| Step 8 – Attach Panel to Posts
|
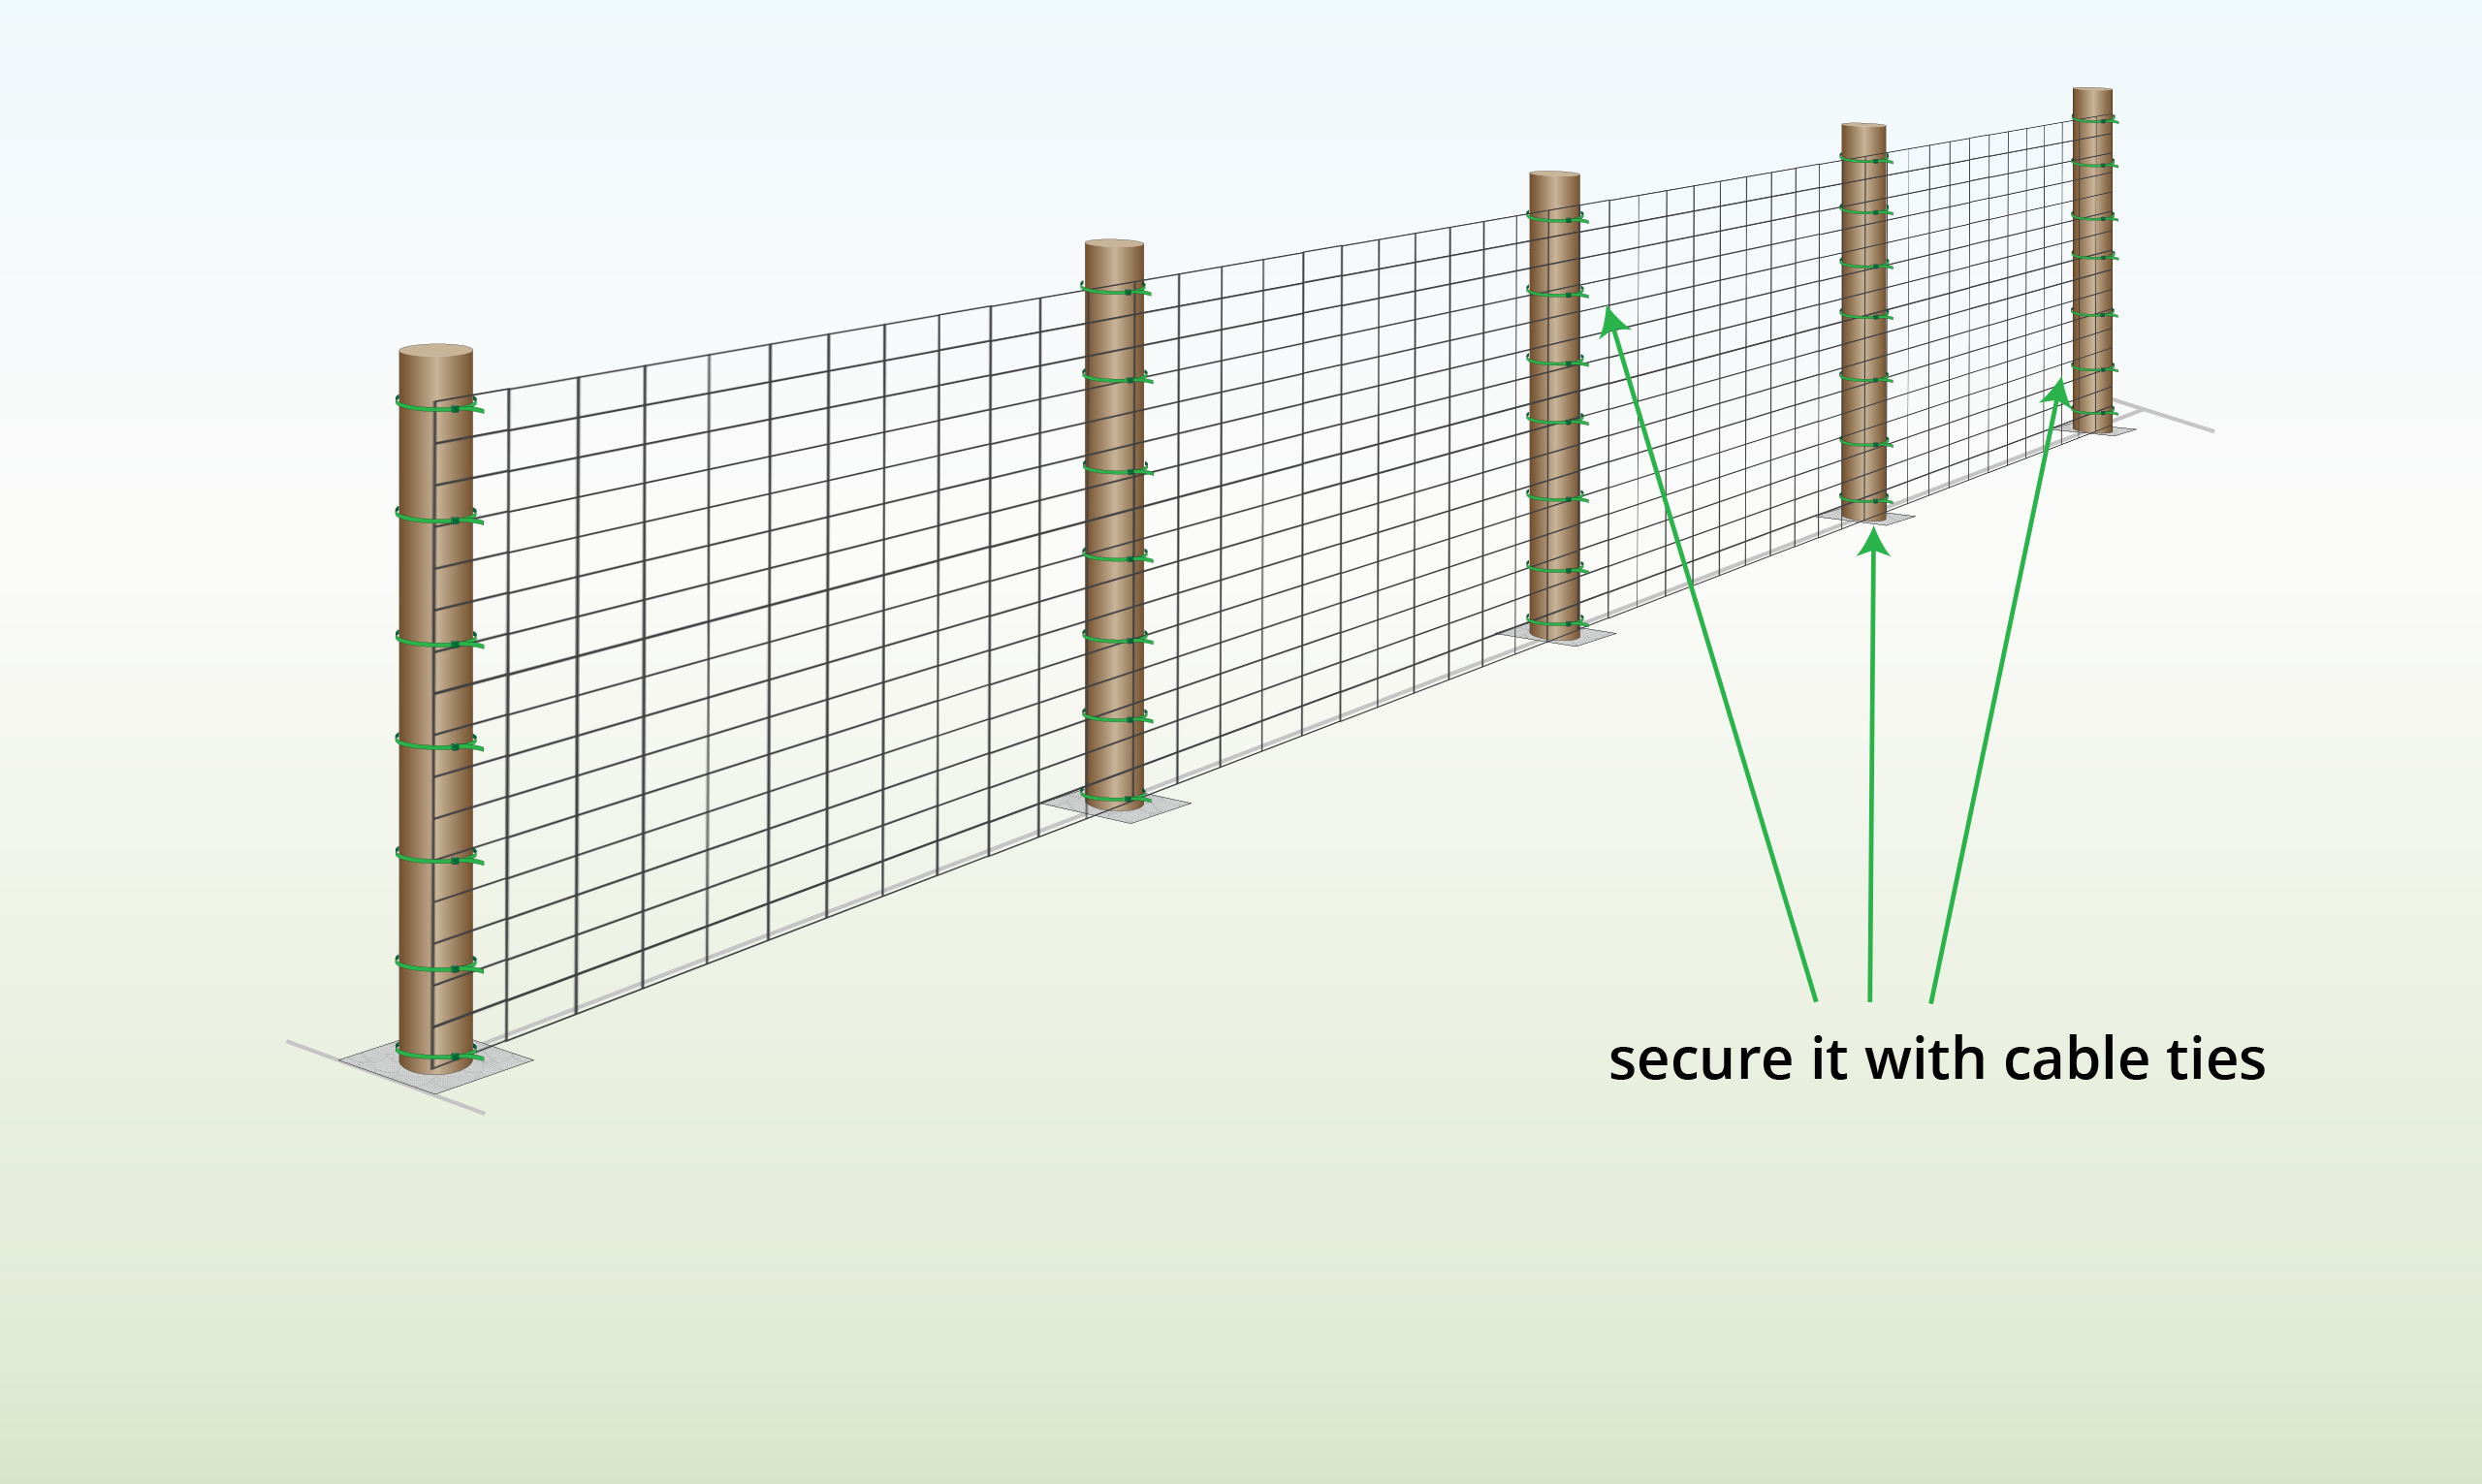
Start at the end post and secure the mesh to it by using cable ties. These ties can be threaded through the pre-drilled holes in the post.
You can add extra cable ties to encircle the entire post. |
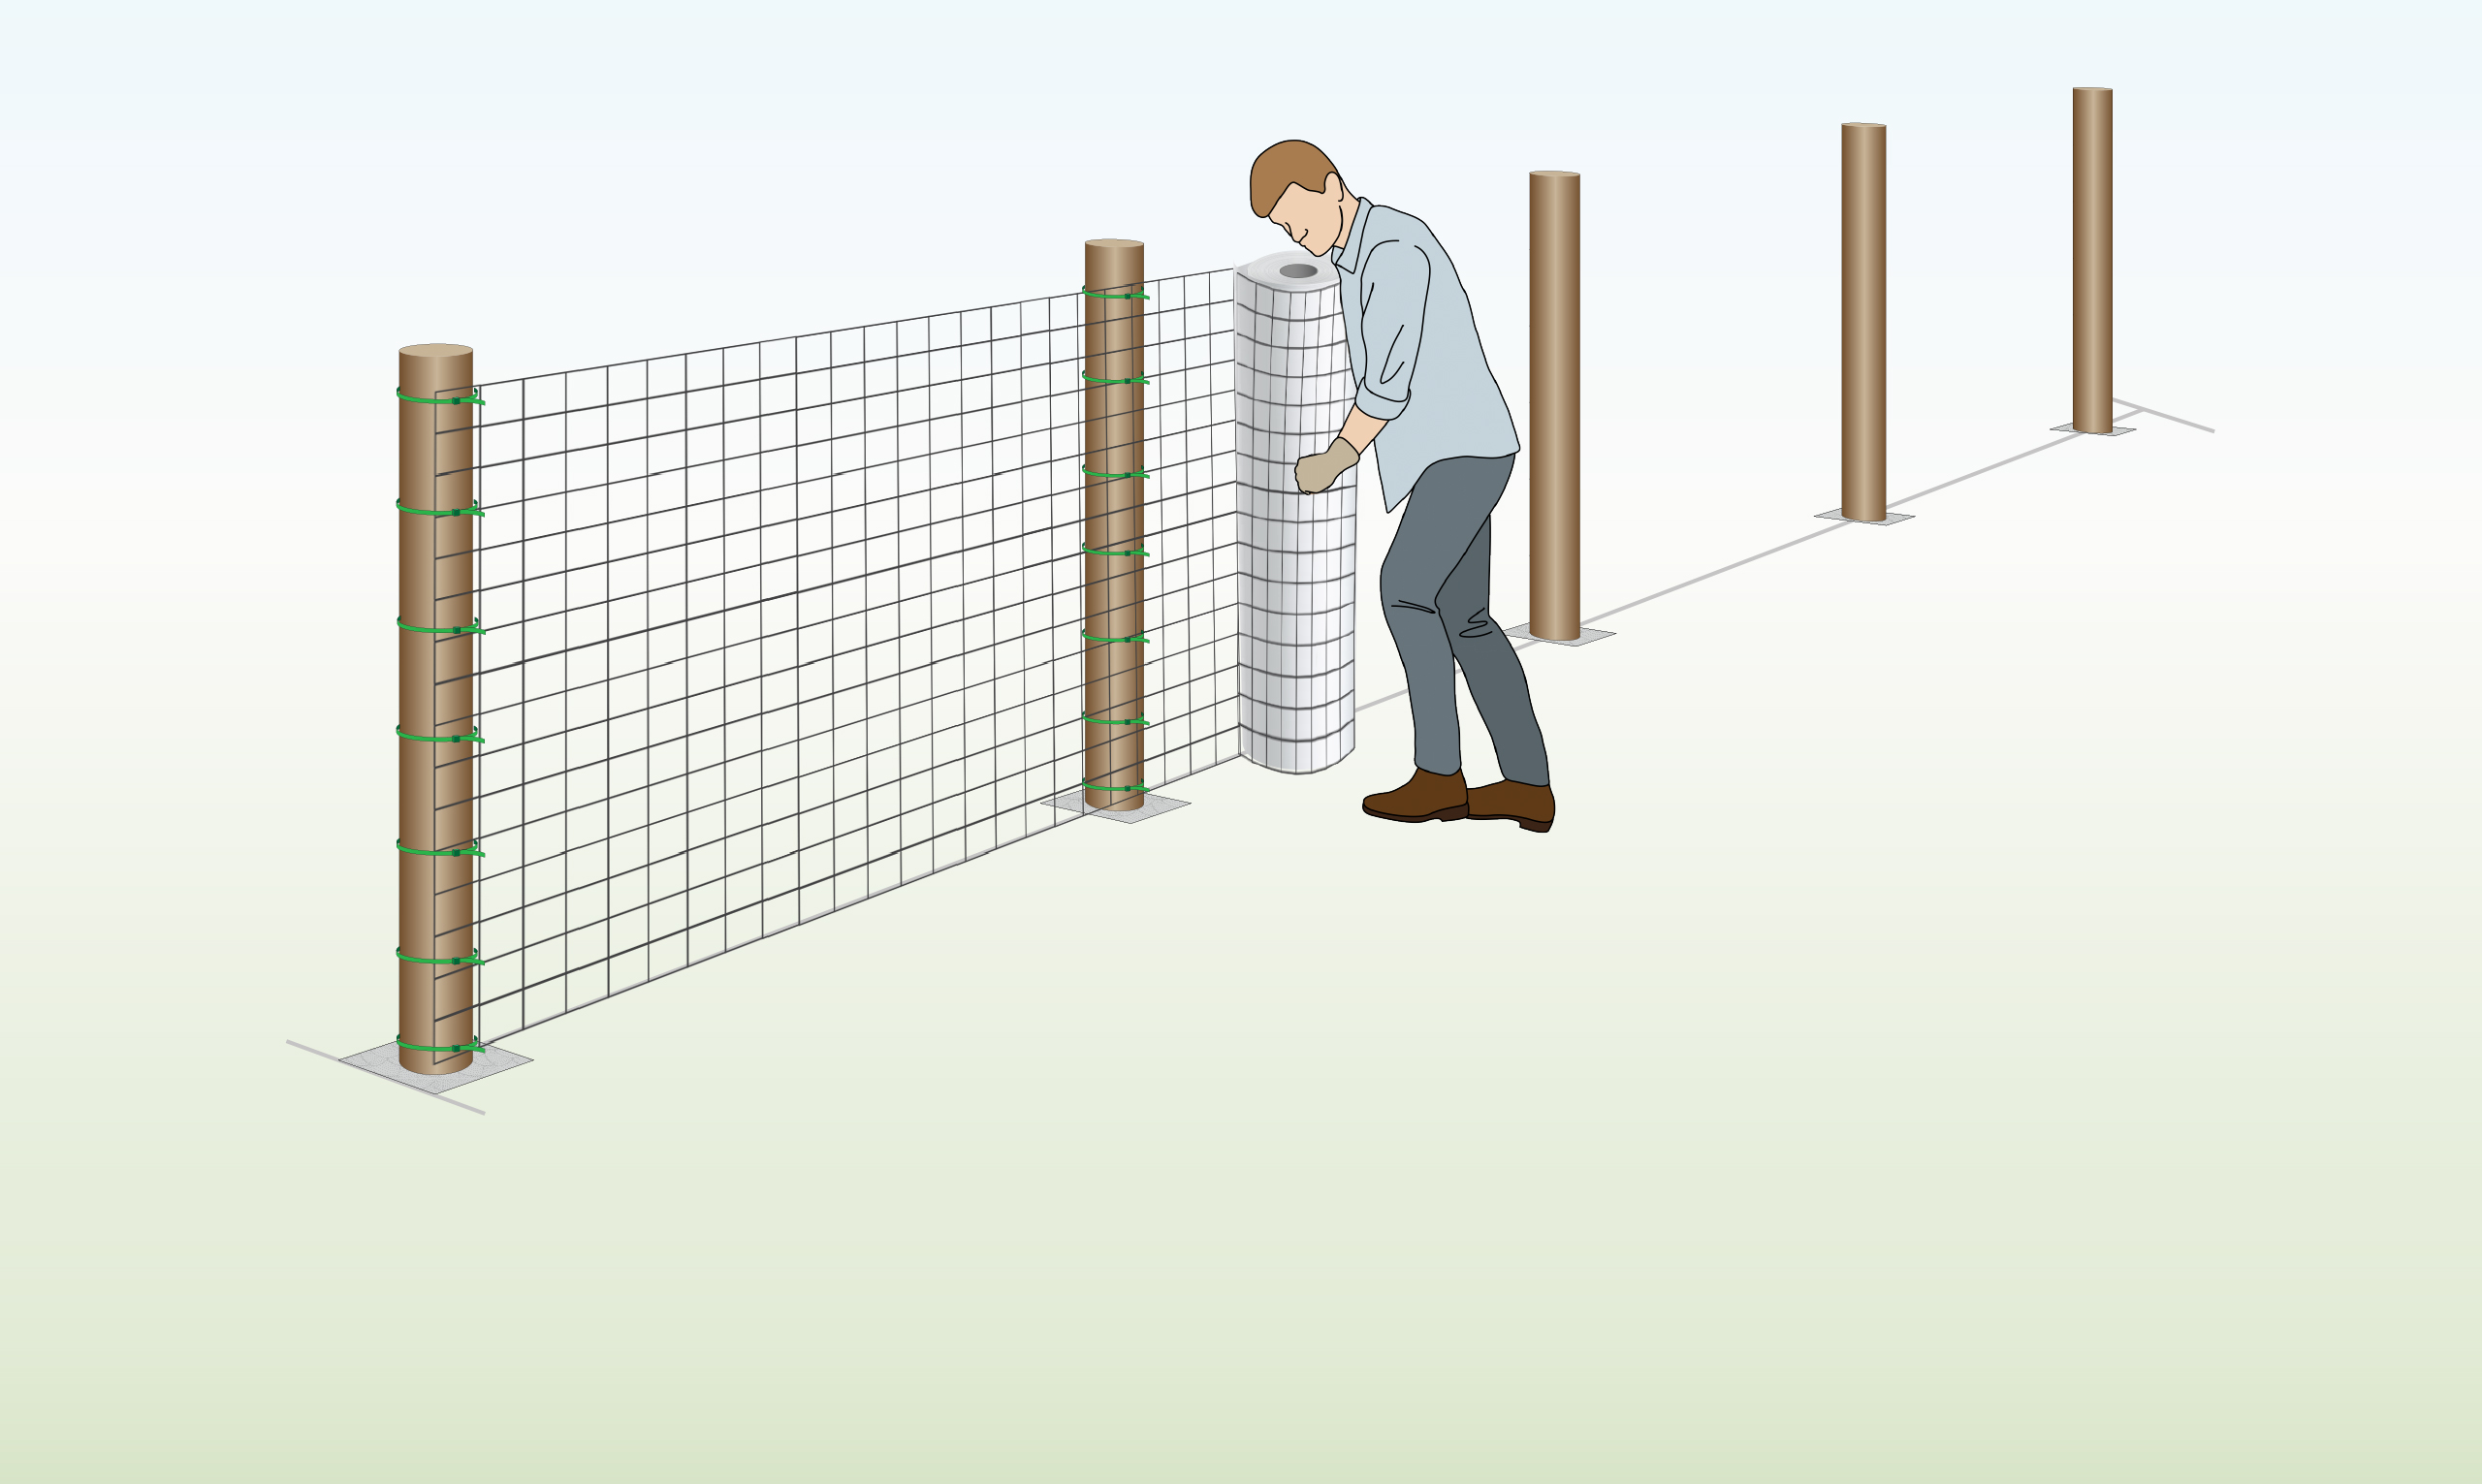
| Alternative Option
|
Expand the gap between the posts by overlapping the panels and join them by fastening them together using cable ties. |
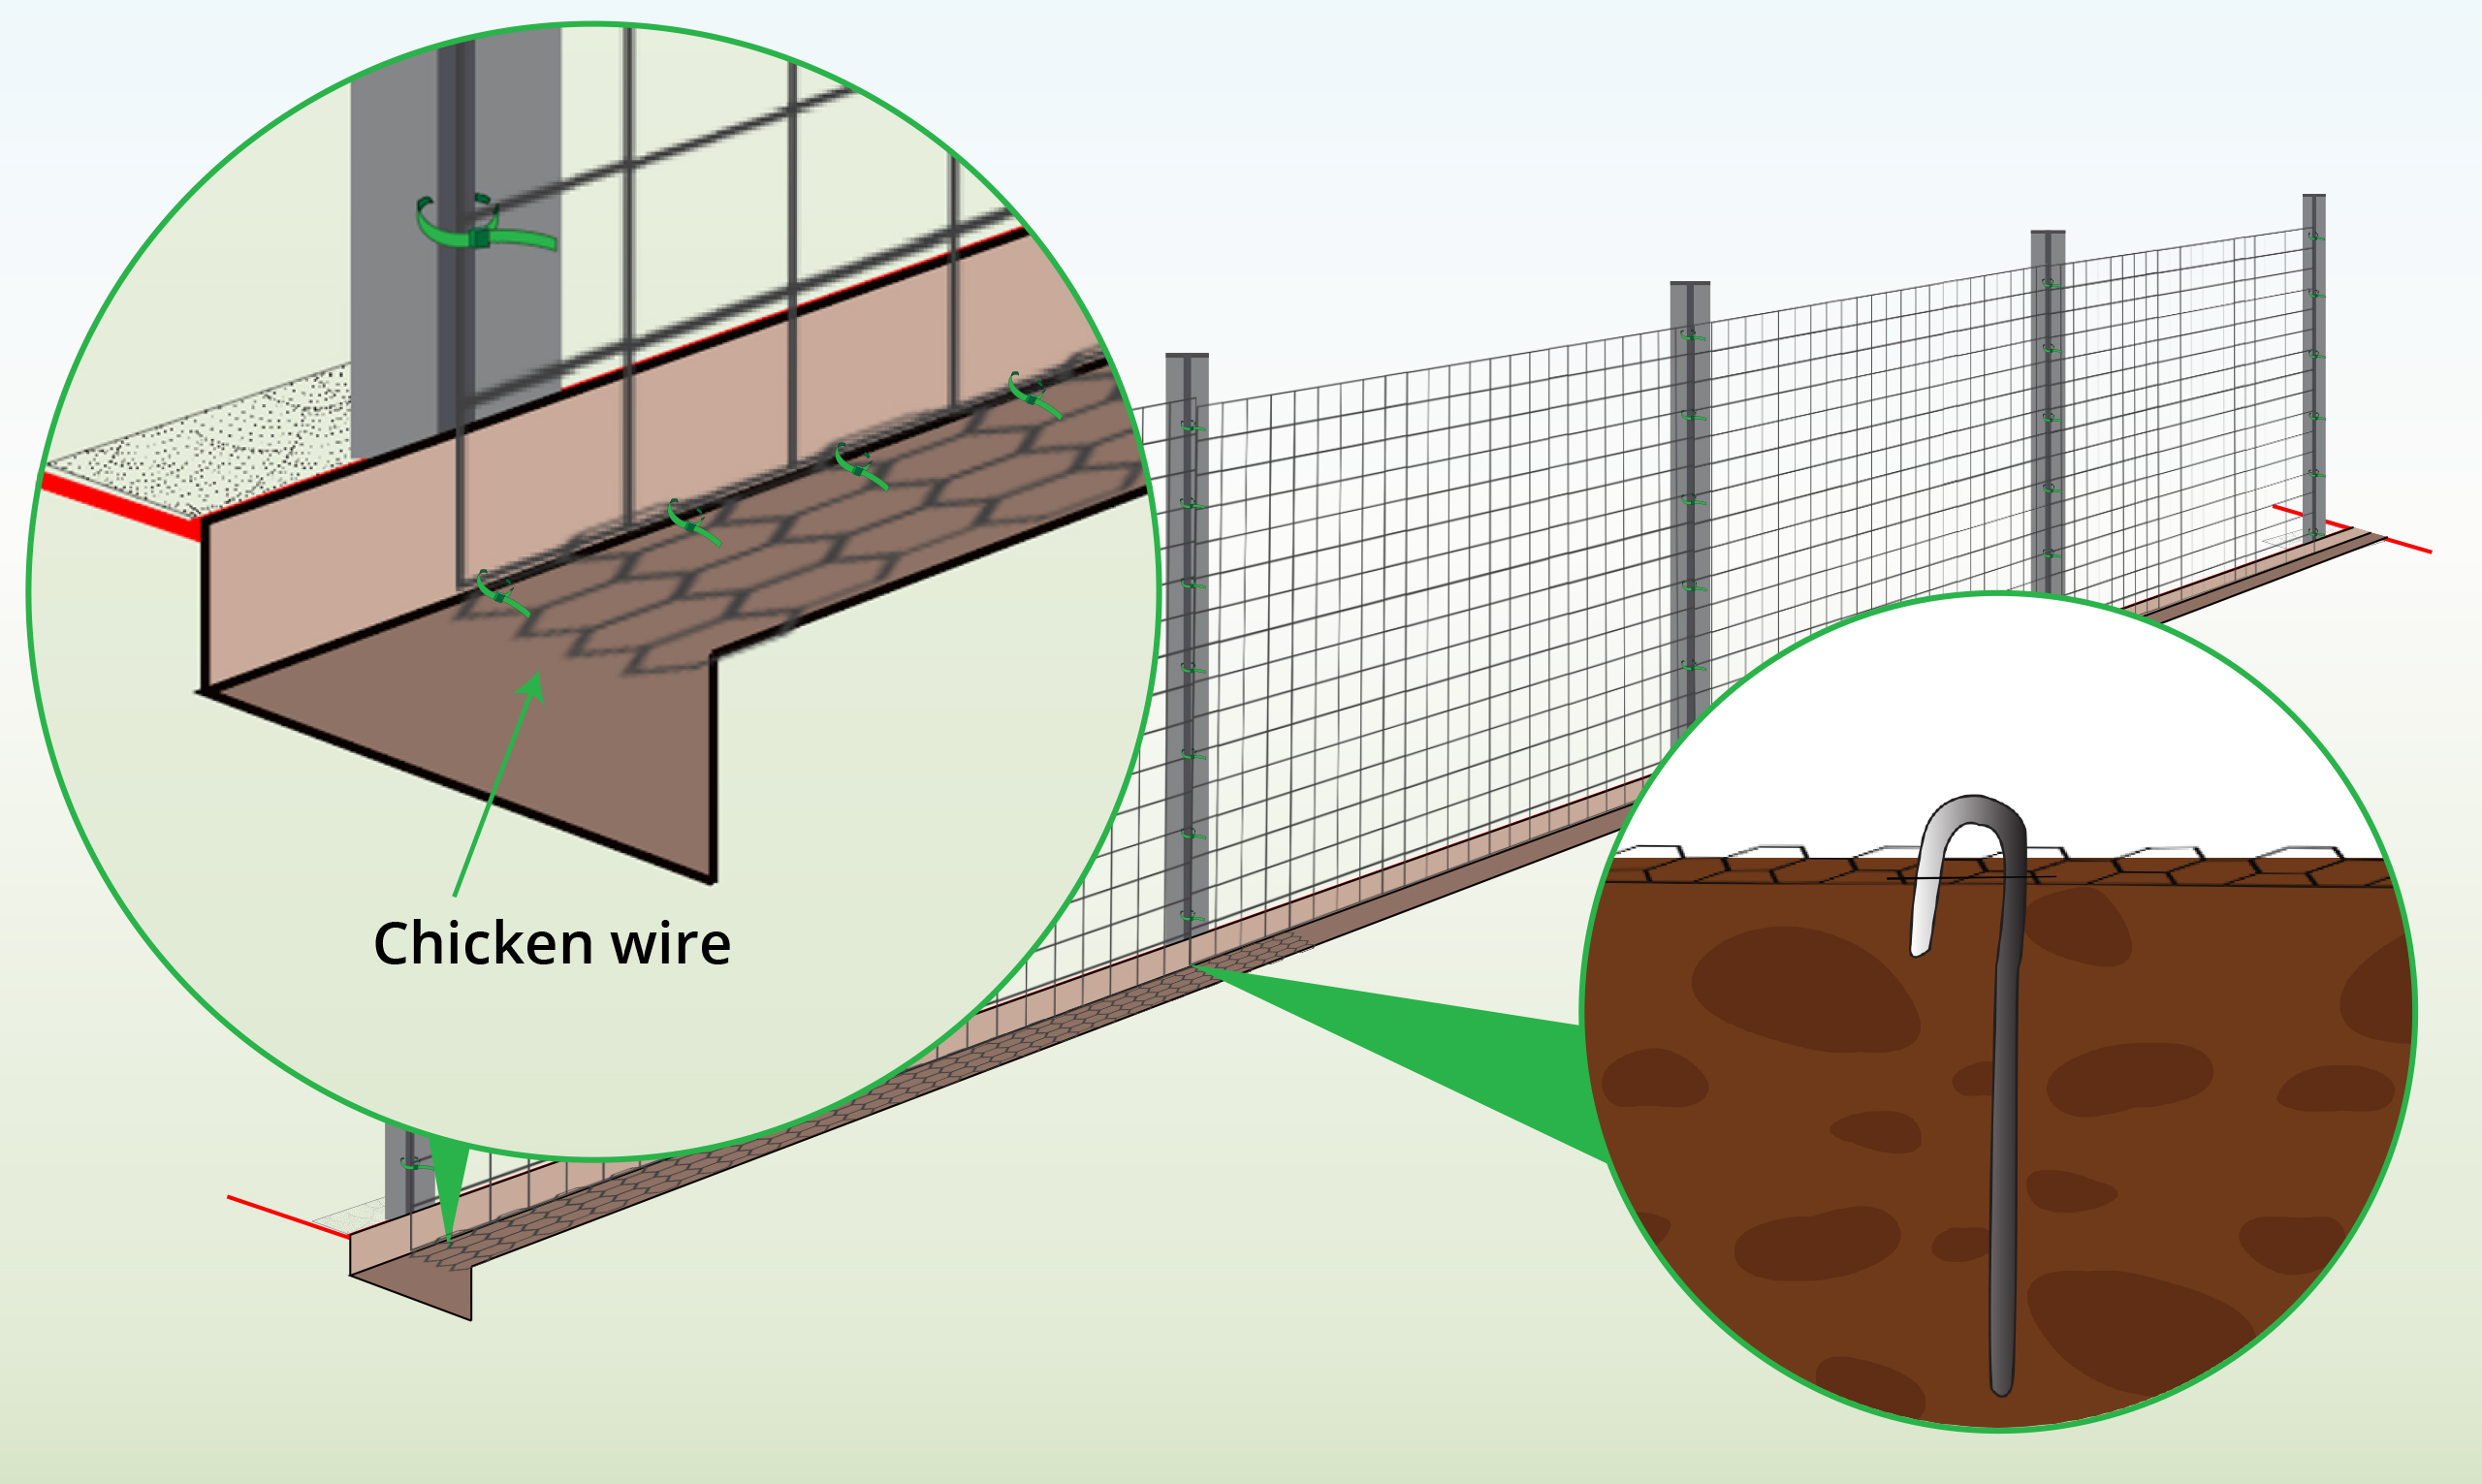
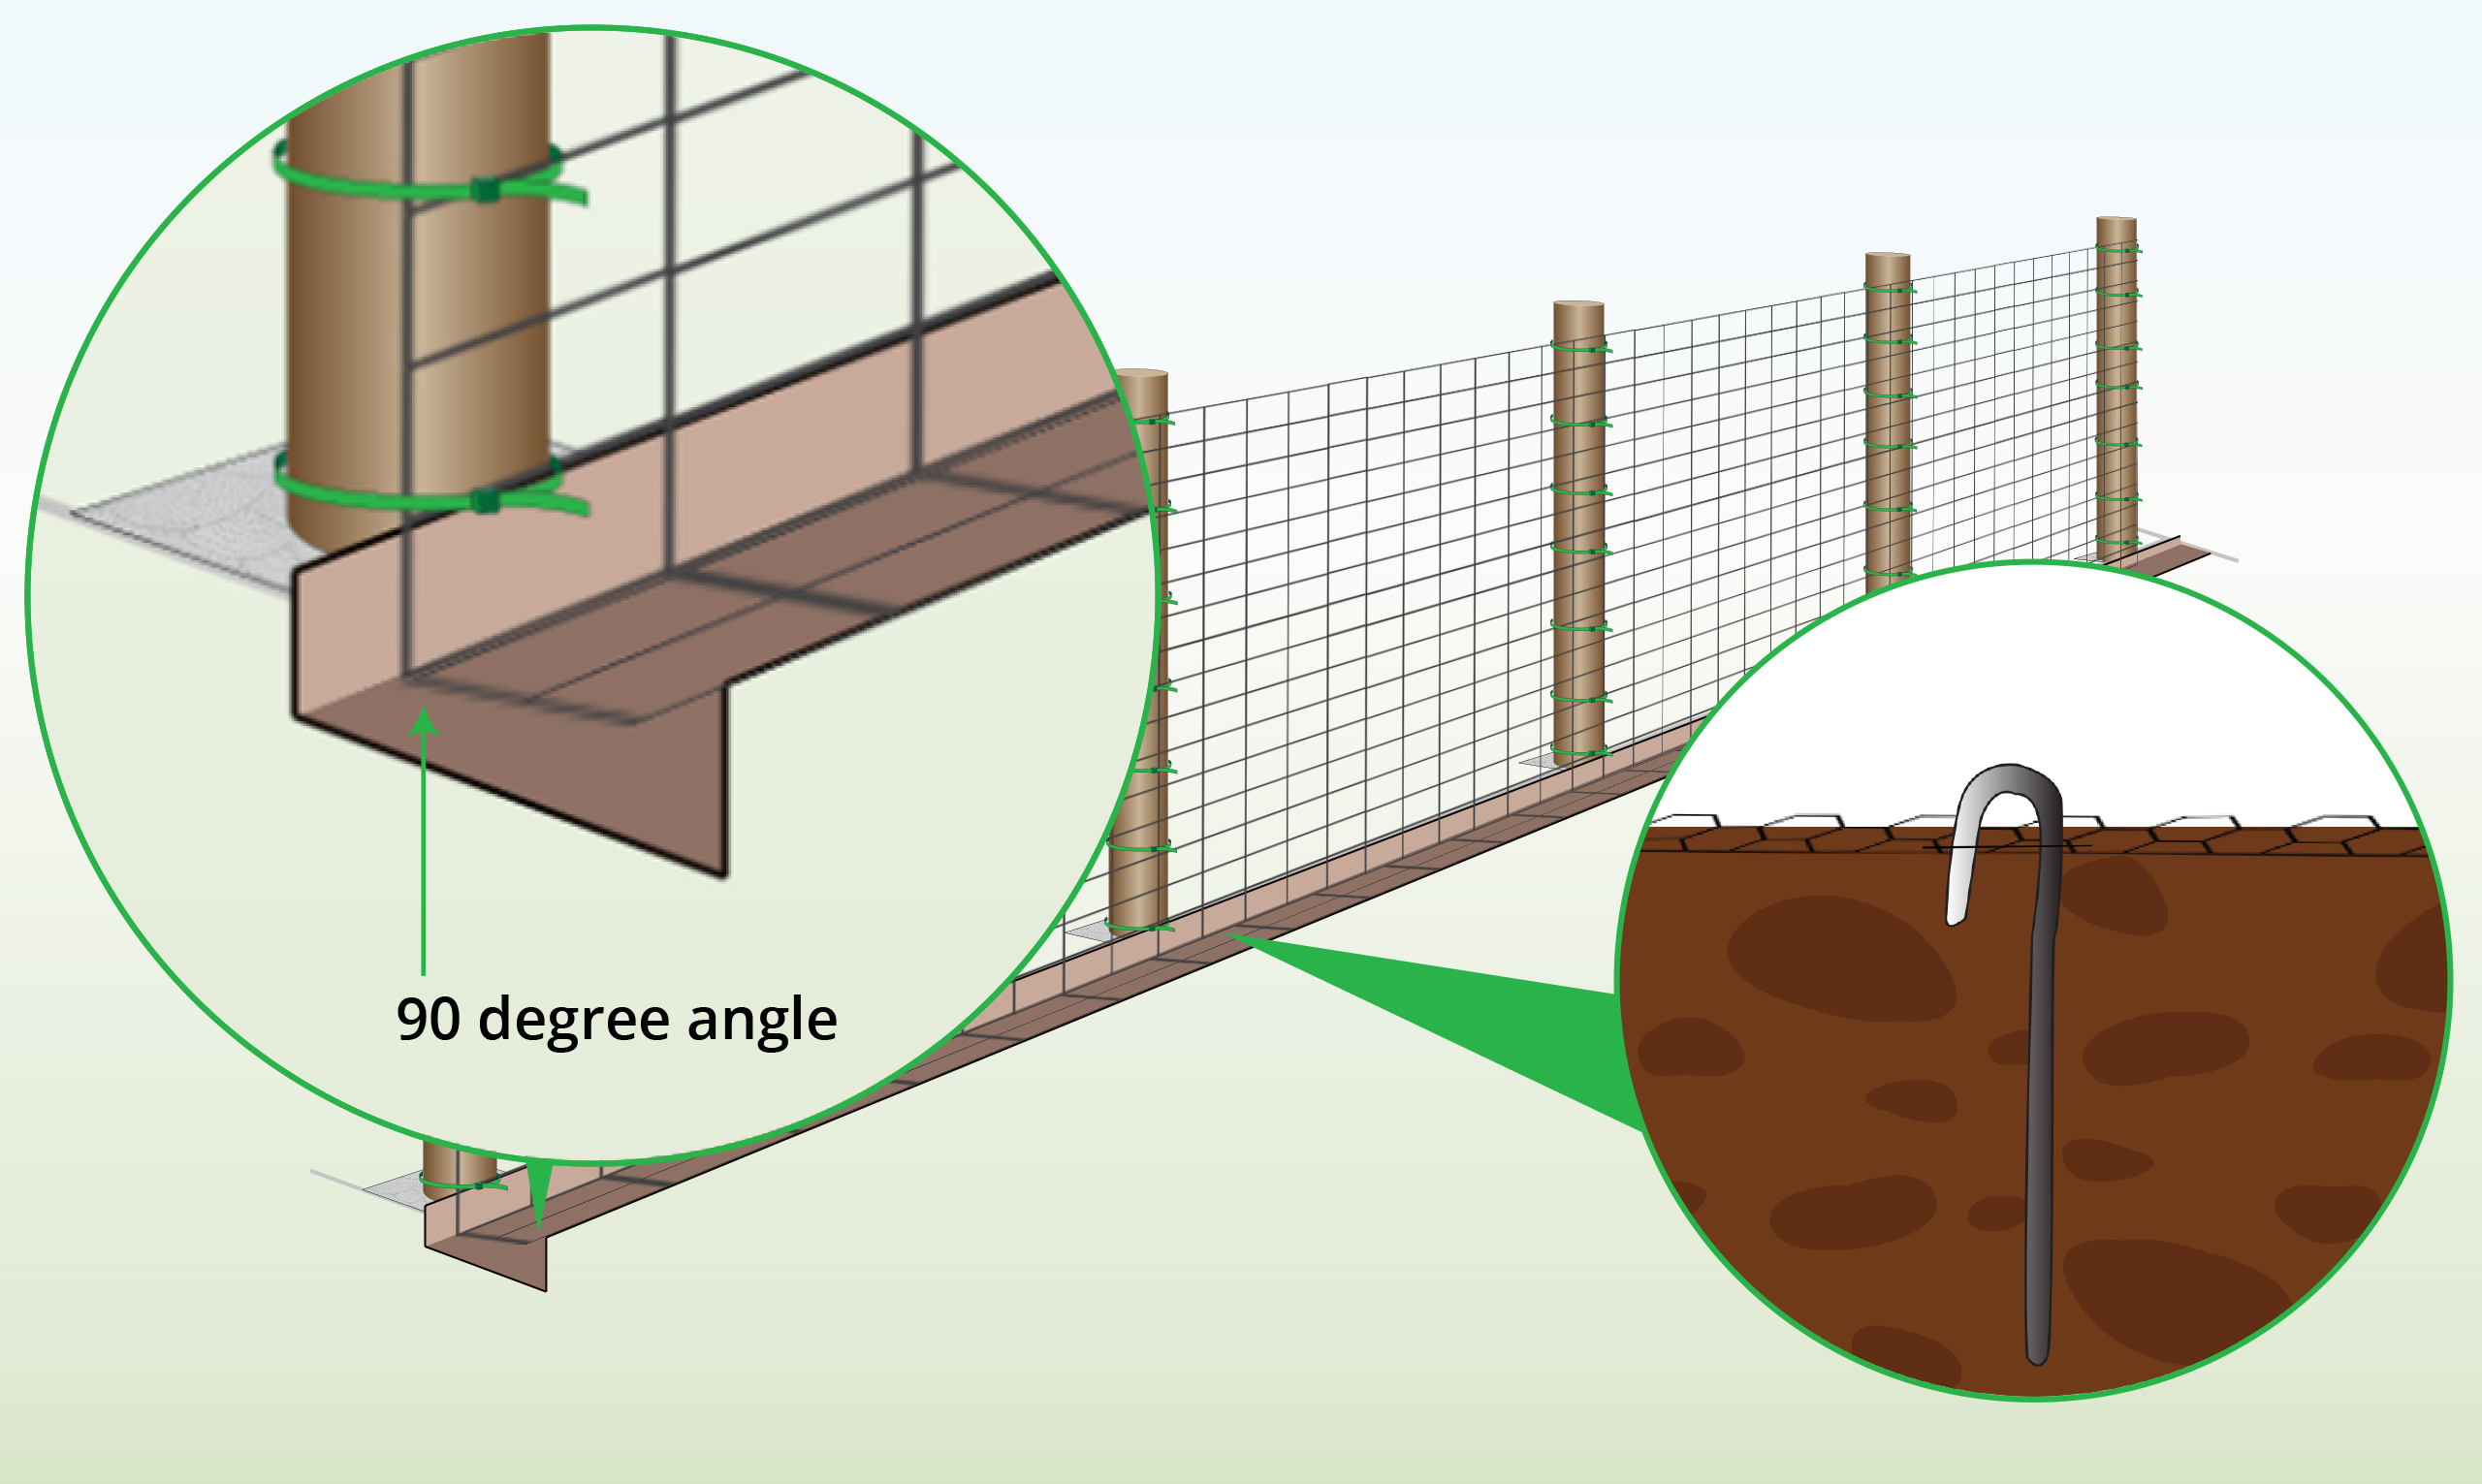
| Additional Step to Prevent Digging
|
Dig a trench along your fence line and cover the trench’s bottom with a piece of chicken wire. Attach the wire to the panel by using cable ties.
|

FAQ’s
What is the best option to stop my pup from escaping?
If you want to keep your pet happy and healthy a physical barrier is the best option. Electric and invisible puppy fences will keep your pet from escaping but they can cause damage to the health of your pet. This has been documented in the TV show ‘It’s me or the Dog‘ (based in the UK and US)
Please look after the health of your canine and stay away from electric shock options.
What is the most cost-effective option?
Electric / hidden options are usually the cheapest which is the reason why pet owners buy them but they do not realise the potential cost to their pet’s health.
At approximately the same cost as an electric dog fence, you can cover 100m at £1.60 per meter with our lowest-cost metal dog fencing. For most well-behaved canines, this will work perfectly but please read the description before purchasing to ensure its suitability to your dog.
How big should I make my pen/run?
The bigger the better as long as you have space in your yard. Longer-shaped pens work best as it gives your hound more space to run up and down. As general guidance we suggest the following dimensions;
- 2m x 6m for long periods of time
- 2m x 4m for short periods of time
The area should double in size if the pen is going to be shared
Downloadable PDFs
Specification
- Economy Dog Fencing Specification
- Prime Dog Fencing Specification
- Super Prime Dog Fencing Specification
- PVC Coated Welded Wire Mesh Specification
- Galfan Coated Dog Panels Specification
- PVC Coated Dog Panels Specification
- PVC Coated Chain Link Specification
- Galvanised Chain Link Specification
- Field Fence Specification
- Plastic Field Fencing Specification
- PVC Coated Chicken Wire Specification