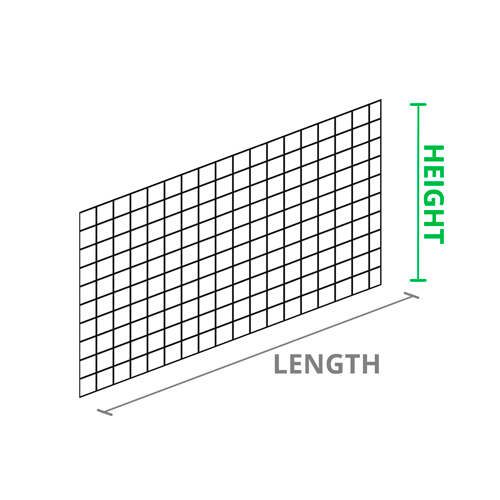
Dog Fence Panels
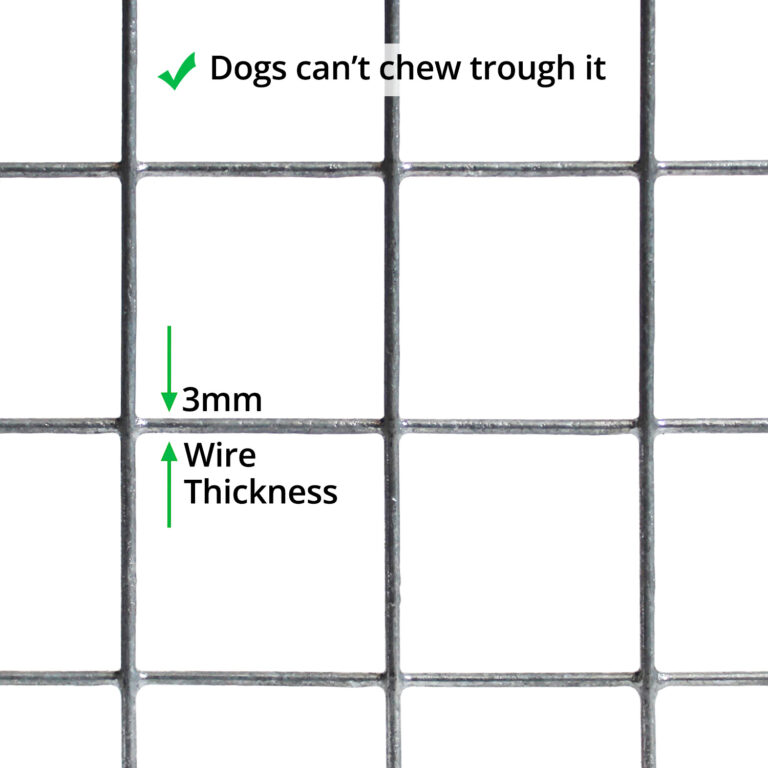


3mm+ dog panels are strong enough to keep all dog breeds in or out of an area.
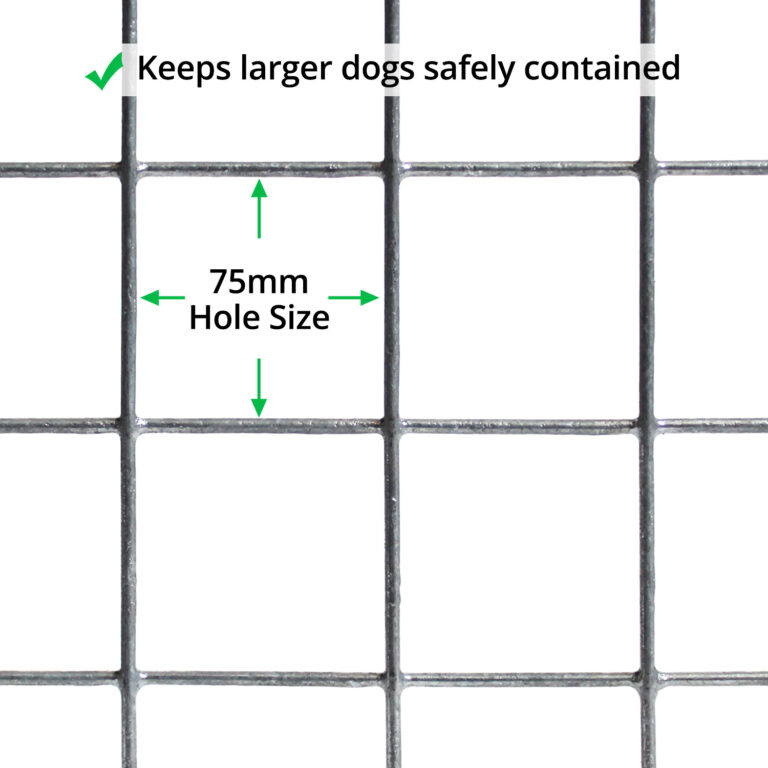
The panels meet all criteria for commercial dog fencing except the mesh hole size of 75mm x 75mm allows the legs of smaller dogs to poke through.
No products were found matching your selection.
Dog Panel Help
Customer Images
Videos
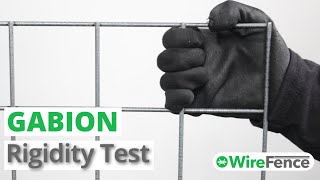
Panel rigidity test (COMPARING DIAMETERS)

PVC panel rigidity test (COMPARING DIAMETERS)
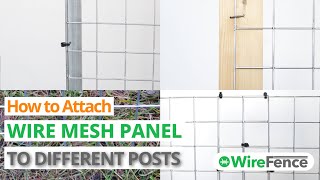
How to attach wire mesh panels to posts and different materials
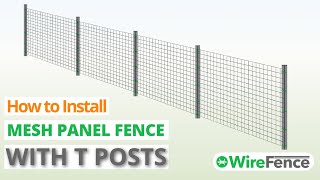
How to install a mesh panel fence with T posts
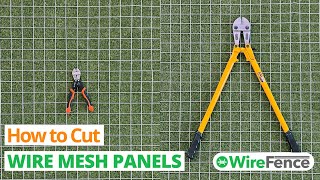
How to cut panels
Dog Proofing Overview
| Dog proofing suited to: | |||
| High jumping breeds | – select 202.5cm (6.6ft) for the highest jumping dogs | ||
| Powerful breeds | – 3mm+ wire diameter is strong enough to contain the most powerful breeds | ||
| Good climbers | – 75mm x 75mm holes can allow smaller paws to slip into the mesh holes so the dog can pull themselves up. | ||
| Diggers | – (download installation guide) | ||
| Very small dogs | |||
| Small dogs | Maybe | ||
| Medium dogs | |||
| Large dogs | |||
| Very large dogs | |||
| Please note | See the detailed guide below to help select the correct product for your particular dog | ||
Stop Dogs Climbing: Select Hole Size
If you are unsure of your dog’s ability to climb we suggest going for a mesh hole size of 25mm x 25mm or less. This will ensure that your dog’s paws do not fit into the holes so they can lift themselves up and over the mesh.
| Hole size | 75mm x 75mm |
| Very small dogs | |
| Small dogs | Maybe |
| Medium dogs | |
| Large dogs | |
| Very large dogs | |
| Best climbers |
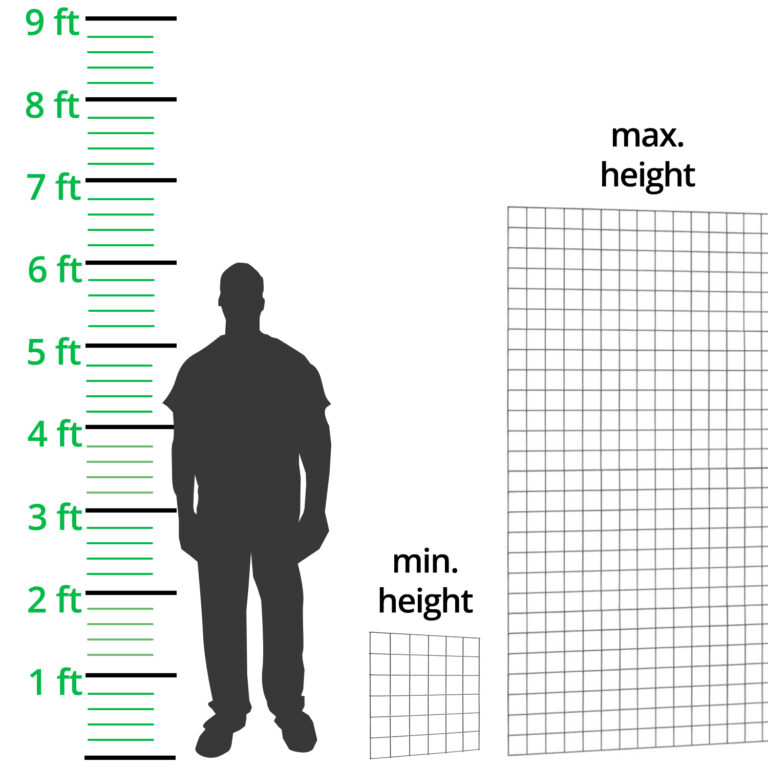
Stop Dogs Jumping Over: Select Height
If you are unsure of your dog’s ability to jump we suggest going for 202.5cm (6.6ft) which will contain 99% of dogs. The very highest jumping dogs can clear 8ft.
| Height | 45cm
(1.5ft) |
97.5cm
(3.1ft) |
150cm
(4.9ft) |
202.5cm
(6.6ft) |
| Very small dogs | ||||
| Small dogs | Maybe | |||
| Medium dogs | Maybe | |||
| Large dogs | Maybe | |||
| Very large dogs | ||||
| Highest jumpers | Usually | |||
| Increasing fence height | Add extra height using tension wire (view instructions) | |||
Stop Dogs Chewing Through Wire: Select Wire Diameter
All panels are 3mm+ thick which will stop all dogs from pushing over or chewing through the wires.
| Wire diameter | 3mm (10g) | 4mm (8g) | 5mm (6g) |
| Very small dogs | |||
| Small dogs | |||
| Medium dogs | |||
| Large dogs | |||
| Very large dogs | |||
| Most powerful jaws |
General Product Information
| Manufacturing Standard | |
| Material | Glafan coated (95% Zinc / 5% Aluminium) steel. Offers greater weather protection compared to galvanised steel |
| Made in | UK |
| Conforms to British Manufacturing Standards | BS EN 10244-2:2009 & EN 60229:2008 |
| Life expectancy under normal conditions | 20 years |
| British Kennel Standards |
– meets all criteria except the hole size is 75mm x 75mm.
|
| Has sharp edges and corners? | The edges of the panels can sometimes be rough but the panel itself is smooth to prevent injury to dogs |
| Delivered as | Panels are cable tied together then shrink wrapped |
| Applications | |
| Suited to outdoors | |
| Run or exercise area | |
| Partition off driveways, etc | |
| Kennels & enclosures |
– good for residential enclosures.
|
| Strength & Environment | |
| Corrosion resistant | Yes – conforms to British standard BS EN 10244-2:2009 |
| Abrasion resistance | Yes – conforms to EN 60229:2008 |
| Life expectancy under normal conditions | 20 Years |
| Suited to Environments | C2-C4 |
| Installation & Maintenance | |
| Speed of installation | Quick |
| Experience required to install | Beginner |
| Can be installed with wooden posts? | |
| Can be installed with metal posts? | |
| Can stand alone without posts? | |
| Join together using | U Staples |
| Cut using | Wire cutters or bolt cutters |
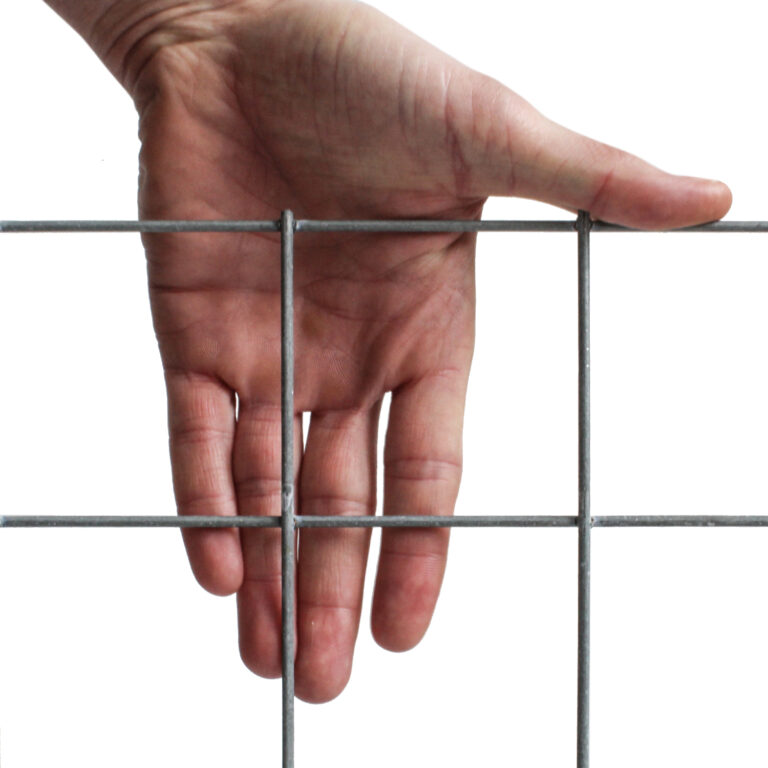
| Requires protective glove for handling | |
| Ease of repair | Easy |
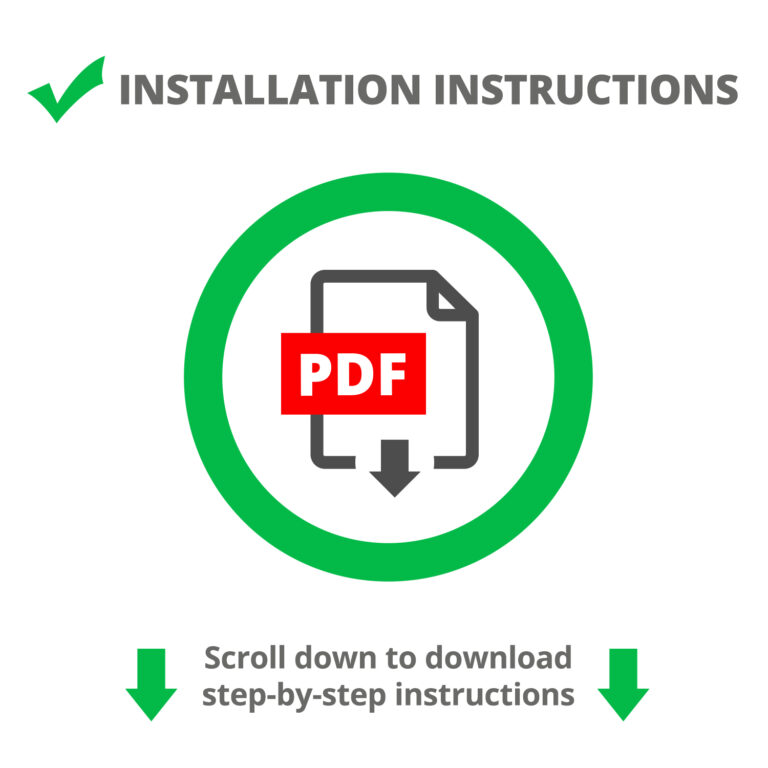
| Installation instructions | Download |
| Appearance | |
| General look of the fence | Metallic grey, silver look |
| Invisible from a distance | – Mesh with 75mm x 75mm holes can be difficult to spot from a distance but they are not 100% invisible |
| Example installation |
View Image |
| Also stops? | |
| Rabbits | – select mesh hole size no bigger than 31mm x 31mm |
| Foxes | – select mesh hole size no bigger than 50mm x 50mm |
| Cats | – select mesh hole no bigger than 25mm x 25mm |
| Pigs, sheep, etc | |
| View all animal and pet fencing |
Attachments
| Attach to: | How to: |
| T Posts | 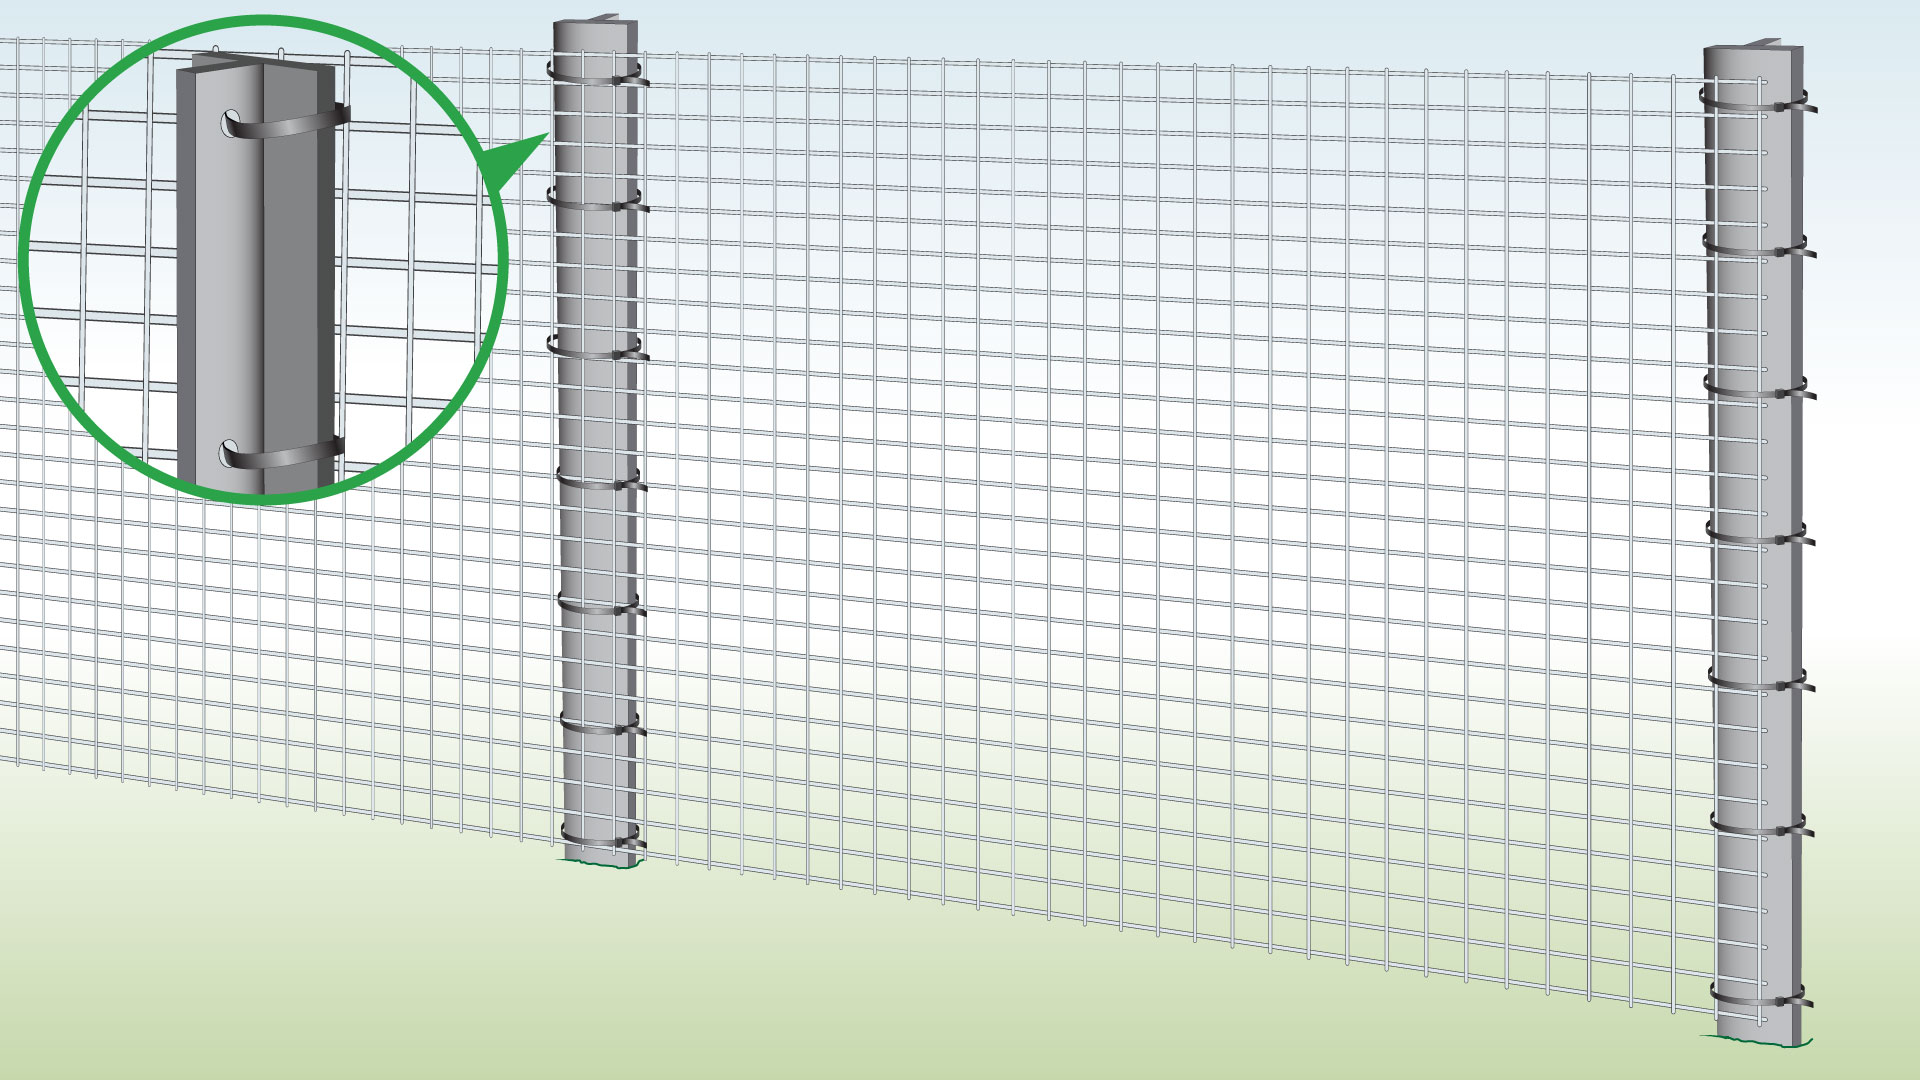 |
| Wood/ Wooden Posts(Staples) |
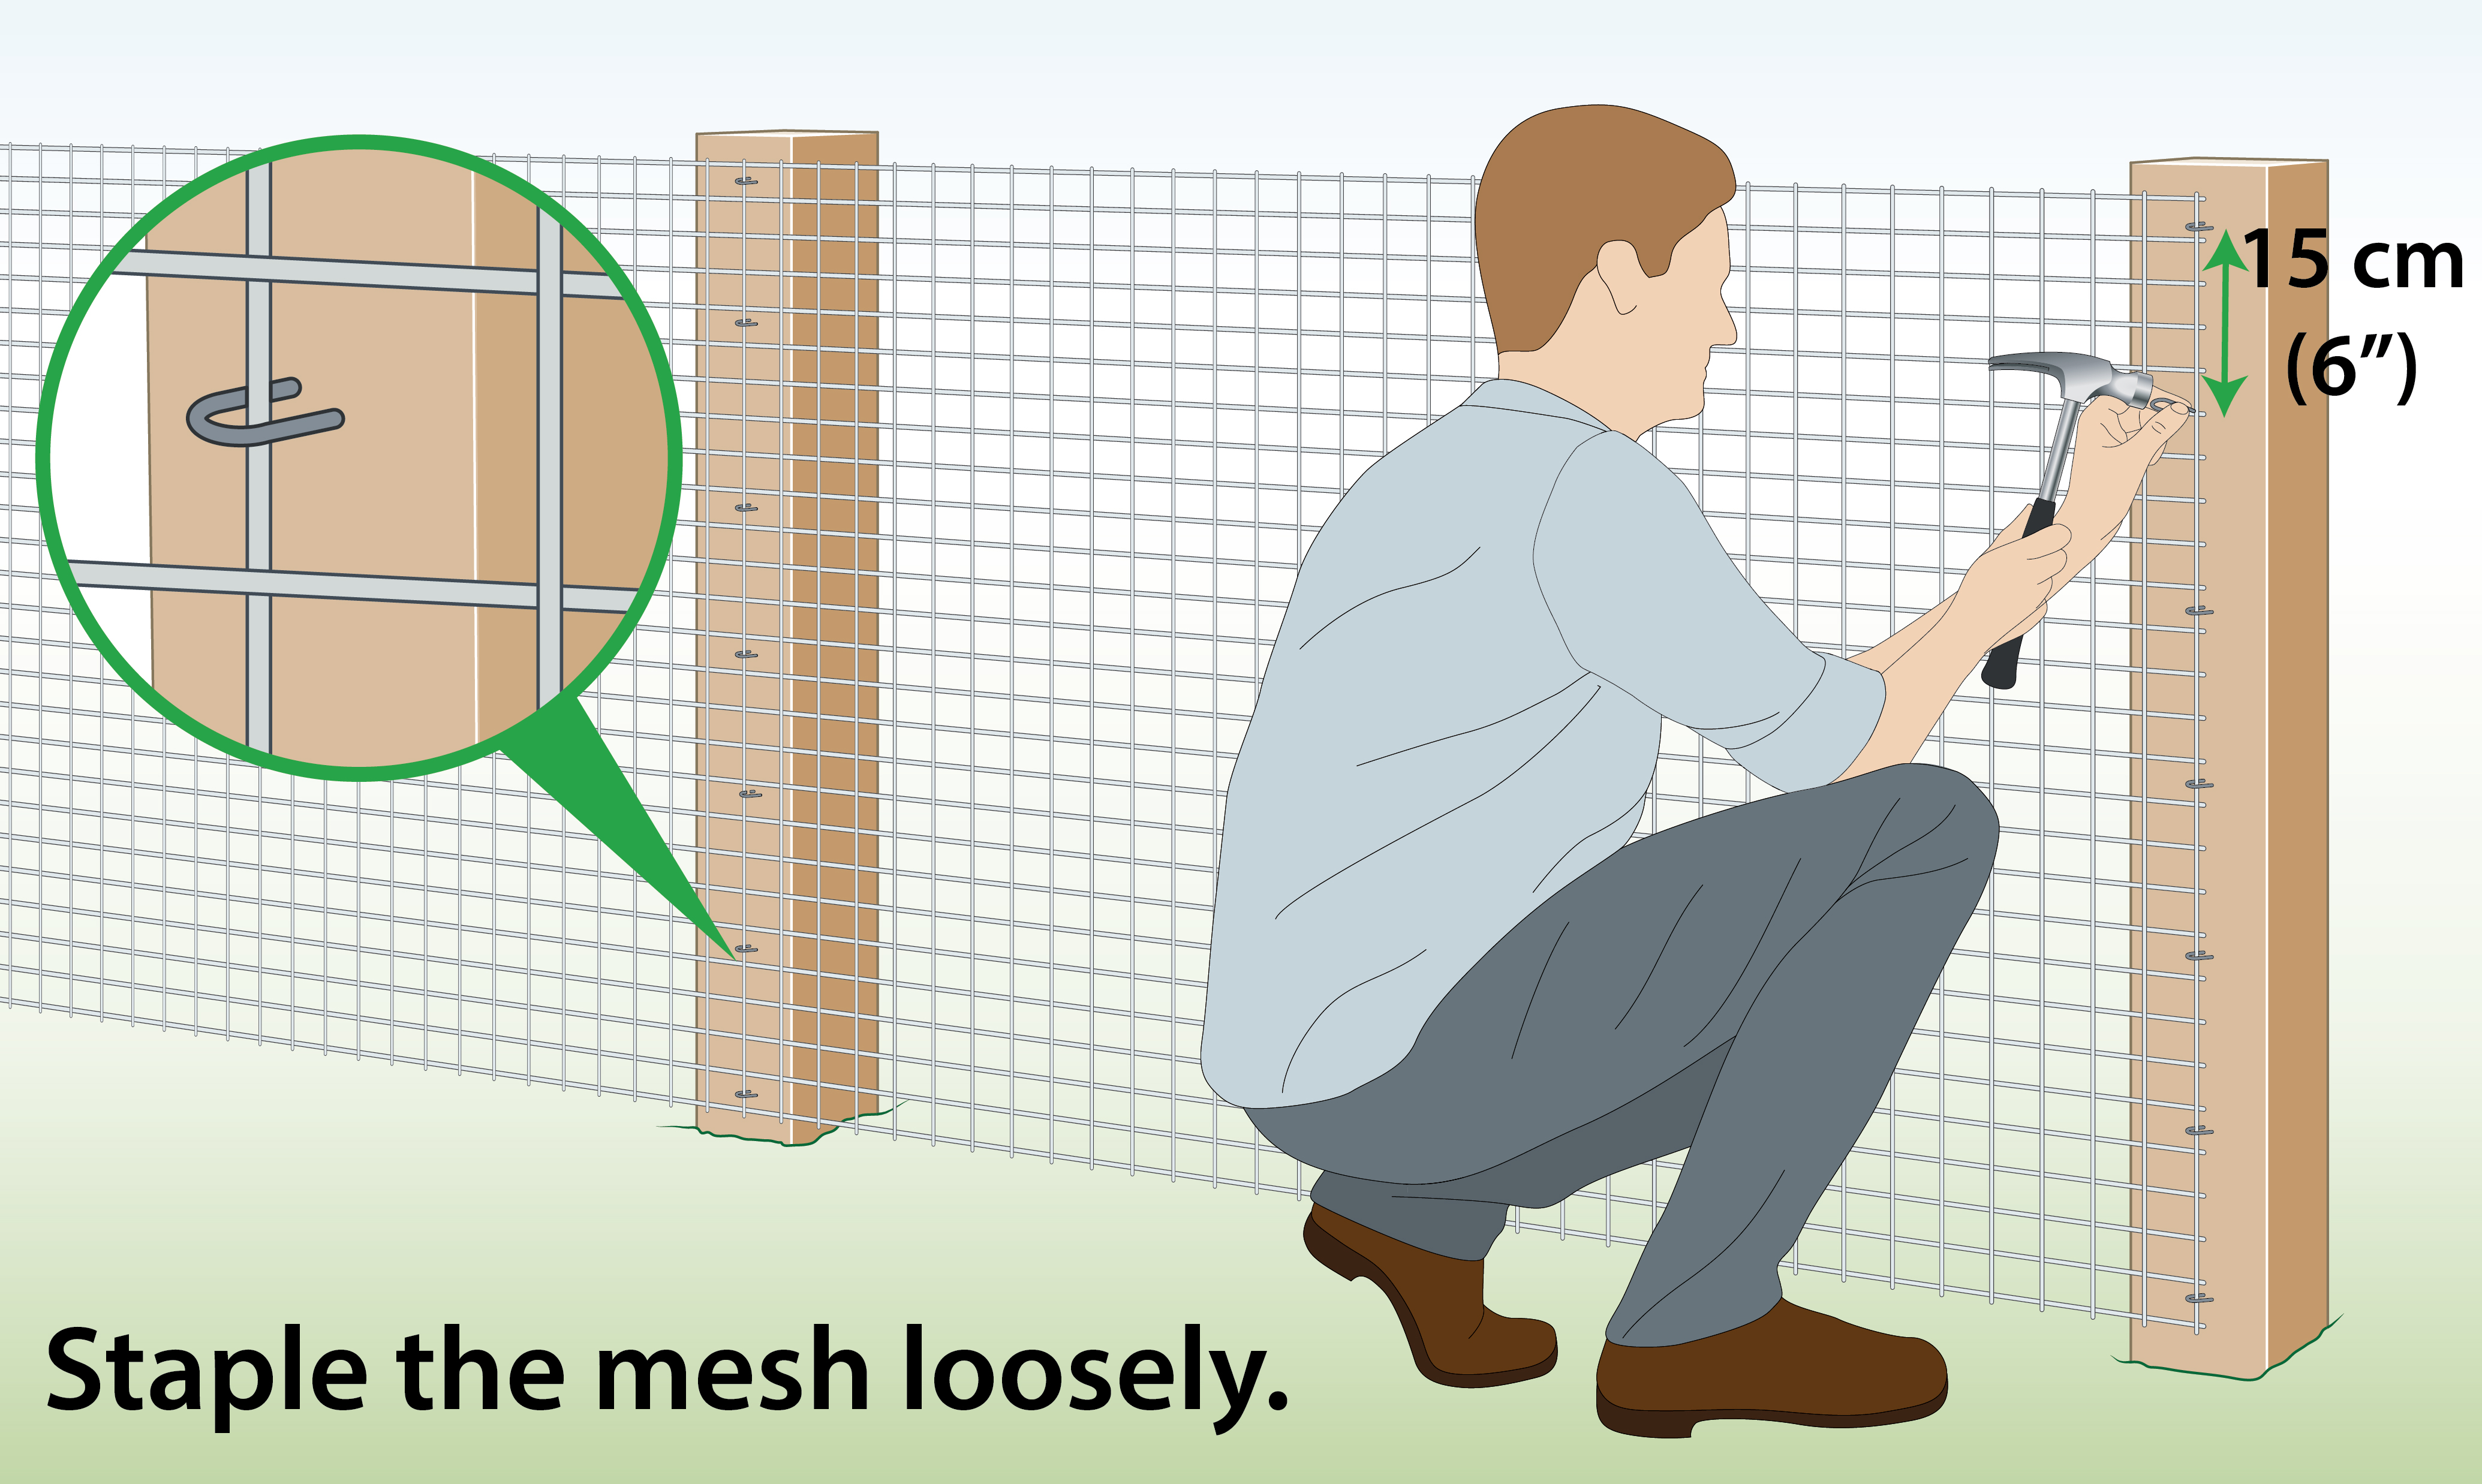 |
| Metal/ Metal Posts(Cable ties) |
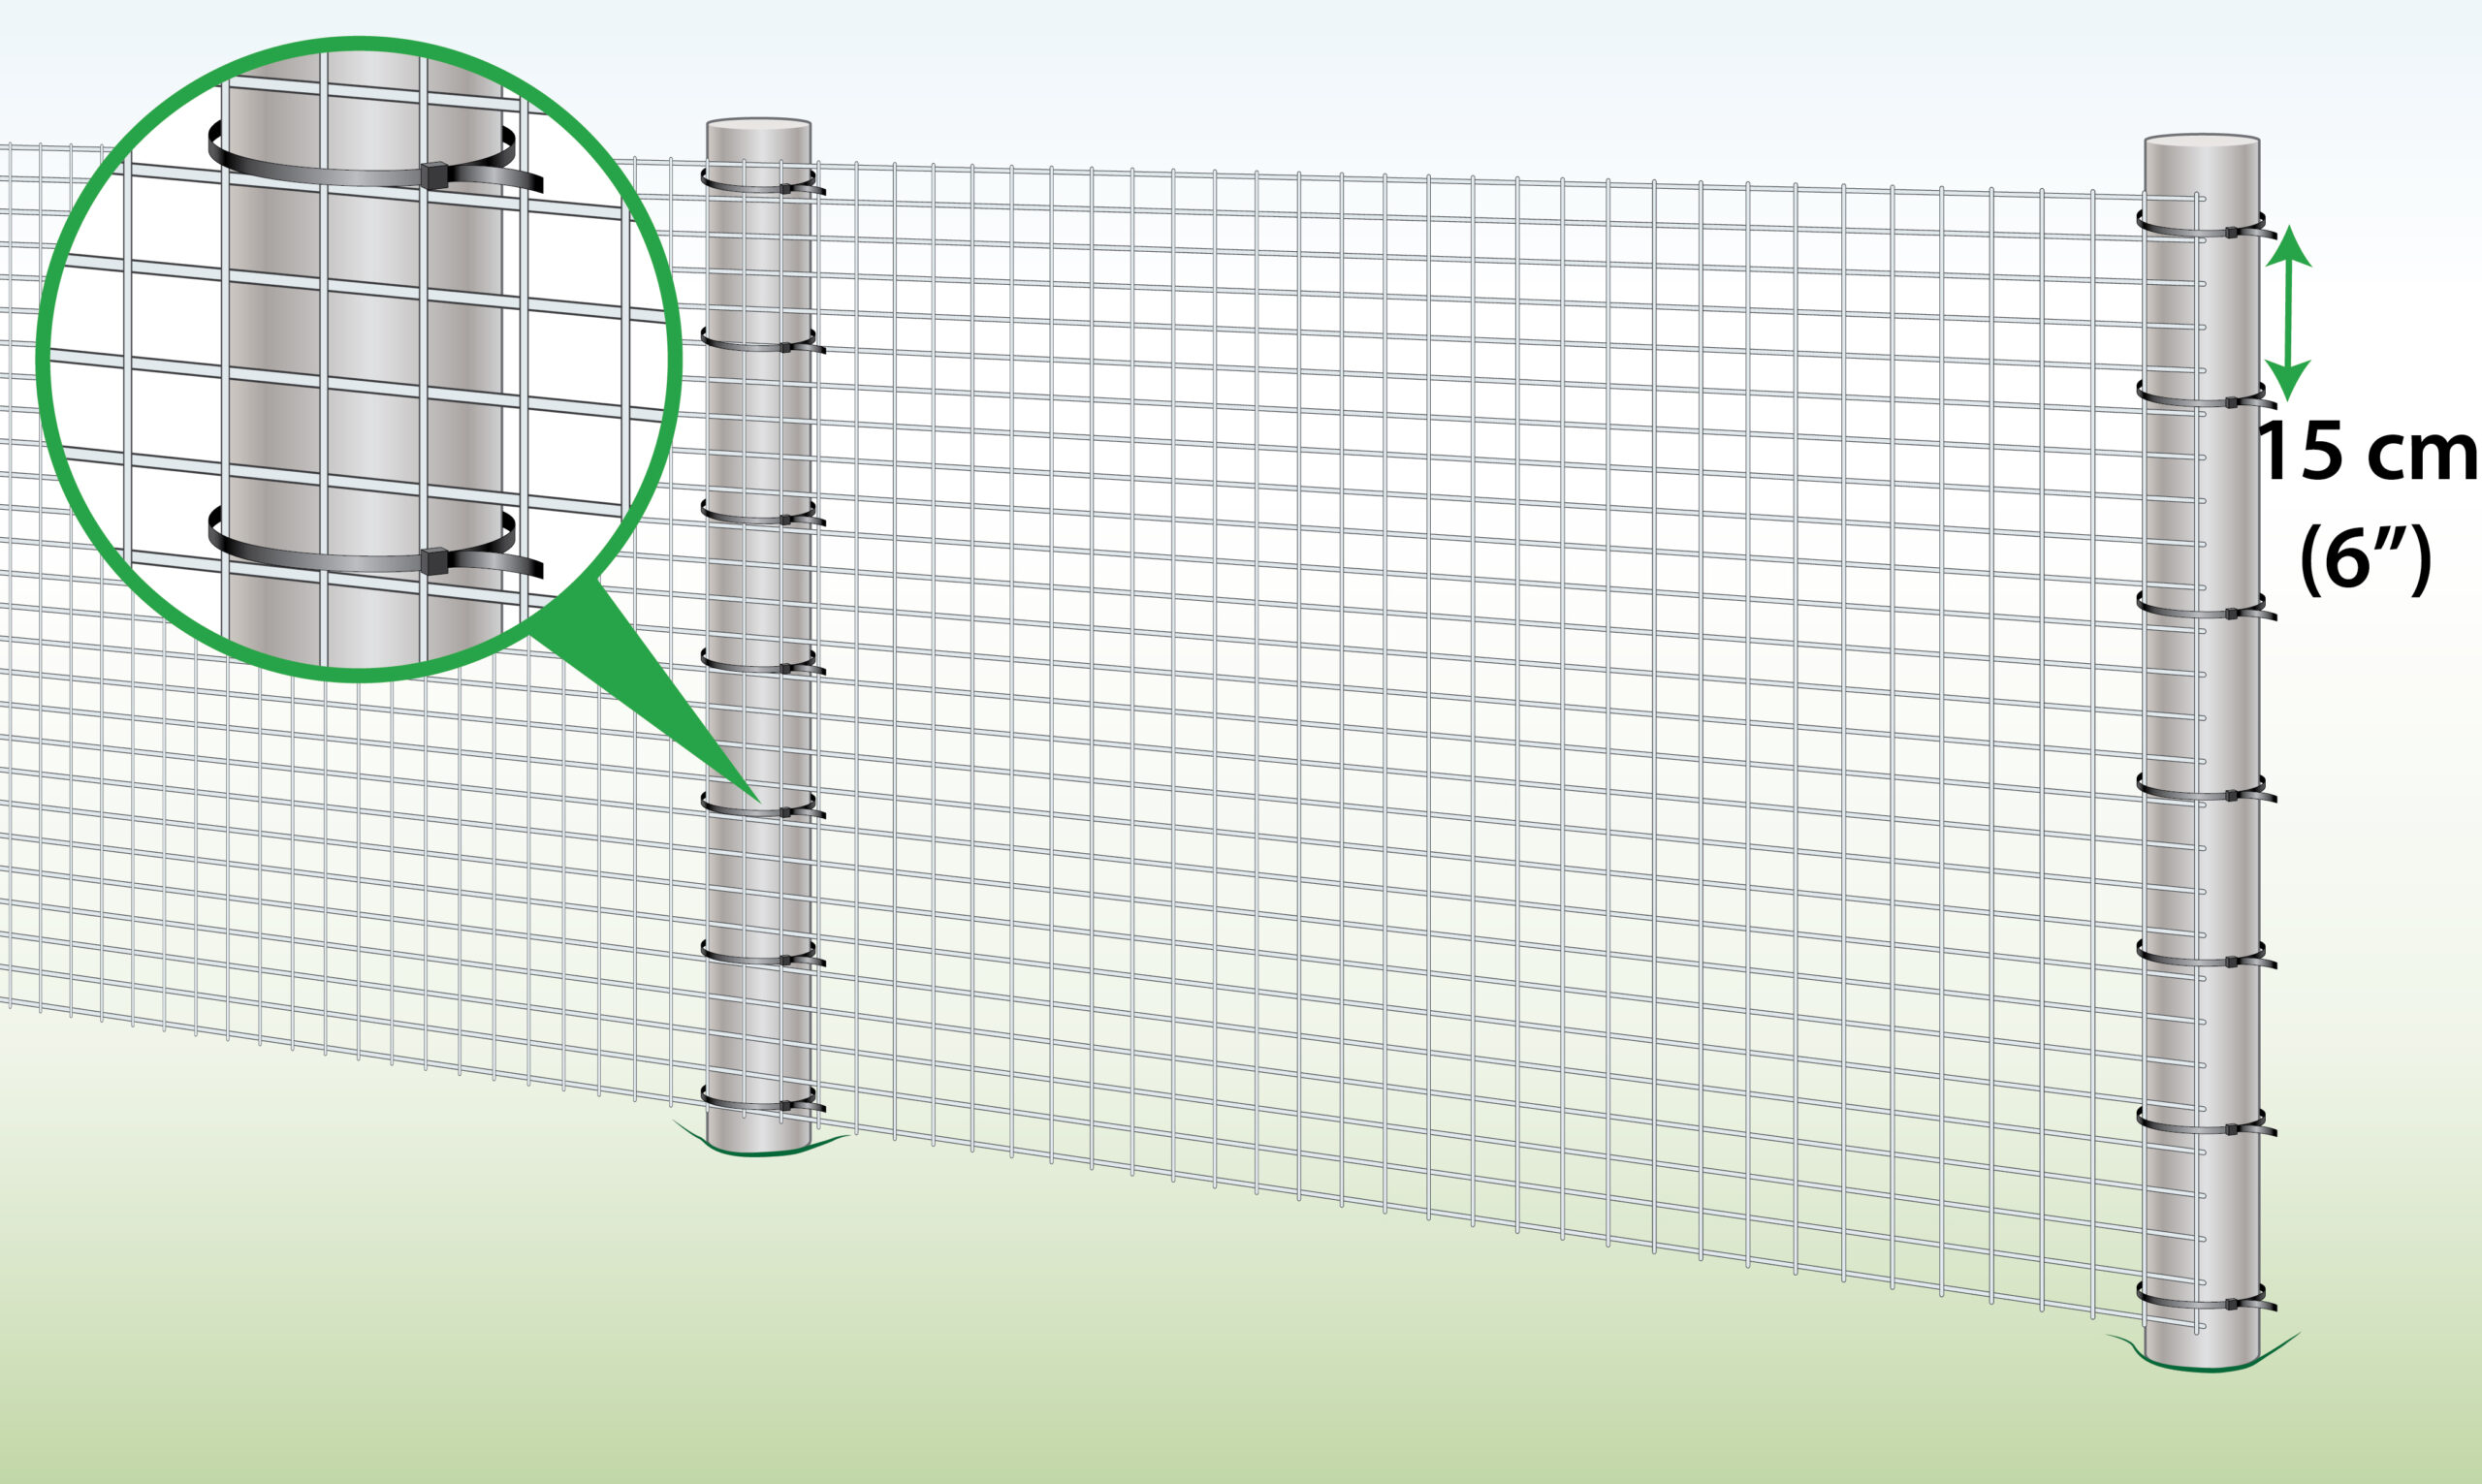 |
| Concrete Posts | 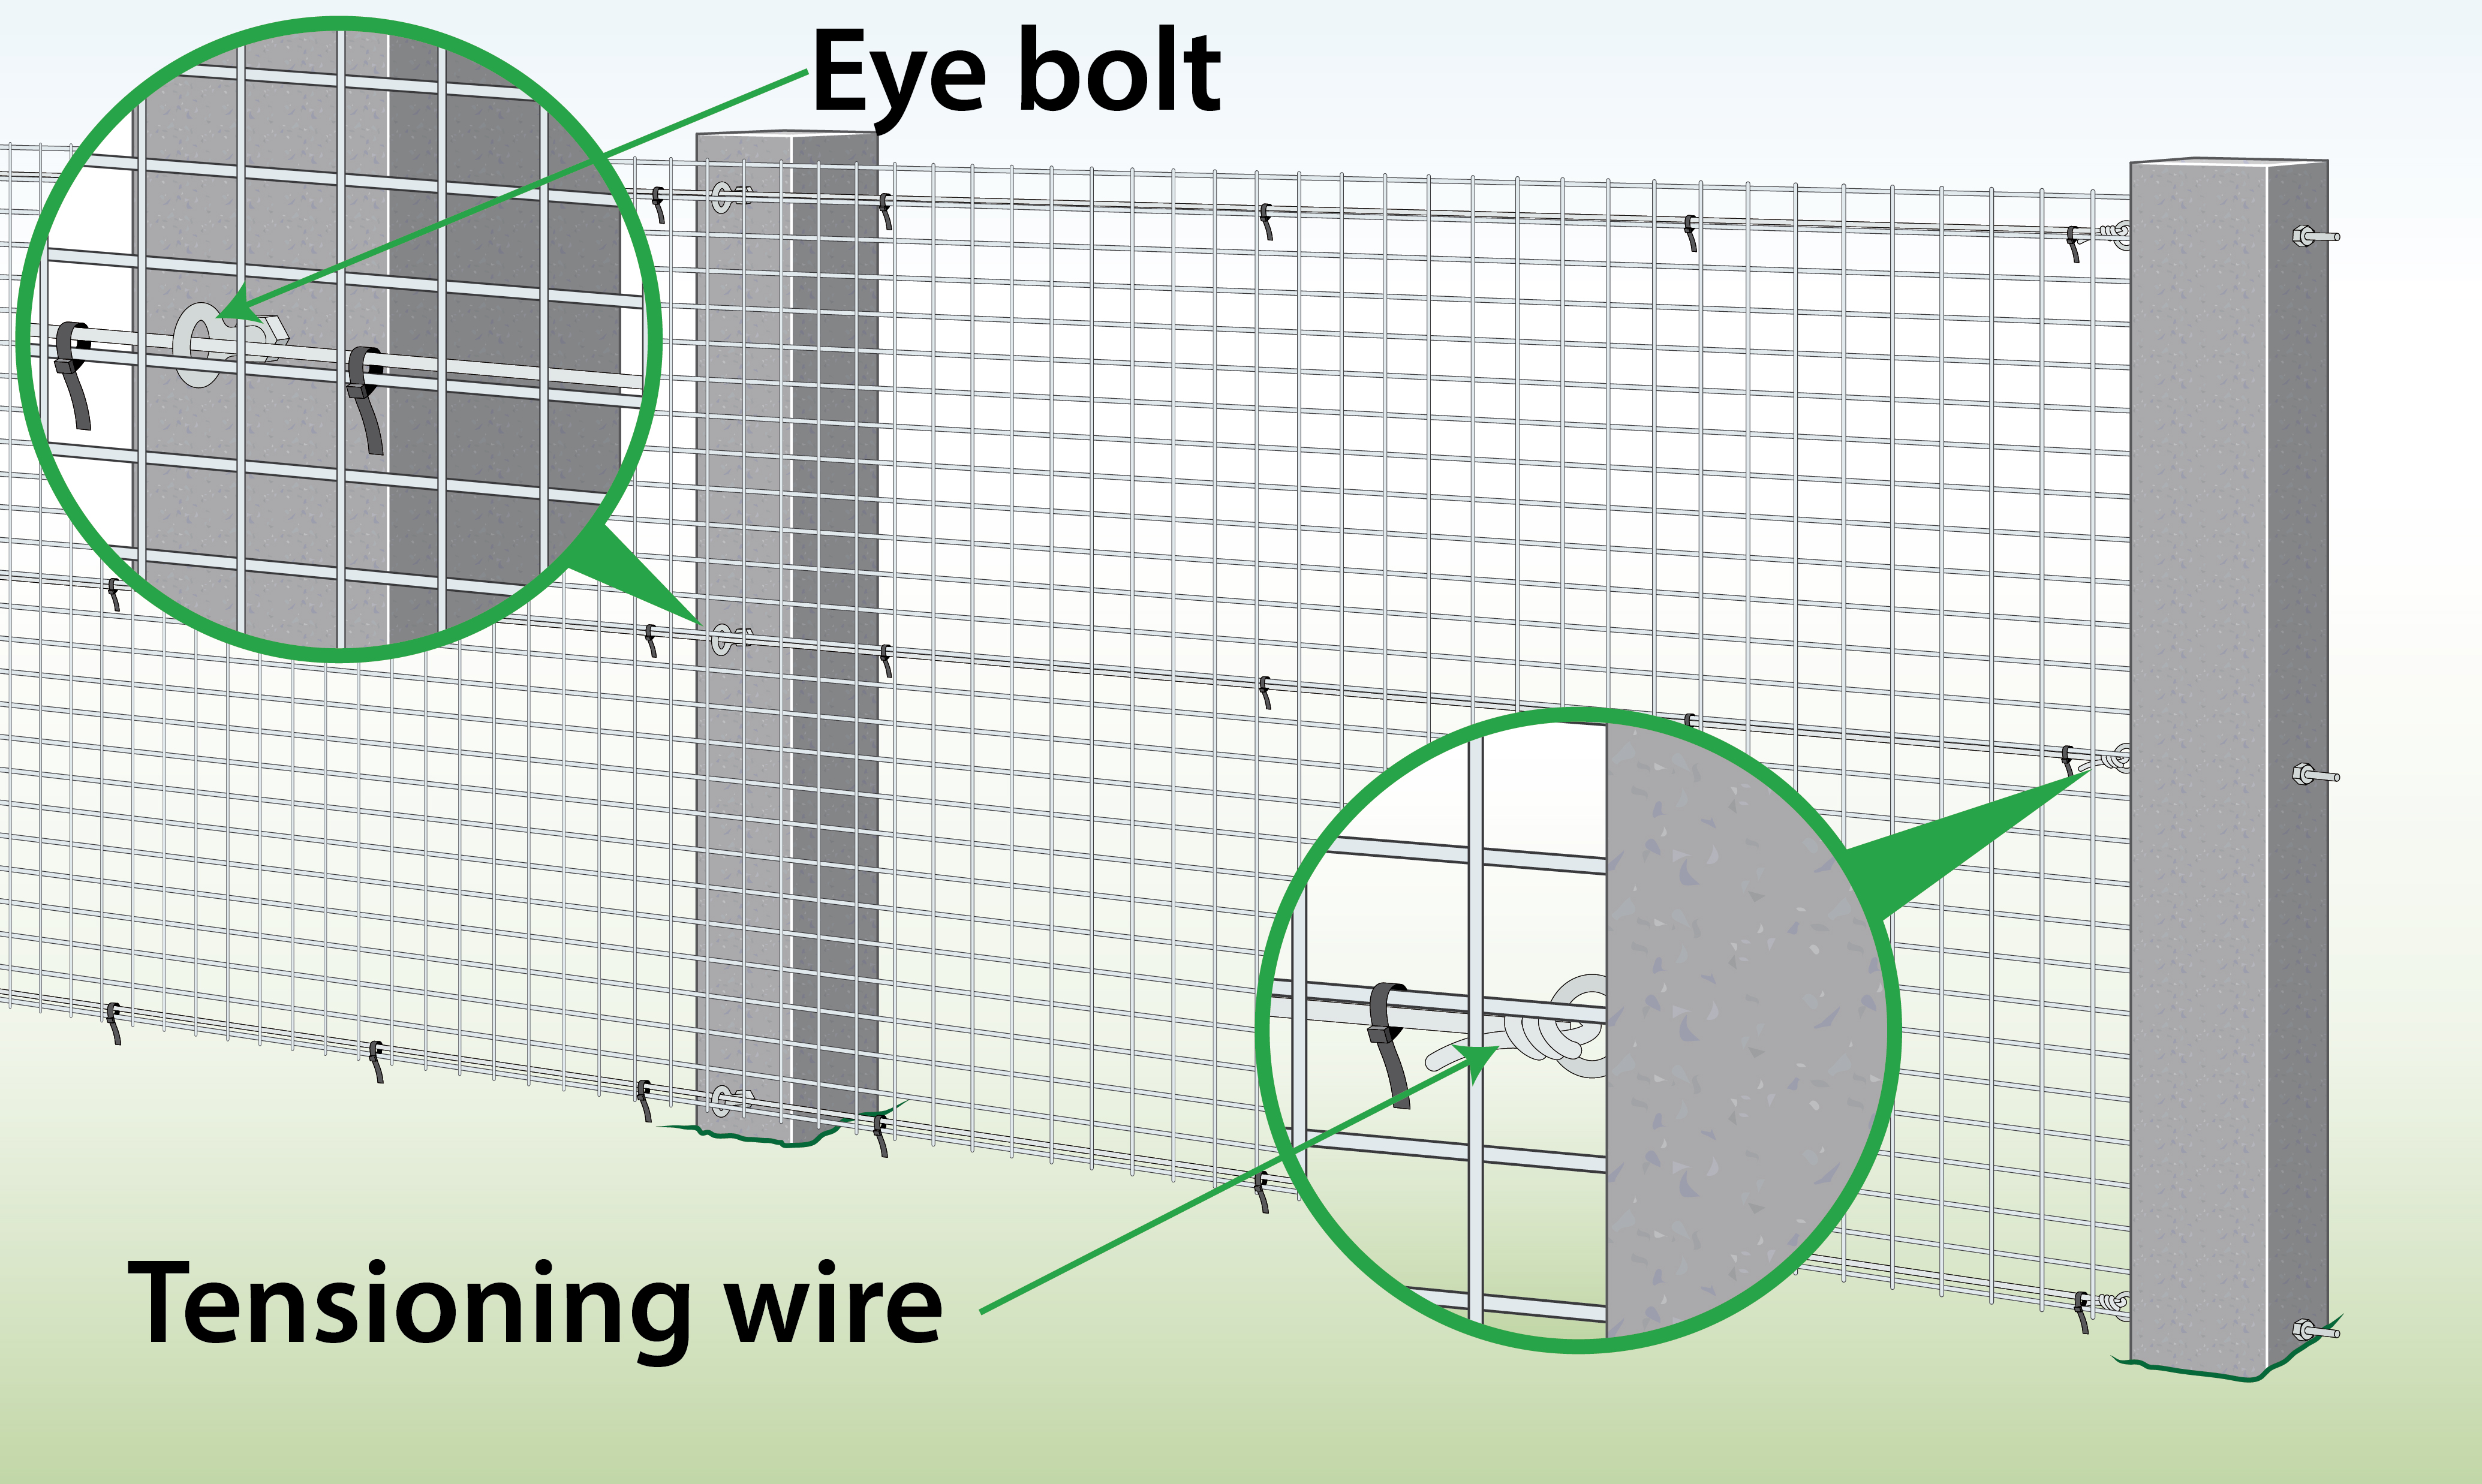 |
| Soil
(Pegs) |
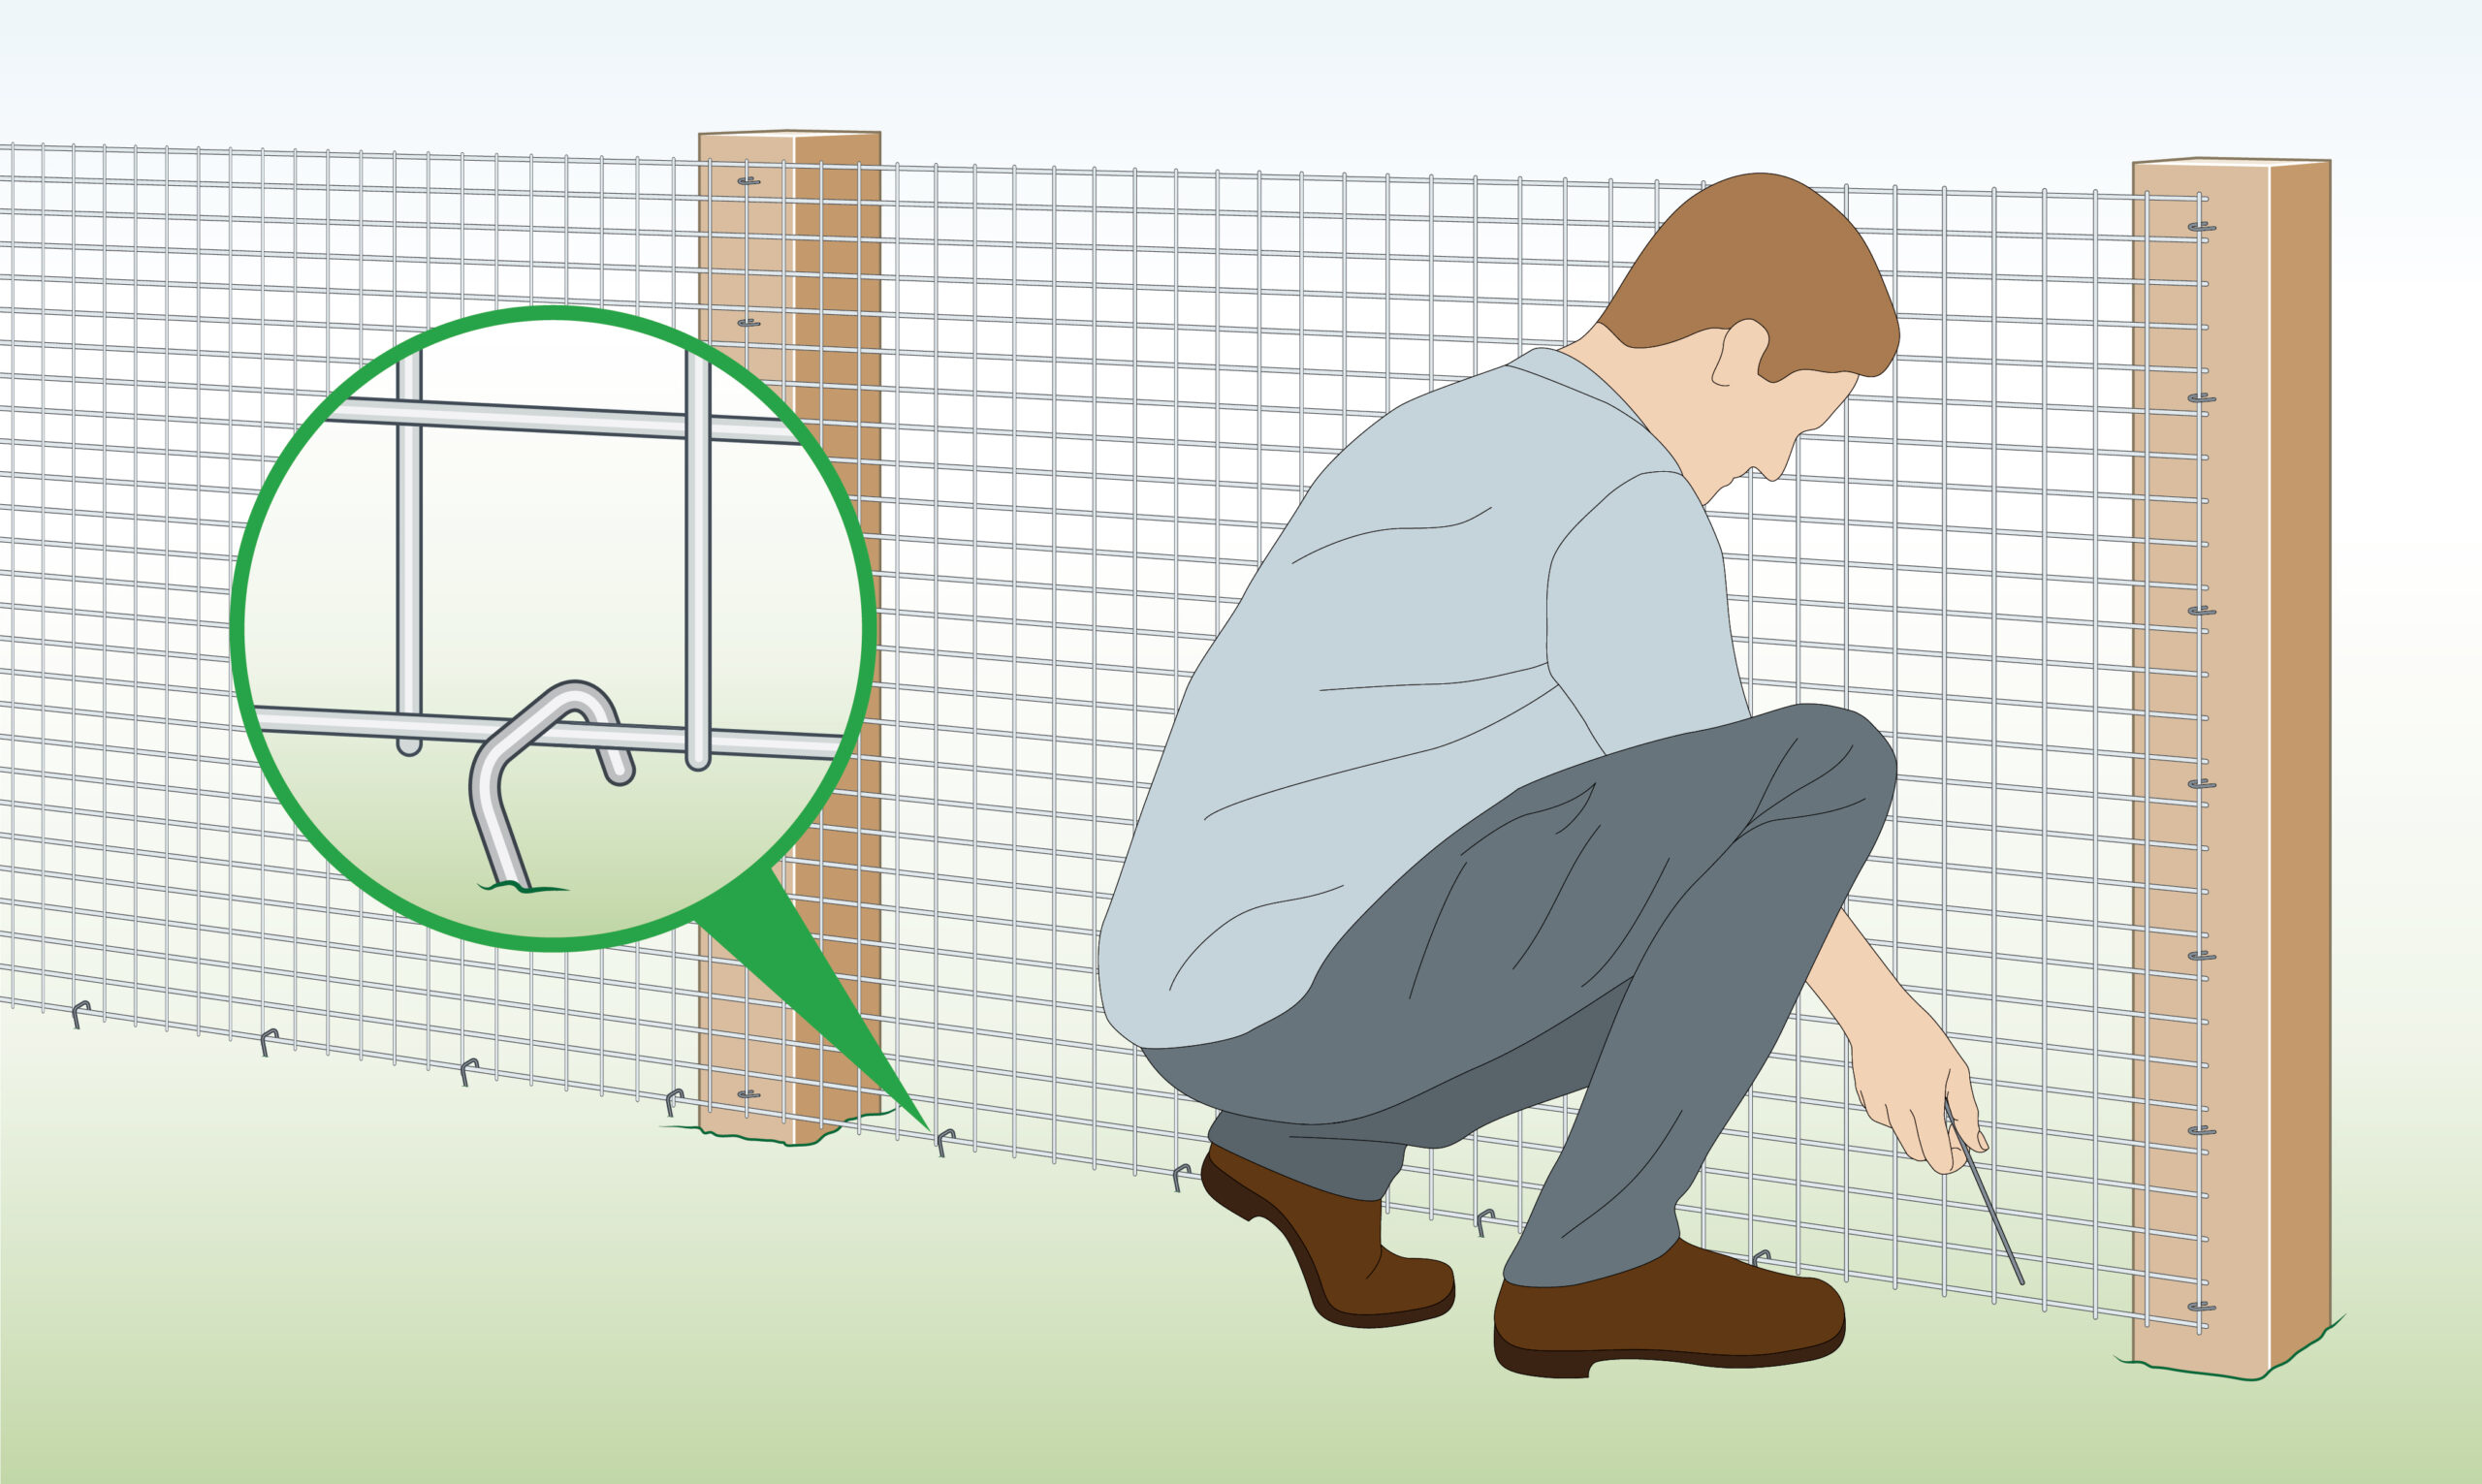 |
| Wire Fence
|
 |
Installation Instructions
| To Do | Explanation |
| Completed Installation
|
Follow these steps for installation. |
| Step 1 – Mark the Location
|
Create a straight line to outline the fence between the two end posts. |
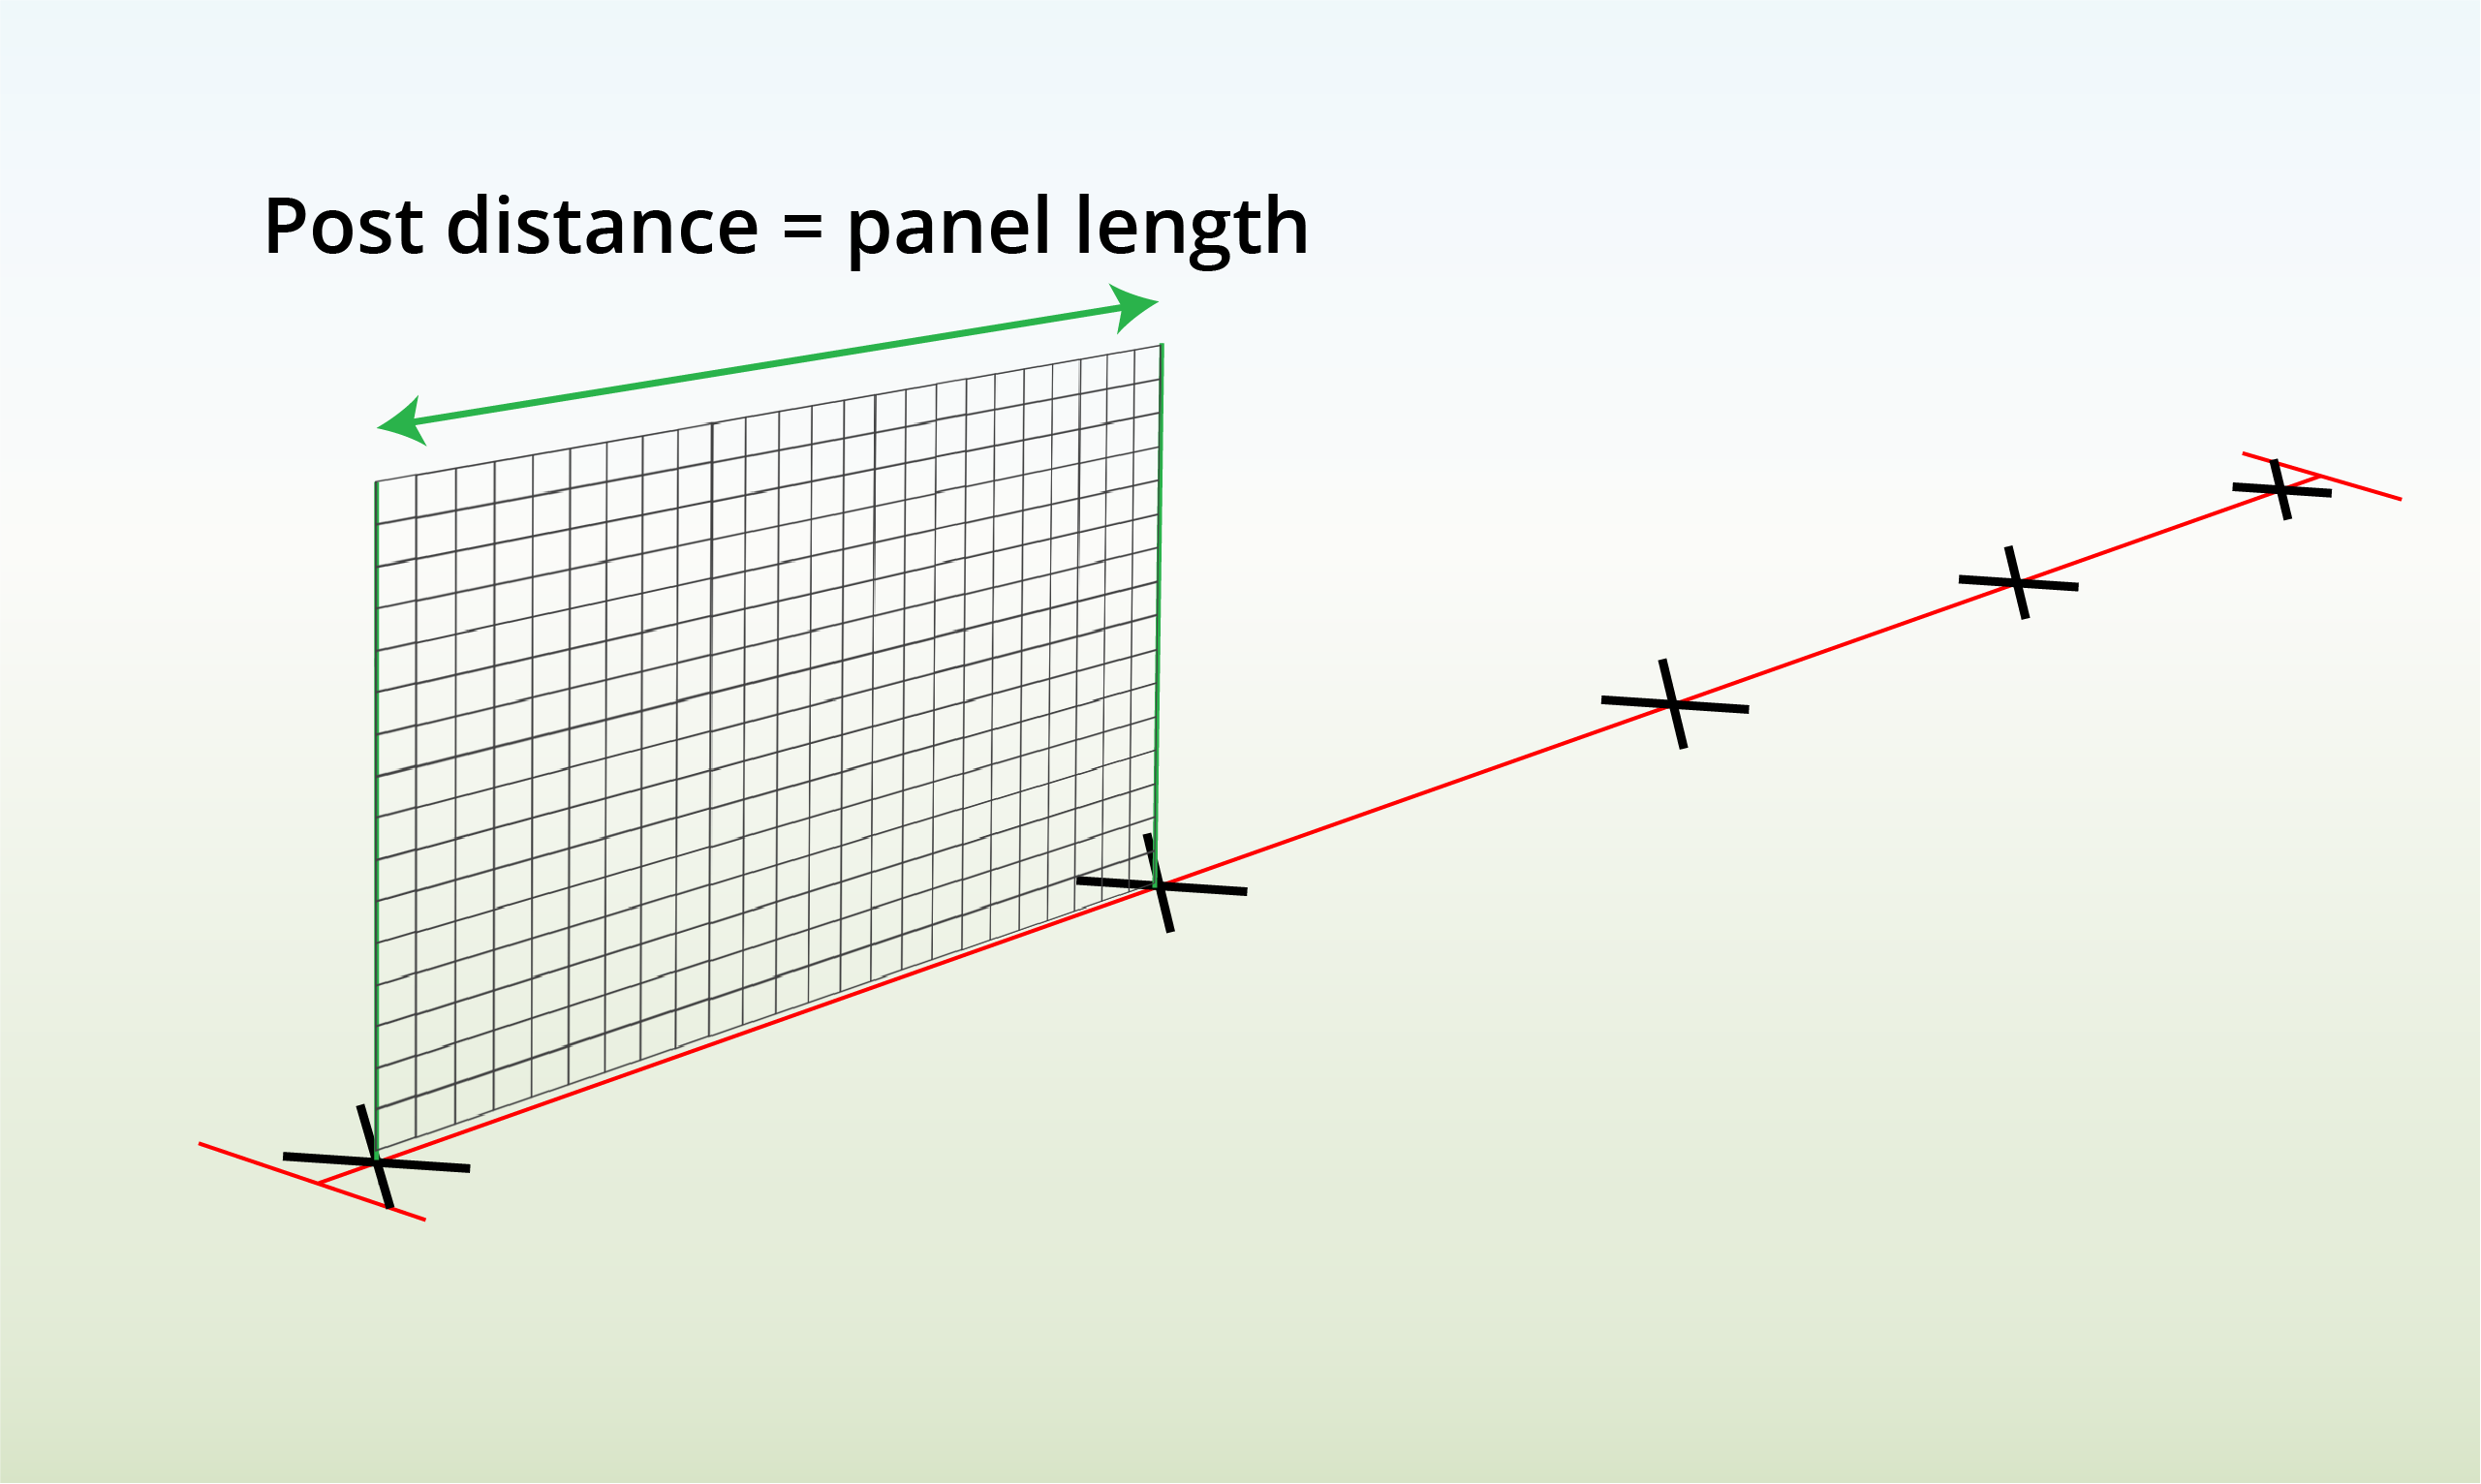
| Step 2 – Measure Post Distance
|
Use your panels to measure the post distance. |
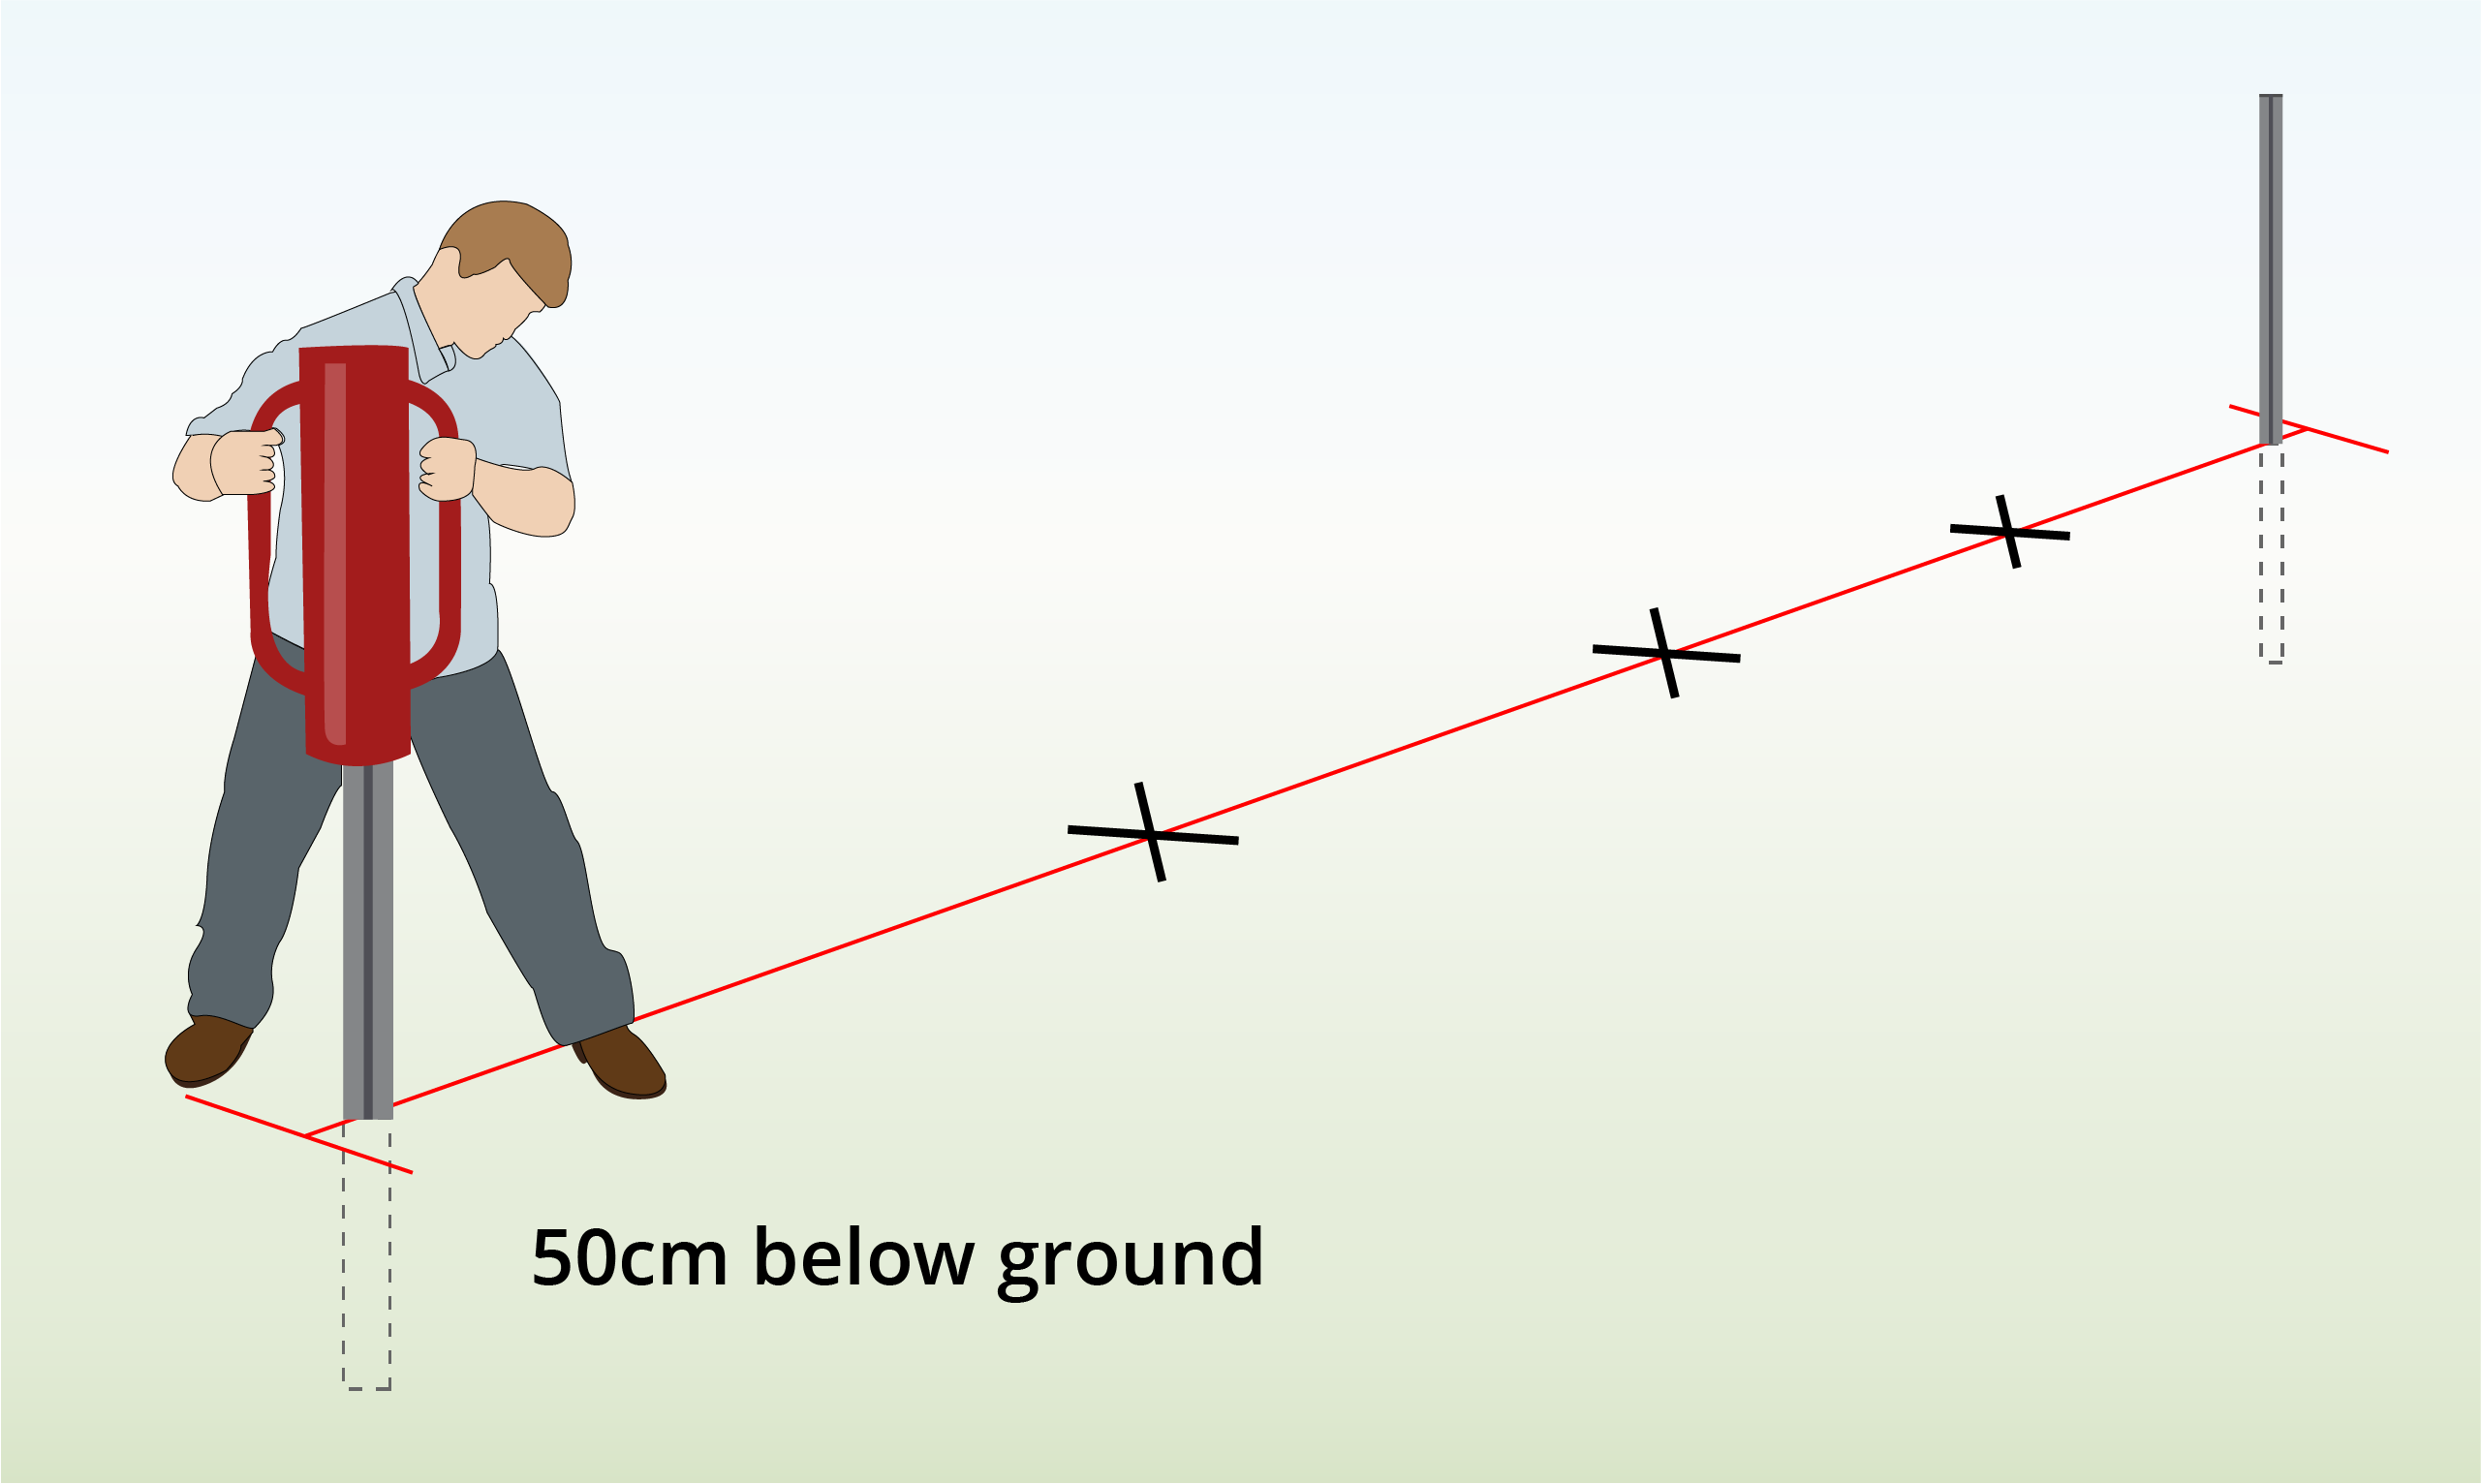
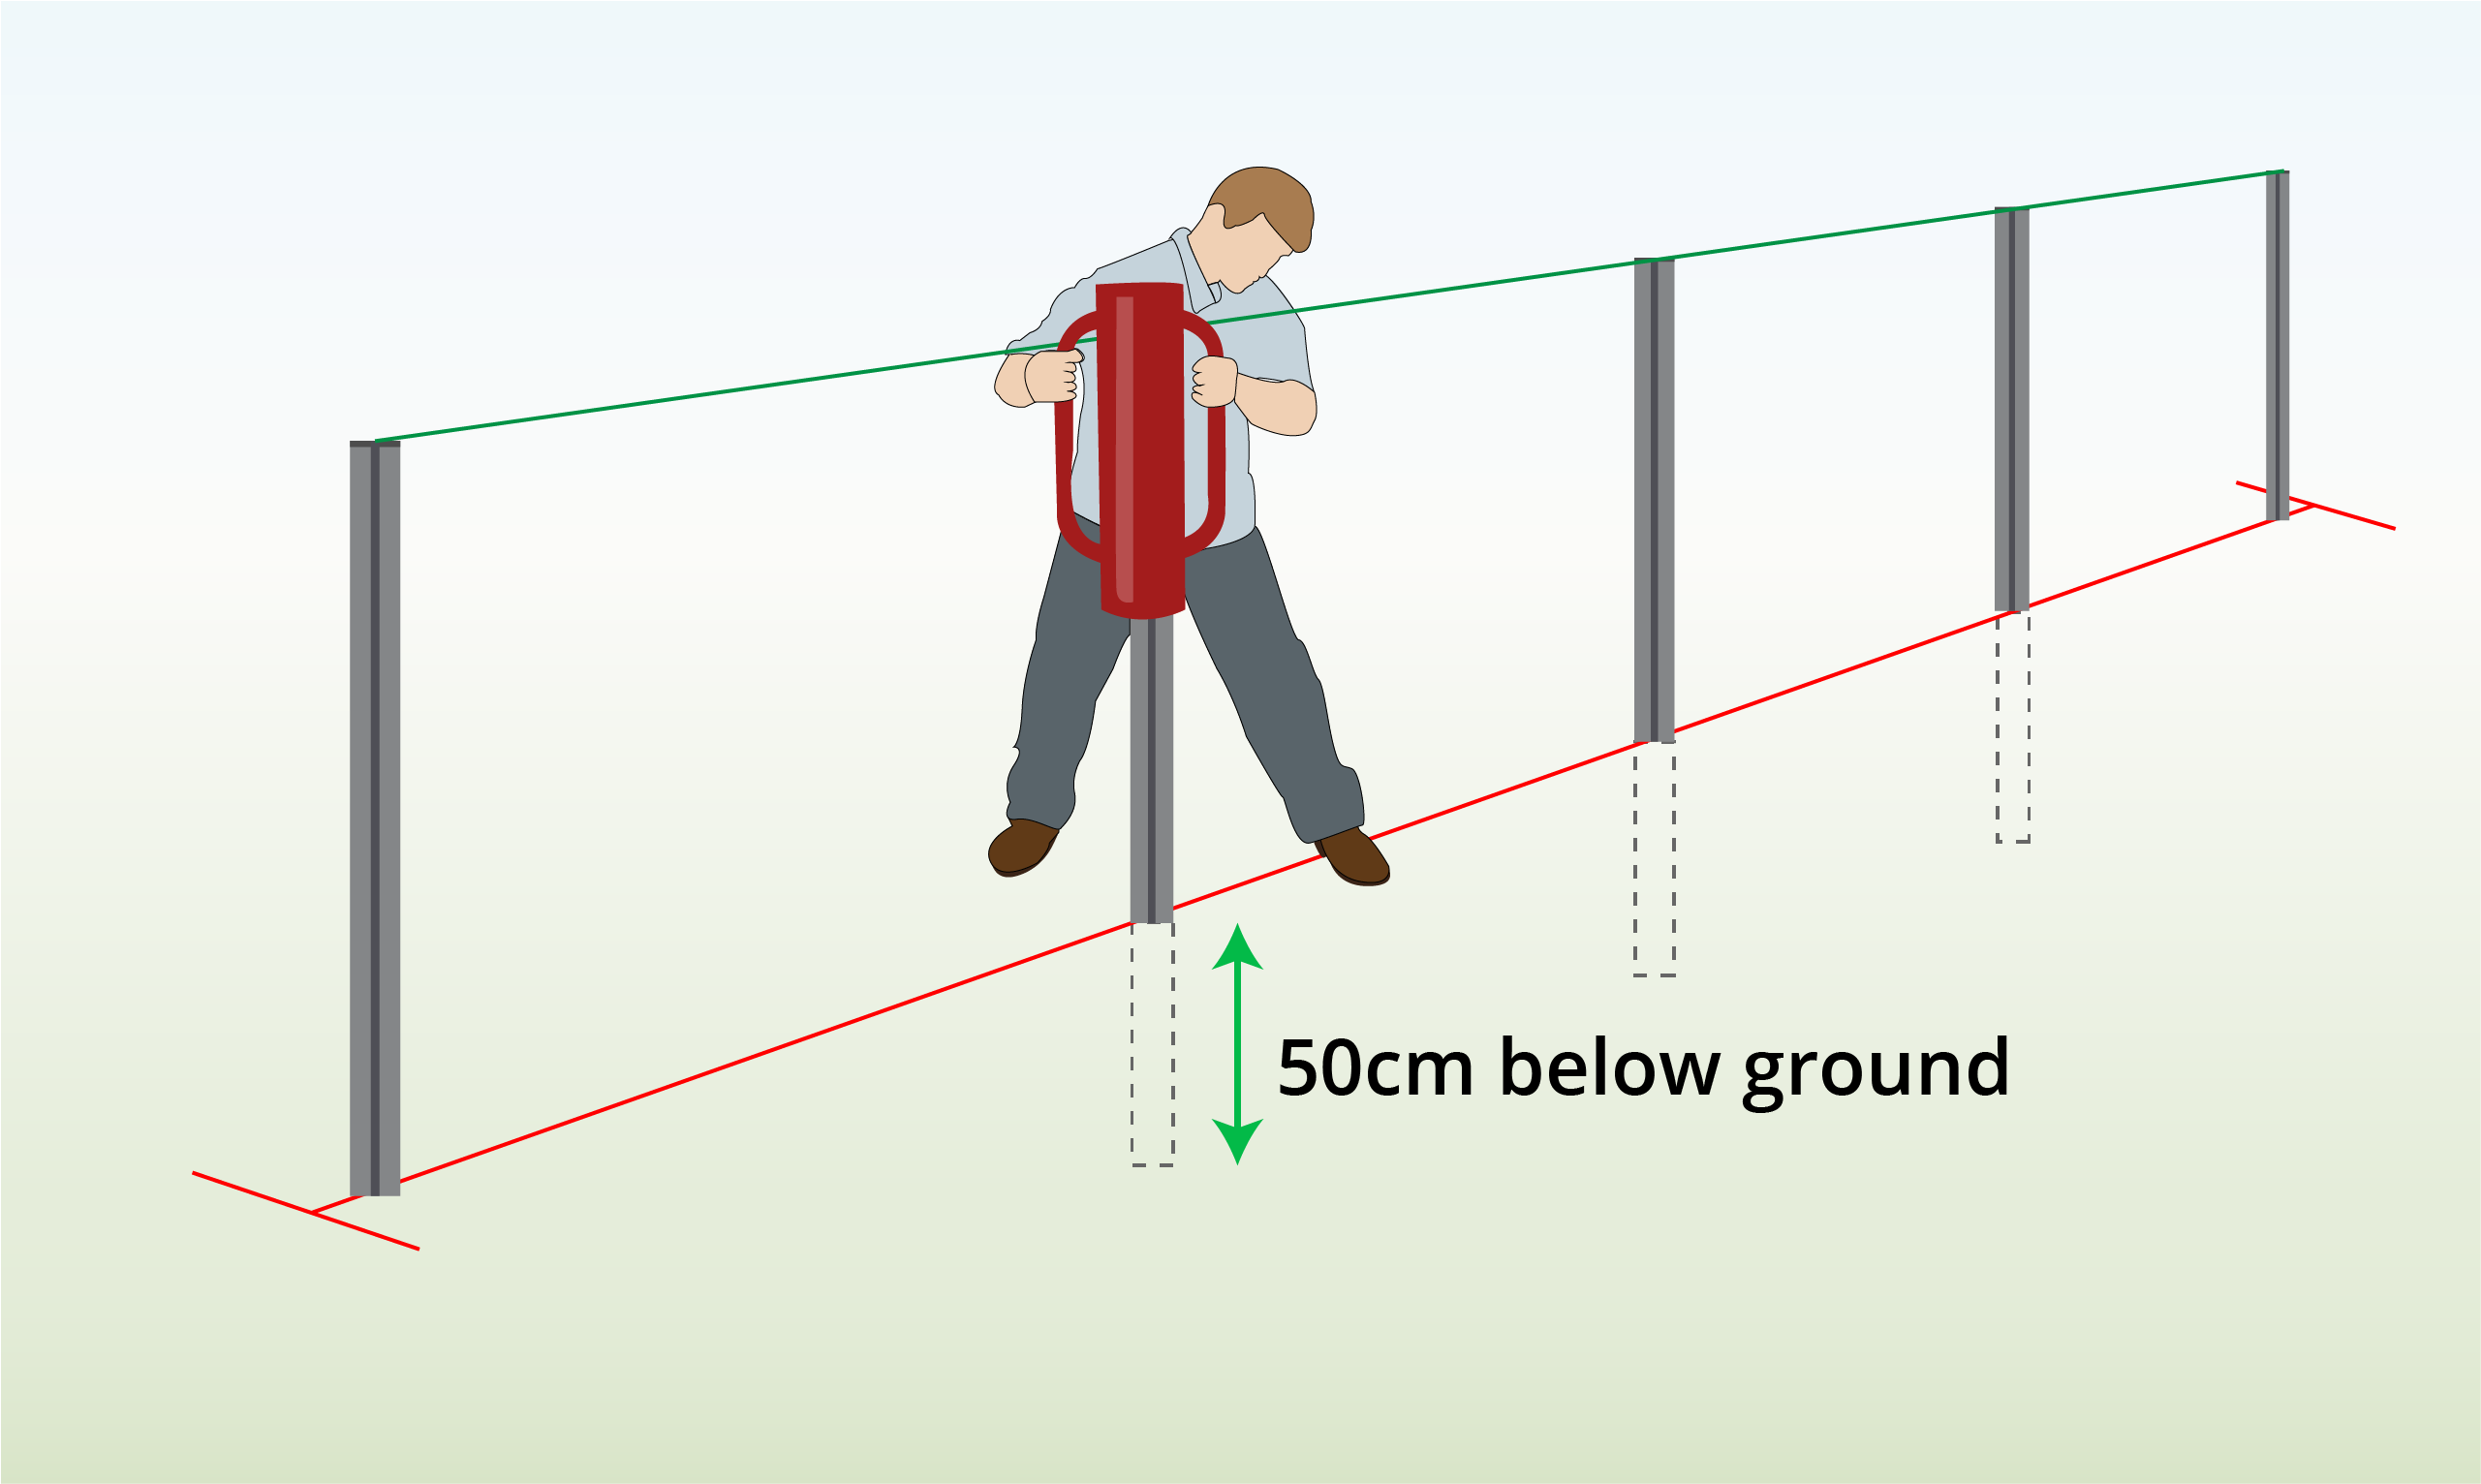
| Step 3 – Install End Posts
|
Use a post driver or mallet to sink the end posts 50cm into the ground.
Make sure the end posts are pointing in the same direction. |
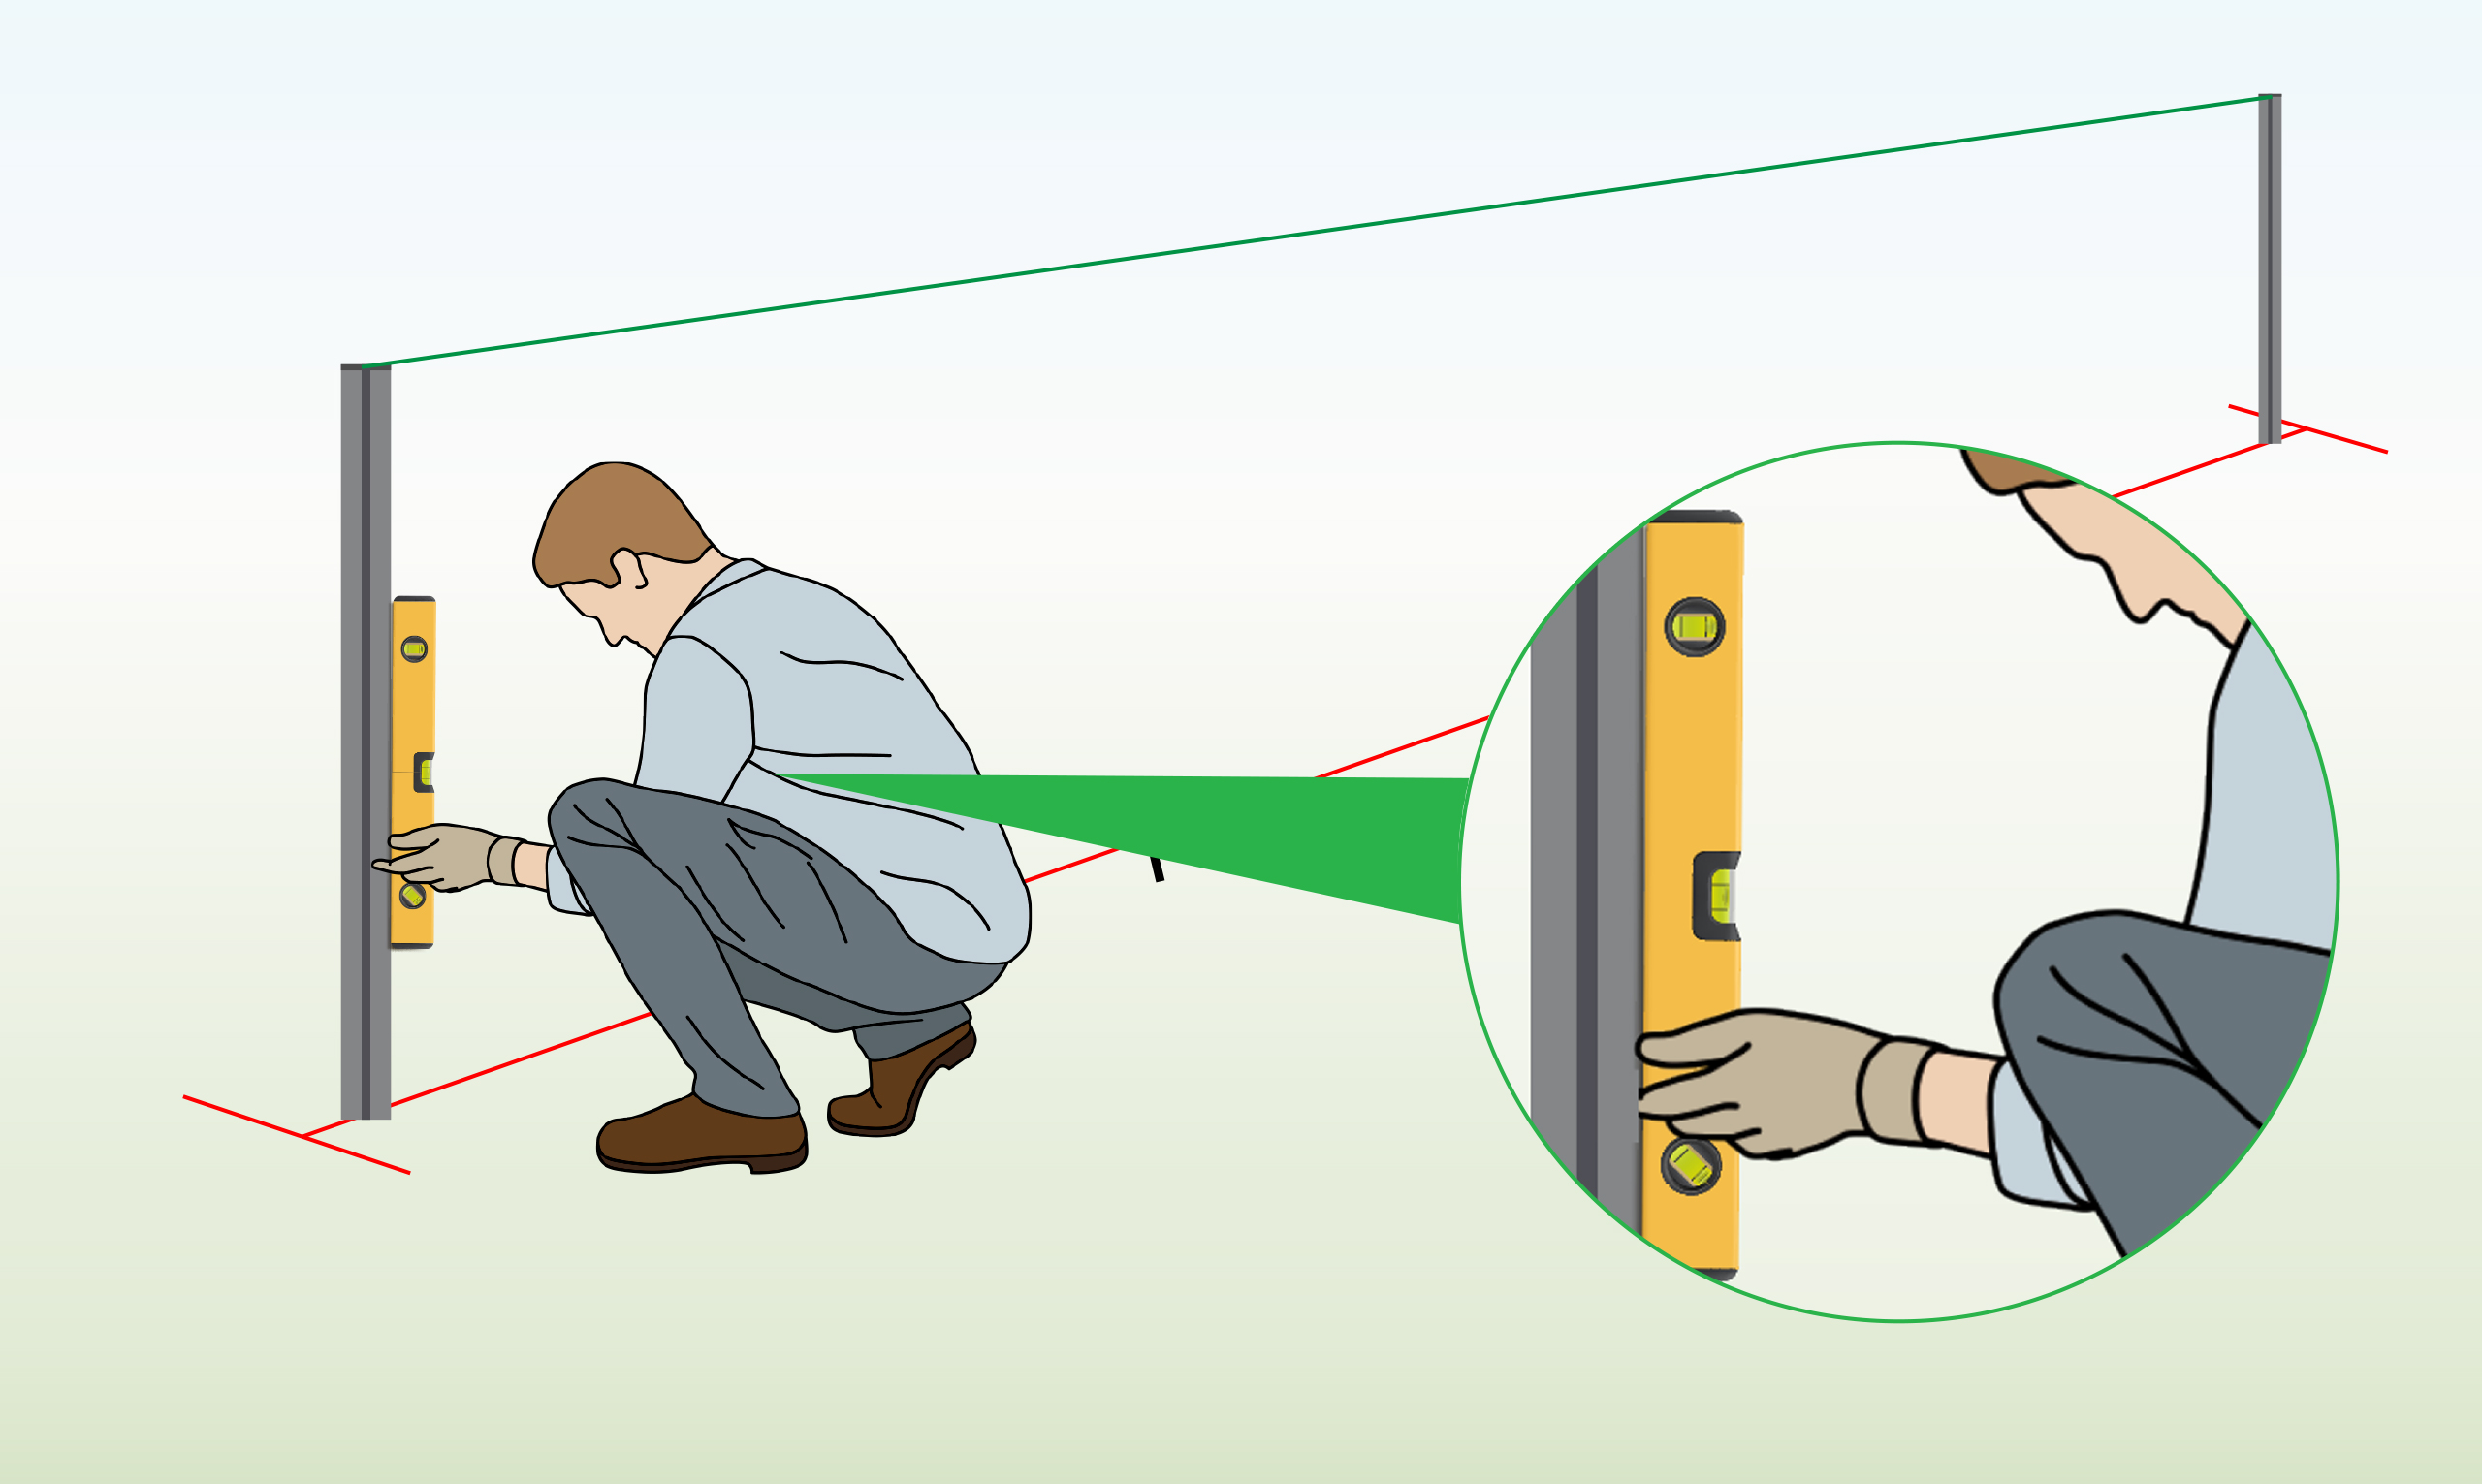
| Step 4 – Check for Same Height
|
Attach a string across the end posts, and check the height of their installation using a tape measure. |
| Step 5 – Check for Straightness
|
Ensure that the posts have been installed completely straight by using a spirit level. |
| Step 6 (Optional) – Set in Concrete
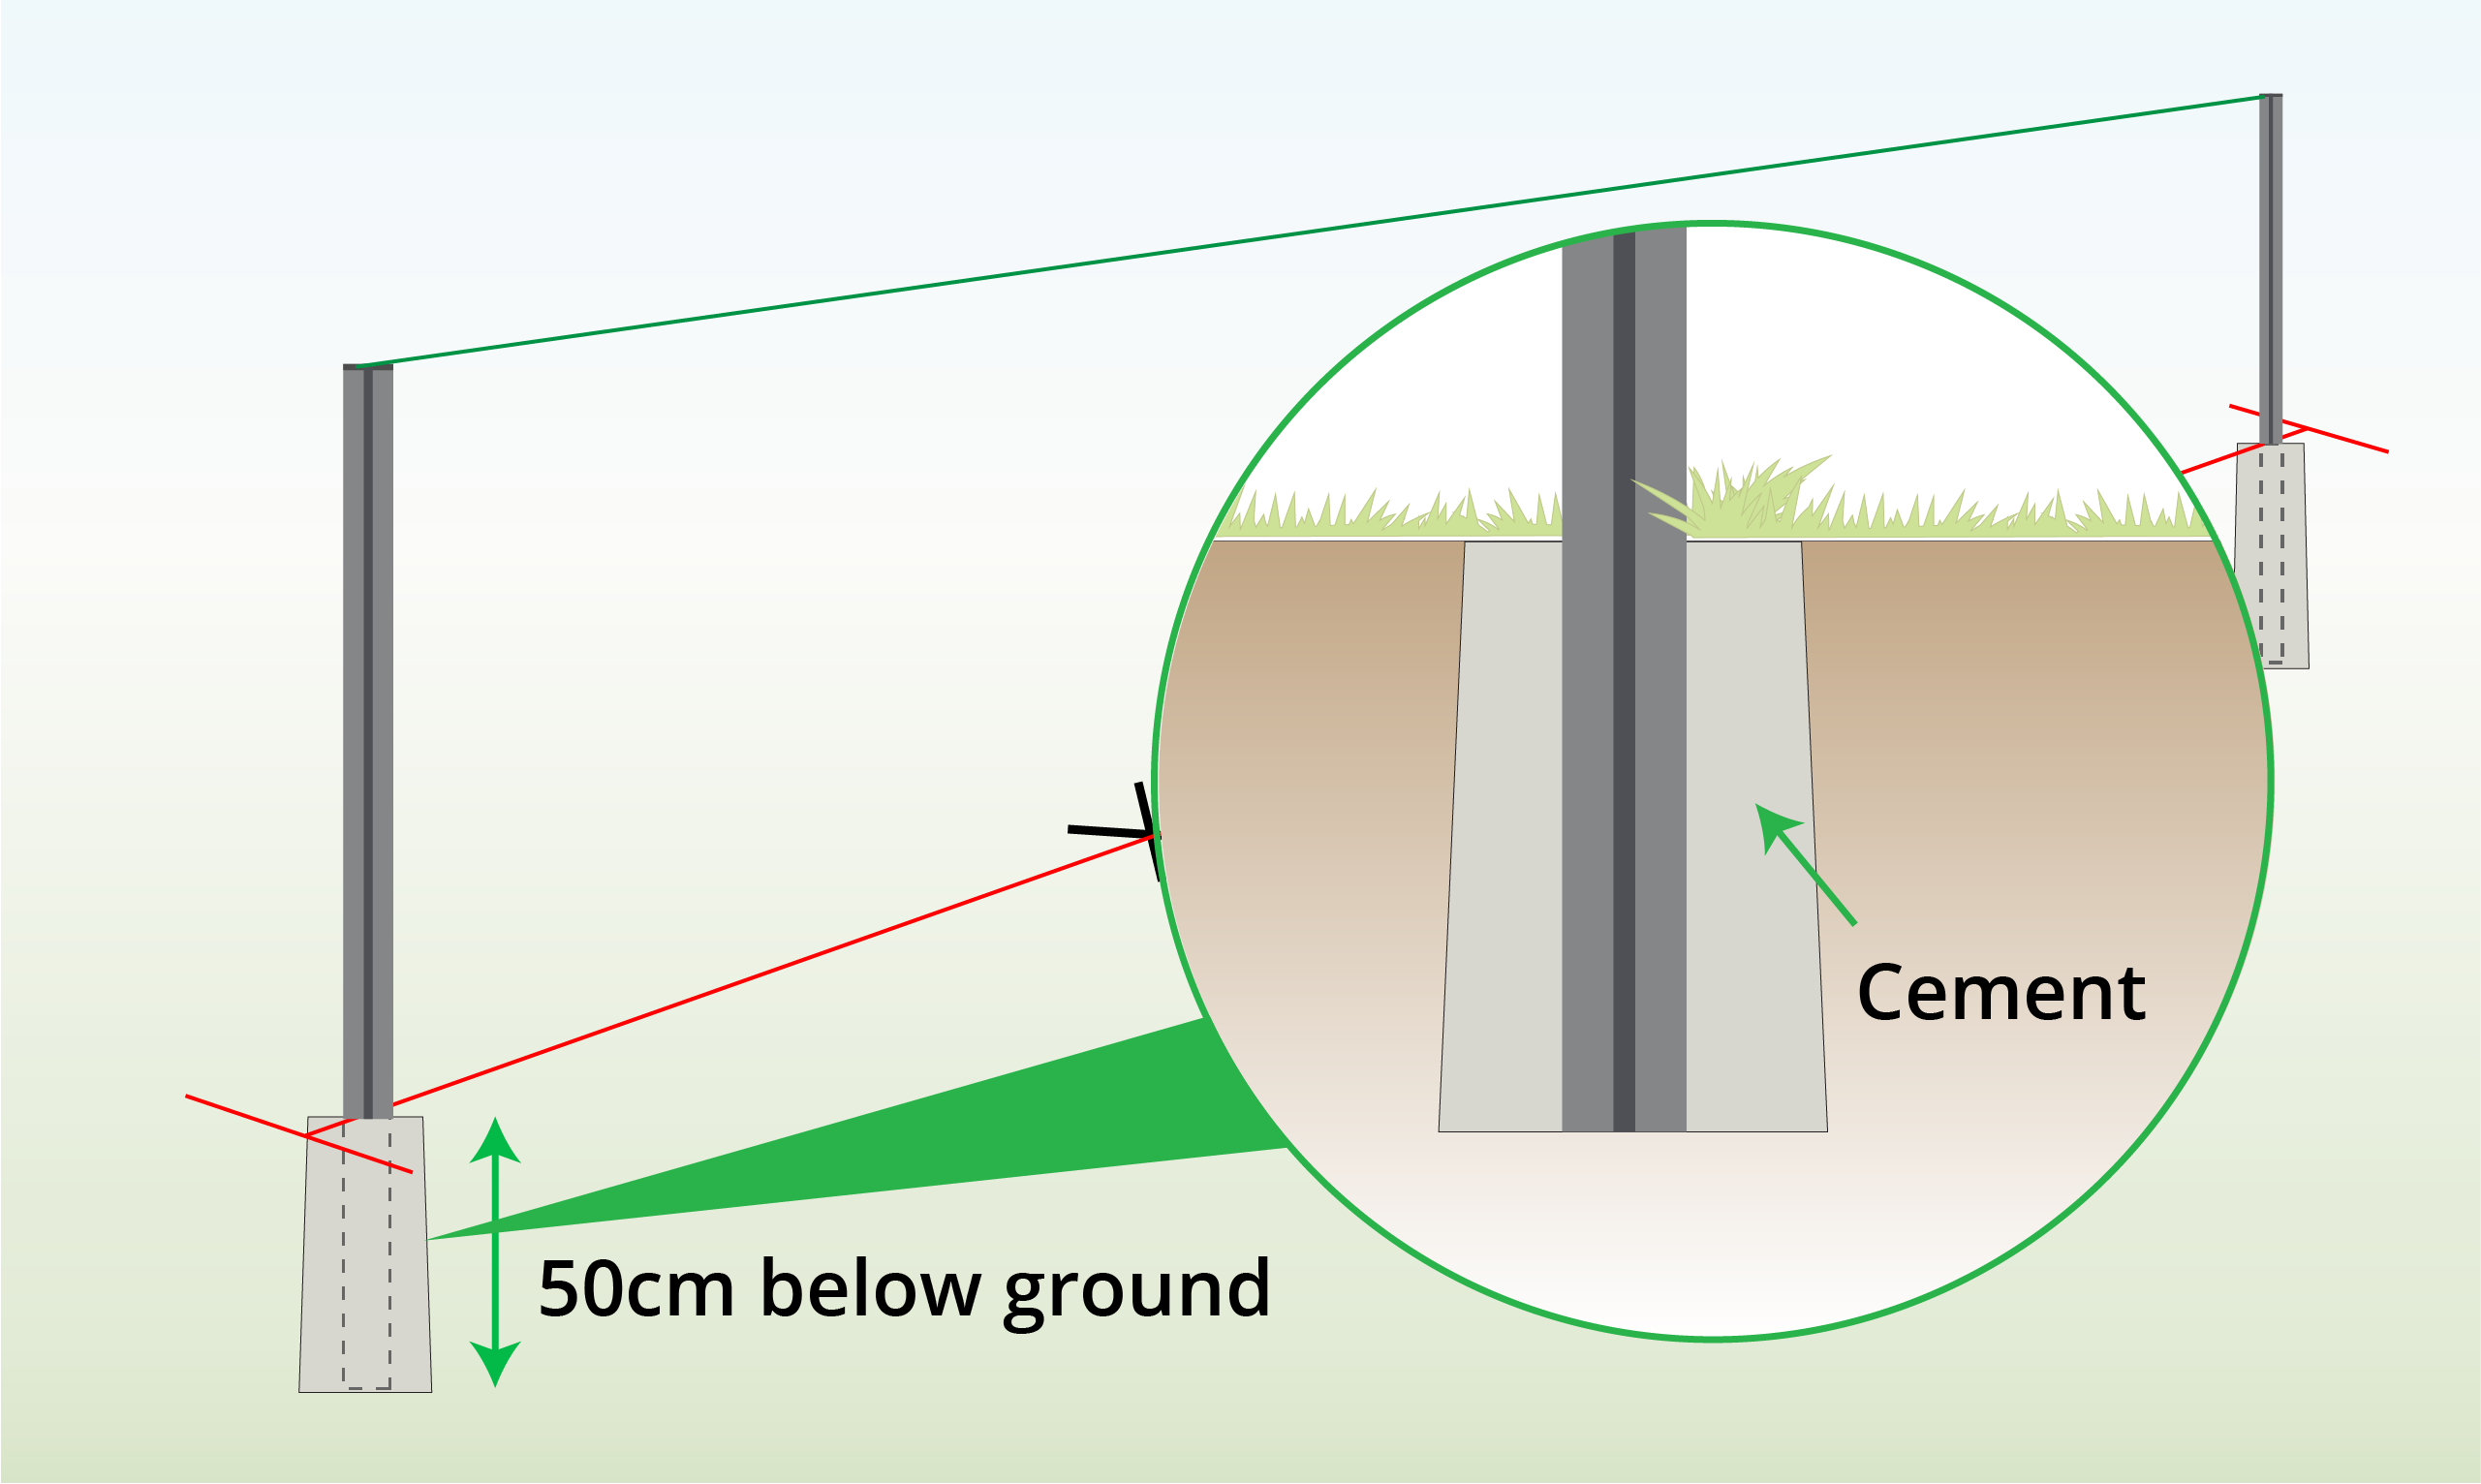
|
For a sturdier and more reliable fence, enhance its stability by setting your posts in concrete.
This involves digging a 50cm hole and pouring cement to create a foundation for the posts. |
| Step 7 – Install Middle Posts
|
Follow steps 3 through 6 to install the middle posts.
|
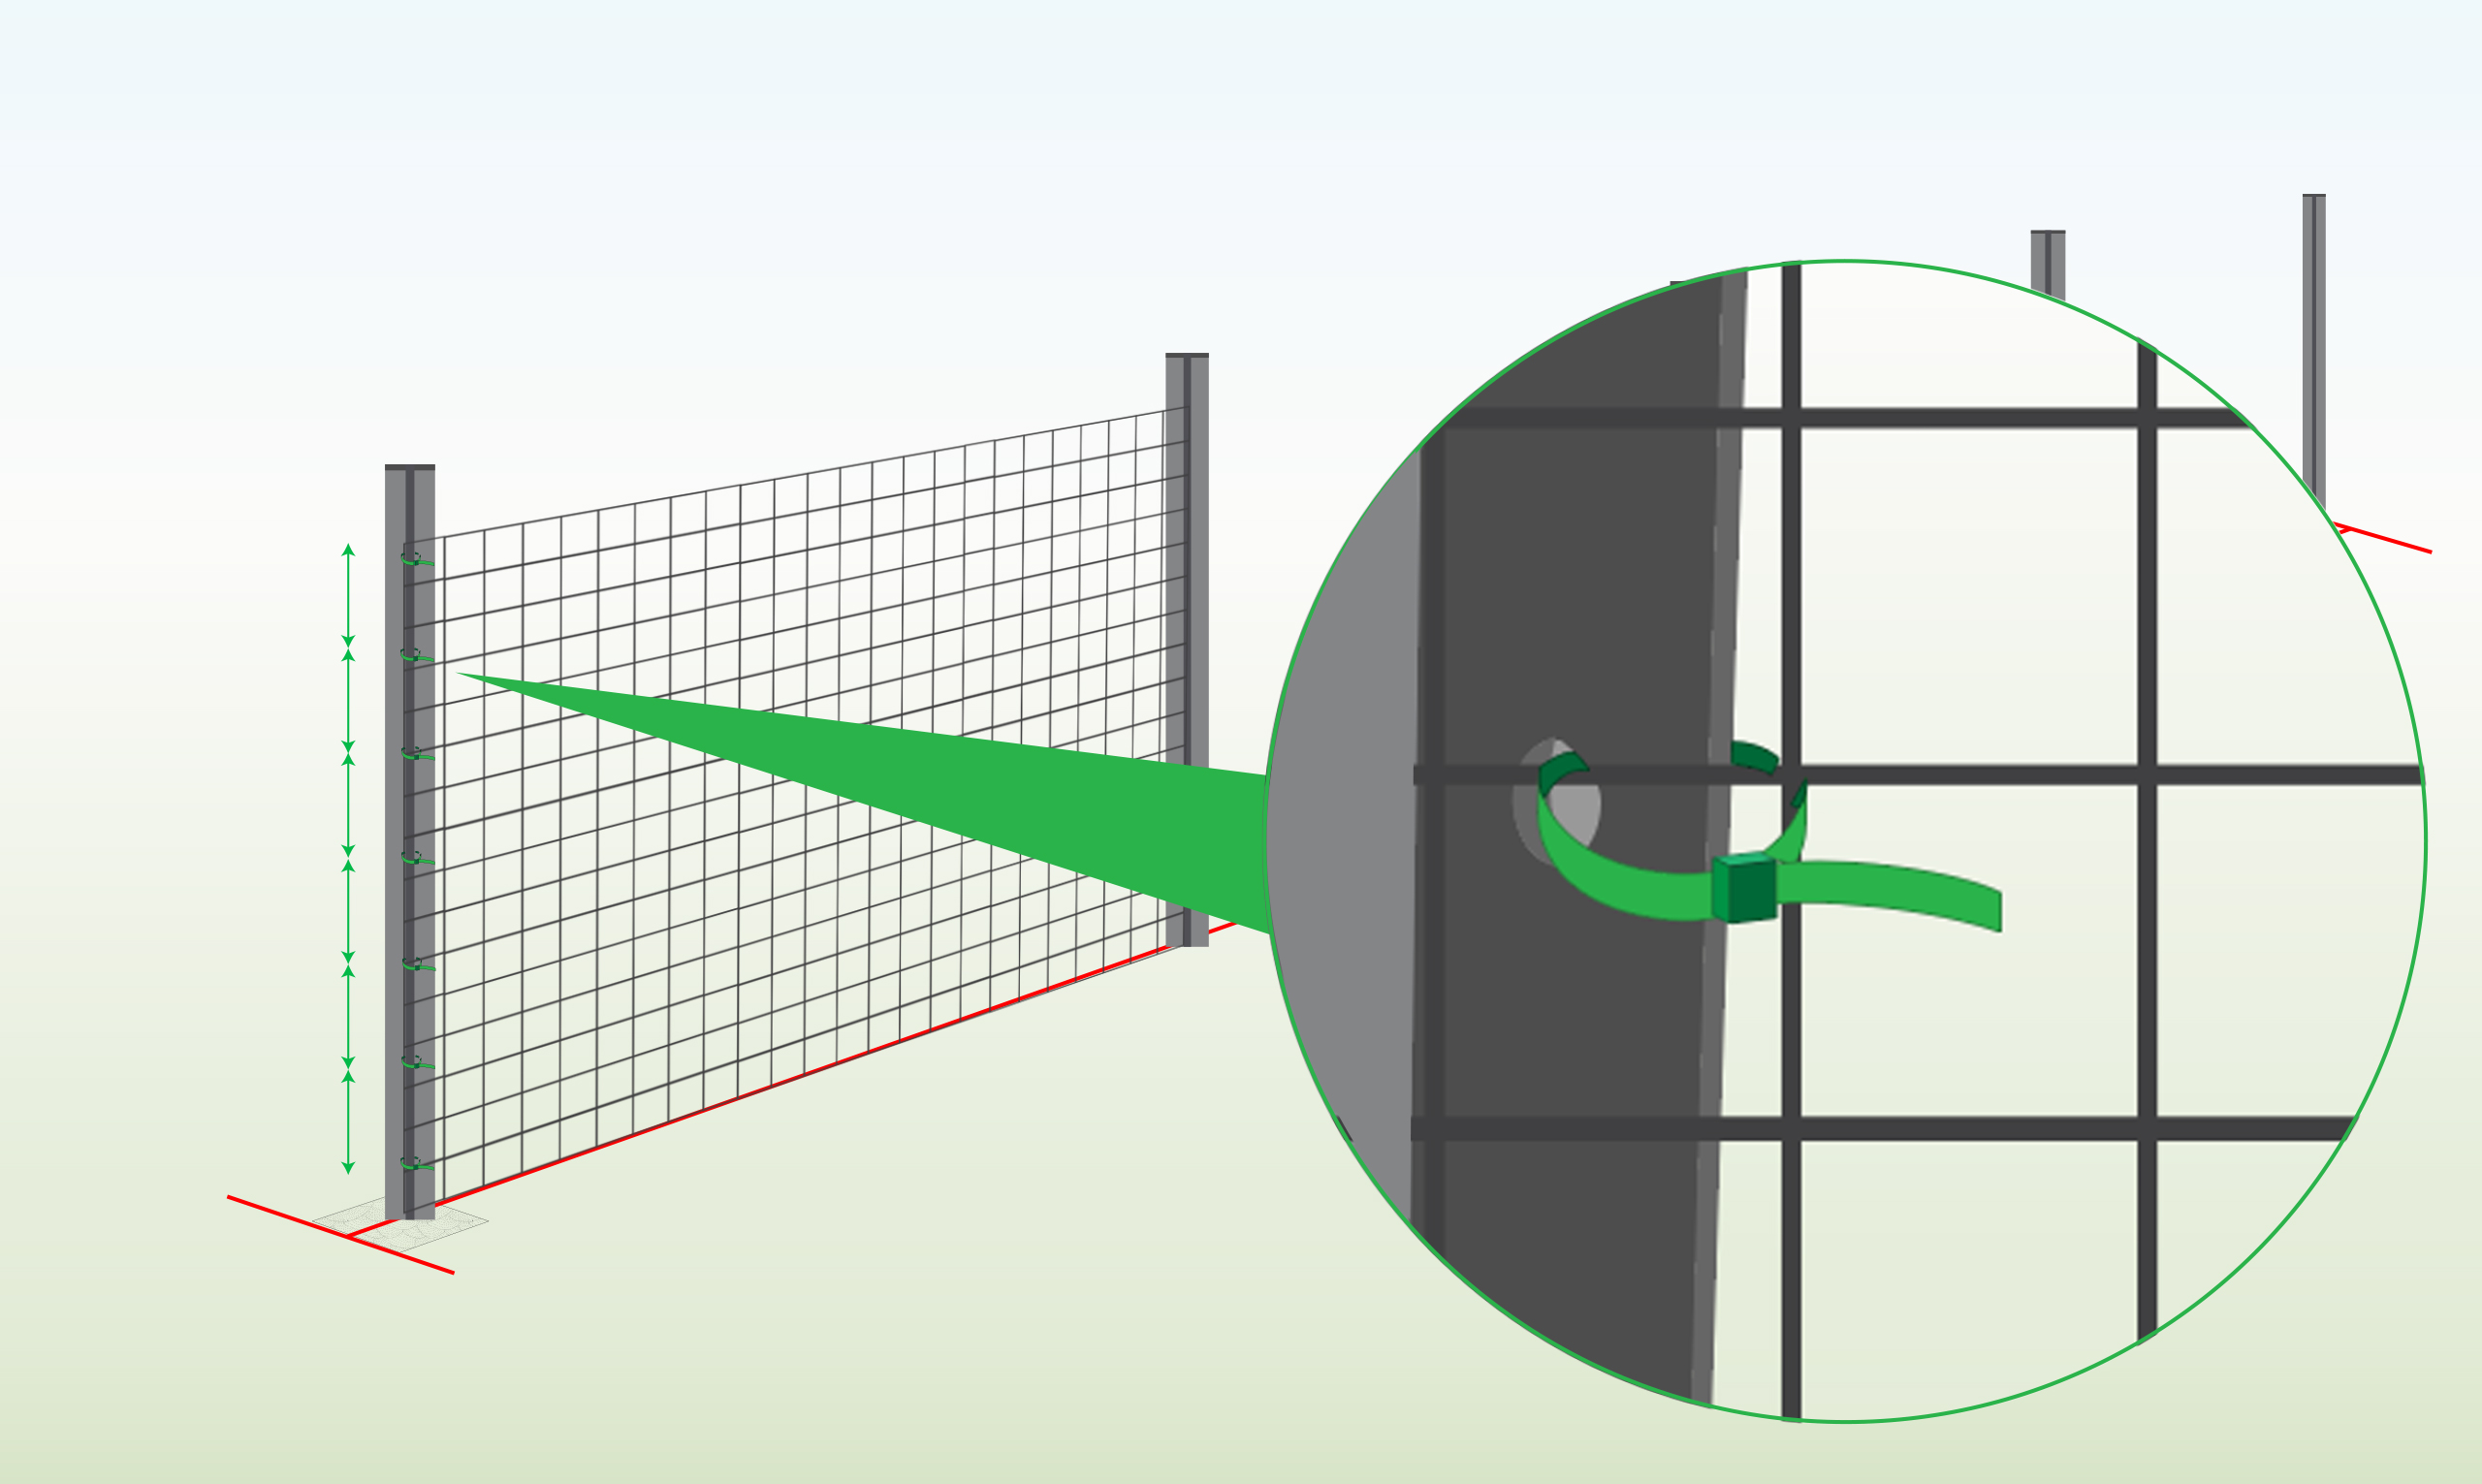
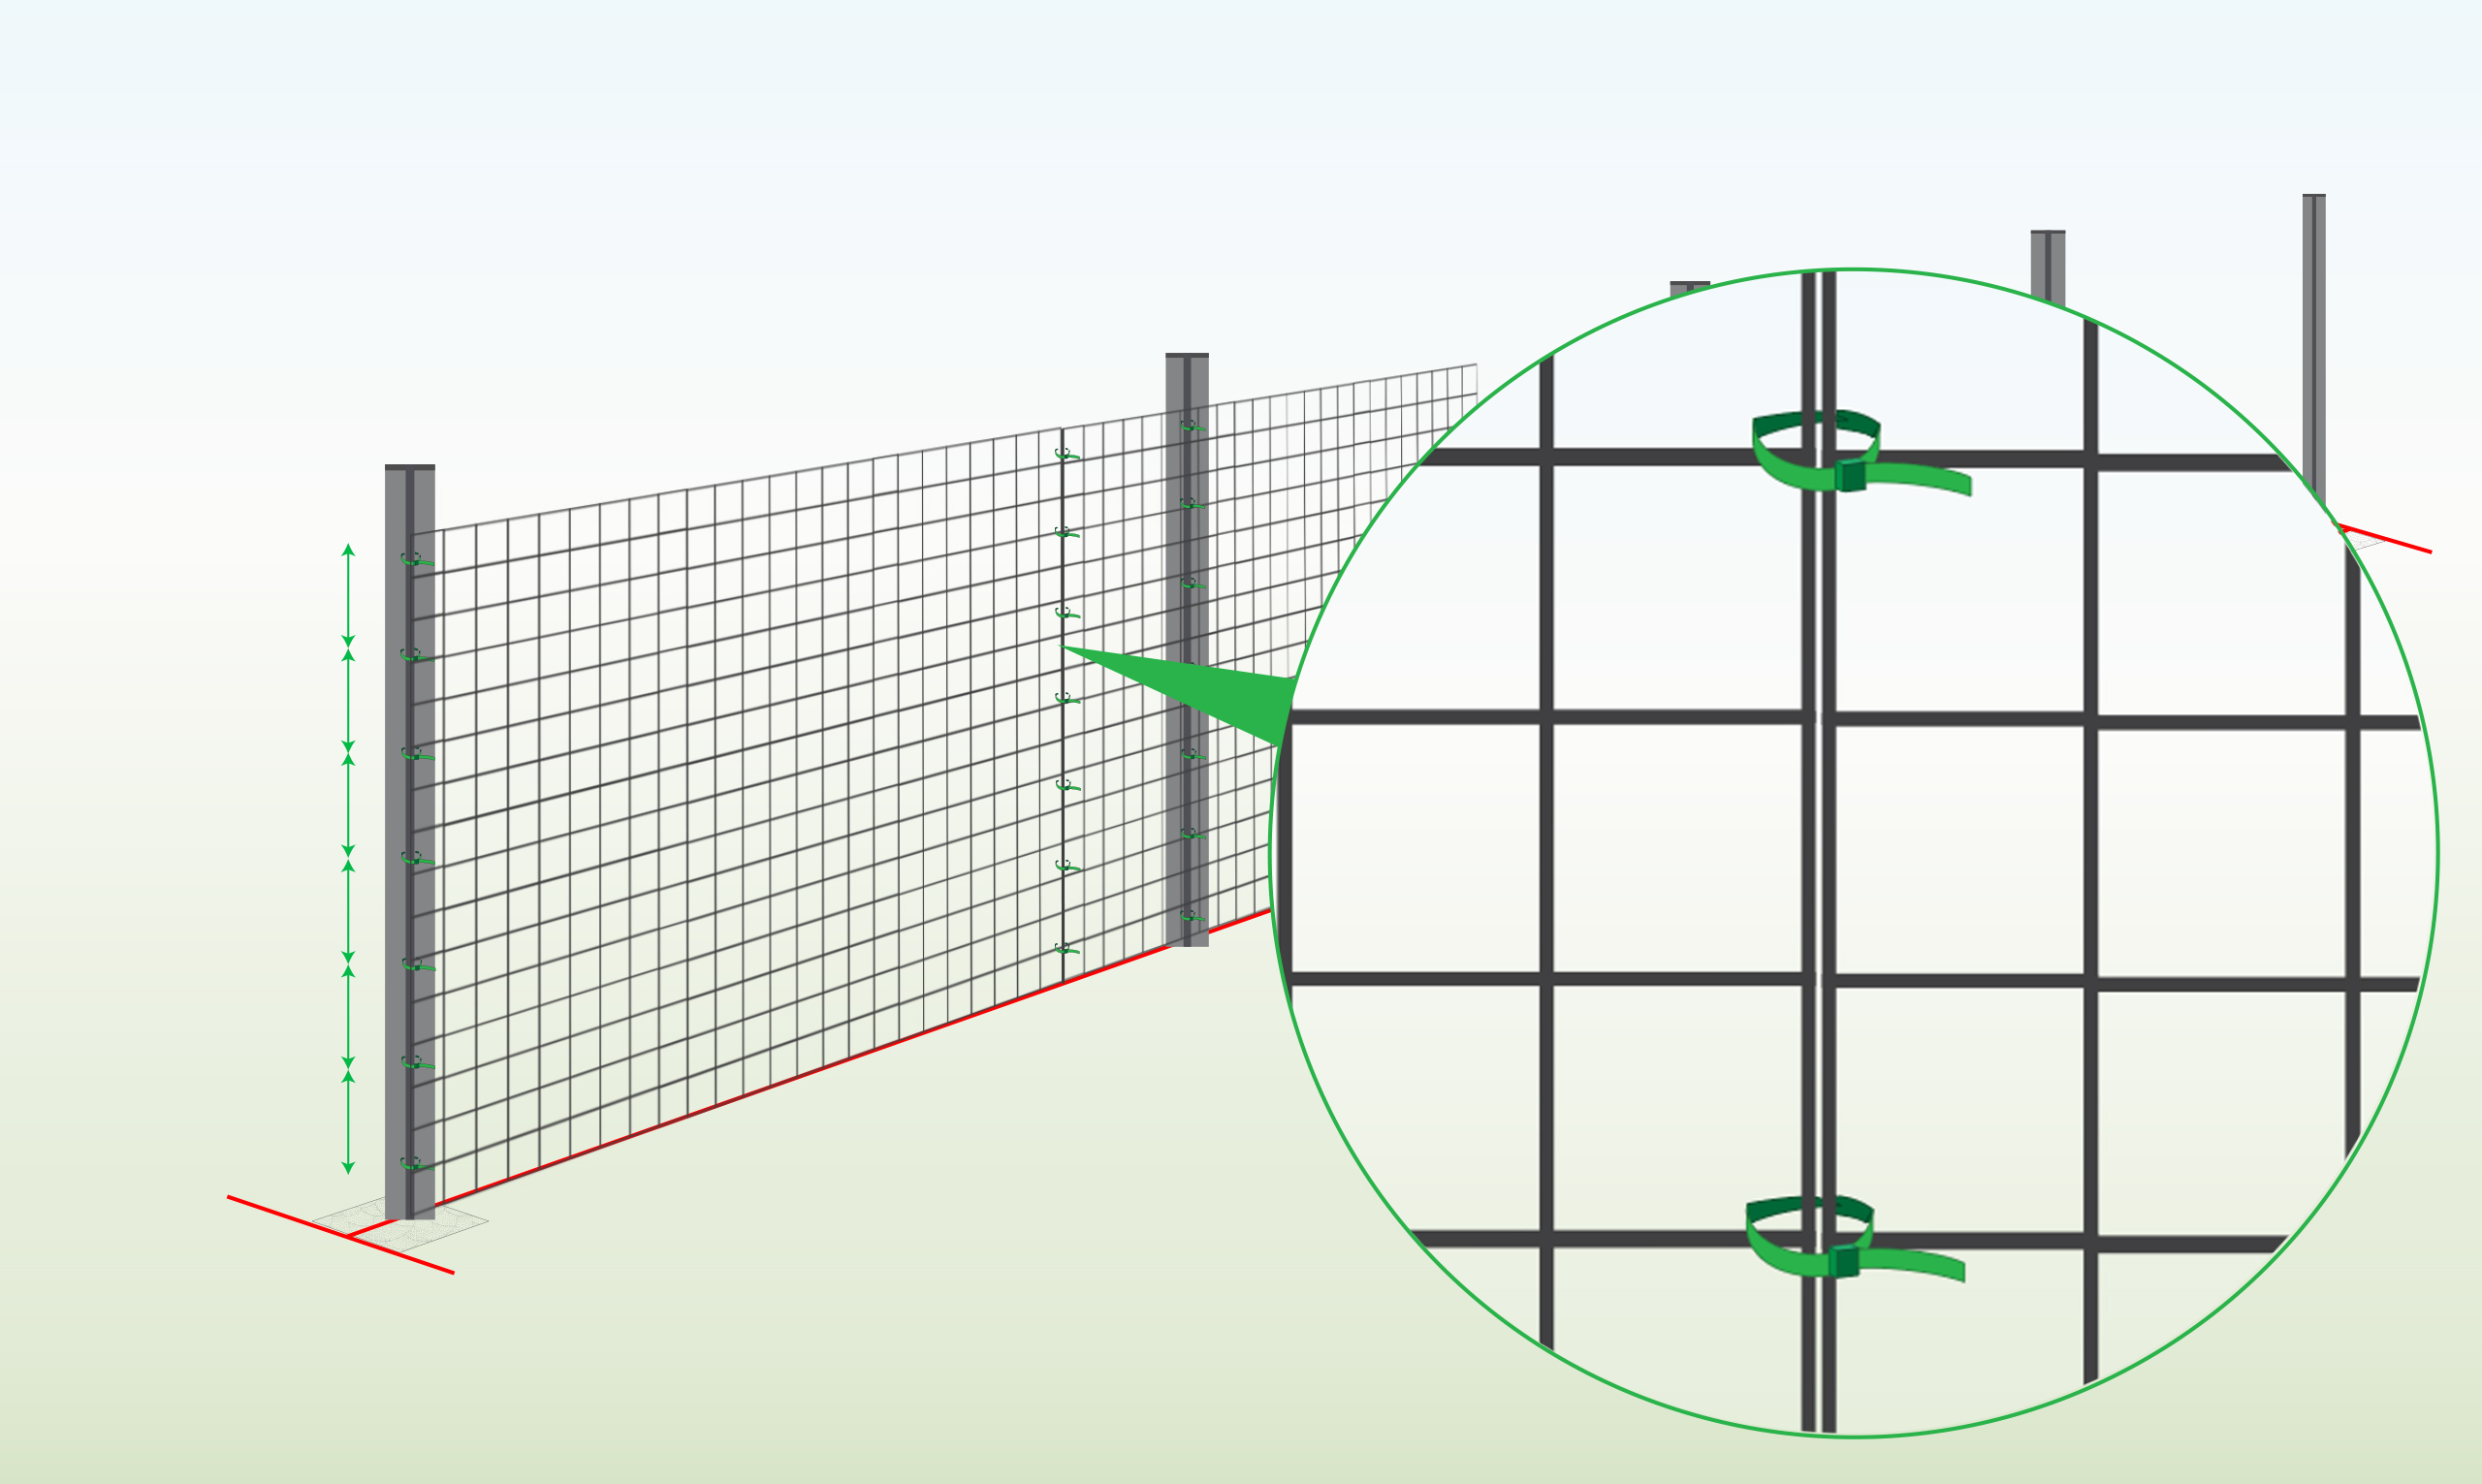
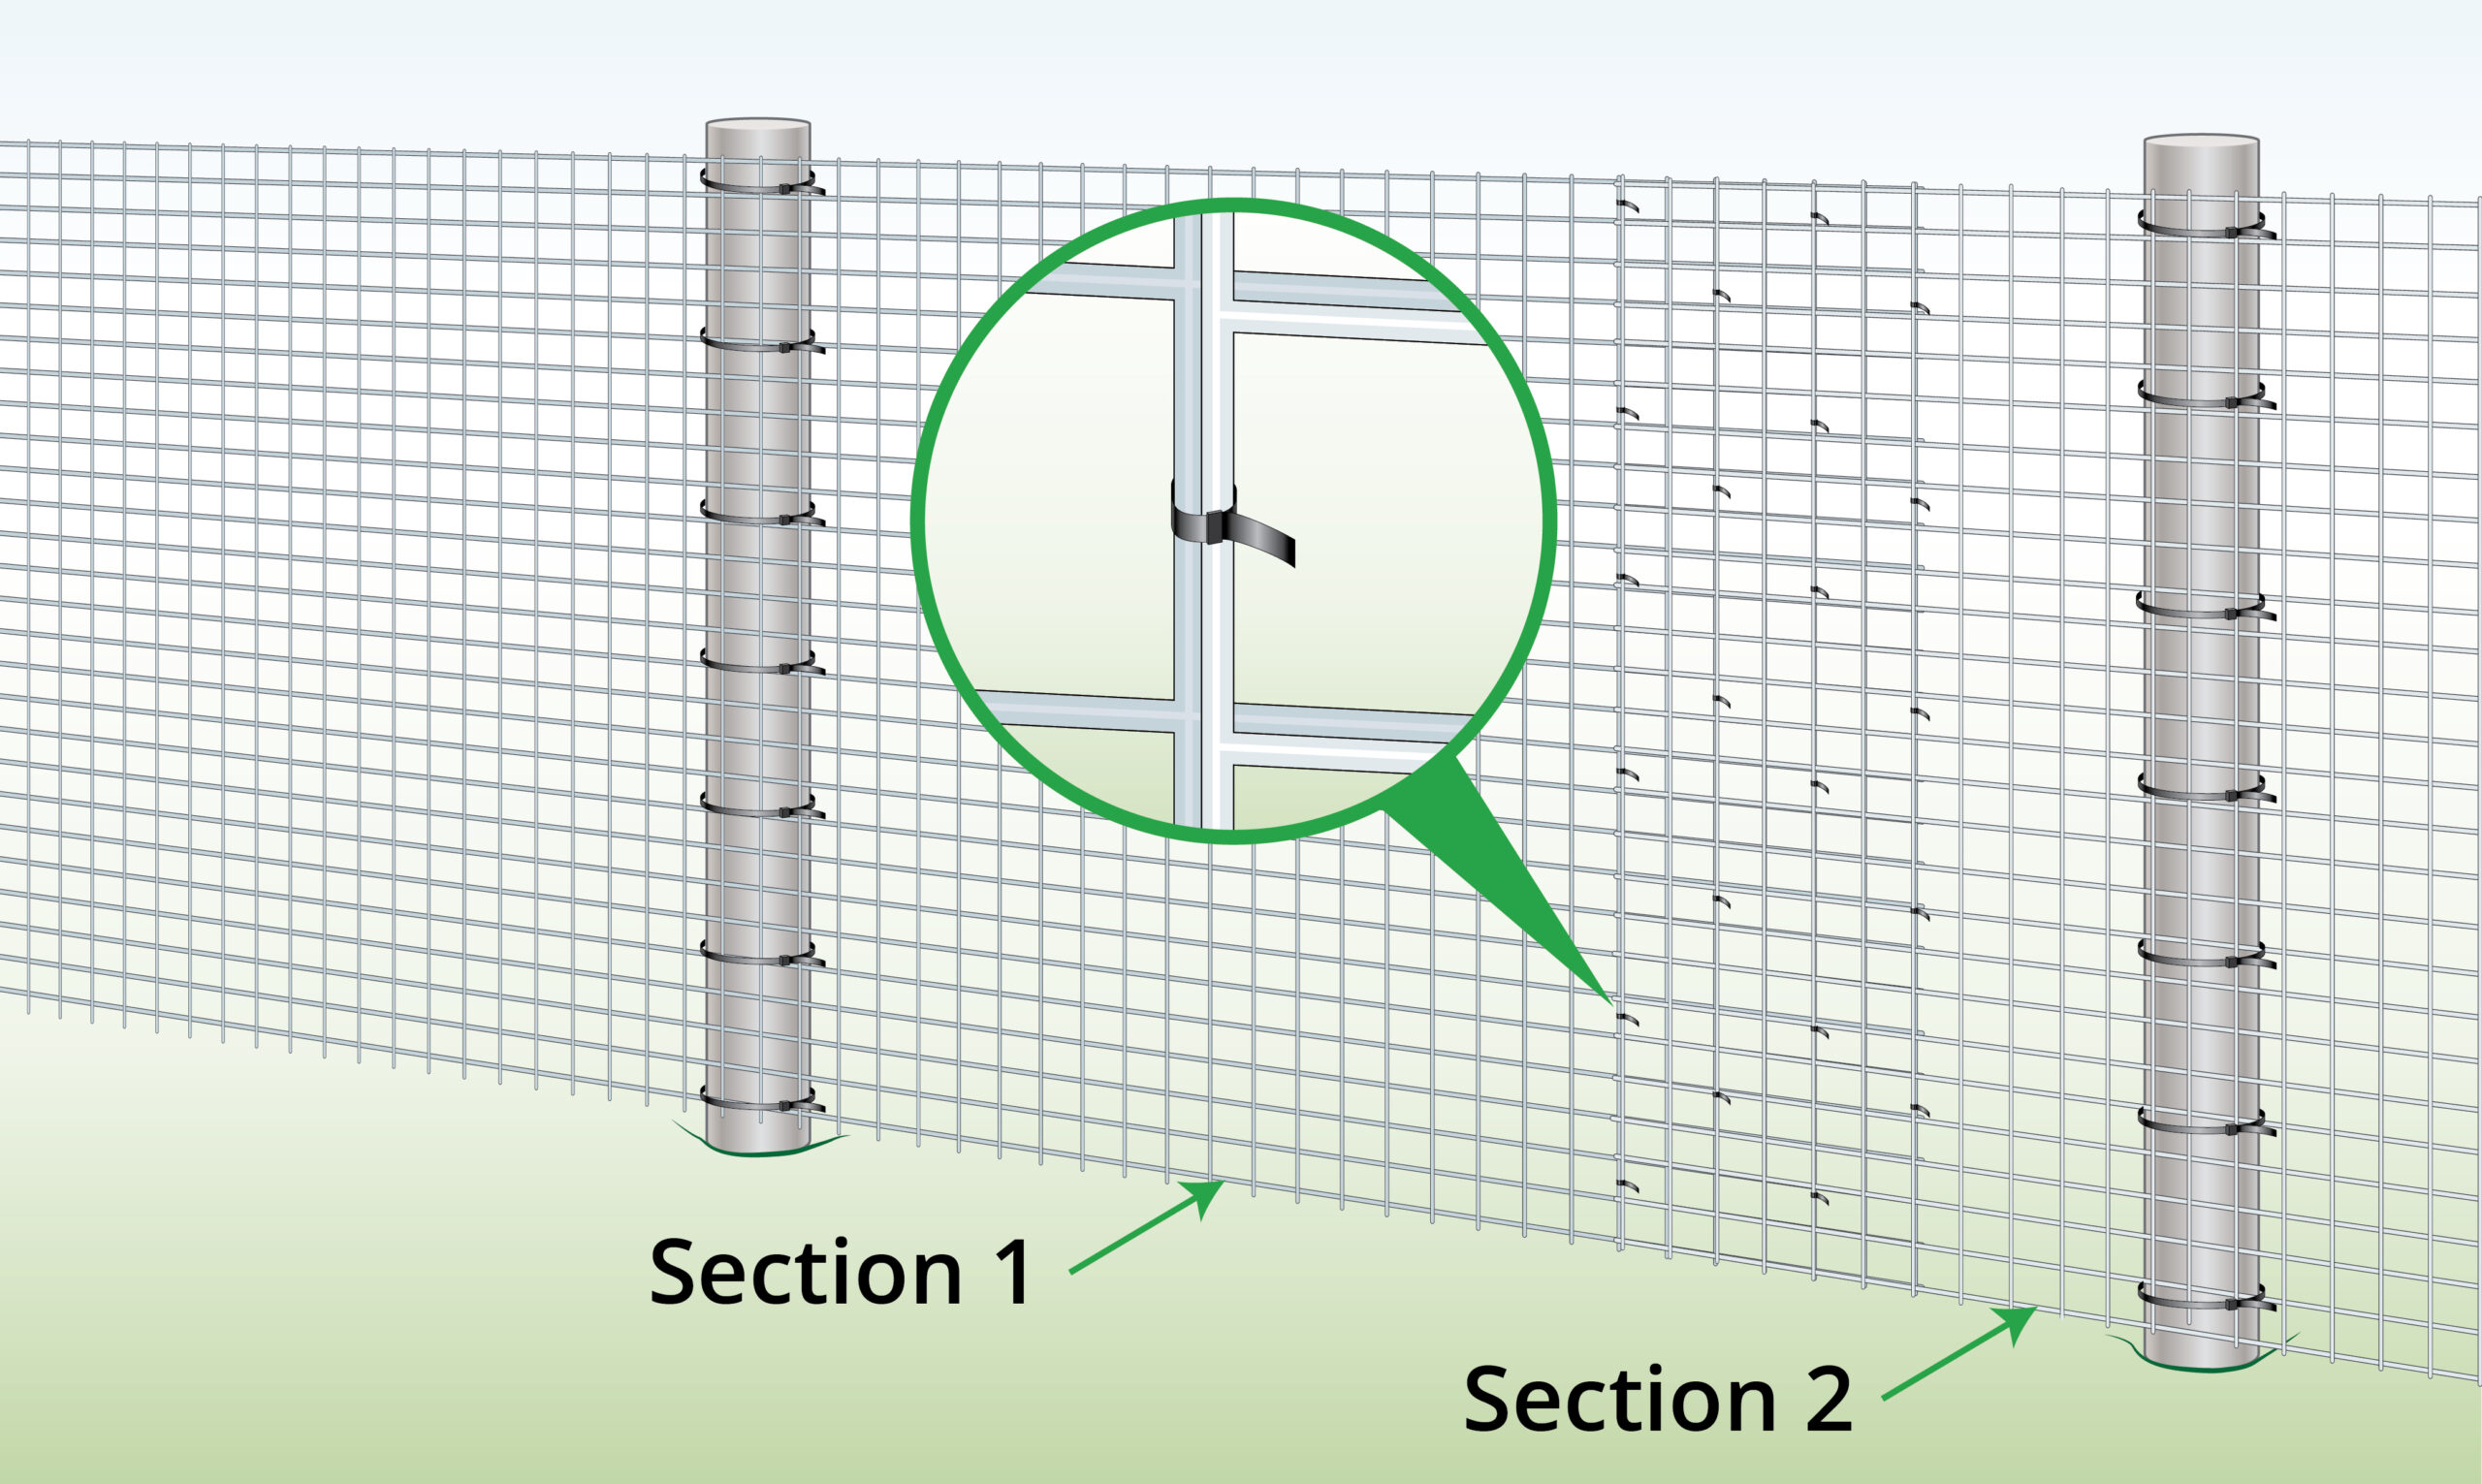
| Step 8 – Attach Panel to Posts
|
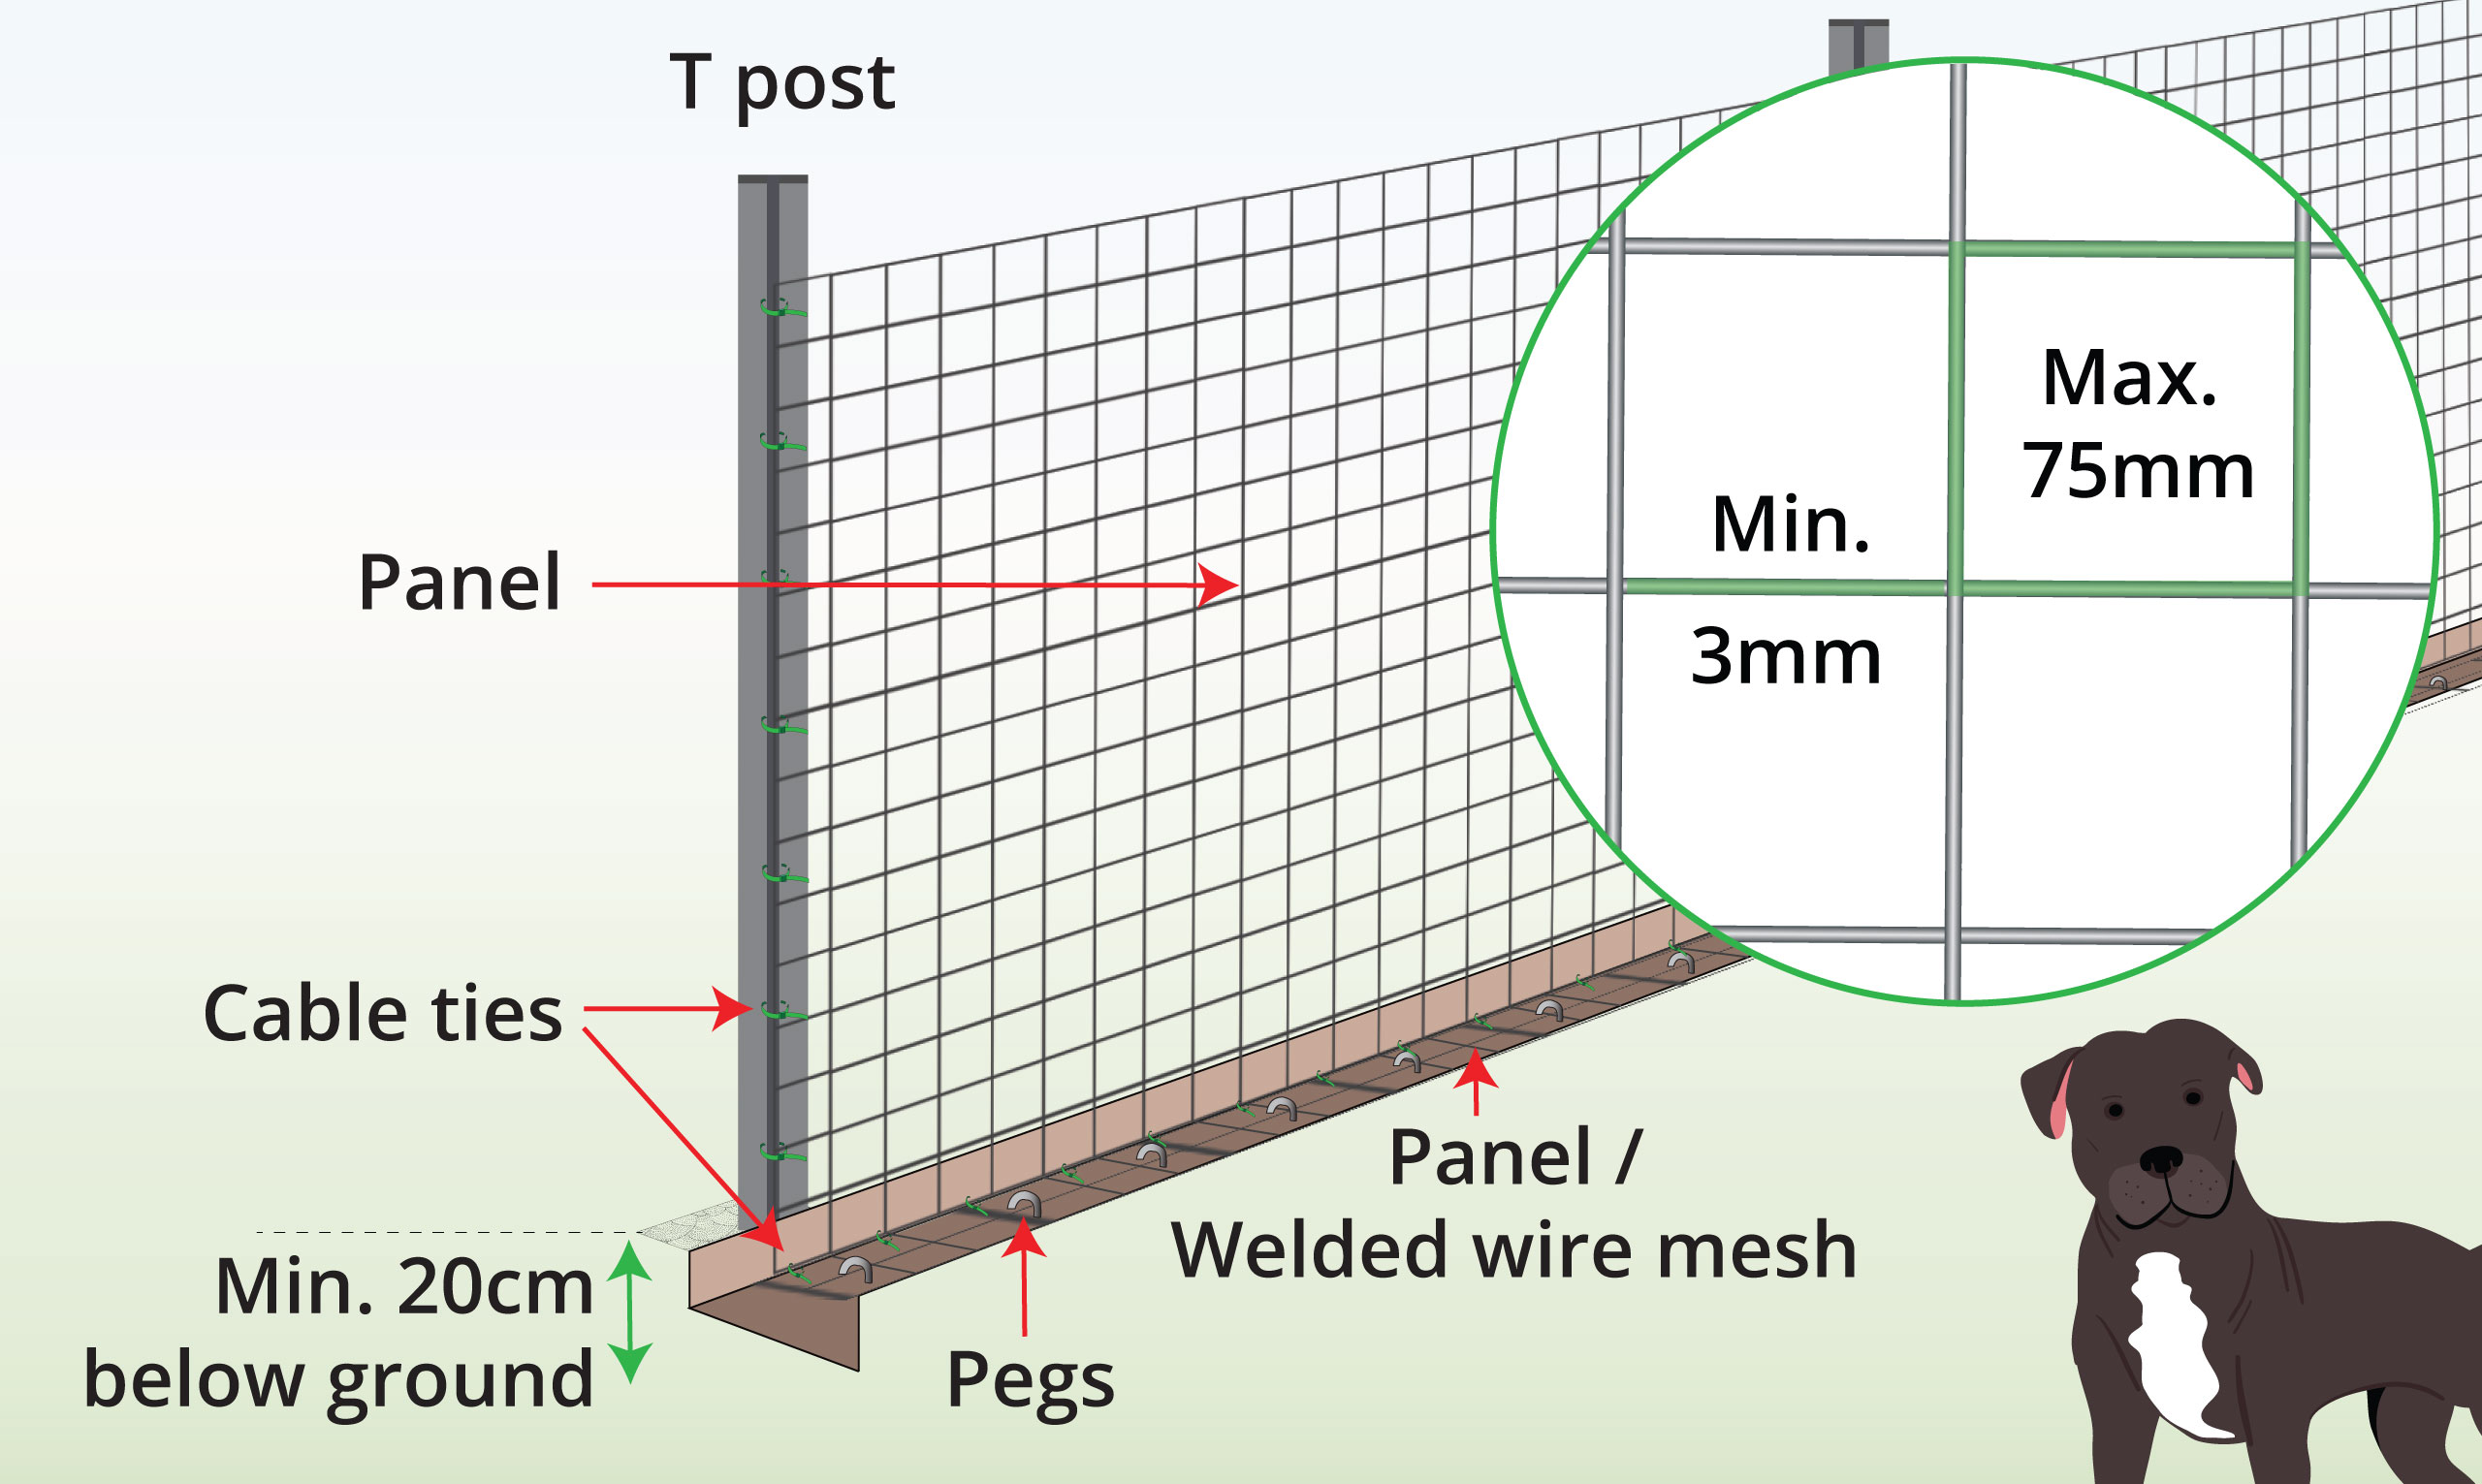
Start at the end post and secure the mesh to it by using cable ties. These ties can be threaded through the pre-drilled holes in the post.
You can add extra cable ties to encircle the entire post. |
| Alternative Option
|
Expand the gap between the posts by overlapping the panels and join them by fastening them together using cable ties. |
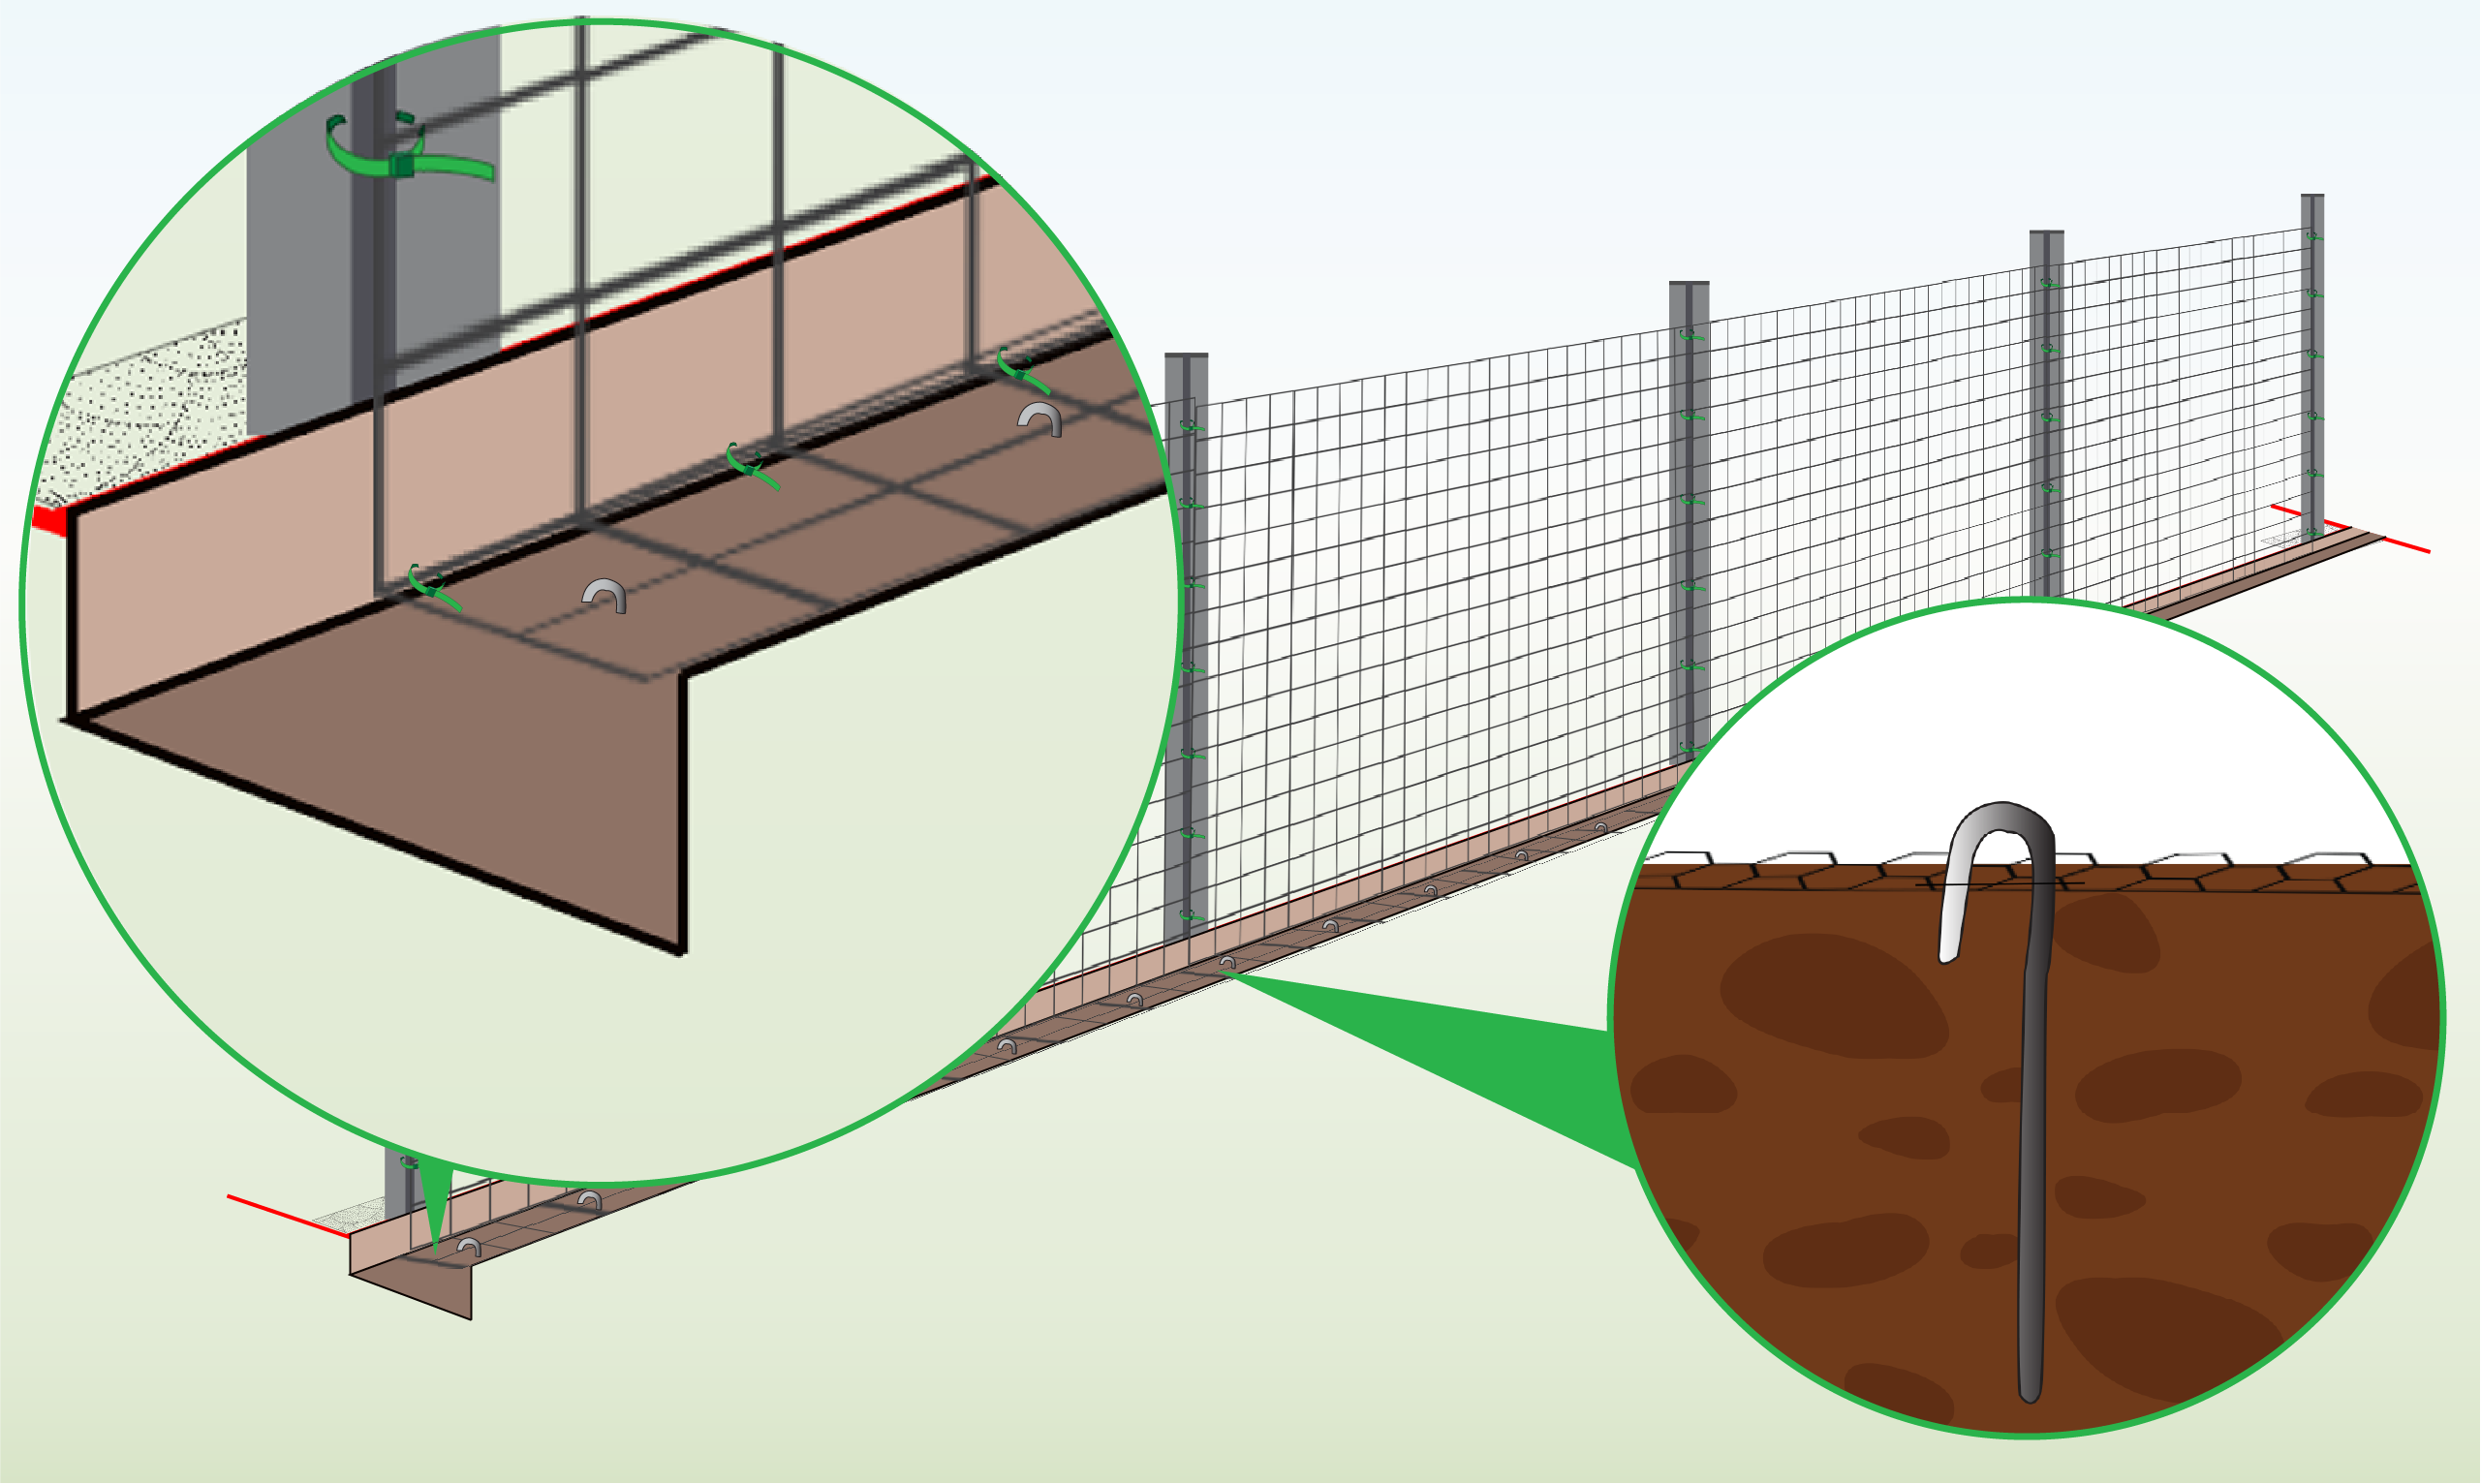
| Additional Step to Prevent Digging
|
Dig a trench along your fence line and cover the trench’s bottom with a shorter panel or a piece of welded wire. Attach the wire to the panel by using cable ties.
|