Show video
2.4m (8ft)
1.2m (4ft)
25mm x 25mm
Hot dip galvanised
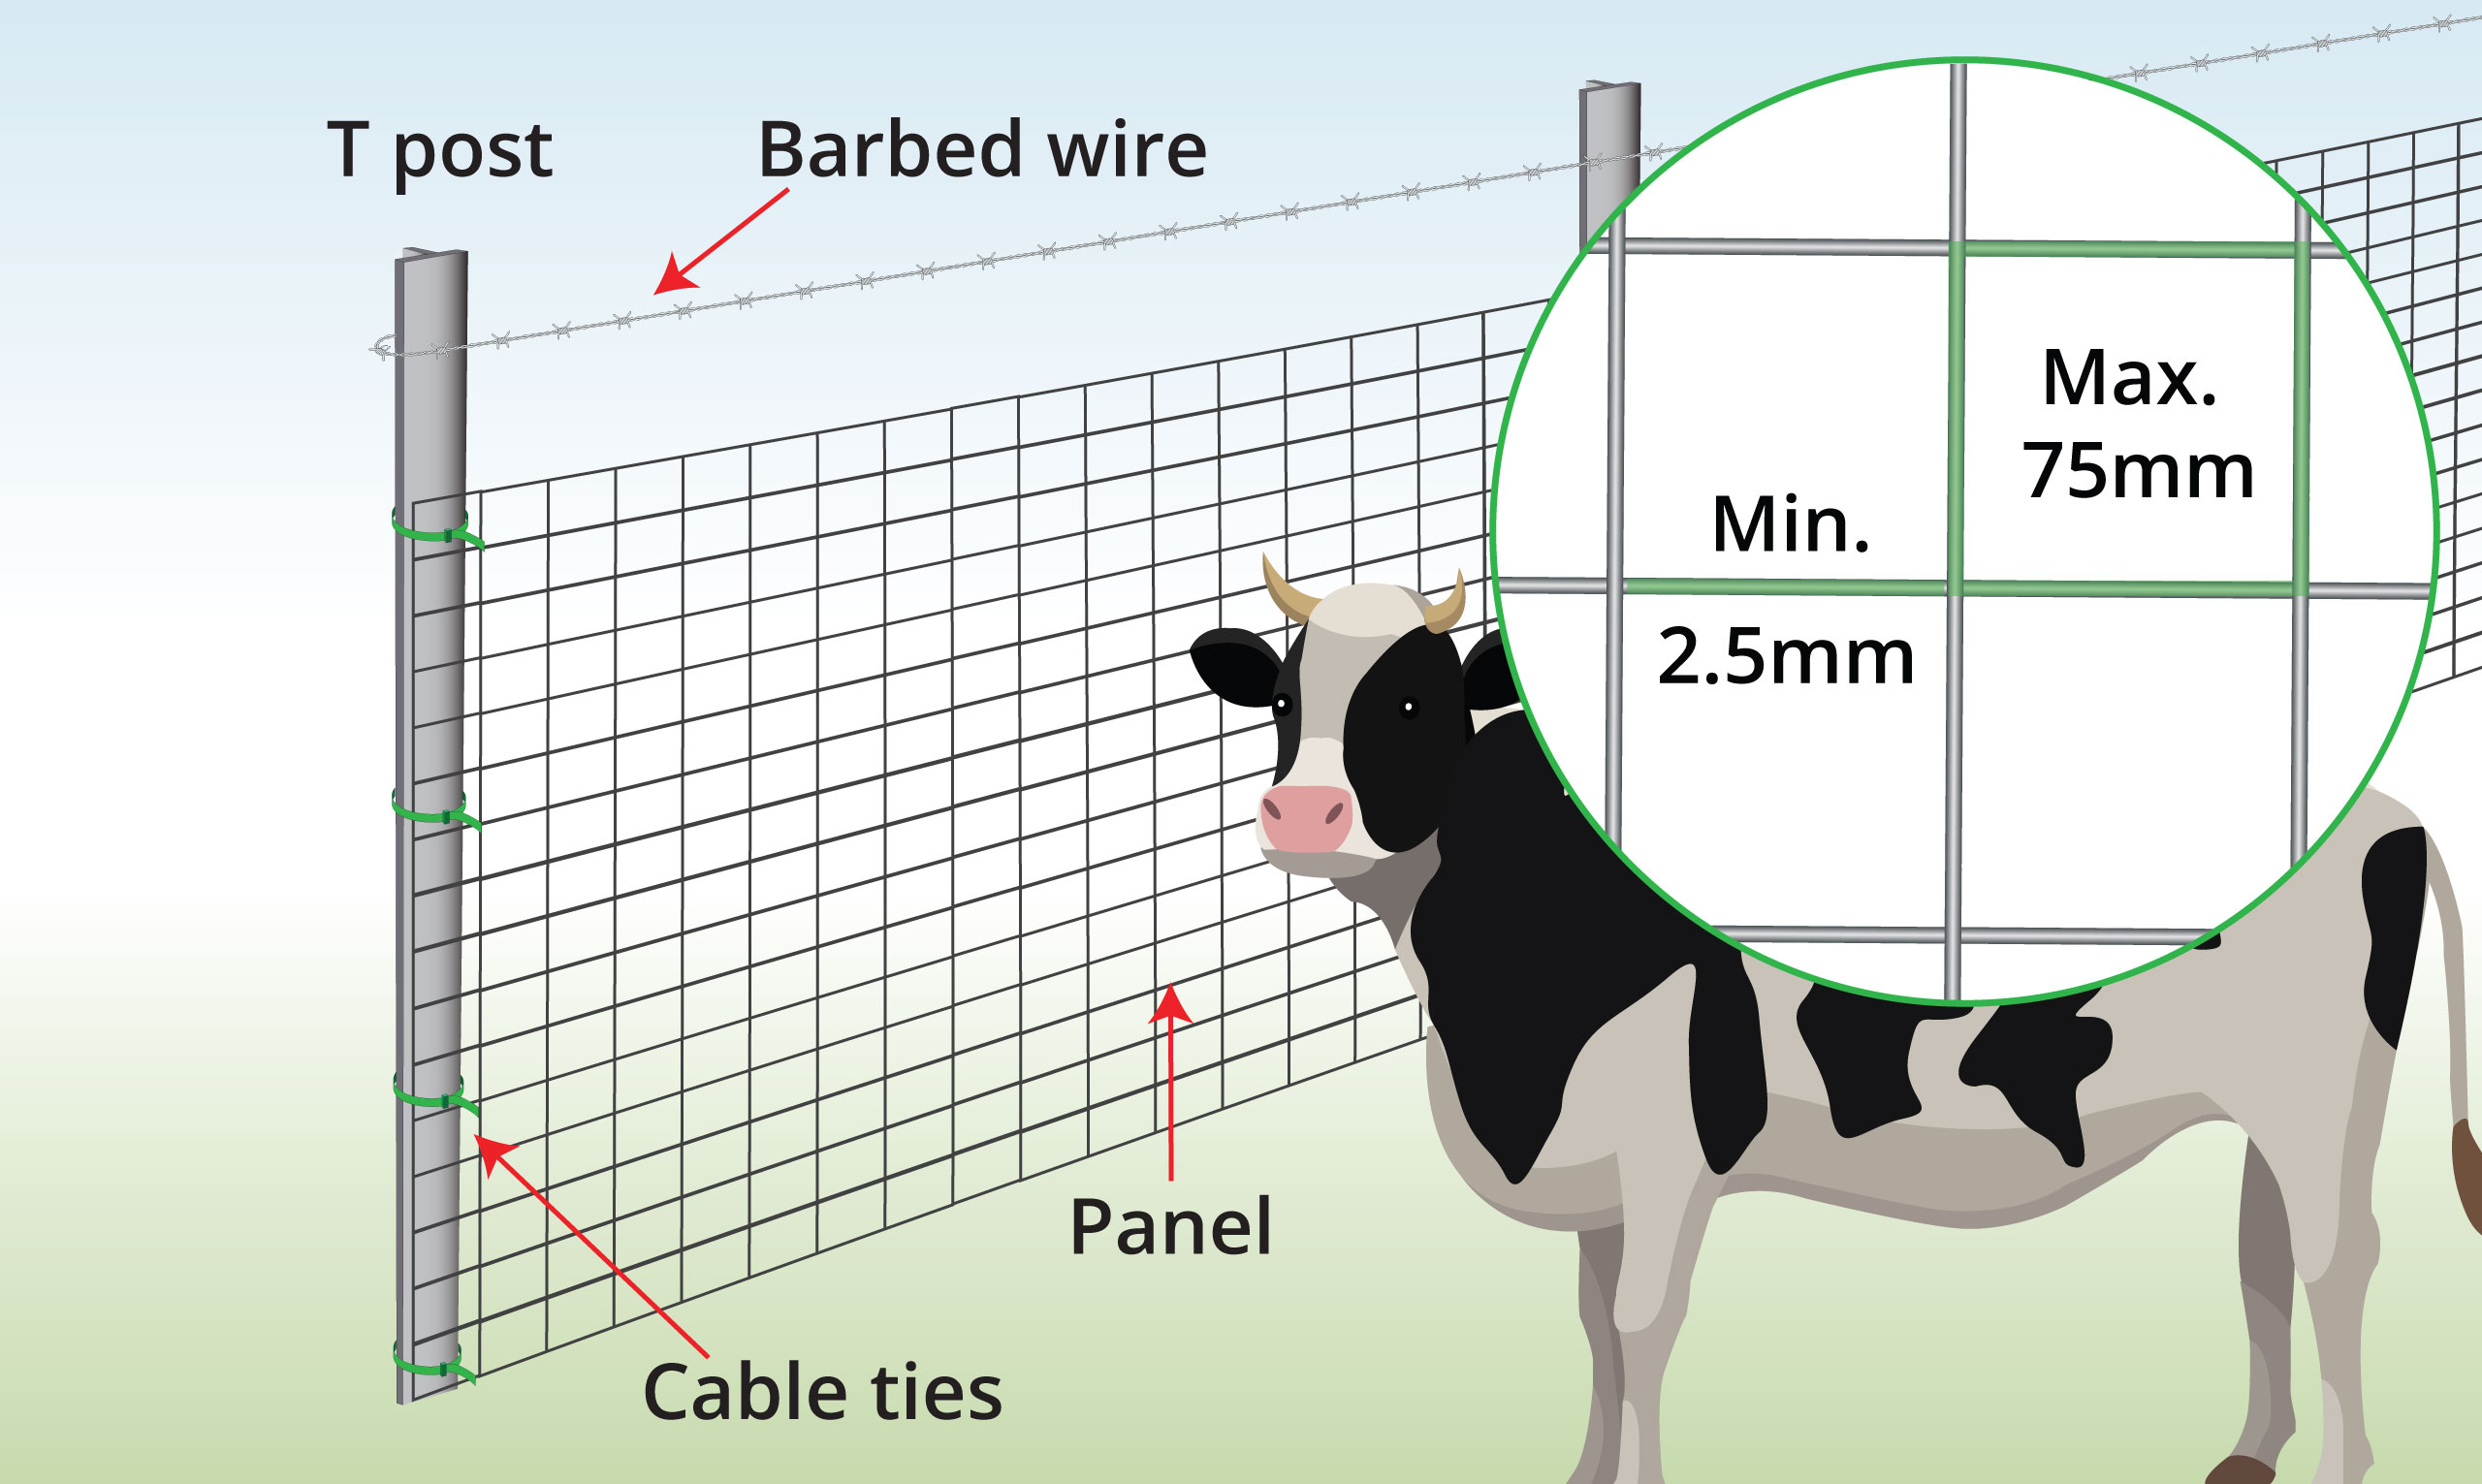
2.5mm (12g)
£74.99 inc. VAT


ISO certified cattle panels are lightweight, rigid and sag-resistant, making them easy to handle and install.


| Wire Diameter | 2.5mm | 3mm | 4mm | 5mm |
| Can be bent Refers to the ability of the mesh to be bent out of shape by hand | ||||
| Holds shape when bent Confirms whether the mesh will hold its shape after bending it | ||||
| Sags over time Refers to whether the mesh will droop over time if it is stood up | ||||
| Trellis |
– Popular
|
|||
| Garden archway | ||||
| Cattle pens | ||||
| Large cattle fields | ||||
| Portable | ||||
| Prevents cows chewing through? | ||||
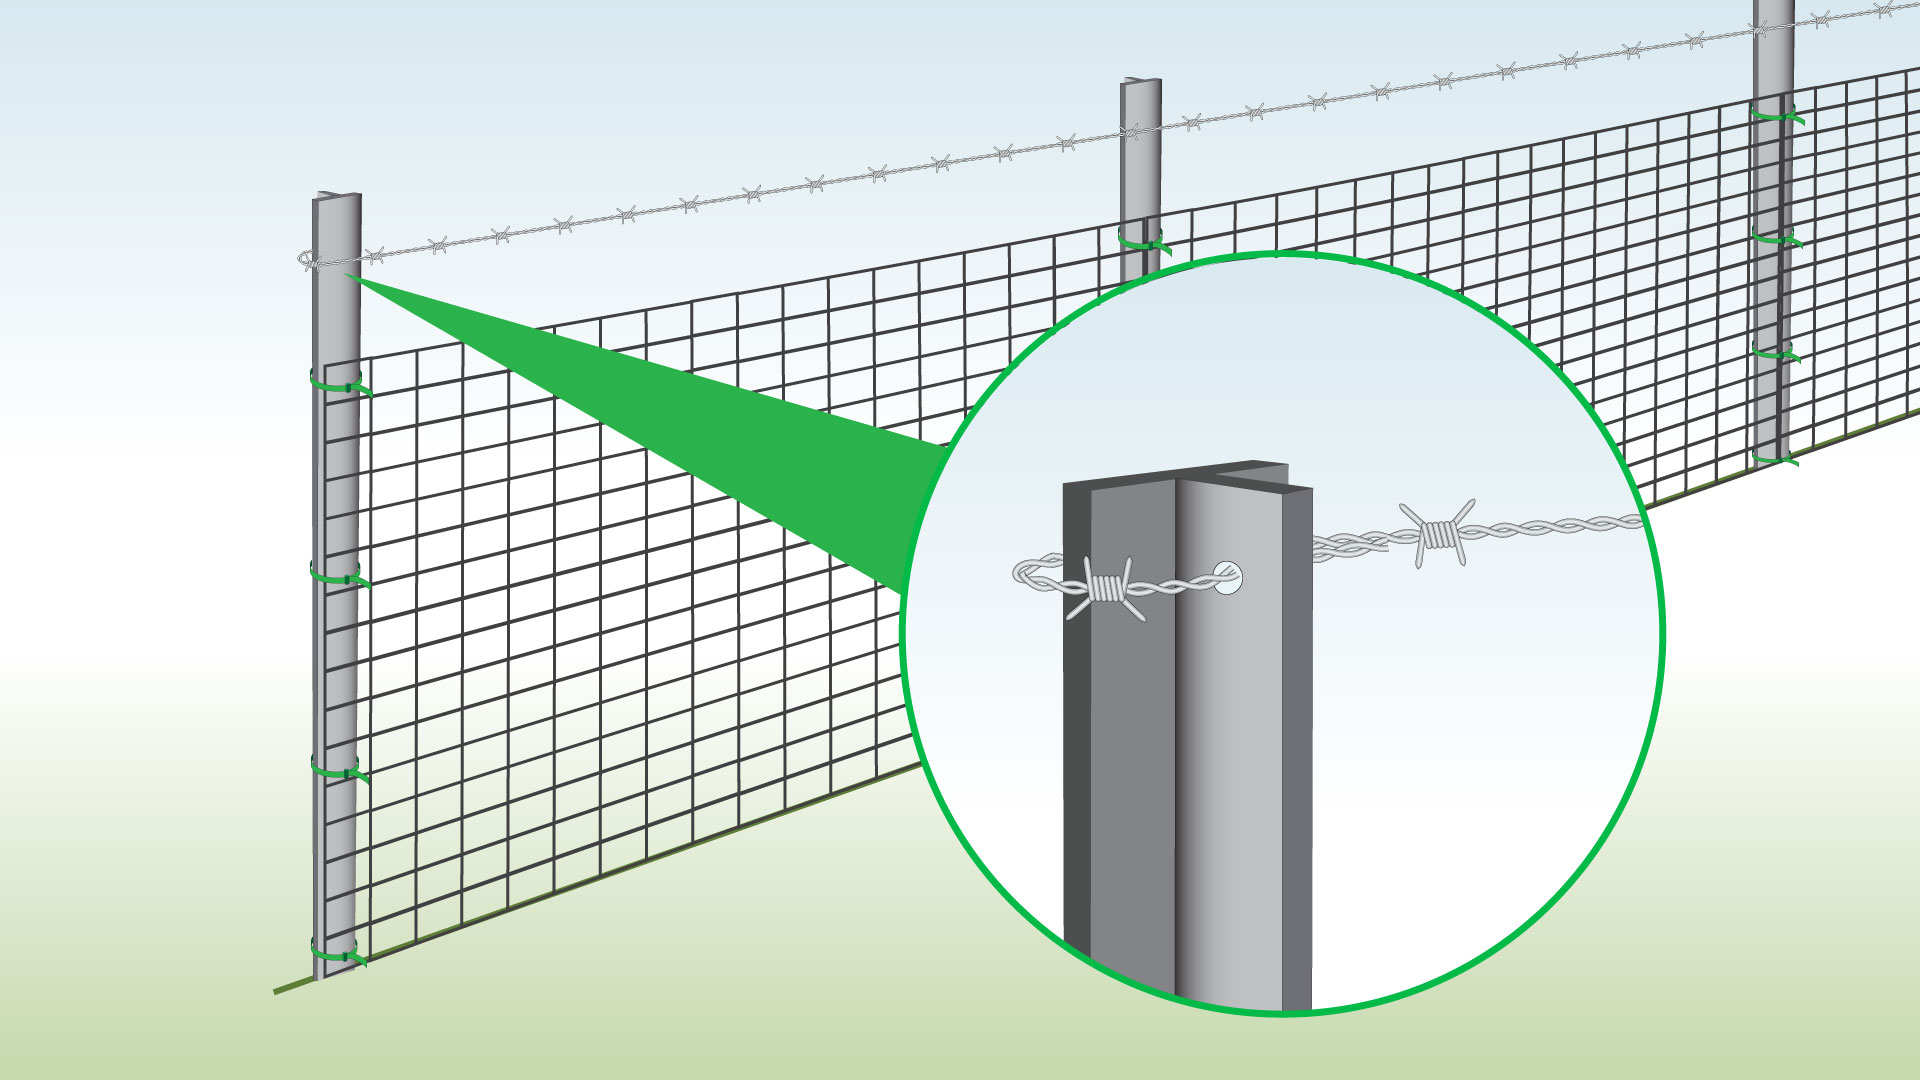
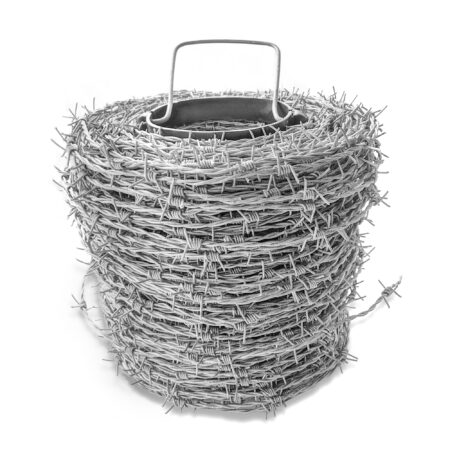
| Prevents cows from pushing over? Show Image | Yes, if correctly installed. Add electric or barbed wire for extra protection. | |||
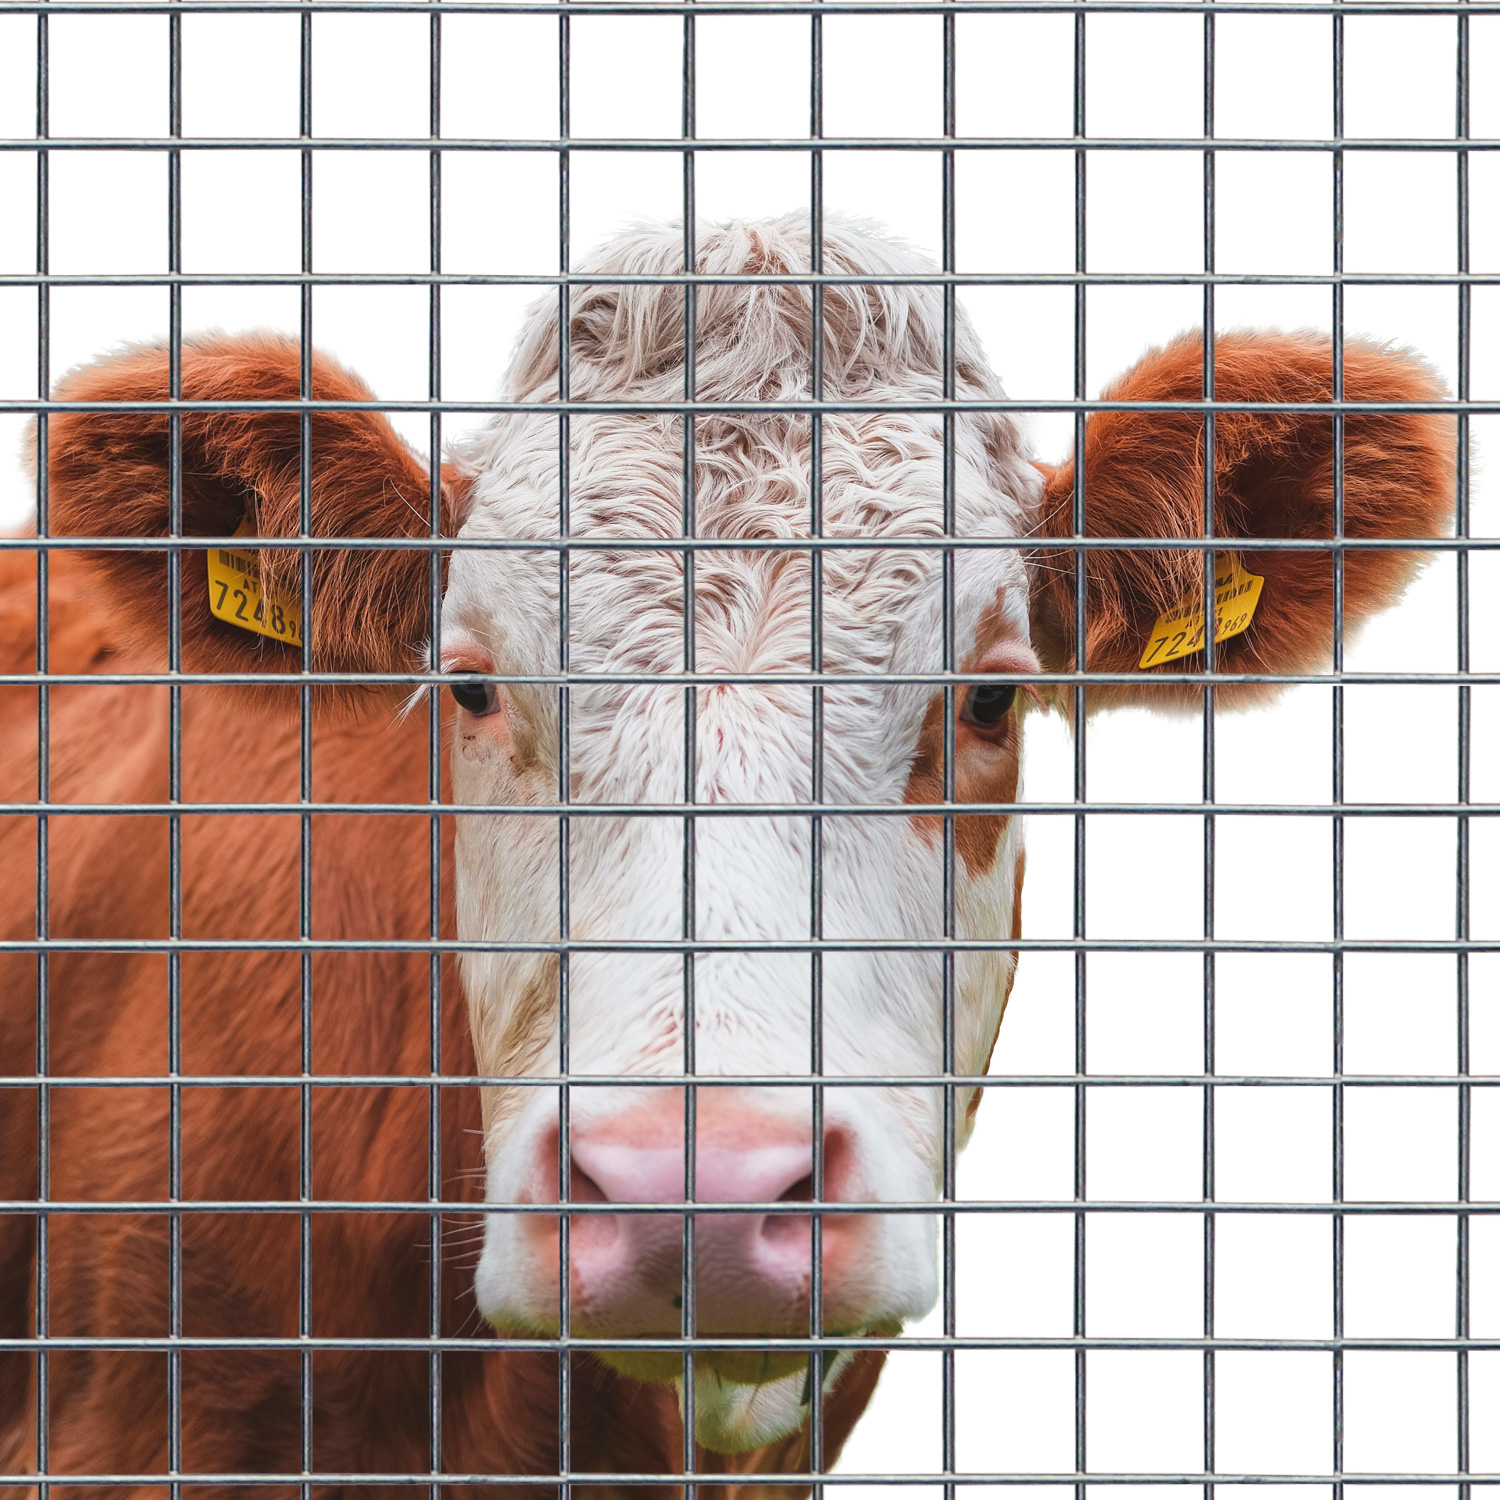
| Prevents head poking through? Show Image | ||||
| Financial | ||||
| Cost | ££ | |||
| Discounts for multi purchase |
– viewable on product pages & automatically calculated for you during checkout
|
|||
| Save money | See Cattle Fence for a cheaper alternative. The downside is that it is more difficult to handle and install. | |||
| General | ||||
| Delivered as | Shrink-wrapped panel. Heavy orders will be strapped to a pallet | |||
| Made in | UK | |||
| Manufacturing Standards |
– conforms to BS EN 10218-2:2012
– conforms to BS EN 10244-2:2009
– BBA certificate number: 05/4215 (Galfan panels only)
|
|||
| Construction | ||||
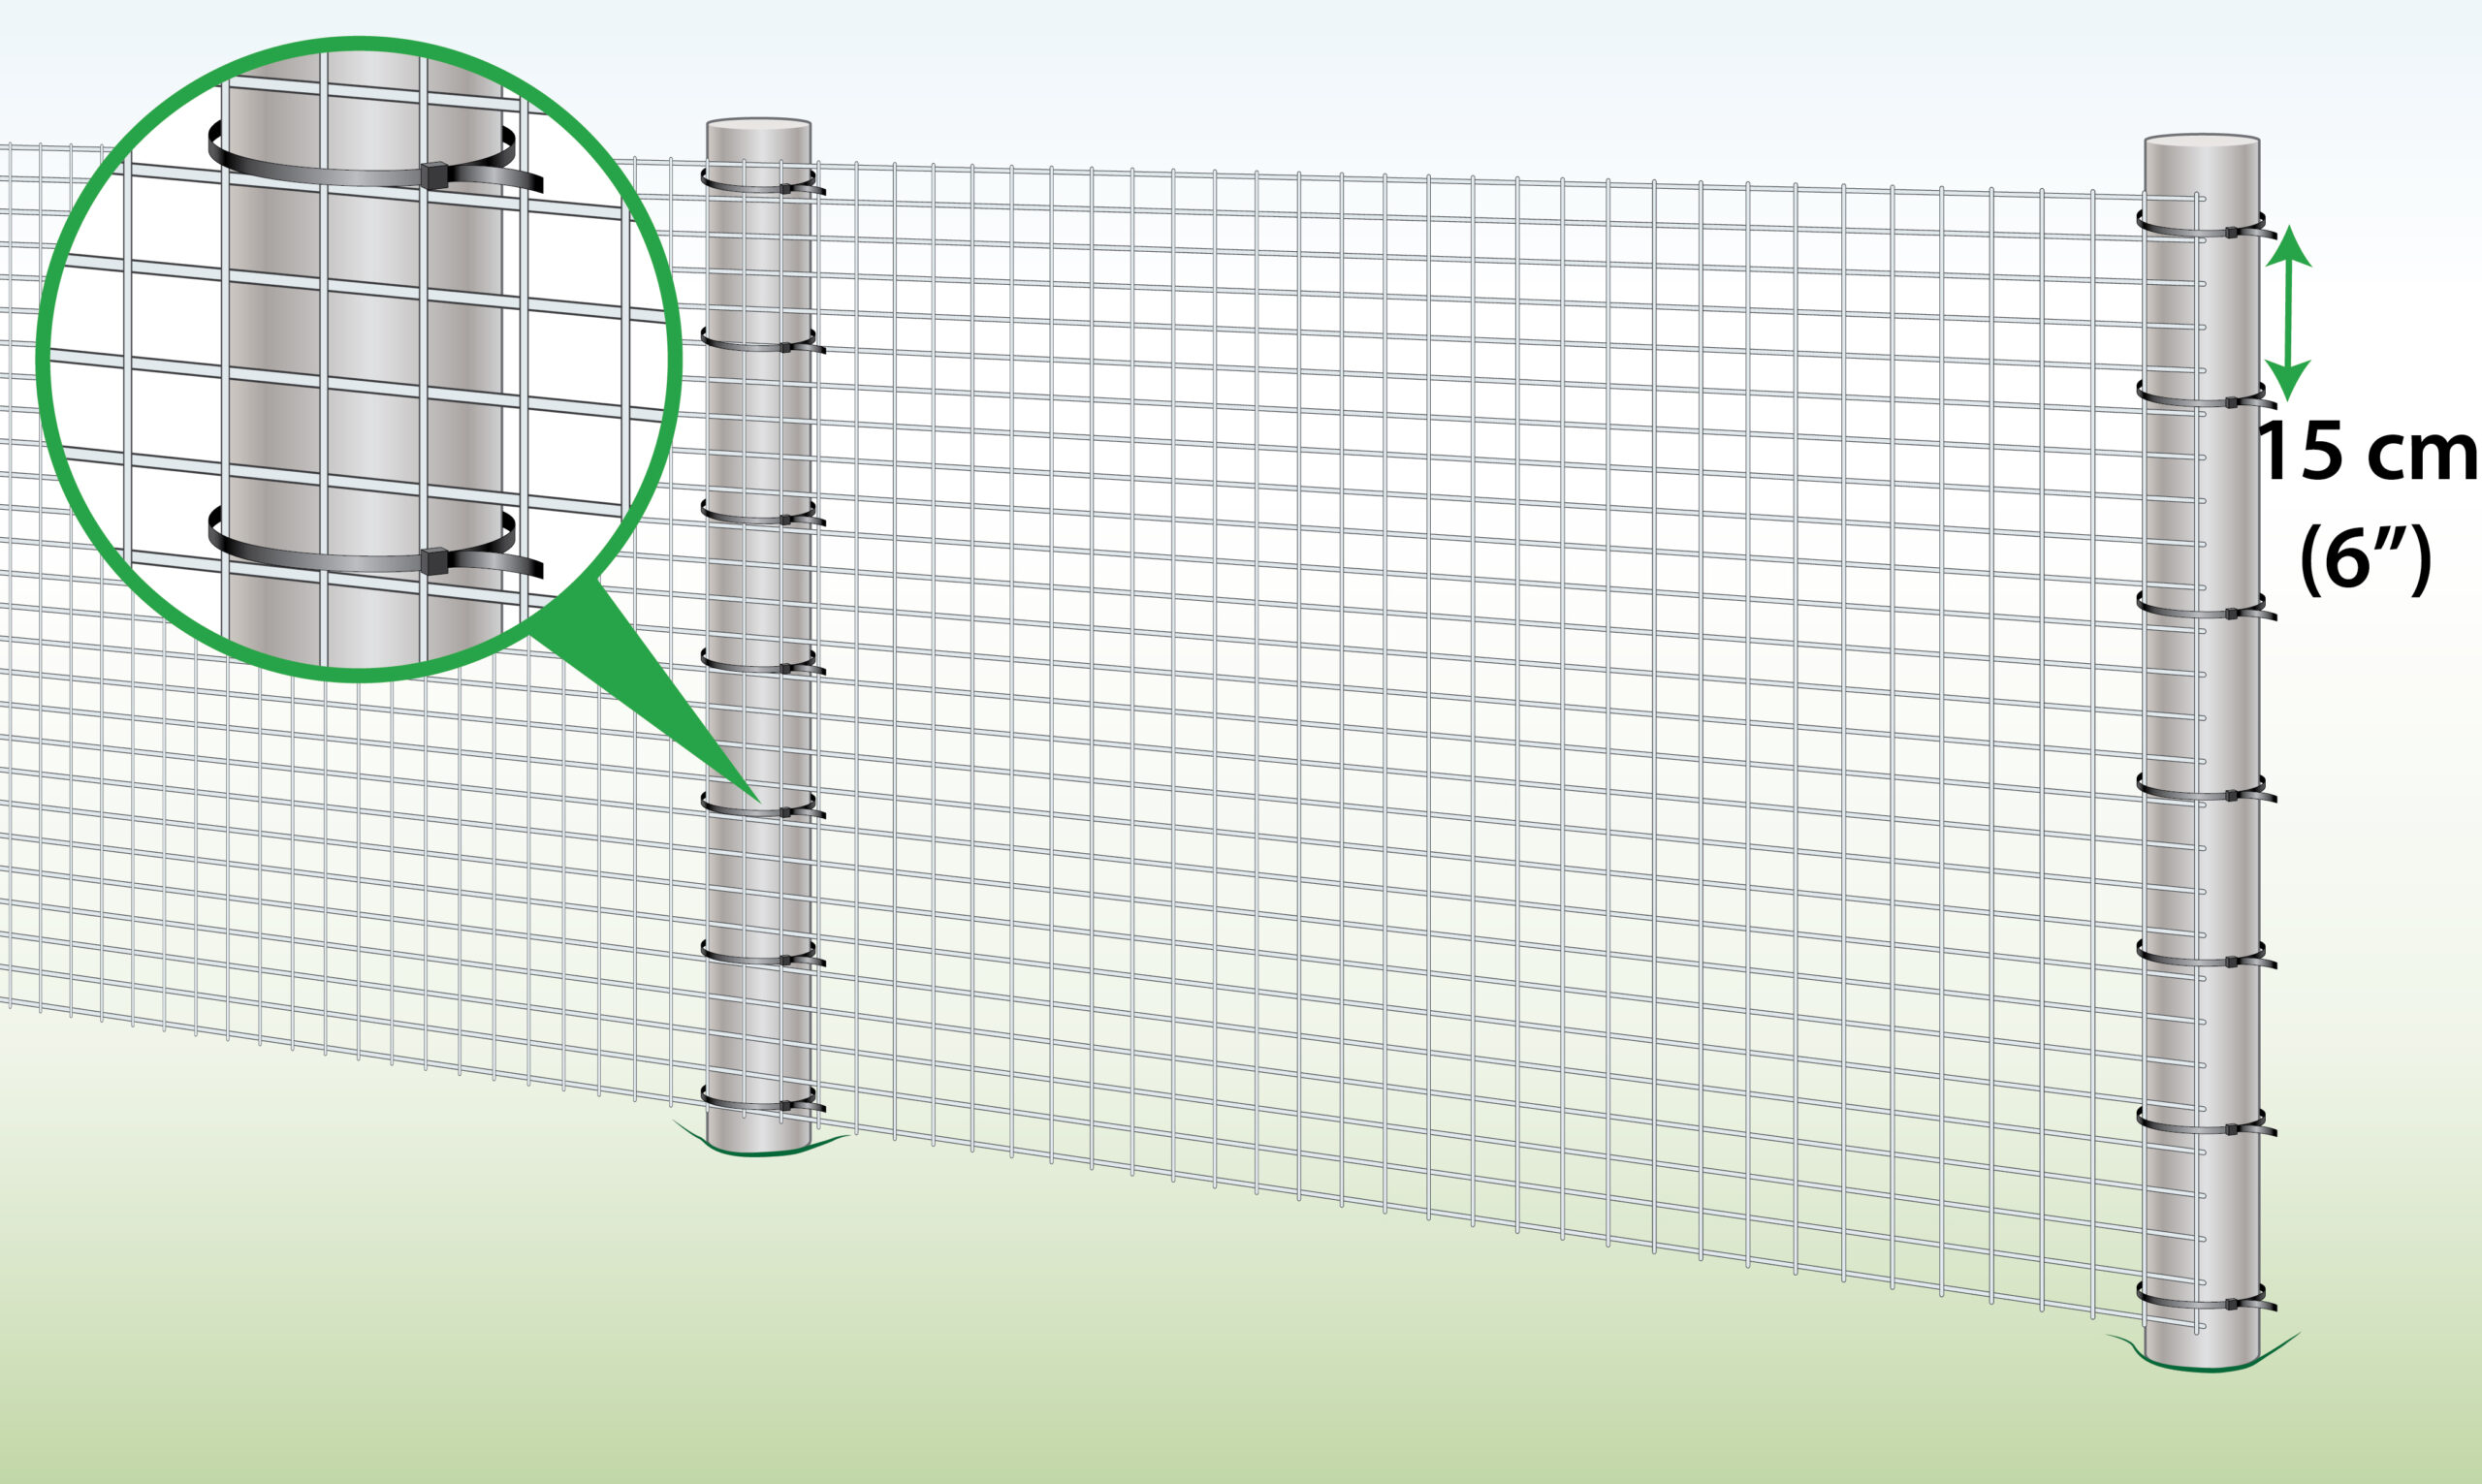
| Maximum height availability | 2.4m (8ft) | |||
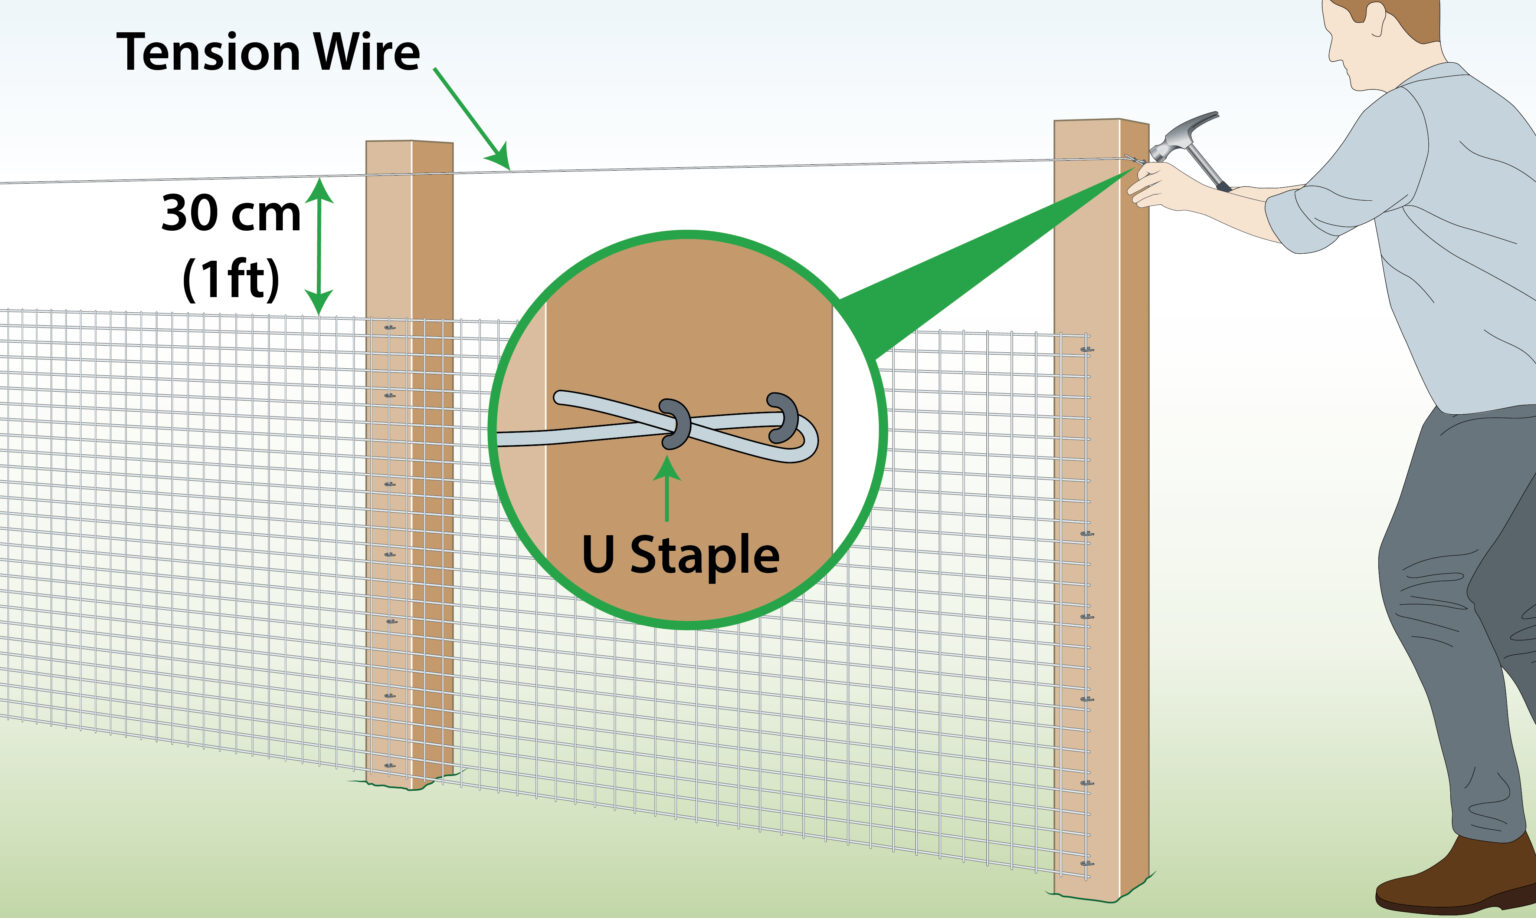
| Add extra height | Add a tension wire to increase the height (view instructions) | |||
| Mesh material | Galvanised or Galfan coated steel (triple corrosion protection) | |||
| Mesh construction | Welded | |||
| Hole size available | 50mm x 50mm – 150mm x 75mm | |||
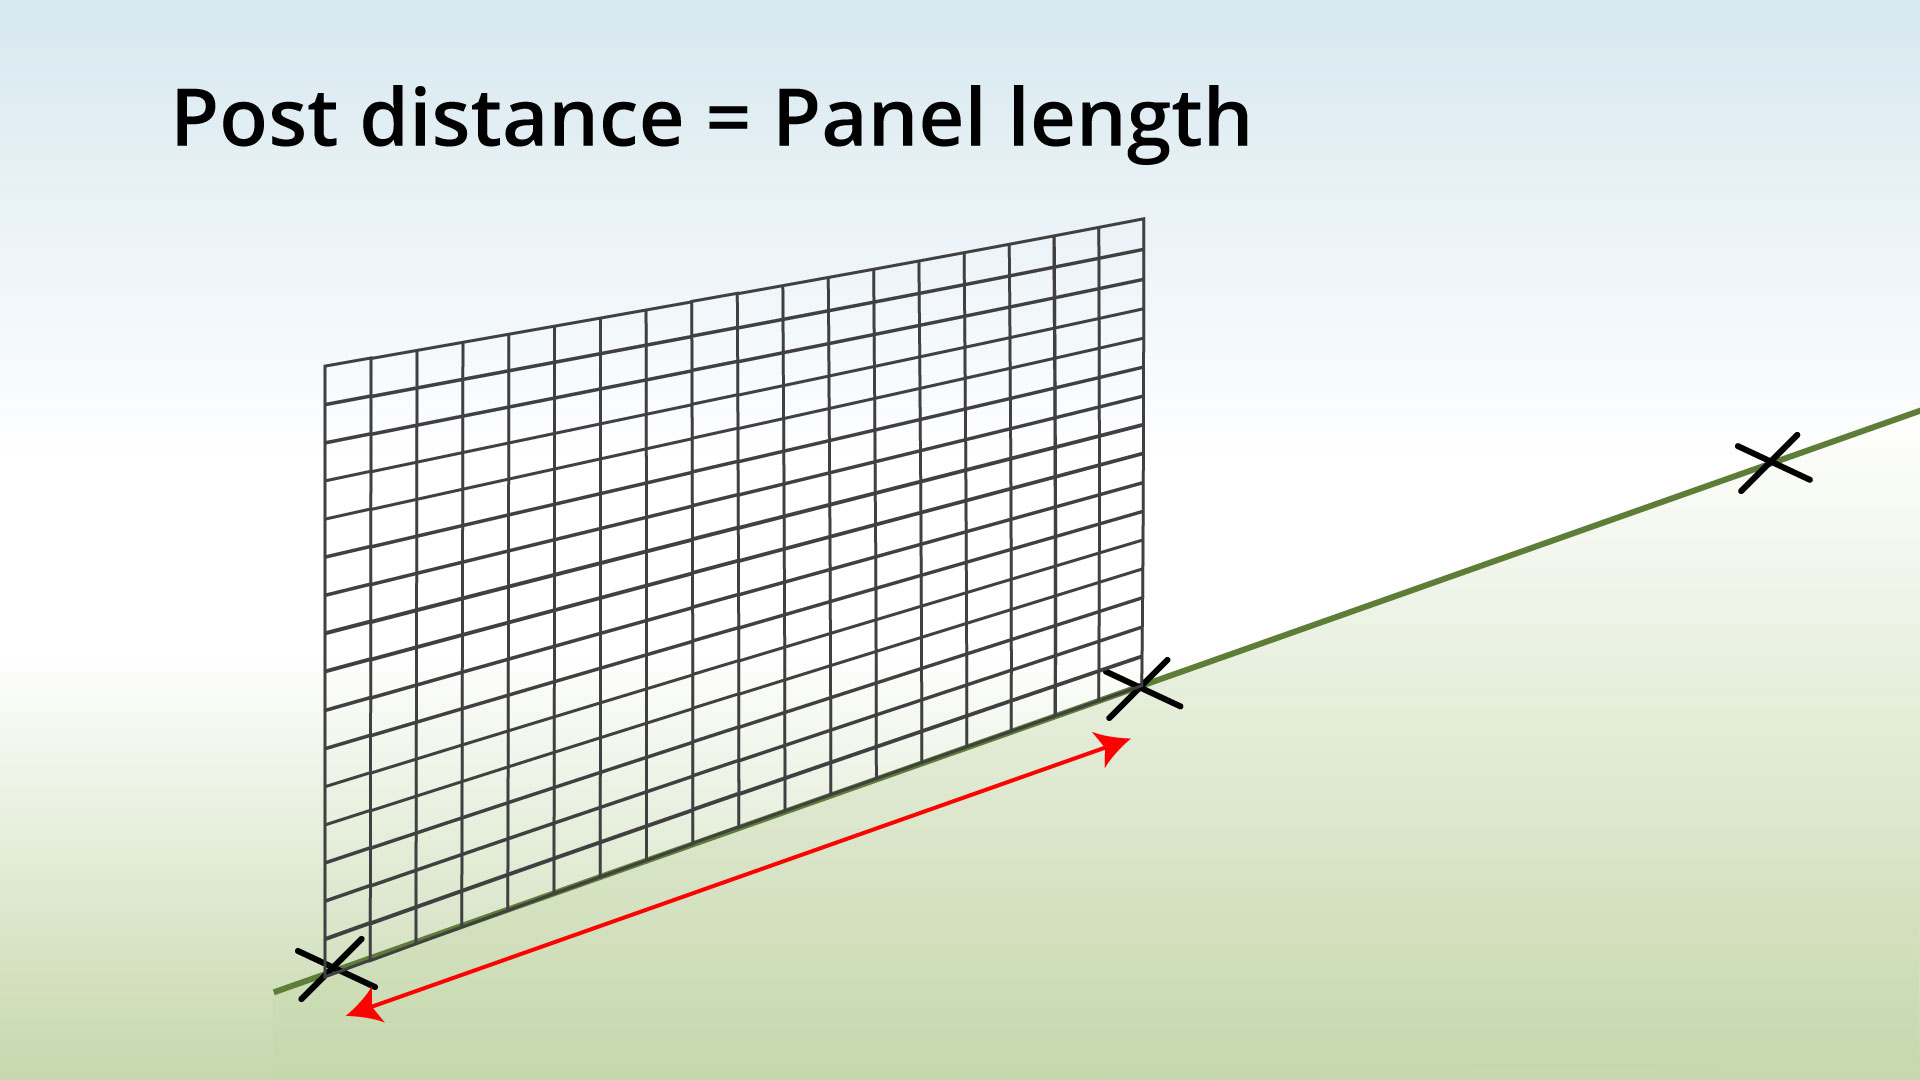
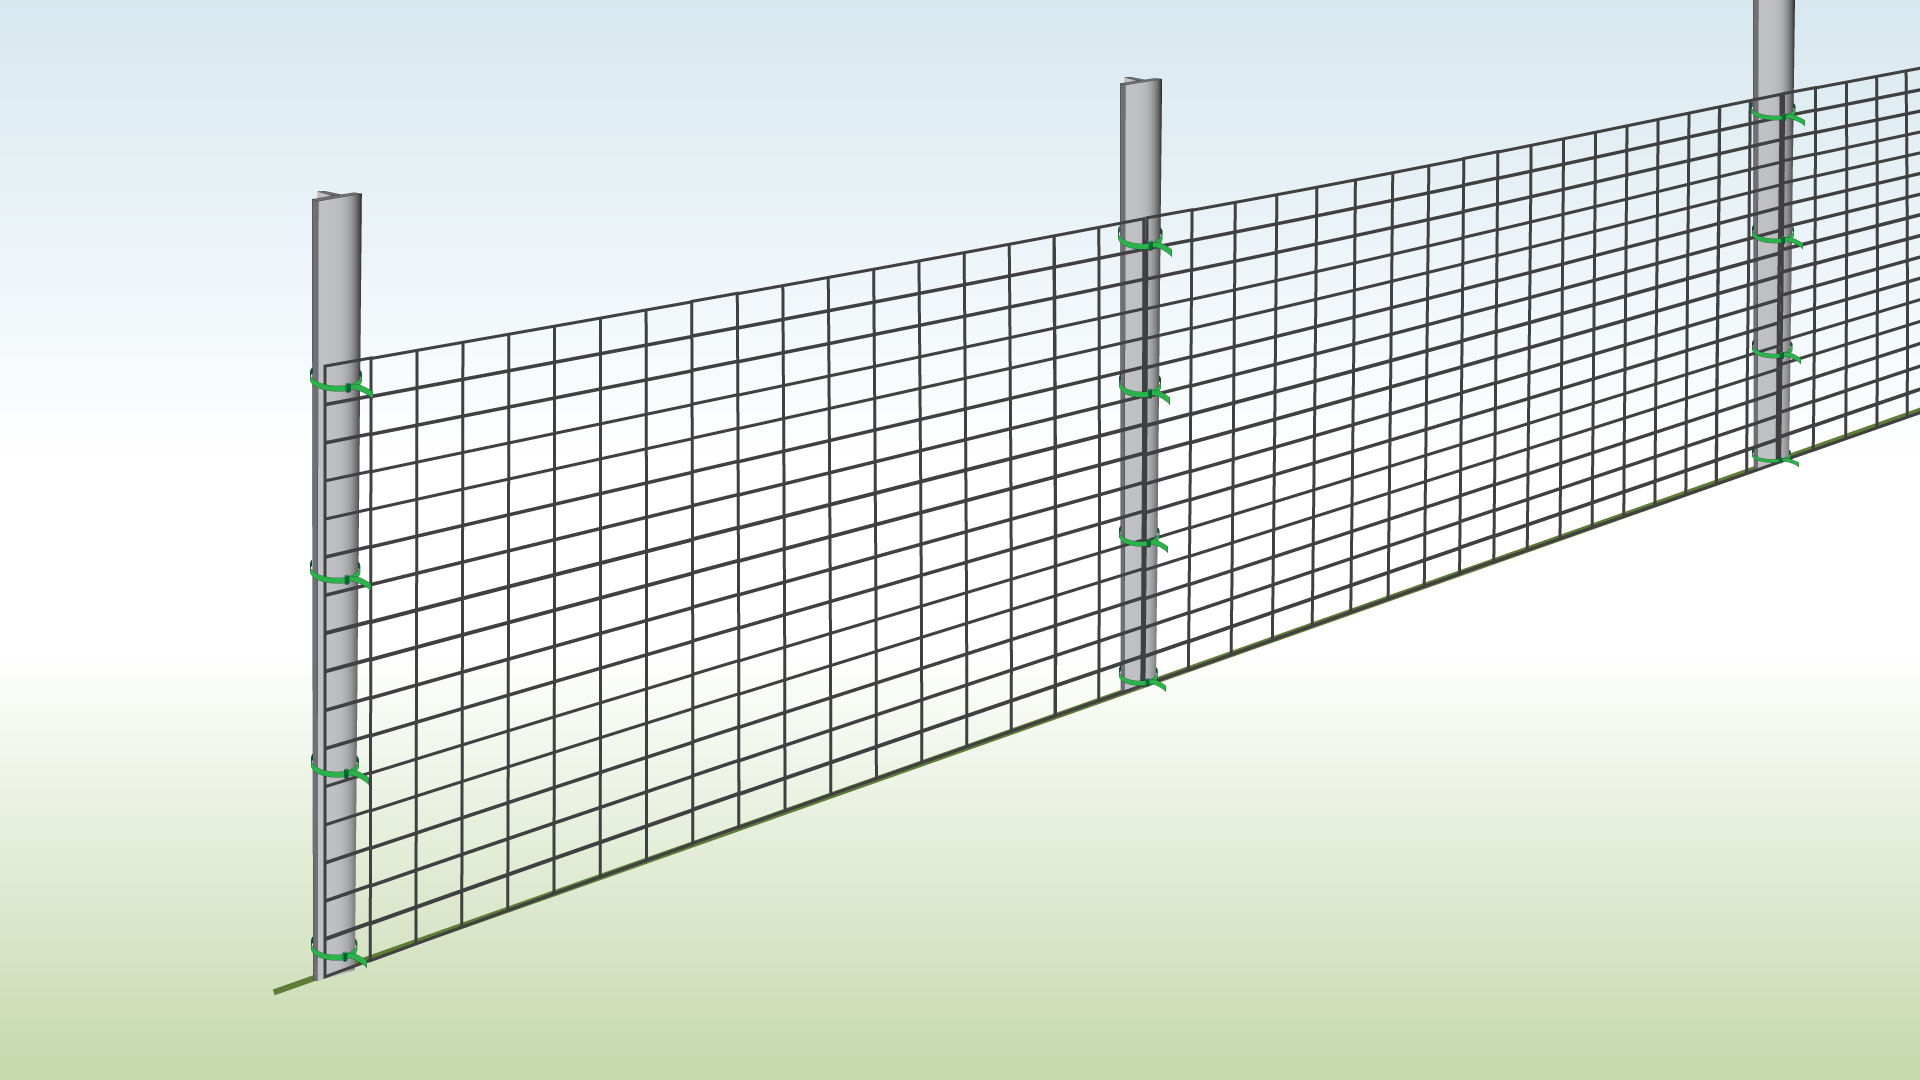
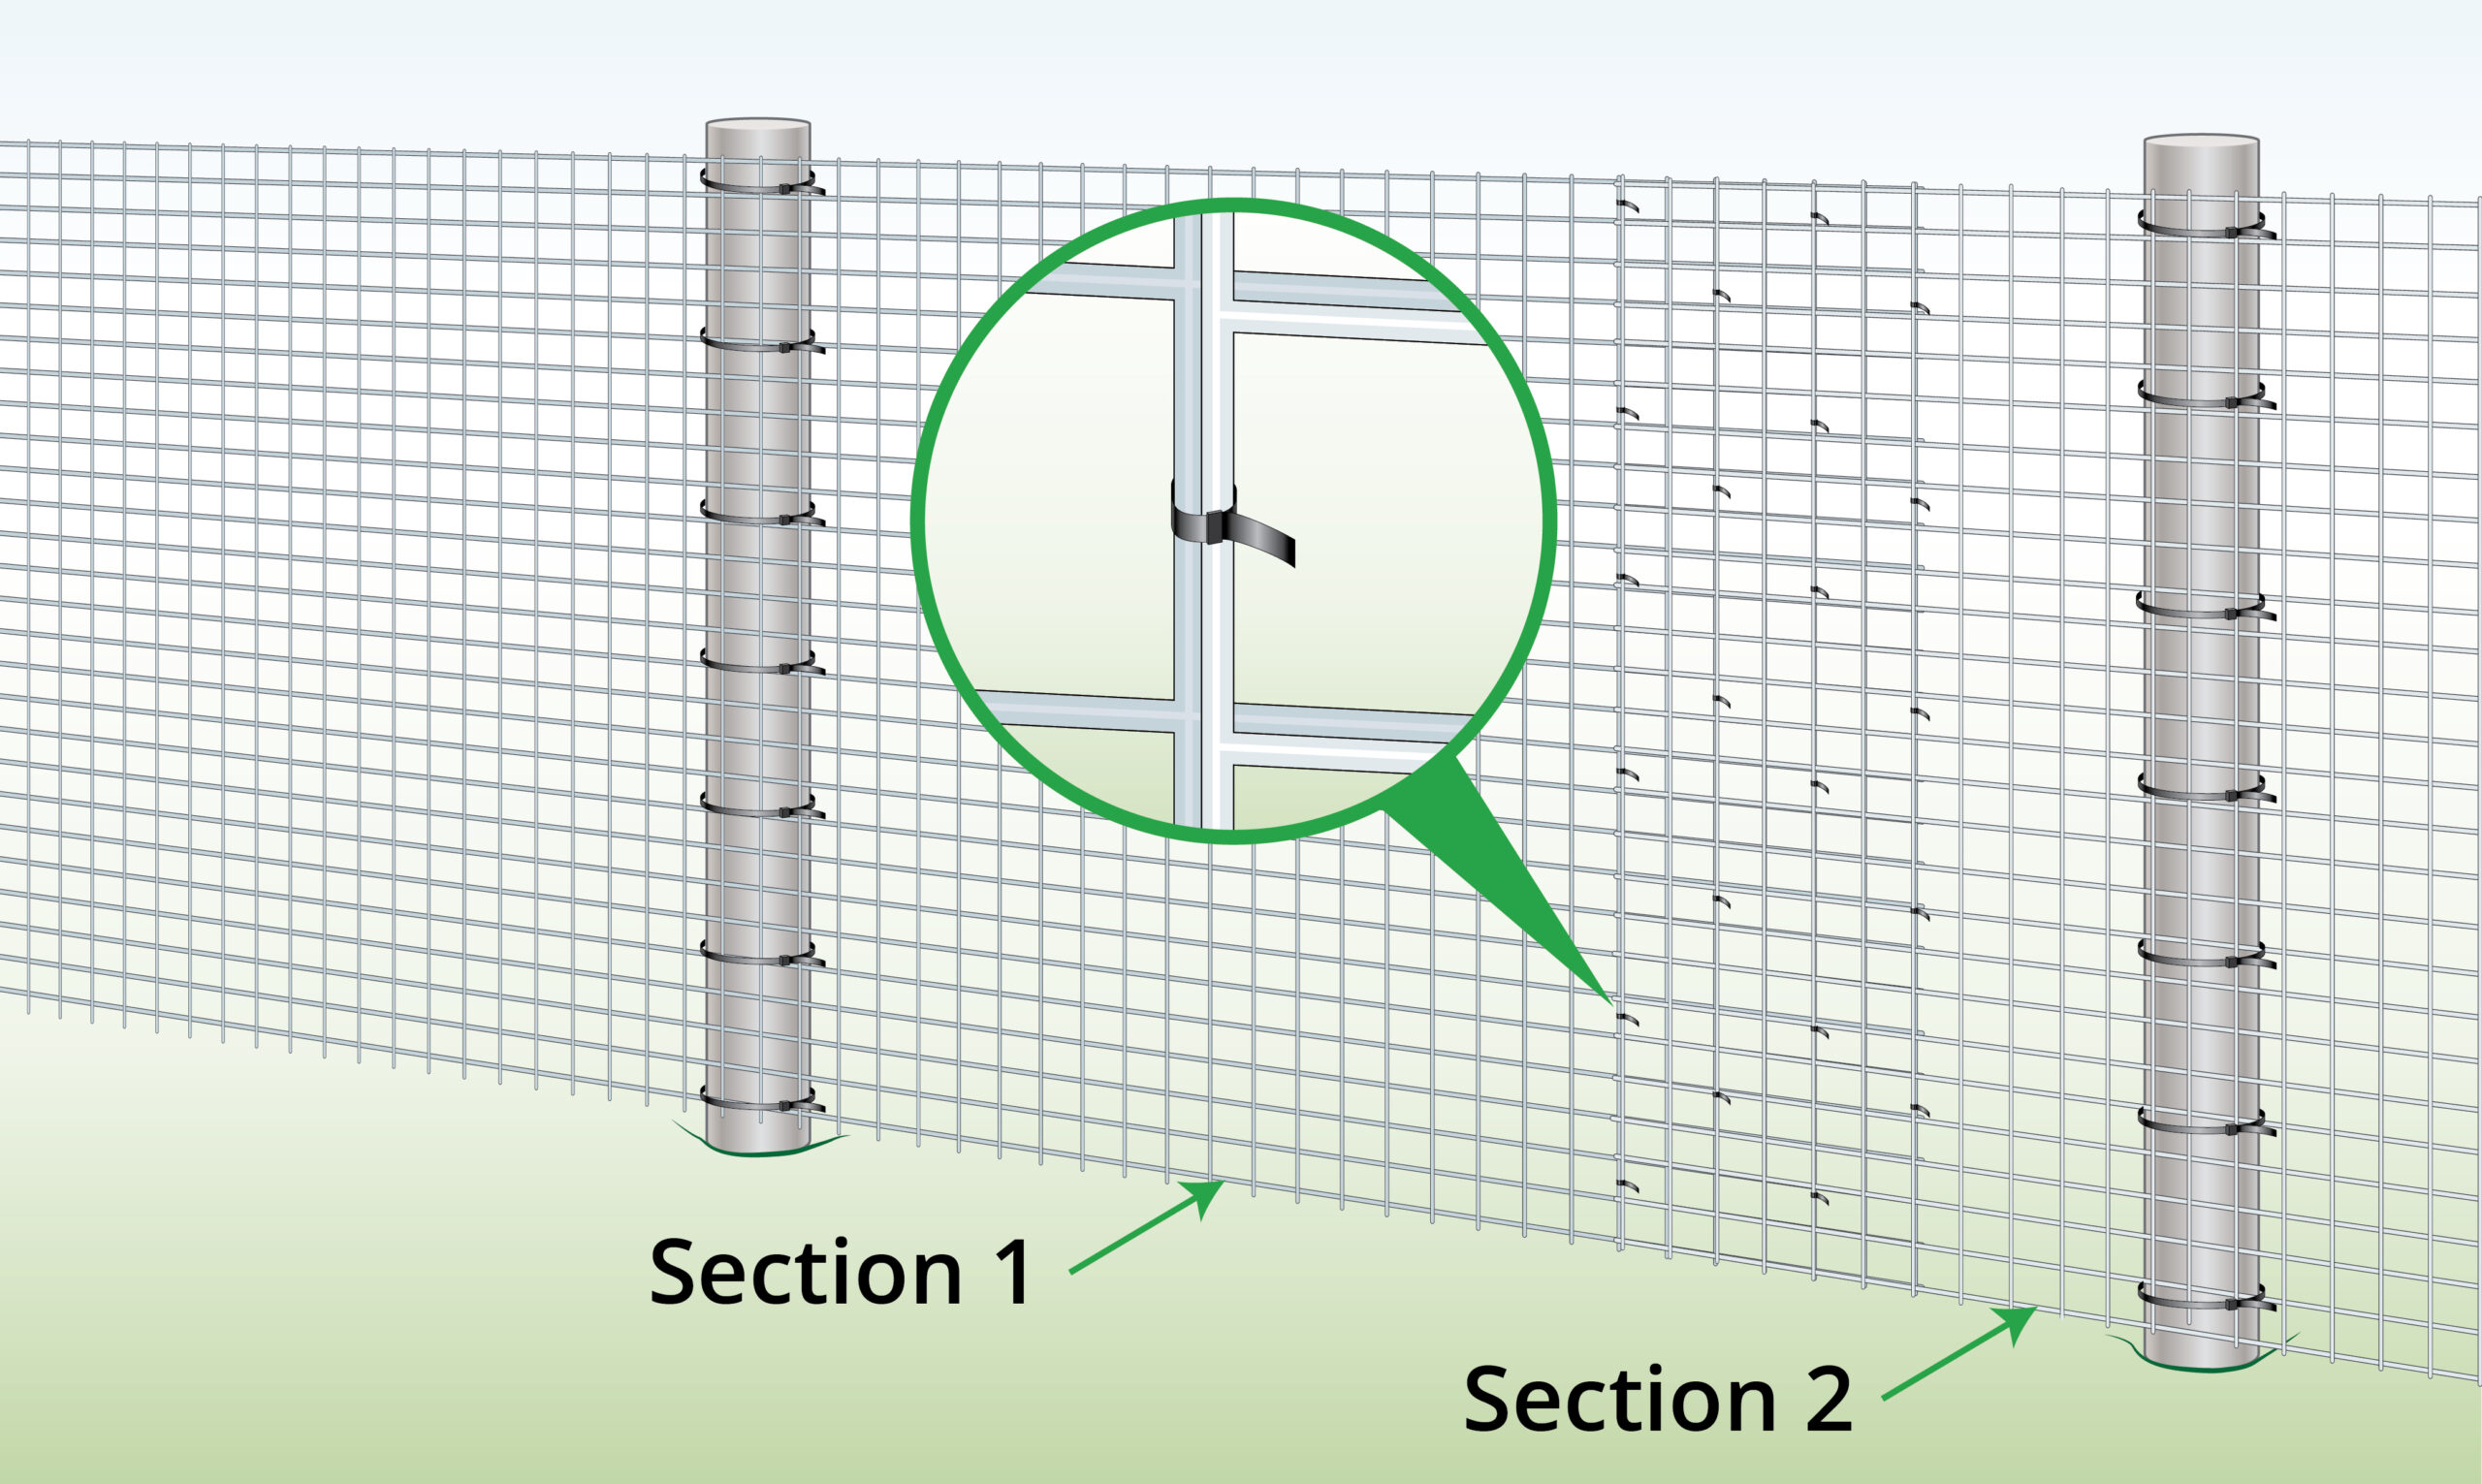
| Length | Can be joined together to create any length required Show Image | |||
| Strength & environment | ||||
| Corrosion resistant |
– conforms to conforms to BS EN 10244-2:2009
|
|||
| Abrasion resistance | Very good | |||
| Suited to Environments | C2-C4 | |||
| Installation & maintenance | ||||
| Speed of installation |
Very quick |
|||
| Experience required to install | None | |||
| Can be installed with wooden posts? | ||||
| Can be installed with T Posts? | ||||
| Distance between posts |
|
|||
| Can stand alone without posts? | ||||
| Join together using | Cable Ties | |||
| Can be cut using Refers to the tool that is required as a minimum to cut the mesh | Bolt Cutters | Mini Bolt Cutters |
Bolt Cutters | Bolt Cutters |
| Requires protective glove for handling |
– Recommended
|
|||
| Appearance | ||||
| General look | Metal mesh | |||
| Can be disguised | Yes, can easily be covered by climbing plants up the mesh or using garden screening Show Image | |||
| Attach to: | How to: |
| T Posts | 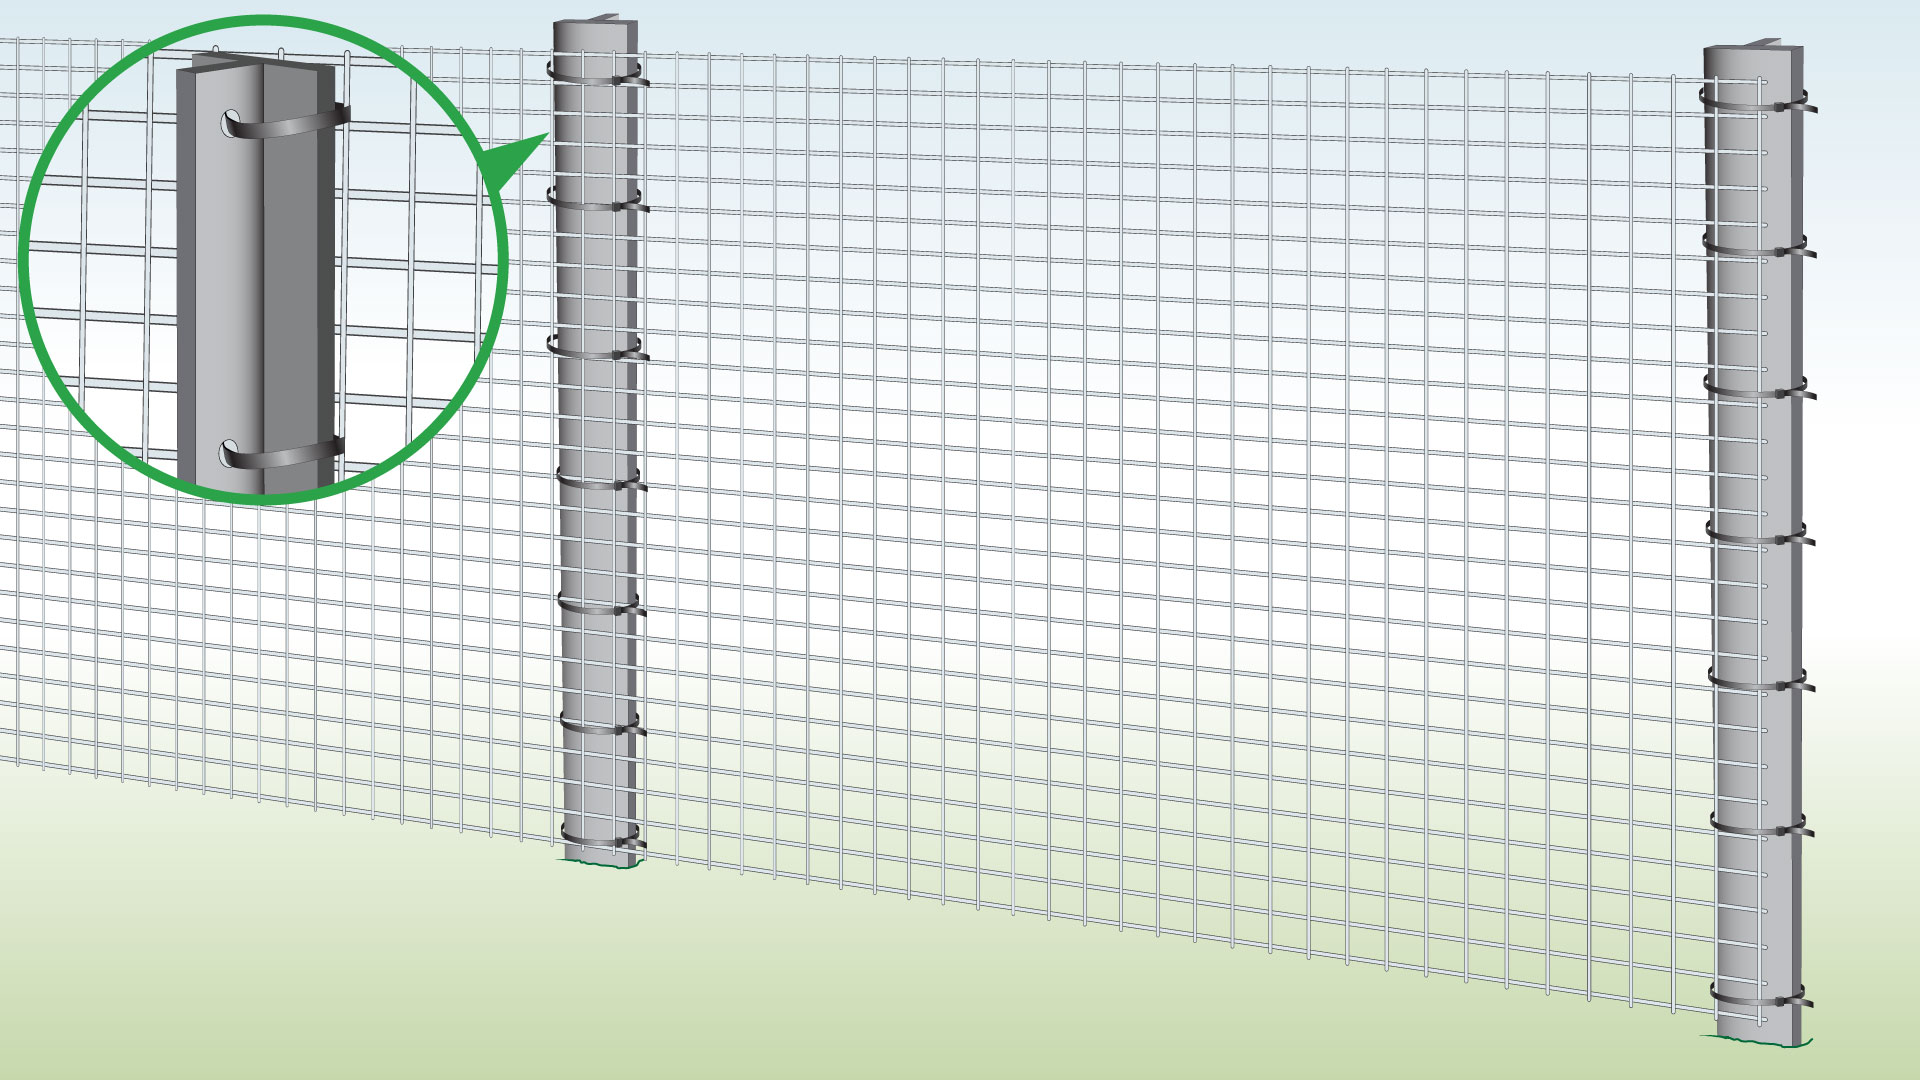
|
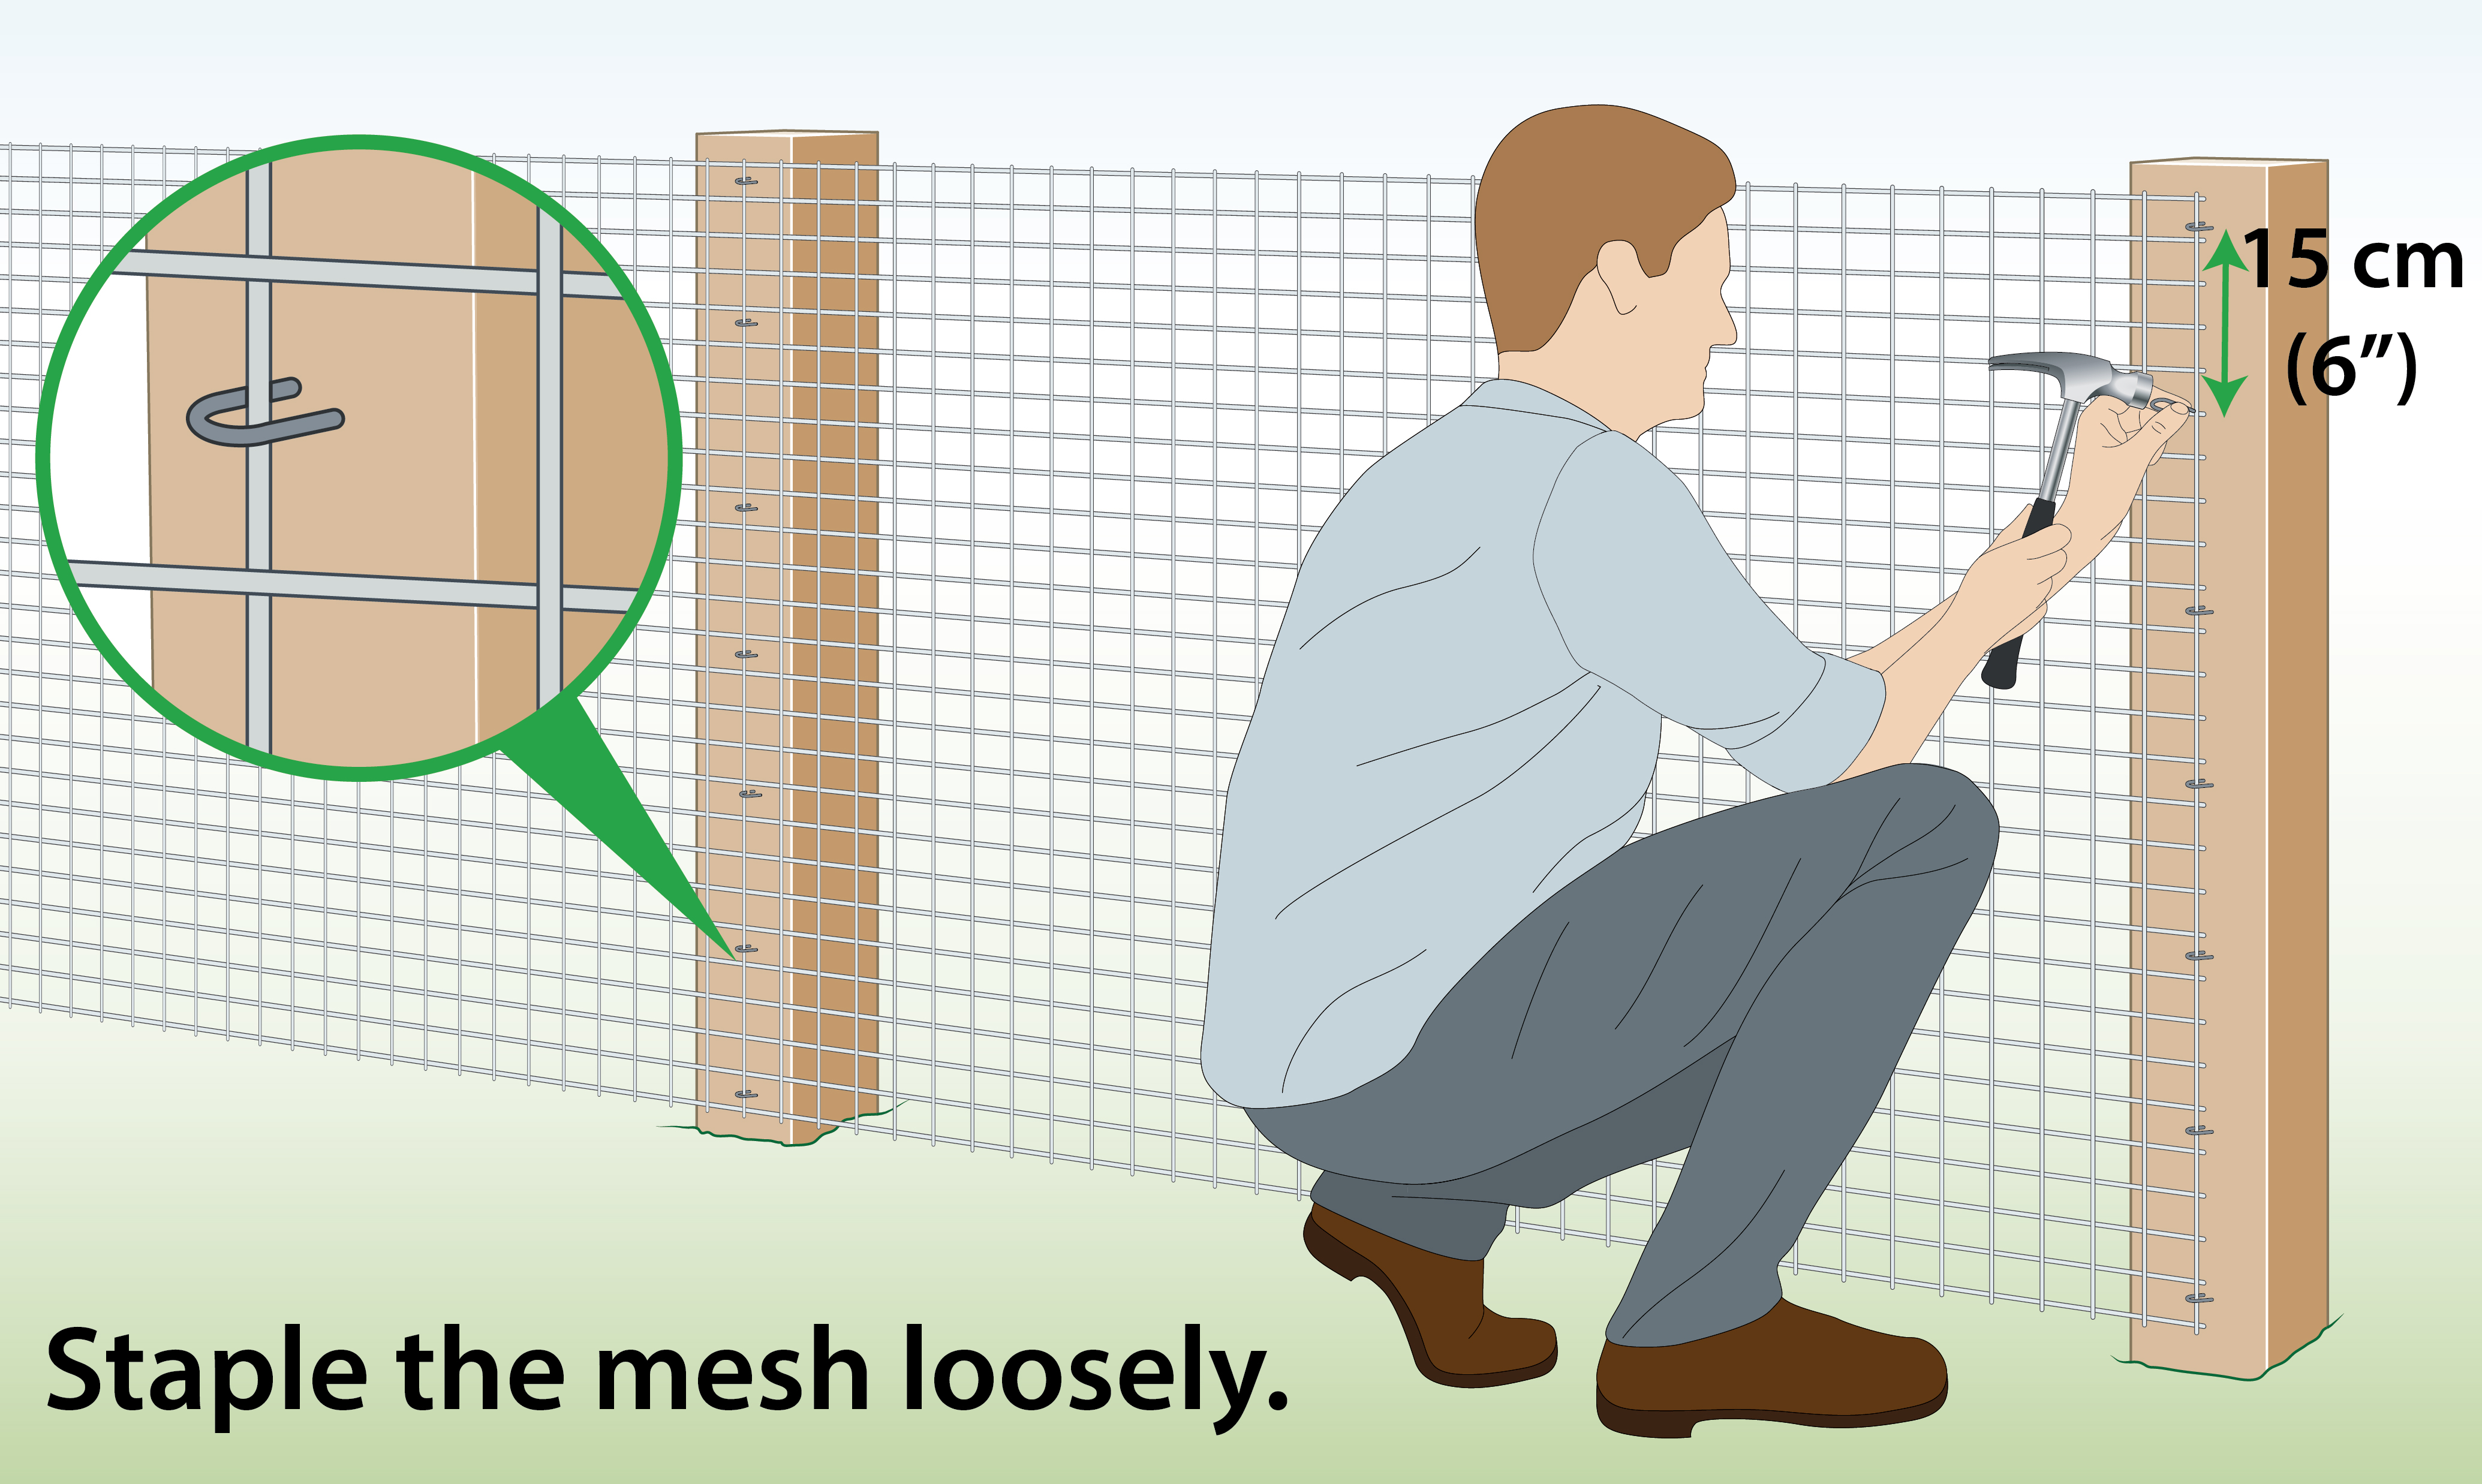
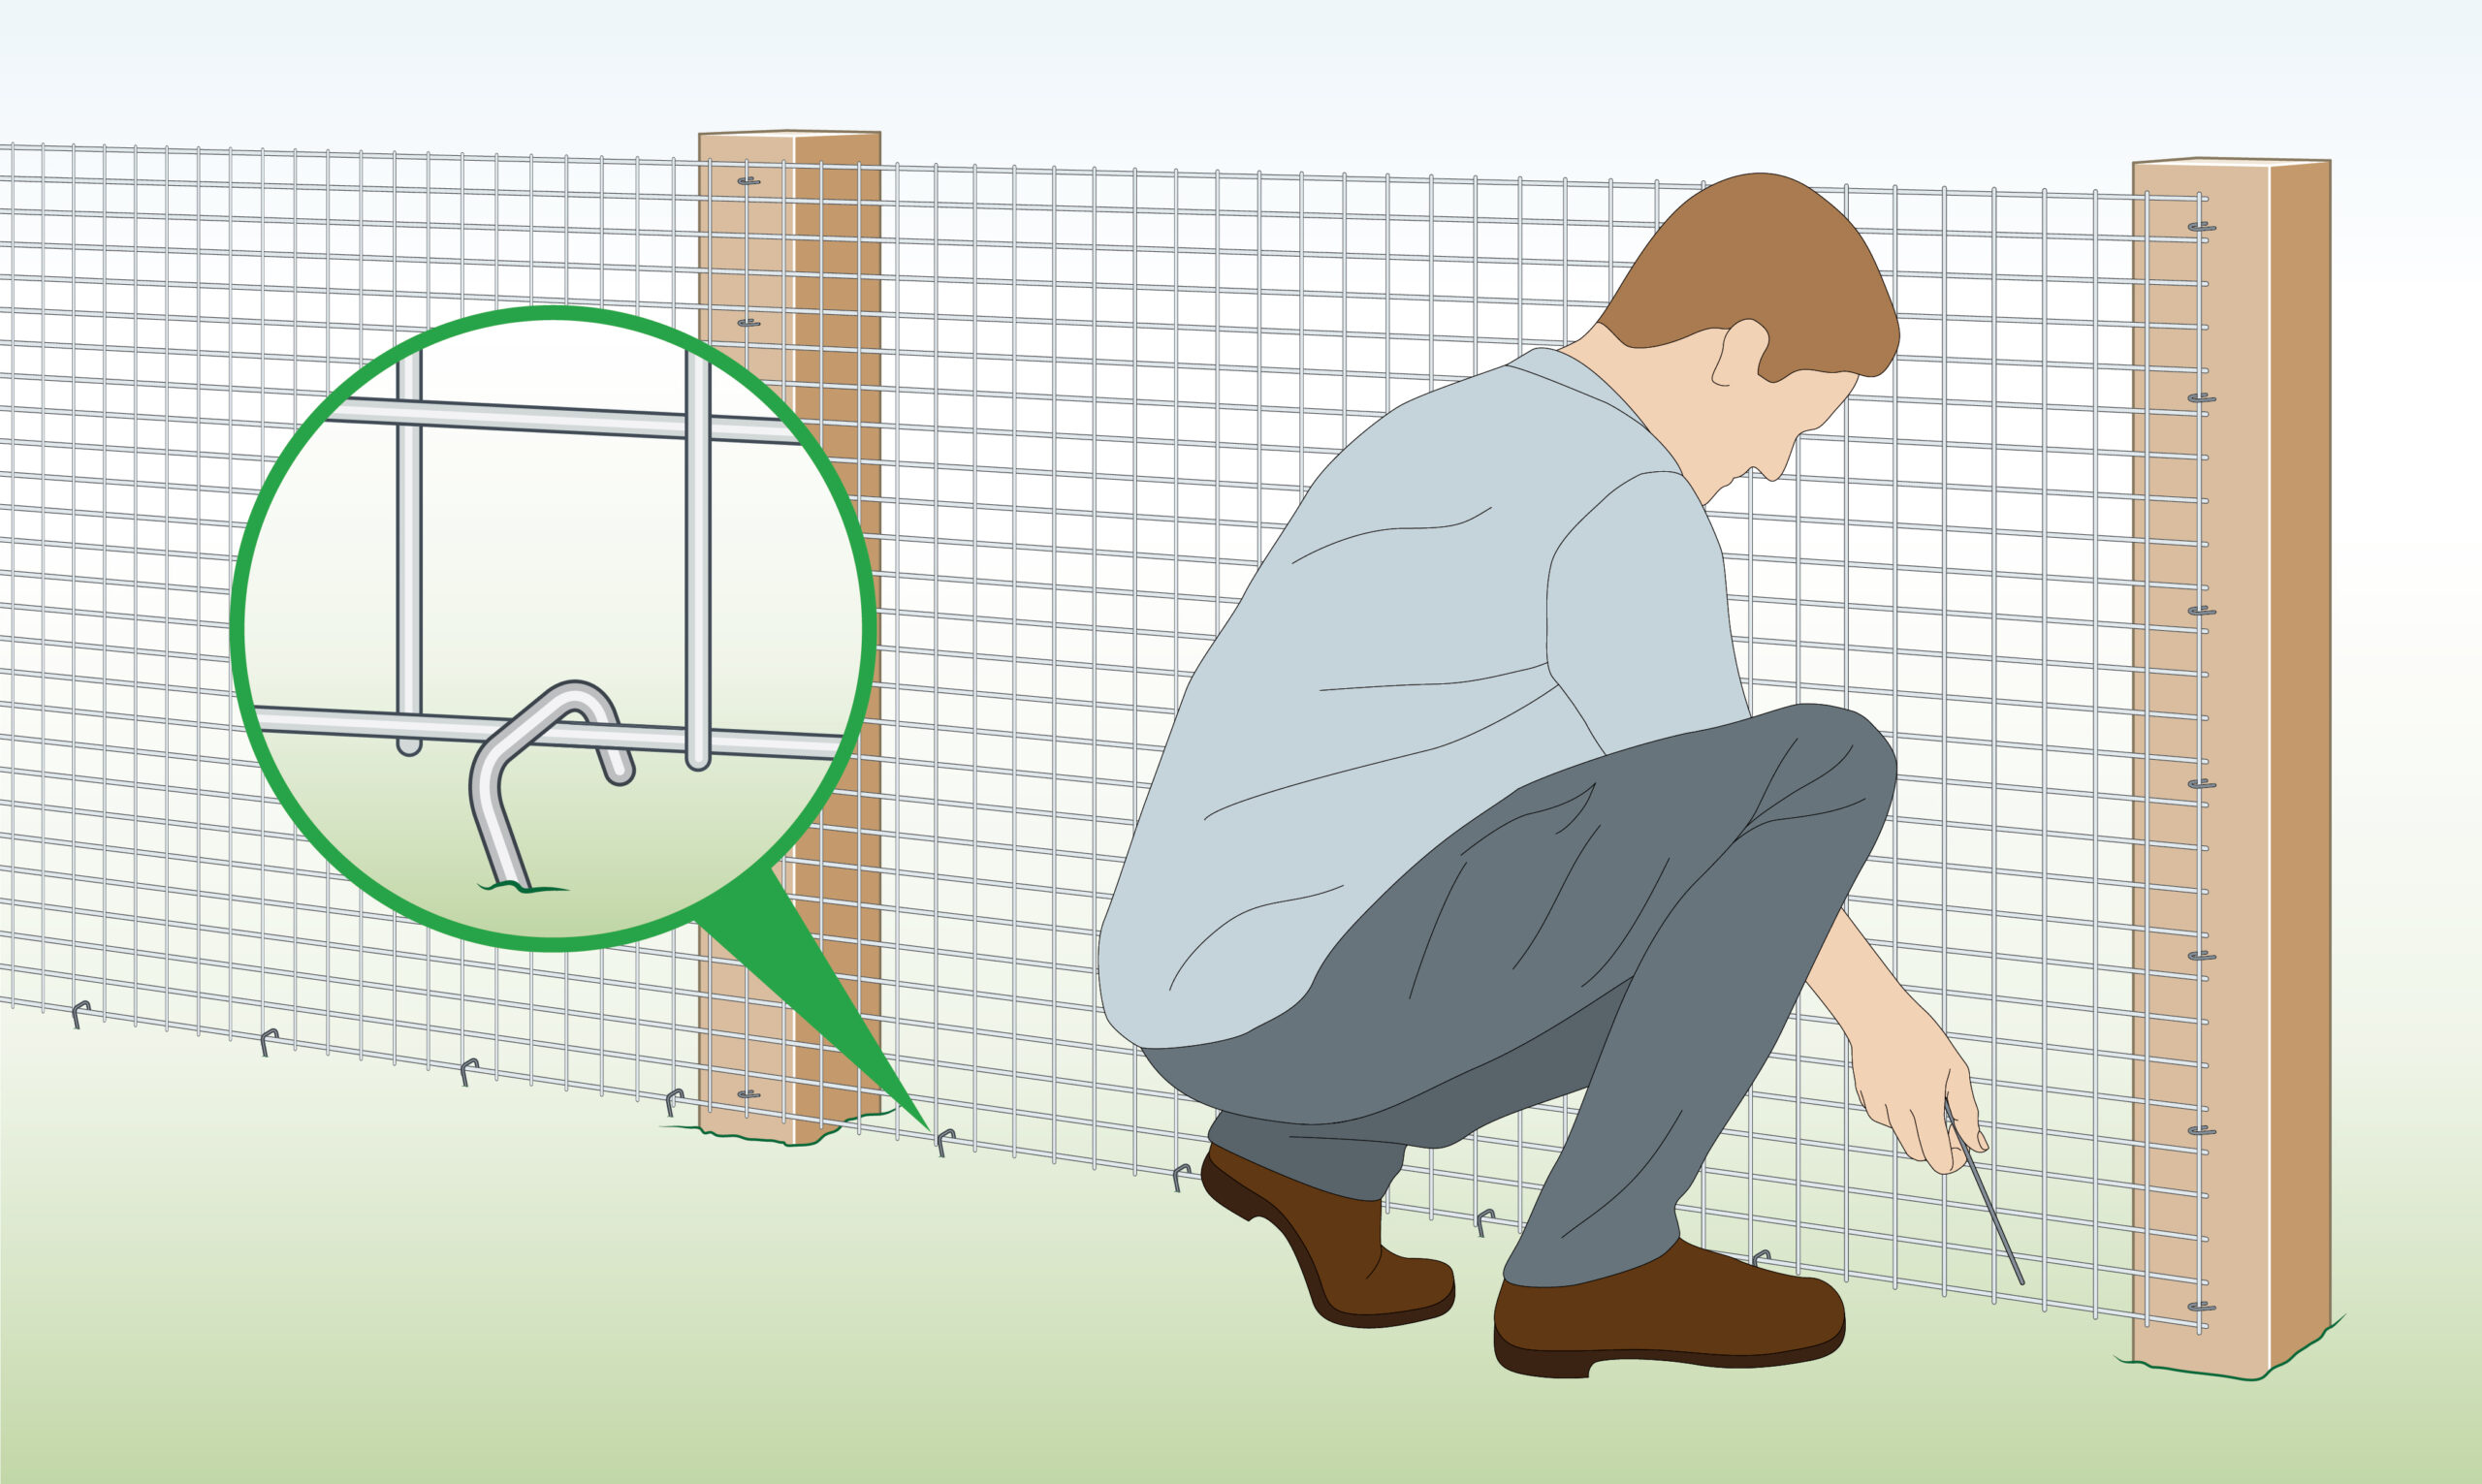
| Wood/ Wooden Posts (Staples) |
 |
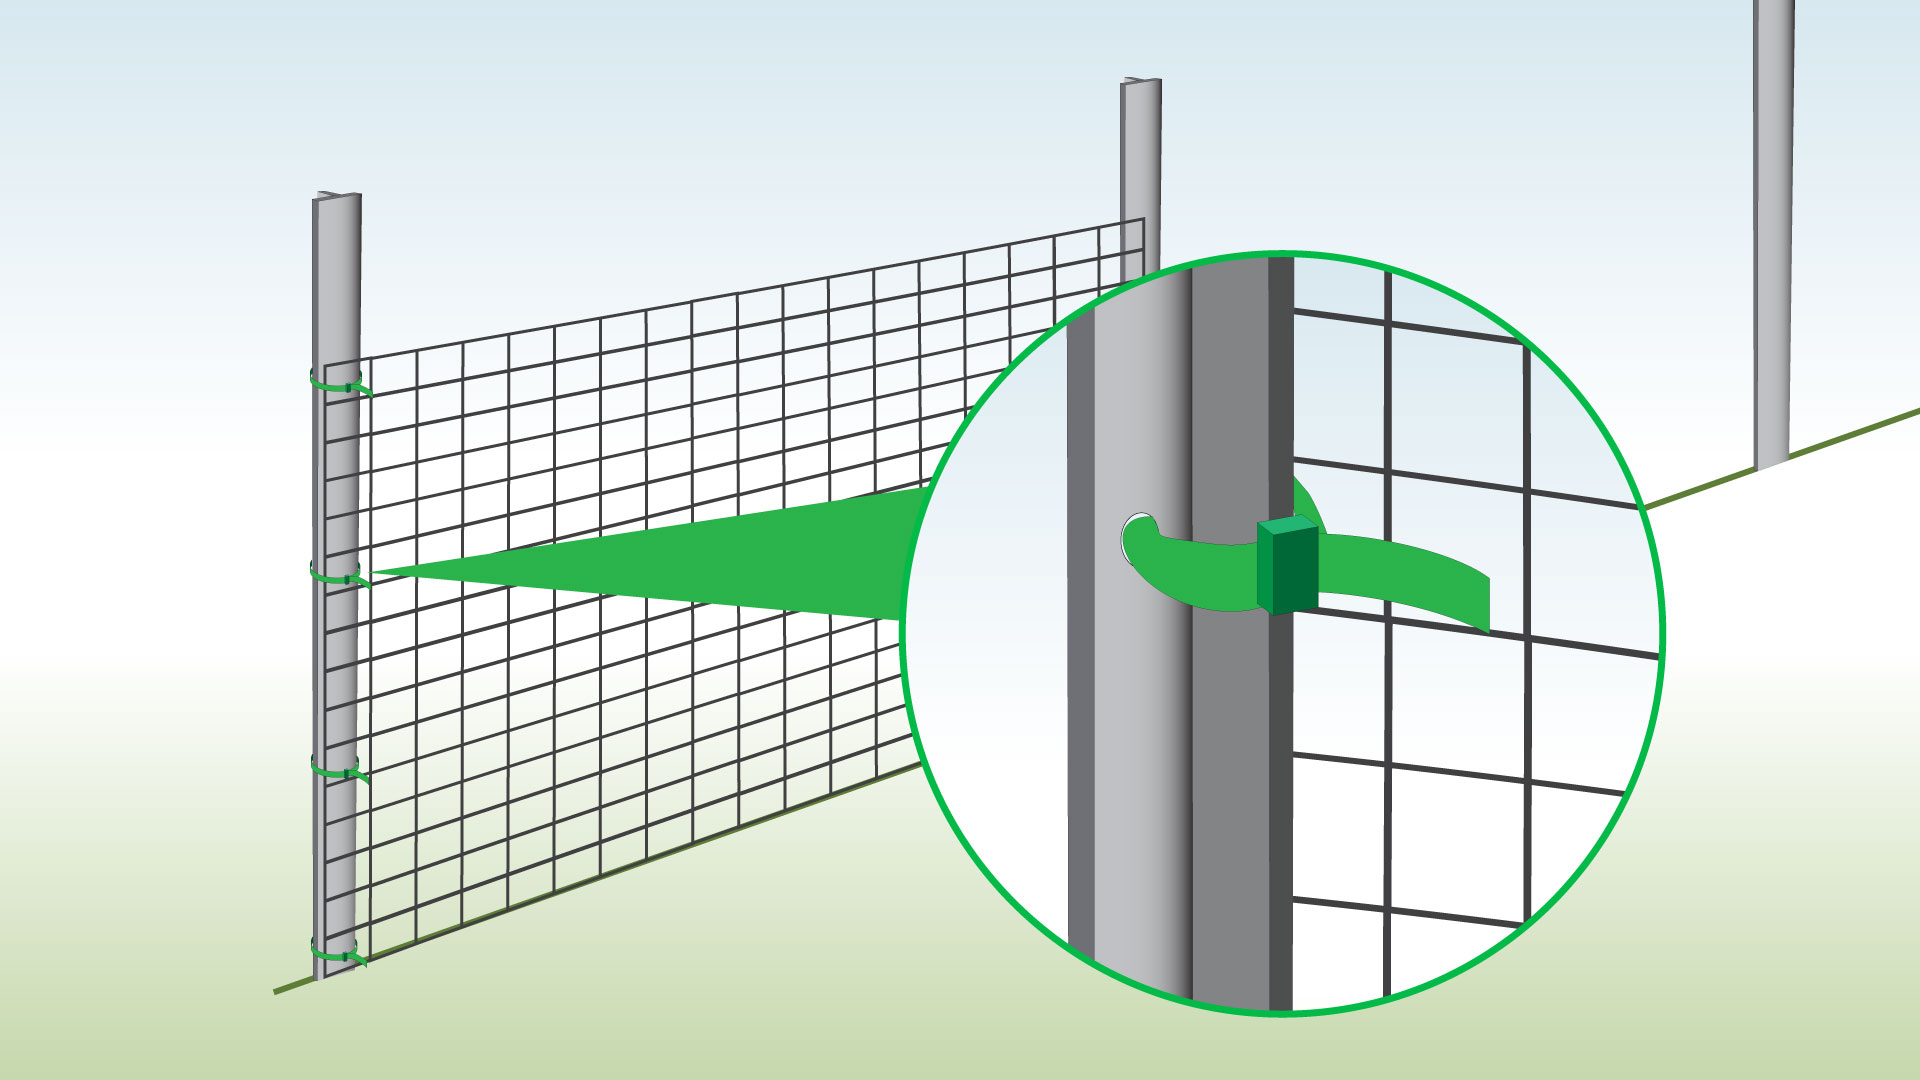
| Metal/ Metal Posts (Cable ties) |
|
| Concrete Posts
(Tension wire, |
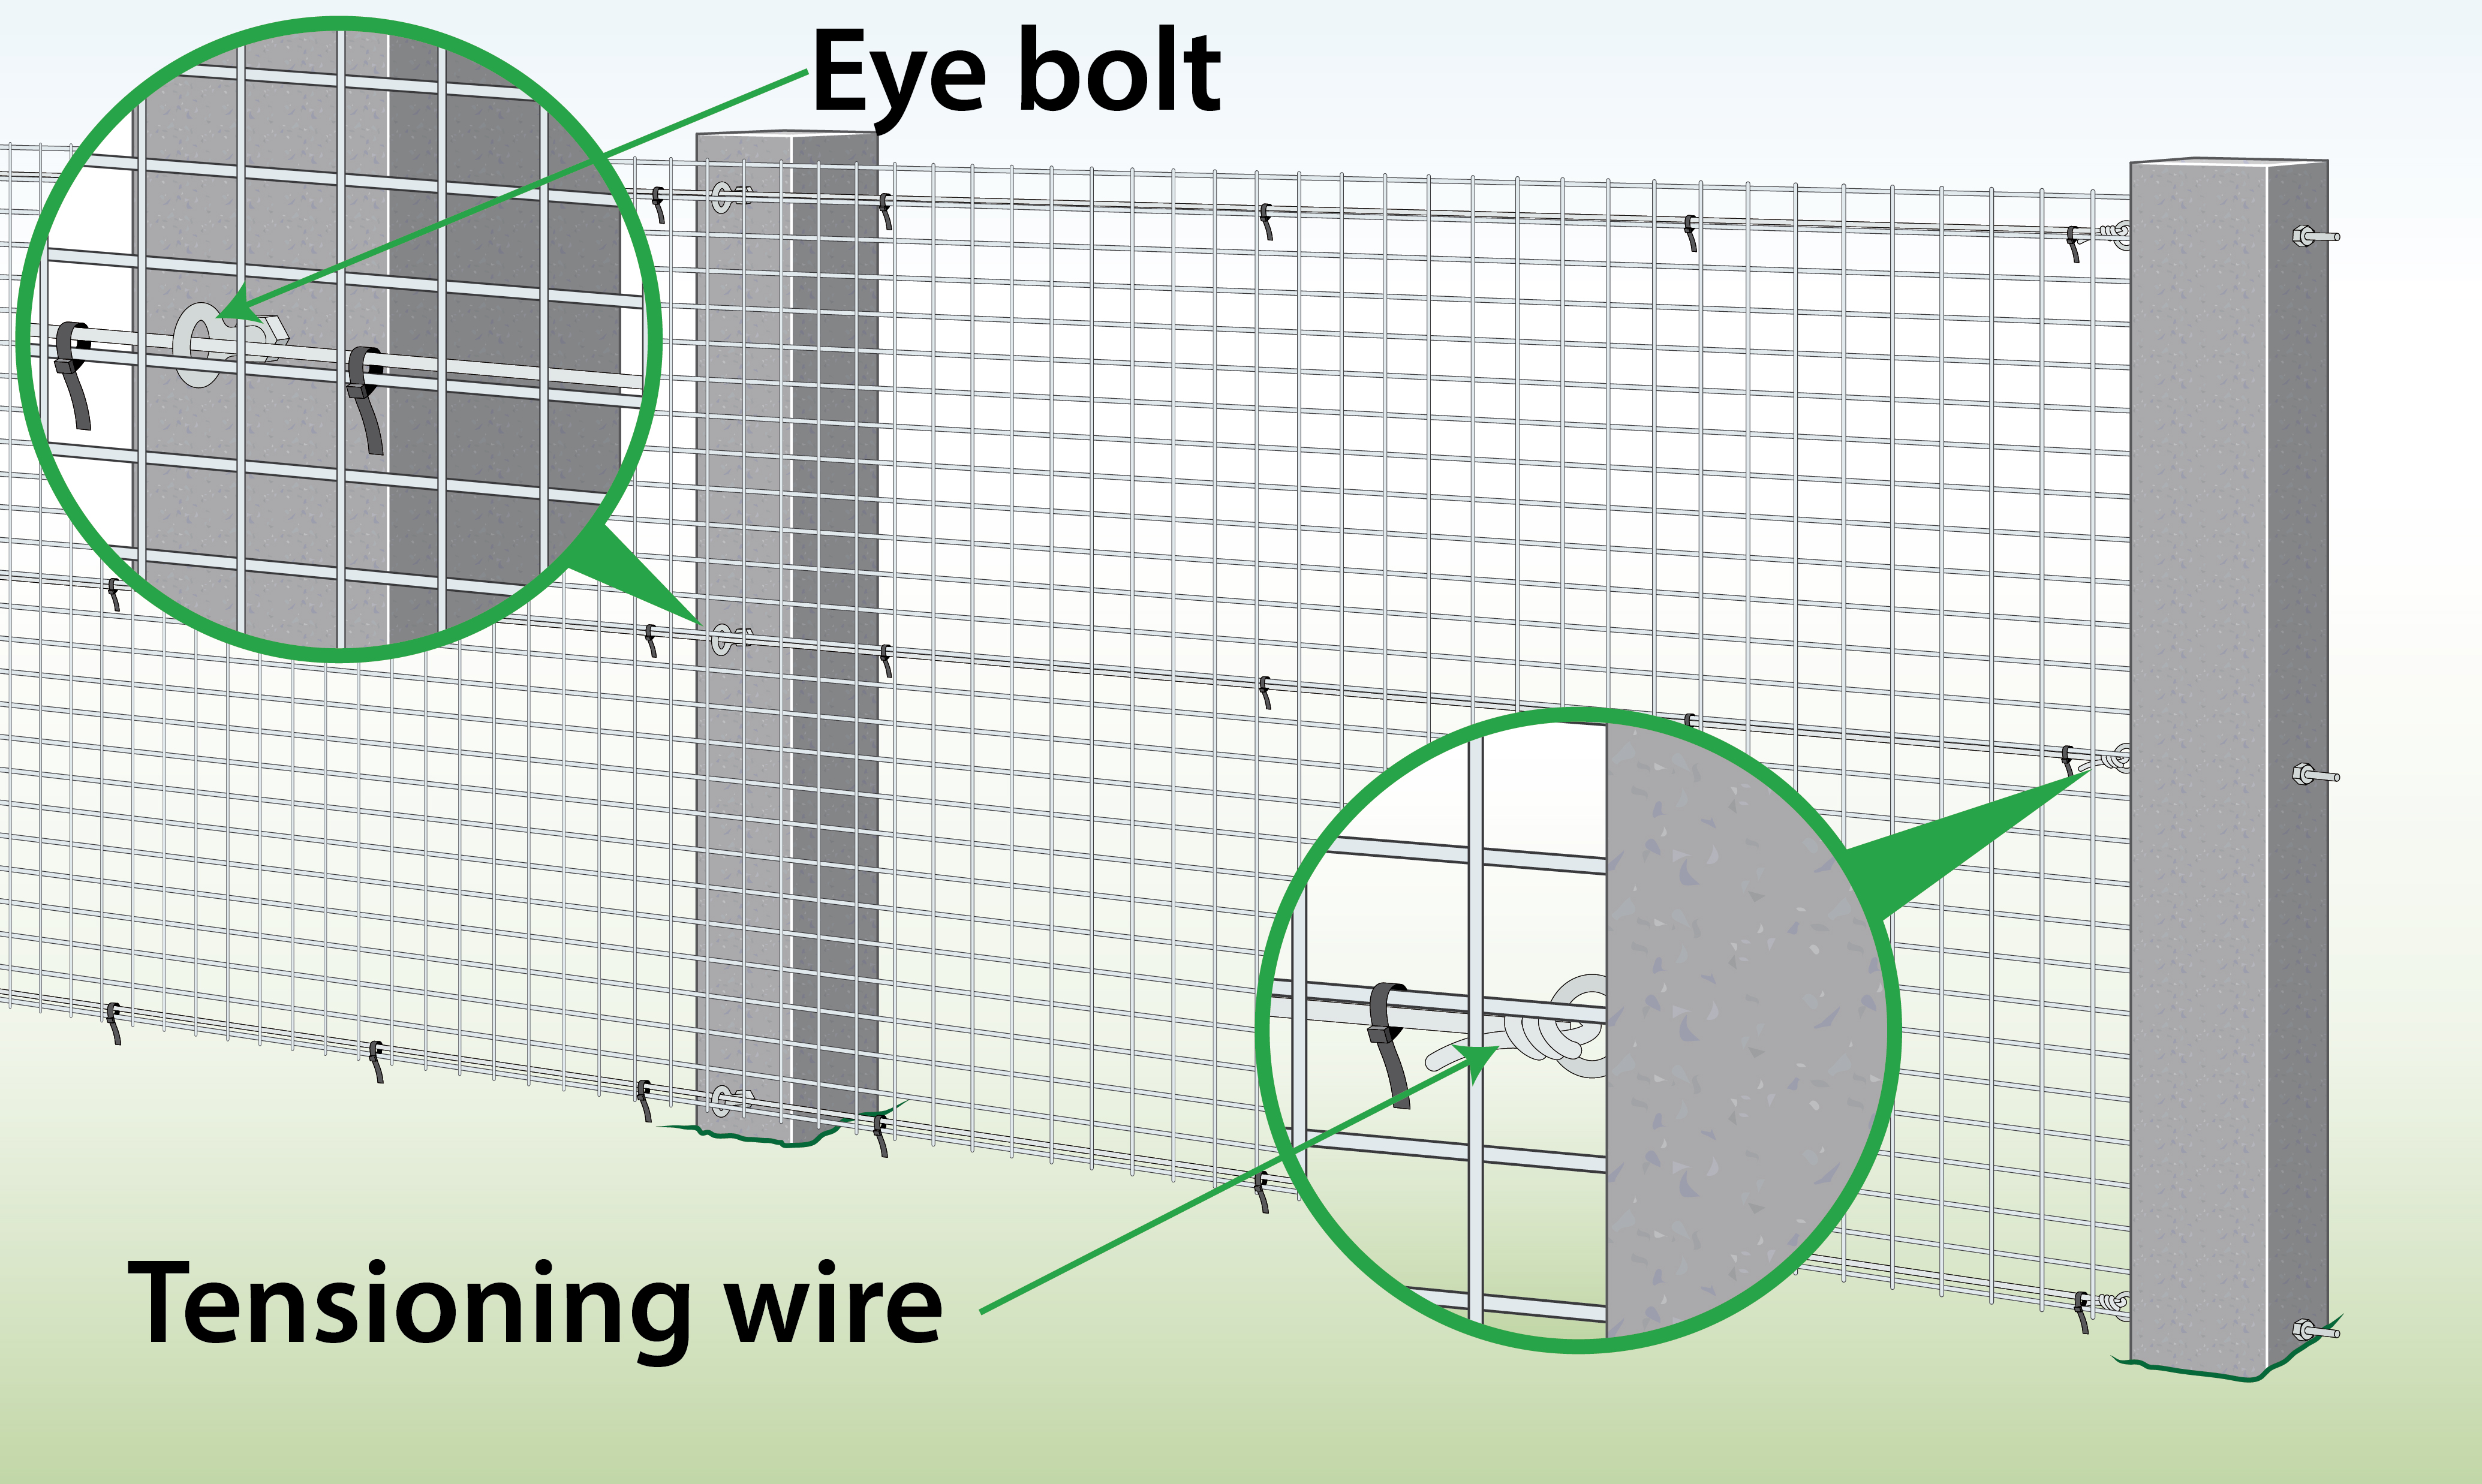 |
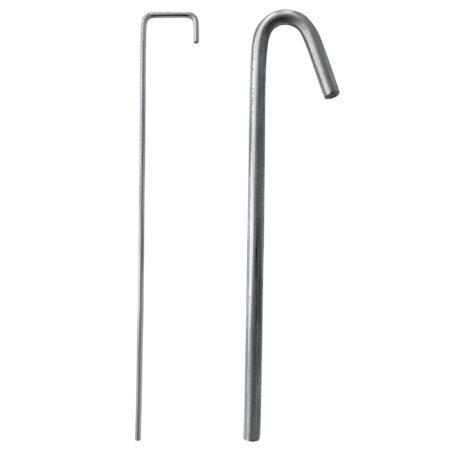
| Soil
(Pegs) |
|
| Wire Fence
|
|
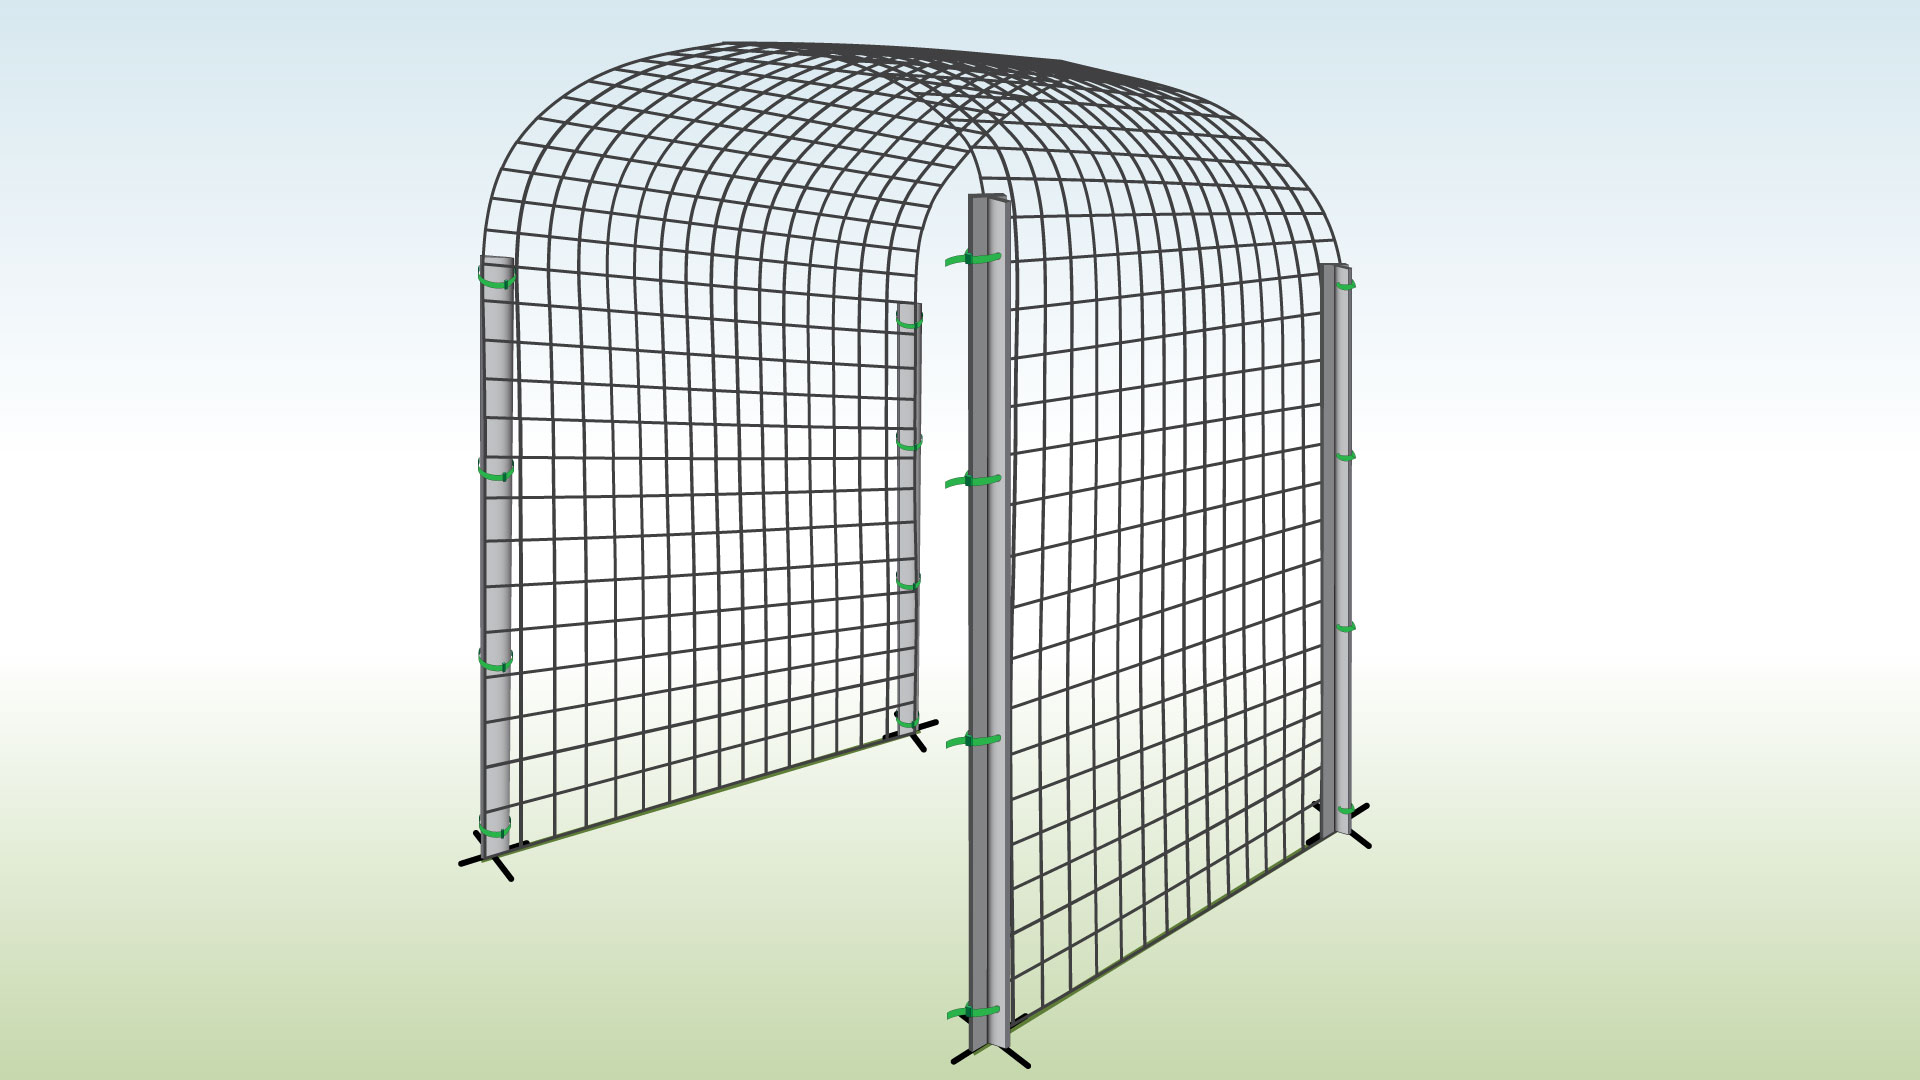
Cattle Panel Trellis
Cattle Panel Fence
| To Do | Explanation |
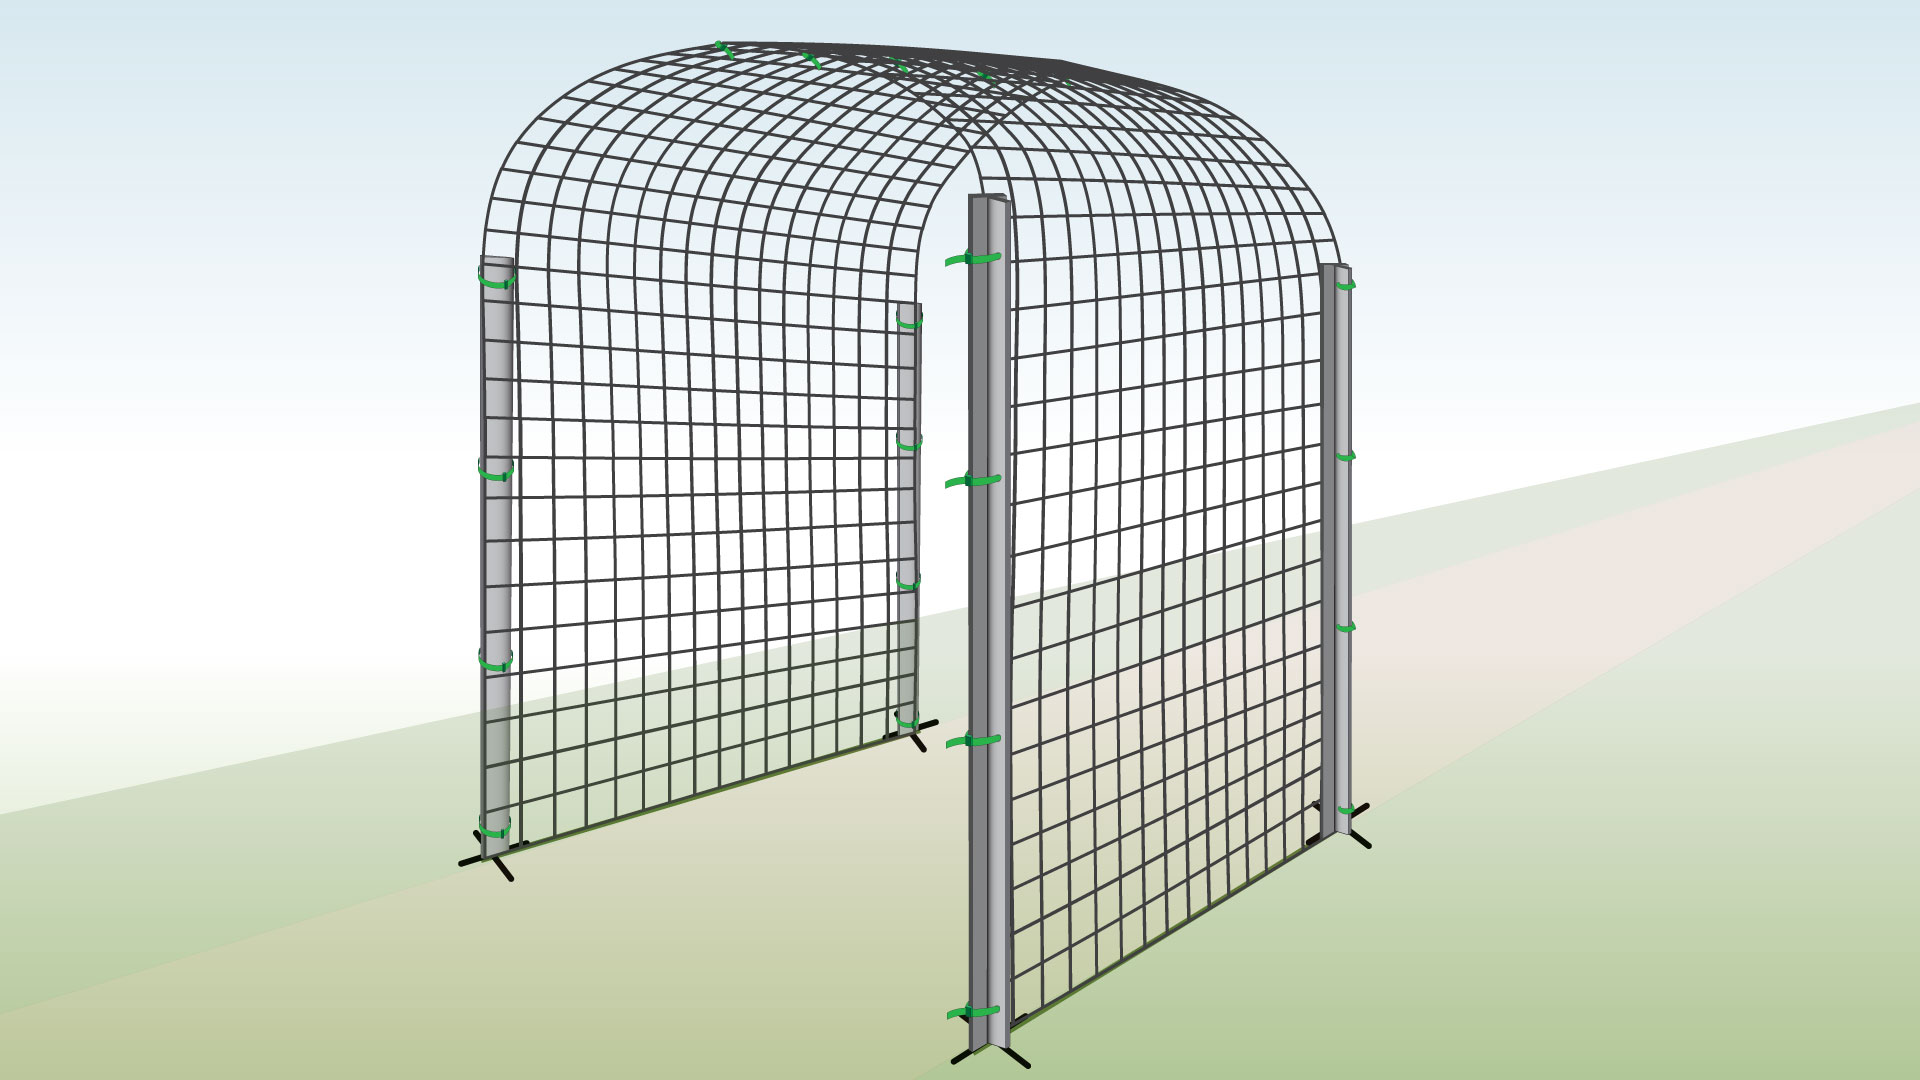
Completed Installation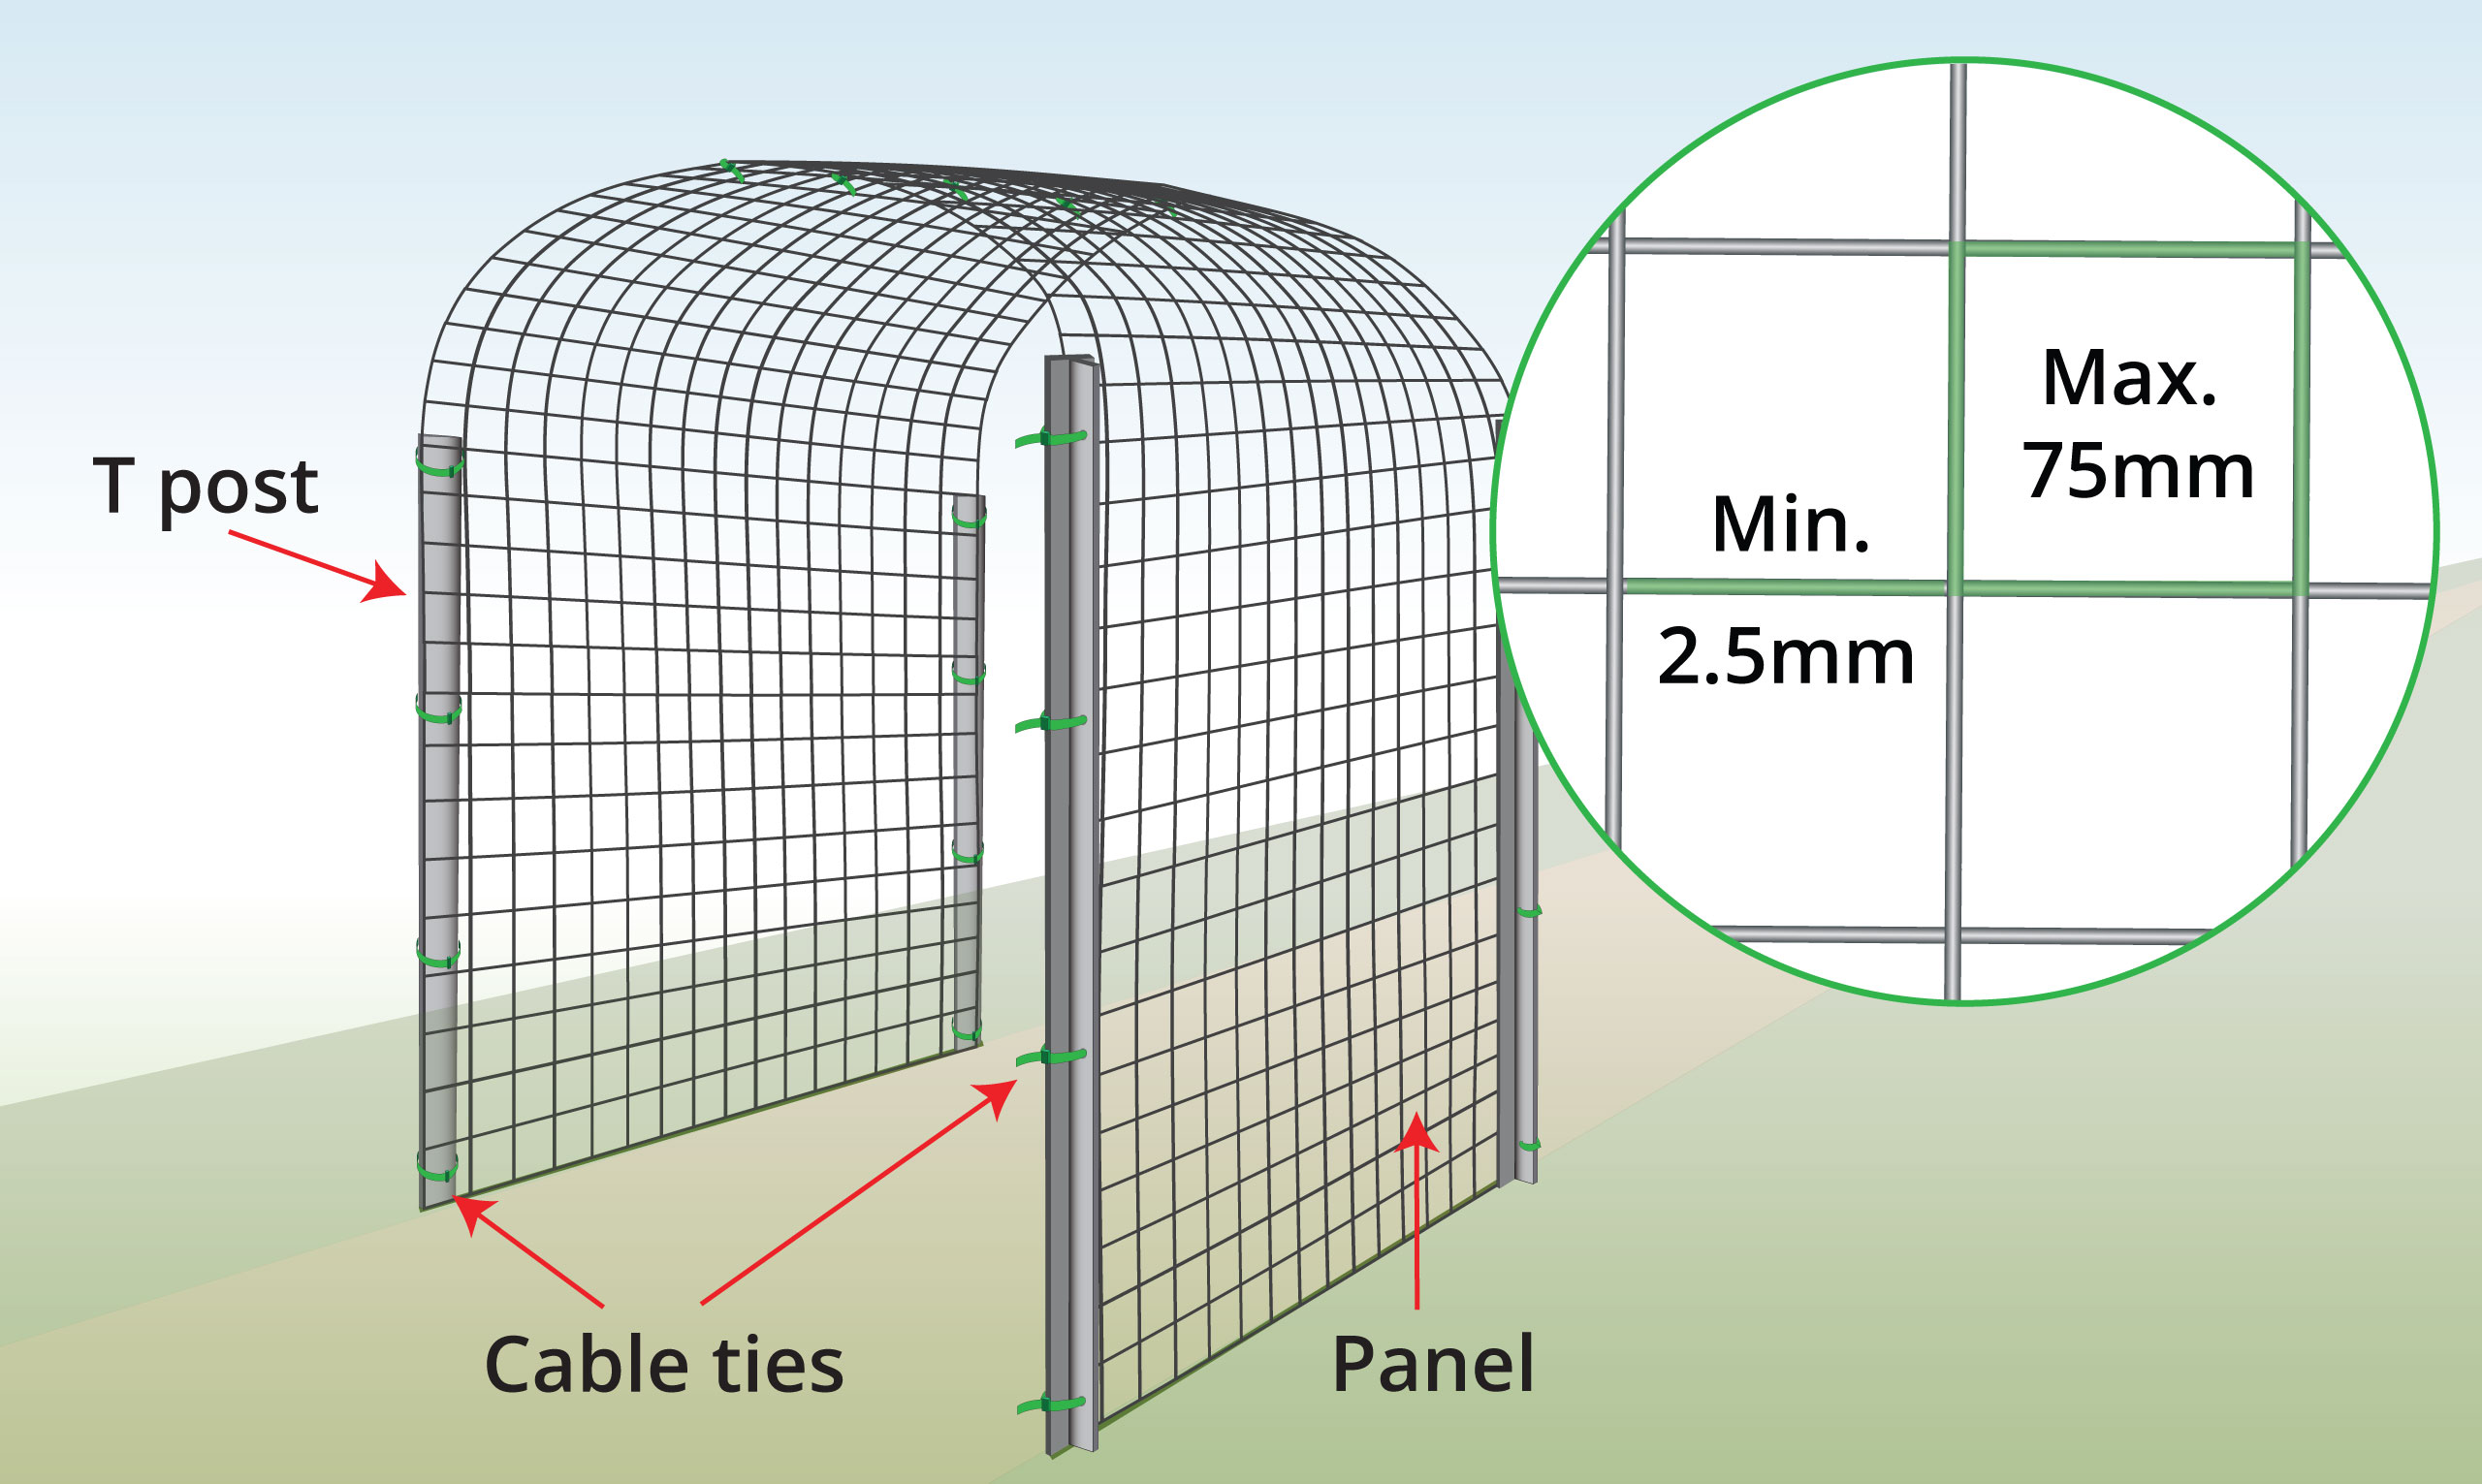
|
Drive T-posts into the ground, then secure each cattle panel to the posts, bending the top to create the arch shape, and finally fasten the two panels together with cable ties at the top.
Full instructions below or watch this video |
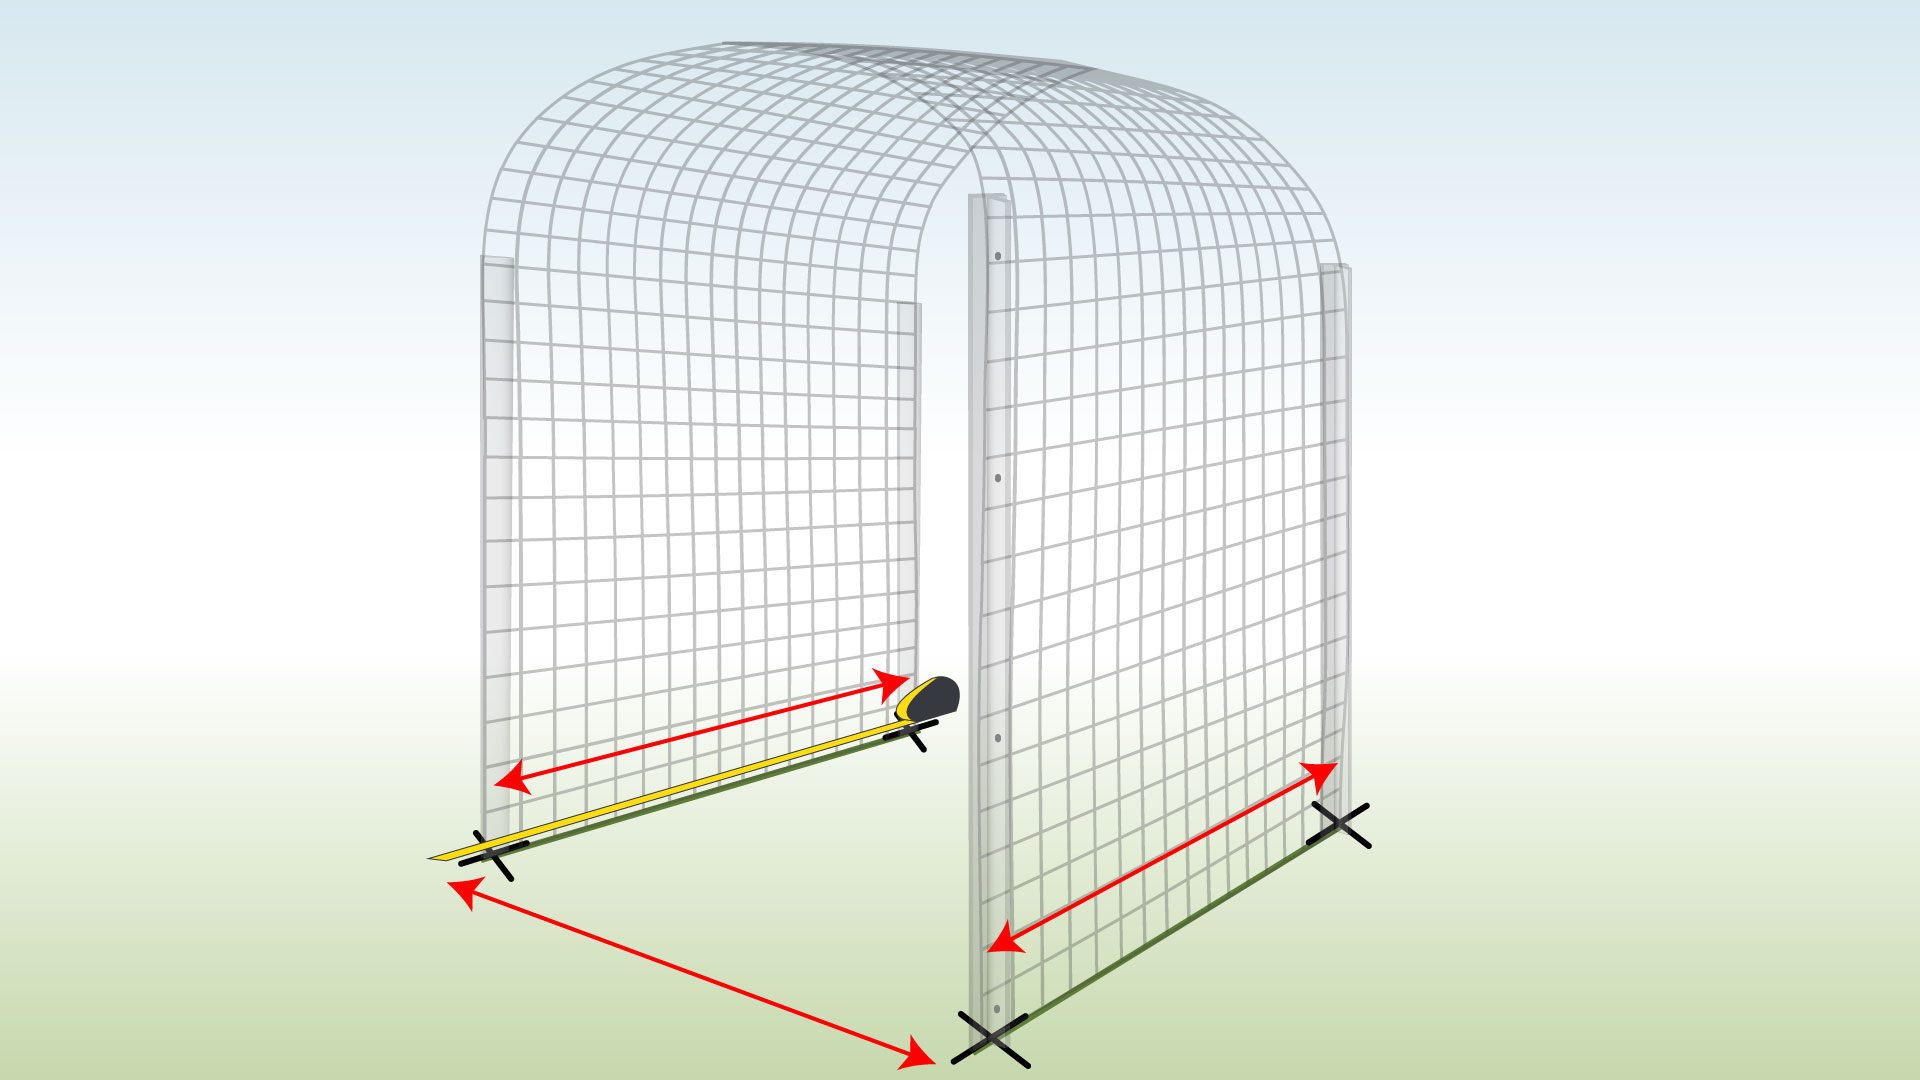
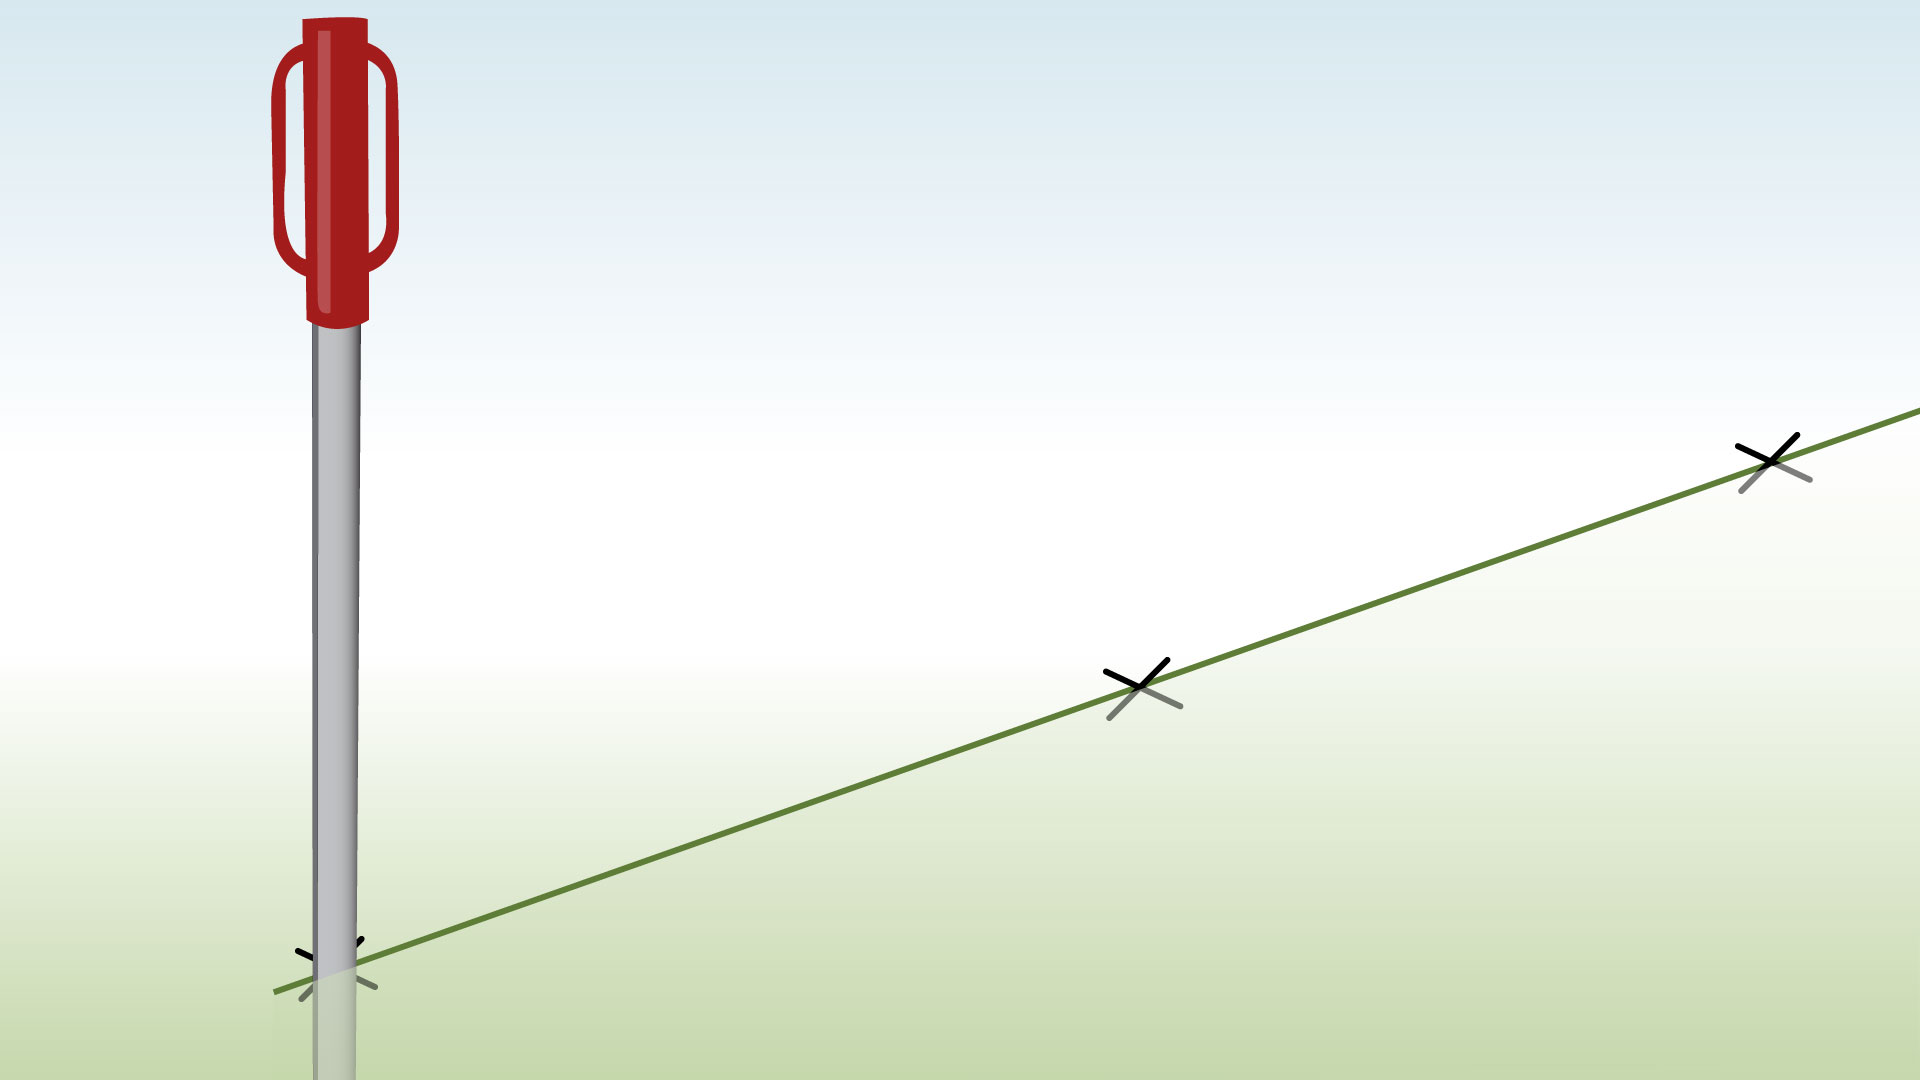
| Step 1 – Measure Area & Mark Post Locations
|
Measure your area and mark your post locations according to your plan. |
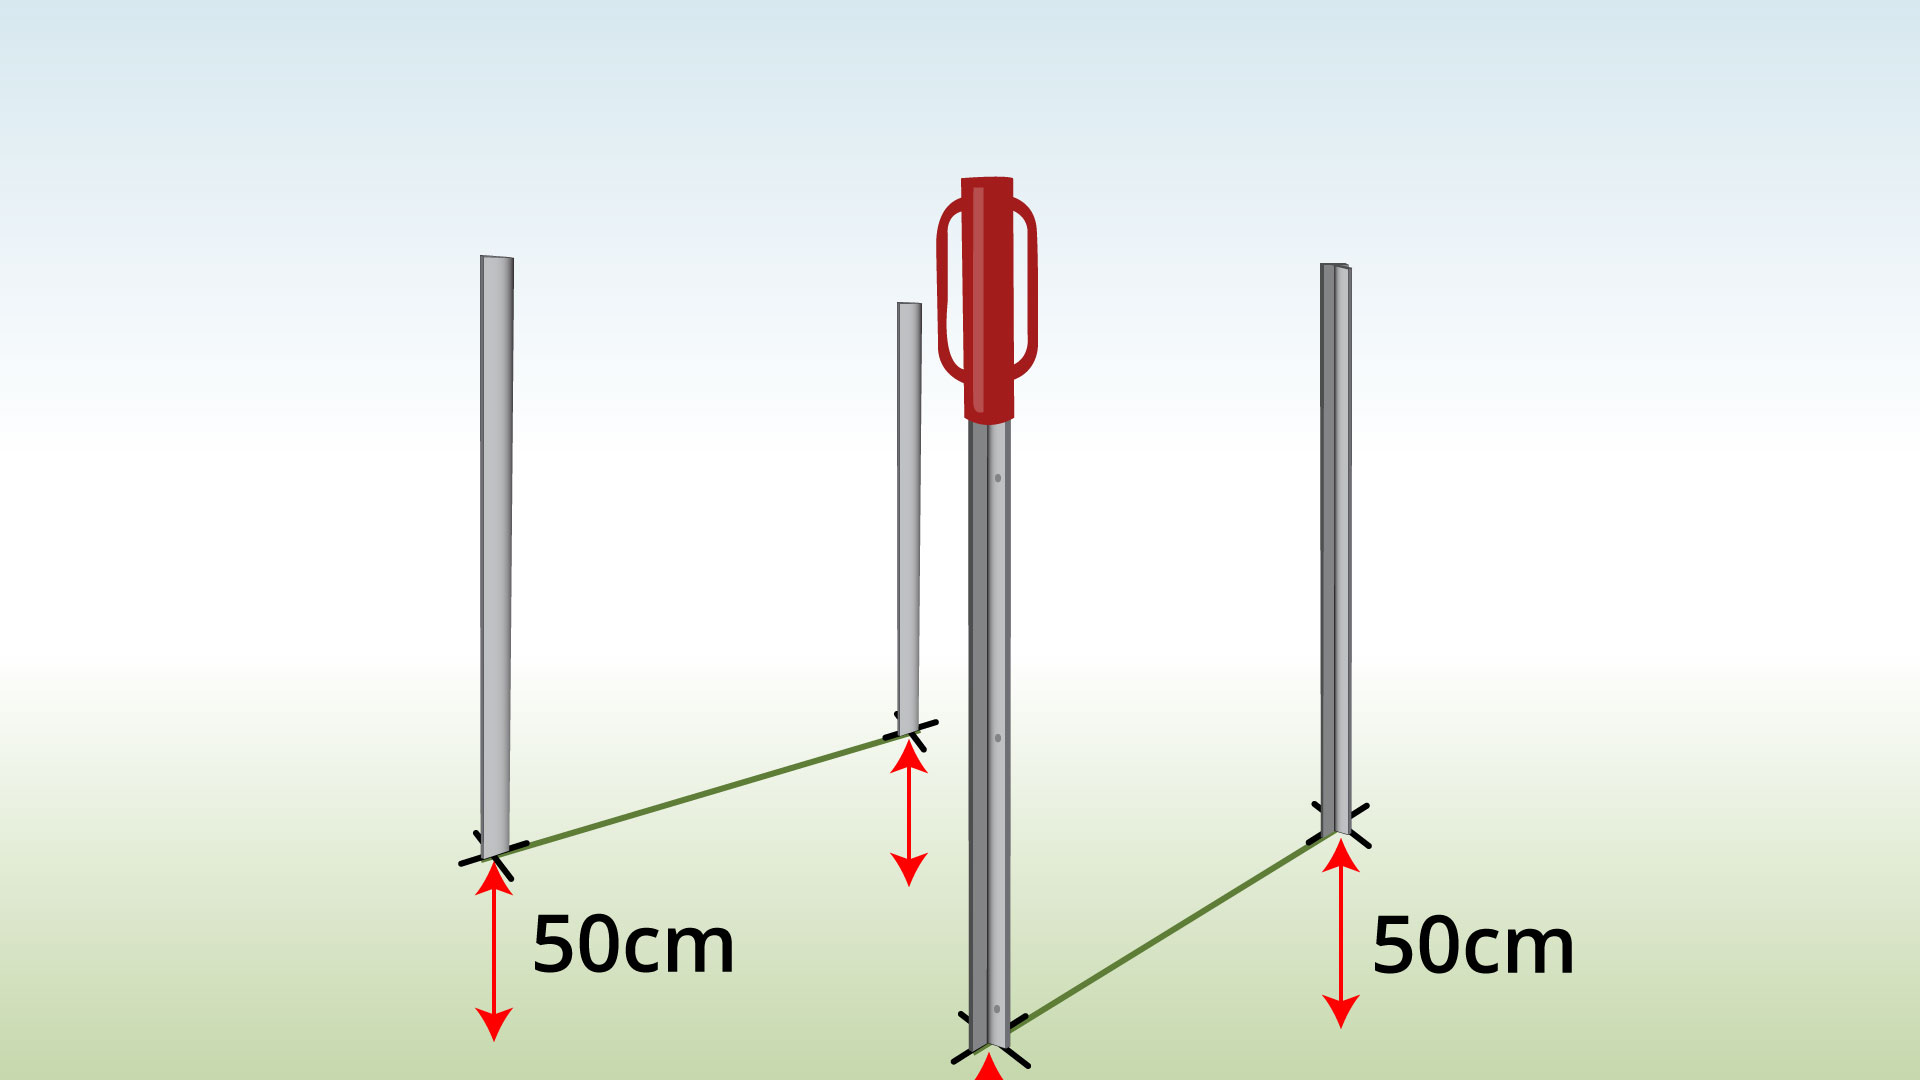
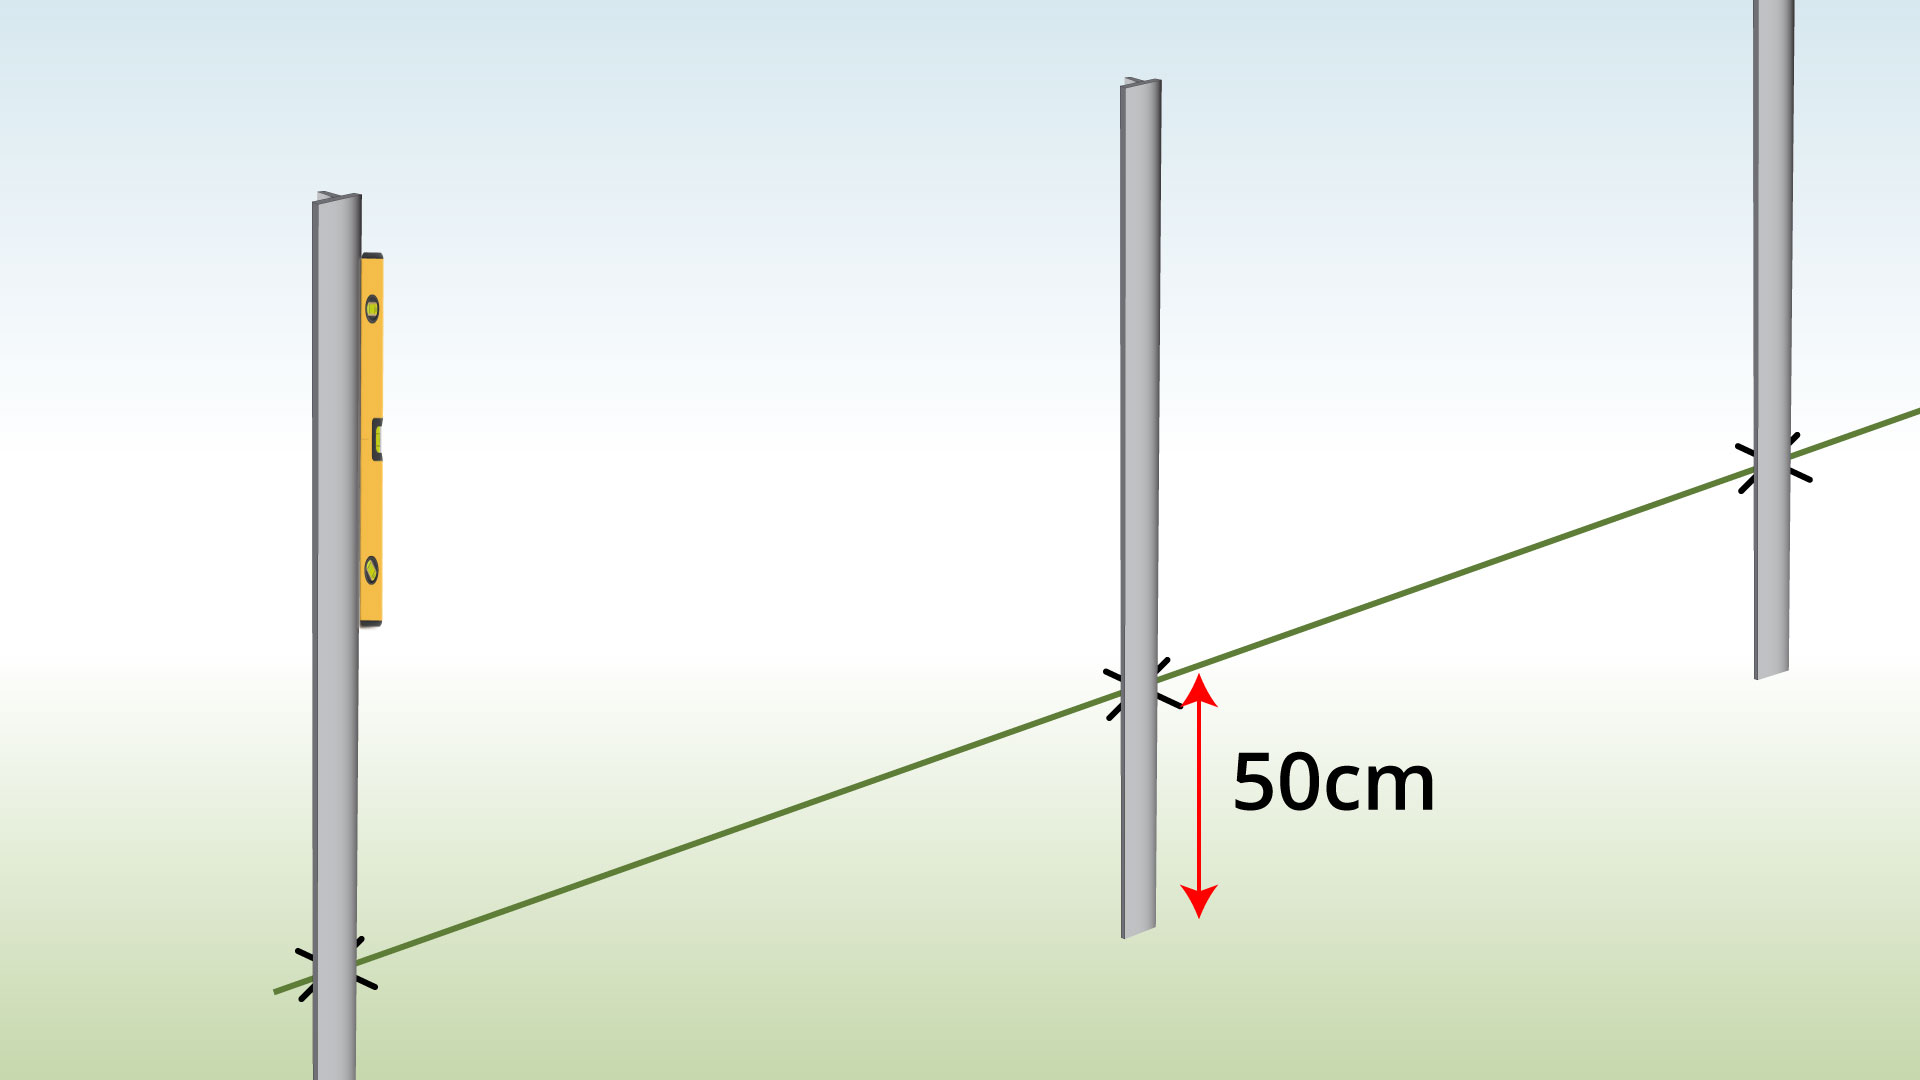
| Step 2 – Install the Posts
|
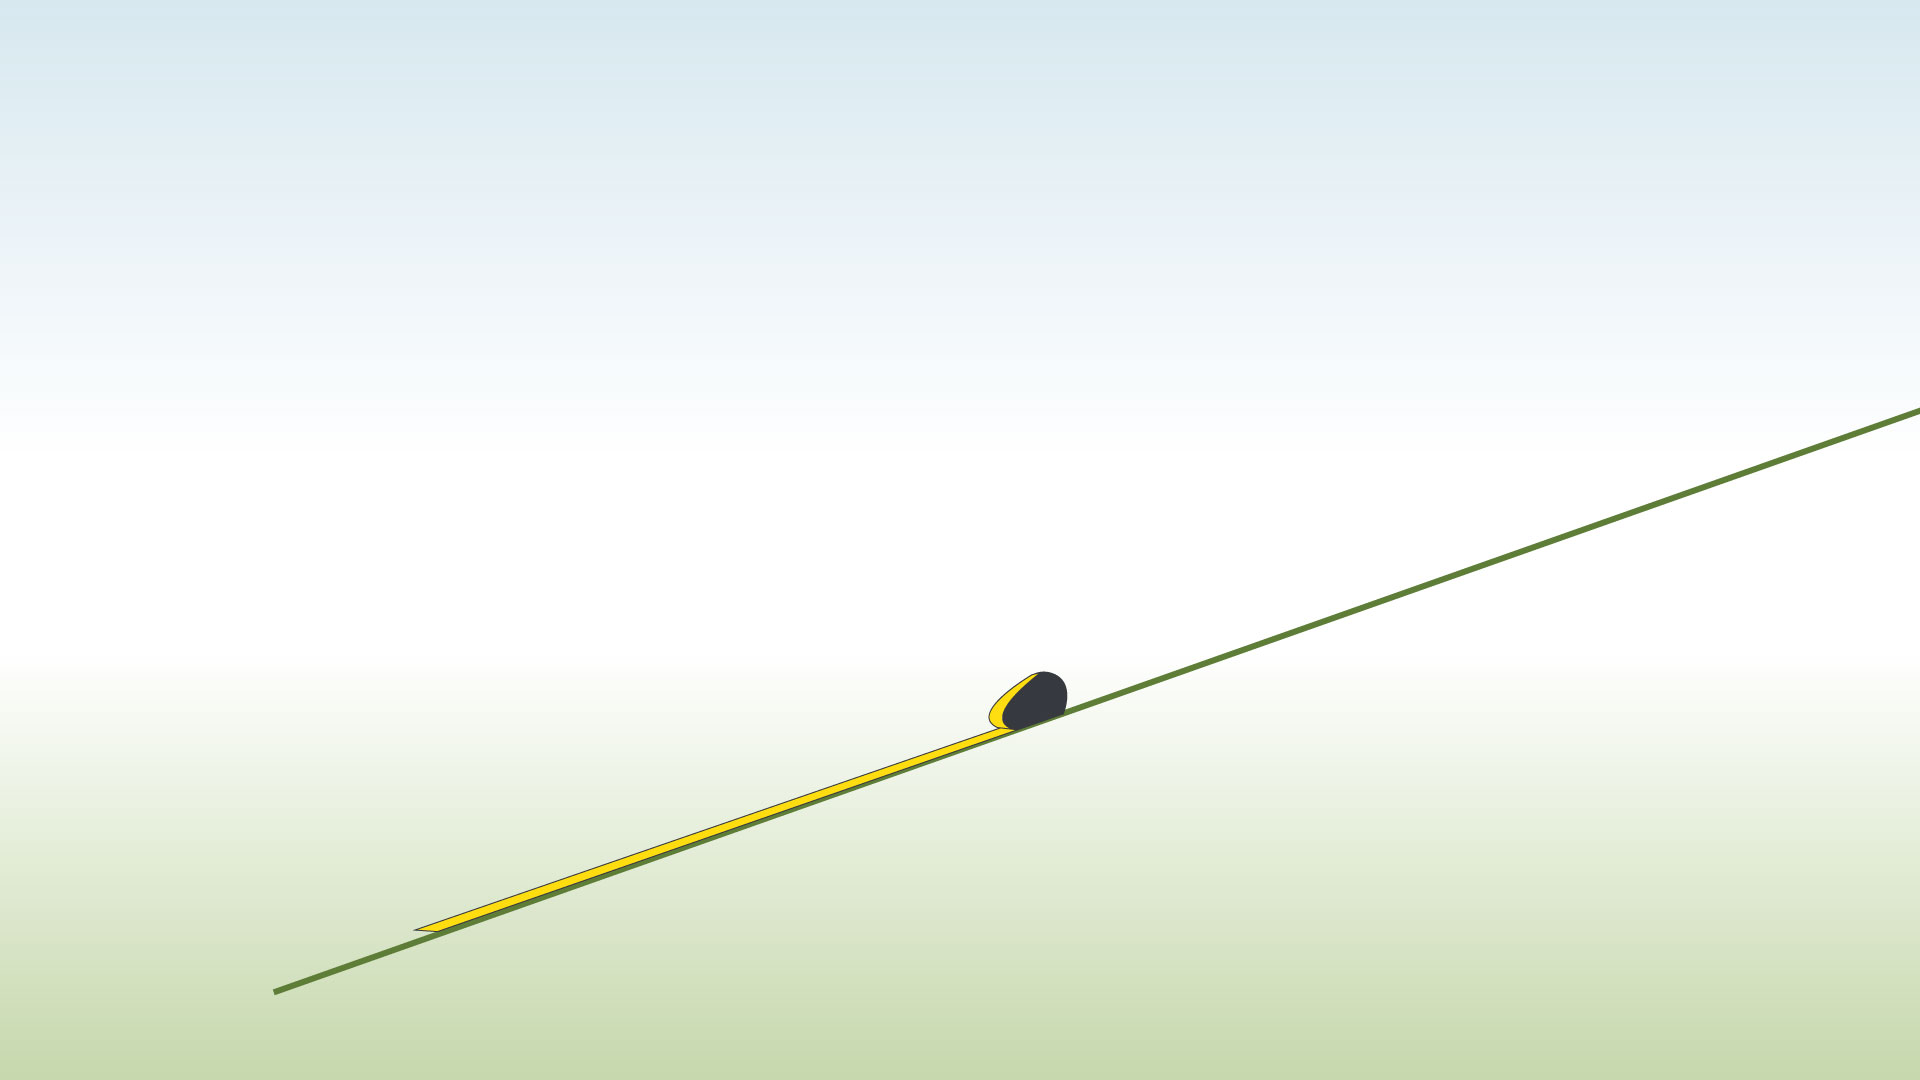
Drive your T posts at least 50cm into the ground, making sure the flat side of each post is facing inward. |
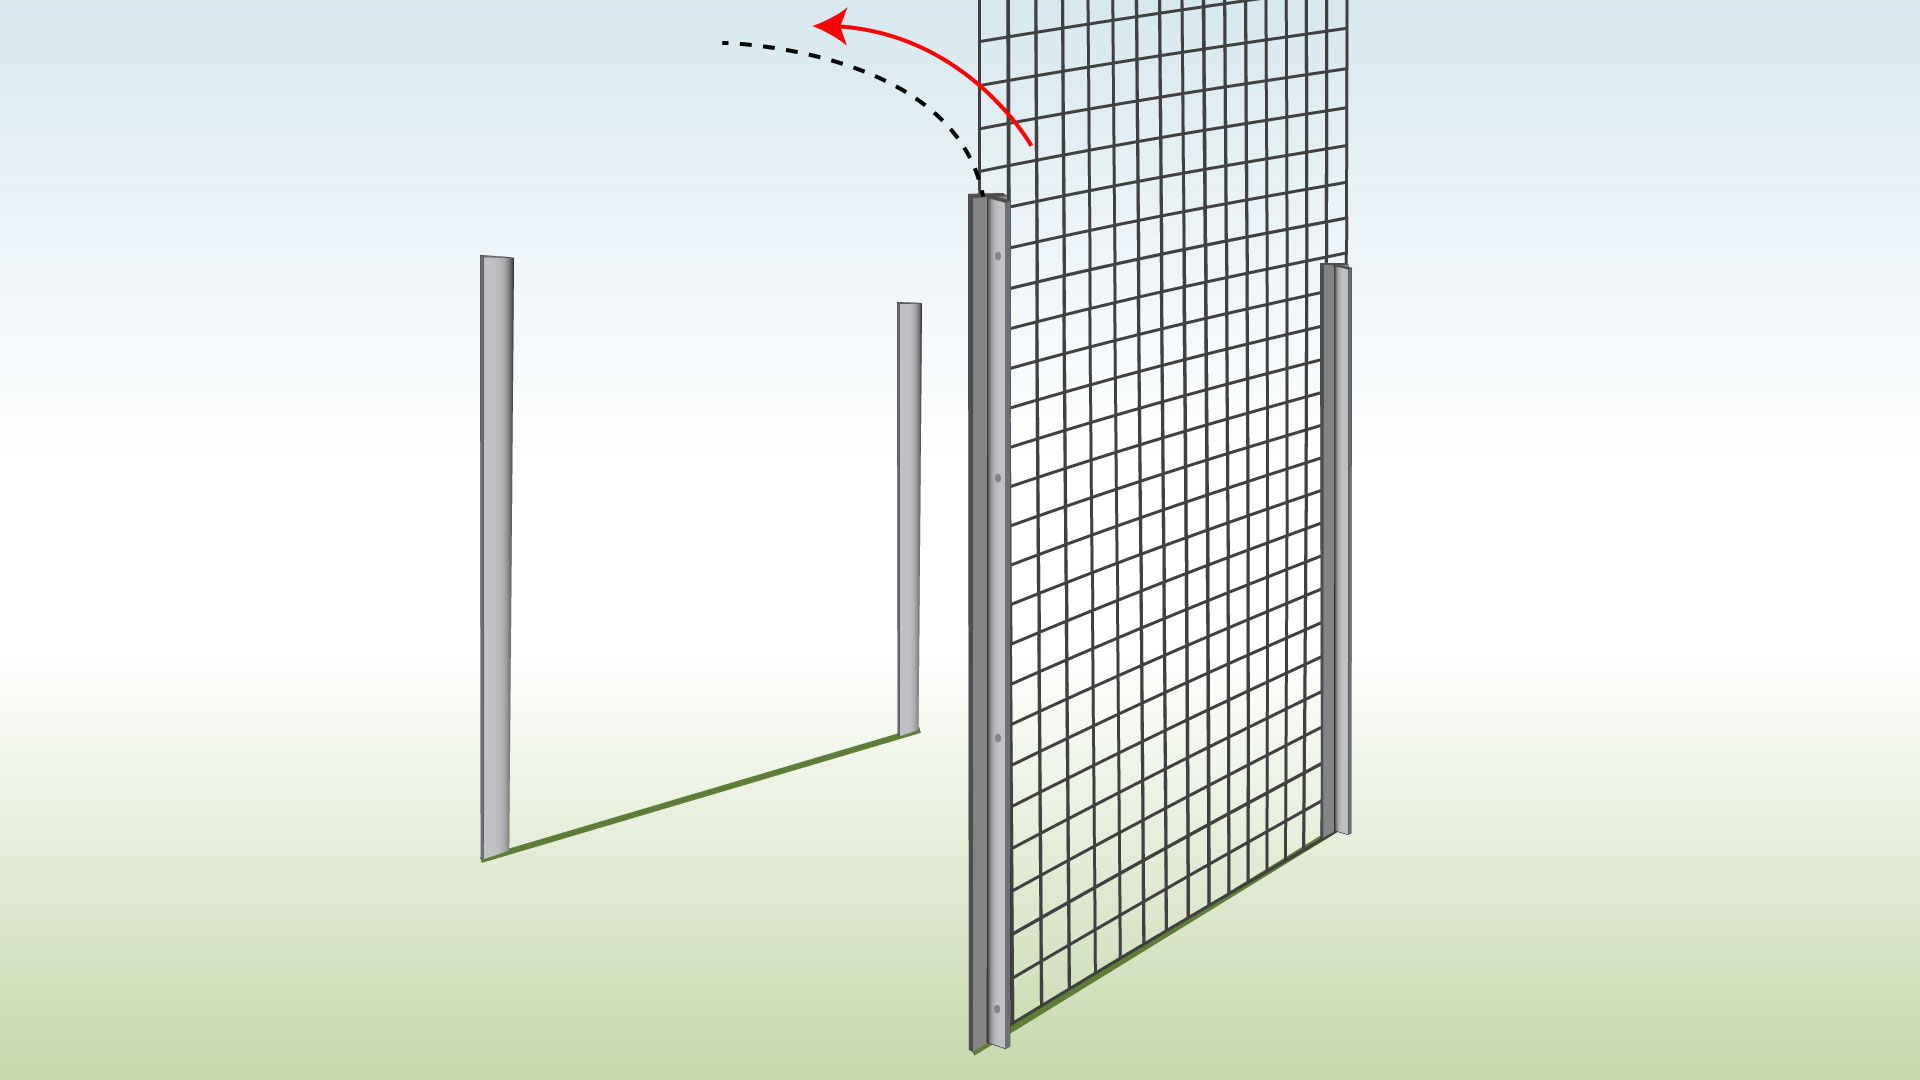
| Step 3 – Bend Panel
|
Position one of the panels and bend the top to create an archway. |
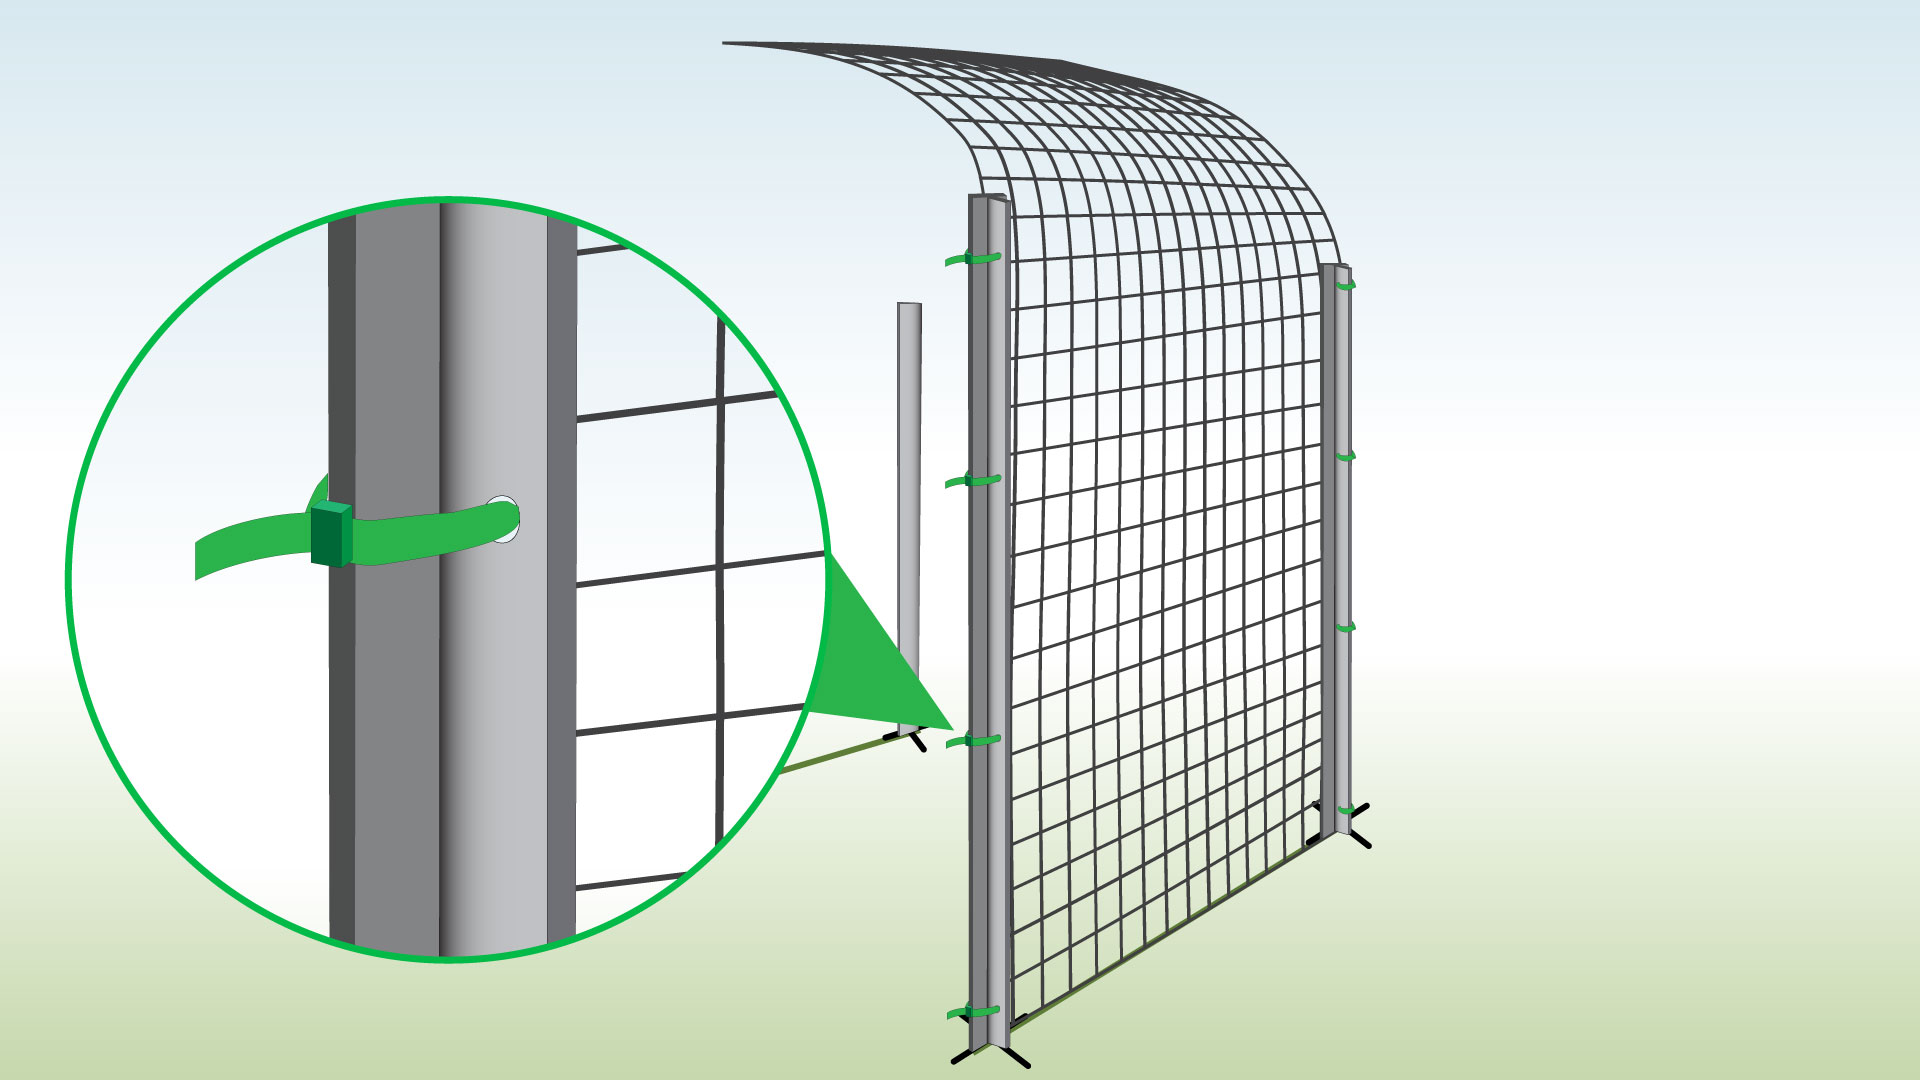
| Step 4 – Secure Panel
|
Secure it to the posts using cable ties through the pre-drilled holes.
Ensure the panel sits against the flat side of the post. |
| Step 5 – Position the Second Panel
|
Position and secure the second panel, repeating the same process. |
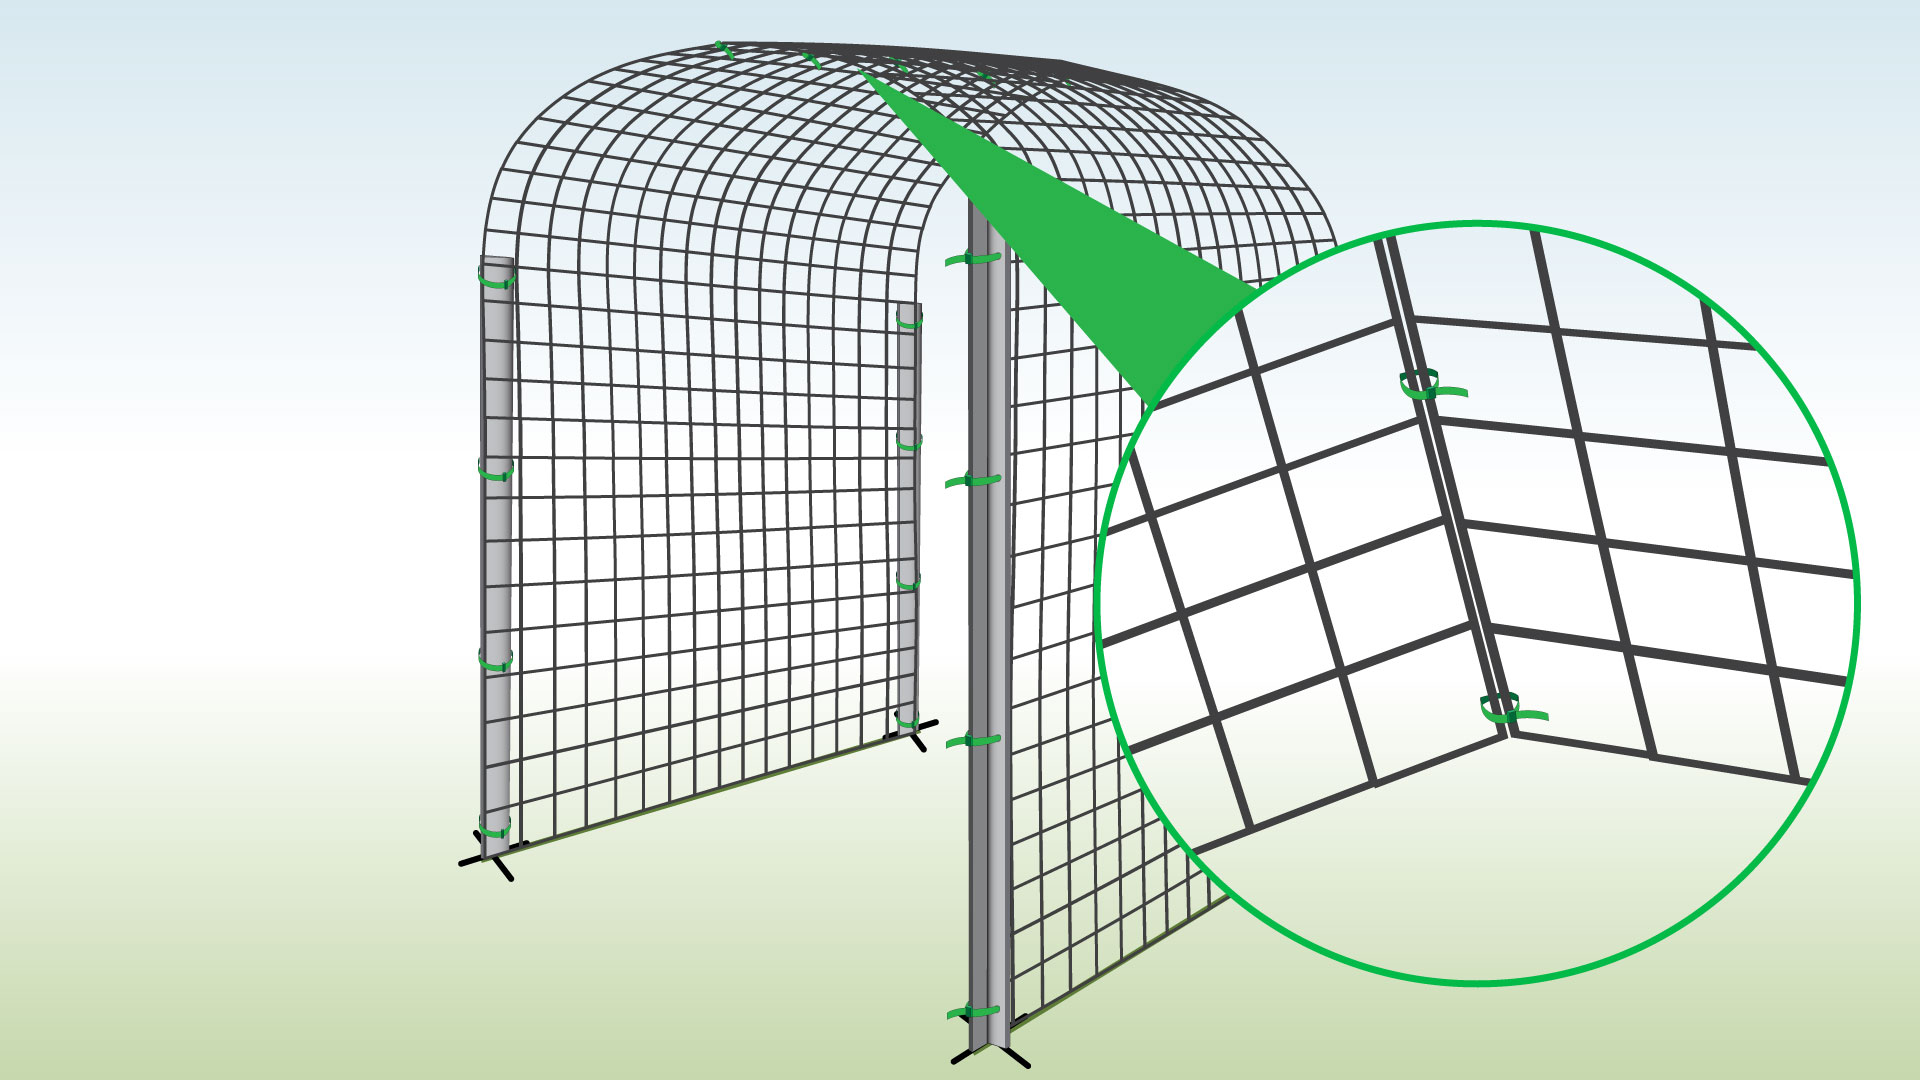
| Step 6 – Attach Them Together at the Top
|
Attach the panels together at the top using cable ties. |
| Step 7 – Start Planting
|
You can now decorate the base with mulch or start training climbing plants up your new trellis. |
How tall does a cattle panel need to be?
If you are intending to use it to fence in cows the height should be at least 90cm to stop the cow from getting its head over the top.
How do you install it?
Please refer to the diagrams above.
It is possible to install cattle panels with different methods and post types. The installation instructions we have provided outline the most common method for both metal T Posts as well as wooden posts.
Whilst wooden posts are still the most commonly used T posts tend last longer. They also offer a similar level of strength and stability for middle/intermediate posts as well as being lighter, easier to handle, and longer-lasting.
Wooden posts with struts are still used to construct corner posts to ensure a greater level of stability.
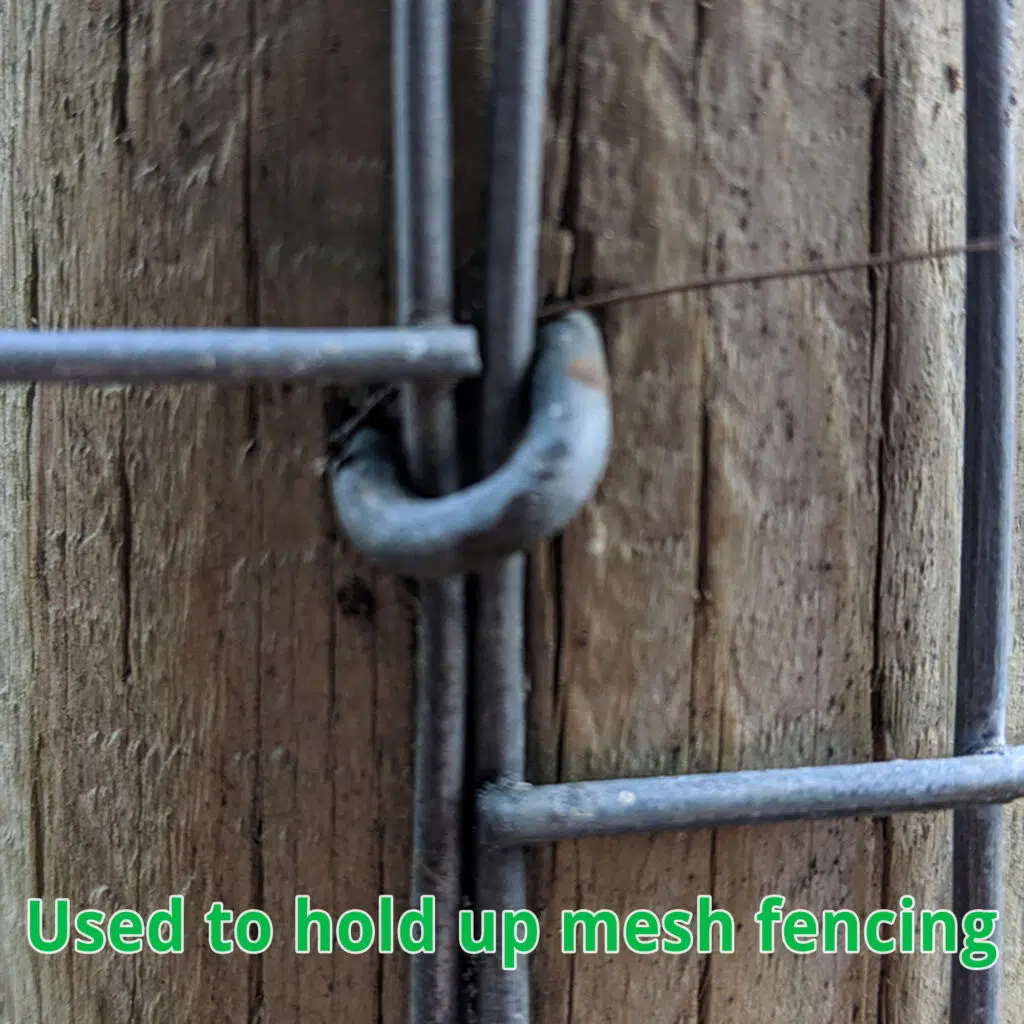
How do I attach to a wooden post?
The easiest and most common method is to hammer a U staple around mesh squares into the wooden post (view image)
Can I use cattle panels as a trellis to grow fruit and veg?
Yes, the mesh is often used to grow fruit and veg either as a flat trellis attached to a wall or an arch.

Wire Fence is part of the Super Magic Bean group - VAT Registered: 344 7643 83 - Company Registration No: 11290483