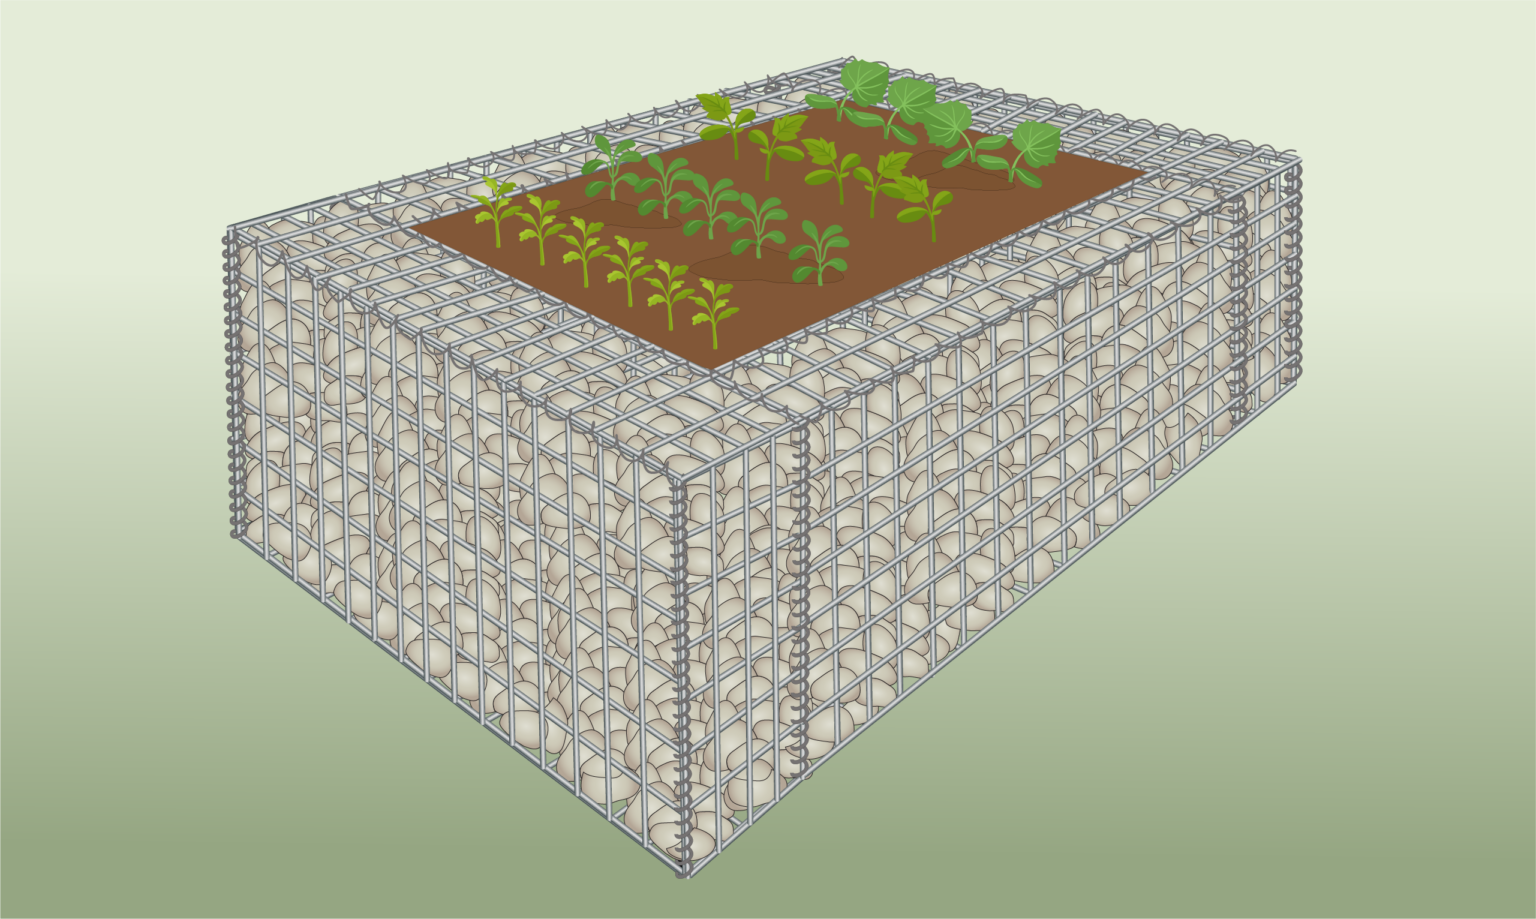
How to Build a Gabion Raised Bed

Below is a step by step guide on how to build a raised bed made from gabion baskets

- Tools Required: Protective gloves, Tape measure, Wire cutter, Plier
- Materials Required: Gabion wire cages, Geotextile, Stone, Helicals, Gabion wire, Soil
Step 1) Measure Your Space
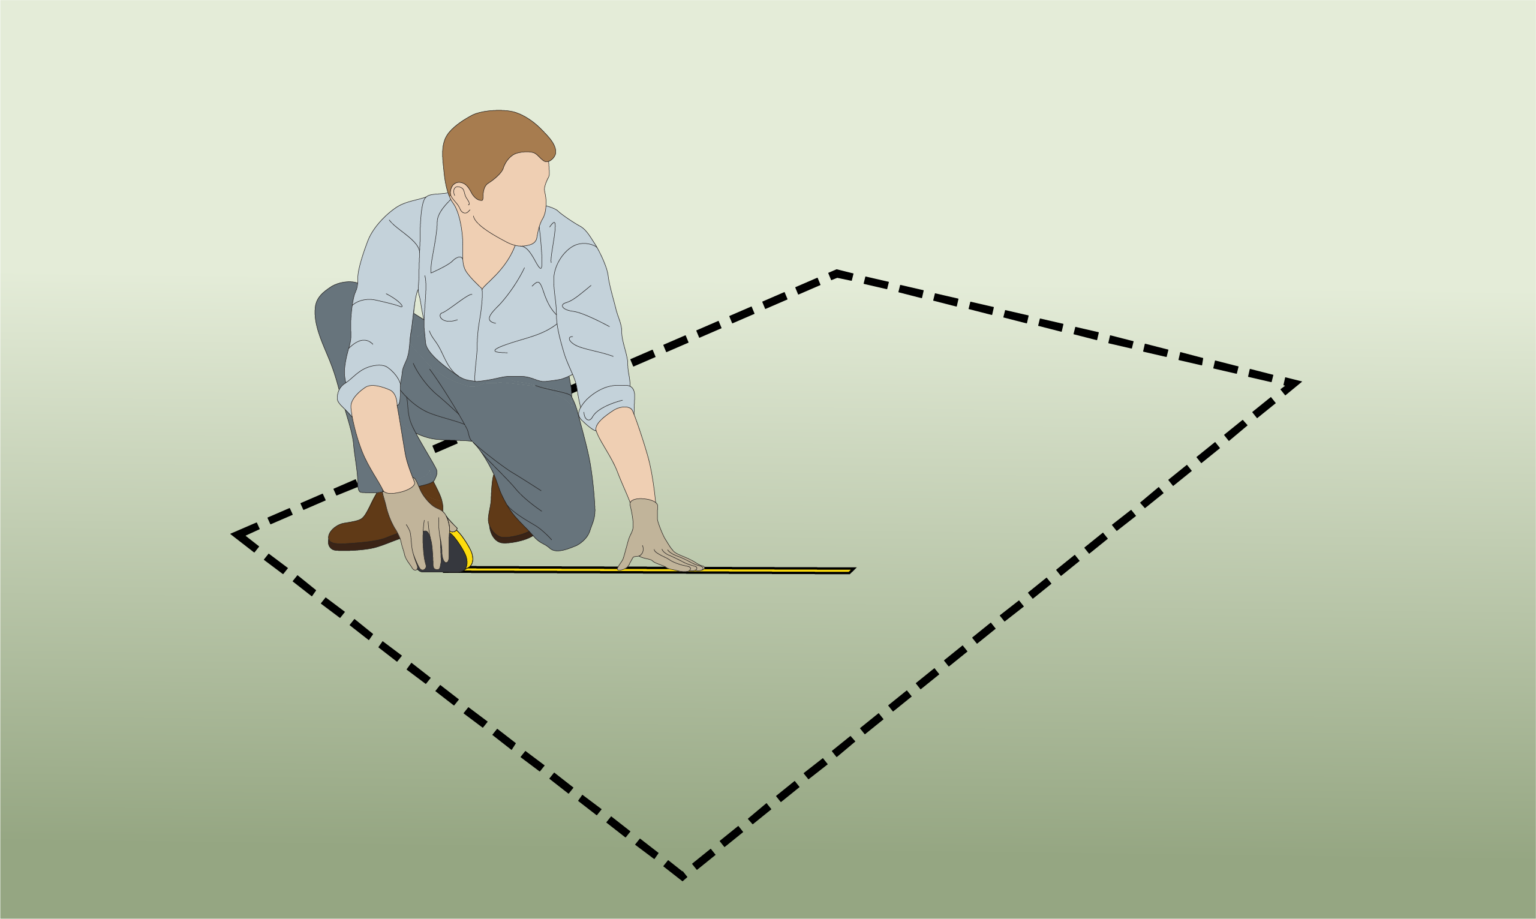
- Measure the space where you plan to place your raised bed.
- Position it in direct sunlight, near the kitchen, or close to daily activities for convenience.
- Ensure the ground is level by digging out high spots or adding paver sand or gravel to raise lower areas.
Step 2) Draw a Plan with Measurements
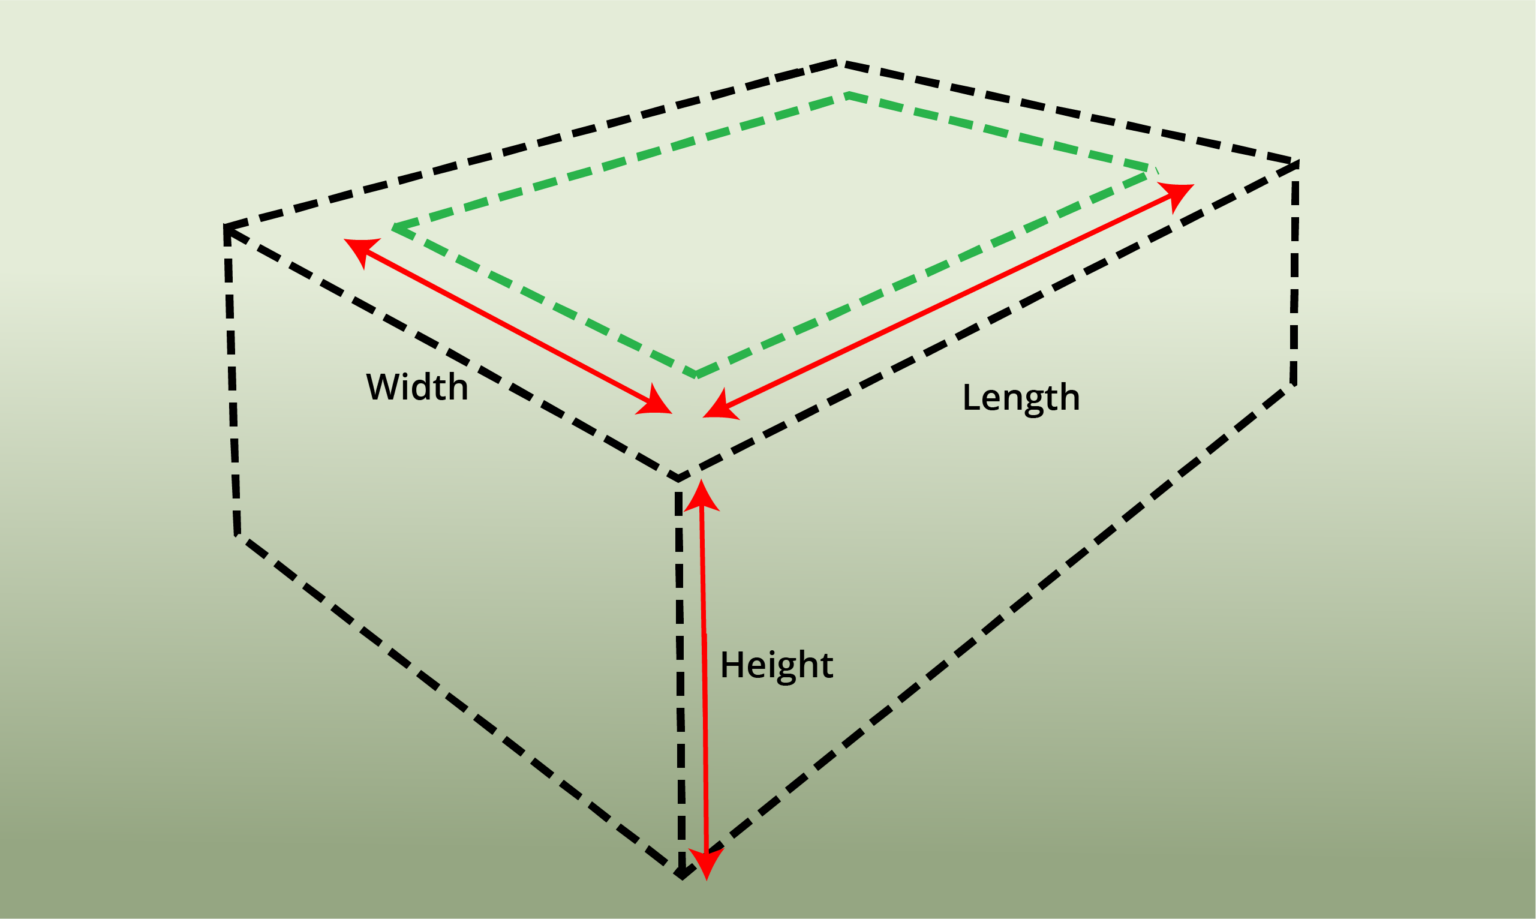
- The general dimensions for a raised bed are a width of 45cm to 1.2m and a length of 1.2m to 3m.
- The depth should be at least 45cm to accommodate the root balls of kitchen garden plants.
- Adjust based on your preferences and the specific needs of your plants.
Step 3) Calculate What You’ll Need

- In the process of how to build a gabion raised bed, calculate how many baskets you will need for your structure.
- Additionally, determine the amount of helicals and stones required for your project.
Step 4) Assemble Baskets Without Lids
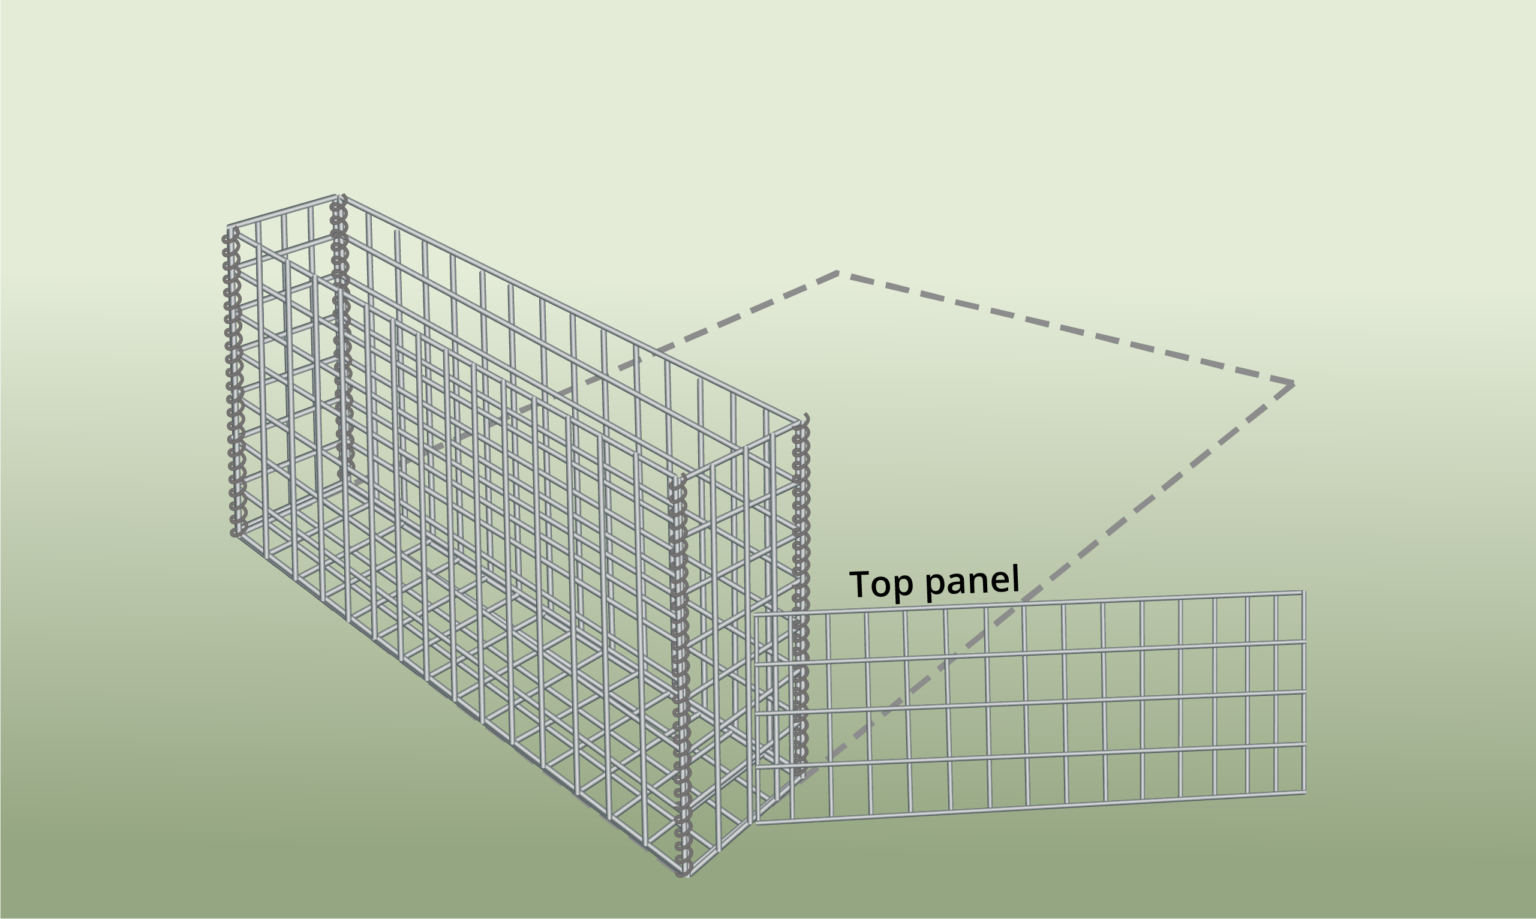
- Start assembling the gabions required for your structure.
- At this stage, avoid securing the lid panel so you can fill the gabions with stones.
- Alternatively, you can remove the lid and set it aside for later use.
Step 5) Place in Final Location
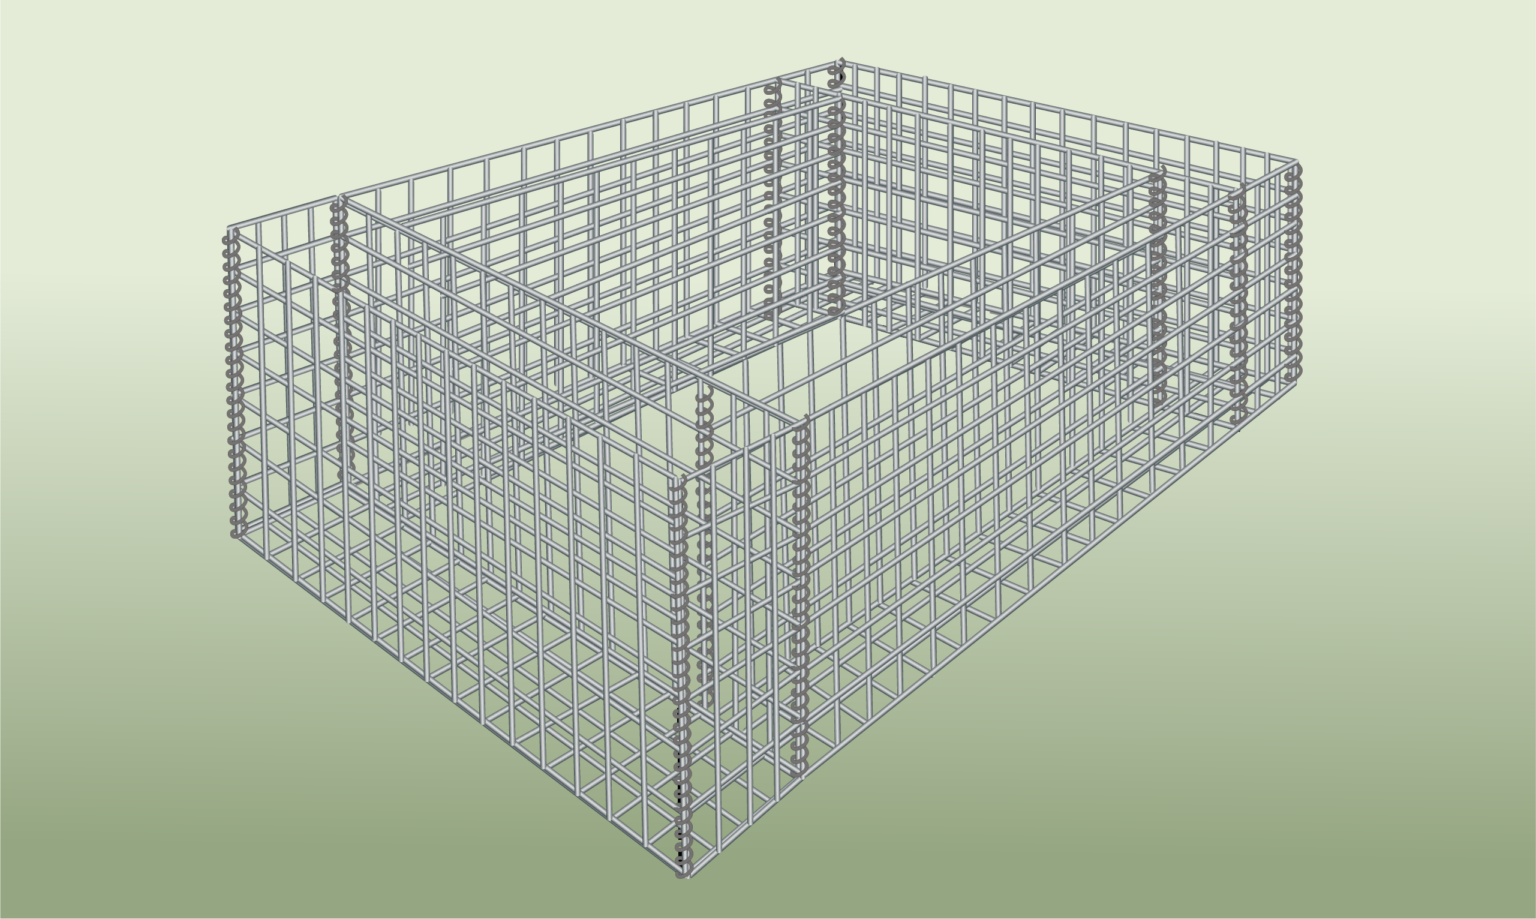
- Position the gabions in their final location, ensuring the adjoining corners are pushed together as closely as possible.
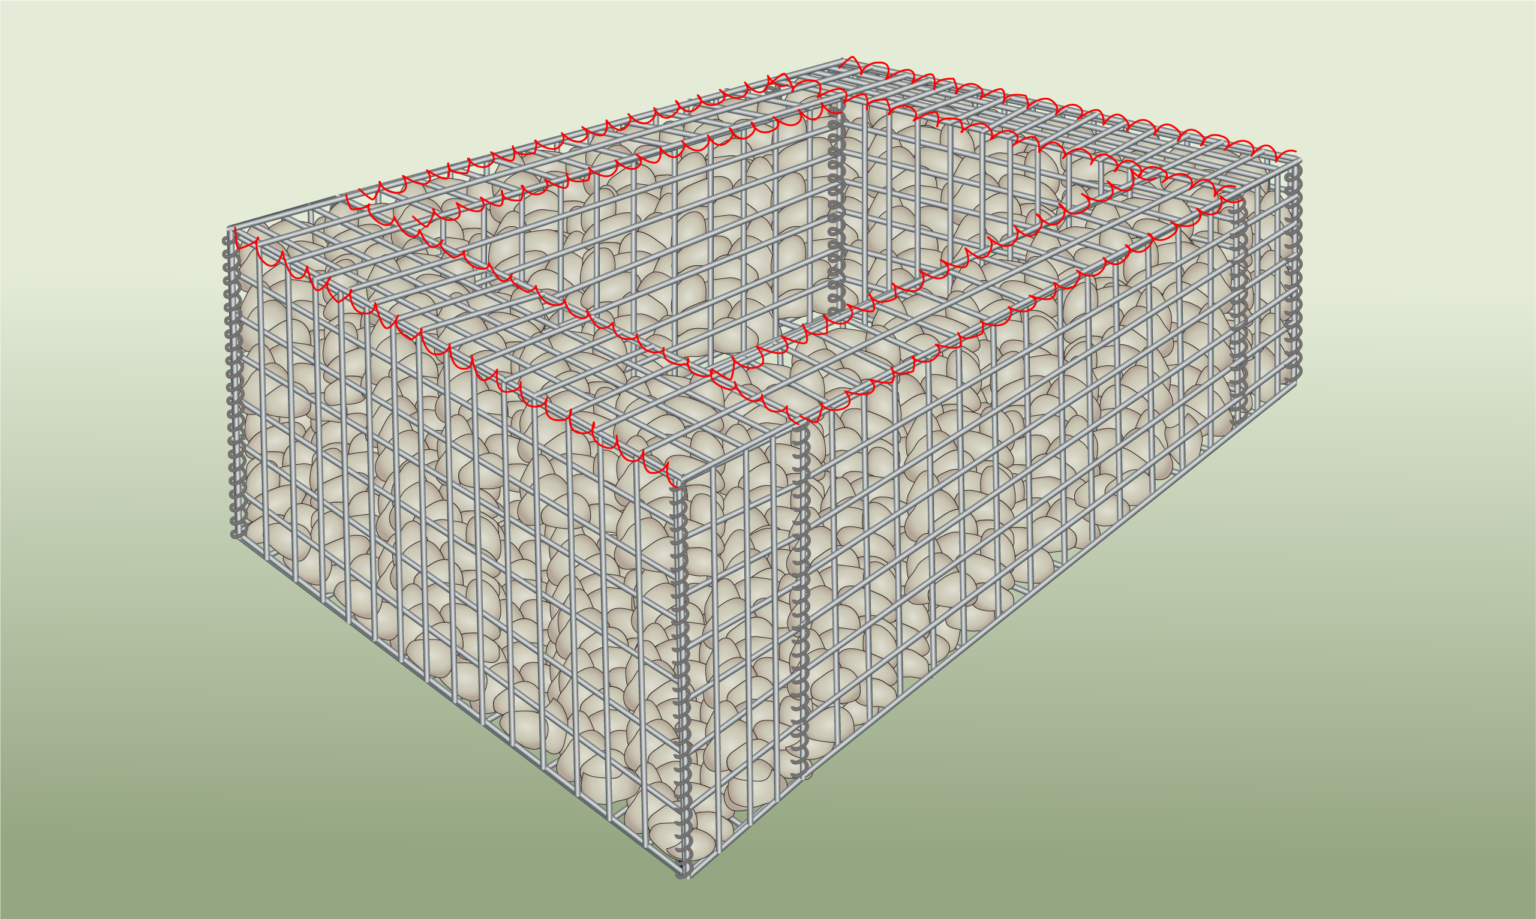
Step 6) Attach Baskets Together
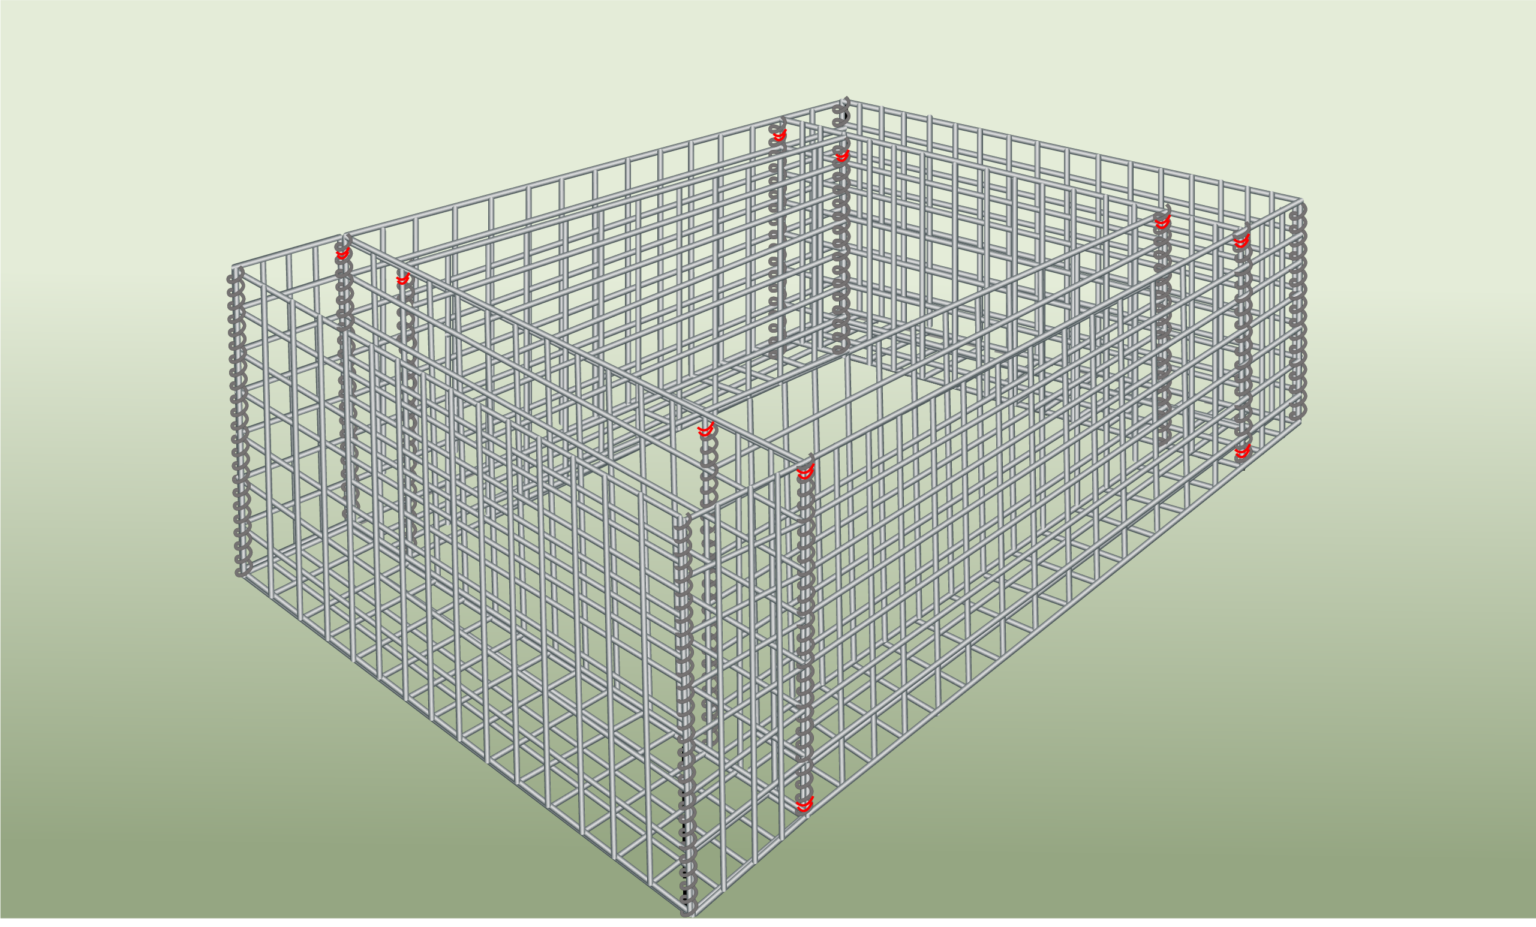
- To prevent any movement, secure the adjoining corners of the baskets at both the top and bottom with a piece of tying wire.
Step 7) Cut Off Excess
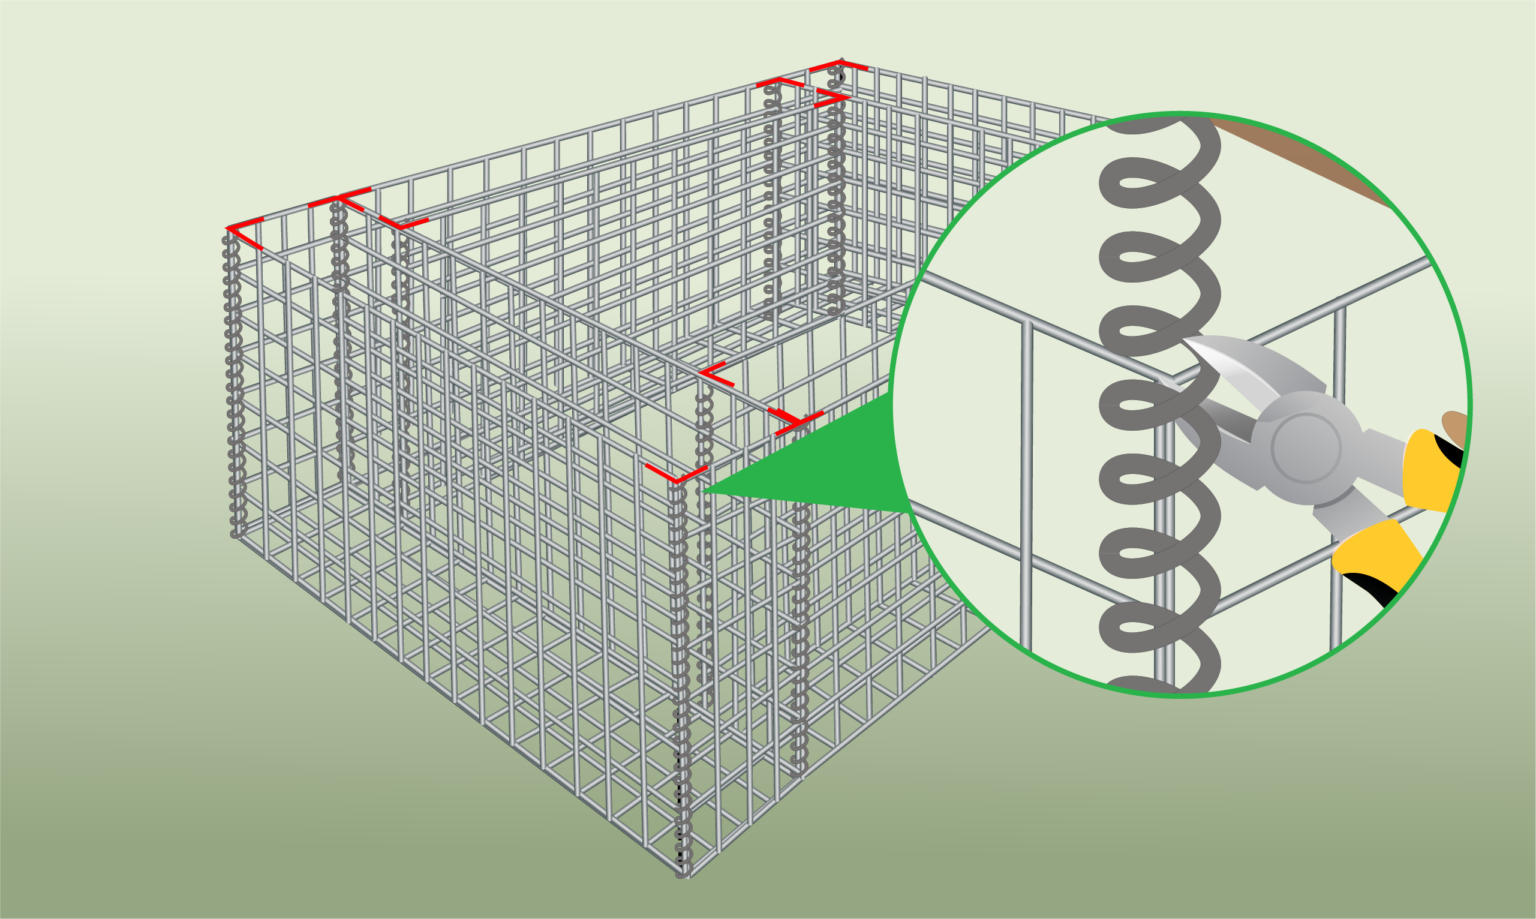
- Cut off any excess length of helical or tying wire as needed using wire cutters.
- Then, use pliers to pinch each end of the helical wire to secure it and prevent it from slipping out.
Step 8) Fill with Stone
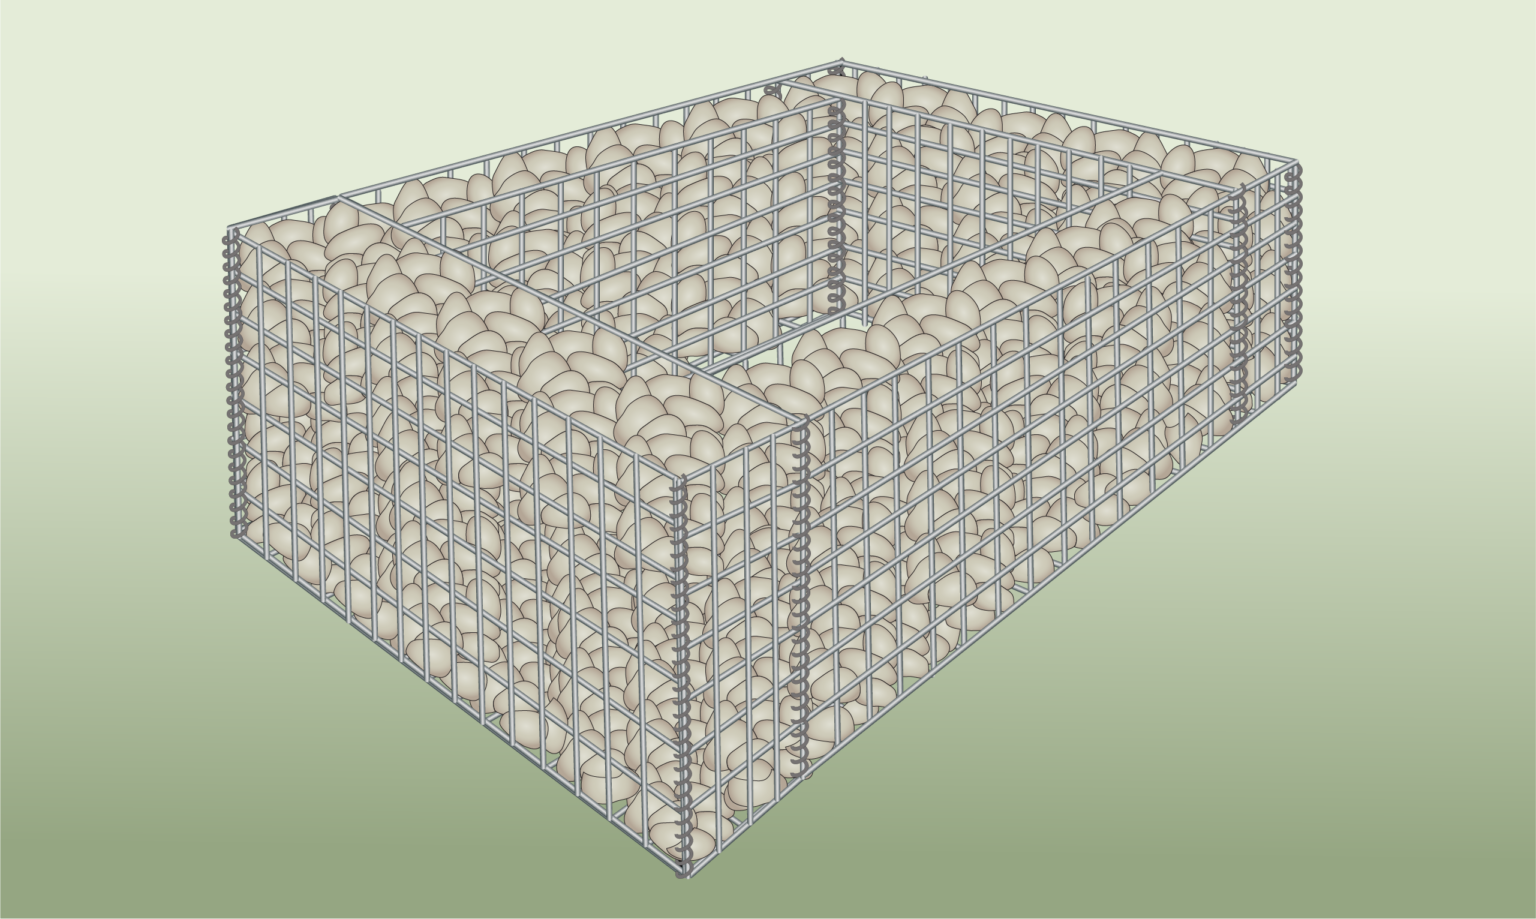
- Fill each basket with the amount of gabion stones you’ve calculated.
Step 9) Secure the Lids
- Secure the lids using tying wire at both the front and back.
- Make sure they rest comfortably on the stones without any gaps.
Step 10) Add Geotextile
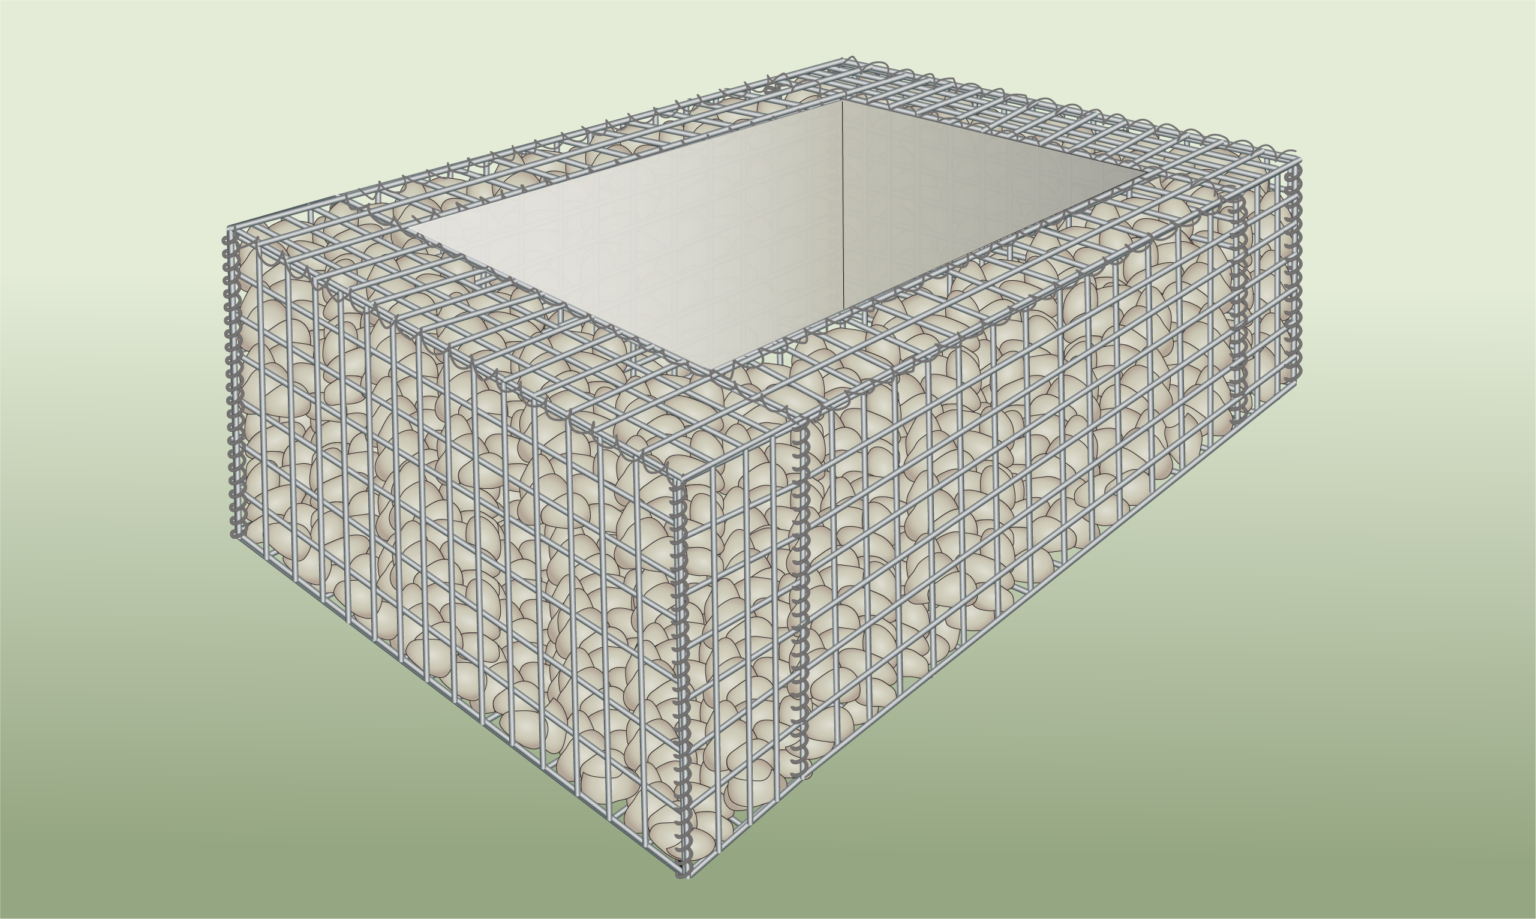
- The inner side of your structure should be covered with geotextile to prevent soil and roots from pushing their way through the stones.
Step 11) Fill with Soil
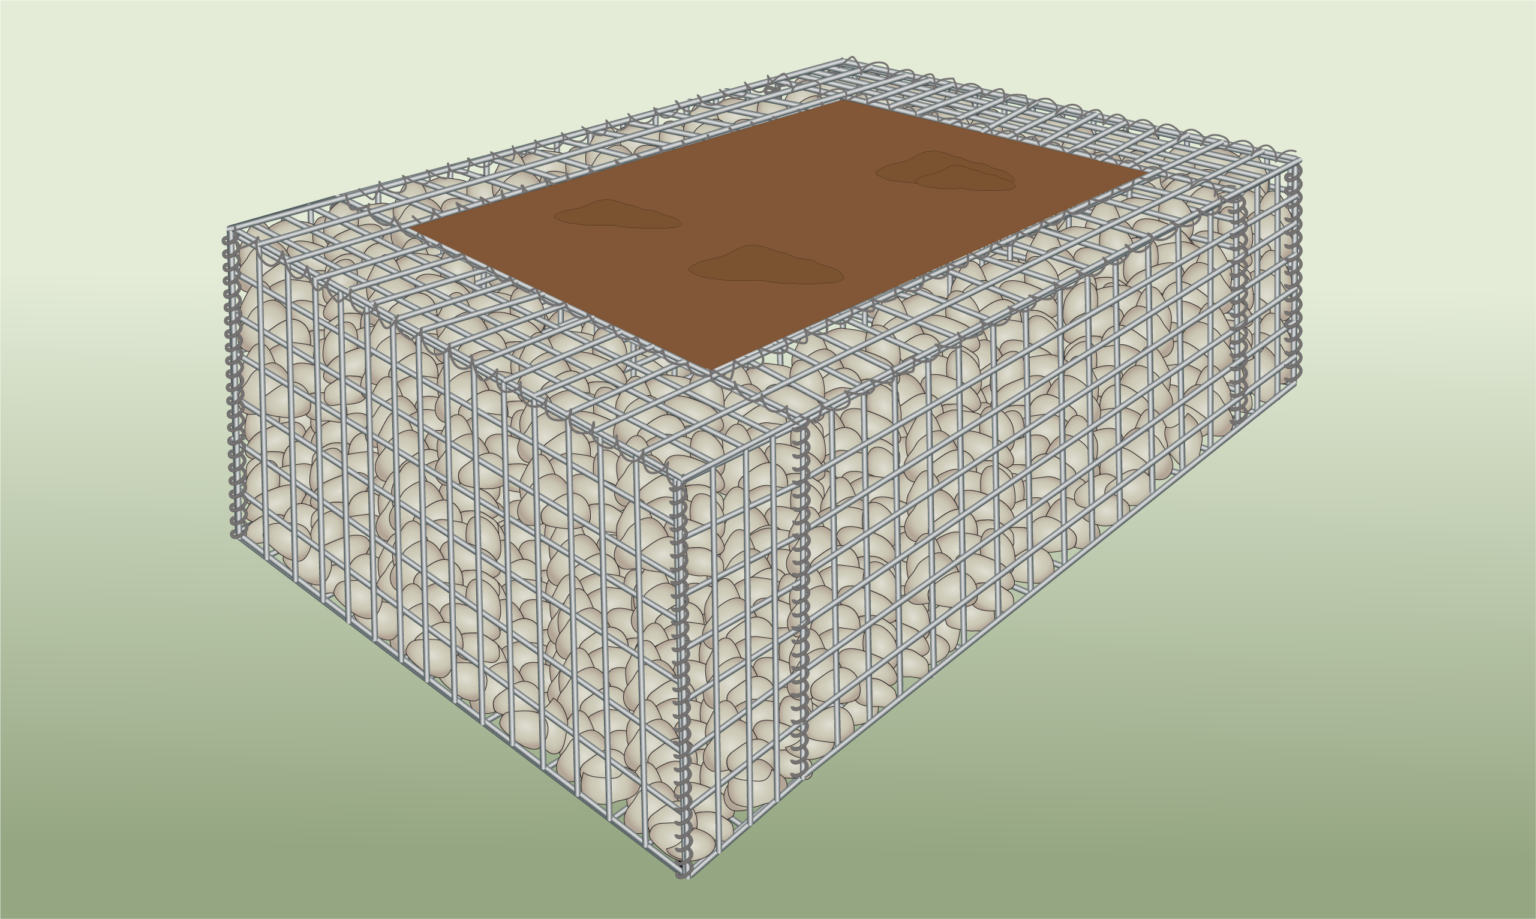
- Fill the inner side with a fertile, free-draining soil mixture.
- Finally, you can use a rake to level the soil.
Step 12) Start Planting
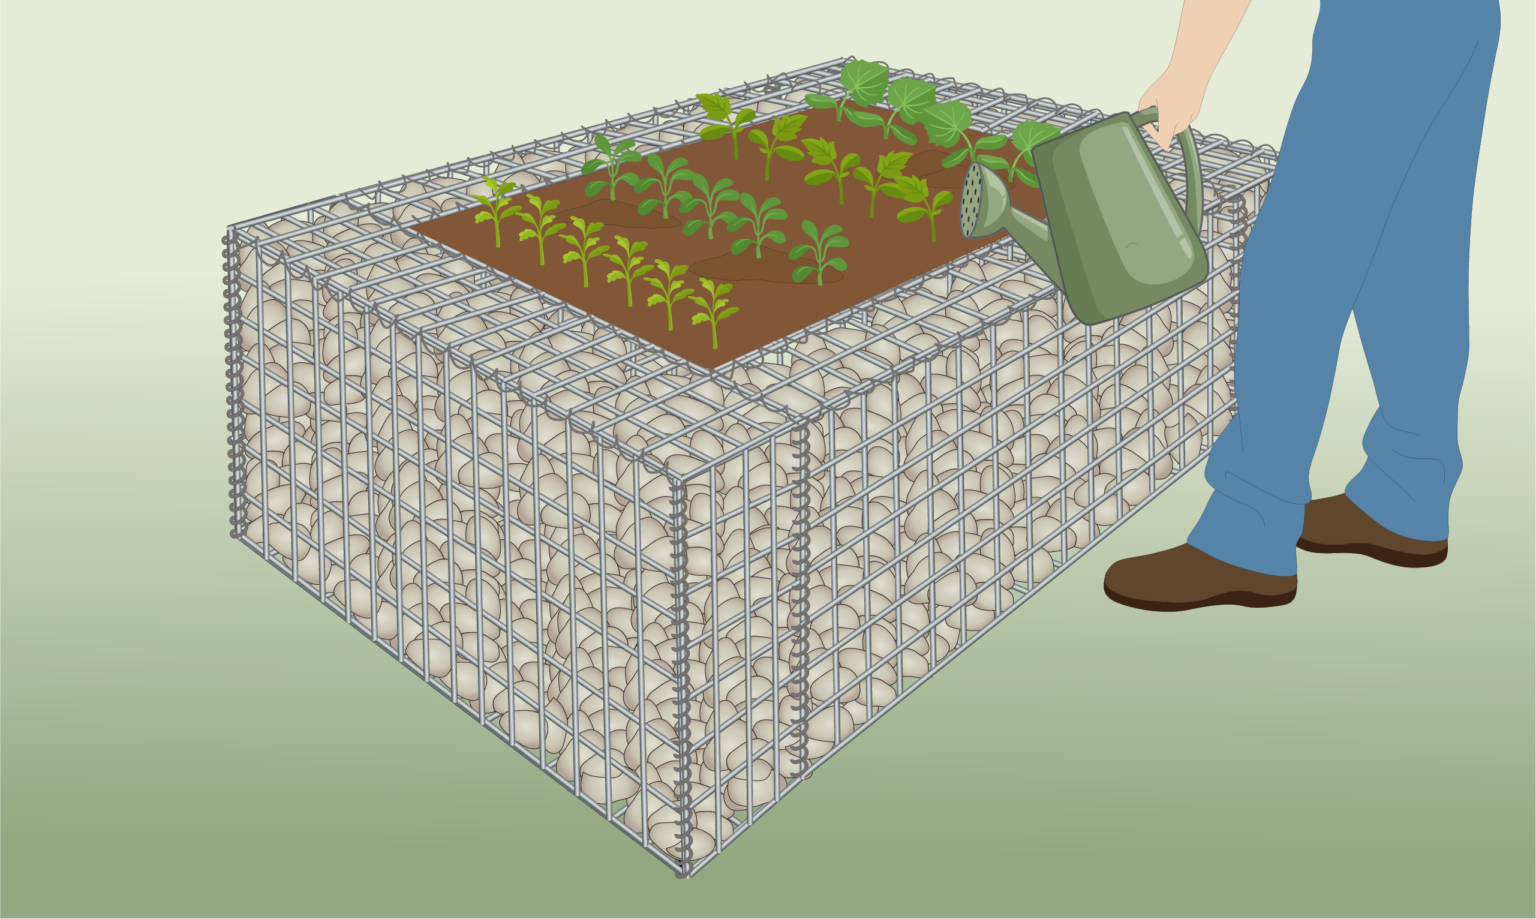
- You can now begin planting in your diy planters and look forward to enjoying the fruits and vegetables!
Pros and Cons
- Healthy, nutrient-rich soil for a fresh start.
- Soil in raised beds stays warmer, allowing for a longer growing period.
- Greater vertical space gives roots room to spread and grow deeper.
- Faster drainage means you’ll need to water more often to maintain moisture levels.
Tips and Tricks
Before starting your gabion raised bed project, it’s important to plan carefully and consider a few key factors. The points below are based on our team’s experience designing and installing gabion structures.
- When planning how to build a gabion raised bed, get creative with the design. Mix and match different colored stones, or experiment with the form and shape of the bed itself.
- Instead of long, continuous beds that can be tricky to manage, consider using several smaller ones for easier maintenance.
- Place the bed in a location that gets at least 6 hours of direct sunlight daily, preferably on the south side of taller structures like fences or trees.
- Ensure the bed is positioned on level ground for optimal setup.
- You can calculate how much stone you’ll need using our stone calculator.
FURTHER READING
- How to Assemble Gabion Baskets – Step by step instructions on how to assemble baskets.
- DIY Round Gabion Planter – A guide showing you how to create a diy round planter.
- DIY Gabion Planter – Learn how to make your own diy planter.
- How to Fill Gabions – Learn how to fill cages using different methods.
- Gabion Learning Hub – a library of help videos
- Shop for Gabion Baskets – BBA-certified gabions made to measure
- Shop for Gabion Stone – dark and light stone suited to filling gabions
VIDEO

Written By
This blog was created by our Technical Illustrator, Timi and reviewed by our Founder, John.
Below you’ll find examples of our real-life gabion raised bed builds and customer projects. We’ve opted for technical illustrations for the instructions found in this blog because they provide better clarity on mesh placement and structural details that can get lost in real-life photography.


Published by
