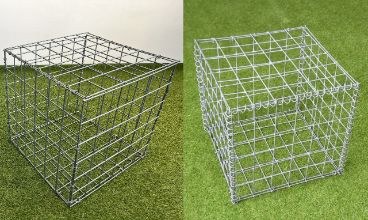
How To Assemble Gabion Baskets

Below you will find a step-by-step guide on how to assemble gabion baskets using different methods.

- Experience Required: Low
- Tools Required: Protective gloves, Wire cutter, Pliers
- Materials Required: Gabions, Lacing wire or Helicals
Step 1) Delivered Flat Packed

- Gabions are delivered flat-packed and come with free tying wire, pre-clipped with steel clips.
- You can also order additional accessories, such as helicals, for quicker assembly.
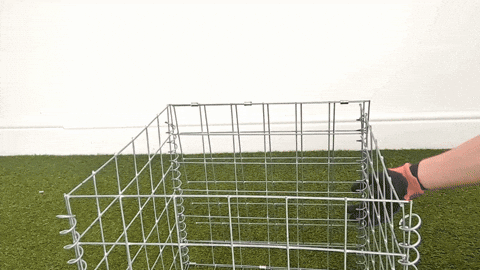
Step 2) Unfold the Gabion
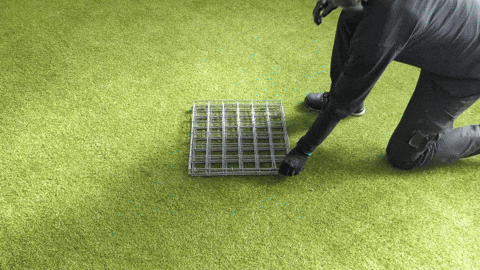
- In the process of how to assemble gabion baskets, unfold them and lay it flat on the ground.
- Cages consist of 6 panels: top, bottom, front, back, and two sides.
- The base is pre-clipped to all four sides, and the lid is attached to the back panel.
METHOD A – Step 3) Cut the Tying Wire
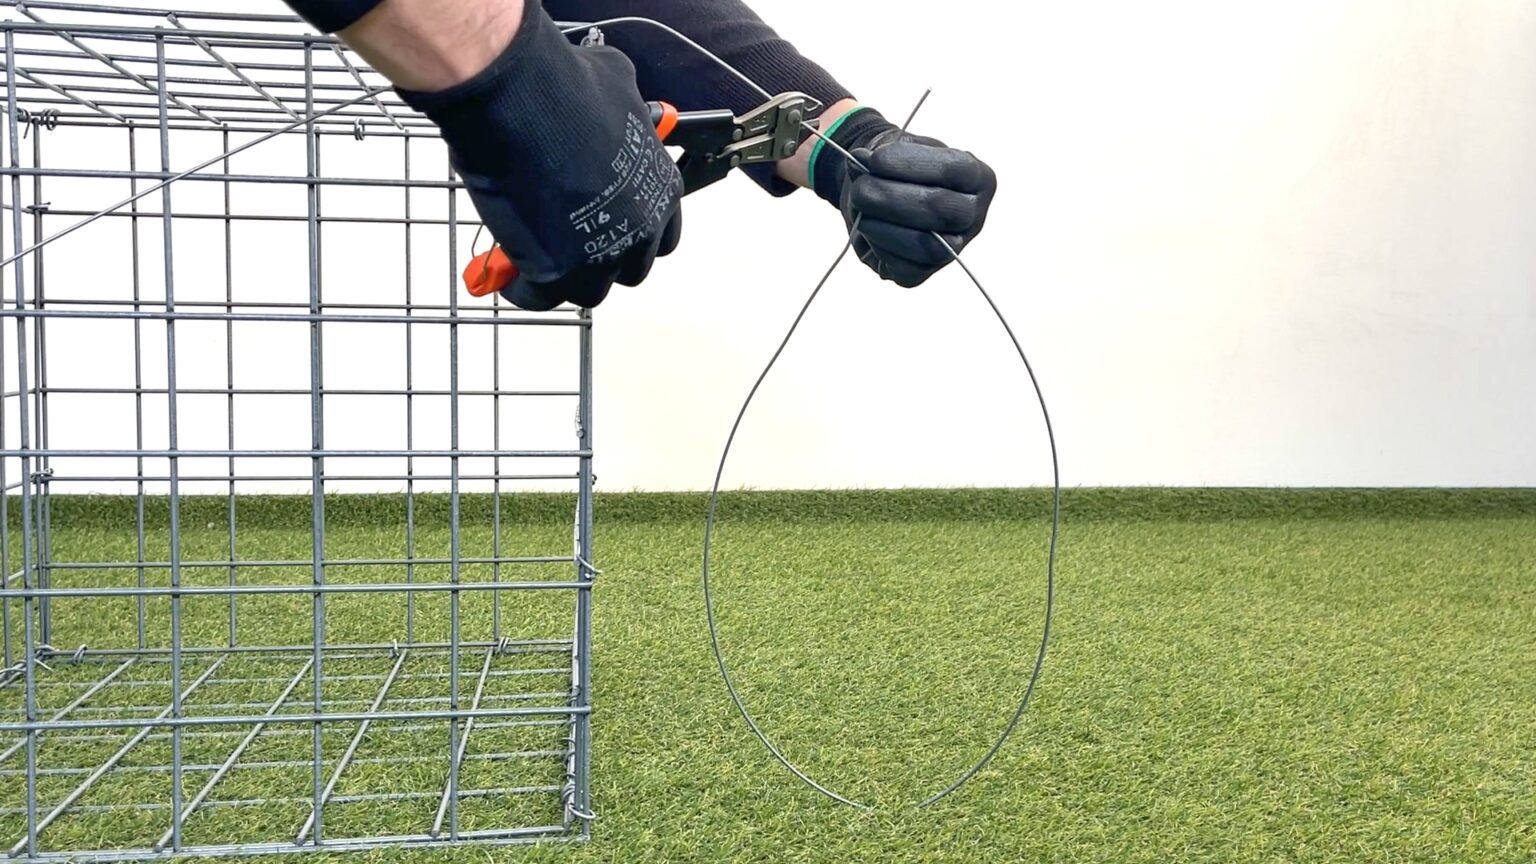
- Use a wire cutter to cut the tying wire to size: for every 1 meter of length, you’ll require approximately 1.5 meters of wire.
- Alternatively, you can calculate it by taking twice the length of the panel.
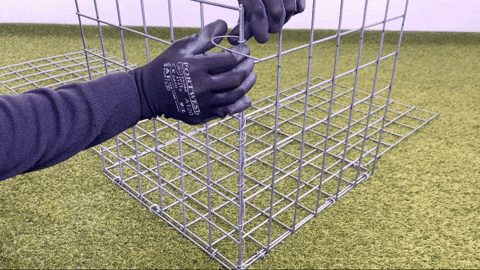
METHOD A – Step 4) Join Adjacent Panels
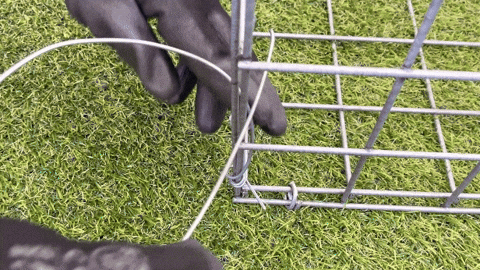
- Join adjacent panels using a continuous lacing wire.
- Start by wrapping the wire around the first mesh hole three times.
- Then, thread the wire in and out to create a double-loop around each hole for added strength, pulling the wire tight as you go.
METHOD A – Step 5) Secure Wire at the Top
- Wrap the wire around the last mesh hole three times to secure it.
METHOD A – Step 6) Cut Off Excess Wire
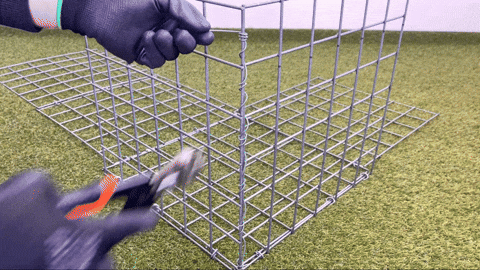
- Use wire cutters to trim off the excess tying wire.
METHOD A – Step 7) Close Lid & Finish Up

- After filling the basket with stones, close the lid snugly with no gaps.
- Secure the top edges with tying wire as before.
- Cut any excess wire, and you’ve finished the process of how to assemble a gabion basket.
METHOD B – Step 3) Calculate & Prepare Helicals
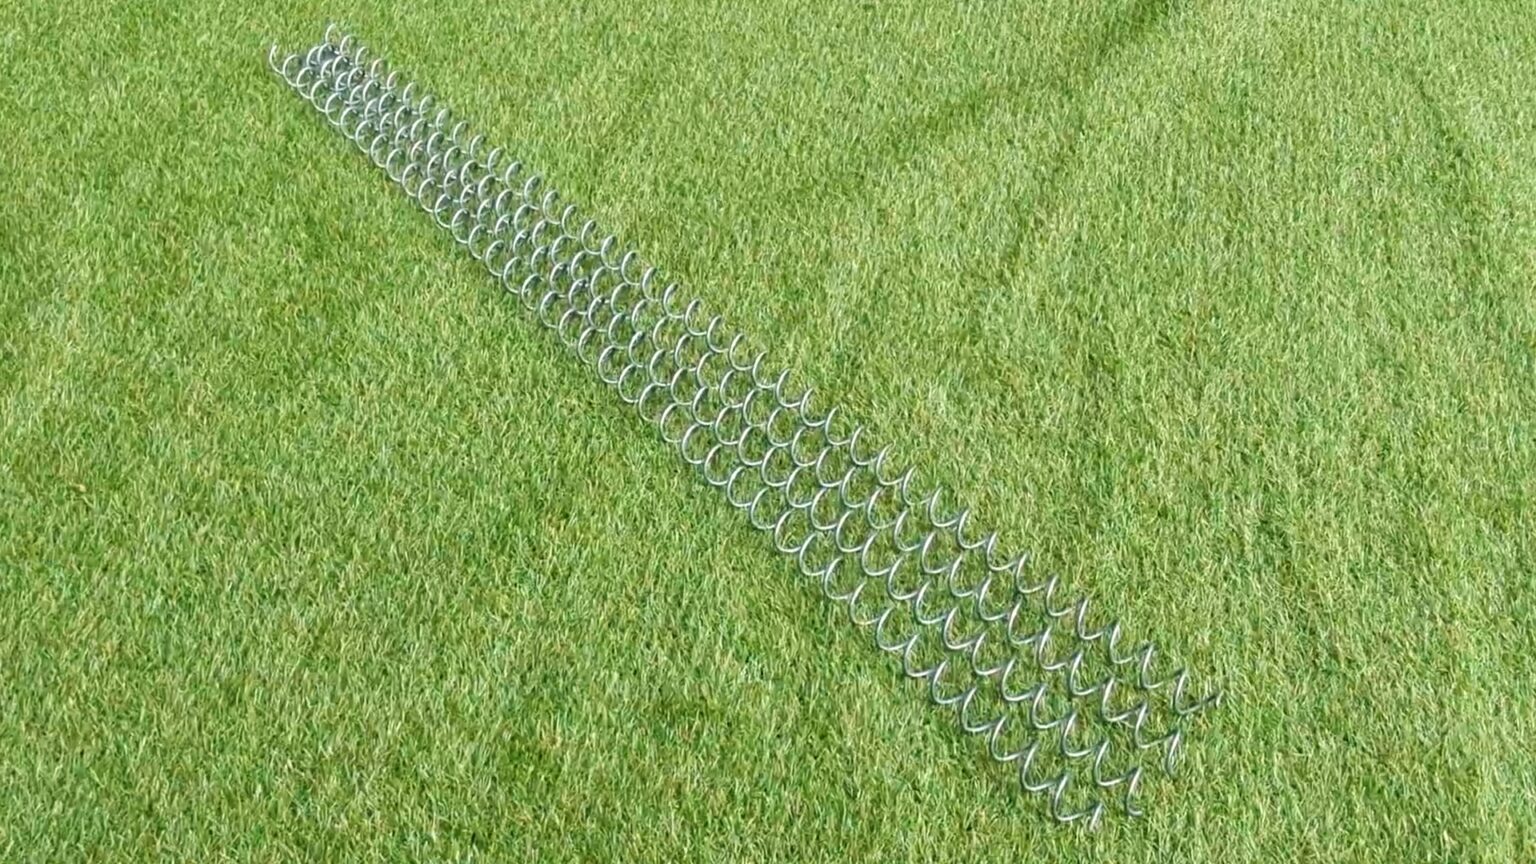
- Each helical is 1 m long.
- You’ll need 4 helicals for the sides of the basket and 1 more for the lid if you’re not using tying wire to secure it.
- If the height is less than 1m, cut the helicals to size as needed. For heights over 1m, use a full helical and a cut one.
METHOD B – Step 4) Join Panels
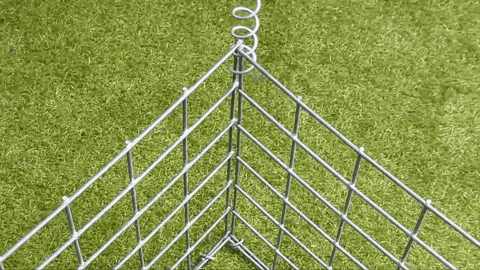
- Connect the four corners by twisting the helical through the mesh.
METHOD B – Step 5) Cut of Excess
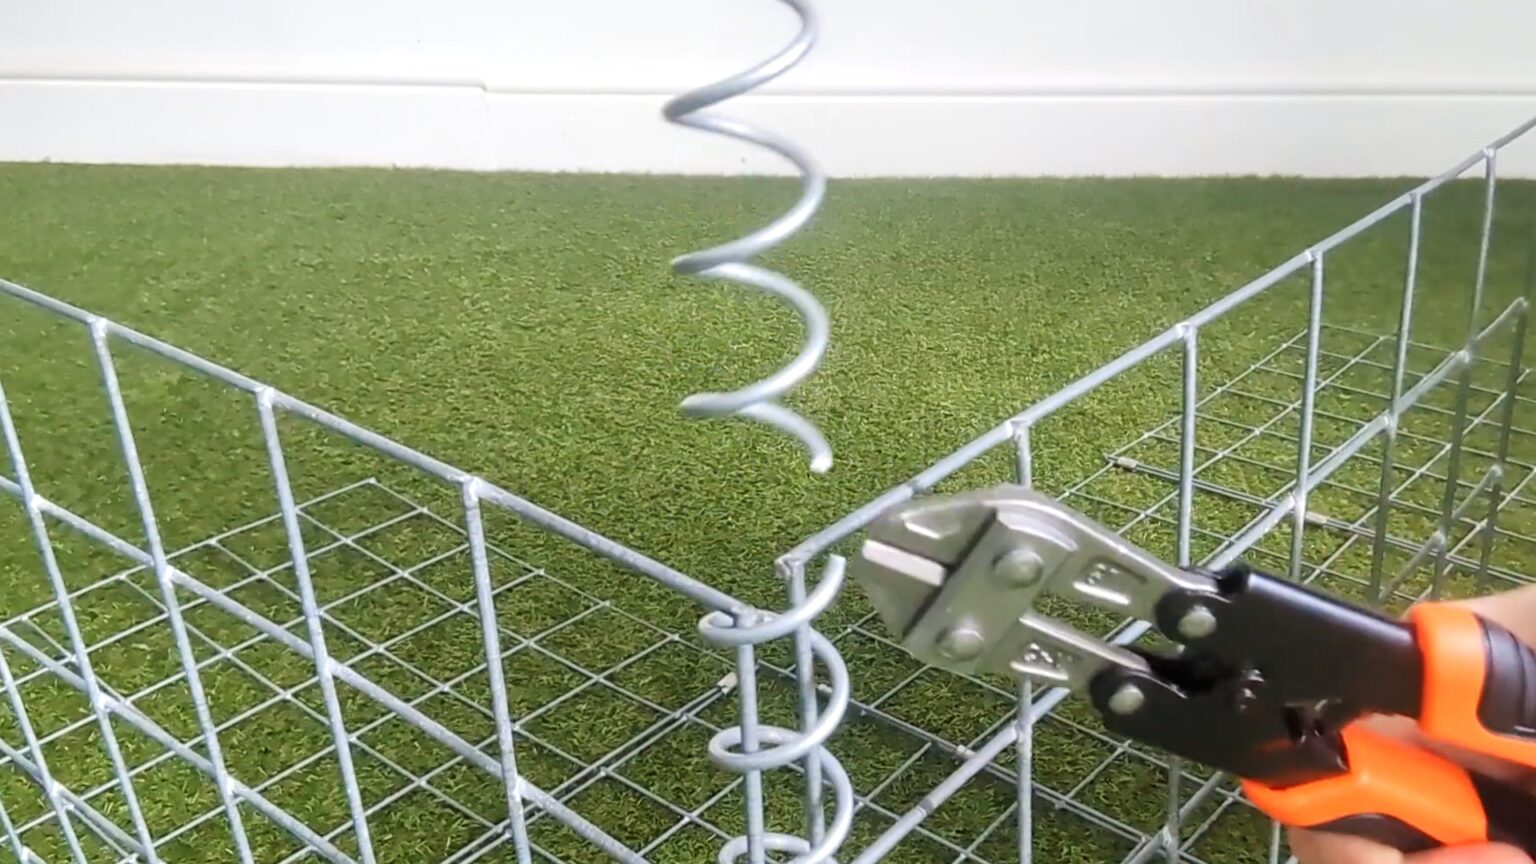
- The helicals are 1 meter long.
- If your gabion is shorter than 1 meter, you’ll need to cut the helical to size using wire cutters.
METHOD B – Step 6) Fold the End of the Helical
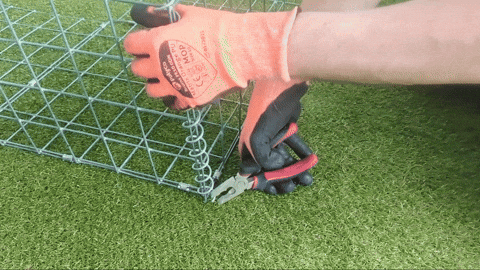
- At the top and bottom, use pliers to turn the last coil of the helical vertically by 90 degrees to prevent movement.
METHOD B – Step 7) Close the Lid
- After filling the basket, close the lid, ensuring it fits snugly on the stones without any gaps.
METHOD B – Step 8) Finish Up
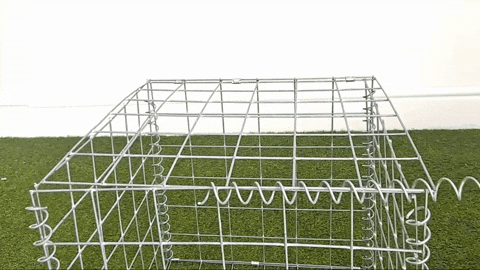
- Secure the top edges with a helical connector, following the same method as before.
- Then, cut any excess helical as described in step 5.
Tips & Tricks
While assembling the gabions we identified both the strengths and the trickier parts of the process, which we’ve compiled into the list below to help make this guide more useful.
- Choose 4mm or 5mm wire for enhanced security, stability, and strength, which helps prevent bulging.
- Use corner ties to stop gabion baskets from bulging.
- Use tying wire as an alternative to corner ties.
- When deciding how to assemble gabion baskets, consider using helicals for a quicker assembly process.
- Keep lacing lengths to around 1 meter for easier handling.
- At the top and bottom ends of the helical, turn the last coil vertically by 90 degrees to prevent movement.
FURTHER READING
- How to Make Your Own Gabion Baskets – Step by step instructions and illustrations on how to make your own gabion baskets.
- How to Lace Gabion Baskets – Learn how to lace wire cages using different methods.
- How to Fill Gabions – A guide showing you how to fill cages.
- How to Stop Gabion Baskets Bulging – Step by step instructions on how to stop wire cages bulging.
- Gabion Learning Hub – a library of help videos
You can buy any size gabion in our shop, as well as accessories to construct them, and stone to fill them.
Videos

Written By
This blog was created by Timi with the help of Erno, who assembled the gabions. Take a look at some behind-the-scenes images below.


Published by
