Attaching Chain Link Fence to Posts and Different Materials

Below is a step-by-step guide on attaching chain link fence to posts and different materials.
TRADITIONAL METAL
- Experience Required: Medium
- Tools Required: Protective gloves, Wrench, Pliers
- Materials Required: Chain link fence, Tension bar, Tension bands, Fence ties, Bolts and nuts
End Support
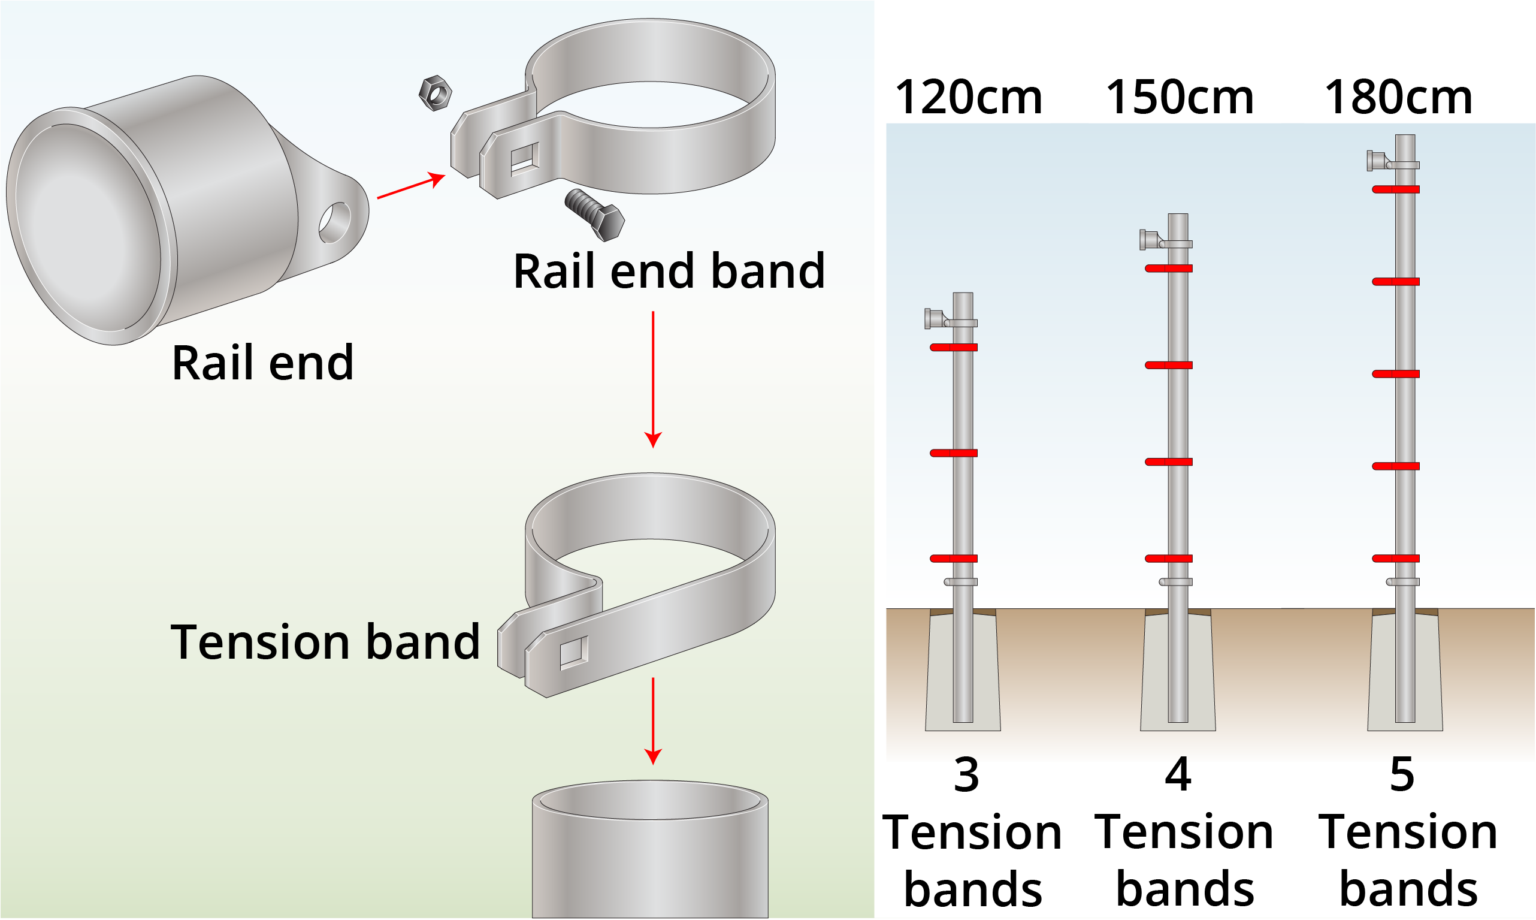
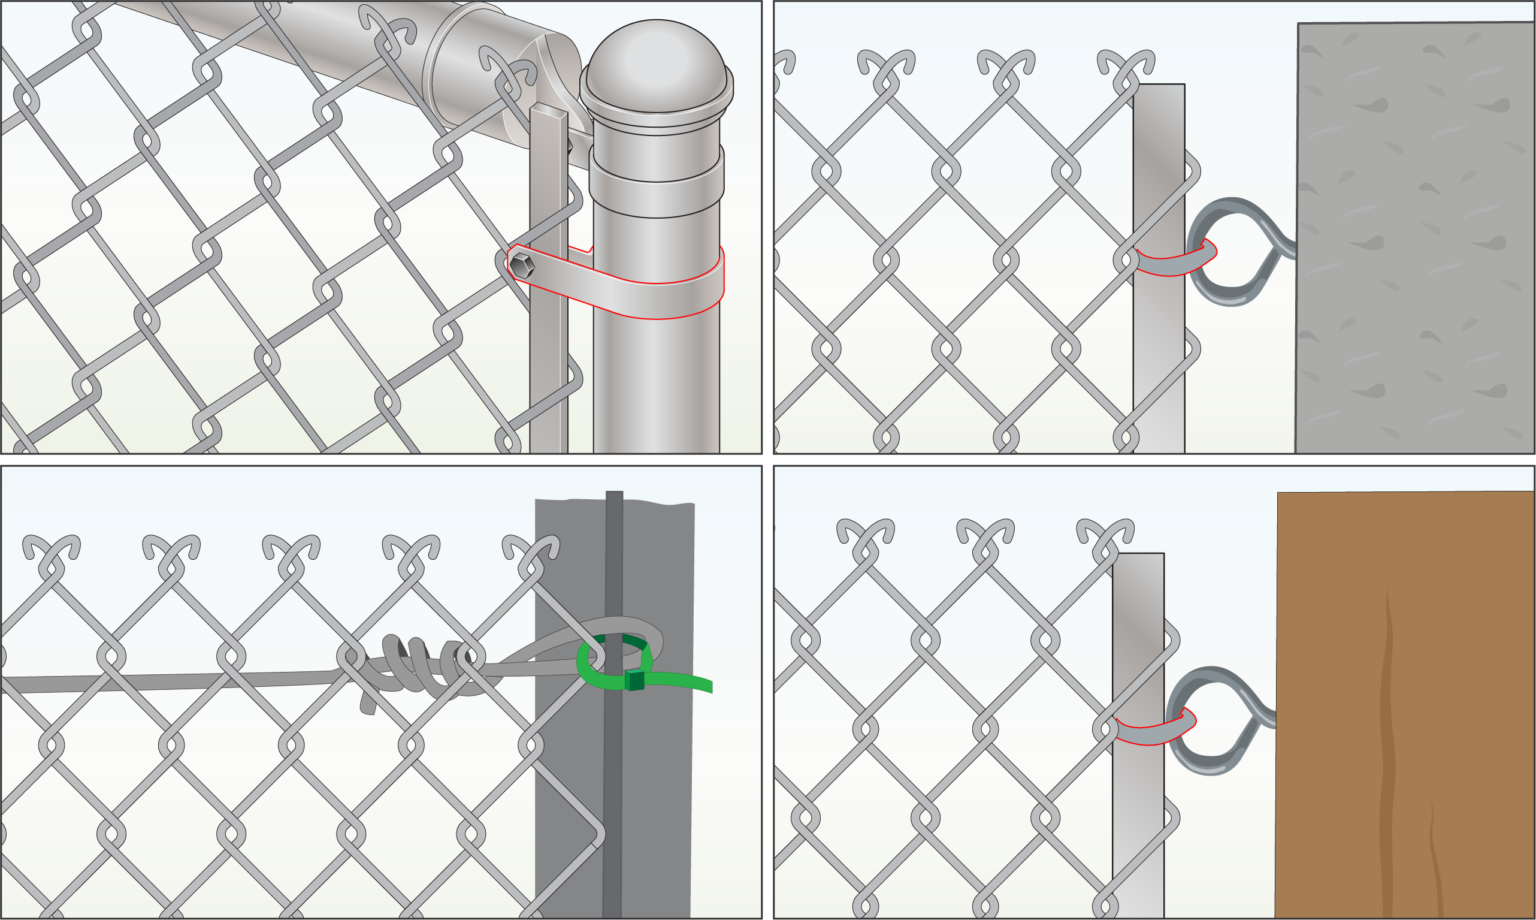
- When attaching chain link fence to posts, place tension bands on each post with the flat side facing outward.
- Taller fences require more tension bands.
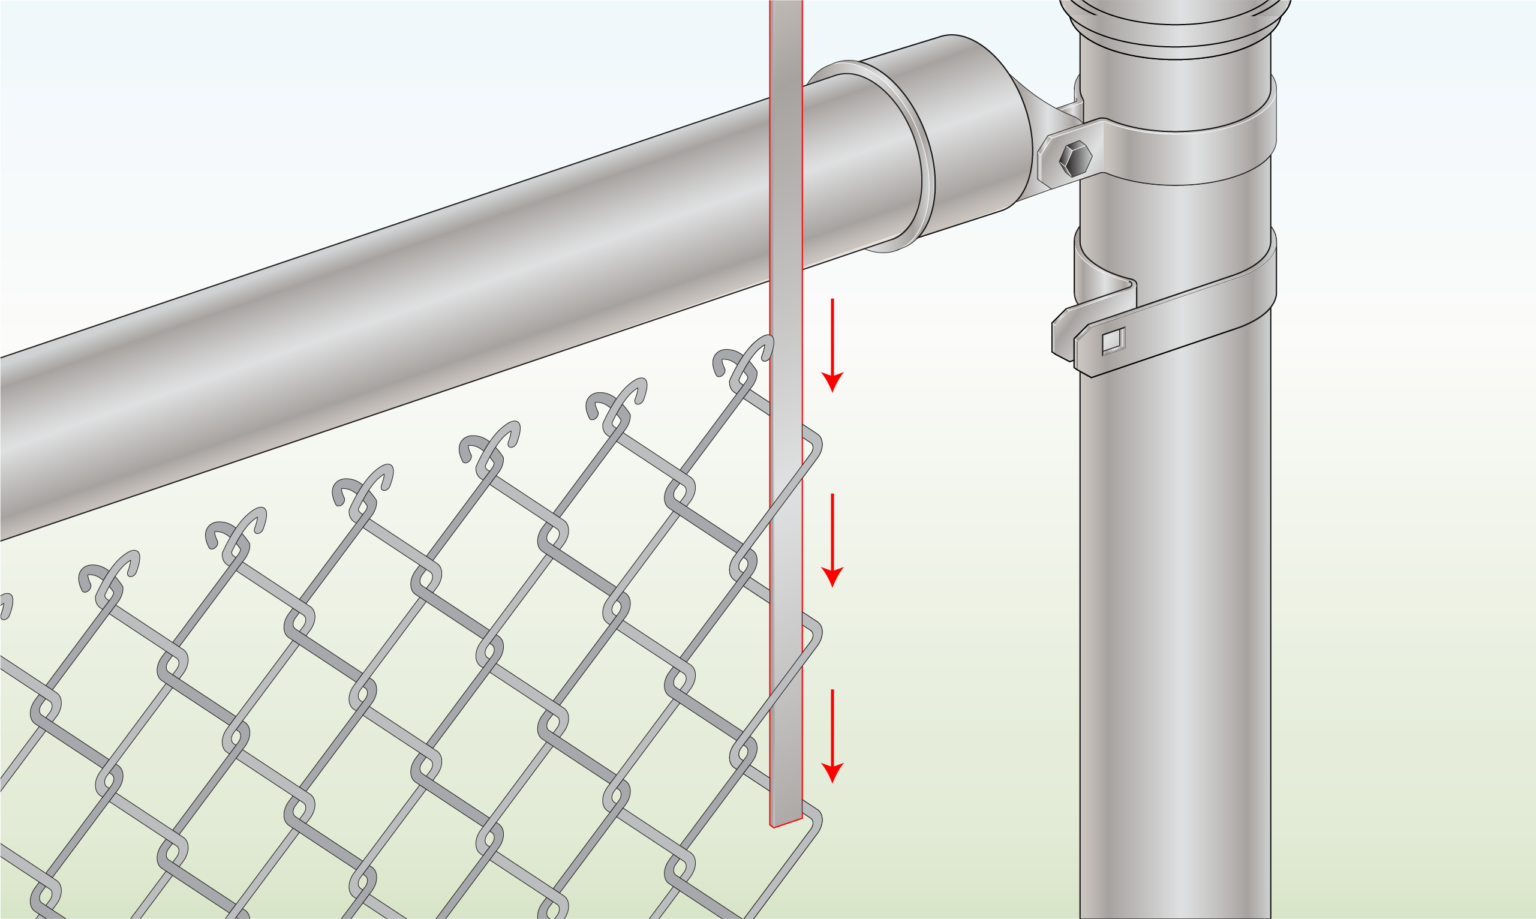
- Insert the tension bar through the end of the mesh roll nearest to the end support.
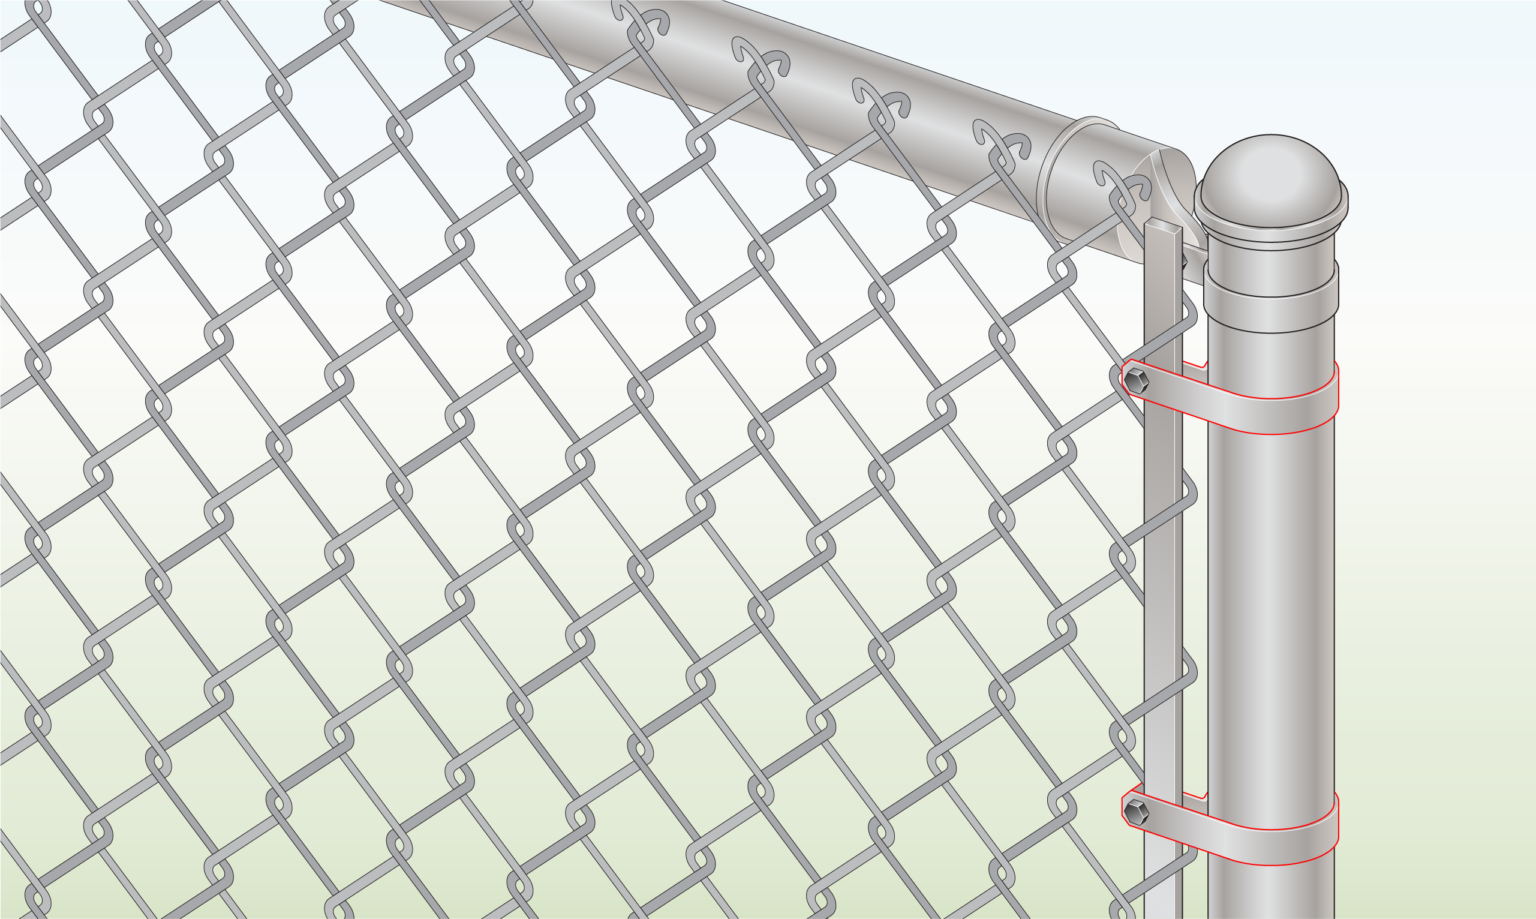
- Connect the tension bar to the tension band to hold the mesh in place.
Top Rail
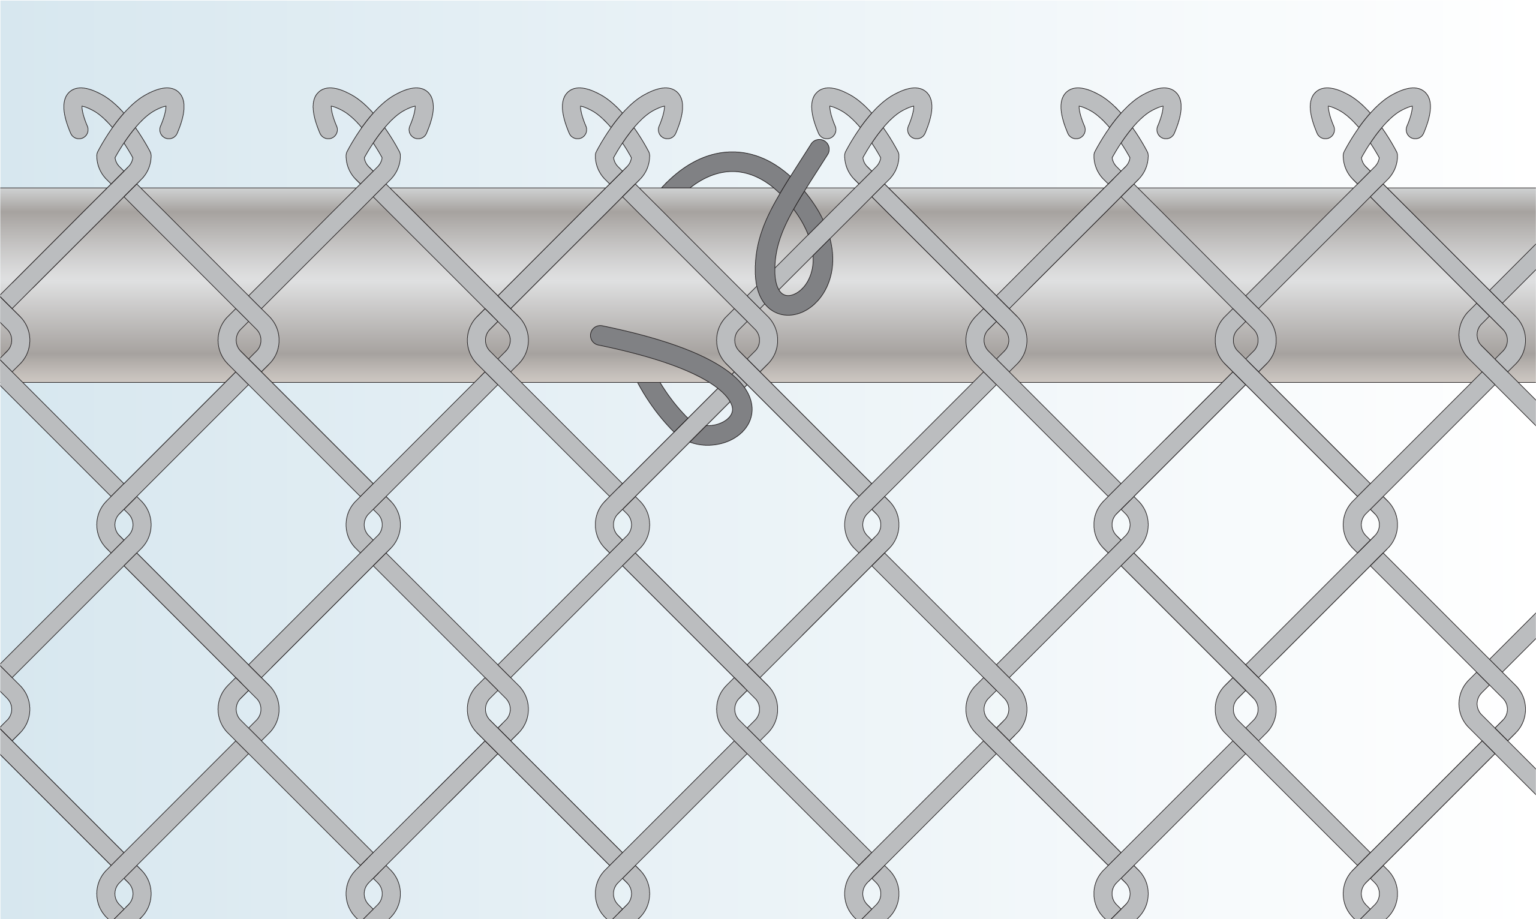
- Use a few wire fence ties to secure the mesh to the top rail with pliers.
Intermediate Support
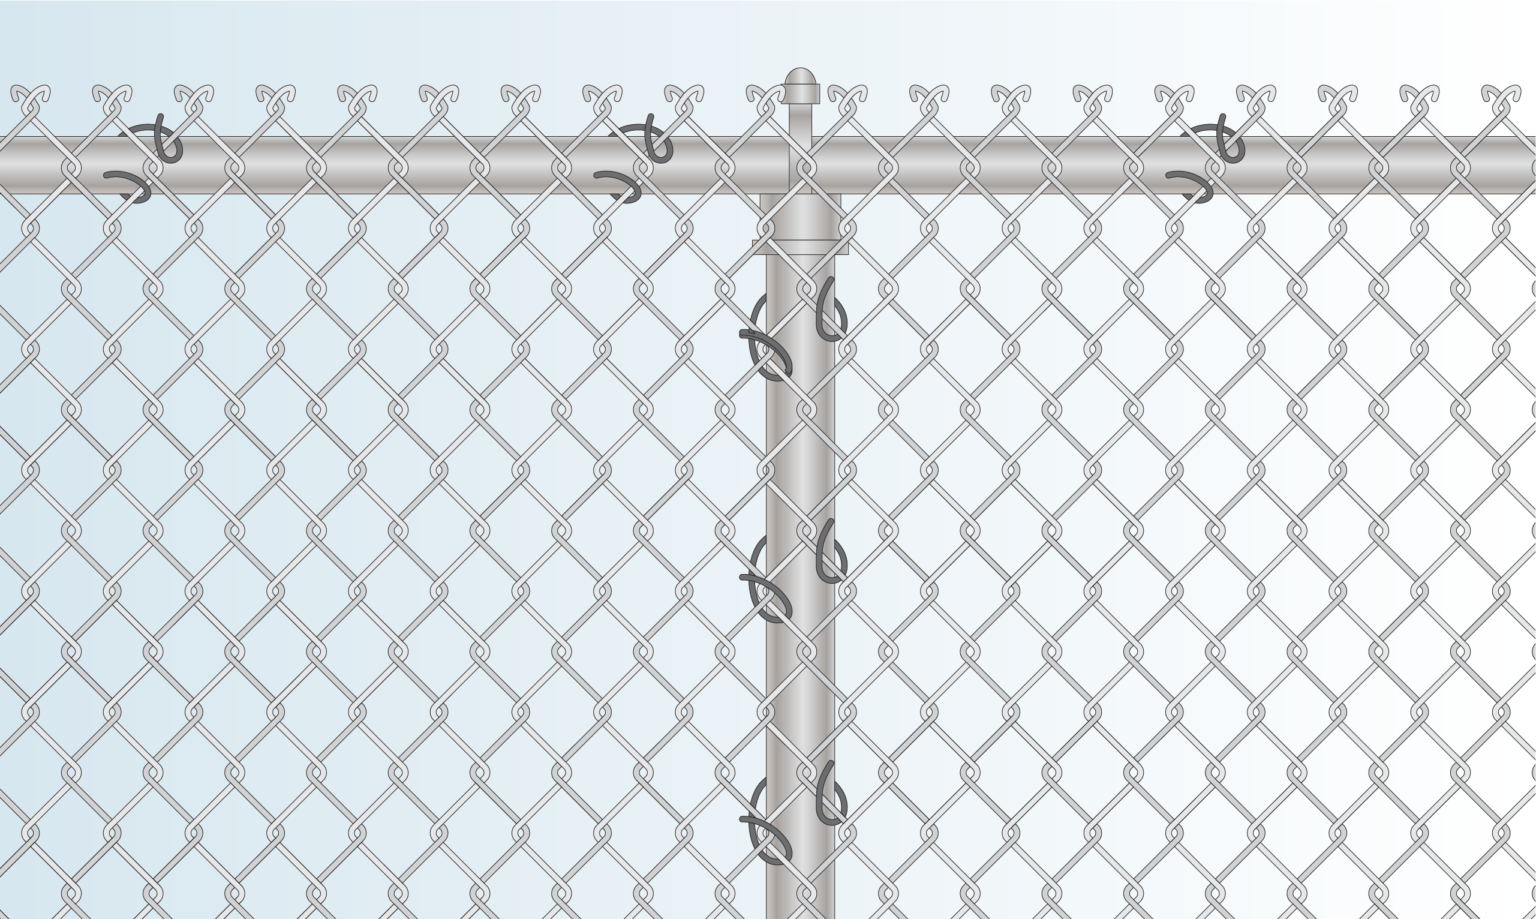
- Secure the mesh to the intermediate supports using the same method with fence ties.
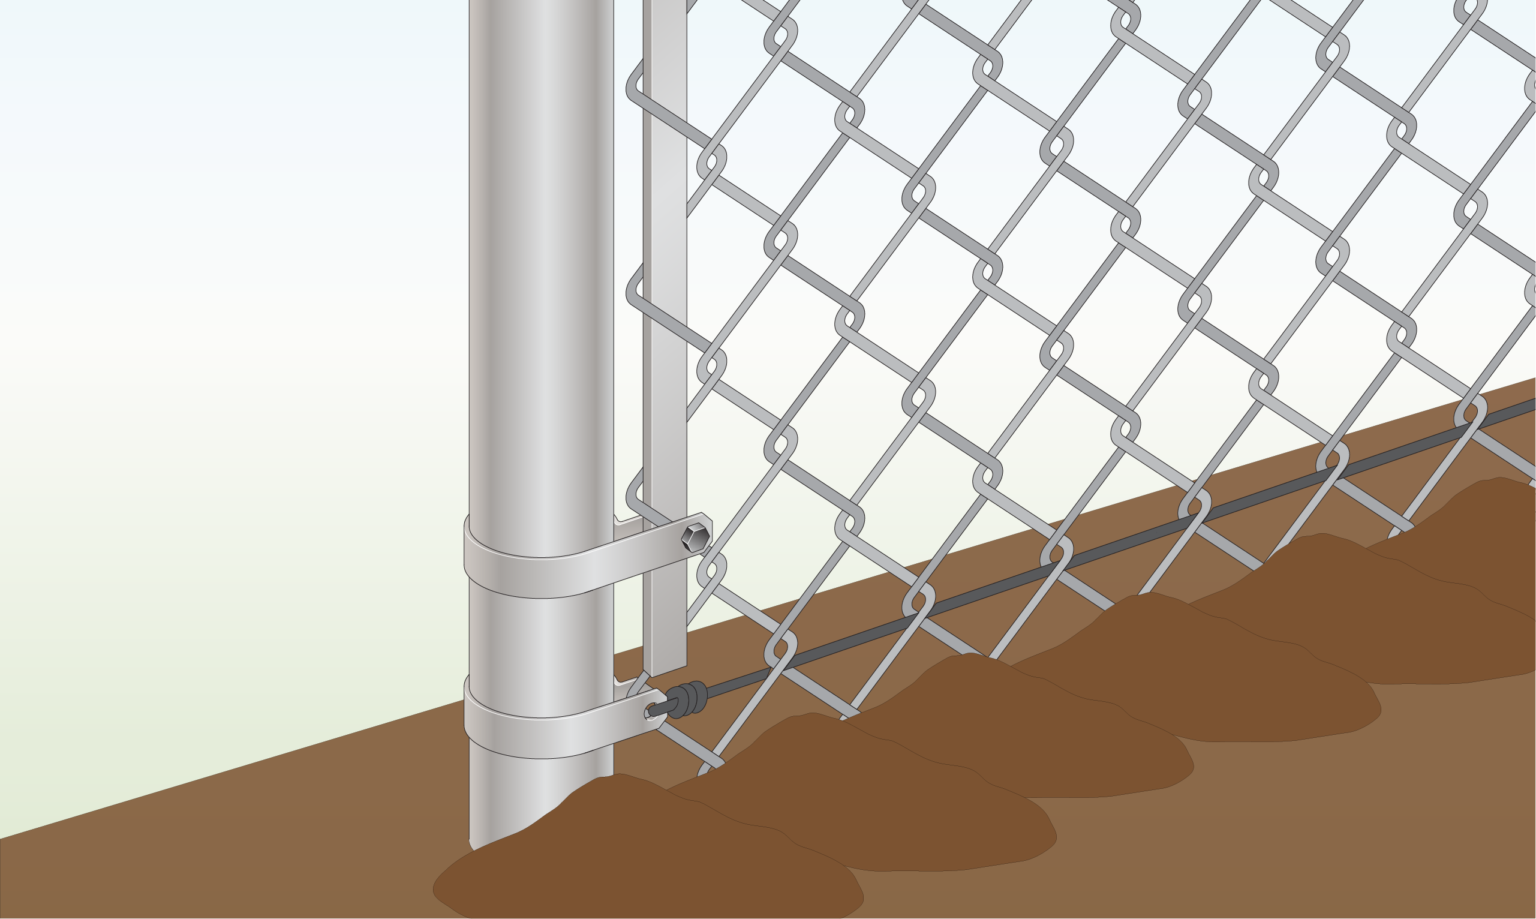
CONCRETE
- Experience Required: Medium
- Tools Required: Protective gloves, Wrench, Pliers, Hammer drill (if needed)
- Materials Required: Chain link fence, Tension bar, Eye bolts, Washer or nut, Snap hook or carabiner, Wire ties or Cable ties
End Pole
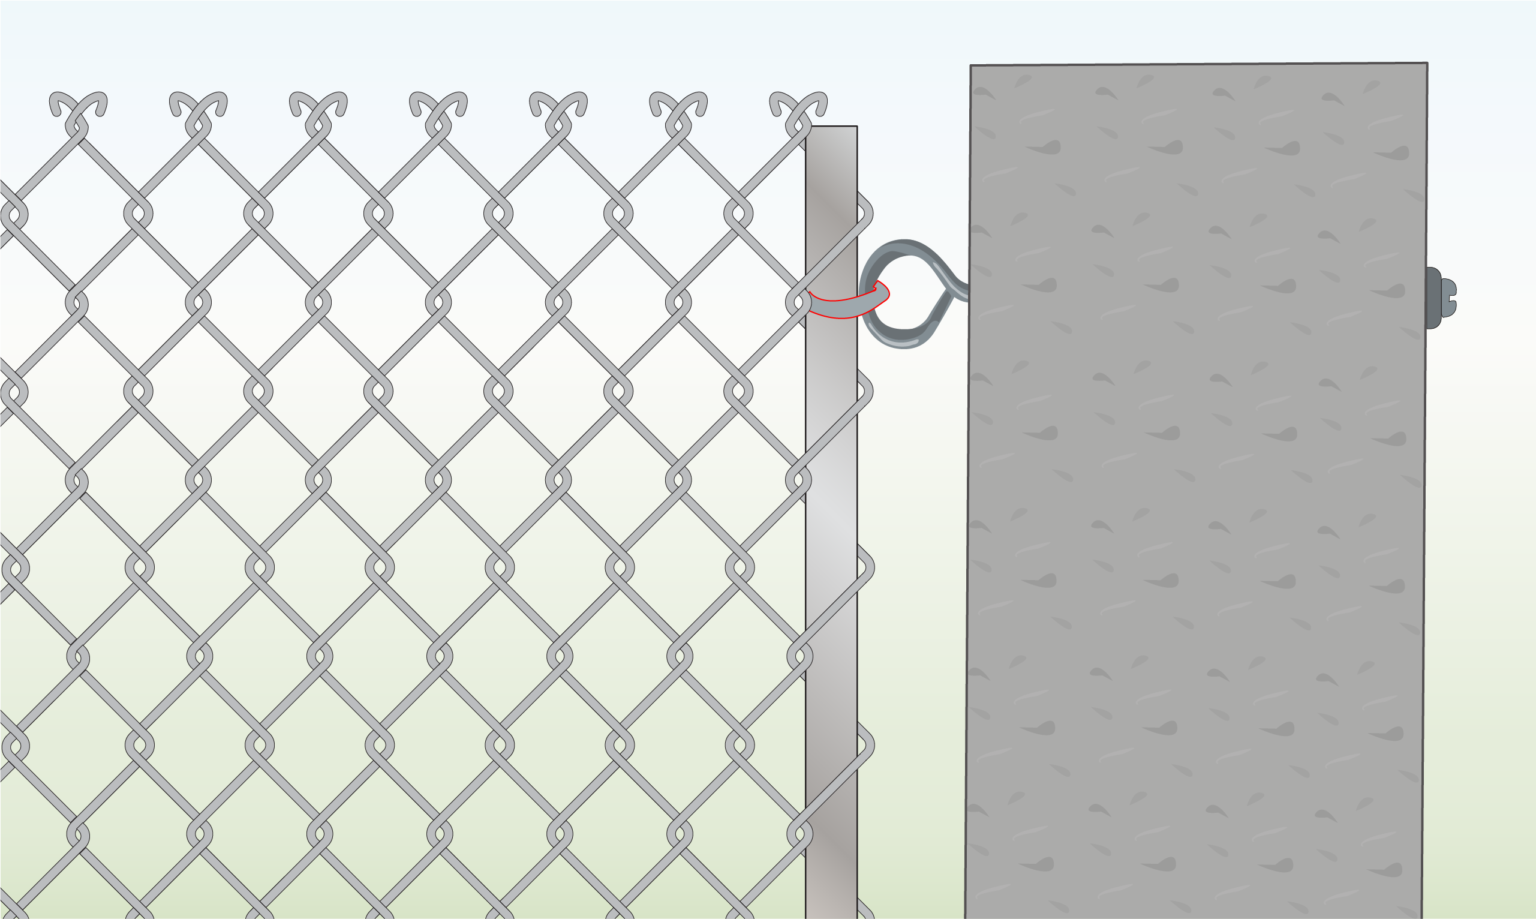
- Insert an eye bolt into the pre-drilled holes or drill new ones with a hammer drill. Secure with a washer and nut, tightening with a wrench.
- Attach a snap hook or carabiner to the eye bolt.
- Slide a tension bar into the fabric and hook it to secure it to the pole.
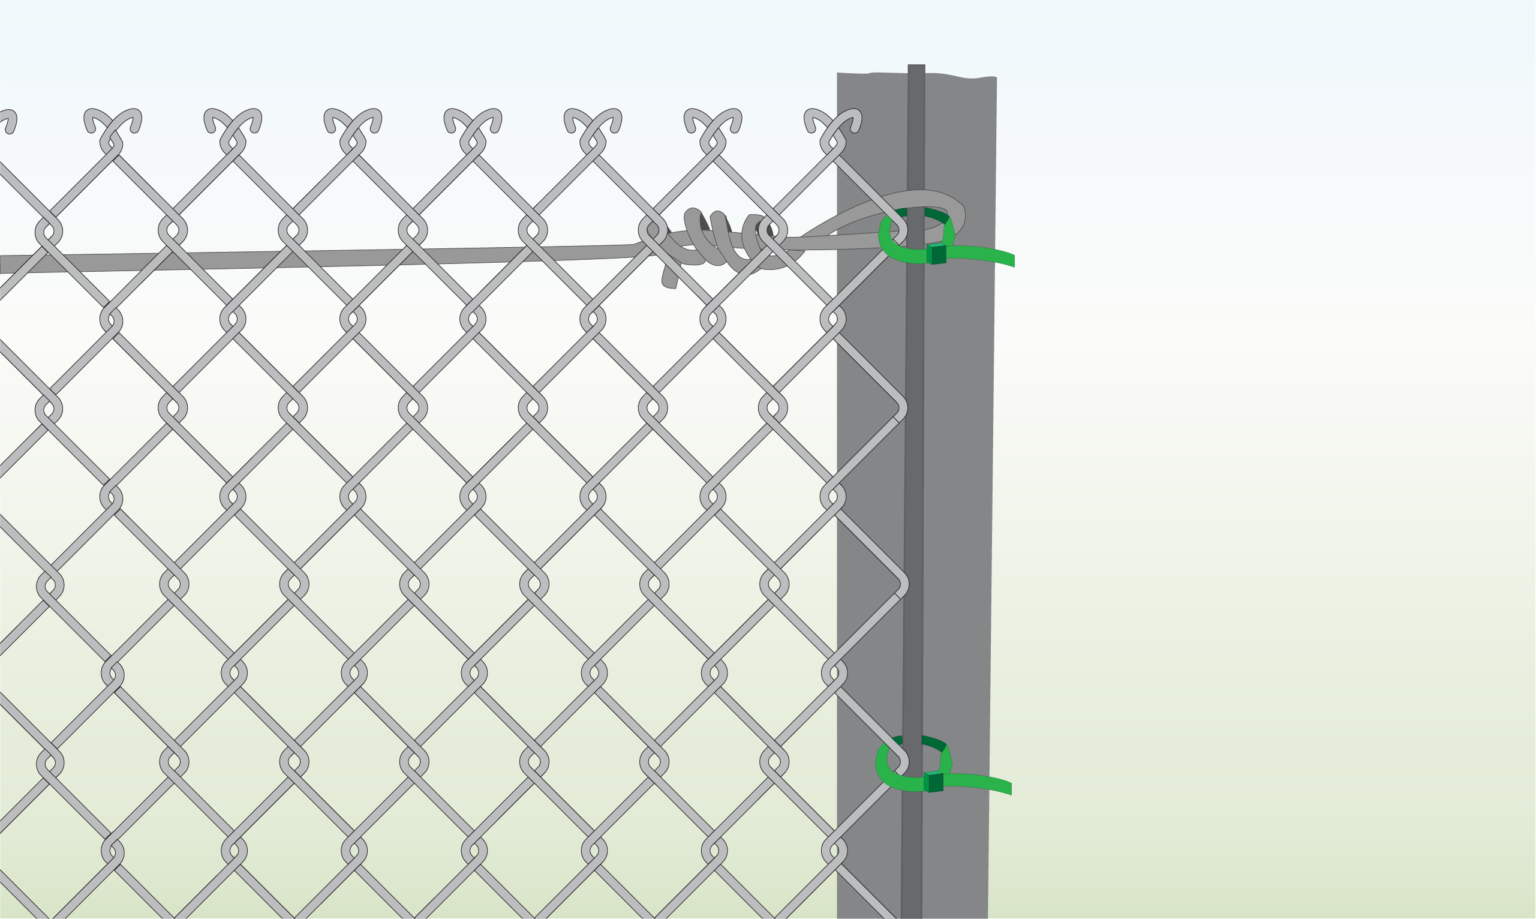
Middle Pole
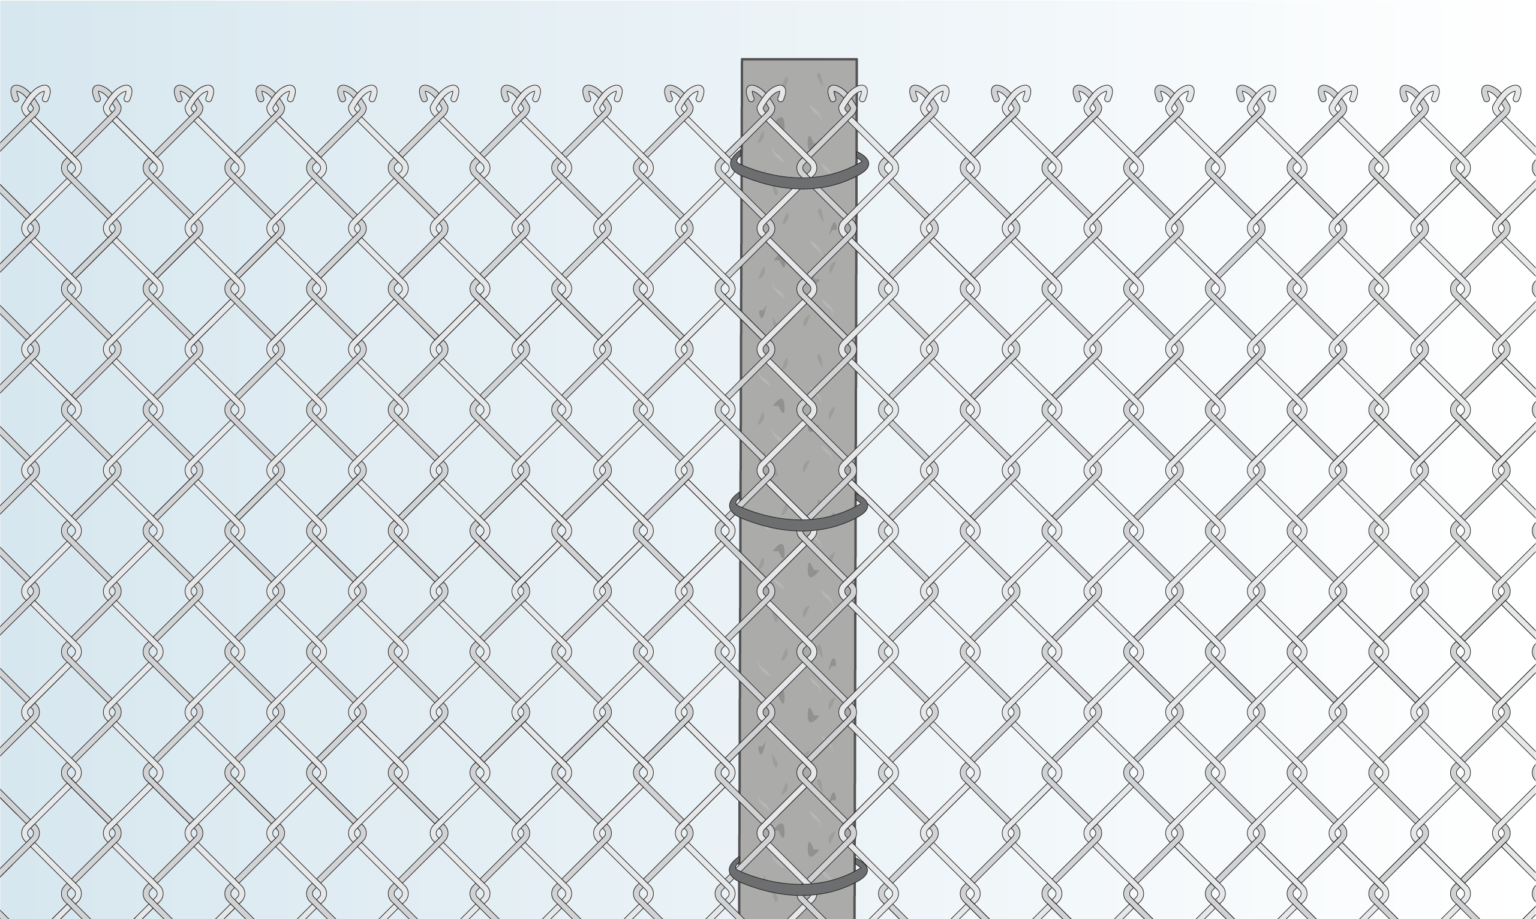
- Use wire ties or cable ties to secure the mesh to the middle poles.
WOOD
- Experience Required: Medium
- Tools Required: Protective gloves, Wrench, Hammer, Drill
- Materials Required: Chain link fence, Tension bar, Eye bolts, Washer or nut, Snap hook or carabiner, Staples
End Support
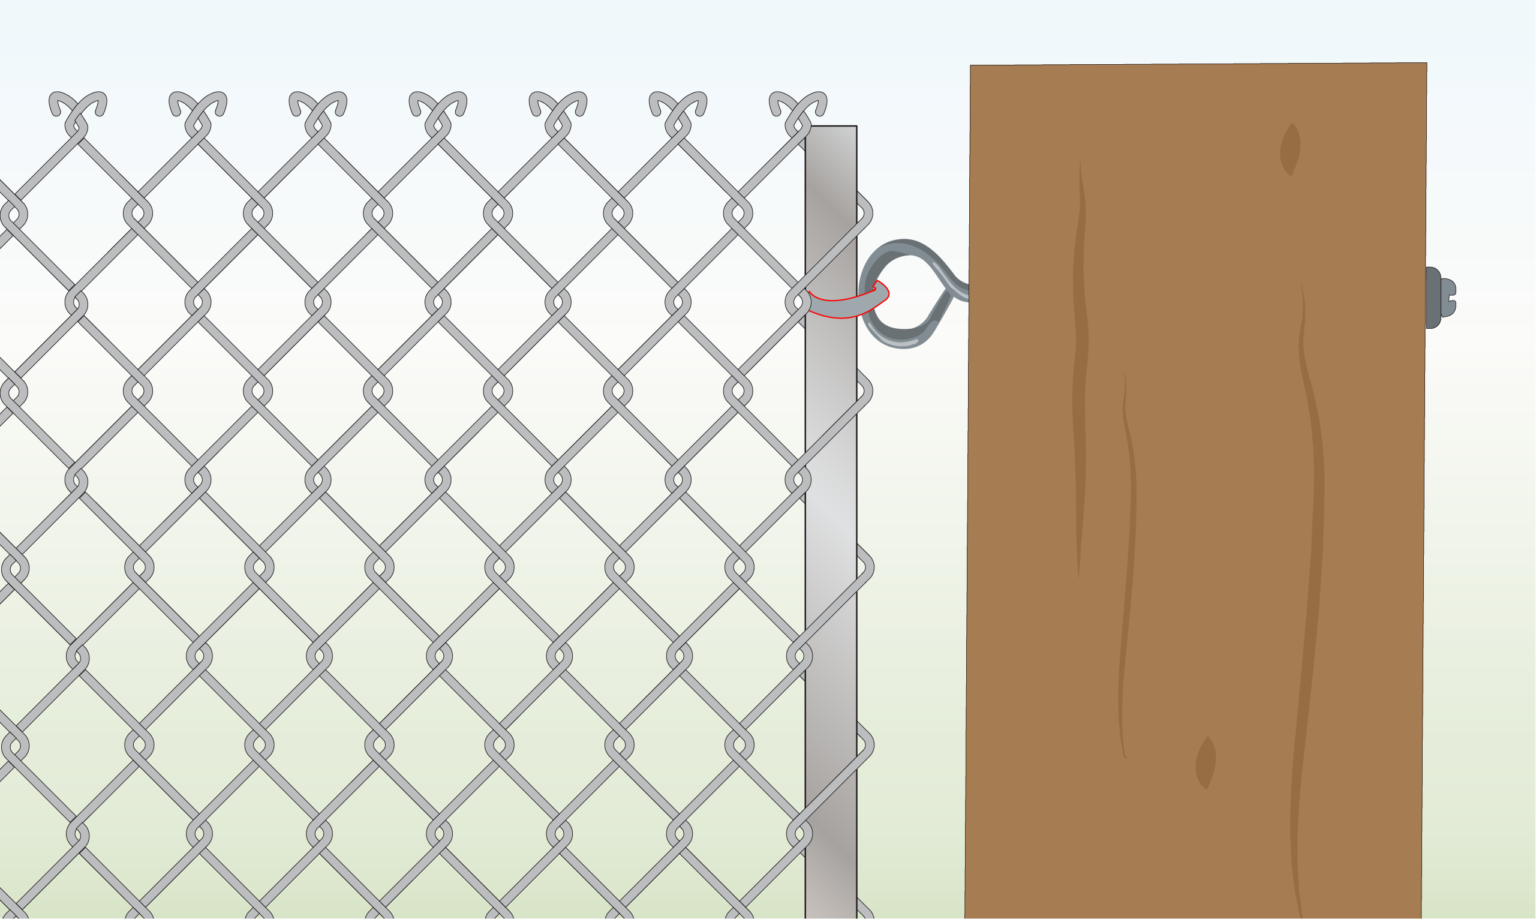
- Drill a hole through the post for an eye bolt. Secure it with a washer and nut, tightening with a wrench.
- Attach a snap hook or carabiner to the eye bolt, then slide a tension bar into the chain link fabric and hook it to secure it to the support.
Mid Support
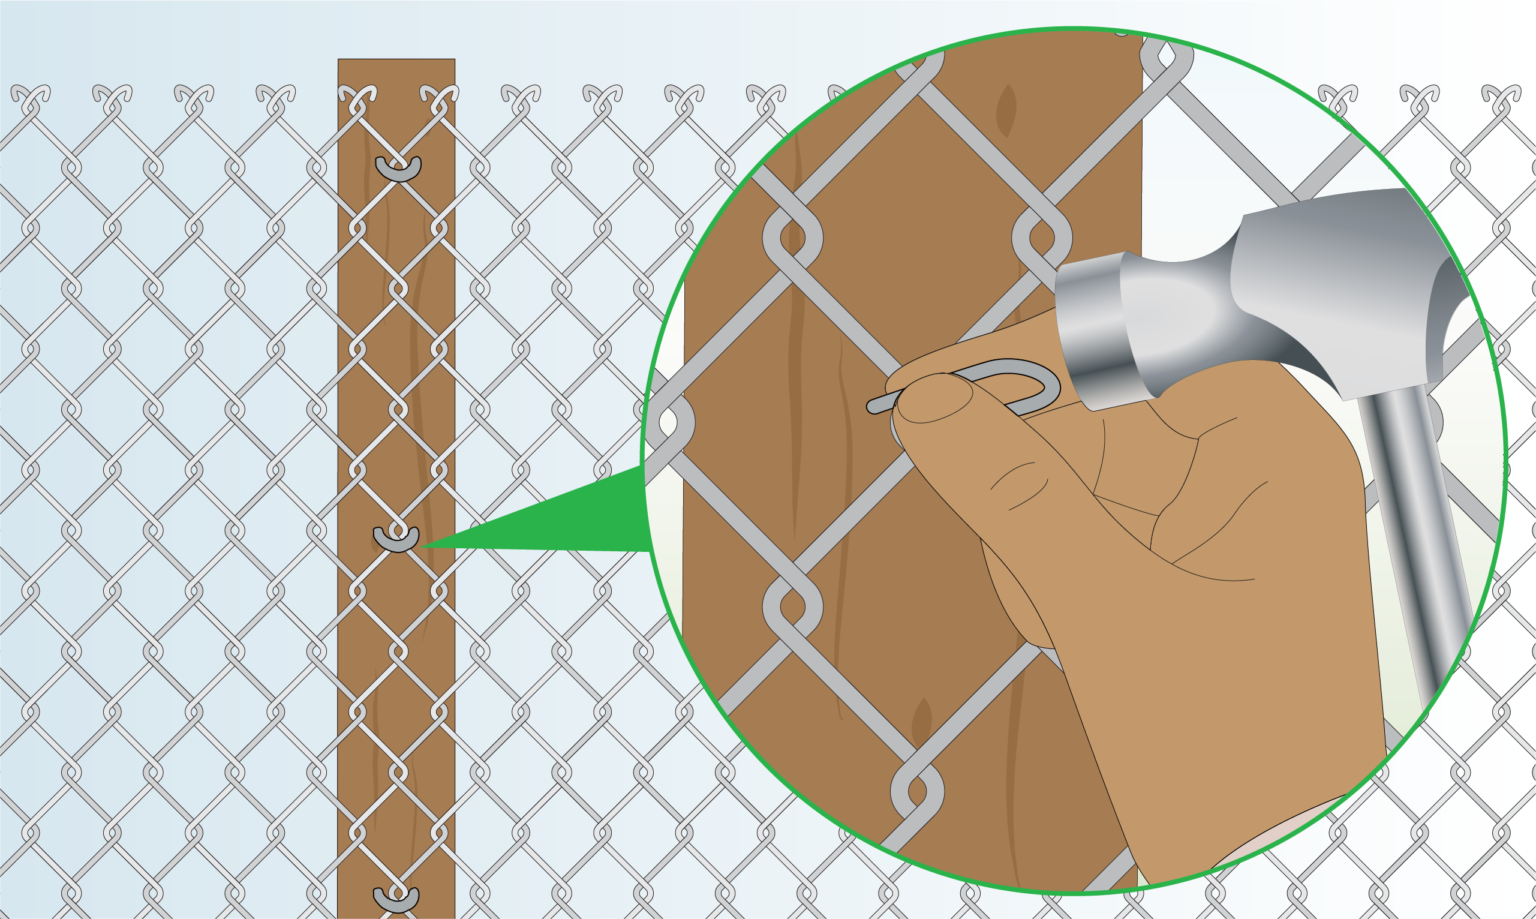
- Secure the mesh to the wooden support by hammering staples into the desired position.
- This method can also be used as an alternative to attach the mesh to the end poles without using a tension bar.
METAL T POST
- Experience Required: Medium
- Tools Required: Protective gloves
- Materials Required: Chain link fence, T posts, Cable ties
End Pole
- In the process of how to attach chain link fence, connect the mesh to the end post using cable ties.
- Thread the ties through the pre-drilled holes and secure them tightly.
Intermediate Pole
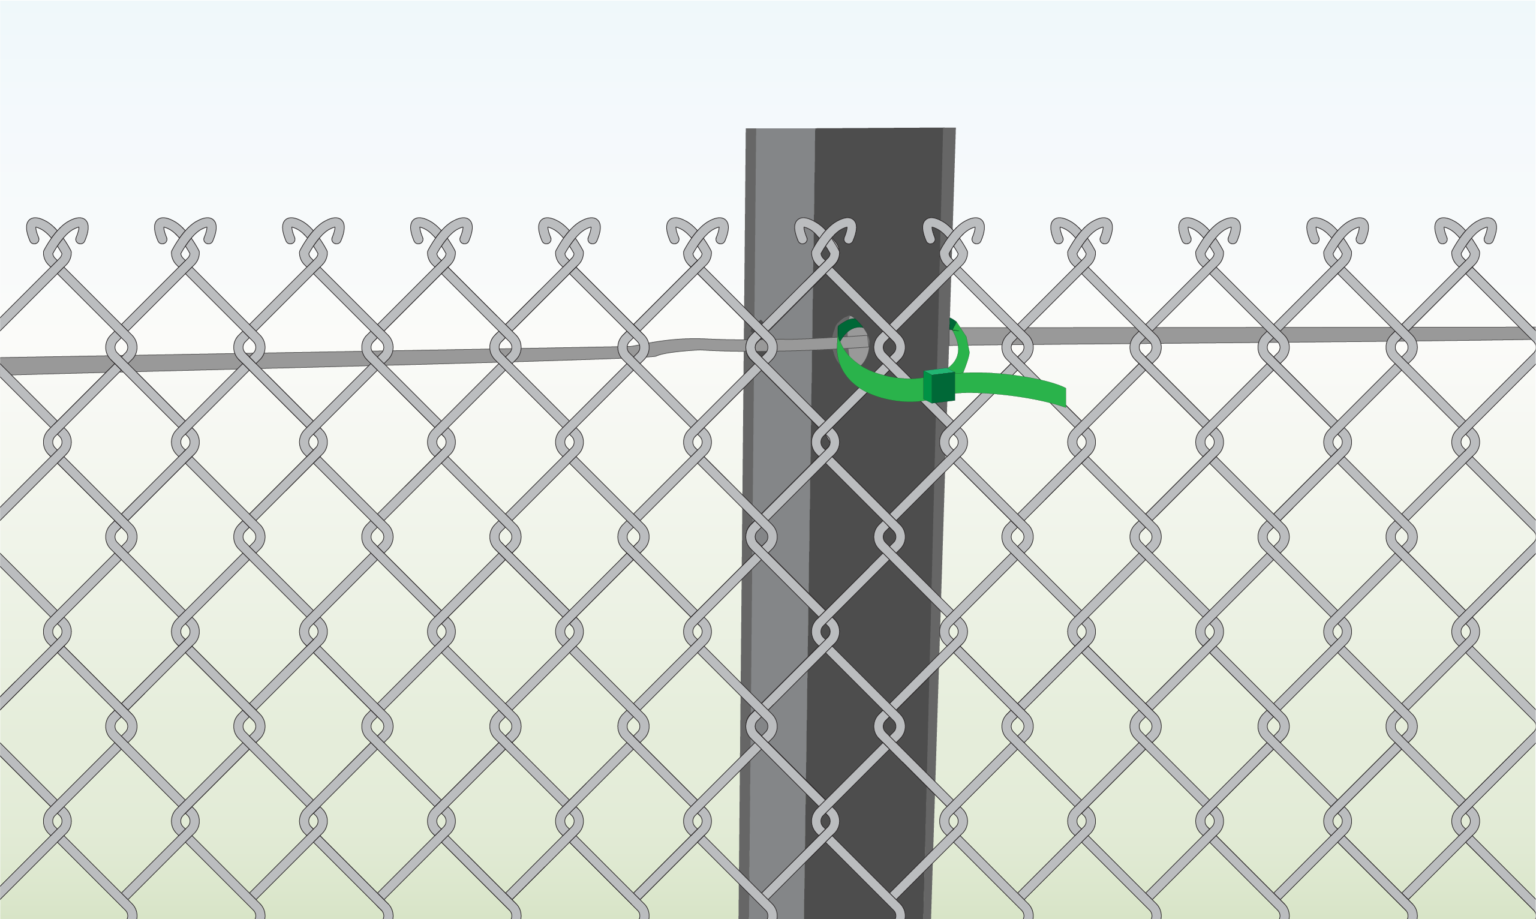
- Continue using cable ties to fasten the mesh to the middle poles, ensuring it’s securely attached.
SOIL
- Experience Required: Low
- Tools Required: Protective gloves, Hammer, Shovel
- Materials Required: Chain link fence, Pegs, Soil or dirt
Method 1) Pegs

- Secure the mesh to the ground by hammering pegs every 60cm along the length of the line.
Method 2) Bury Mesh
- Bury the bottom of the mesh by digging a shallow trench along the line and placing the bottom of the chain link fabric into the trench.
EXISTING MESH
- Experience Required: Low
- Tools Required: Protective gloves, Pliers
- Materials Required: Chain link fence, One loose end
Step 1) Align and Weave the Wire
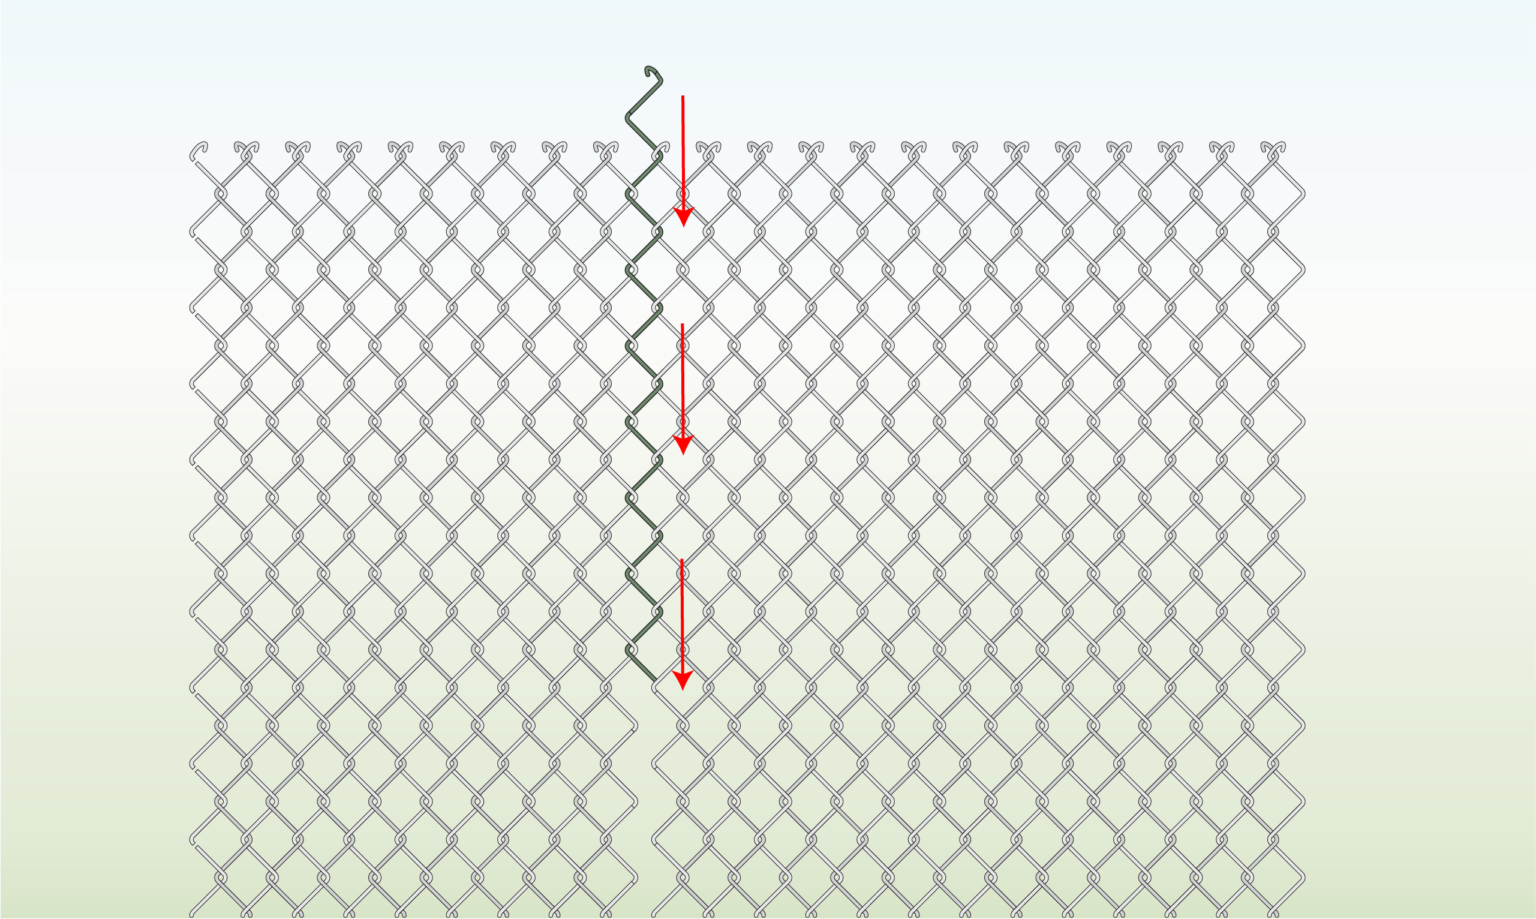
- Make sure the patterns align properly so the loose wire can weave through them evenly.
- Take the loose wire and start weaving it into the first full diamond of one section and the matching diamond of the other section.
Step 2) Spin the Wire
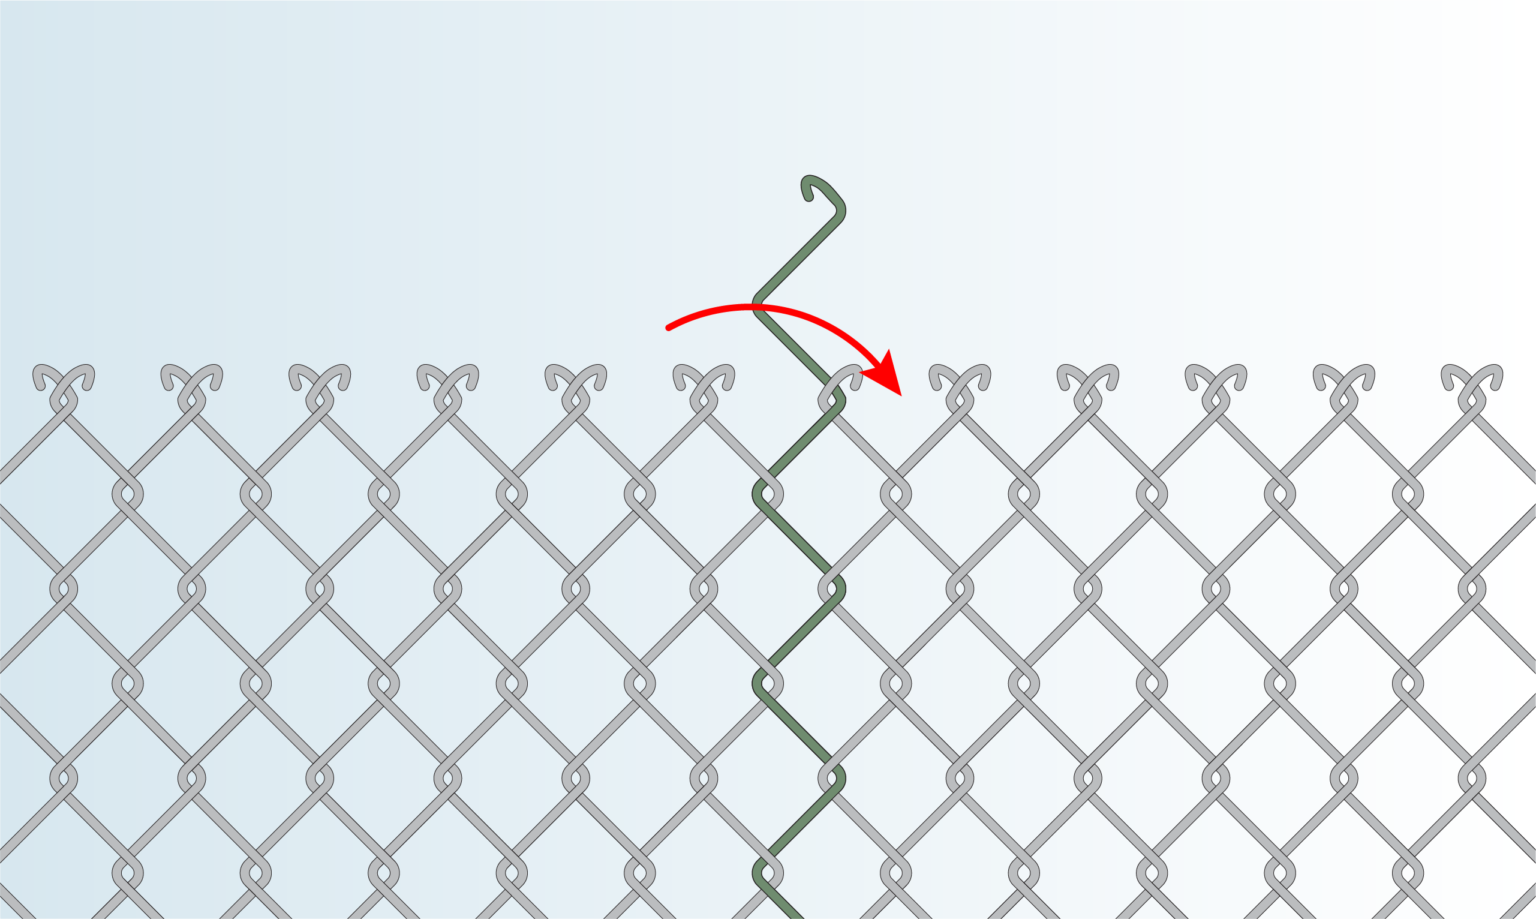
- Spin the wire to ensure it locks into place as it passes through each full diamond.
- Once the loose wire is fully woven, secure the ends at both the top and bottom using pliers.
Tips & Tricks
Before starting your fencing project, it’s important to plan carefully and consider a few key factors. The points below are based on our team’s experience designing and installing different fencing.
- Choose durable hardware: Choose strong, rust-resistant hardware to ensure your enclosure lasts longer, especially in wet areas.
- Prevent Sagging: In the process of attaching chain link fence to posts, stretch the chain link tightly to avoid sagging, using a fence stretcher.
- Maintain alignment: Attach tension wires at the top and bottom to keep the mesh aligned and stable.
- Prioritize Safety: Always wear safety gear like gloves and eye protection when working.
- Distribute tension Evenly: Use tension bars and bands to evenly distribute force and prevent damage.
- Avoid over-tightening: Tighten hardware securely, but avoid over-tightening to prevent weakening posts or bending the chain link.
FURTHER READING
- How to Cut a Chain Link Fence – Learn how to cut mesh.
- How to Unroll Chain Link Fence – A guide showing you unroll correctly a mesh.
- How to Connect Chain Link Fence – Learn how to connect chain link mesh.
VIDEO

Written By
This blog was created by our Technical Illustrator, Timi and reviewed by our Technical Consultant, Erno.
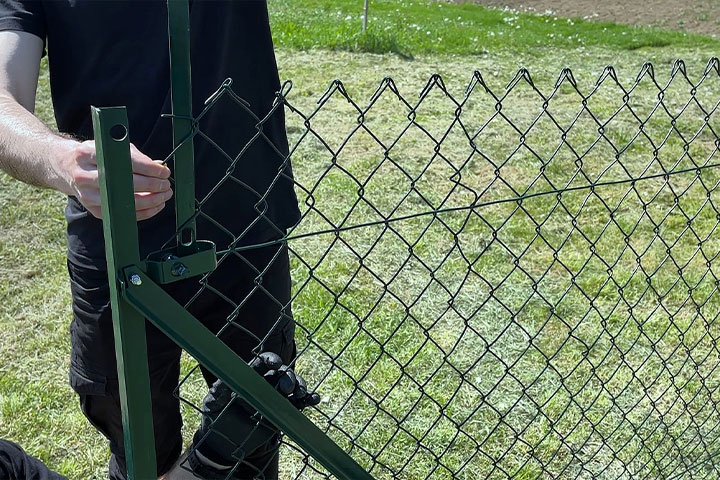
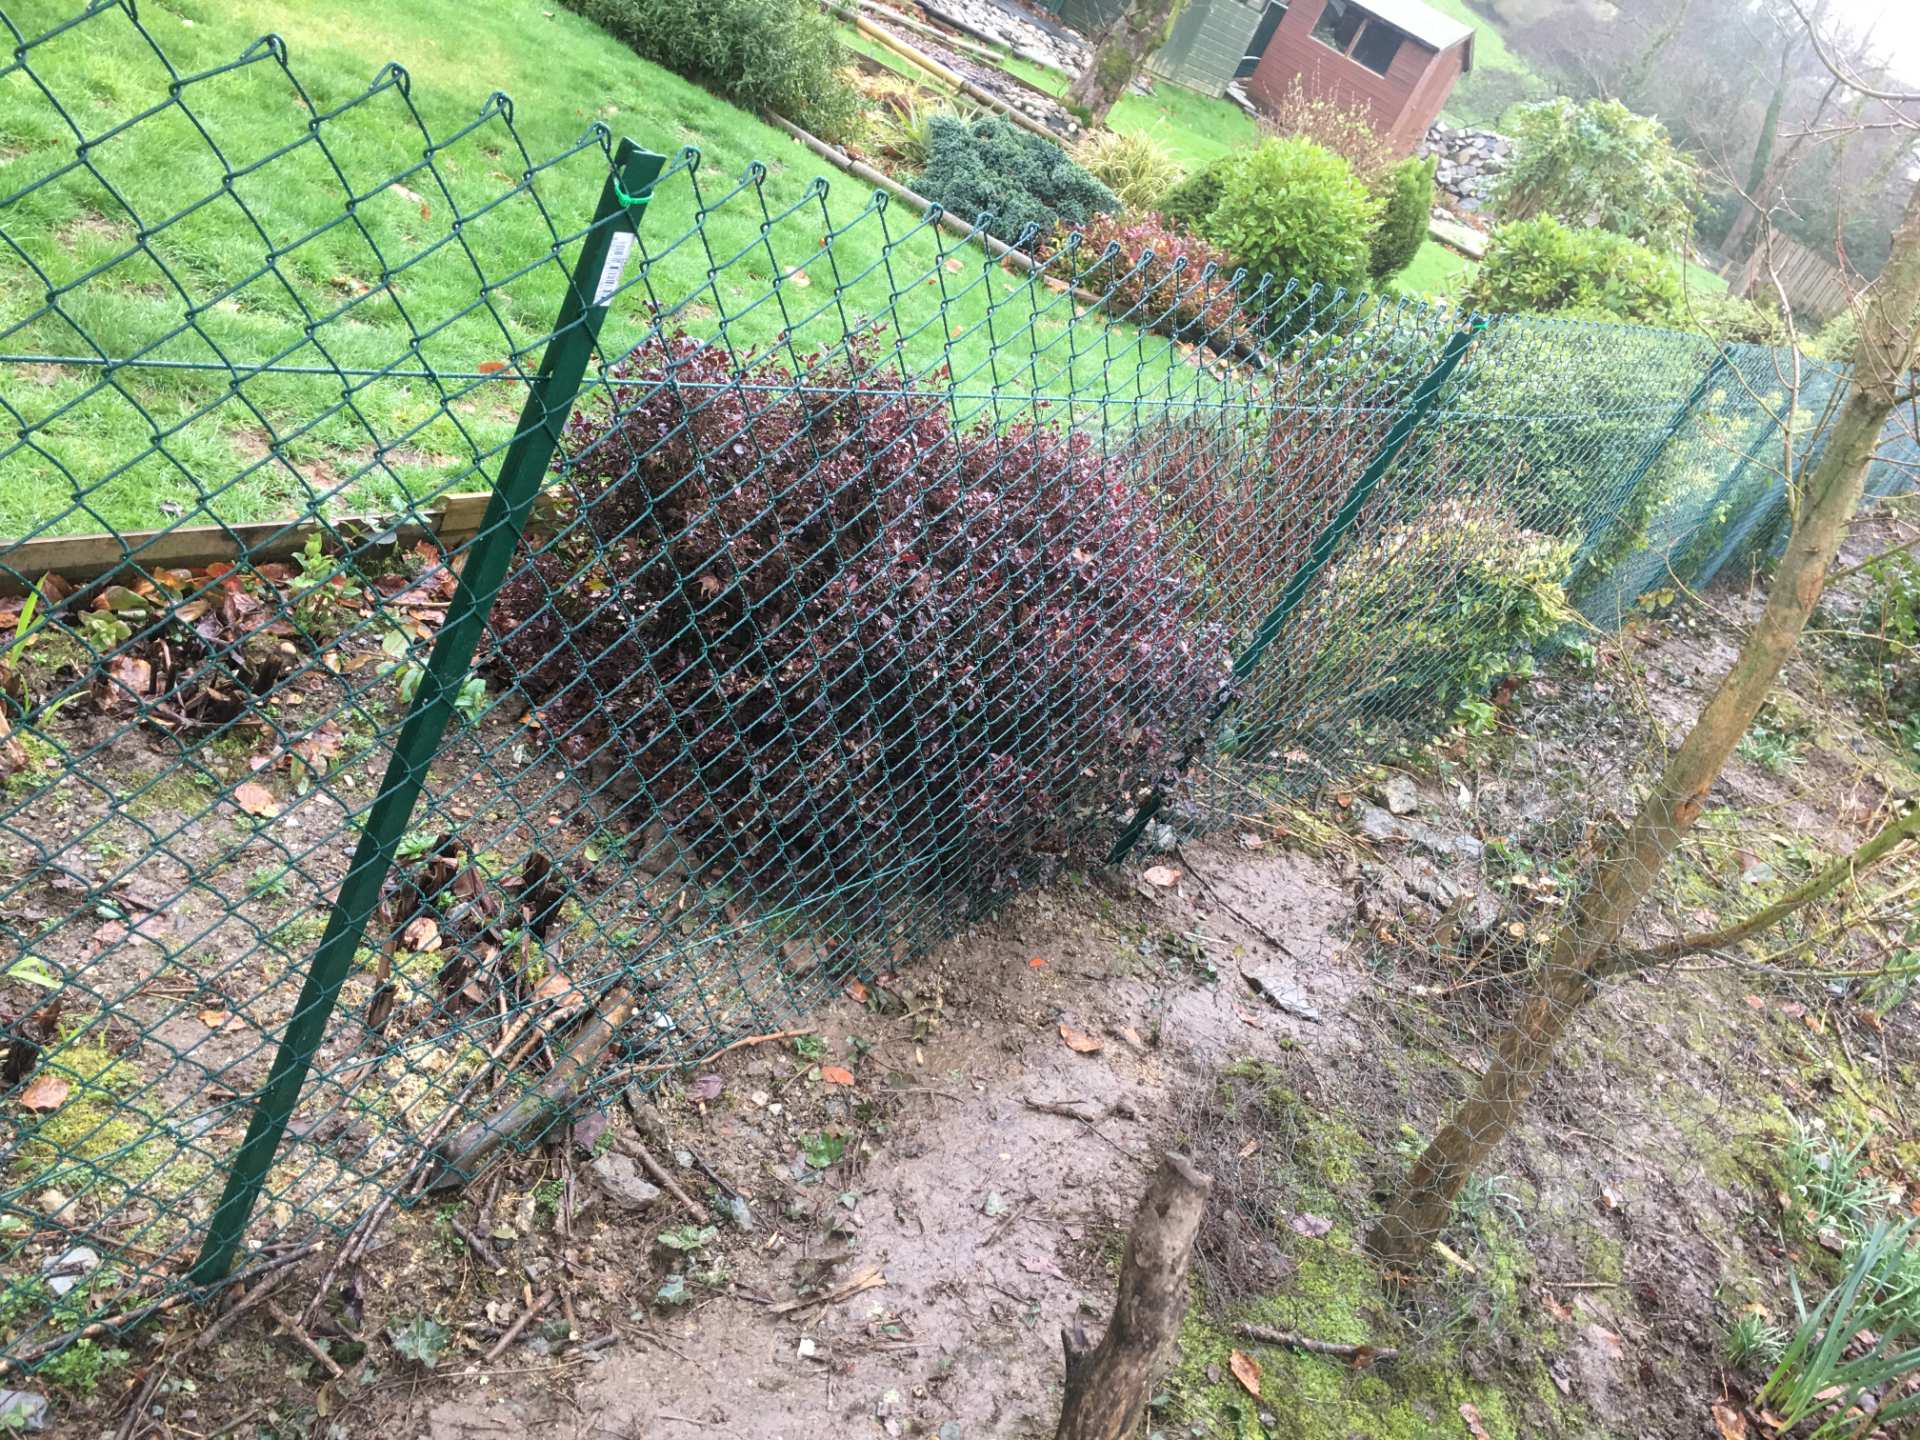
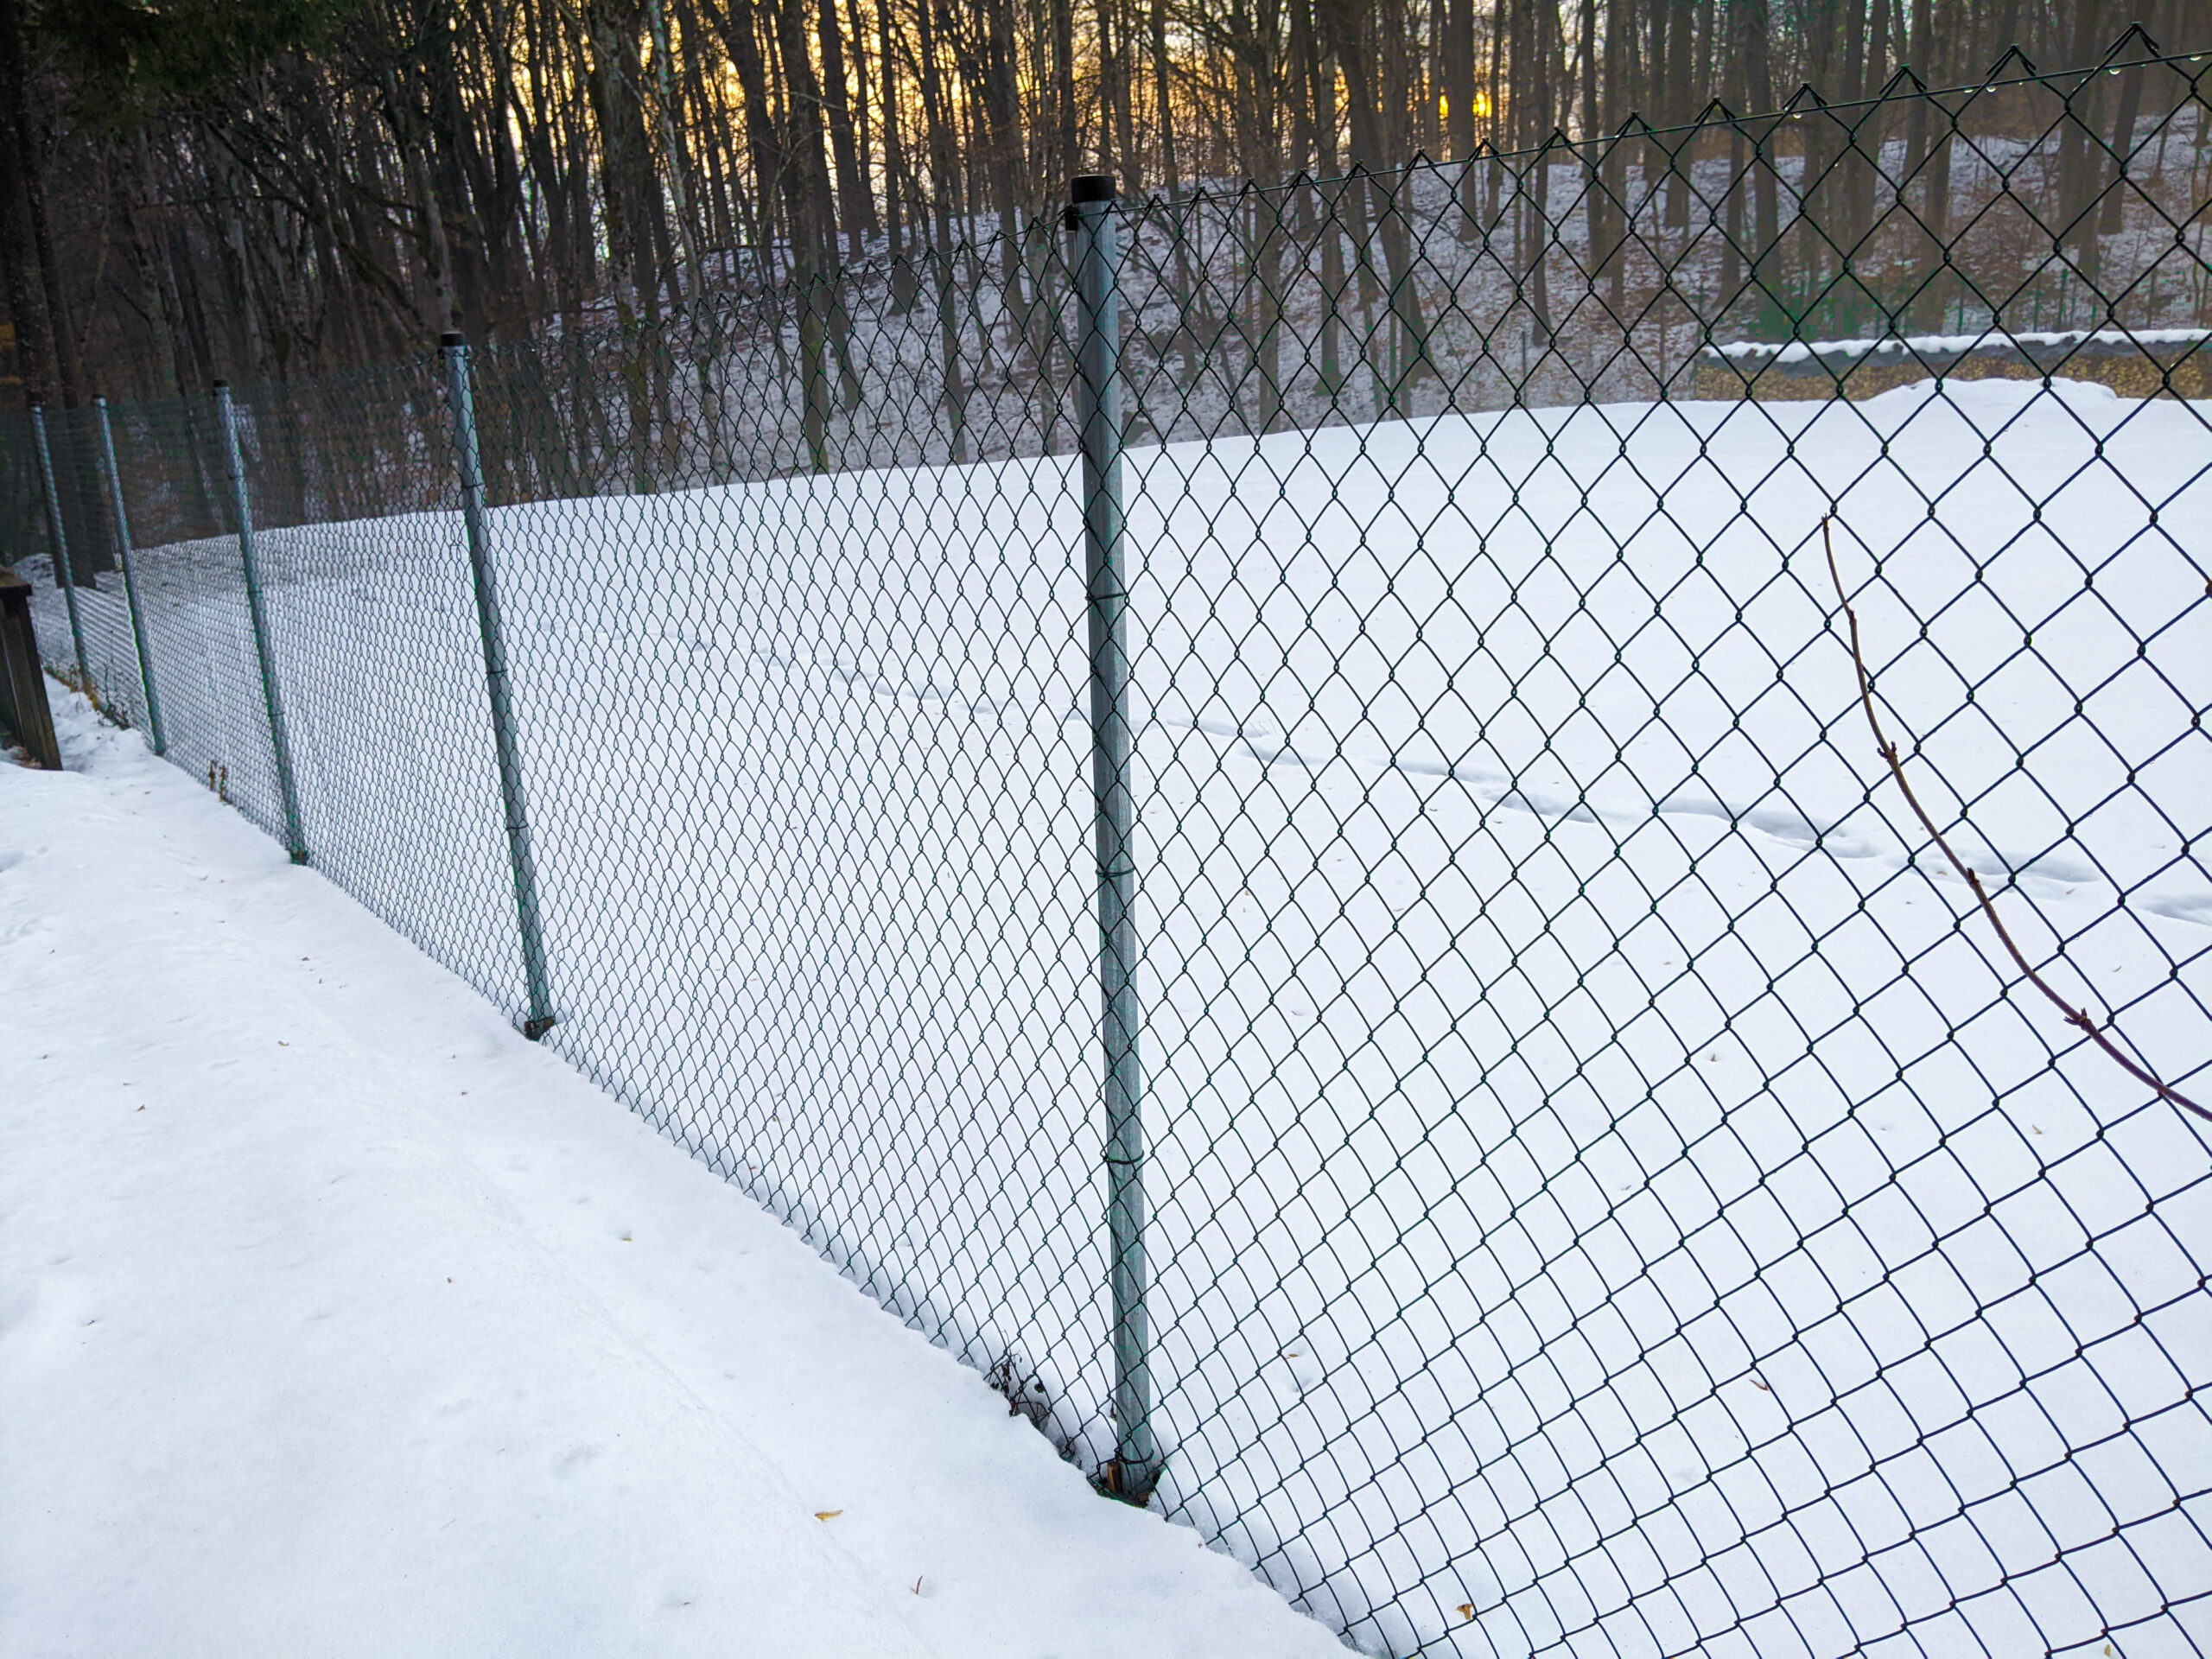
Below you’ll find examples of our real-life chain link fence builds, along with customer projects. We’ve opted for technical illustrations for the instructions found in this blog because they provide better clarity on mesh placement and structural details that can get lost in real-life photography.


Published by

Excellent tutorial! At Fence and Deck Connection, we appreciate clear and practical guides like this. Properly attaching chain link fencing to posts is crucial for durability and security. Your step-by-step approach makes the process accessible for DIYers and professionals alike. Thanks for sharing such helpful fencing expertise!
Thank you so much for the lovely feedback! We’re really glad to hear you found the tutorial useful – it means a lot coming from fencing professionals like Fence and Deck Connection.
Feel free to share it with your audience if you think it could be helpful – the more people it helps, the better! 😊
Thanks again!
“Very useful tips! Understanding how to secure chain link fencing to various materials really helps ensure strength and durability in any setup.”
Good afternoon,
Thanks so much for your comment!
We are very glad you found the tips helpful. Indeed, securing chain link fencing properly really does make a big difference in both stability and long-term durability.
Please let us know if you have any questions regarding chain link fence and we’d be more than happy to assist you!
Kind regards,
Erno