How to Make a Chain Link Gate

Below is a step by step guide on how to make a chain link gate.
- Experience Required: Medium-High
- Tools Required: Protective gloves, Tape measure, Saw, Plier, Fence stretcher
- Materials Required: Chain link fence, Tubing, Corners (elbows), Tension bar, Tension band, Fence ties, Hinges, Latch, Screws, Bolts
GATE TYPES
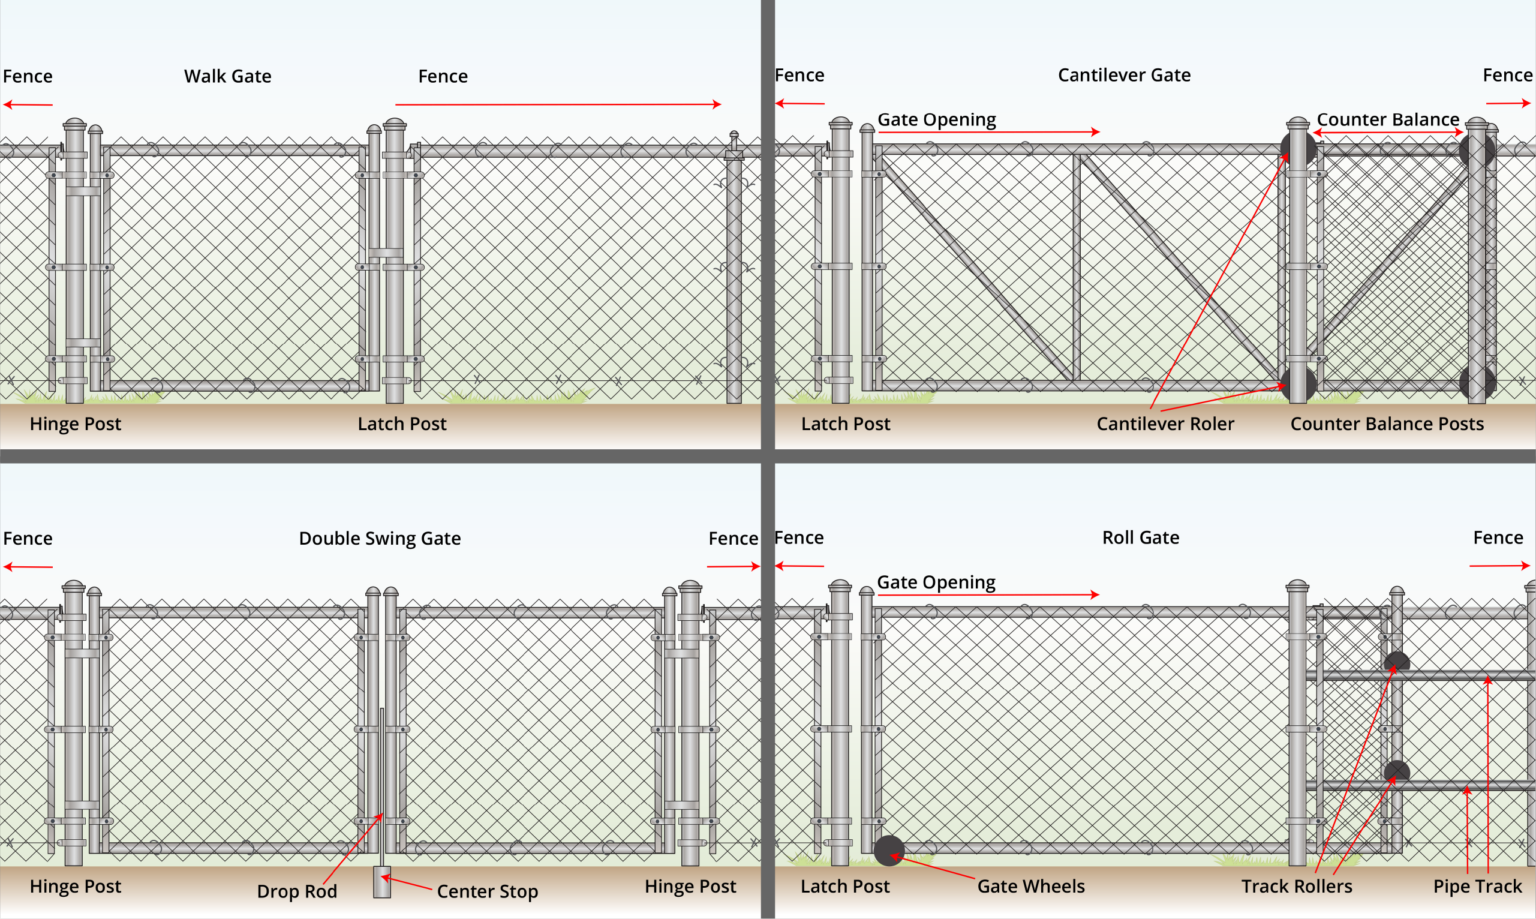
Type 1) Walk Gate
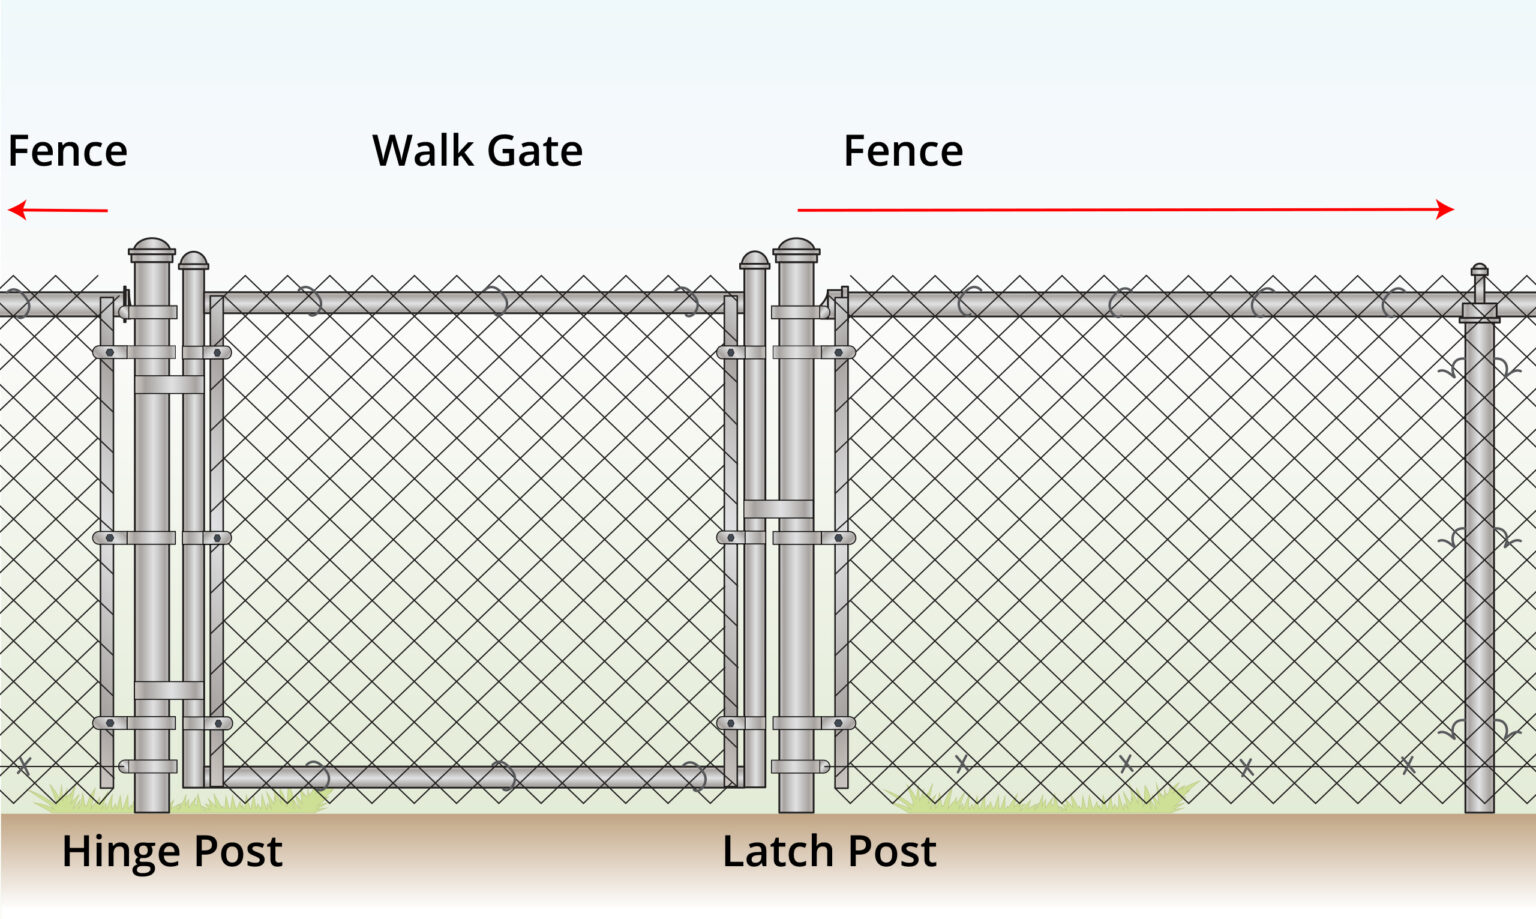
- A smaller entrance designed specifically for pedestrian use.
- Decorative scrolls are an optional feature that can be added to enhance its appearance.
Type 2) Single Swing Gate
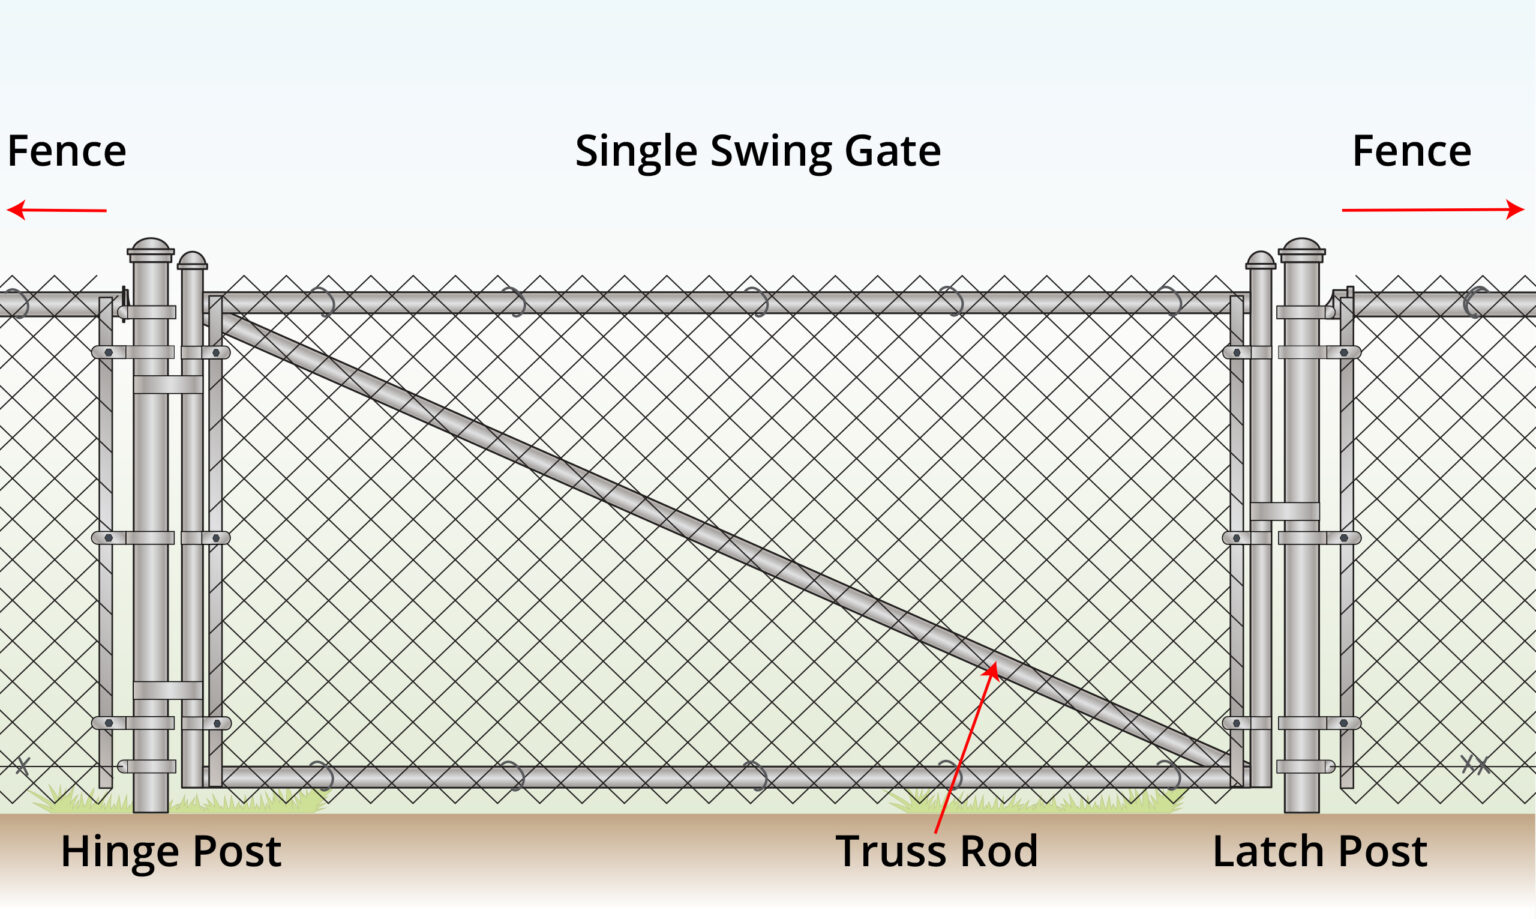
- It is typically used for larger openings to accommodate vehicles, but it operates in a similar way to the first type.
- It can also be automated for added convenience and ease of use.
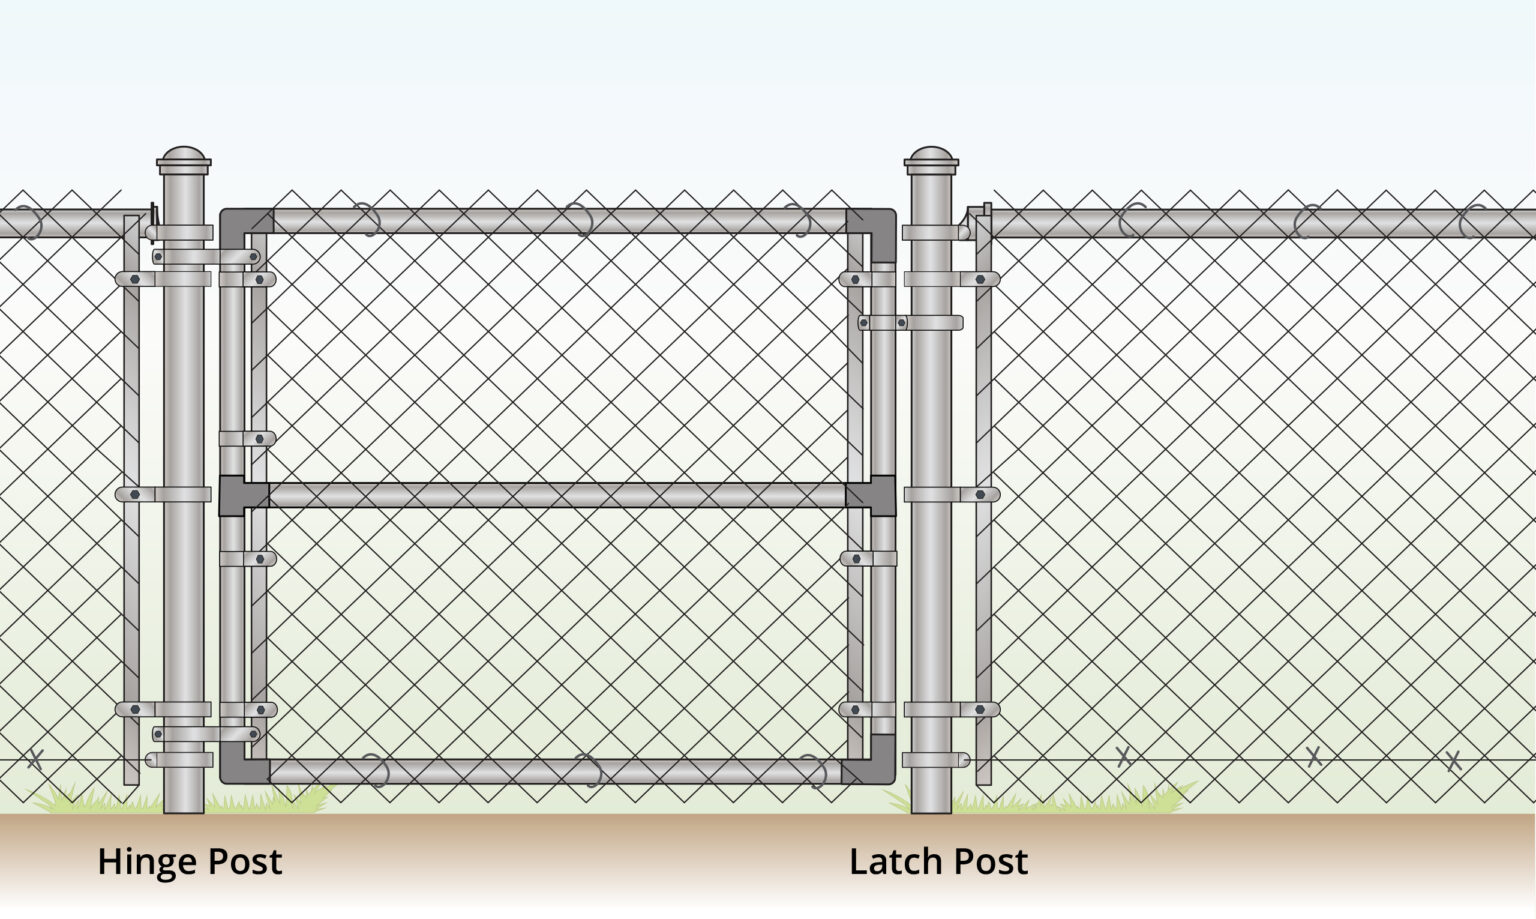
Type 3) Double Swing Gate
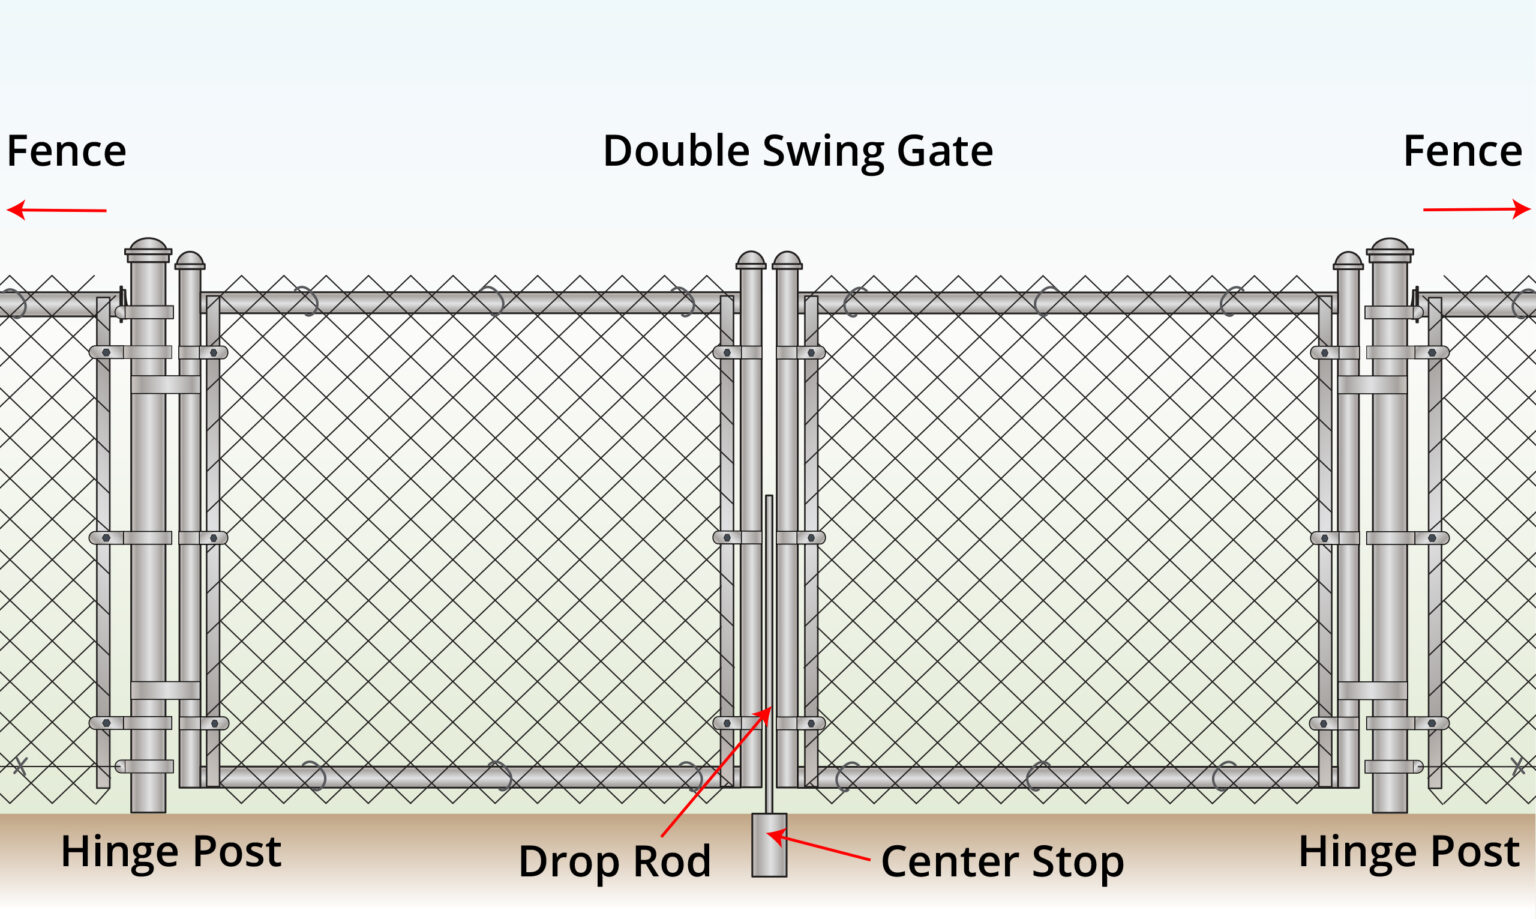
- It is similar to a single swing type but consists of two frames that swing open and meet at a central point when closed.
- This type of entrance can also be automated for added convenience and functionality.
Type 4) Cantilever Gate
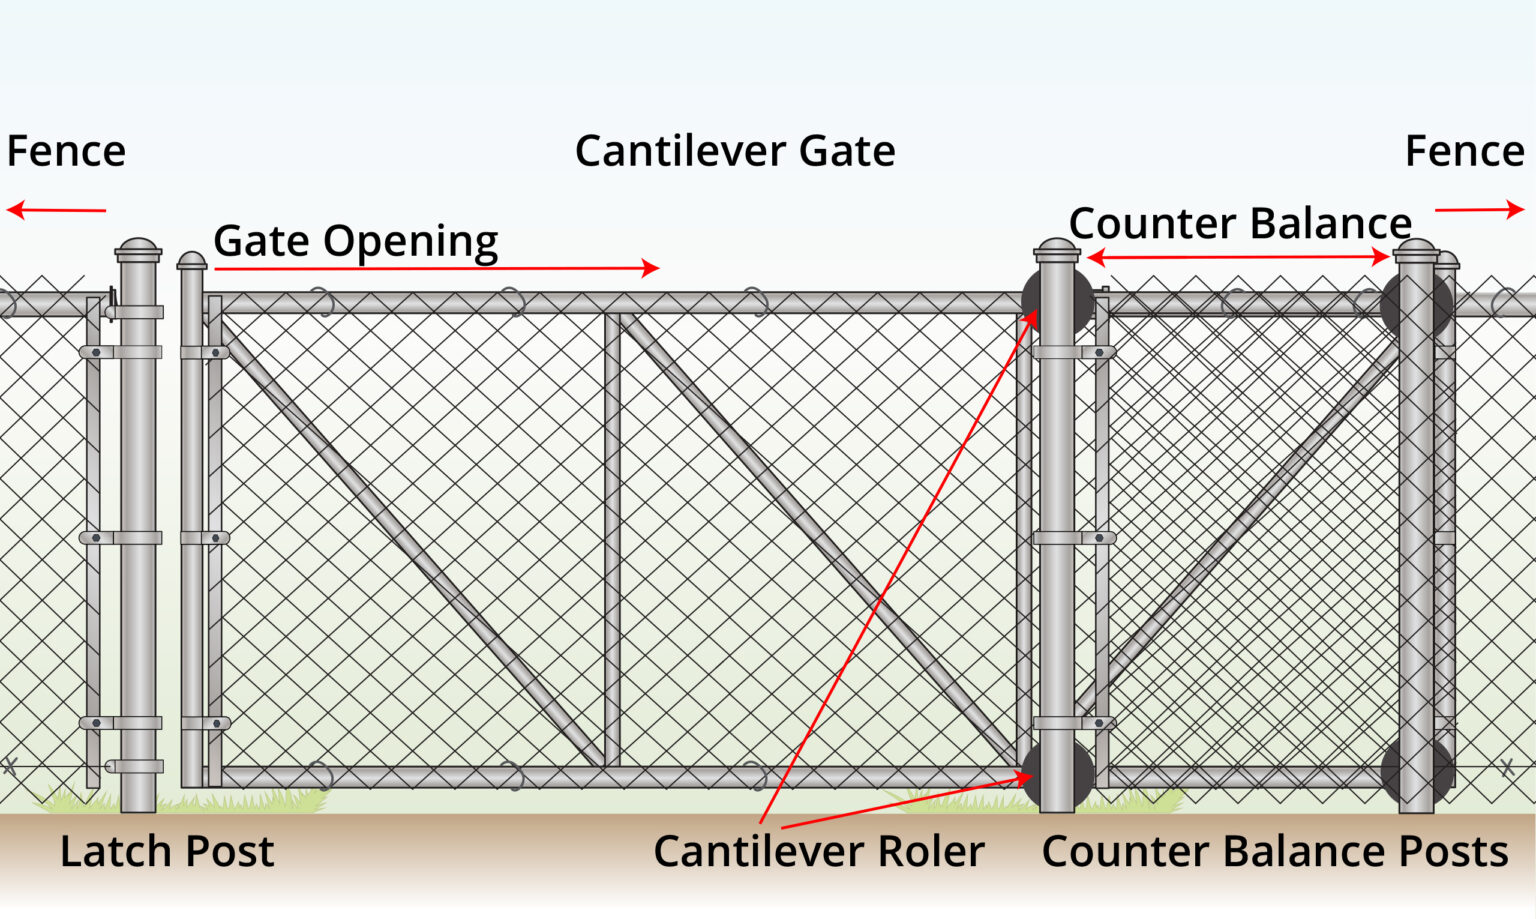
- This type slides open using rollers mounted on counterbalance posts, making it an excellent choice for larger openings.
- It can also be automated for added convenience, but they require more space along the fence line to accommodate the sliding mechanism.
Type 5) Roll Gate
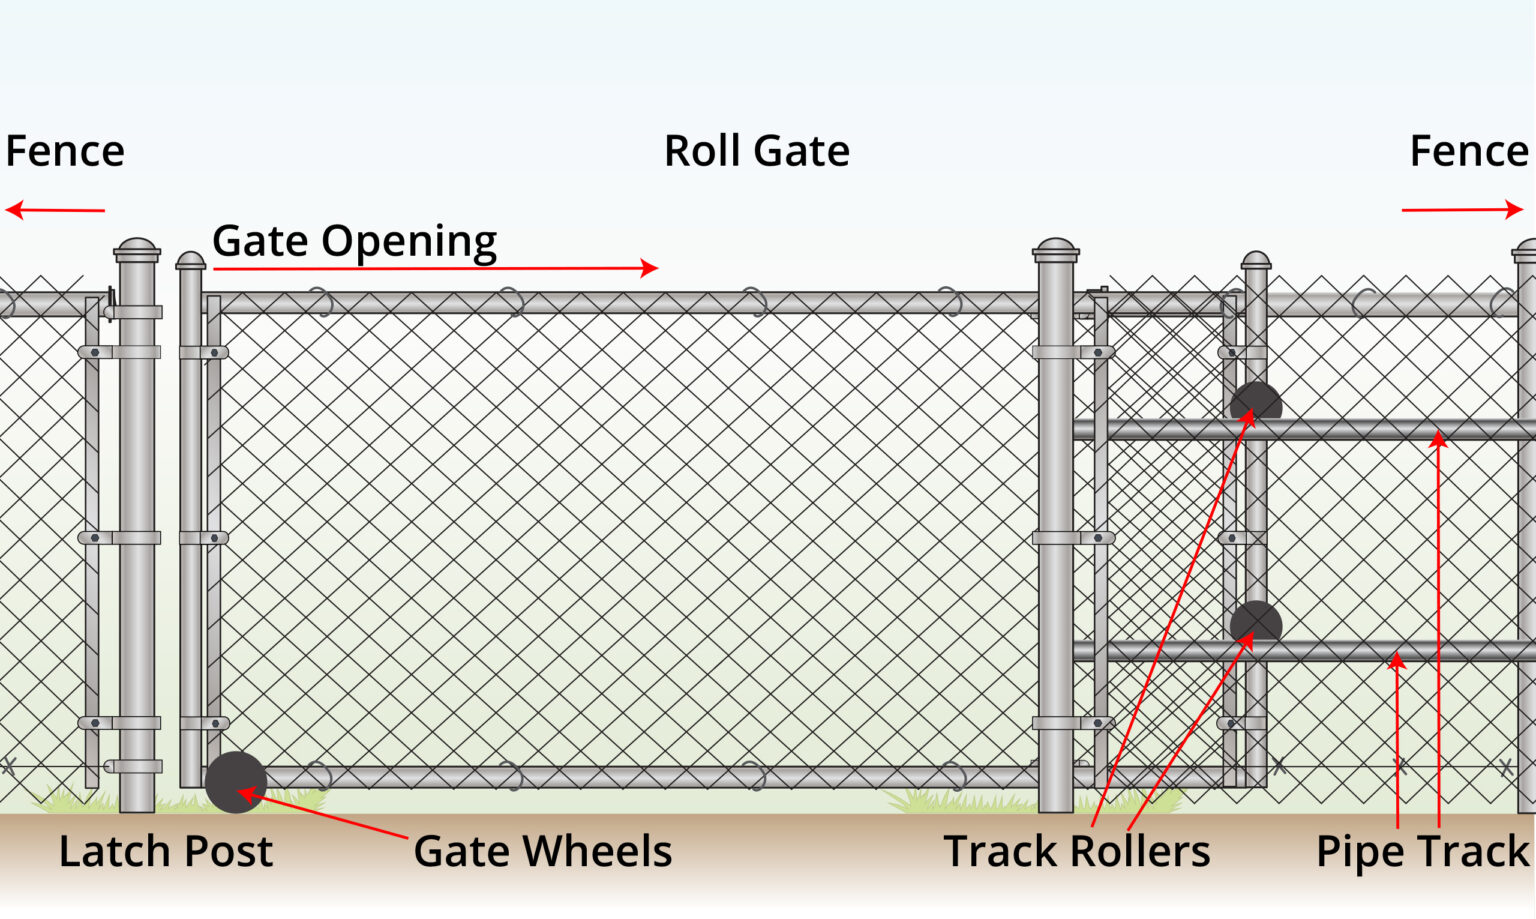
- This type operates by rolling along the ground on a track that is attached to the fence.
- It is not compatible with automation and requires sufficient space along the fence line to roll back when opened.
STEP BY STEP INSTRUCTIONS
Step 1) Take Measurements: Height
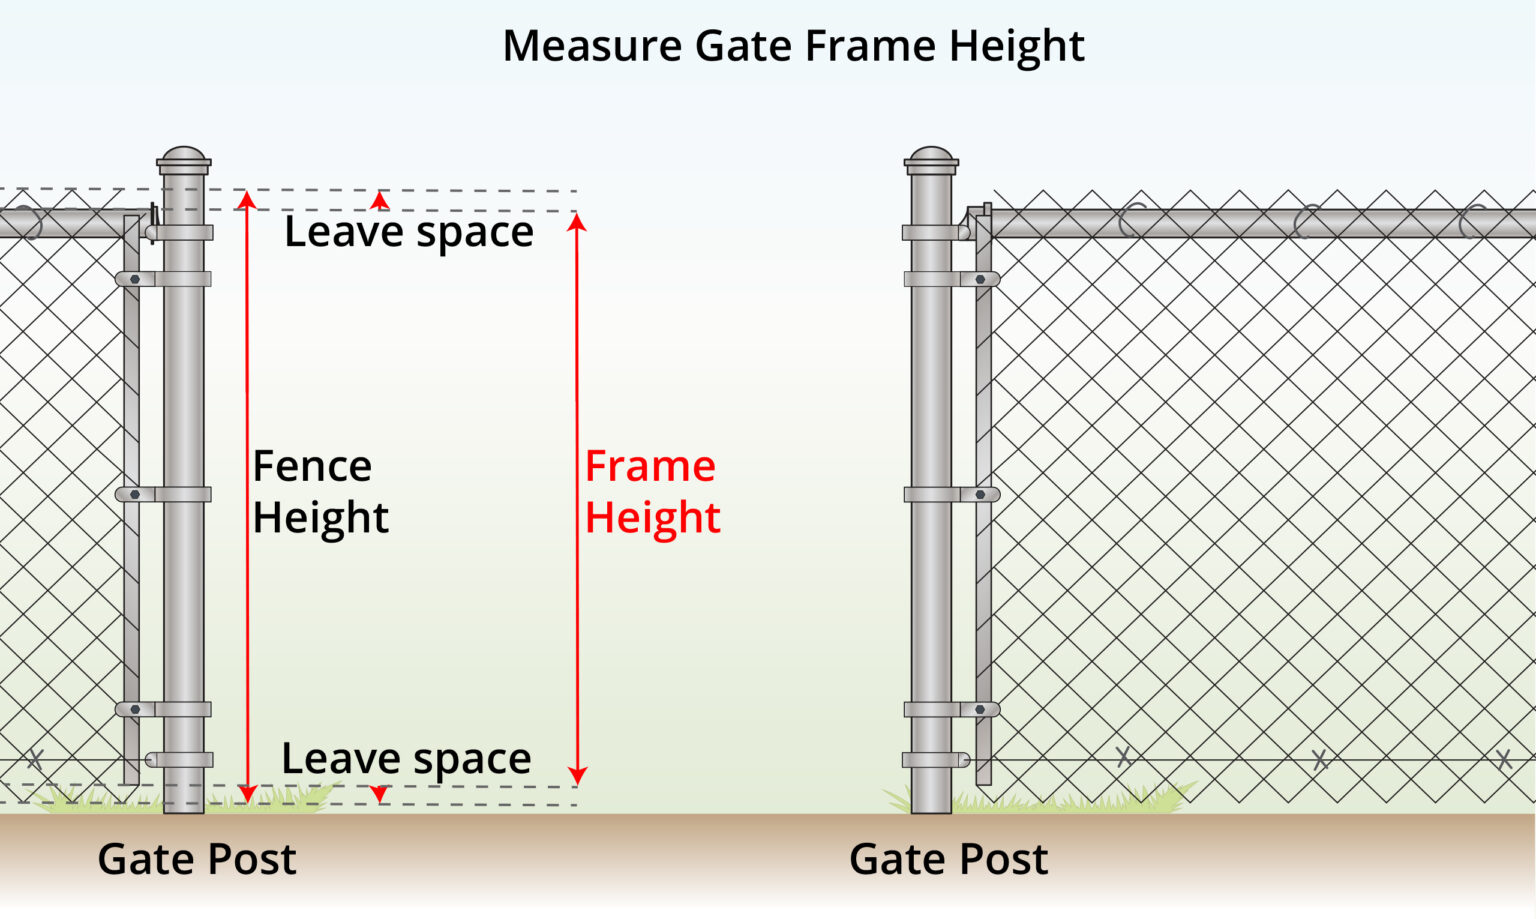
- To determine the door height, account for about 4 cm (1.5″) of extra chain link at both the top and bottom.
- For a 180cm door, subtract 8 cm (2 × 4 cm) to get a frame height of 172 cm.
- This allows the chain link to extend slightly beyond the frame.
Step 2) Measure the Width
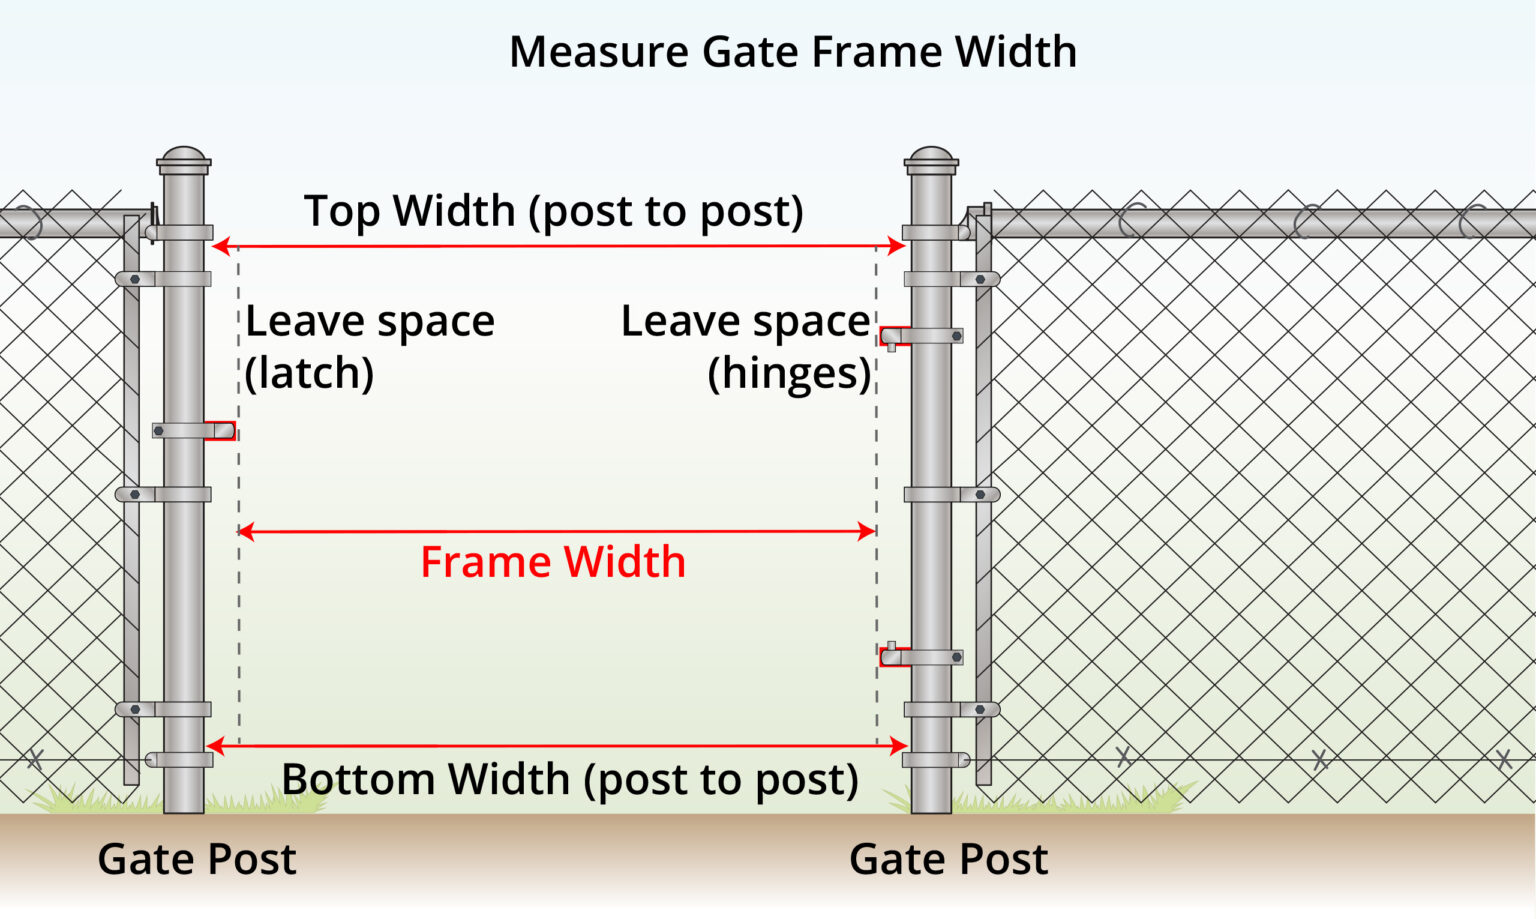
- Use a tape measure to check the distance between the posts at both the top and bottom.
- Include approximately 10cm for hinges and latches (adjust based on your hardware).
- For example, if the total width is 100cm, subtract 10cm for hardware, making the frame width 90cm.
Step 3) Build the Frame
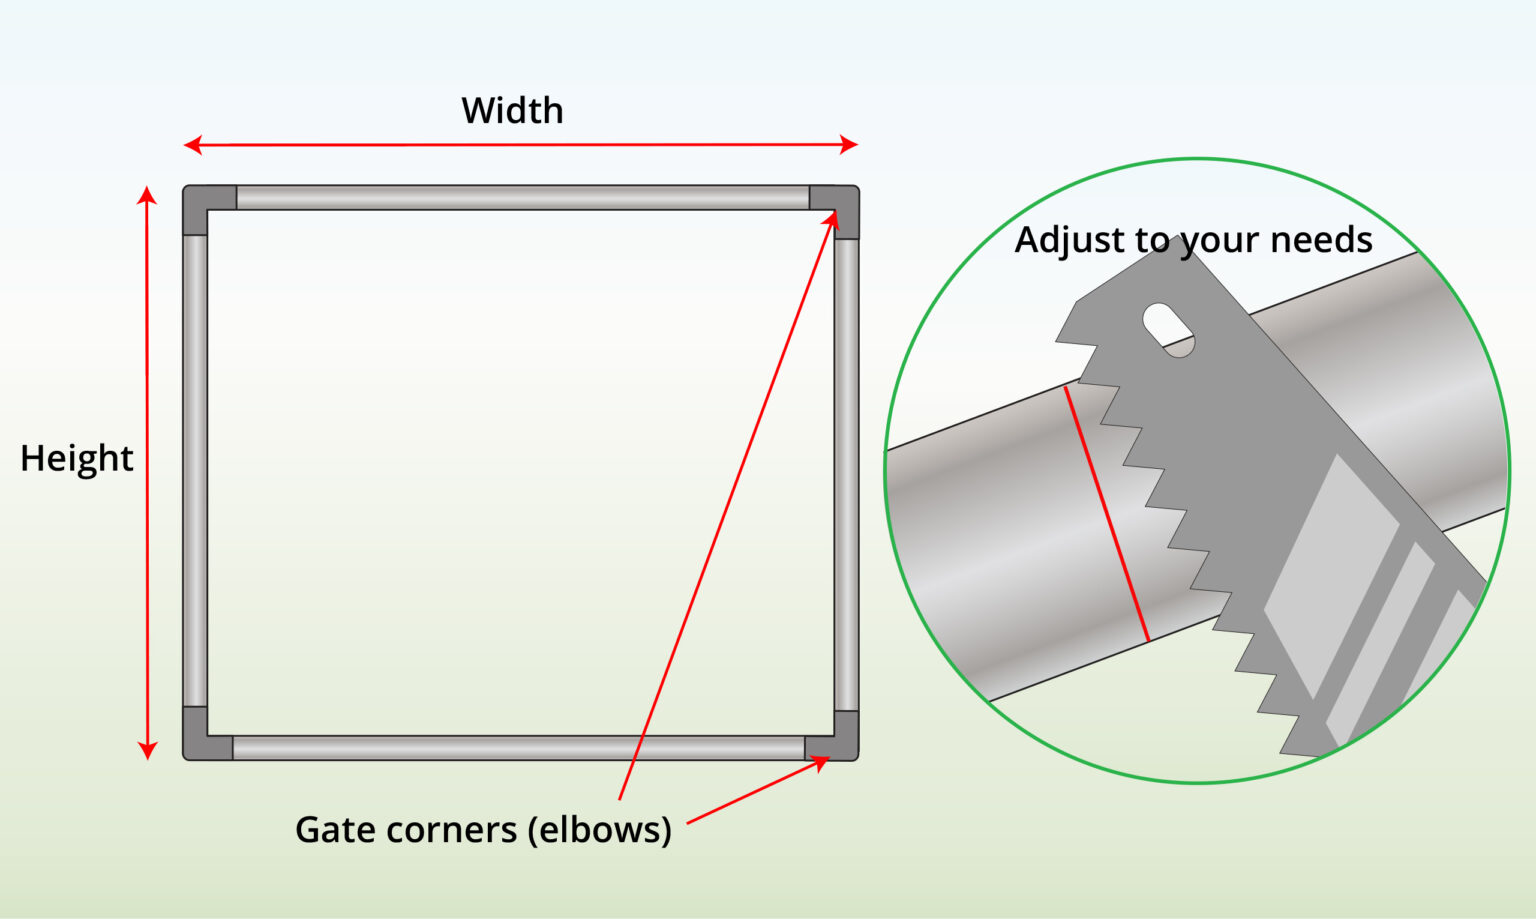
- Arrange the tubing into a rectangle on a flat surface, then cut it to size with a saw.
- Connect the pieces with elbows to form the rectangle, adjusting and making additional cuts if needed.
- Secure the connections with screws or bolts to prevent movement.
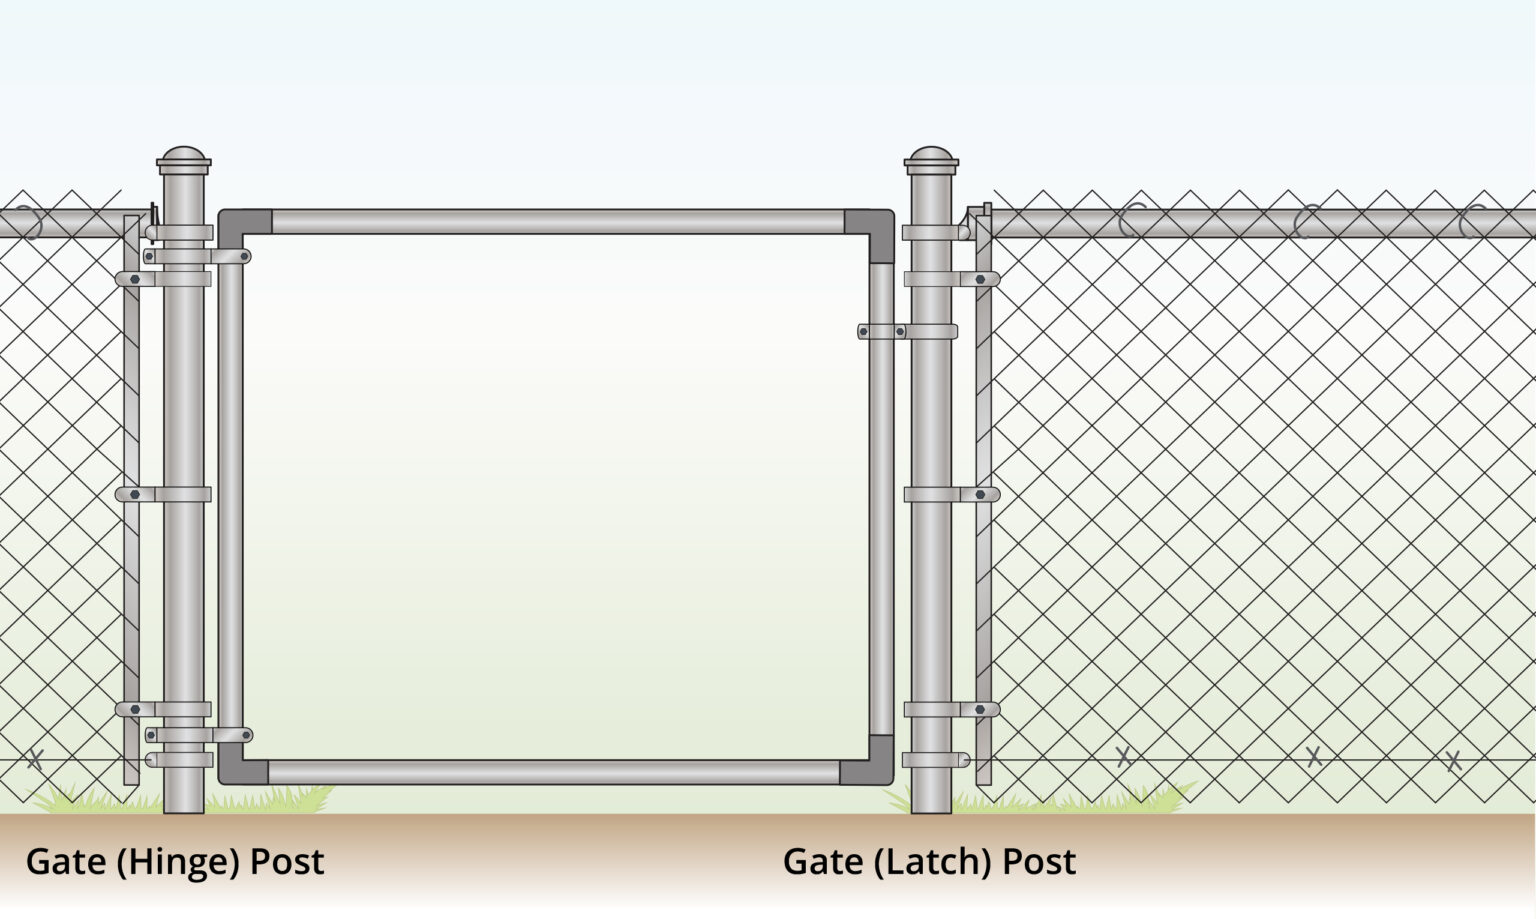
Step 4) Install Male Hinges
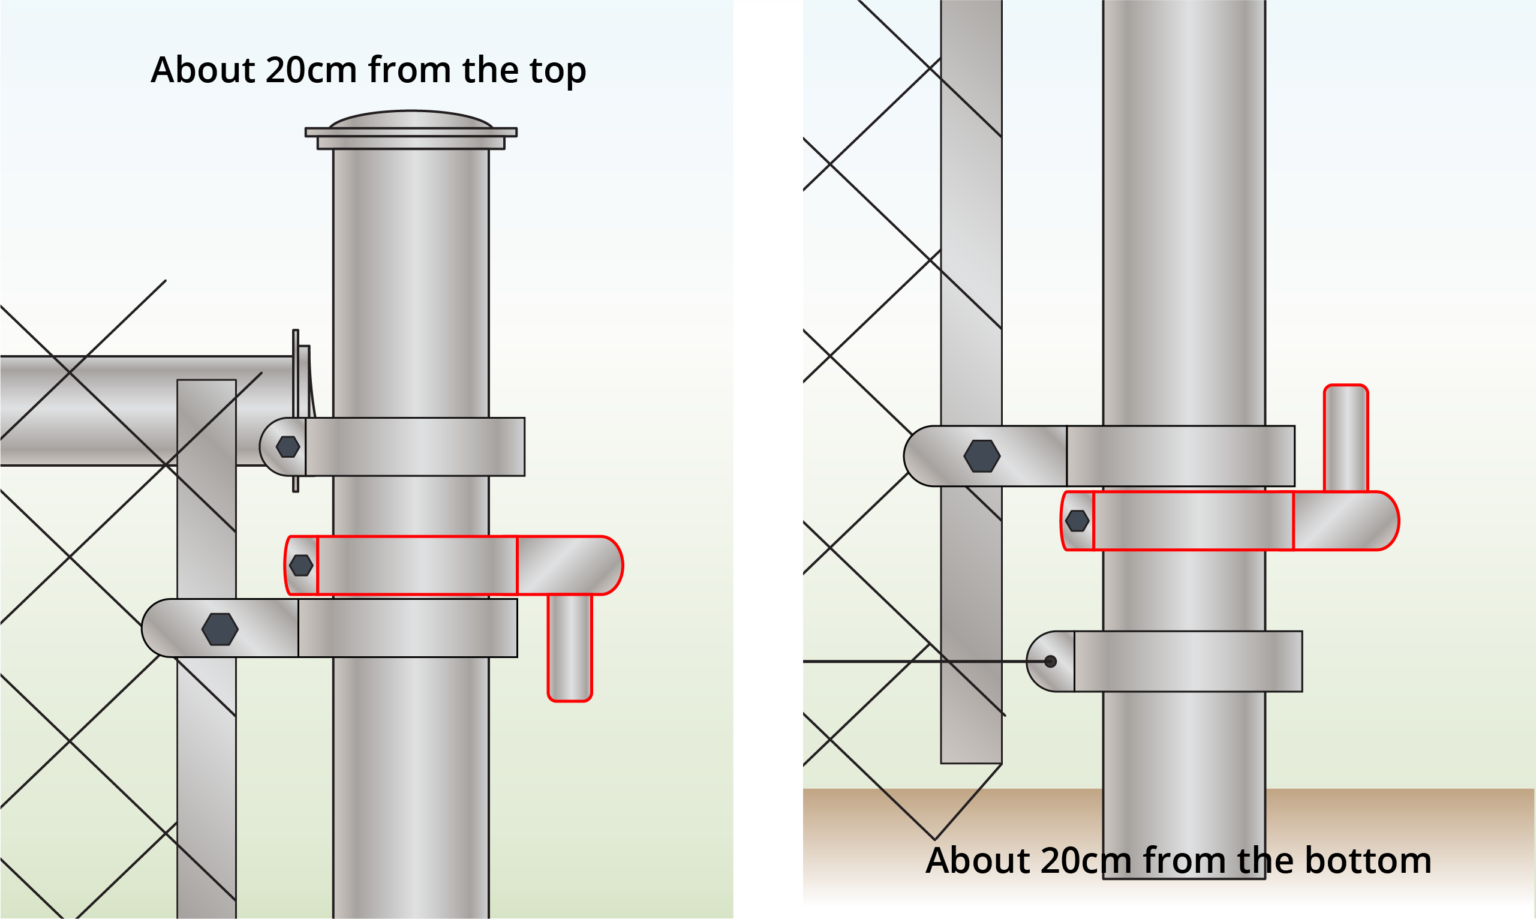
- Attach the male hinges to the post, placing them about 20cm (8″) from the top and bottom.
- Ensure the top hinge pin faces downward and the bottom pin faces upward.
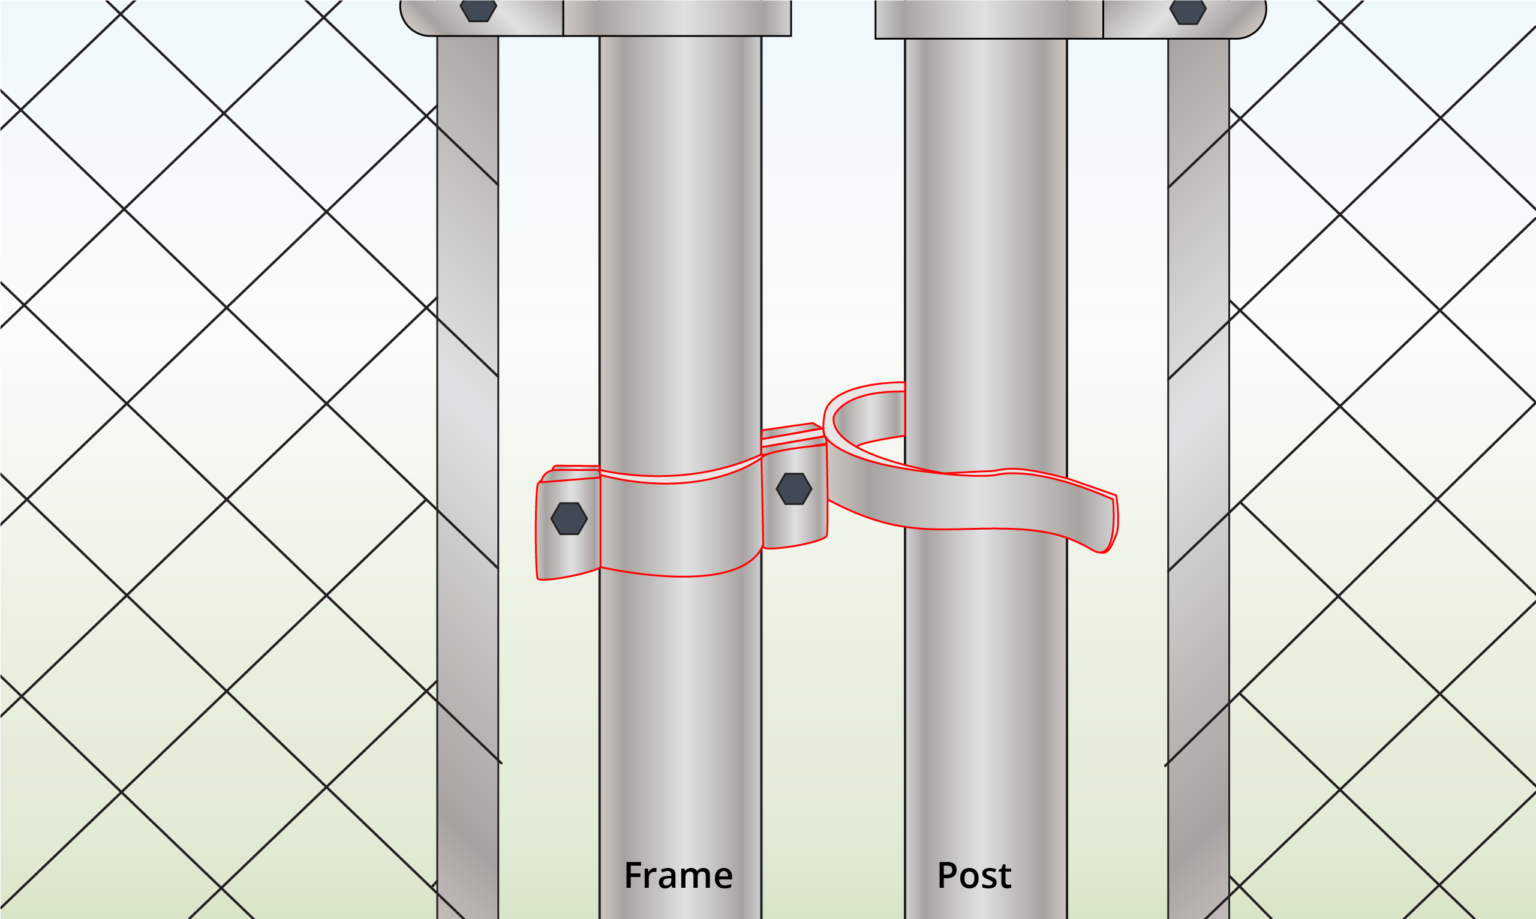
Step 5) Install Female Hinges

- Additionally, install the female hinges onto the frame.
Step 6) Add a Latch
- Attach the fork latch to both the post and the frame at a comfortable height.
- Secure it with nuts and bolts, making sure it aligns properly for a tight closure.
- Keep the bolts loose for now and tighten them later once everything is correctly positioned.
step 7) Do a Test Fit
- In the process of how to make a chain link gate, it’s a good idea to do a test fit before attaching the chain link.
- This will make it easier to adjust or fix things if needed.
Step 8) Install a Brace (Optional)

- Place a brace across the center of the frame to prevent the sides from collapsing when tension is applied to the chain link fabric.
- Cut a piece of tubing to the appropriate length and fasten it securely at the center of the frame.
Step 9) Cut Mesh to Size
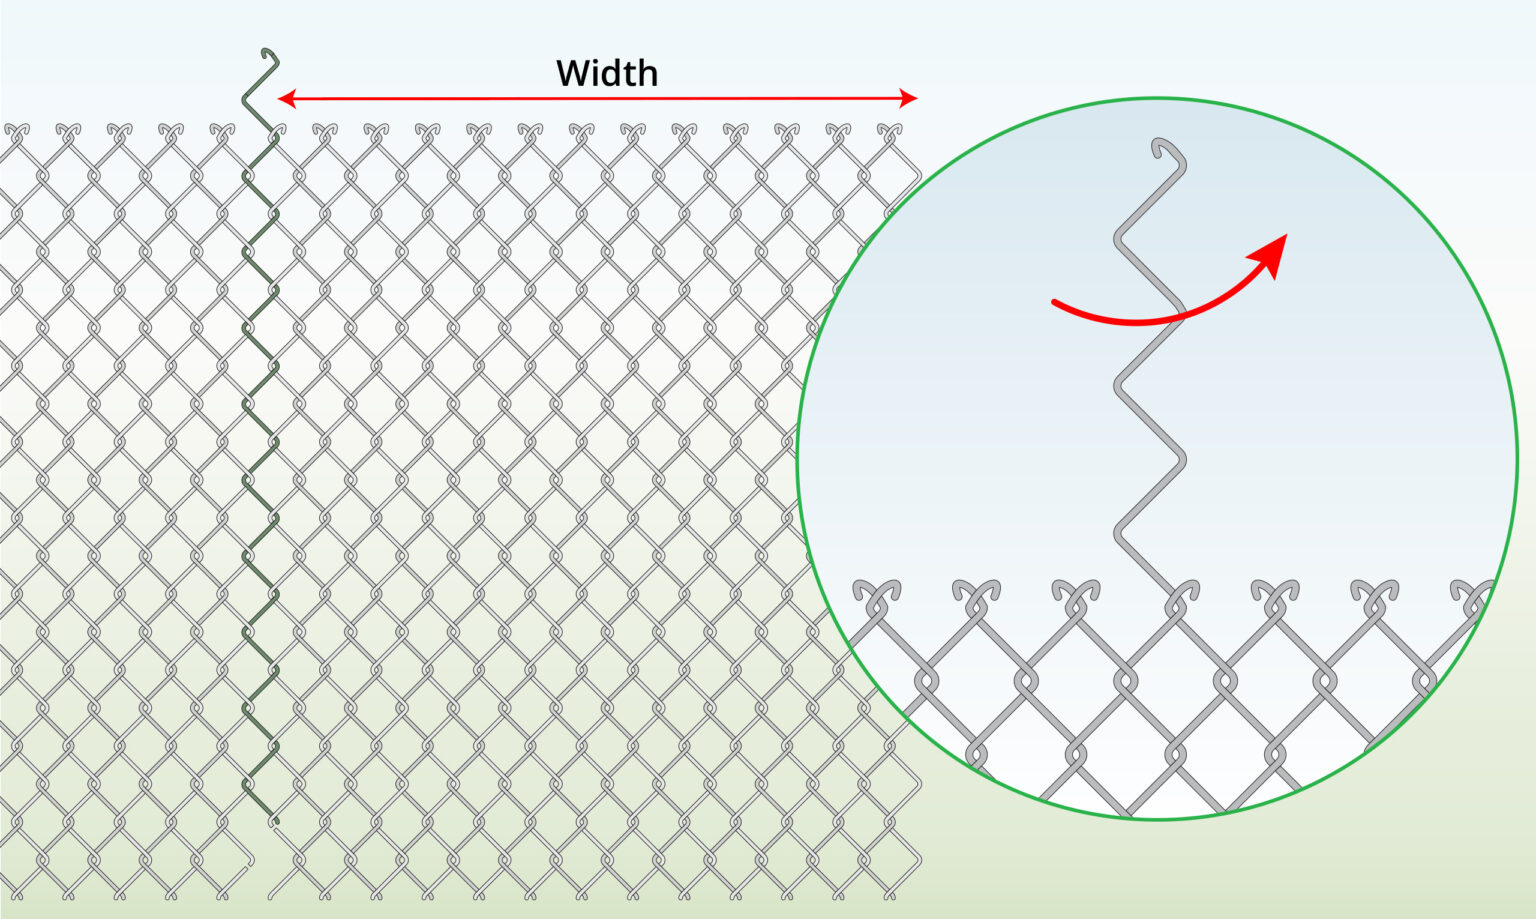
- Measure your chain link mesh and mark the area where it needs to be shortened.
- To shorten the mesh, simply untwist the wire at the marked point.
Step 10) Attach Chain Link to Frame
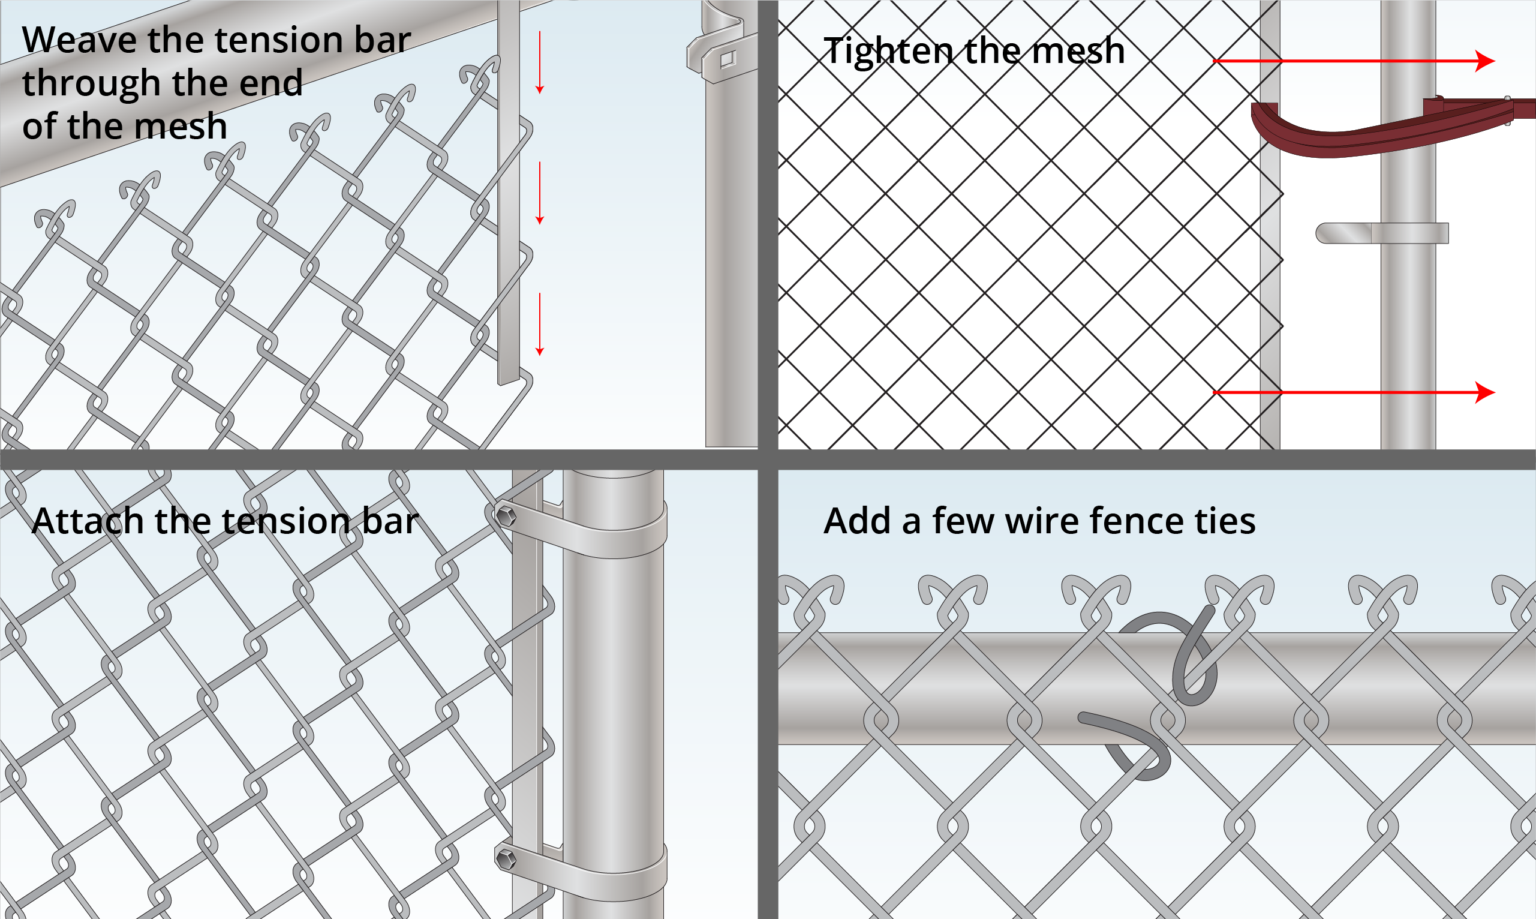
- Weave the tension bar through the mesh at both ends of the frame. Use a fence stretcher to tighten if needed, then attach it with tension bands.
- Secure the mesh to the top and bottom with fence ties.
- For detailed instructions, see our installation blog below.
Step 11) Put into Final Place
- After installation, open and close the door several times to ensure it operates smoothly, and make any necessary adjustments.
- Securely tighten the latch to ensure proper functionality.
Tips and Tricks on How to Make a Chain Link Gate
Before starting your fencing project, it’s important to plan carefully and consider a few key factors. The points below are based on our team’s experience designing and installing different fencing.
- Safety First: Gates are often heavy and large. Be sure to use proper lifting techniques, plenty of manpower or equipment.
- Check for Proper Alignment: Ensure the entrance is installed on a level plane to prevent dragging or sticking.
- Measure Twice, Cut Once: Take the time to double-check your measurements for your frame.
- Choose the Right Hardware: Invest in high-quality hinges, latches, and rollers that can support the door’s weight and withstand outdoor conditions.
- Add Bracing for Larger Entrances: For wider entrances, include diagonal bracing in the frame to maintain rigidity and prevent warping.
- Require More Space: For rolling or cantilever entrances, ensure there is enough room for them to move freely without obstructions.
FURTHER READING
- How to Unroll Chain Link Fence – A guide showing you unroll correctly a mesh.
- How to Cut Chain Link Fence – Learn how cut mesh using different methods.
- How to Connect Chain Link Fence – A guide showing you how to connect two fences.
- How to Tighten Chain Link Fence – Learn how to tighten a mesh.

Written By
This blog was created by our Technical Illustrator, Timi and reviewed by our Technical Consultant, Erno.
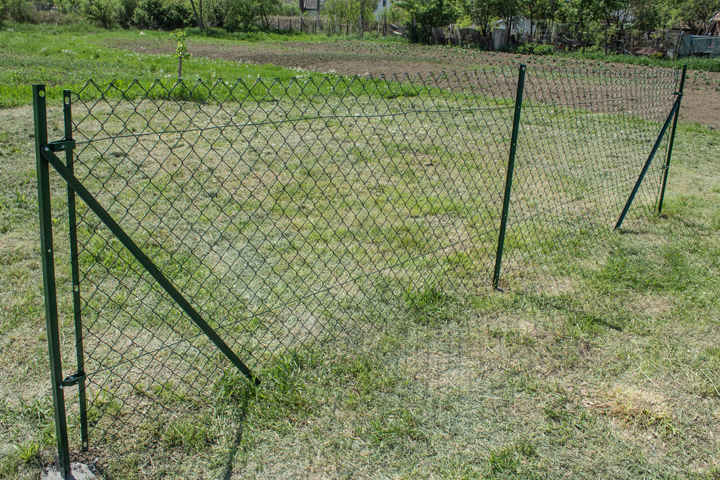
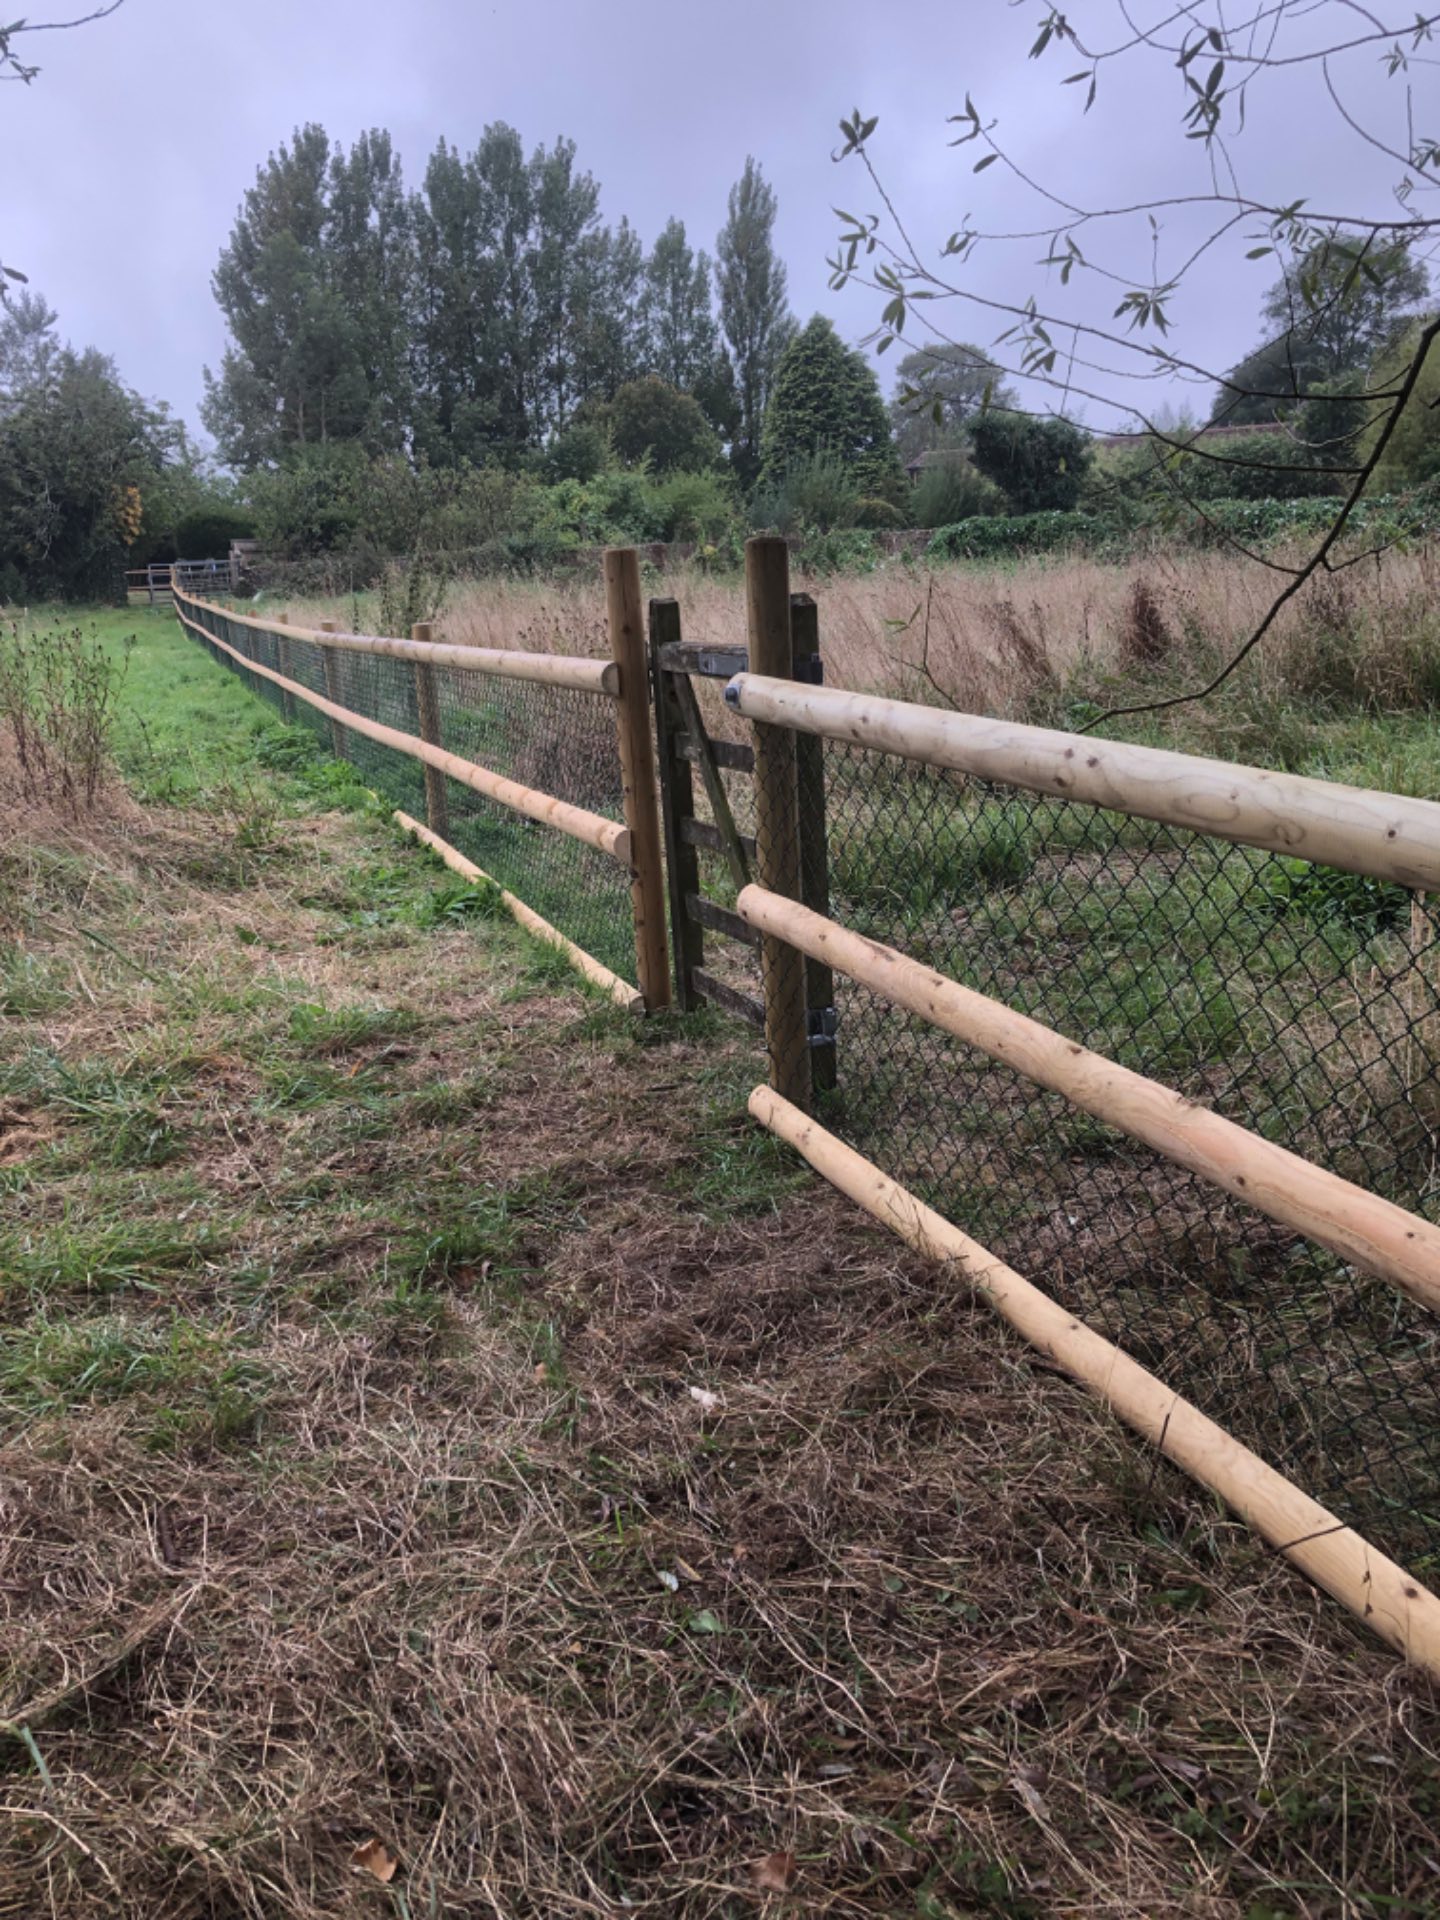
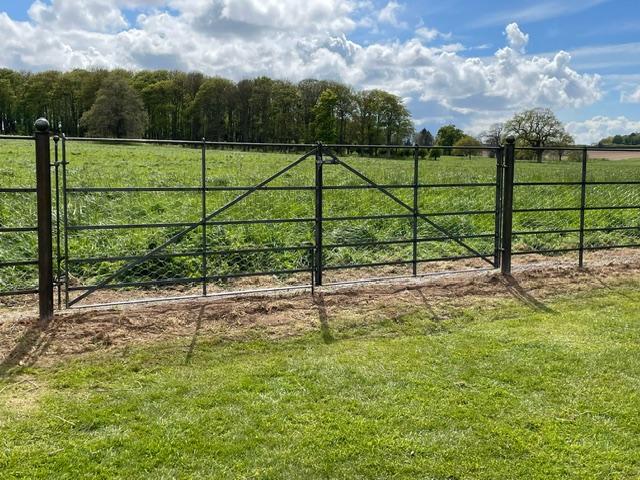
Below you’ll find examples of our real-life chain link fence builds, along with customer projects. We’ve opted for technical illustrations for the instructions found in this blog because they provide better clarity on mesh placement and structural details that can get lost in real-life photography.

Published by
