How to Attach Welded Mesh to Different Posts and Materials
Below you will find a step by step instruction on how to attach a welded mesh to different posts and materials.
OVERVIEW
- Estimated Completion Time: Depends on the amount and size of the posts
- Experience Required: Low
- Tools Required: Hammer
- Materials Required: Welded mesh, Staples, Cable ties, Eye bolts, Tensioning wire
WOOD OR WOODEN POSTS
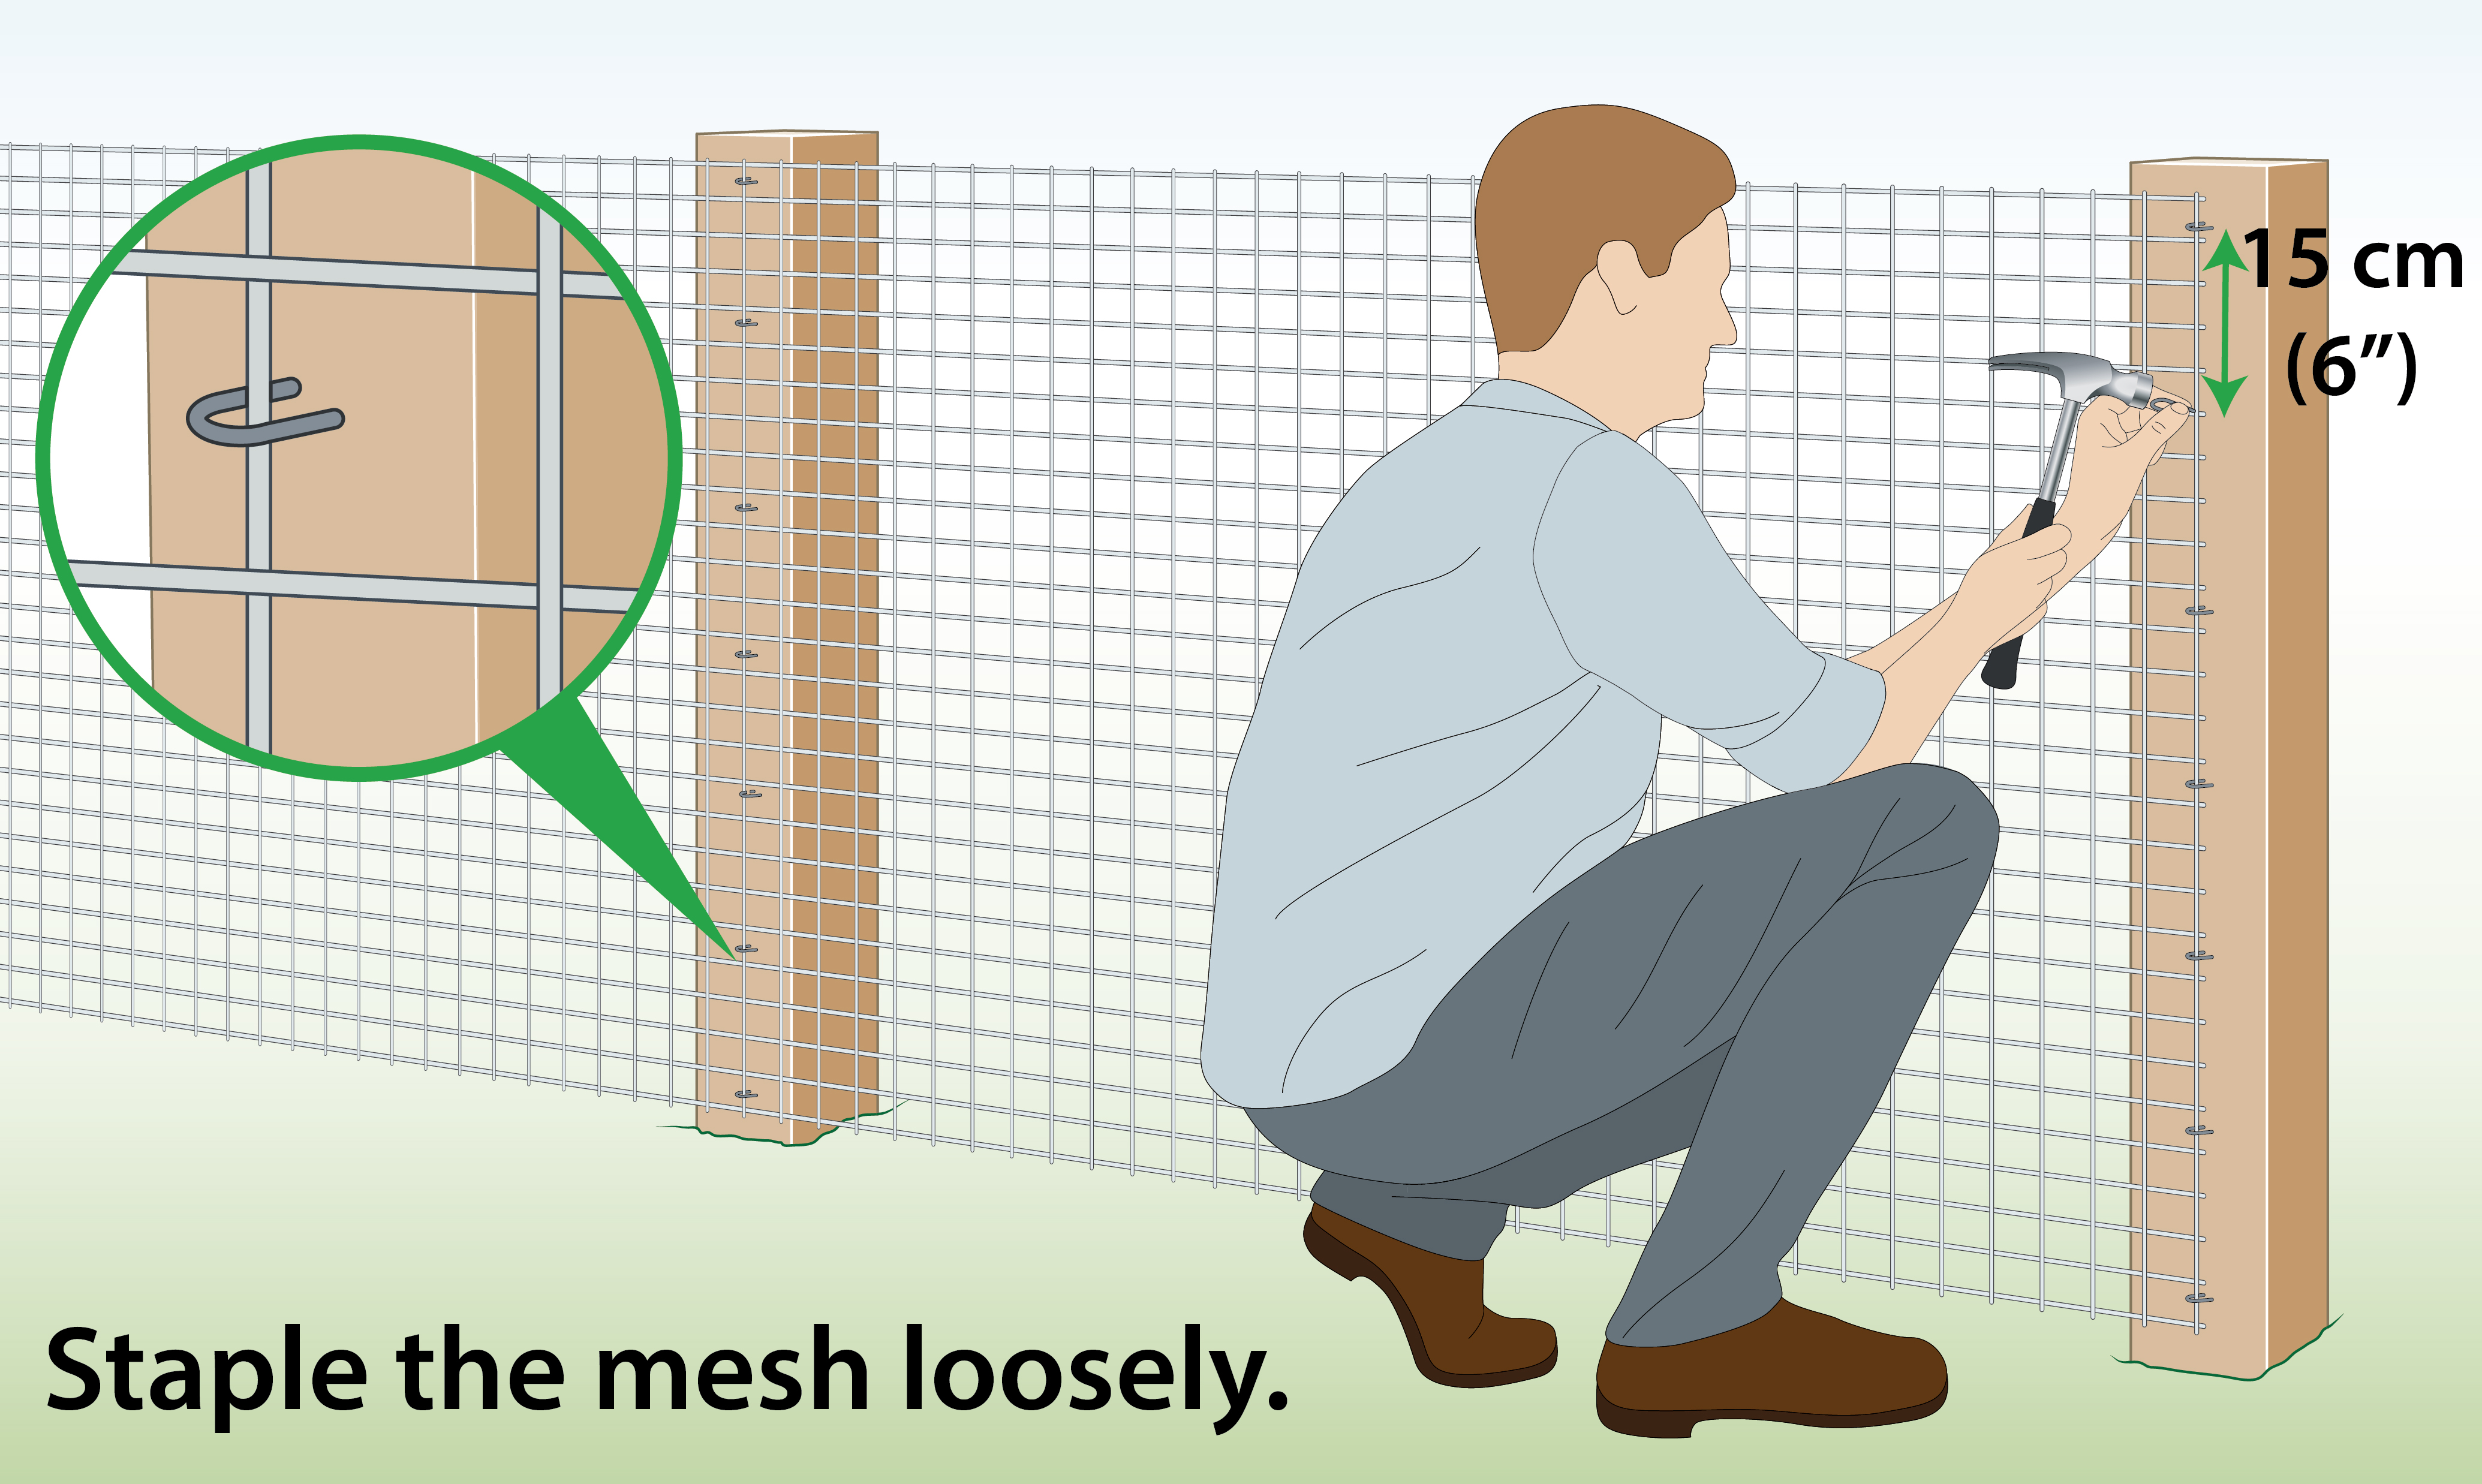
- Staple the mesh every 15cm to keep the welded mesh secure.
- The loose staples allow the mesh to move during impact and temperature changes.
METAL RODS OR POSTS
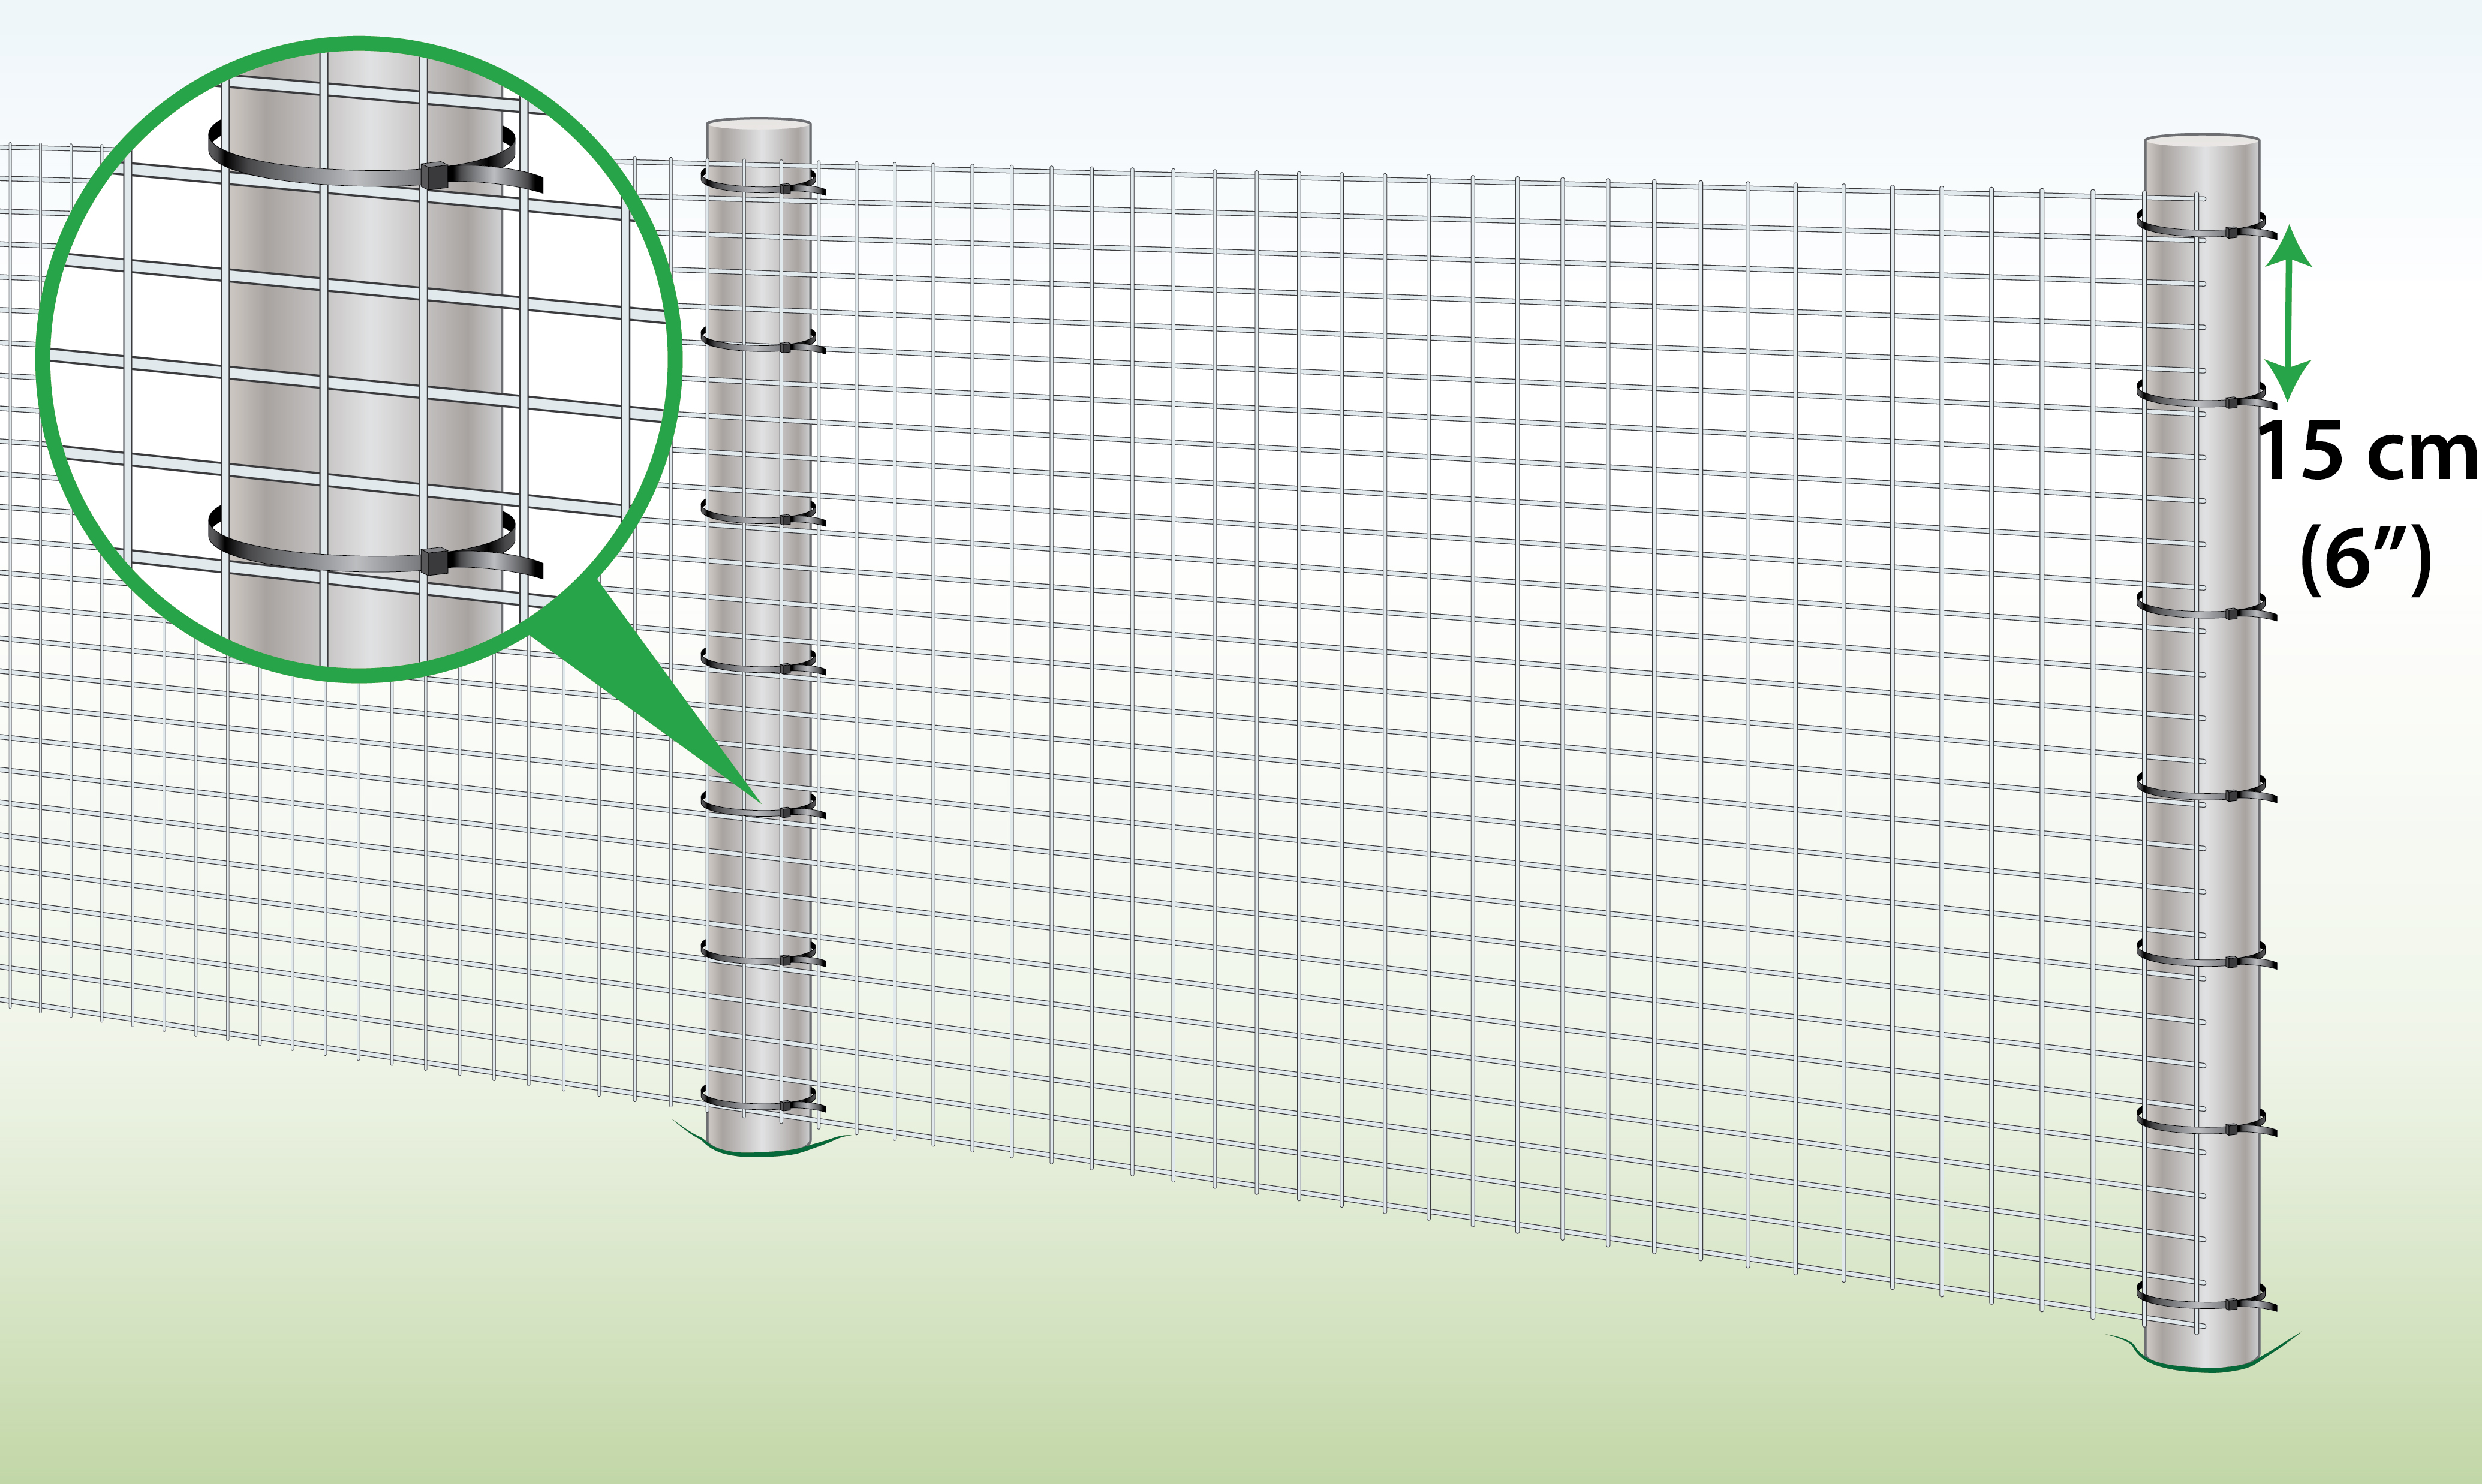
- Attach the welded mesh to the posts with cable ties at 15cm intervals.
- Make sure not to overtighten the cable ties while installing.
CONCRETE POSTS
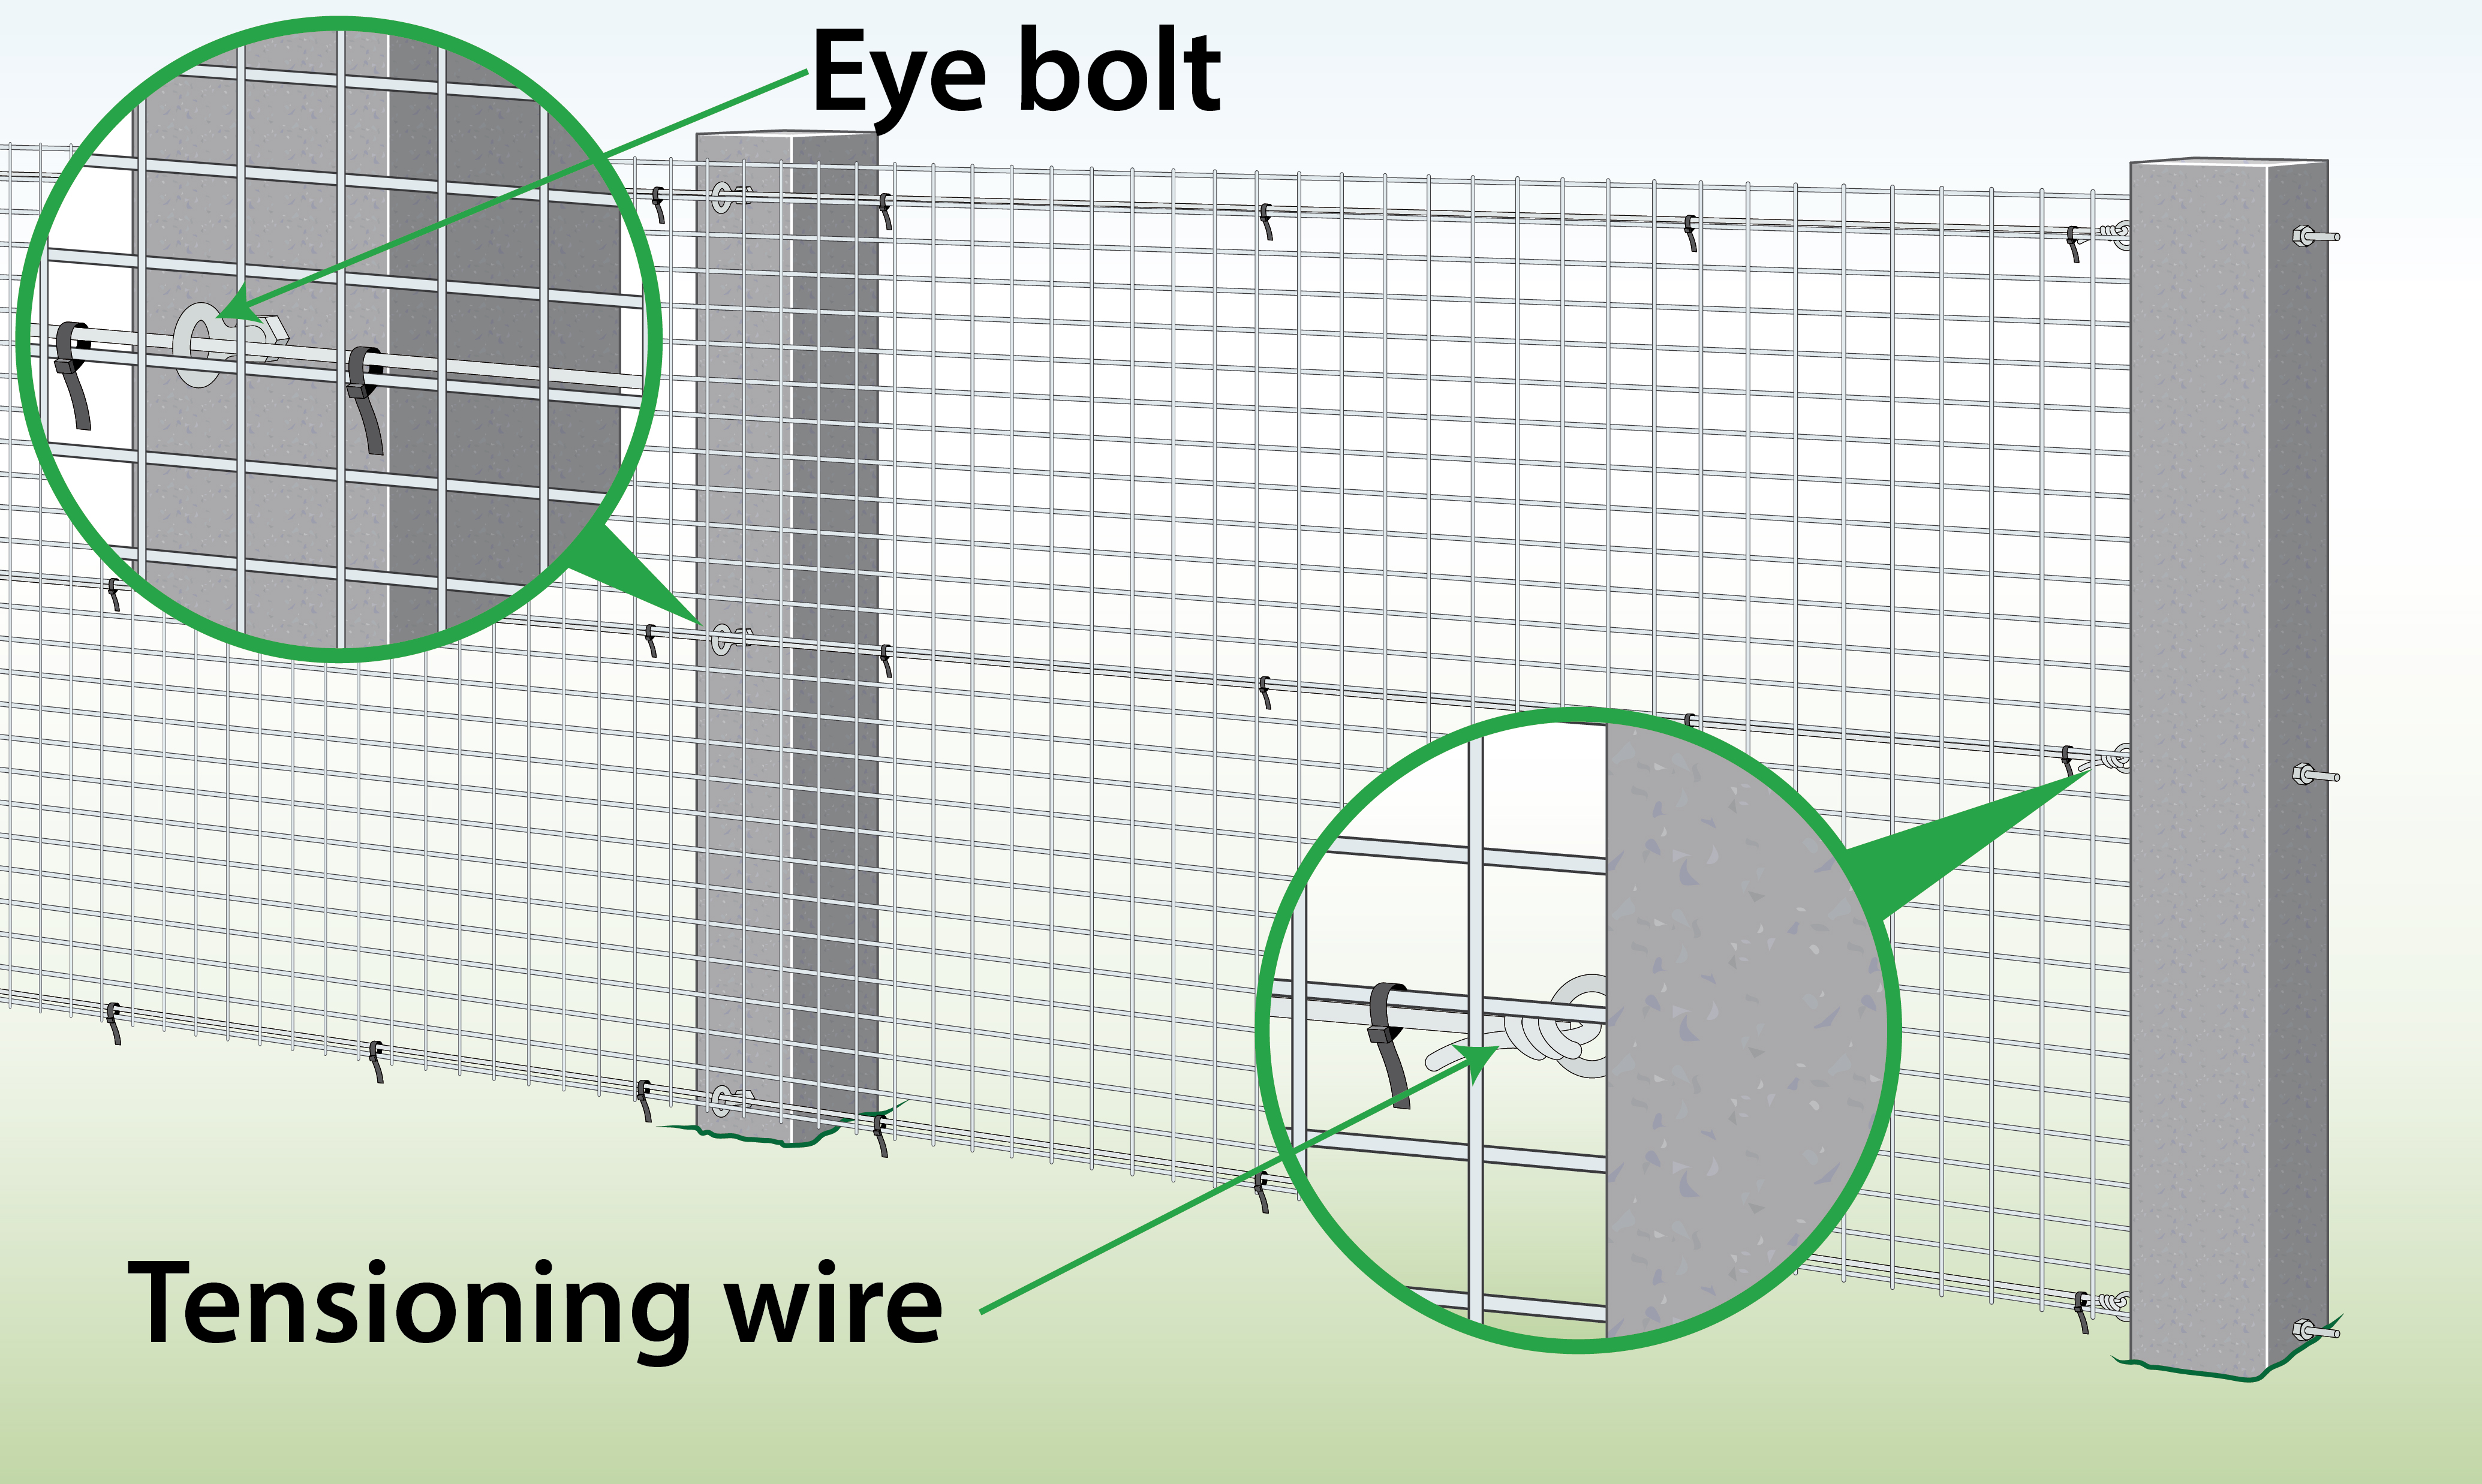
- Use eye bolts and tensioning wire to attach the mesh to the concrete posts.
- Use cable ties to secure the welded mesh to the tensioning wire.
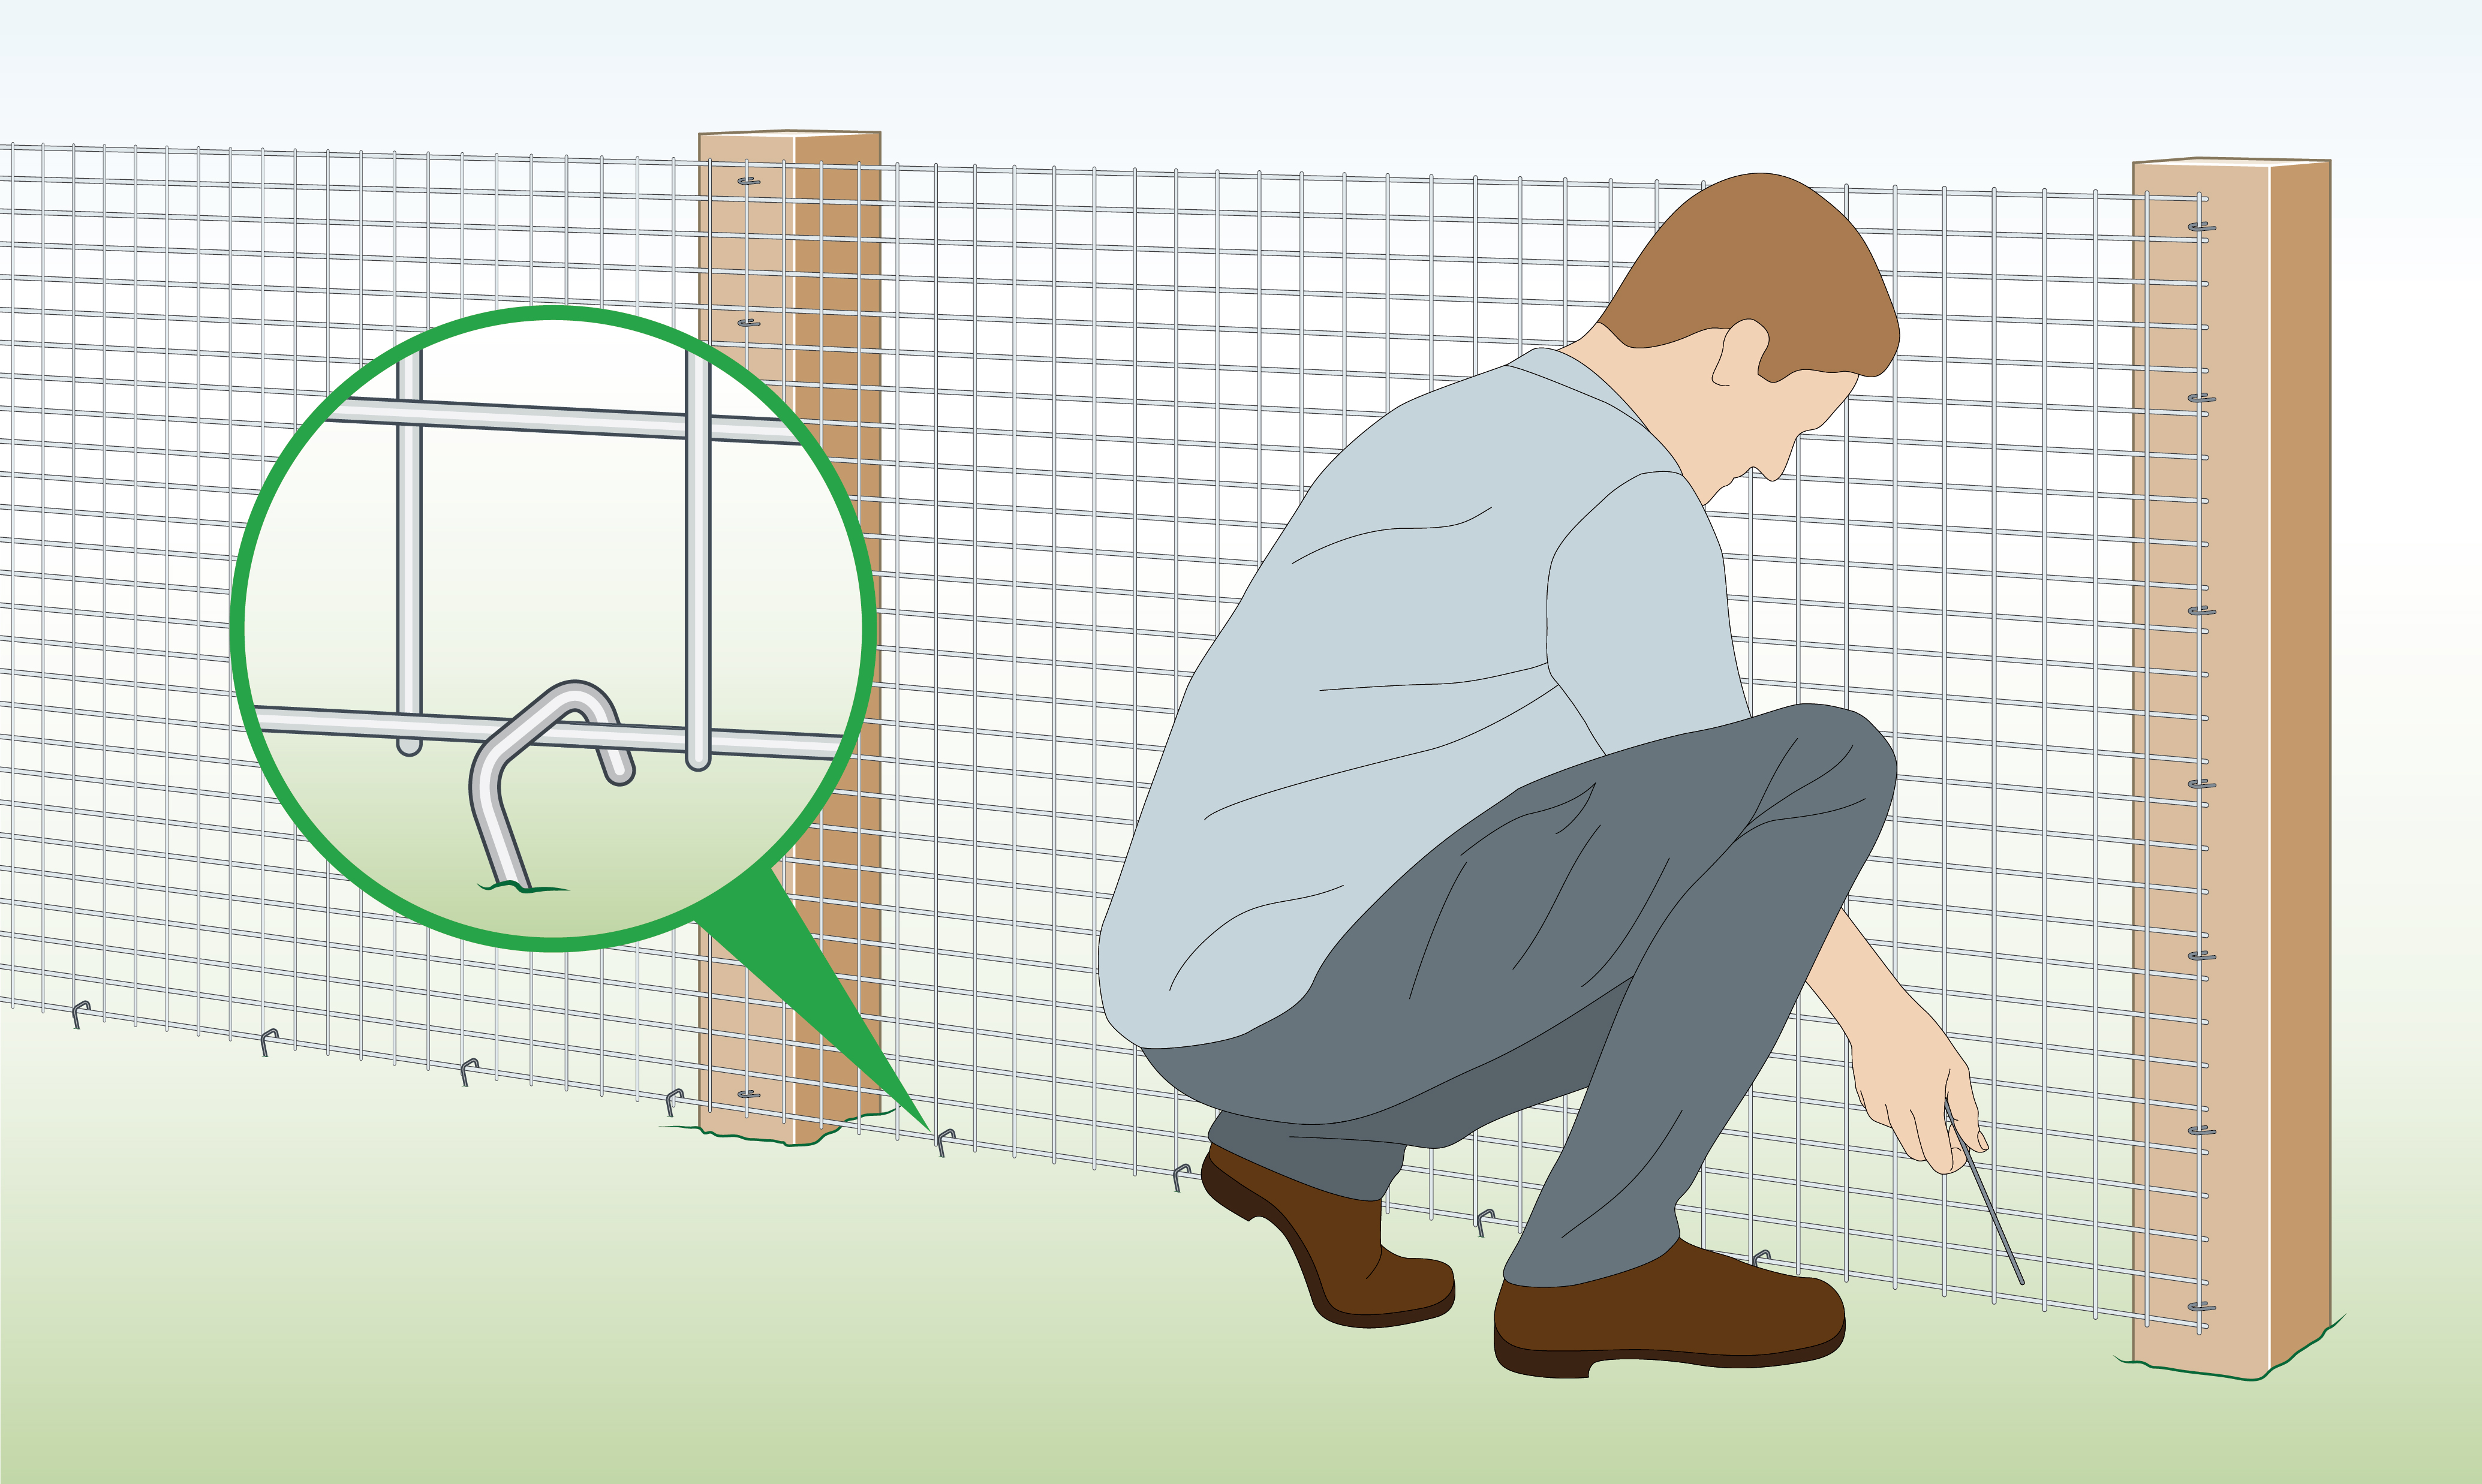
SOIL
- Use pegs to attach the bottom of the fence to the ground.
- Staple the pegs at distances of approx. 60 centimeters, making sure the hook of the peg is attached to the bottom of the mesh holes.
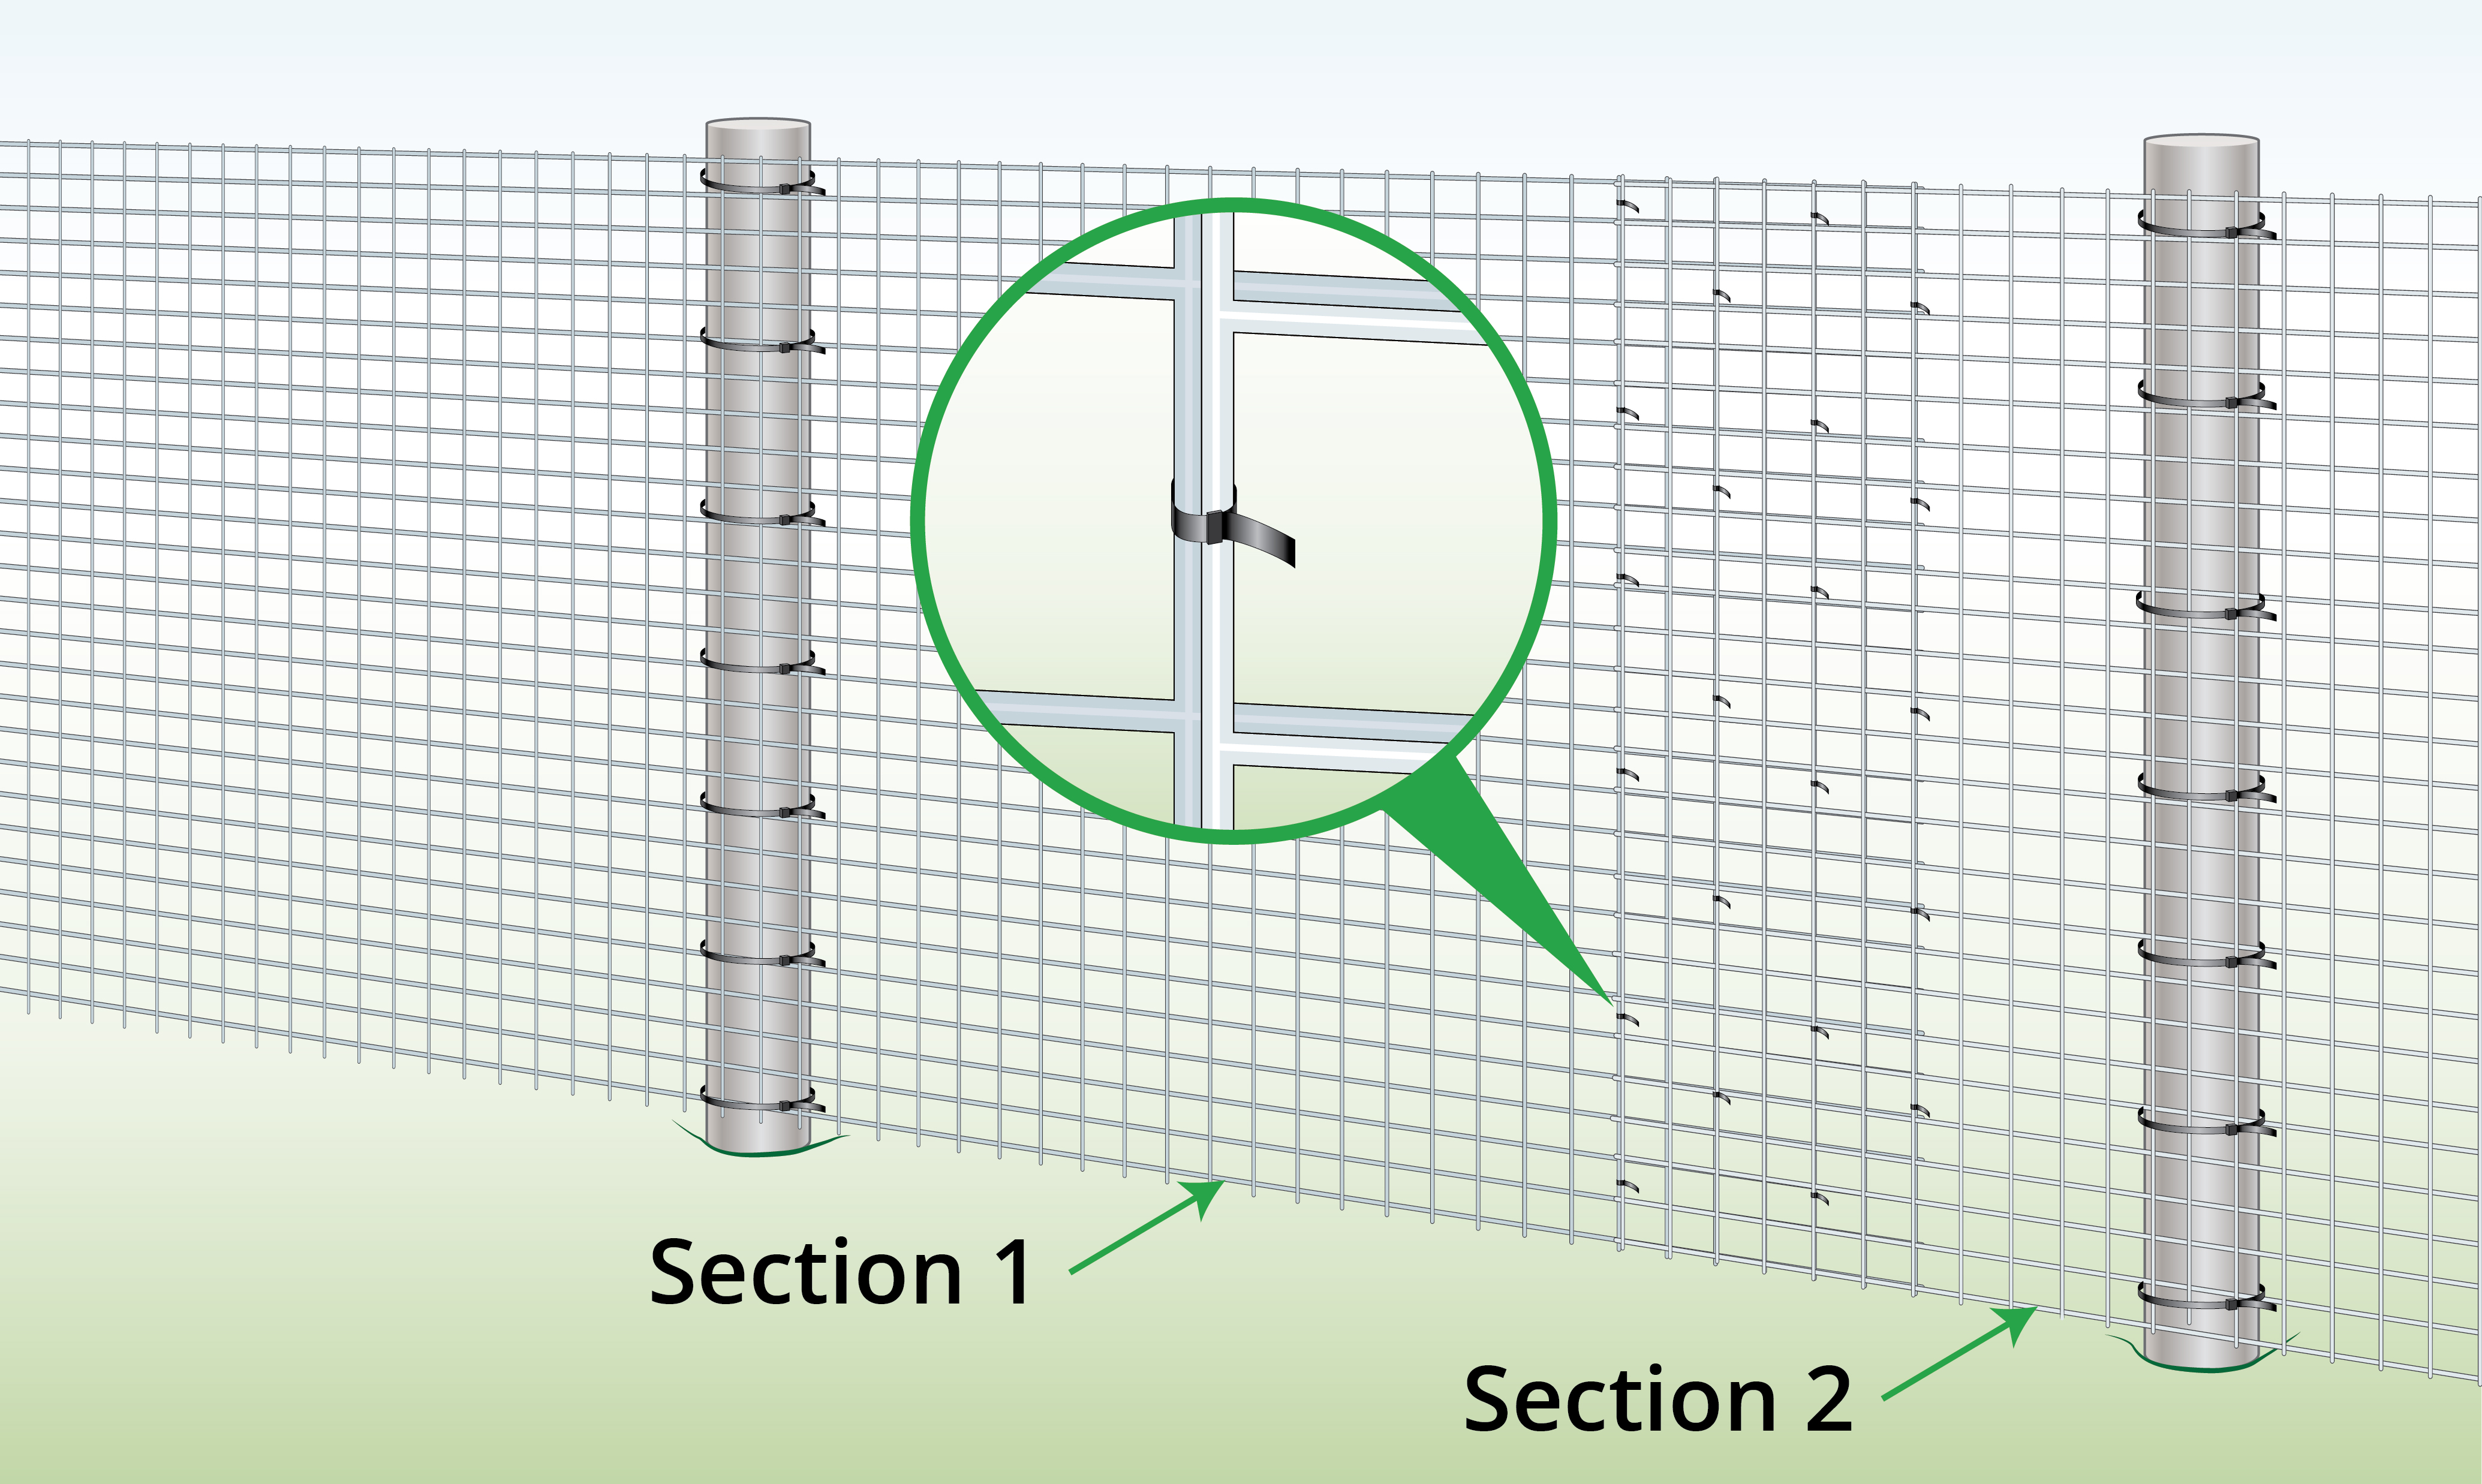
EXISTING WIRE MESH
- Attach two sections of the welded mesh together by overlapping them and using cable ties to join them.
- Make sure not to overtighten the cable ties.
TIPS
- You can use a staple gun to attach the weld mesh to wooden material. This will make your job quicker and easier. If you want to strengthen the attachment points, you can fire two staples in an X shape over the weld point where you start and finish a section. In between the start and finish, it’s best to place the staples at a 45 degree angle in alternating directions.
- You can use fence ties instead of cable ties, but they are a little bit fiddlier.
Want to know how to install wire mesh on underground secondary support
Hi Govender,
Depending on the secondary support type, here is a general guide on how to attach wire mesh to it:
Safety First – Make sure all safety protocols are followed, including wearing proper protective equipment like gloves and safety glasses.
Inspect the Area – Ensure that the primary support (rock bolts, underground posts, shotcrete, etc.) is in place and stable. Check for loose rocks or unstable sections.
Measure and Cut the Mesh – Measure the area where the mesh will be installed, and cut the wire mesh accordingly. The mesh should be large enough to cover the area but manageable to handle.
Positioning the Mesh – Make sure the wire mesh is aligned properly, covering the intended area without any gaps.
Fastening the Mesh – Use bolts, clips, cable ties or tie wire to attach the mesh to the secondary support. Ensure the mesh is securely fastened, with tension to keep it tight. Overlap sections of mesh as necessary, securing them together with additional clips or wire ties.
Inspection – After installation, inspect the mesh to make sure it’s tight, secure, and covering the intended area fully.
Hope this is helpful and please let me know if you need any further help.
Erno