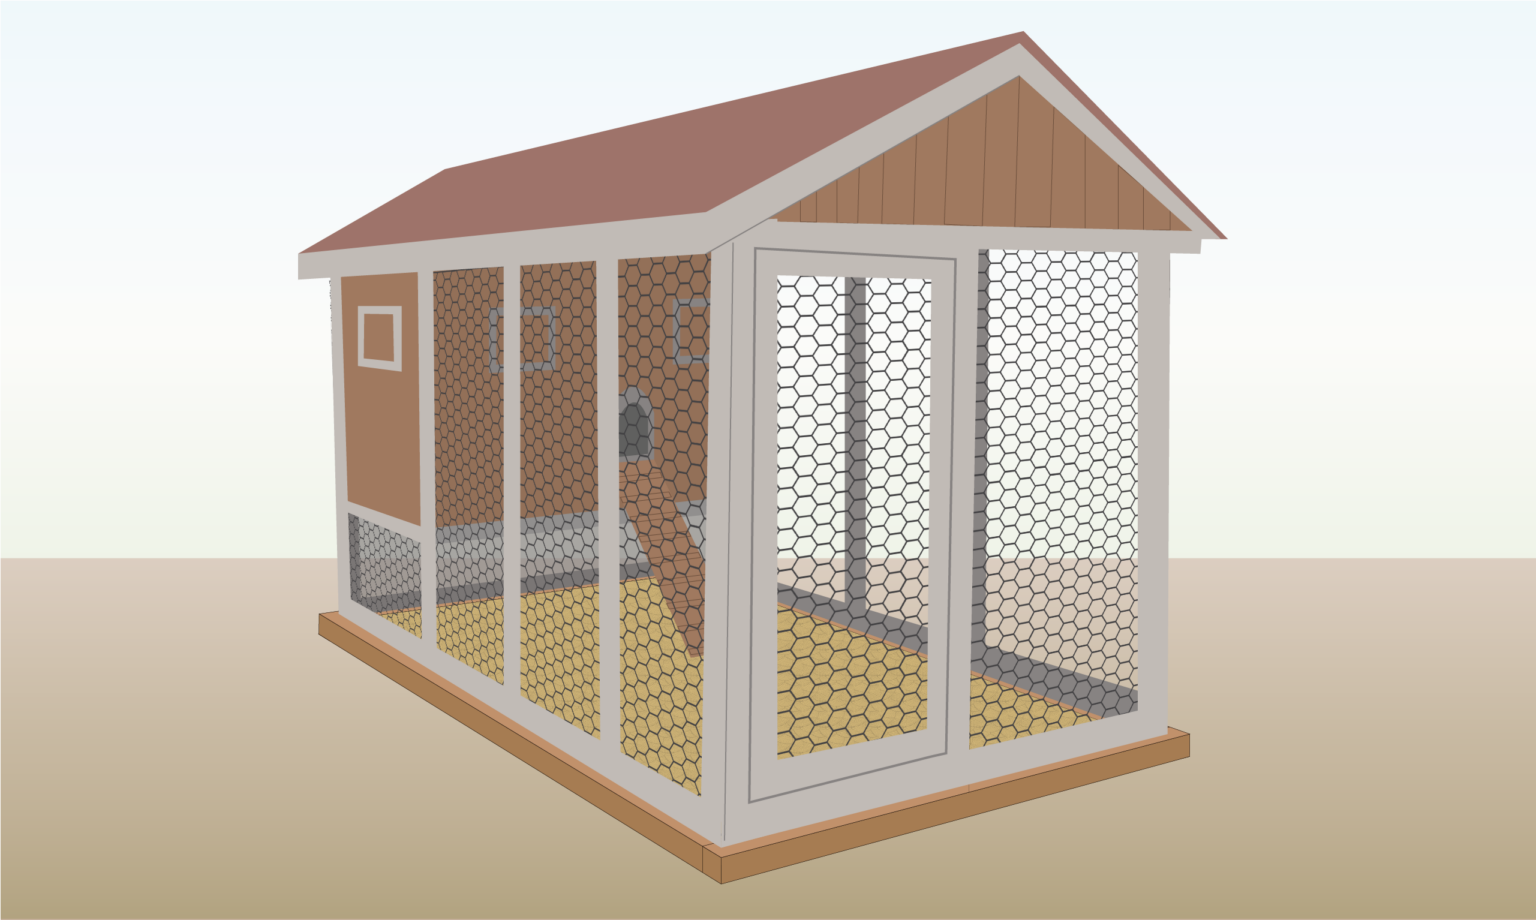
How to Level Ground for Chicken Coop

Below you will find a step-by-step guide on how to level ground for chicken coop.

- Experience Required: Medium
- Tools Required: Protective gloves, Shovel, Hammer, Drill, Saw, Spirit level, Tape measure, Hand temper or Plate compactor
- Materials Required: Treated timber (like two-by-fours), Wooden stakes, String, Sand or gravel
Step 1) Measure Location & Plan
- Use a tape measure to determine the length and width of your space, then design your chicken coop accordingly.
- Consider the number of hens you have and ensure there is enough space for them.
Step 2) Prepare the Ground
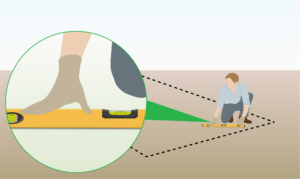
- Remove any plants, grass, and debris from the designated area.
- Use a spirit level on a wooden batten to check the area’s slope.
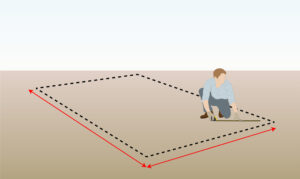
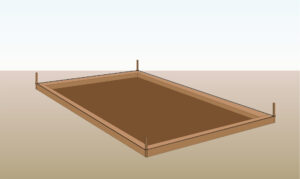
Step 3) Mark the Area
- Mark the corners of the space with wooden stakes.
- Tie string between the stakes to mark the perimeter of the area.
- Make sure the string is taut and at the desired height, and verify that it is align.
Step 4) Create Foundation

- Dig a sturdy base with a shovel, then even out the ground and fill any gaps.
- Creating a foundation is important in the process of how to level ground for chicken coop.
- To ensure stability, regularly check that the base remains aligned.
Step 5) Measure and Cut Wood

- Using your treated timber battens and a tape measure, measure and mark the pieces you need, then cut them to size with a saw.
- Remember to wear protective gloves while doing this!
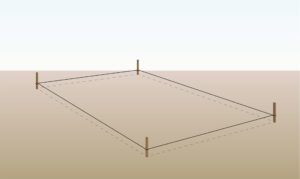
Step 6) Add a Wooden Base
-
Position the treated wood timbers around the perimeter of your area.
- Use a spirit level to ensure the timbers are perfectly horizontal.
- Adjust by adding or removing soil as necessary.
Step 7) Join Timbers
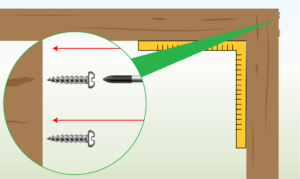
-
Use a utility square to ensure your angles are correct, then join the battens together with wood screws and a drill.
- Check for levelness and adjust by adding or removing soil as necessary.
- Once you’re satisfied, you can remove the corner stakes and the string.
Step 8) Fill with Sand or Gravel
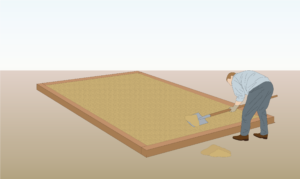
- For better drainage and increased stability, cover the aligned area with a layer of sand or gravel.
Step 9) Compact Base
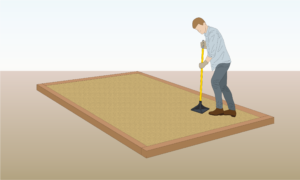
- Use a hand tamper or plate compactor to thoroughly compact the base course, ensuring it is stable.
Step 10) Build or Relocate Your Chicken Coop
- Your base should now be ready, so you can either move or begin constructing your poultry coop. Make sure to select chicken wire that won’t rust quickly or predator-proof mesh (if required)
- Don’t forget to fill it with natural, organic substrates such as compost, topsoil, untreated mulch, leaves, grass clippings, or wood chips for the chicks.
Choosing the Right Foundation
Pavers or Block
Easy to set up with no special skills or equipment needed, but less stable than other options and may shift over time, needing adjustments.
Concrete Base
Offers a stable, durable base that’s resistant to weather and pests. However, it requires more effort and skill to install and is difficult to remove or relocate once in place.
Treated wood
Easier for DIY projects and blends well with outdoor environments, but has a shorter lifespan than concrete and needs regular maintenance.
Gravel, stone, sand
Easy to install with no specialized skills required and offers excellent drainage to prevent water buildup. However, it is less stable than concrete, which may lead to shifting, and might need regular maintenance to stay level and clean.
Tips
-
Before starting construction, consider local regulations.
- Many poultry keepers find that having a coop raised off the ground is simpler than aligning the ground.
- Allocate about 0.2-0.4 square meters per chicken inside the coop and 0.7-0.9 square meters per chicken in the outdoor run or yard.
- While working on how to level ground for chicken coop, frequently check the alignment to avoid major adjustments later.
- Lightly watering the soil before compacting can improve the compaction process.
Do’s & Don’ts
-
Use natural substrates like compost, topsoil, untreated mulch, leaves, grass clippings, or wood chips.
- Avoid cedar mulch and pine straw to prevent respiratory irritation.
- Ensure your chickens have shade and protection from the weather.
- Build the coop on a slope by creating a level base; the floor should rest on a solid, align foundation.
FURTHER READING
- Easy DIY Chicken House – Step by step instructions on how to build an easy DIY poultry house.
- How to Make a Temporary Chicken Coop – Learn how to make a temporary chicken coop with these easy steps.
- Chicken Coop Ideas (110 UNIQUE IDEAS) – A guide showing you many poultry coop ideas.
- How to Build a Chicken Run – Step by step instructions on how to build a run.
- Buy Chicken Wire – 100s of chicken wire rolls to choose from in our shop


Published by
