How to Make a Temporary Chicken Coop
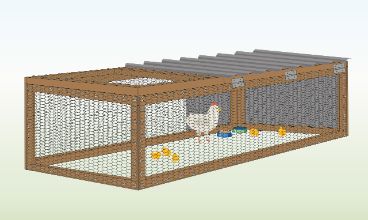
Below you will find a detailed step-by-step guide on how to make a temporary chicken coop.
- Experience Required: Low
- Tools Required: Protective gloves, Tape Measure, Marker, Utility square, Wire cutters, Hammer, Hacksaw, Drill
- Materials Required: Chicken wire or Chicken wire PVC, Timber battens (like two-by-fours), Plastic sheet, Staples, Screws, Hinges, Hook & Eye Latch
Step 1) Design Your Plan
- While planning how to make a temporary chicken coop, you can design it in various shapes and sizes based on your preferences.
- Make sure to include a roof for protection and a door for easy access.
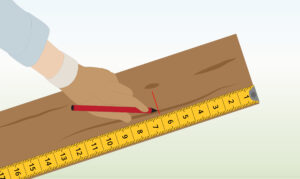
Step 2) Measure the Wood
- Use a tape measure and timber battens to measure and mark your lengths.
- These will form the structural frames of the enclosure.
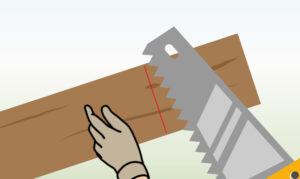
Step 3) Cut Battens
- Cut your battens to size using a hacksaw and wear protective gloves.
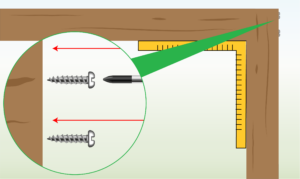
Step 4) Join Battens Together
- Use a utility square to ensure your angles are accurate.
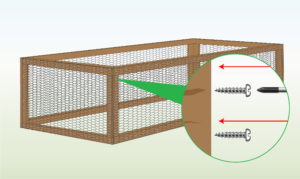
- Join the battens together using wood screws and a drill.
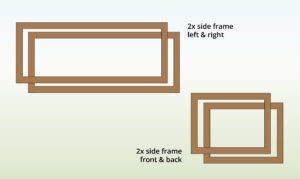
Step 5A) Construct Side Frames
- Follow your design plan and the steps outlined in step 4 to create all the necessary wooden frames for construction.
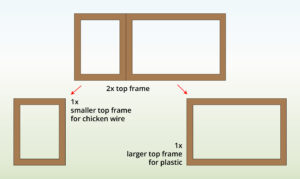
Step 5B) Construct Top Frames
- While constructing the roof, ensure to provide shade and include an access door.
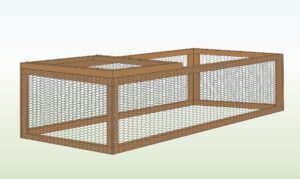
- Create a smaller top frame covered with netting and a larger top frame covered with plastic.
- This will serve as the roof and shade for the enclosure.
Step 6) Measure & Cut Mesh
-
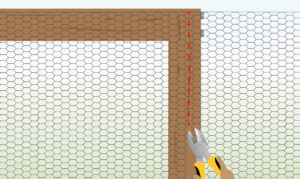
Lay out your wire mesh on the frames and cut along the wood.
- Ensure that the mesh overlaps the wood to allow space for attachments.
Step 7) Attach Netting to Frames
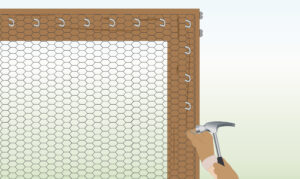
- Attach the netting to the frames using staples placed every 15 cm.
Step 8) Join Side Frames
- Follow the instructions in step 4 to join the side frames together using wood screws and a drill.
Step 9) Attach Smaller Top Frame
- Attach the smaller top frame with the same method used in step 8.
Step 10) Construct the Roof
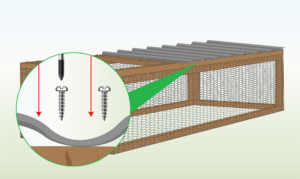
- Position the larger top frame in place, ensuring not to attach it to the frames as done previously.
- Secure a piece of plastic (or alternatively, wood or metal material) to the frame.
-
This will serve as the roof and provide shade for the chickens.
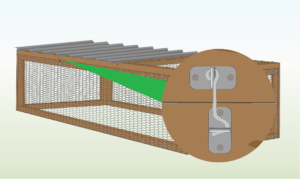
Step 11) Attach Hinges for the Access
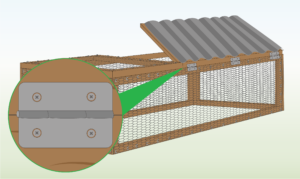
- Use screws to attach two or three hinges to one side of the wooden frame.
-
This will allow you to access the chicken coop from the top.
Step 12) Attach Latch to Secure the Access
- Also, screw in a hook & eye latch on the opposite side to keep the door closed.
-
This setup will allow you to access the chicken tractor from the top.
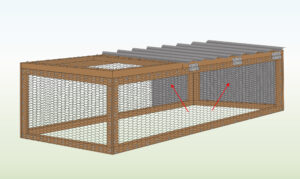
Step 13) Optional: Attach Plastic to the Sides
- You can also secure plastic to the sides for additional protection.
- Follow the procedure outlined in step 10 to cover the side frames.
Step 14) Move to Location & Furnish

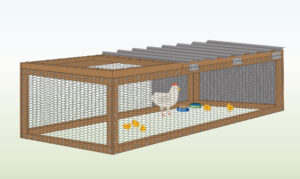
- Your enclosure should now be ready.
- It’s time to add food and water so your poultry can fully enjoy the outdoors.
Tips
- Opt for PVC coated mesh for enhanced durability and weather resistance.
- While planning how to make a temporary chicken coop, consider building an A-shape enclosure.
- Since these coops are portable, you can move them to different areas to help control excess vegetation.
- Use this as an emergency coop for sick hens or when introducing new chicks to your flock.
- Consider adding wheels to your coop to turn it into a chicken tractor for easy mobility.
- Alternatively, create a hoop coop using a wooden frame, hooped EMT or plastic piping, and cover it with greenhouse plastic.
Do’s and Don’ts
- Provide or construct a roof and shaded area for chickens.
- Ensure they have access to food and water.
- Install roosting bars and nesting boxes.
- Clean out their coop weekly.
- If the coop is small enough, you can simply lift up a side for access instead of installing a door.
FURTHER READING
- How to Attach Chicken Wire to Posts and Different Materials – Step by step instructions on how to attach netting to different materials.
- Cutting Chicken Wire – Learn how to cut netting using different methods.
- How to Attach Chicken Wire to Bottom of Fence – A guide showing you how to attach netting to bottom of fence
