How to Brace a Fence Post
Below is a step by step guide on how to brace a fence post using different methods.
- Tools Required: Protective gloves, Chain or hand saw, Hole digger or spade, Wire cutter, Hammer, Wrench
- Materials Required: Wooden posts, Tensioning wire, Wire strainer, Staples, Nail or brace pins, Support base, Concrete (optional)
HORIZONTAL (H) BRACE
Introduction
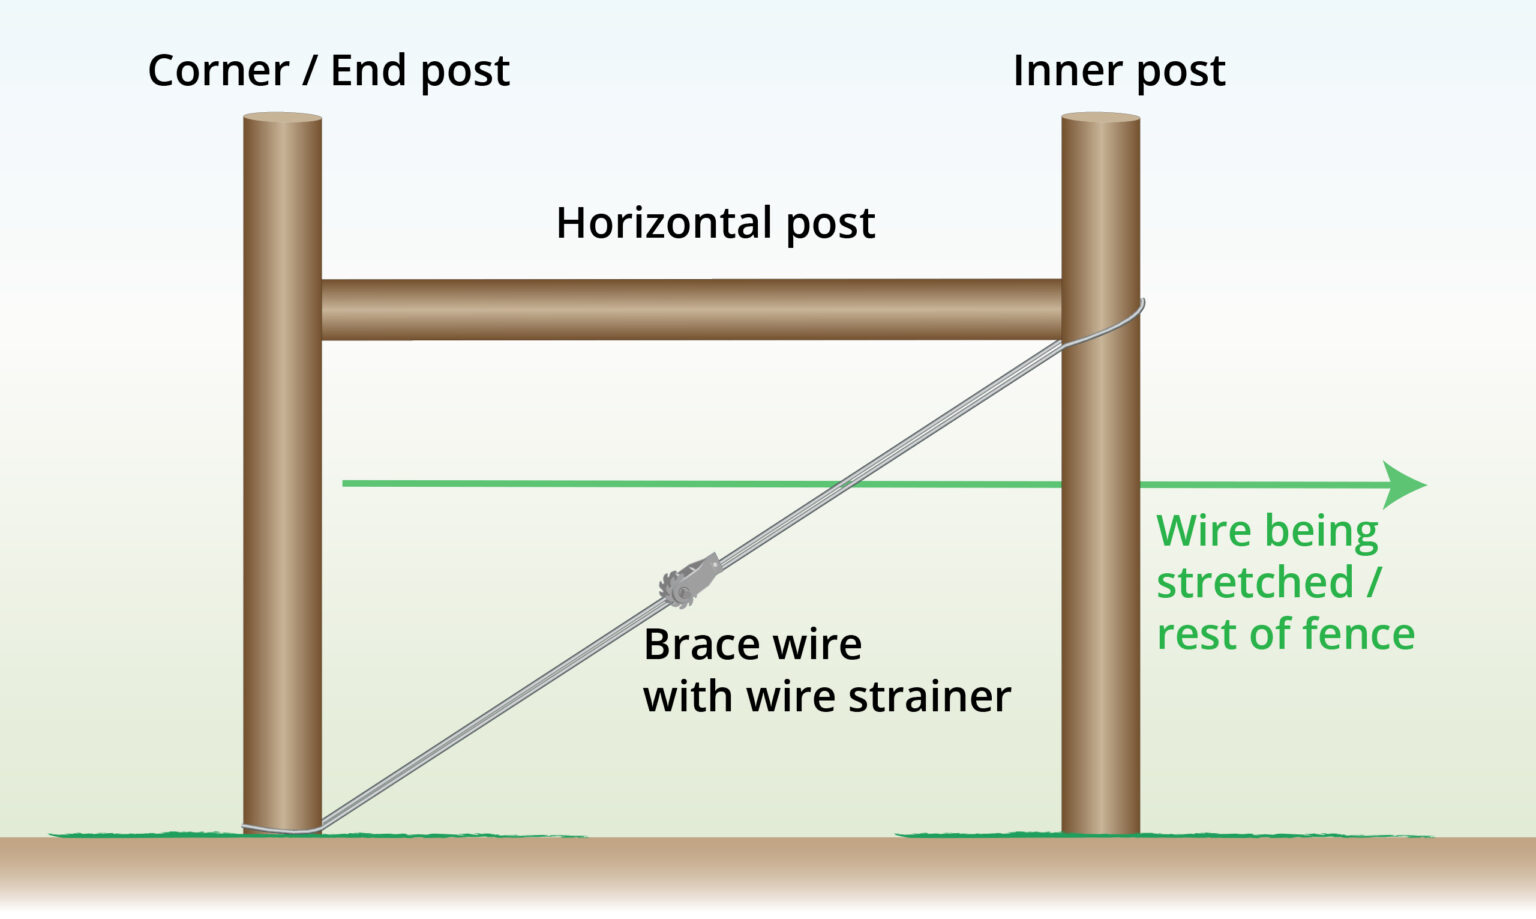
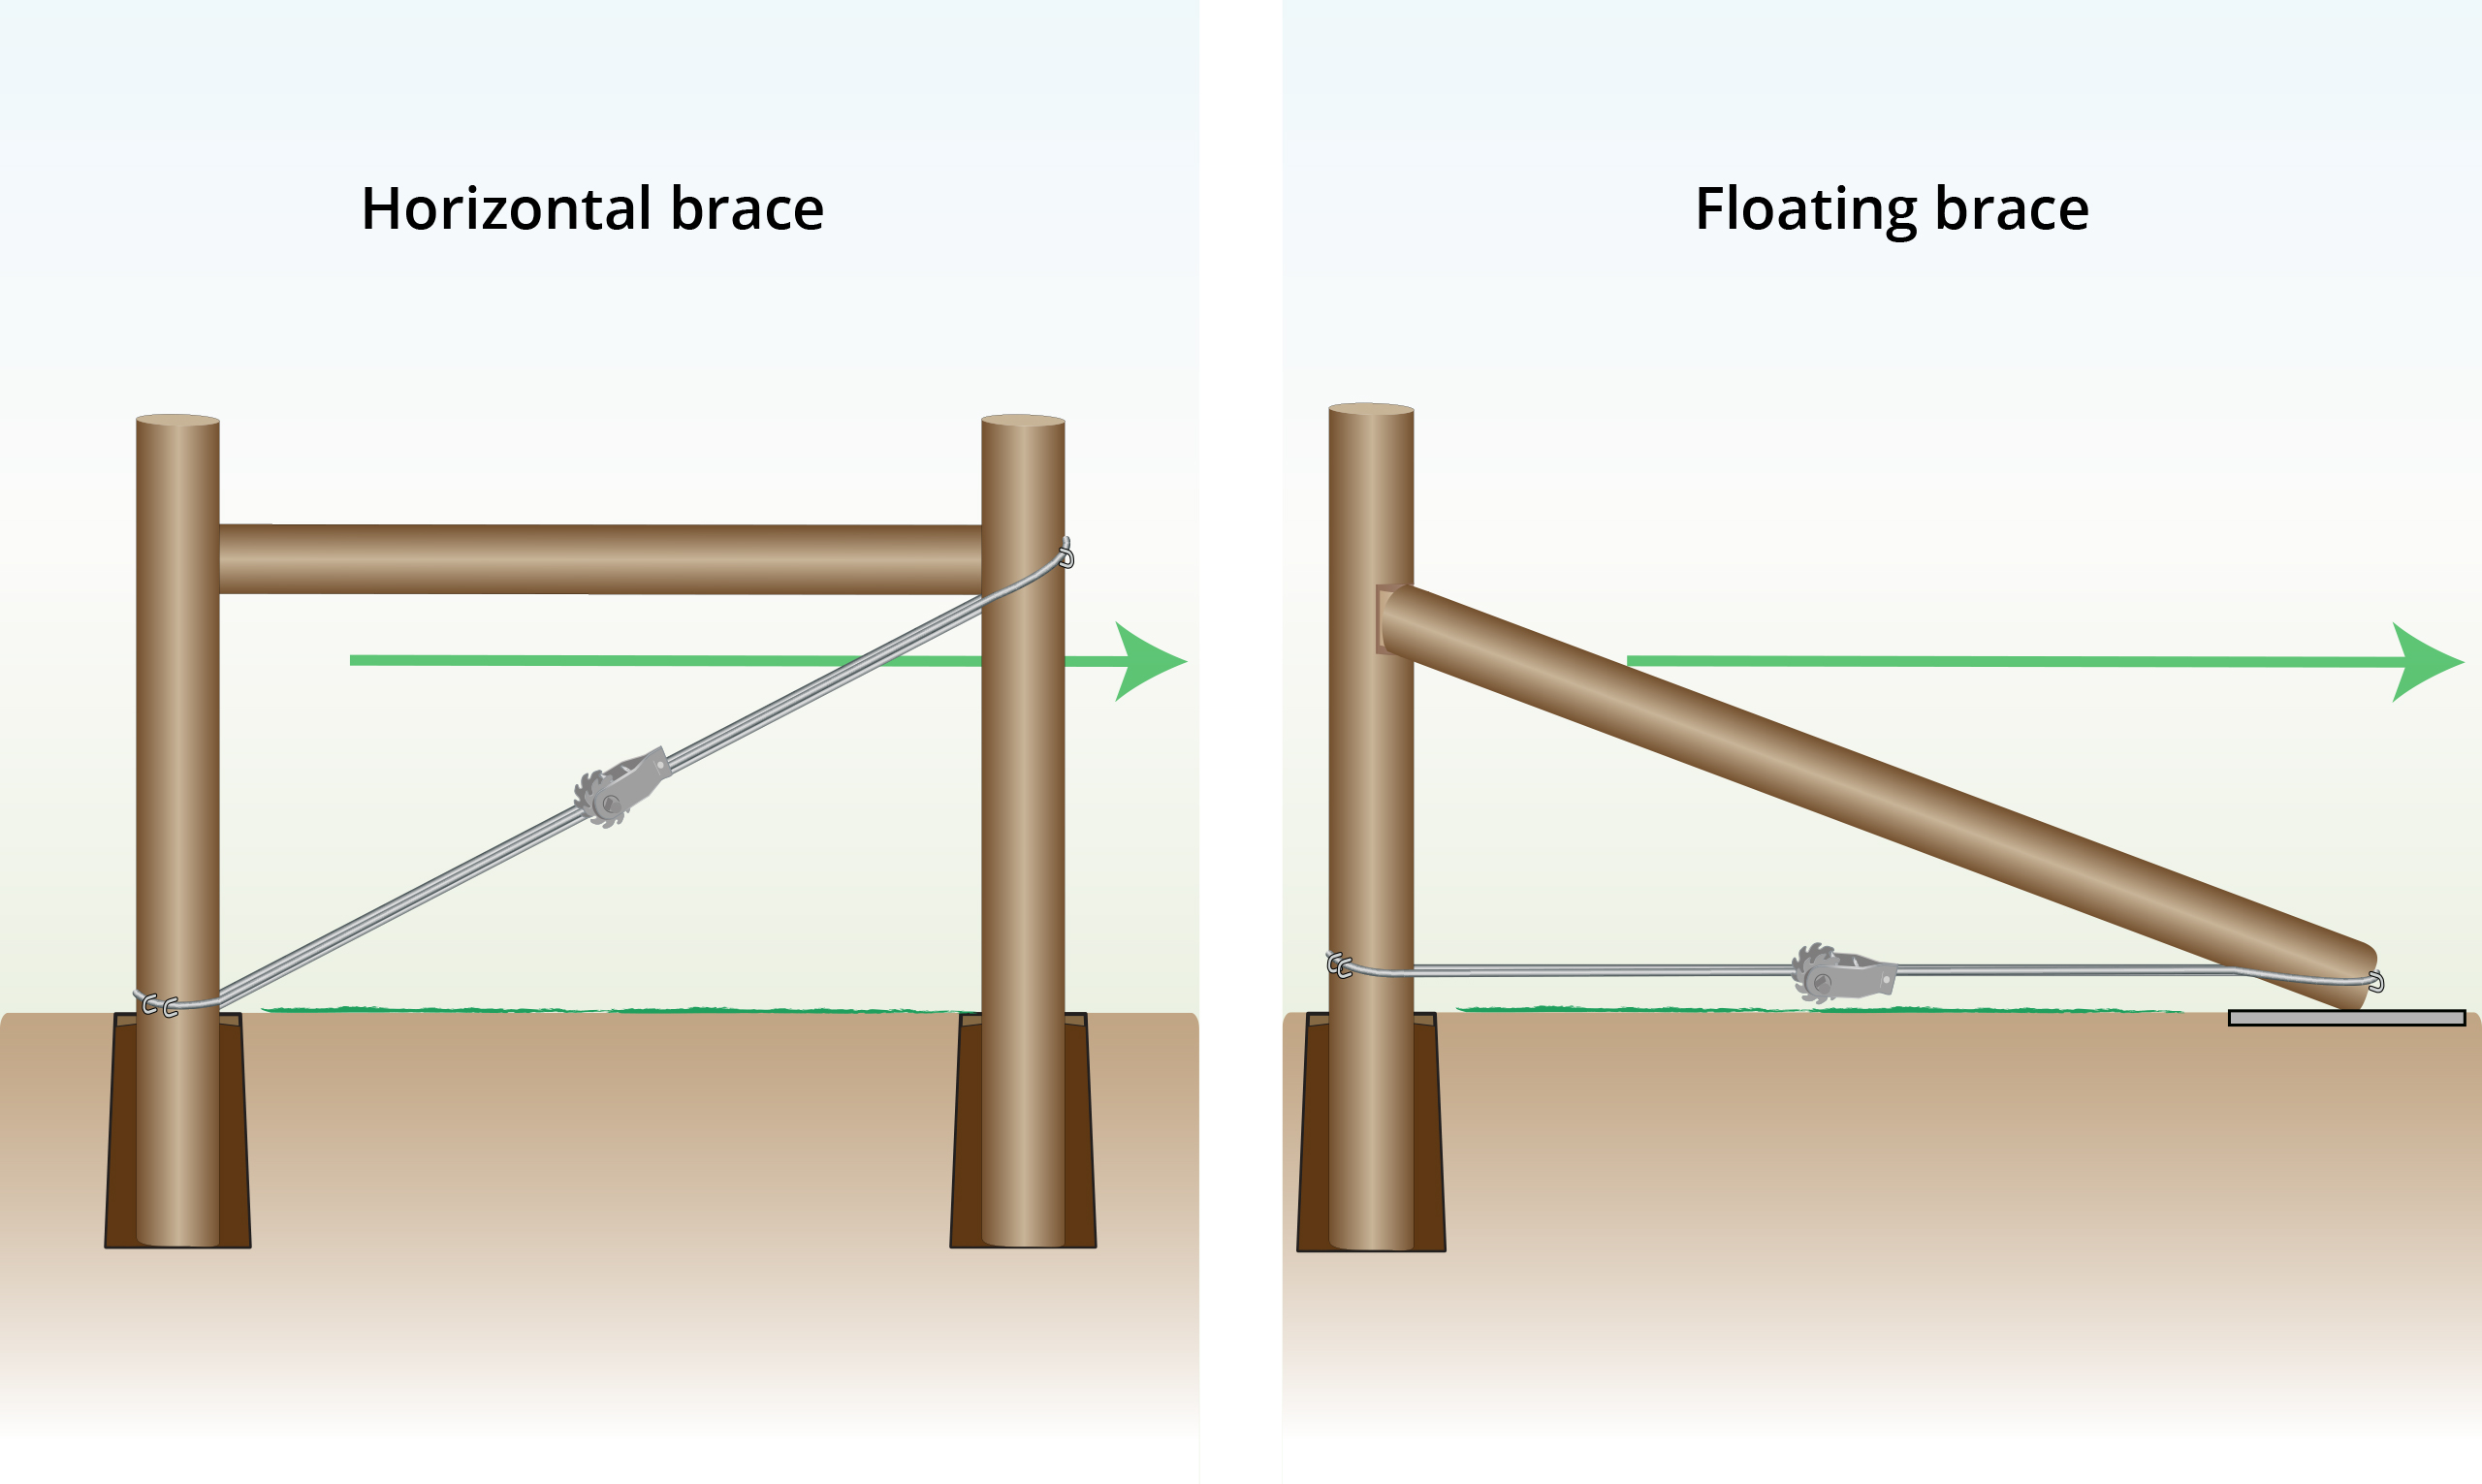
- Also referred to as a Horizontal brace, this is one of the most common and popular methods due to its sturdiness and reliability.
- It requires more work since you need to dig additional holes, and it comes with a higher cost due to the need for more poles.
Step 1) Plan Fence Corners
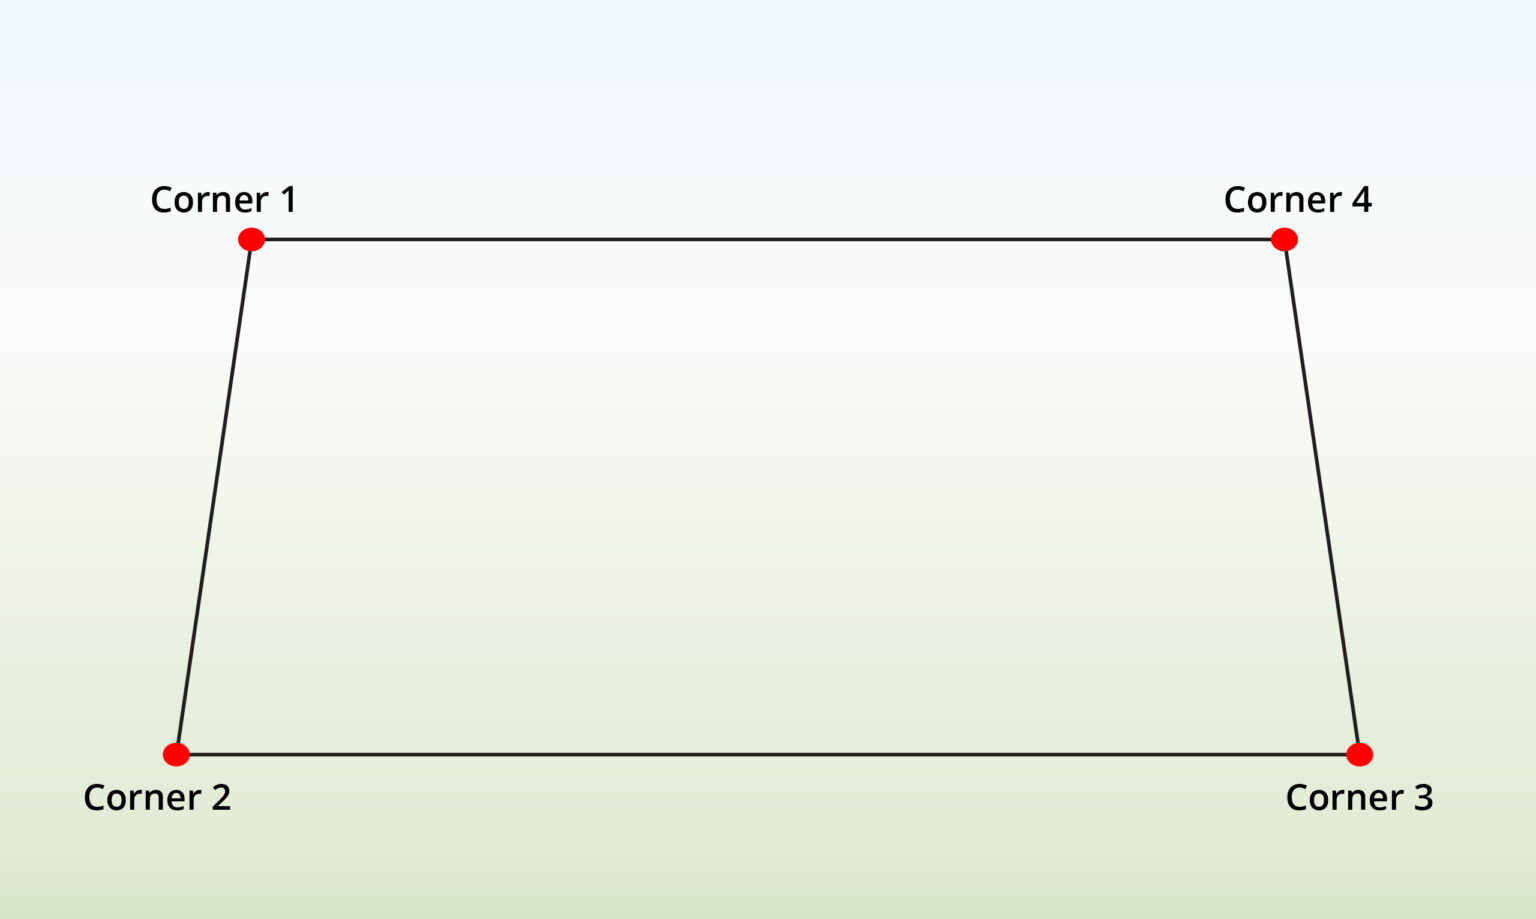
- Plan and figure out how many corner posts are needed by identifying where to strengthen the poles.
- For example, if your fence surrounds a square area, you will have four corners.
Step 2) Calculate Total Holes Needed
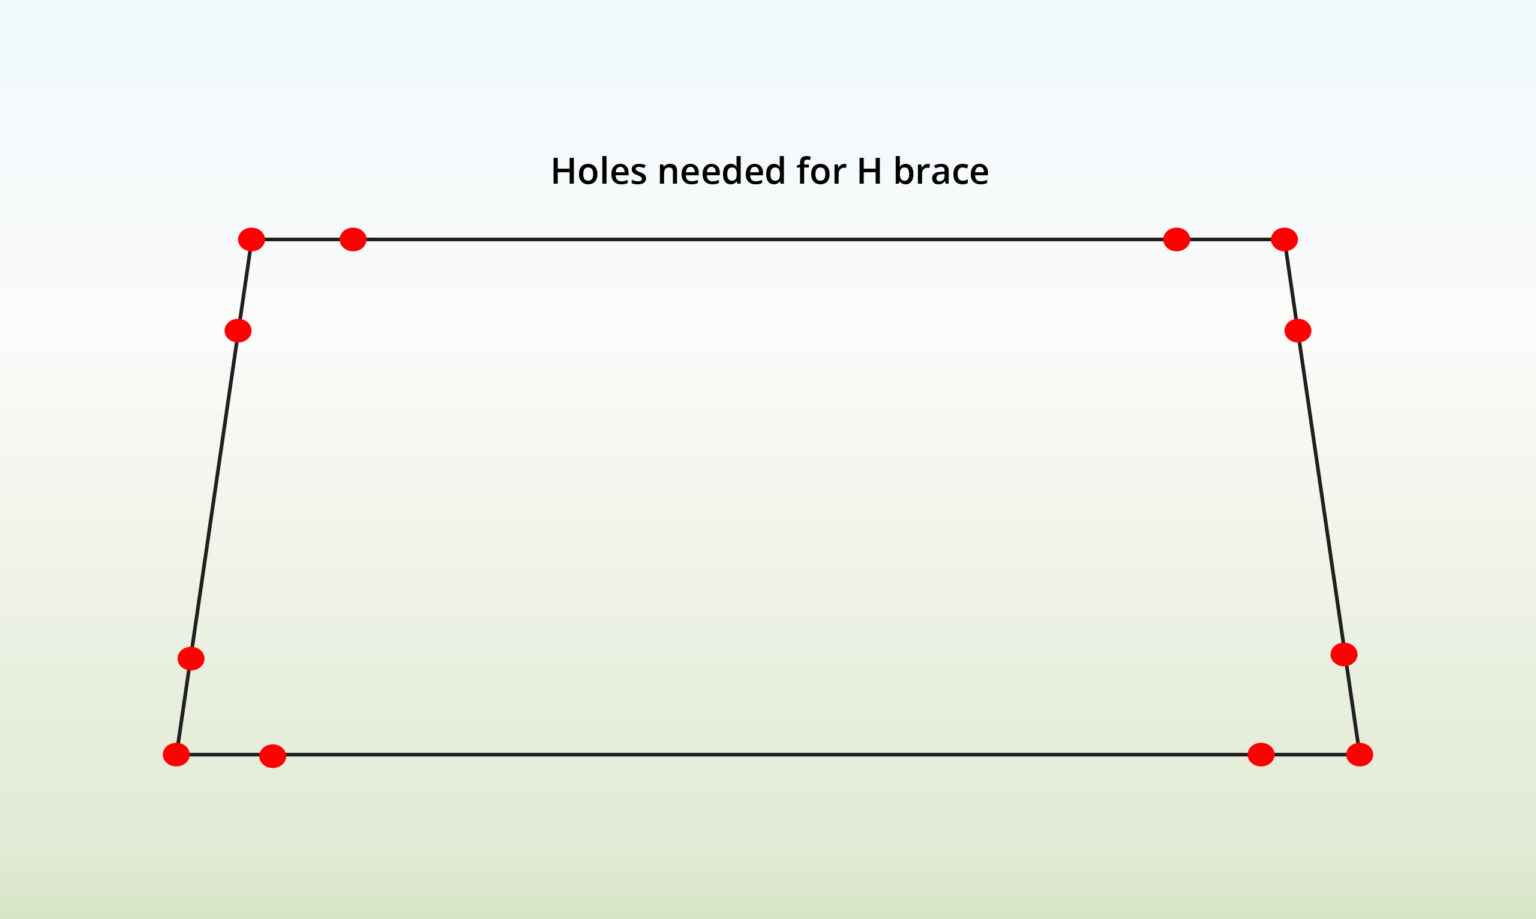
- If you have 4 corners, you will need at least 5 wood supports per corner, totaling 20 supports overall.
- Mark the locations where the holes need to be dug for the primary poles.
- Typically, two supports are spaced between 2.4 – 3m apart.
Step 3) Dig Holes
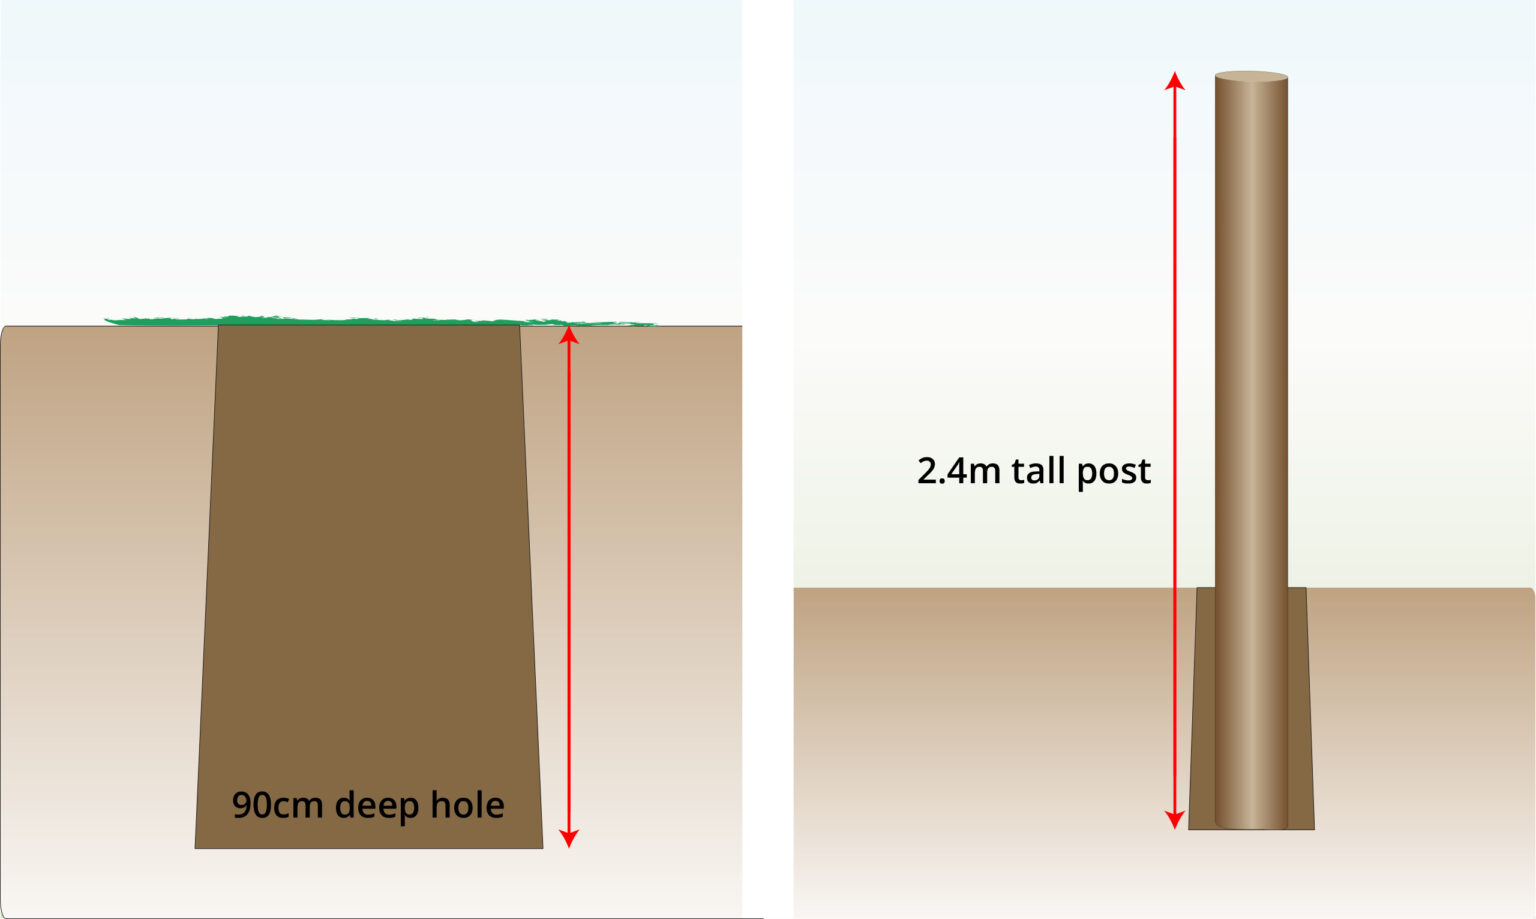
- For a 2.4m wooden pole, you should bury 90cm of the pole underground.
- Dig a 90cm deep hole for each of the primary poles to ensure proper stability.
Step 4) Set Primary Posts
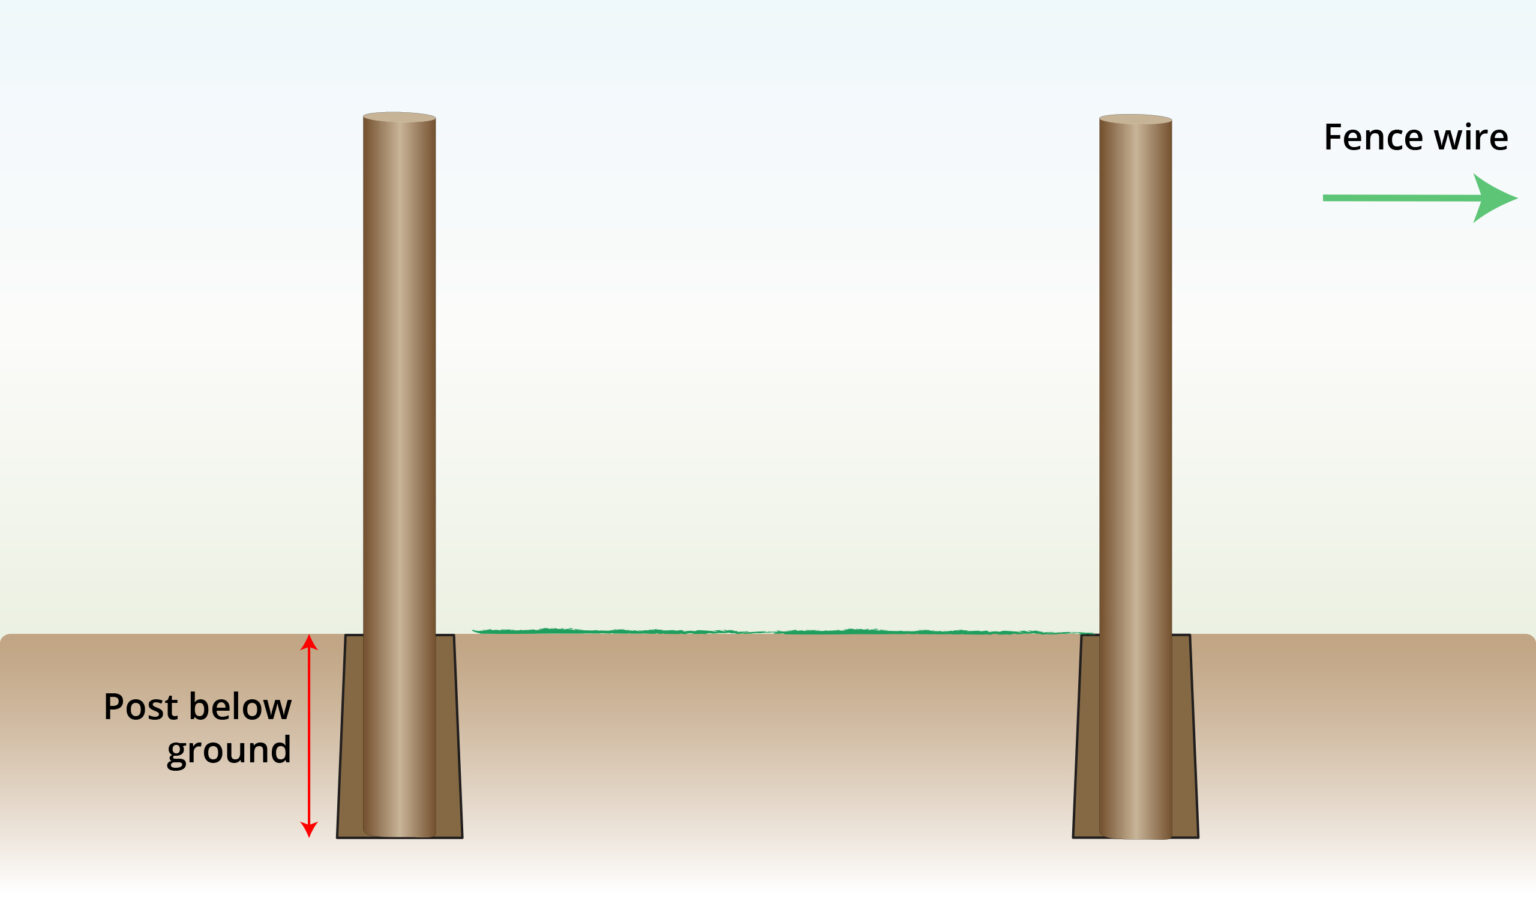
- Set up the primary poles, ensuring they are perfectly aligned with your fence line.
- Typically, primary poles will have a diameter of 20 cm or more.
Step 5) Fill Pole Holes
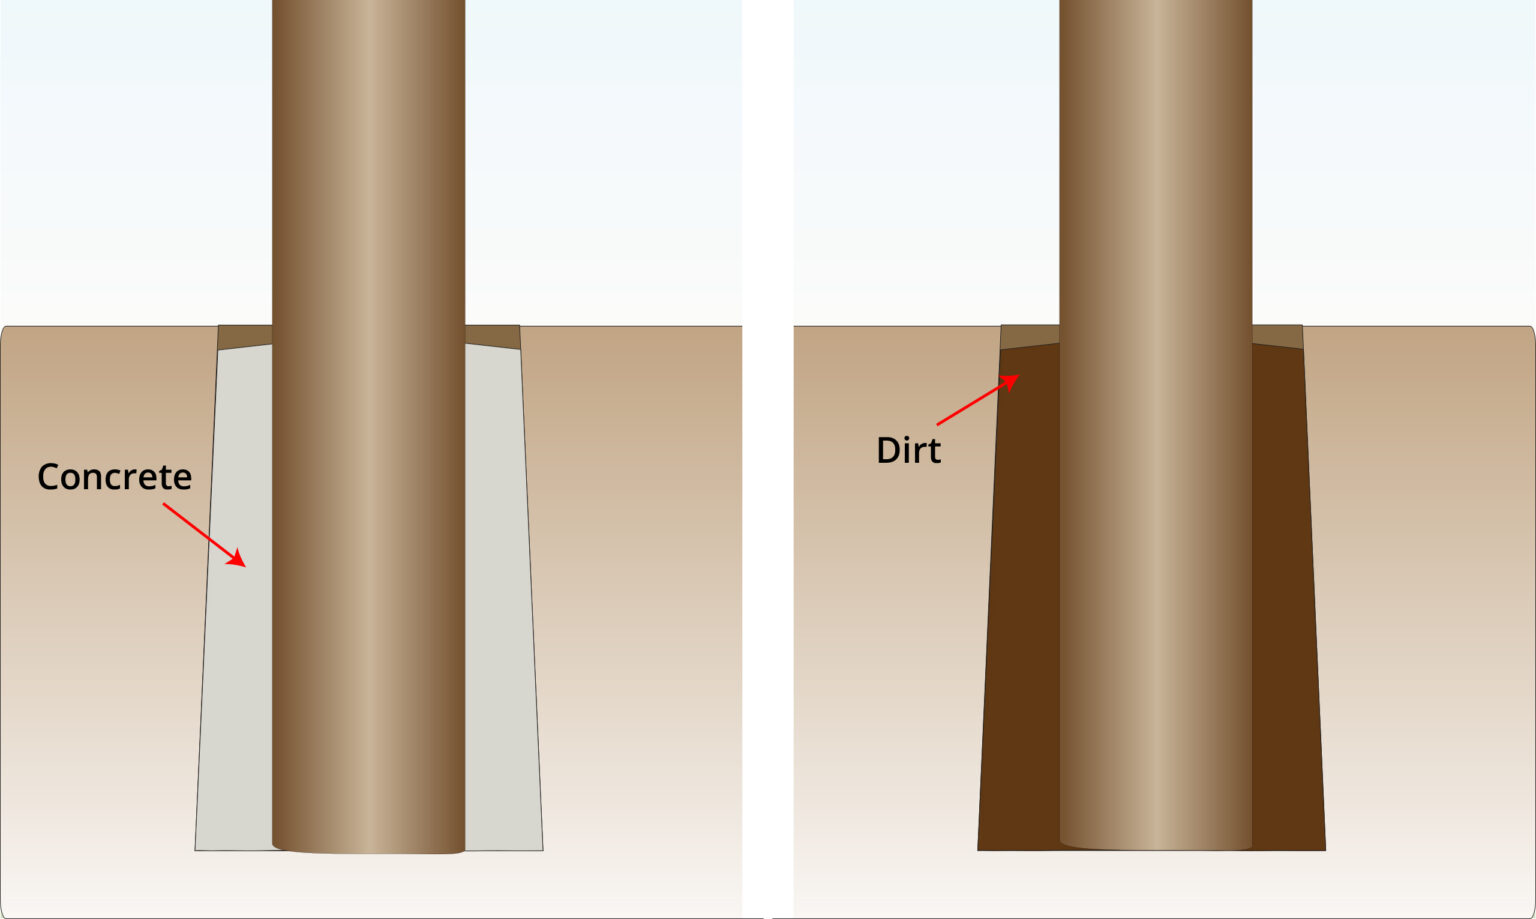
- Fill the holes by either packing the dirt back around the poles or using concrete for added stability.
- If you choose concrete, make sure to allow it to cure fully according to the manufacturer’s instructions.
Step 6) Mark Brace Pin Locations
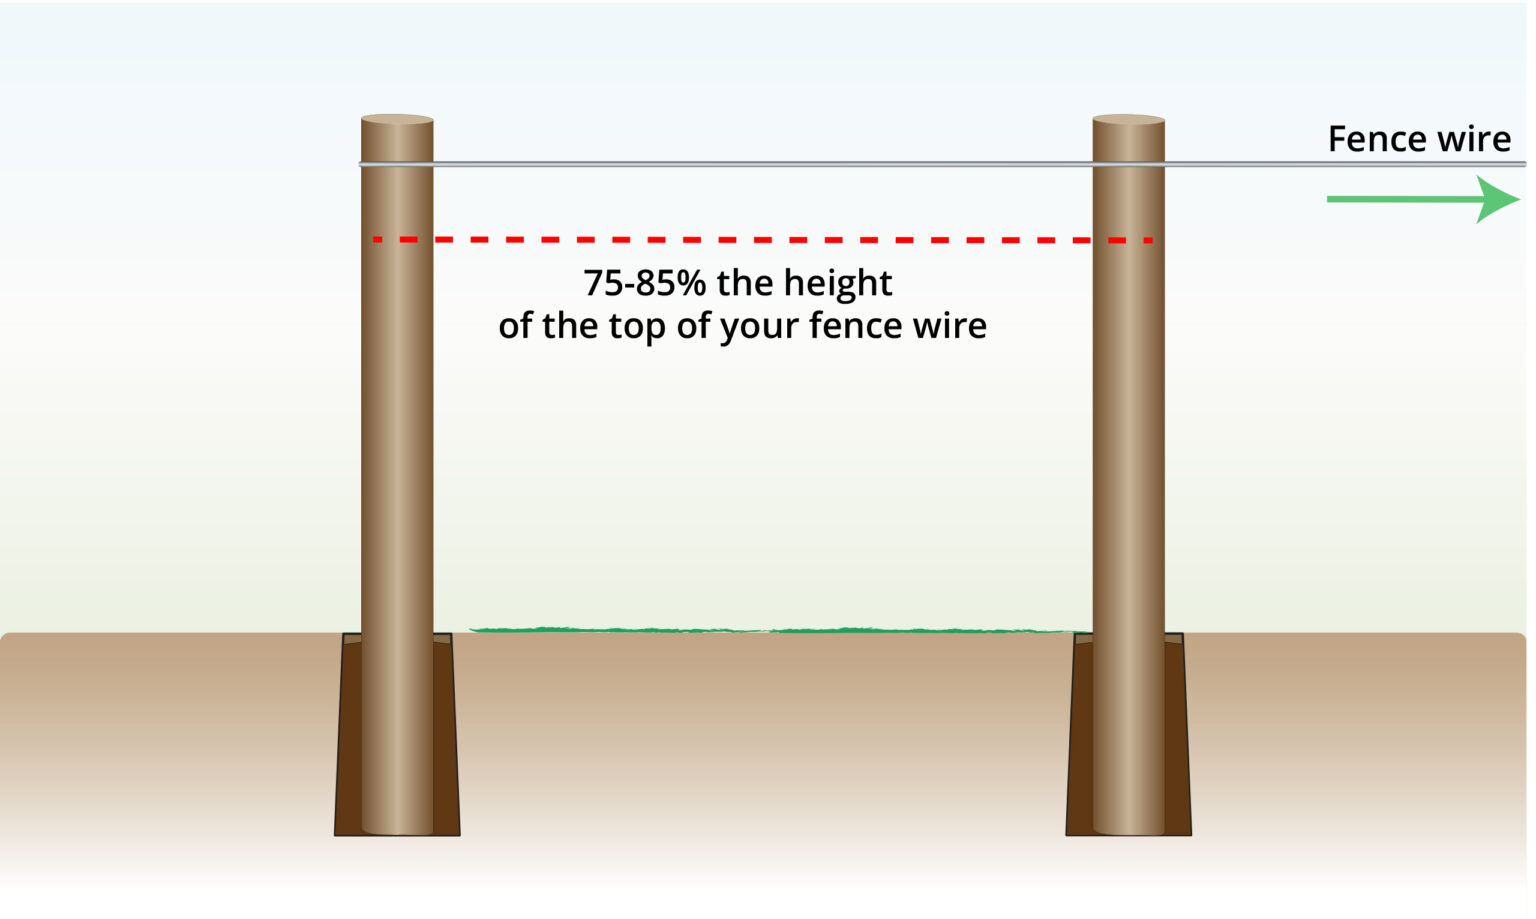
- Mark the pin locations on the poles at a height between 75% and 85% of the total height where the top of your mesh wire will be.
- This ensures the braces are positioned correctly for optimal support.
- Alternatively, you can cut a notch in the poles.
Step 7) Attach Pins
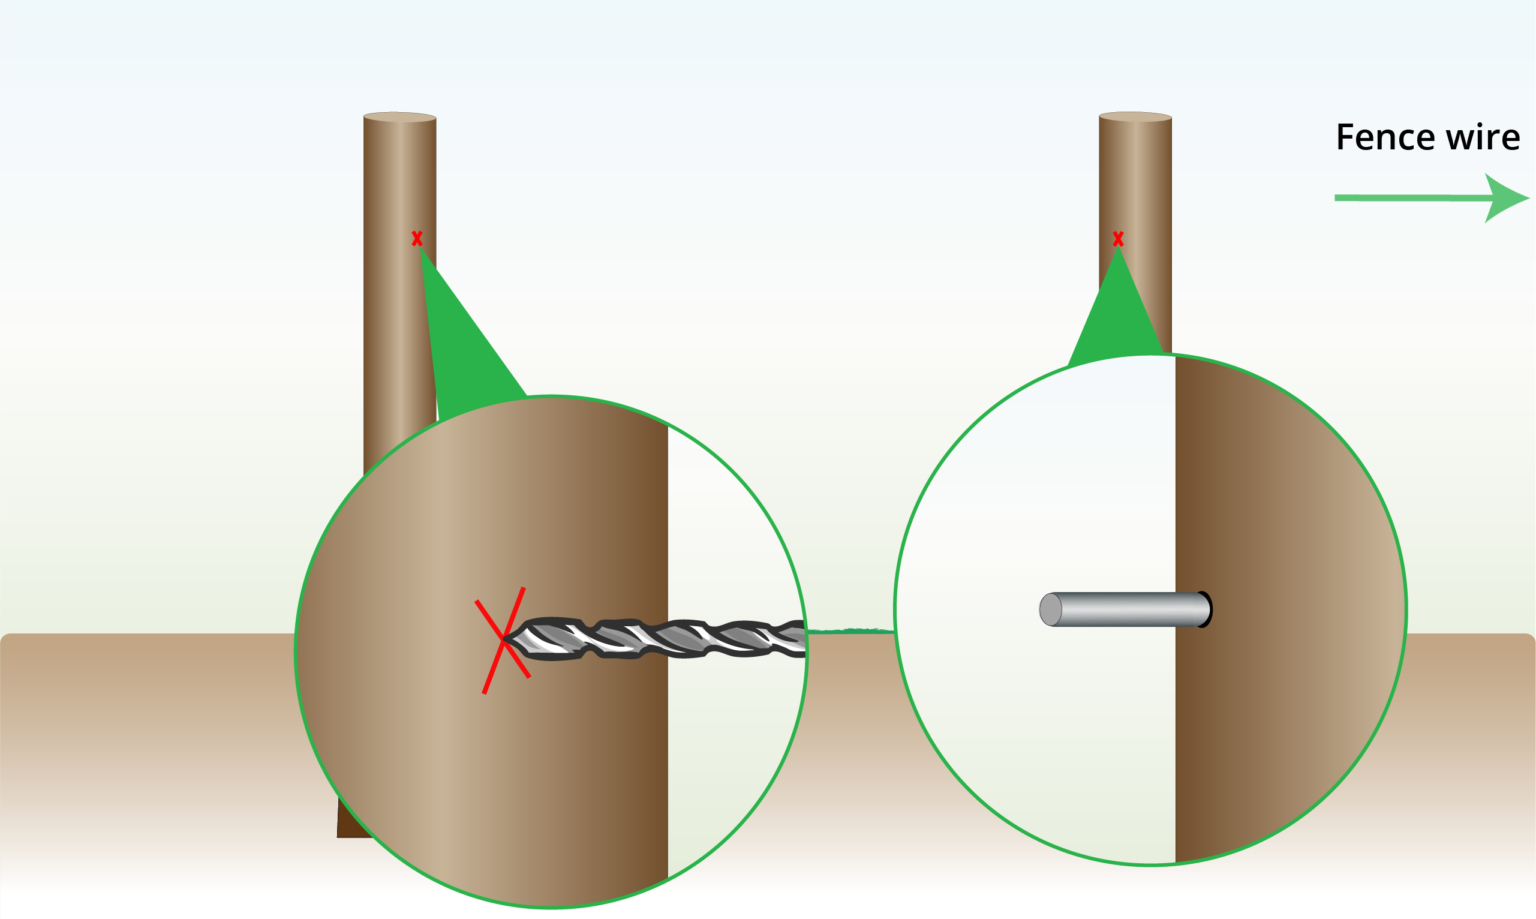
- Drill holes for pins at the marked locations on both primary and the horizontal poles, then insert the pins.
- Alternatively, notch the primary poles, place the support in the notch, and secure it with nails.
Step 8) Install Horizontal Post
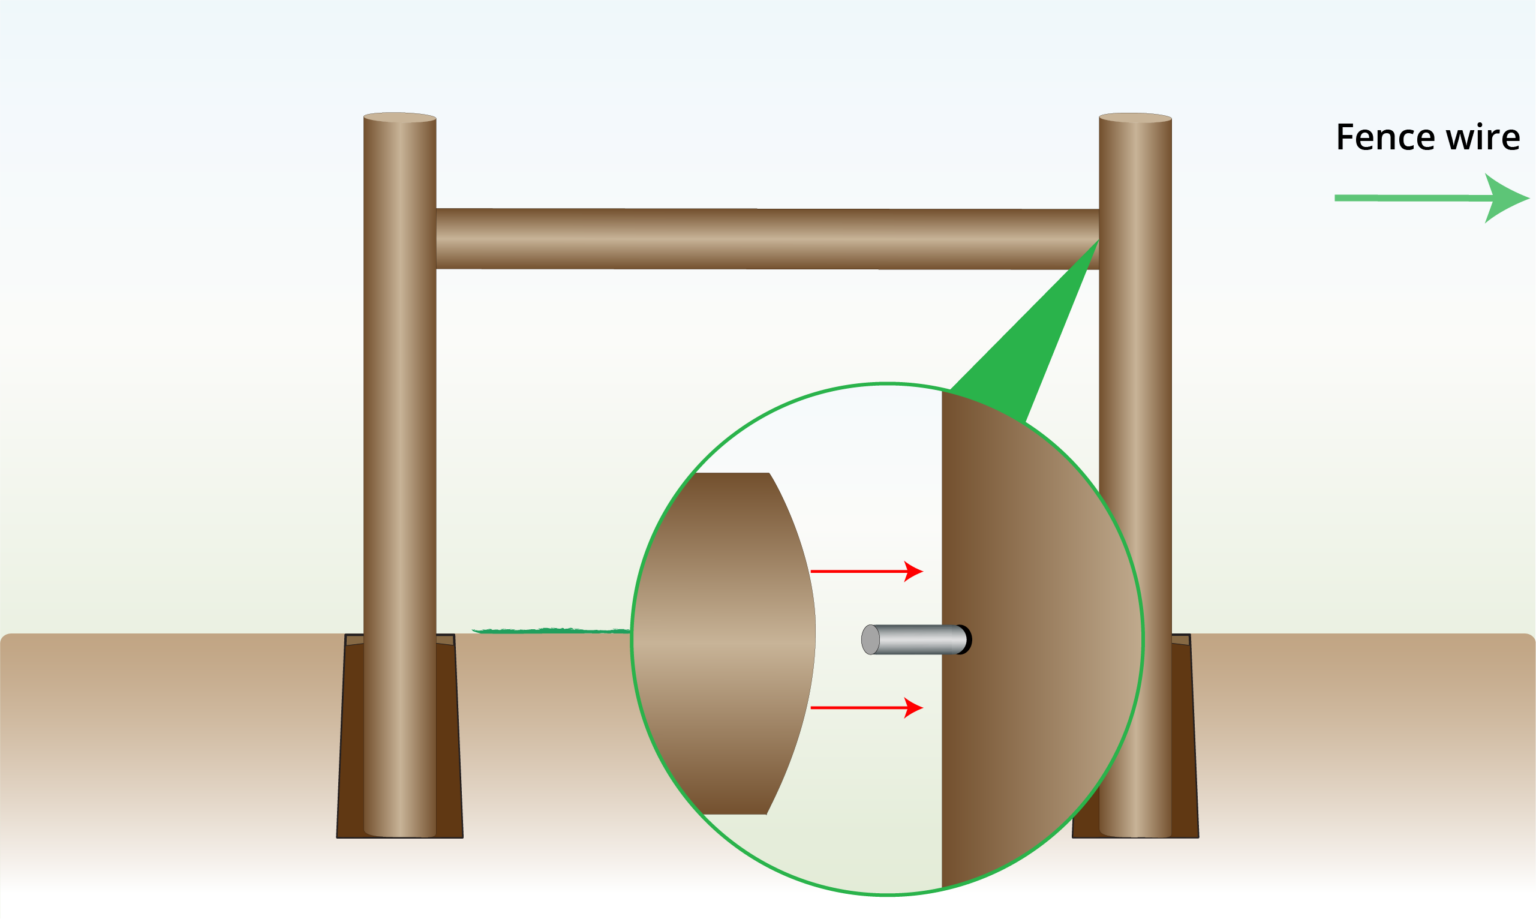
- Install the horizontal pole in place and secure it with nails.
- As a rule of thumb, the horizontal pole should be at least twice the height of the primary pole.
Step 9) String & Attach Wire
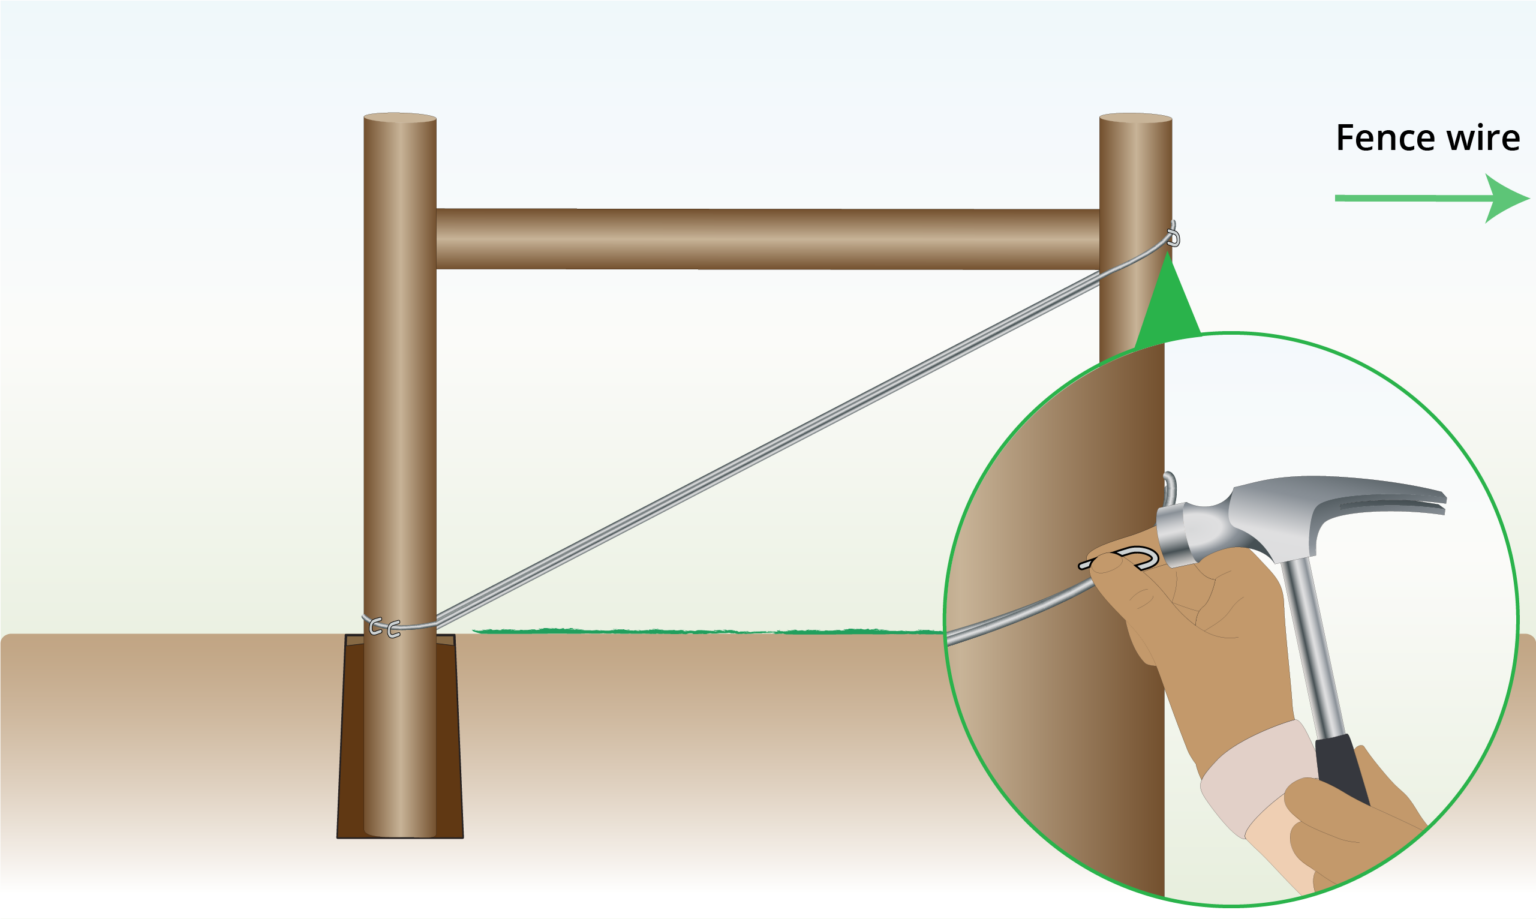
- String the wire around the H-support system, running from the top of the support pole to the bottom of the braced pole.
- Use a high-tensile wire system, wrapping it twice around the poles and stapling it securely into place.
Step 10) Install Wire Strainer
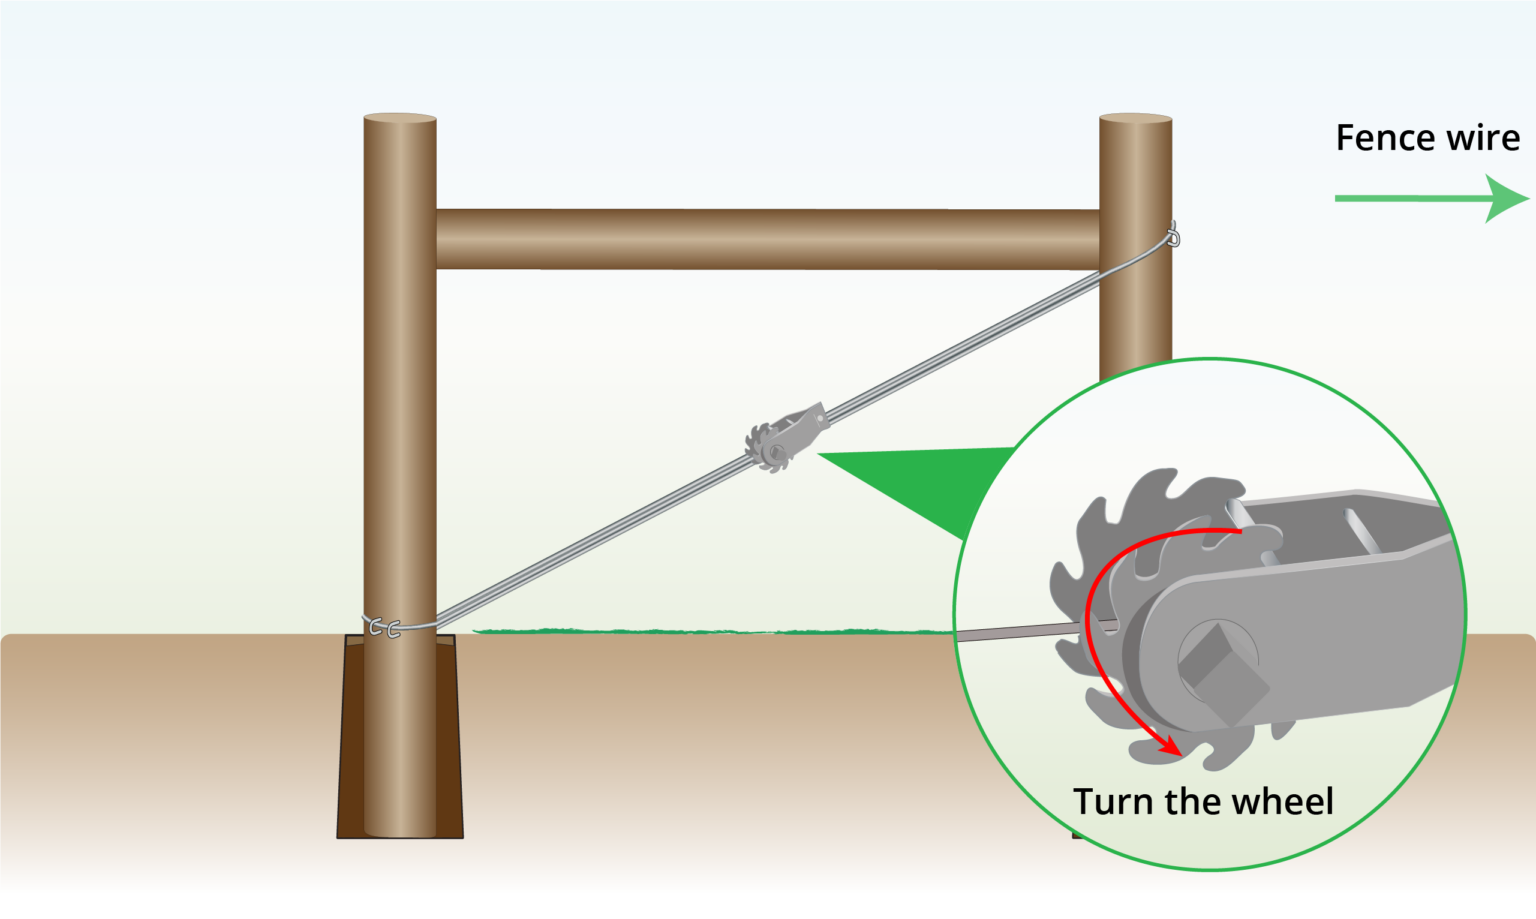
- Choose a slack spot on the wire, often midway between poles.
- Clip the tensioner onto the wire, ensuring it sits properly in the channel of the device.
- Turn the toothed wheel to grip the wire securely and tighten it, with each ratchet click increasing tension.
FLOATING BRACE
Introduction
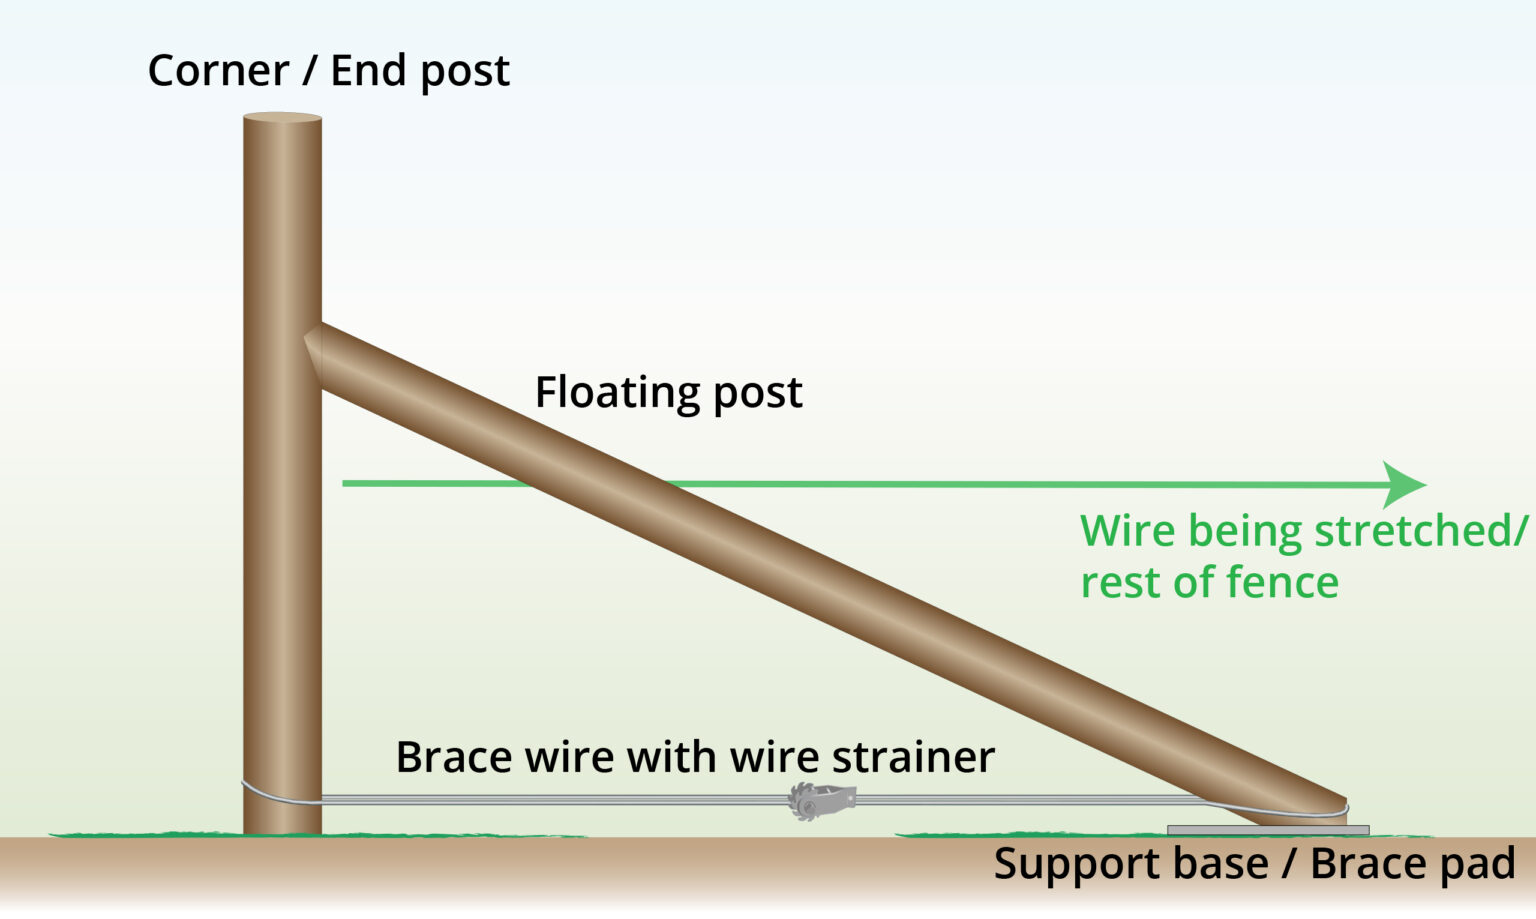
- Also known as the Deadman brace, this low-cost method is similarly secure and stable but requires fewer wood poles and less digging.
- The installation process can be simpler and quicker and it allows for easier adjustments and modifications.
Step 1) Plan Fence Corners

- Determine the number of corner posts required by assessing where additional support is needed.
- For instance, if your fence encloses a square area, you’ll need four corner poles.
Step 2) Calculate Total Holes Needed
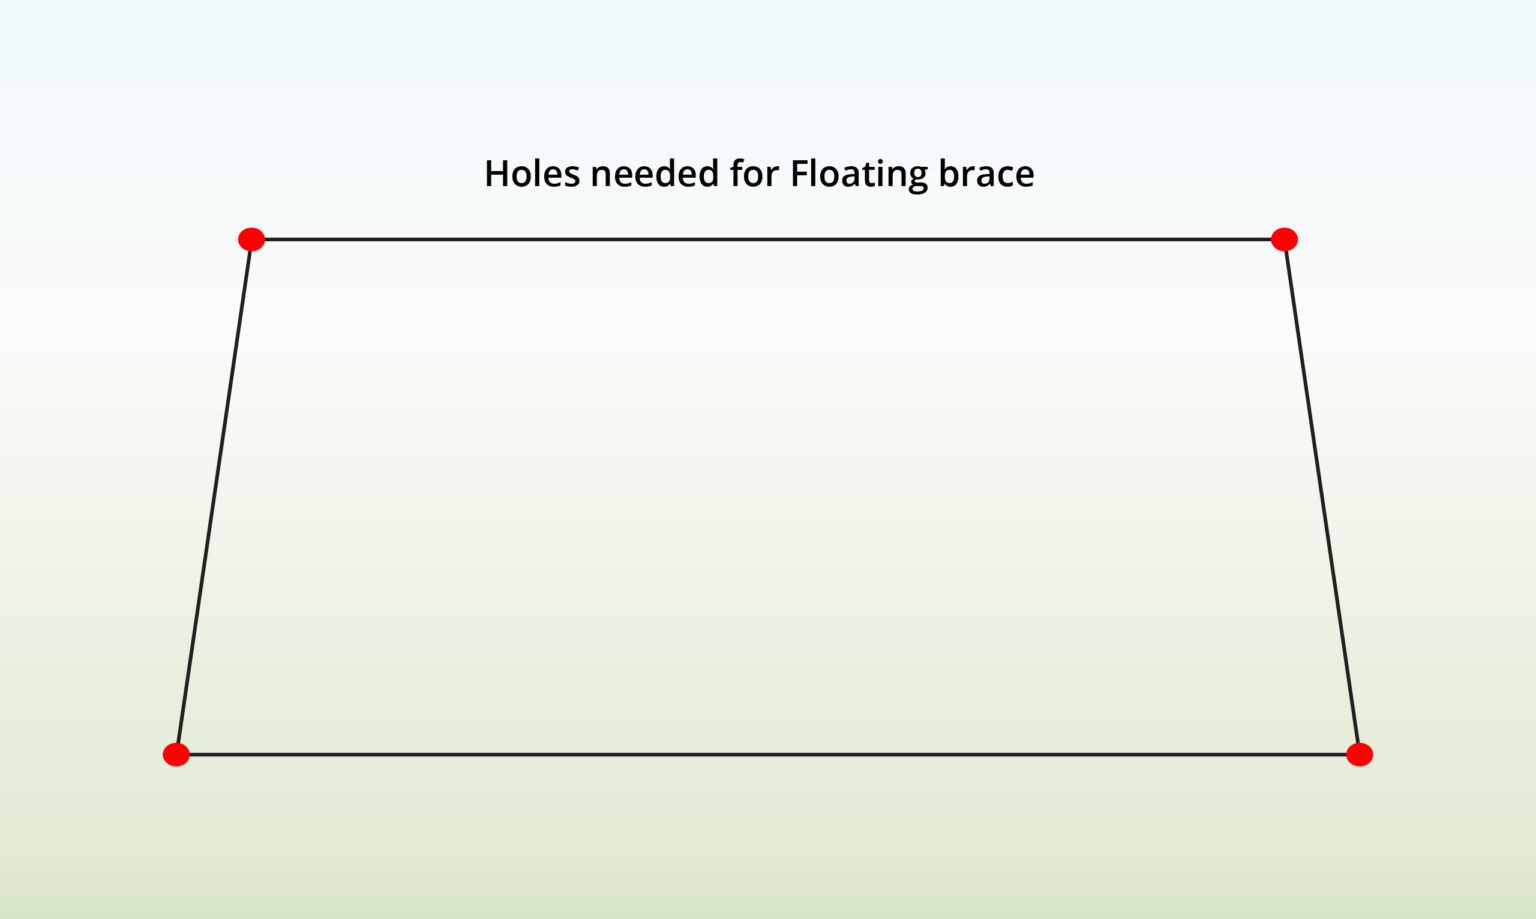
- Determine how many holes do you need.
- For this assembly, you will need at least 3 supports per corner, or 12 supports total for 4 corners.
- Then, mark the locations where the holes should be dug for the primary poles.
Step 3) Dig Holes

- For a 2.4m wooden pole, bury 90cm of the pole underground.
- Dig a 90cm deep hole for each primary pole to ensure proper stability.
Step 4) Set Primary Post
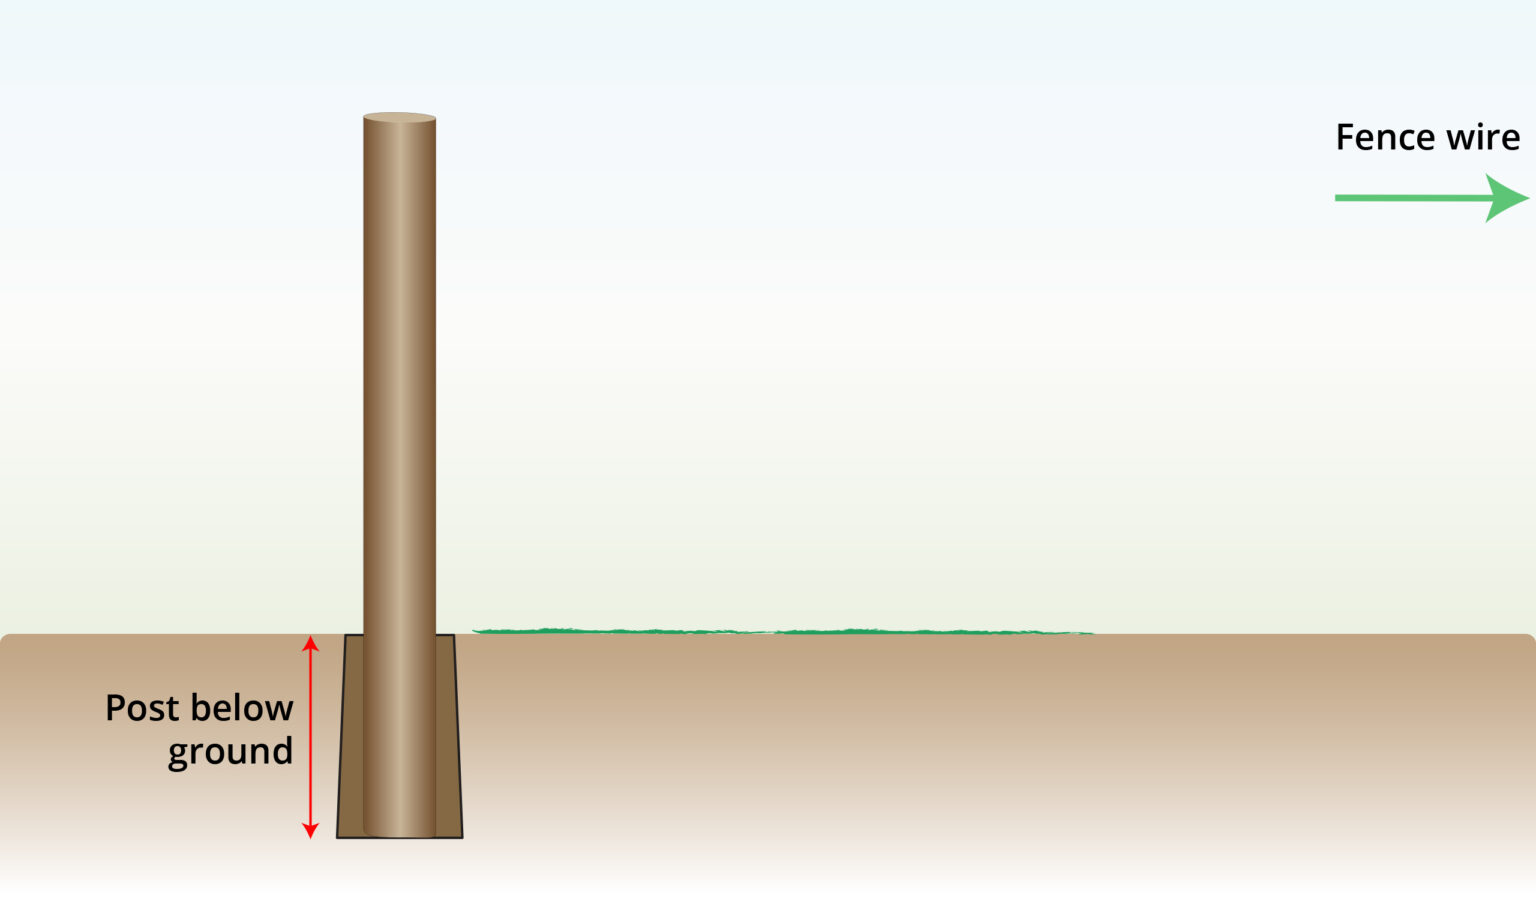
- Set the primary pole, ensuring it is perfectly aligned with your fence line.
- Typically, primary poles have a diameter of 20 cm or more, while diagonal poles in a floating support assembly are usually 10-15 cm in diameter.
Step 5) Fill the Hole

- Fill the holes by either packing the dirt back around the pole or using concrete for extra stability.
- If you opt for concrete, ensure it cures completely according to the manufacturer’s instructions.
Step 6) Mark Post Notch Location
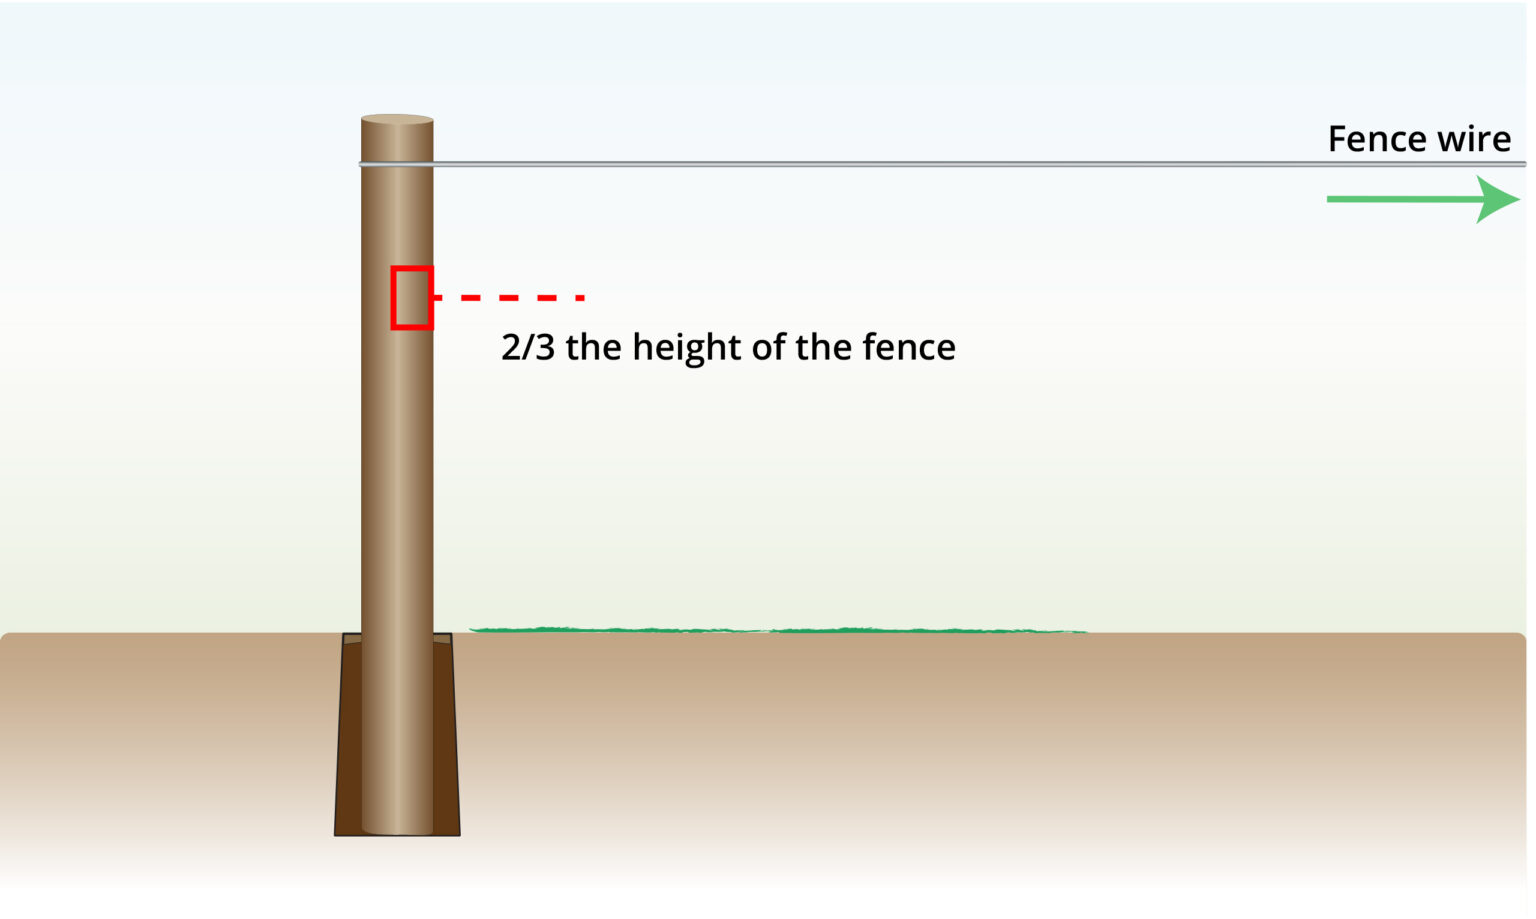
- Mark the notch location on the primary pole, positioning the support to attach at about 2/3 of the mesh height.
- Avoid setting the reinforcement too high, as this is a common mistake when building corners.
Step 7) Create a Notch
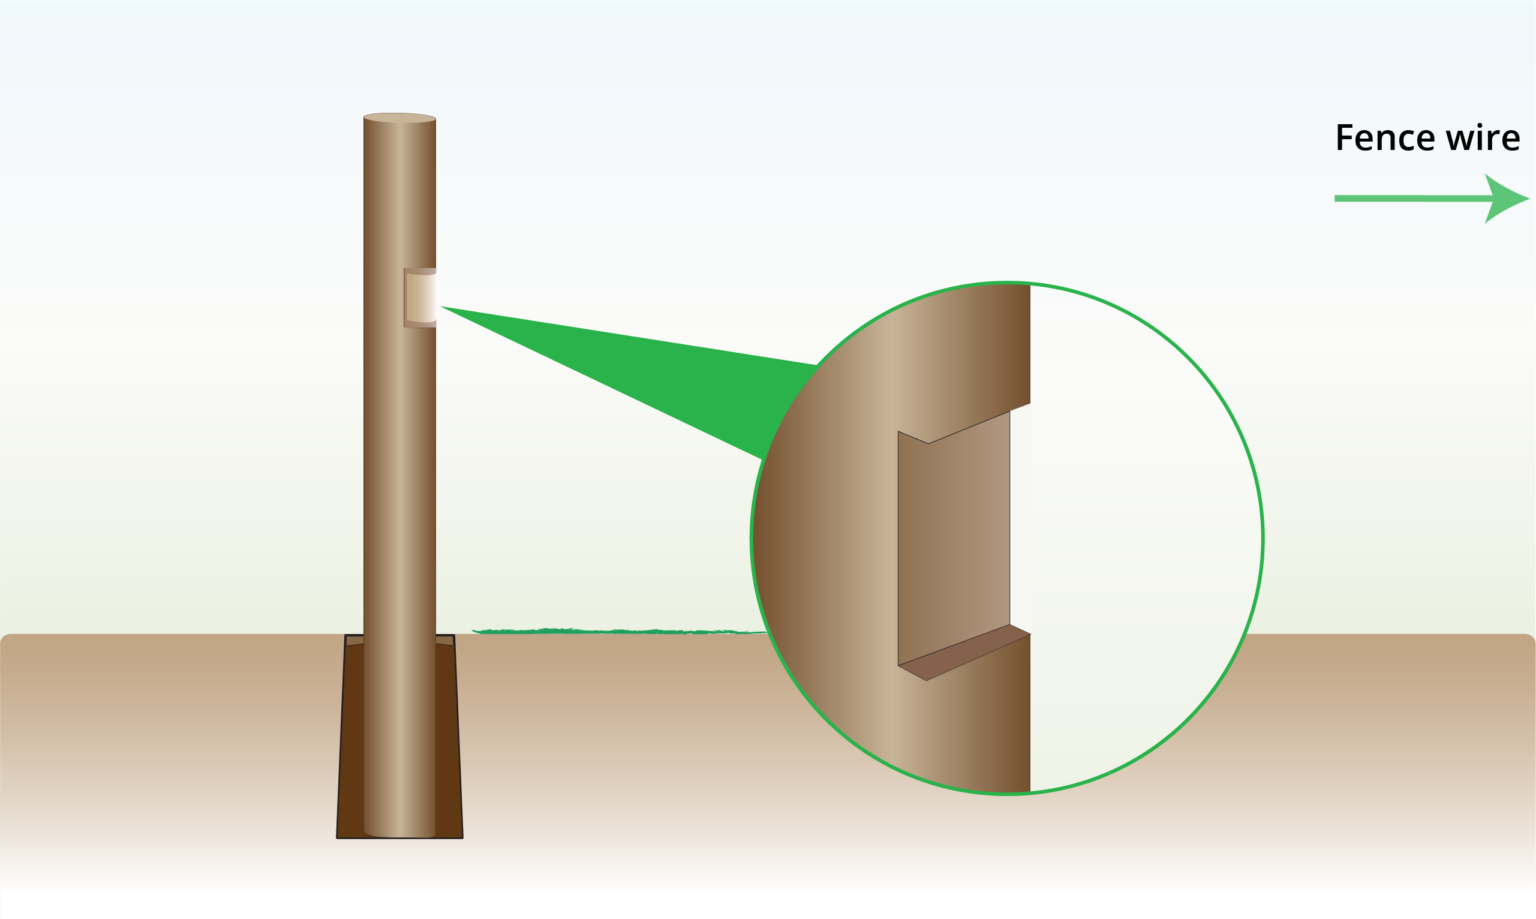
- Cut a 2-3cm deep notch in the face of the corner pole, ensuring it’s tall enough to fit the end of the support.
- Cut the upper end of the support to fit into the notch.
- Alternatively, drill a brace pin into the corner pole to secure the floating support.
Step 8) Secure Floating Pole
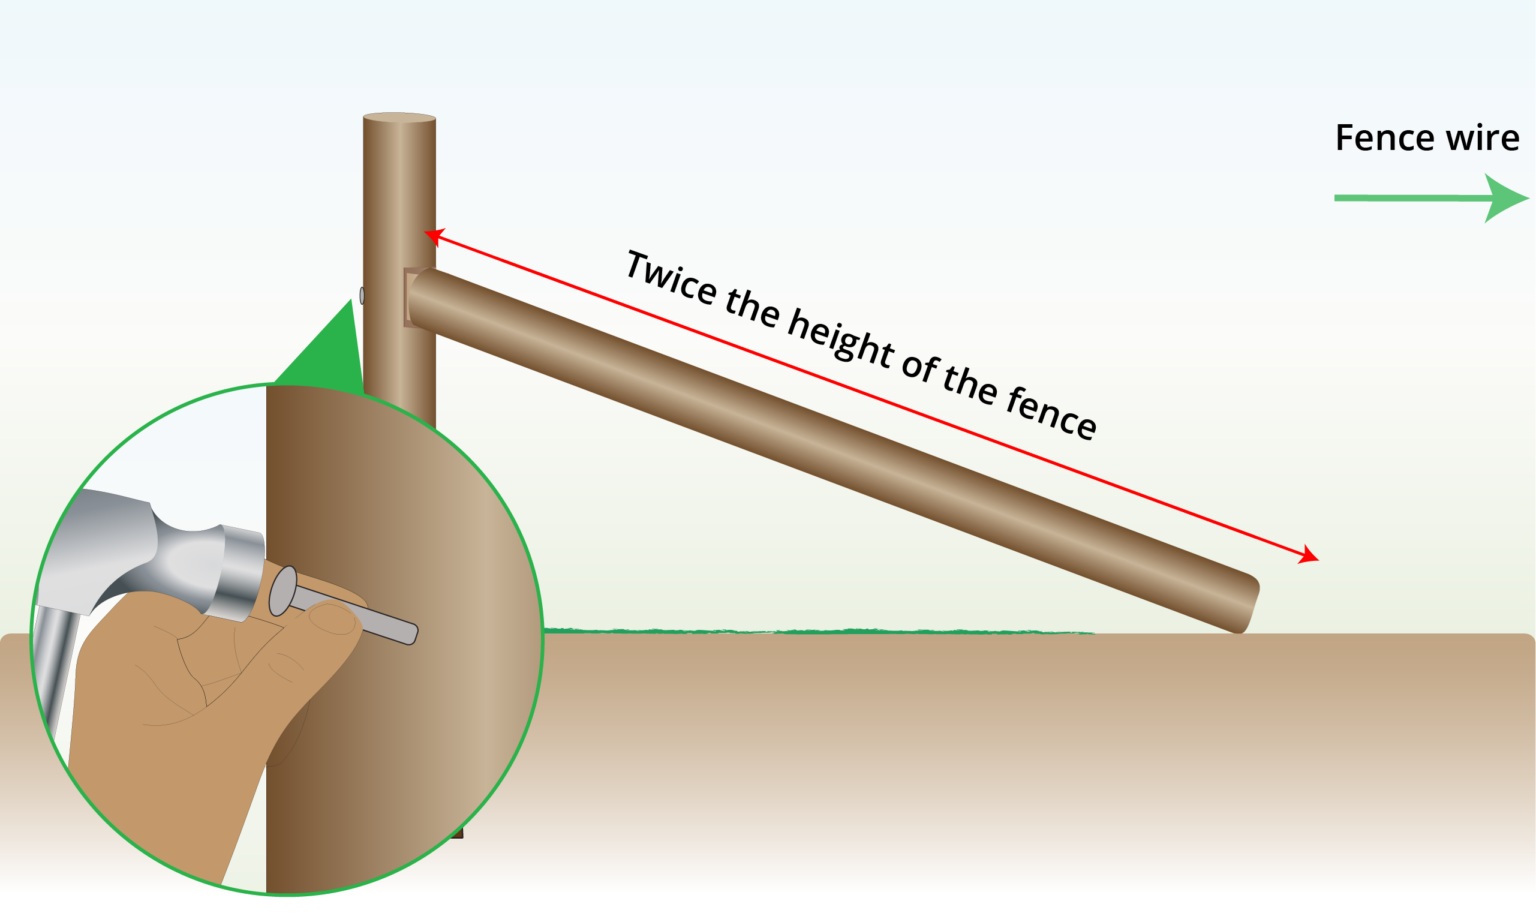
- While you brace posts for fence, secure the floating support to the primary pole.
- The support should be twice the height of the fence.
- Once the support is positioned, fasten it to the pole with sturdy nails.
Step 9) Add a Brace Pad
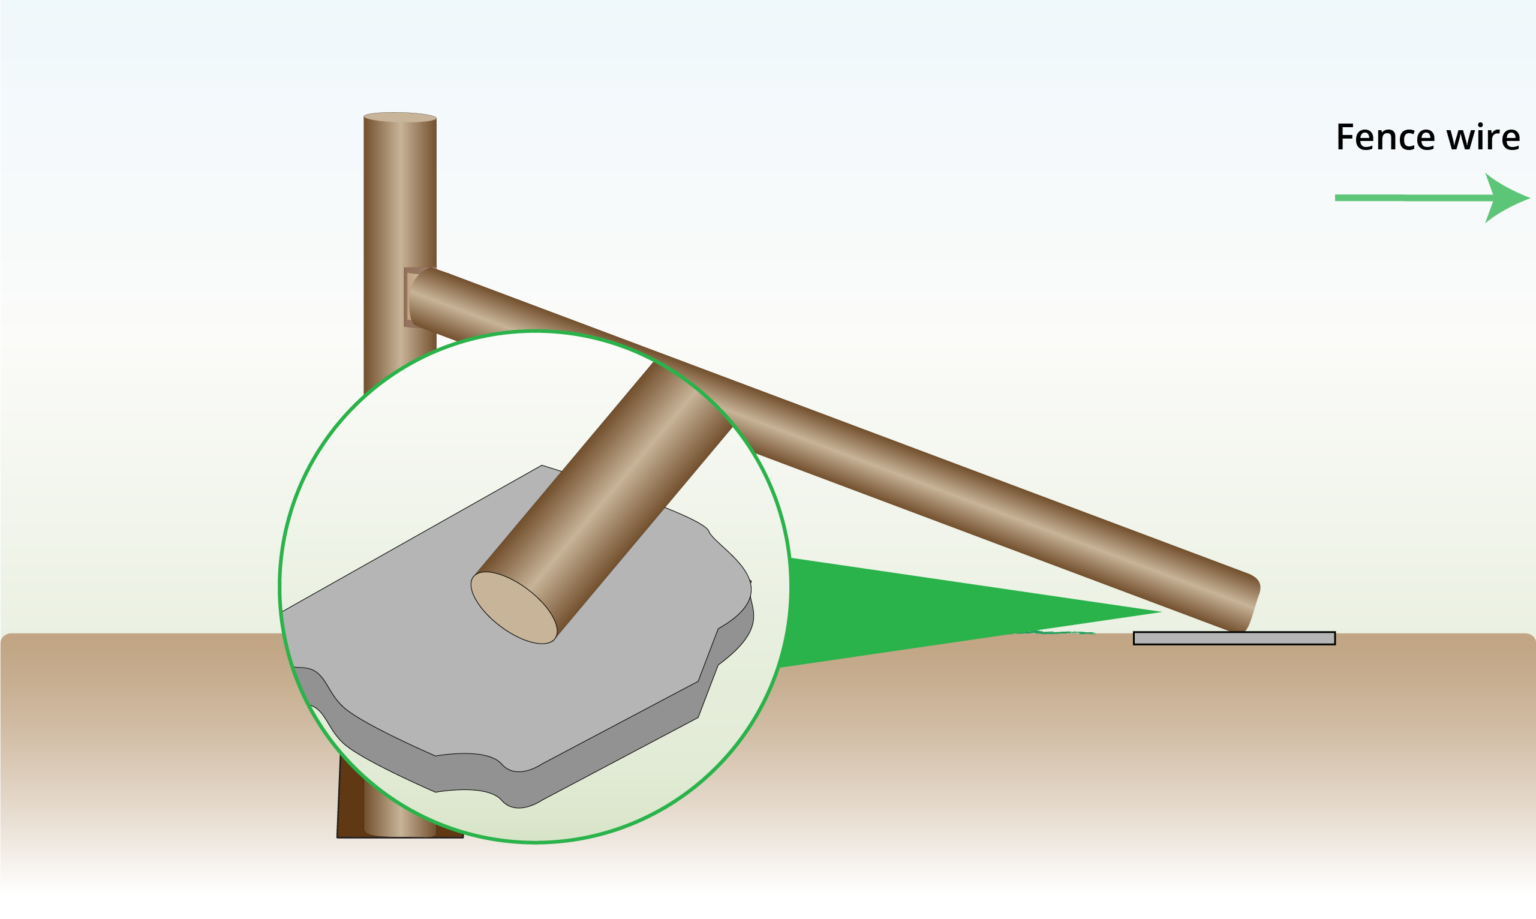
- Place the end of the support on a support base, also known as a pad.
- Ensure that the end of the support resting on the pad is smoothed off so it sits flat.
- Good options for the base include bridge planks, flat rocks, concrete blocks, or disc blades.
Step 10) Staple Wire to Poles
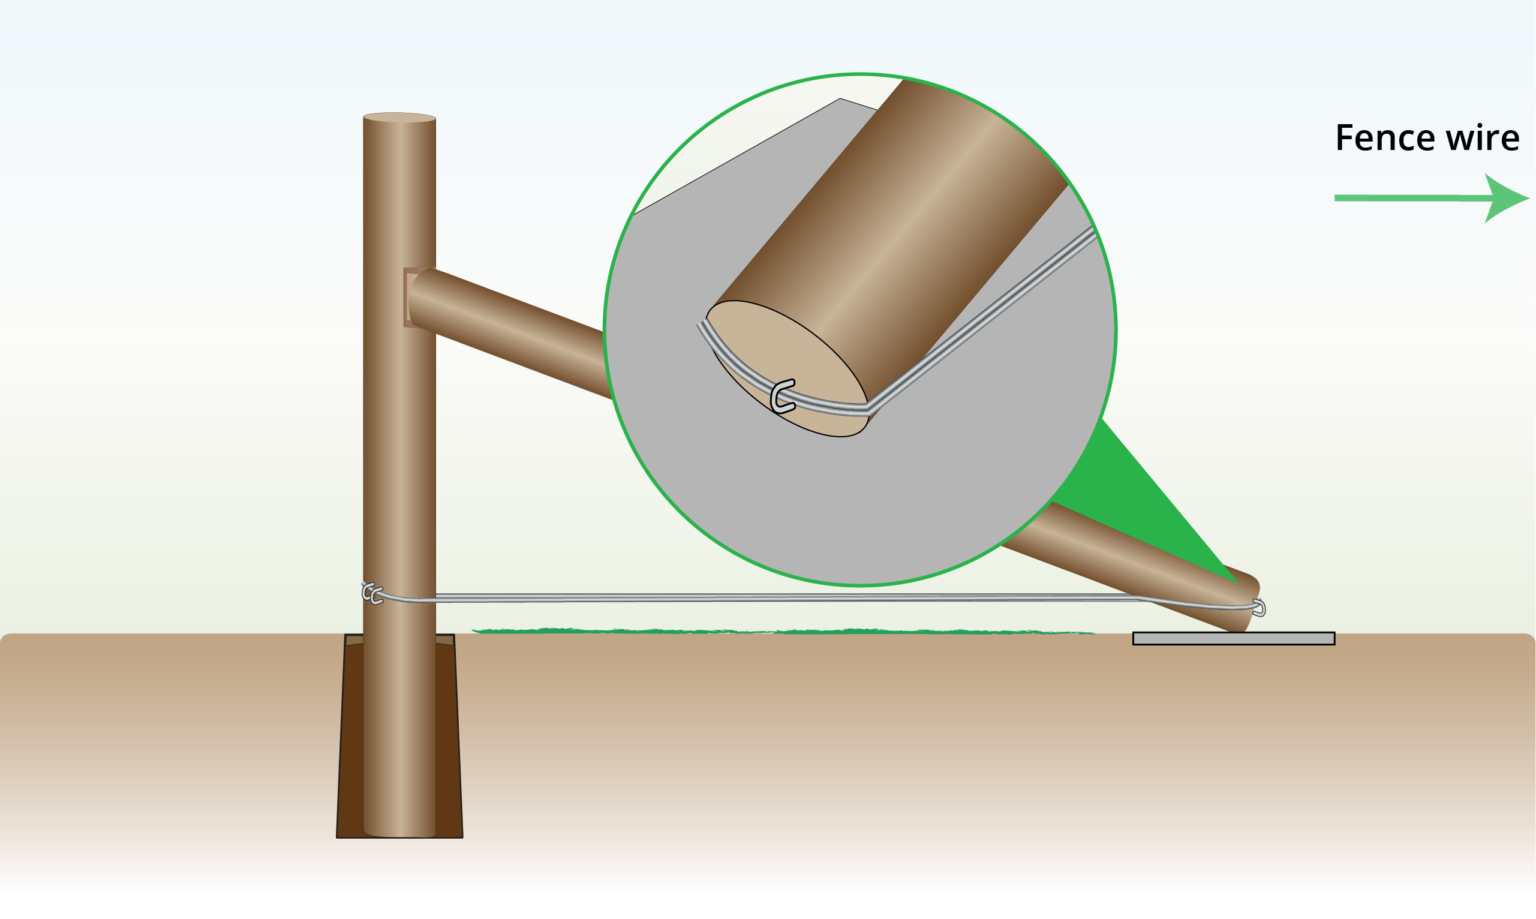
- Staple the wire to the poles using a high-tensile wire system.
- Wrap the wire twice around the poles and secure it with staples.
Step 11) Install Wire Strainer
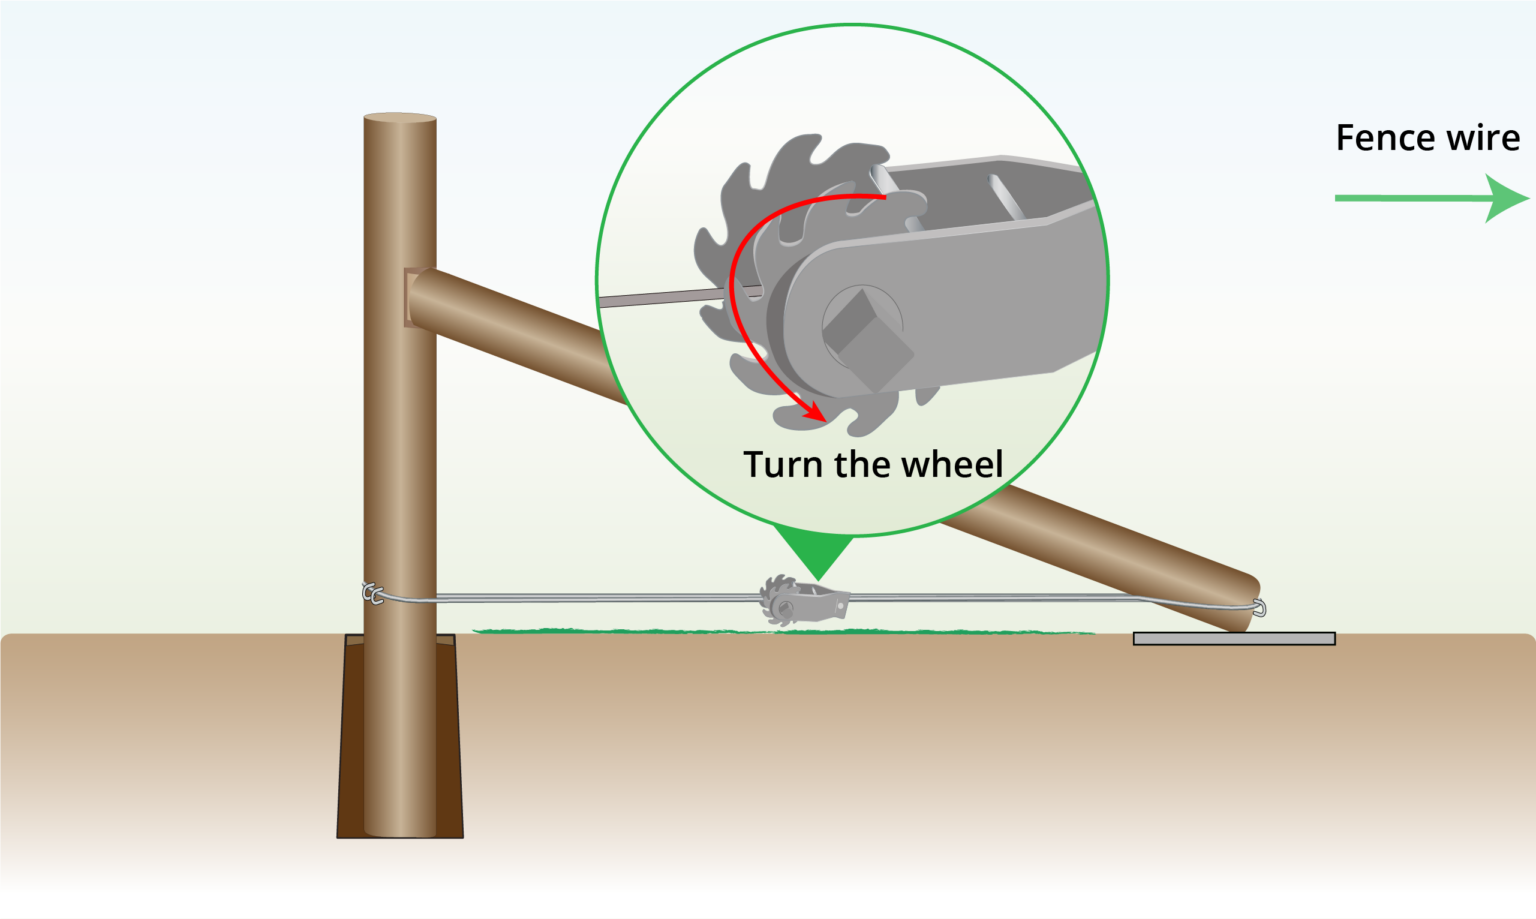
- Choose a slack spot on the wire, often midway between poles.
- Clip the tensioner onto the wire, ensuring it sits properly in the channel of the device.
- Turn the toothed wheel to grip the wire securely and tighten it, with each ratchet click increasing tension.
Tips and Tricks
- On the process of how to brace a fence post, use large pressure treated wood for the poles.
- You can either drill a pin into the corner pole or cut a notch to hold the support securely. Both methods can be effective depending on your setup.
- Regularly check the tension of the wire and adjust as necessary to prevent sagging. If the wire becomes slack again over time, you can simply tighten it further using the same wire strainer.
- Don’t over-tighten the wire or supports as it can cause warping or damage.
- Consider alternatives such as N-braces for additional support, rock pinning for stabilization, or guy wire braces for extra reinforcement.
FURTHER READING
- How to Attach Welded Mesh to Different Posts and Materials – Step by step instructions on how to attach mesh to different poles & materials.

