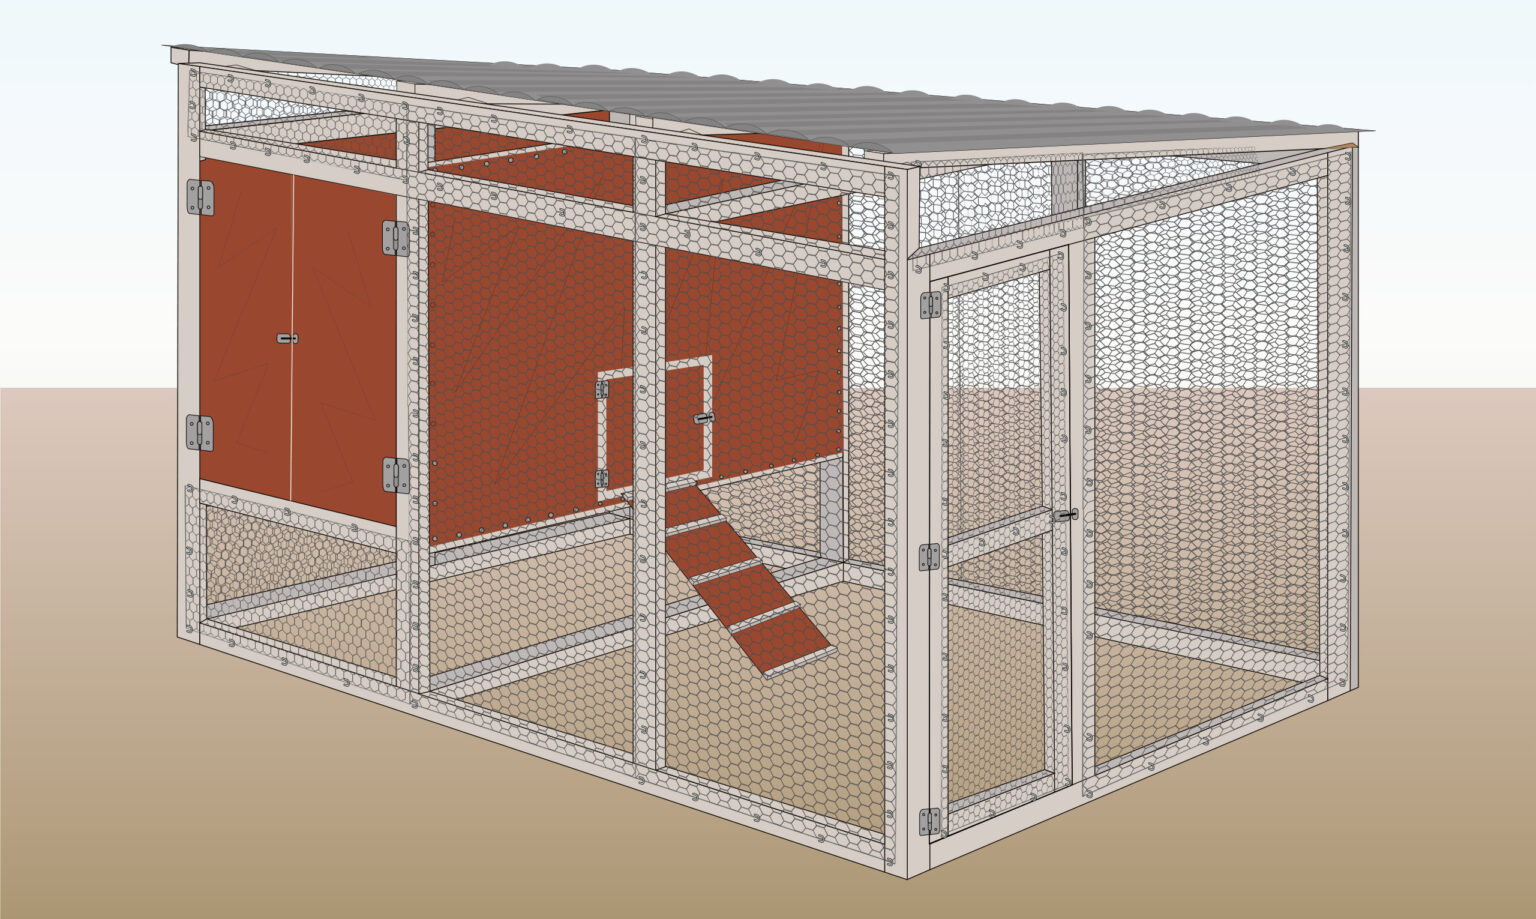
How to Build a Chicken Coop

Below you will find a step-by-step guide on how to build a chicken coop.

- Experience Required: Medium
- Tools Required: Protective gloves, Wire cutter, Hammer, Drill, Saw, Spirit level, Tape measure, Marker, Utility square
- Materials Required: Chicken wire, Treated timber (like two-by-fours), Plywood sheets, Plastic sheet, Staples, Screws, Hinges, Latches
Step 1) Plan & Design Main Frame
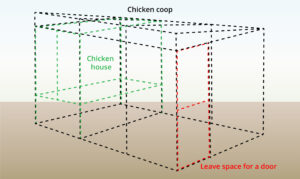
- Take measurements and design your enclosure while considering the space available and the number of hens you have to ensure enough room for.
- Be sure to include space for a door for easy access and incorporate a roof.
Step 2) Plan & Design the House
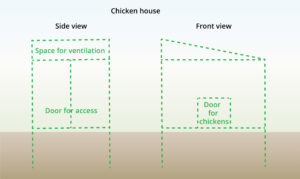
- When designing how to build a chicken coop, ensure you include a window or ventilation space.
- Also, remember to create a door for the hens inside the coop, as well as a separate door for yourself to facilitate cleaning.
Step 3) Measure & Cut Wood
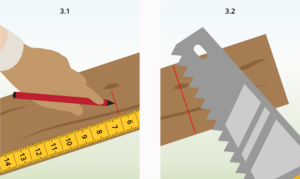
- Using your treated timber battens and a tape measure, mark the pieces you need and cut them to size with a saw.
- Don’t forget to wear protective gloves during this process!
Step 4) Connect Pieces
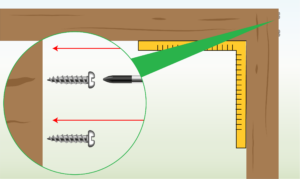
- Connect the batten pieces using wood screws and a drill.
- Be sure to check your angles with a utility square.
Step 5) Build Frames
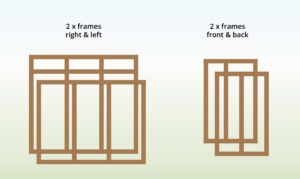
- Construct the mainframes per your design, then repeat step 4 to build the necessary wooden frames.
-
Ensure that one of the sides (right or left) is higher to create an angled roof for proper drainage.
- Additionally, prepare the remaining roof battens.
Step 6) Join Mainframes
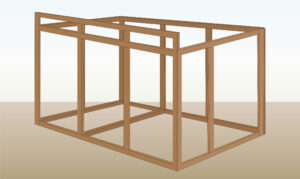
- Attach the frames you prepared in the previous step as outlined in step 4.
- For added stability, consider using corner braces to secure the frames together.
Step 7) Add House Frames
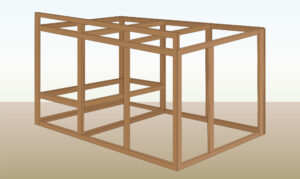
- Following your diy hen house plans from step 2 and the process outlined in step 4, join the battens together to assemble the chicken house.
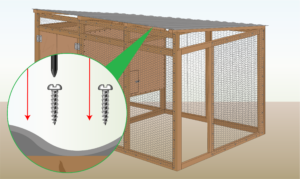
Step 8) Secure Plywood
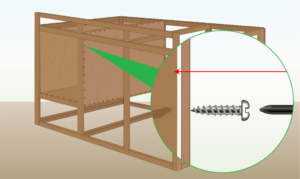
- Cut the plywood to fit as needed, wearing protective gloves.
- Hold the sheet against the timber frame to check the fit.
- Use a drill to secure the plywood to the battens with screws, sinking them just below the surface. Repeat for each panel.
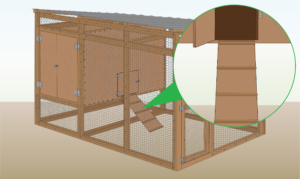
Step 9) Secure Door Stop
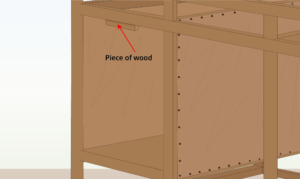
- Additionally, attach a piece of wood at the top of the door frame.
- This will prevent the door from closing inward.
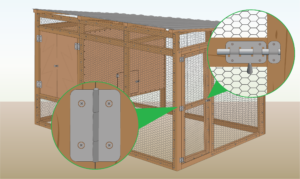
Step 10) Install House Door
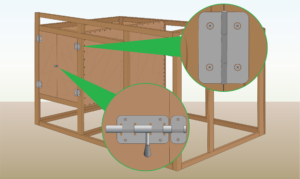
- Attach two or three hinges to both the left and right sides of the door.
- In the middle, where the two sections meet, secure a latch.
- Test the door to ensure it opens smoothly and latches securely.
Step 11) Install Chicken Door
- Measure and mark the plywood, then cut out a hole for the chicken door, typically about 30 cm wide by 40 cm high.
- Secure hinges on one side and attach a latch on the opposite side of the door.
Step 12) Measure & Cut Wire
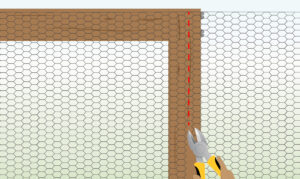
-
Measure and cut the hexagonal wire or square welded wire mesh to cover all sides of the coop.
- Ensure the mesh overlaps the wood to provide space for secure attachments.
Step 13) Secure Wire to Wooden Frame
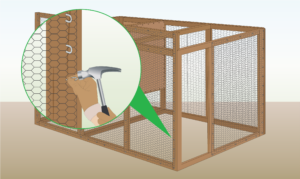
-
Secure the wire netting to the wooden frames on all sides.
- Attach the netting by hammering in staples every 15 cm.
Step 14) Assemble the Roof

- Using treated timber, cut the rafters and create recesses (notches) in each to join them with the horizontal timber frames.
- Secure the beams (horizontal timbers) to the rafters with wood screws.
- This will ensure the roof is sloped to avoid water buildup.
Step 15) Cover the Roof
- Attach a plastic sheet (or alternatively, wood or metal) to the roof rafters using screws.
- This will function as the roof, providing shade and protection for the chickens.
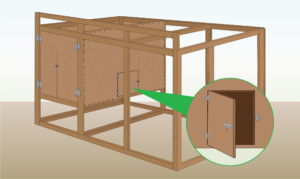
Step 16) Create & Attach Entry Door
- Attach two or three hinges to one side of the wooden frame using screws.
- On the opposite side, install a latch to keep the door closed.
- Test the door by opening and closing it to make sure it moves smoothly and latches securely.
Step 17) Create the Chicken Ladder
- Cut a wooden plank from plywood and space the rungs 7-10 cm apart along the plank, securing them with screws.
- Position the ladder at a 30-45 degree angle to the coop entrance.
Step 18) Create Nesting Boxes & Roosting Bars
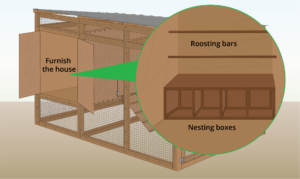
- To create the nesting boxes, cut the plywood for the horizontal and vertical walls and secure them with wood screws.
- For the roosting bar, use pressure-treated wood. Roosts in your hen coop should be at least 5 cm (2 inches) wide, ideally 10 cm (4 inches).
Step 19) Furnish & Decorate
- Now that your easy DIY chicken house is ready, you can personalize it using your favorite paint, stain, or preservative.
- Be sure to provide water and food for your poultry, and consider filling the coop with natural materials like compost.
Tips
-
While deciding how to make a chicken coop, consider using an old shed to save money and materials.
- Welded wire mesh is a stronger alternative option.
- You can find free coop designs online and then sketch out your desired layout.
- Ensure each hen has 0.2-0.4 square meters of space inside the coop. Allow 0.7-0.9 square meters per hen in the outdoor run or yard.
- For extra safety, bury mesh around the coop’s perimeter to deter foxes and other animals from digging.
- Consider installing a self-locking automatic poultry door.
Do’s & Don’ts
-
Install approximately two nesting boxes, positioned high enough off the ground.
- Remember to include windows and ventilation for proper airflow.
- Make sure your hens have shade and weather protection.
- Use natural substances like compost to fill the coop floor.
- Add a high perch or roosting bar for the hens to roost.
FURTHER READING
- How to Level Ground for Chicken Coop – Step by step instructions on how to level ground for poultry coop.
- How to Make a Temporary Chicken Coop – Learn how to make a temporary coop with these easy steps.
- Chicken Coop Ideas (110 UNIQUE IDEAS) – A guide showing you many poultry coop ideas.
- How to Build a Chicken Run – Step by step instructions on how to build a chicken coop with a run.


Published by
