Gabion Fence Installation

Below you will find a step by step guide on gabion fence installation.

- Experience Required: Medium
- Tools Required: Protective gloves, String, Pegs, Shovel, Spirit level, Tape measure, Plate compactor
- Materials Required: 4mm or 5mm Gabion baskets, Stone, Helicals, Gabion wire or Cable ties, Type 1 gravel, Geotextile, Supporting posts, Concrete
Step 1) Measure Area & Plan

- Begin by measuring your space: how long it is, how much space you have from front to back, and how high you want your diy gabion fence to be.
- This will help you figure out how many baskets you’ll need.
- Also, remember to calculate how much stone you’ll need.
Step 2) Plan for Second Layer

- For a taller fence than 1m, think about adding another layer of baskets in your plan.
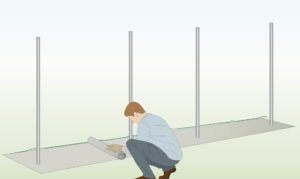
Step 3) Mark the Location
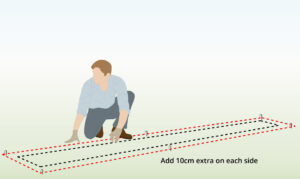
- Mark the fence line with a string and pegs, allowing an extra 10 cm on each side for better alignment and stability.
- The string will ensure everything is straight.
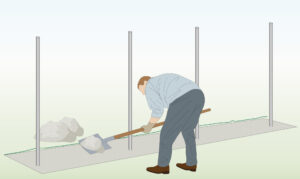
Step 4) Prep the Foundation
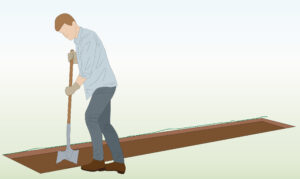
- Use a shovel to dig a solid base, then level the ground and fill any gaps.
- Ensuring the base is level is crucial for stability.
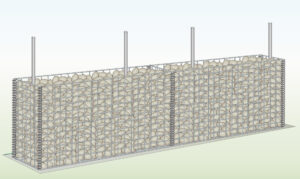
Step 5) Mark Support Post Location
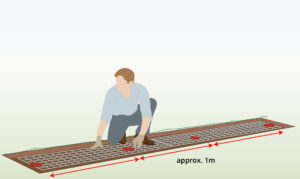
- Remove the lid panels from the baskets and use them to mark the position of the support posts.
- Plan to place each post inside the basket, fitting them through a mesh hole, and space them about 1 meter apart.
Step 6) Add Supports
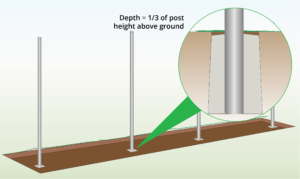
- Dig the posts to a depth of about one-third of the height of the gabion fencing.
- Secure the support posts using concrete.
- Note: Make sure the posts are sized to fit inside a mesh hole – otherwise, you’ll need to cut the wires to accommodate them.
Step 7) Check Support Post Location
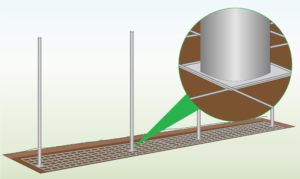
- Verify the post locations using the same lid panels while the concrete sets.
- Adjust them as needed to ensure they are in the correct positions.
- Use a spirit level to make sure the posts are straight.
Step 8) Add Basecourse
- Add a layer of Type 1 gravel:
- For a 1m high fence, use 10cm of basecourse.
- For a 2m high fence, use 20cm of basecourse.
- For a 3m high fence or taller, use 30cm of basecourse.
Step 9) Compact Basecourse
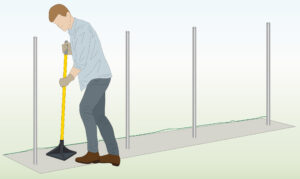
- Compact the basecourse thoroughly for stability using either a plate compactor or a spade.
- Then, use a spirit level to check and adjust for straightness.
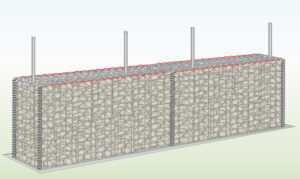
Step 10) Add Geotextile
- To prevent soil erosion and enable drainage, line the bottom of the structure with geotextile fabric.
- Cut holes in the fabric for the posts, then position it properly over the basecourse.
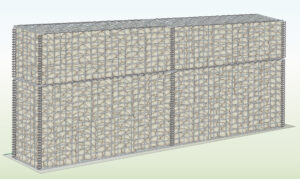
Step 11) Pre-Assemble Baskets without Lids
- Fold up and secure the vertical corners of each gabion with two cable ties: one at the top and one at the bottom of each corner.
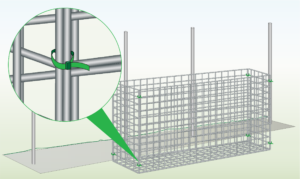
Step 12) Position Around Support Posts

- While positioning the baskets, thread the support posts through the mesh holes in the pre-determined spots.
- Ensure the adjoining corners are pushed as close together as possible.
Step 13) Attach Baskets Together
- To prevent any movement, secure the adjoining corners of the baskets with a helical.
- One helical should connect the corners of two adjoining gabions.
Step 14) Cut Off Excess
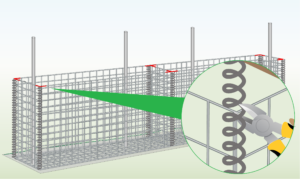
- Trim any excess length of helical where necessary.
- Use pliers to pinch each end to secure it and prevent it from slipping out.
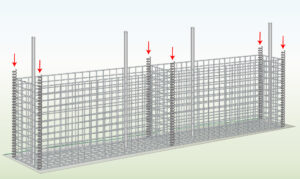
Step 15) Fill with Stone
- Fill each basket with the calculated amount of stones.
Step 16) Attach Lid
- Close the lids by using tying wire both in the front and back.
- Ensure they sit comfortably on the stones and there are no gaps.
Step 17) Add Second Layer
- For a taller structure, place the new layer on top of the first layer of stone-filled gabion baskets, connecting the bottom and top of the two baskets.
- Then, fill the second layer of baskets with stones and secure the lids.
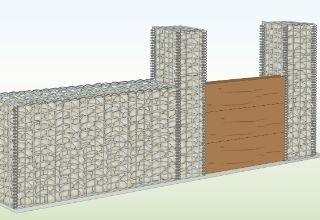
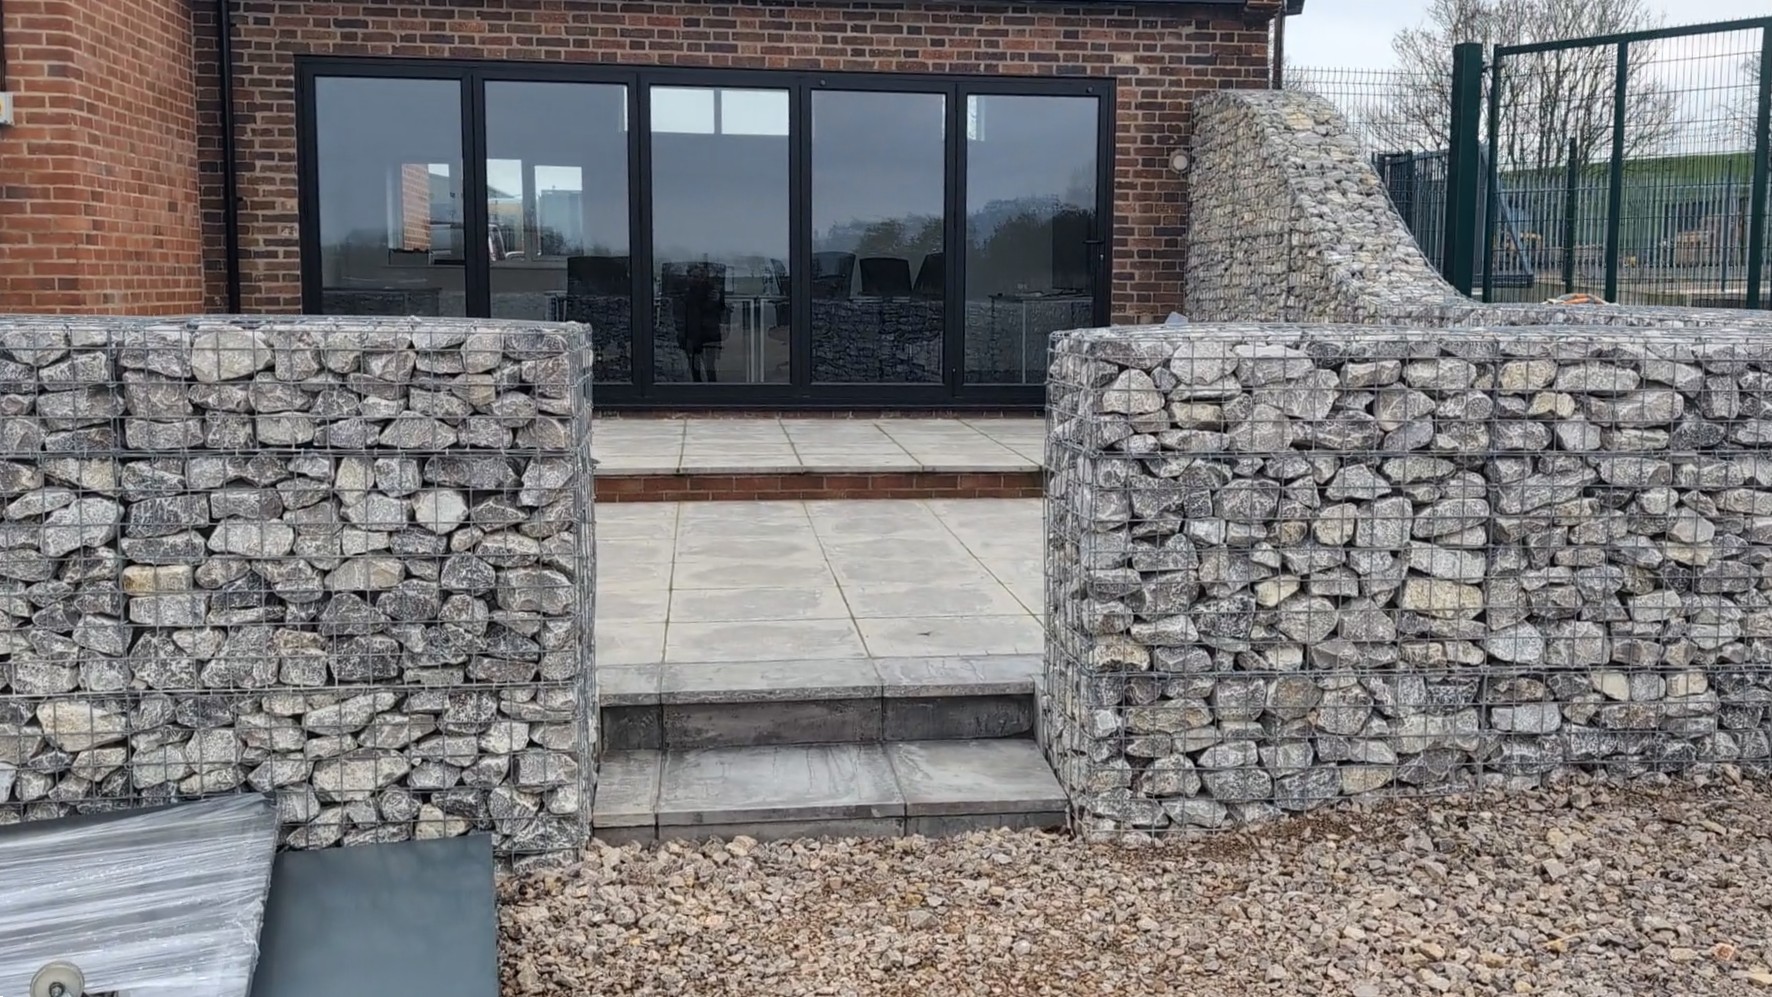
Step 18) Hybrid Gabion Fence Installation Structures
- You can combine a column with a short wall or use timber elements in between them.
- This provides many options for creating unique structures, such as walls, garden corners, or barriers.
TIPS
Before starting your gabion wall project, it’s important to plan carefully and consider a few key factors. The points below are based on our team’s experience designing and installing gabion structures.
- It’s advisable to opt for 4mm or 5mm baskets over the 3mm ones to prevent bulging, thus ensuring structural stability and strength.
- Depth is usually small, so supporting posts are needed to ensure maximum stability and also reduce the risk of collapse.
- You can play with the shape of your structure & create a unique gabion fence installation design by adding different elements like columns or timbering.
- You can calculate how much stone you’ll need using our stone calculator.
- To make sure the edges stay straight you can use the free tying wire to create internal bracing.
- Use corner ties for a quicker bracing technique.
FURTHER READING
- How to Lace Gabion Baskets – Instructions on how to lace baskets
- How to Fill Gabions – Learn how to fill cages using different methods
- Gabion Learning Hub – a library of help videos
VIDEO

Written By
This blog was created by our Technical Illustrator, Timi and reviewed by our Founder, John.
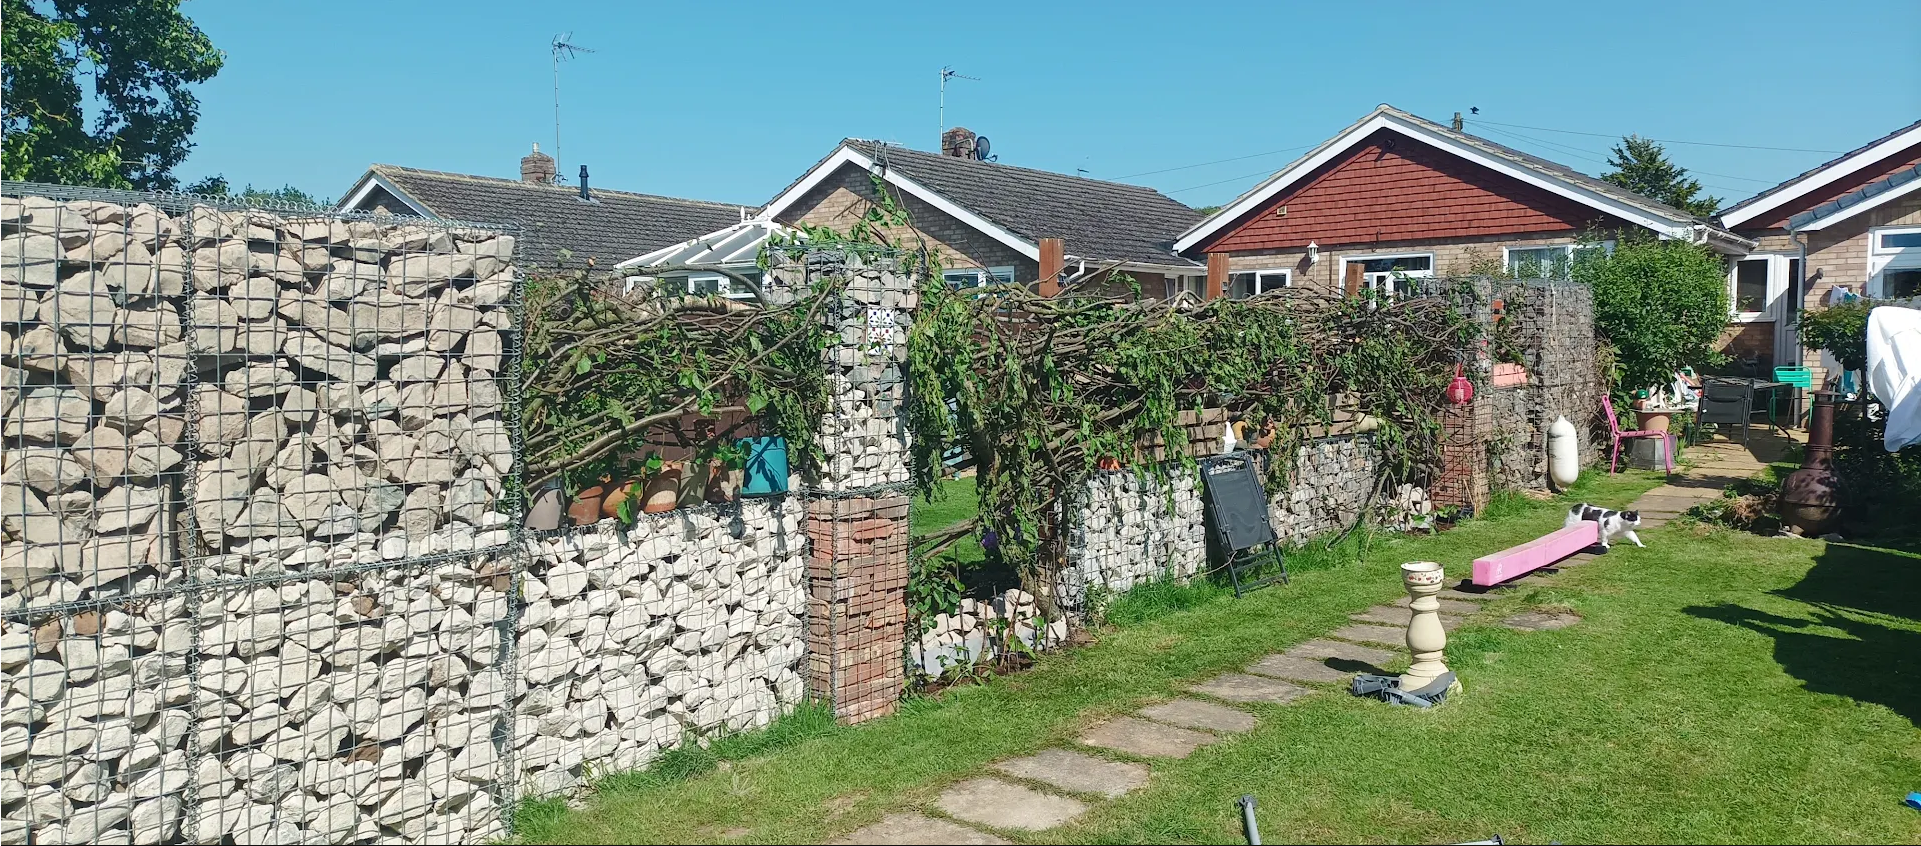
Below you’ll find examples of our real-life gabion fence builds, along with customer projects. We’ve opted for technical illustrations for the instructions found in this blog because they provide better clarity on mesh placement and structural details that can get lost in real-life photography.


Published by
