DIY Gabion Fireplace
Below you will find a step by step guide on how to build a DIY gabion fireplace.
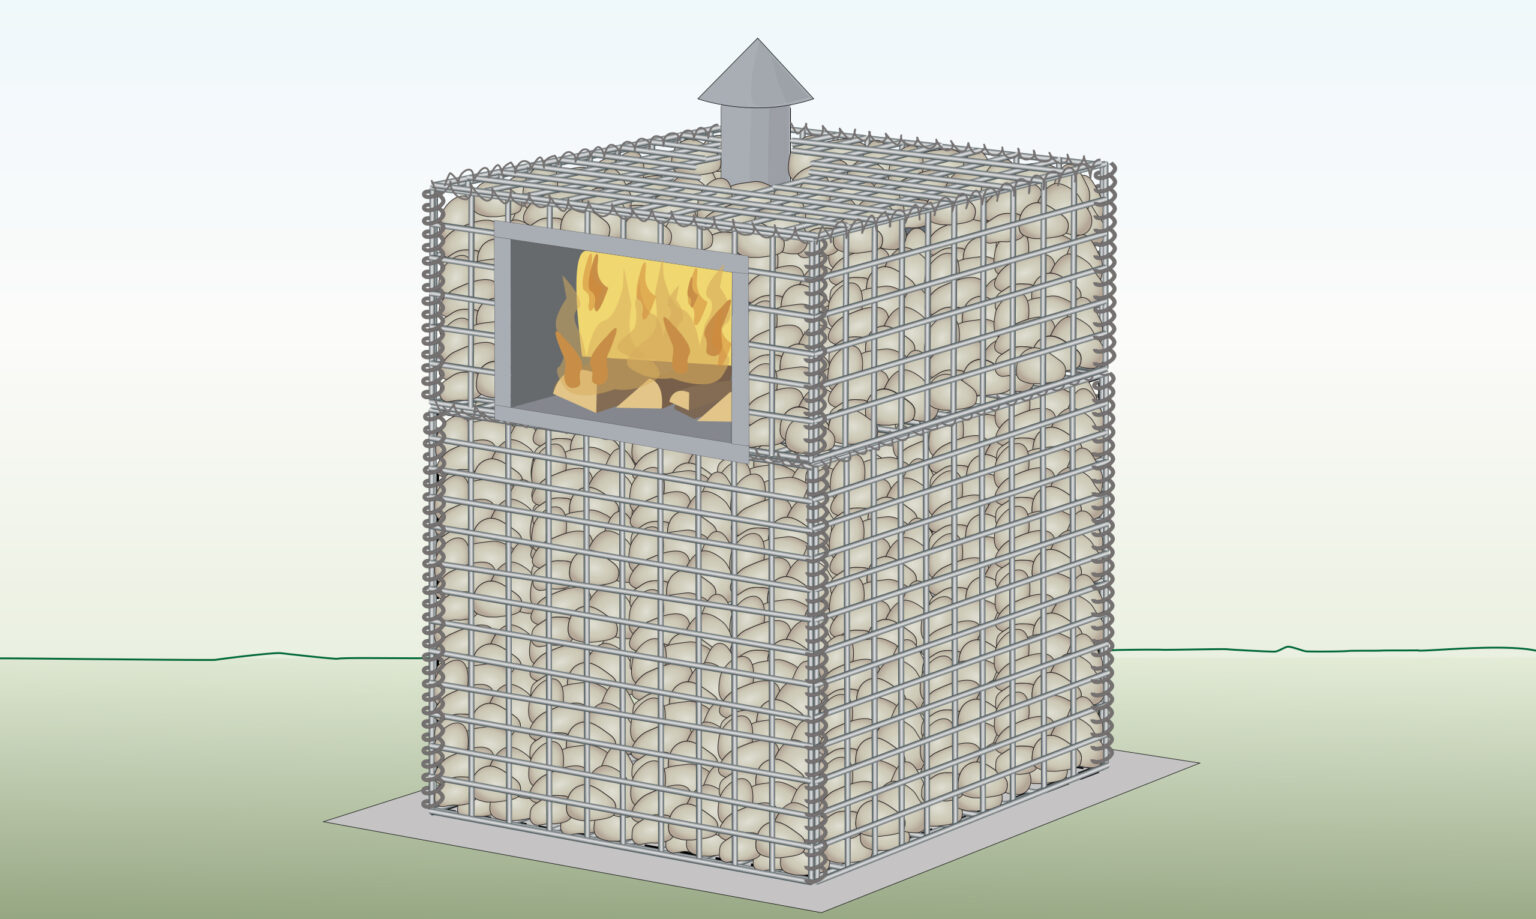
- Experience Required: Medium
- Tools Required: Protective gloves, String, Pegs, Shovel, Spirit level, Tape measure, Pliers, Wire cutters, Bolt cutter
- Materials Required: 4mm or 5mm Gabion baskets, Stone, Helicals, Tying wire, Oven (fits into the smaller basket), Chimney, Rain cover for the chimney, Concrete, Roast for BBQ (optional), Corner ties (optional)
Step 1) Measure Area & Plan
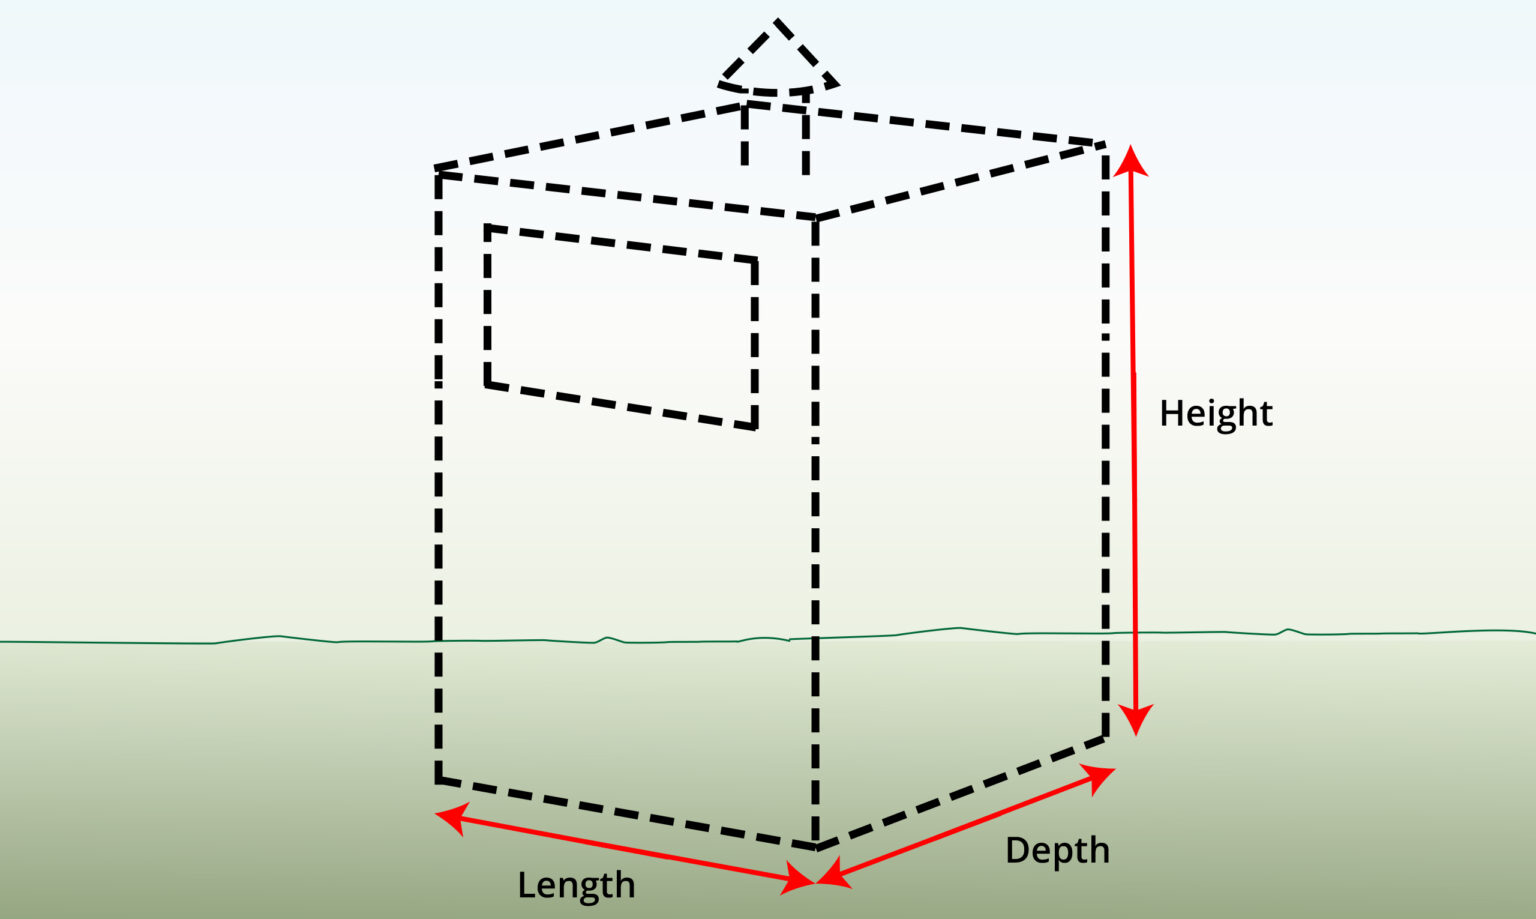
- Begin by measuring your space.
- Draw a sketch of your DIY gabion fireplace, including dimensions based on your needs, and ensure the oven size fits within the basket structure.
- Make sure the total height is not be more than double the size of the base.
Step 2) Calculate Gabion Sizes

- Calculate the materials required: baskets, helicals, and the amount of stone fill based on the dimensions of your structure.
- For a total height of 142.5cm you will need:
larger basket: L75cm x D75cm x H97.5cm
smaller basket: L75cm x D75cm x H45cm
Step 3) Mark the Location

- Mark the baseline using a string and pegs, leaving an extra 10 cm on each side to ensure better alignment and stability.
Step 4) Prepare the Foundation

- Use a shovel to dig a solid base, leveling the ground and filling any gaps.
- It’s crucial to have an even foundation to maintain the stability of the basket structure.
Step 5) Add Concrete Base

- Pour a 10-15 cm thick concrete slab, level it, and allow it to cure before continuing.
- Alternatively, you can use pavers or bricks as a base.
Step 6) Assemble Gabions
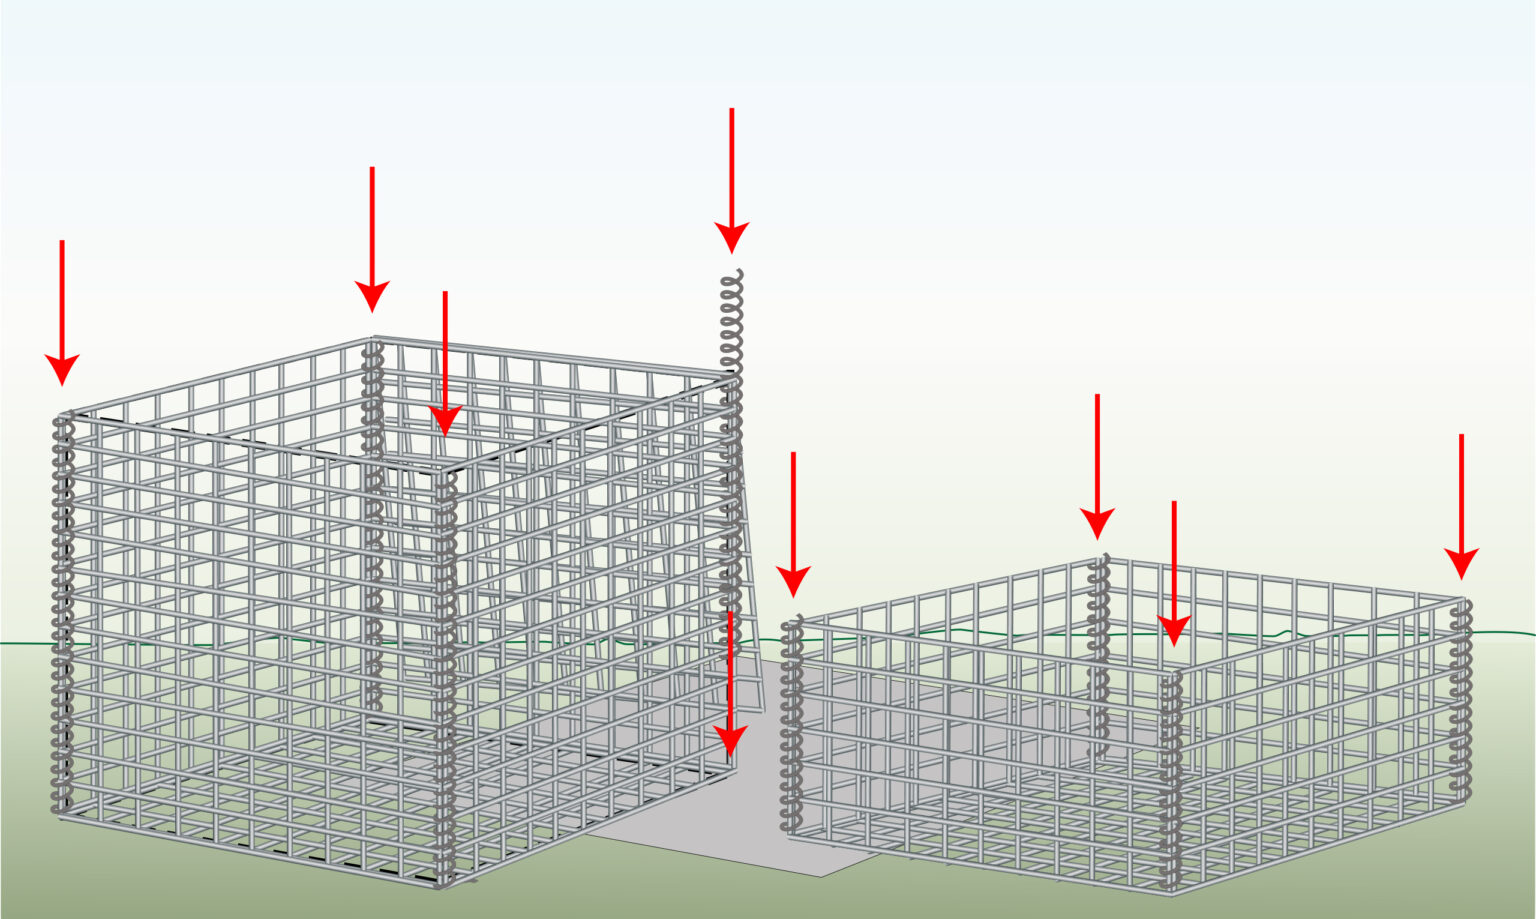
- Fold and secure the vertical corners of each basket with helicals.
- For now, leave the lid panel of the large basket unsecured.
- Remove and set aside the lid panel of the small cage.
Step 7) Cut off Any Excess Wire
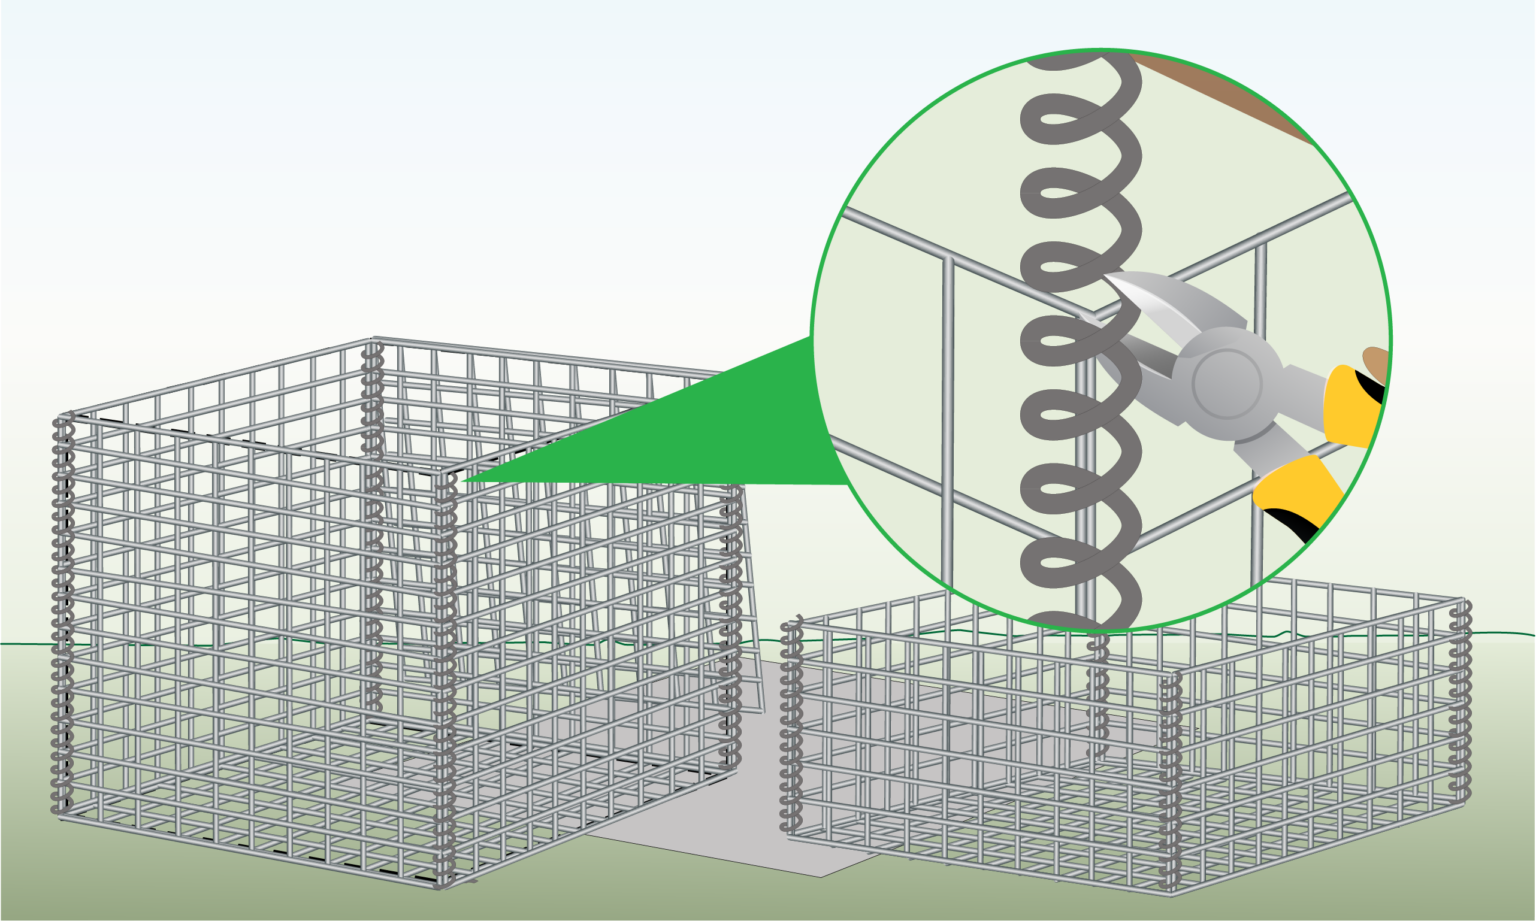
- Use wire cutters to cut any excess length of helicals or wire where necessary.
- Use pliers to pinch each end, securing it to prevent slippage.
- Make sure all edges are smooth to eliminate any sharp, exposed ends.
Step 8) Position Large Basket

- Place the larger basket in position on the concrete base.
Step 9) Fill with Stone

- Fill the basket with the calculated quantity of stones.
Step 10) Secure the Lid

- Close the lids with tying wire at both the front and back.
- Ensure they rest securely on the stones without leaving any gaps.
Step 11) Position Small Gabion
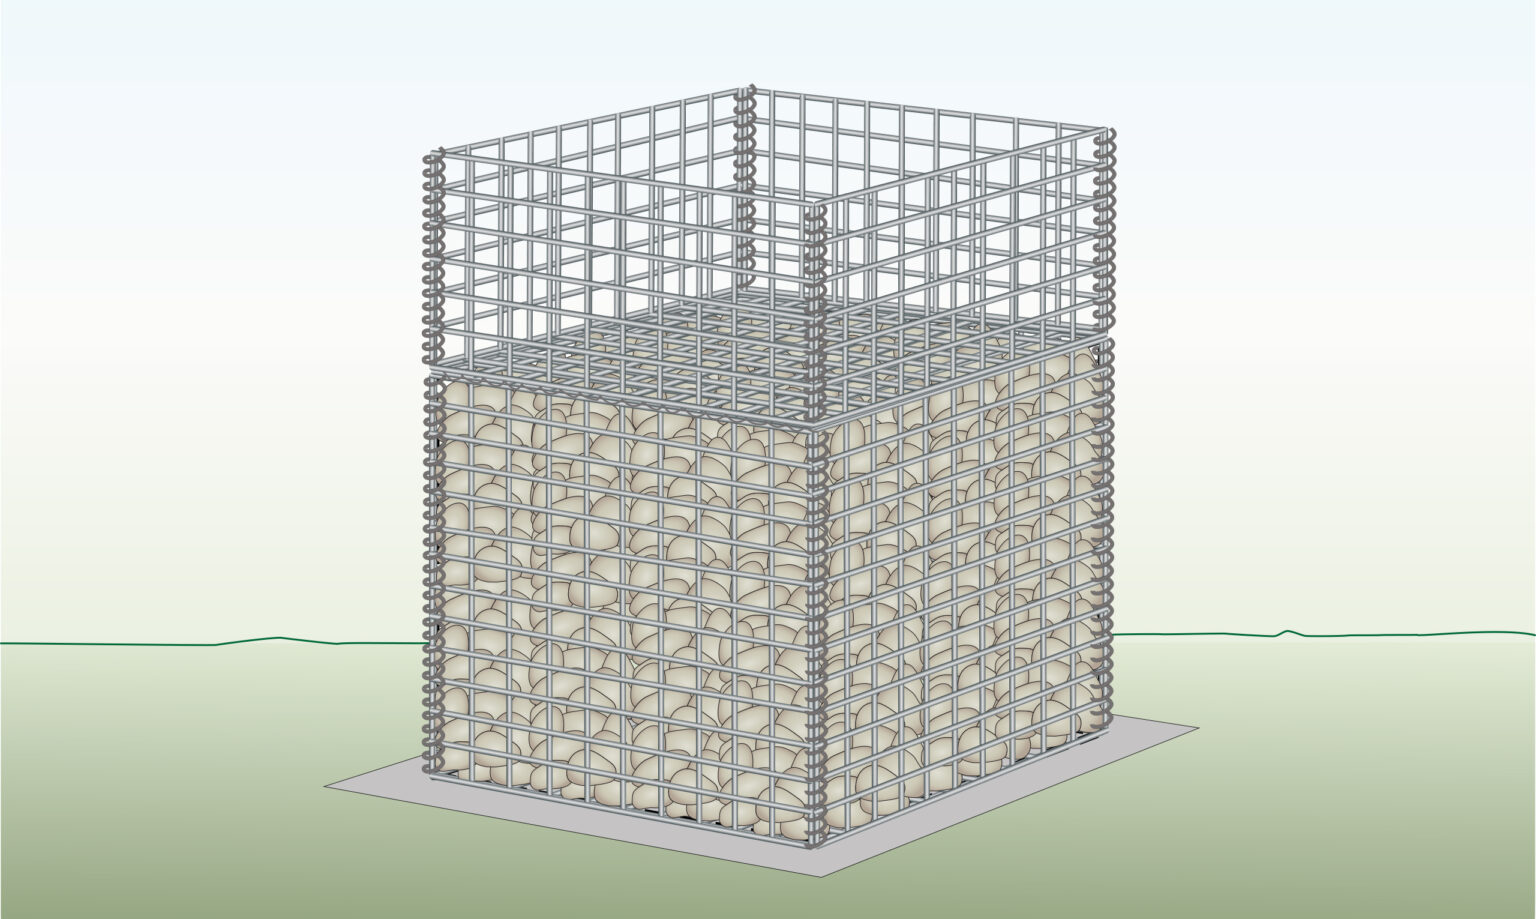
- Position the smaller basket on top of the initial layer of the stone-filled gabion basket.
Step 12) Attach the Baskets Together

- Connect the two cages together by securing the top and bottom with tying wire to prevent any movement.
Step 13) Cut the Front Panel for the Oven

- Measure the dimensions of the oven and mark the front panel of your gabion accordingly.
- Use a bolt cutter to cut a hole in the panel that matches the size of the oven, ensuring a precise fit for a snug installation.
Step 14) Position the Oven
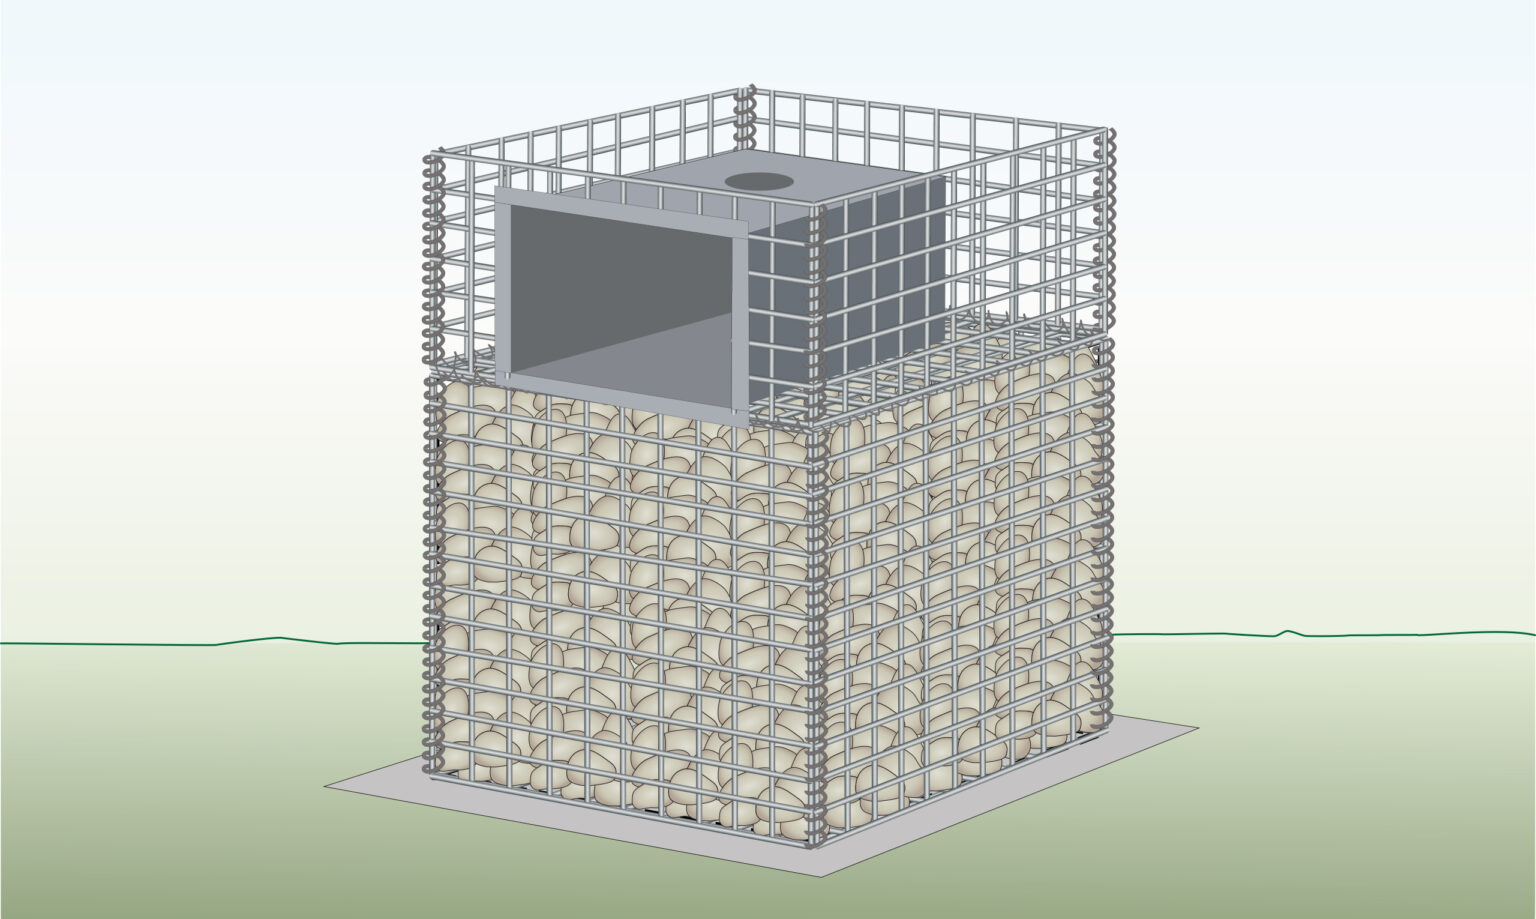
- Place the pre-made oven in its final position.
- Verify that it is level and securely positioned before proceeding.
Step 15) Secure the Chimney

- Attach the chimney to the oven according to the manufacturer’s instructions, ensuring it is properly aligned and securely fastened.
- Then, secure a rain cover to the chimney to prevent water ingress.
Step 16) Fill with Stone
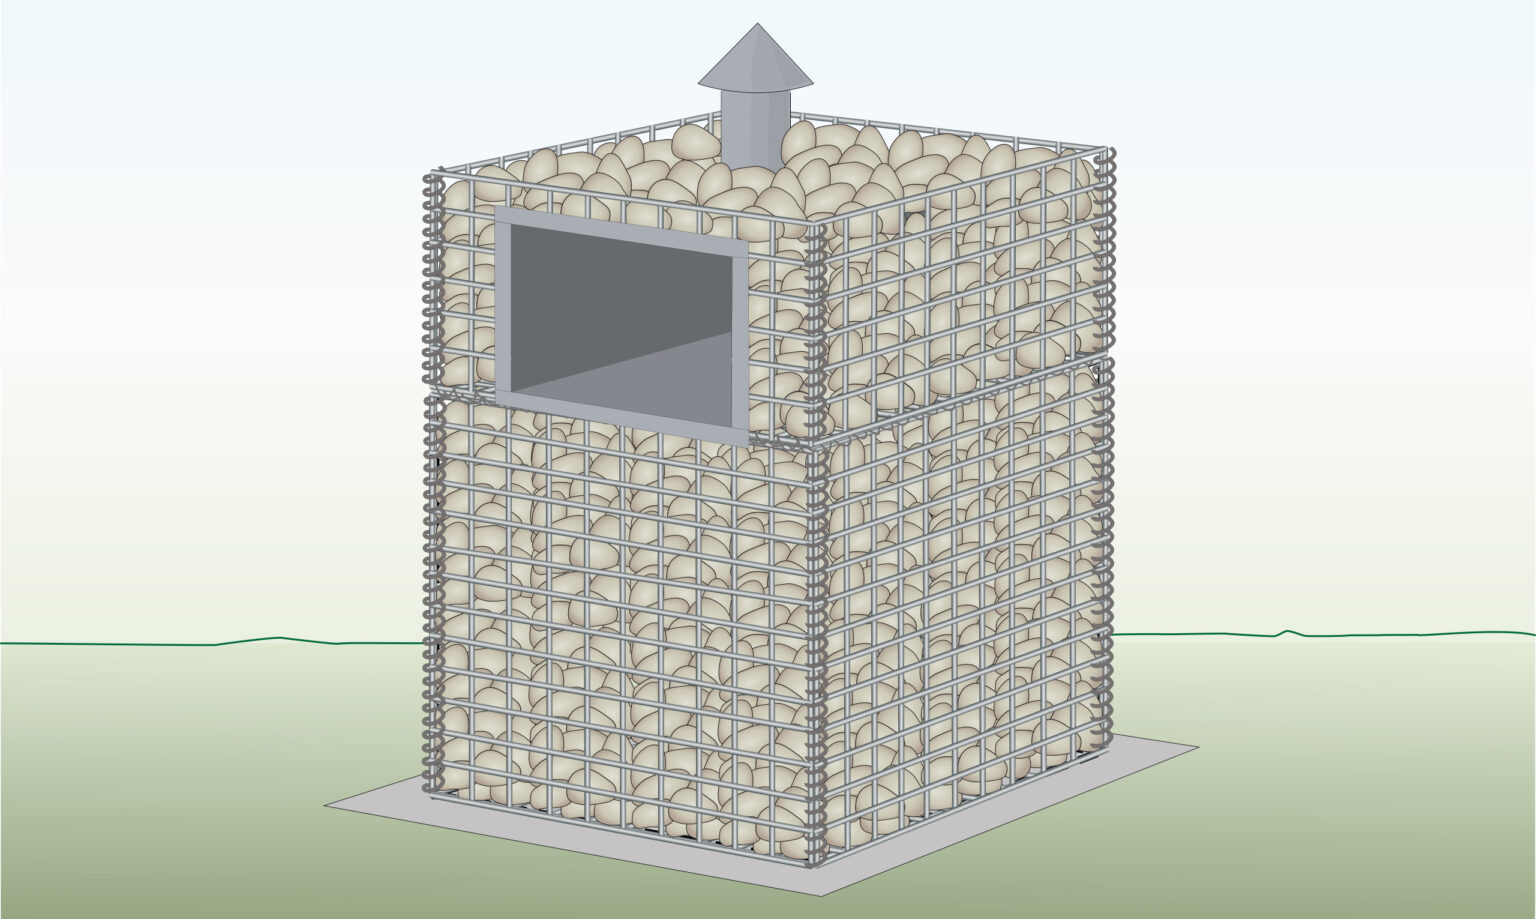
- Carefully fill the gabion with stones around the oven.
- Be sure to minimize large gaps or voids as you work.
Step 17) Cut a Hole in the Top Panel
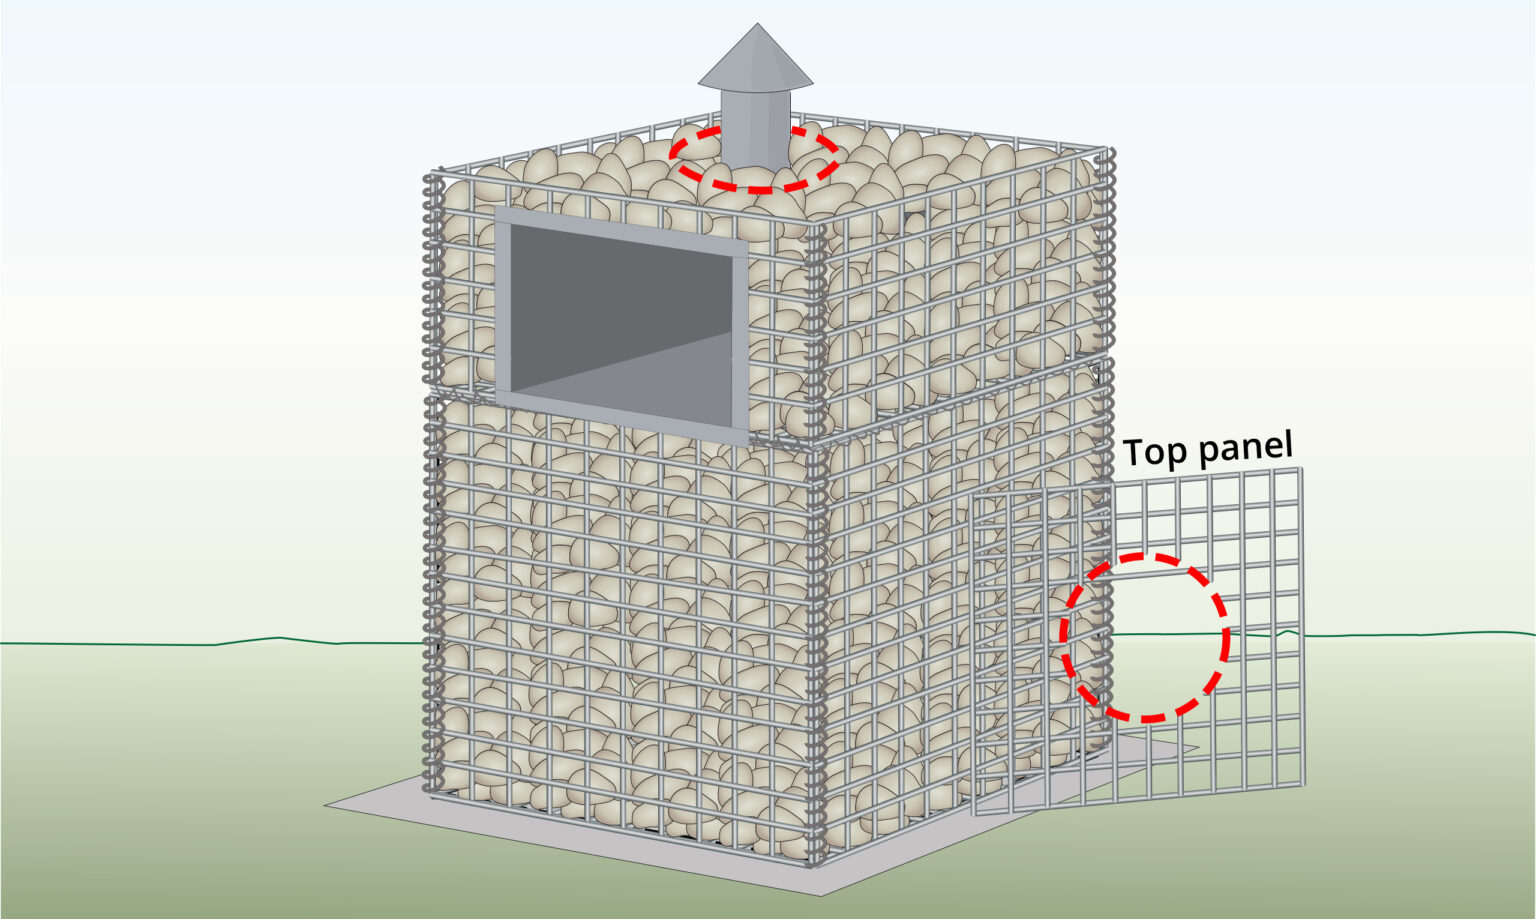
- Measure the chimney and its rain cover, then mark these measurements on the removed top panel.
- Use bolt cutters to cut a hole in the top panel that is large enough to accommodate the chimney and rain cover.
Step 18) Secure the Top Panel
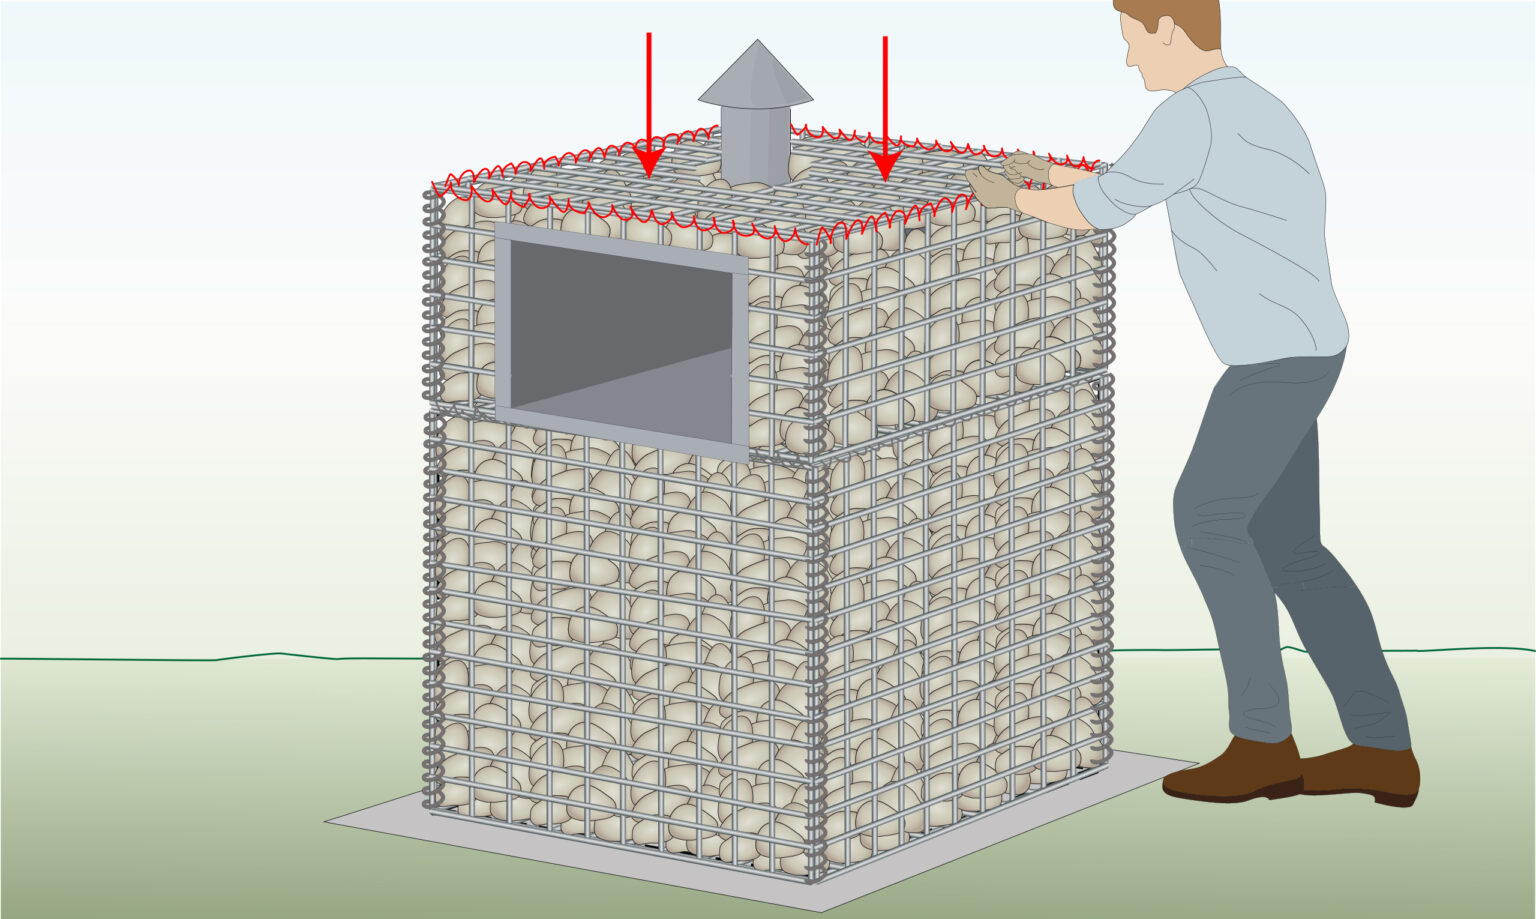
- Position the top panel in place and secure it on each side with tying wire.
- Trim any excess wire as described in step 7.
Step 19) Check & Enjoy
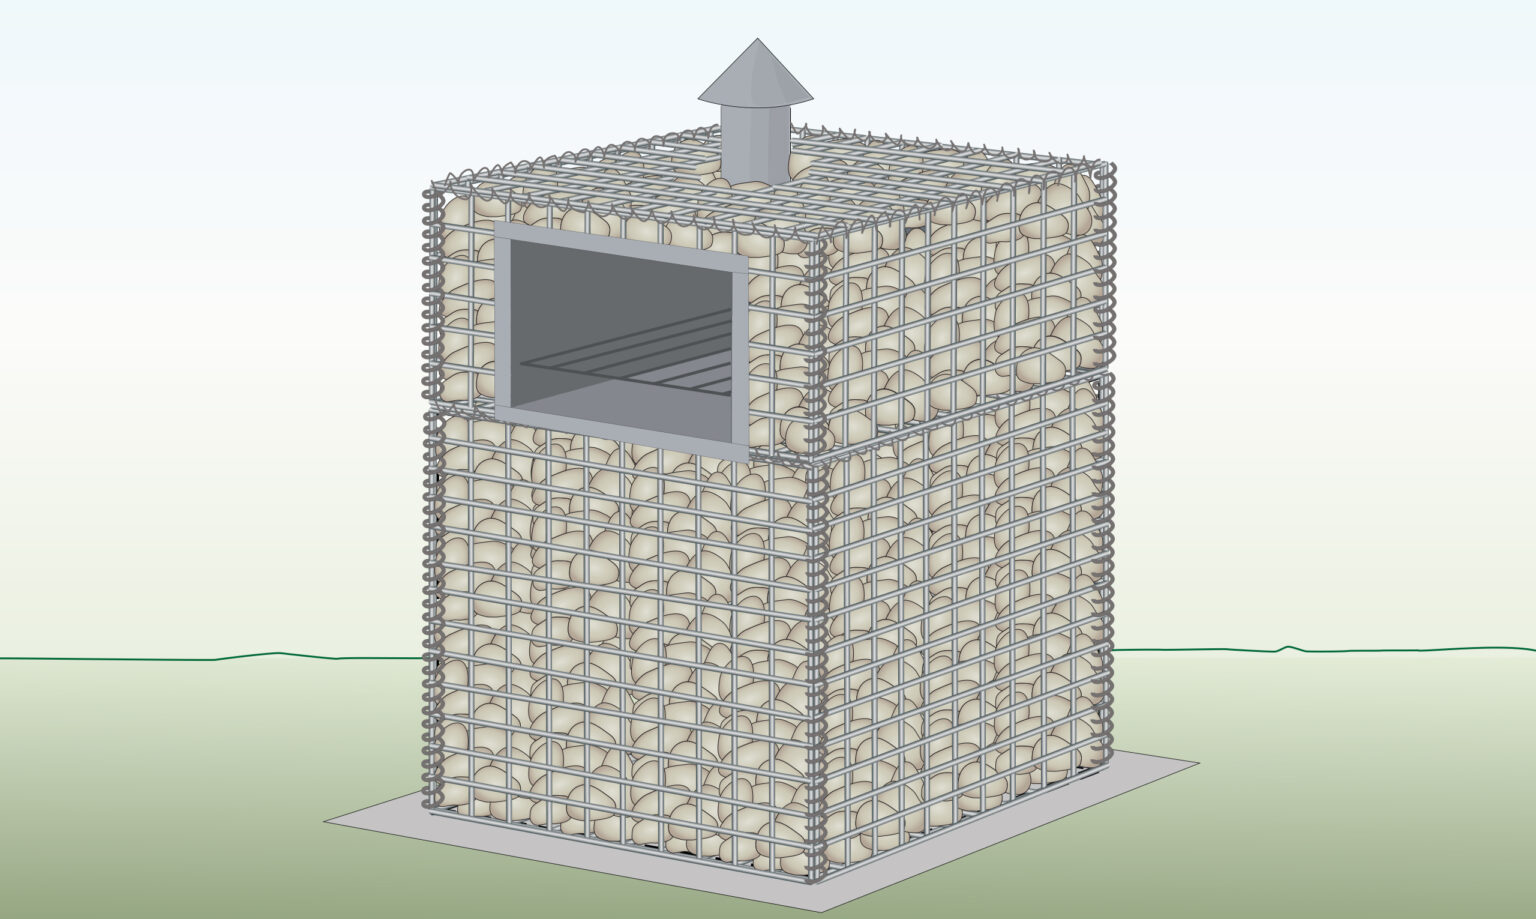
- Check the structure for stability and make sure everything is securely fastened.
- Look for any sharp edges and ensure there are no flammable materials nearby.
- Insert the barbecue roast and enjoy the warmth and delicious meals from your DIY gabion fireplace BBQ.
TIPS
- Opt for 4mm or 5mm baskets instead of 3mm ones to avoid bulging and ensure structural stability.
- To prevent bulging, especially with thinner wire diameter, consider using corner ties.
- Get creative with your design by experimenting with various styles, sizes, or types of stones
- Determine how much stone you’ll need using our stone calculator.
- Alternatively, you can use your fireplace as a gabion BBQ DIY.
FURTHER READING
- How to Lace Gabion Baskets – Instructions on how to lace baskets
- How to Fill Gabions – Learn how to fill cages using different methods
- How To Assemble Gabion Baskets – A guide showing you how to assemble baskets

Excellent DIY instructions! Where can I get the “oven” insert in the USA. Is it a outdoor fireplace insert or a less complex insert that I see is in several gabion fireplace examples outside of the USA?
Hi Andrew,
Thank you for your kind words! Glad to hear you found our DIY instructions helpful! 🙂
The “oven” insert you’re asking about is indeed a less complex insert, designed more for practicality and ease of installation.
You can find similar inserts in the USA by searching for “oven for outdoor fireplace”, “outdoor oven” or “outdoor stove” etc. Many retailers specializing in outdoor fireplaces or DIY home projects may supply them. Additionally, metal fabrication shops can often create custom inserts tailored to your project if needed.
Here are a couple of links to get you started:
-https://www.amazon.com/outdoor-stove-oven/s?k=outdoor+stove+and+oven
-https://www.vevor.com/commercial-pizza-oven-c_10580/
Feel free to reach out if you have any other questions or need more assistance.
Happy building!
Kind regards,
Timi