
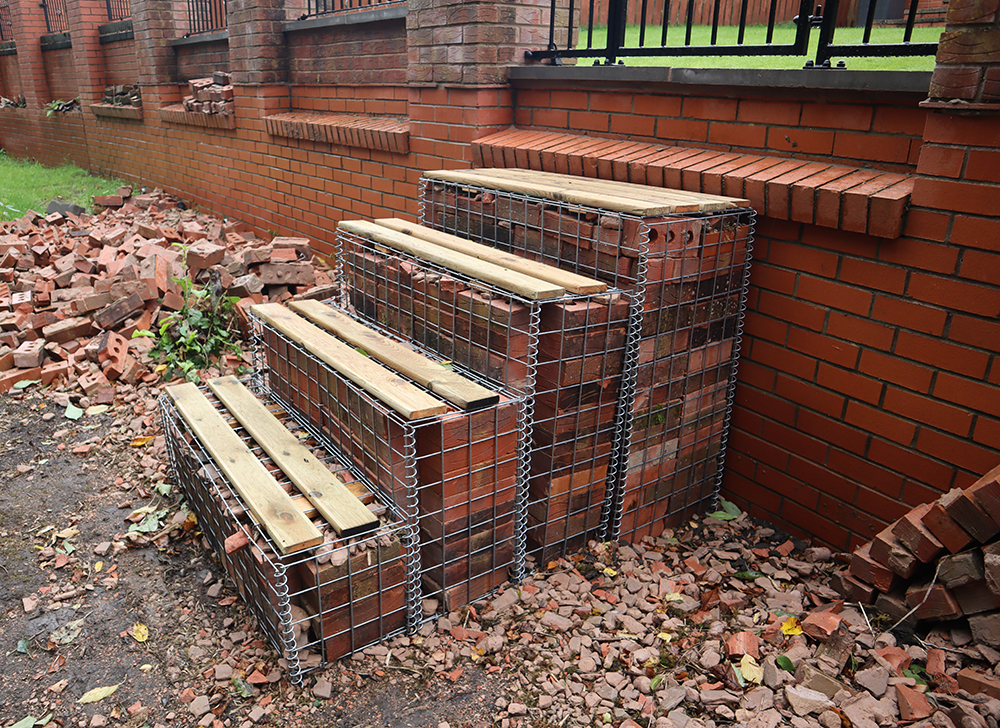
How to Make Gabion Steps

Below you will find a detailed guide on how to make gabion steps.
- Experience Required: Medium
- Tools Required: Protective gloves, Tape measure, Shovel, Spirit level, Hammer, Wire cutters, Screws, Plate compactor
- Materials Required: 5mm gabion baskets, 6G Stone, Timber treads, Helicals, Lacing wire or Cable ties, Type 1 gravel, Geotextile (optional)
Step 1) Measure Up Your Area

- Begin by examining the area where you plan to place the new steps.
- Measure the length and width of your structure according to the available space.
- Also, measure the total height (rise) to get an idea of how many steps you’ll need in total.
Step 2) Calculate Gabion Sizes
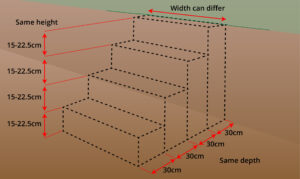
- Sketch a plan for your stair following these guidelines: each step’s height (rise) should be around 15-22.5cm & each step’s depth (tread) should be around 30cm.
- Calculate gabion sizes and quantity needed (visit our gabion basket shop page)
- Use our calculator to find out how much interlocking gabion stone you’ll need.
Step 3) Mark the Area
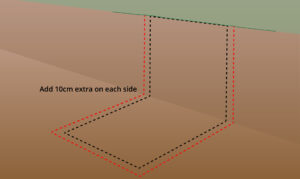
- Mark the area with spray paint or strings.
- Remember to add an extra 10cm on each side for proper alignment and stability.
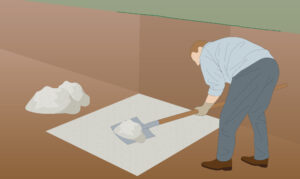
Step 4) Create Foundation

- Make sure the stair foundation is level for stability.
- Also, incorporate a slight slope towards the front for drainage to prevent water from collecting.
Step 5) Add Basecourse
- Add a layer of Type 1 gravel according to the height of the structure:
- For 1m high stairs, use 10cm of basecourse.
- For 2m high stairs, use 20cm of basecourse.
- For stairs 3m high or taller, use 30cm of basecourse.
Step 6) Compact Basecourse
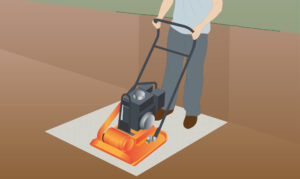
- Use a plate compactor to compact the basecourse thoroughly, ensuring stability.
Step 7) Add Geotextile (Optional)
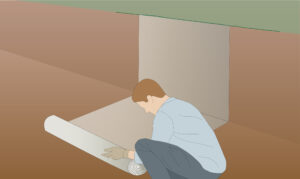
- Line the bottom and sides of the structure with geotextile fabric to prevent soil erosion.
Step 8) Fold up Baskets
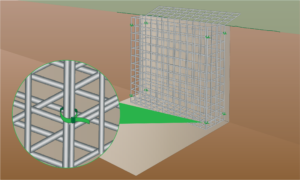
- Fold up and secure the vertical corners of each basket with 2 cable ties: 1 at top and 1 at the bottom of the corner.
Step 9) Position the Baskets
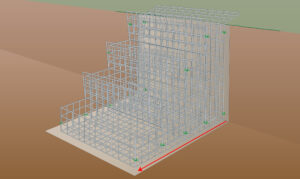
- Position the boxes starting with the largest one at the back and working towards the shortest one.
- Make sure to push the adjoining corners as close together as possible.
- The lids should be folded upwards, make sure they’re not falling behind the baskets.
Step 10) Attach them Together
- Secure the corners of the adjoining steps with a helical to prevent movement.
- The helical should connect the corners of two gabions.
Step 11) Trim Excess
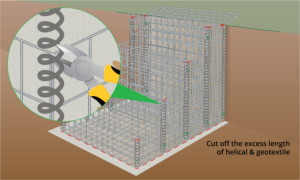
- Cut off the excess lengths of helical where needed.
- Fold the ends of the helicals downwards with pliers.
- Additionally, cut off any excess geotextile.
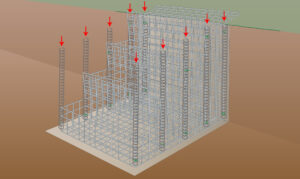
Step 12) Fill with Stones
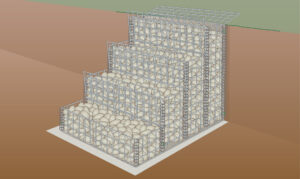
- Fill each gabion basket with the calculated amount of stones.
- Leave a slight gap at the top to allow space for the timber.
Step 13) Attach Timber Treads
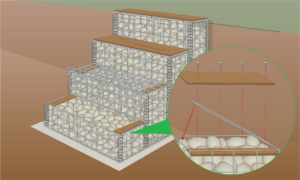
- Place a timber on top of the stones on both sides of the stair. Close and secure the lid with a piece of wire or cable ties.
- Position timber treads onto the lid and screw them to the timber under the wires.
- Repeat these steps until you complete the process.
Step 14) Check for Stability
- Inspect the completed garden stairs and check for stability.
- Make any necessary adjustments to ensure safety and durability.
WARNINGS
Before starting your gabion wall project, it’s important to plan carefully and consider a few key factors. The points below are based on our team’s experience designing and installing gabion structures.
- When considering how to build gabion steps, it’s advisable to opt for 5mm baskets over the 3mm and 4mm ones to prevent bulging, thus ensuring structural stability and strength.
- To avoid water accumulation and any accidents, maintain a slight slope on step treads and plan drainage, especially for sloped garden stairs.
- While deciding how to build garden steps, make sure to maintain consistent height, width, and, in the case of straight stairs, also depth, to avoid stumbles or falls.
FURTHER READING
- How to Assemble a Gabion Basket – Instructions on how to assemble baskets
- How to Fill Gabions – Learn how to fill cages using different methods
- Stone Quantity Calculator – A guide showing you how to calculate the required stone quantity for your baskets
- Gabion Learning Hub – a library of help videos
VIDEO

Written By
This blog was created by our Technical Illustrator, Timi and reviewed by our Founder, John.
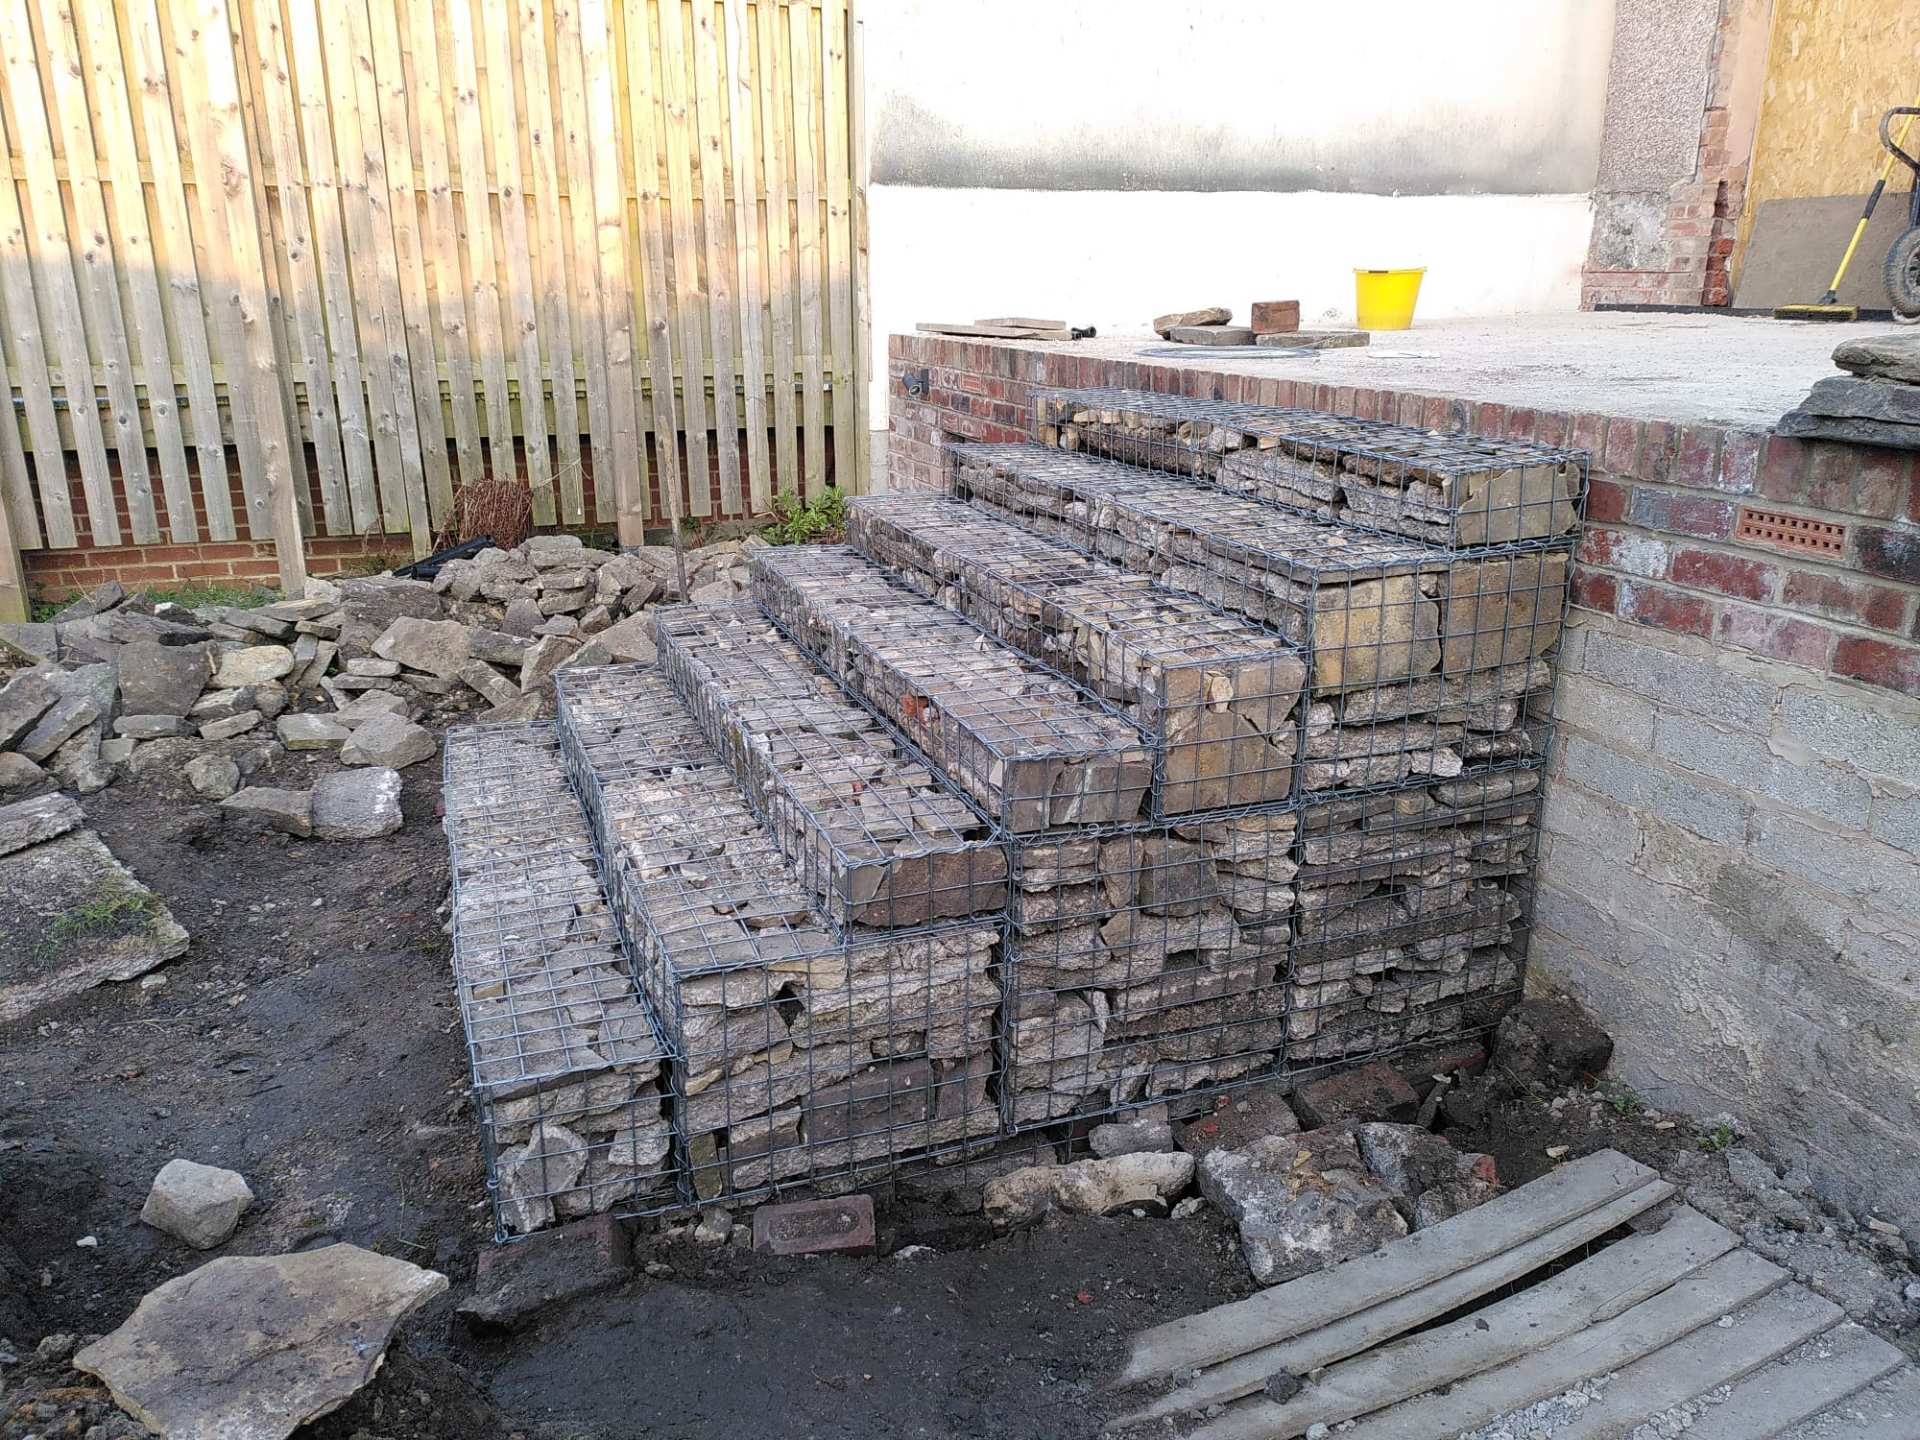
Below you’ll find examples of real-life customer projects and technical drawings Erno created for them. We’ve opted for technical illustrations for the instructions found in this blog because they provide better clarity on mesh placement and structural details that can get lost in real-life photography.


Published by
