

How to Install Gabion Cladding

Below is a step by step guide on how to install gabion cladding using two different methods.
- Experience Required: High
- Tools Required: Shovel, Spirit Level, Concrete, Industrial Clamp Plate
- Materials Required: Gabions, Gabion Stone, Helicals/Tying Wire, Support Posts, Lintel (Optional), Angle Section (Optional), Clamp Bar (Optional)
WITH SUPPORT POSTS
Anatomy of Typical Installation

- This technique tends to be used in public areas or cladding over 4 meters tall.
Step 1) Preparation

- Check the structure you are planning to attach the cladding to ensure it can hold the weight.
- If you are unsure, ask the help of an engineer to perform a test with a tension testing tool.
Step 2) Mark The Area

- Before installing, mark the location with a spirit or laser level so it’s nice and level.
Step 3) Dig

- Dig a trench at least 50 cm deep below the base of the cladding.
- This is where your support beams will go.
Step 4) Install Support Beams

- Install the support beams every 1 metre under the planned basket locations, checking they’re level as you go.
Step 5) Concrete Foundation

- Pour the concrete to hold the beams firmly in place, and use a spirit level to keep the posts straight.
Step 6) Assemble the Baskets
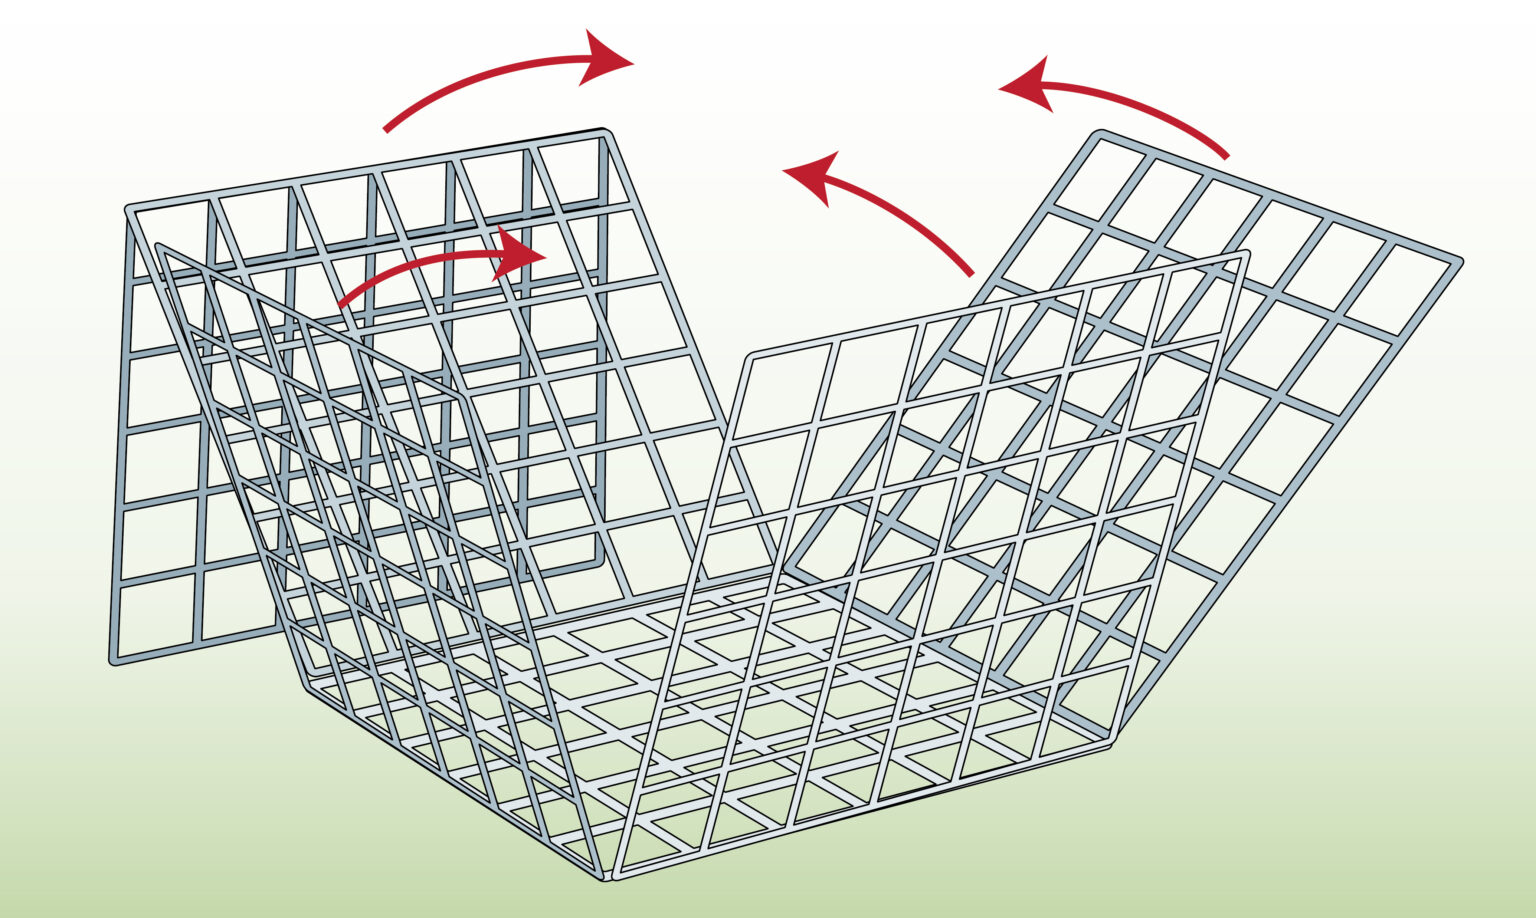
- Fold the 4 side panels up from the base, ensuring the lid is falling backwards and resting.
- Join the corners together.
Step 7) Attach to Wall

- Lower the baskets over the support posts, allowing the posts to pass through the mesh. If the posts don’t fit through the 75 mm × 75 mm mesh openings, cut a larger hole with bolt cutters.
- Use an industrial clamp plate or similar hardware to secure the gabions to the wall once they are in place.
Step 8) Fill with Stone

- Fill the baskets with your choice of stone.
Step 9) Repeat Steps

- Repeat steps 6-8 for each row.
Optional Step 1) Set Into the Ground

- For added stability, you can install the first row into the ground/concrete.
Optional Step 2) Angle Section and Clamp

- If you’d like to add more strength, install an angle section and clamp bar for extra support.
Optional Step 3) Add an Opening

- For any door or window openings, install a suitable lintel to provide structural support.
ATTACHED TO WALL
Anatomy of Typical Installation

- Use this method only if the surface has been confirmed as strong enough to support the weight of the gabion cladding.
Step 1) Getting Ready
- Check that the structure you’re attaching the cladding to can safely support the weight of the gabions. If there’s any doubt, have a qualified engineer verify it using a tension testing tool.
Step 2) Mark Area
- Mark out the installation area using a spirit or laser level so everything is level from the start.
Step 3) Assemble the baskets
- Assemble the baskets required for the first row.
Step 4) Attach to The Wall

- Create a solid base for the gabions by laying and compacting gravel, or by installing a concrete foundation.
- Pin the first row to the wall using clamp plates.
Step 5) Fill The Gabions

- Fill the first row with your choice of stone.
Step 6) Repeat Steps
- Repeat steps 3-5 for each row.
Optional Step 1) Angle Section and Clamp
- You can also install an angle section and clamp bar to give the structure additional stability.
Optional Step 2) Add an Opening
- If your cladding includes doors or windows, you’ll need a suitable lintel above each opening.
Tips & Tricks
- Dry-fit the cages first. Before securing everything permanently, place the baskets in position to make sure the posts, openings, and fixings all line up as expected.
- Fill the baskets in layers. We recommend filling in stages and checking the basket faces regularly to keep them straight and prevent bulging.
- For the best finish, add bracing wires as you fill the baskets. This helps maintain the basket’s shape and creates a straighter, more professional-looking wall.
- Keep your best-looking stones for the visible faces.
- Helical connectors can be used to assemble the gabions while also joining adjacent baskets in a single step.
FURTHER READING
- How to Fill Gabions – Multiple ways to fill gabion baskets.
- Gabion Cladding at Gunnersbury Park Sports Hub – A case study on a cladding project at Gunnersbury Park Sports Hub.
- How to Assemble a Gabion Basket – Step by step instructions.
VIDEO
Written By
This blog was created by our Content Coordinator, Timi and reviewed by our Technical Consultant, Erno.
We’ve opted for technical illustrations for the instructions found in this blog because they provide better clarity on mesh placement and structural details that can get lost in real-life photography.

Published by
