
How to Make a Gabion Bench – Case Study by James Harris
We love seeing the creative ways our customers use our products. James Harris kindly shared his clever garden project with us, where he transformed a garden edge into a smart and sturdy gabion bench. Here’s his write-up of the process, step by step:
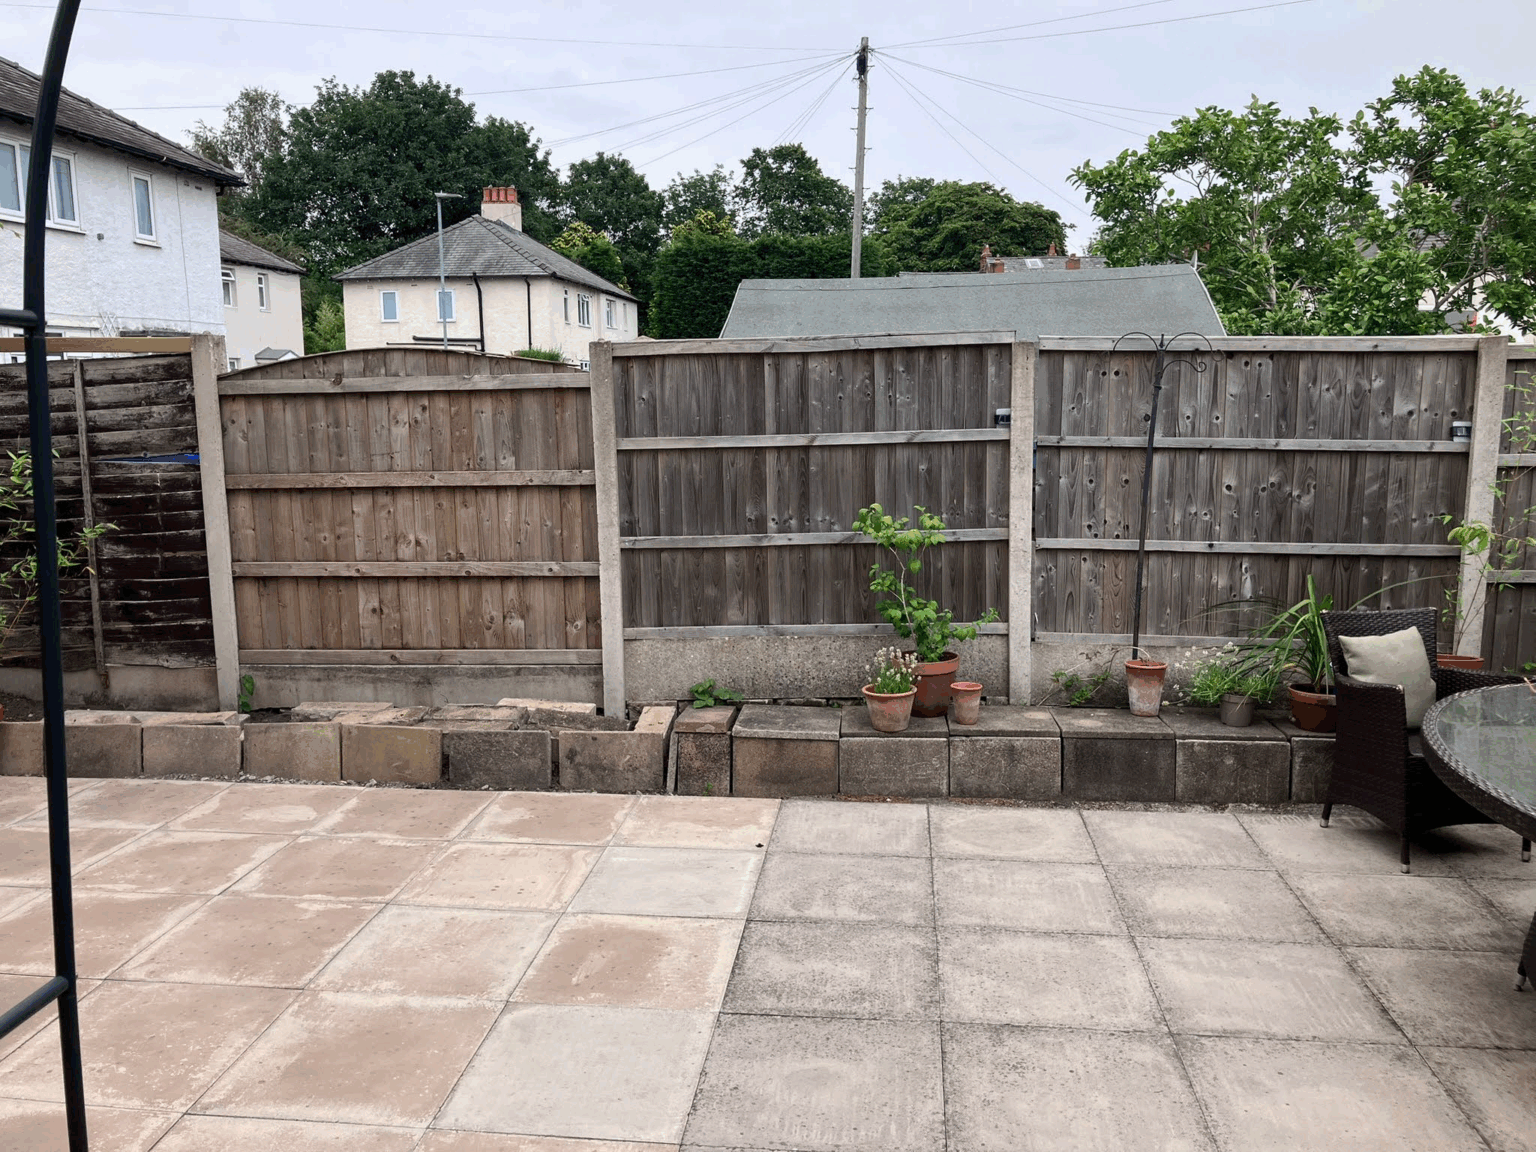
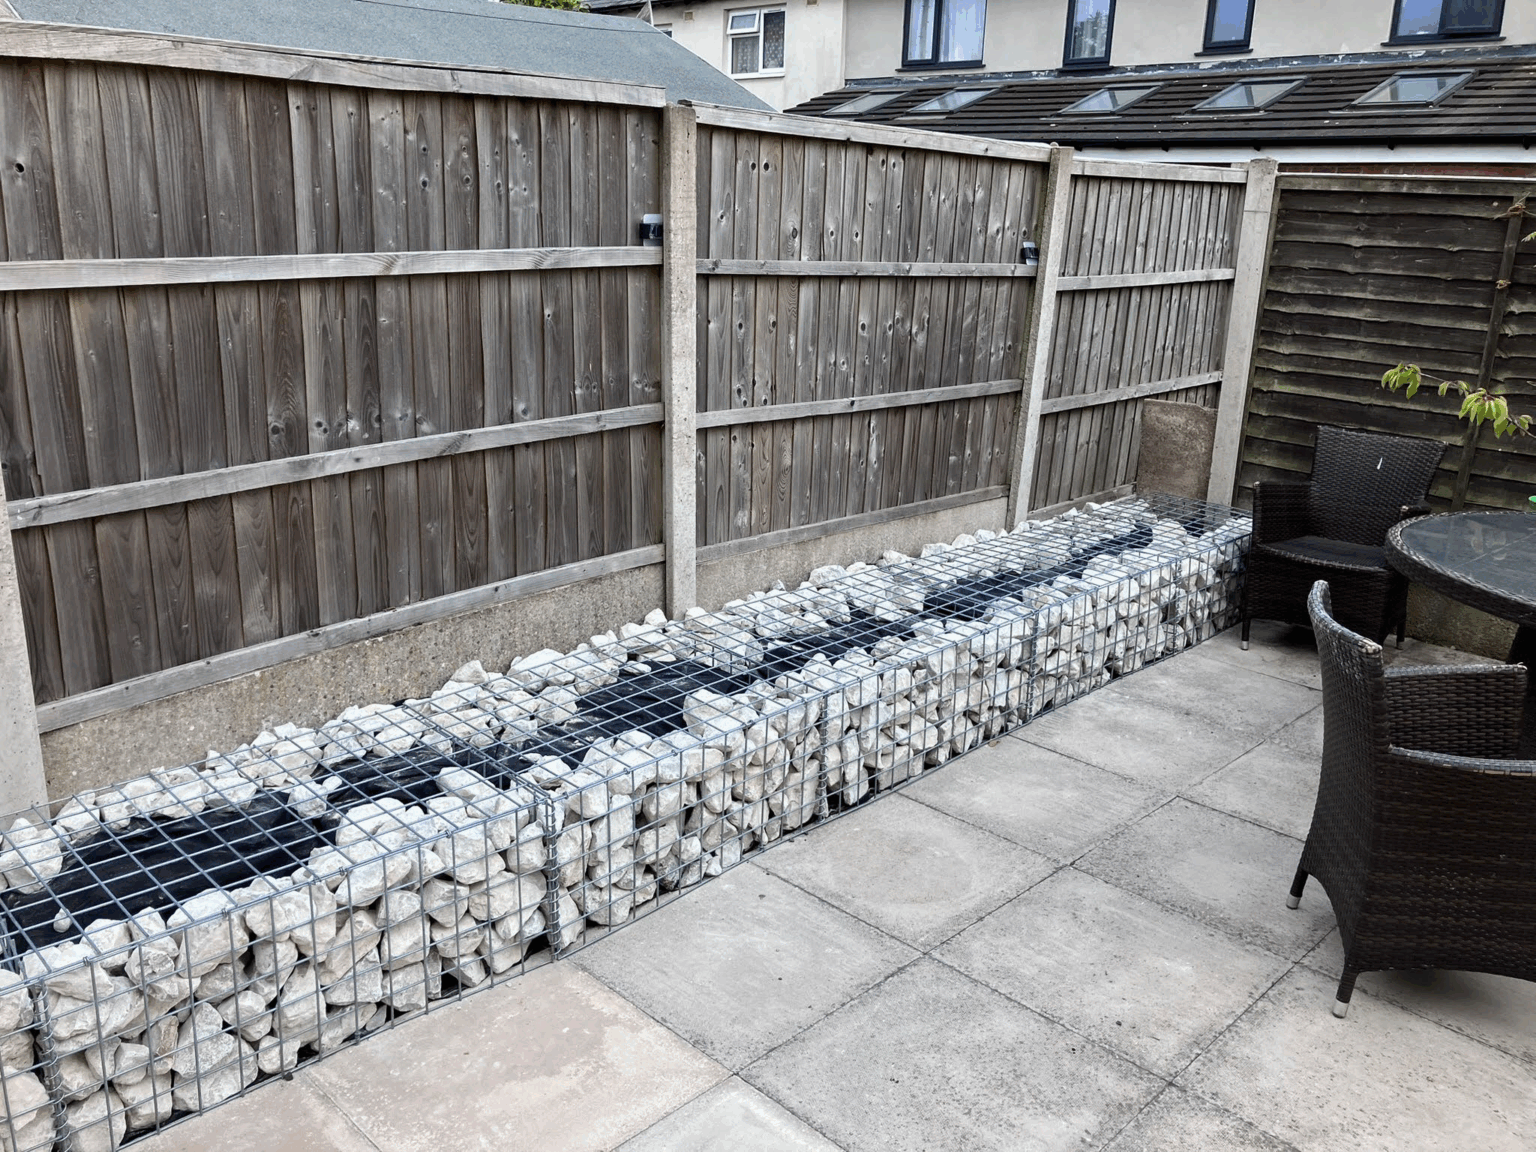
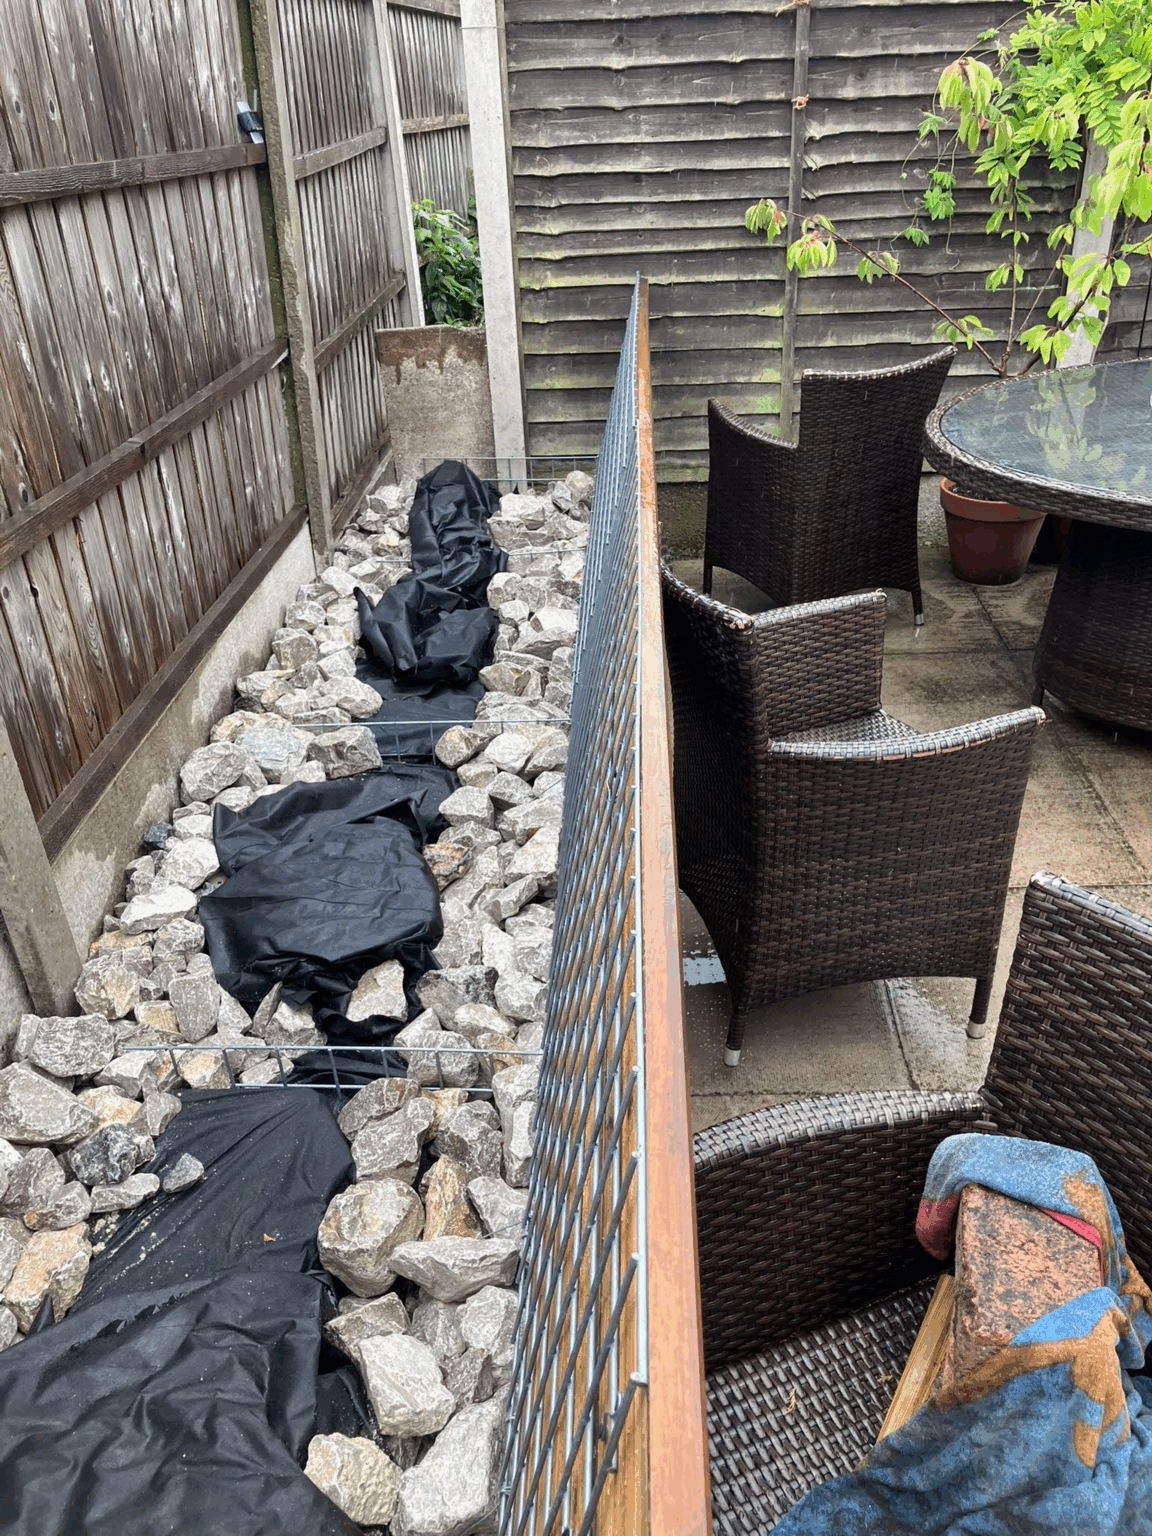
Understanding the Garden Layout
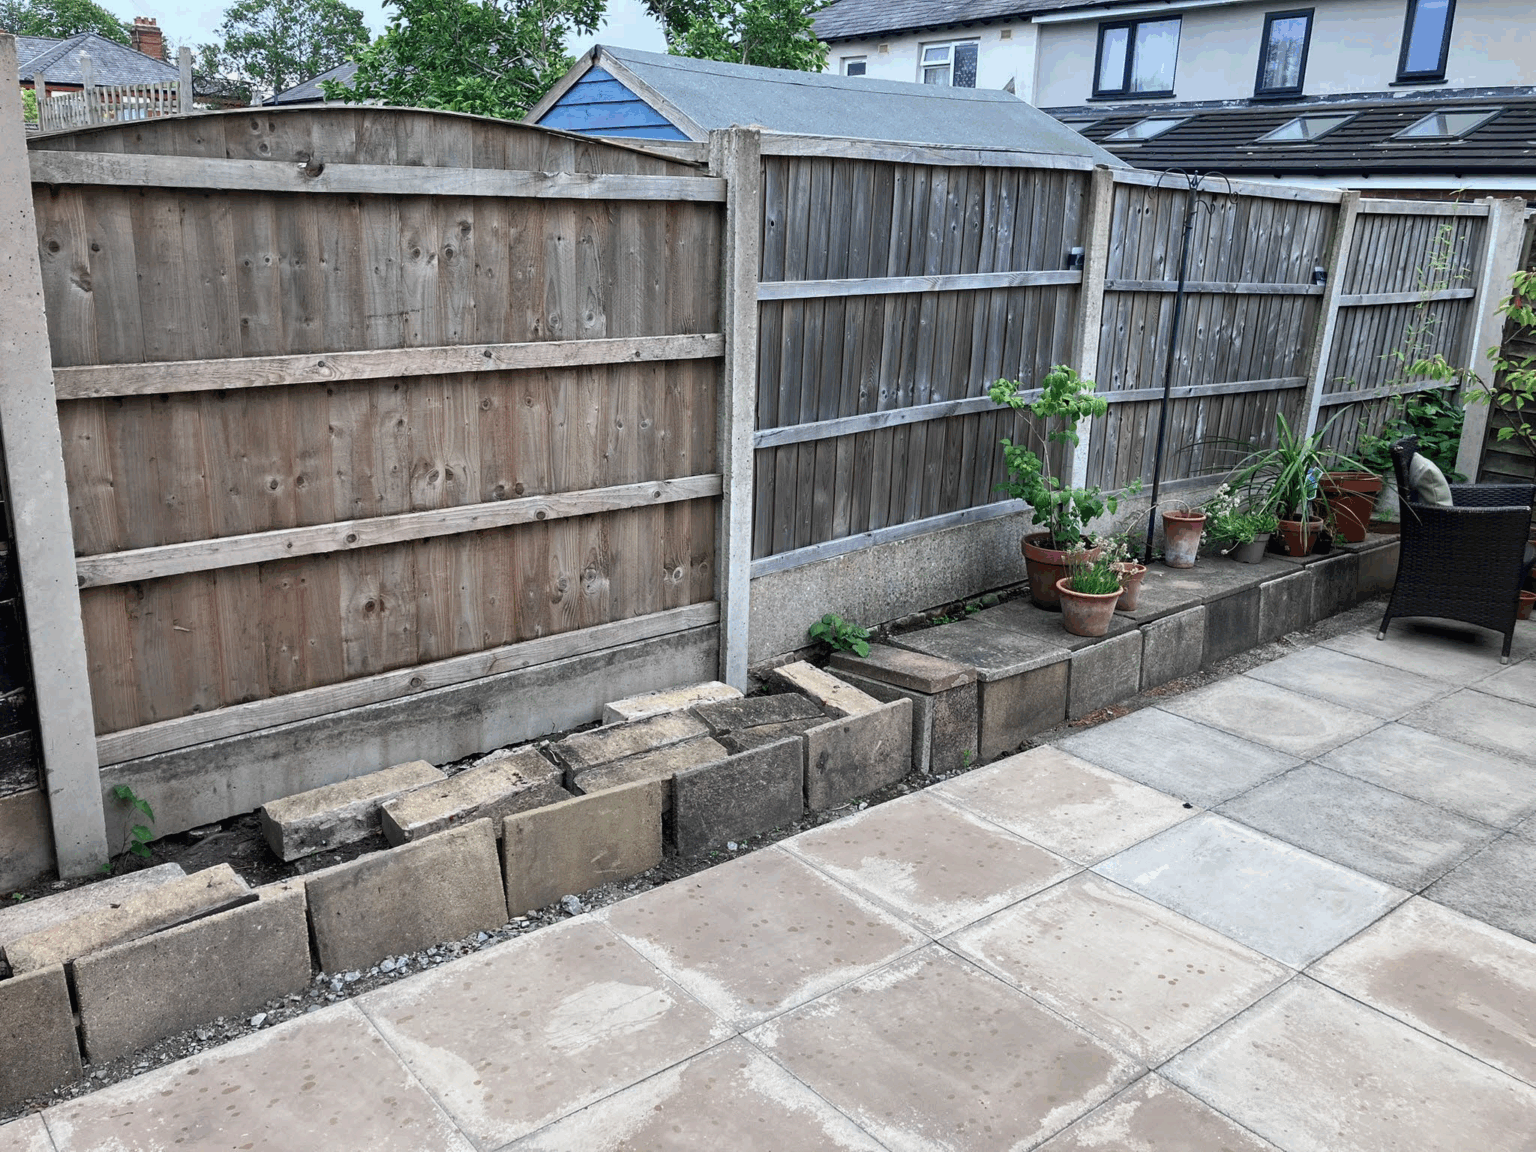
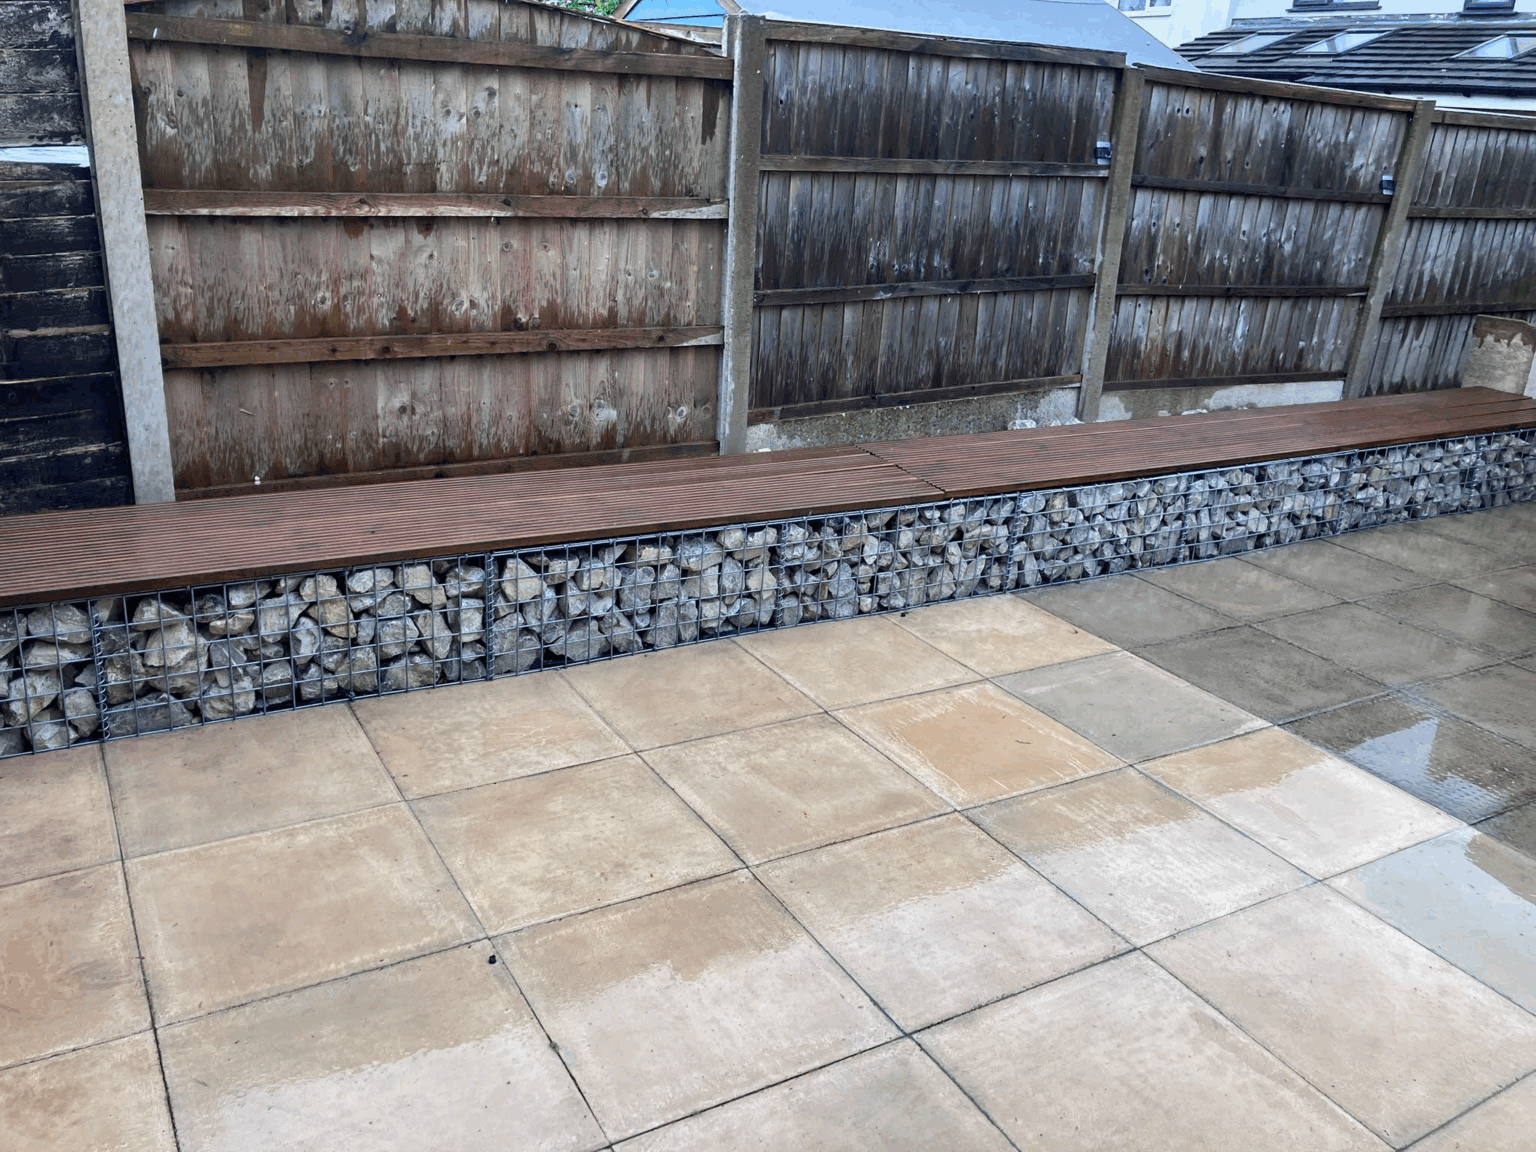
The gardens beyond those fences are 12 inches approx. higher than our garden level and so those flags are buried 1/3 deep and filled with earth with a flag on top. The idea was to cover this on two sides (top and front) with a gabion basket and limestone and put decking boards on top for a bench.
Preparing the Base
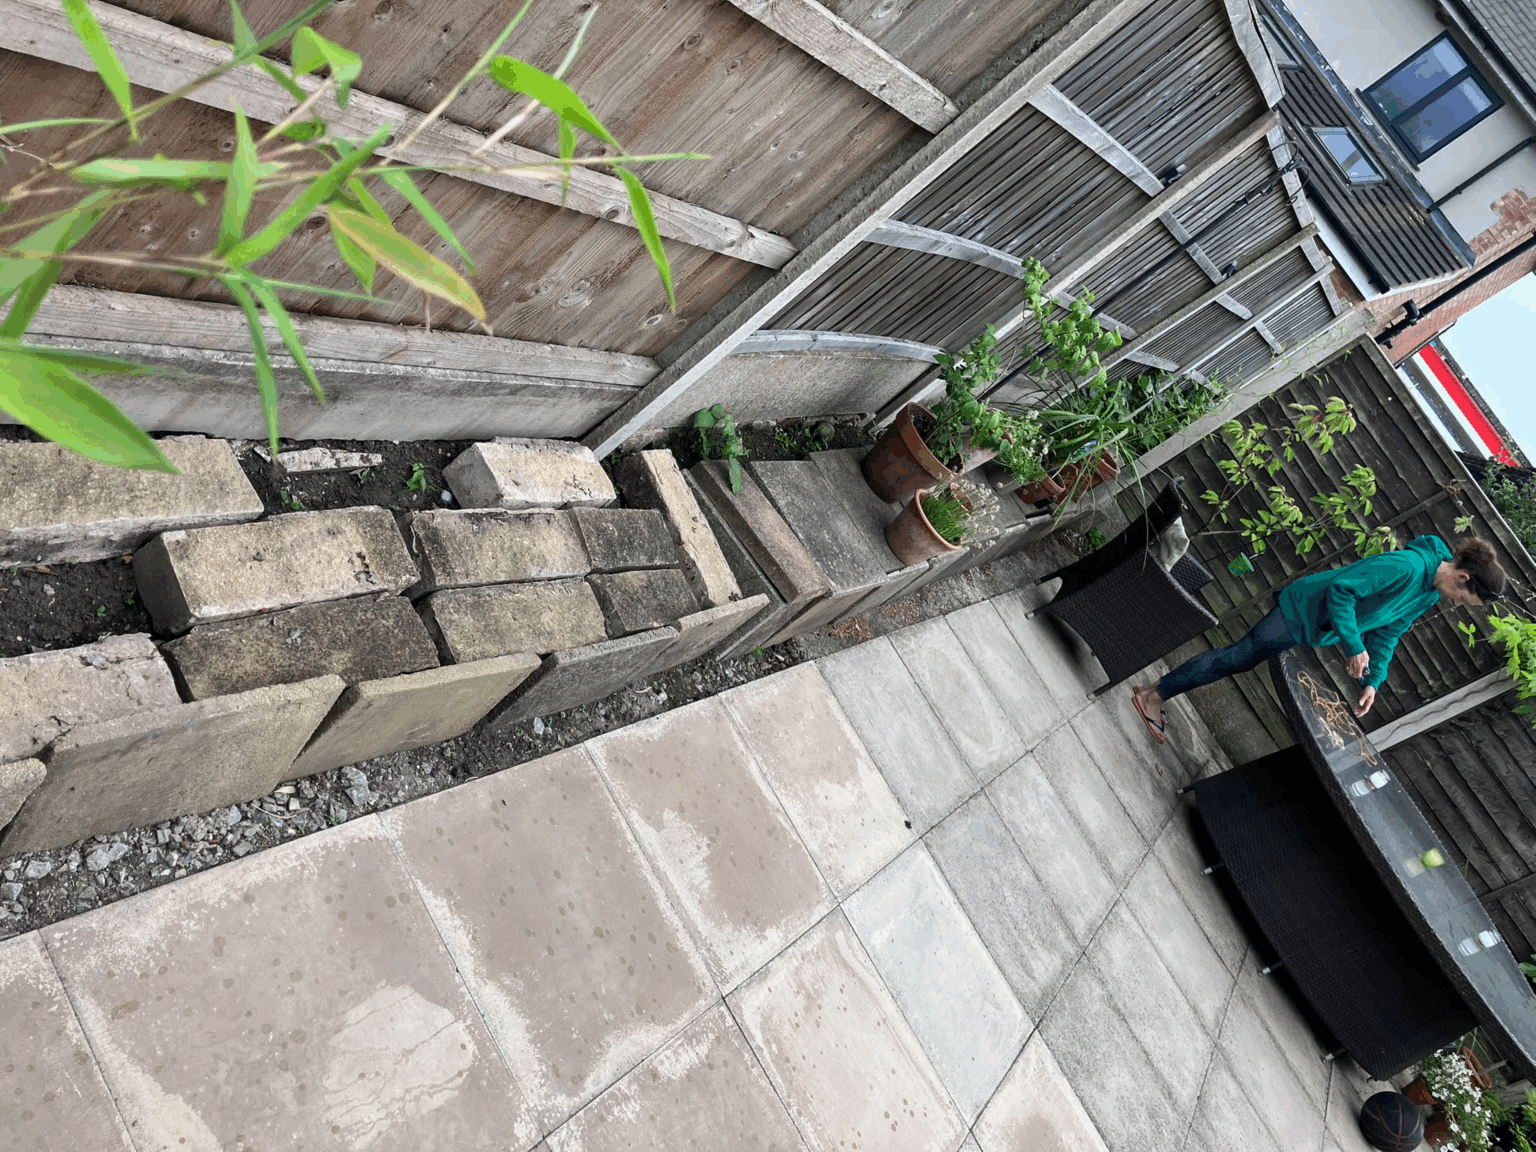
I made the flags go all the way across and filled then with loose bricks / stones I had already.
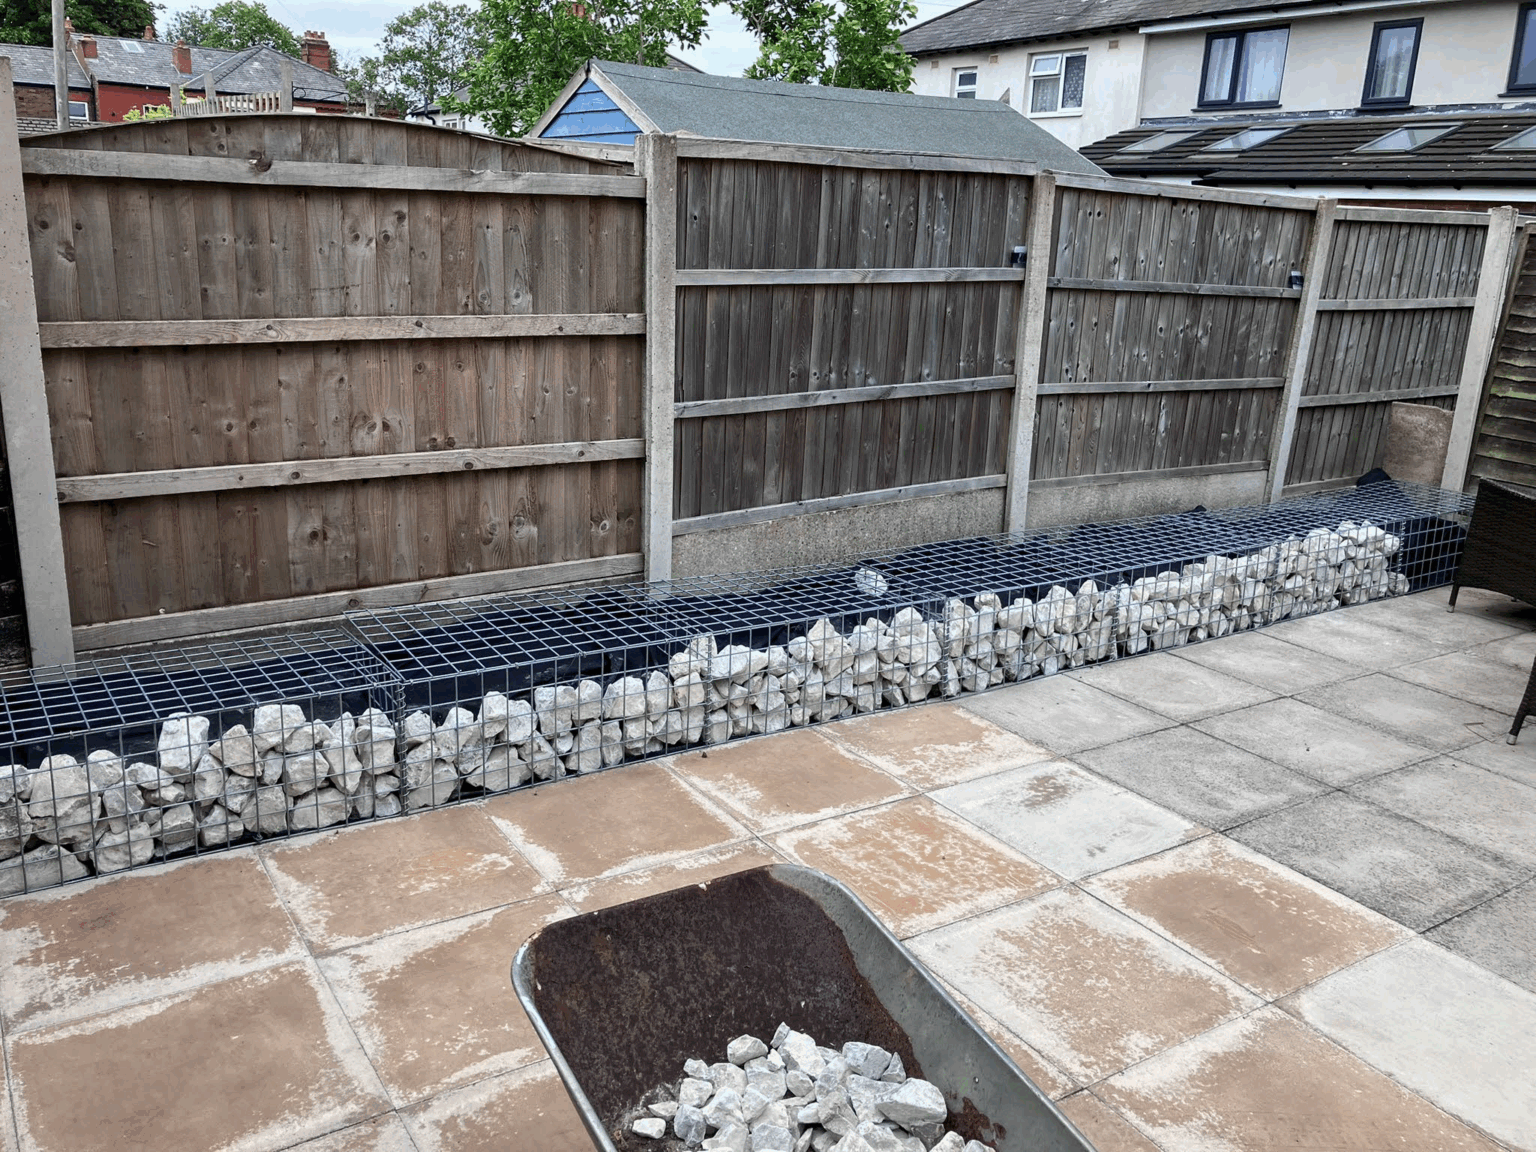
Modifying the Gabion Baskets
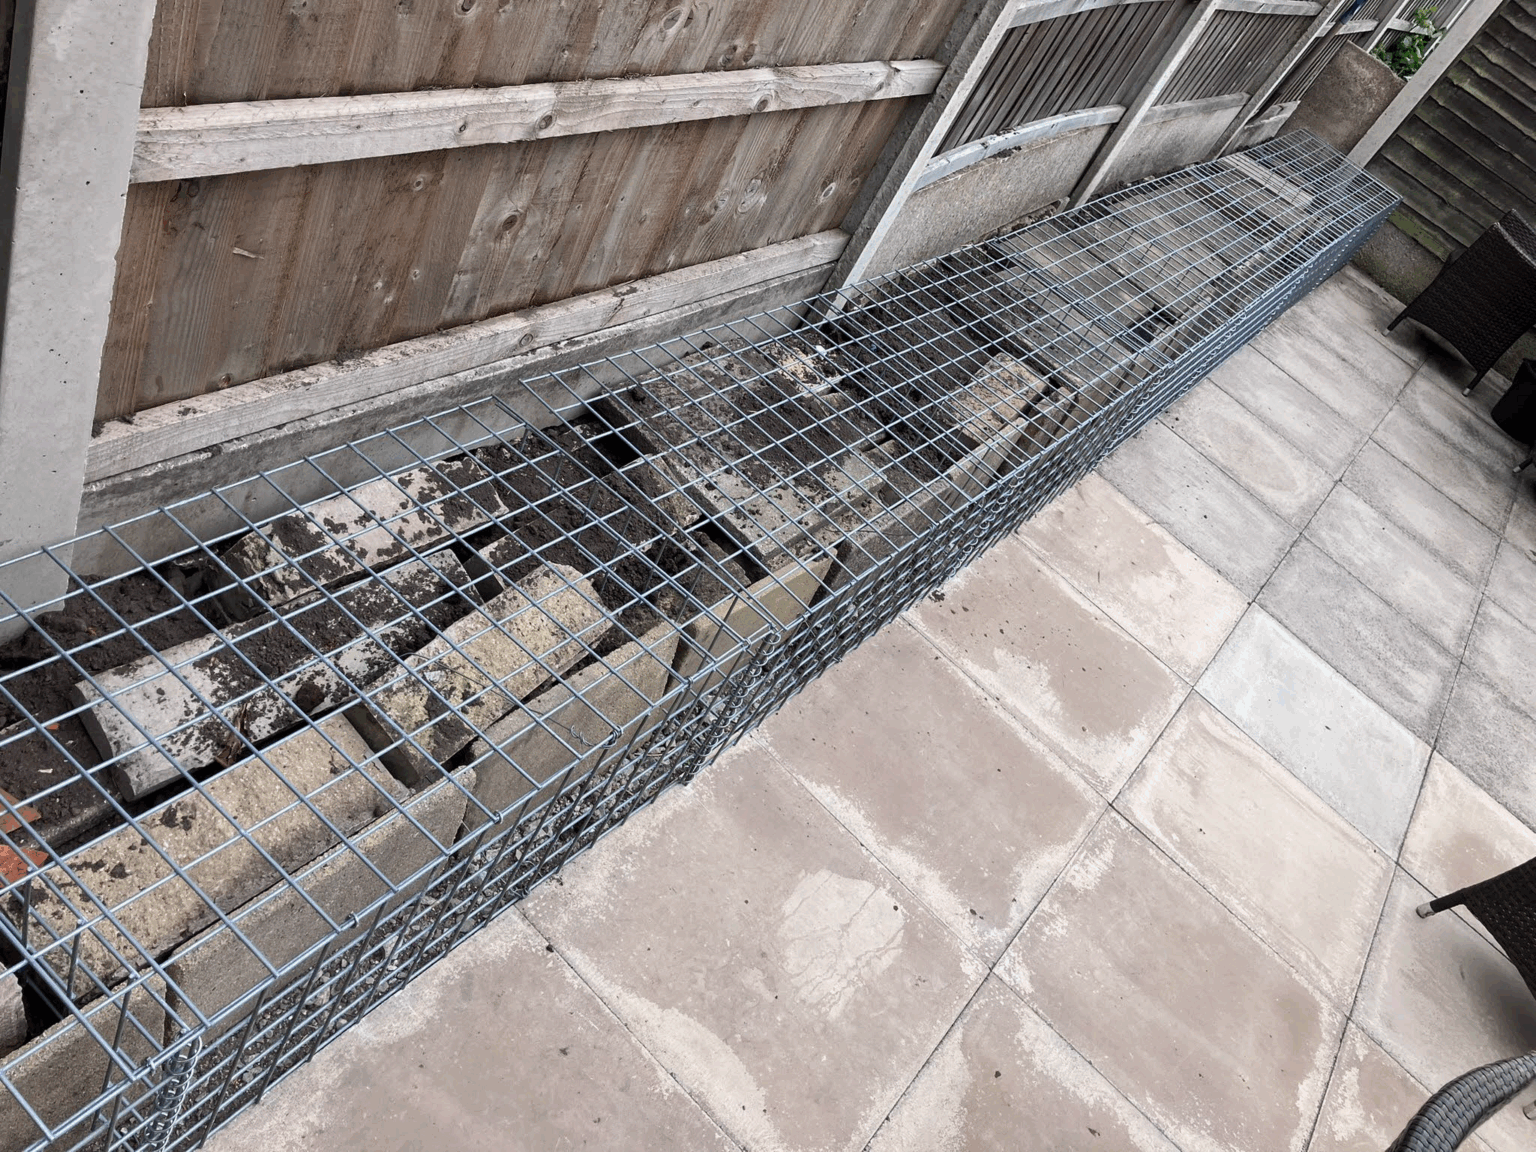
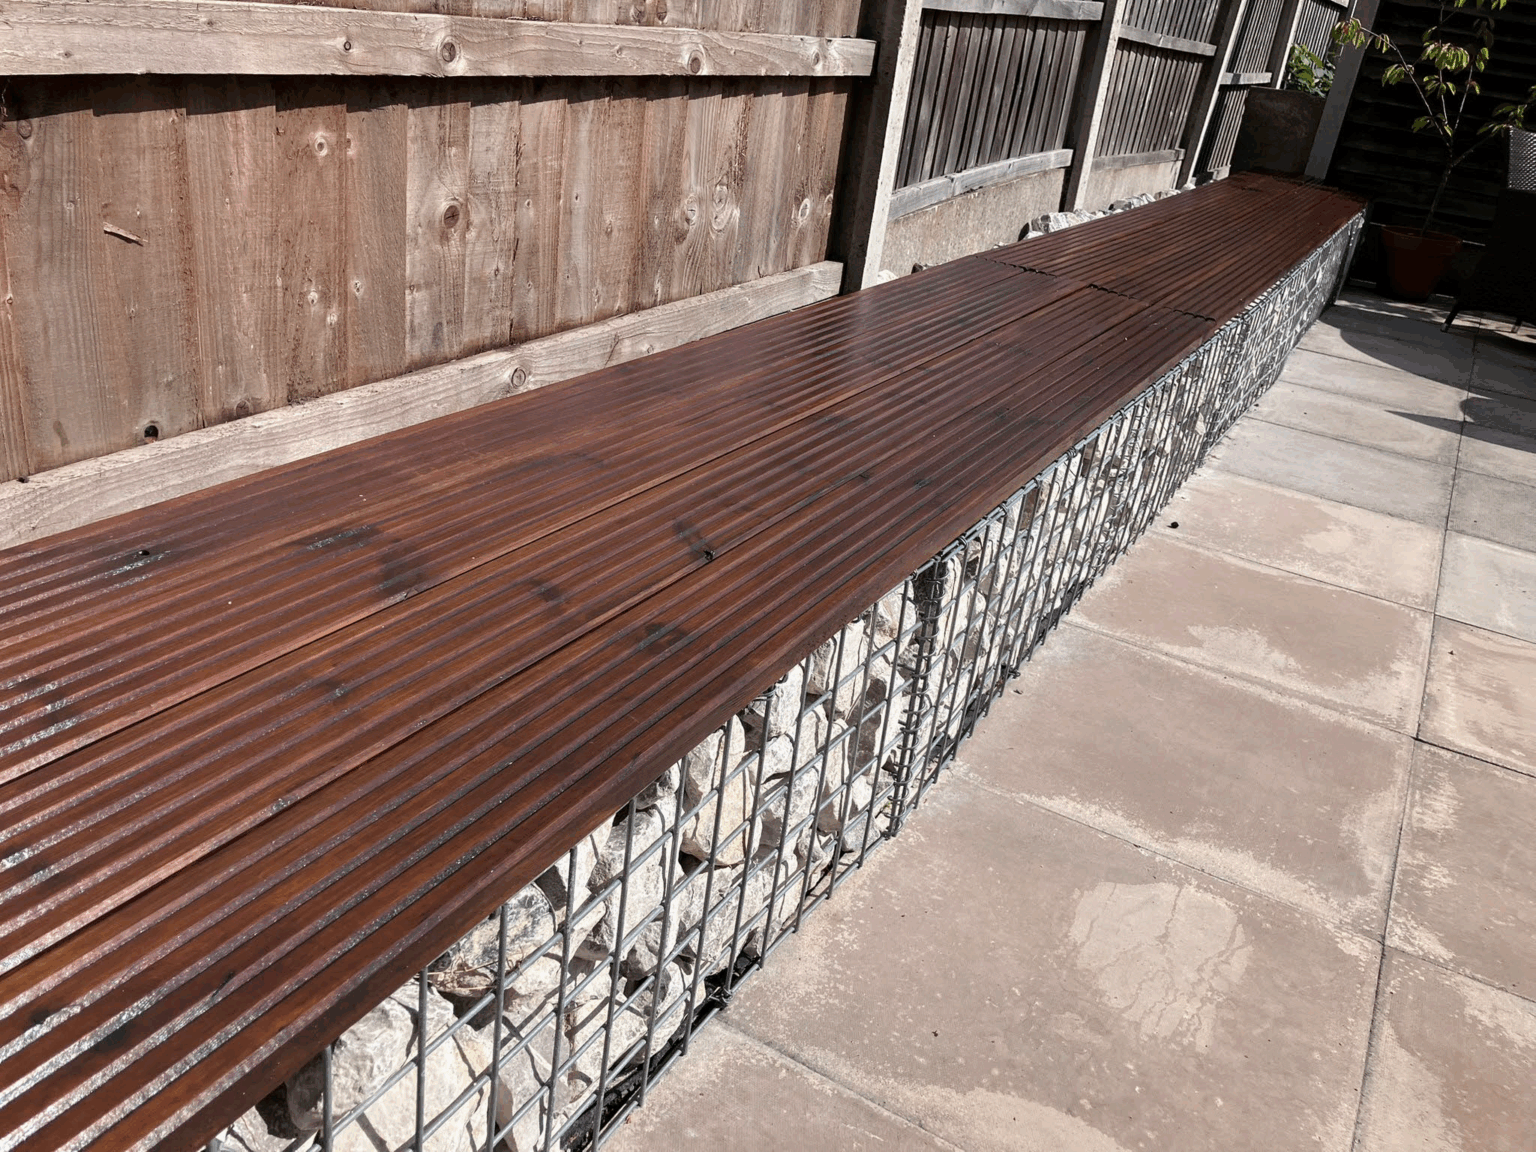
I ordered two gabion basket kits at 5mm thickness and a size that would cover half the length of the garden wall when made conventionally tying six sides together. Then I used tools to take apart the six sides keeping small sides as supports cut into the wall and two long pieces still joined together for the front and top. I cut the small rectangles diagonally to form triangles. Which acted as supports for the helicals and a level for the top.
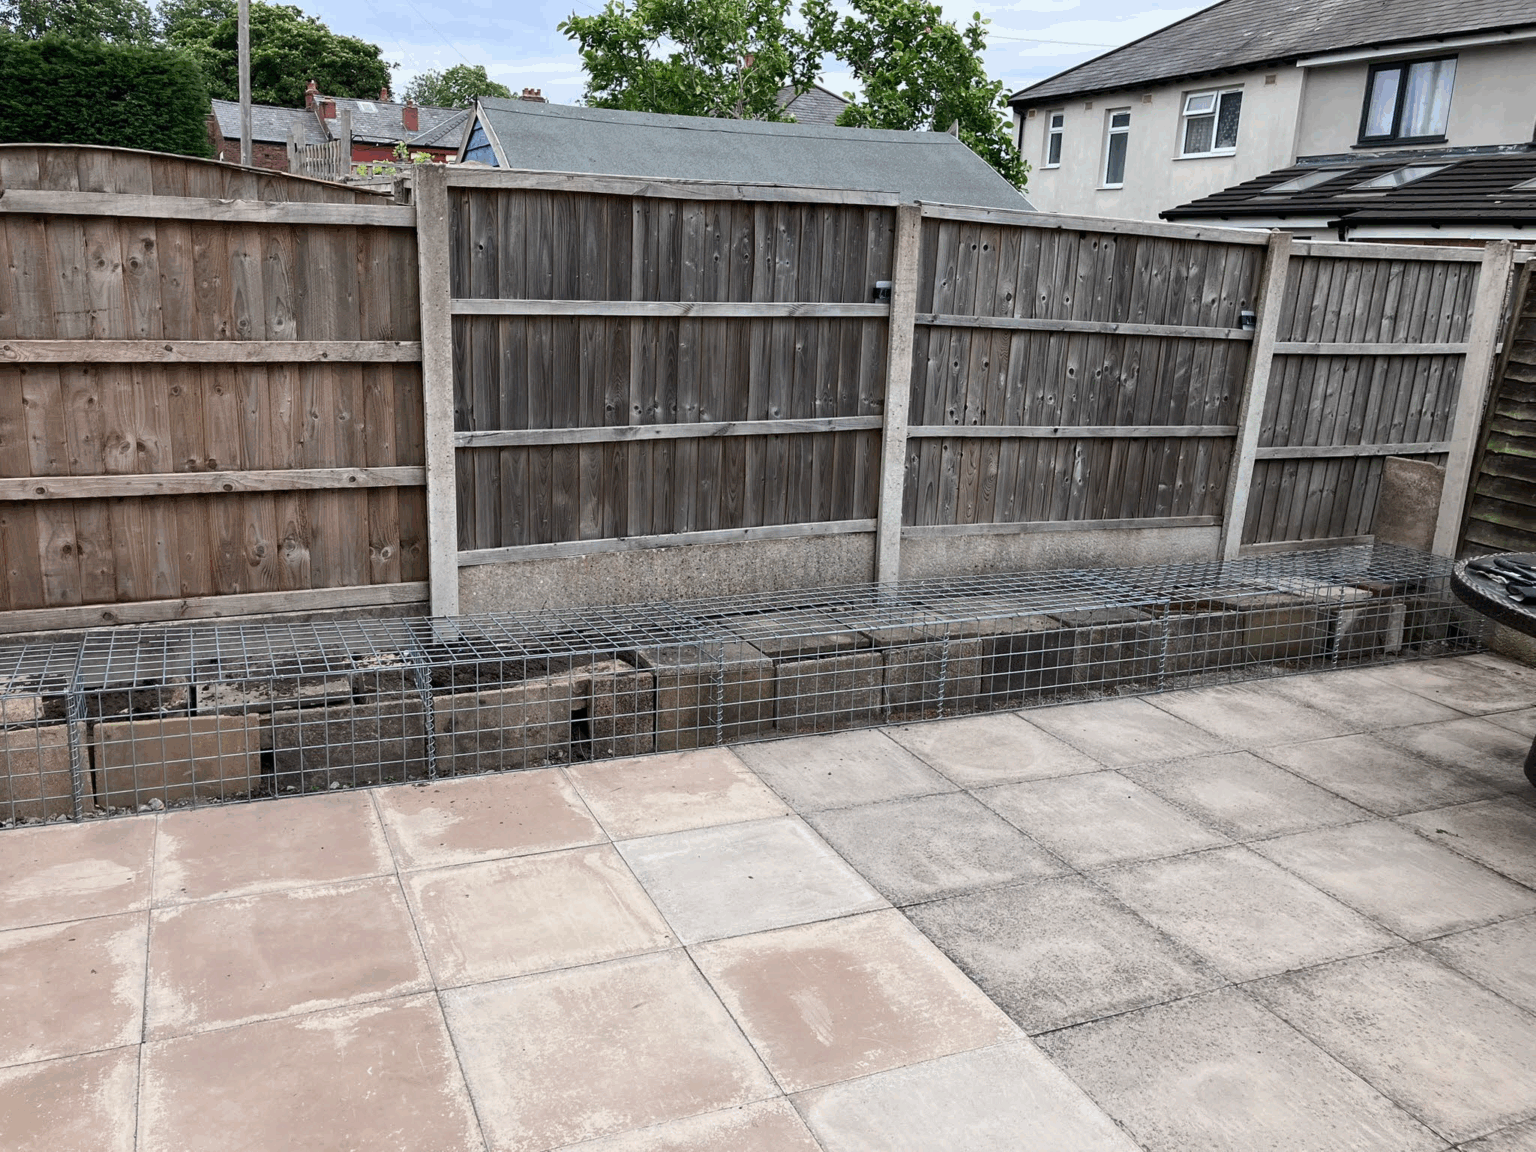
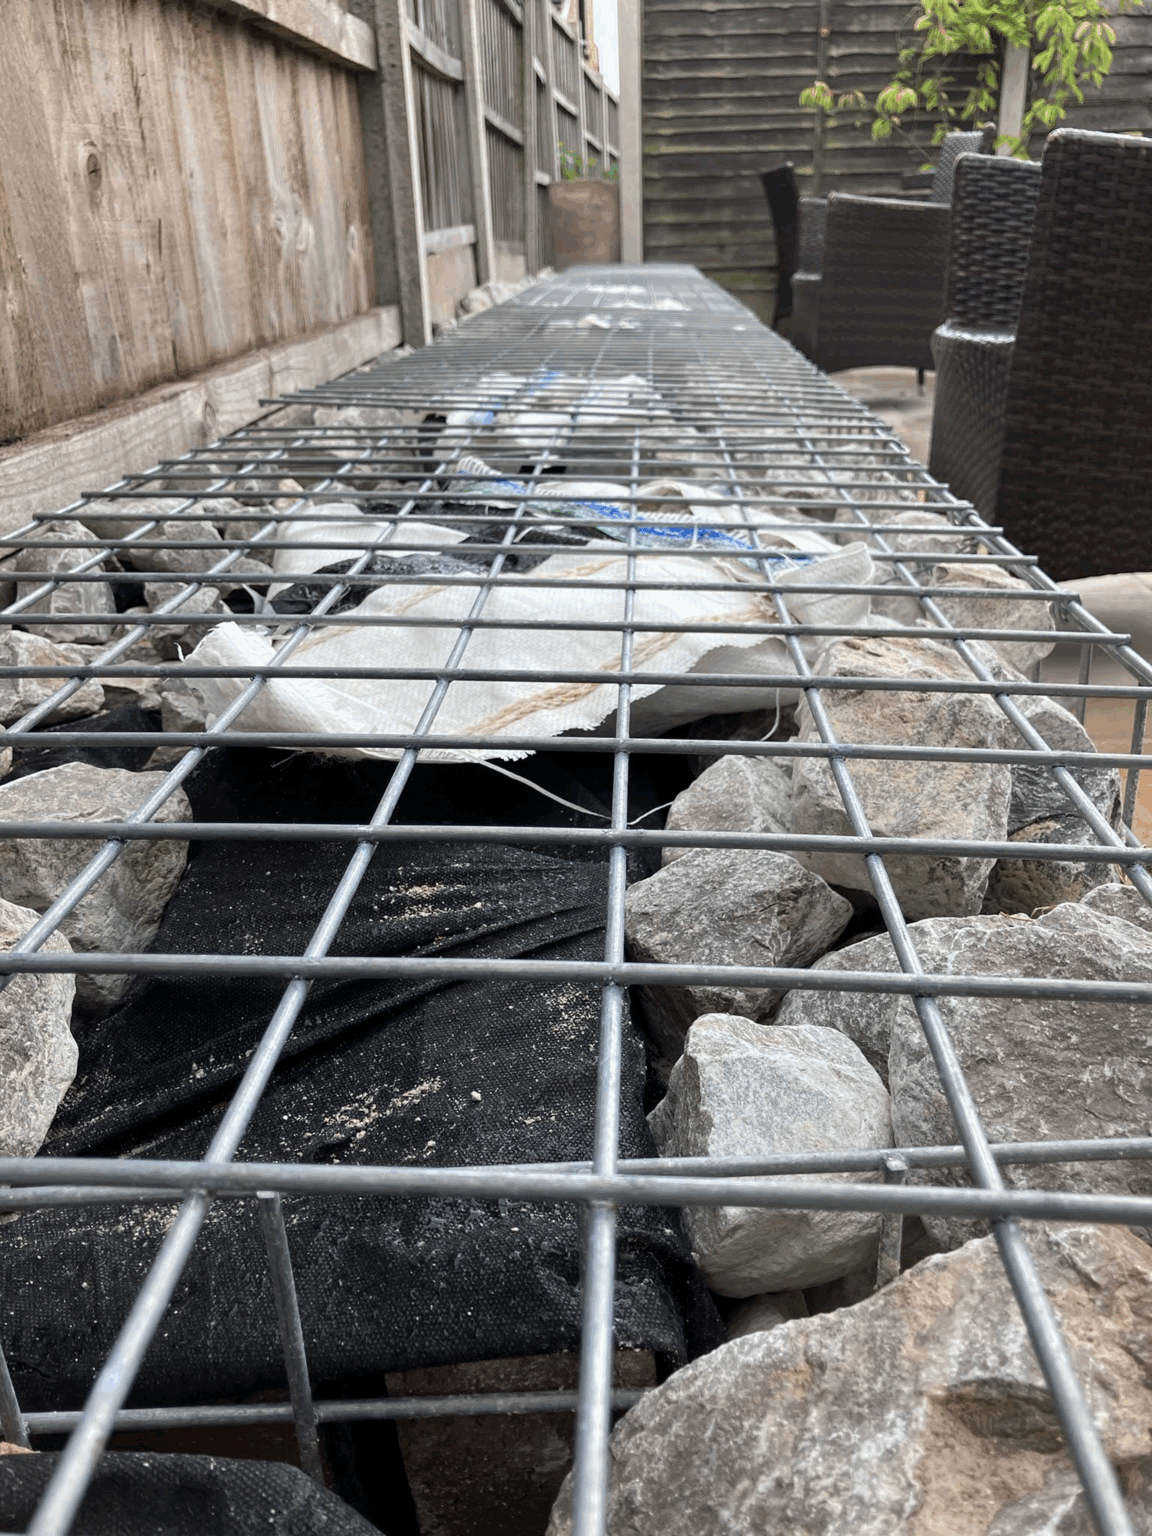
Adding Ground Protection
Weed suppressant material was put on top of the original flags before the limestone was put in.

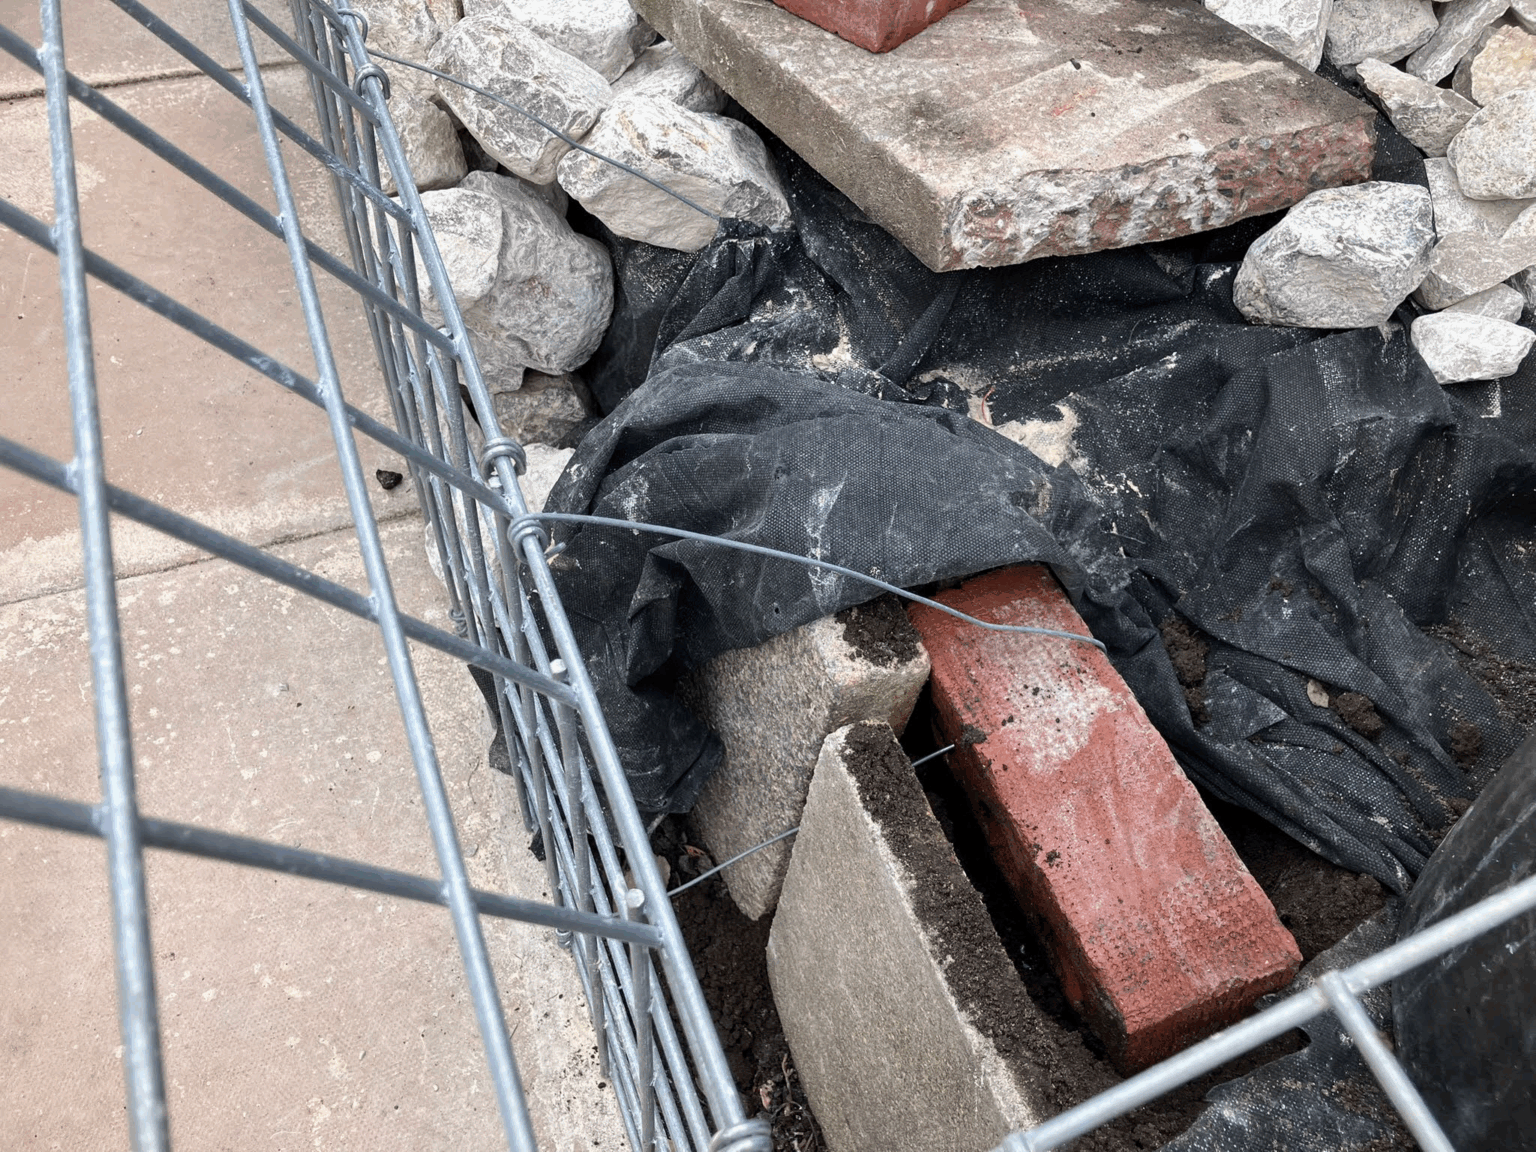
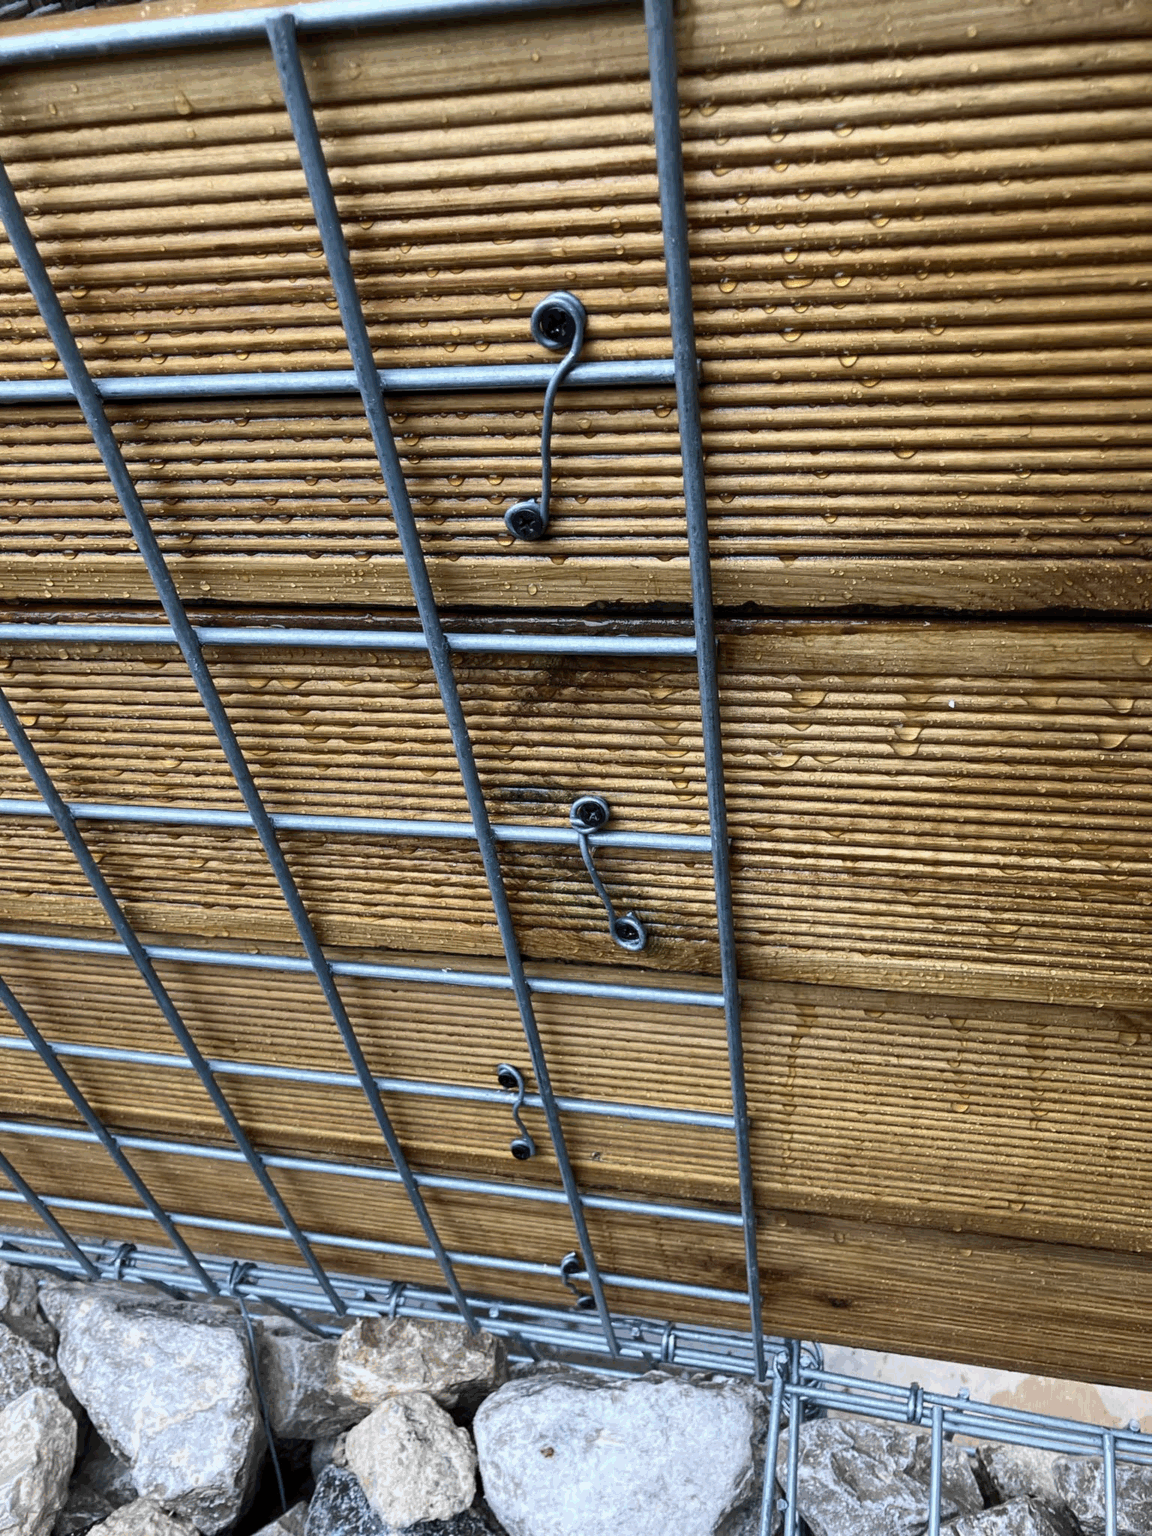
Securing the Structure
This is an example of how the basket is anchored into the wall so the weight of the stones don’t pull the front of the basket forward when filled. The ties are along the wall at regular intervals.
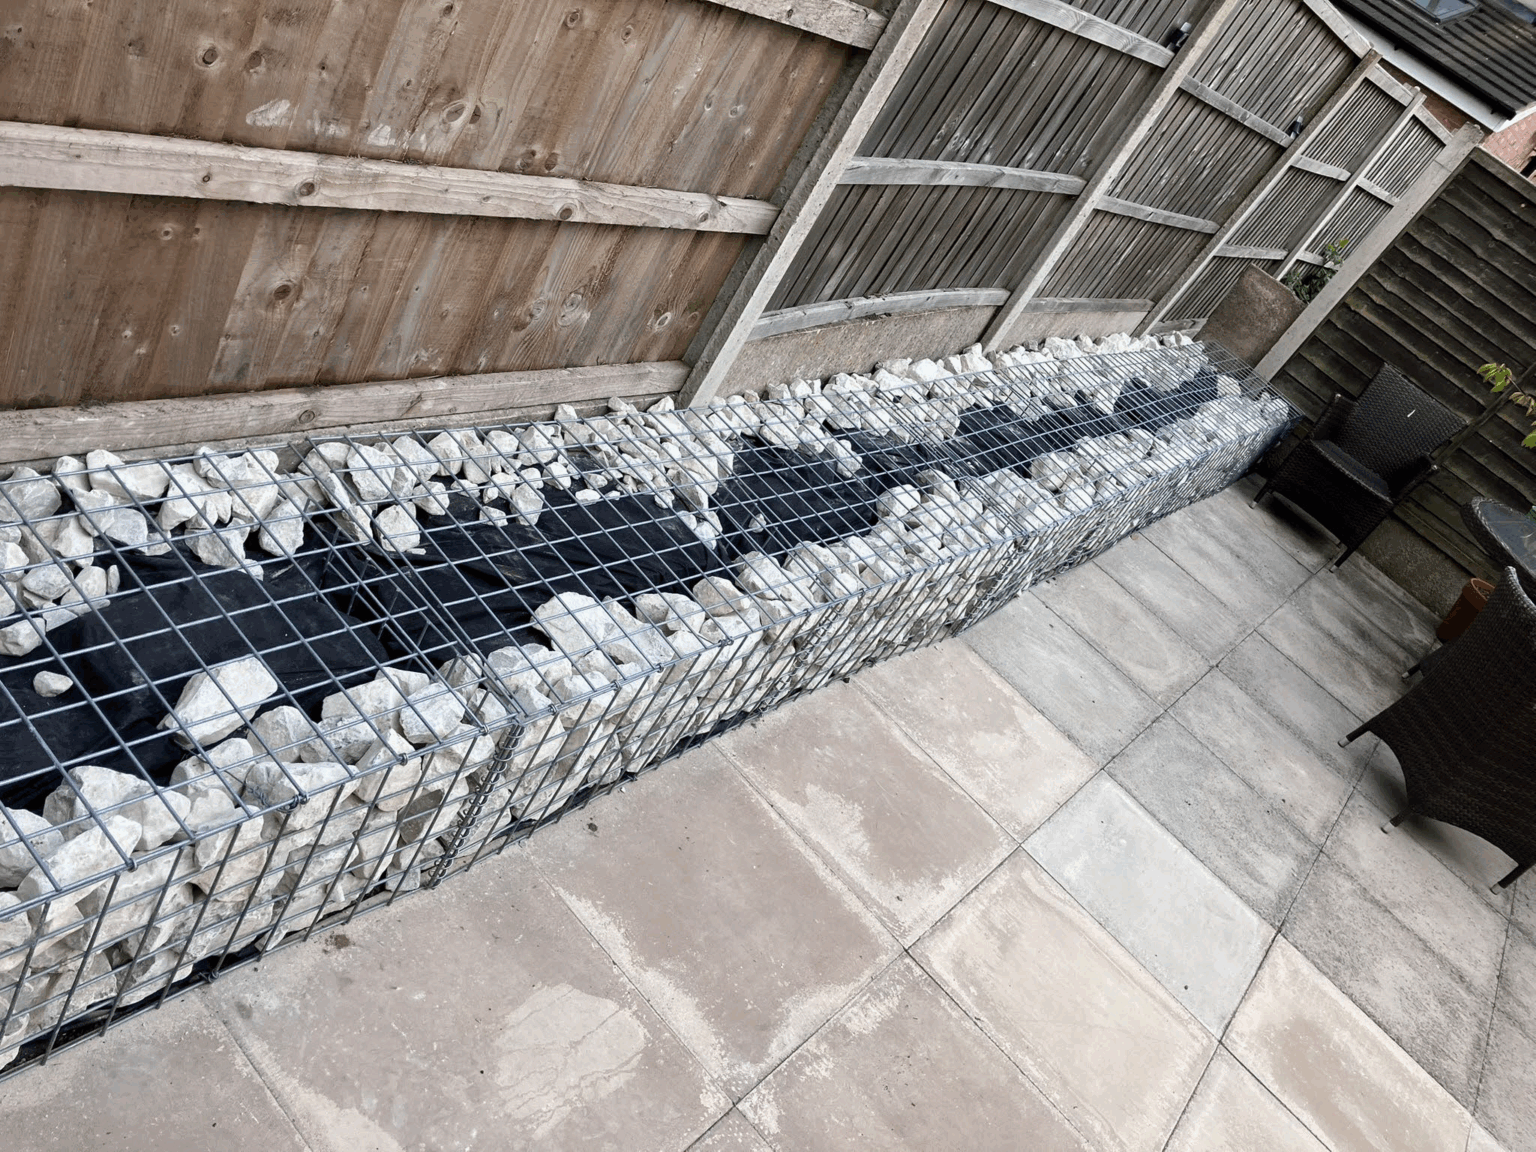
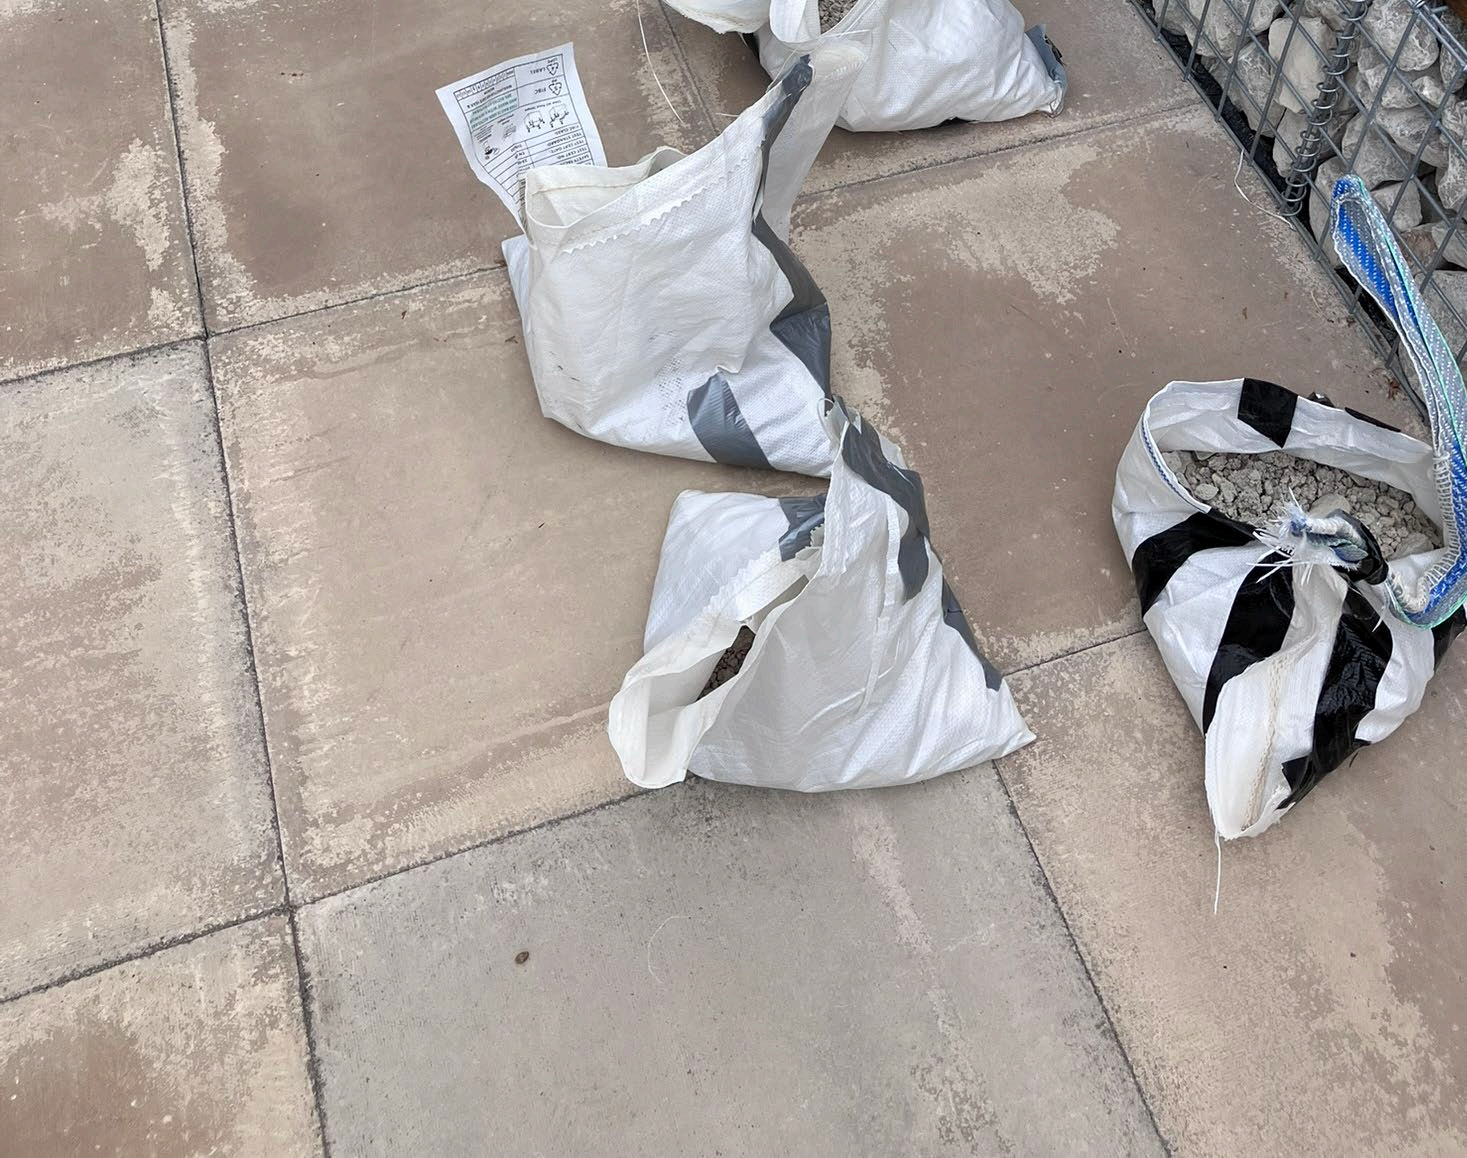
Preventing Bench Sag
To fill the gaps under the bench tops I used the bag the limestone came in and the 10% of unusable loose material to make small sandbags that support the bench in the middle all along so it didn’t bow in the middle.
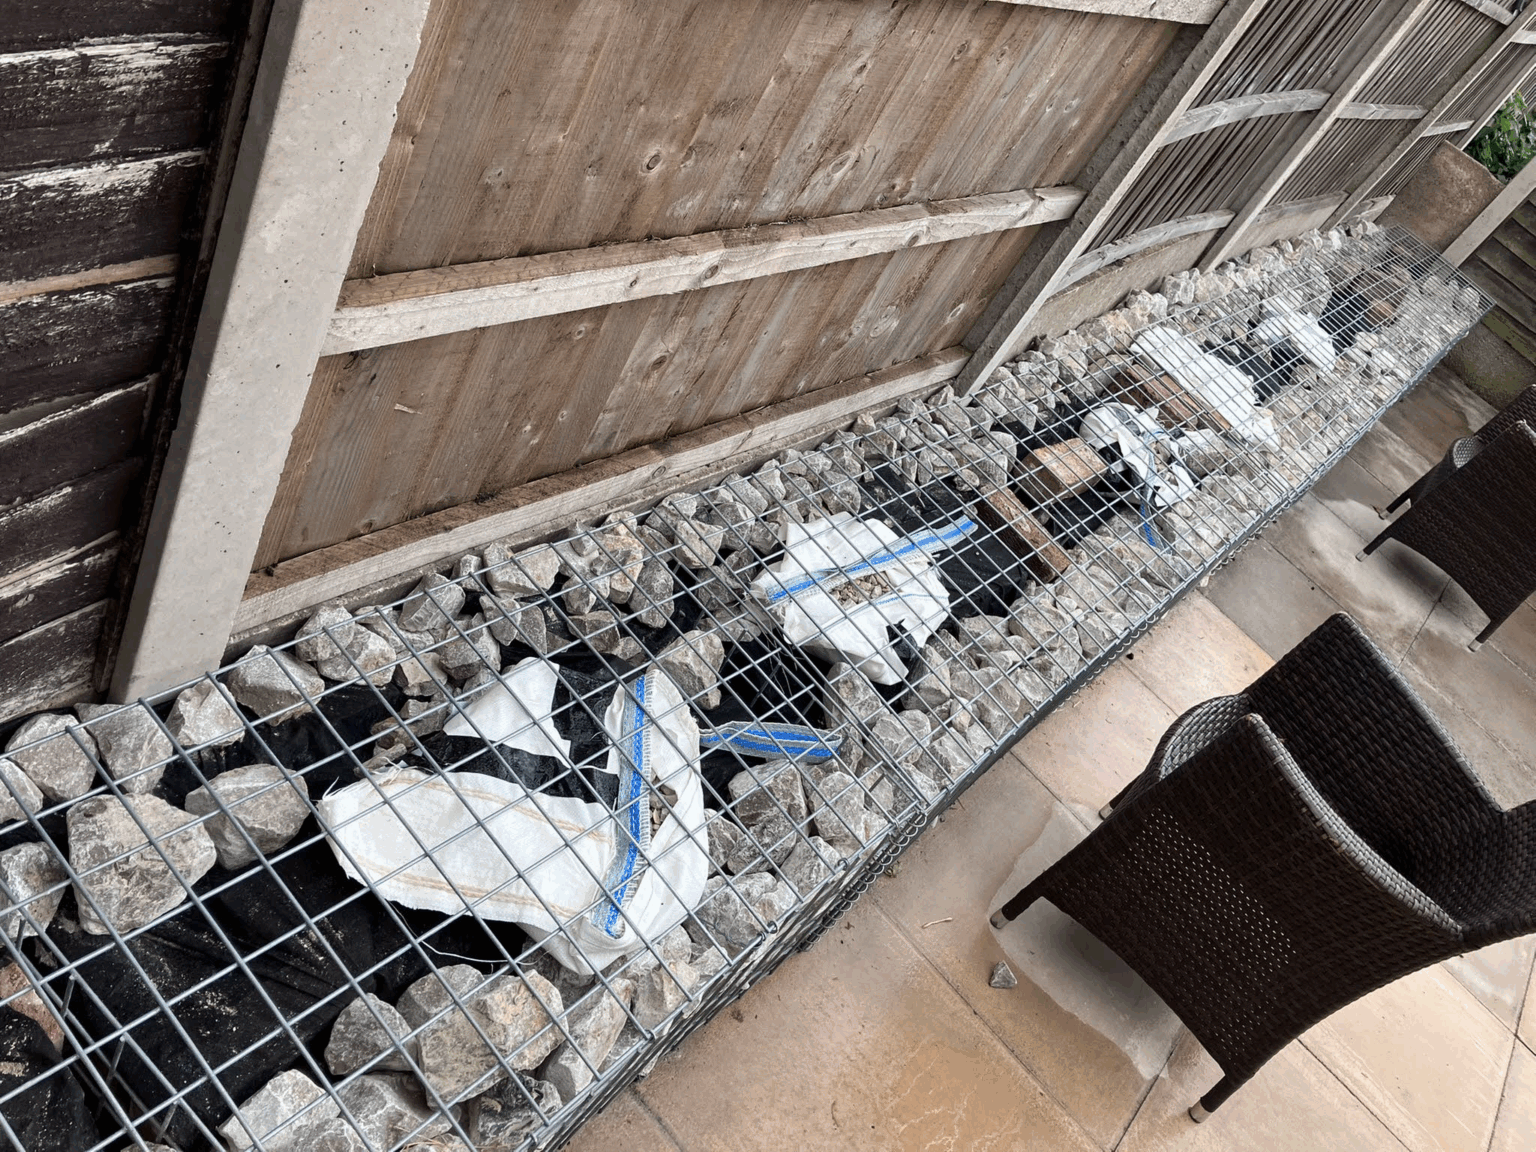
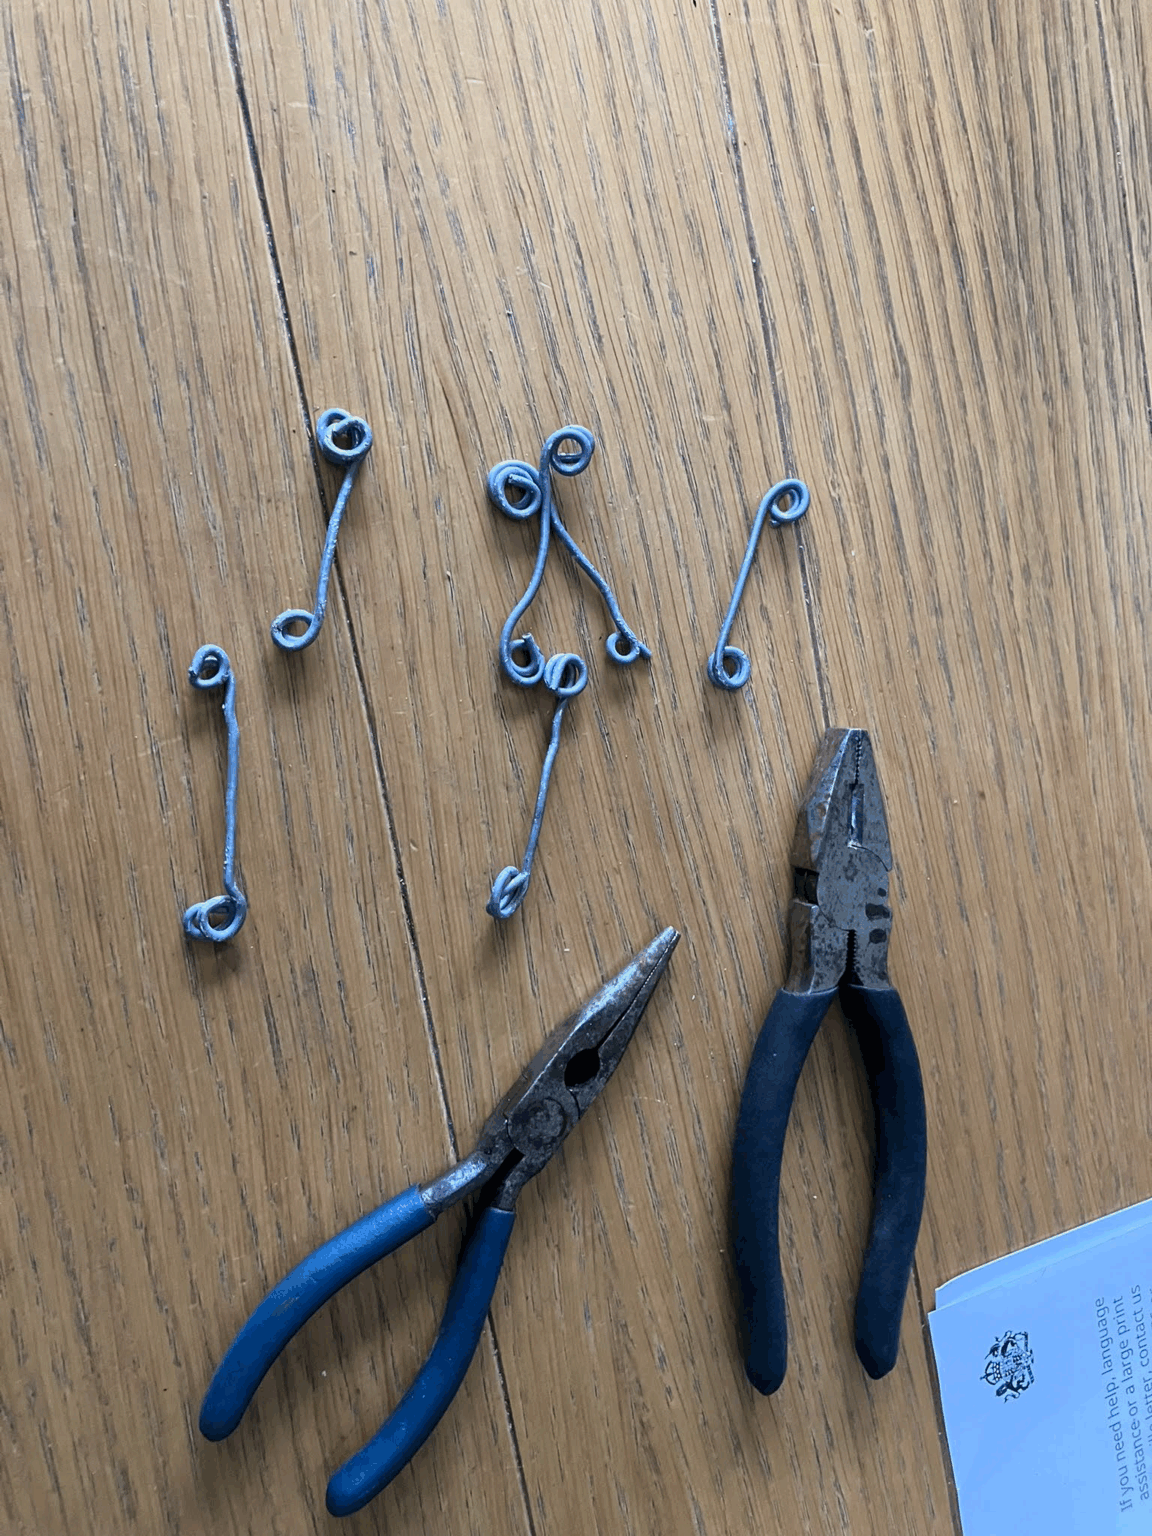
Fixing the Decking Boards
I made fastenings with the tying wire that I used underneath the decking boards to fasten the boards onto the baskets from underneath.
Finishing Touches
The decking boards are 32mm thick and had 4 coats of stain during the recent heatwave!
Products Used in This Project
- 2x Custom Gabion (Length: 195 cm; Depth: 60 cm; Height: 37.5 cm; Diameter: 5 mm)
- 1x Limestone for Gabions
- 10x Helical Connector – 1m
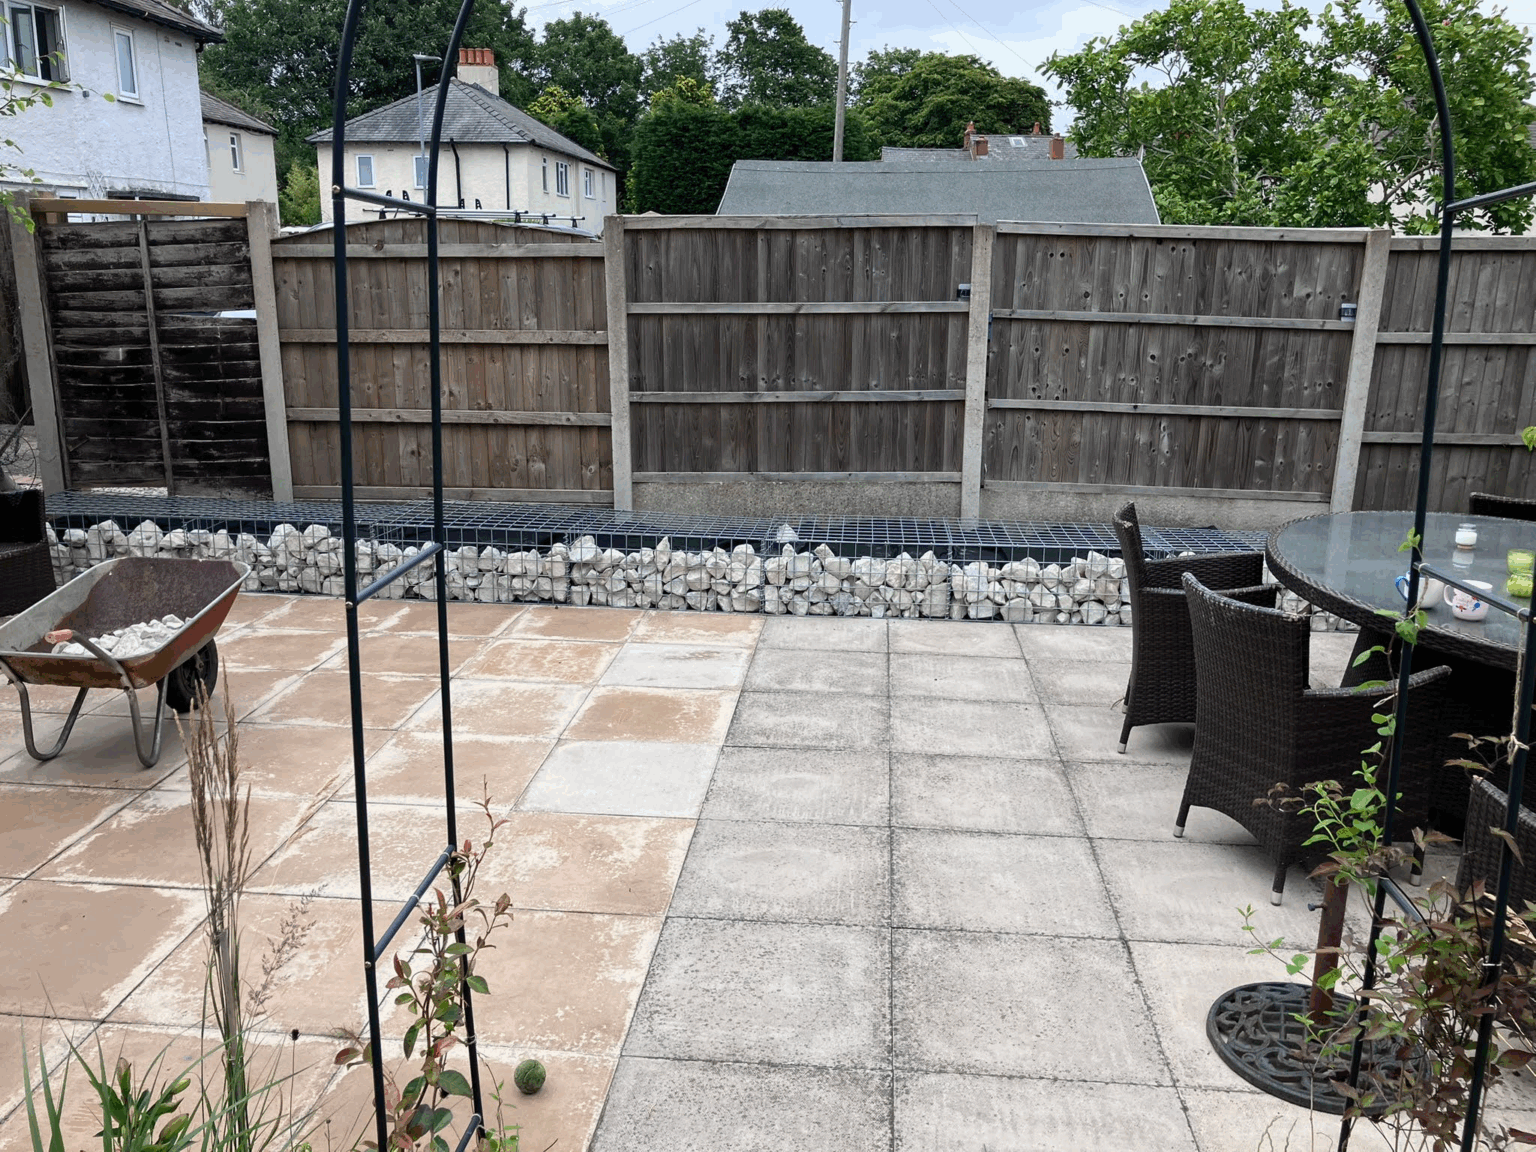
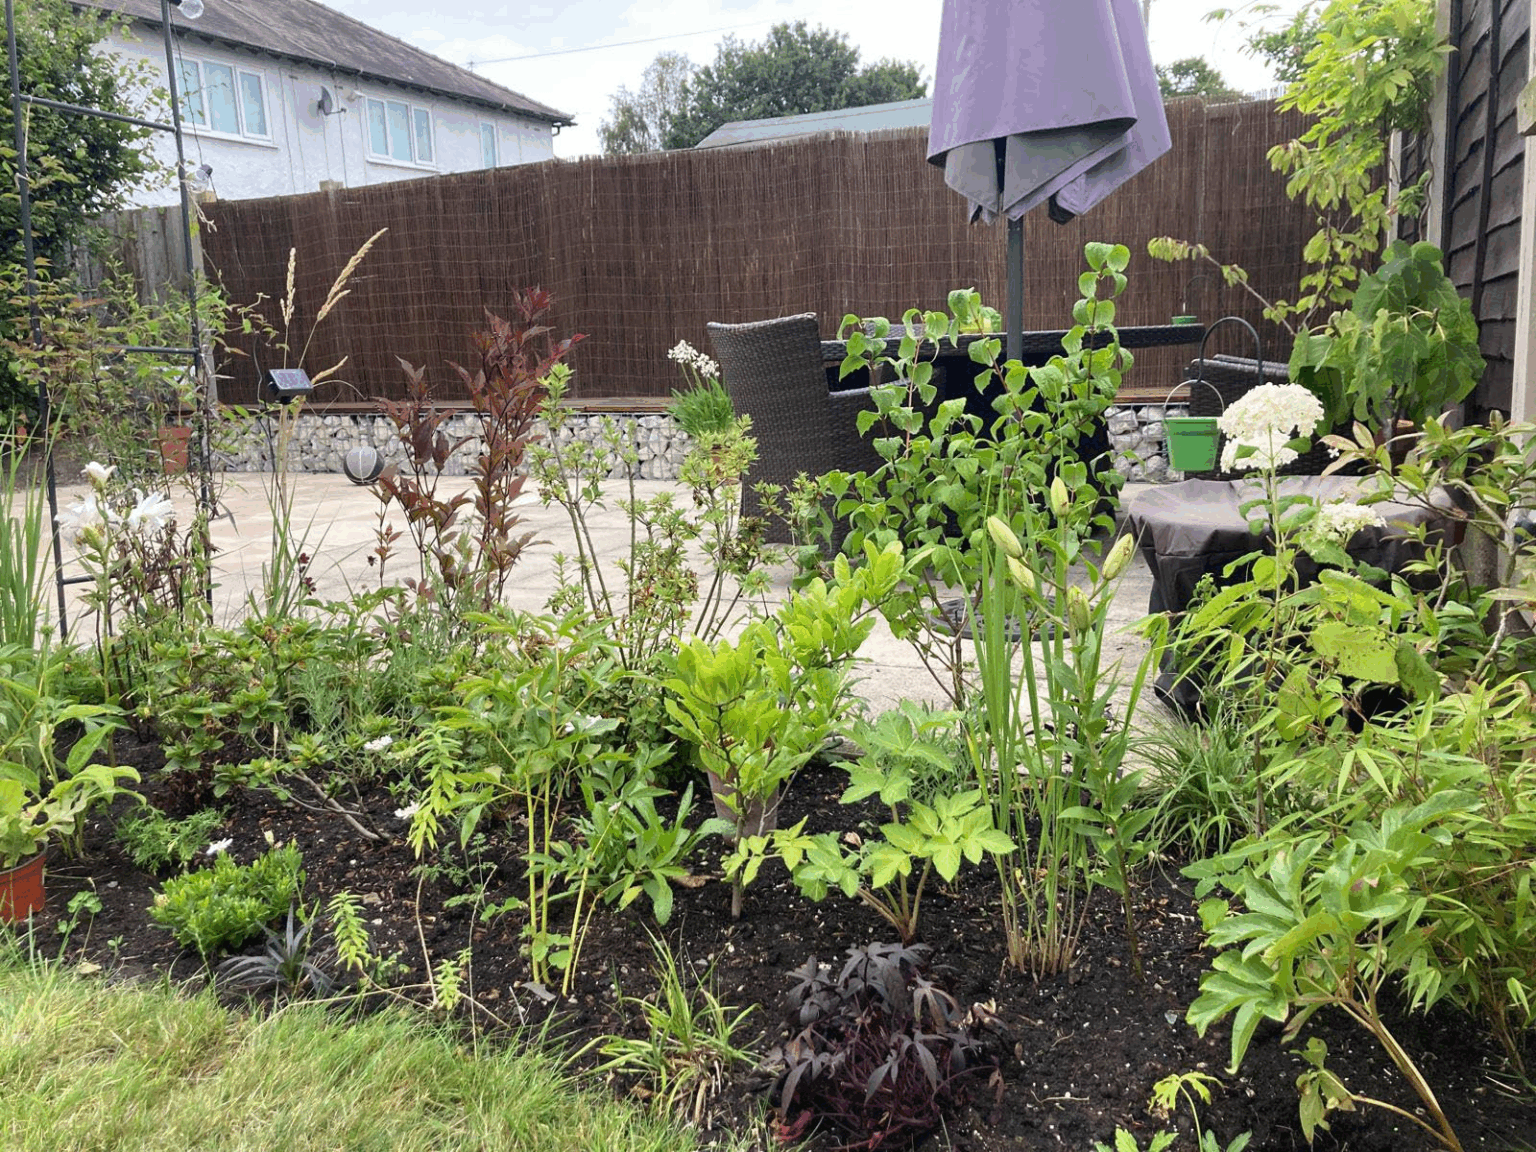
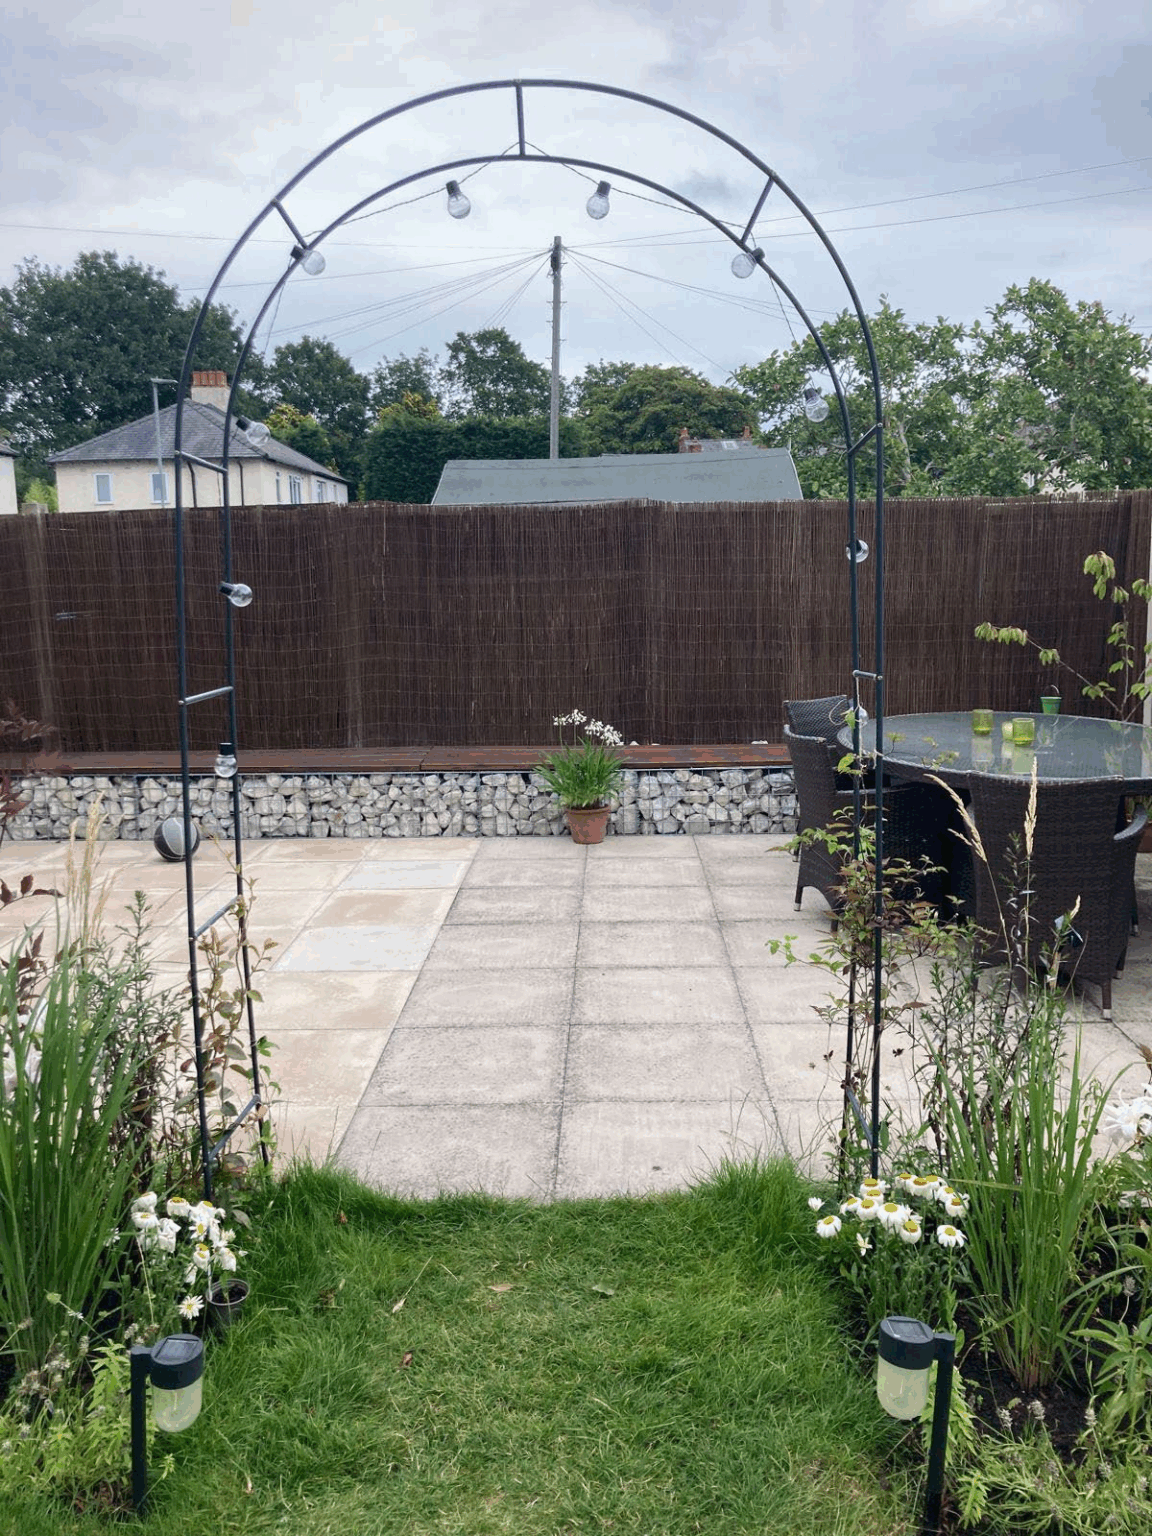
Finished Patio
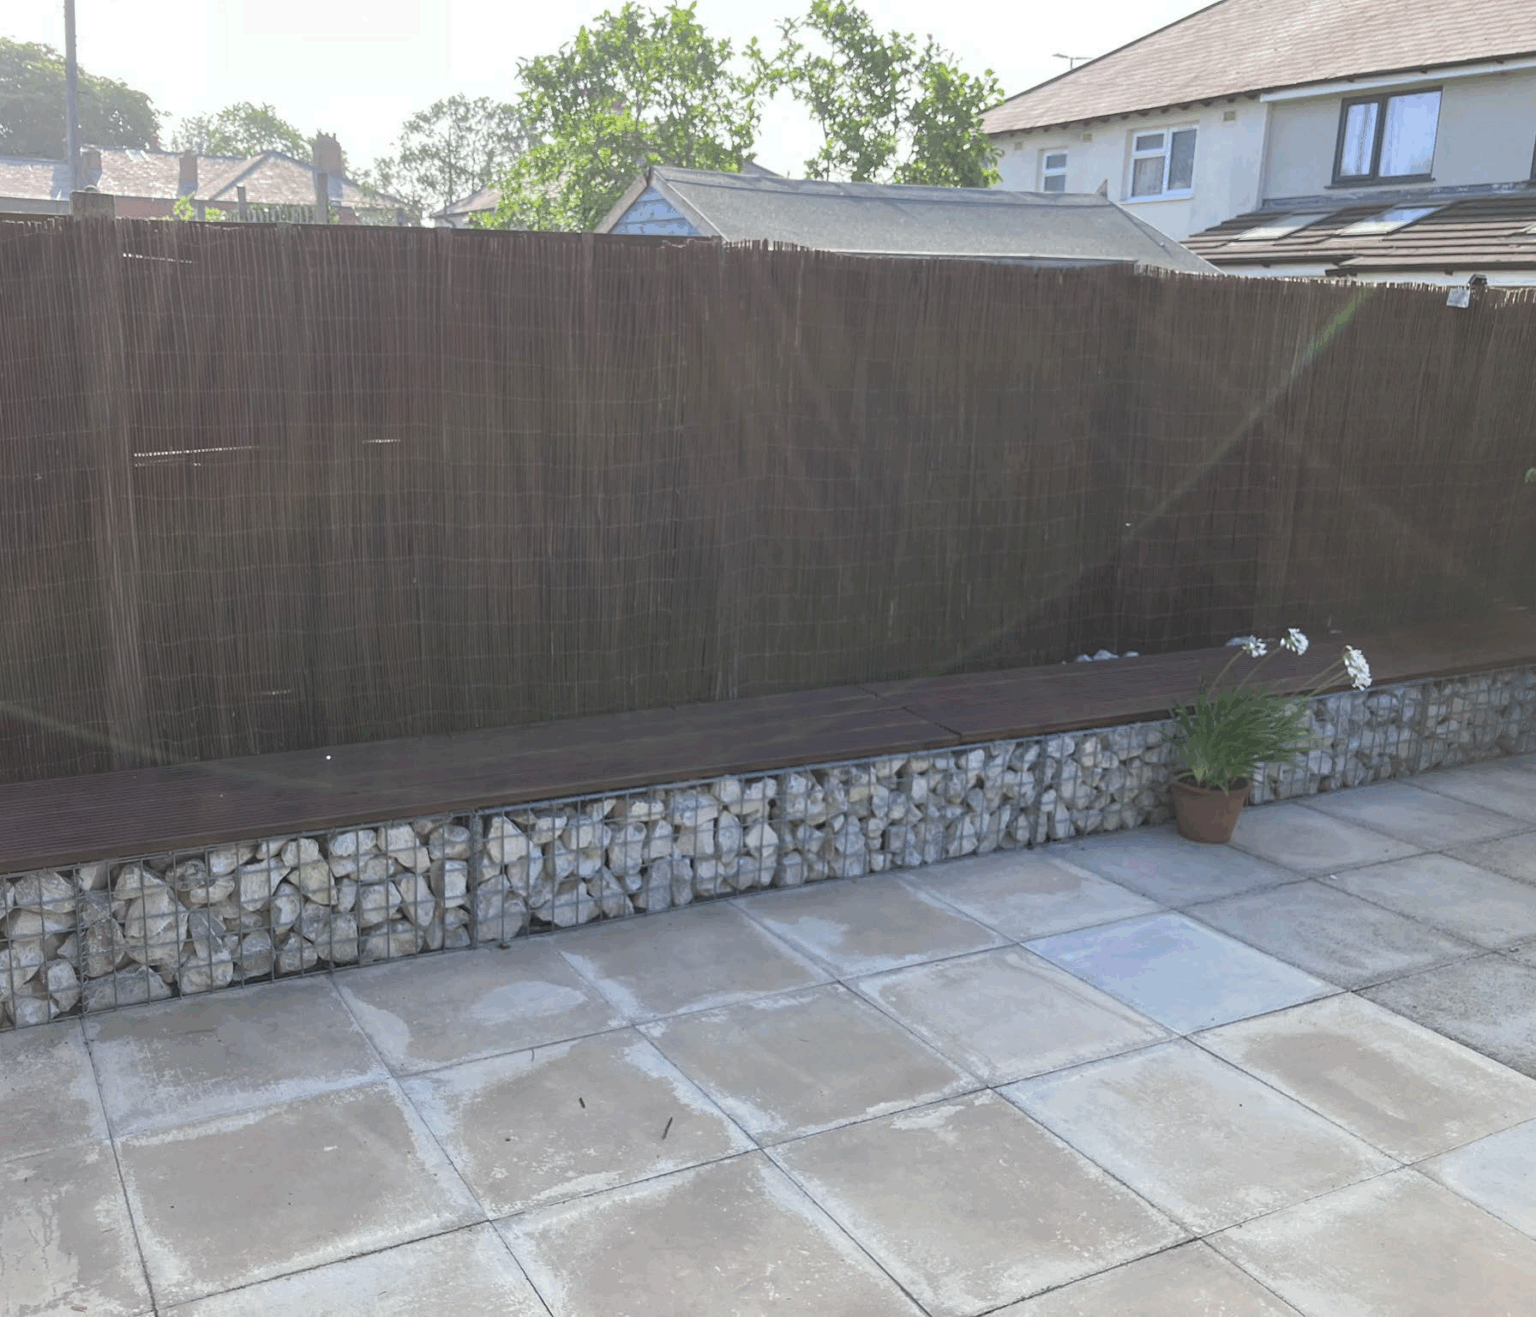
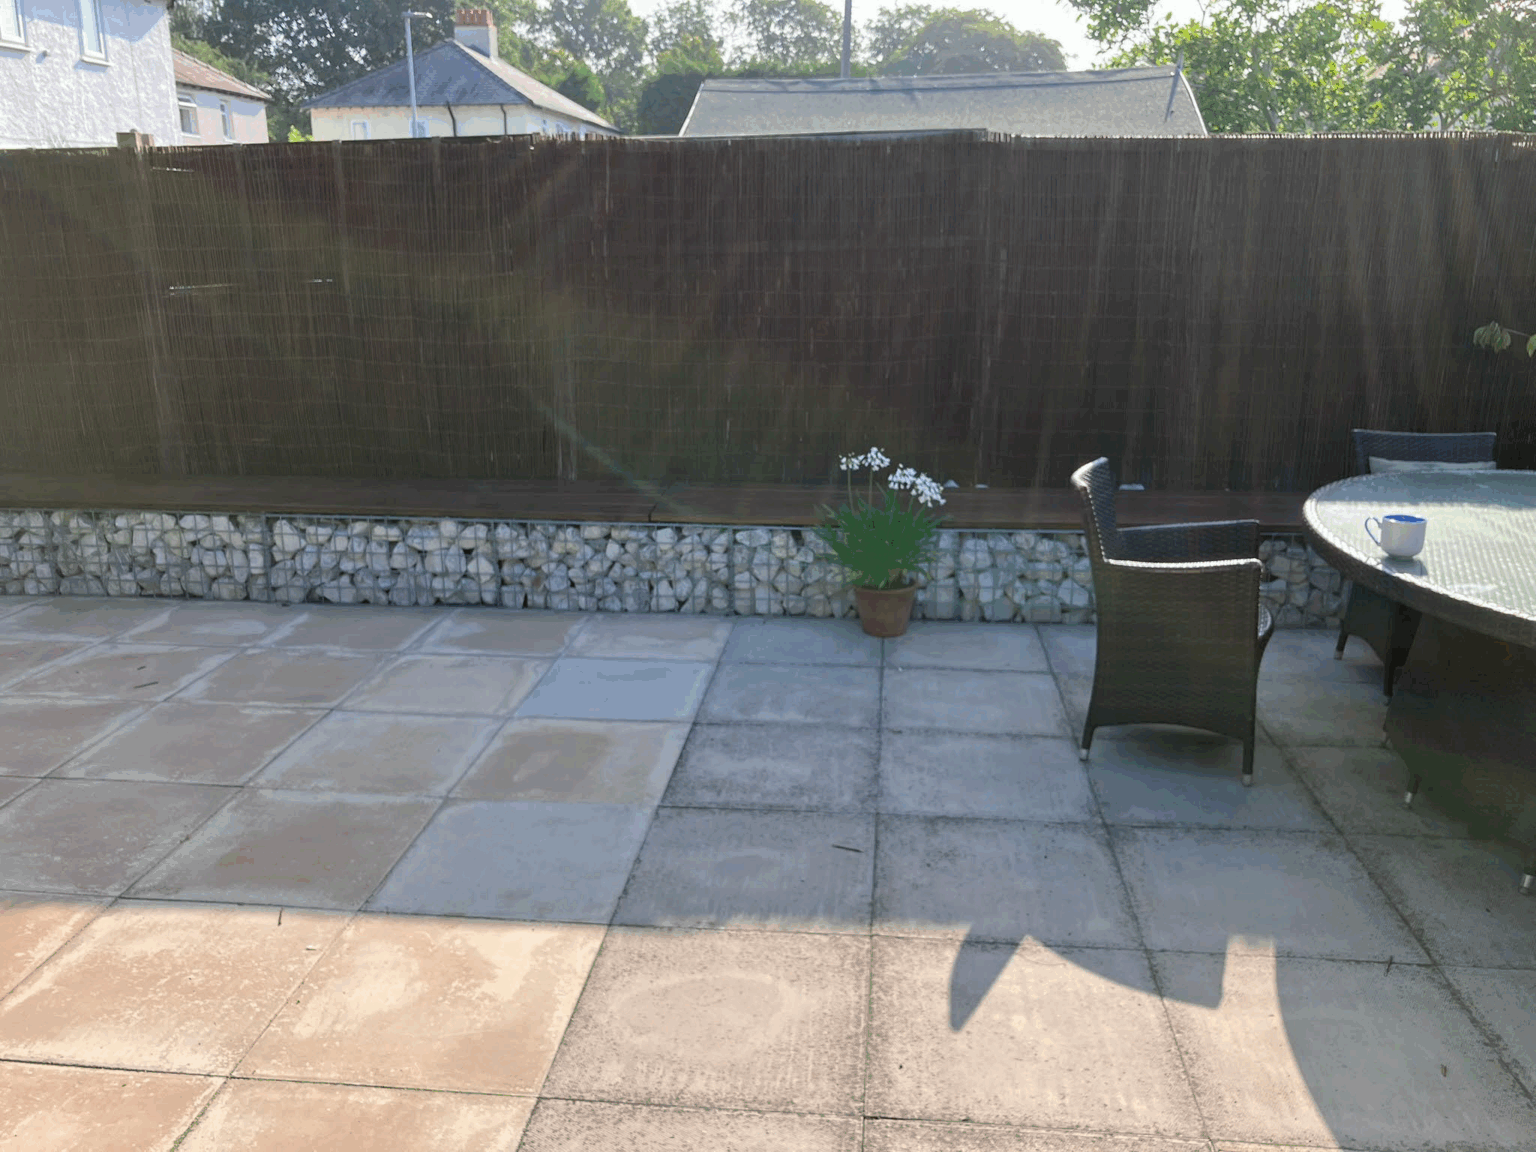
The patio is now finished with reed screening covering up the fencing behind.
The plants and planting I can take no credit for whatsoever. My wife is the gardener!
Thank you to all at Wirefence.co.uk
Comment From Wire Fence
This project really came to life before our eyes—we received regular updates as Jim worked on his garden seating area, which allowed us to offer timely input and advice along the way. That said, we can’t take credit for the many clever twists Jim introduced. He took an ingenious and environmentally conscious approach, making the most of materials he already had on hand. For example, he dismantled the baskets to cover a longer span, used leftover fines to fill rubble bags for support, and even crafted fastenings from the free tying wire. These resourceful touches not only resulted in a beautiful bench but also kept the project impressively sustainable. We love it when customers think creatively and take our products to the next level with smart DIY solutions—so it’s been a real pleasure to watch this project evolve in real time and be a small part of the process.
Joy, Customer Support Manager at Wire Fence
Thinking About Creating a Gabion Bench?
Inspired by this project? A gabion bench is a simple, stylish, and durable addition to any outdoor space – and it’s easier to make than you might think.
Learn More About Gabions
- More about gabions – A quick guide to gabions and their uses.
- Gabion assemble guide– Step-by-step instructions for putting your cages together.
- How to fill gabions – Tips for a neat and sturdy finish.
- How to make a gabion bench – A complete guide to creating a durable and stylish outdoor seating solution.
Shop Gabion Products
Want to create your own gabion bench? Get in touch with our team for advice, quotes, or help choosing the right materials.