
How to Make Gabion Pillars


Below you will find a step by step guide on how to make gabion pillars.
- Difficulty level: Medium
- Tools Required: Shovel, Spray Paint (optional), Plate Compactor/Spade, Protective Gloves
- Materials Required: Gabion, Gabion Stone, Helicals/Tying wire, Gravel/Concrete, Support Posts
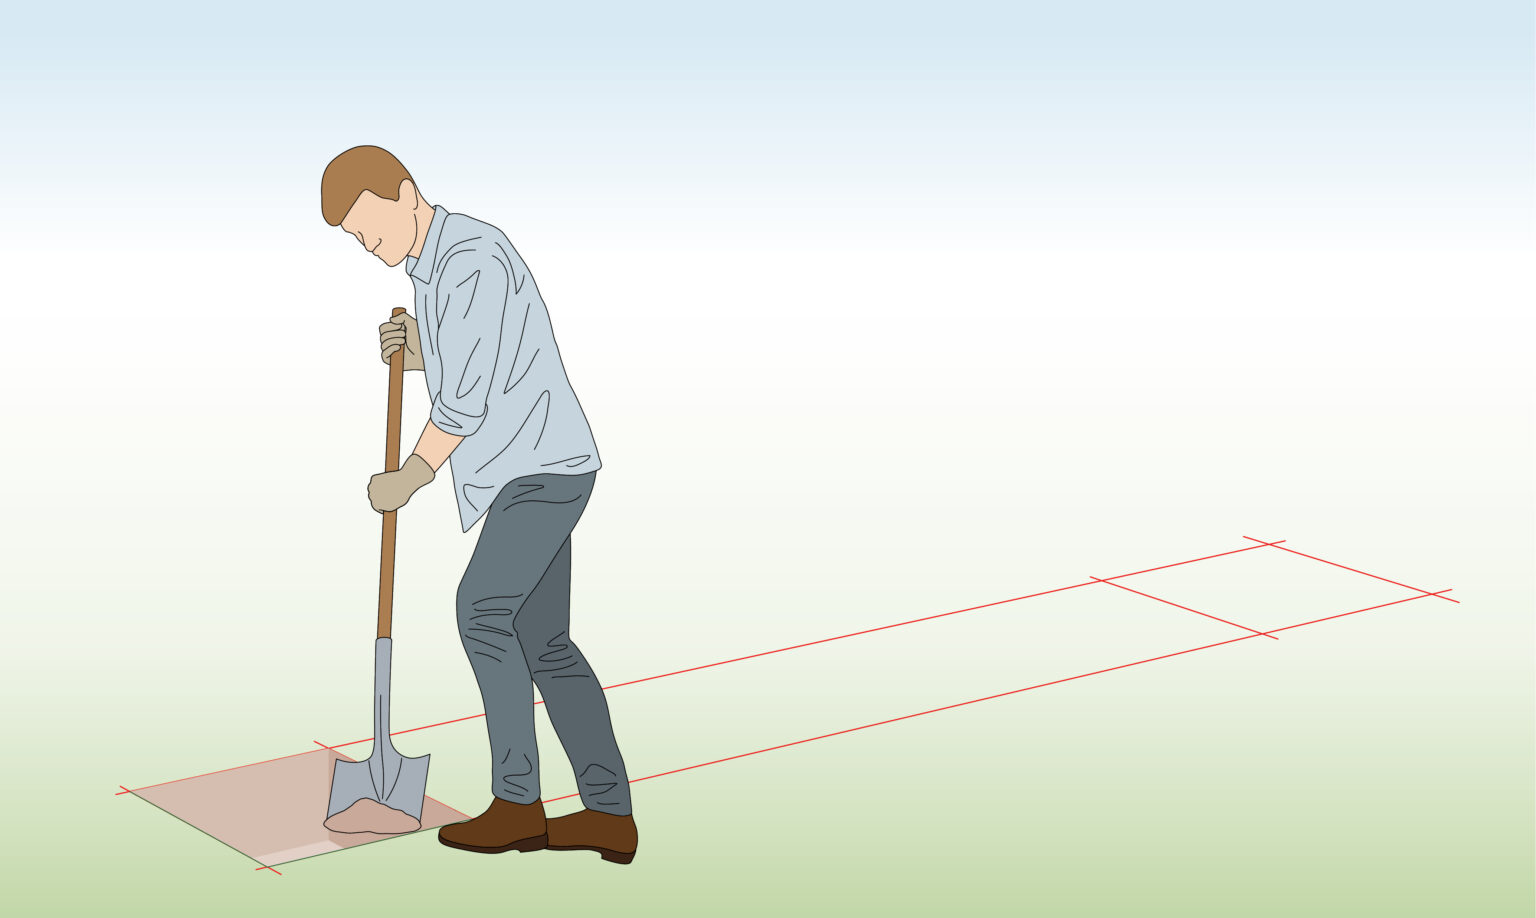
Step 1) Mark the Location

- Begin by marking the desired location for your wall using spray paint, stones, or alternative materials.
- Indicate the perimeter where you intend to build the wall with these markers.
Step 2) Dig the Base
- Dig until the earth is solid beneath.
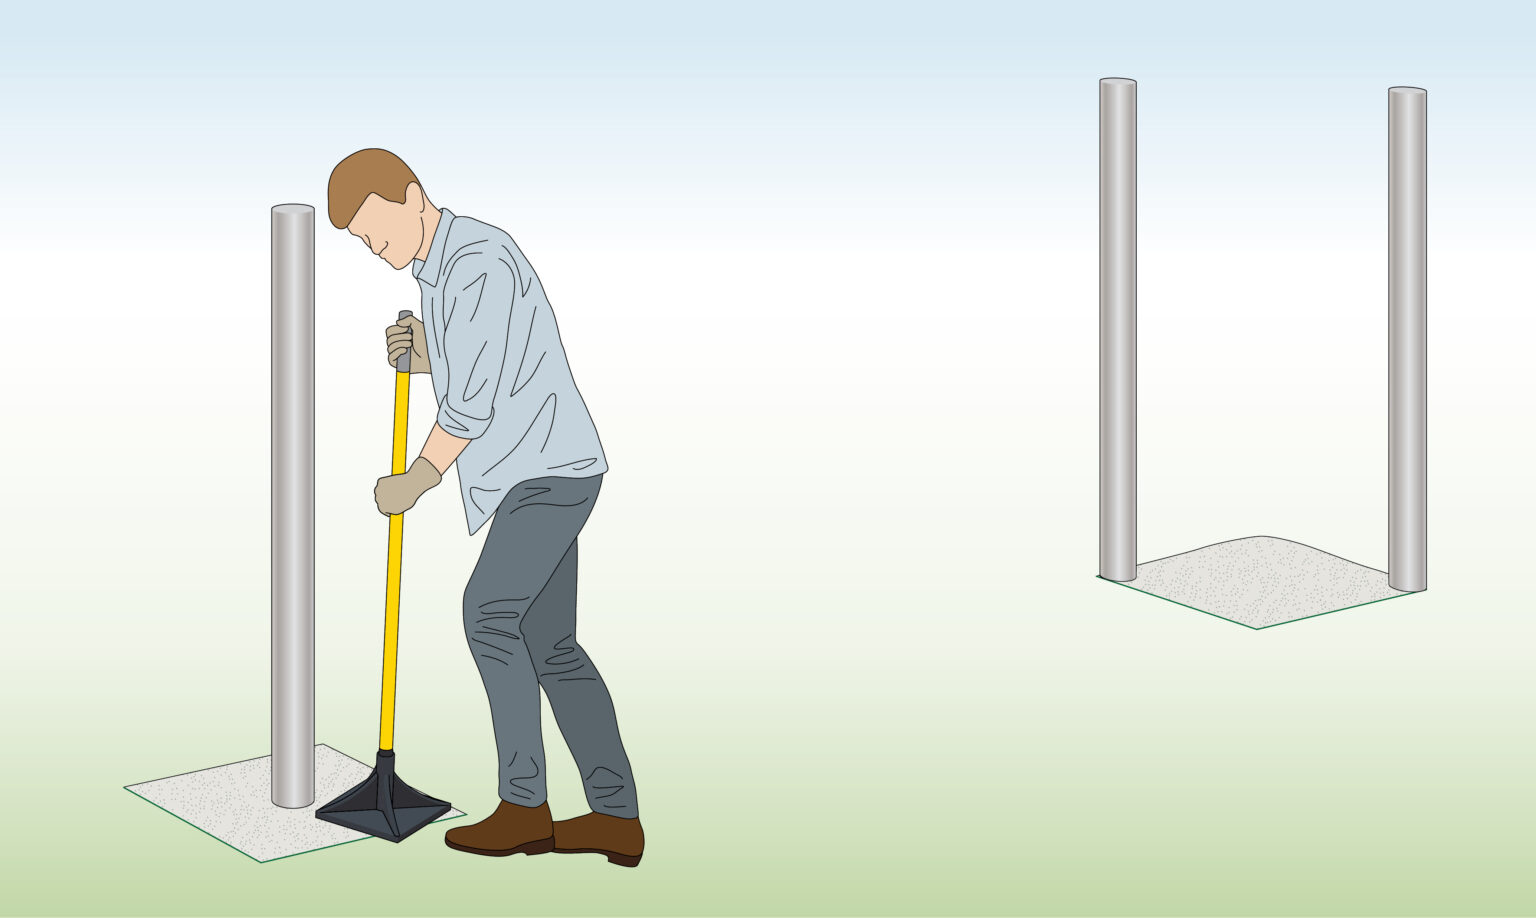
Step 3) Install Support Posts
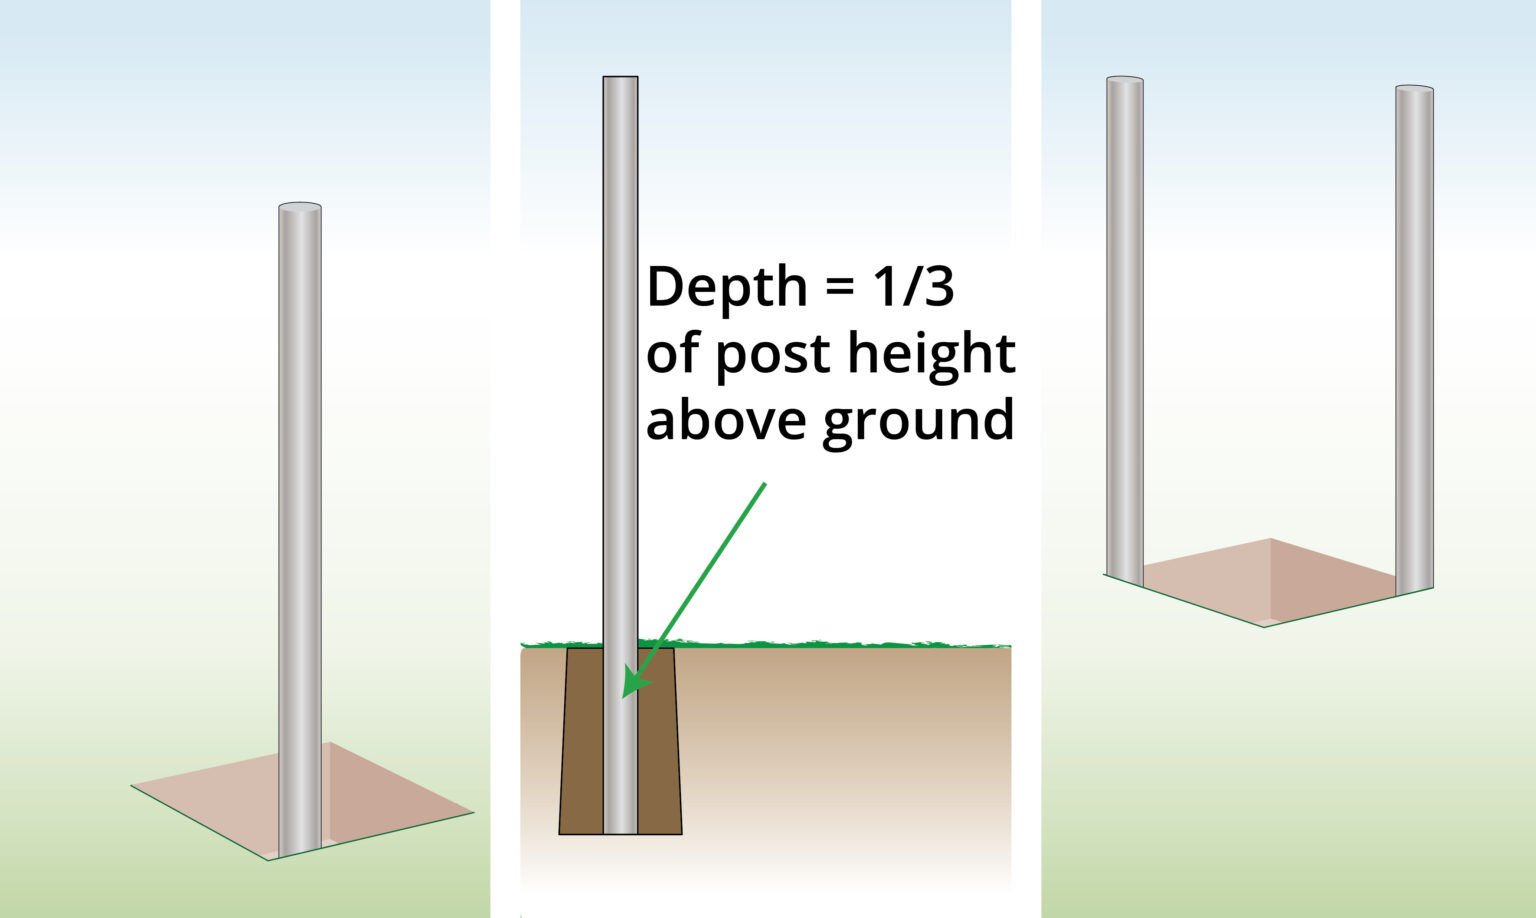
- Insert a support pole into the gabion, either inside or outside.
- The pole’s depth should be one-third the height of the gabion column.
- Use wooden or metal poles, and seal the top if hollow to prevent water damage.
Step 4) Add Basecourse
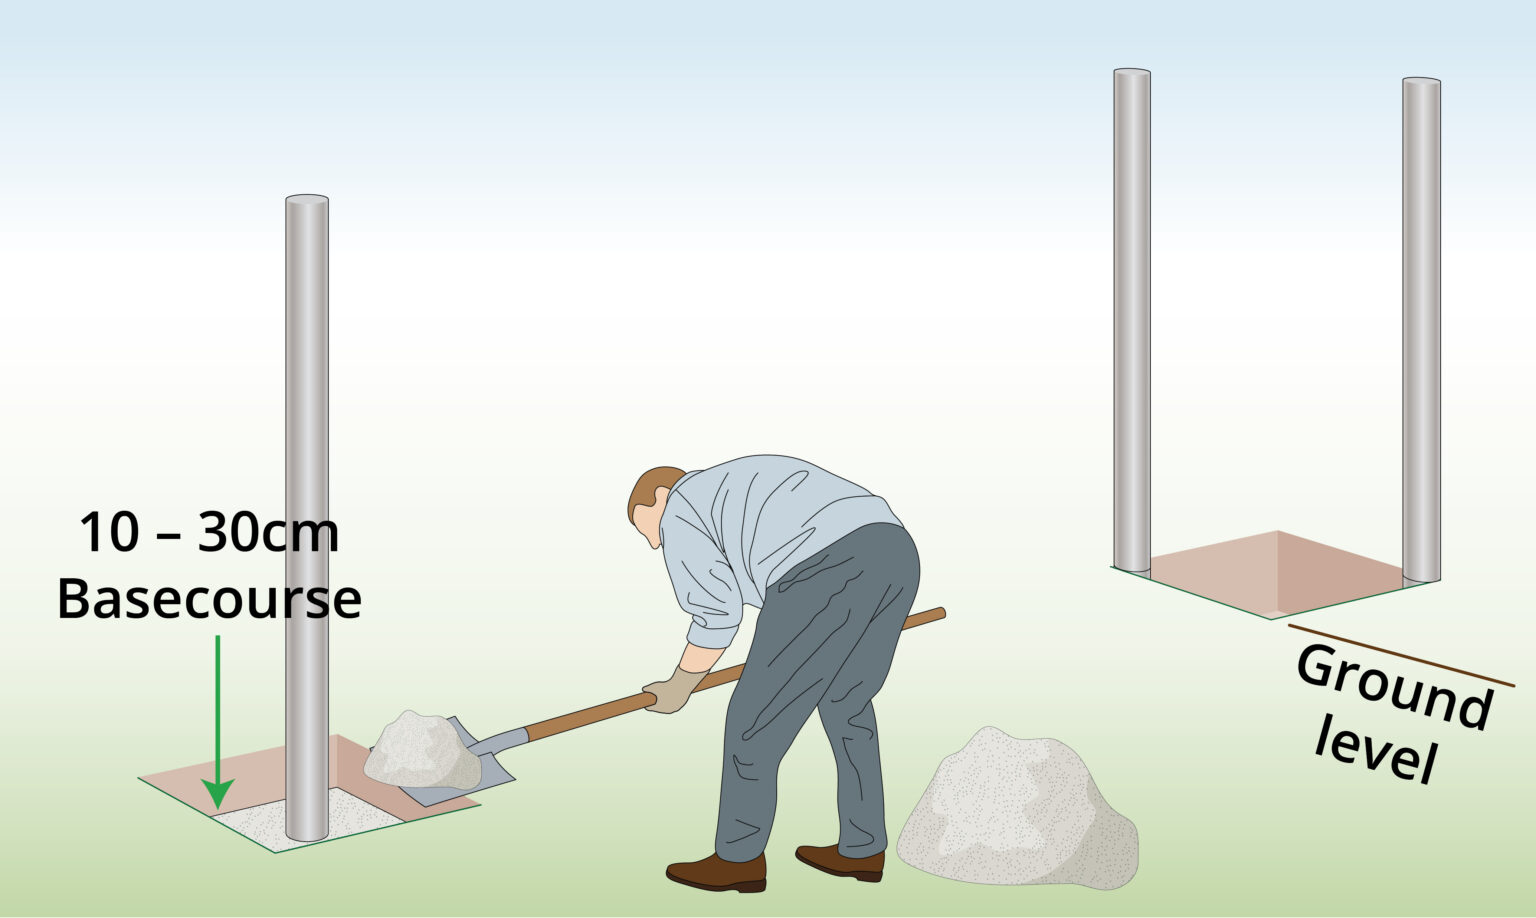
Step 6) Compact
- You can effectively compact the basecourse by using either a plate compactor or a spade, ensuring thorough consolidation of the material for optimal stability and durability.
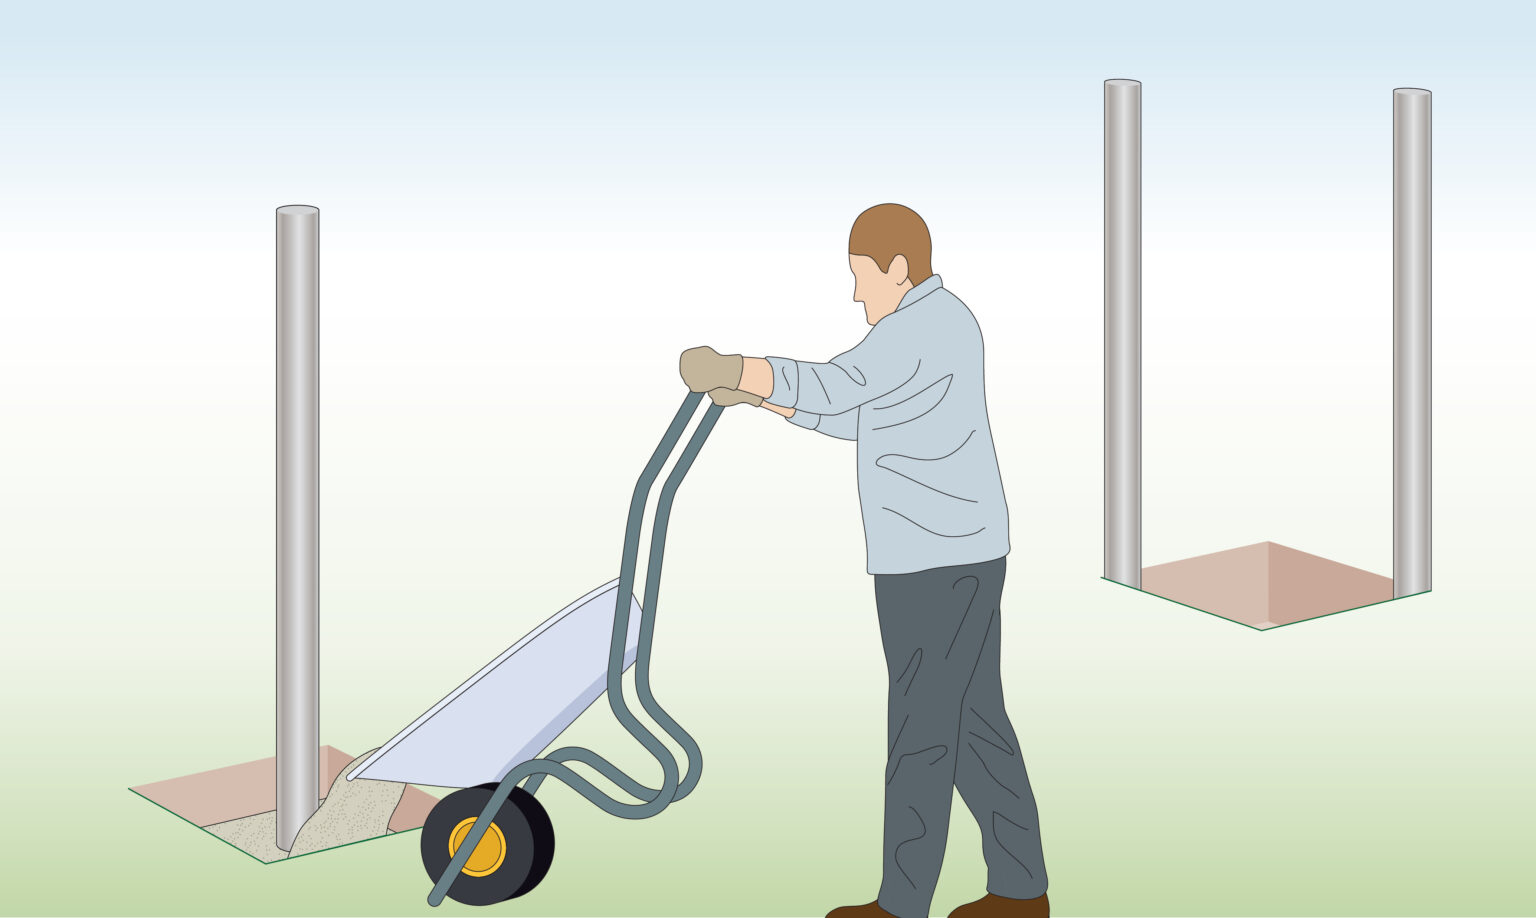
Step 7) Install Baskets
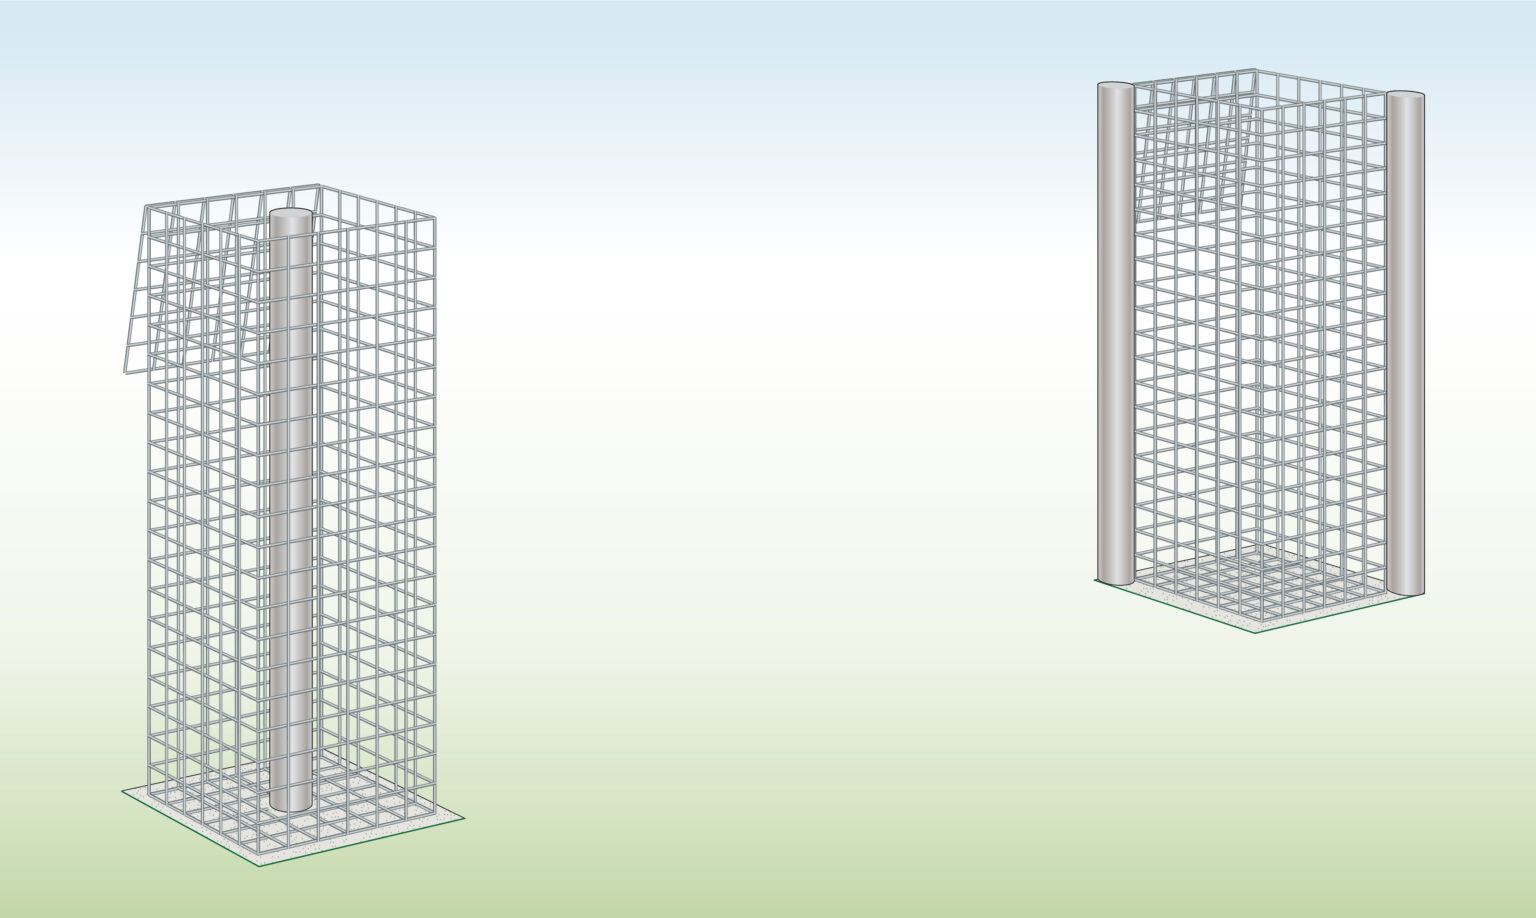
- Position the gabion cages either onto or between the support posts.
Step 8) Fill the Gabions
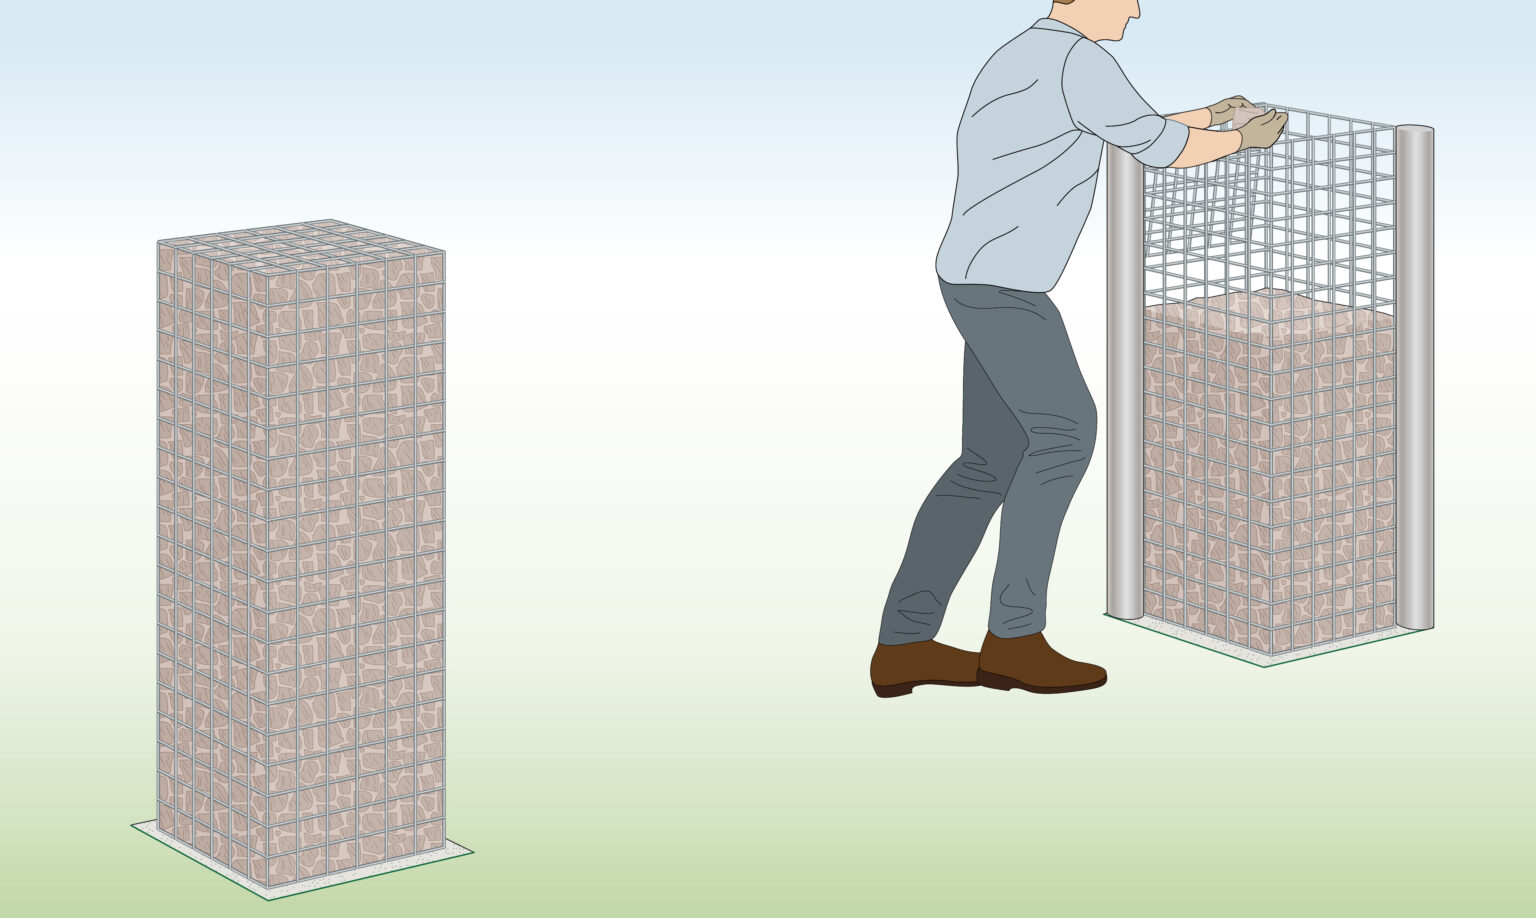
- Complete the columns by incorporating helicals into the structure, ensuring their proper placement, and then seal the lids securely to finalize the construction process.
Step 9) Make up the Height

- When assembling 2 baskets for height adjustment:
- Attach helicals on three sides to link the second cage with the first.
- Proceed to fill the top basket as well.
TIPS AND TRICKS
- Use spray paint or stones to mark the location of your gabion pillars clearly. This will help ensure precise placement and alignment.
- When digging the base, make sure you reach solid earth to provide a stable foundation. This is crucial for the stability of the pillars.
- When installing support posts, ensure they are inserted to a depth of one-third the height of the gabion column. Sealing the tops of hollow poles prevents water damage and extends the life of the posts.
- Follow the recommended gravel layer thickness based on the height of your pillar. This ensures adequate support and prevents shifting.
- Use a plate compactor or a spade to compact the basecourse material thoroughly. This step is essential for the stability and durability of your gabion pillars
- You can calculate how much stone you’ll need using our stone calculator.
FURTHER READING
- Gabion Fence Installation: A guide for building a gabion fence, using pillars.
- DIY Gabion Letterbox: A step-by-step guide for creating a gabion letterbox, which can be attached to pillars.
VIDEO


Published by