
DIY Gabion Water Feature

Below you will find a step by step guide on how to install a DIY water feature with Gabion baskets.
- Experience Required: Medium
- Tools Required: Protective gloves, Tape measure, Spray paint, Shovel, Level, Tamper
- Materials Required: Gabion baskets, Helicals or Tying wire, Gabion stone, Geotextile, Pond container, Basecourse or gravel, Water pump, Tubing, Spouts, Concrete (optional)
Step 1) Plan & Measure Your Space
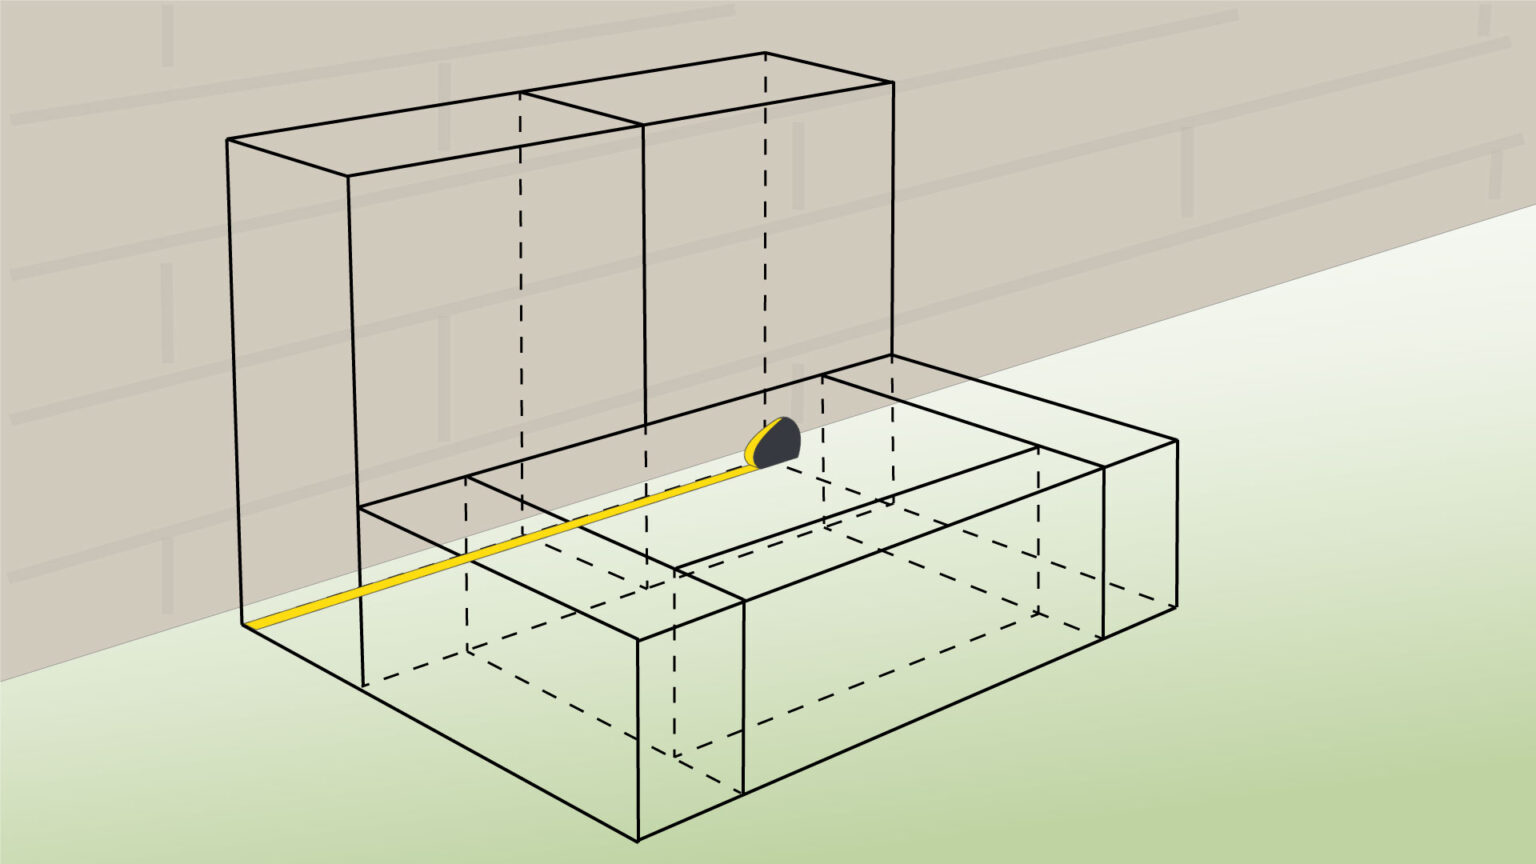
- Start by measuring your space and begin planning your design.
- Choose the shape, size, and style of your DIY gabion water feature.
Step 2) Measure Container, Calculate Gabions
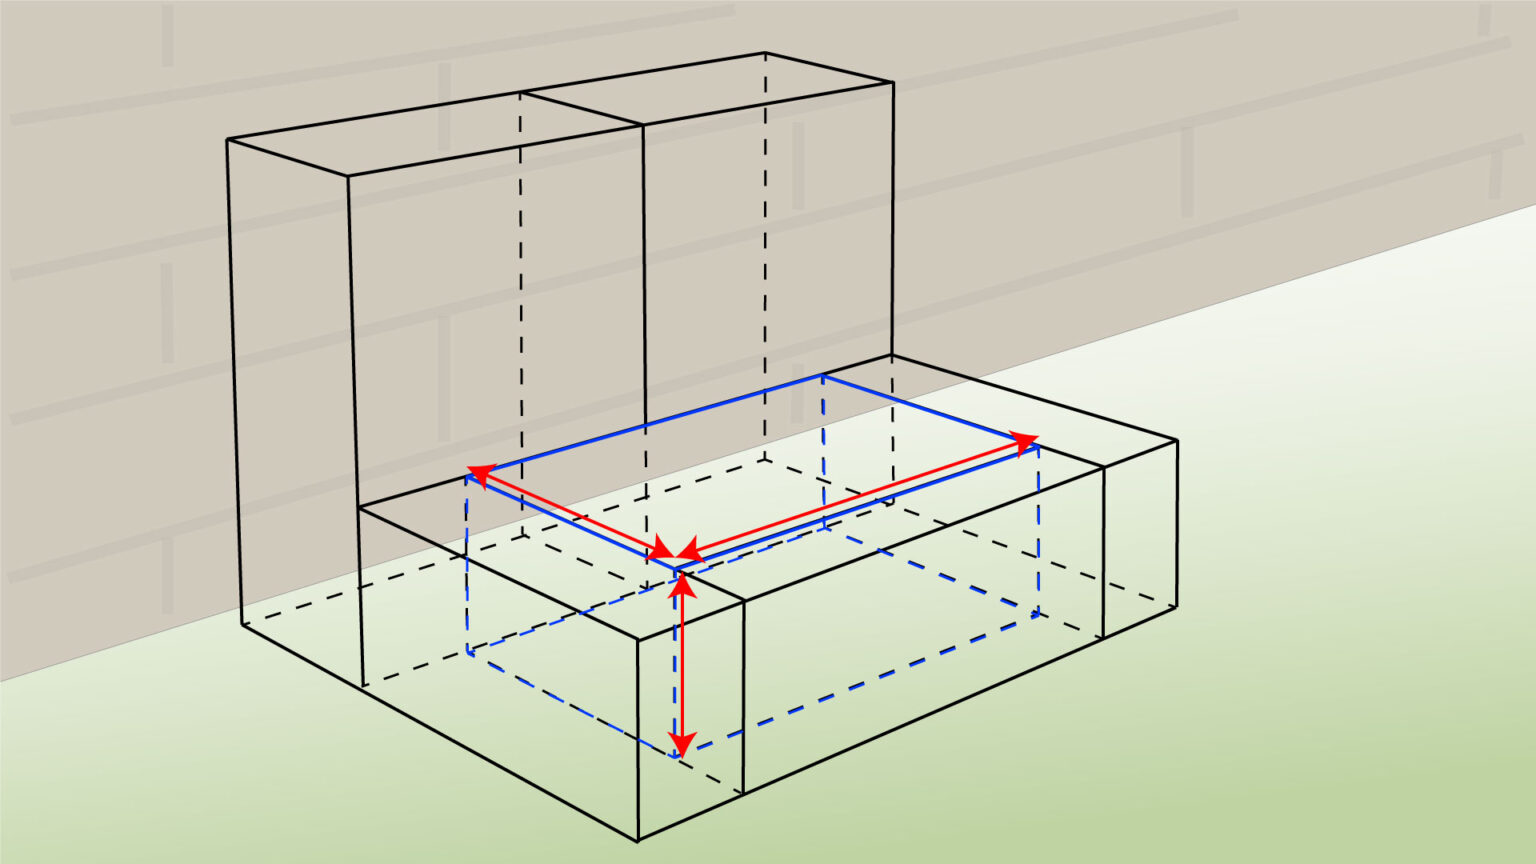
- Measure your pond container, then work out how many baskets you need and what sizes, based on your plan.
Step 3) Mark Location
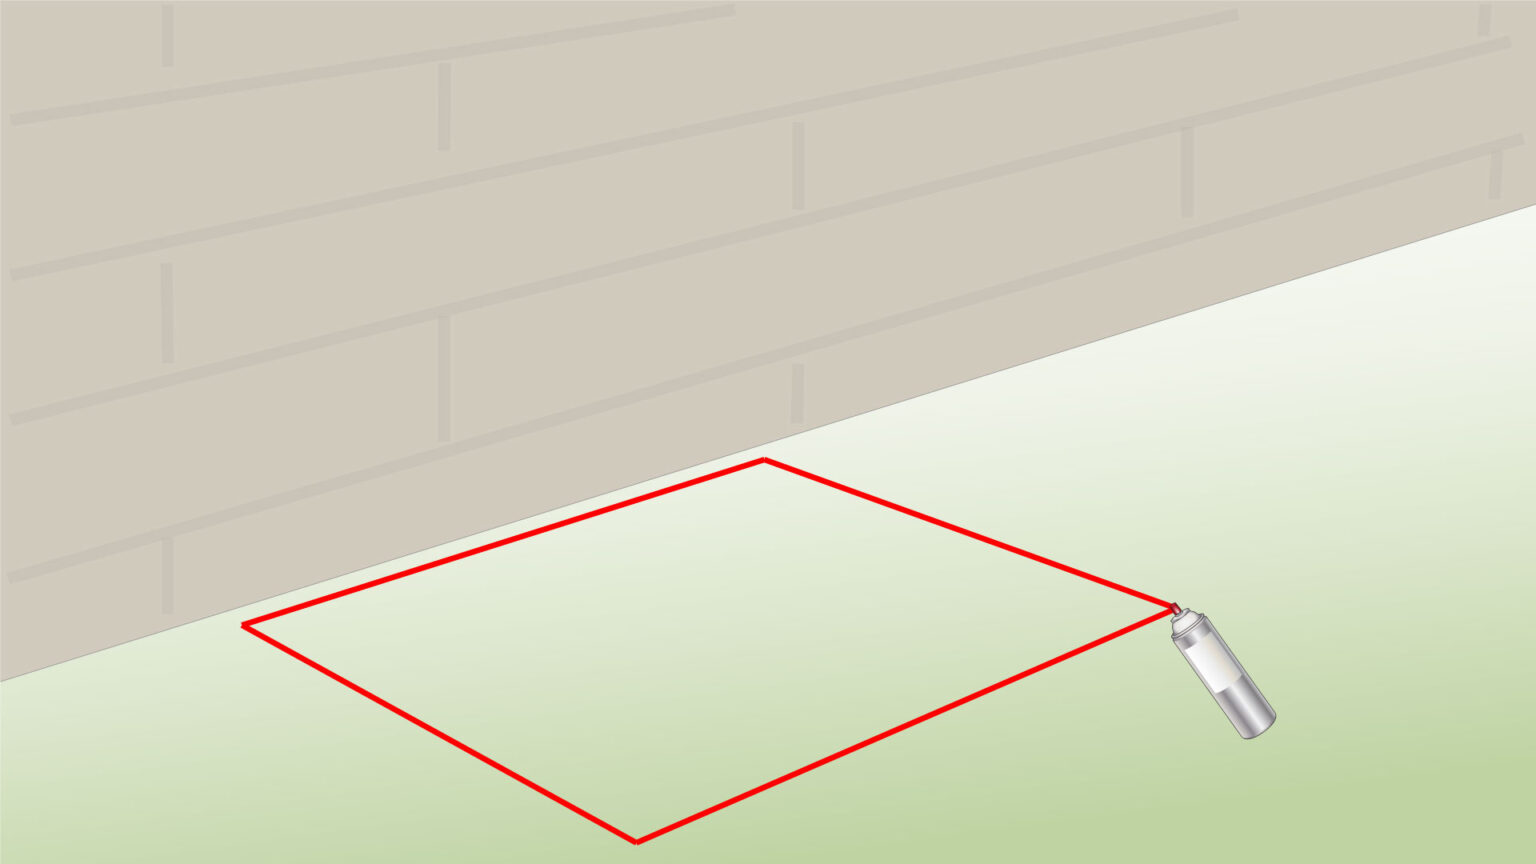
- Use spray paint to mark the spot where you plan to place the baskets and the pond container.
Step 4) Dig a Base
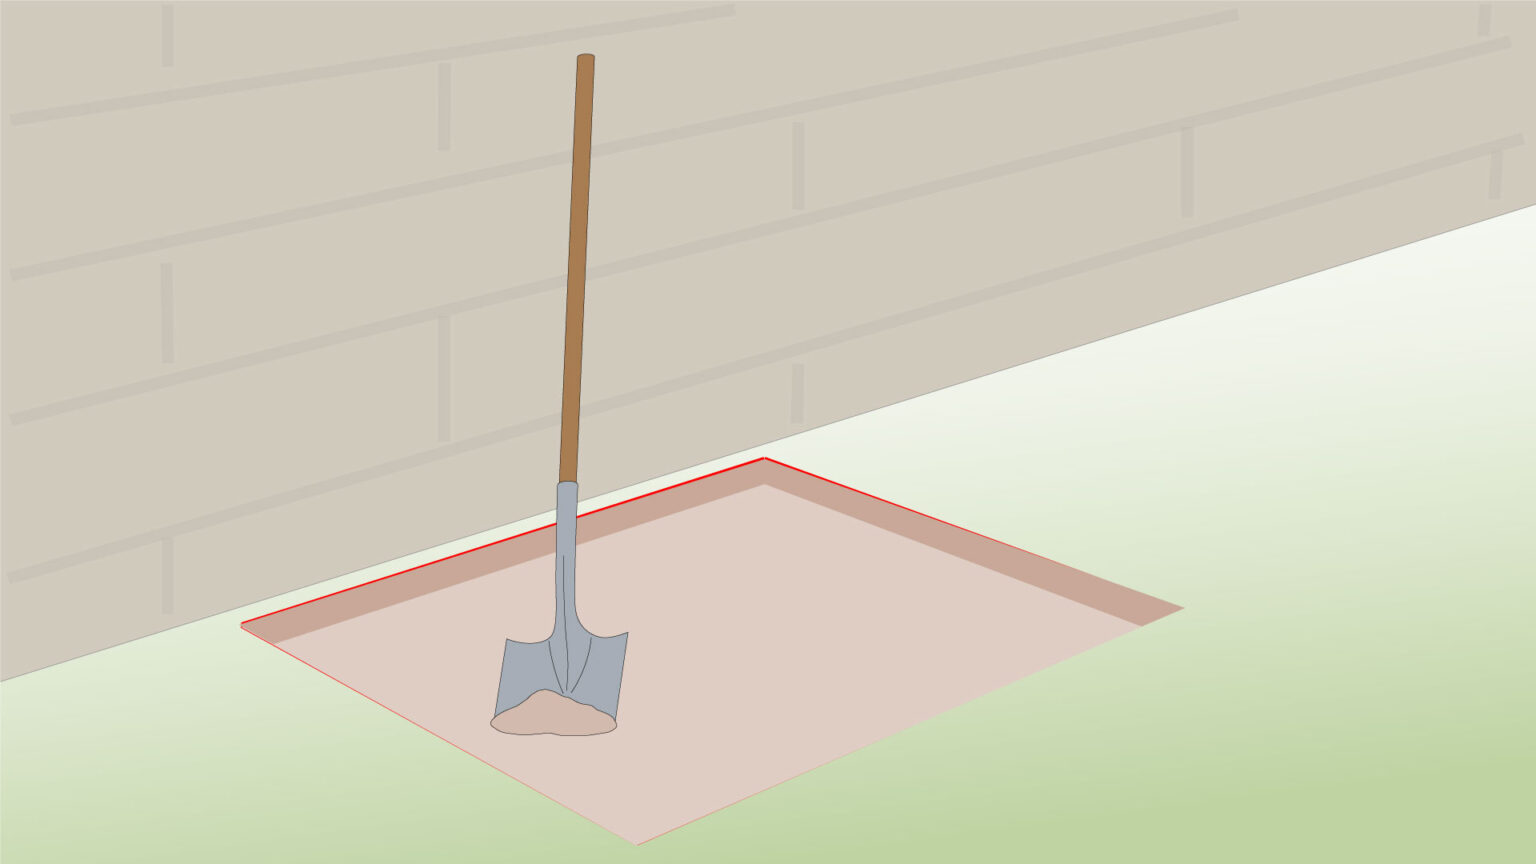
- Begin by digging a base for your gabion fountain, making sure it’s level.
Step 5) Add Geotextile
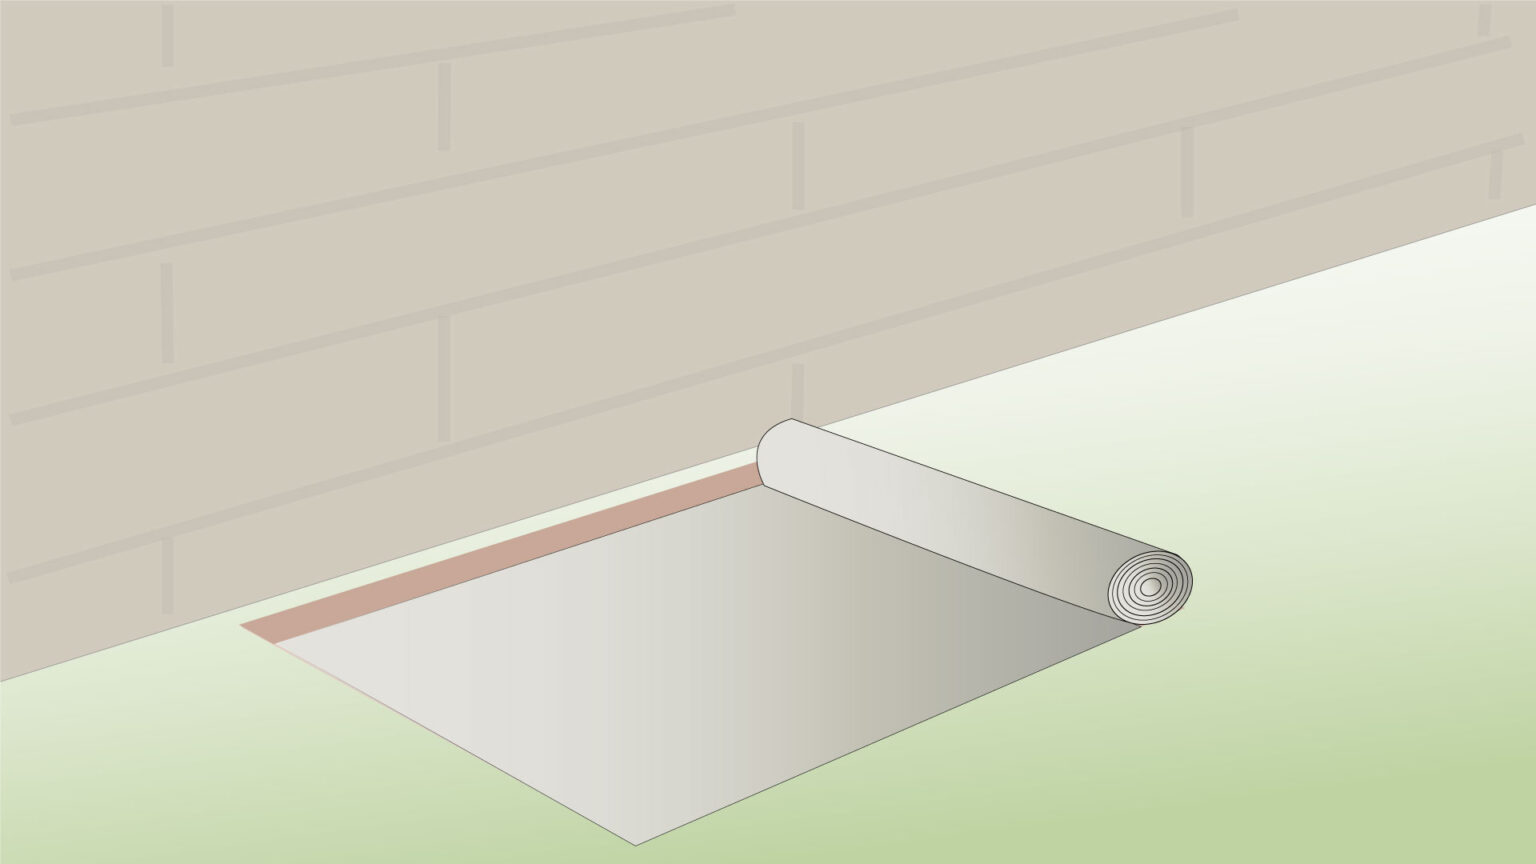
- Place a layer of geotextile over the soil to help with stability and drainage.
Step 6) Add Basecourse

- Next, add a layer of gravel or basecourse on top of the geotextile.
- If the soil is soft or your structure is larger, you can pour a concrete foundation instead, for added strength.
Step 7) Compact Basecourse
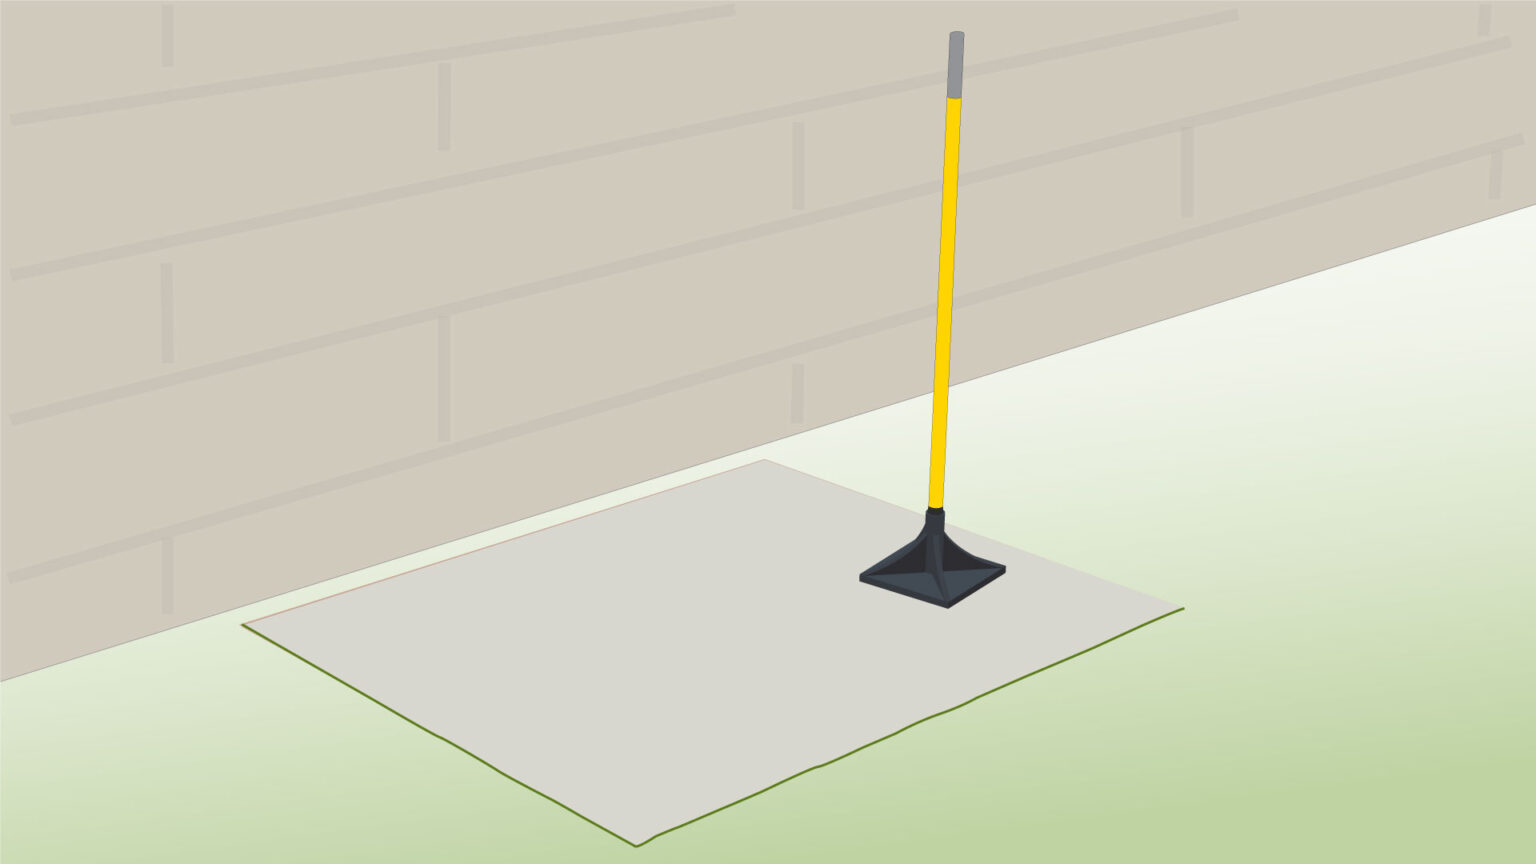
- Compact the gravel firmly using a hand tamper to create a solid, level base.
Step 8) Position the Pond Container
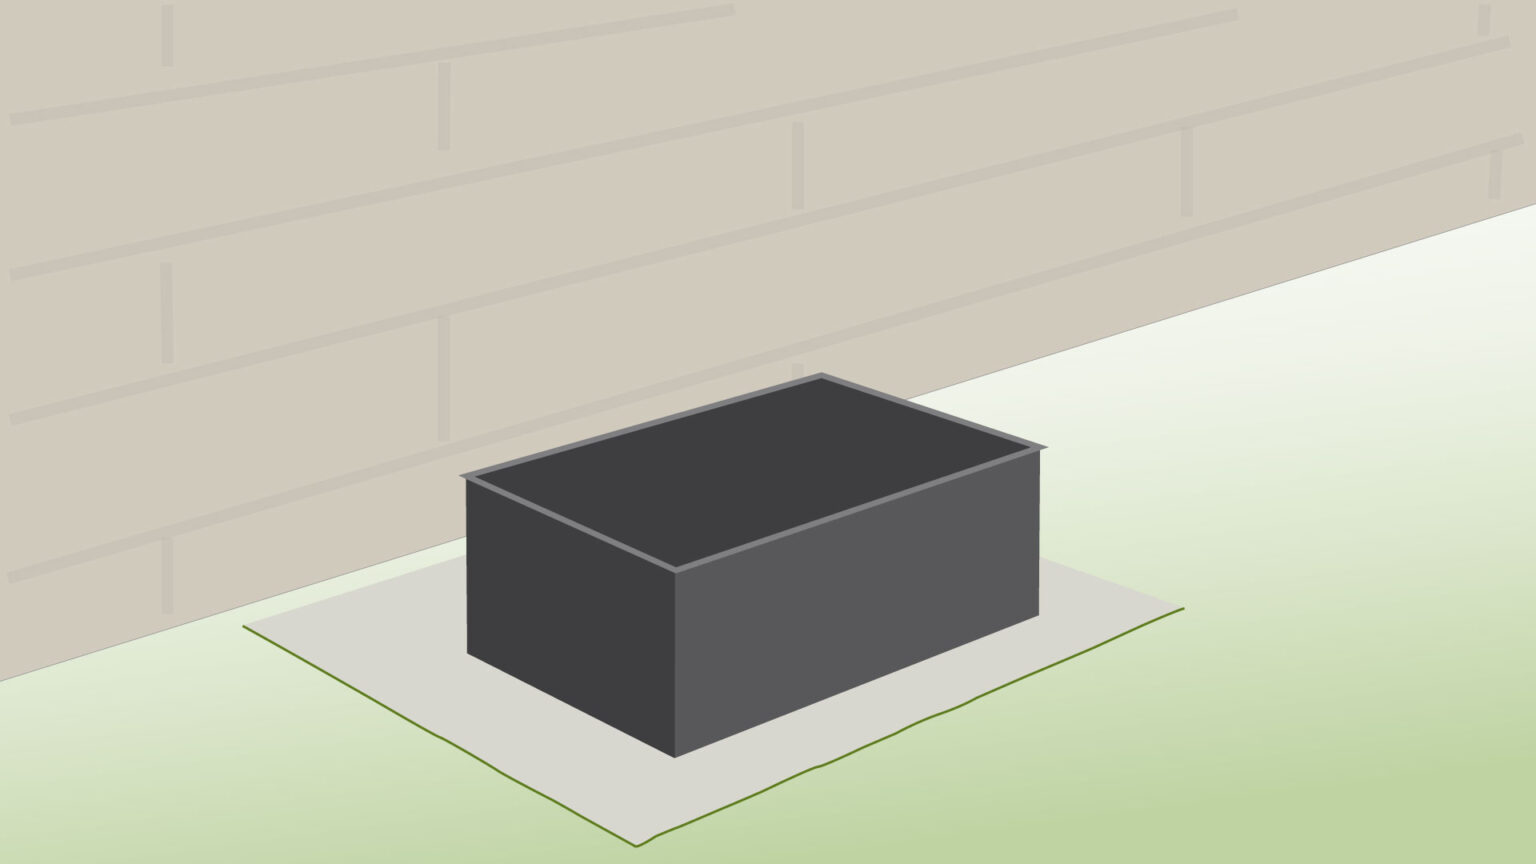
- Place the pond container in its planned spot.
- Make sure it sits level on the compacted base.
Step 9) Assemble Gabion
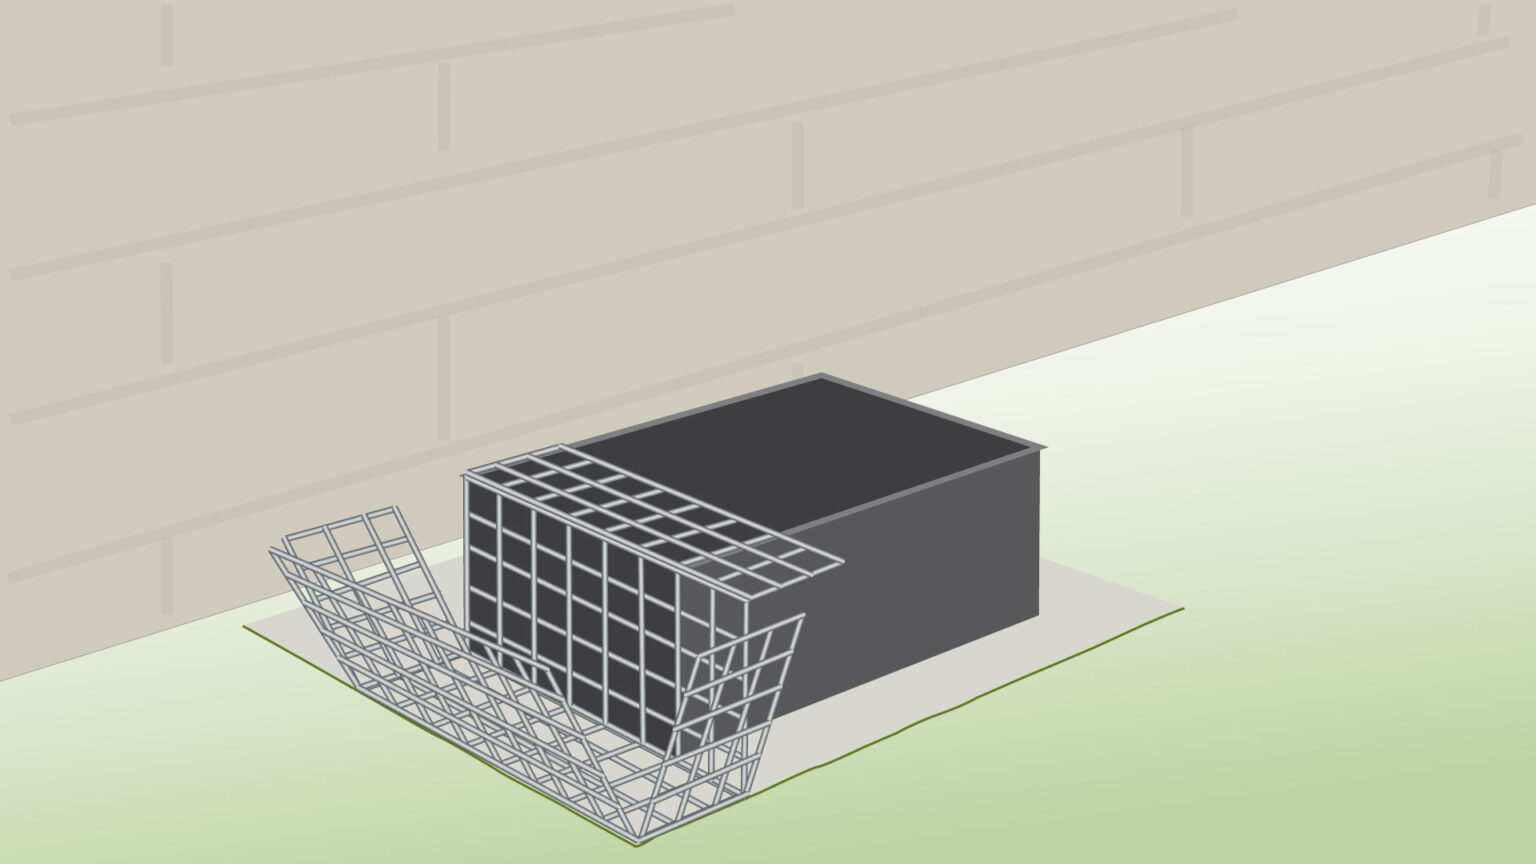
- Lay the first basket flat on the ground.
- Begin assembling it by securing the corners with helicals, but leave the adjacent corners open for now.
Step 10) Repeat with All Gabions
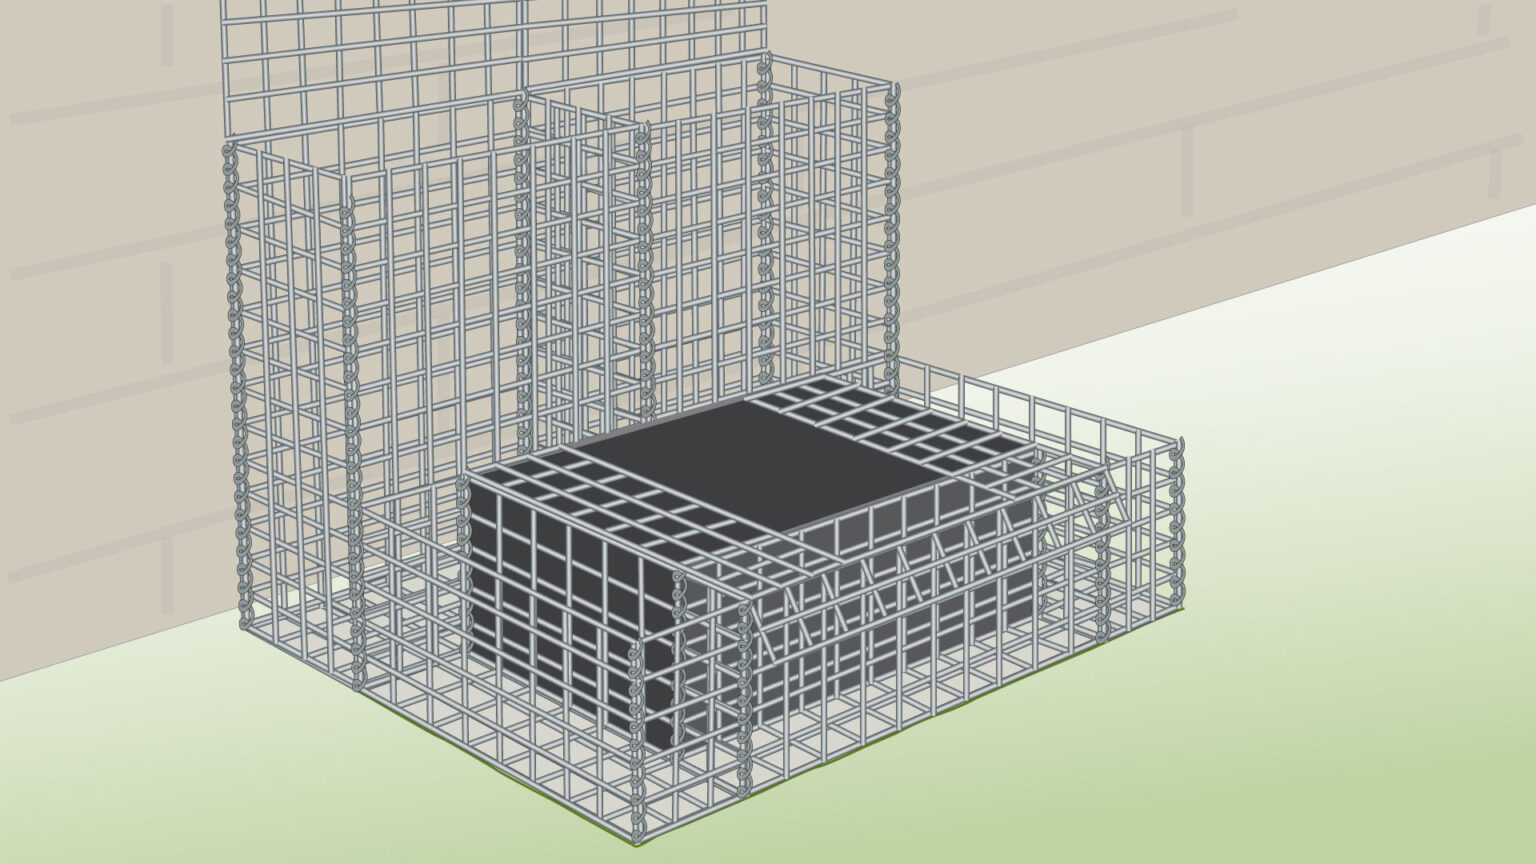
- Repeat the same steps for the remaining baskets.
- Use helicals to secure each corner and also where the gabions connect to each other.
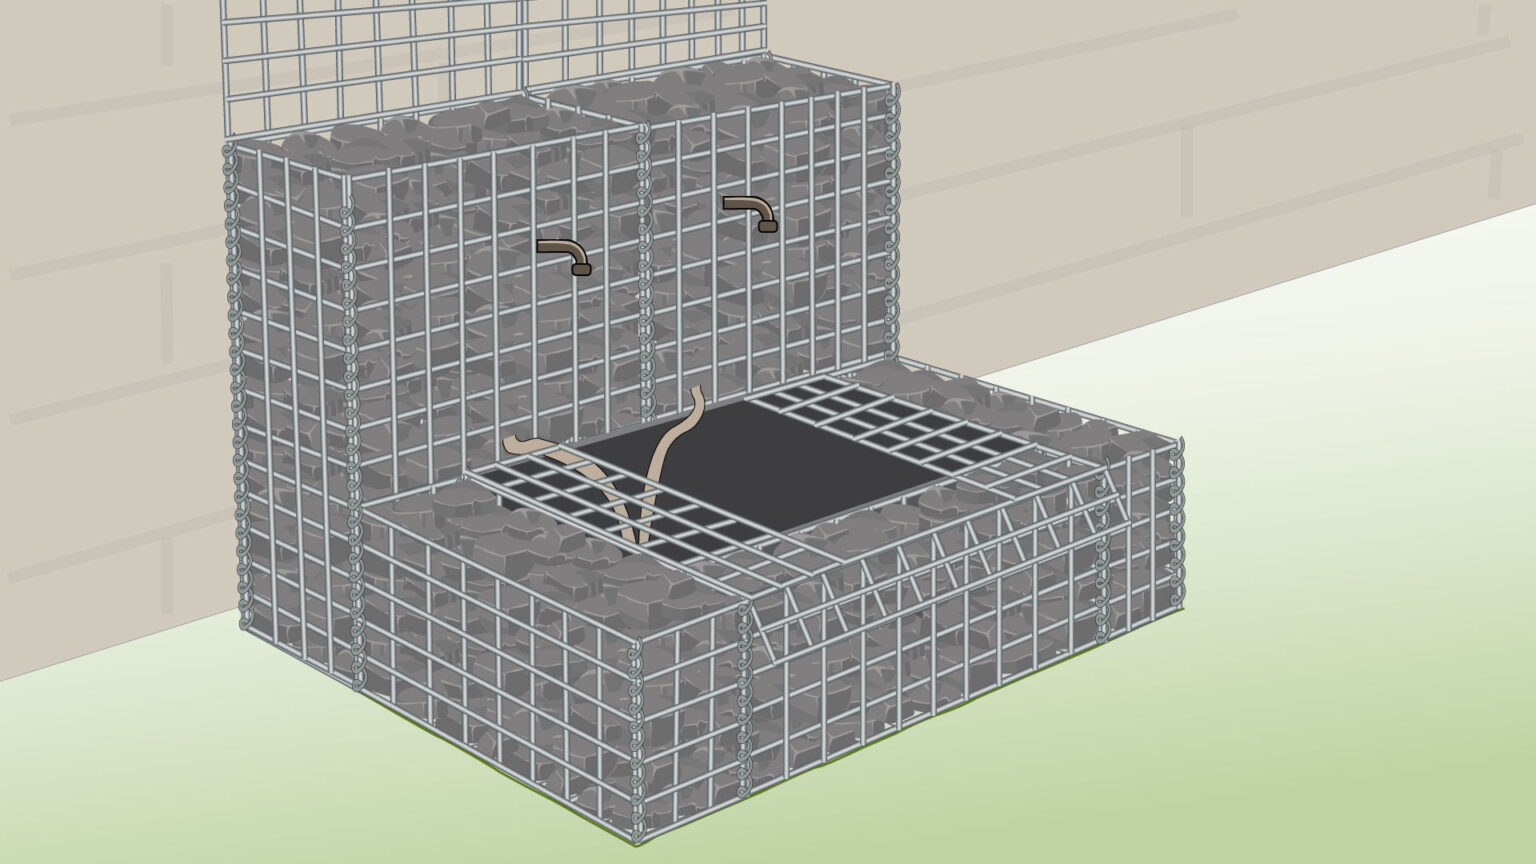
Step 11) Install the Pump System
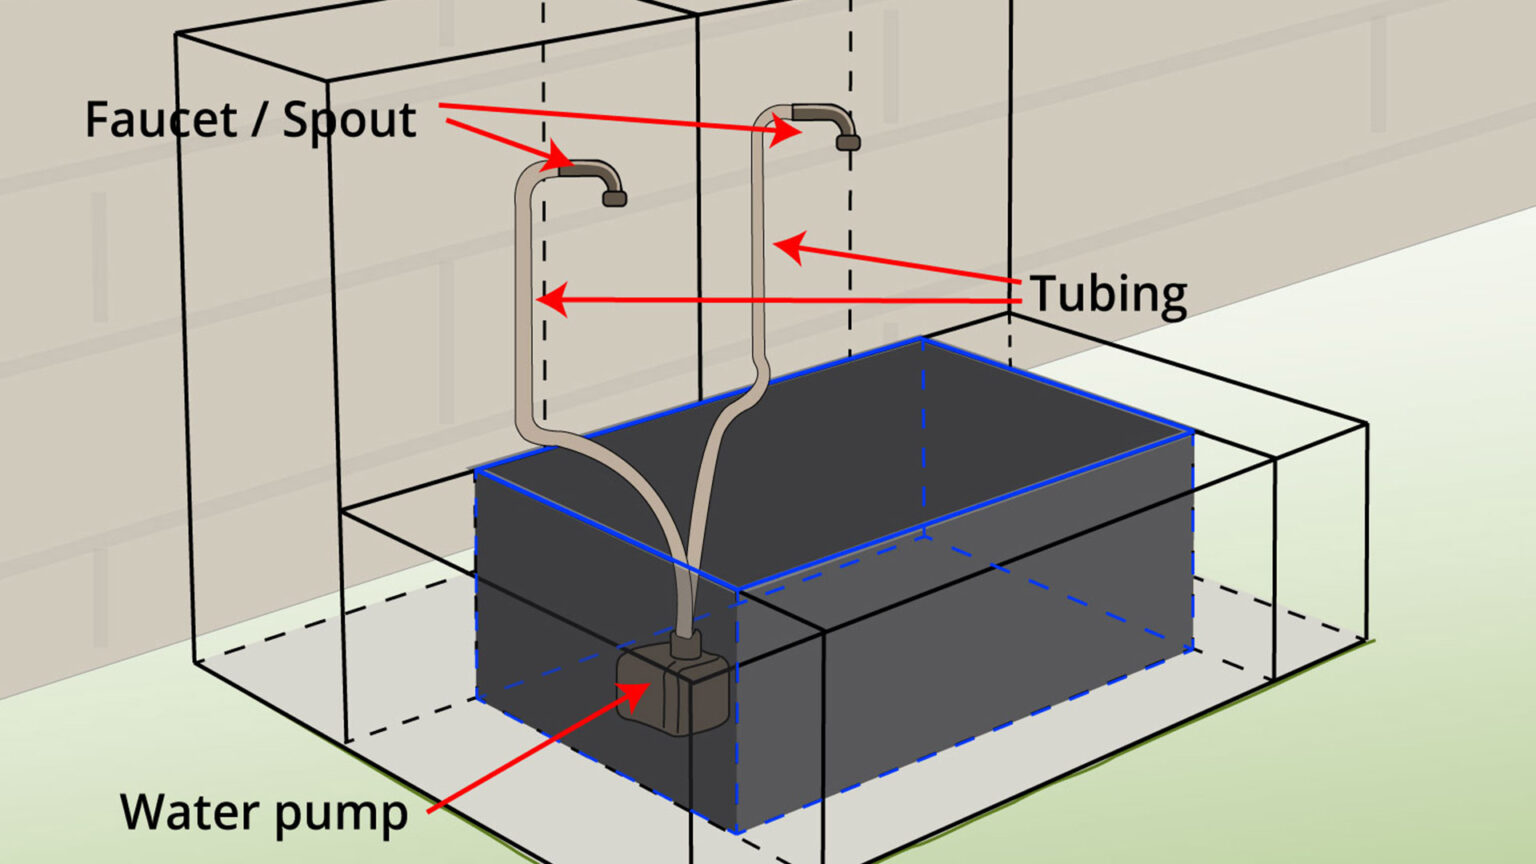
- Place the pump and run the tubing through the back or inside the baskets, ending where the water will flow out.
- Fit the faucets there.
- If unsure about setup, consult a landscaper or garden pond expert.
Step 12) Check the System

- Run the pump and test the flow, making adjustments if needed.
Step 13) Fill with Stones
- Fill your baskets with stones.
Step 14) Close the Lids
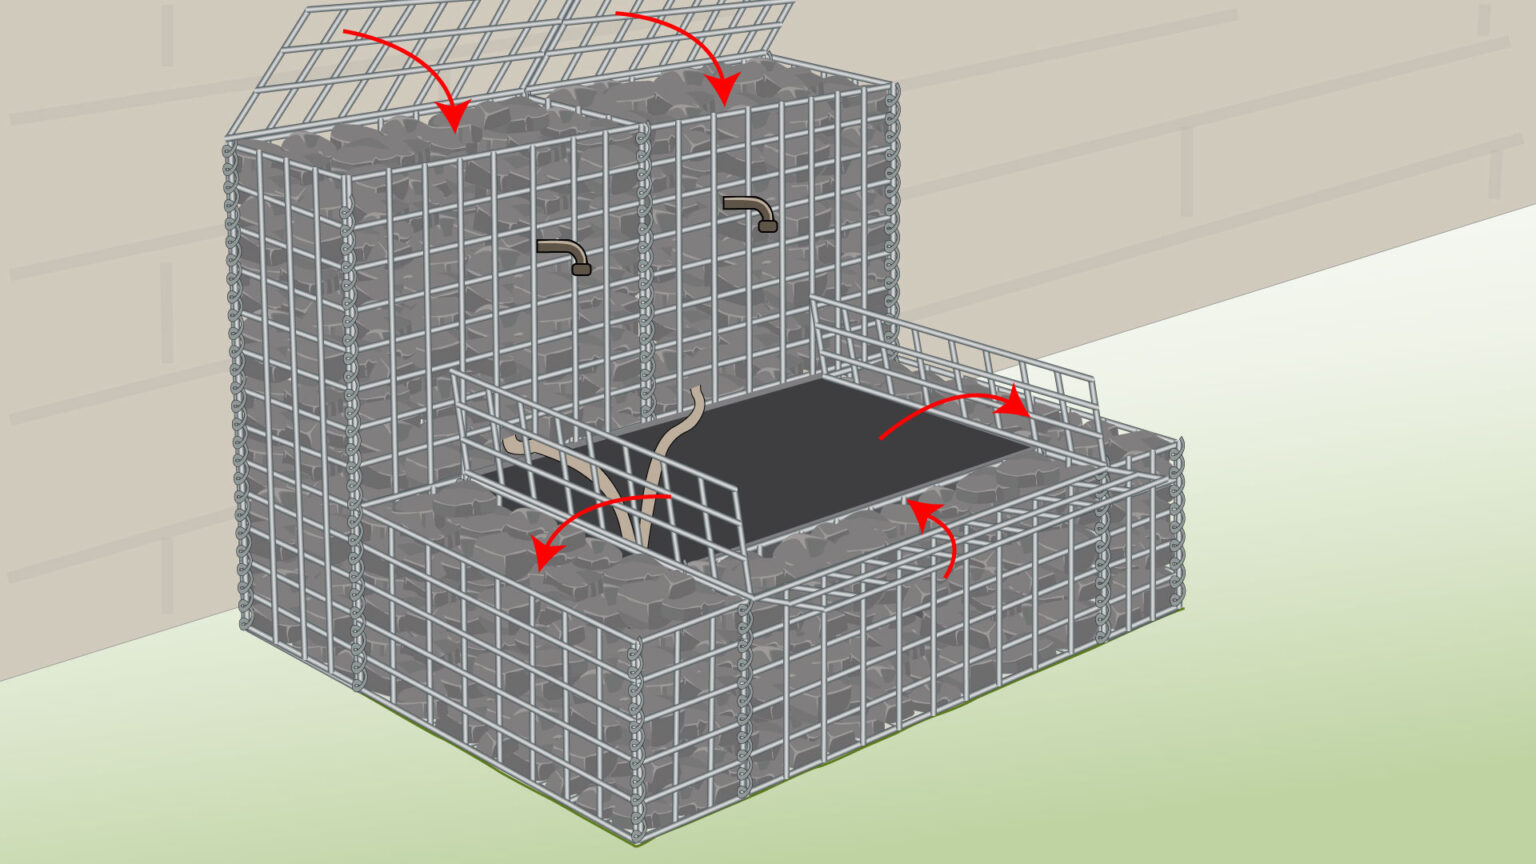
- Fold the lids down to close the baskets.
Step 15) Secure the Lids
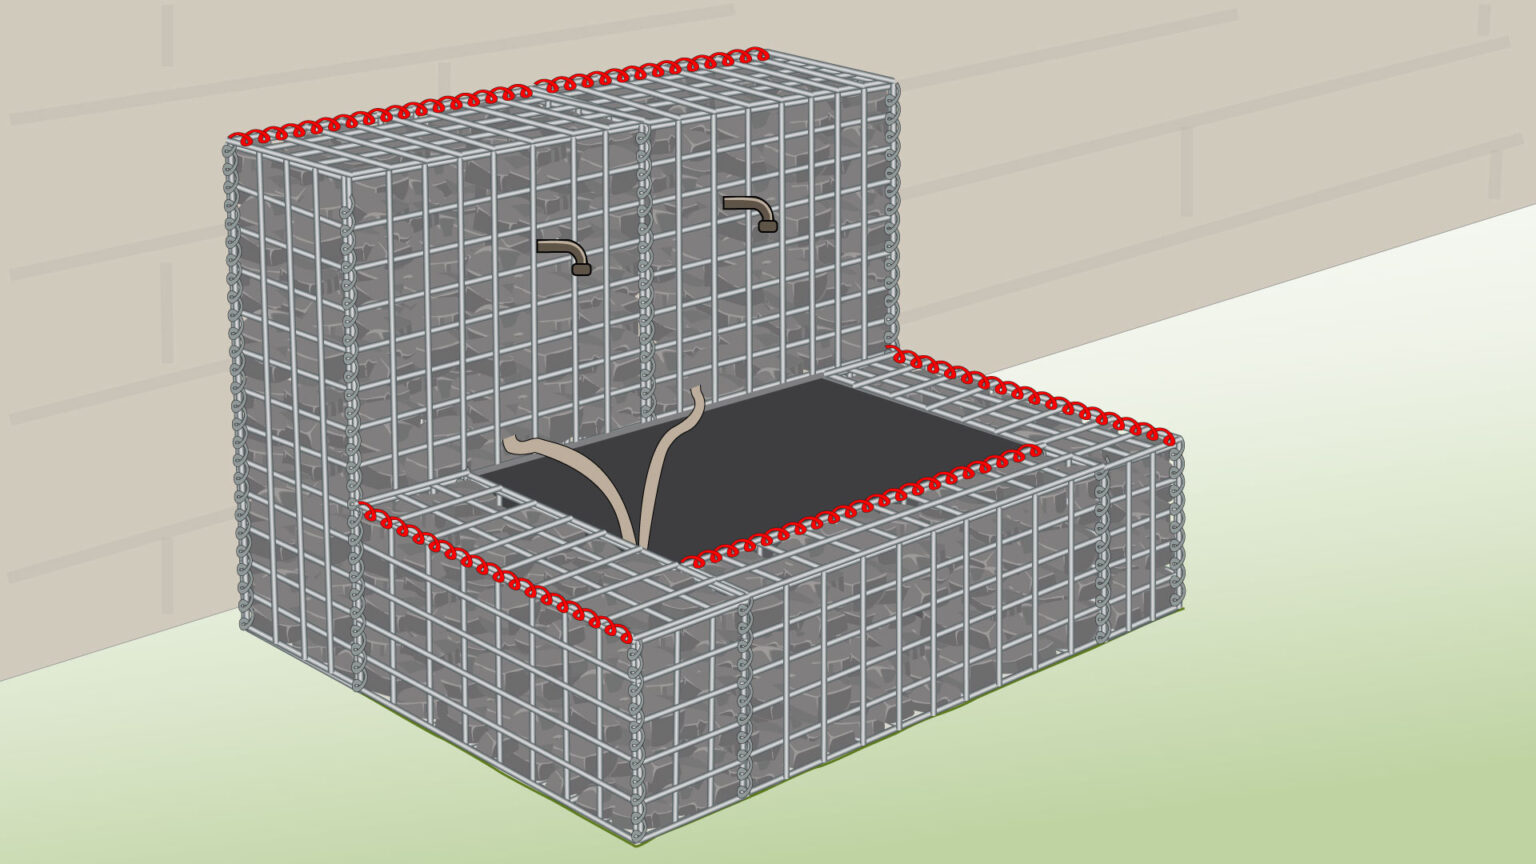
- Secure the lids with helicals or tying wire.
Step 16) Finished Project
- Your DIY gabion water feature is now finished!
- You can start adding decorations like plants, lighting, or any other features you like.
Tips and Tricks
Before starting your gabion wall project, it’s important to plan carefully and consider a few key factors. The points below are based on our team’s experience designing and installing gabion structures.
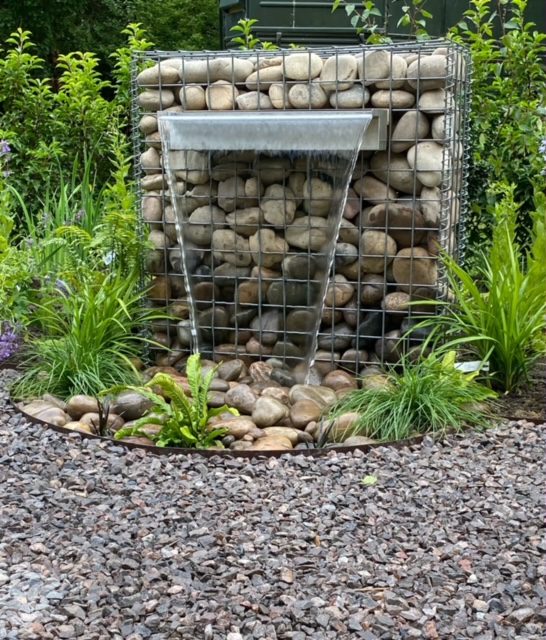
- Before you begin, decide what kind of water feature you want. Instead of a pond container, you can use a pond liner.
- Choose the outlet: a spout, wall pipe, tap, or a waterfall blade.
- Gather your gabion water feature ideas: there are endless ways to design your fountain, with different shapes, styles, and layouts.
- Place the feature near an outdoor waterproof cable if your pump needs electricity.
- Add any decorations you like, such as plants or other features. You can also install LED lights for night-time lighting.
- If you’re not sure how to set up the pump, or how much water you need, ask a landscaper or garden pond expert.
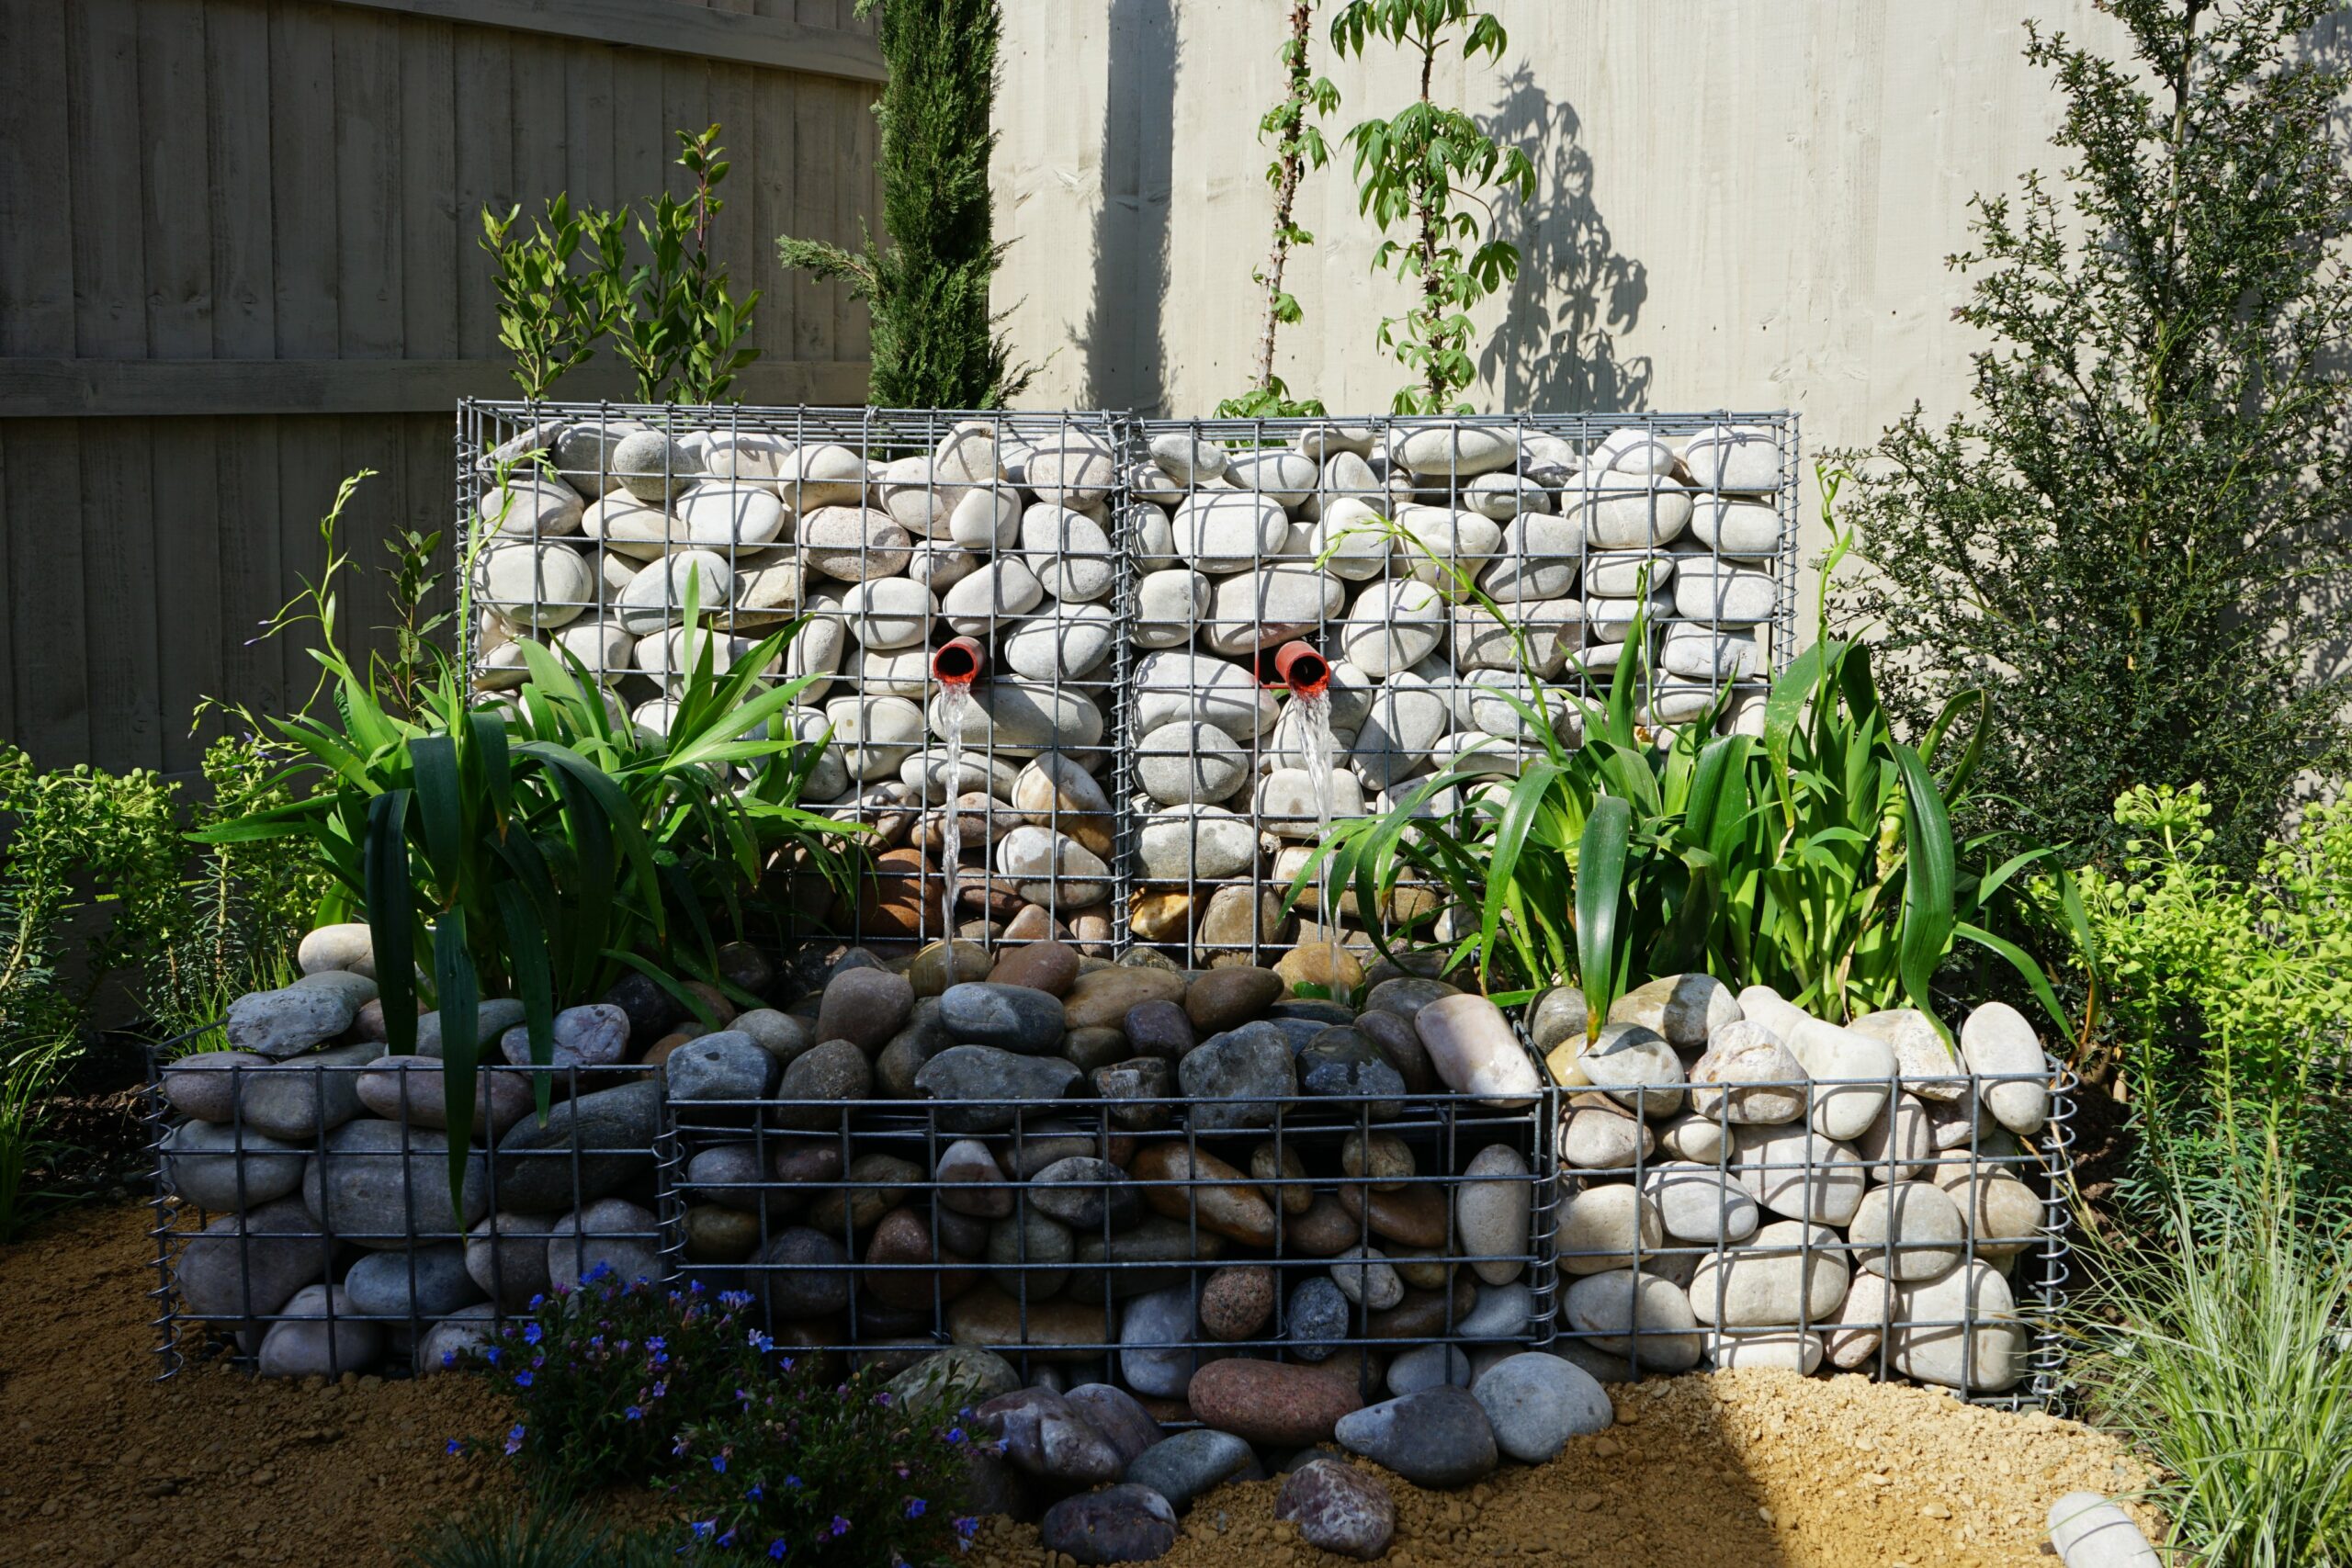
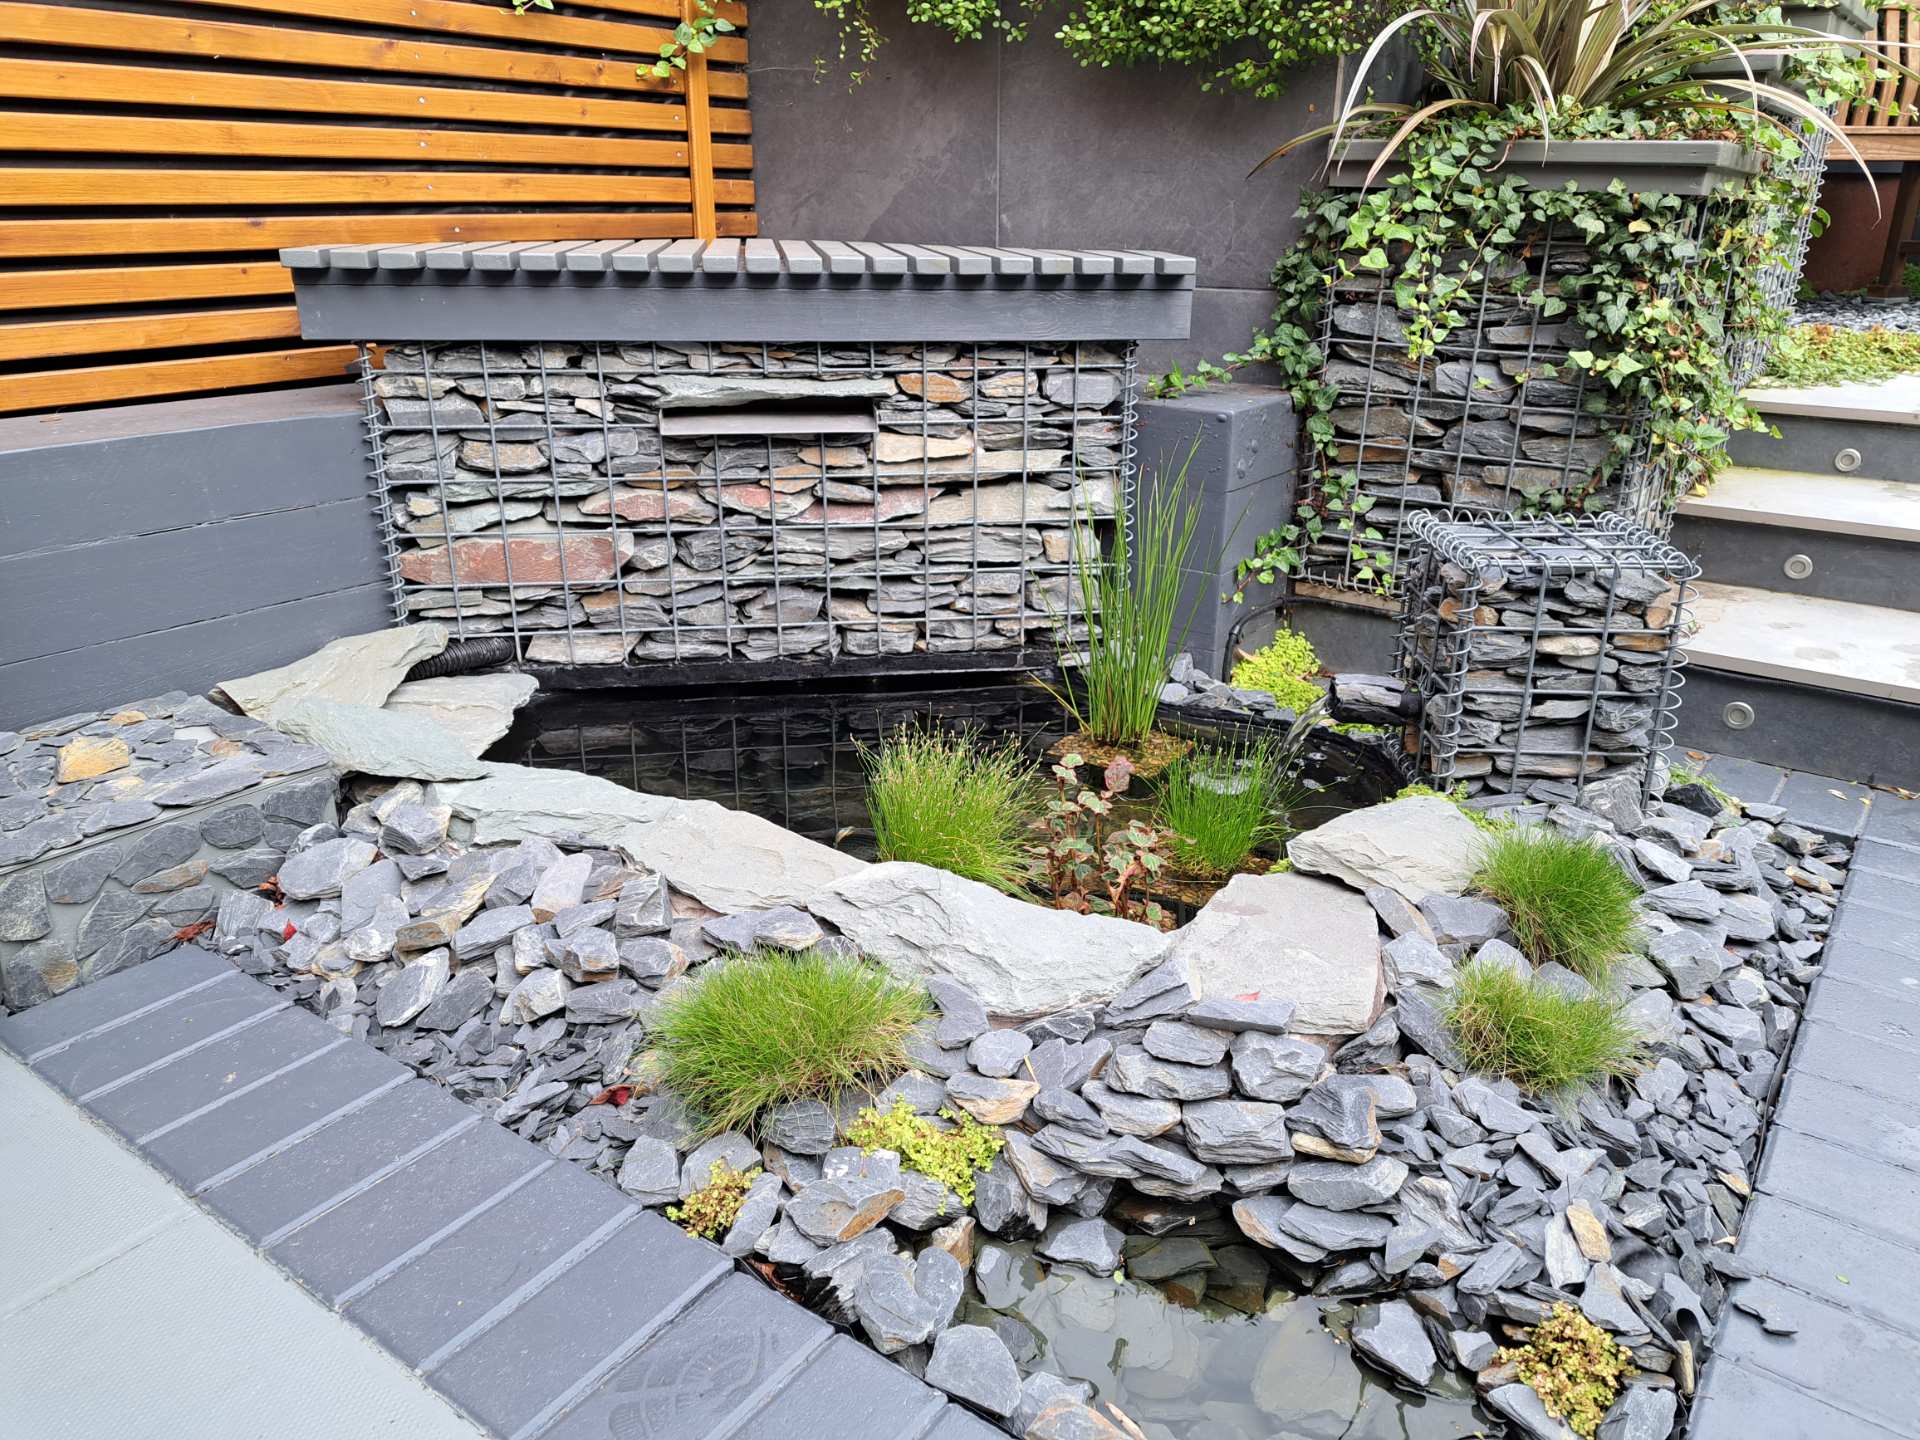
Real Life Image
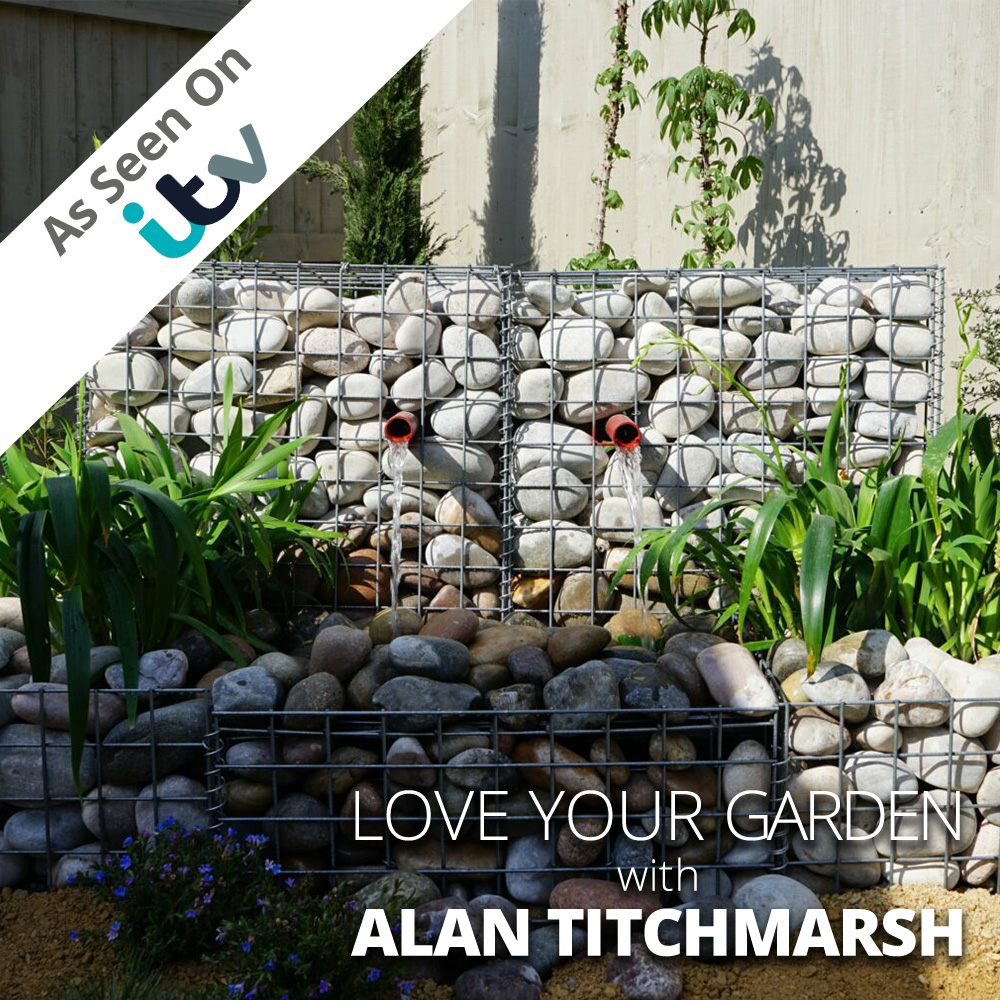
- Episode 7, series 10 of ITV Love Your Garden, was broadcast on 31st August 2021.
- Alan Titchmarsh and the team visited Dudley to give James and his family’s garden a full makeover.
- Check out the finished project here.
FURTHER READING
- How to Install Gabion Baskets – A guide showing you how to assemble baskets.
- How to Fill Gabions – Learn how to fill cages.
- How to Lace Gabion Baskets – Step by step instructions on how to lace baskets.
- Gabion Learning Hub – a library of help videos
- Shop Gabions – we sell certified and approved baskets
- Shop Gabion stone – we sell responsibly sourced dark and light stone to fill your Gabions
VIDEO

Written By
This blog was created by our Technical Illustrator, Timi and reviewed by our Founder, John.
After the Love Your Garden team built a gabion water feature we wanted to create a guide so other could recreate this project. Below you’ll find real life images of this project and other similar gabion builds created by our customers. We’ve opted for technical illustrations for the instructions found in this blog because they provide better clarity on mesh placement and structural details that can get lost in real-life photography.


Published by
