

How to Build a Cat Enclosure with Chicken Wire

Below you will find a step by step guide on how to build a cat enclosure with chicken wire mesh.

- Experience Required: Medium
- Tools Required: Protective gloves, Tape measure, Marker, Utility square, Wire cutters, Hammer, Hacksaw, Drill
- Materials Required: Chicken wire, Timber battens (like two-by-fours), Staples, Screws, Hinges, Latch
Step 1) Design Scheme
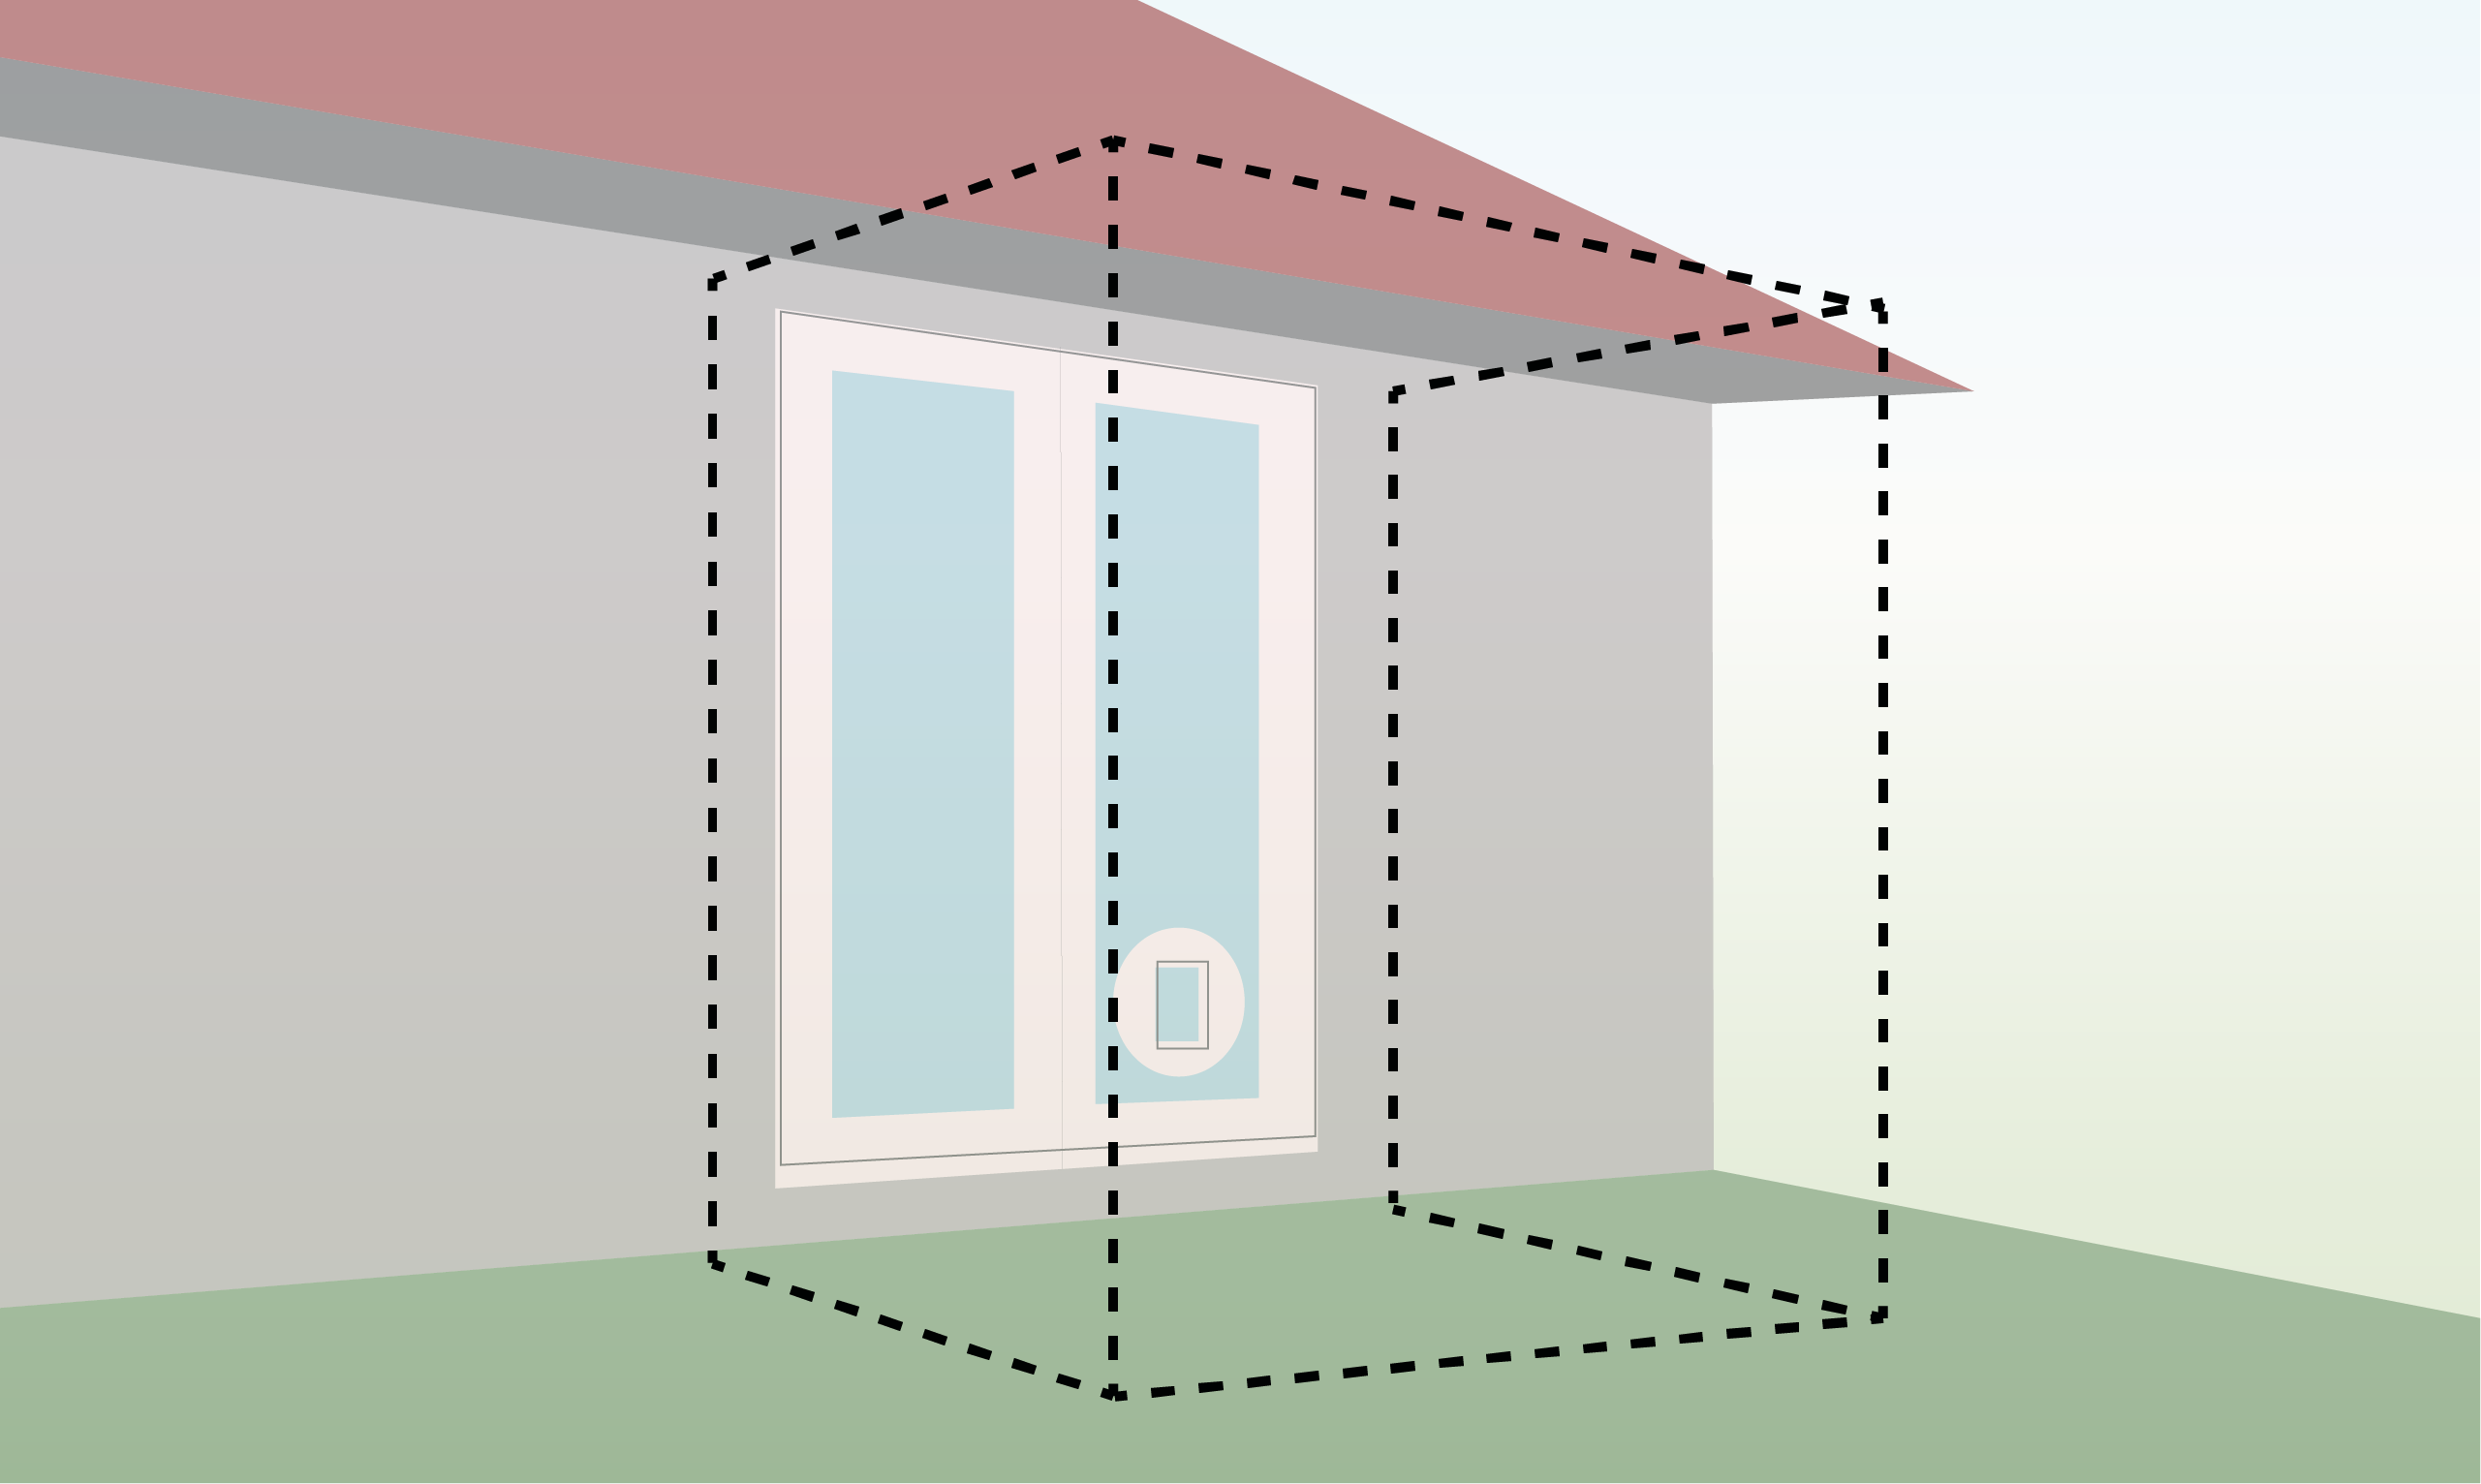
- Measure your area and plan your chicken wire cat enclosure:
- Allocate 1-2 square meters per cat.
- Provide feline access via window, door or pet flap & include a door for yourself.
Step 2) Take the Measurements of Wood

- Grab your treated timber battens and a tape measure.
- Measure and mark the pieces required to craft the structural frames of the enclosure.
Step 3) Cut Battens

- Use a stable, horizontal surface to lay the battens on as you cut them to size with a hacksaw.
- Remember to wear protective gear throughout the process!
Step 4) Connect Batten Pieces
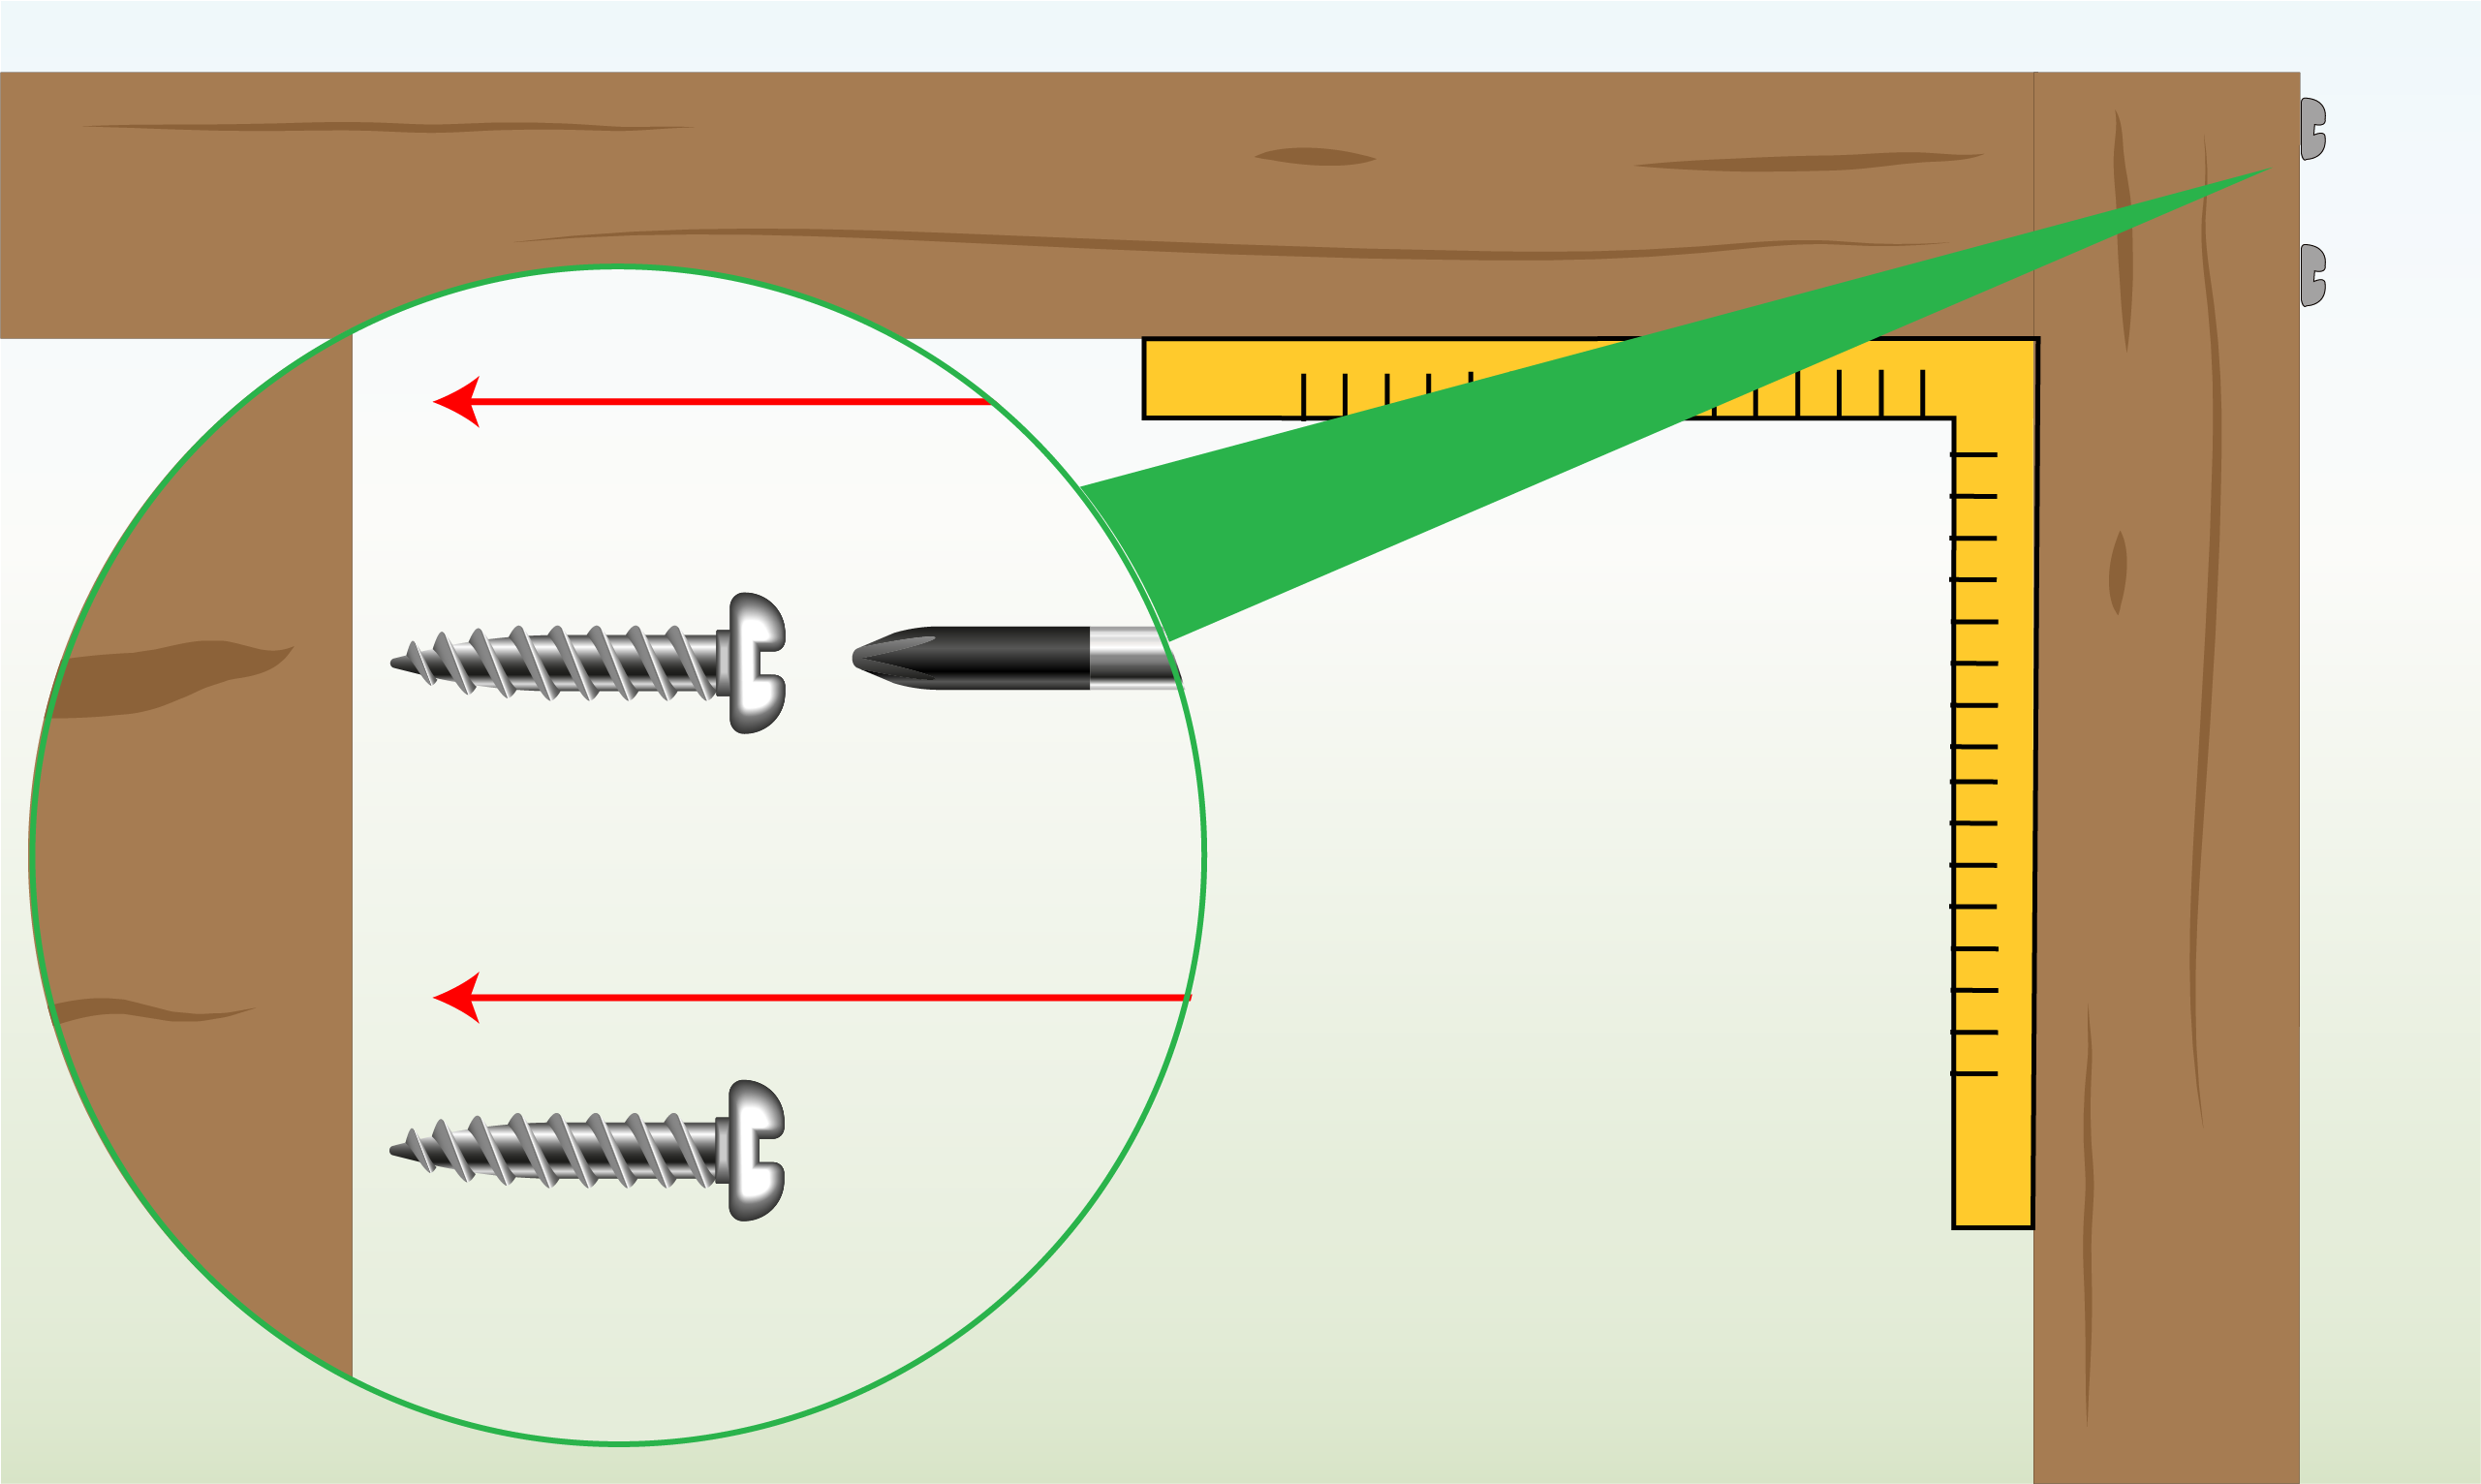
- Make sure the angles are precise by using a utility square.
- Alternatively use glue to connect the battens with wood, then secure with screws and drill.
- Pre-drilling and countersinking your joins will make the finish more secure.
Step 5) Build Frameworks
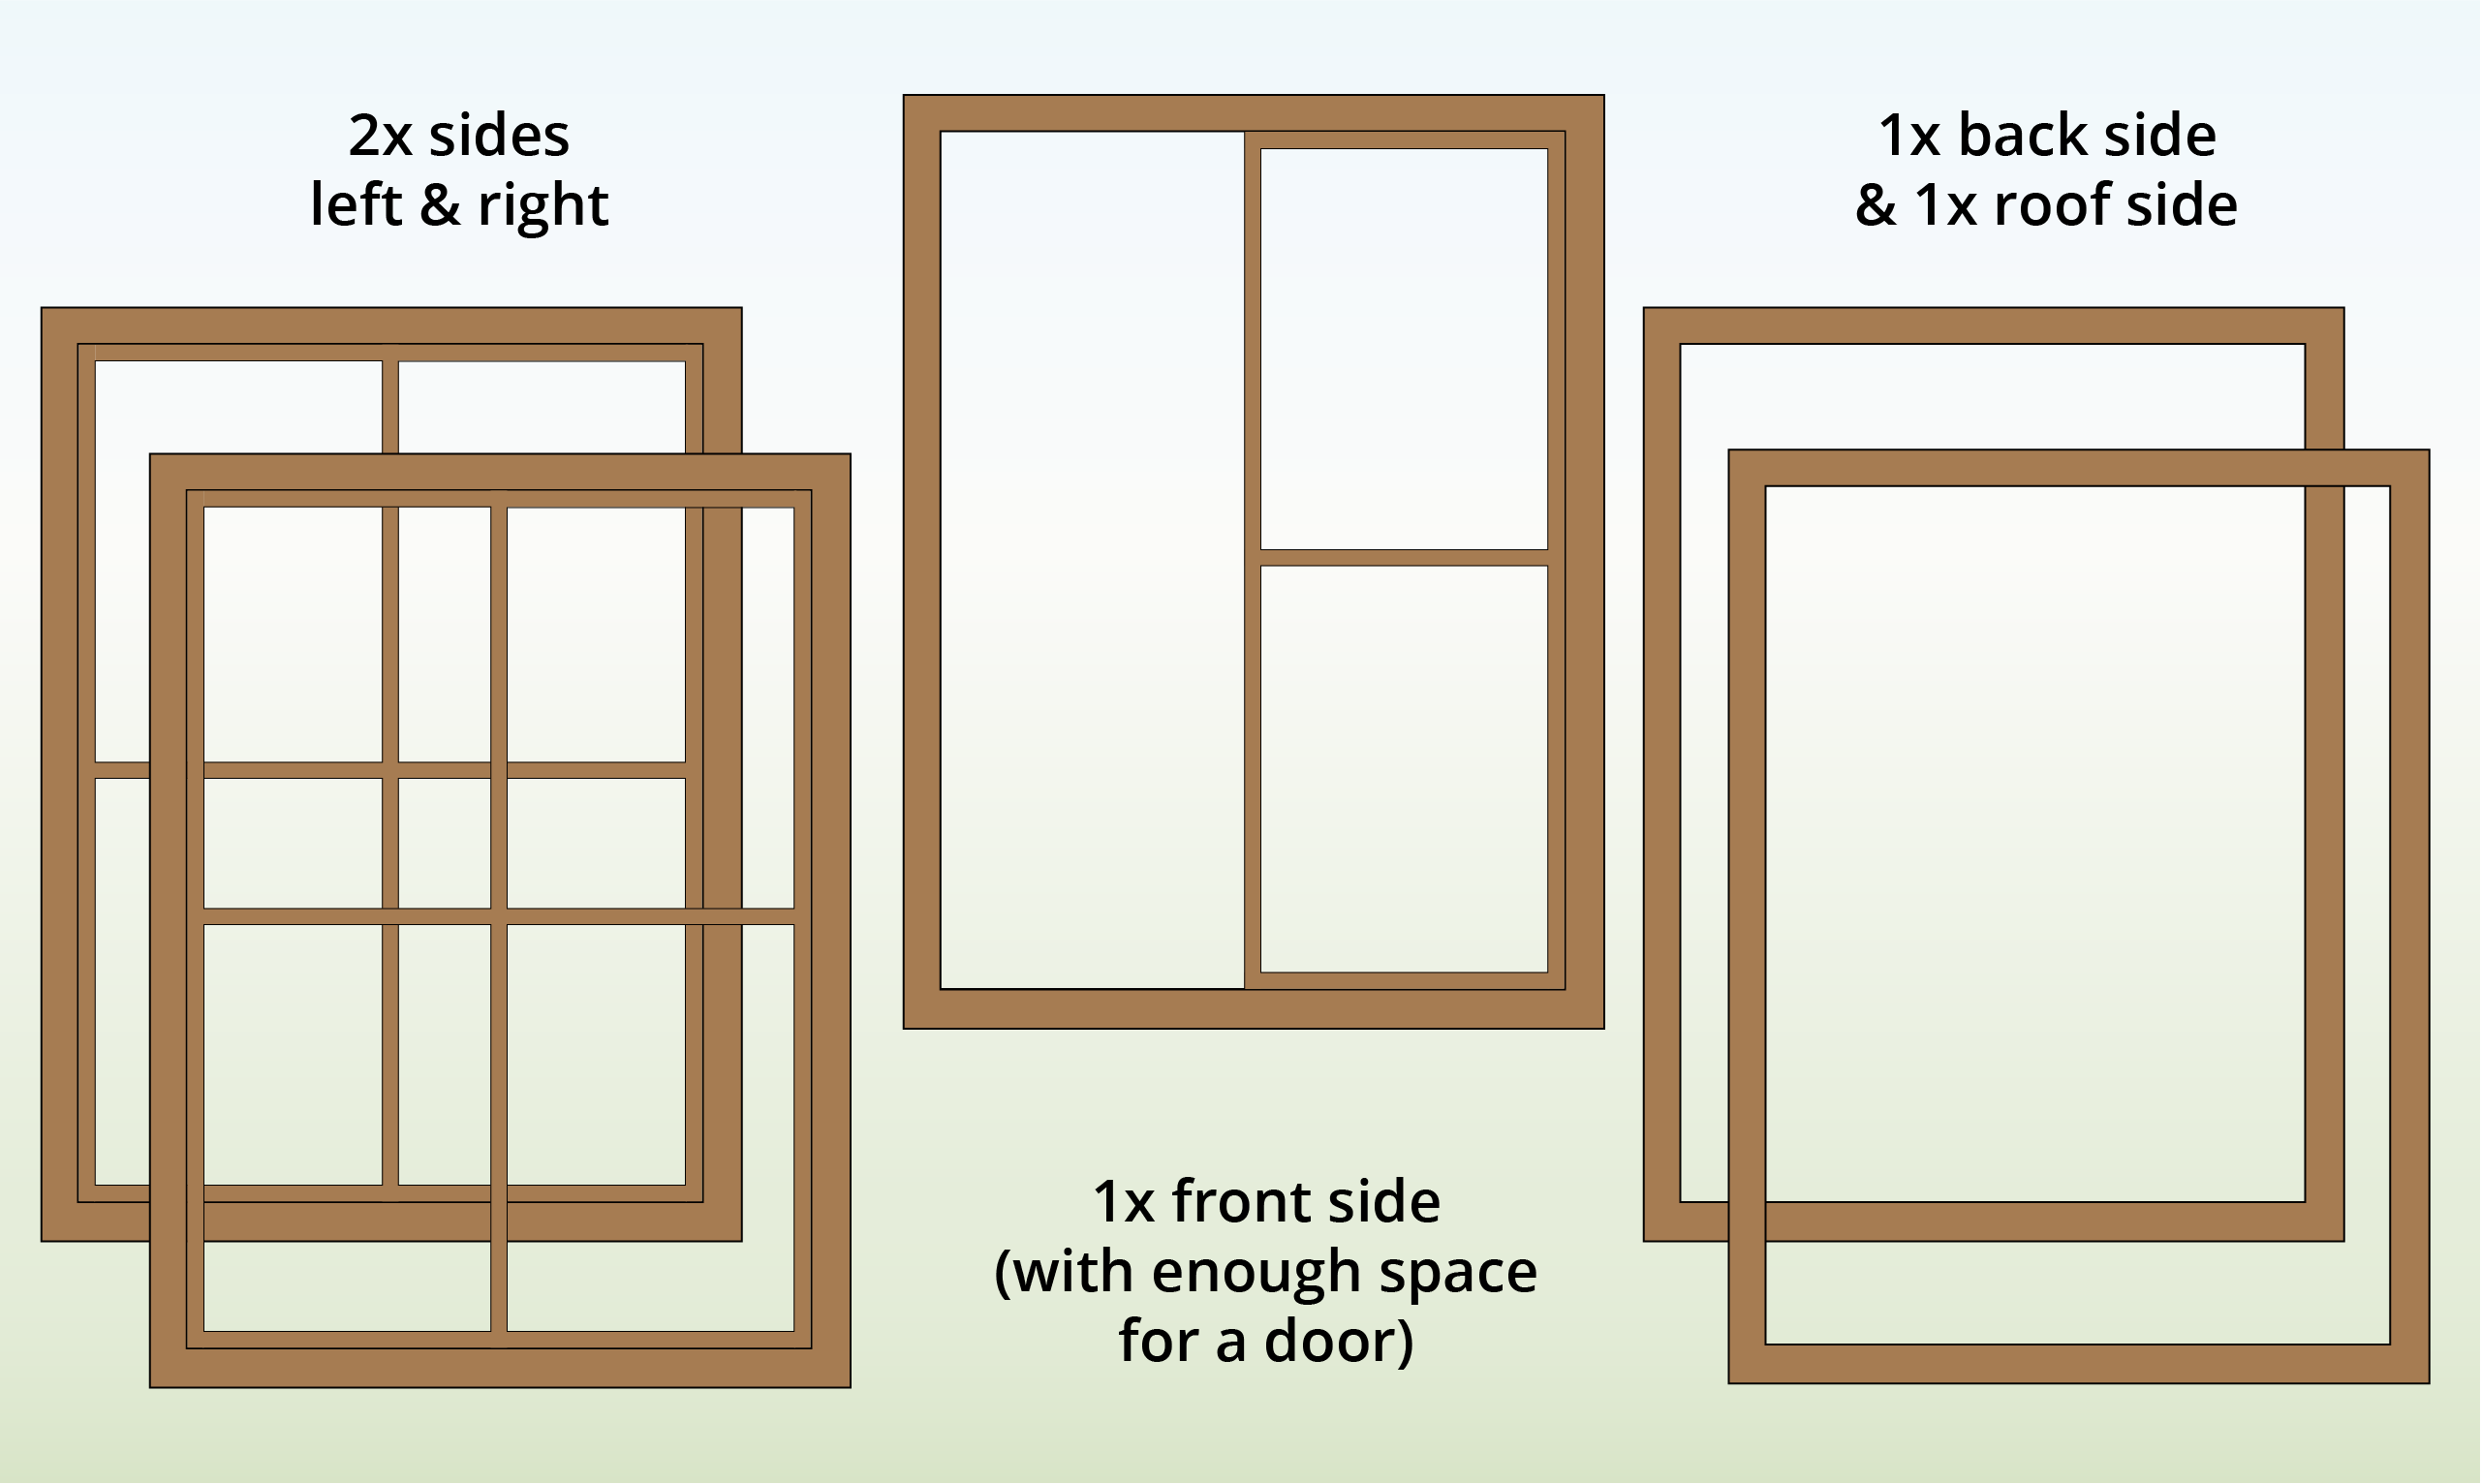
- Stick to your design plan and complete step 4 to make all required wooden frames.
- Ensure the backside of the enclosure stays open for doorway access, and leaving space for an exterior door if needed.
- Also, build a roof frame if choosing an open mesh design.
Step 6) Measure & Cut Netting

- Lay the wire mesh on the frames, ensuring it overlaps the wood.
- Cut along the wood to allow space for attaching with staples.
Step 7) Secure Netting to Frames

- Use staples spaced at most 15cm apart and hammer them into the wood to attach the netting to the frames.
- Ensure the back side remains open for easy access for your pets.
Step 8) Secure Back Frame to Wall

- Depending on the construction materials of the house, you may require various wall fixings for this stage.
- Ensure the open back of the enclosure is flush against the wall and securely attached.
Step 9) Attach Side Frames

- Connect the two side frames to the back frame using screws at least 4 points per side.
- Ensure that the mesh attachments are facing outwards.
- Remember to pre-drill and countersink your joins for a flush and secure finish!
Step 10) Secure Front Frame

- Continue with the previous step to secure the front frame to the two sides.
Step 11a) Build Roof Structure – Open (Mesh)

- Choose between weather-protective plastic or open mesh roofing.
- Proceed with steps 7-8 to install the roof panel and enclose the cat enclosure from the top.
- Ensure there is ample shade to shield your felines from UV rays if opting for this type of roofing.
Step 11b) Build Roof Structure – Closed (Plastic)

- Affix a batten to the back of the structure, then add several more perpendicularly on top to create a proper slope for water drainage.
- Cut and secure a plastic roofing sheet using roof screws to prevent water from entering the enclosure.
Step 12) Construct Door (if applicable)

- If your structure lacks interior access, add a door. Consider two entryways for convenience.
- Construct the door like the frame, but reinforce with diagonal braces.
- Attach mesh to the exterior to make it cat-proof.
Step 13) Secure Door (if applicable)
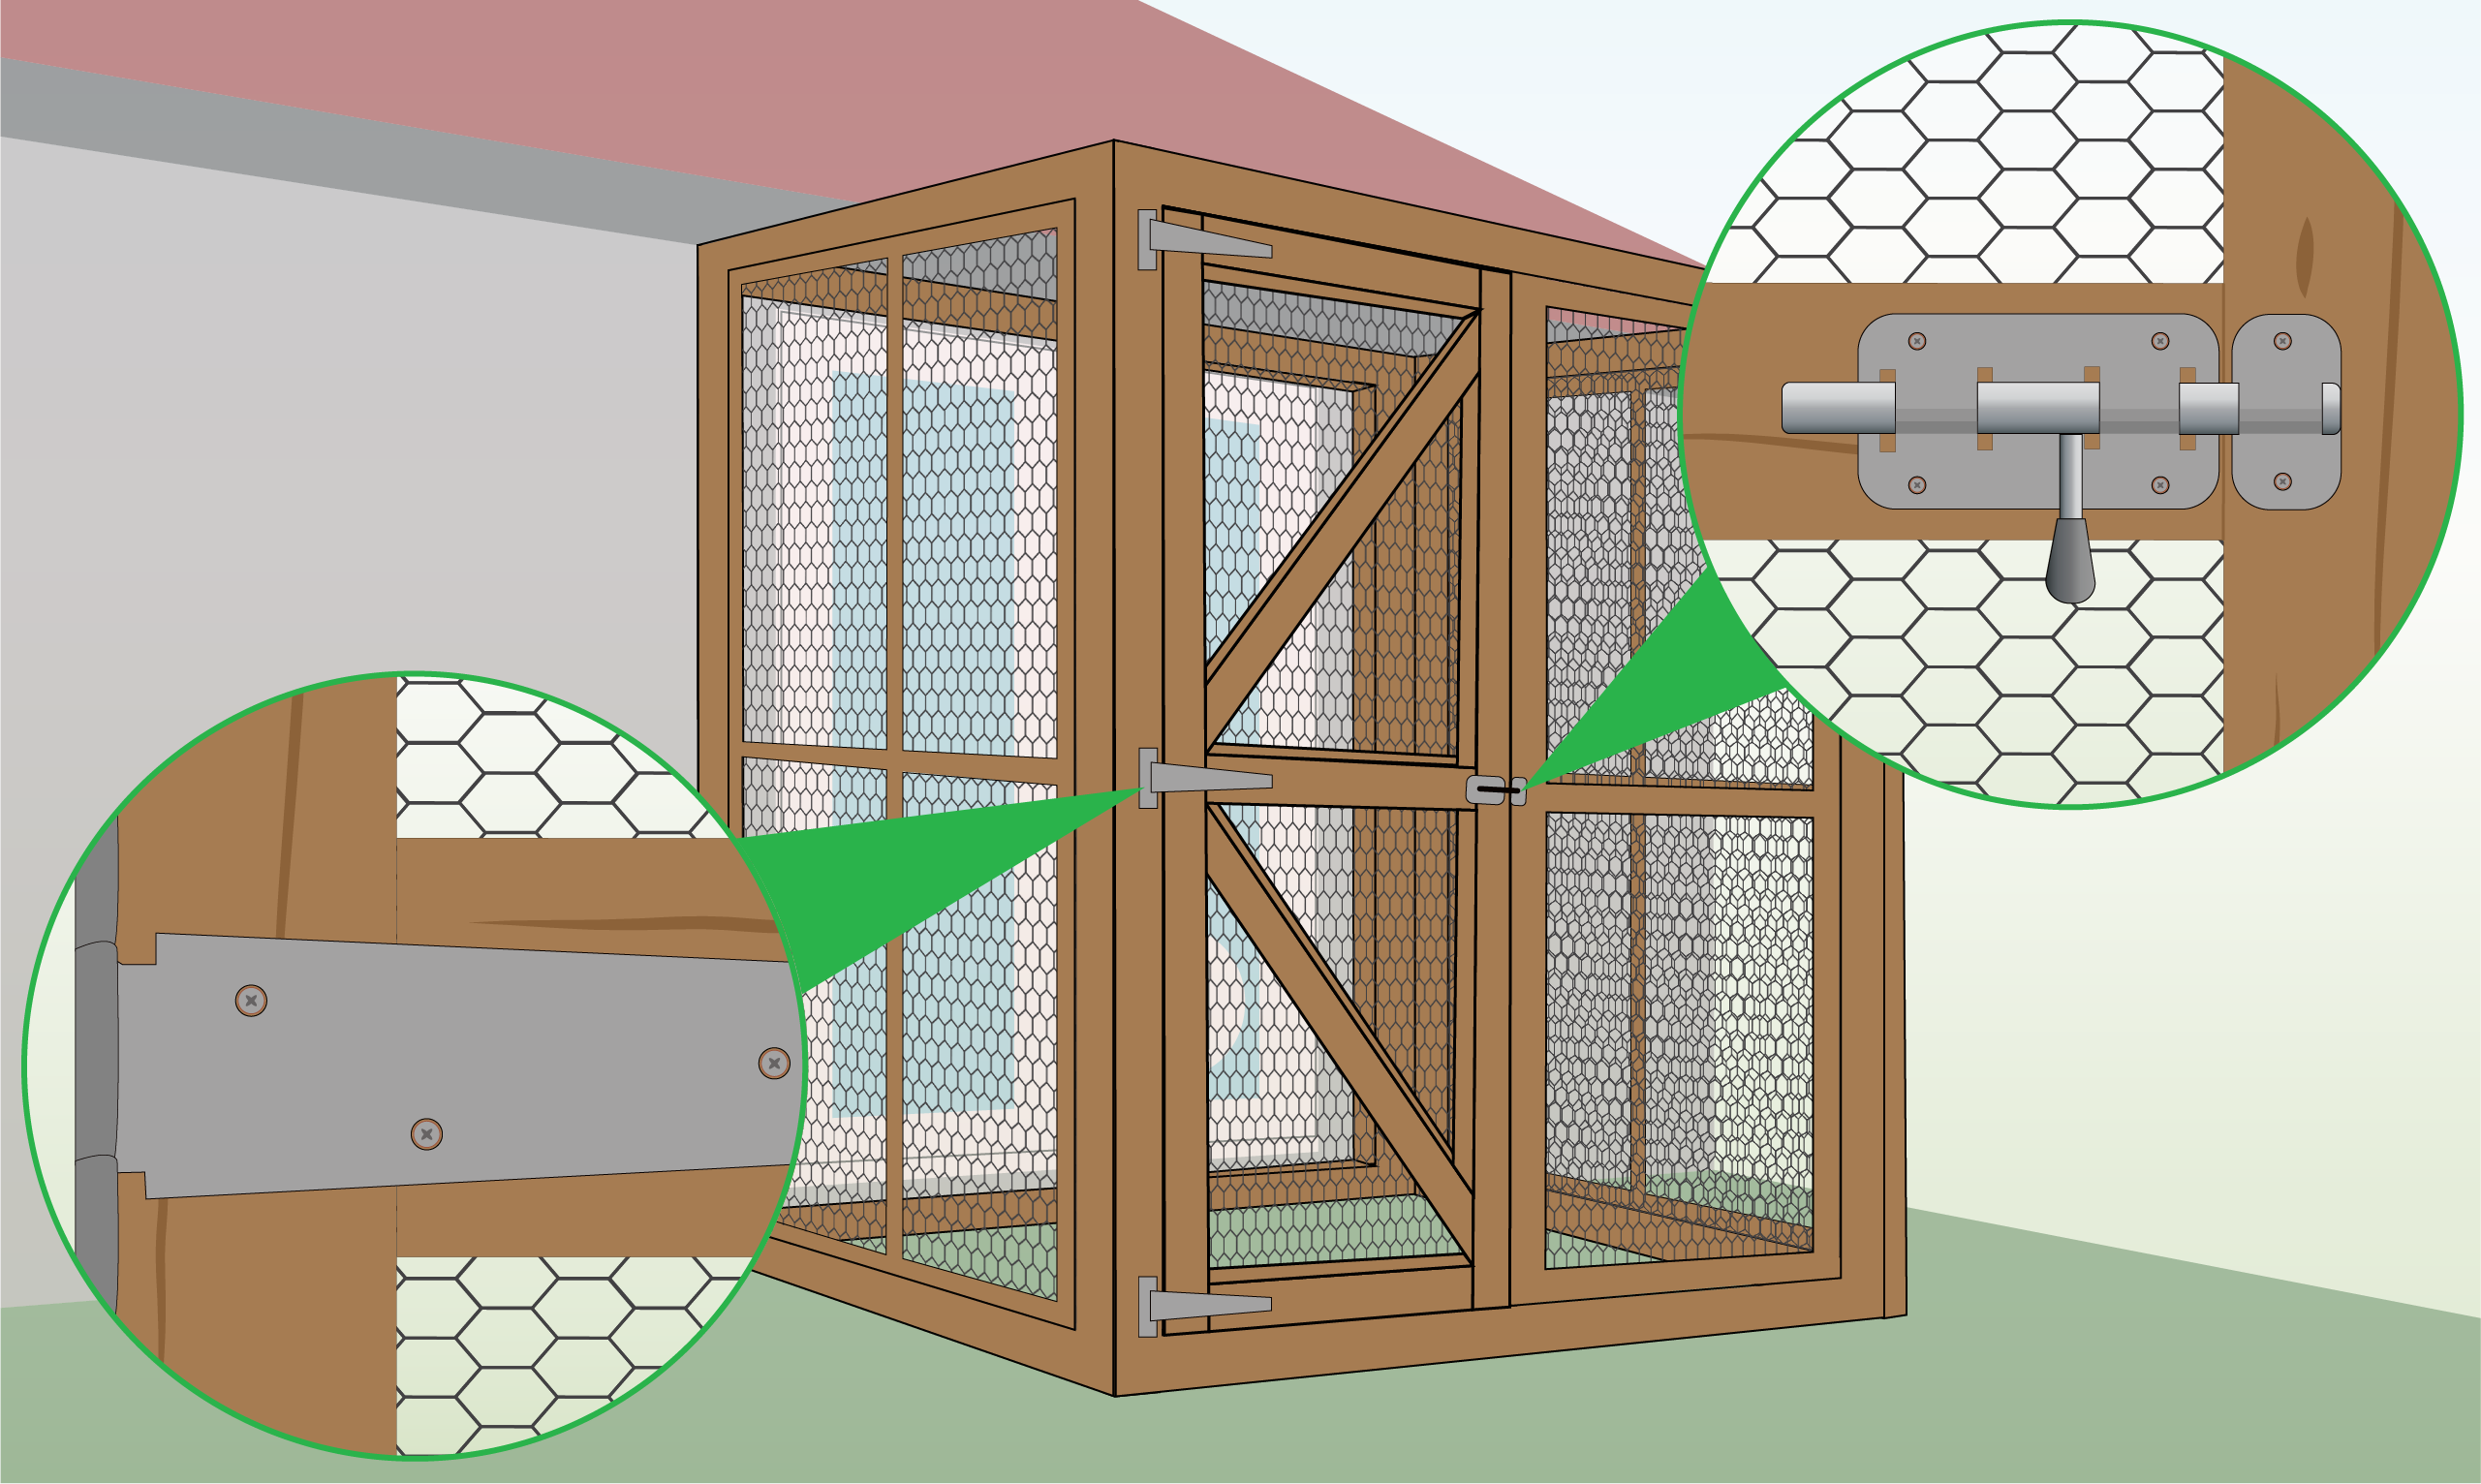
- If you’re not adding a door, skip this step.
- Attach three latches to the wooden frame using screws.
- Additionally, screw in a latch to secure the door closed.
Step 14) Inspect for Weak Spots

- Your cat enclosure should be complete.
- Ensure all sides and joins are properly attached, with no gaps for cats to escape.
- The back frame should be flush with the wall and securely attached, and the door should close properly.
Step 15) Furnish Your Cat Enclosure
- Enhance your pets’ outdoor experience with:
- Climbing trees, steps, ladders, and DIY scratching posts
- Hiding spots, beds, shelves and hammocks
DO’S AND DON’TS
- Avoid leaving food outside to deter animals;
- Provide fresh water and a litterbox;
- Ensure materials are comfortable and splinter-free;
- Choose pavement, wood, or grass for flooring;
- Include hiding spots and shade, while allowing sunlight for sunbathing.
FURTHER READING
- DIY Cat Proof Fence– Instructions on how to cat proof your fence
- Cutting Chicken Wire – Learn how to cut chicken wire using different tools
- How to Paint Chicken Wire – A guide showing you how to paint your mesh easily
If you are looking to build your own cat enclosure, you can purchase chicken wire from our shop. You might also be interested in our cat mesh category, which has a range of mesh suitable for cat enclosures.


Published by
