How to Install a Rabbit-Proof Fence

Below you will find a step by step guide on how to install a rabbit-proof fence.
OVERVIEW
- Estimated Completion Time: 2-3 days
- Experience Required: Medium
- Tools Required: Shovel, Hammer, Wire cutters
- Materials Required: Rabbit Fence, Staples / Cable Ties, Pegs, Wooden Fence Posts
STEP 1) Creating a Trench

- Take the shovel and start digging a trench around the perimeter of the area you want to protect.
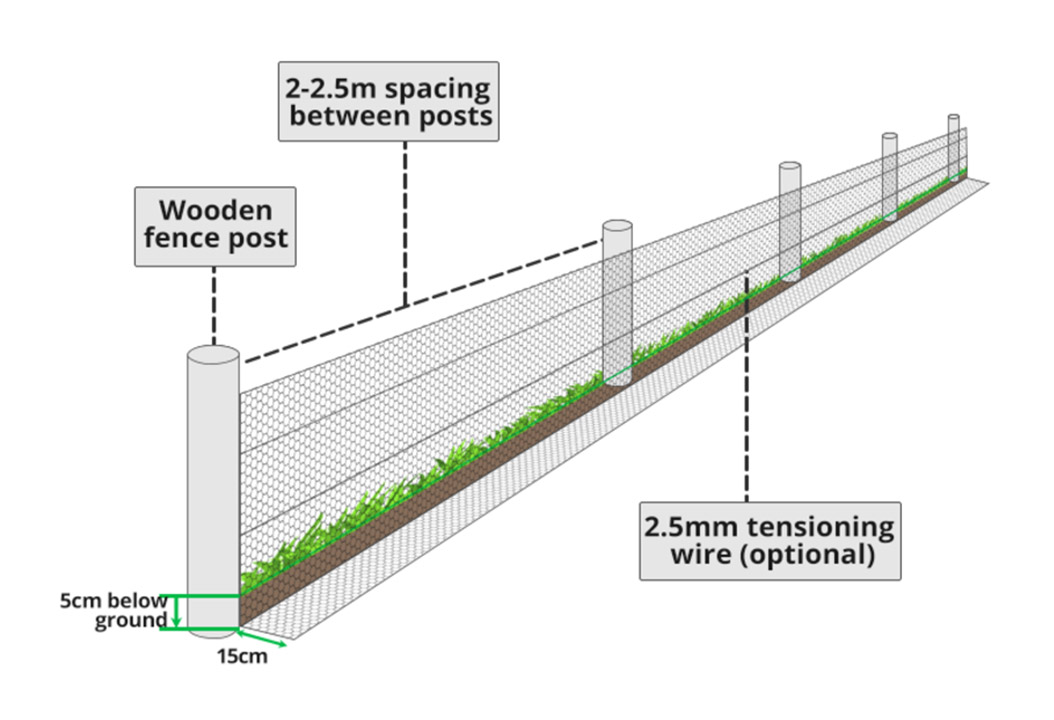
- The trench should be 15cm wide and about 5cm deep.
STEP 2) Placing the Fence Posts

- Hammer wooden fence posts at least 30 centimetres deep into the ground, one at each corner of the area.
- For effective rabbit-proofing, hammer posts every 2—2.5 meters, keeping an even spacing between them.
STEP 3) First Section with an ‘L’ Shape Below Ground
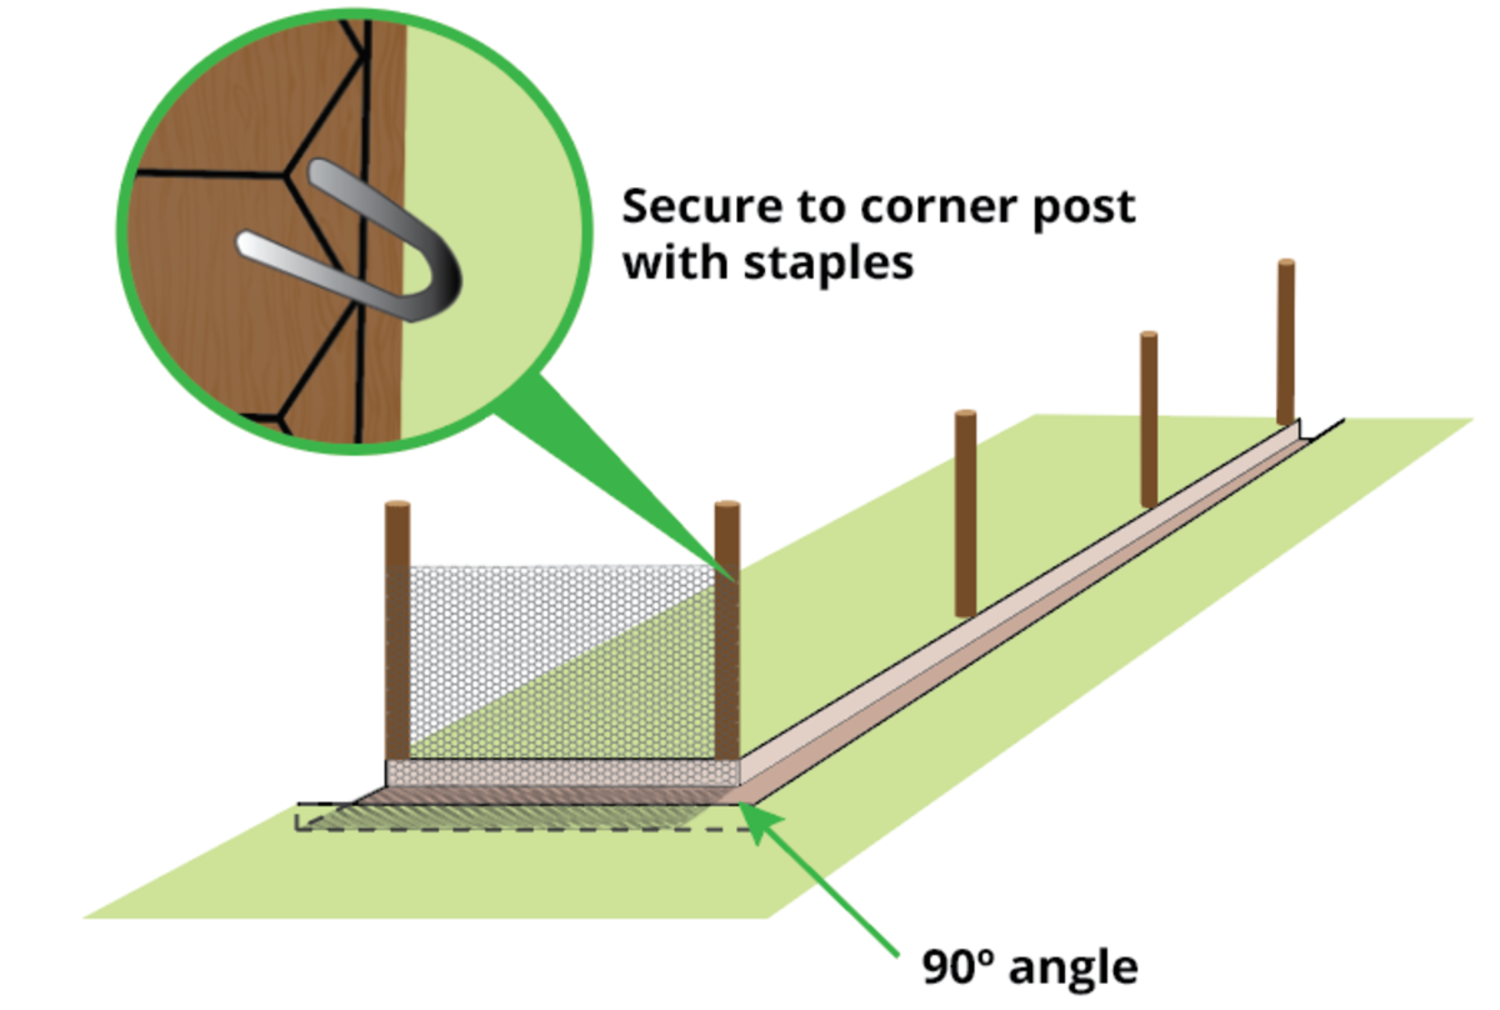
- Take enough netting to cover the distance between the first two corner posts, and bend the bottom at a 90-degree angle, creating a 15cm lip.
- This flap will cover the bottom of the trench on the outside of your fence, ensuring the rabbits can’t tunnel under it.
- Secure the portion of the fence with staples (or cable ties) to the corner posts, ensuring the flap is pointing outward, in the direction of the rabbits.
STEP 4) Continuing on the Other Sides
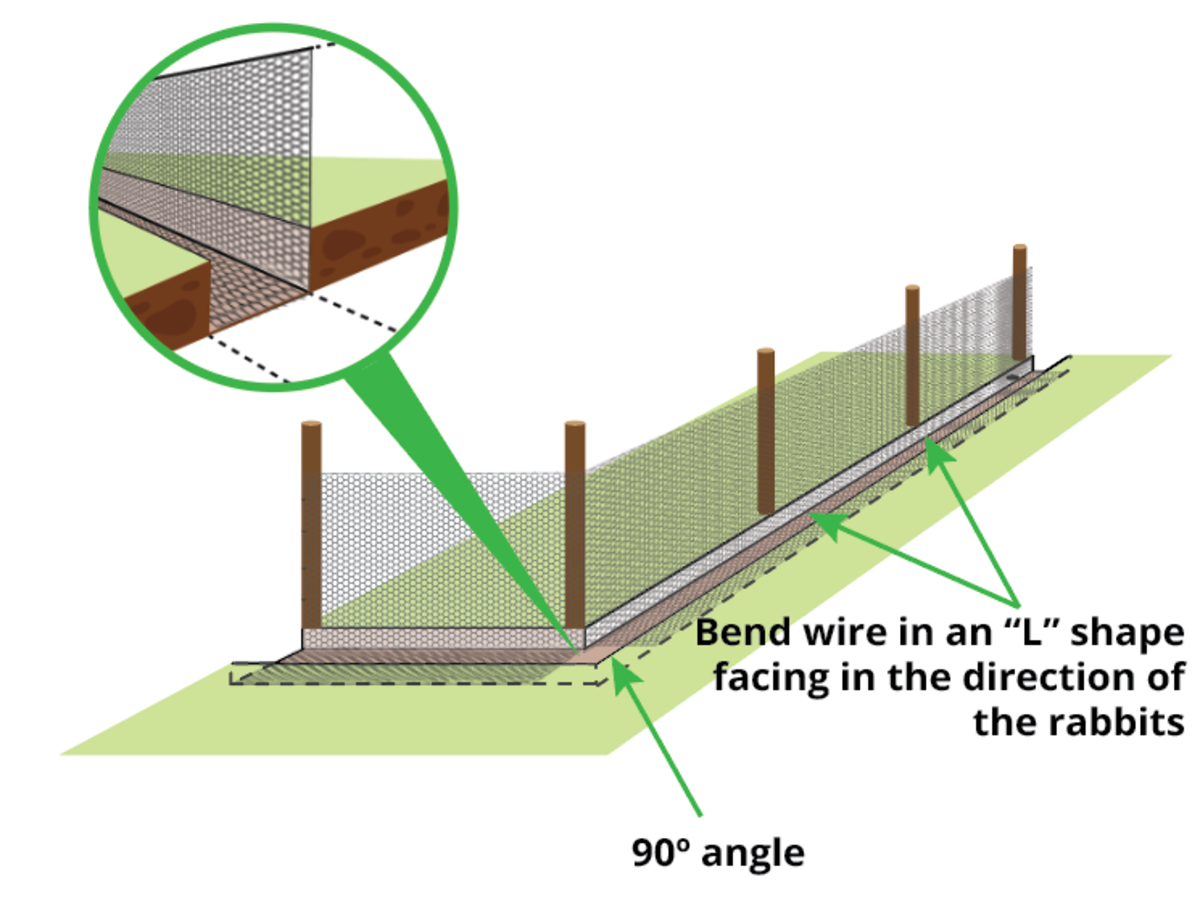
- Do the same for the other sides of the fence.
- Using staples, secure the rabbit wire to all the other posts.
- Stretch the netting tight against each post and use the staples every 15 centimeters to attach it tightly to the post.
- Make sure to leave a little room in the staple for the fence to move upon impact or temperature changes, or else the wire will wear down quicker.
STEP 5) Securing the flap to the ground
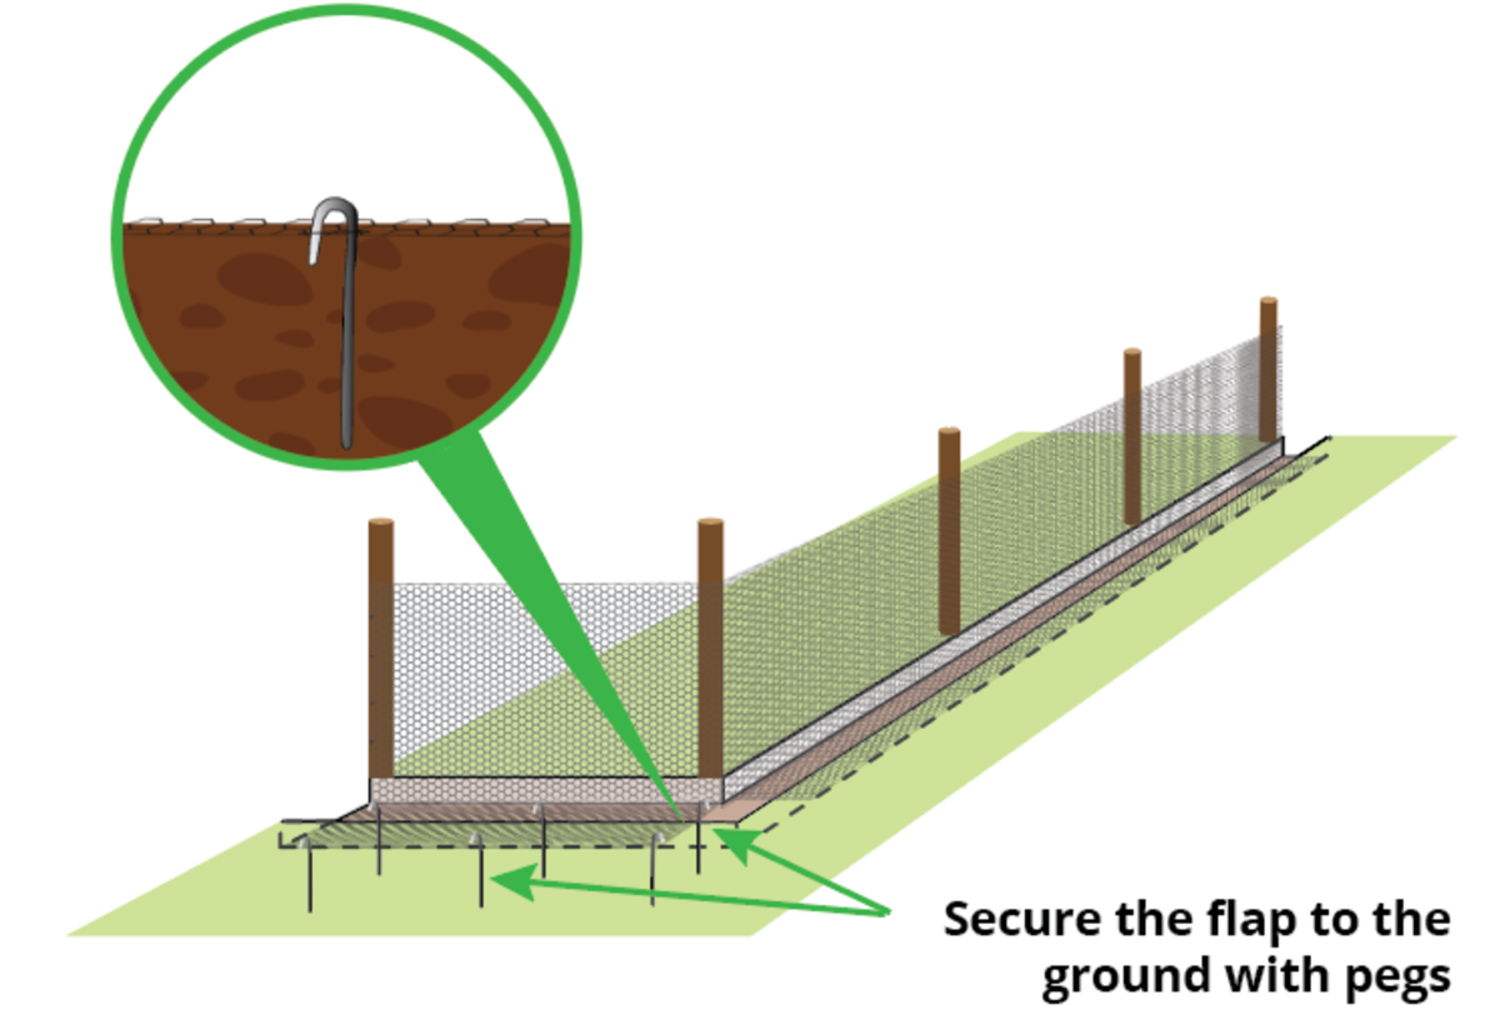
- Using landscape garden staples or pegs, secure the flap to the ground.
- Staple right at the 90-degree angle and also at the outside edge of the lip.
- You should have about 60 centimetres between the staples to make sure the flap is securely attached to the ground.
STEP 6) Finishing Touches
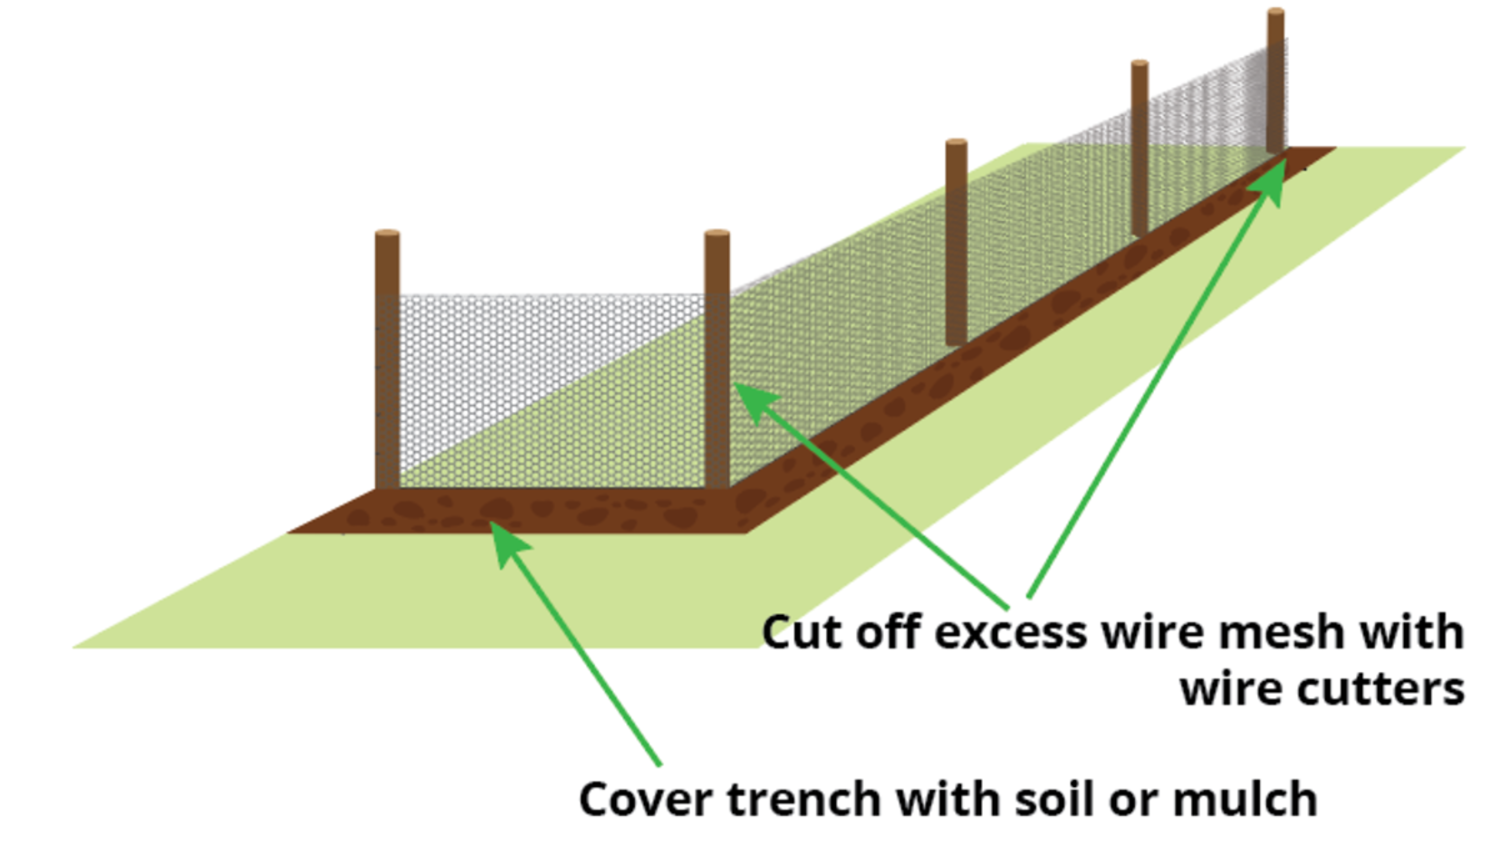
- Remove any excess wire using wire cutters.
- For best rabbit-proofing results, check for any gaps in the fencing and reinforce them if you find any.
- Cover the outside flap with 5cm of soil or mulch to hide it.
FURTHER READING
- Cutting Chicken Wire – A guide showing you how to cut chicken wire.
- How to Attach Chicken Wire to Posts and Different Materials – Learn how to attach wire netting to posts and different materials.
Please click on the link if you would like to purchase a fence to keep out rabbits.
VIDEO

Published by
