
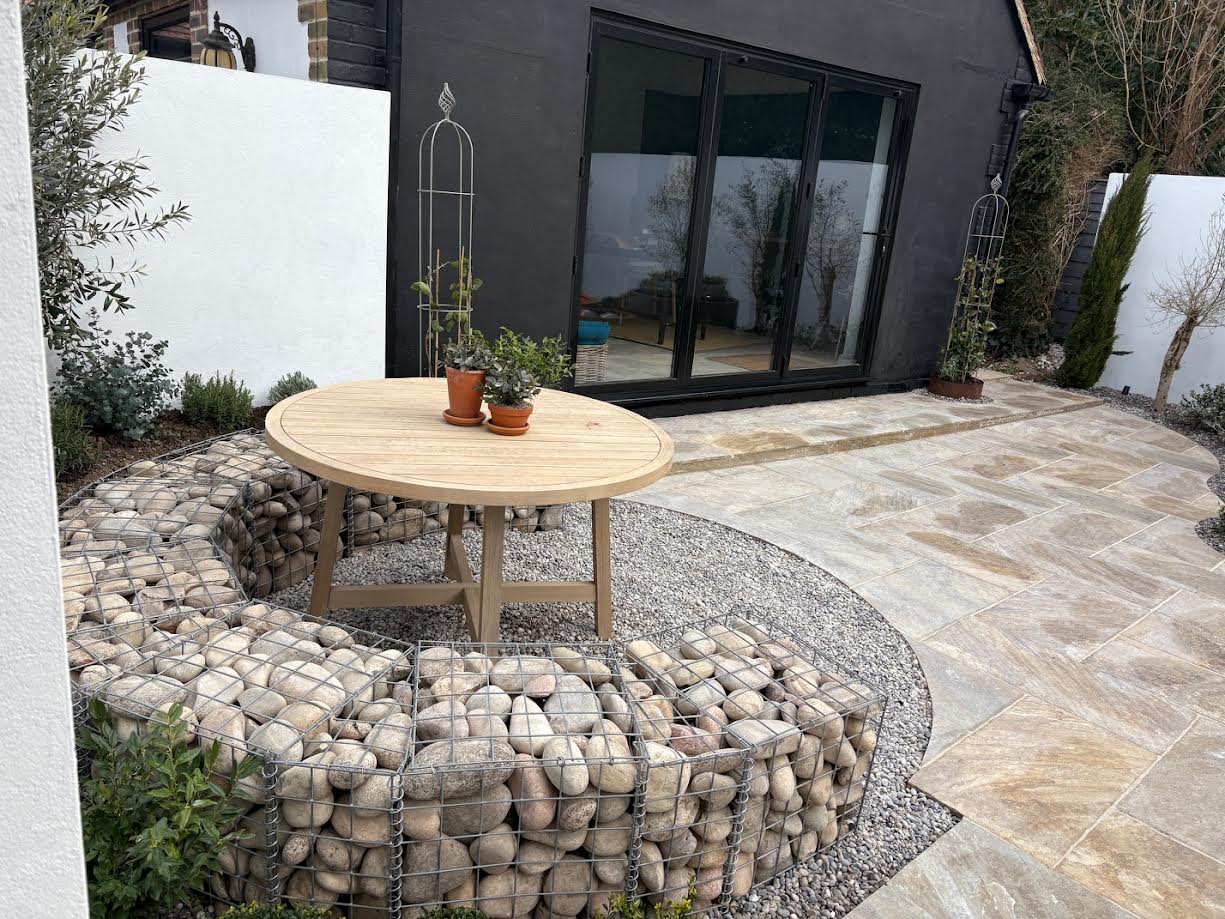
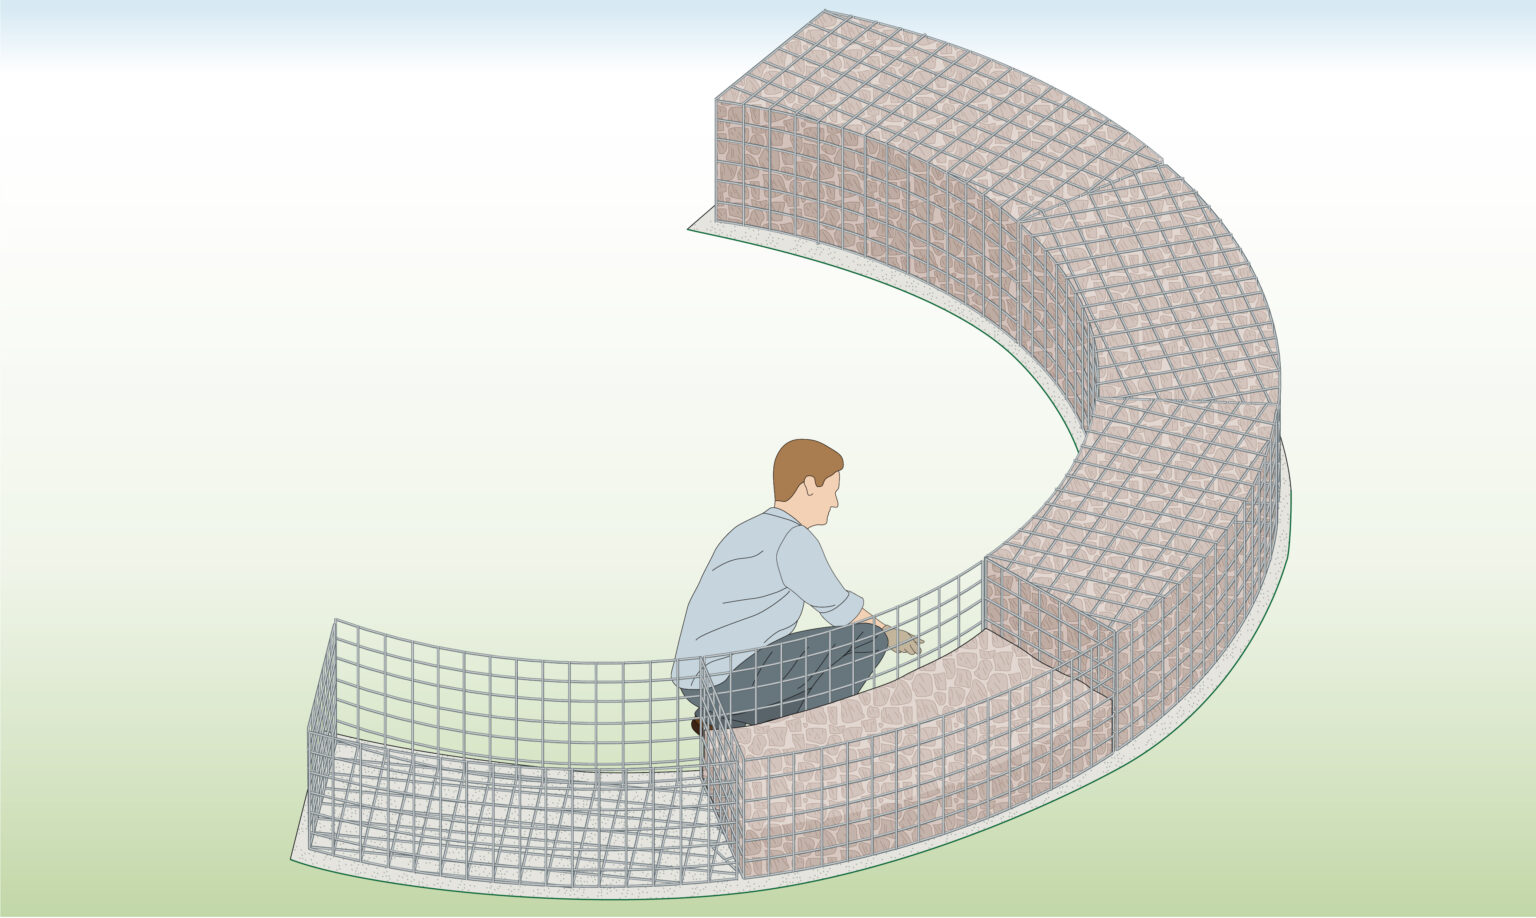
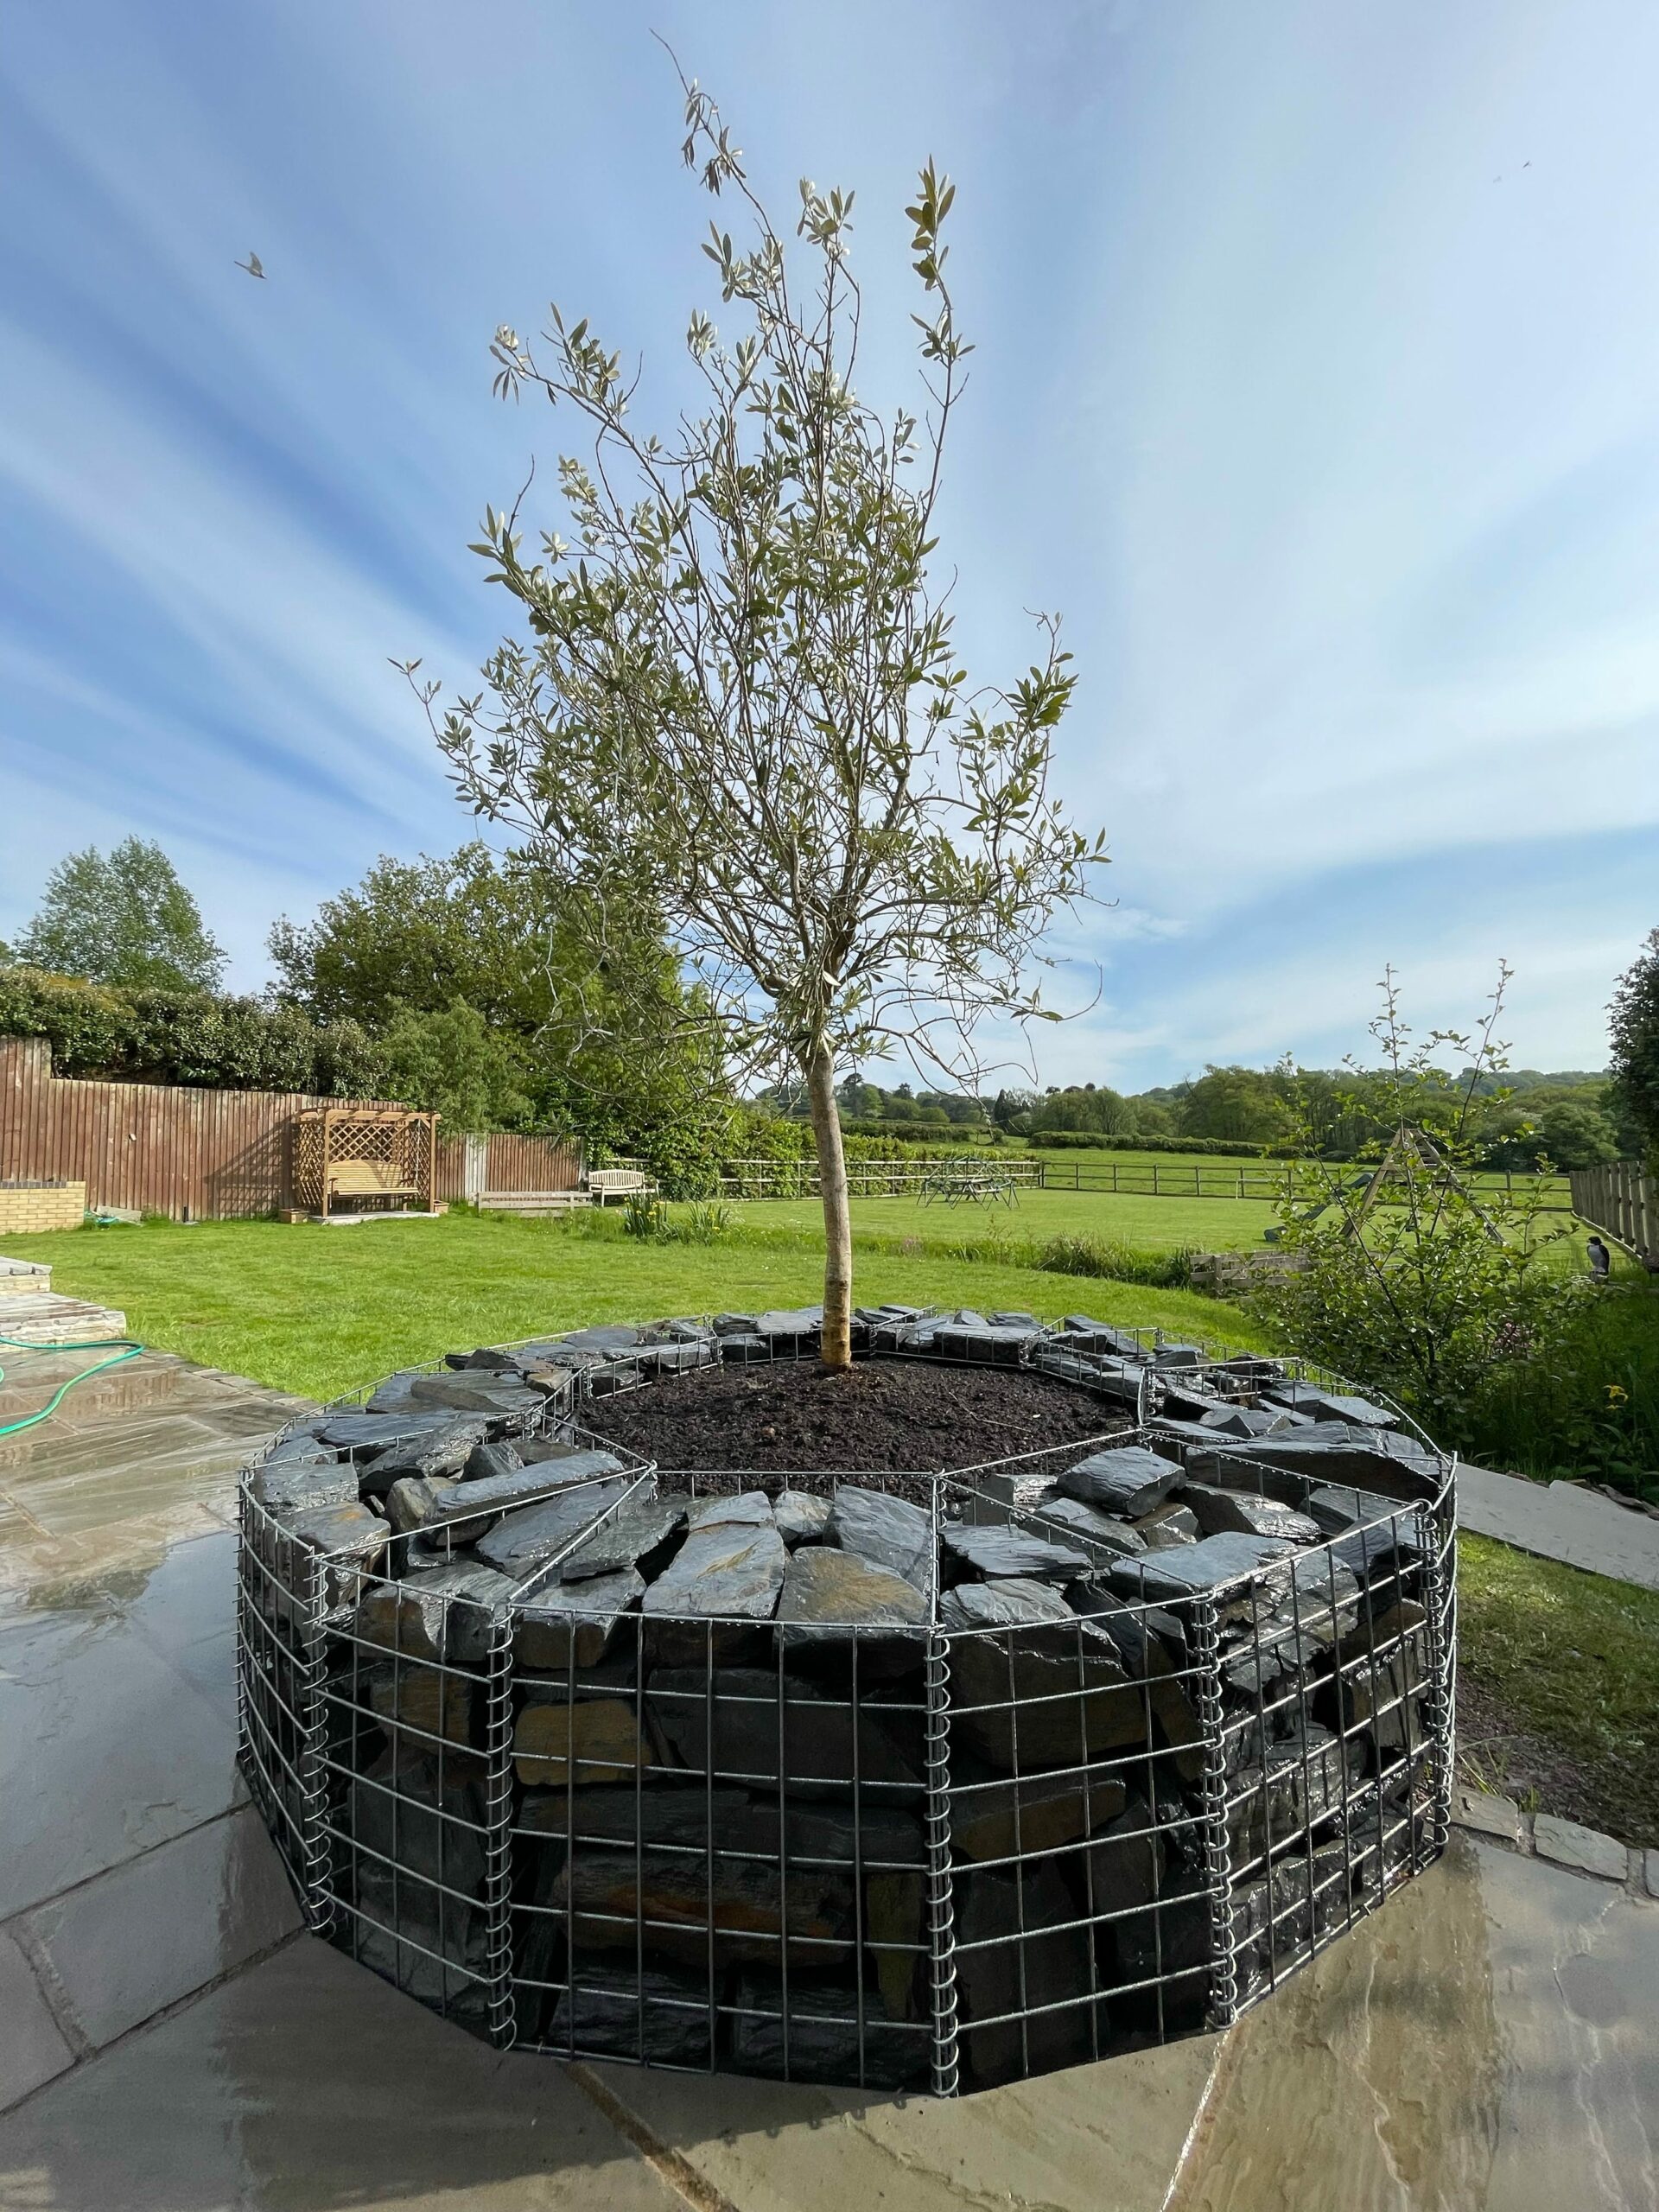
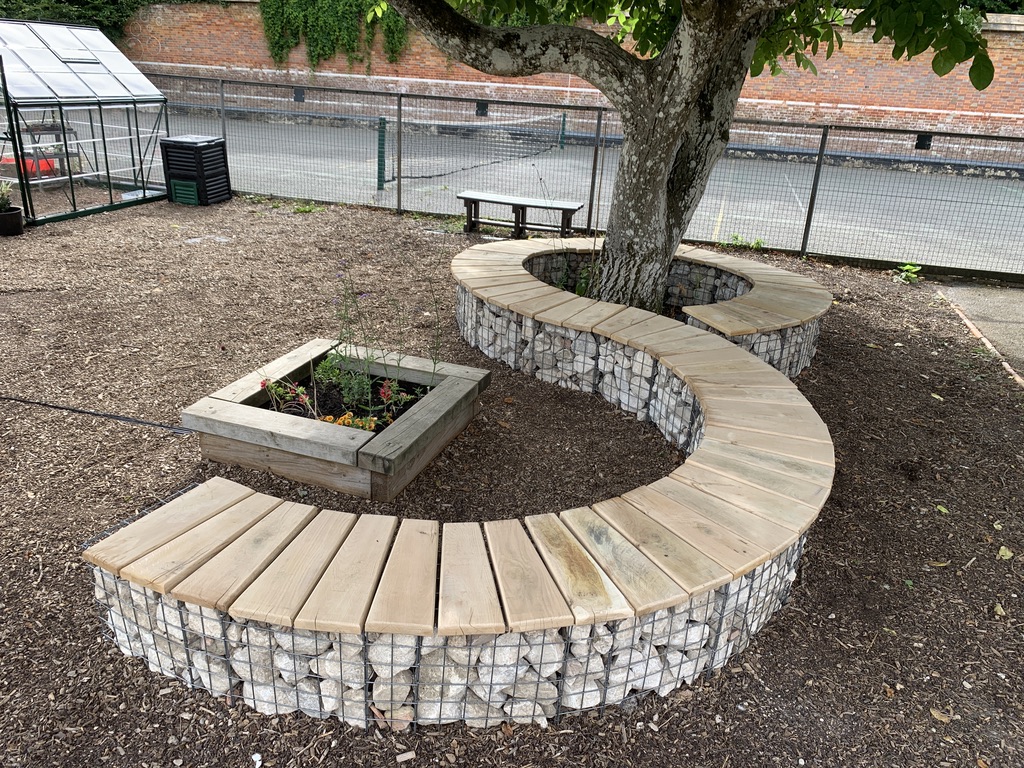
How to Make a Curved Gabion Wall

Below you will find a step by step guide on how to make a curved gabion wall.
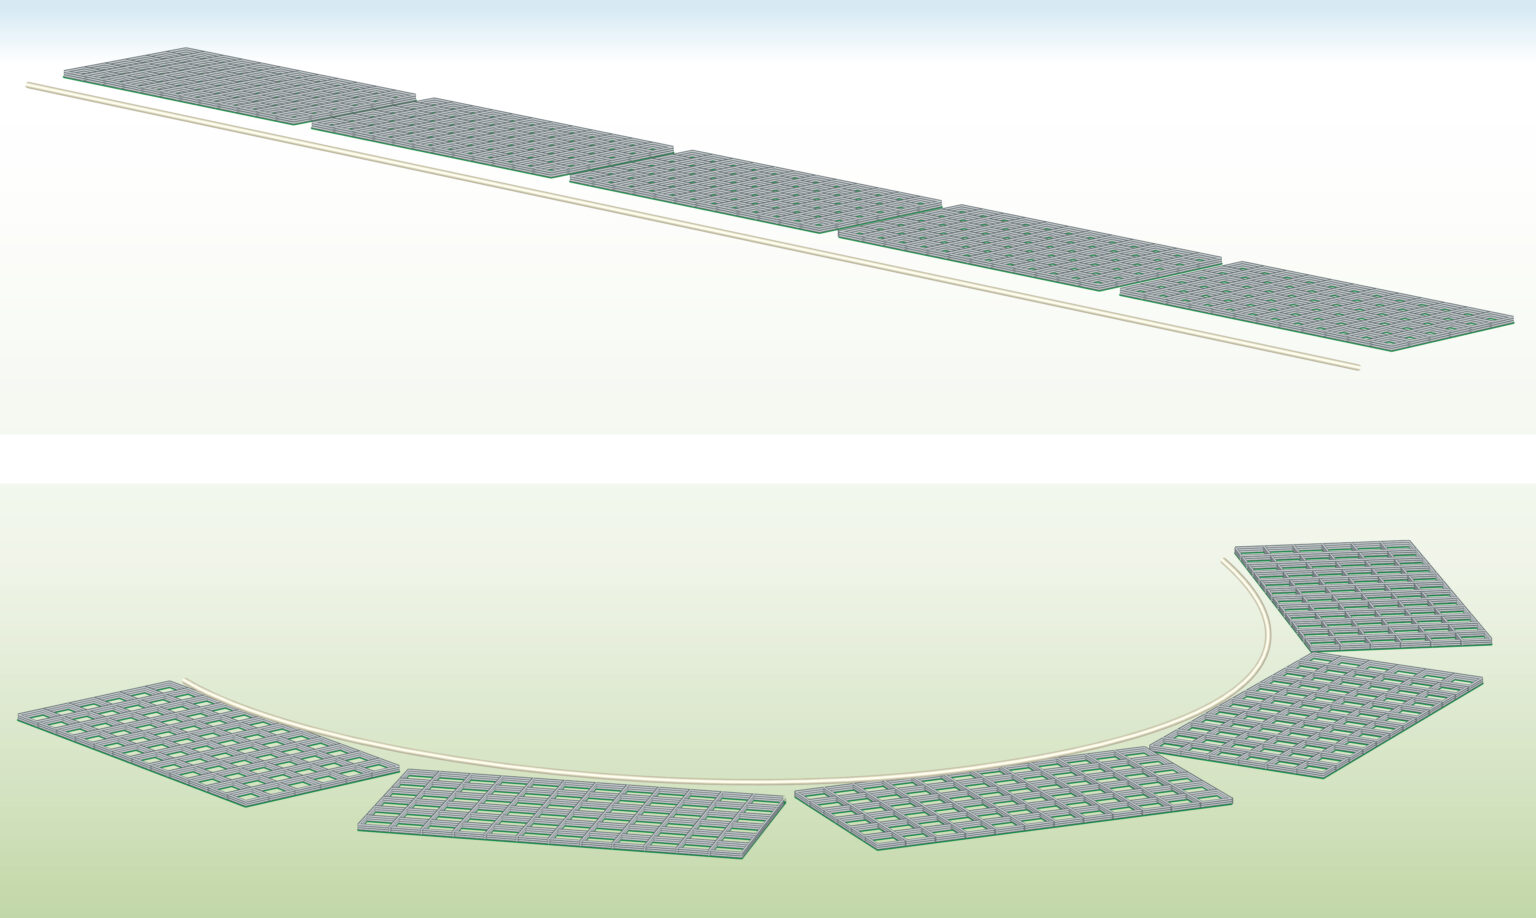
ANGLED GABIONS
- Experience Required: Medium
- Tools Required: Tape measure, Shovel, Bolt cutters, Tamper, String, Spray paint or rocks
- Materials Required: Gabion baskets, Panels, Gabion stones, Helicals and/or Tying wires, Geotextile, Gravel or basecourse
Step 1) Mark area

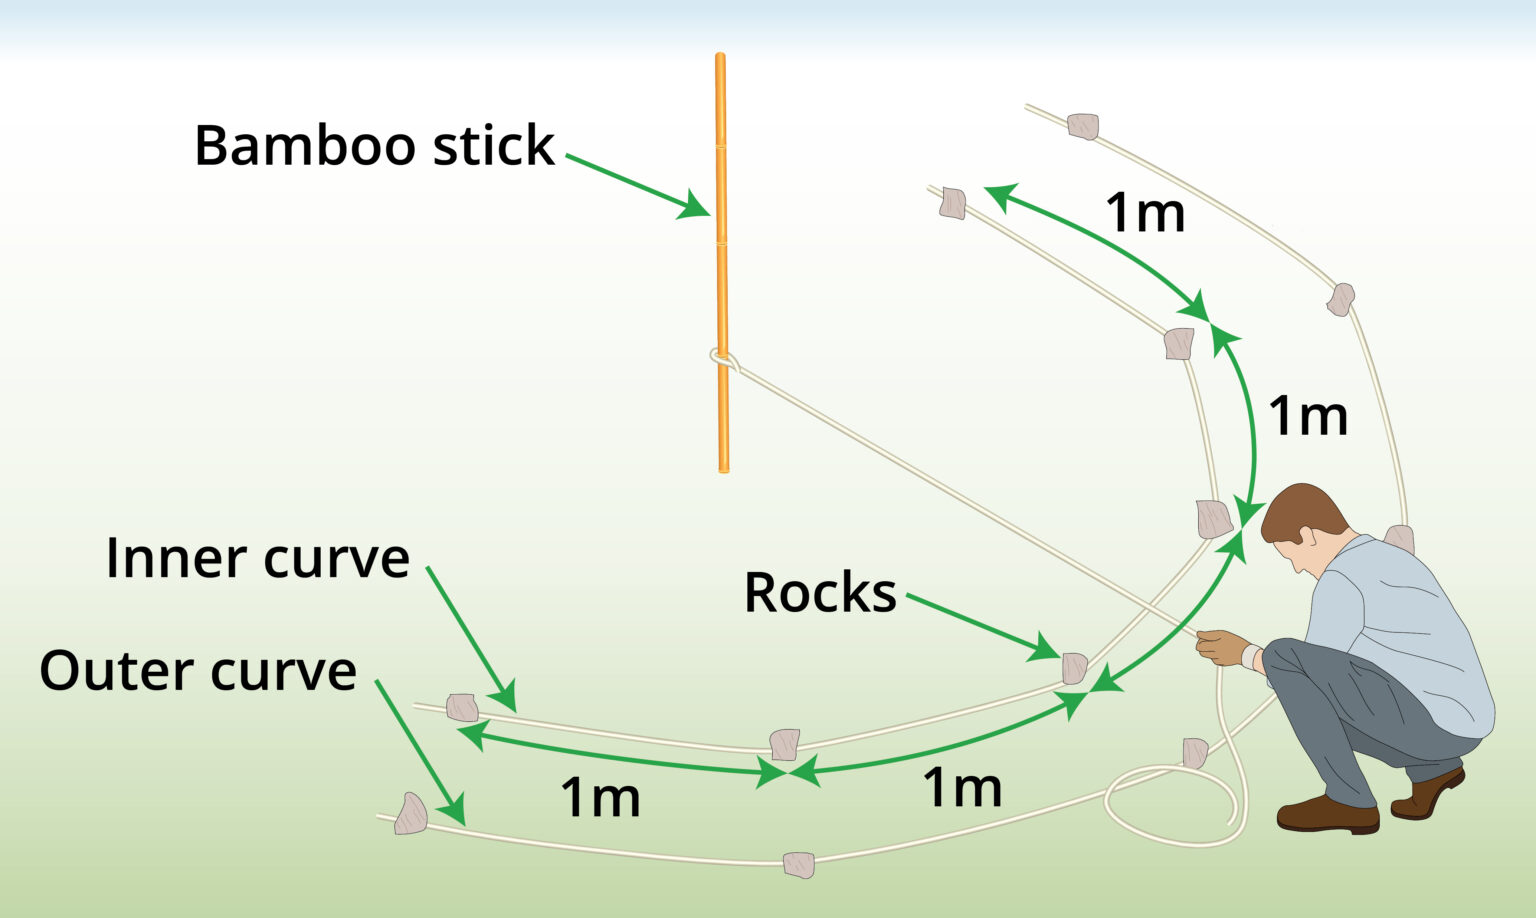
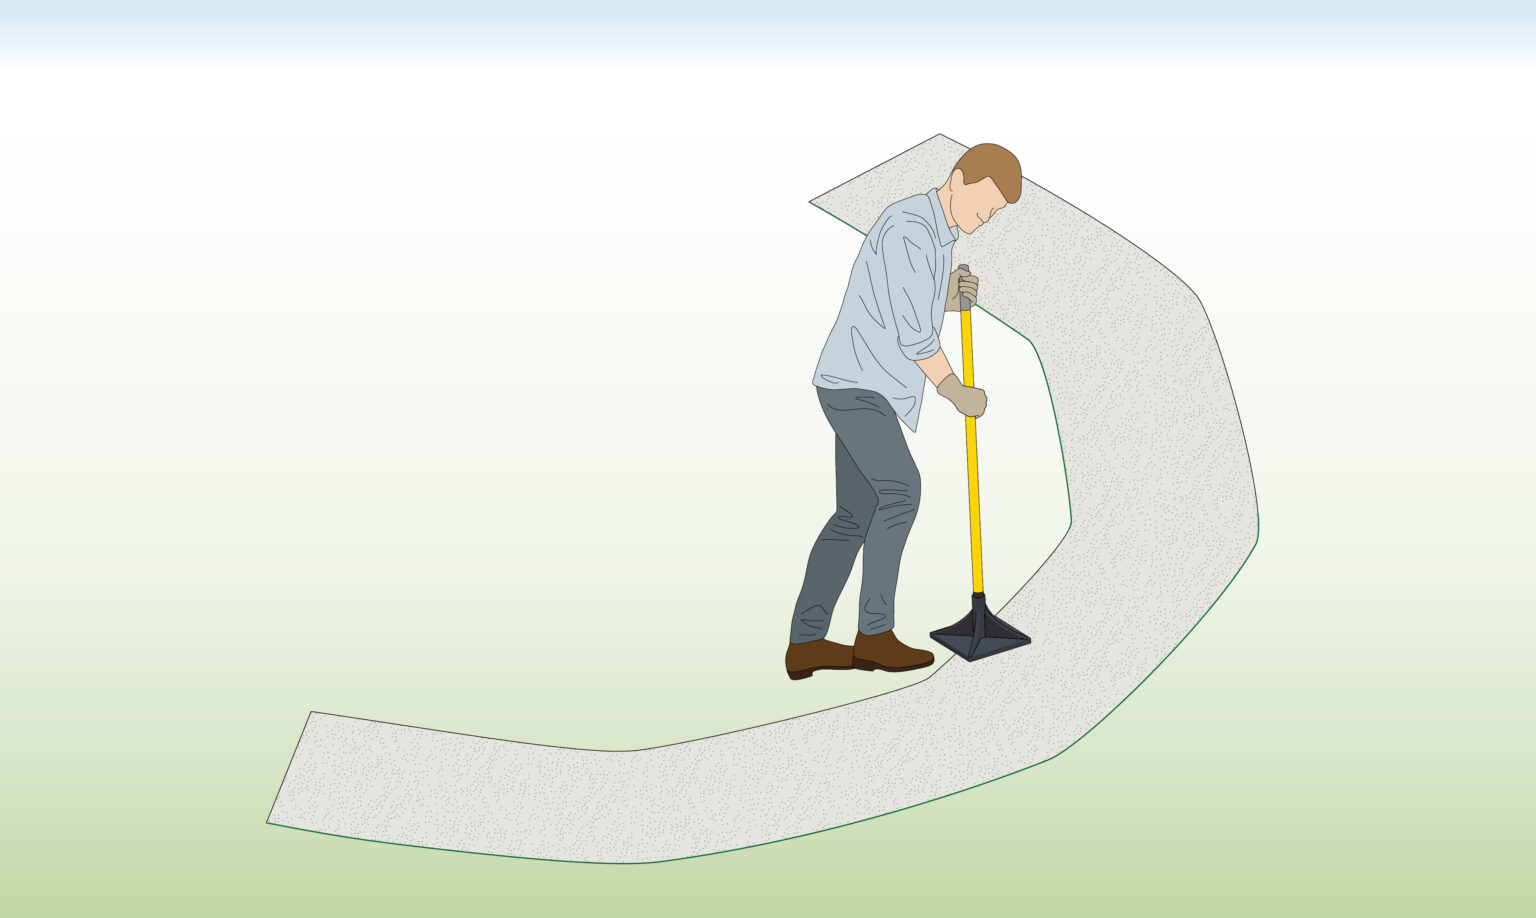
- Begin by attaching a string to a bamboo stick at the centre of the location where you would like to install the curved structure.

- Tighten the string to the desired radius and mark it to keep a consistent curve.
- Walk in a circle, placing stones to mark the inner curve.
- Then lay a second string along it, securing it with rocks every meter.
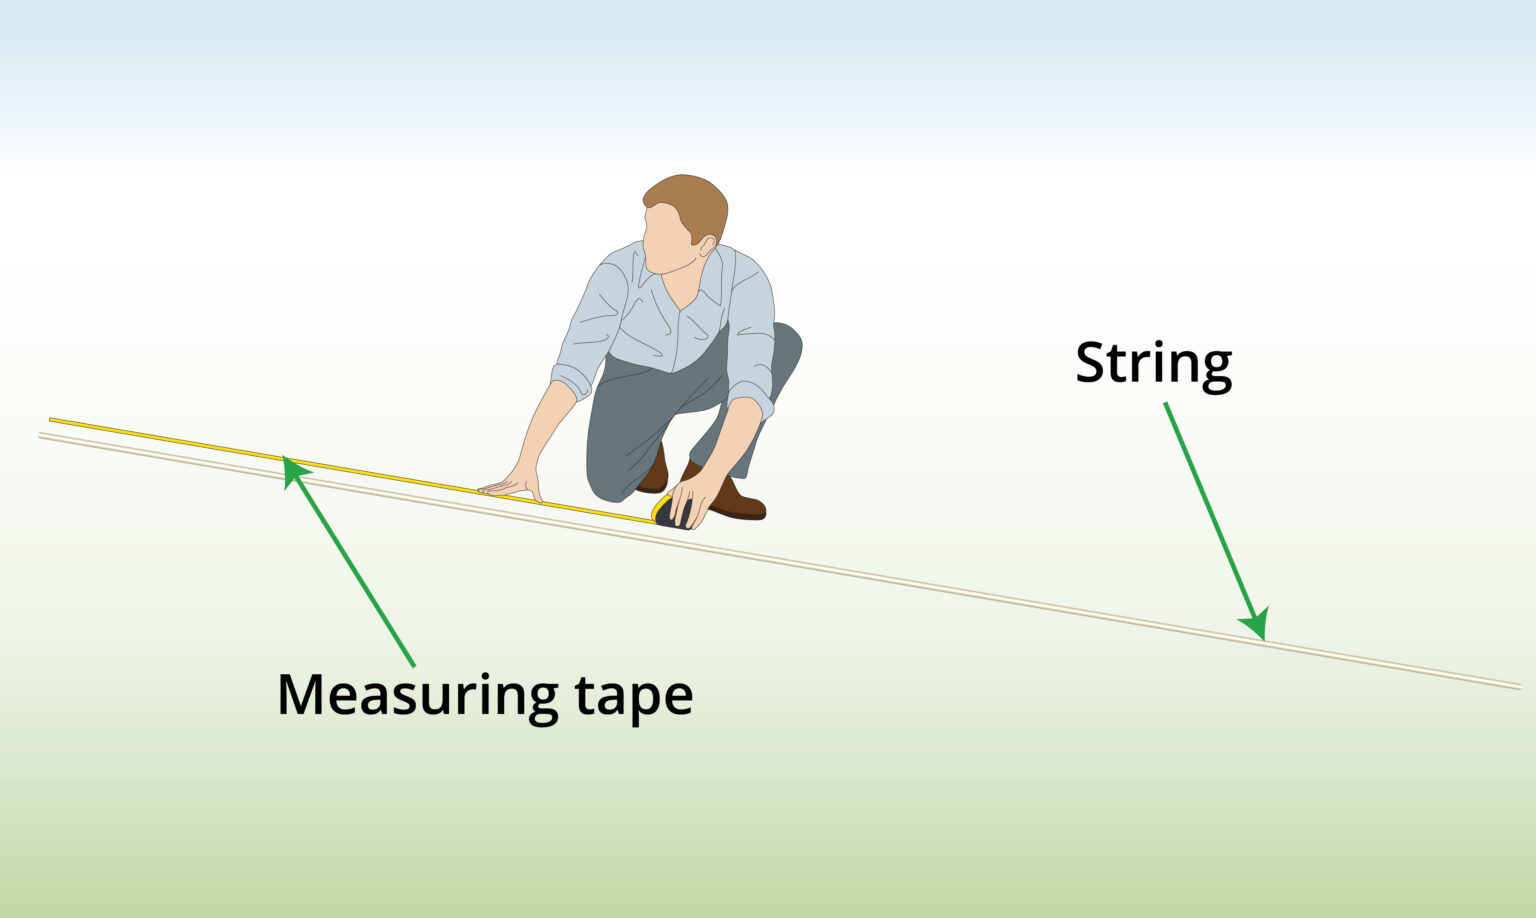
Step 2) Measure & calculate

- Measure and record the lengths of both the strings on the ground using a measuring tape to plan and order materials.
Step 3) Order materials

- While planning to order and buy materials, don’t forget to include the panels for the outer curve.
- You can also add optional panels for the triangles on the top, if needed.
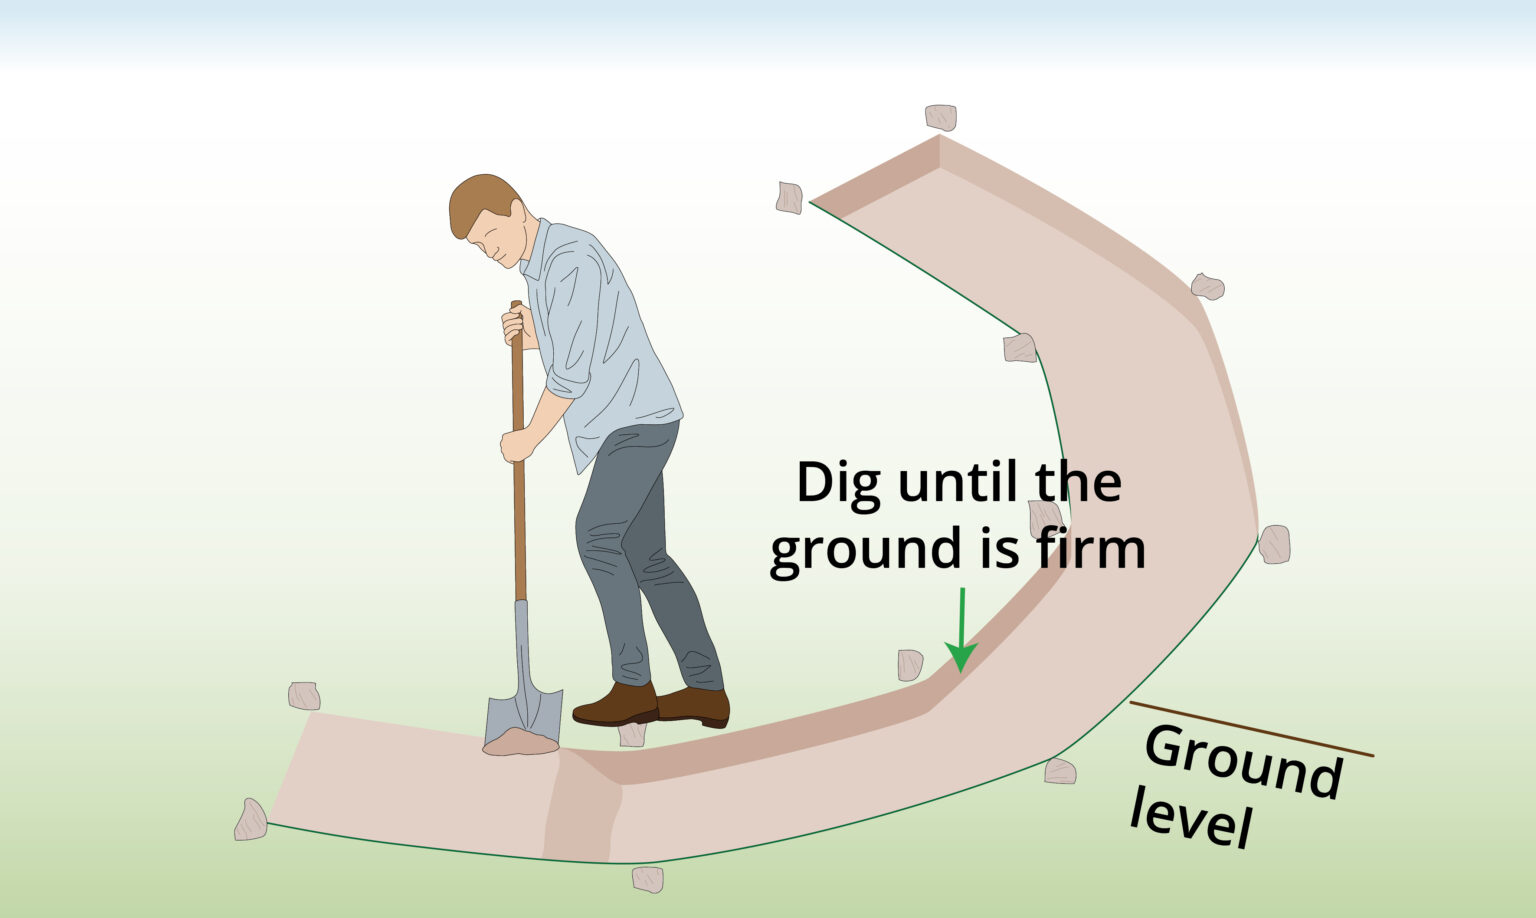
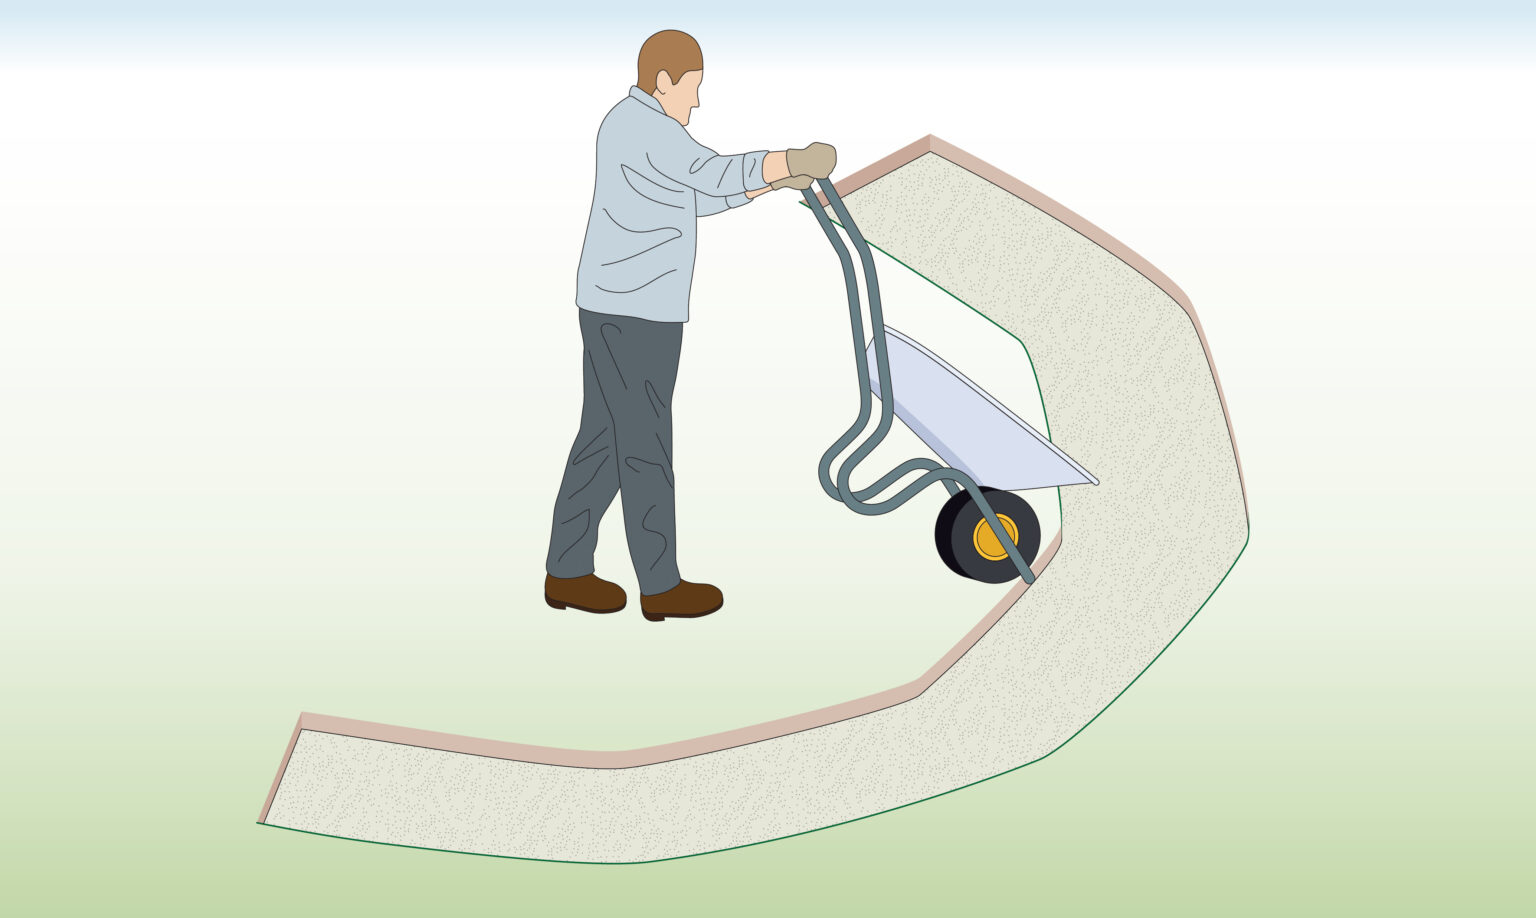
Step 4) Dig a base

- Dig until the ground is firm.
- Structures 1m tall or less are often placed directly on the ground but they will be more stable if placed on firm ground.
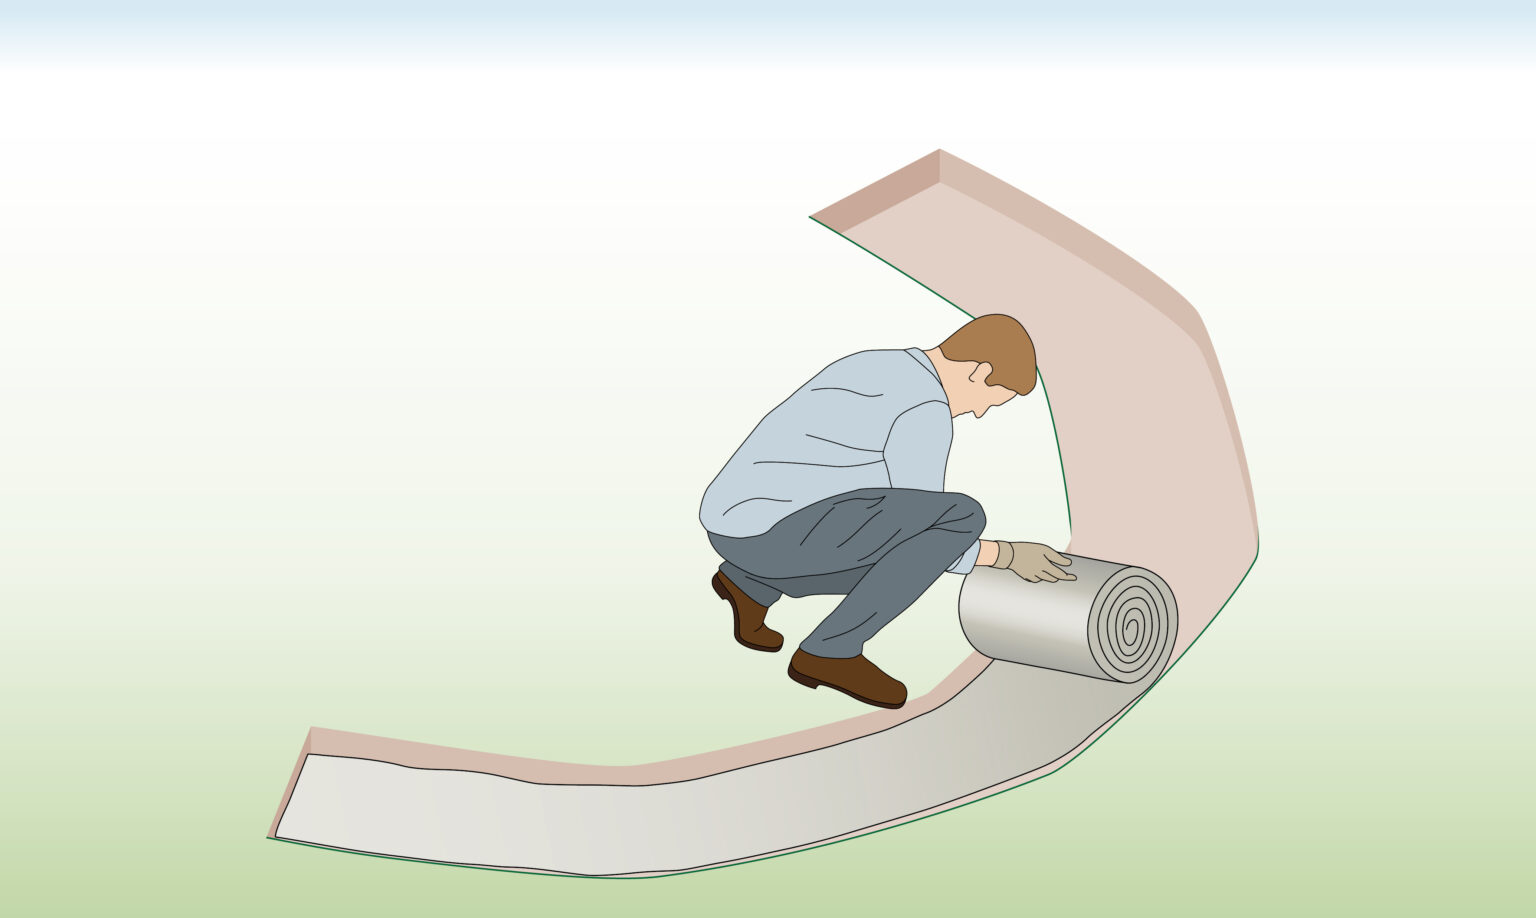
Step 5) Geotextile

- Place a layer of geotextile on top of the soil.
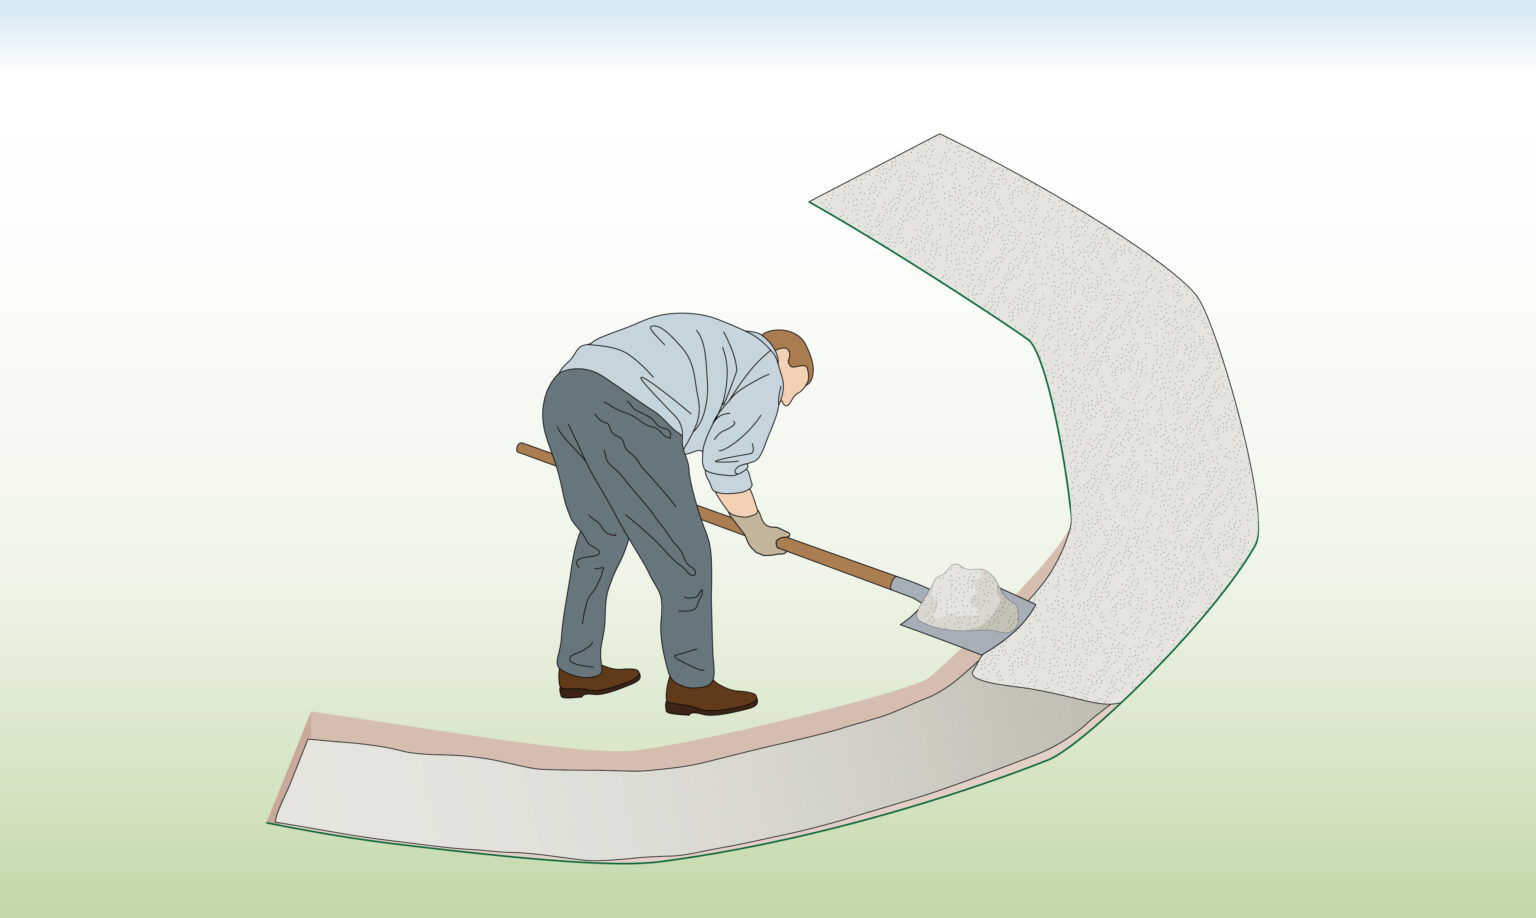
Step 6) Add basecourse

- Add a layer of gravel or basecourse on top of the geotextile.
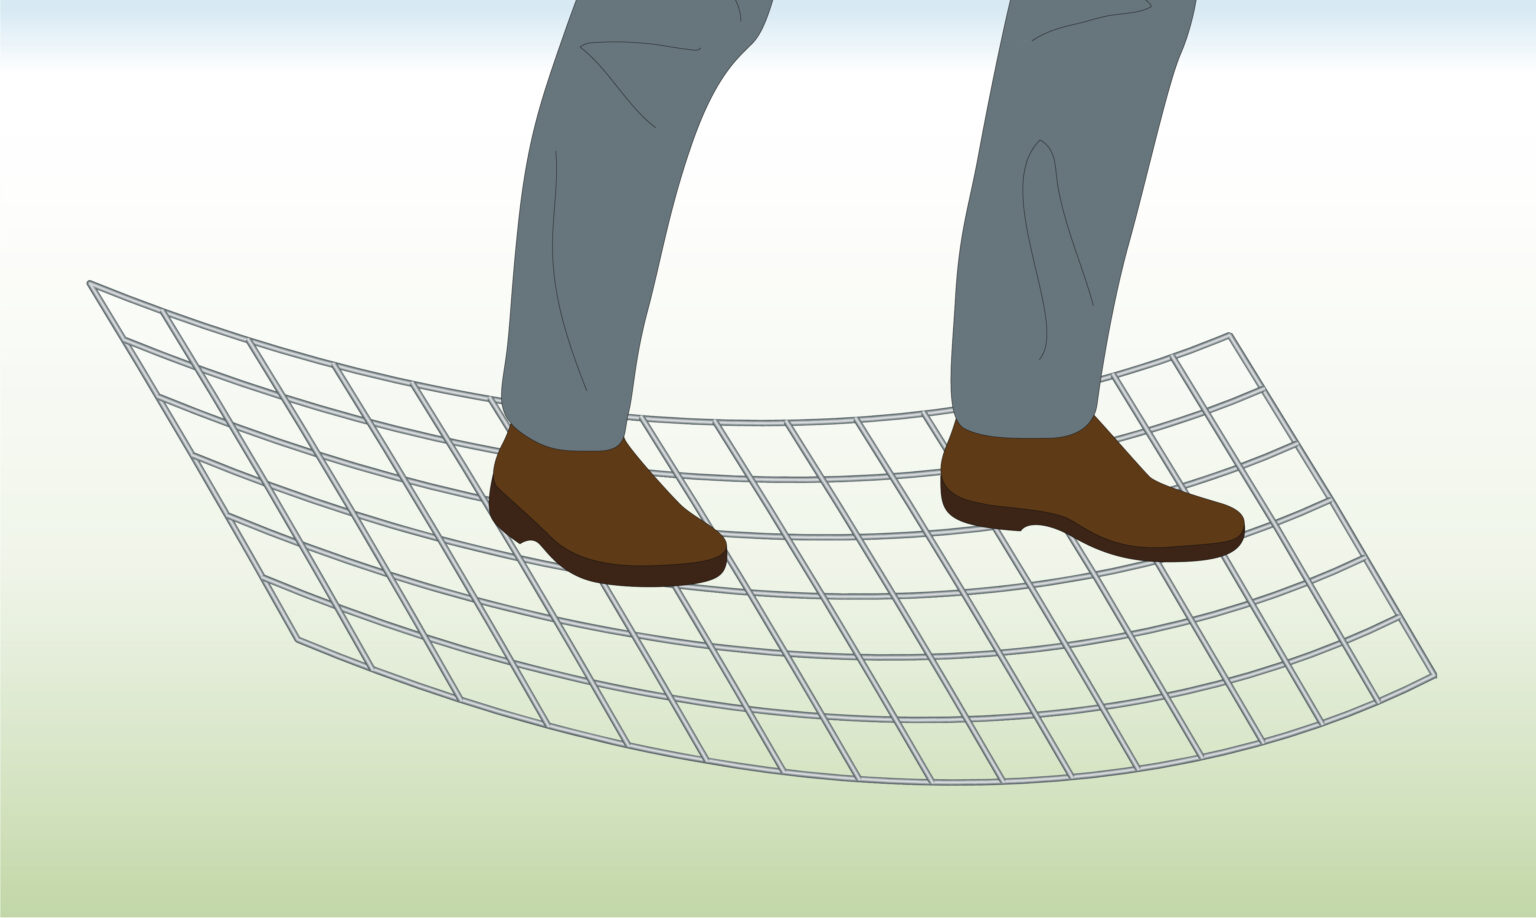
Step 7) Compact basecourse

- Walk and stomp on the gravel to make it compact or use a base plate for bigger jobs.
- If the soil is weak, it may be needed to use a concrete foundation instead.
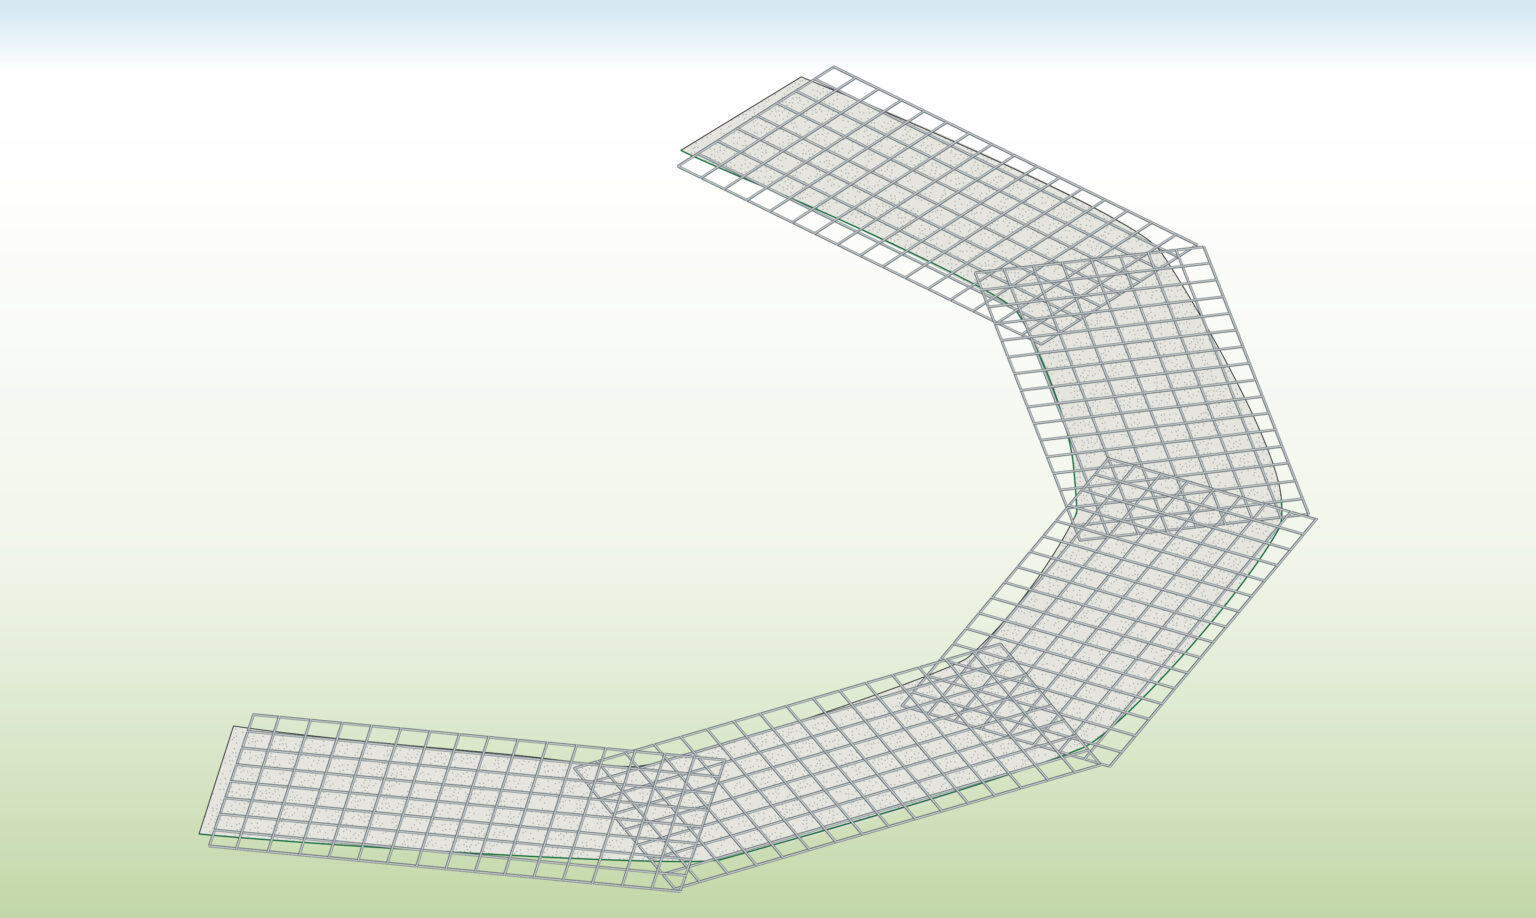
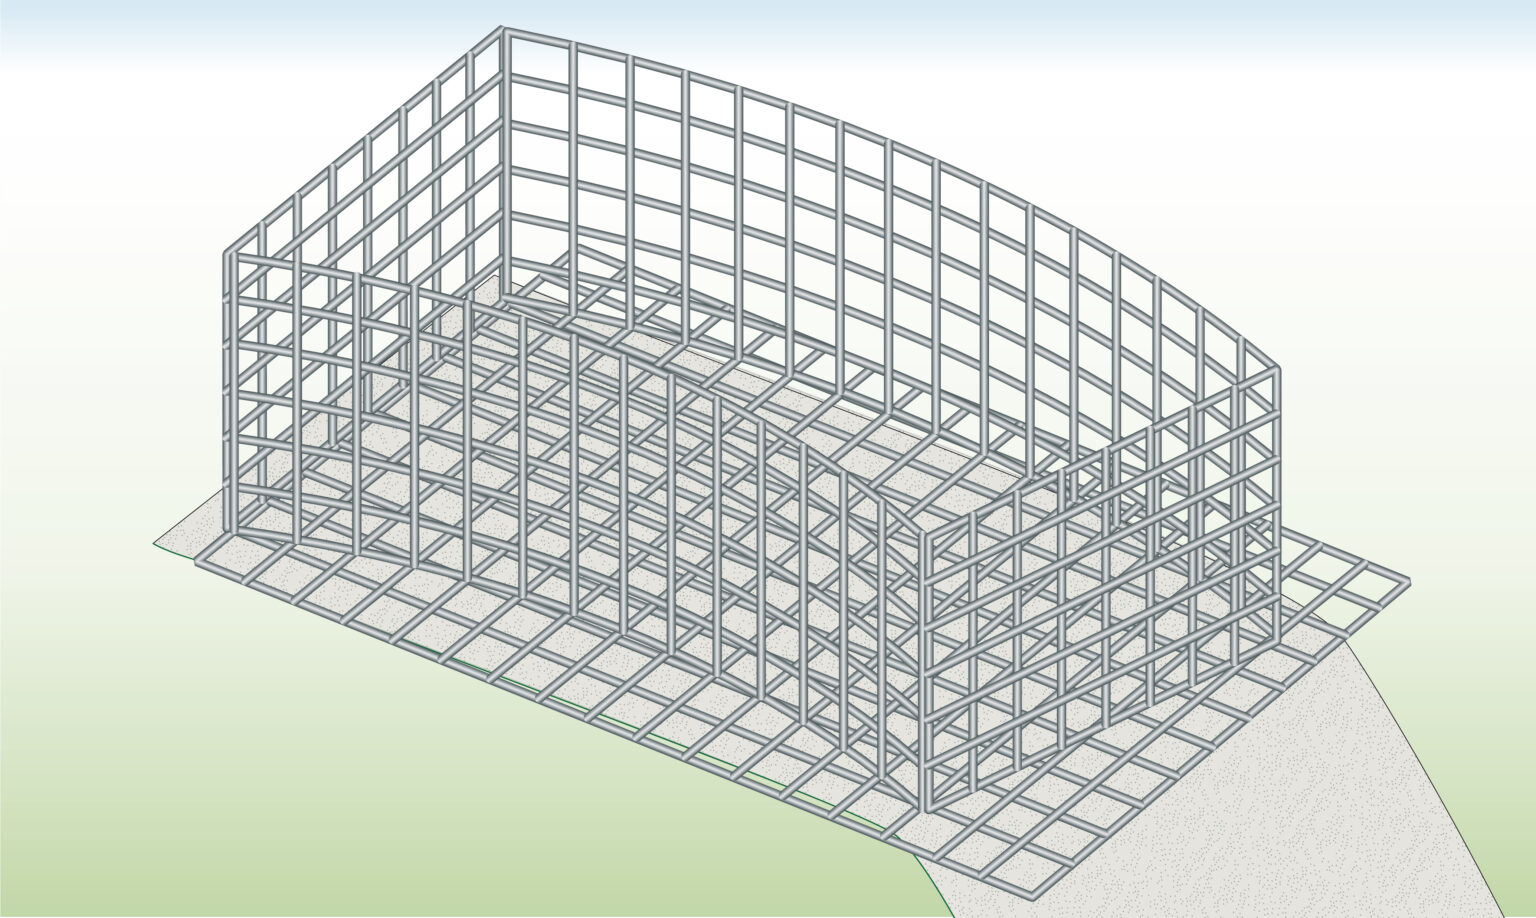
Step 8) Position and secure gabions

- Place the first gabion, fold up the sides, and leave the lid open.
- Insert helicals only on corners not connecting to another unit, then add the second cage and secure it.
- Finally, install the panel between them to fix the shared corners.
Step 9) Continue

- Continue the same process with the remaining gabions and panels, securing each one to the next using helicals.
Step 10) Fill with stones

- Fill the cages with stones.
Step 11) Continue filling

- Then fill the triangle sections as well.
Step 12) Close the lids

- Close the lids.
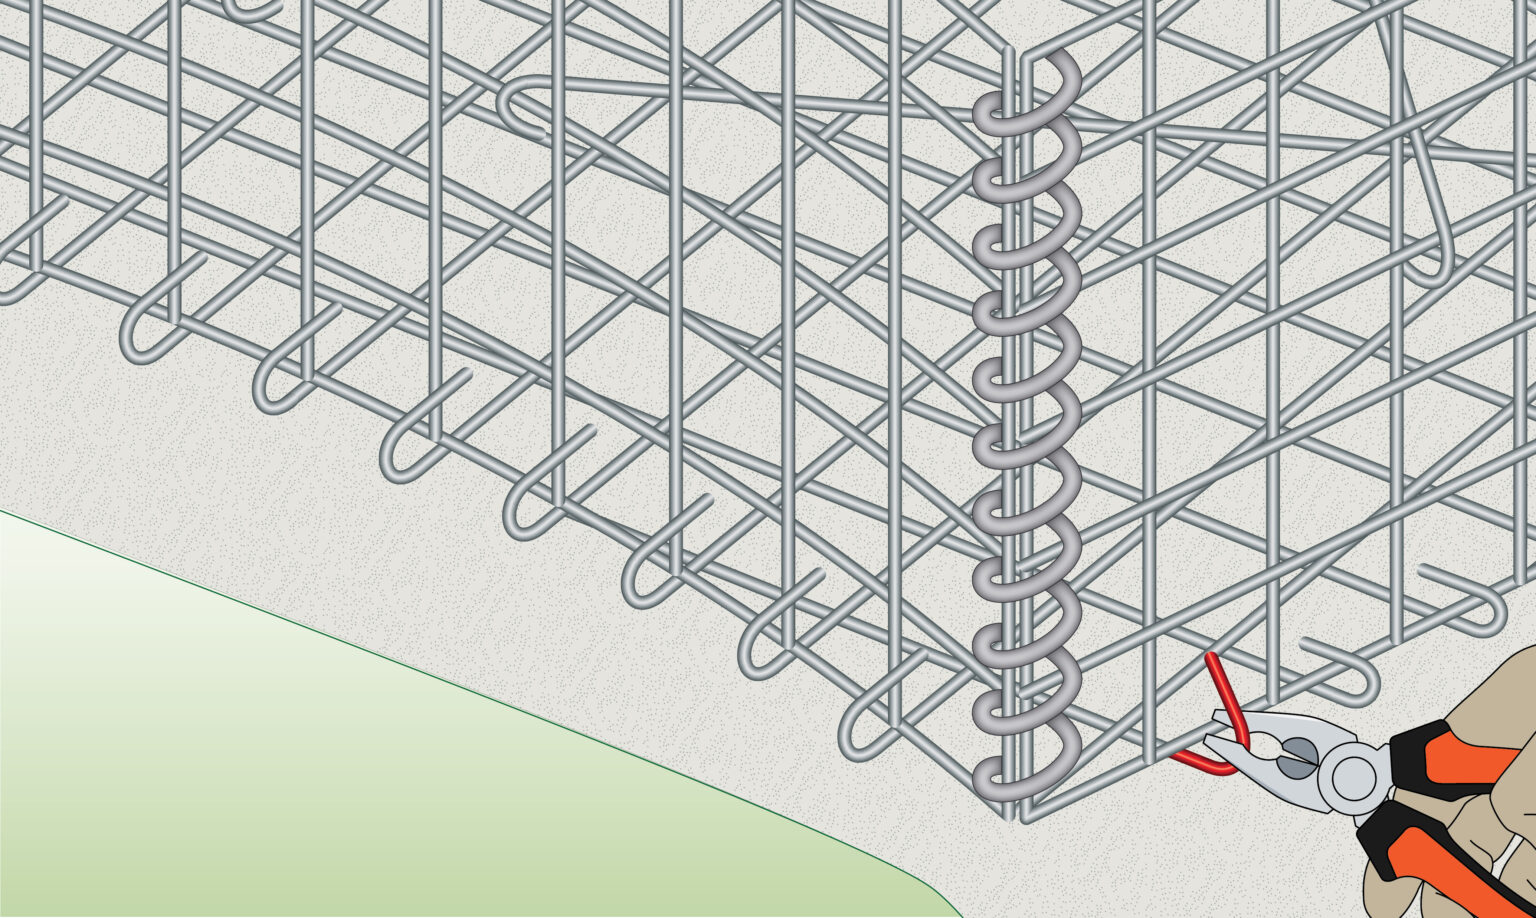
Step 13) Secure the lids

- Secure the lids using helicals.
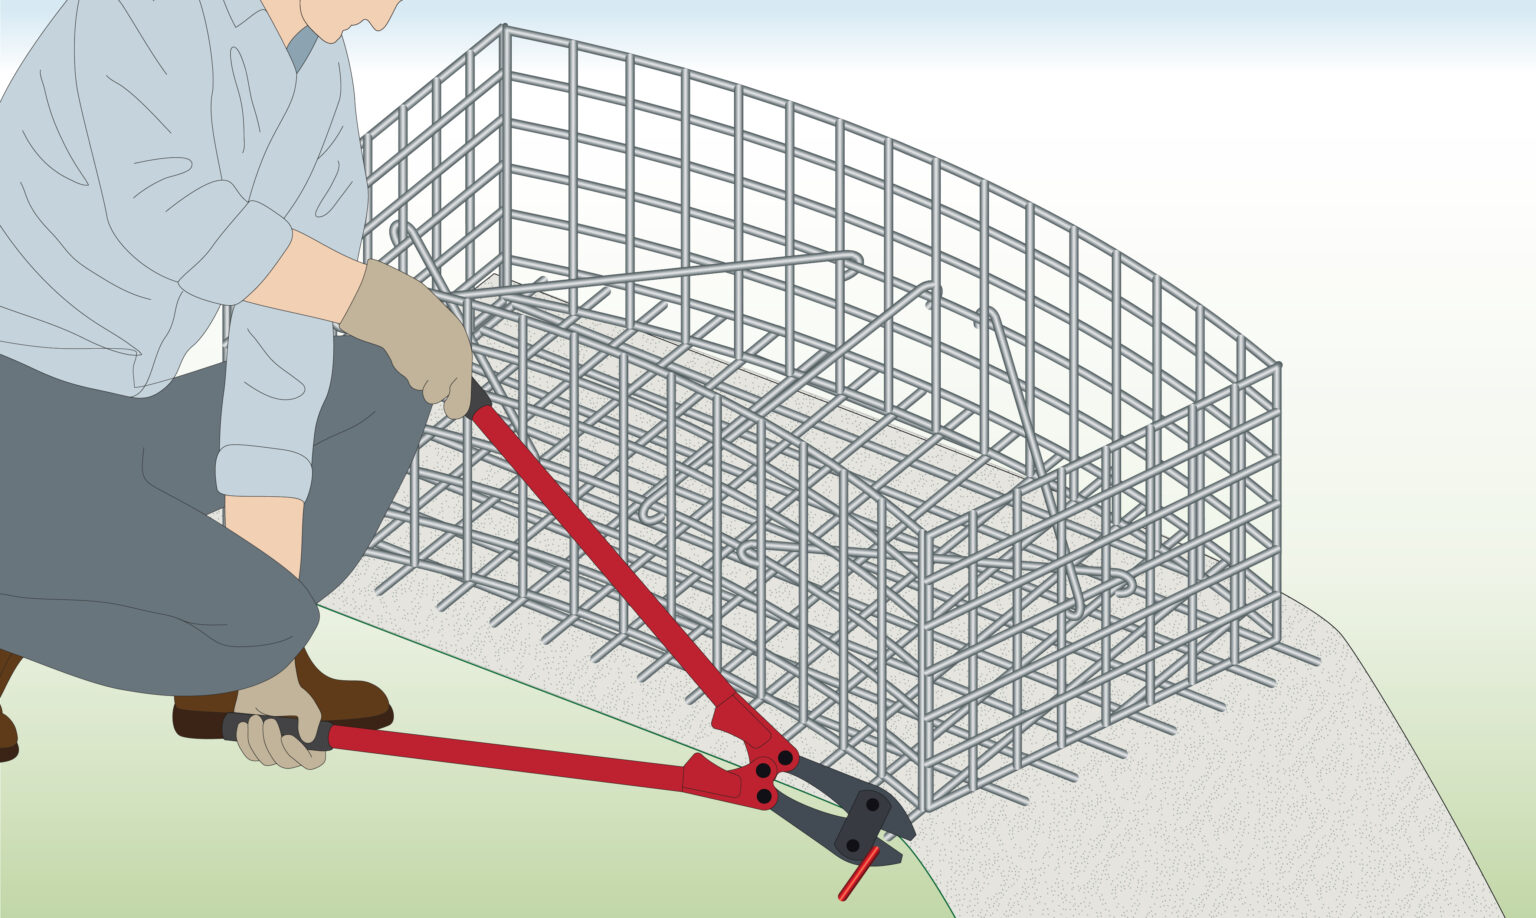
Step 14) Cover triangles

- If you don’t want to leave the triangular gaps open, cover them with mesh panels.
- Cut the panels to size using bolt cutters.

- Then secure them to the lid with tying wire.
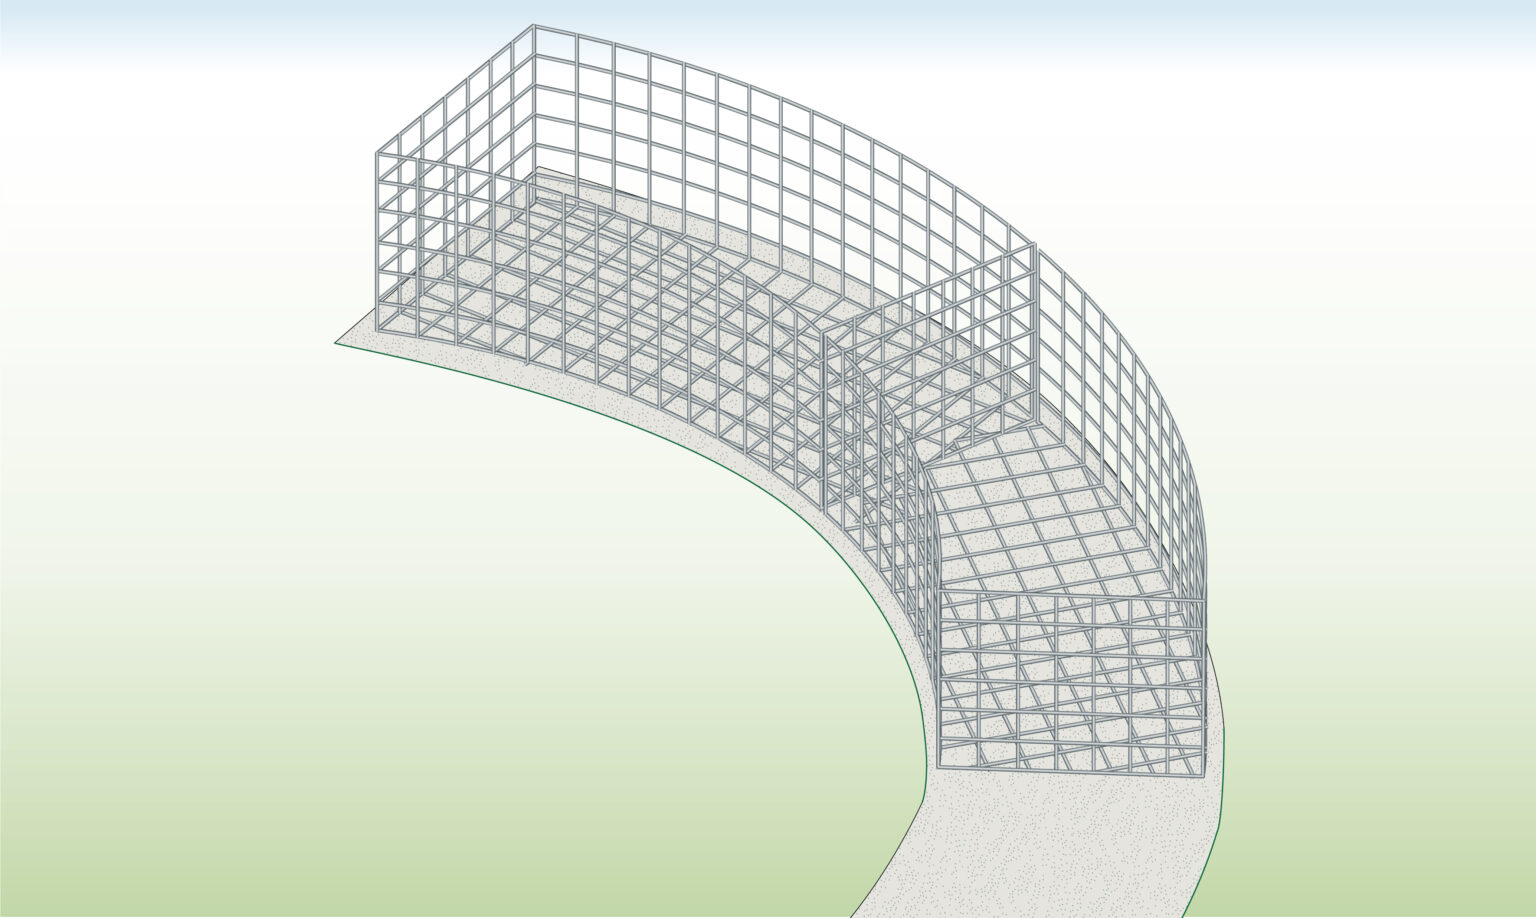
Step 15) Finished project
- Your curved gabion wall is complete.
PANEL BENDING
- Experience Required: Medium
- Tools Required: Shovel, Bolt Cutters, Spray Paint (optional), Tamper, Car Tire (or similar round object)
- Materials Required: Gabion Baskets, Gabion Stone, Geotextile, Helicals / Tying wire, Braces, Gravel
Step 1) Walk the curve
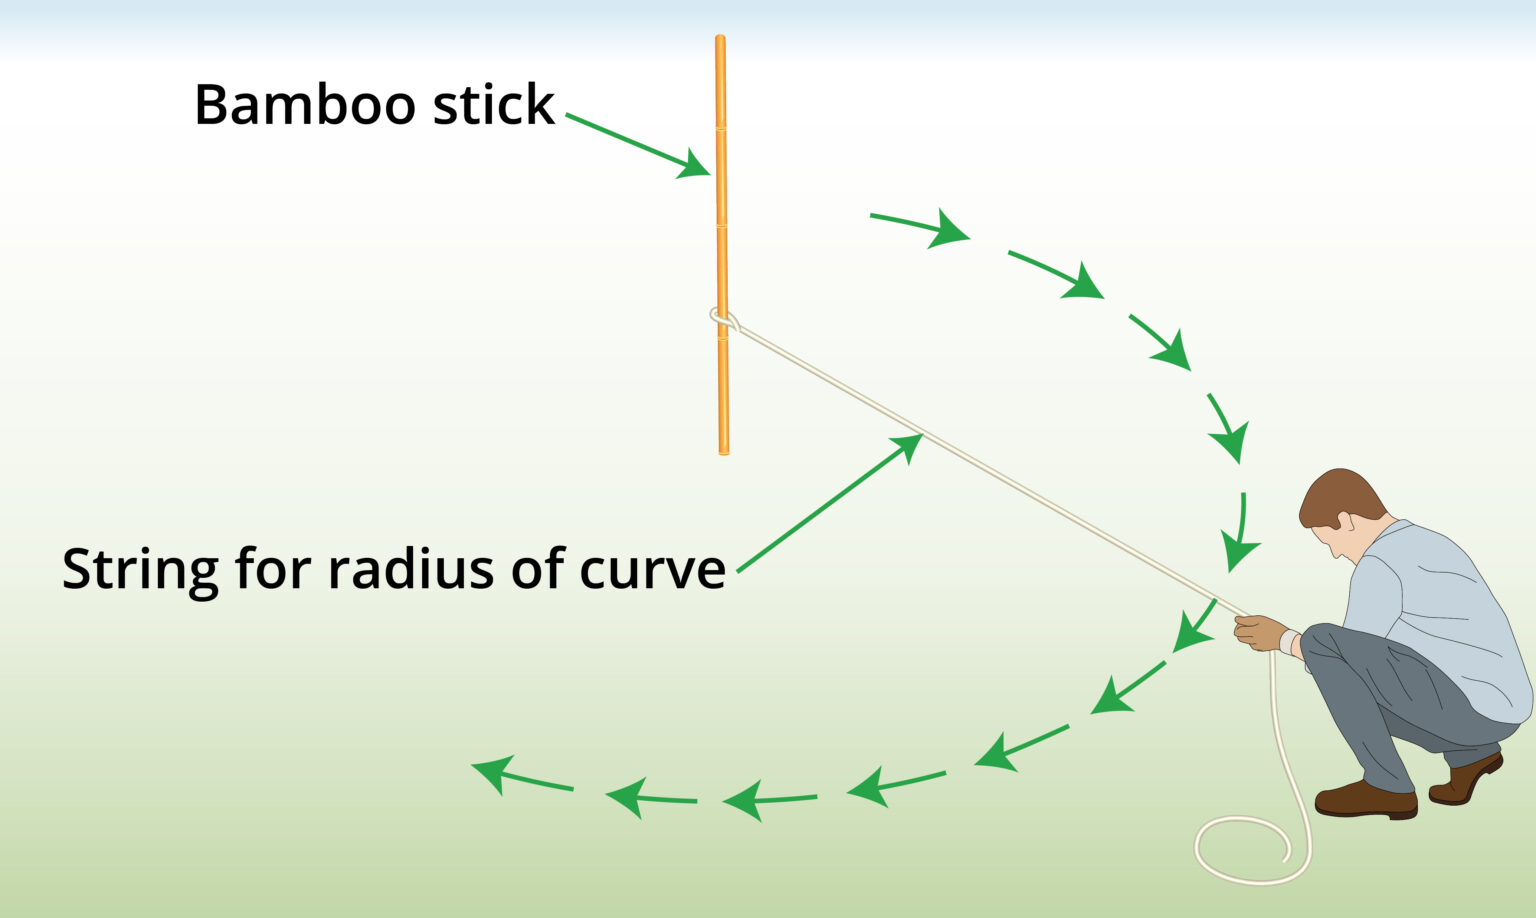
- Use a string attached to a bamboo stick and walk it along the area where you would like to create a curved gabion wall.
Step 2) Mark the curve
- Lay string along the planned curve for wall installation.
- Position the string on the ground to delineate inner and outer sides.
- Secure the string at intervals of 1 meter using rocks to keep it in place.
Step 3) Measure string
- Place the string on the ground.
- Utilize a measuring tape to determine the length of each string segment.
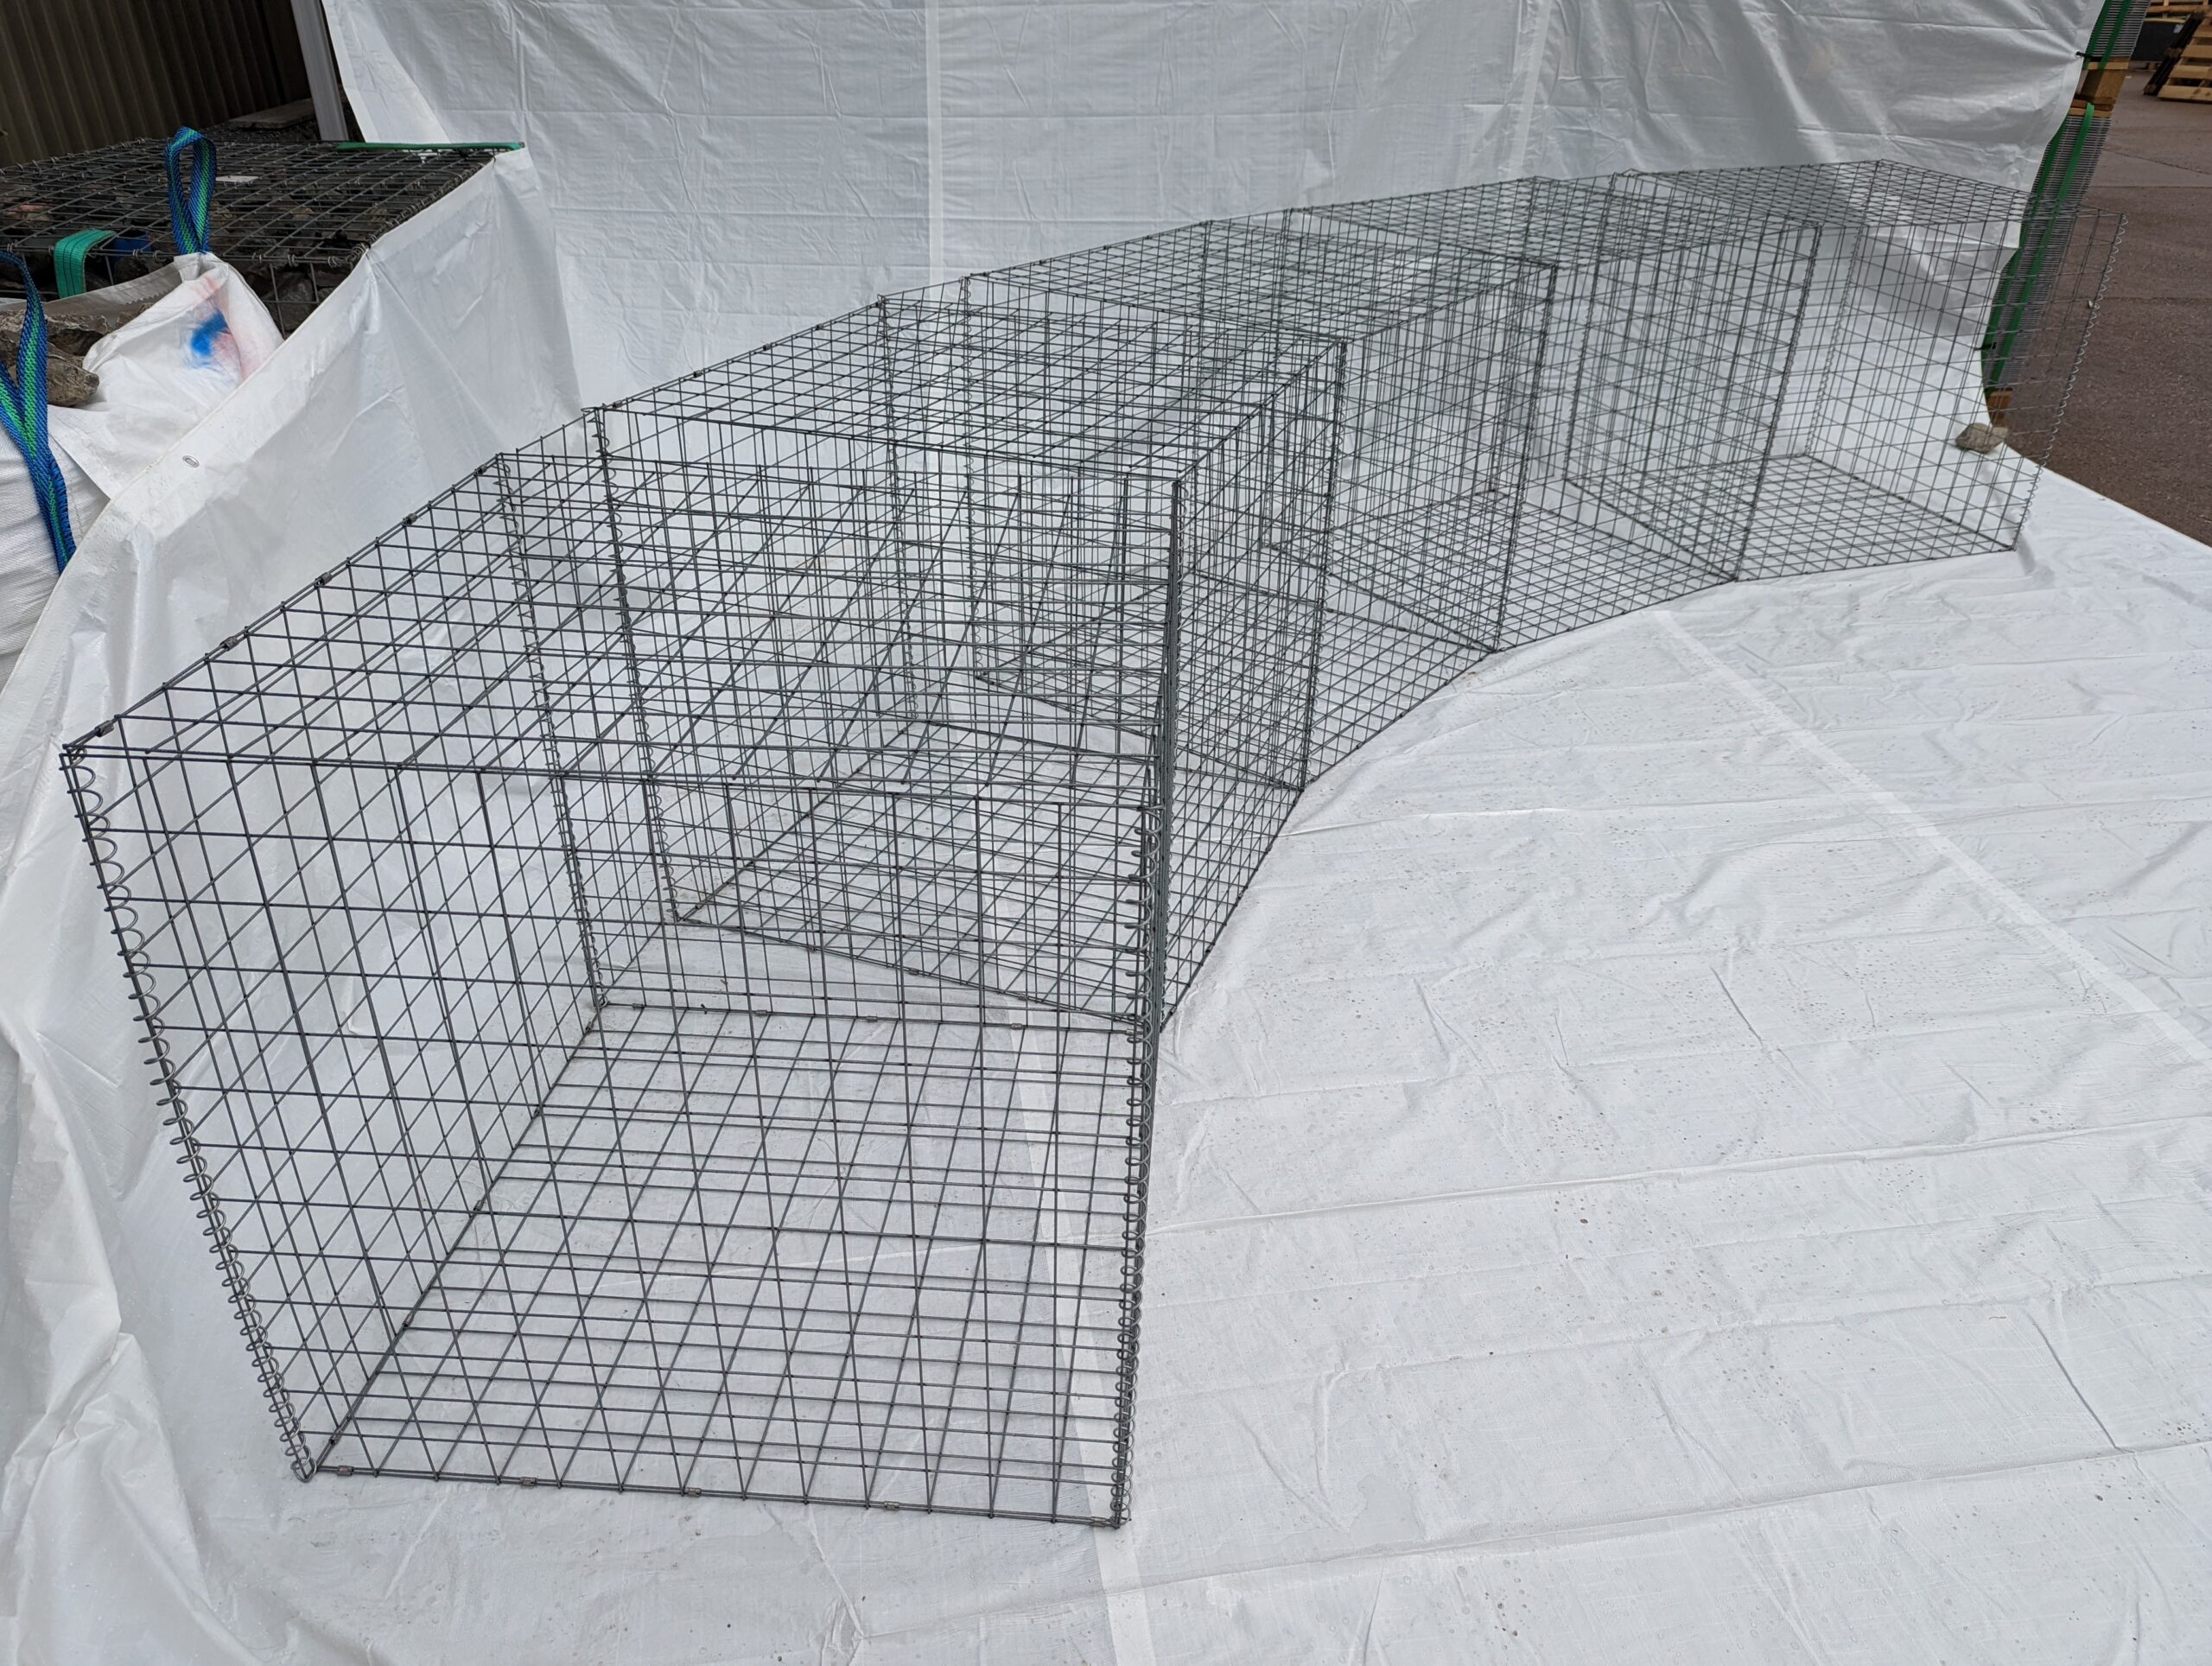
Step 4) Buy materials
- Obtain cages to match the length of your inner curve.
- Optimal lengths for cages are 45cm or 97.5cm for achieving the desired curve effect.
- Longer cages are acceptable, but they may not produce as pronounced of a curve effect.
Step 5) Dig
- Dig to a depth of 10cm, or until the soil is solid.
- Gabion walls shorter than 1m can be placed directly on the ground, but for better stability, it’s advisable to set them on solid ground like clay rather than topsoil.
Step 6) Geotextile
- Cover the soil with geotextile to inhibit weed growth beneath your structure once it’s install
Step 7) Add gravel or basecourse
- Place a layer of gravel or basecourse over the geotextile.
Step 8) Compact gravel
- Walk and stomp down on the gravel to compress it.
- Alternatively, you can use a tamper tool.
Step 9) (Optional) Concrete foundation
- Many basic installations don’t necessitate a foundation, however, in cases of excessive groundwater or poor soil quality, it might become necessary.
Step 10) Placing Base Panels
- Position panels horizontally on the ground.
- Ensure panels extend beyond the base of the curved wall.
- Cover the entire length of the wall with these panels.
Step 11) Rolling panels into shape

- Curve the side panels around a tire or another curved item.
- Roll it repeatedly until it forms the desired circular shape.
Step 12) Adjust curve
- If necessary, step on the panel post rolling to fine-tune the curve.
Step 13) Position Side Panels
- Place the initial inner, outer, back, and front panels onto the base panels.
- Ensure the corners of the panels are securely attached to maintain their position.
- Consider adding rocks or posts for extra support during the installation process.
Step 14) Add braces

- Add braces at every meter interval along the wall.
- Place the braces around the midpoint of the structure’s height.
- Enhance stability and minimize bulging by adding these braces.
Step 15) Cut the base
- Cut the base panels to match the contour of the side panels.
- Leave approximately 5-10cm surplus wire for folding back into the cage.
Step 16) Fold the base wires
- Fold the additional 5-10cm of wires backward into the basket.
- Ensure the fold loops over the top of the side panel mesh.
Step 17) Repeat Steps 7-12
- Repeat steps 7-12 until you have completed your installation.
Step 18) Fill the cages
- After positioning them, proceed to load the cages with gabion stone.
VIDEO
Written By
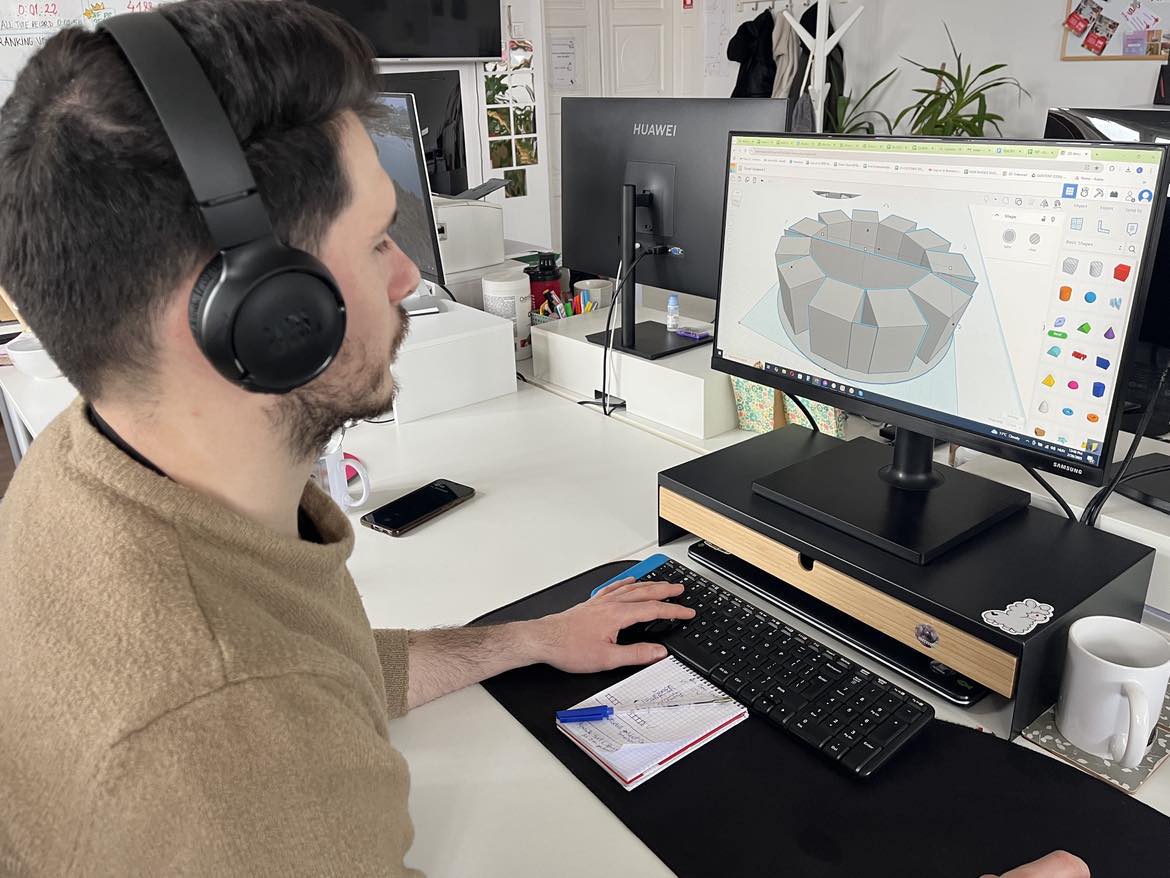
This blog was created by our Technical Consultant, Erno.
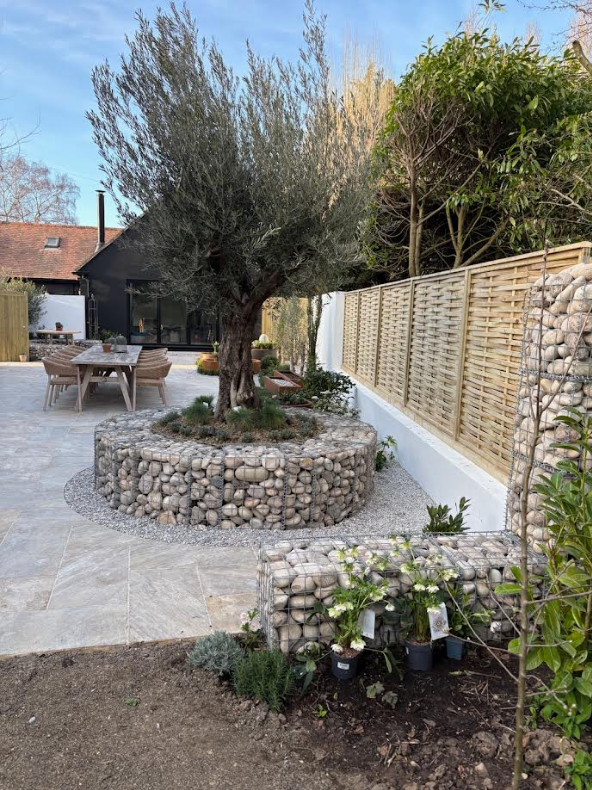
Below you’ll find some of our real-life gabion wall builds, along with customer projects and technical drawings Erno created for them. We’ve opted for technical illustrations for the instructions found in this blog because they provide better clarity on mesh placement and structural details that can get lost in real-life photography.
Hiya, thank you for this tutorial. It is just what I needed to understand how to construct a curved gabion feature. Easy to follow.
Hi Jenny,
Many thanks for your comment and the kind words.
We’re happy to hear that the tutorial gave you exactly what you needed and that you found it easy to follow. It’s reassuring to know that our blogs are helpful and straight forward even for first timers.
We wish you good luck with your gabion project and feel free to get in touch with us if you have any questions or need any help during your project!
Kind regards,
Erno