DIY Wire Basket Drawers

Below you will find steps on how to create a DIY wire basket drawer using welded mesh.
OVERVIEW
- Experience Required: Medium
- Tools Required: Protective Gloves, Tin Snips, Needle Nose Pliers Marker, Tape Measure
- Materials Required: Wire Mesh, Rope
STEP 1) Determine the Dimensions

- Take a tape measure and find out the size that you need for the wire basket drawer.
- Measure the width, length and height as that way you’ll know where to mark the mesh.
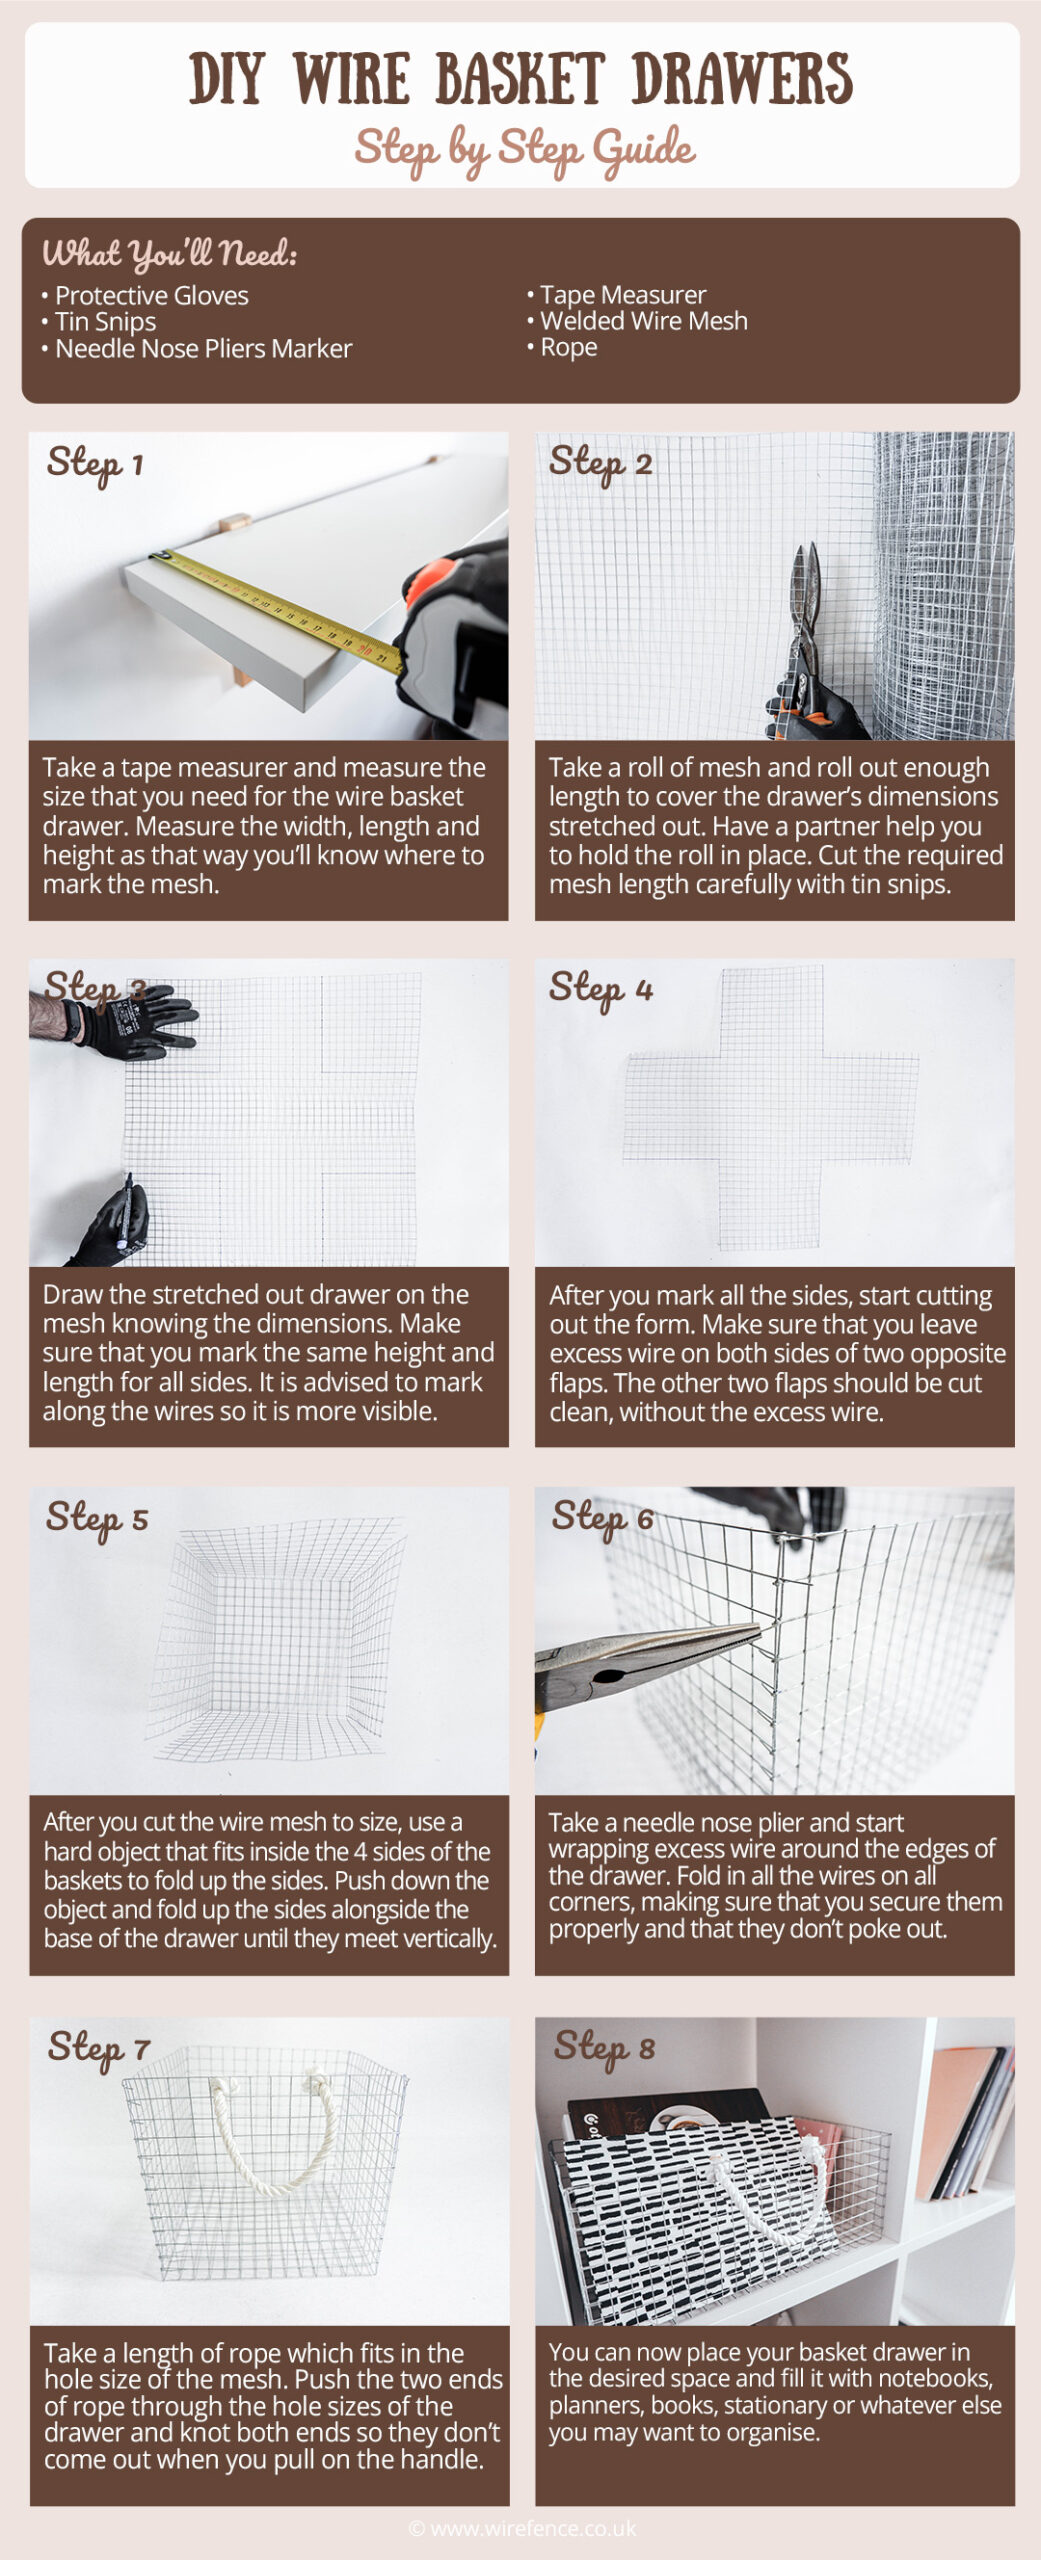
STEP 2) Roll Out and Cut Down Wire Mesh
- Take your mesh and roll out enough length to cover the drawer’s dimensions stretched out.
- Have a partner help you hold the roll in place.
- Cut the required mesh length carefully with tin snips.
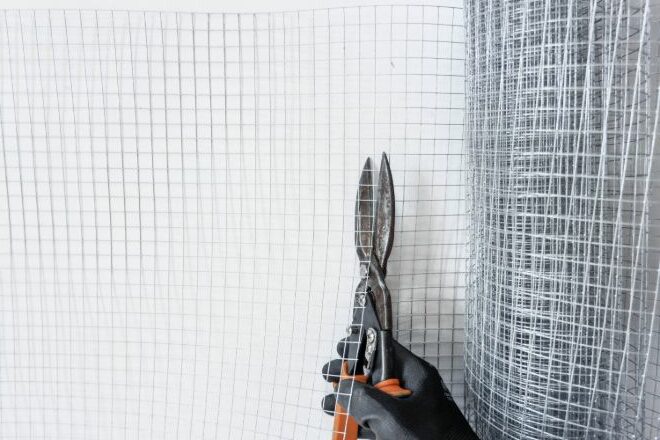
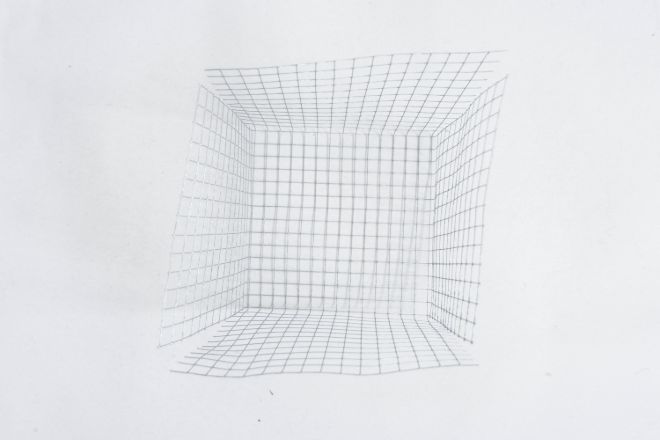
STEP 3) Mark the Mesh
- Draw the stretched out drawer on the mesh knowing the dimensions.
- Make sure that you mark the same height and length for all sides.
- It is advised to mark along the wires so it is more visible.
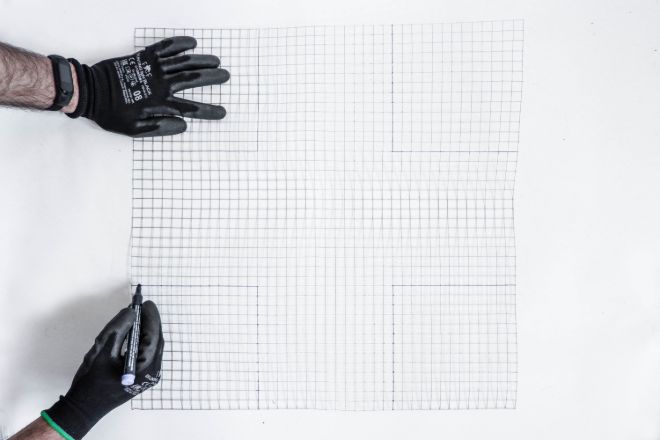
STEP 4) Cut to Size
- After you mark all the sides, start cutting out the shape.
- Make sure that you leave excess wire on both sides of two opposite flaps.
- The other two flaps should be cut clean, without the excess wire.
STEP 5) Fold it Together
- After you cut the wire mesh to size, use a hard object that fits inside the 4 sides of the basket (ie. a book or small ruler etc.) to fold up the sides.
- Push down the object and fold up the sides alongside the base of the drawer until they meet vertically.
STEP 6) Secure the Corners
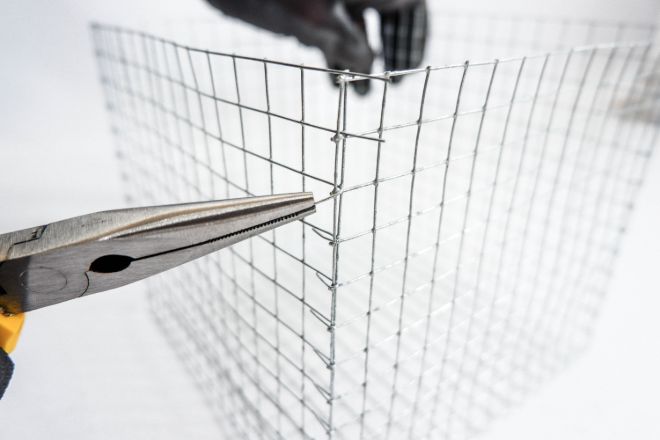
- Take needle nose pliers and start wrapping excess wire around the edges of the drawer.
- Fold in all the wires on all corners, making sure that you secure them properly and that they don’t poke out.
STEP 7) Attach the Handle
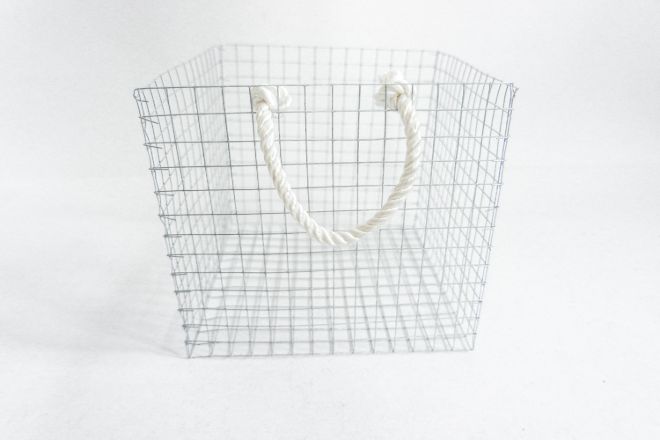
- Depending on the handle length you wish to achieve, take some rope that fits in the hole size of the mesh.
- Push the two ends of rope through the holes of the drawer and knot both ends so they don’t come out when you pull on the handle.
STEP 8) Fit into Desired Space
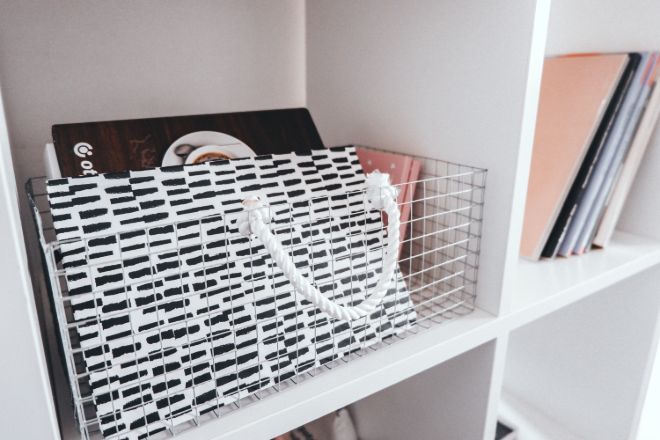
- You can now place your basket drawer in the desired space and fill it with notebooks, planners, books, stationary or whatever else you may want to organise.
FURTHER READING
- How to Straighten Rolled Wire Mesh – Learn the easiest way to flatten welded mesh netting
- How to Cut Wire Netting – A step by step guide showing you how to cut netting with different tools
- DIY Metal Wire Basket – This guide will show you how to make a round basket using the same material