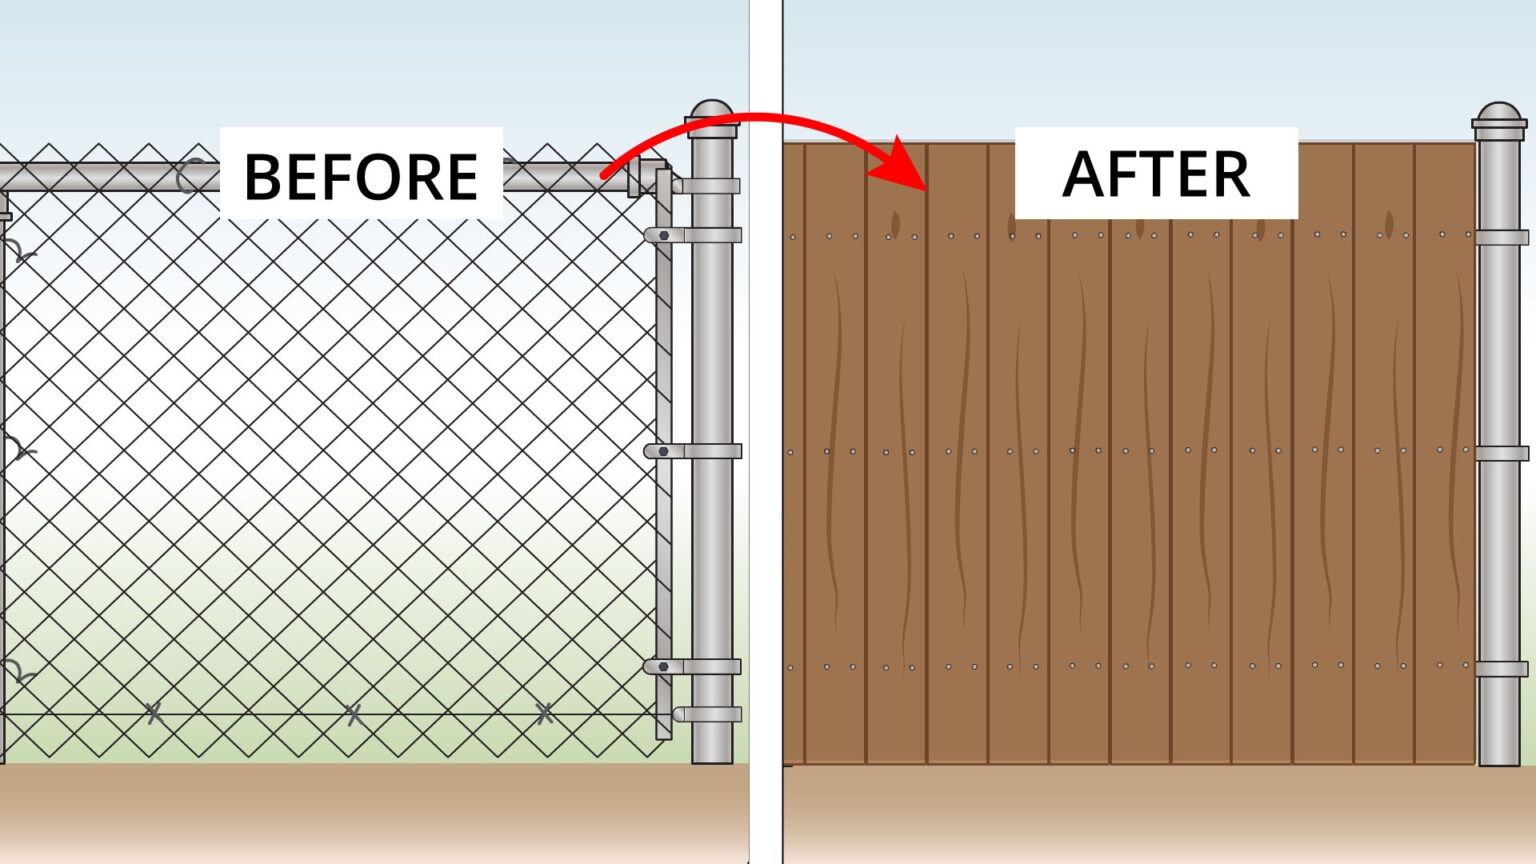
Convert Chain Link Fence to Wood
Below you will find a step by step guide on how to convert chain link fence to wood.
- Experience Required: Medium
- Tools Required: Protective gloves, Tape measure, Level, Pliers, Wrench, Drill, Brush
- Materials Required: Wood timbers and/or panels, Tension bands, Bolts, Washers, Nuts, Fence brackets, Screws, Wood stain
Step 1) Plan and Measure
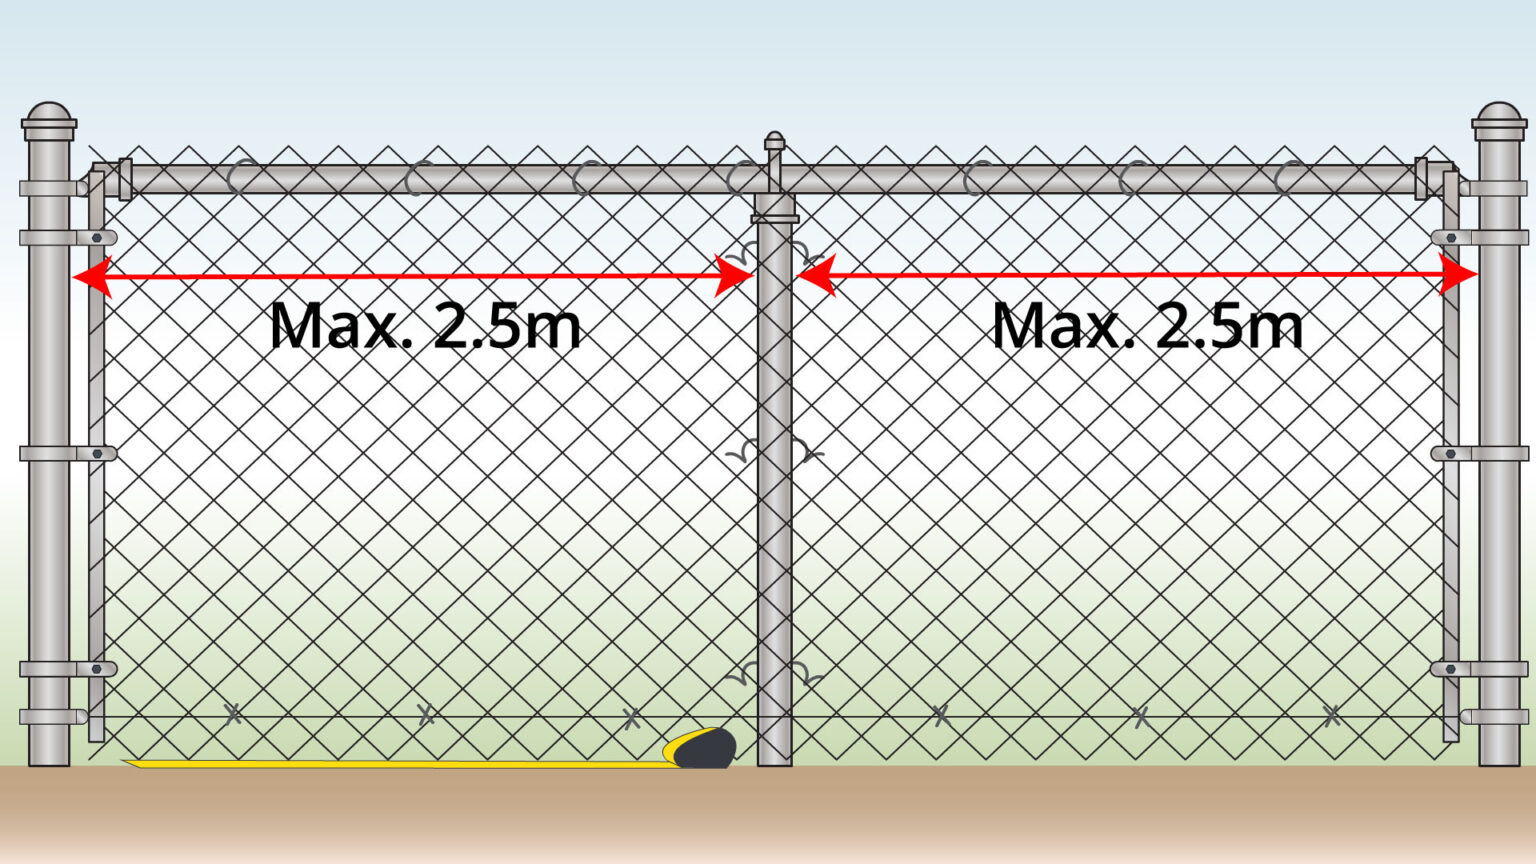
- Start by measuring the distance between the posts: the spacing should be no more than 2.5 m.
- Prepare the work area by removing debris and clearing any weeds.
- Decide whether to keep the existing mesh or remove it before installing the new panels.
Step 2) Remove Chain Link (If Chosen)
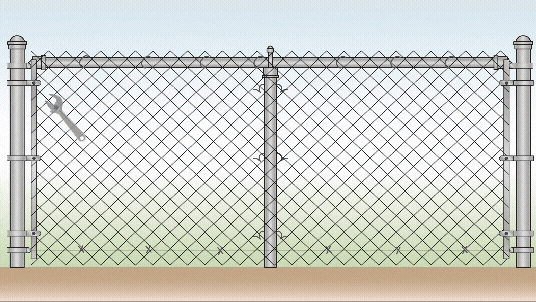
- Remove the tension bands and fence ties, then pull out the tension bars.
- Take out the bottom tension wire if one is installed.
- Remove the mesh fabric and roll it tightly so it is easier to dispose of or reuse.
Step 3) Remove Top Rail
- Start by removing the rail end band. Loosen the nuts and bolts, then take off the top rail.
- As another option, cut the rail using a hacksaw.
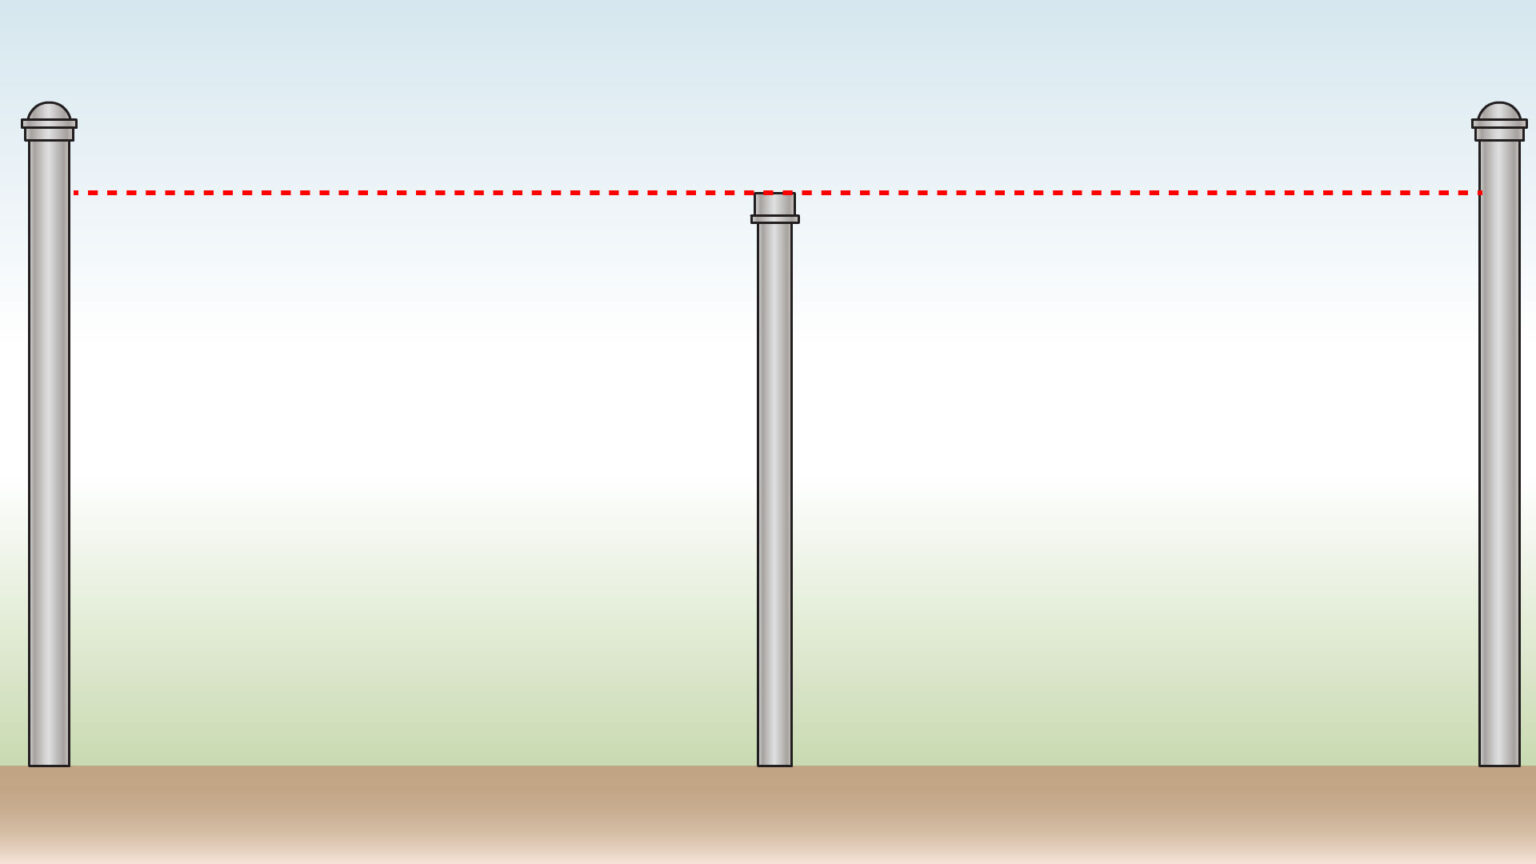
Step 4) Inspect and Reinforce Posts
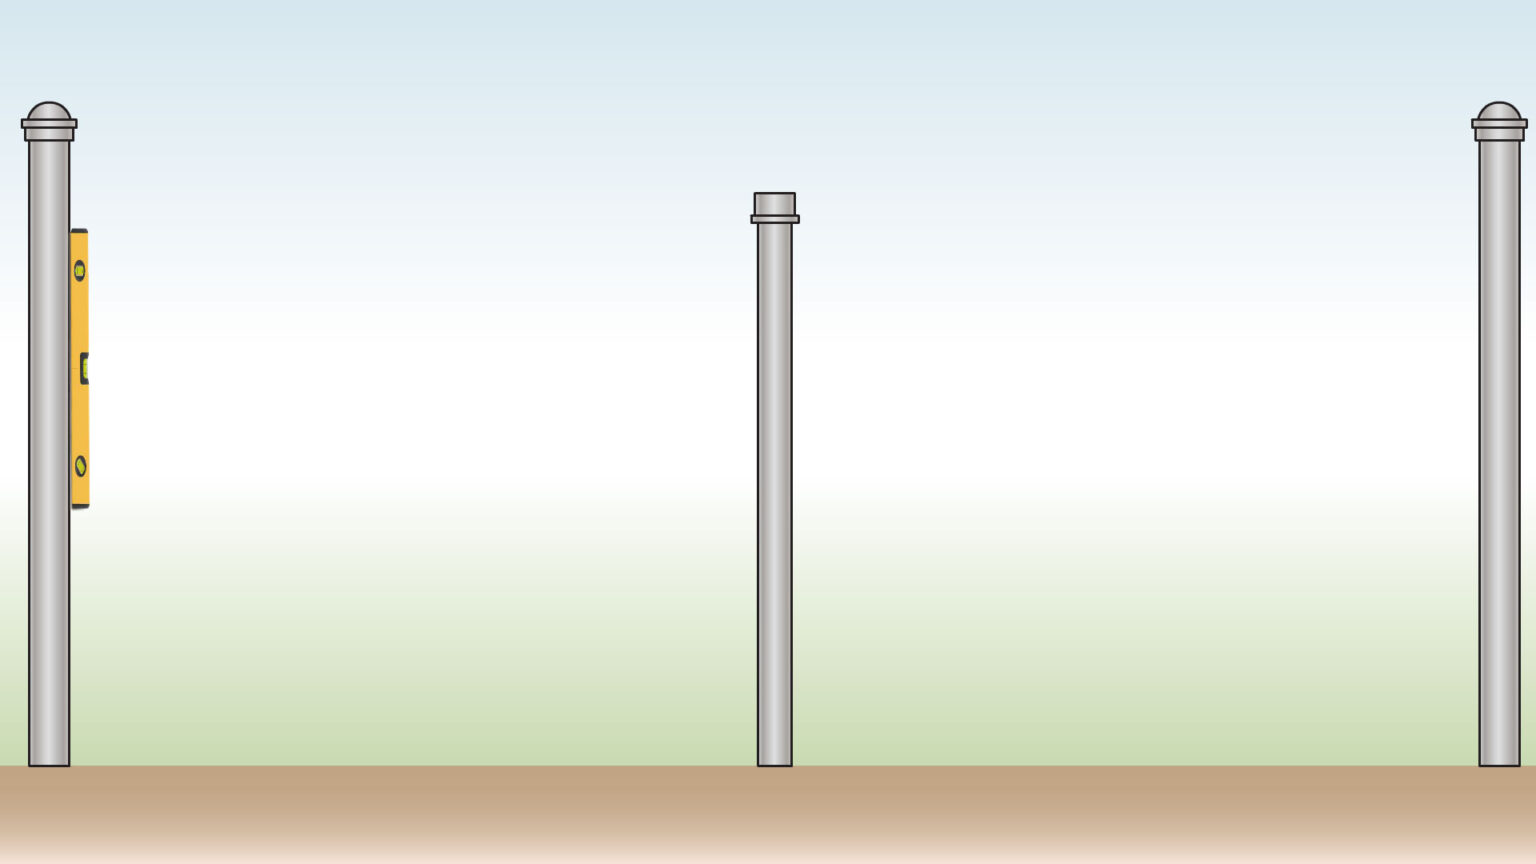
- Check that all posts are level and firmly set.
- Replace any posts that are loose or damaged.
- Install additional posts if the spacing between existing ones is too wide.
Step 5) Attach Frame Timbers to End Posts
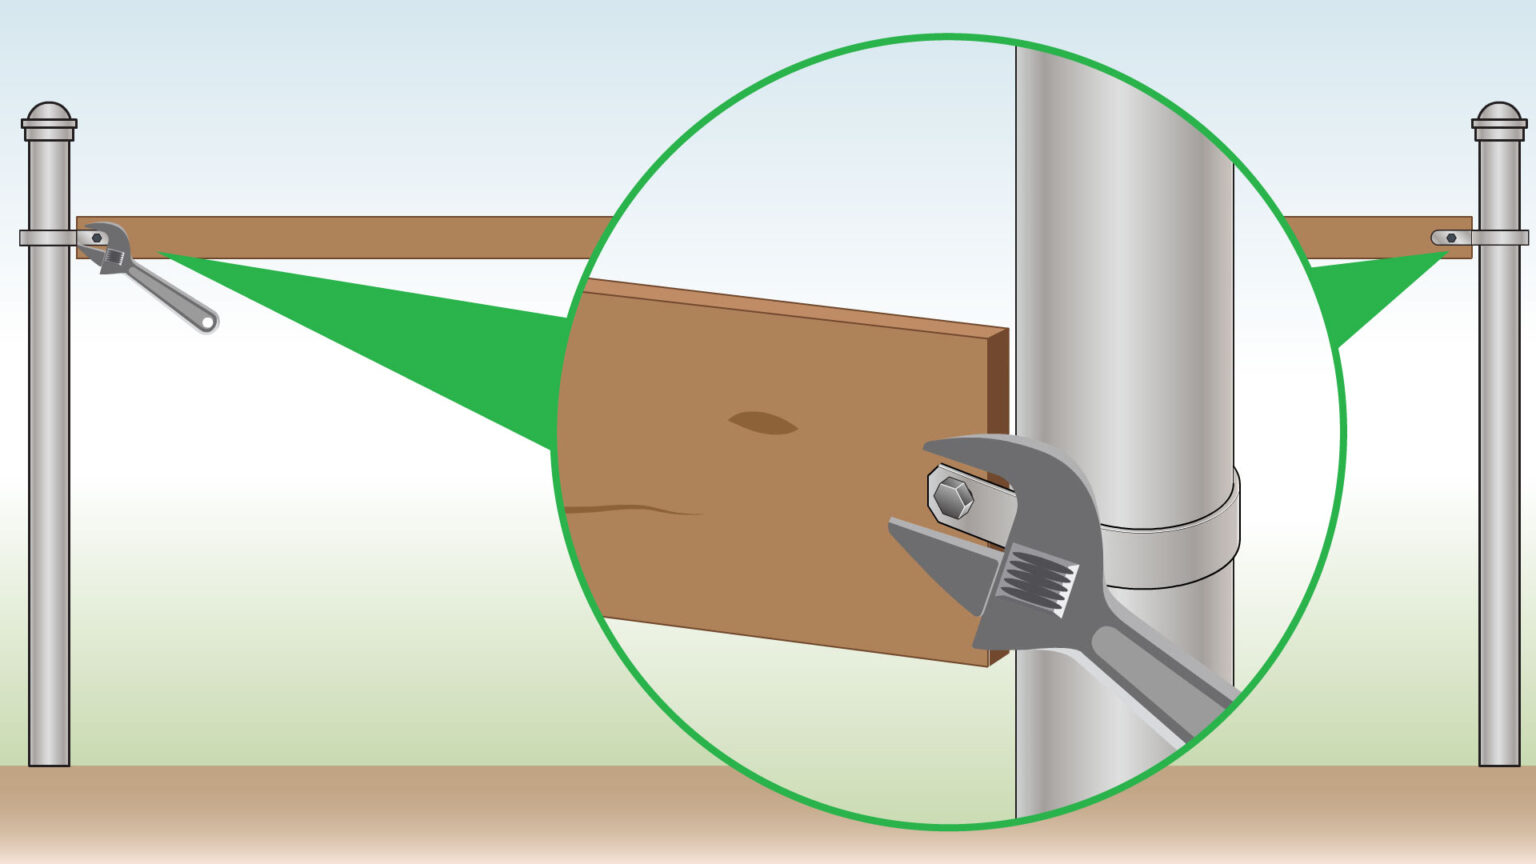
- To convert chain link fence to wood, attach three horizontal timber rails (top, middle, and bottom) to the end posts.
- Secure the rails to the posts using tension bands, then bolt the timbers onto the bands for a strong, stable frame.
Step 6) Secure to Middle Posts

- Fasten the rails to the middle posts at the top, middle, and bottom using fence brackets for added support.
Step 7) Frame Check and Reinforcement
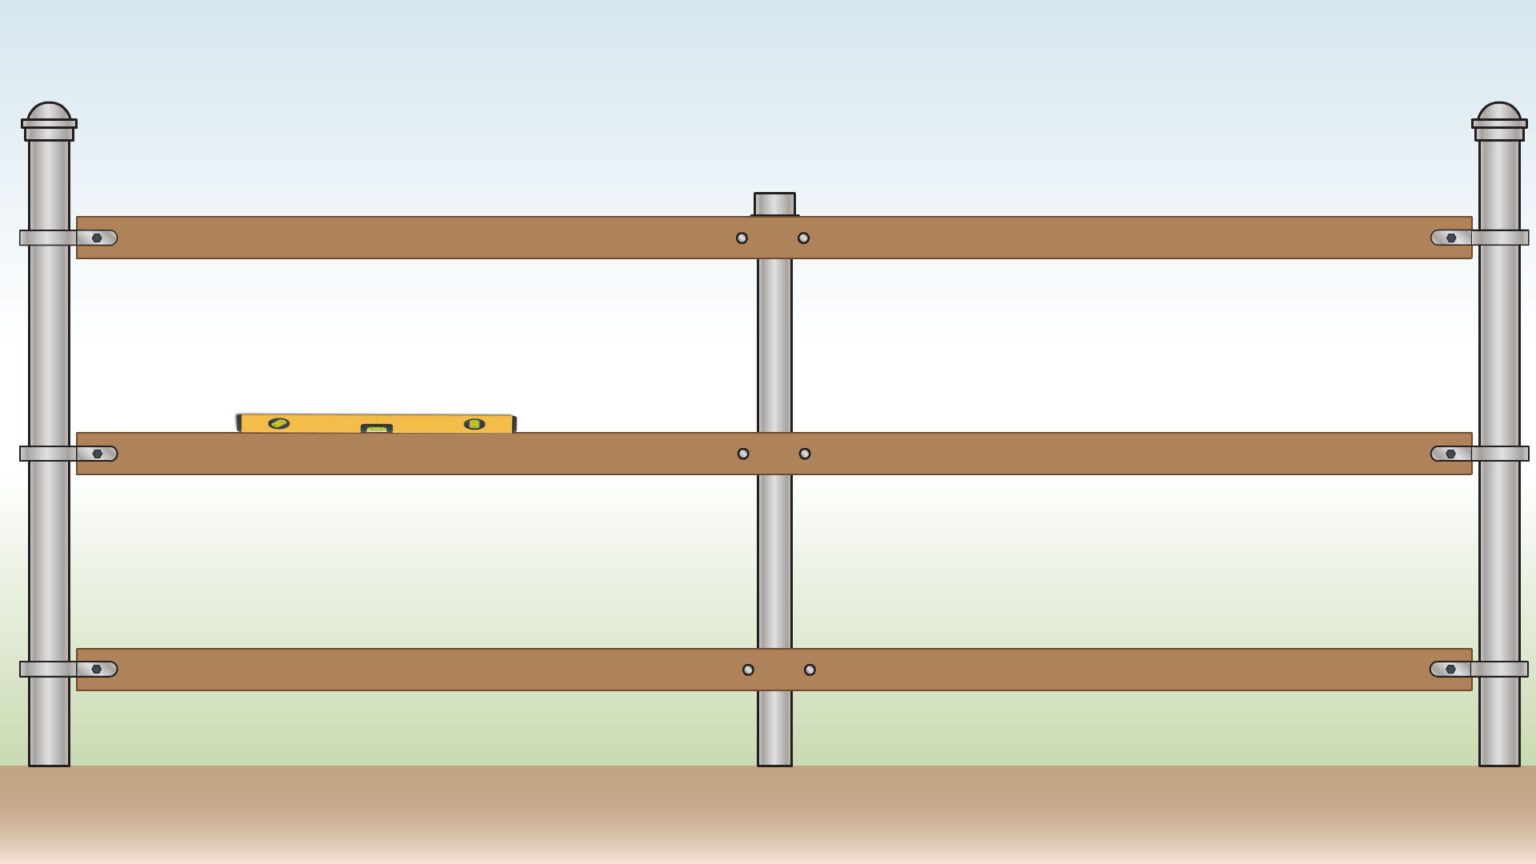
- Make sure the complete timber frame is level and sturdy.
- Add extra support timbers or braces if necessary for stability.
Alternative: For Longer Runs
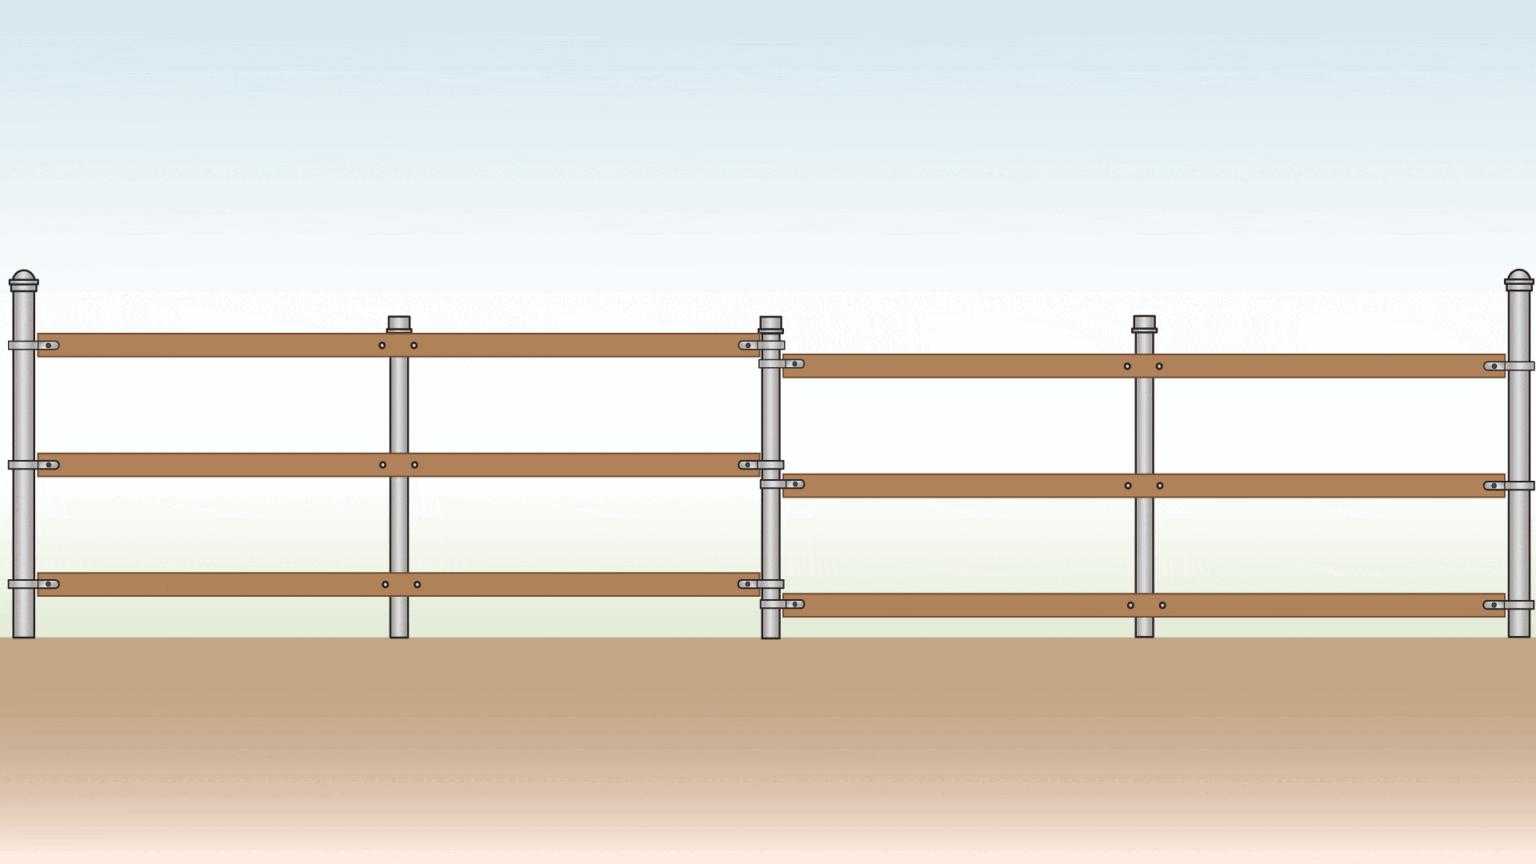
- If your fence line is longer, simply add more timber sections along the frame until the entire run is covered.
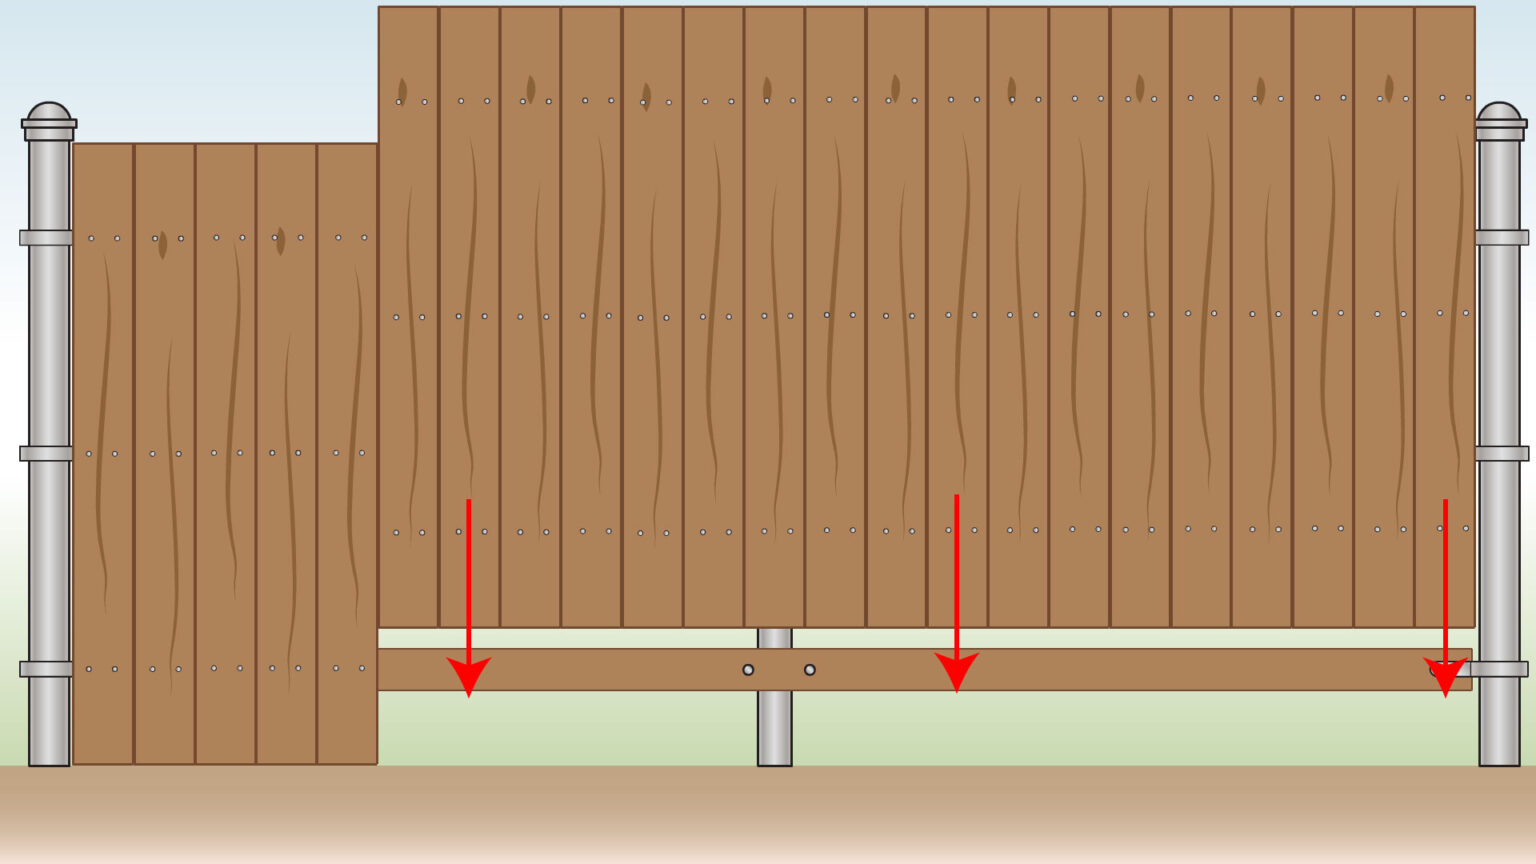
Step 8) Secure Wood Timbers
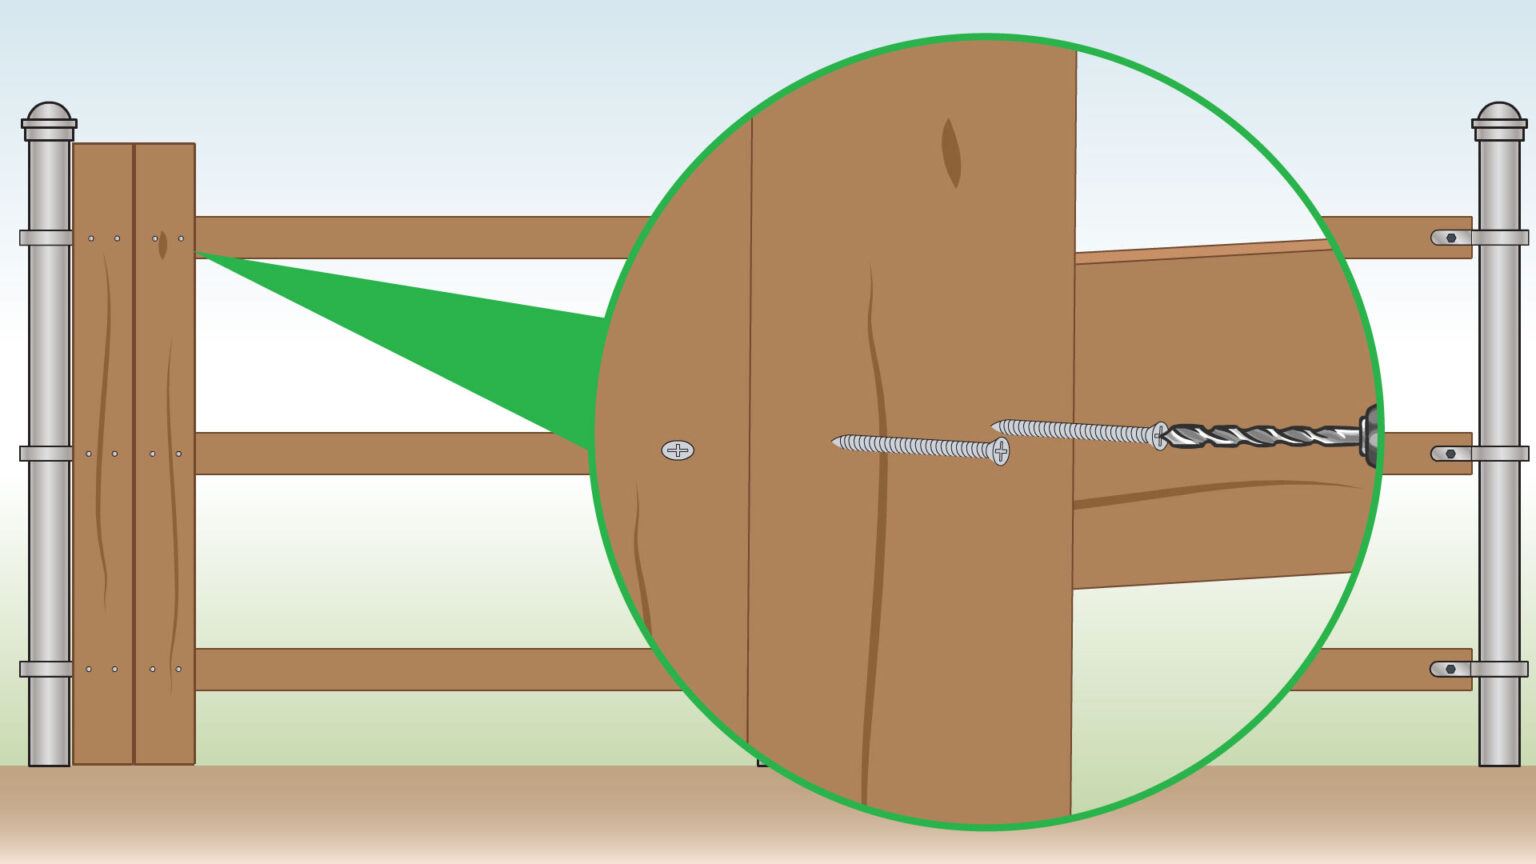
- Attach the vertical boards to the horizontal rails one at a time using a drill and screws.
- Secure them from the back to keep the front surface neat and clean.
Step 9) Alternative: Fence Panels
- Alternatively, use prefabricated wood panels, place them in position, and secure them to the timber frame.
Step 10) Finish the Fence
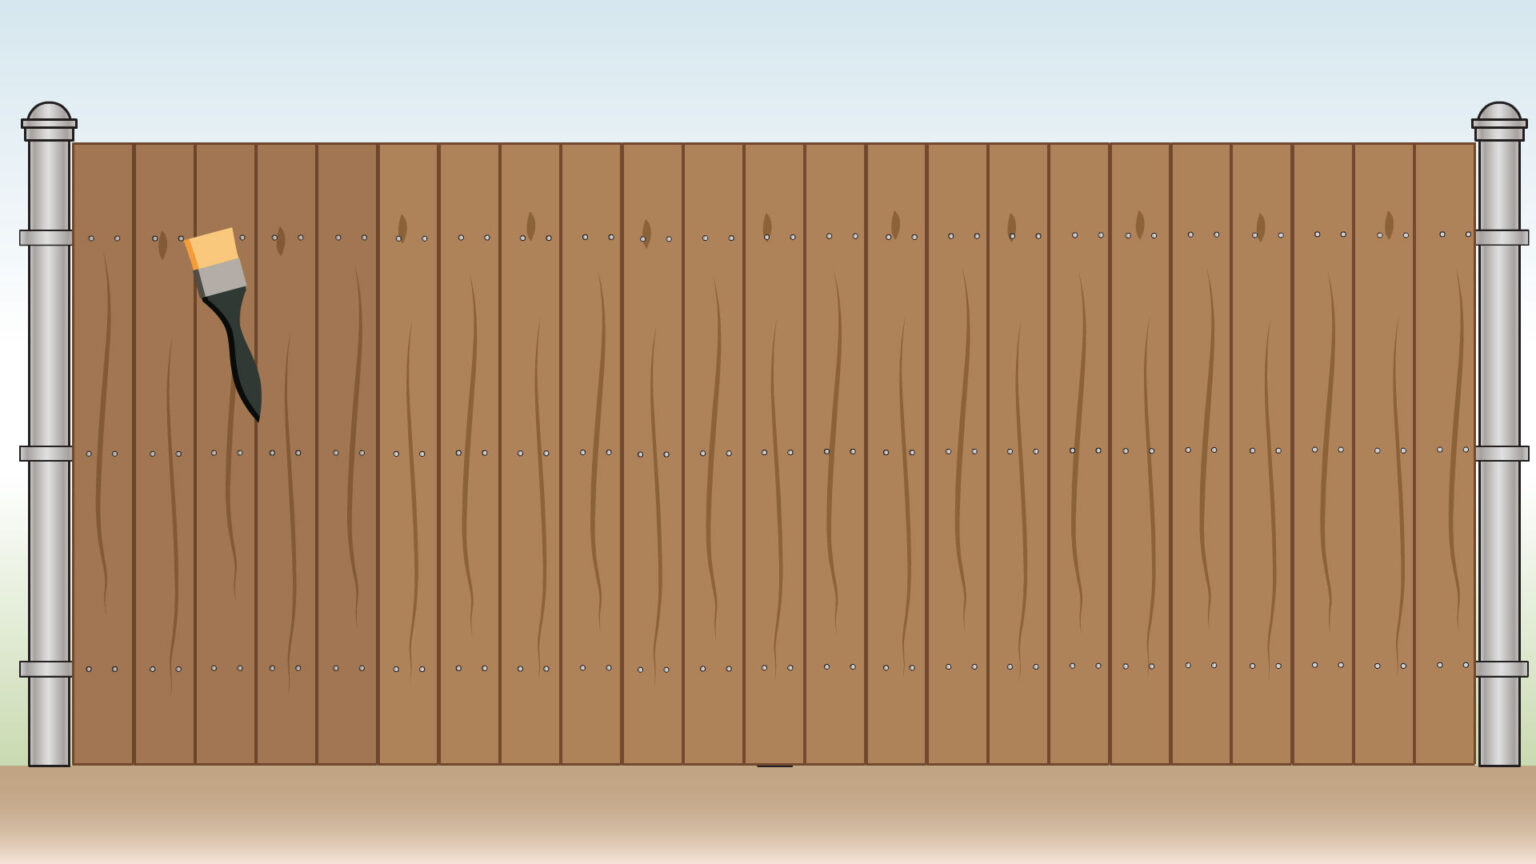
- Finish by applying stain to the timbers to enhance durability and weather resistance.
Tips and Tricks on How to Convert Chain Link Fence to Wood
- Attach the panels from the back using nails or screws to keep the front surface clean with a professional look.
- Always include back supports or rails to prevent panels from sagging over time.
- Check the post spacing first: posts are often about 3 m apart, while wood panels are usually around 2.5 m wide.
- If the spacing between posts is too large, install additional metal posts to prevent future strength or wind-load issues.
- Make sure the existing steel posts are stable with no looseness before attaching any wood fencing.
- Roll up removed mesh fabric neatly to make disposal or reuse easier.
- Install post caps on steel posts to prevent water buildup inside, which may cause rust.
- This task often requires more than one person, especially when positioning or securing large panels.
- Finish by applying stain or sealant to the boards to help the fence last longer while improving its overall appearance.
Further Solutions
- Remove the mesh fabric plus the top rail if you plan a complete conversion to a wooden fence.
- Another option is to leave the existing mesh in place while attaching the timbers directly over it.
- Prefabricated panels are quicker, more affordable, plus simpler to install compared with placing individual timbers one by one.
- Start by building a sturdy frame with top, middle, bottom rails, then secure the timbers or panels onto that structure.
- If the metal posts are too short for the desired height, install post extensions instead of replacing the entire post system.
FURTHER READING
- How to Attach Privacy Screen to Chain Link Fence – Learn how to attach privacy screen to chain link fabric.
- How to Cut Chain Link Fence – A guide on how to cut mesh fabric.
- How to Repair Chain Link Fence – Step-by-step instructions for repairing damaged mesh.
- How to Install a Chain Link Fence (Traditional) – Step-by-step instructions for traditional installation.
VIDEO
