
Chicken Wire Christmas Tree DIY

In this blog you will find out how to make a chicken wire Christmas tree.

OVERVIEW
- Experience Required: Medium
- Tools Required: Pliers, Wire Cutters, Protective Gloves
- Materials Required:
- Chicken Wire (120cm x 150cm)
- 6x Stakes (90cm long each)
- Christmas Lights (15m long)
- Tying Wire (2.5m long)
- Lacing Wire
- Spray Paint (preferably green)
STEP 1) Cut Tying Wire
- You will need to create two hoops to create and hold the cone shape of the Christmas tree together.
- Cut an approximately 150cm long piece and a 100cm long piece of tying wire for the top and bottom hoops.
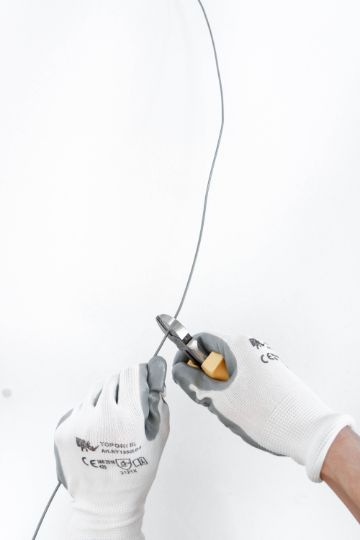
STEP 2) Make Tying Wire Hoops


- Bend the tying wire into a hoop with a small overlap.
- Tie it off with thin lacing wire to secure it into place.
STEP 3) Insert First Stake Into the Bottom Hoop
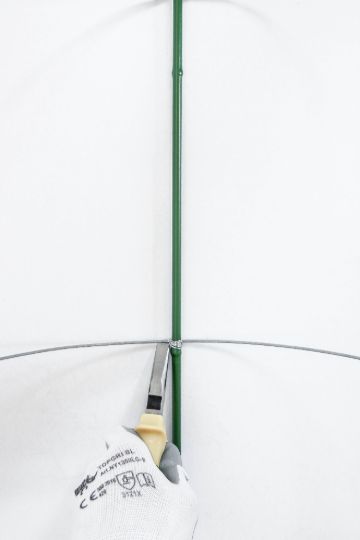
- Tie the bigger hoop at a 20cm distance from the bottom of the first stake with the lacing wire.
STEP 4) Place the Top Hoop
- Place the smaller hoop onto the stake at 40cm from the top and secure it with the lacing wire.
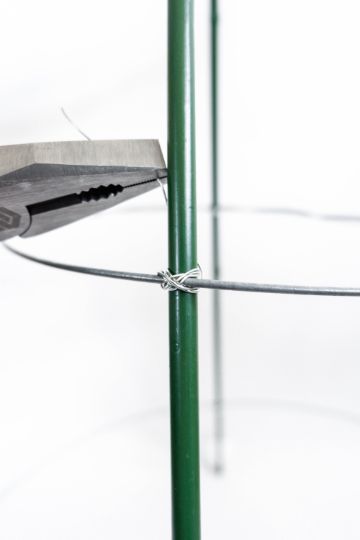
STEP 5) Insert the Remaining Stakes
- Place the next stake on the opposite side and tie it to both hoops at equal distances.
- Repeat the same steps with the rest of the stakes at even distances – insert and secure to both hoops.
- Make sure to always place opposite stakes.
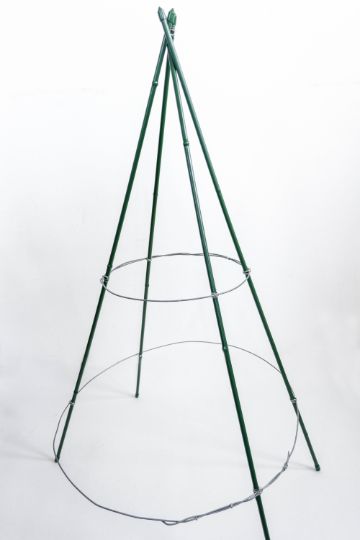
STEP 6) Secure the Top of the Stakes
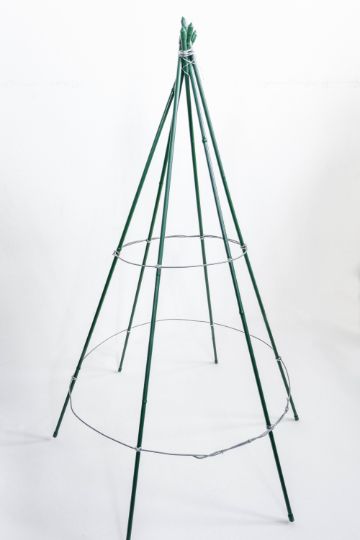
- To give stability to the structure, tie the top of the stakes together.
- Just wrap the thin lacing wire in between and around the stakes to hold them in place.
STEP 7) Measure the Mesh
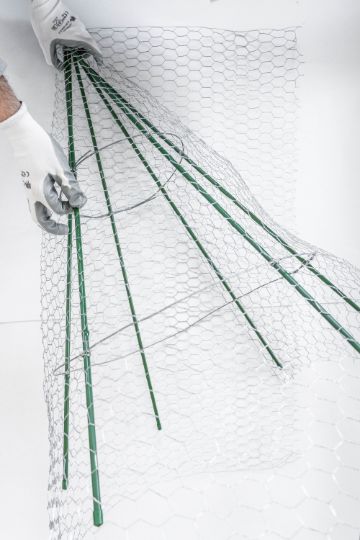
- Roll out a length of chicken wire (any wire thickness will do), lay the structure on it and wrap the mesh around it.
- This way you’ll roughly have the length you need to wrap the structure completely (approx. 120cm x 150cm).
STEP 8) Cut the Mesh

- Cut down the chicken wire with wire cutters or tin snips.
- Tip: if the mesh is very lightweight, you may even be able to cut it with a good pair of household scissors.
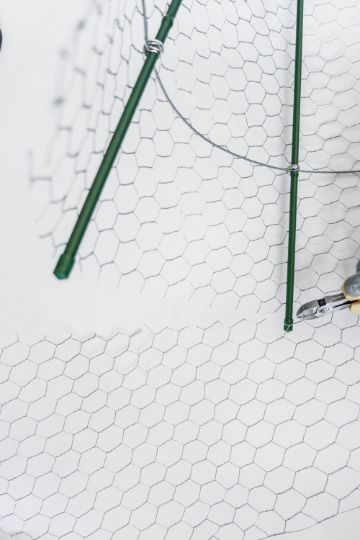
STEP 9) Secure the Mesh to the Frame

- Secure the mesh to the frame with the lacing wire.
- Make small hooks in the form of a J to make the job quicker and easier.
- Pull the mesh slightly before attaching it to each stake so that it stays taut.
STEP 10) Cut Down Excess Mesh
- Once you secured the chicken wire to each stake, cut down the excess chicken wire at the bottom of the structure.
- You can use a ruler or an object with a straight edge to guide you and achieve a precise cut.
STEP 11) Paint the Structure (Optional)

- Use a spray paint to give the structure an even colour, preferably green to imitate a real pine tree.
- Paint it from top to bottom, making sure that the paint covers the chicken wire evenly.
- Let it dry for an hour.
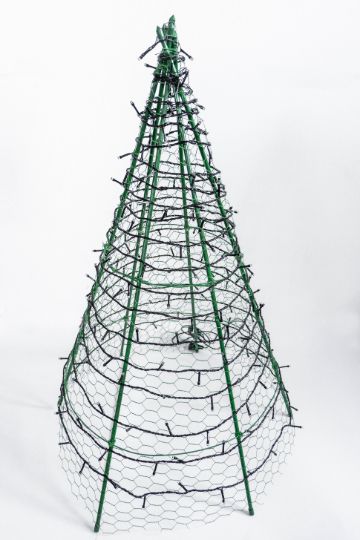
STEP 12) Wrap the Frame in Christmas Lights

- Start from the top and make your way down in spirals.
- Once you reach the bottom, tie the light strand to the mesh and start in a different direction if you still have some of it left.
STEP 13) Secure the End of The Light Strand
- Once you’ve run out of lights, secure the end to the mesh with some tape or the lacing wire.
STEP 14) Plug it in
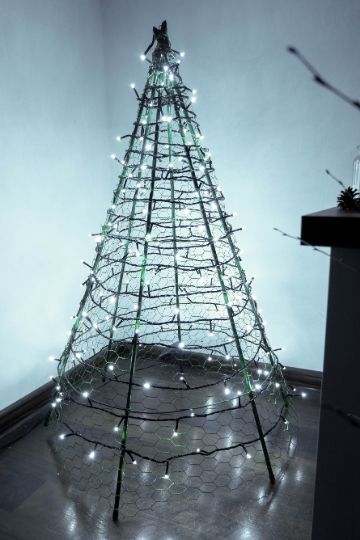
- Your Xmas tree should now be ready so you can plug the lights in.
- Put on some holiday music as now you have something to rock around at the Christmas party hop. 🙂

