How to Make Topiary Frames with Chicken Wire


This blog will show you how to make topiary frames with chicken wire and how to decorate it with succulents and moss. Just follow the steps below in order to recreate this topiary cat sculpture.

OVERVIEW
- Estimated Completion Time: ~5 Hours
- Experience Required: Low
- Tools Required: Pliers, Wire Cutters, Protective Gloves
- Materials Required: Chicken Wire, Succulents, Moss, Multi Purpose Compost, Coco Liners
STEP 1) Prepare Materials and Tools
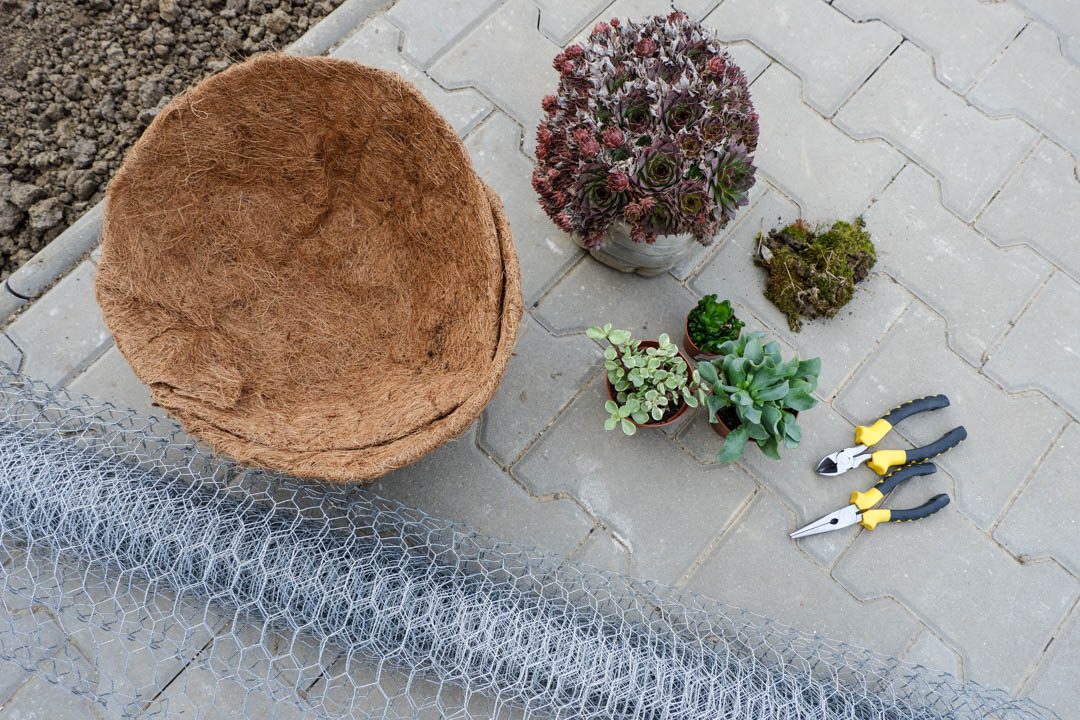
- Make sure you get everything you need for your DIY topiary frame project, including chicken wire (approx 1mm thick will do the job), succulents, coco liners and the tools mentioned above
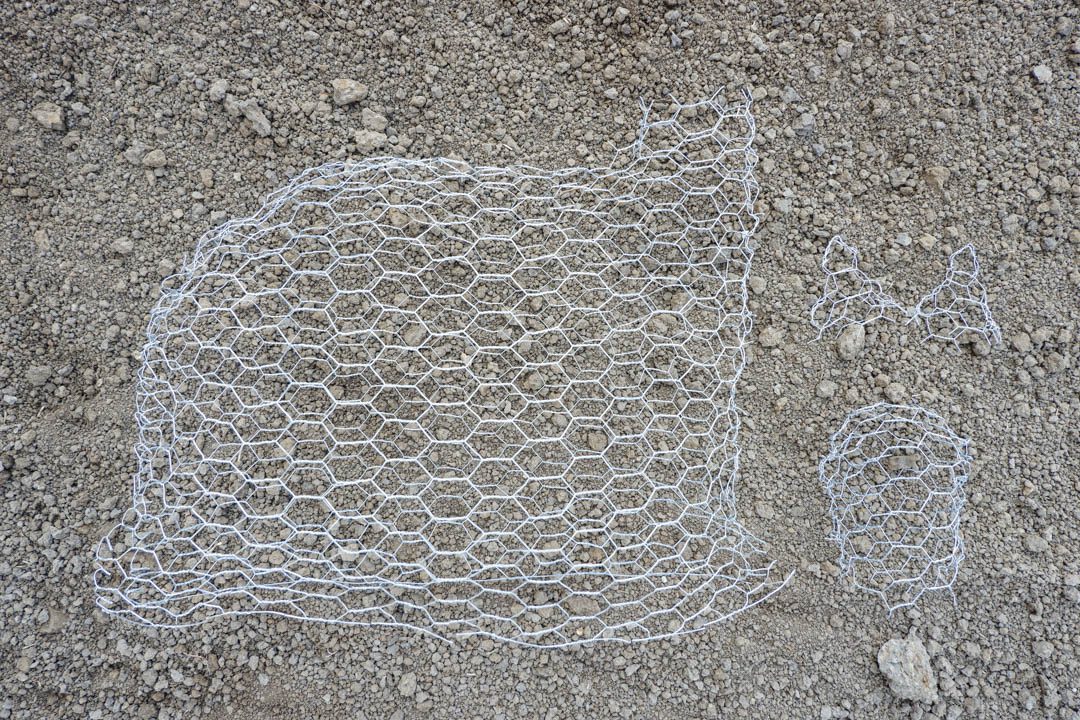
STEP 2) Measure and Cut the Mesh
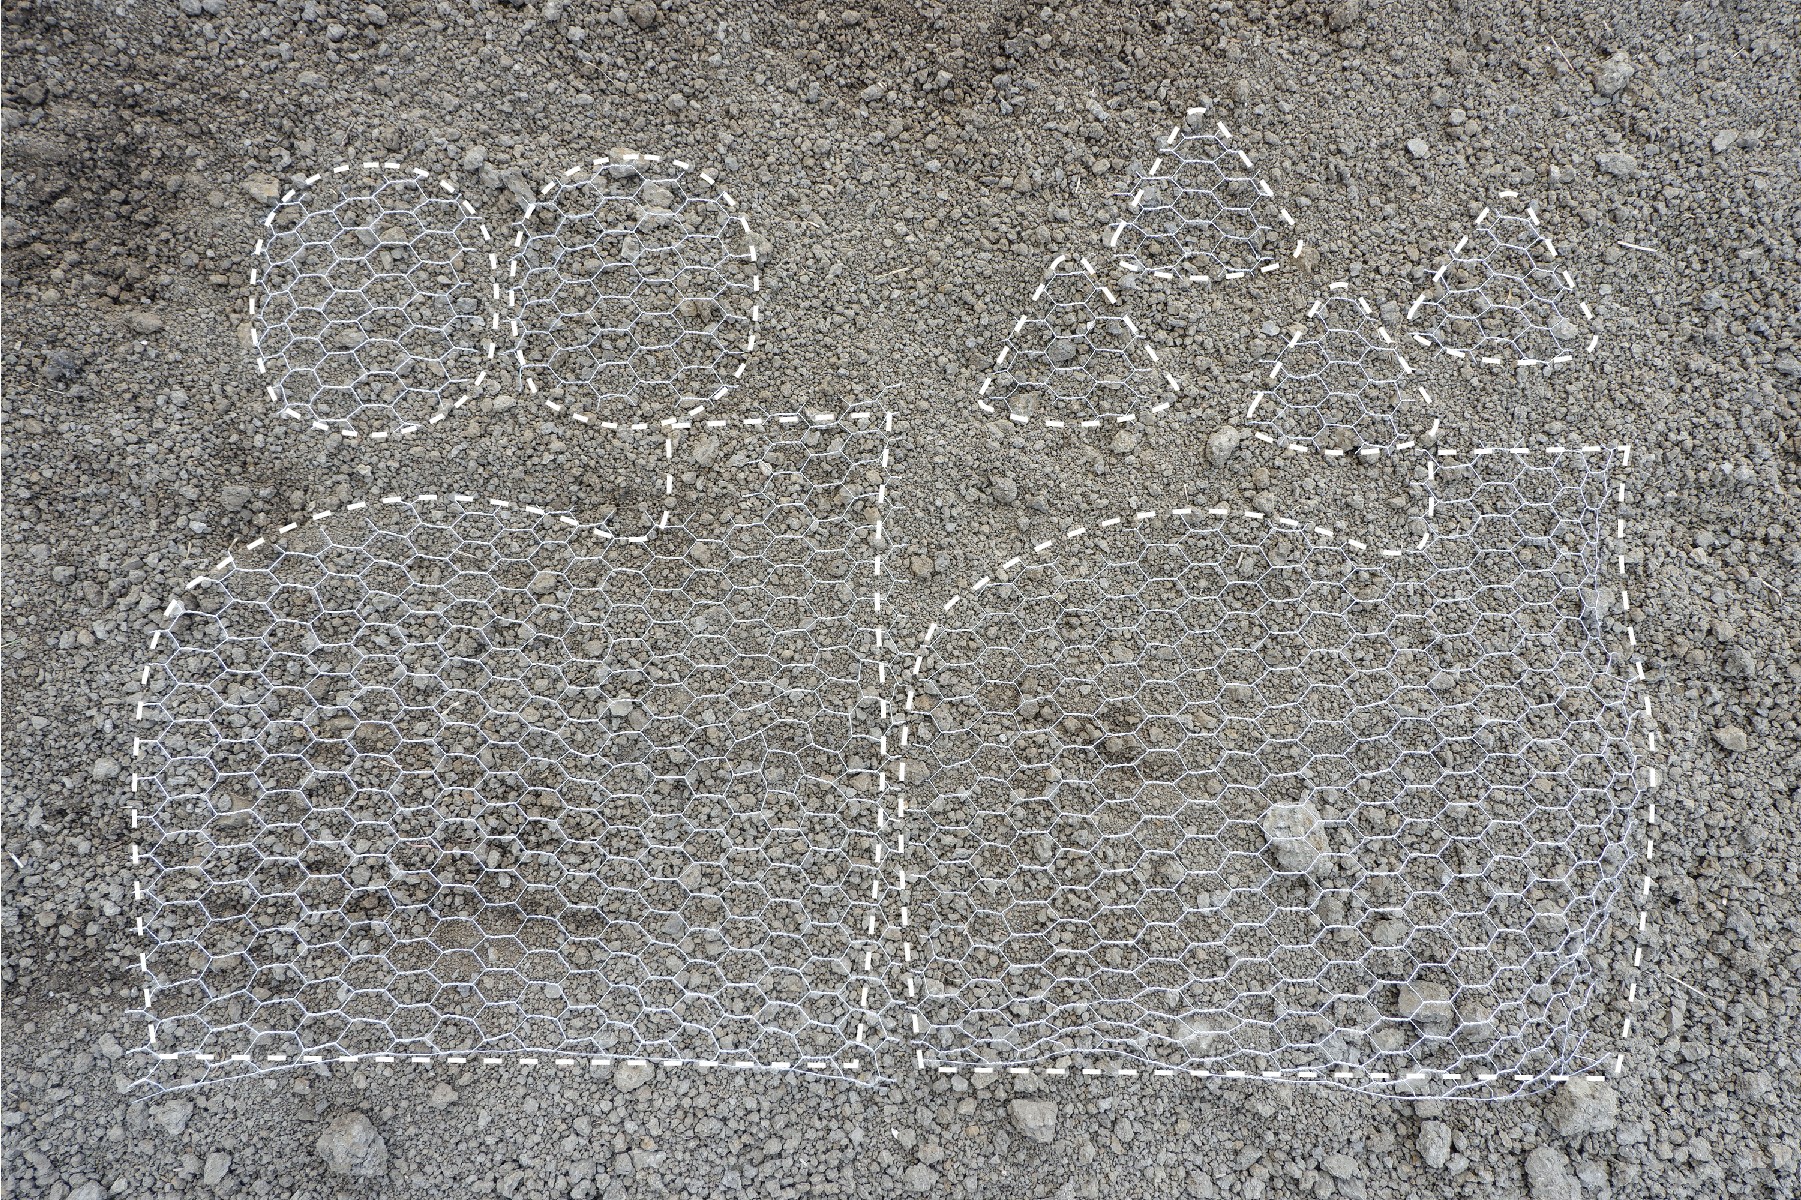
- Follow the shapes shown in the picture above and cut the pieces of chicken wire for the sculpture accordingly
- Measurements:
- Body (2 pieces) : 55H * 40L cm;
- Head (2 pieces): 18 cm dia.;
- Ears (4 pieces): 8L cm
STEP 3) Connect the Identical Pieces
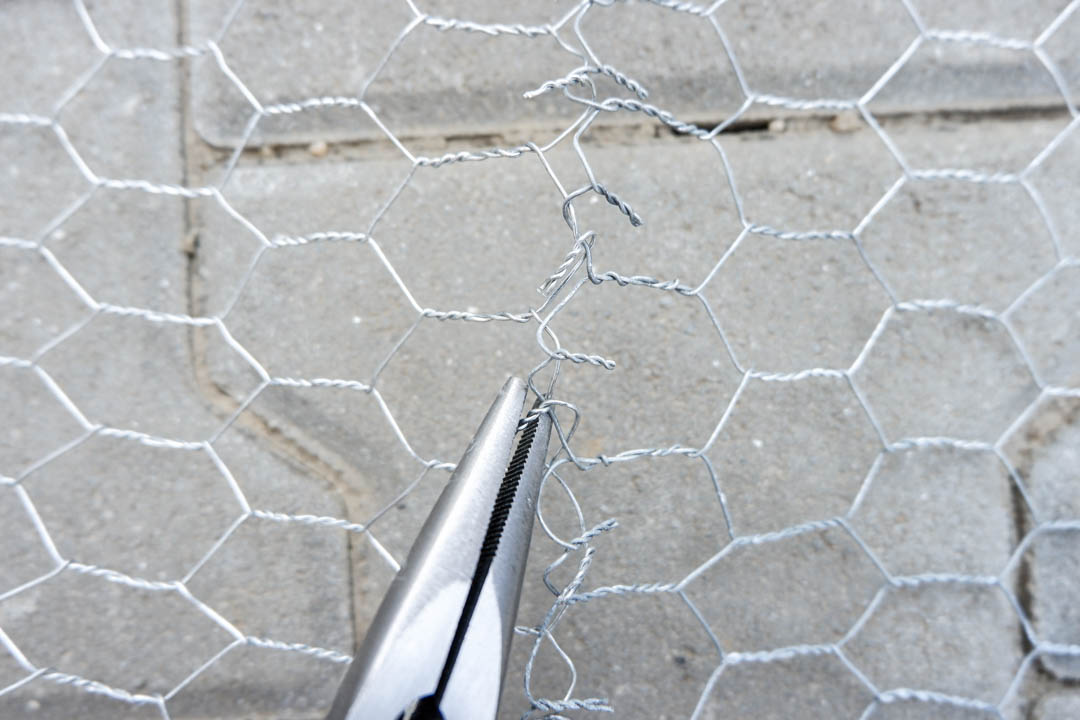
- Start to connect the identical pieces to each other by twisting the loose ends together
STEP 4) Assemble the Sculpture
- By connecting the identical pieces together you will form the body, the head and the ears of the cat sculpture
- Leave the bottom open in order to fill the parts with multi purpose compost and later attach them to each other
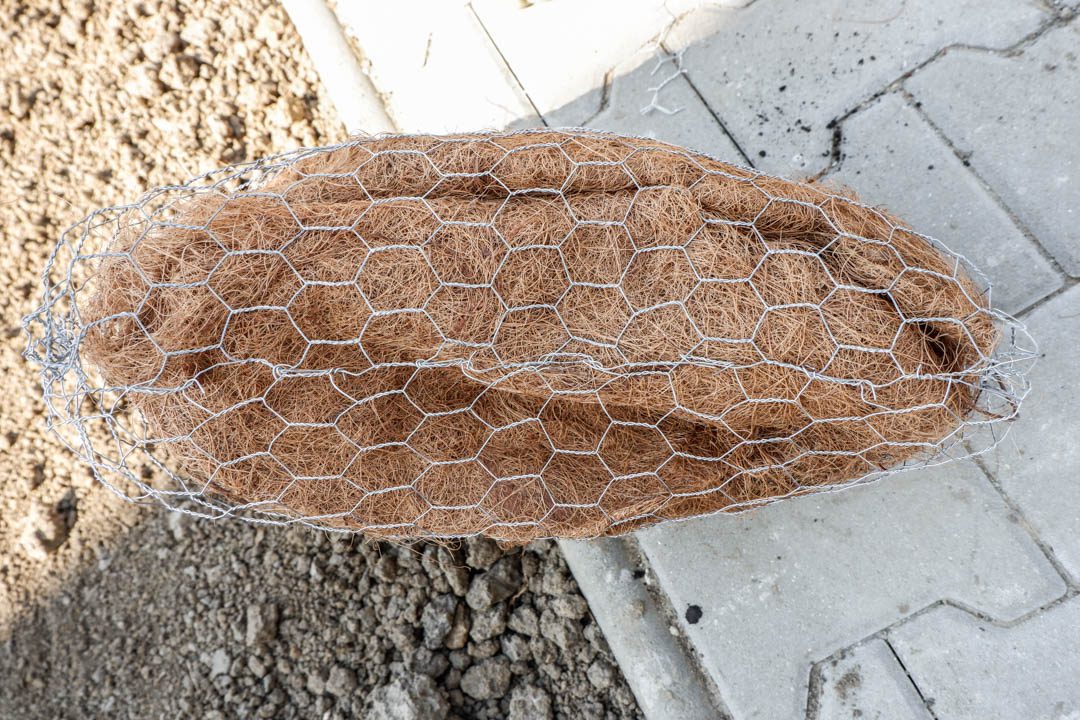
STEP 5) Insert the Coco Liners
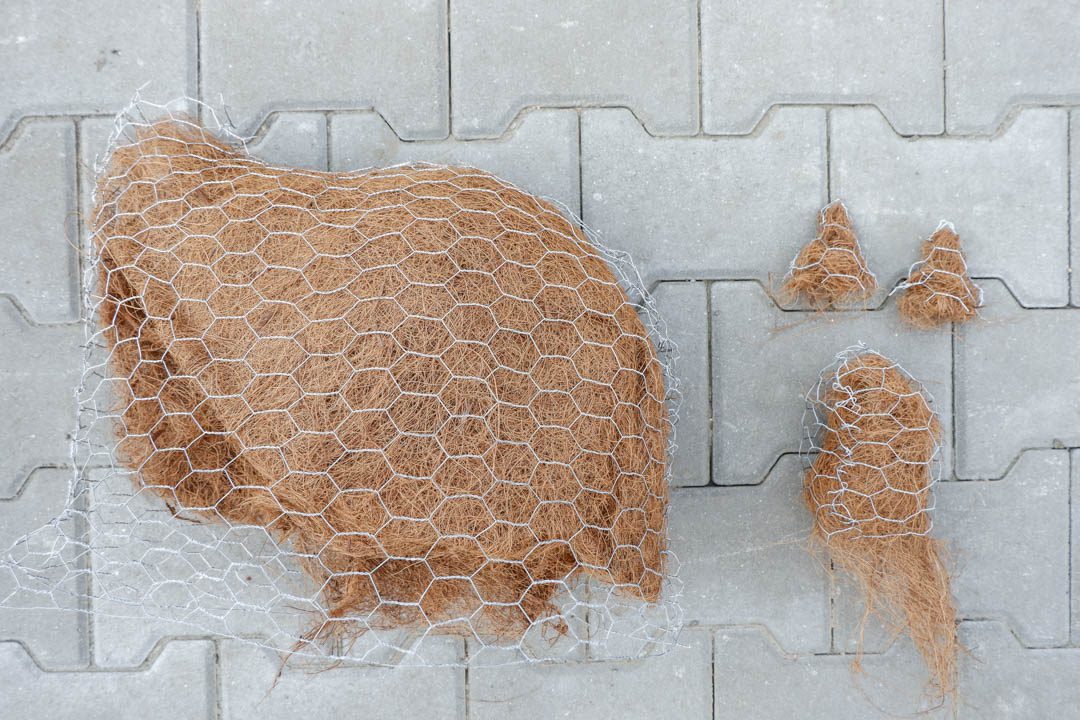
- Cut the coco liners into pieces in order to line every part of the sculpture
- Line the sculptures with the coco lining before connecting the parts together
STEP 6) Arrange the Liners
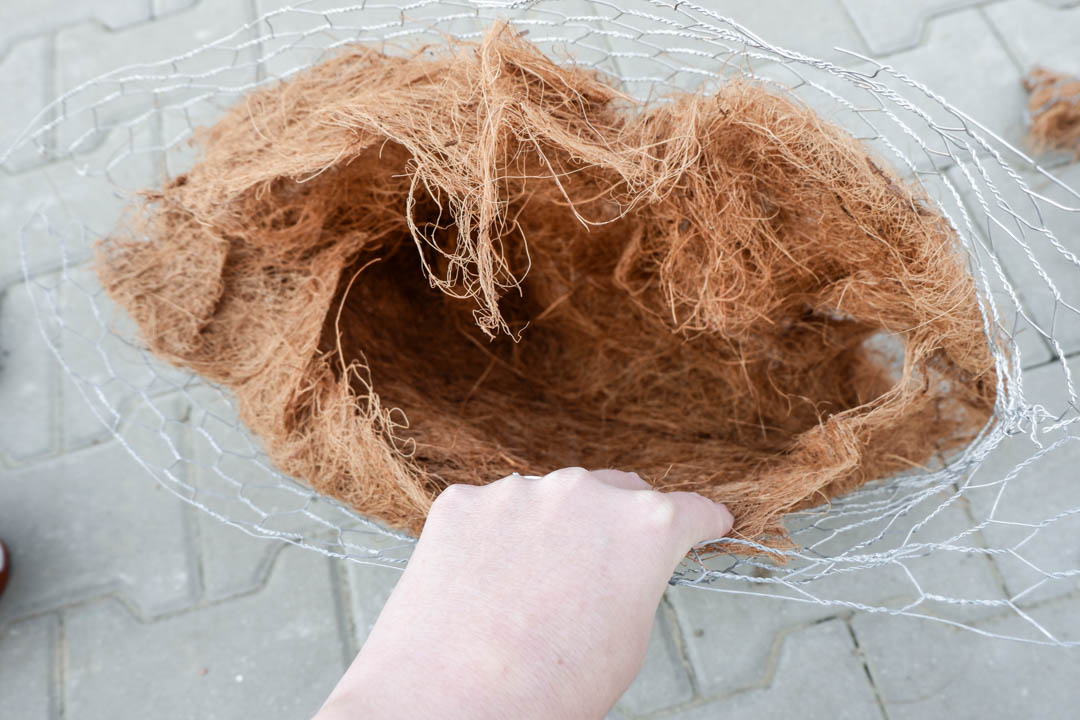
- Here is a close up on how the sculpture should look like with the coco liners before connecting the parts of the sculpture together
STEP 7) Connect the Parts

- Connect the parts of the sculpture together by twisting the loose wire ends over each other
STEP 8) Fill the Sculpture
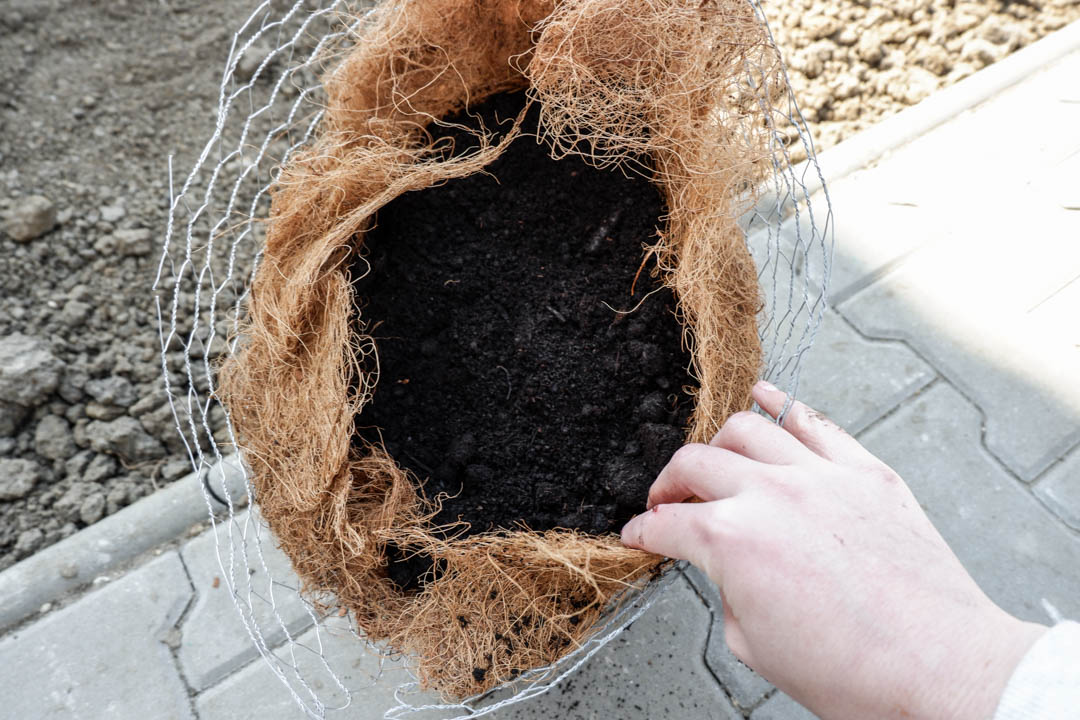
- Fill the sculpture with multi purpose compost
- Make sure to use enough compost and push it firmly into the sculpture
STEP 9) Close the Bottom
- After filling up the sculpture with multi purpose compost close the bottom up by connecting the loose ends of wire with each other
STEP 10) Add Succulents
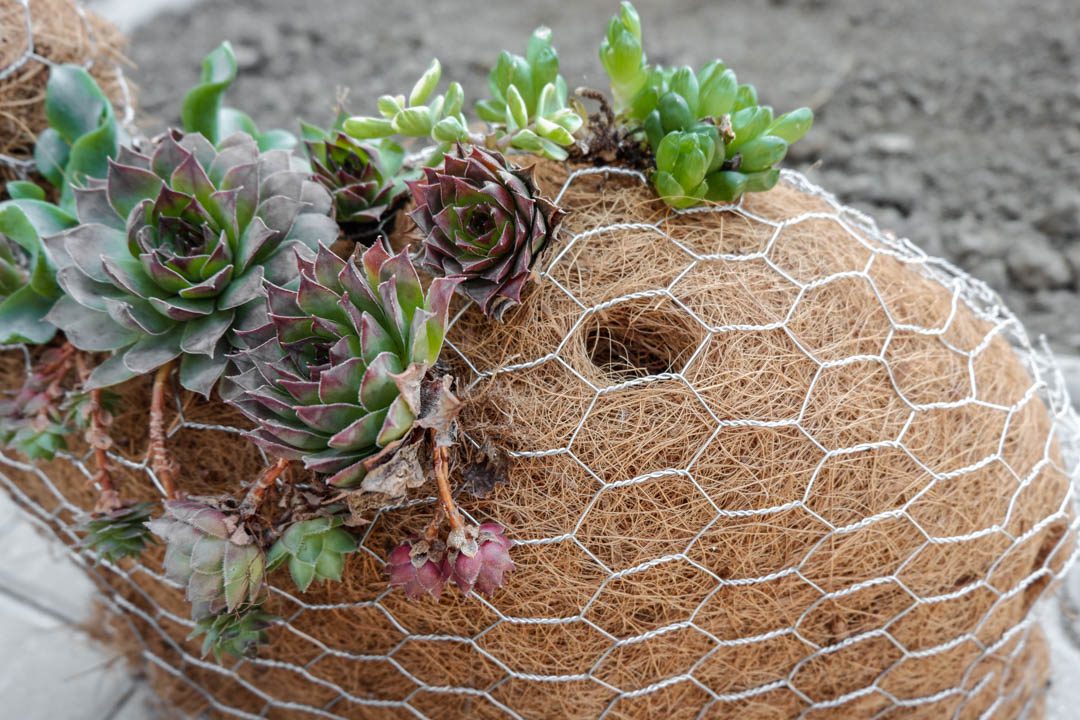
- Make some holes in the coco lining and insert the succulents one by one in the holes
STEP 11) Add Moss
- To fill the gaps add moss to the sculpture by pressing it on firmly
- Squeeze some of the the ends between the wire and lining to secure the moss to the sculpture even better
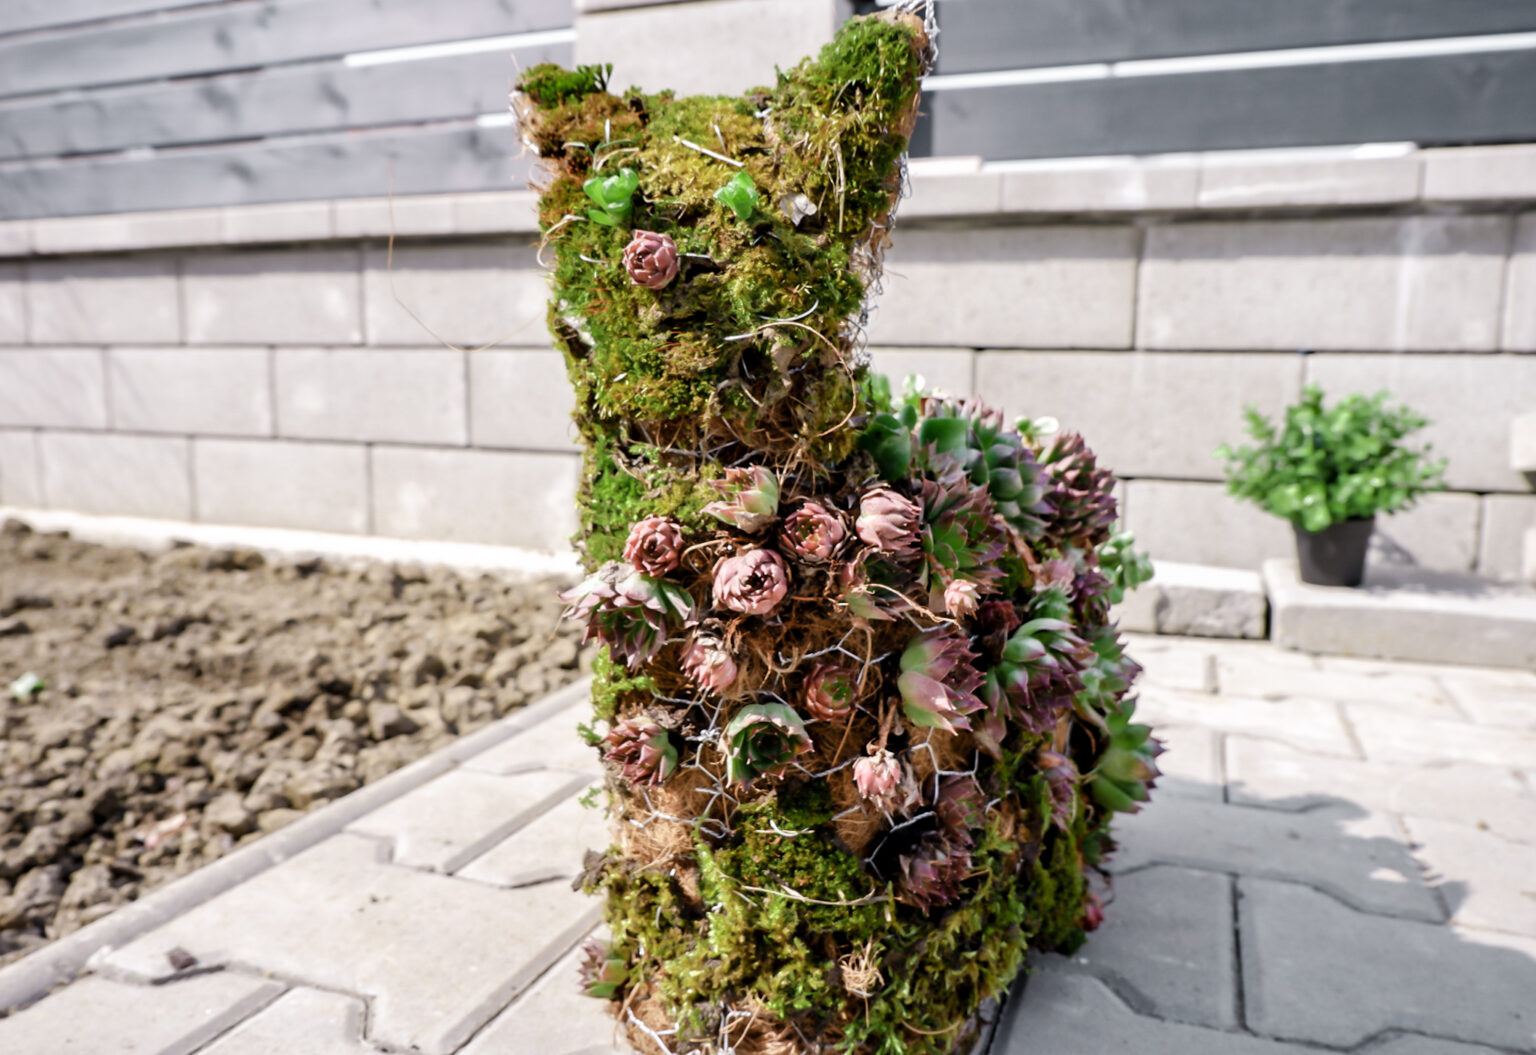
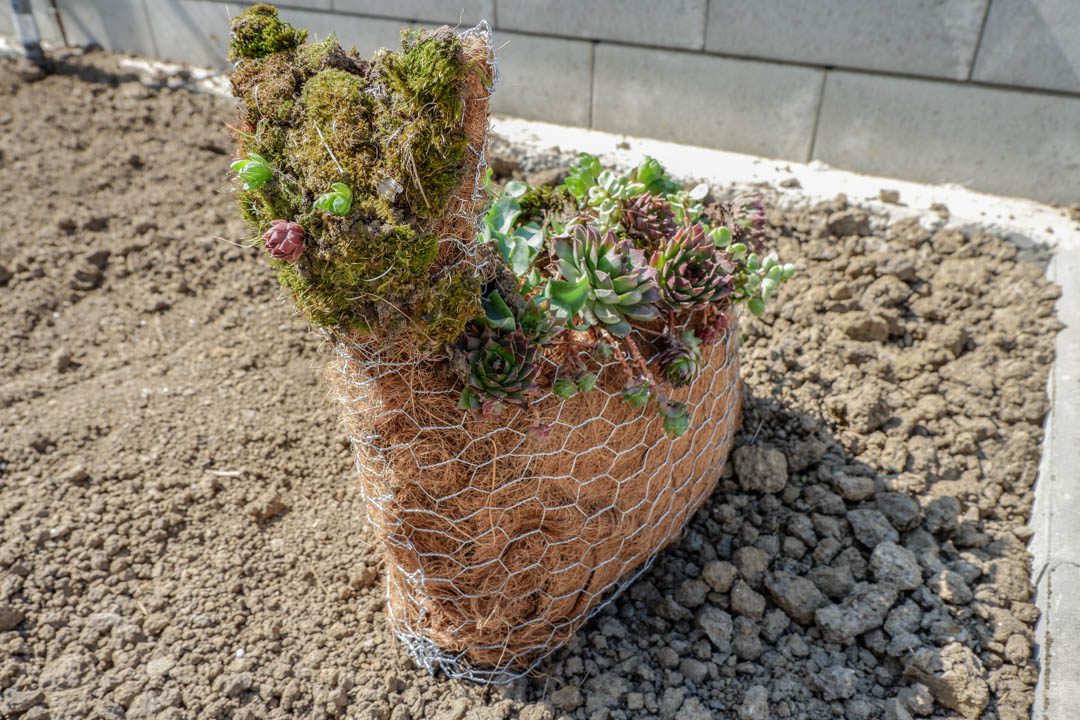
STEP 12) Your Cat Sculpture is Ready
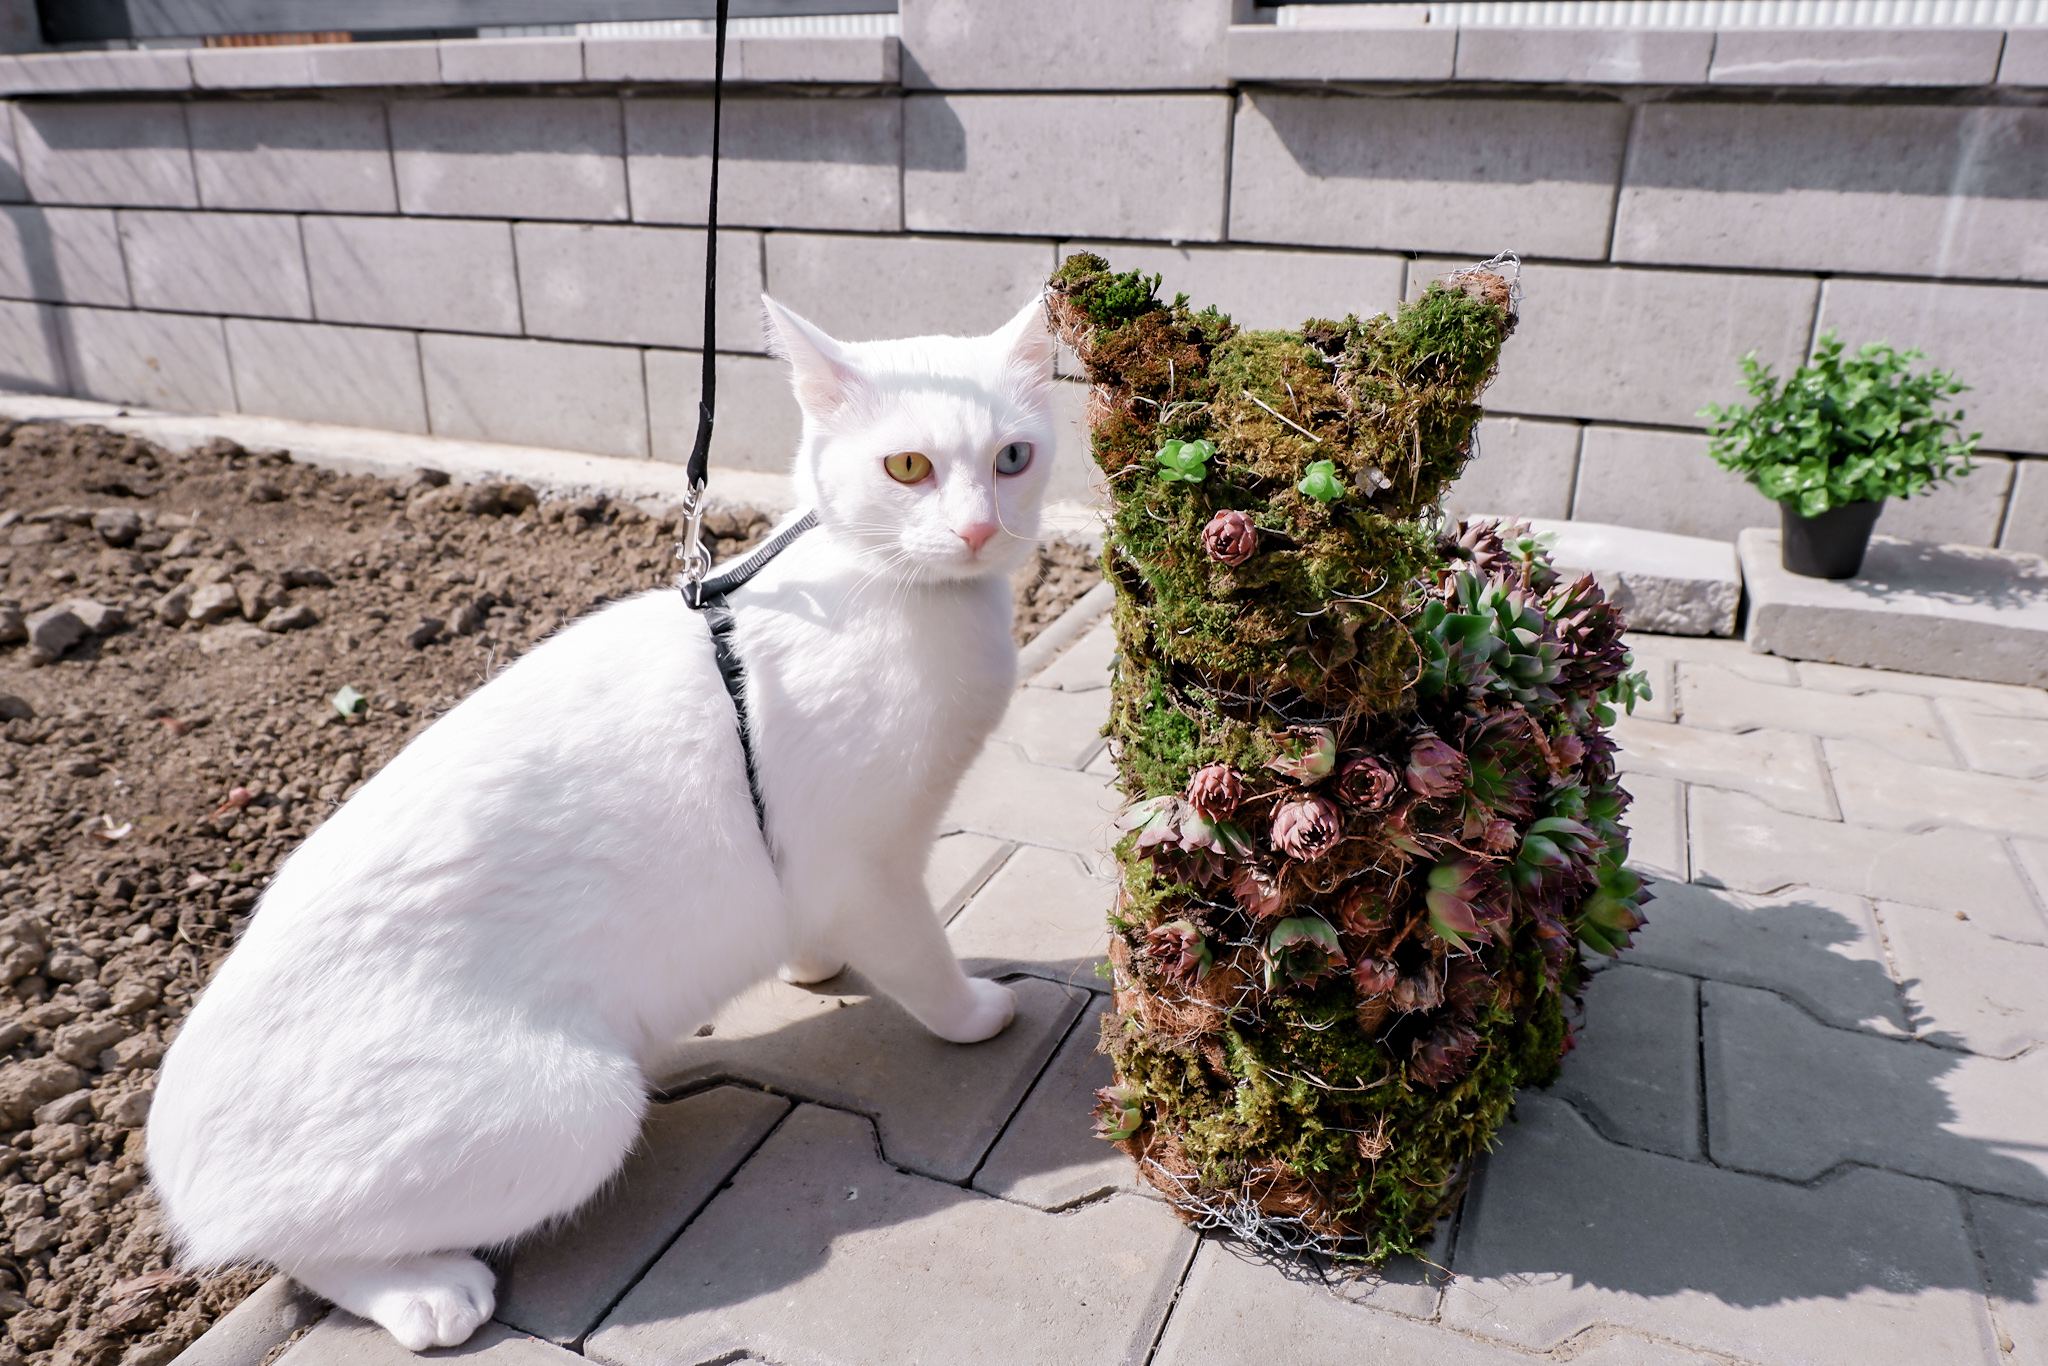
- When you’re pleased and ready with your sculpture place it to it’s final spot and water it gently
- With time the moss and succulents will become denser and your sculpture will be even greener
TIPS
- Use protective gloves when making your own topiary frame.
- You can use any soil instead of multi purpose compost if you have it on hand.
FURTHER READING
- Cutting Chicken Wire – Follow this step by step guide to learn how to cut chicken wire with different tools


Published by
I’m excited because I was looking for a website and I actually found you and I’m so happy because I want to try some of your projects.
Hi Ginny,
Glad to hear you’d like to try out some of our projects!
Let us know if we can be of any help or advice.
Kind regards,
Joy
Hello, great idea!! Do you have a bunny diy?
Hi Kerryanna,
Thank you for your comment.
Unfortunately we do not have a guide for bunnies, however you can potentially cut larger pieces for ears and make this cat one look more like a bunny.
We also have bunny wrath guide which you can find here: https://www.wirefence.co.uk/diy-easter-bunny-wreath/
Hope this is helpful.
Erno
Looking to make a a big topiary sculpture and trying to to make chicken wire frame two opposing fis. on each side of a pisces symbol. Any suggestions or tips on the easier way to create the chicken wire frames for each piece
Hi Kimberley,
Thank you for your question!
I’d recommend starting by sketching your two fish (like in step 2). When deciding on dimensions, be sure to plan for internal support—larger frames benefit from a sturdier structure.
To create a solid armature, use thicker wire for the spine, and consider using at least two layers of chicken wire for the body to prevent it from being flimsy.
As a finishing step, I suggest cutting the fish’s fins separately and attaching them to the main body.
Let me know if you have any other questions—I’d be happy to help.
Good luck with your project!
Timi