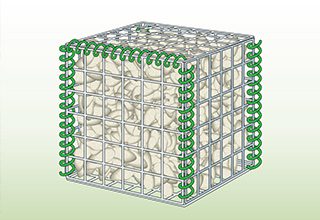
How to Lace Gabion Baskets


Below you will find a step by step guide on how to lace gabion baskets, with easy to follow diagrams.
OVERVIEW
- Experience Required: Low
- Tools Required: Pliers (if using tying wire)
- Materials Required: Gabions, Helical Connectors, Corner Ties
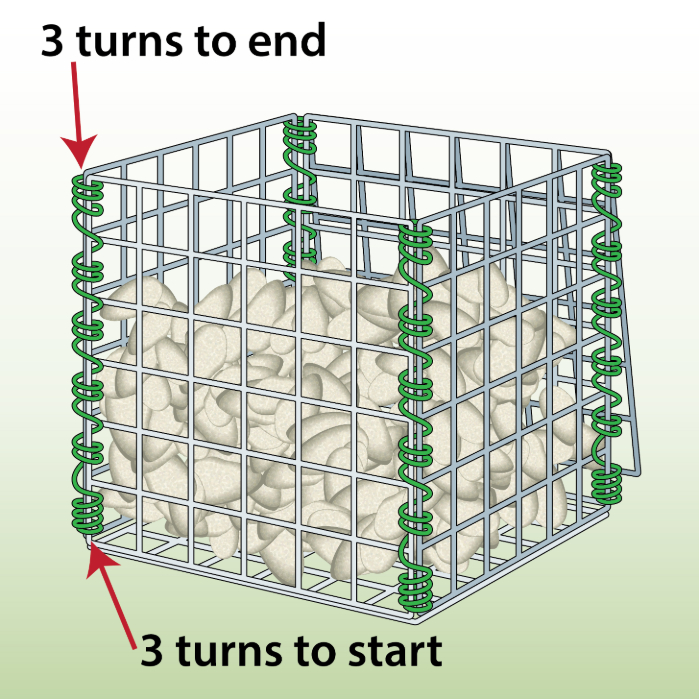
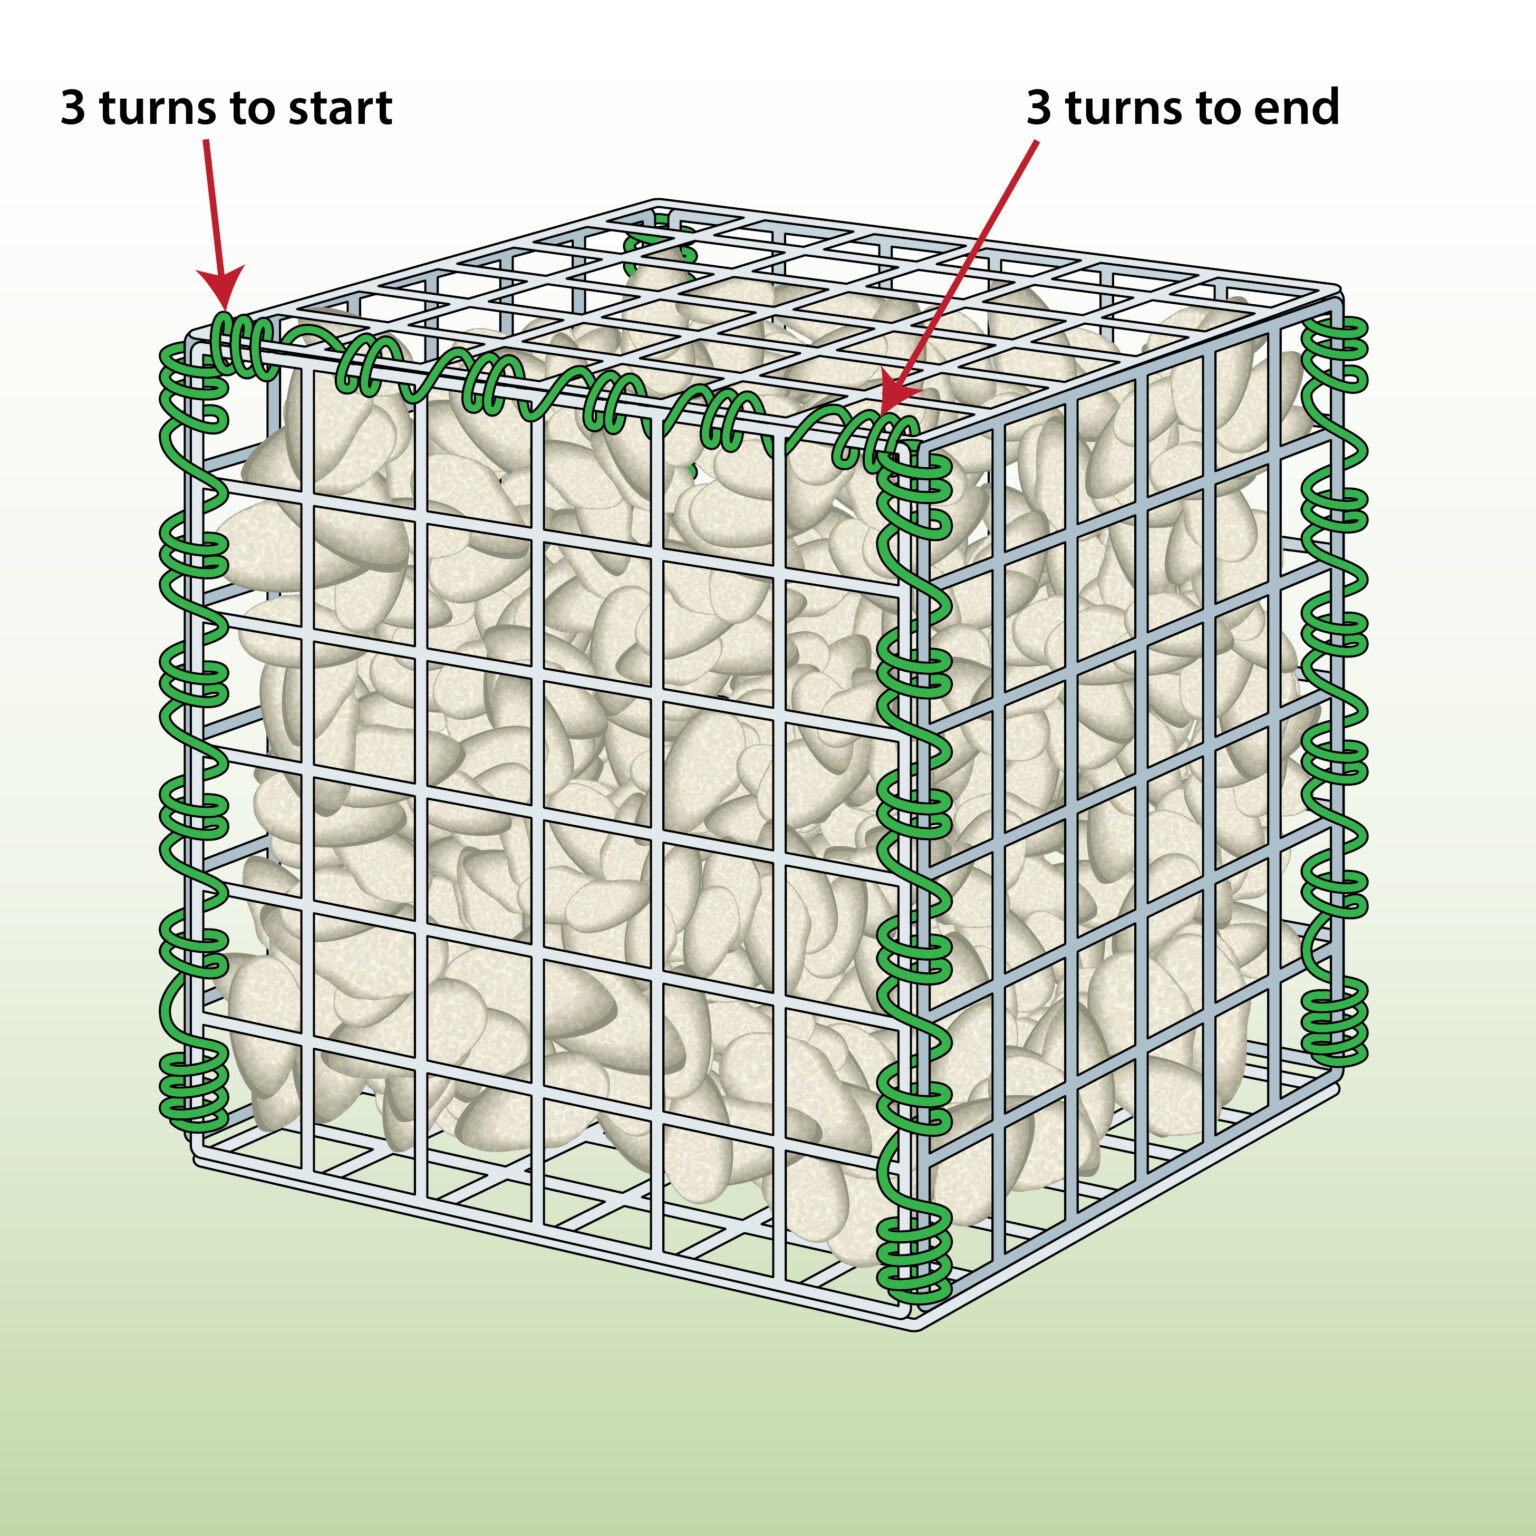
METHOD A – STEP 1) Lace Using Tying Wire

- Cut the tying wire to size: 1m length of gabion will require 1.5m of wire.
- Thread the wire in and out of each mesh hole.
- Wrap the wire three times around the first hole.
- For extra strength, double-loop the wire around each mesh hole as you go.
- As you thread the wire, pull it to tighten.
- At the end of the section, wrap the wire three times to secure it.
METHOD A – STEP 2) Fill The Baskets
- Carefully fill the basket with hard, durable and non-degradable rocks that are bigger than the mesh aperture (min. 80mm). 100-200mm is recommended.
- Angular shaped, interlocking rocks work best.
METHOD A – STEP 3) Secure The Lid
- Close the lid, ensuring that it sits comfortably on the stones and there are no gaps.
- Secure the top around the edges with the tying wire, using the same technique as before.
METHOD B – STEP 1) Lace Using Helical Connectors
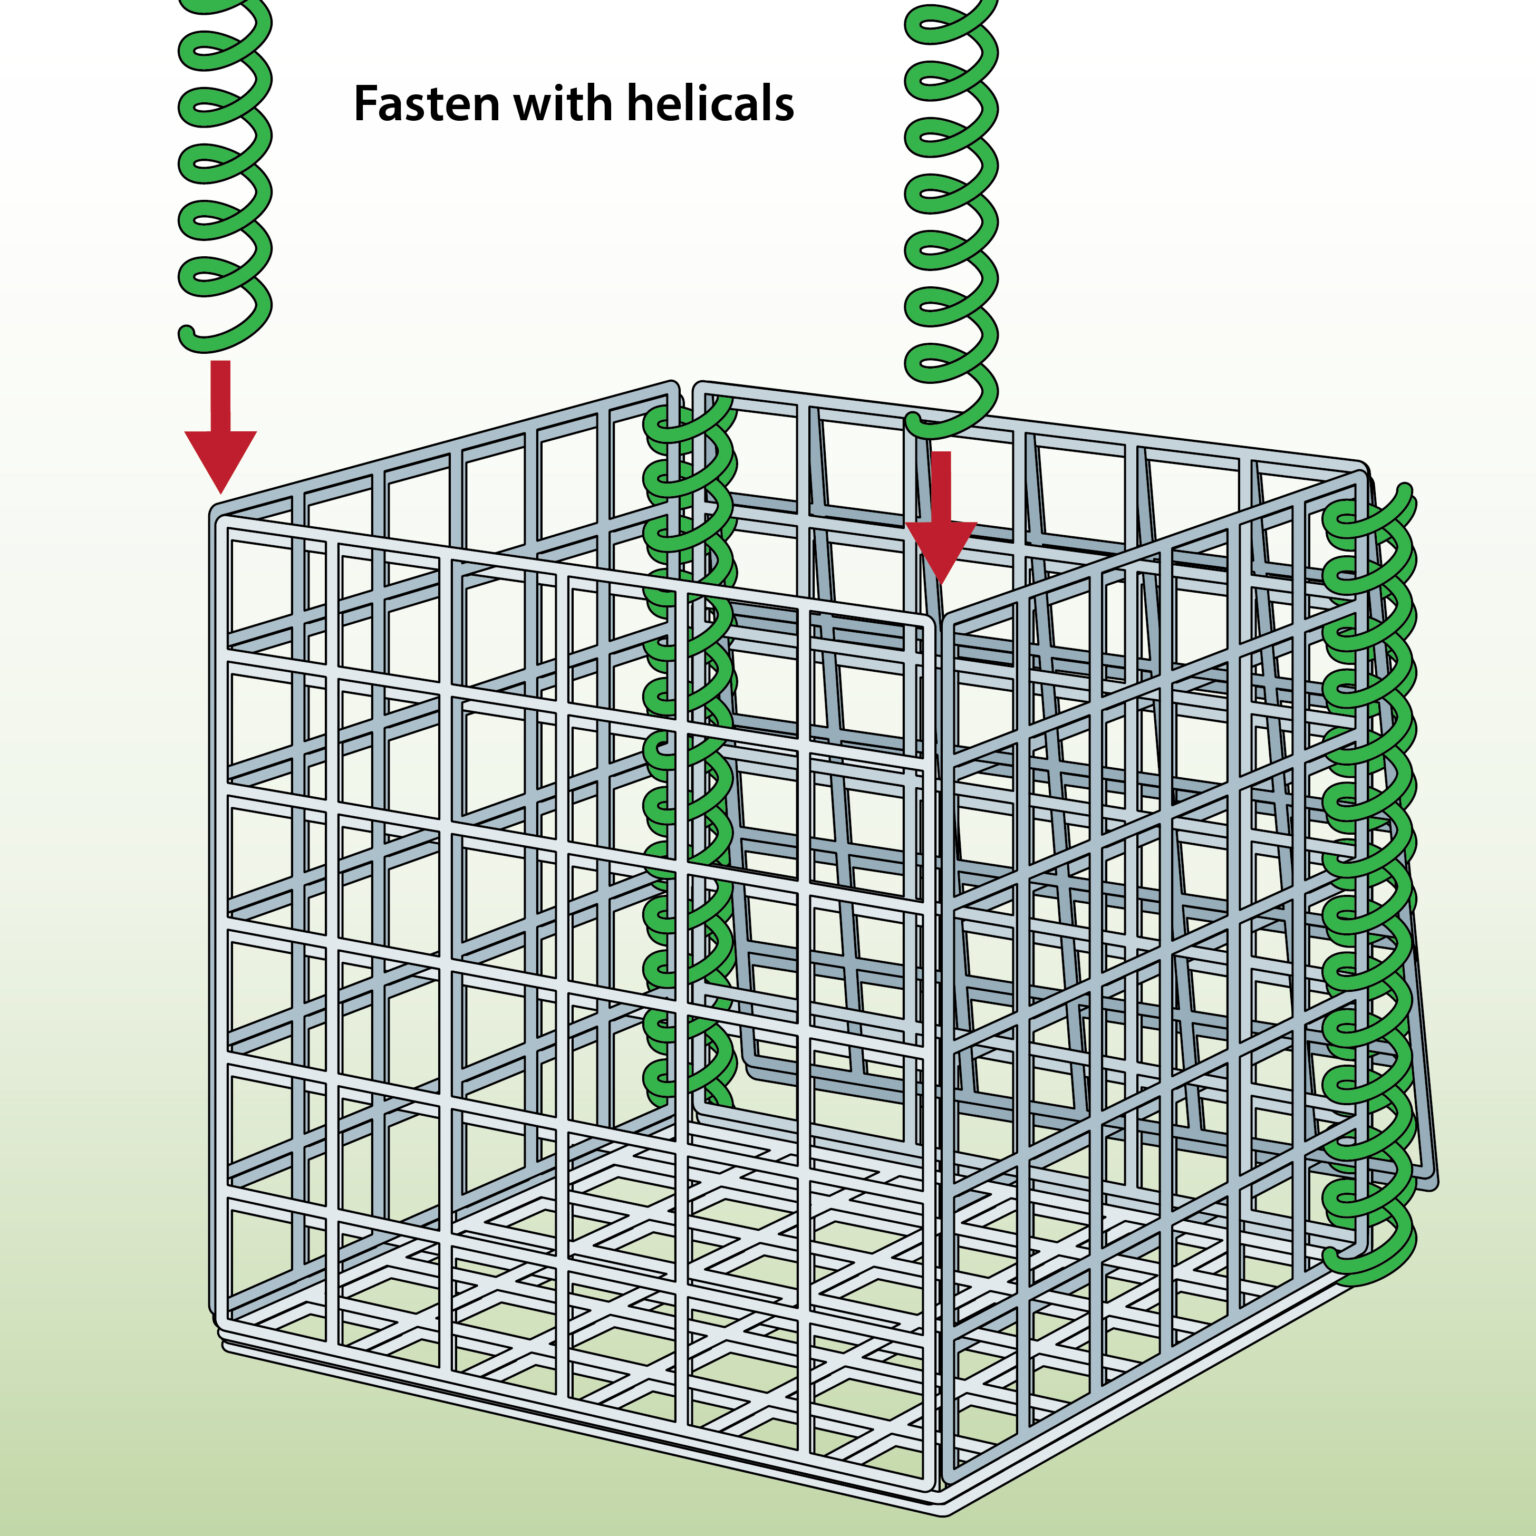
- You can opt for helical connectors instead of tying wire to make your job quicker and easier.
- Twist the spirals into place making sure they contain the corners of both panels.
- You will need 4 helicals per basket, one for each corner.
- If the height is less than 0.5m, you only need 2 helicals as you can cut one in half to use for two corners.
- Use a hacksaw or wire clippers to cut them to size.
METHOD B – STEP 2) Fill The Baskets
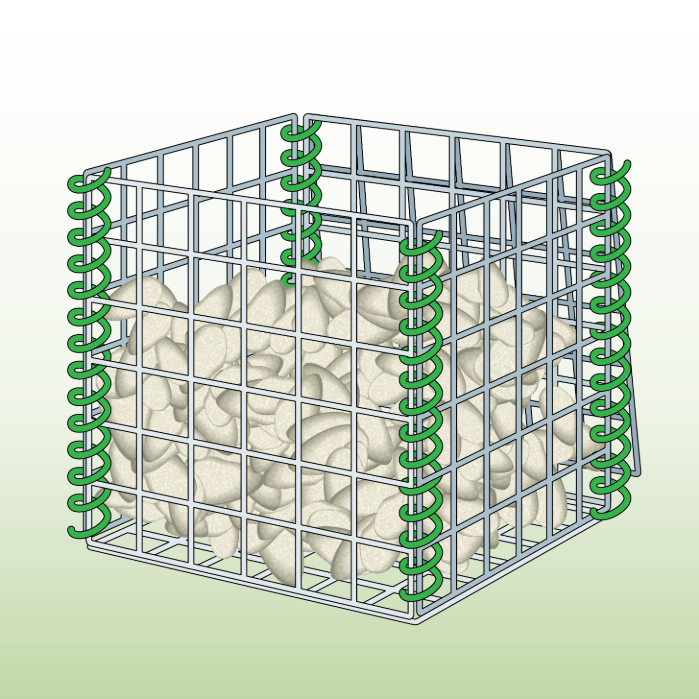
- Carefully fill the basket with hard, durable and non-degradable rocks that are bigger than the mesh aperture (min. 80mm). 100-200mm is recommended.
- Angular shaped, interlocking rocks work best.
METHOD B – STEP 3) Close the Lid
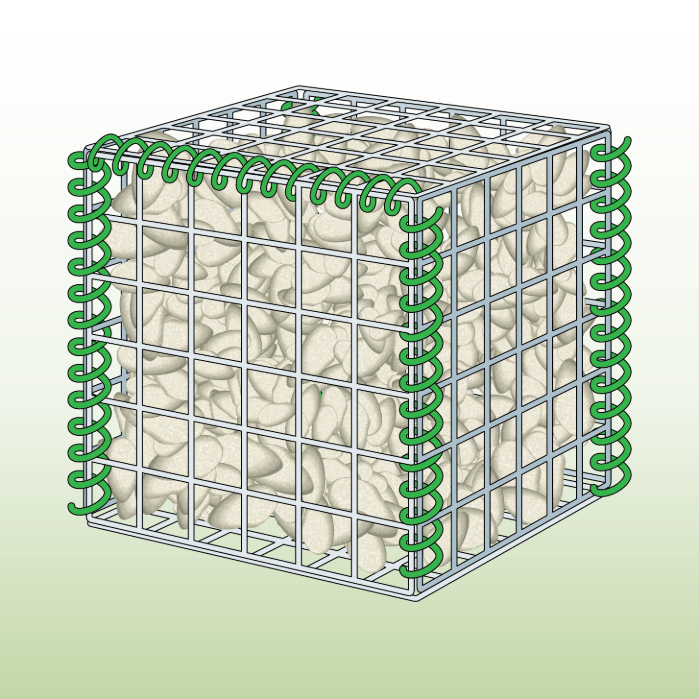
- Close the lid, ensuring that it sits comfortably on the stones and there are no gaps.
- Secure the top around the edges with the helical connectors, using the same technique as before.
- That’s it, you’re done! You can now use your gabion baskets for whatever project you had in mind. 🙂
Further Reading
- How to Install Gabion Baskets – Step by step instructions for complete gabion installation.
- How to Assemble Gabion Baskets – Learn how to assemble wire cages with different methods.

this was a great help to me. thank you
Hi Daniel,
Many thanks for your comment!
We are glad to hear that our guide was helpful and comprehensive.
Feel free to get in touch with us if you have any further questions about gabions or need any assistance with them.
Kind regards,
Erno
A great help, thanks.
Hi Brendan,
Glad to hear our guide helped you lace your gabion baskets – we know it can get tricky!
Don’t hesitate to reach out on any of our channels (email – [email protected], phone – 03301243556 or live chat – button below) if you have follow-up questions regarding gabions as we’d love to help.
Wishing you a great day ahead,
Erno
It would be really cool to see examples of gabions using different colours for the wire, like white, black, brown, green, grey, beige paired with different colour and shapes of stone. For example how would a gabion using white wire and white stones look compared to one using black wire and white stones. I can’t seem to find visuals for different options anywhere on the internet.
Hi Miriam,
Thank you for the suggestion, this sounds like a cool avenue for us to explore!
We don’t yet have such content as we currently only supply grey (galfan or PVC coated) gabions and tying wire, as well as only two types of stone (limestone and granite: https://www.wirefence.co.uk/gabion/stone/ ).
However, these materials can be painted and it makes sense to want different visuals before committing to an aesthetic, so we may create different videos in the future.
Thanks again for the feedback and wishing you a great rest of your day!
Kind regards,
Joy