How to Make Tomato Cages From Chicken Wire

Below you will find step by step instructions to create a homemade DIY tomato cage for your garden made from chicken wire. This type of cage will supply a simple and cheap support structure for your growing plants, and make it easy to pick off the growing fruit.
OVERVIEW
- Estimated Completion Time: 1-2 hours
- DIY Experience Required: Low
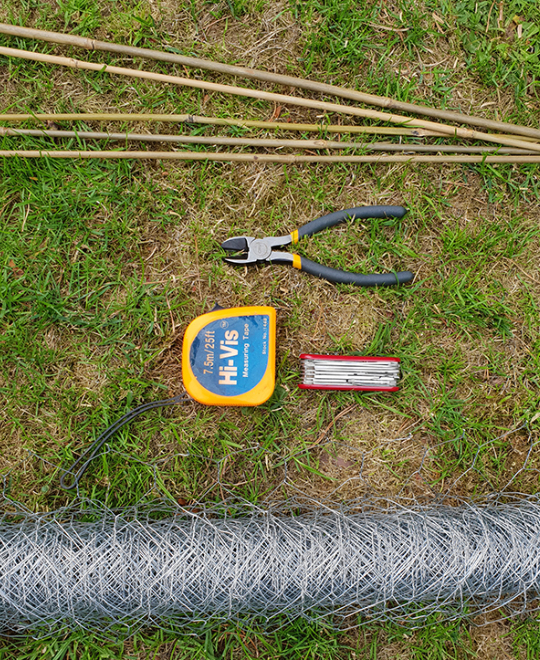
- Tools Required: Wire cutters, Penknife, Work Gloves, Eye Protection Glasses
- Materials Required: Wooden Support Sticks, Chicken Wire Roll
STEP 1) Pre-Work
- It is the best policy to plant your small tomato plants first so as not to disrupt the ground once that you have the wire in place.
- This also helps to define the circle of your wire and ensure that the wire is situated on the inside area of the plants themselves.
STEP 2) Starting Out
- Put the eye protection on.
- Ideally, you will create a circle of approximately 24” (60cm) diameter (depending upon the ground available to you), which would give sufficient growing room for six fully grown tomato plants to spread and maximize their fruit.
- You will need to cut the wire to the right length, roll it to the right diameter, cut the sticks to the right length, and construct the mesh frame.
- Cut it through the section of the joined wires.
STEP 3) Cutting the Wire
- Put the gloves on.
- Roll the wire out flat on the ground. For a circle of approximately 24”, you will need approximately 75” of wire, but will also need a small overlap, so measure out 80”.
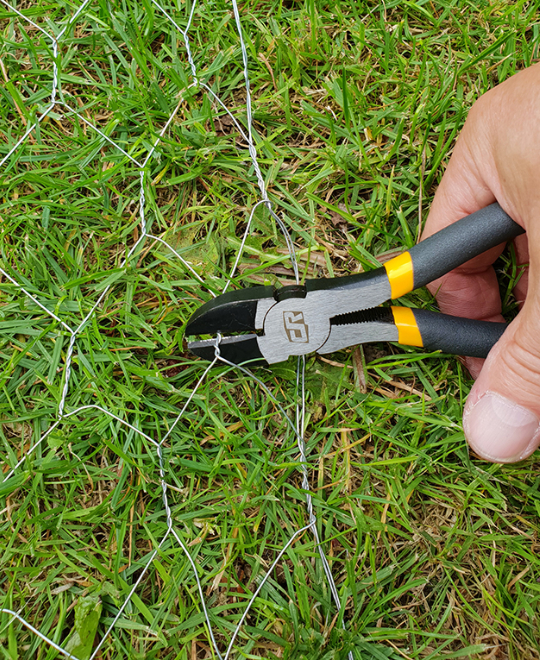
- Lay a straightedge along the width of wire and cut along it – or close to it – with the wire cutters, ensuring that you cut through each wire. Store the rest of the wire somewhere safe.
STEP 4) Preparing the Sticks
- Check the sticks to make sure that they are undamaged, fairly straight, and all of the same length.
- The sticks will need to be placed into the wire at approximately 12” intervals, ignoring the overlap part. Therefore you will need five sticks for this project.
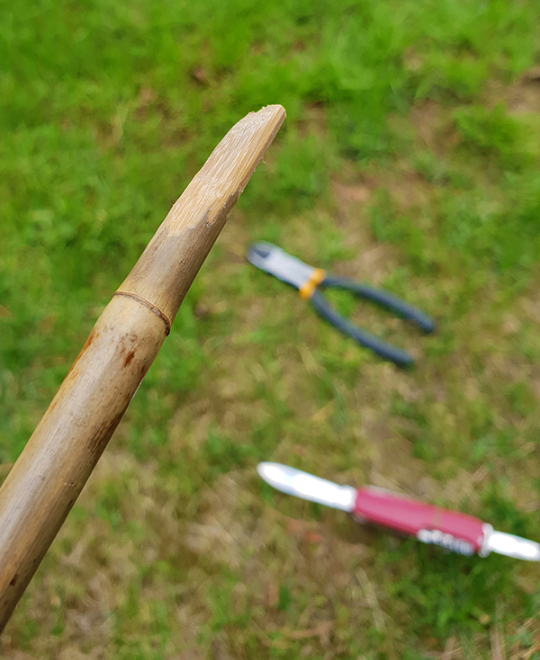
- One end of each stick will need to have a point put on it to help push it into the ground. This is best done by paring the end with the penknife until it has a fairly decent point.
STEP 5) Adding the First Stick to the Wire
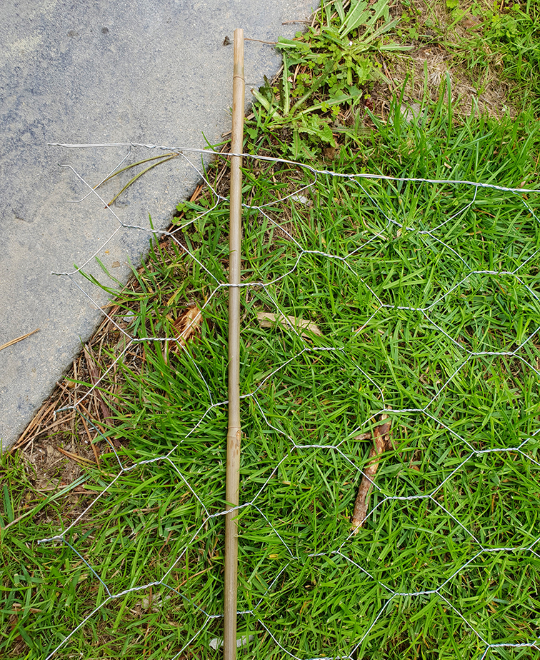
- The sticks will need to be woven through the wire to add support to the structure.
- The first stick should be woven through the wire at approximately 1” from the first edge, as shown in the picture above.
STEP 6) Adding the Rest of the Sticks
- The stick should end up finally placed so that approximately 12” to 18” protrude from the bottom of the wire.
- This will be pushed into the ground for support.
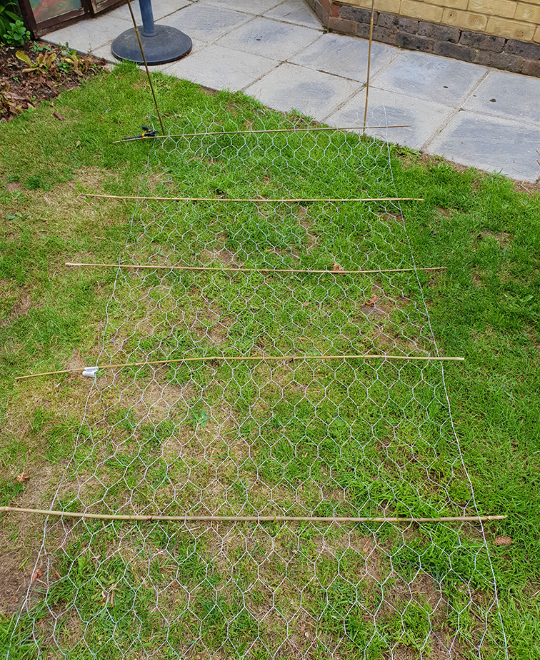
- With the first stick in place, thread the second stick through the wire parallel to the first stick and approximately 14” further along the wire.
- Carry on in this manner until all five sticks are placed as above.
STEP 7) Building the Wire Cage
- Note that the cage has been constructed flat, it needs to be placed on the inside periphery of the tomato plants.
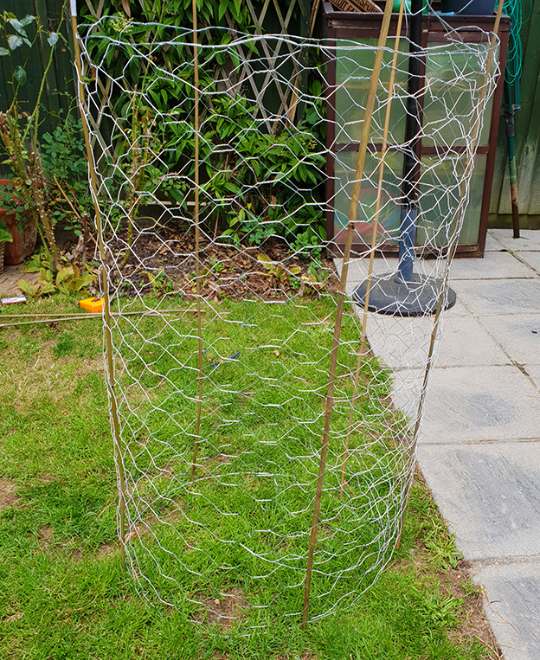
- Roll the wire and sticks into a circle and place it on the inside of the ring of tomato plants.
- Remove the first stick and rethread it through both layers of wire, thereby enduring that the overlapping section is securely attached to the circle of wire.
STEP 8) Pushing the Sticks Into the Ground
- The extended sections of the sticks should be pushed firmly into the ground so that the wire cannot be knocked over easily.
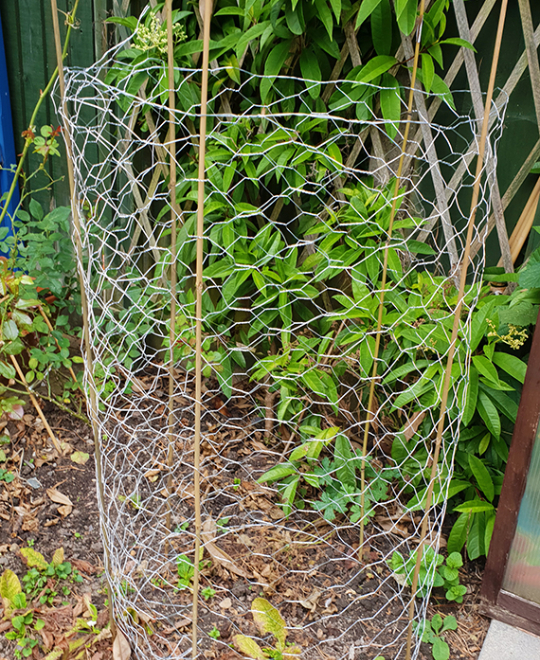
- Your chicken wire cage is now ready for the growing tomato plants to use the wire for support as they grow.
FURTHER READING
- Cutting Chicken Wire – Learn how to cut wire mesh with different tools.
- How to Unroll Chicken Wire – A guide showing you how to unroll properly chicken wire.

I have done similar. The main issue is it becomes difficult to harvest tomatoes . You cant get to them when they are surrounded by the wire.
Hi Ray,
Glad to hear you have used a similar method as well.
Harvesting is easiest if you can reach down the tomato cage from the top.
However, if the height of the mesh doesn’t allow for that, you can remove the tomato cage altogether when it’s time to pick your tomatoes.
Since the sticks are just pushed into the ground, it’s fairly easy to remove the structure and then place it back once you’re done.
The best thing about this method is that it doesn’t have to be permanent.
Hope this helps and let us know if you have any further questions. 🙂
Gyopi
Make a door..
How can you prepare the wooden support sticks for the tomato cage, and why is it important to sharpen one end of each stick?
Hello,
These are both really good questions, thanks for your interest!
Preparing the wooden support sticks consists of checking them for straightness, even length and any damage. You could also treat them with wood preservatives to make them last longer when exposed to the elements.
Sharpening one end to make a point makes it easier to push the sticks into the ground, which is important so that they are anchored securely and are able to hold the tomato cages upright.
Hope this helps answer your questions and please let us know if we can provide any further advice!
Kind regards,
Joy
Fantastic tutorial! The idea of a homemade tomato cage from chicken wire is pure genius. It’s great to know there’s a simple, cheap, and effective way to support my plants and make harvesting a breeze.
Hi Aretabet,
We’re really glad you found the tutorial helpful. Chicken wire cages are such a game-changer—affordable, sturdy if supported well and also easy to customize.
Many thanks for your comment and we wish you fruitful harvesting!
Kind regards,
Erno