
DIY Frame With Chicken Wire for Pictures


This step by step guide will help you create a frame with chicken wire for pictures.
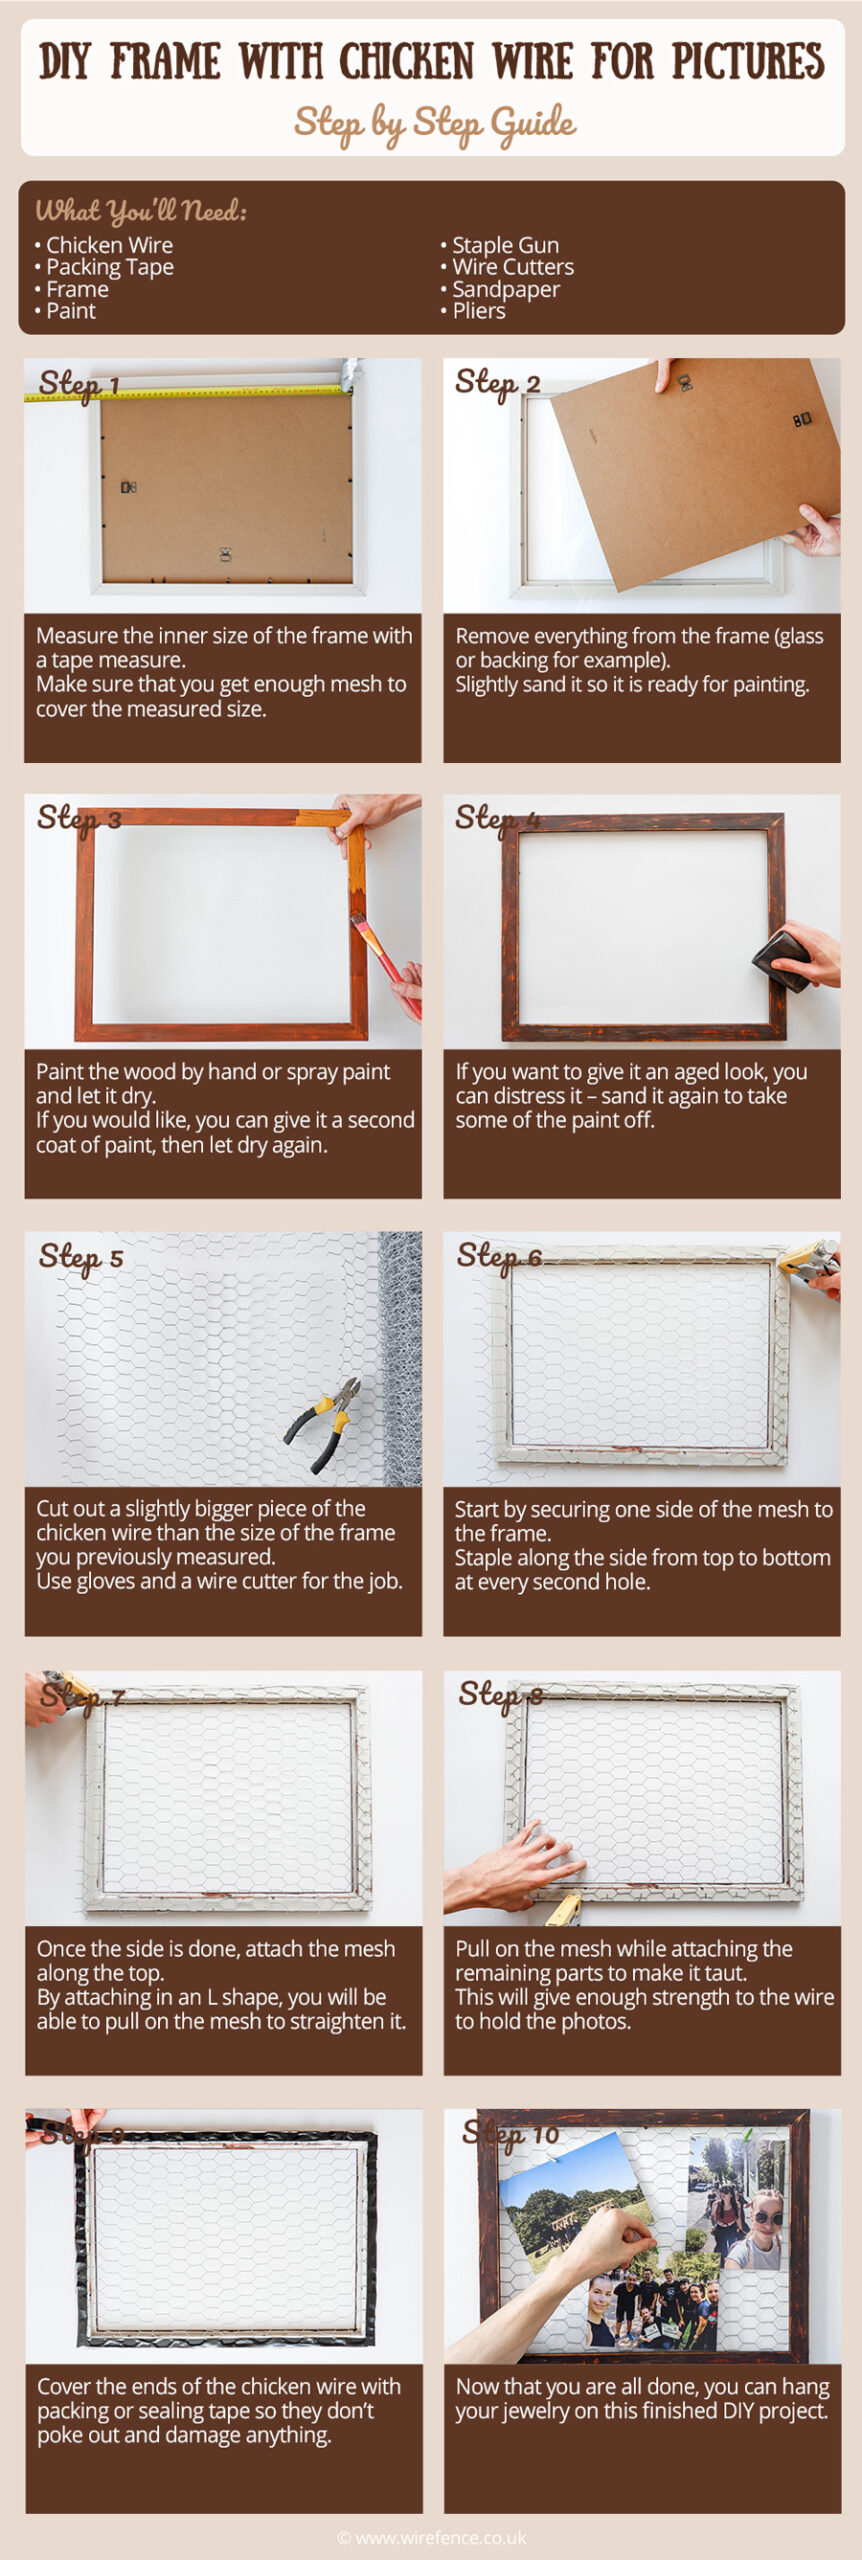
OVERVIEW
- Estimated Completion Time: ~3 hours
- Experience Required: Low
- Tools Required: Staple Gun, Wire Cutters, Pliers, Sandpaper, Tape Measure
- Materials Required: Chicken Wire, Frame, Paint, Packing Tape, Fabric (optional)
STEP 1) Measure Up

- Measure the inner size of the frame with a tape measure.
- Make sure that you get enough mesh to cover the measured size.
STEP 2) Ready the Frame
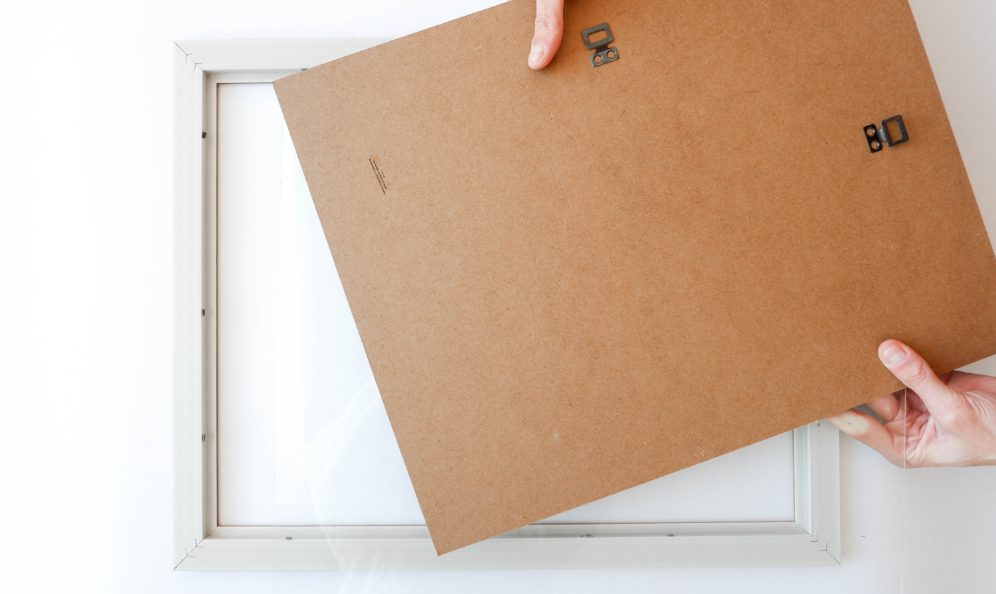
- Remove everything from the frame (glass or backing for example).
- Slightly sand it so it is ready for painting.
STEP 3) Paint the Frame
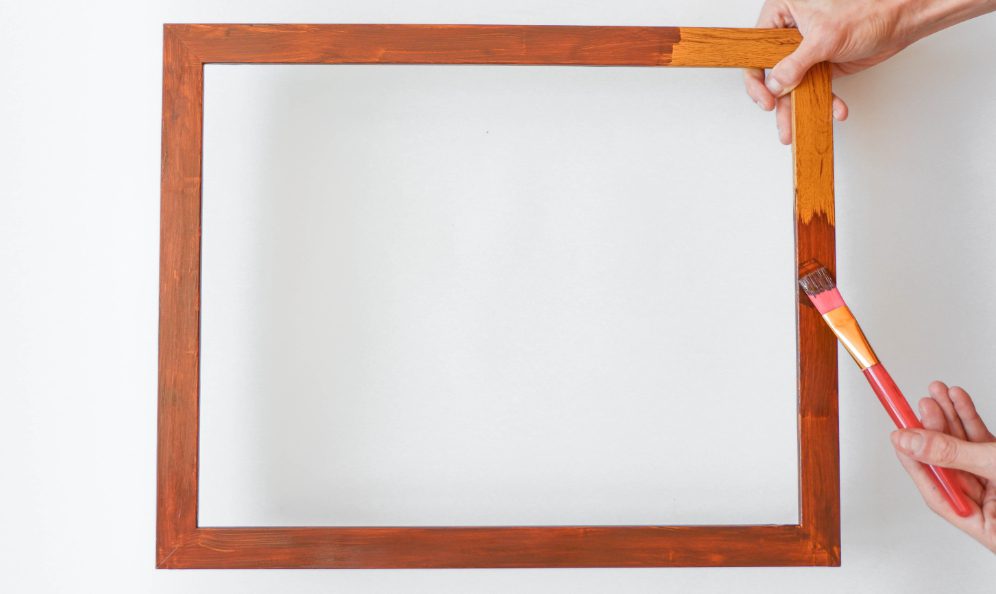
- Paint the wood by hand or spray paint and let it dry.
- If you would like, you can give it a second coat of paint, then let dry again.
STEP 4) Distress the Paint
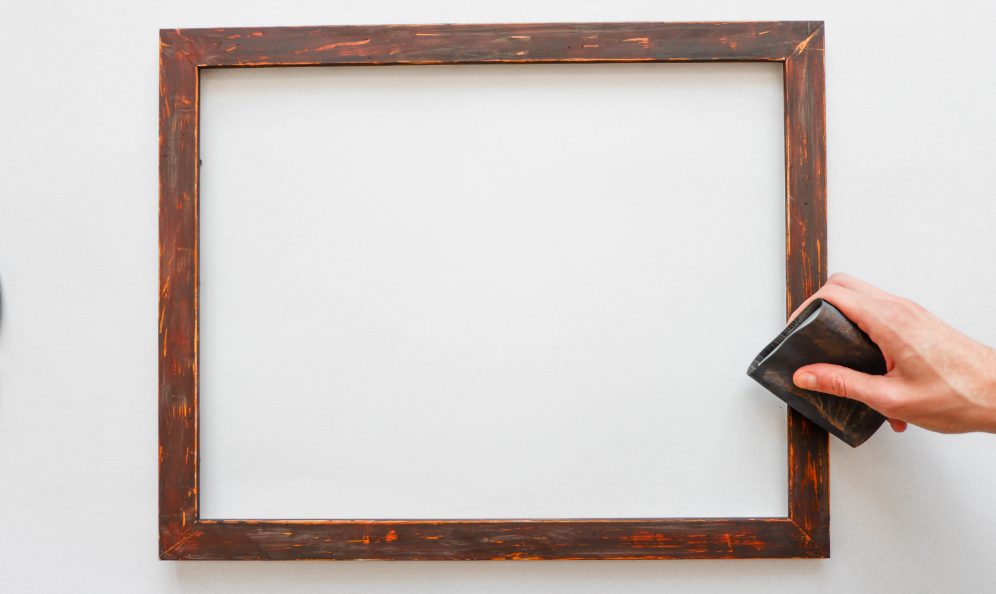
- If you want to give it an aged look, you can distress it – sand it again to take some of the paint off.
STEP 5) Cut the Mesh
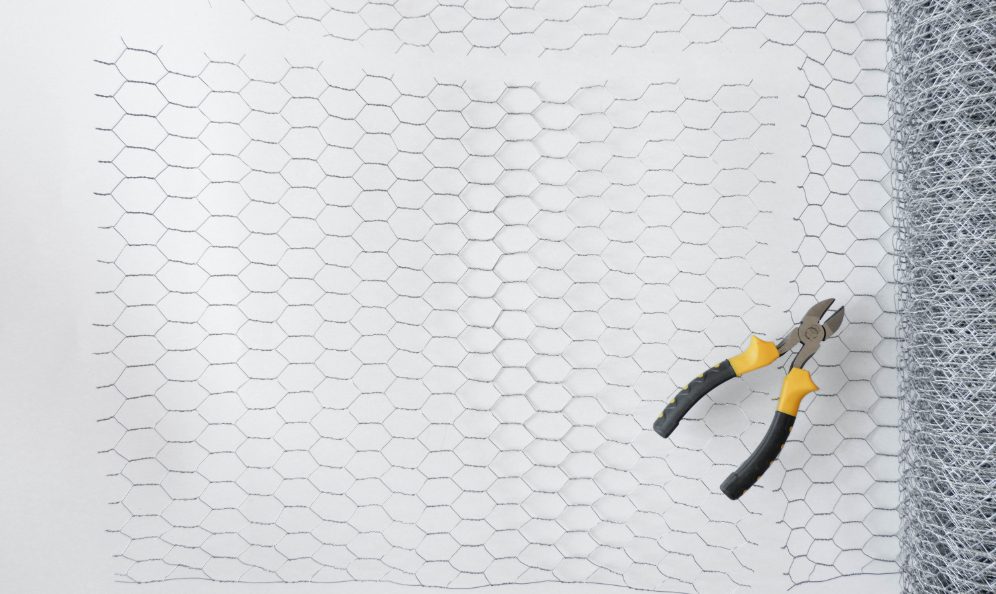
- Cut out a slightly bigger piece of the chicken wire than the size of the frame you previously measured. You can use any size chicken wire roll for this task.
- Use gloves and a wire cutter for the job.
STEP 6) Attach the First Side of the Mesh
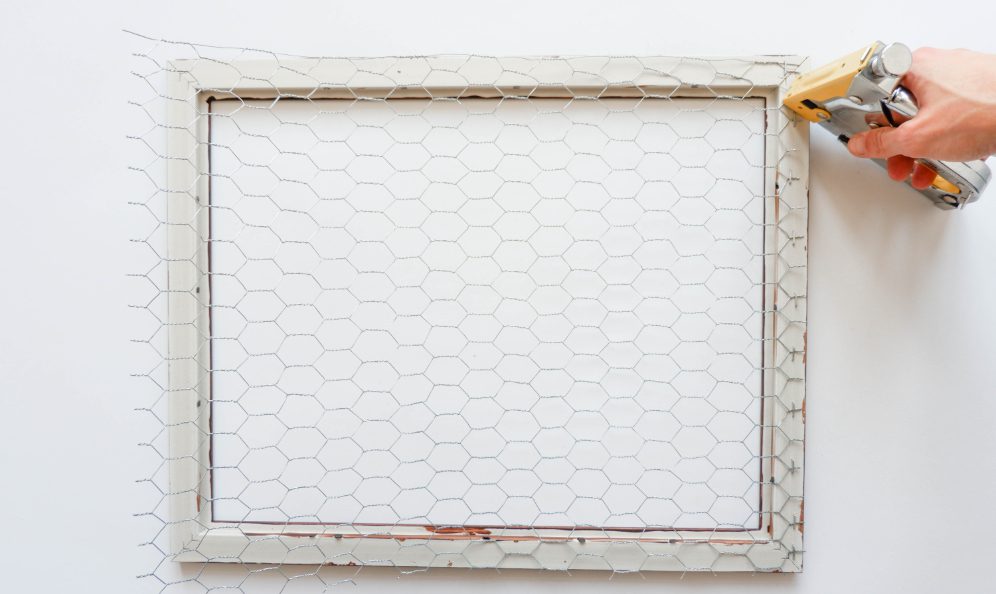
- Start by securing one side of the mesh to the frame.
- Staple along the side from top to bottom at every second hole.
STEP 7) Attach the Top
- Once the side is done, attach the mesh along the top.
- By attaching in an L shape, you will be able to pull on the mesh to straighten it.
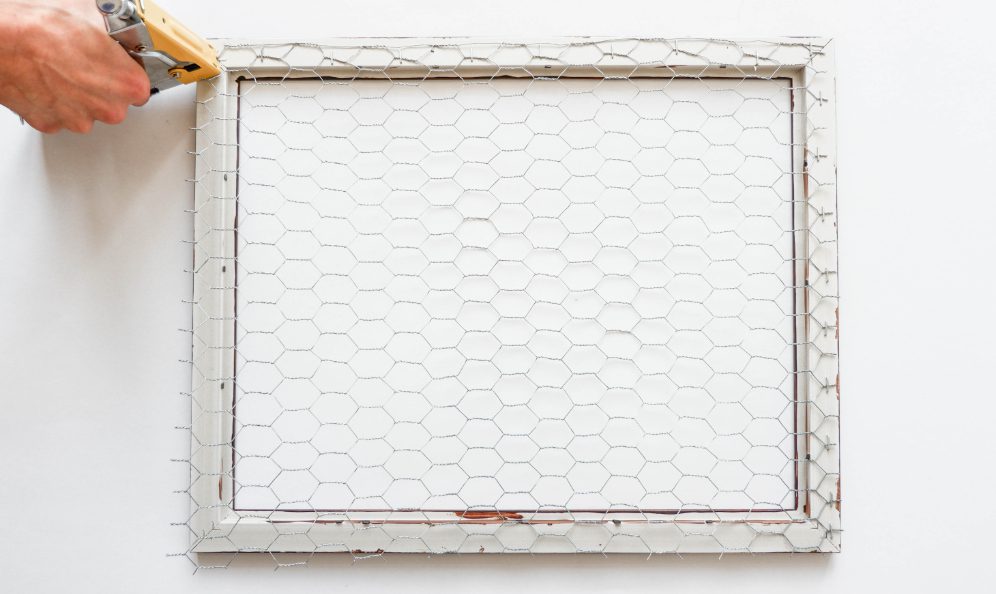
STEP 8) Pull and Attach the Remaining Sides
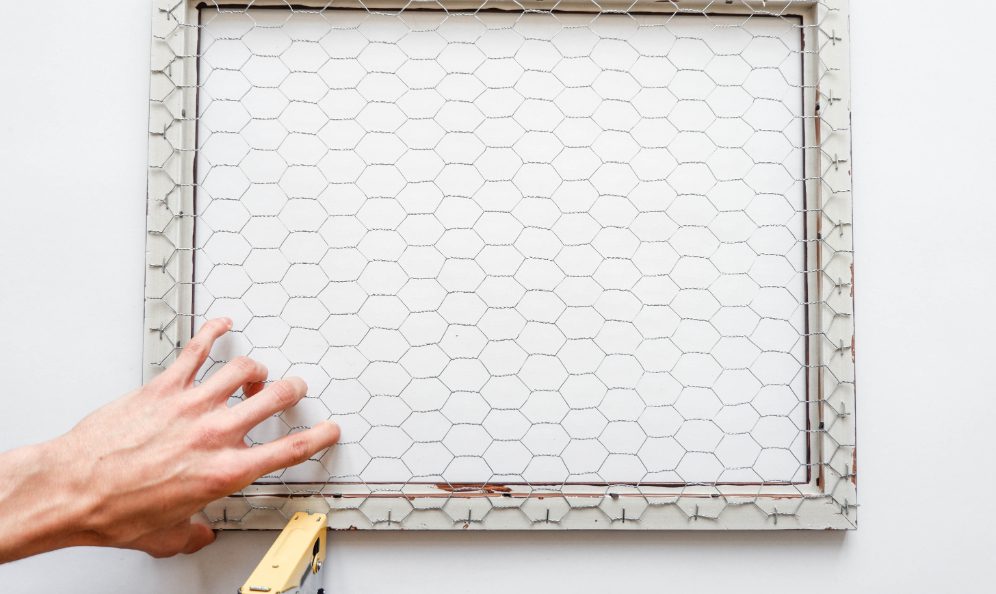
- Pull on the mesh while attaching the remaining parts to make it taut.
- This will give enough strength to the wire to hold the photos.
STEP 9) Cover the Ends of the Mesh
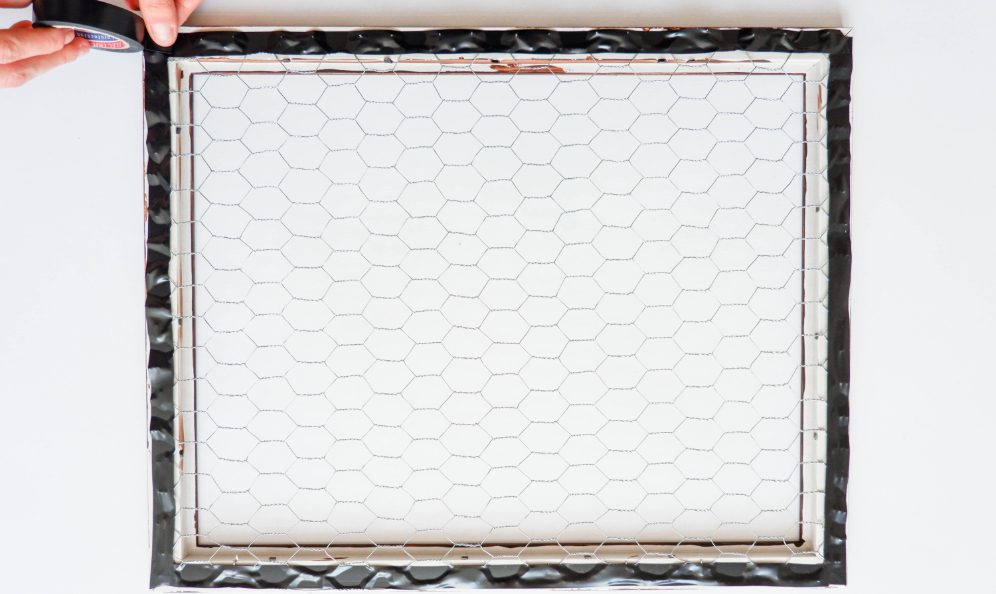
- Cover the ends of the chicken wire with packing or sealing tape so they don’t poke out and damage anything.
STEP 10) Hang Your Pictures
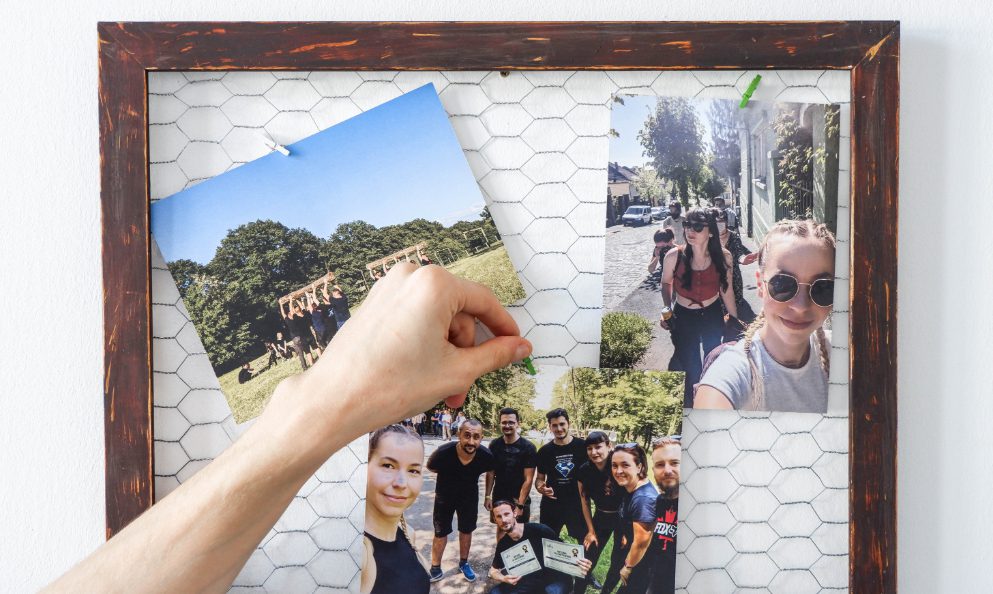
- Once you are done, you can hang your pictures on the chicken wire with some clothespins.
TIPS
- You can add some fabric as backing.
- Staple the fabric to one of the sides and to the top of the frame.
- While stapling the bottom and the other side, pull on the material and staple as you go.

What techniques are suggested for painting and distressing the frame to achieve desired aesthetics?
Hello,
Thank you for your question!
The easiest technique for painting and distressing the frame includes sandpaper – sanding the surface before painting helps the paint stick as it creates a rougher surface. Once the frame has been painted, you can use the sandpaper again to give it an aged look and reach the desired aesthetics.
Hope this helps and please let us know if you have any further questions!
Kind regards,
Joy