
DIY Trellis

Below, you’ll find a simple step by step guide to installing a DIY trellis using different methods.

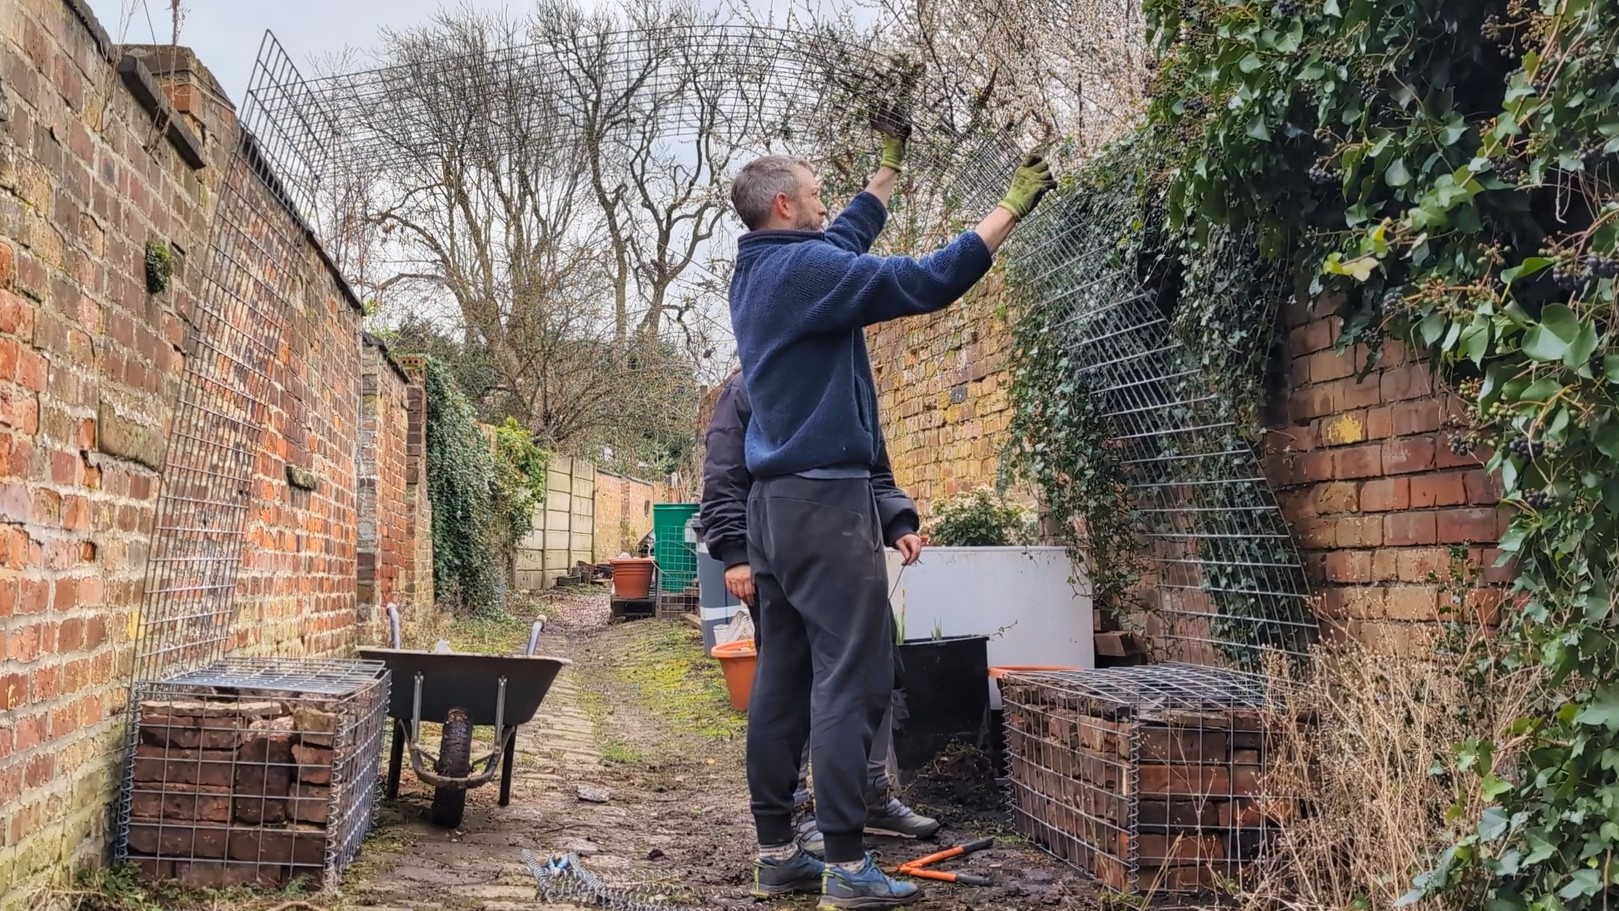
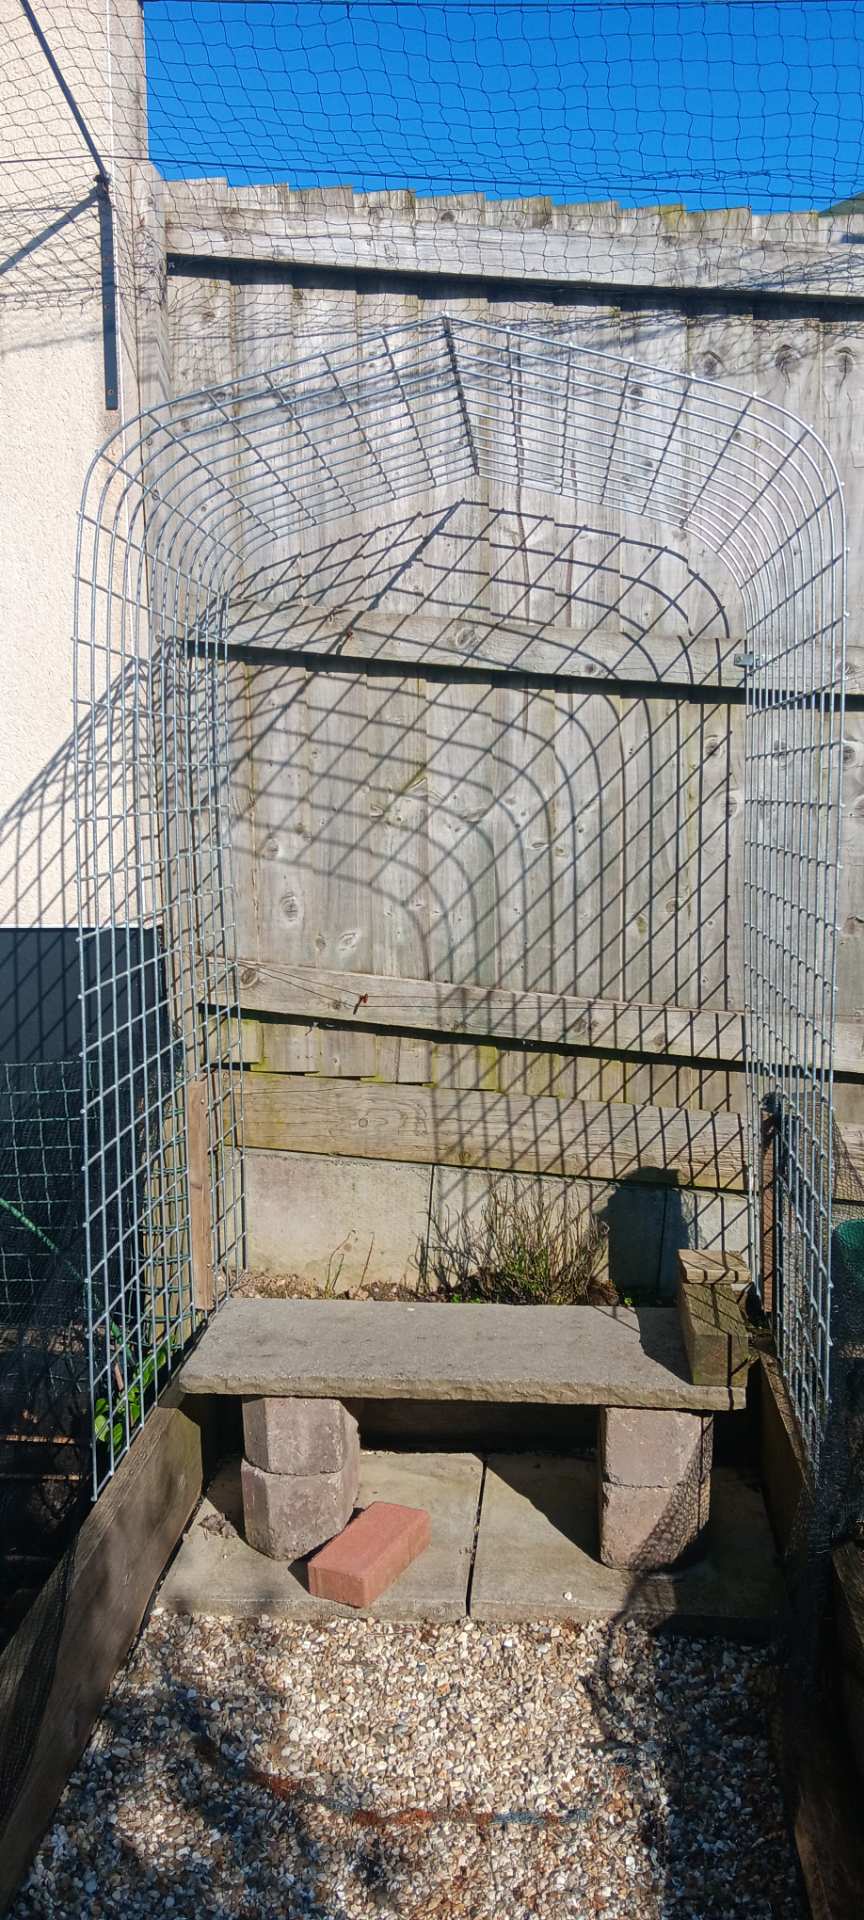
DIY TRELLIS ARCH
- Experience Required: Low
- Tools Required: Protective gloves, Tape measure, Post driver
- Materials Required: Cattle panels, T Posts, Cable ties
Step 1) Measure Your Area
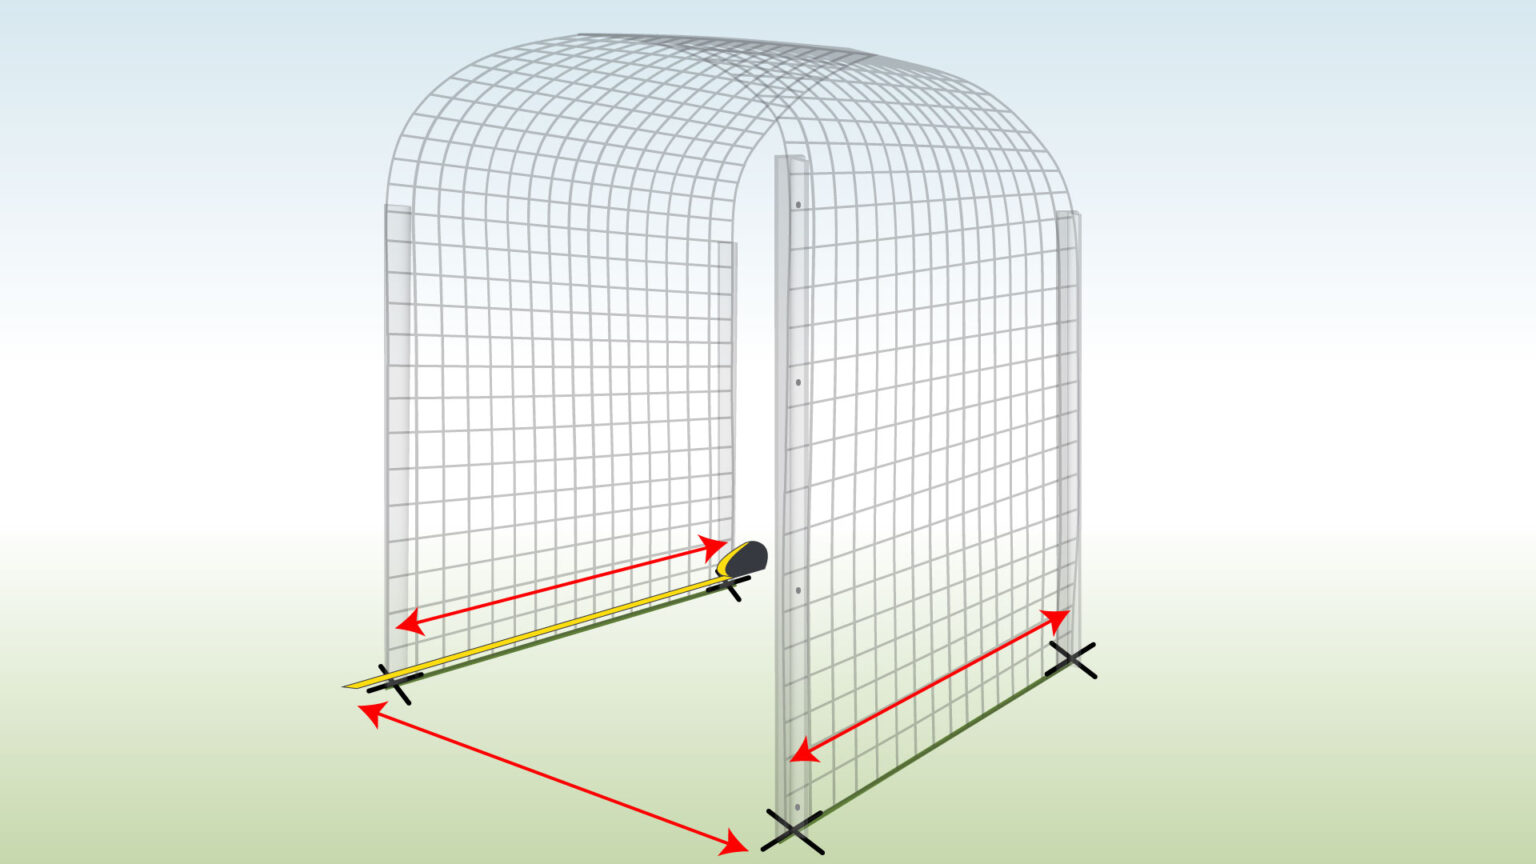
- Measure and mark the area, including the post positions, based on your plan.
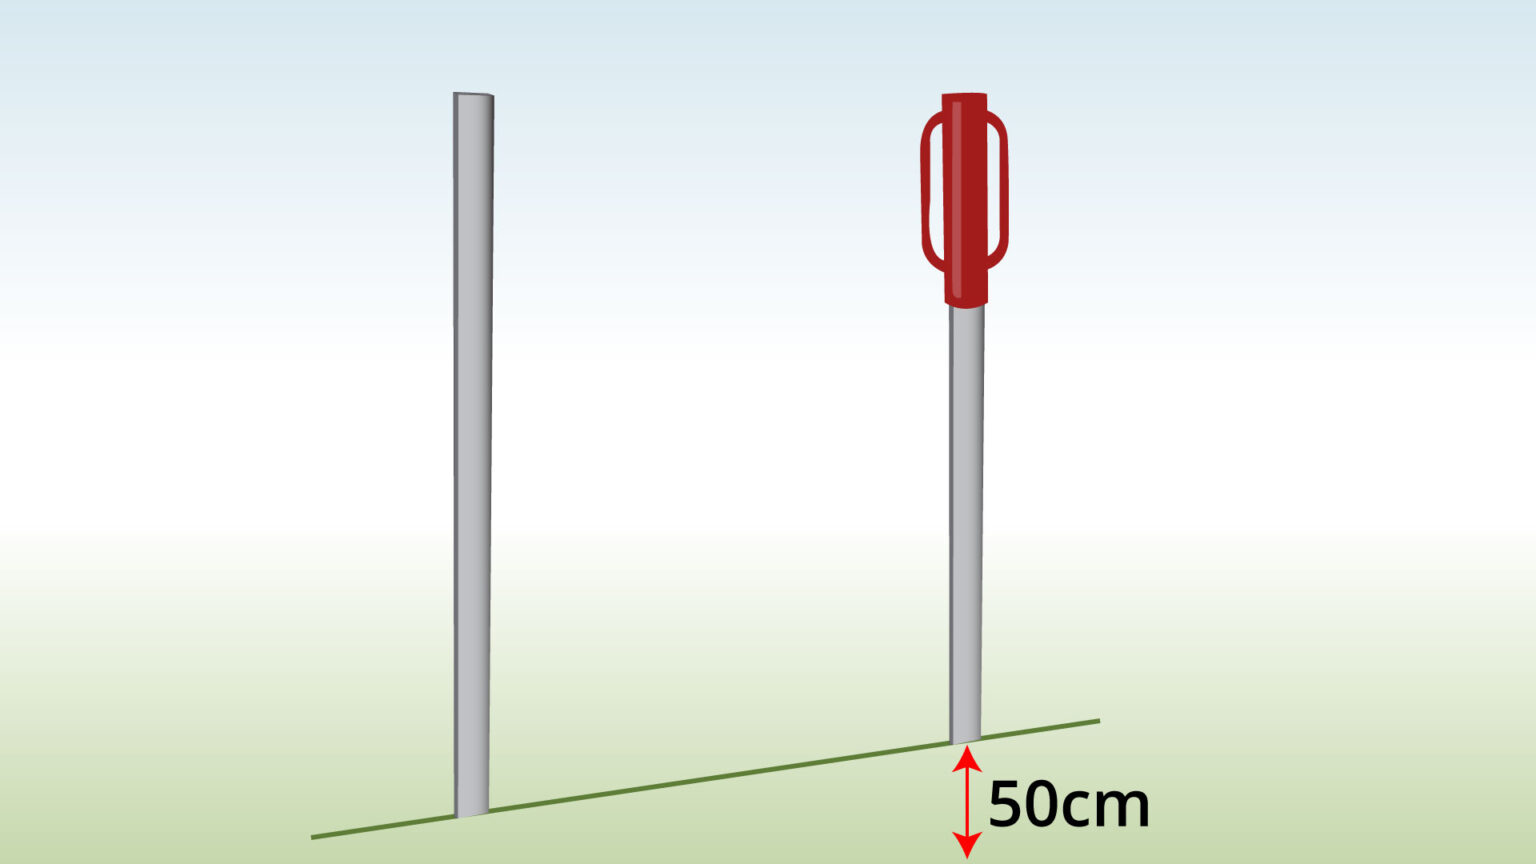
Step 2) Install Posts
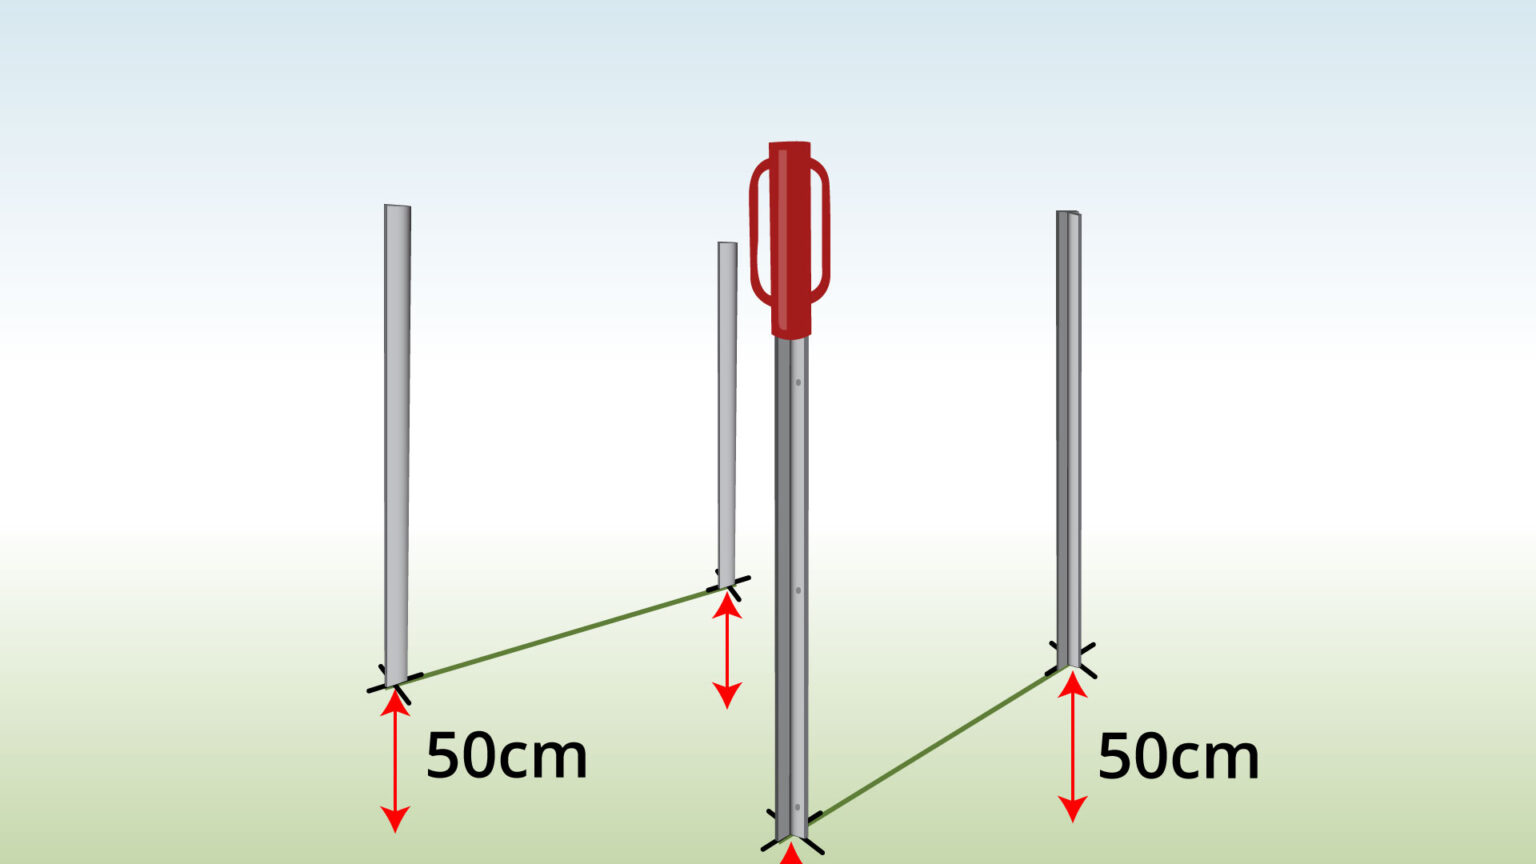
- Drive the T posts at least 50cm into the ground, making sure the flat side of each post faces inward.
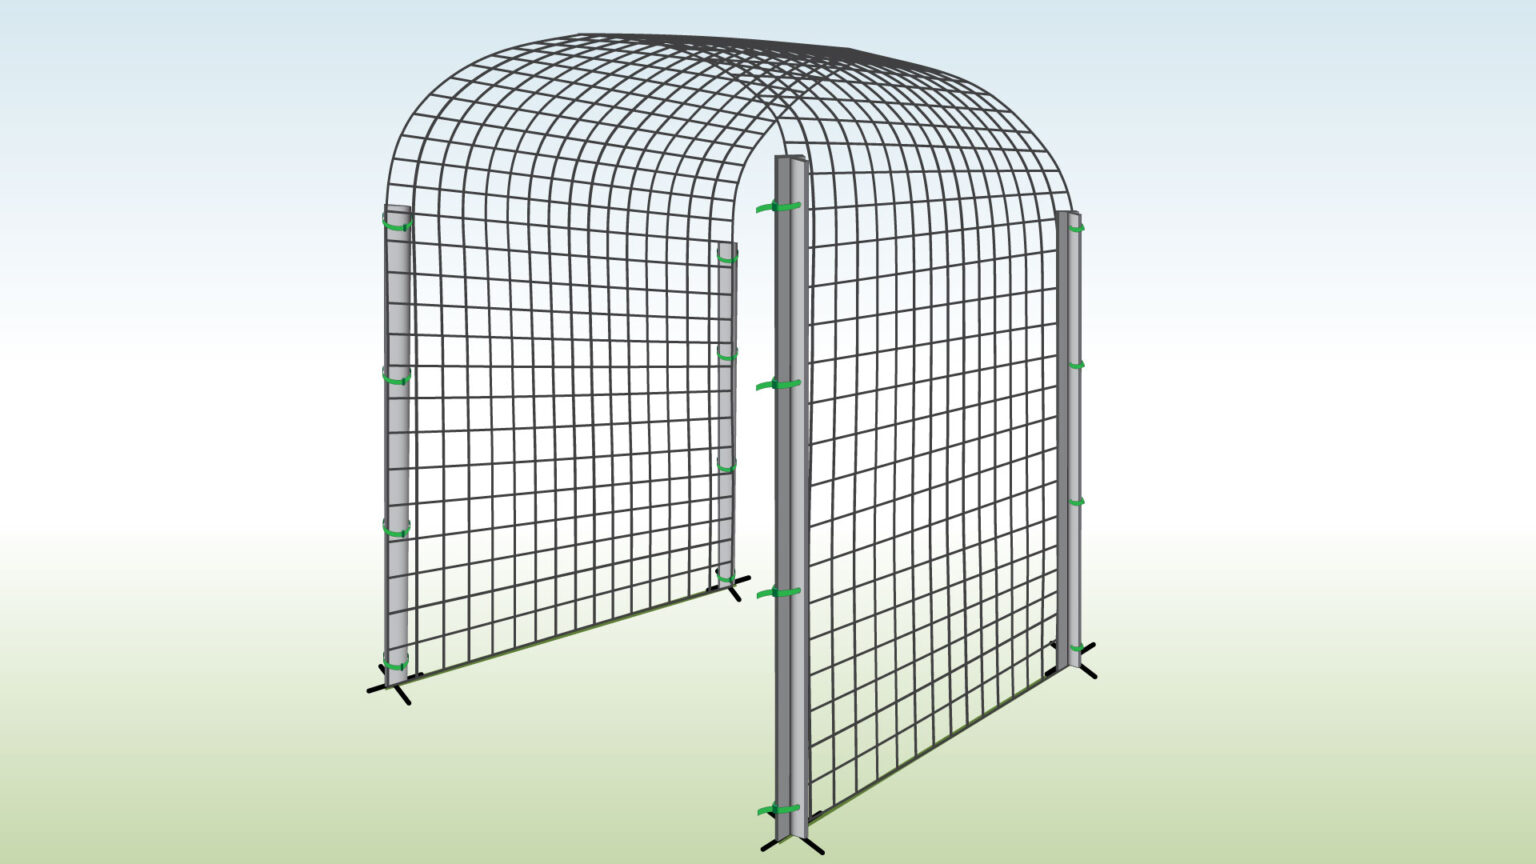
Step 3) Bend Panels
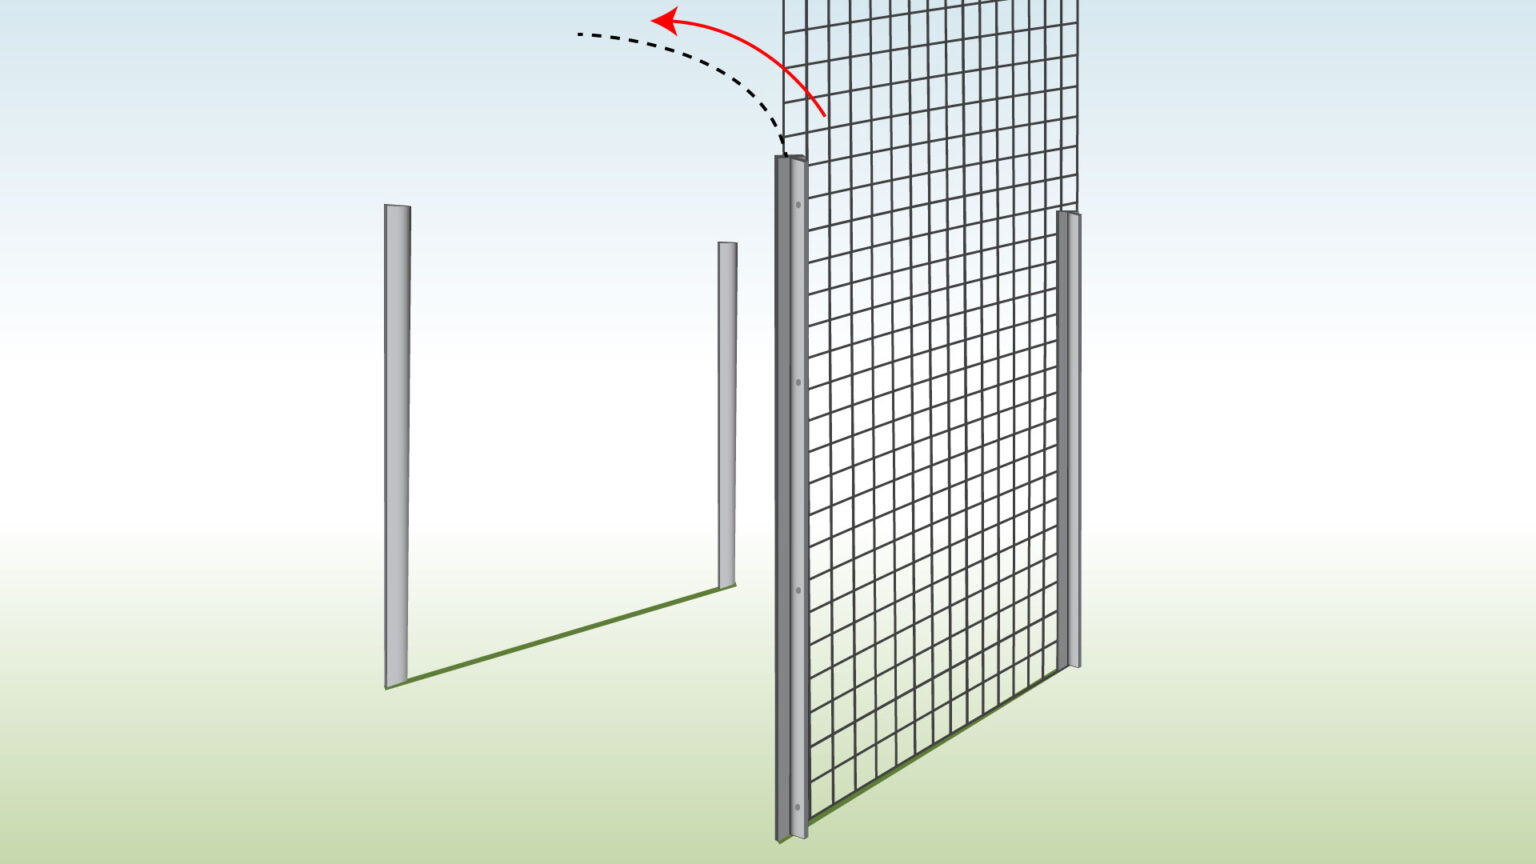
- Position one panel and gently bend the top by hand to create an arch shape.
Step 4) Attach First Panel
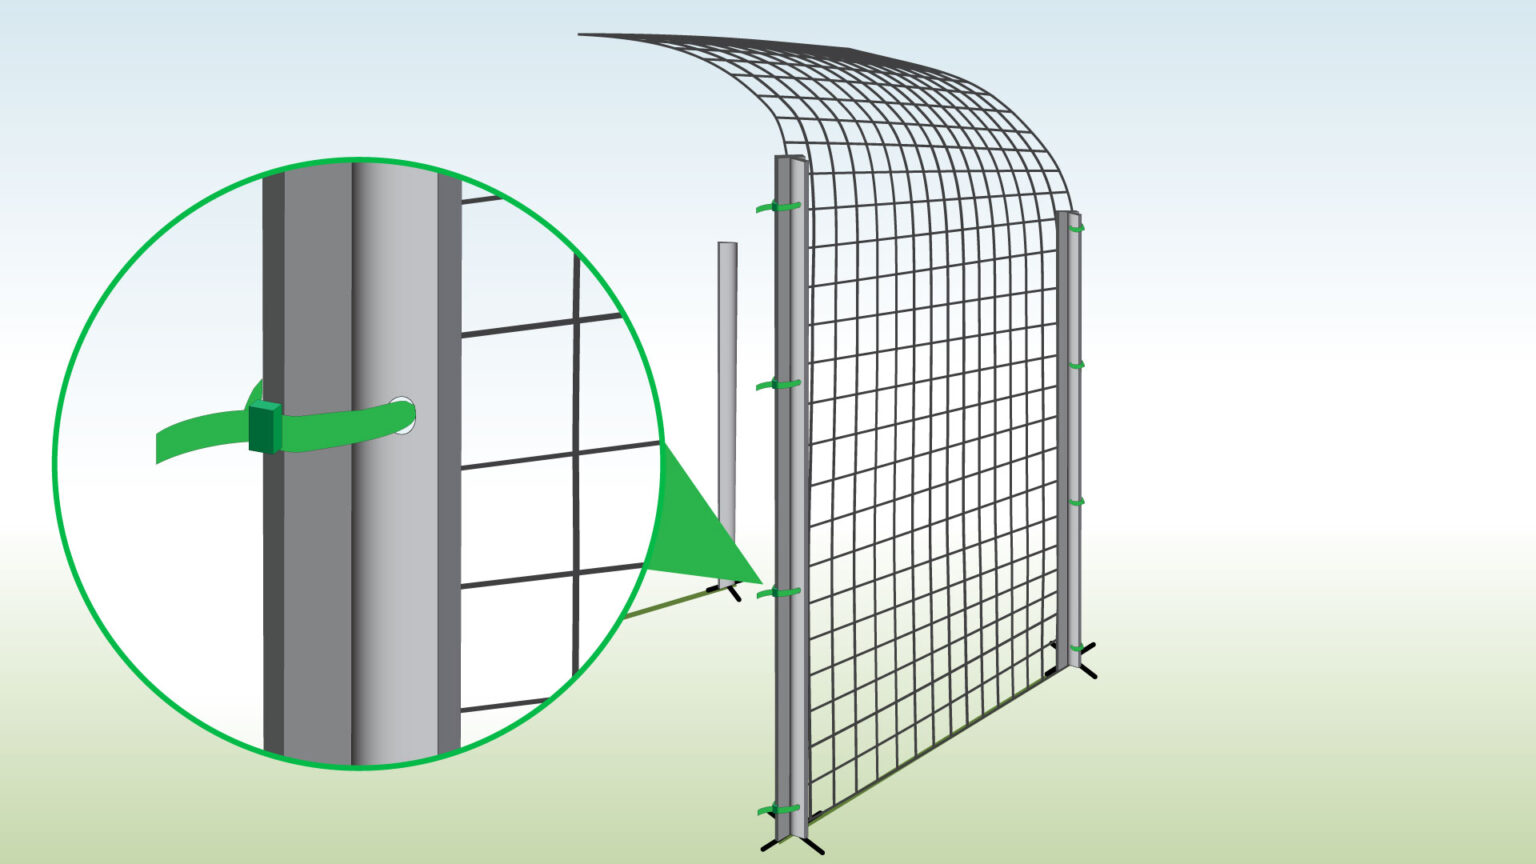
- Secure the first panel to the posts using cable ties through the pre-drilled holes.
- Make sure the panel sits against the flat side of the post.
Step 5) Secure Second Panel
- Position and secure the second panel using the same method.
Step 6) Secure at the Top
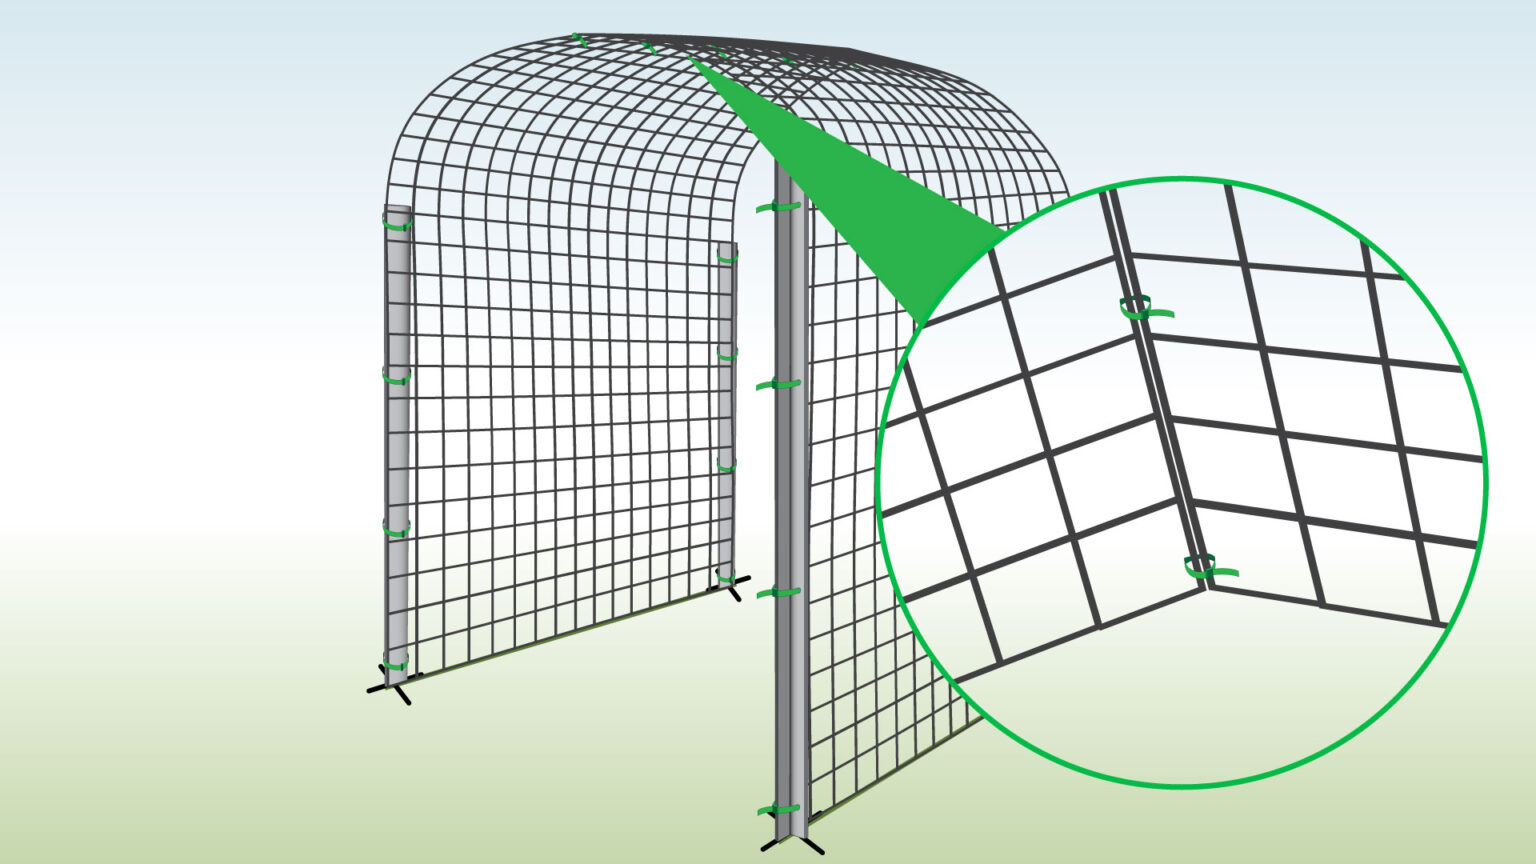
- Attach the panels together at the top with cable ties.
Step 7) Train Climbing Plants
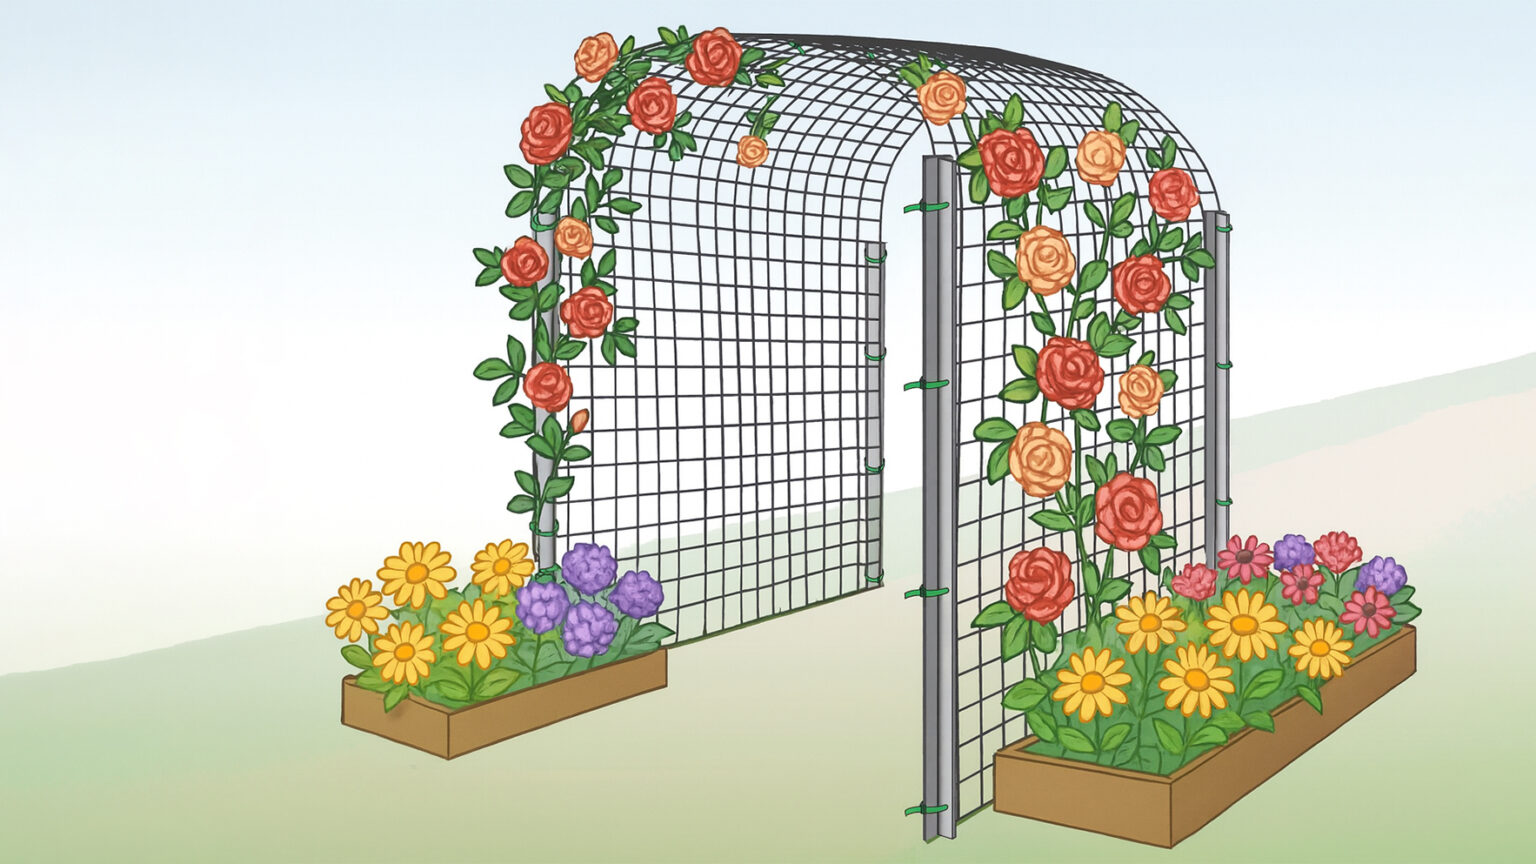
- Your cattle panel trellis is now ready to personalise.
- Add mulch around the base or begin training climbing plants up the support.
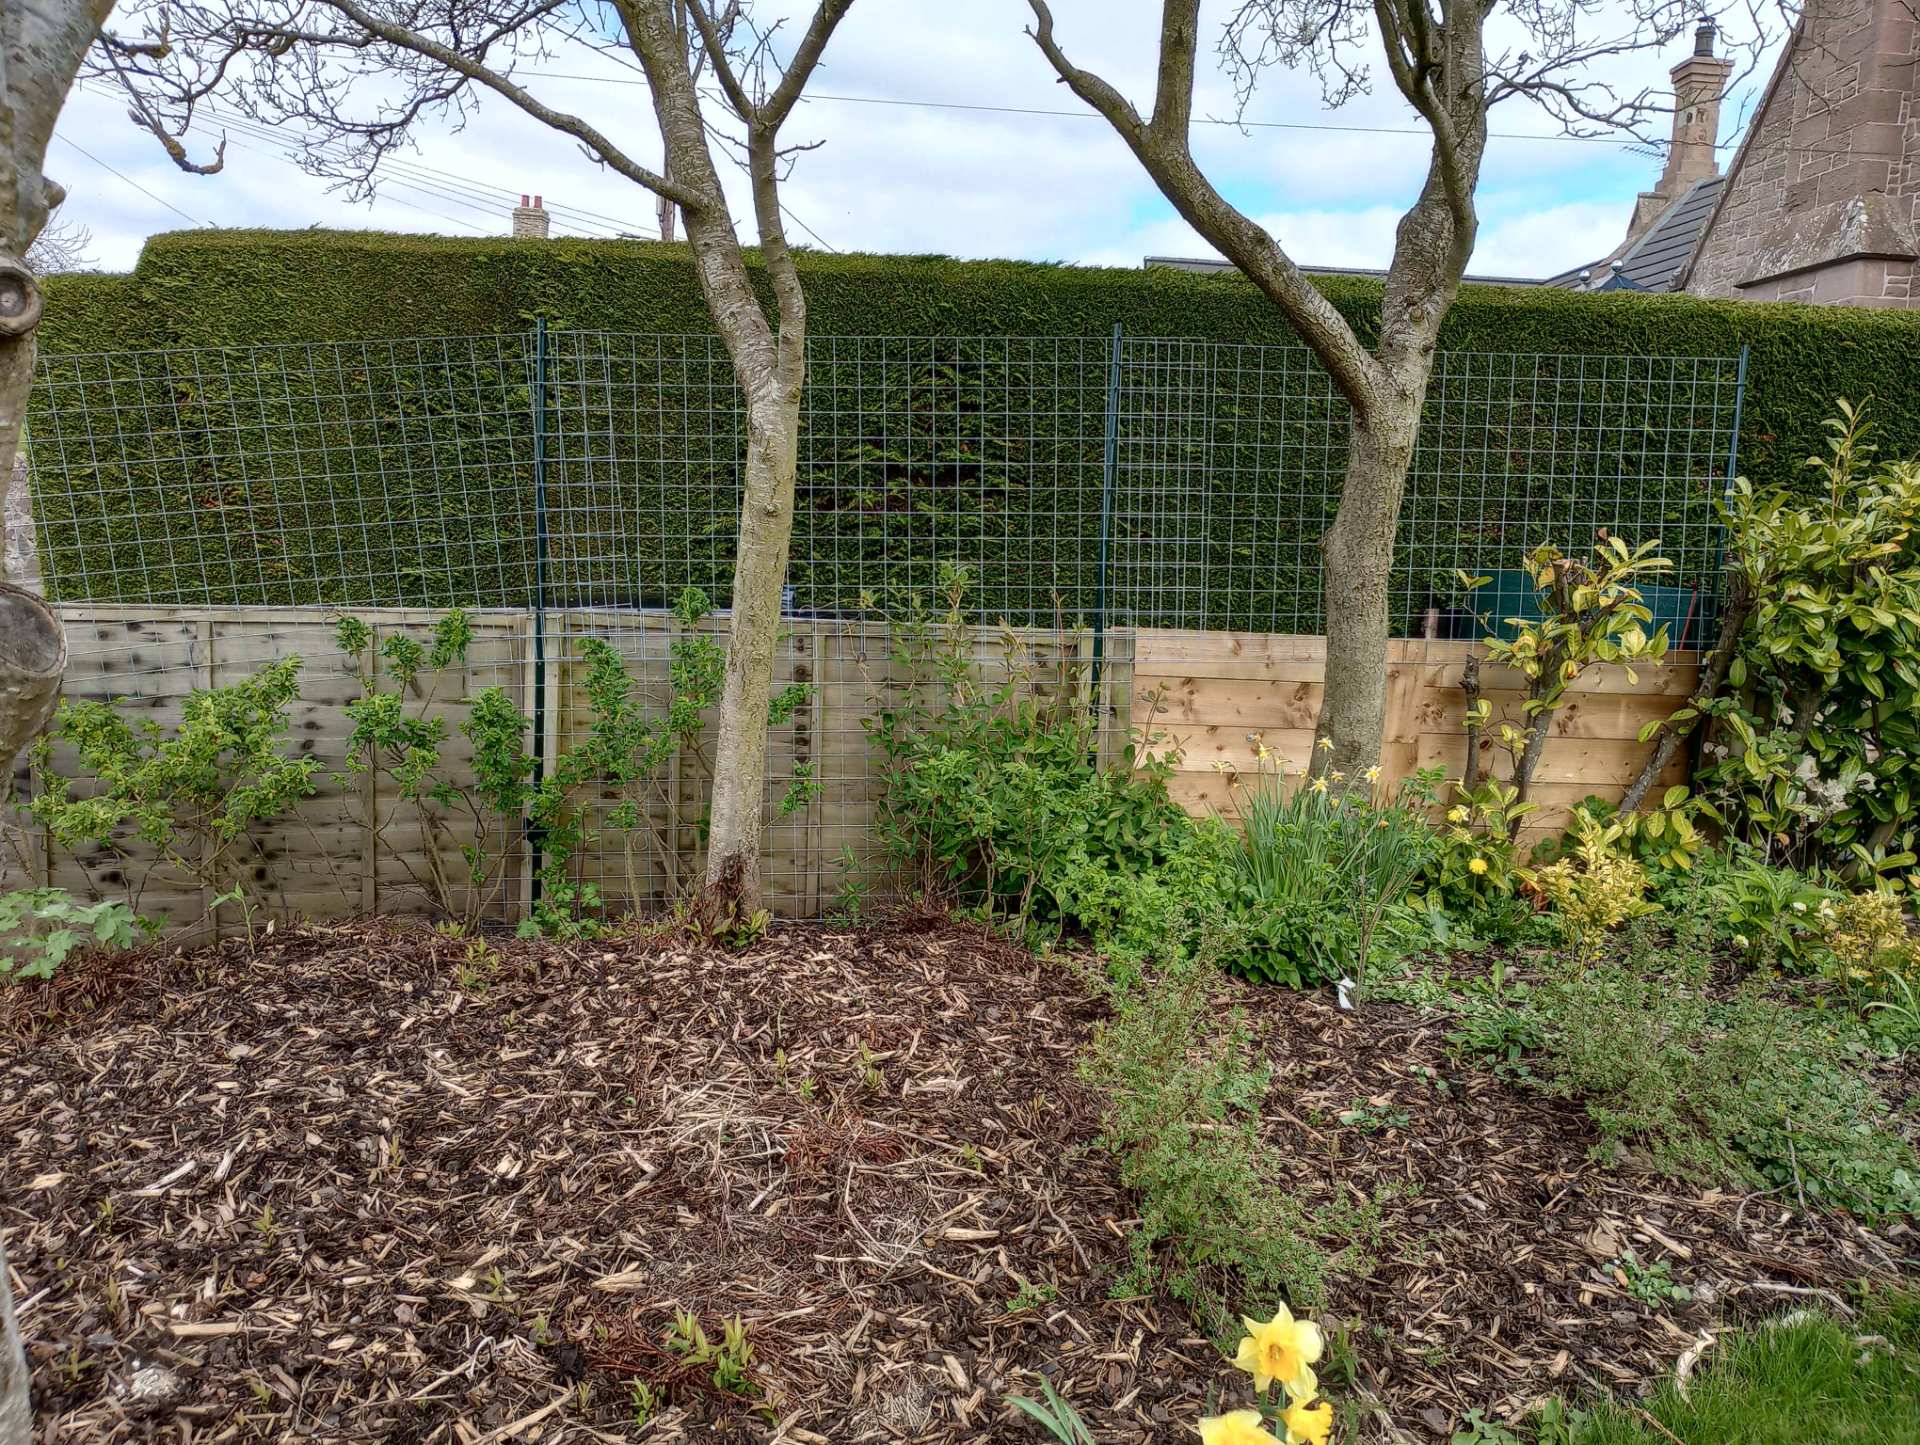
FREESTANDING TRELLIS
- Experience Required: Low
- Tools Required: Protective gloves, Tape measure, Post driver
- Materials Required: Cattle panels, T Posts, Cable ties
Step 1) Plan & Measure
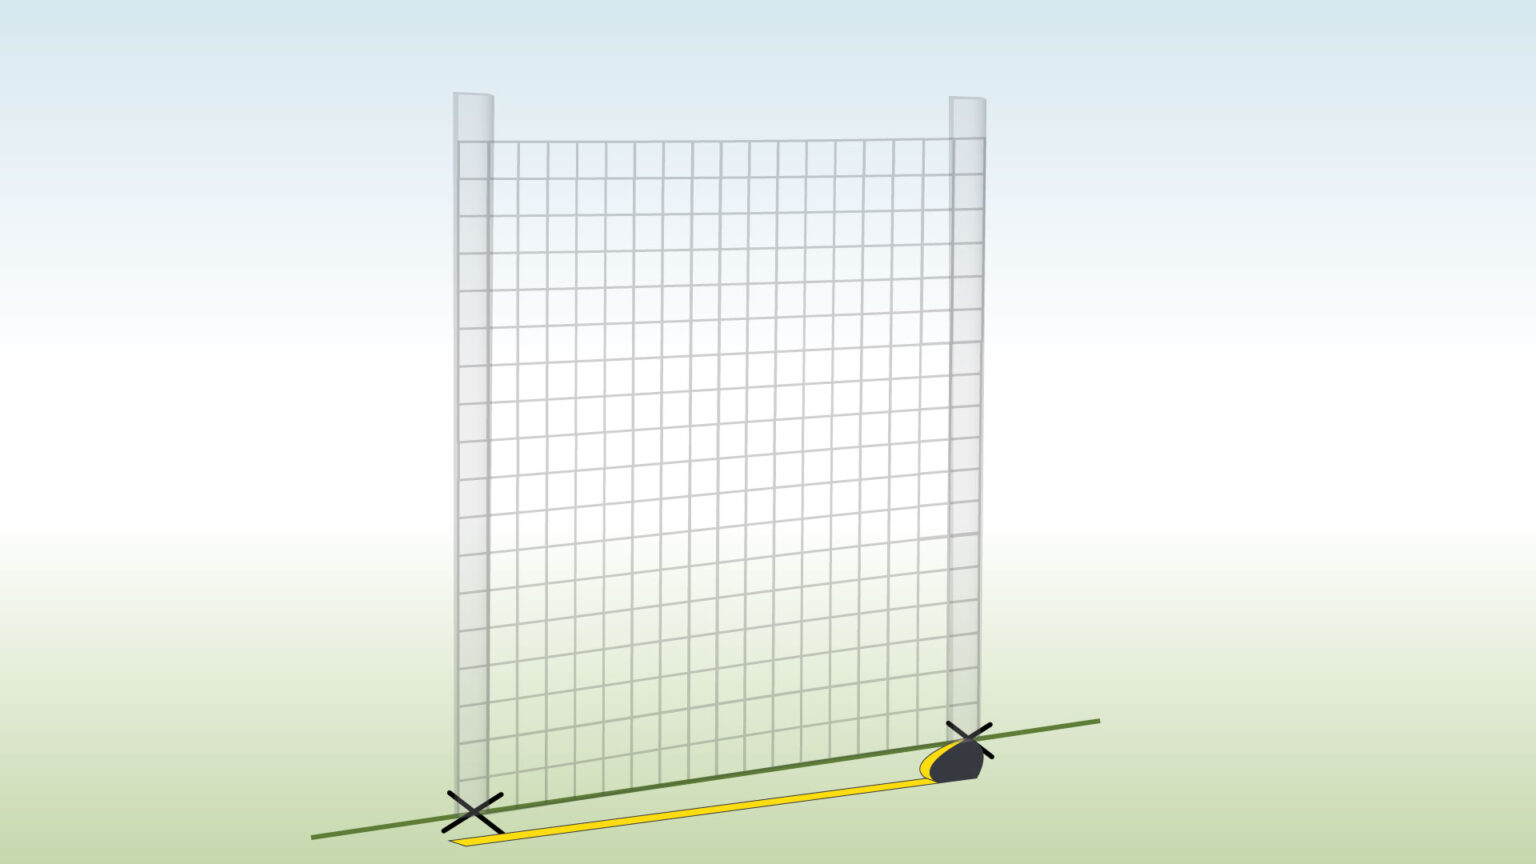
- Plan and measure the distance between your posts according to the panel size.
- Mark the exact spots where you will install each post.
Step 2) Install Posts
- Drive your posts at least 50 cm into the ground.
Step 3) Position & Secure Panel
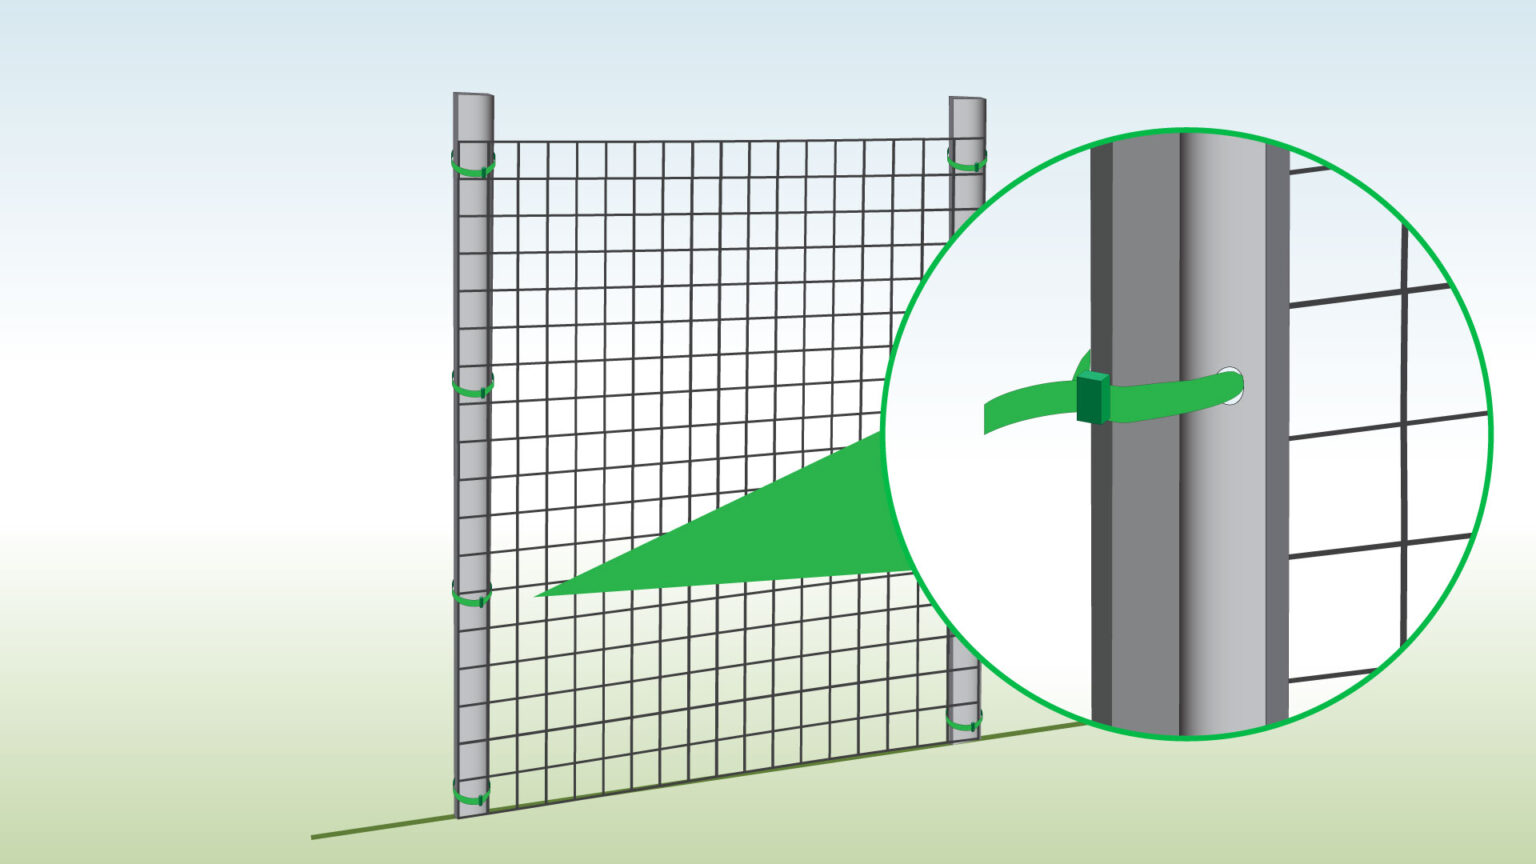
- Position the panel and secure it to the posts using cable ties through the pre-drilled holes.
Step 4) Grow Climbing Plants
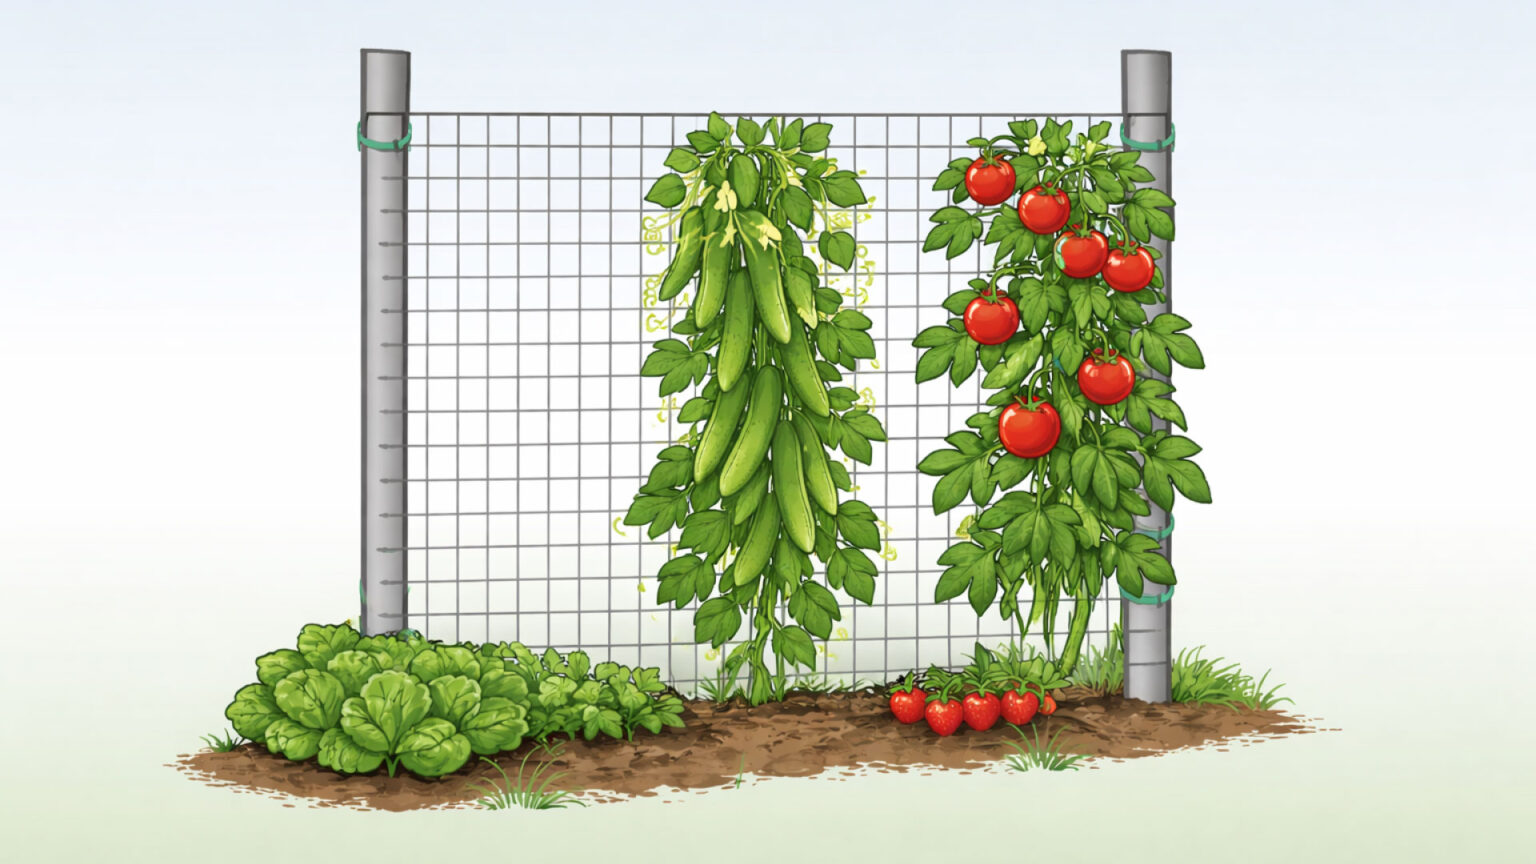
- Once your DIY trellis is ready, you can start growing your climbing plants.
MOUNTED TRELLIS
- Experience Required: Low
- Tools Required: Protective gloves, Tape measure, Level
- Materials Required: Cattle panels, Staples / Brackets
Step 1) Mark Position

- Hold the panel against the fence or wall to plan its position.
- Always check with a level to make sure it is straight before fixing.
Step 2A) Staple to Wood
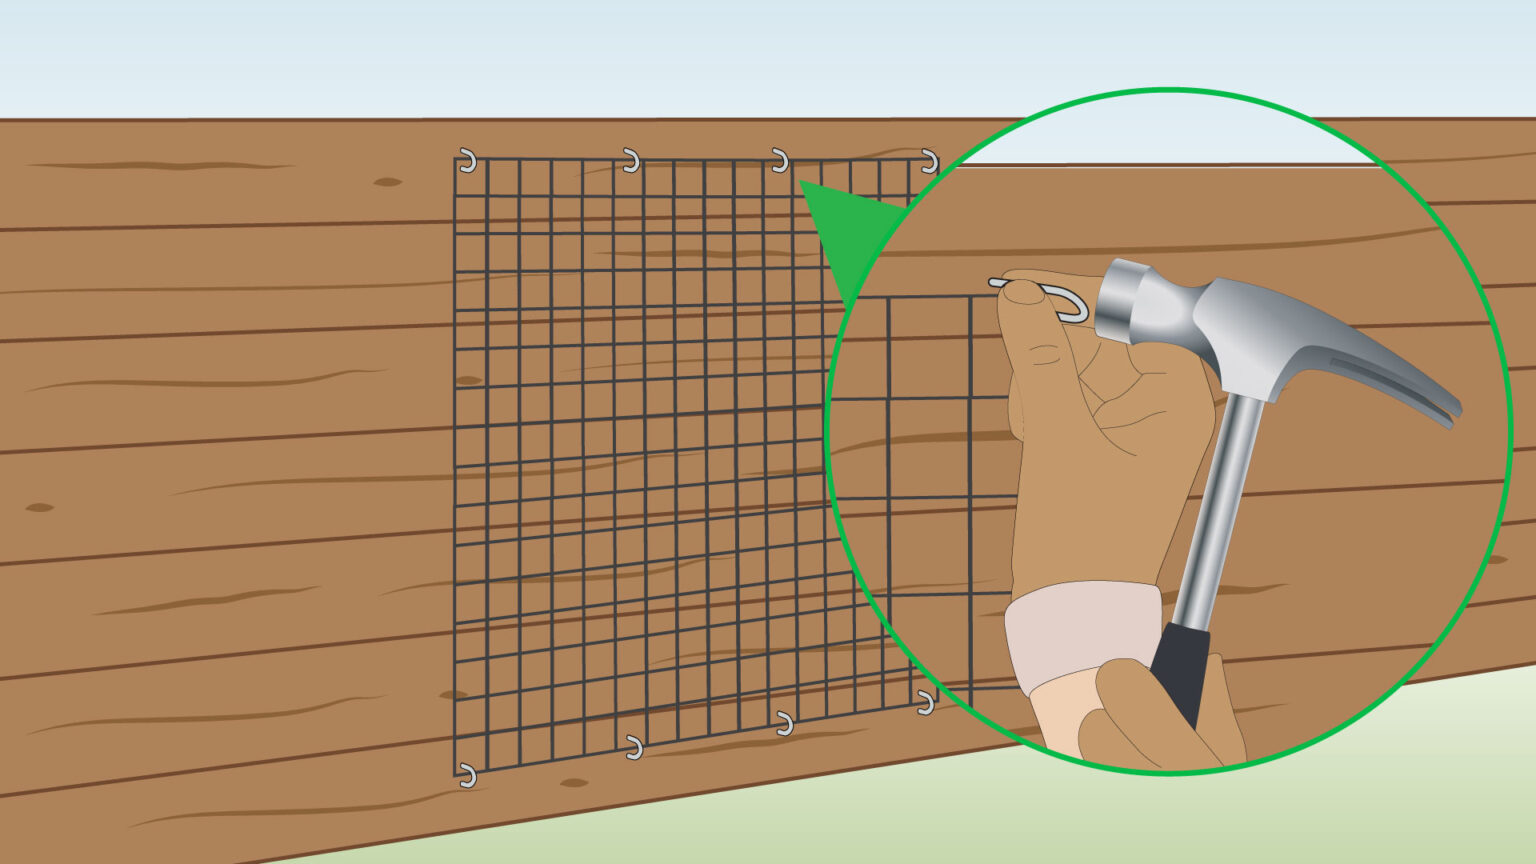
- If you are attaching to wood, simply staple the panel to the wood at the top and bottom.
Step 2B) Fixing to Brick
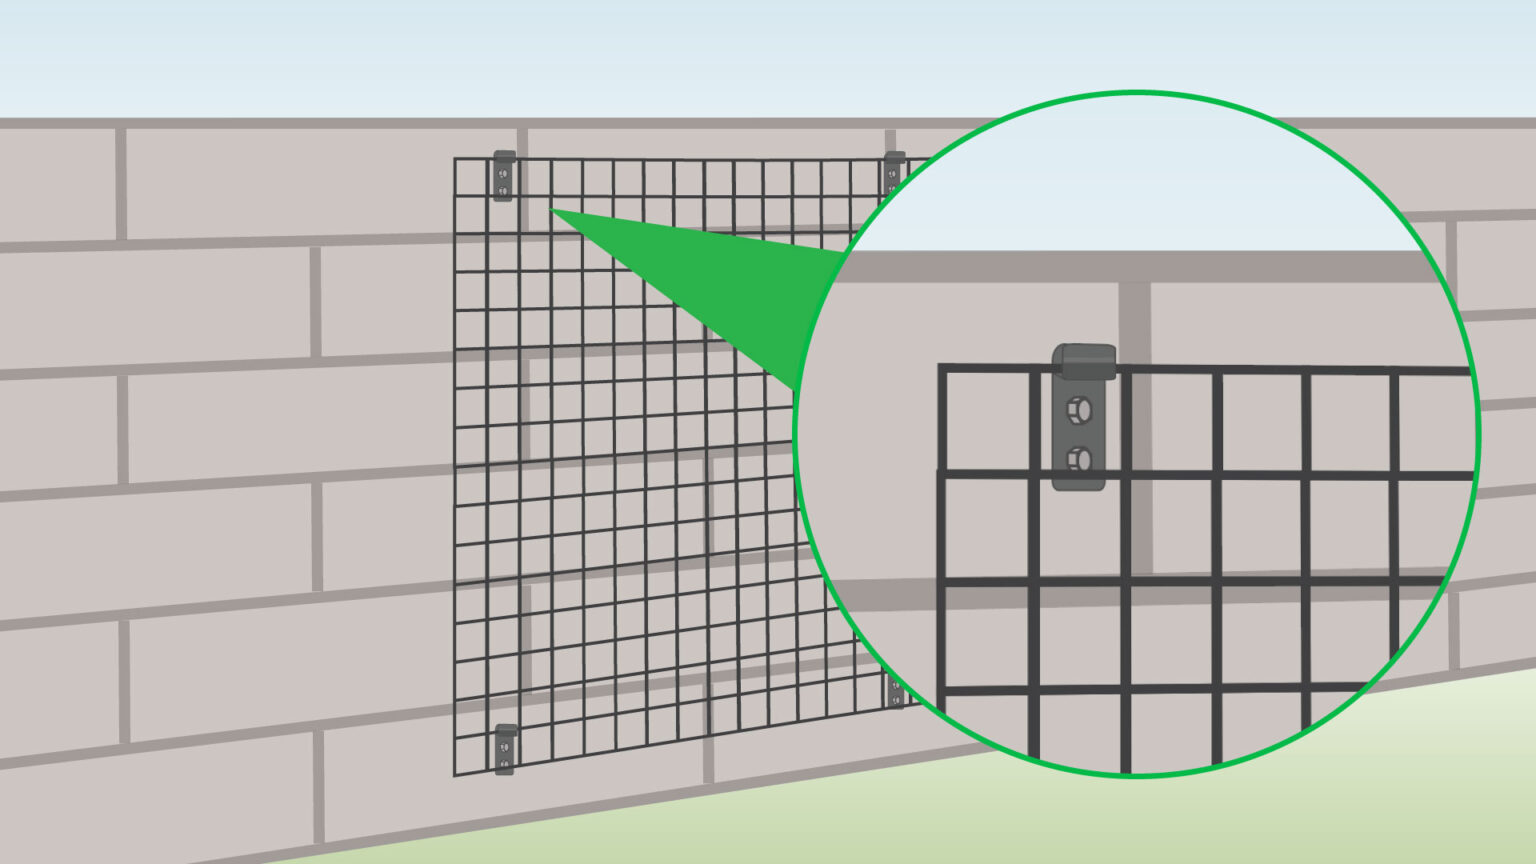
- If you are attaching to a brick or concrete wall, install brackets into the wall and hang the panel onto them.
Step 3) Climb Plants

- Plant your seedlings along the base of your DIY trellis and watch them grow.
Further Tips on How to Make a Trellis
Before starting your trellis project, it’s important to plan carefully and consider a few key factors. The points below are based on our team’s experience designing and installing fencing structures and trellises.
- Plan your structure’s layout before planting, then plant seedlings at the base and guide them upward as they grow.
- Vertical growing helps maximize space in small gardens.
- Trellis can be used to increase privacy and divide your garden into separate areas.
- It also works well in pots and containers, making it ideal for patios and balconies.
- Many everyday items can be repurposed into a climbing frame, including old ladders, wire mesh, fencing panels, and window frames.
- Bamboo poles, timber battens, pallets, and expanding panels are affordable options for both small and large gardens.
- If you are looking to make your own trellis, we stock long, rigid wire panels suitable for a trellis.
FURTHER READING
- How to Attach a Fence Panel to a Post and Different Materials – Step by step instructions for attaching a panel to different surfaces.
- How to Cut a Fence Panel – A guide on how to cut panels easily.
- How to Paint Wire Mesh – Learn how to paint wire mesh.
VIDEO

Written By
This blog was created by our Technical Illustrator, Timi and reviewed by our Founder, John.
Below you’ll find examples of our real-life trellis builds, along with behind the scenes images and customer projects. We’ve opted for technical illustrations for the instructions found in this blog because they provide better clarity on mesh placement and structural details that can get lost in real-life photography.


Published by
