Wire Mesh Memo Board DIY


In this post you will find out how to turn an ordinary mesh panel into a wire mesh memo board DIY style.

OVERVIEW:
- Estimated Completion Time: ~30 minutes
- Experience Required: Low
- Tools Required: Drill (Electric Screwdriver) or Hammer, Spray Paint (we used matte black)
- Materials Required: Mesh Panel, Screws
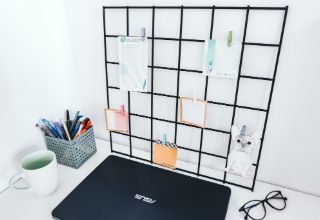
STEP 1) Get the Right Size Panel
- Measure the space that you have free for the panel.
- Purchase the right size, or if you are only able to purchase a bigger panel, cut it to size.
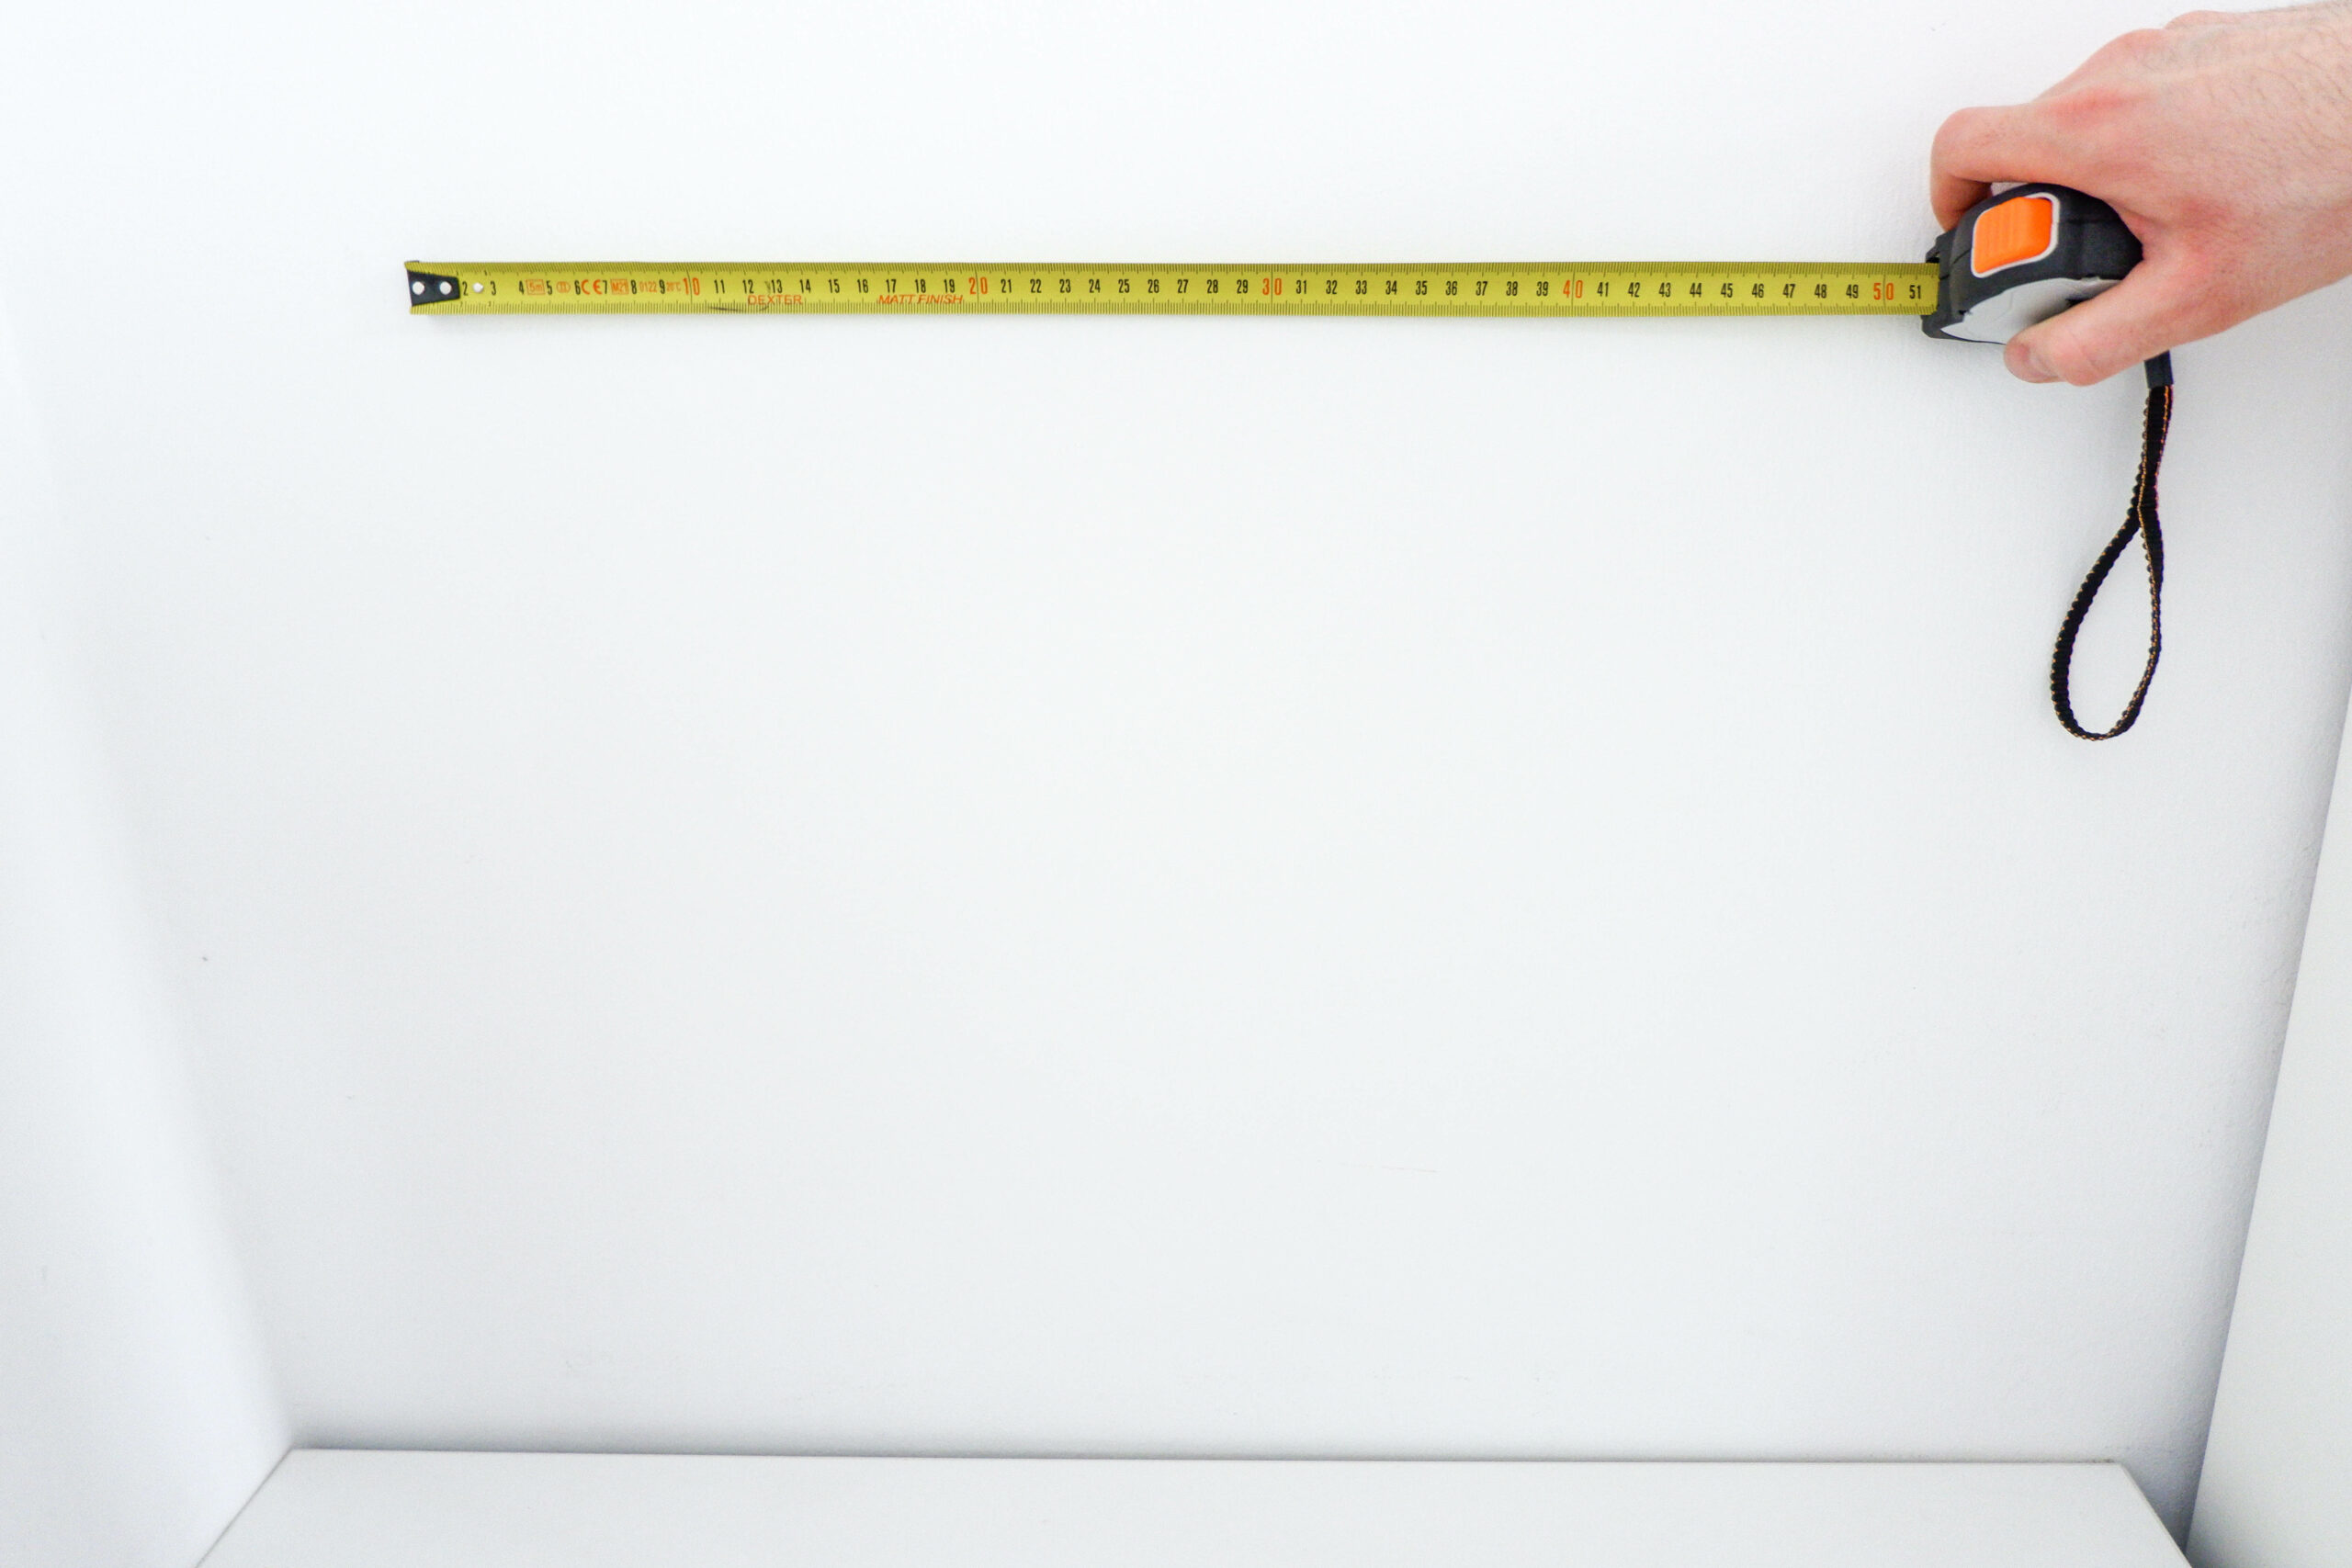
STEP 2) Paint the Mesh (Optional)
- Use a spray paint suitable for metals and follow the instructions on the label to paint the panel.
- Once painted, let it dry before hanging it on the wall.
STEP 3 – METHOD A) Hang the Grid on the Wall with Screws
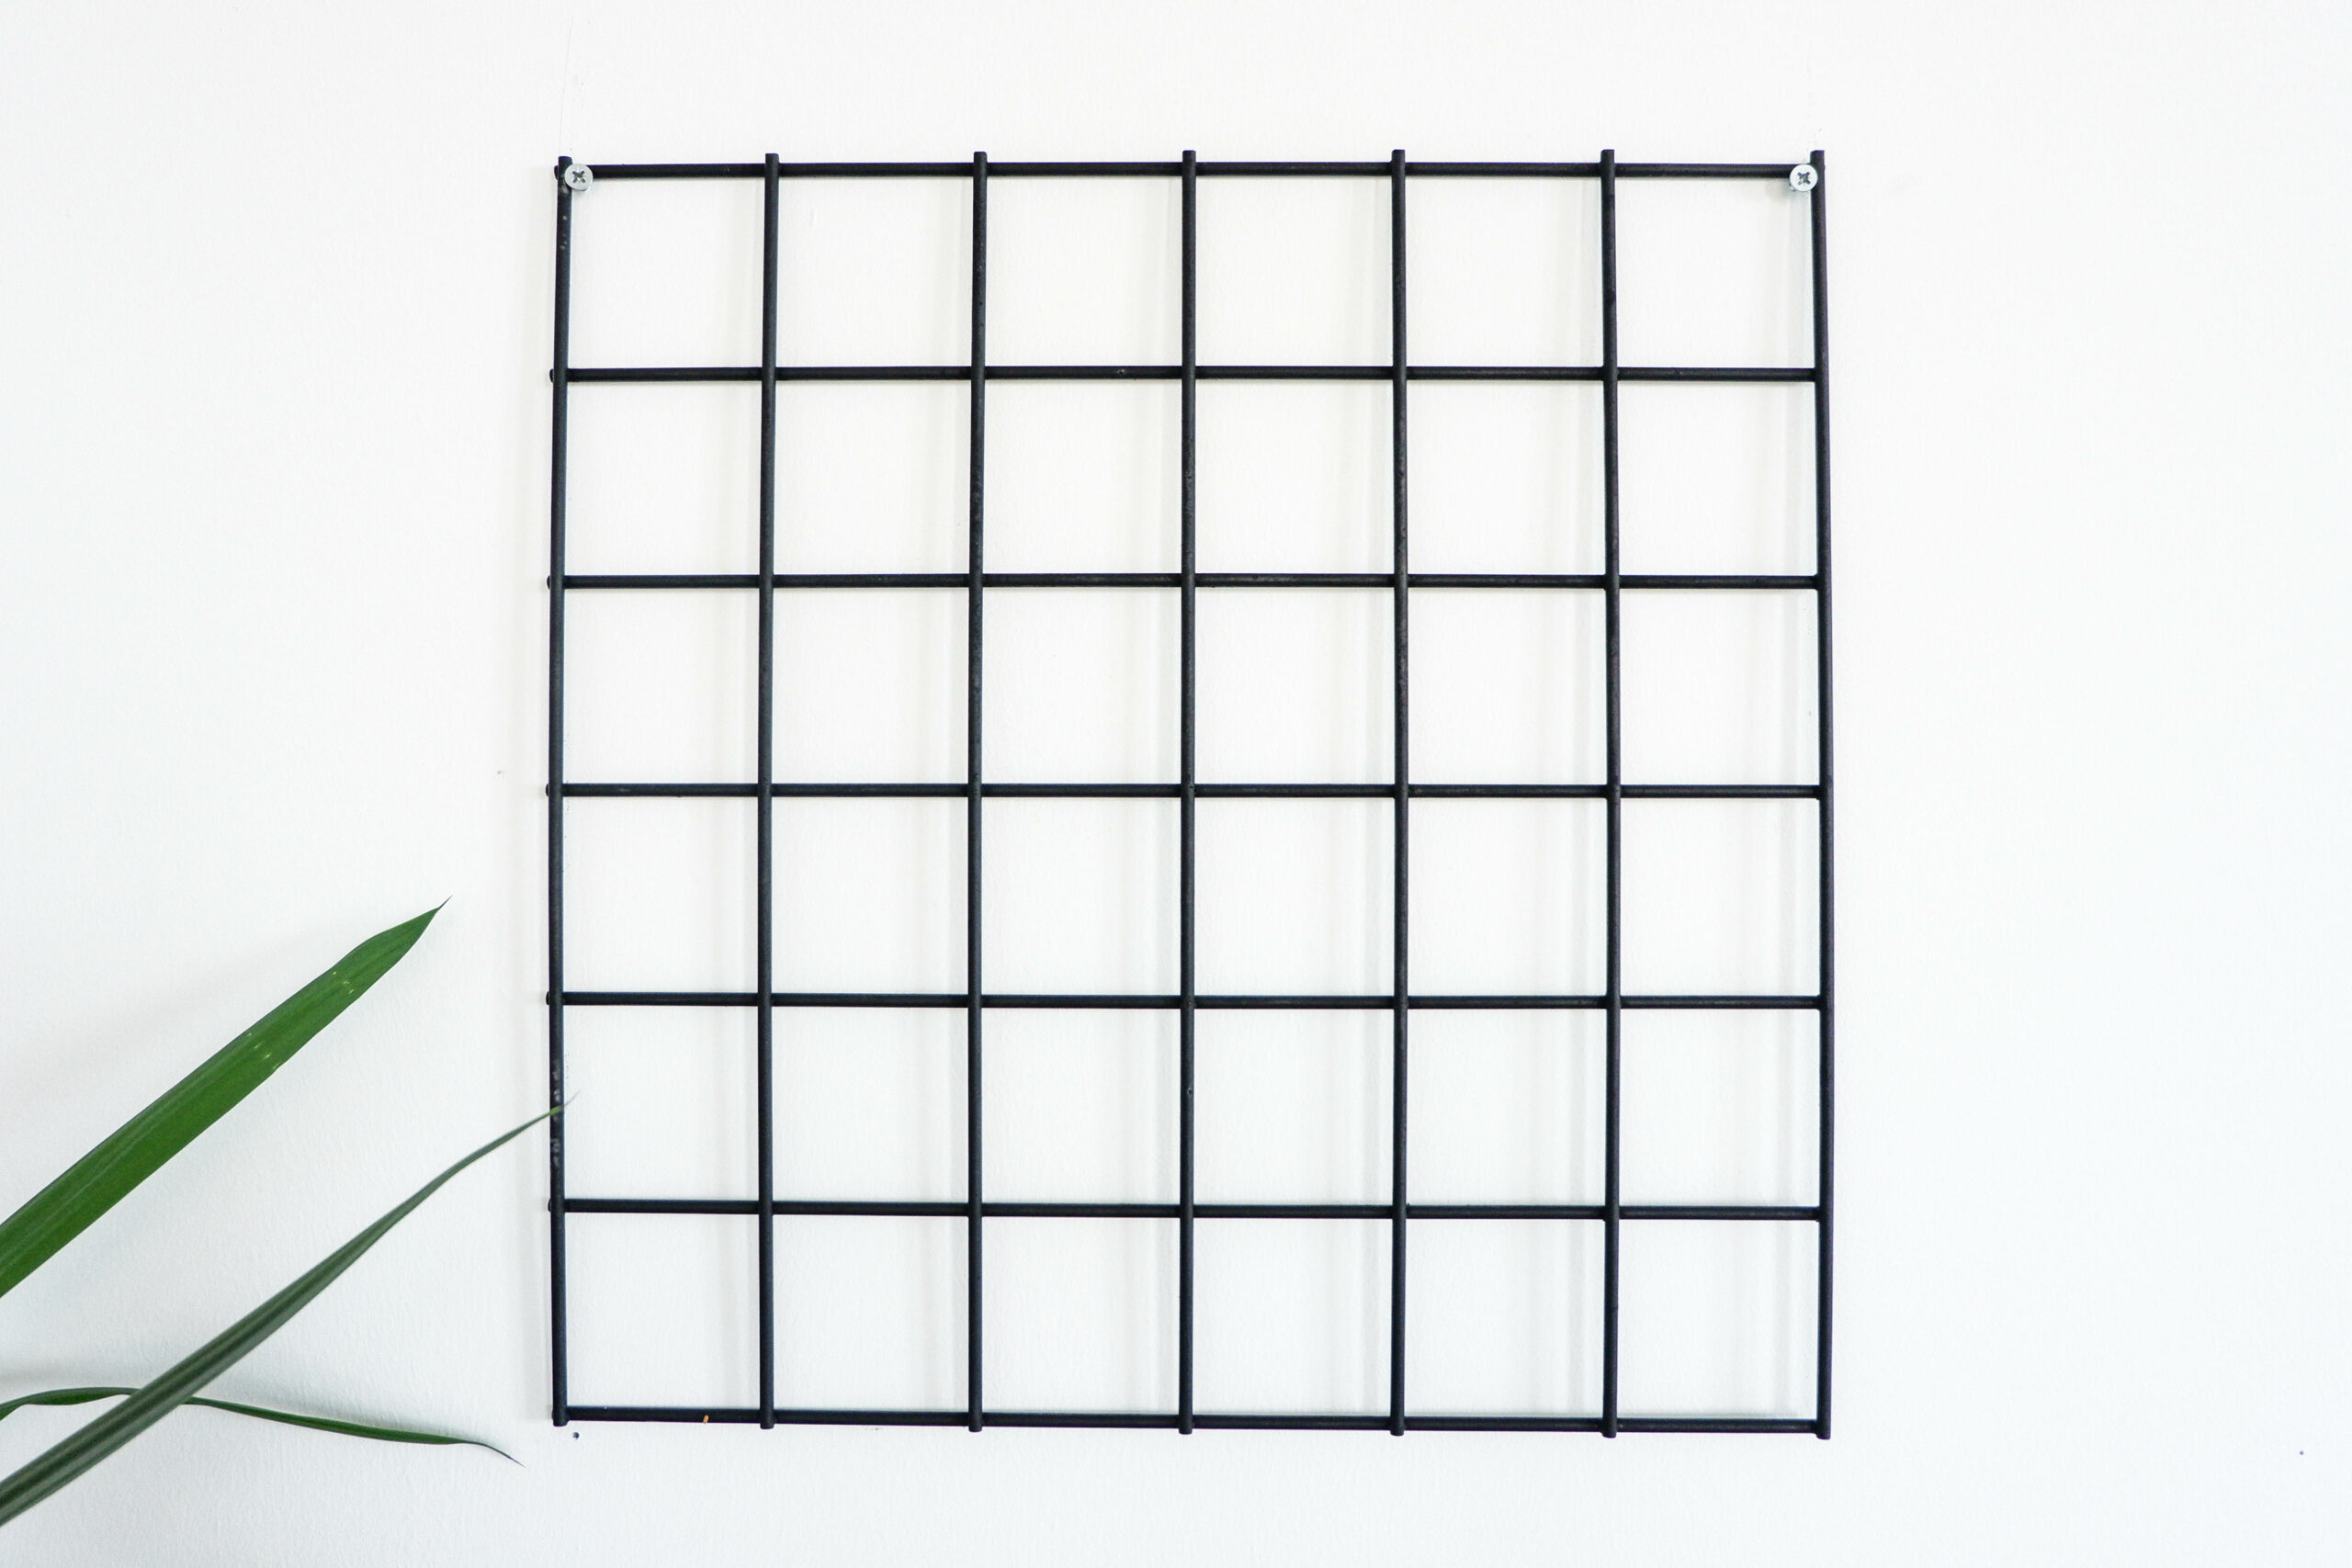
- You can hang the grid with many different methods. The easiest is using screws.
- Drive 2 screws into the wall – one at each of the top corners of the panel and hang the board on them.
STEP 3 – METHOD B) Fit the Grid into the Desired Space
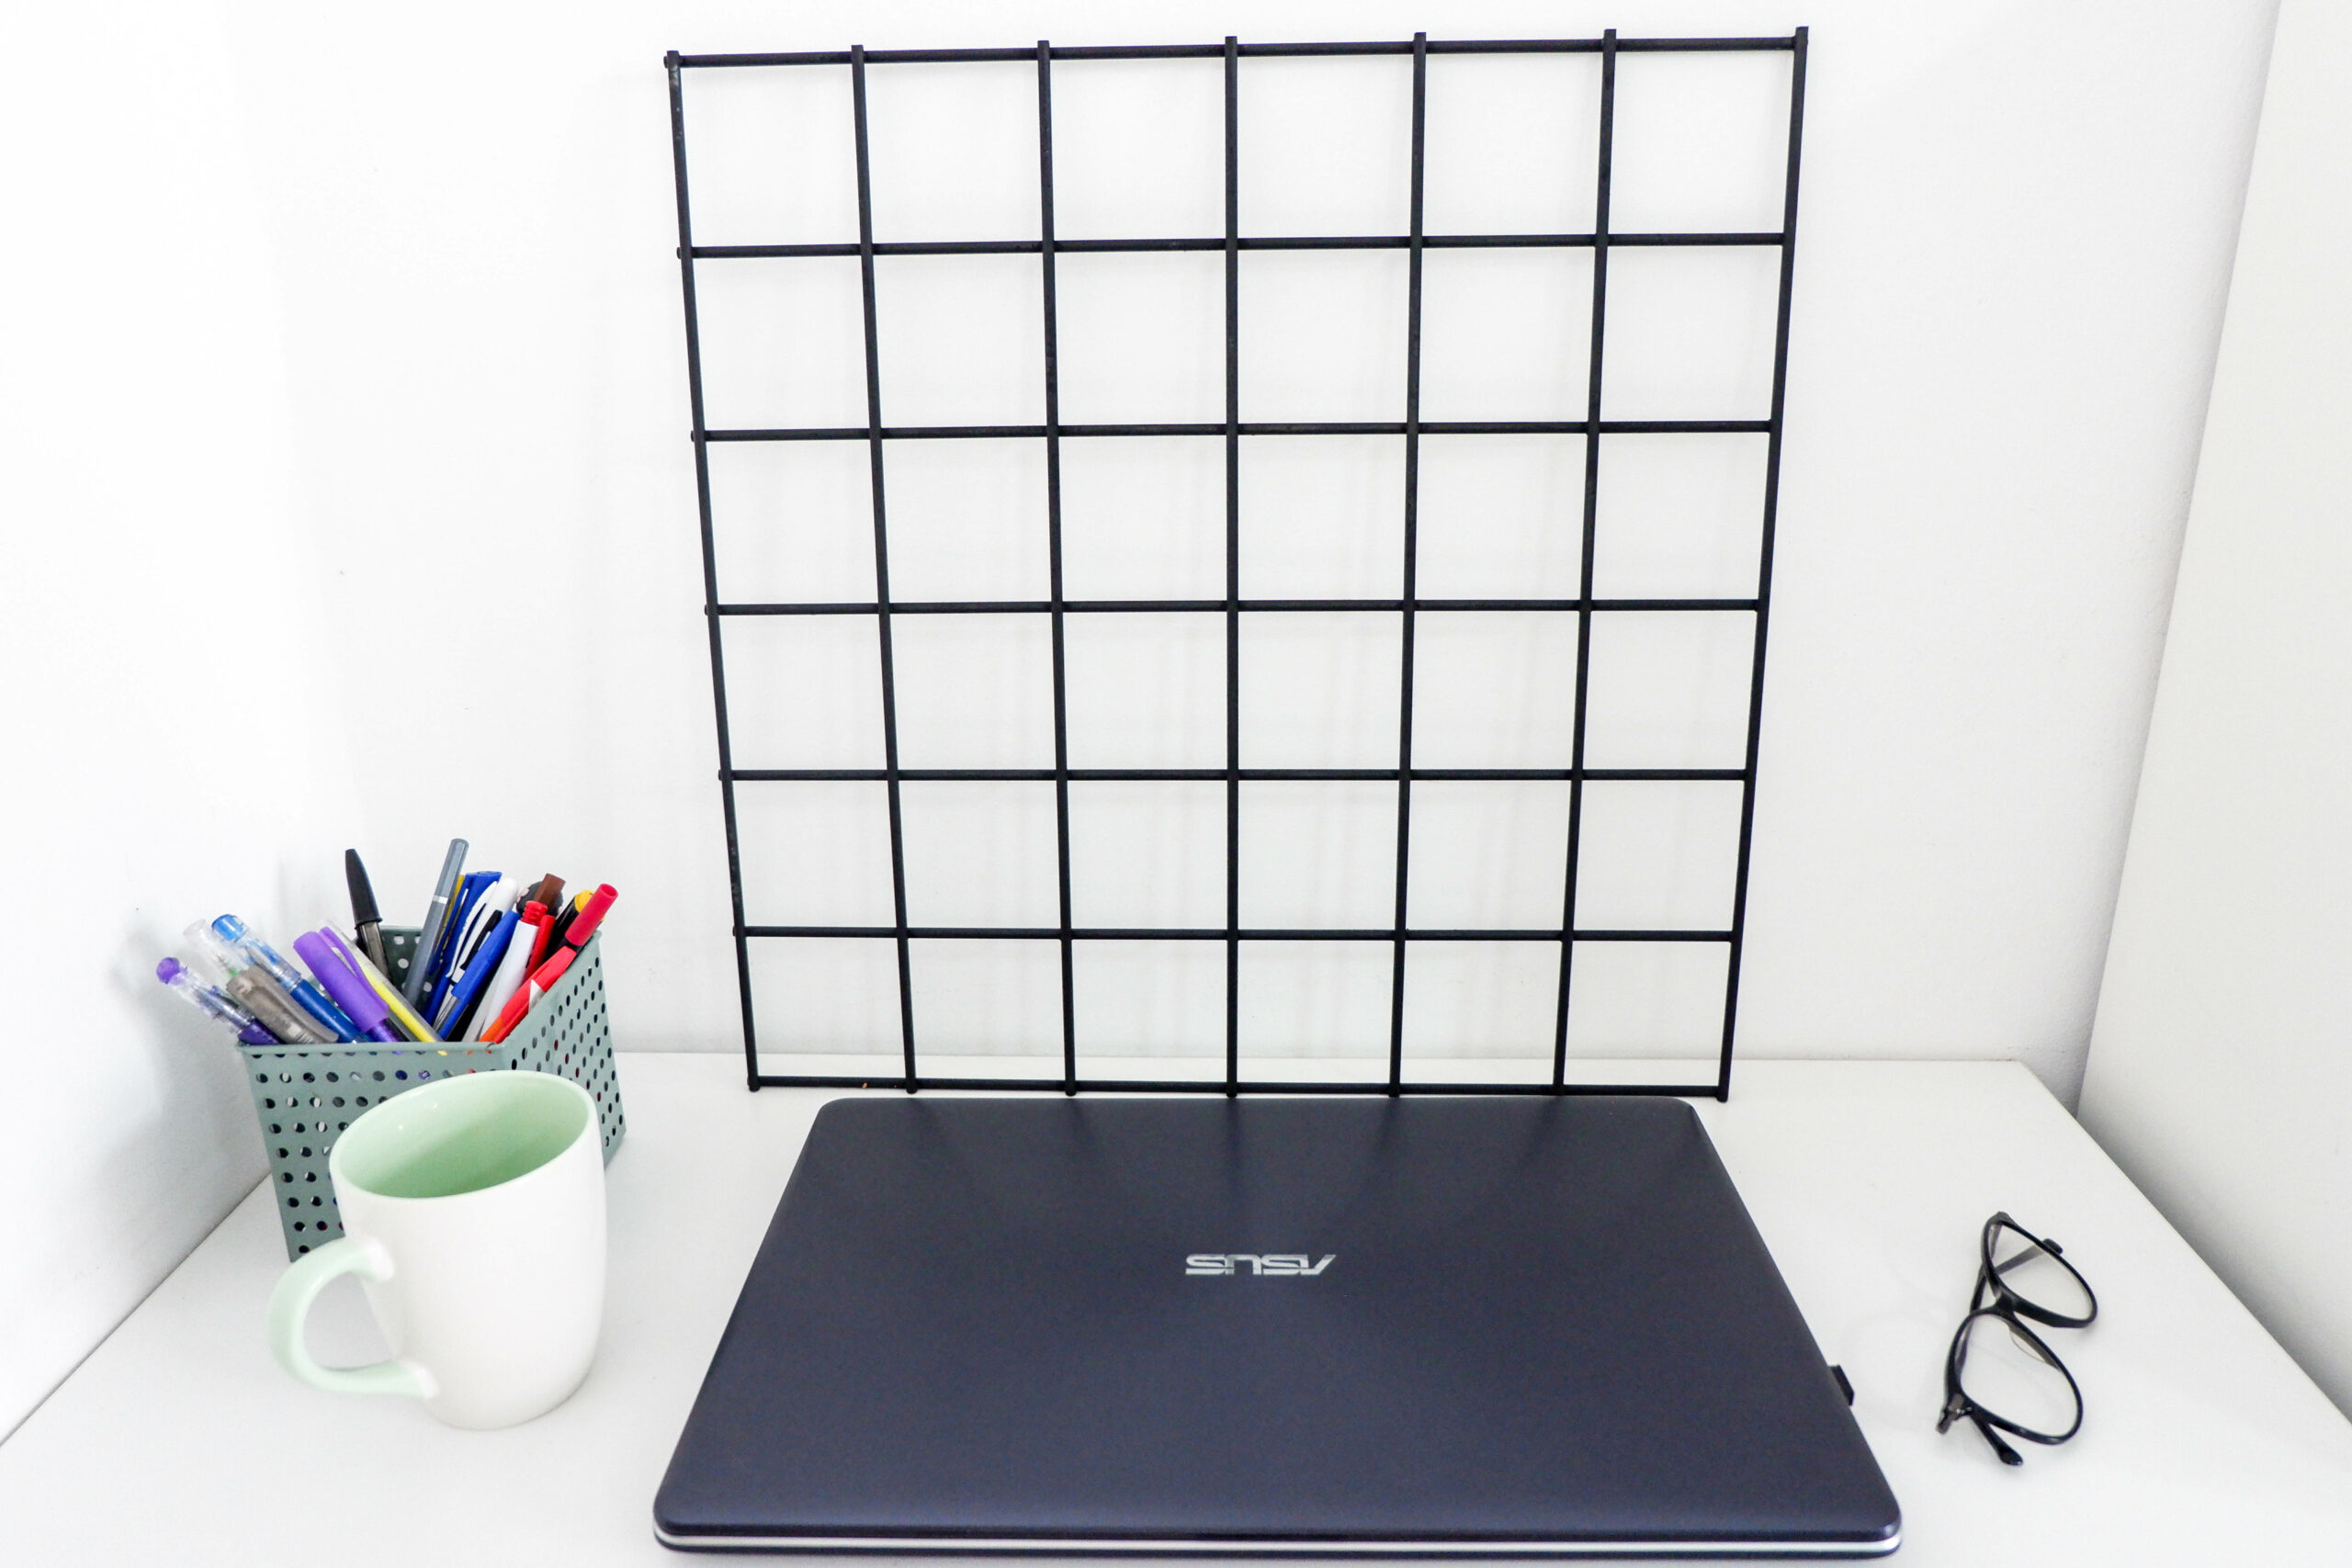
- Another easy way is to stand it up on your desk.
- Make sure that you place it on a non slippery surface so it doesn’t fall when decorated.
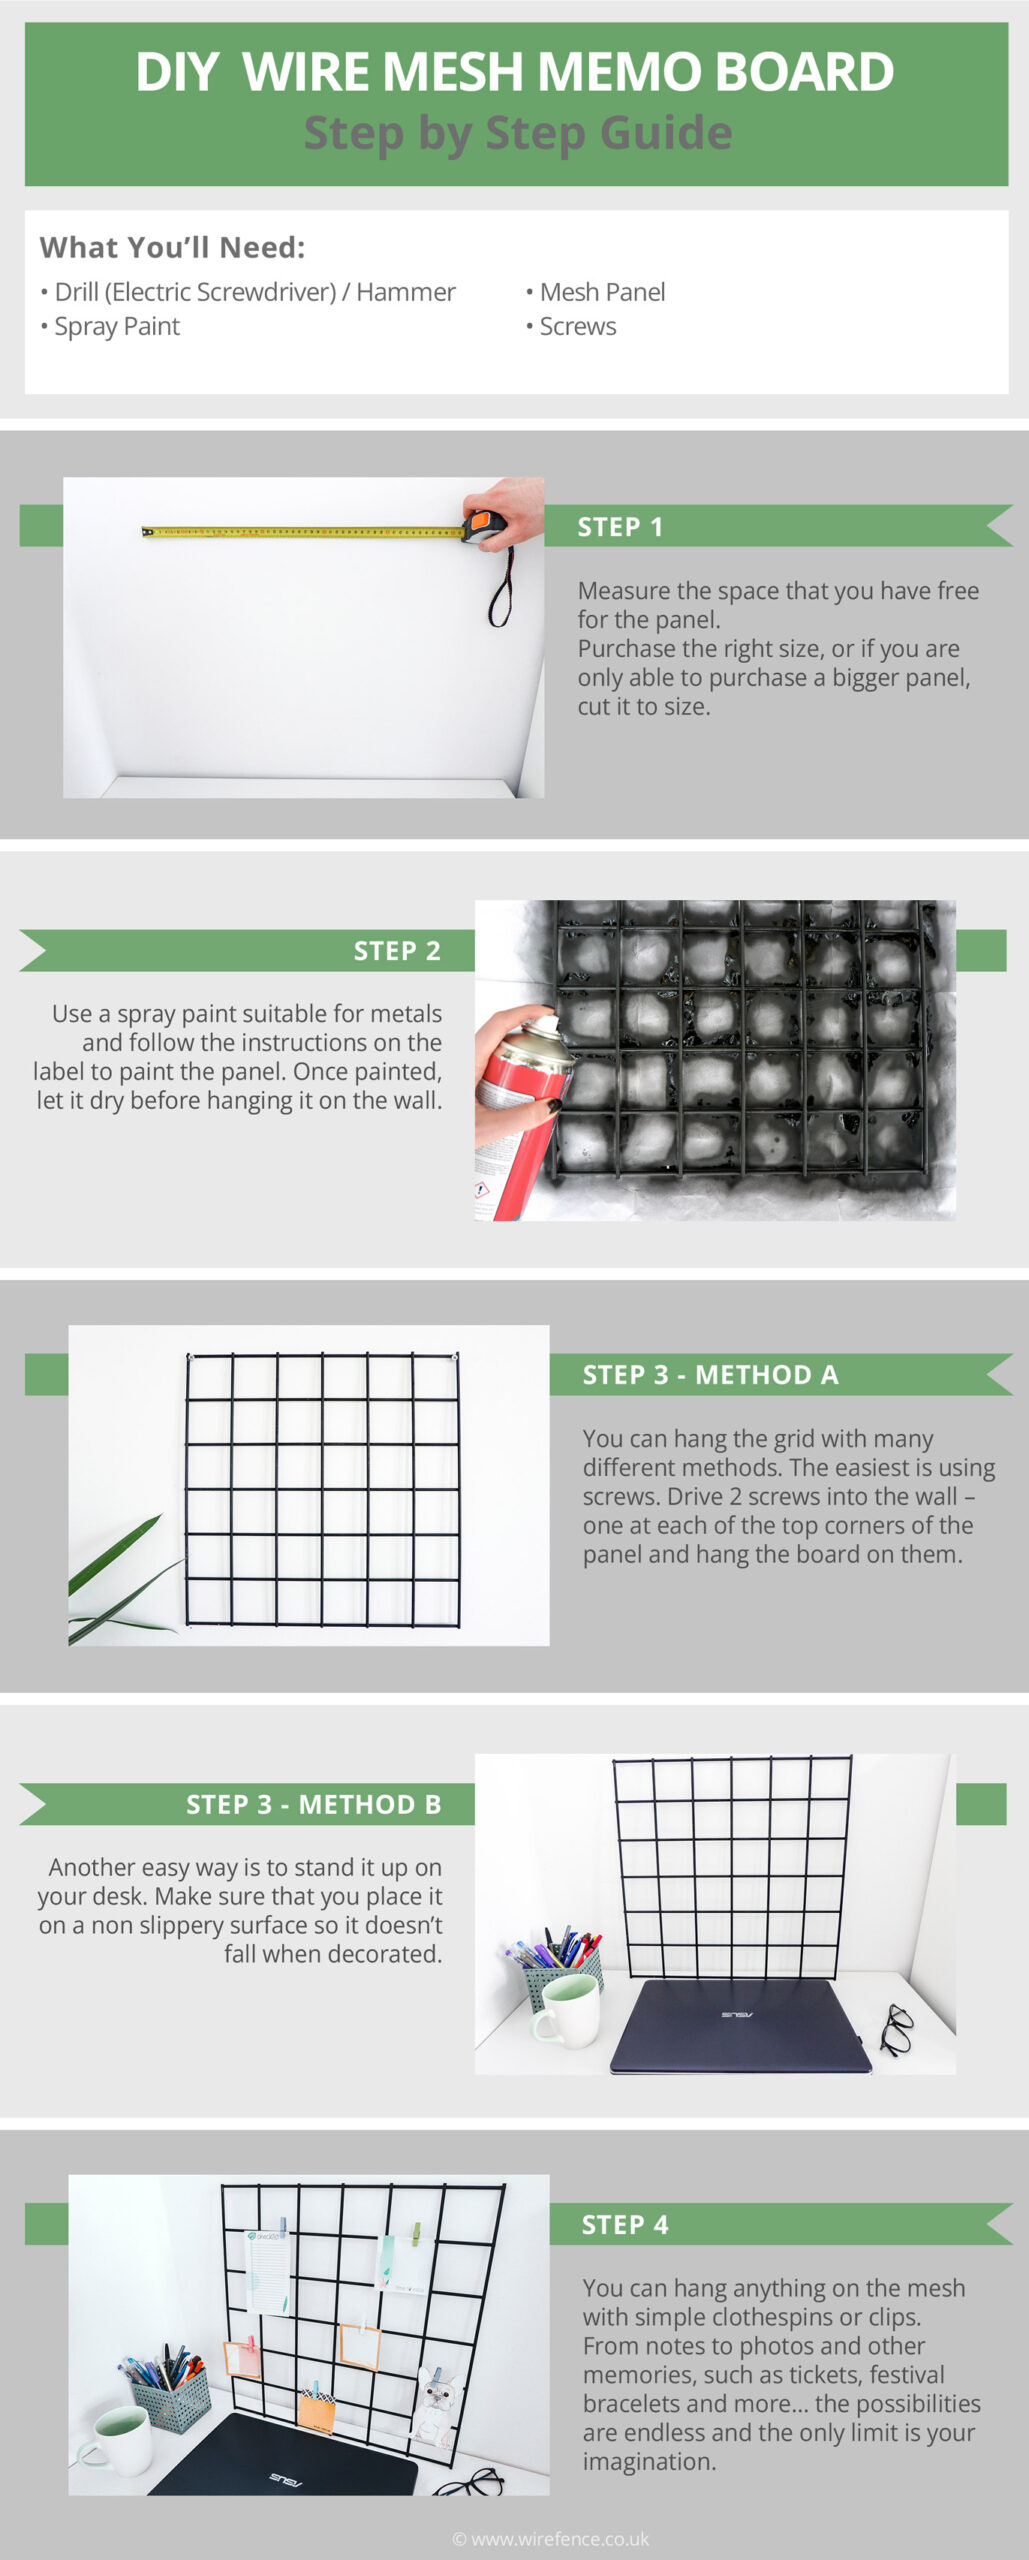
Step 4) Decorate the Grid
- You can hang anything on the mesh with simple clothespins or clips.
- From notes to photos and other memories, such as tickets, festival bracelets and more… the possibilities are endless and the only limit is your imagination. 🙂
TIPS
- You can use a metal primer before applying the coloured paint in order to have a smoother surface. This also ensures that the paint doesn’t chip.
- It is advised to let the paint dry for at least 5 minutes before turning the panel to the other side.
- If the first layer of paint didn’t cover the panel entirely, you can spray a second coat of paint.
WARNINGS
- To keep things clean and tidy place an old newspaper or any kind of paper beneath the panel before spray painting it.
FURTHER READING
- How To Cut Wire Netting – Learn how to cut wire netting to a thickness of 10mm with different tools