Grey PVC Fence Panels

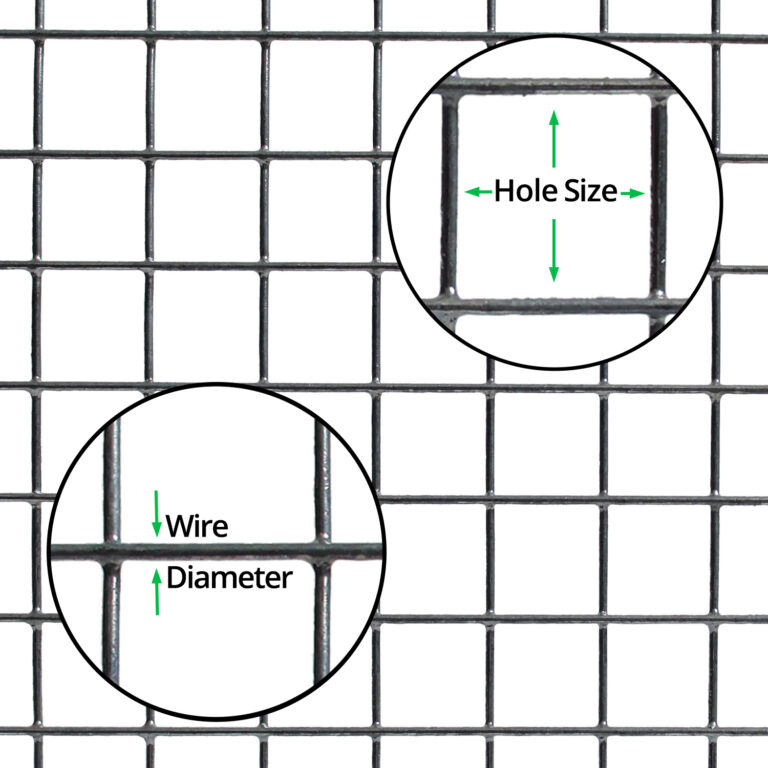
Grey PVC coated welded mesh panels with 75mm x 75mm holes. Used for multiple applications from security fencing to dog fencing.
We advise you order a minimum quantity of x3 panels to prevent damage during transit.
- Manufactured in the UK, to BS EN standards.
- Starting from £4.99
Scroll for more details

Metal Fence Panel Overview
| PVC Coated | |
| Max height | 6.6ft (202.5cm) |
| Max wire diameter | 4.3mm |
| Security fencing | Yes – Security fencing starts at 2.5mm |
| Perimeter fencing | Yes – for commercial uses we suggest 5mm thick wire |
| Garden fencing |
|
| High-security fencing | See High Security for detailed information |
| Dogs: keep in or out | See Dog Fencing for detailed information |
| Animals: keep in or out | See Animal & Pet Fencing for detailed information |
| Farm perimeter fencing | See Farm Fencing for detailed information |
| School perimeter |
|
| Playground |
|
| Railways |
|
| Housing Estate |
|
| Inner City |
|
| Public railings |
|
| Industrial & Warehouse |
|
| High-security areas |
|
| Airports |
|
| Data Centres |
|
| Marine environments |
|
| Prevent climbing | |
| Note | The taller the fence and the smaller the mesh holes the less likely the security fence can be scaled. |
| Climbing difficulty | Medium |
| Max height | 1.8m (6ft) |
| Min hole size | 75mm x 75mm |
| Max hole size | 75mm x 75mm |
| Increase difficulty | Install barbed wire at the top of your fence |
| Increase difficulty naturally |
Grow rose bushes up the mesh which has the added benefit of looking good. in addition, there are no height restrictions for rose bushes which allows you to make your barrier taller.
|
| Strength: Prevent cutting through | |
| Note | The thicker the metal wire the less likely it is that the wire can be cut through. Machinery such as cordless angle grinders makes it impossible to create a 100% vandal-proof barrier. |
| Max wire diameter |
4.3mm (9g) Heavy |
| Can wire be cut? | Yes – all types of fencing can be breached using cordless angle grinders bolt cutters, etc |
| Financial | |
| Cost | ££ |
| Cost per sq m (starting from) | £3.29 |
| Discount for multi purchases |
– viewable on product pages & automatically calculated for you during checkout
|
| Minimum qty available to purchase | 1.8m |
| General | |
| Delivered as | Panel |
| If the weight exceeds 33kg delivery will be on a pallet | |
| Made in | UK |
| Conforms to British manufacturing standard | Yes – see product category or pages to view specific BS EN standards |
| Construction | |
| Mesh construction | Welded |
| Hole size available | 75mm x 75mm |
| Wire diameter available | 3.8mm – 4.3mm |
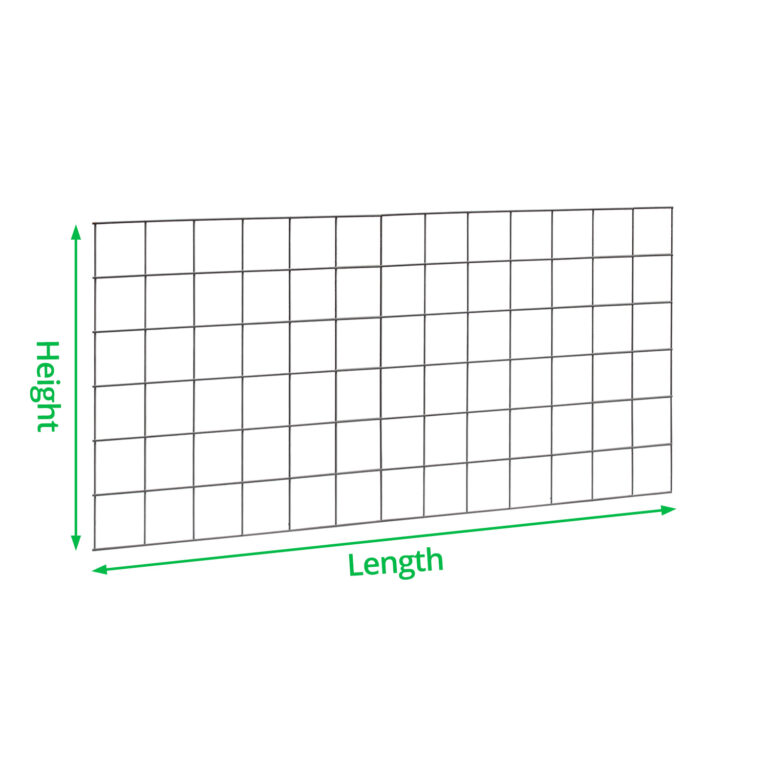
| Length | Can be joined together to create any length required |
| Colour | Grey |
| Average product weight | 2kg |
| Strength and environment | |
| Corrosion resistance |
|
| Life expectancy under normal conditions | 20 years |
| Suited to Environments | C2 – C5 |
| Installation | |
| Experience required to install | Low |
| Speed of installation | Quick |
| Can be installed with wooden posts |
|
| Can be installed with metal posts |
|
| Can be installed with concrete posts |
|
| Qty of people required | 1 |
| Cut using | Bolt cutters |
| Handle with protective gloves |
|
| Installation instructions | Download |
Installation Instructions
The following instructions show how to install a panel fence using T Posts.
| To Do | Explanation |
|
Step 1 – Mark Area
|
Mark a straight line for the fence between the two end posts. |
|
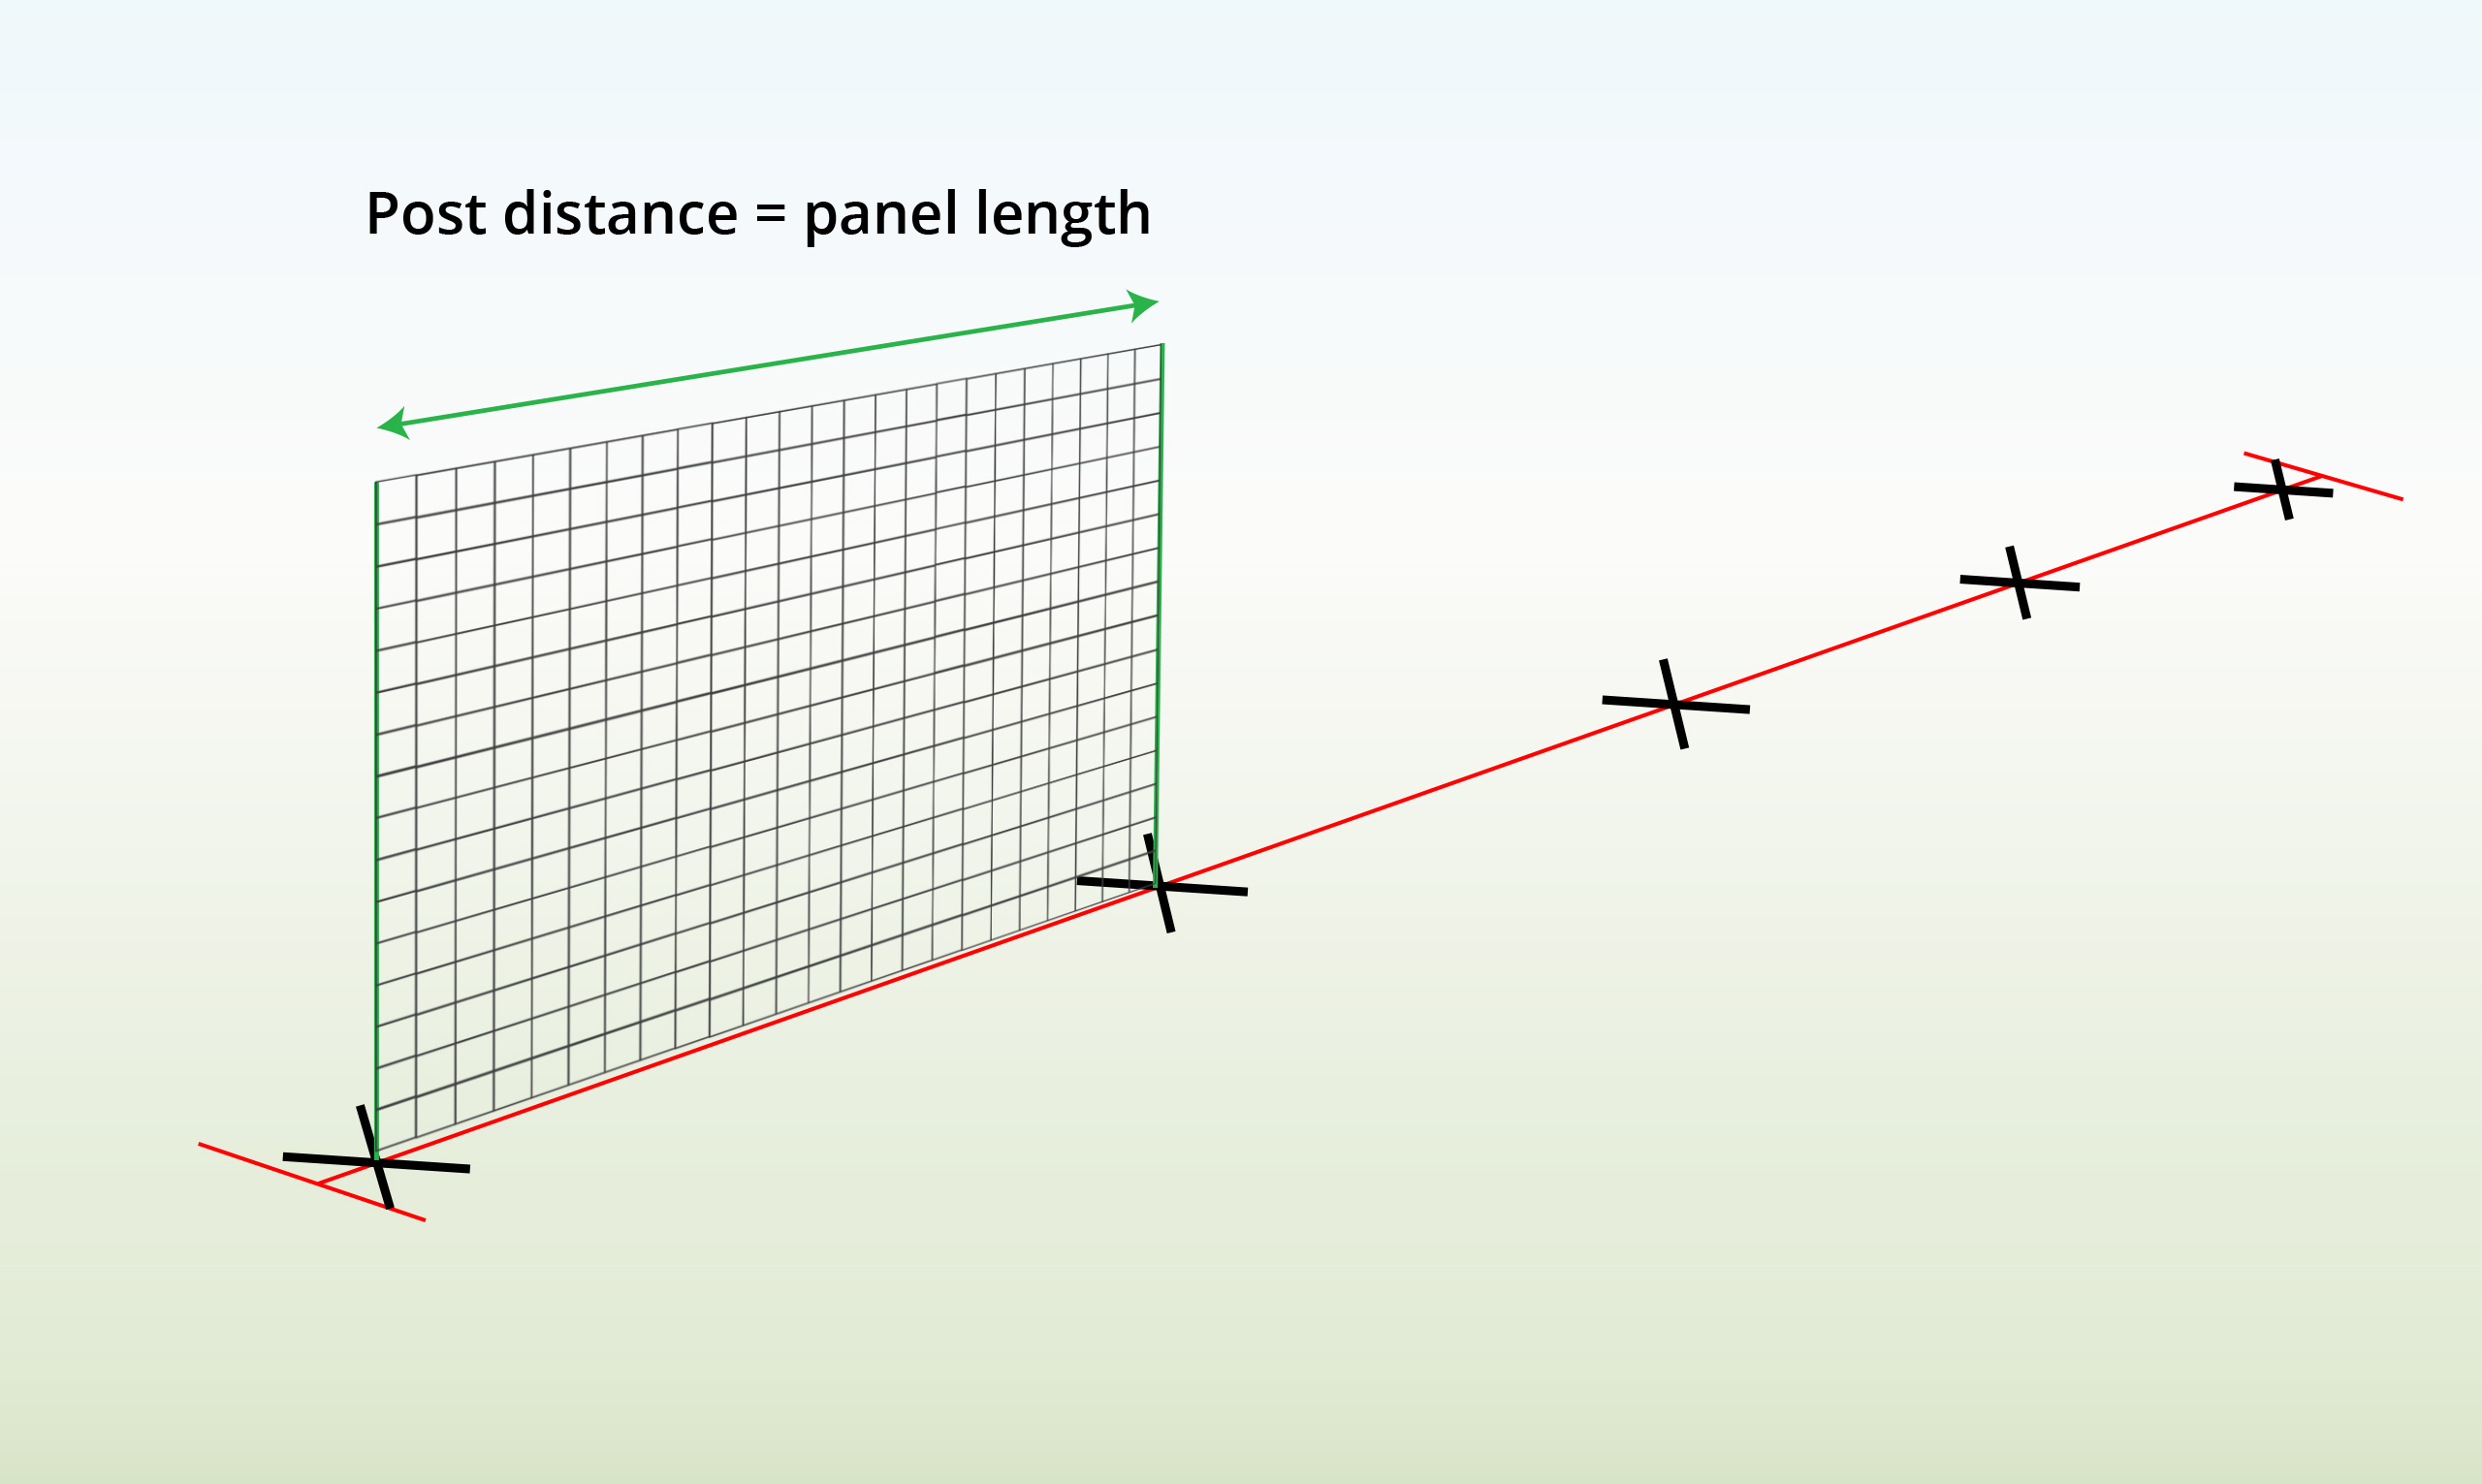
Step 2 – Measure Distance
|
Use panels to measure the distance between the posts. |
|
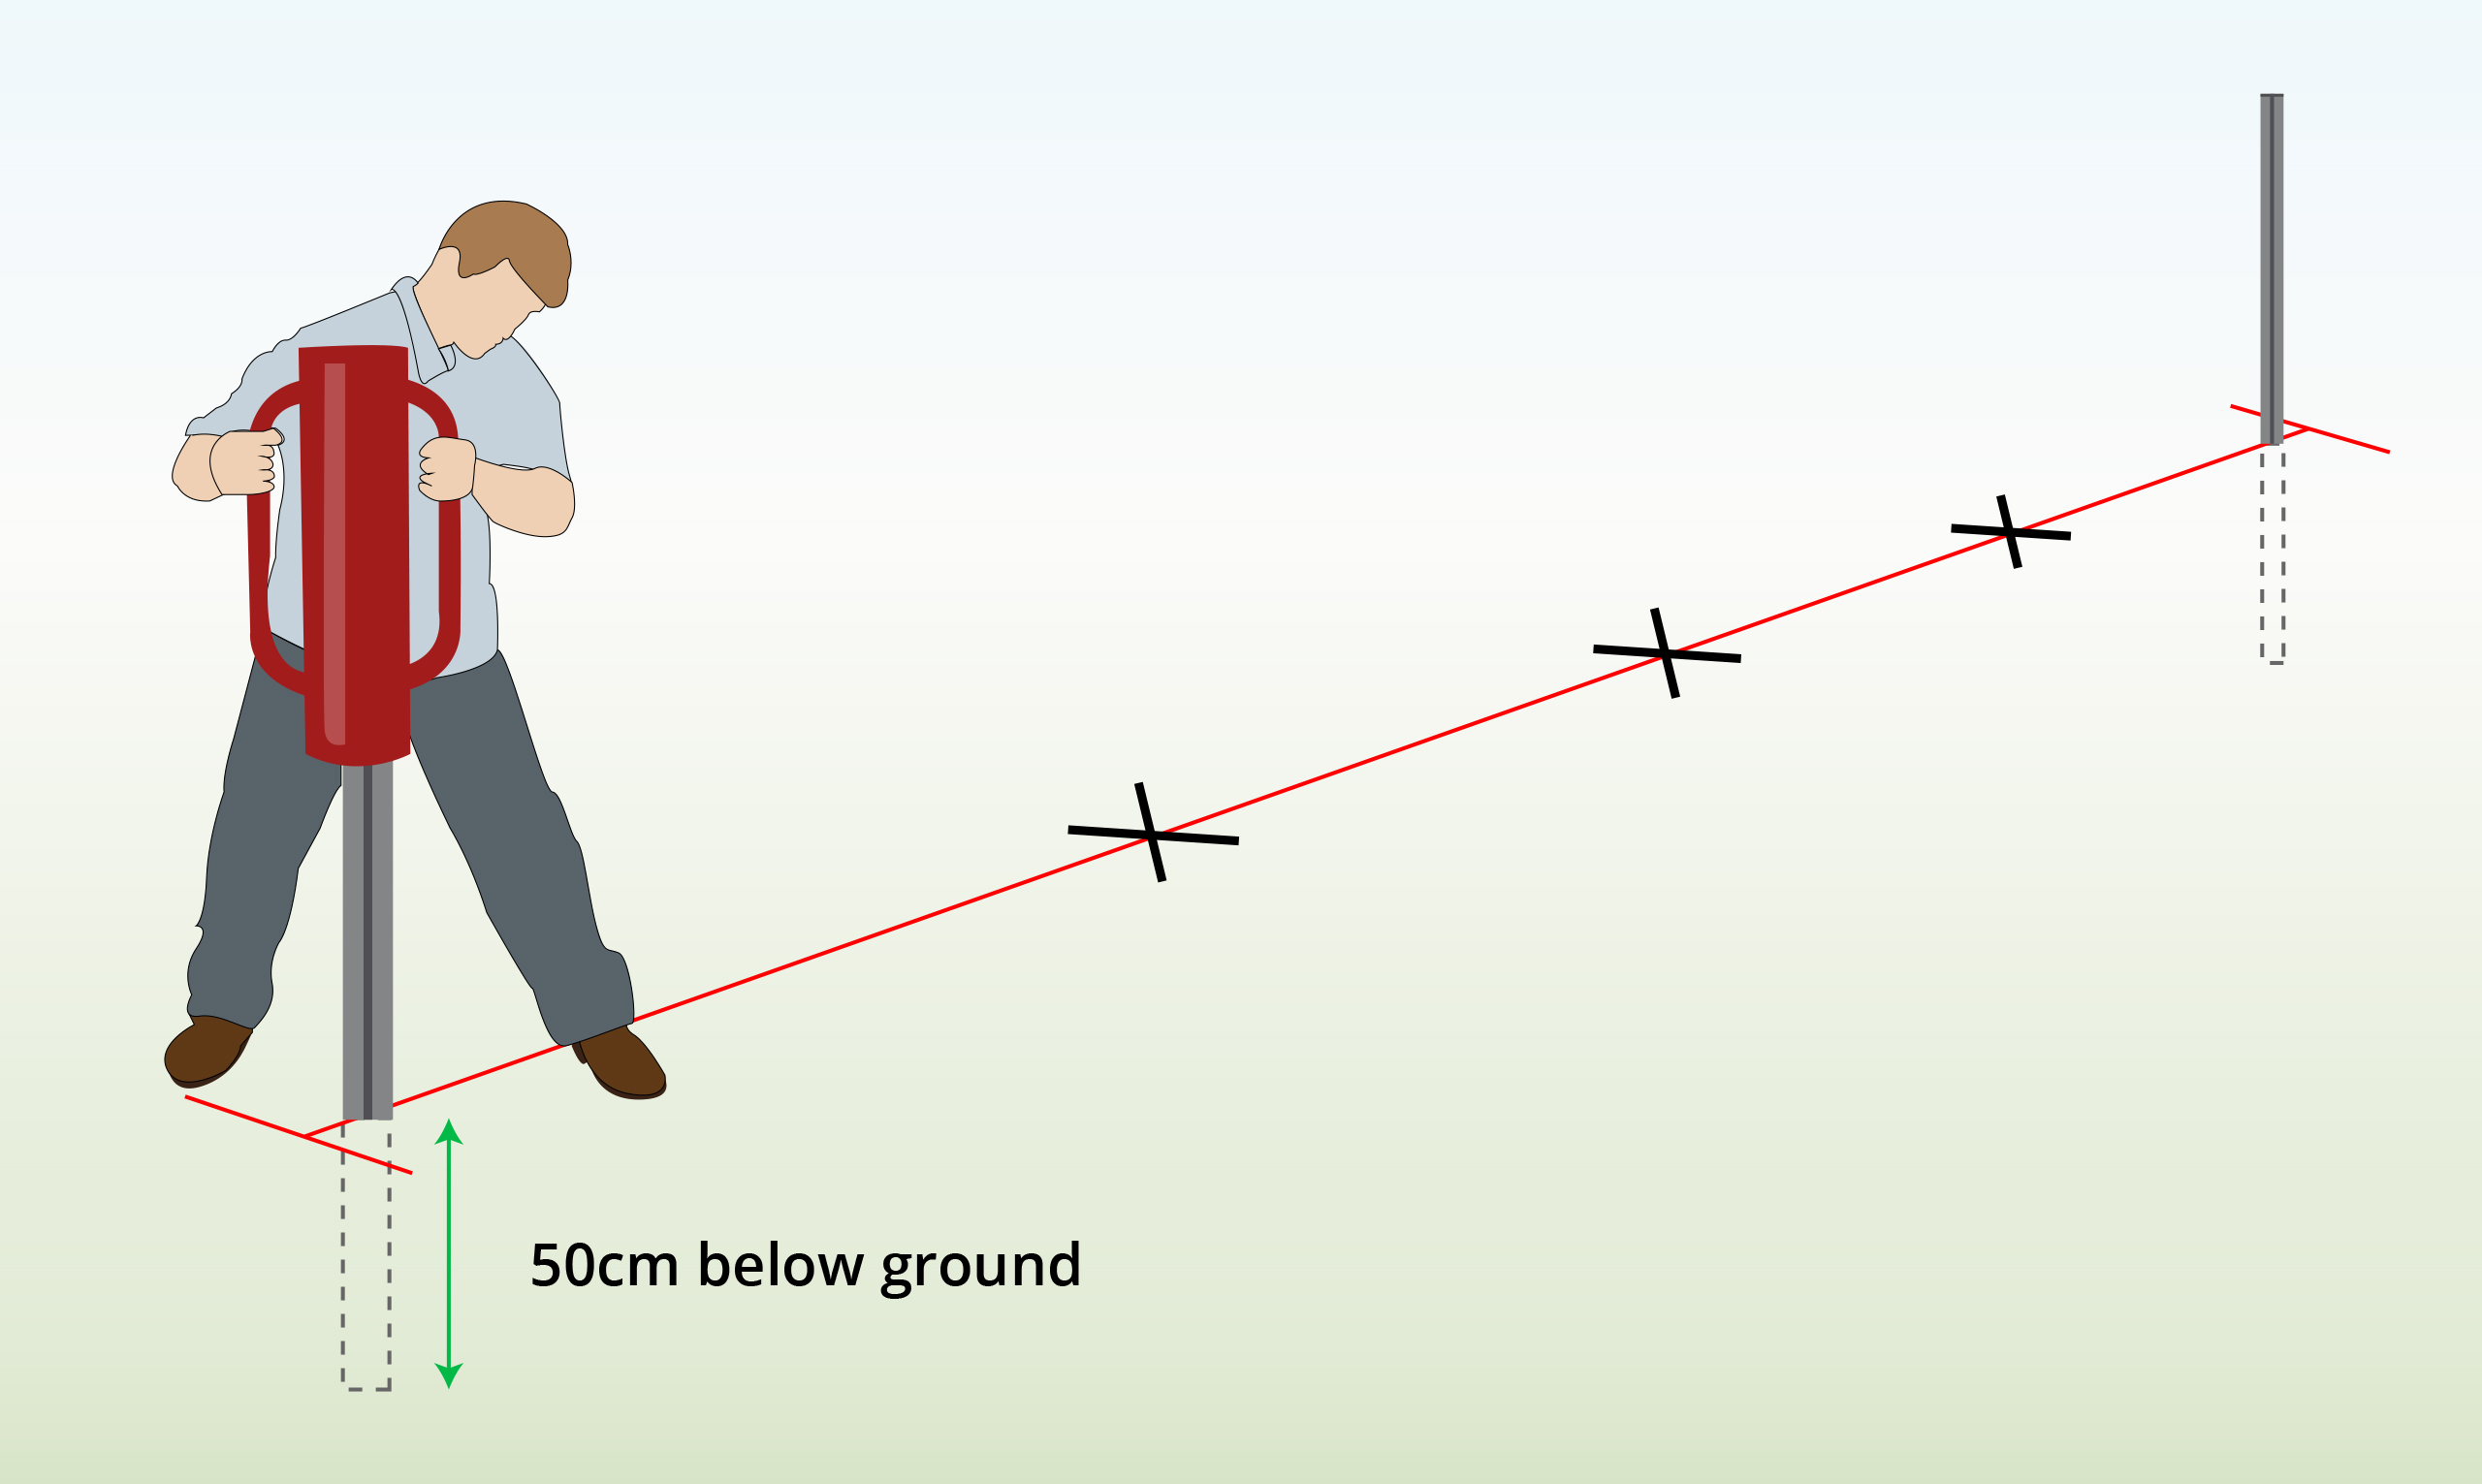
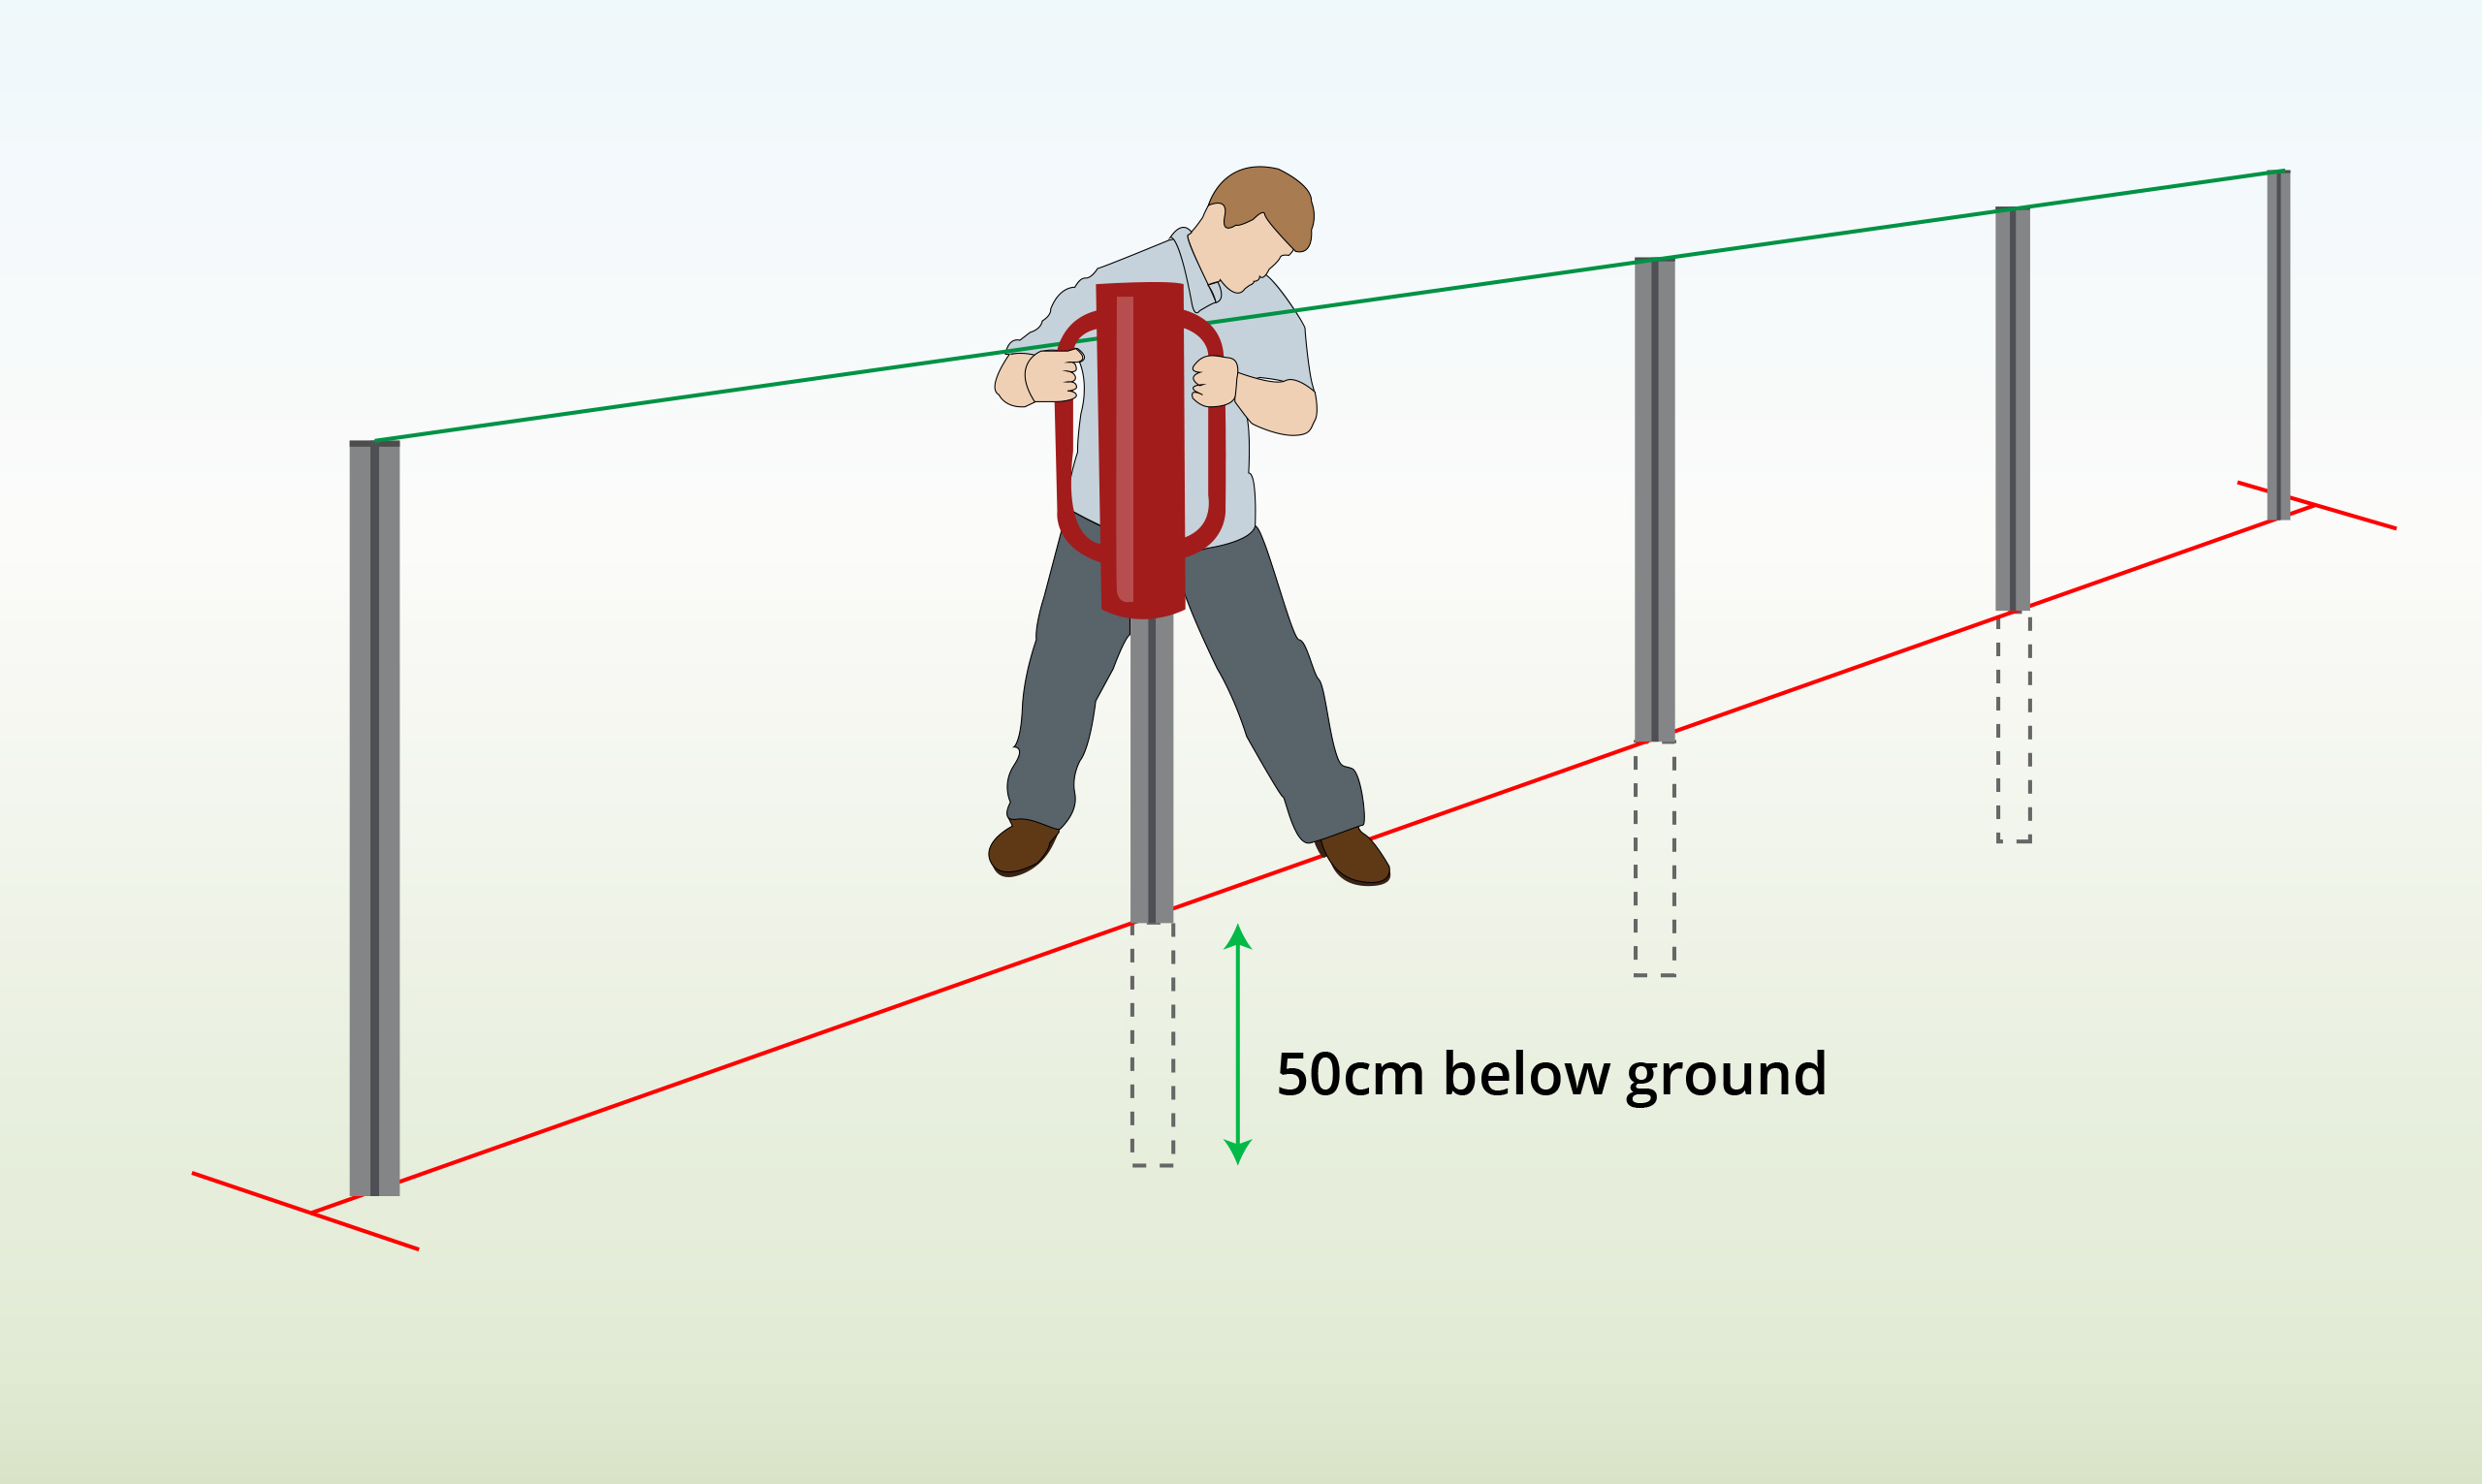
Step 3 – Install End Posts
|
Drive the end posts 50cm into the ground using a post driver or mallet.
Ensure the posts face in the same direction. |
|
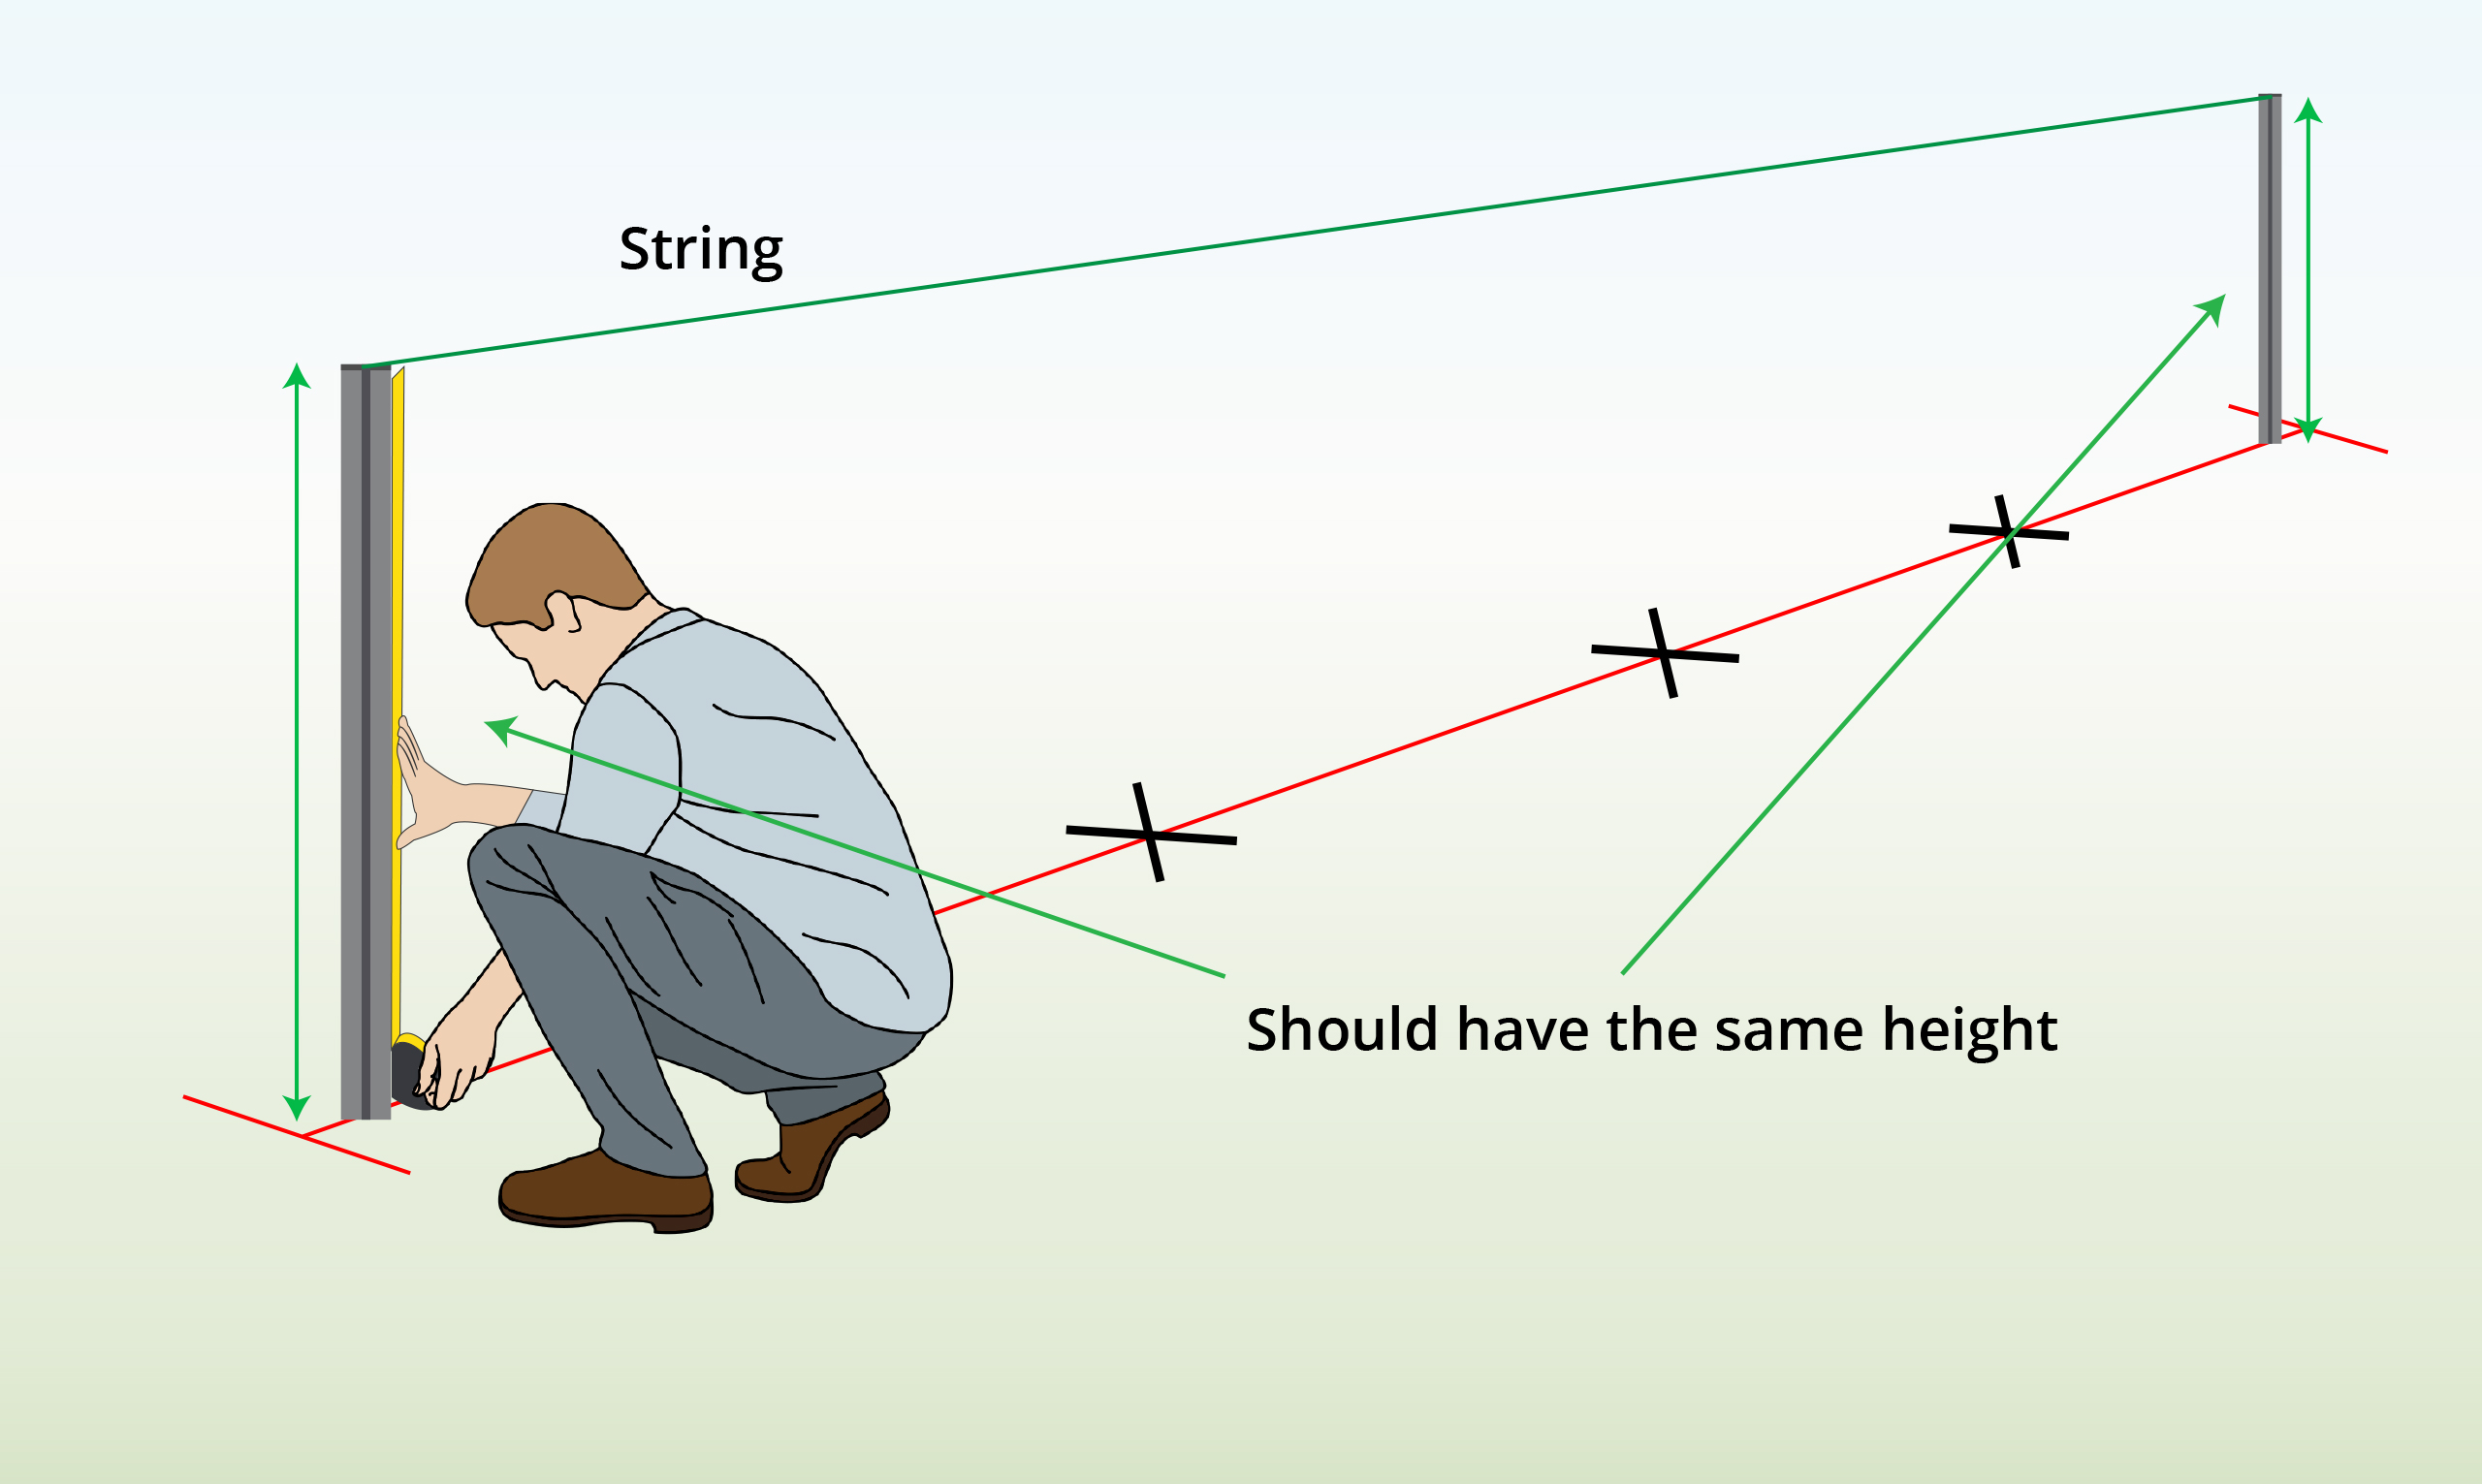
Step 4 – Check for Same Height
|
Secure a string between the end posts, then check their installation height with a tape measure. |
|
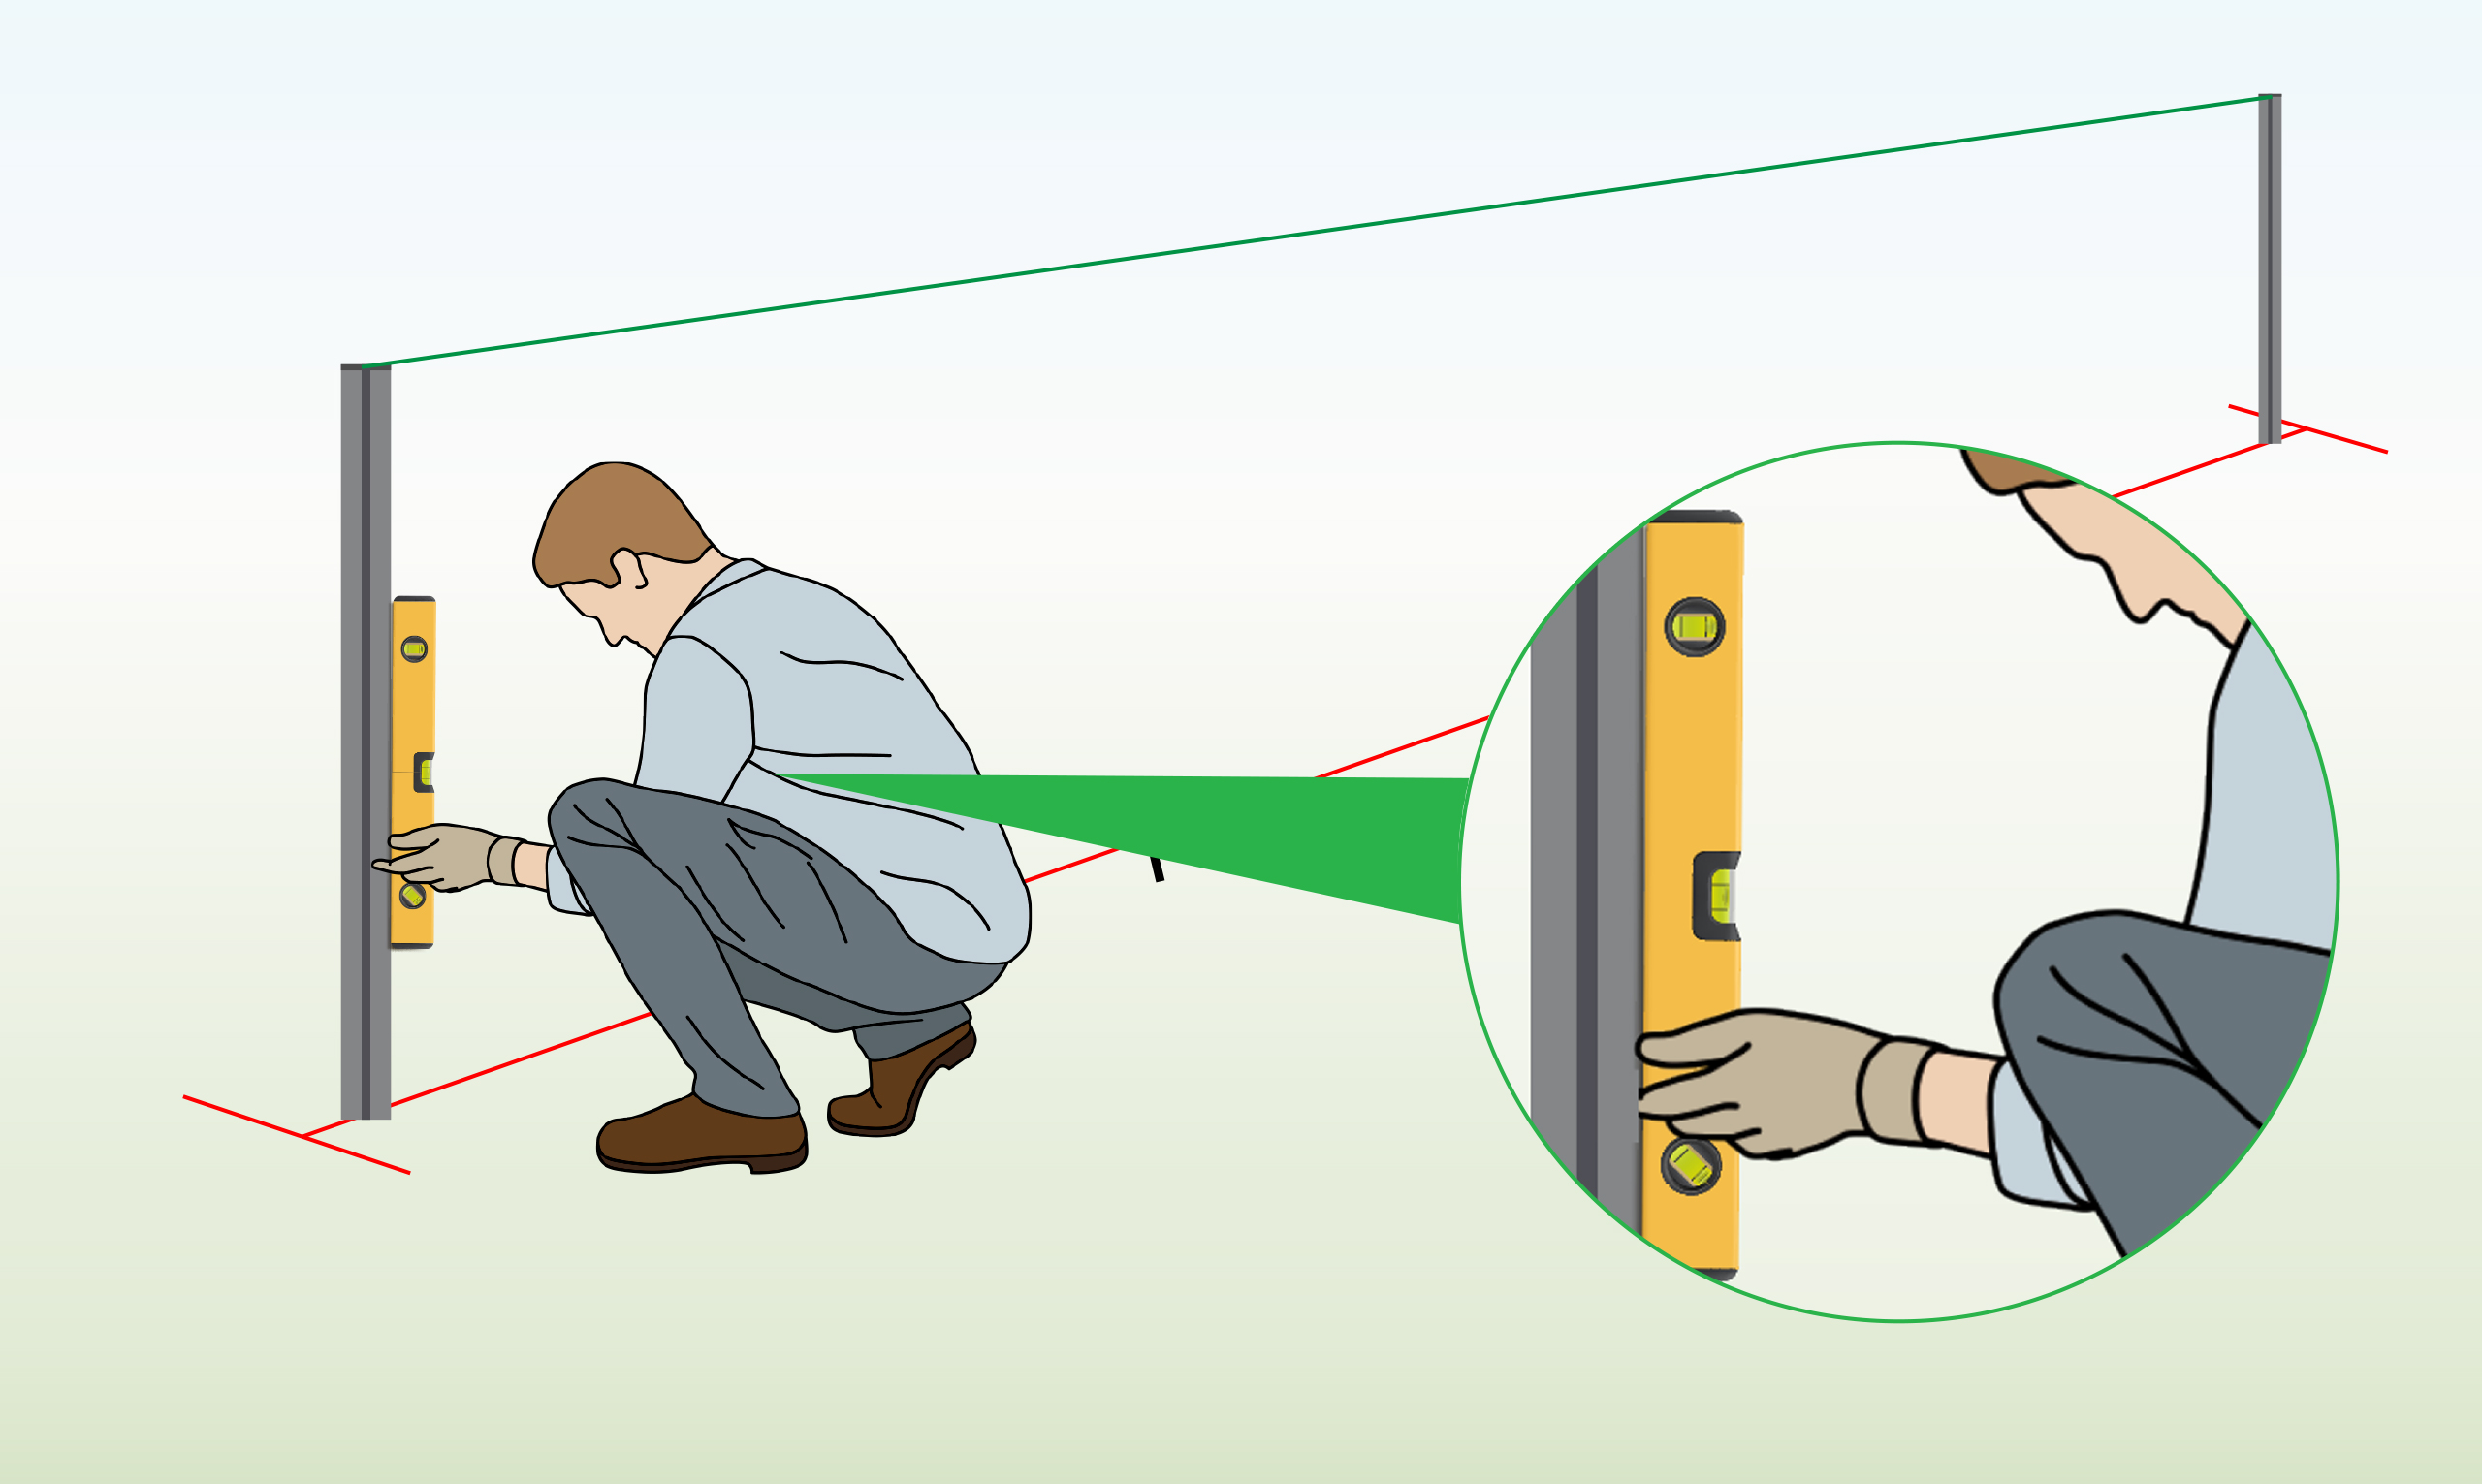
Step 5 – Check for Straightness
|
Use a spirit level to confirm that the posts have been installed perfectly straight. |
|
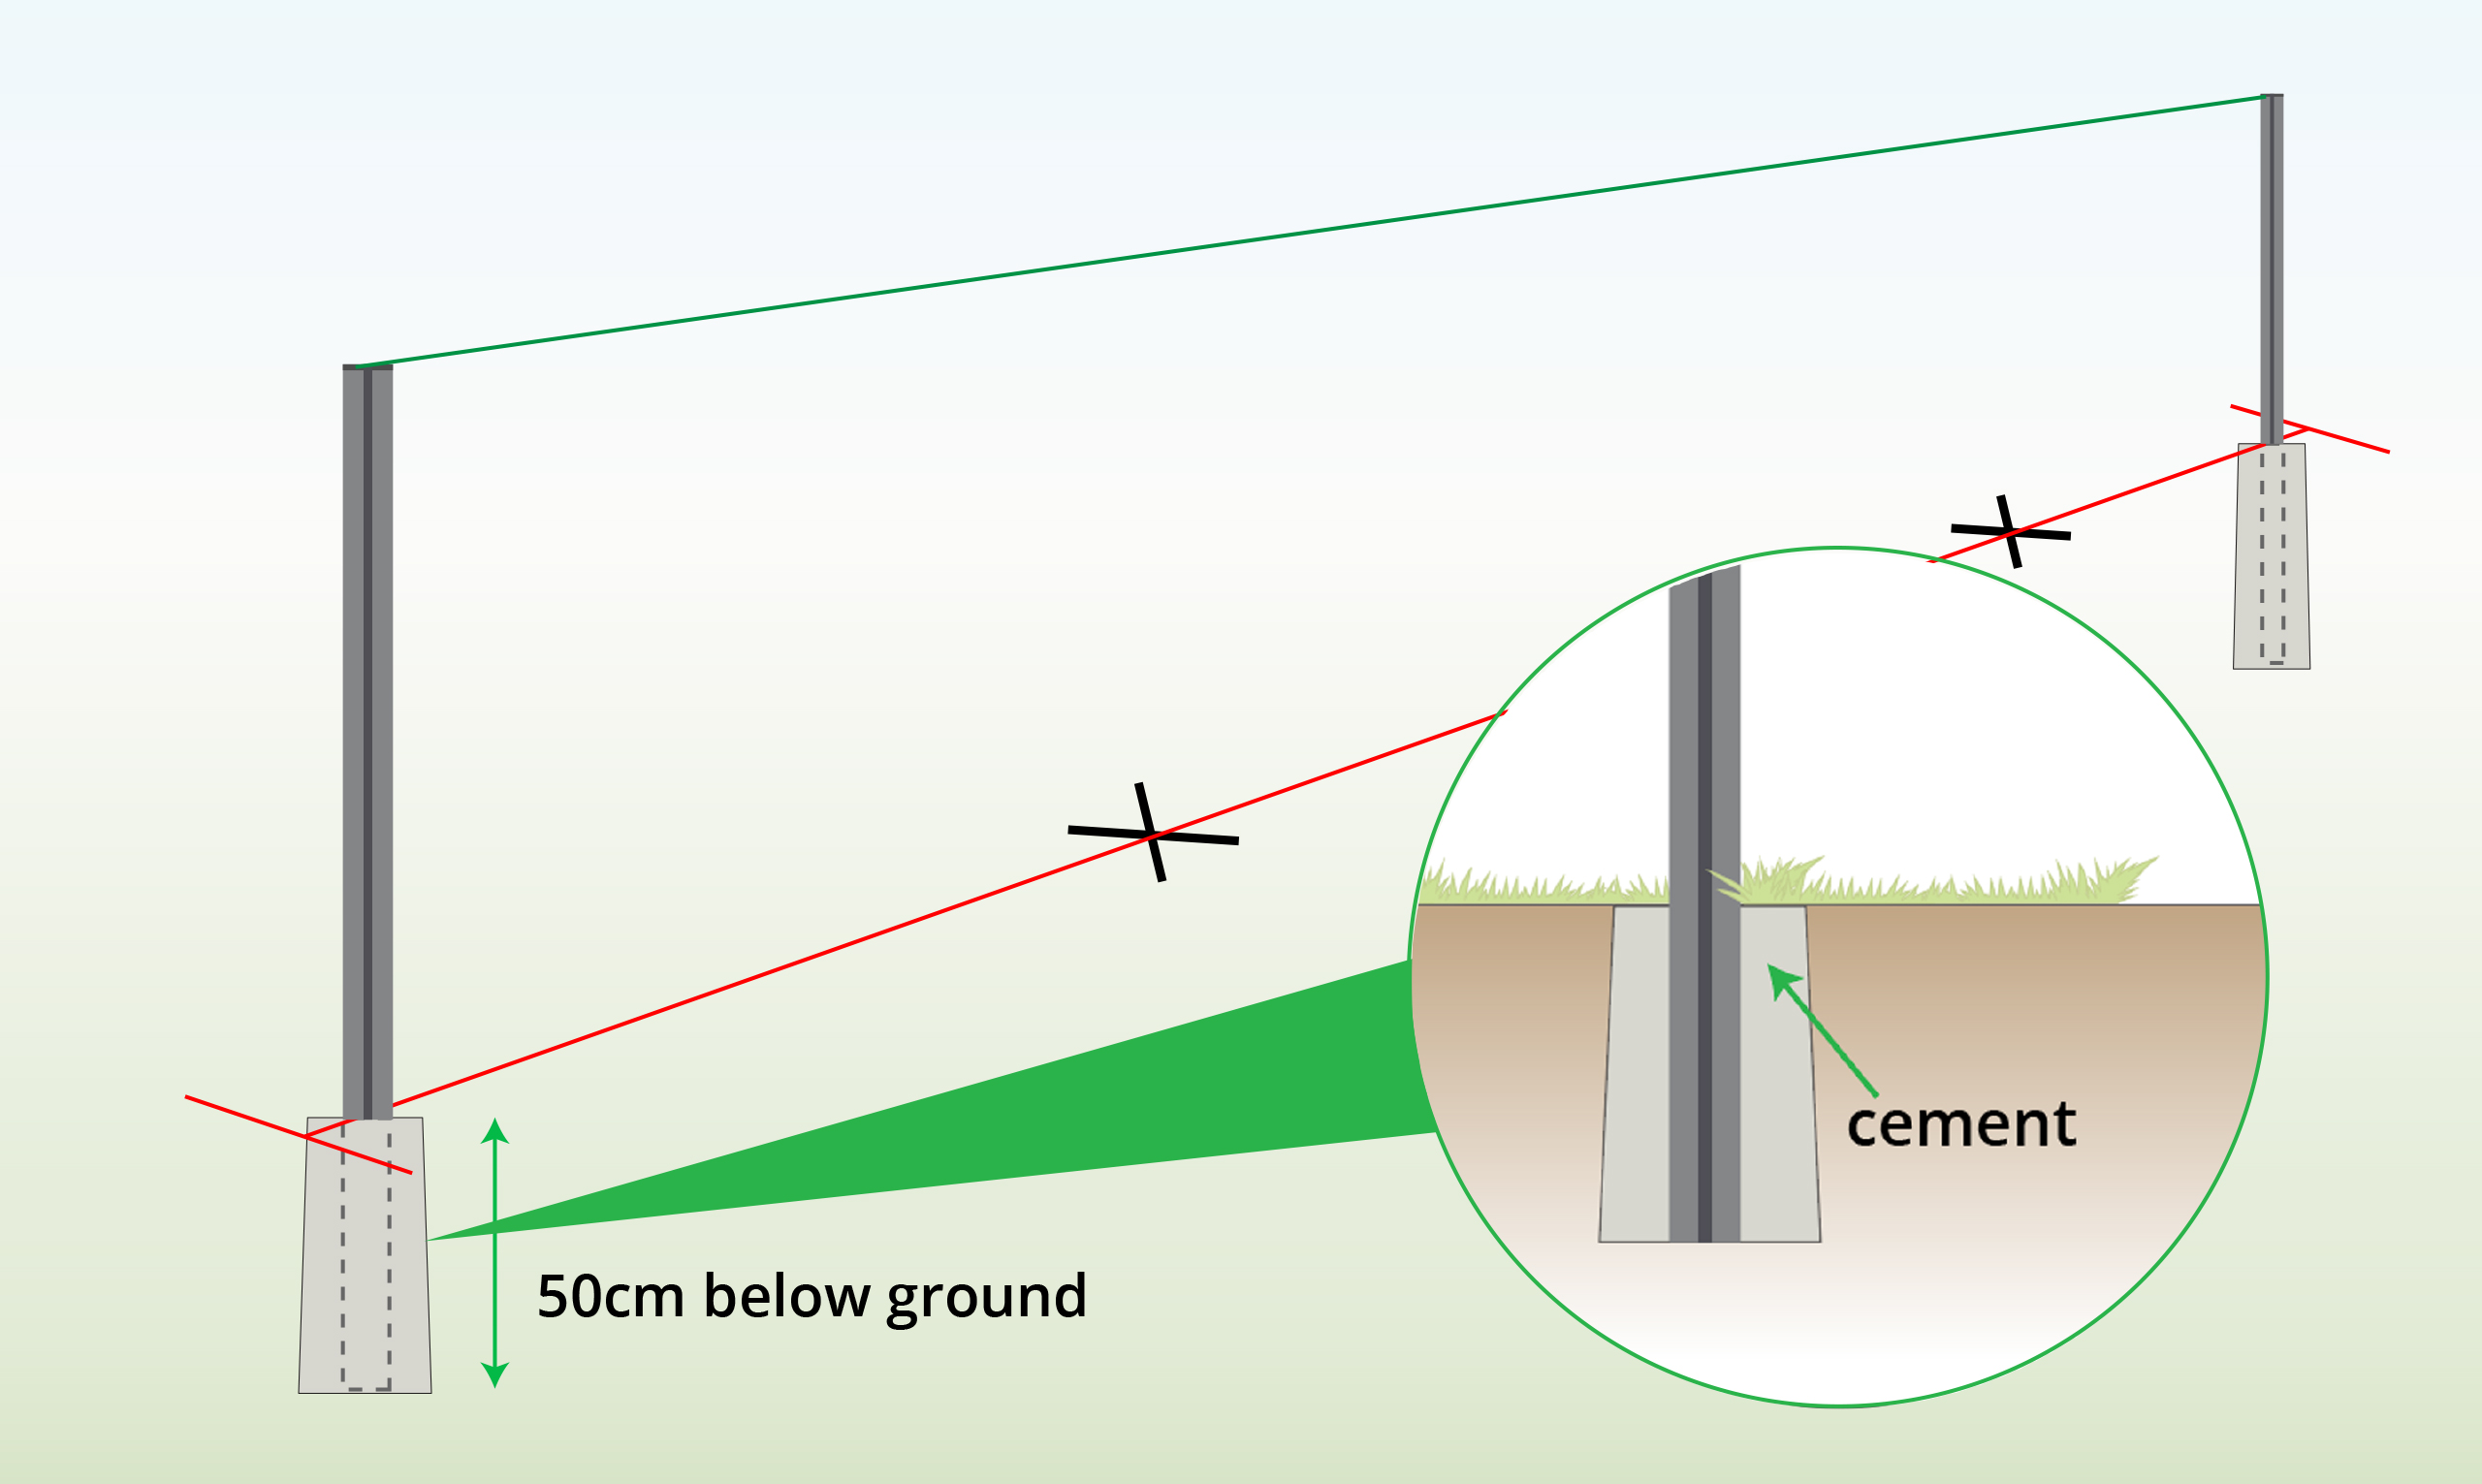
Step 6 (Optional) – Set in Concrete
|
To achieve a stronger and more secure fence, place your posts in concrete by digging a 50cm hole and pouring cement into it for your post to sit in. |
|
Step 7 – Install Middle Posts
|
To install middle posts, repeat steps 3-5.
|
|
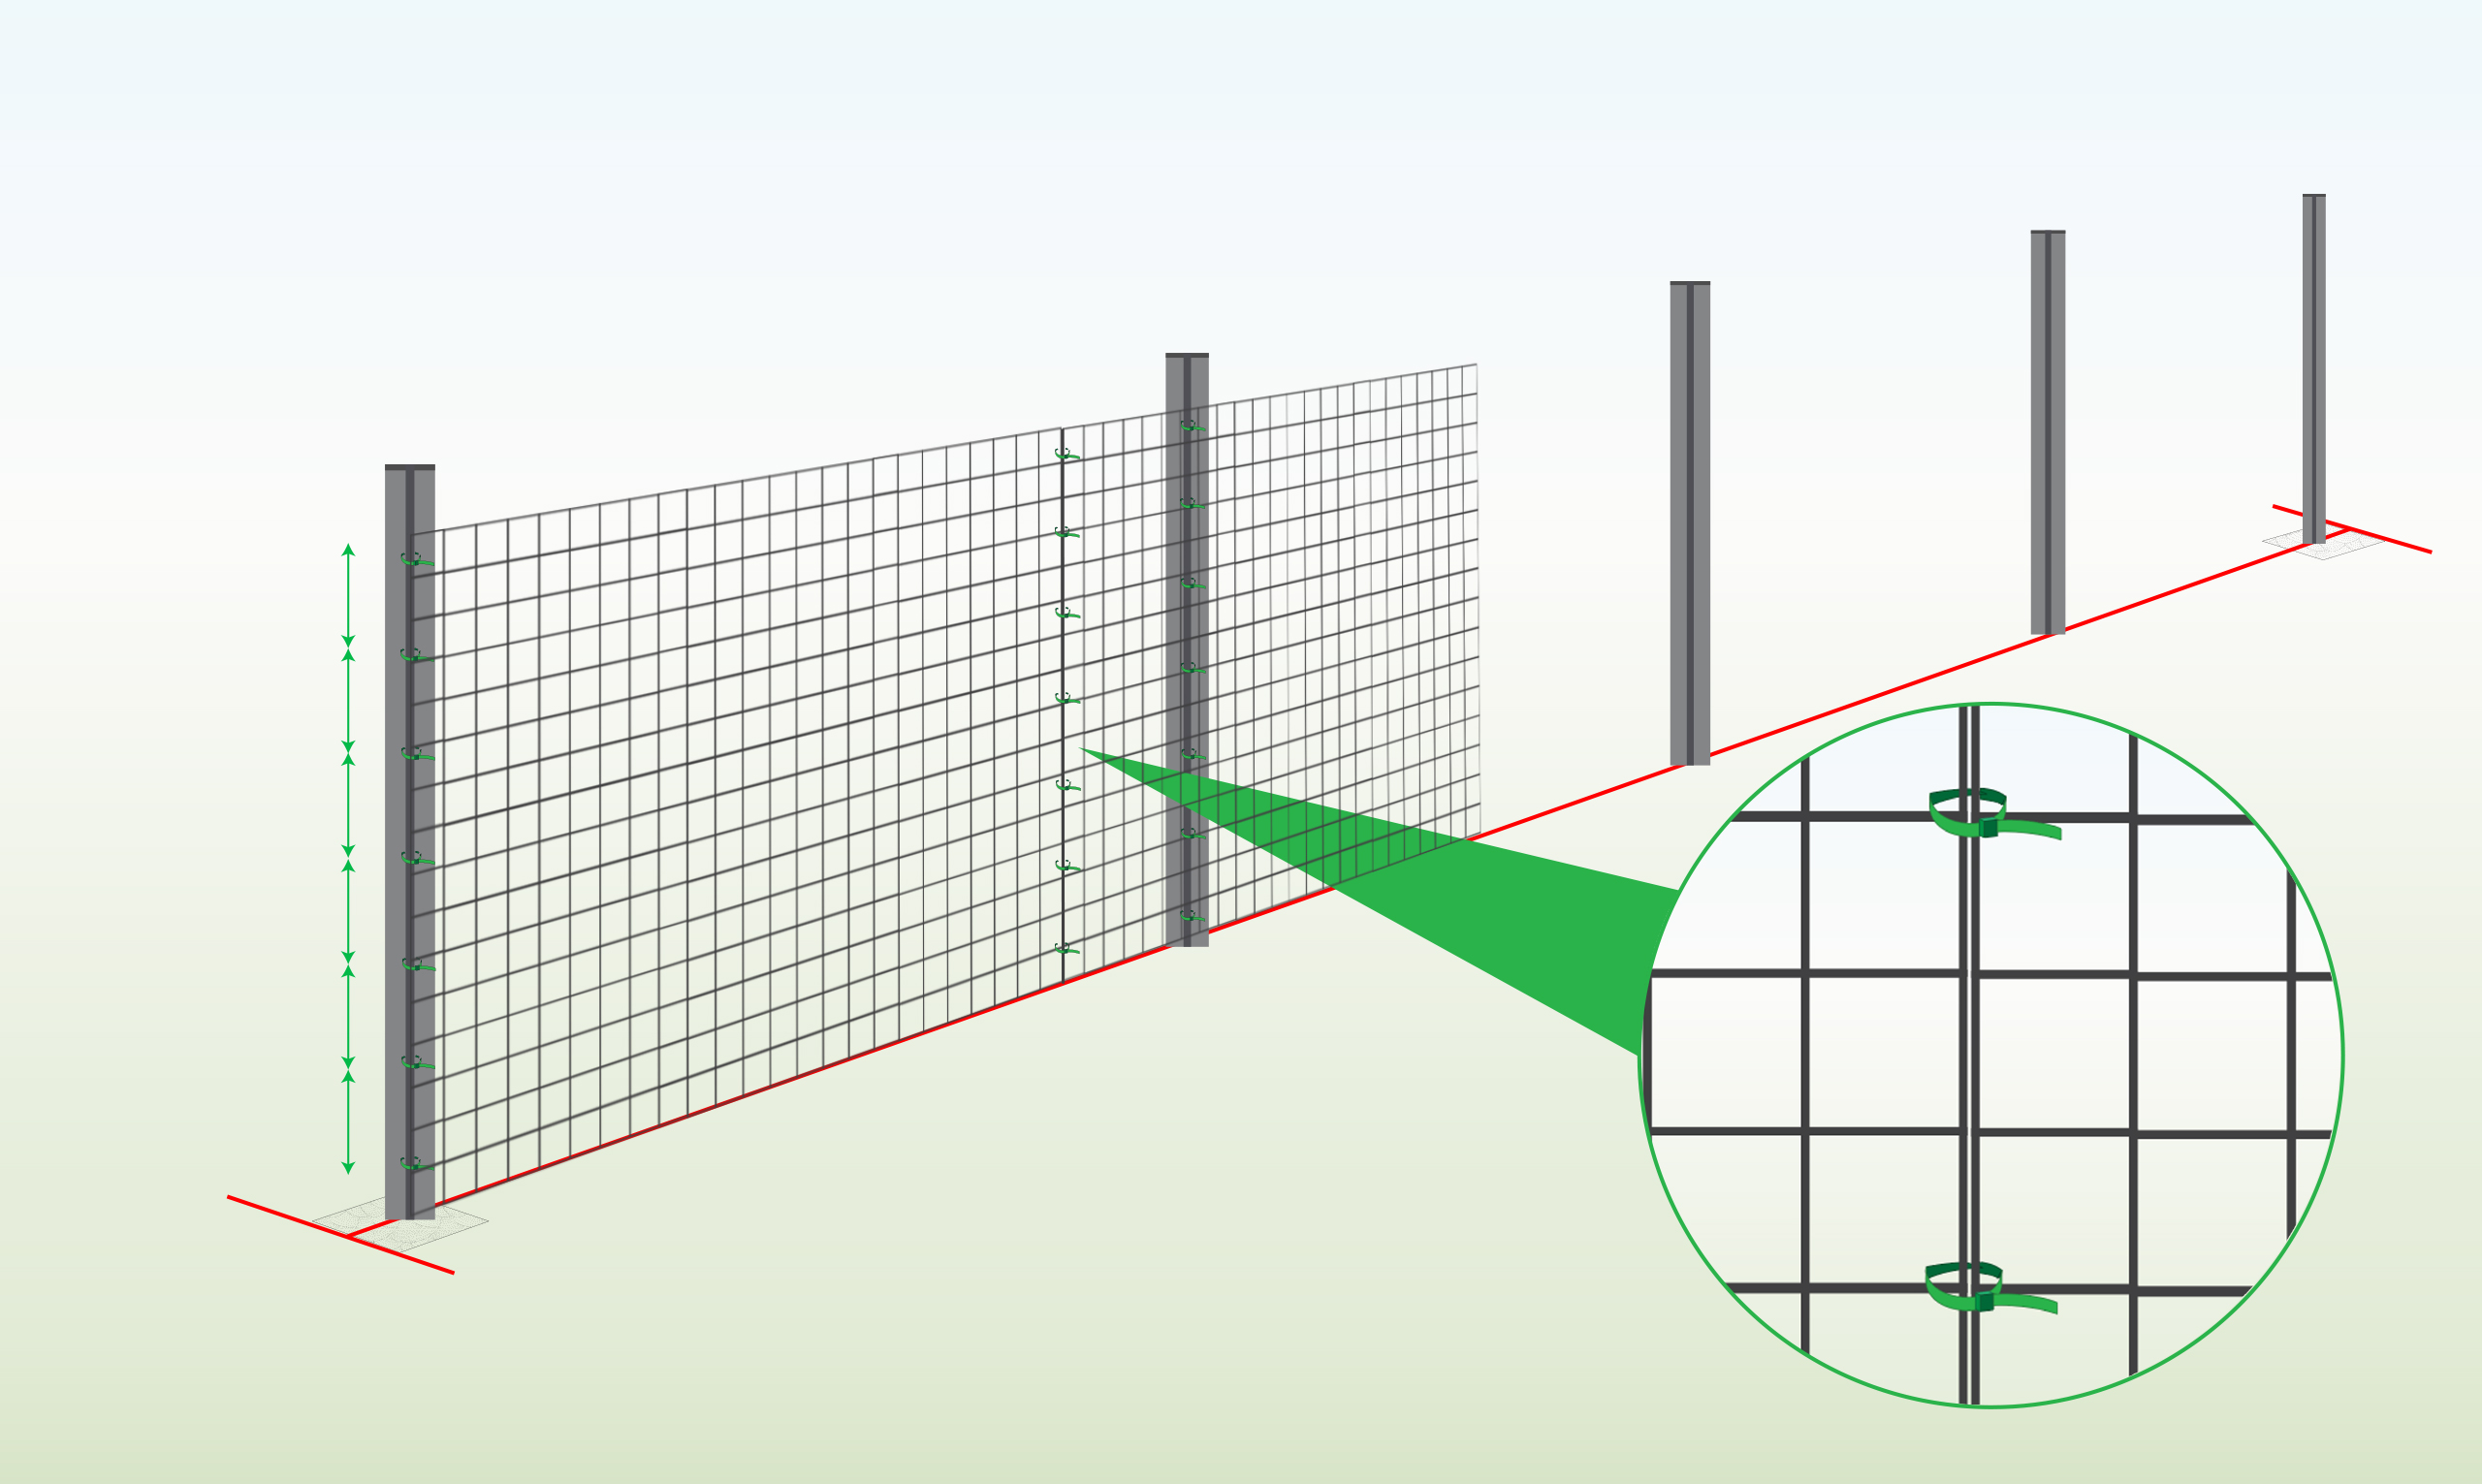
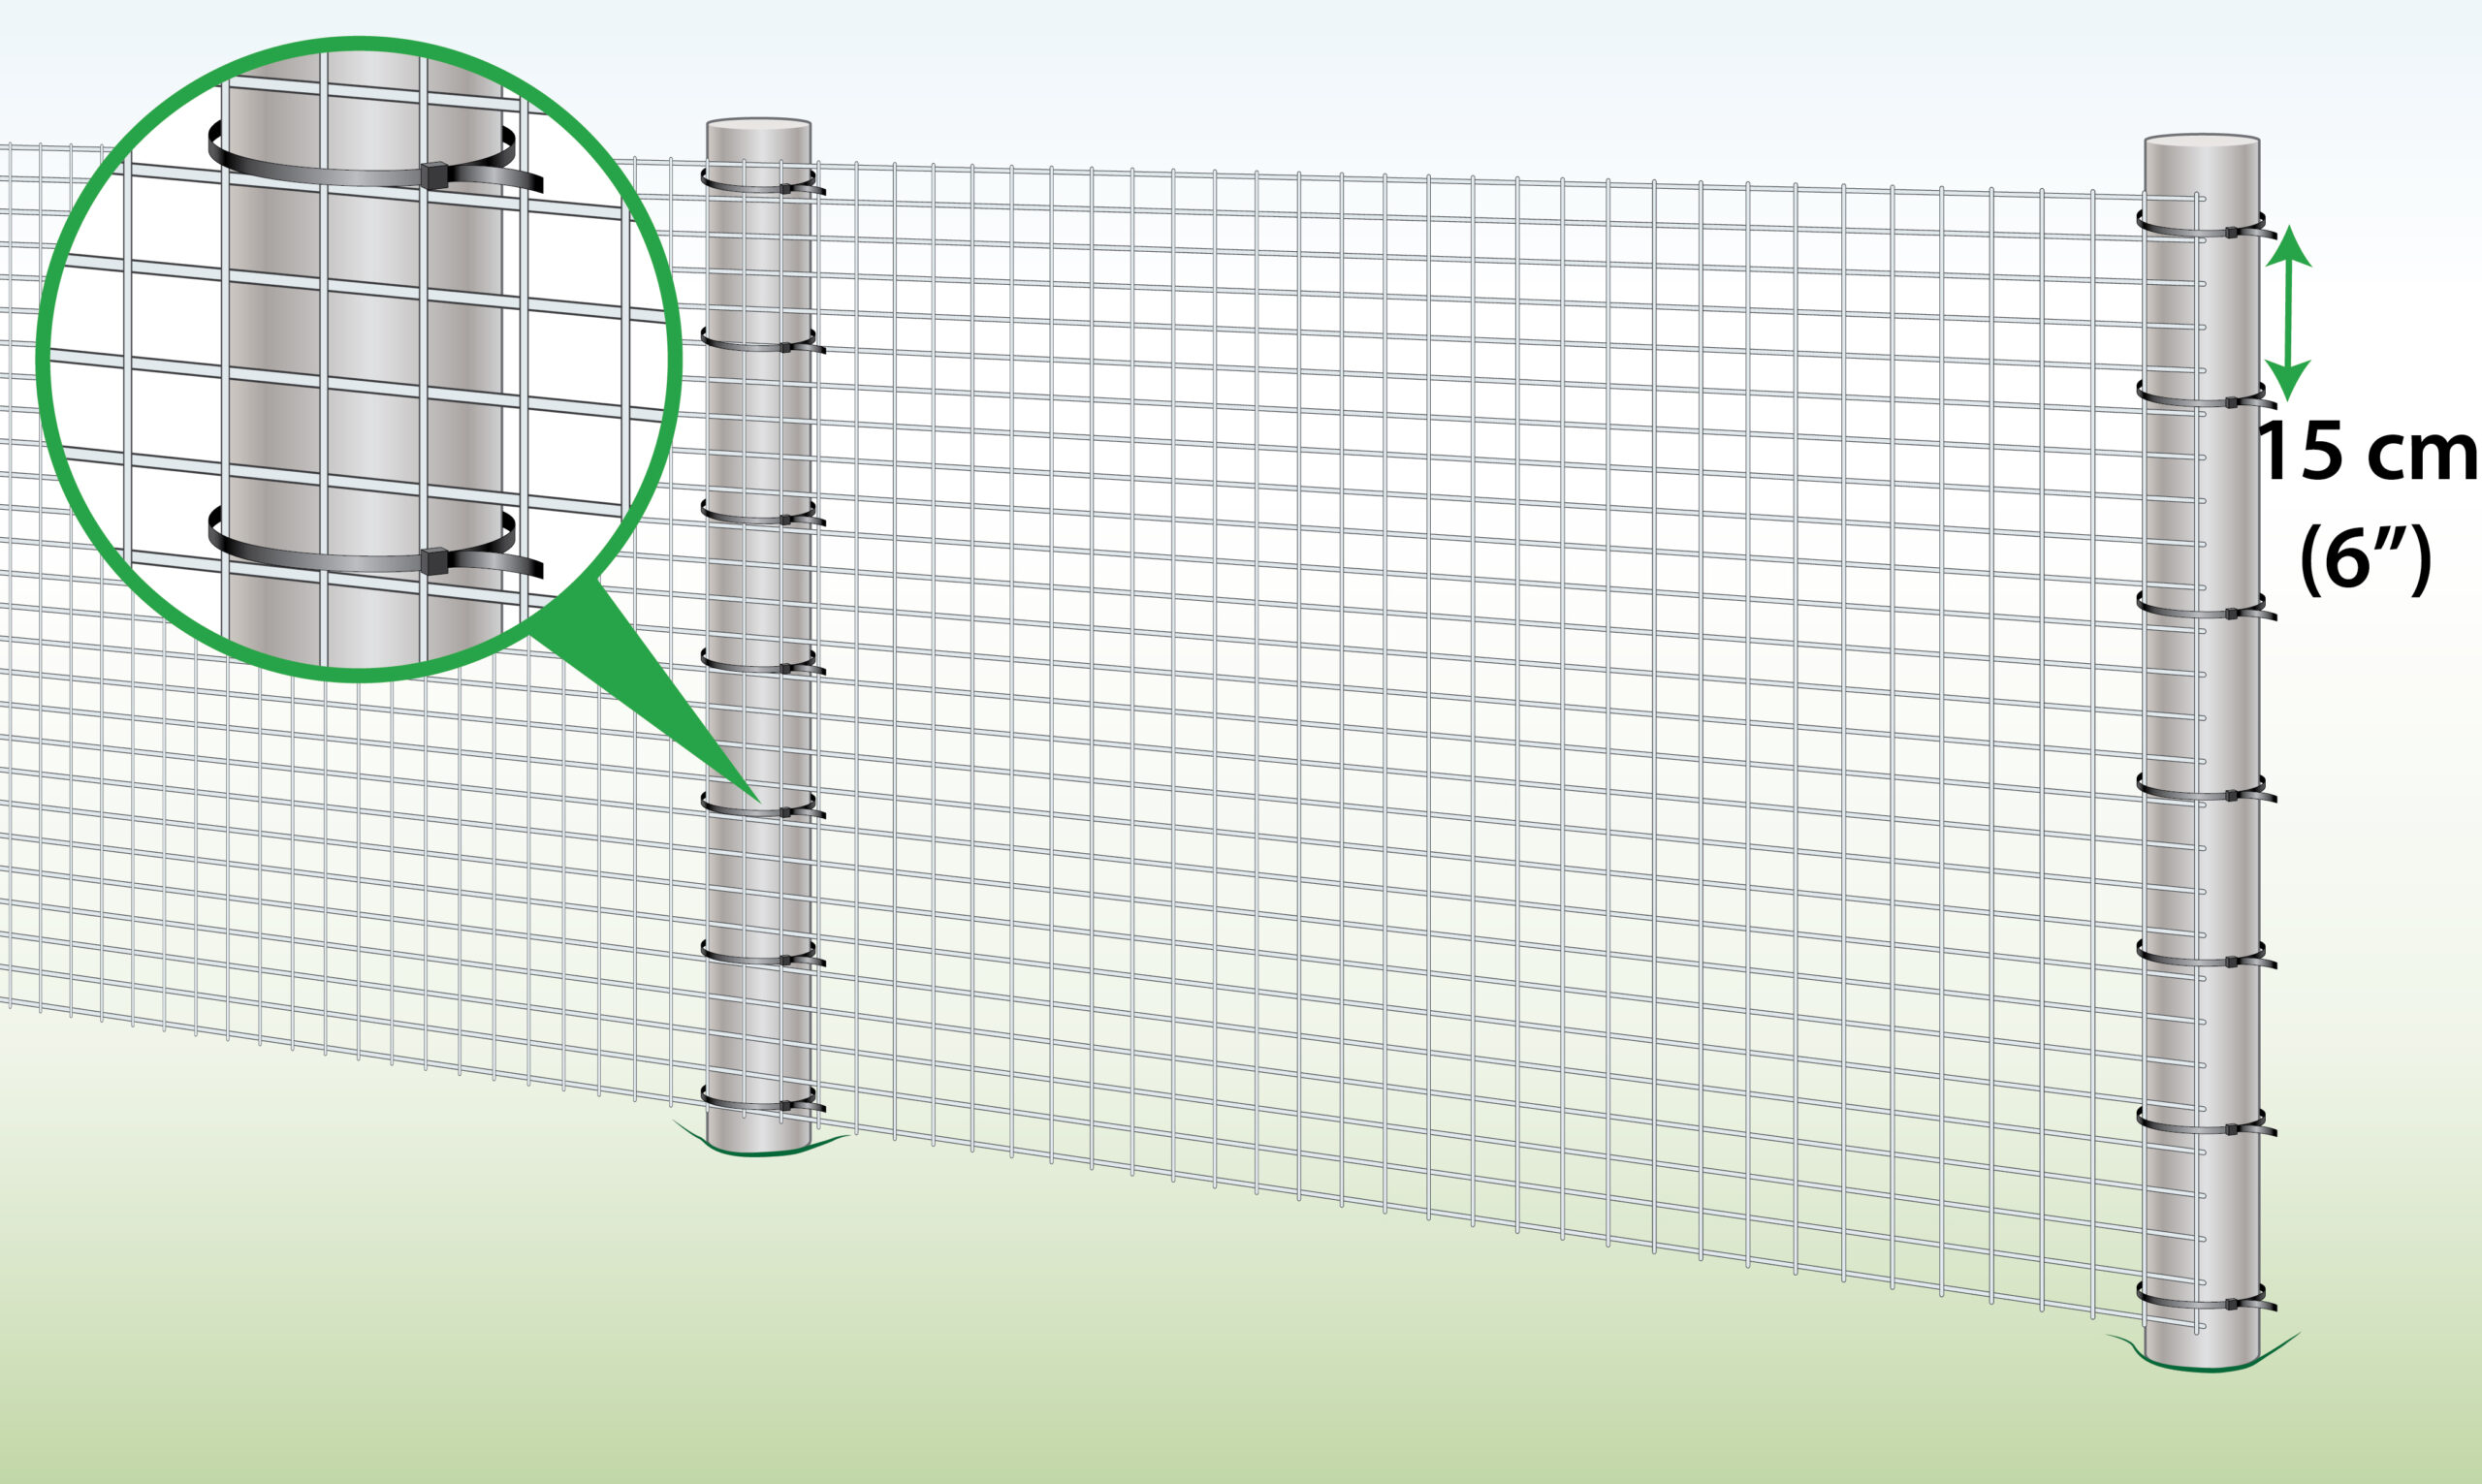
Step 8 – Attach Panels
|
Begin at the end post and fasten the mesh to it using cable ties, which can be threaded through the pre-drilled holes in the post.
You can add additional cable ties by enclosing the entire post. |
|
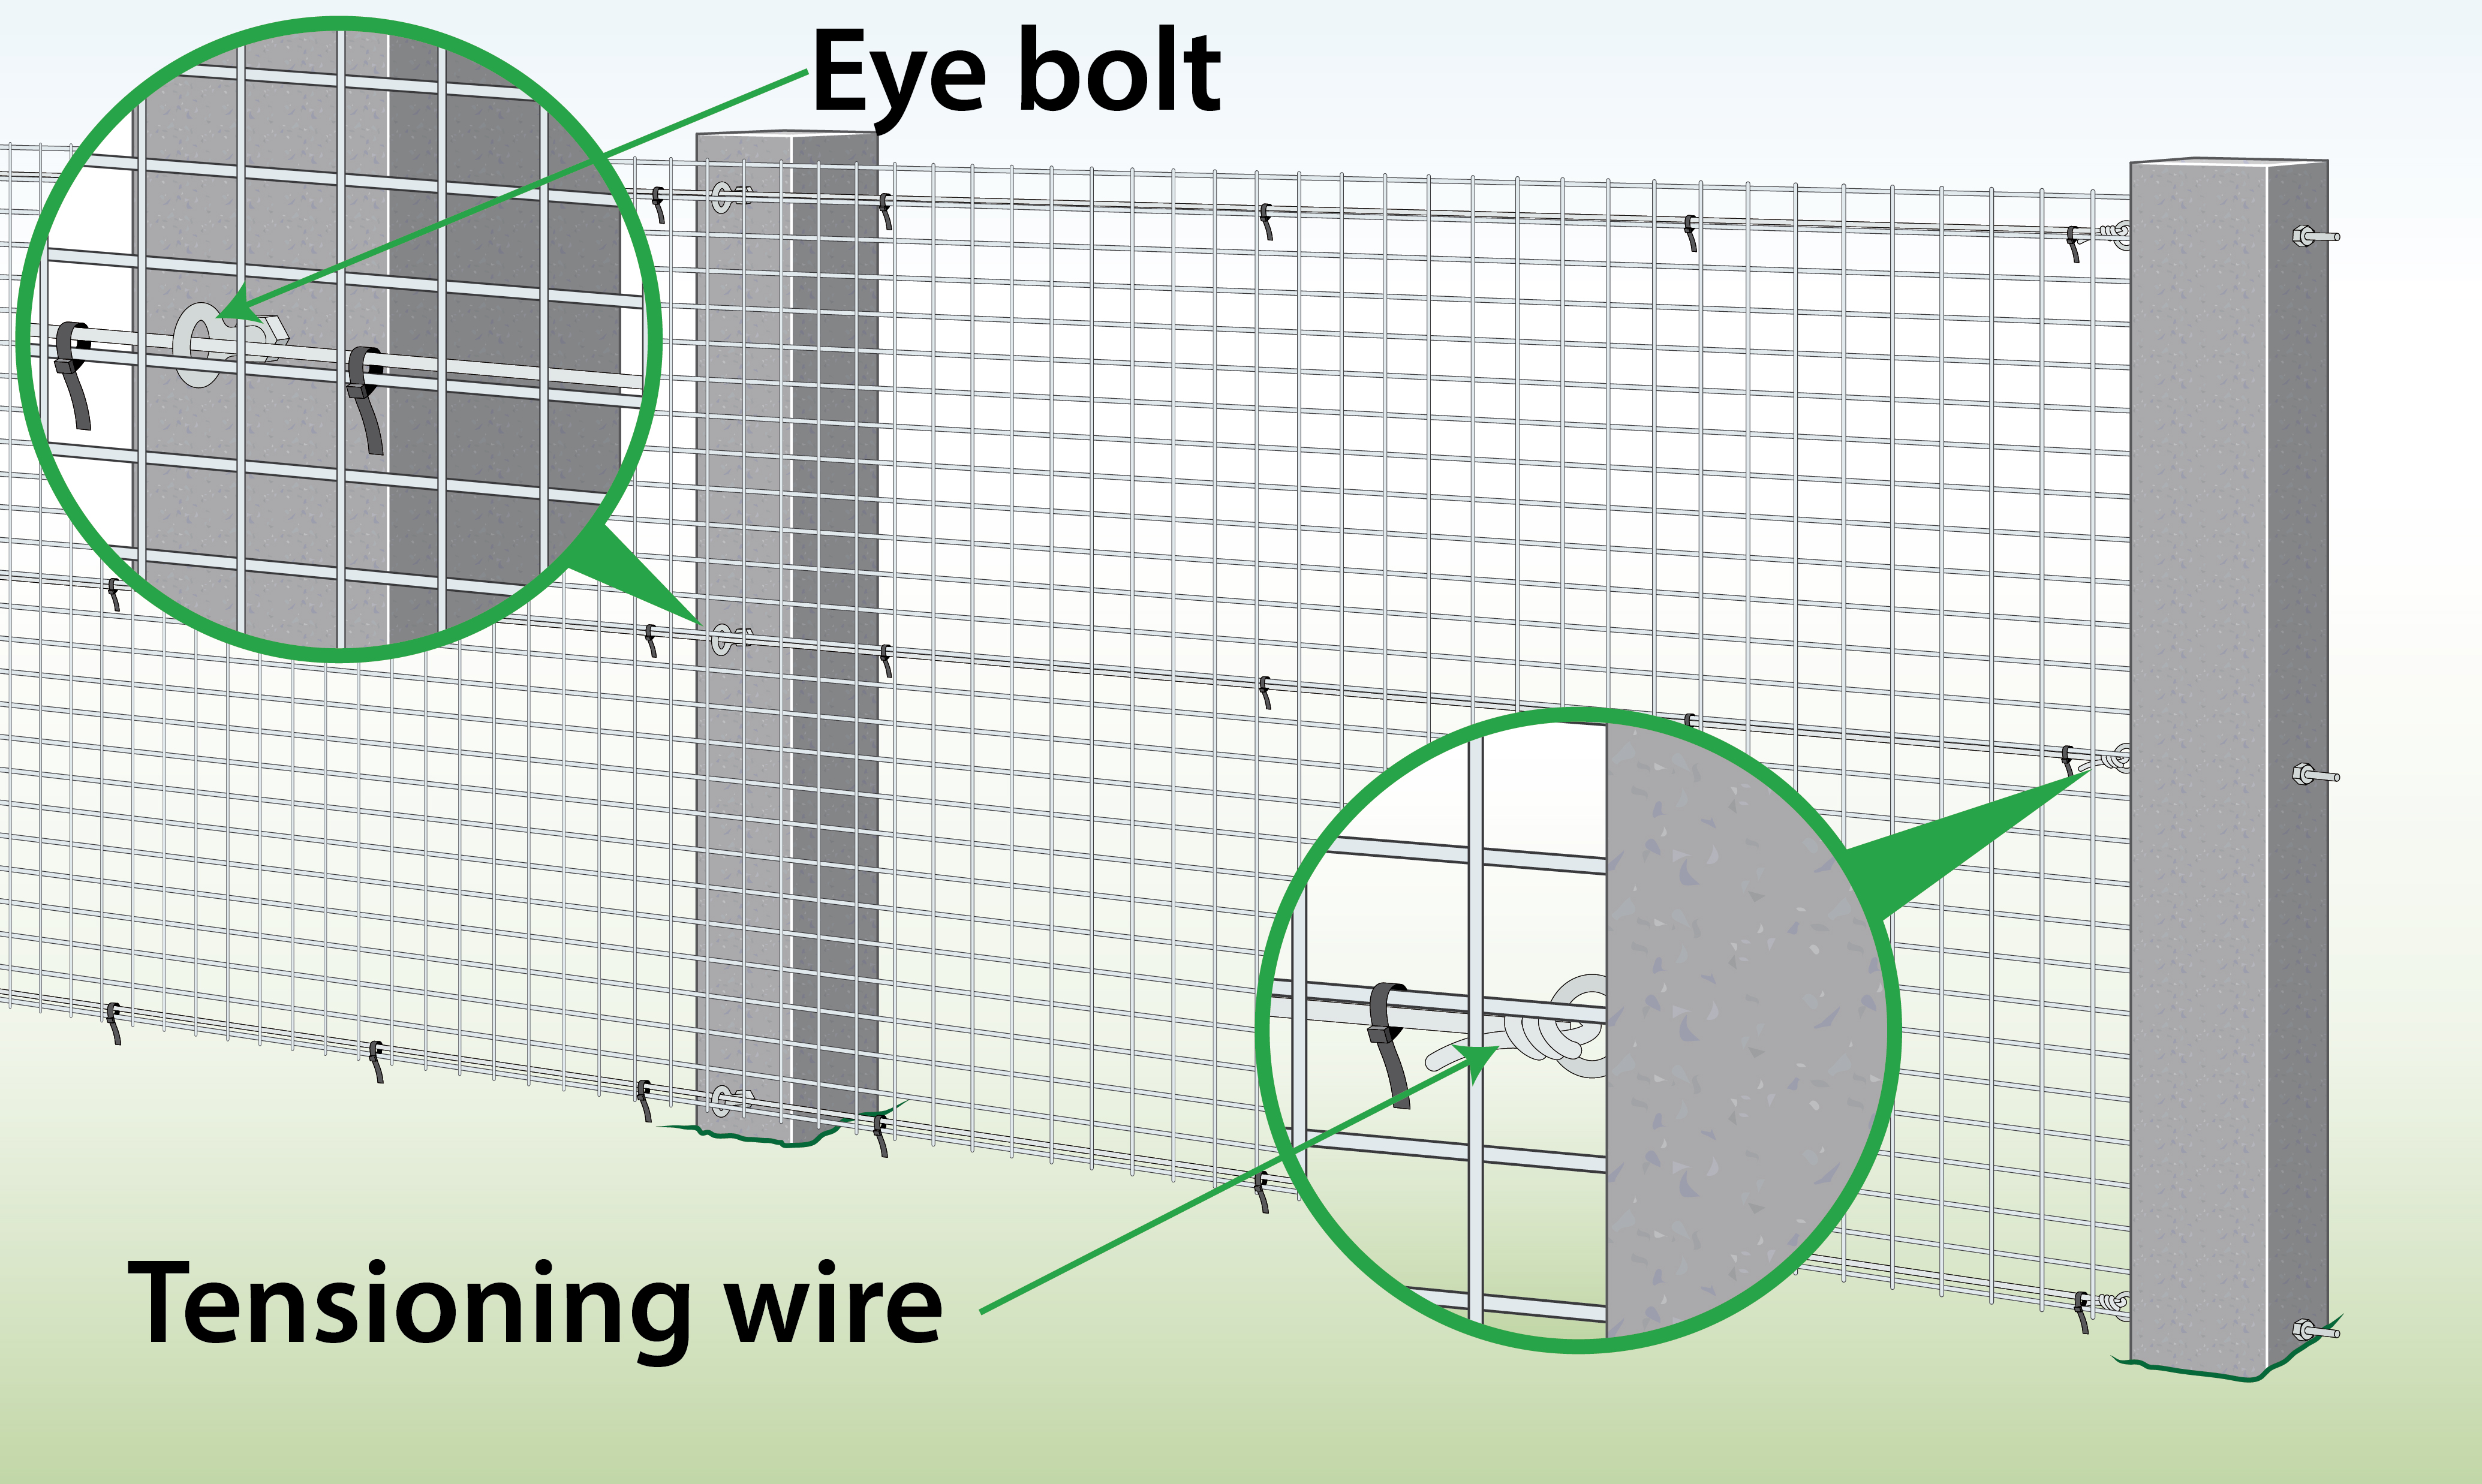
Alternative Option
|
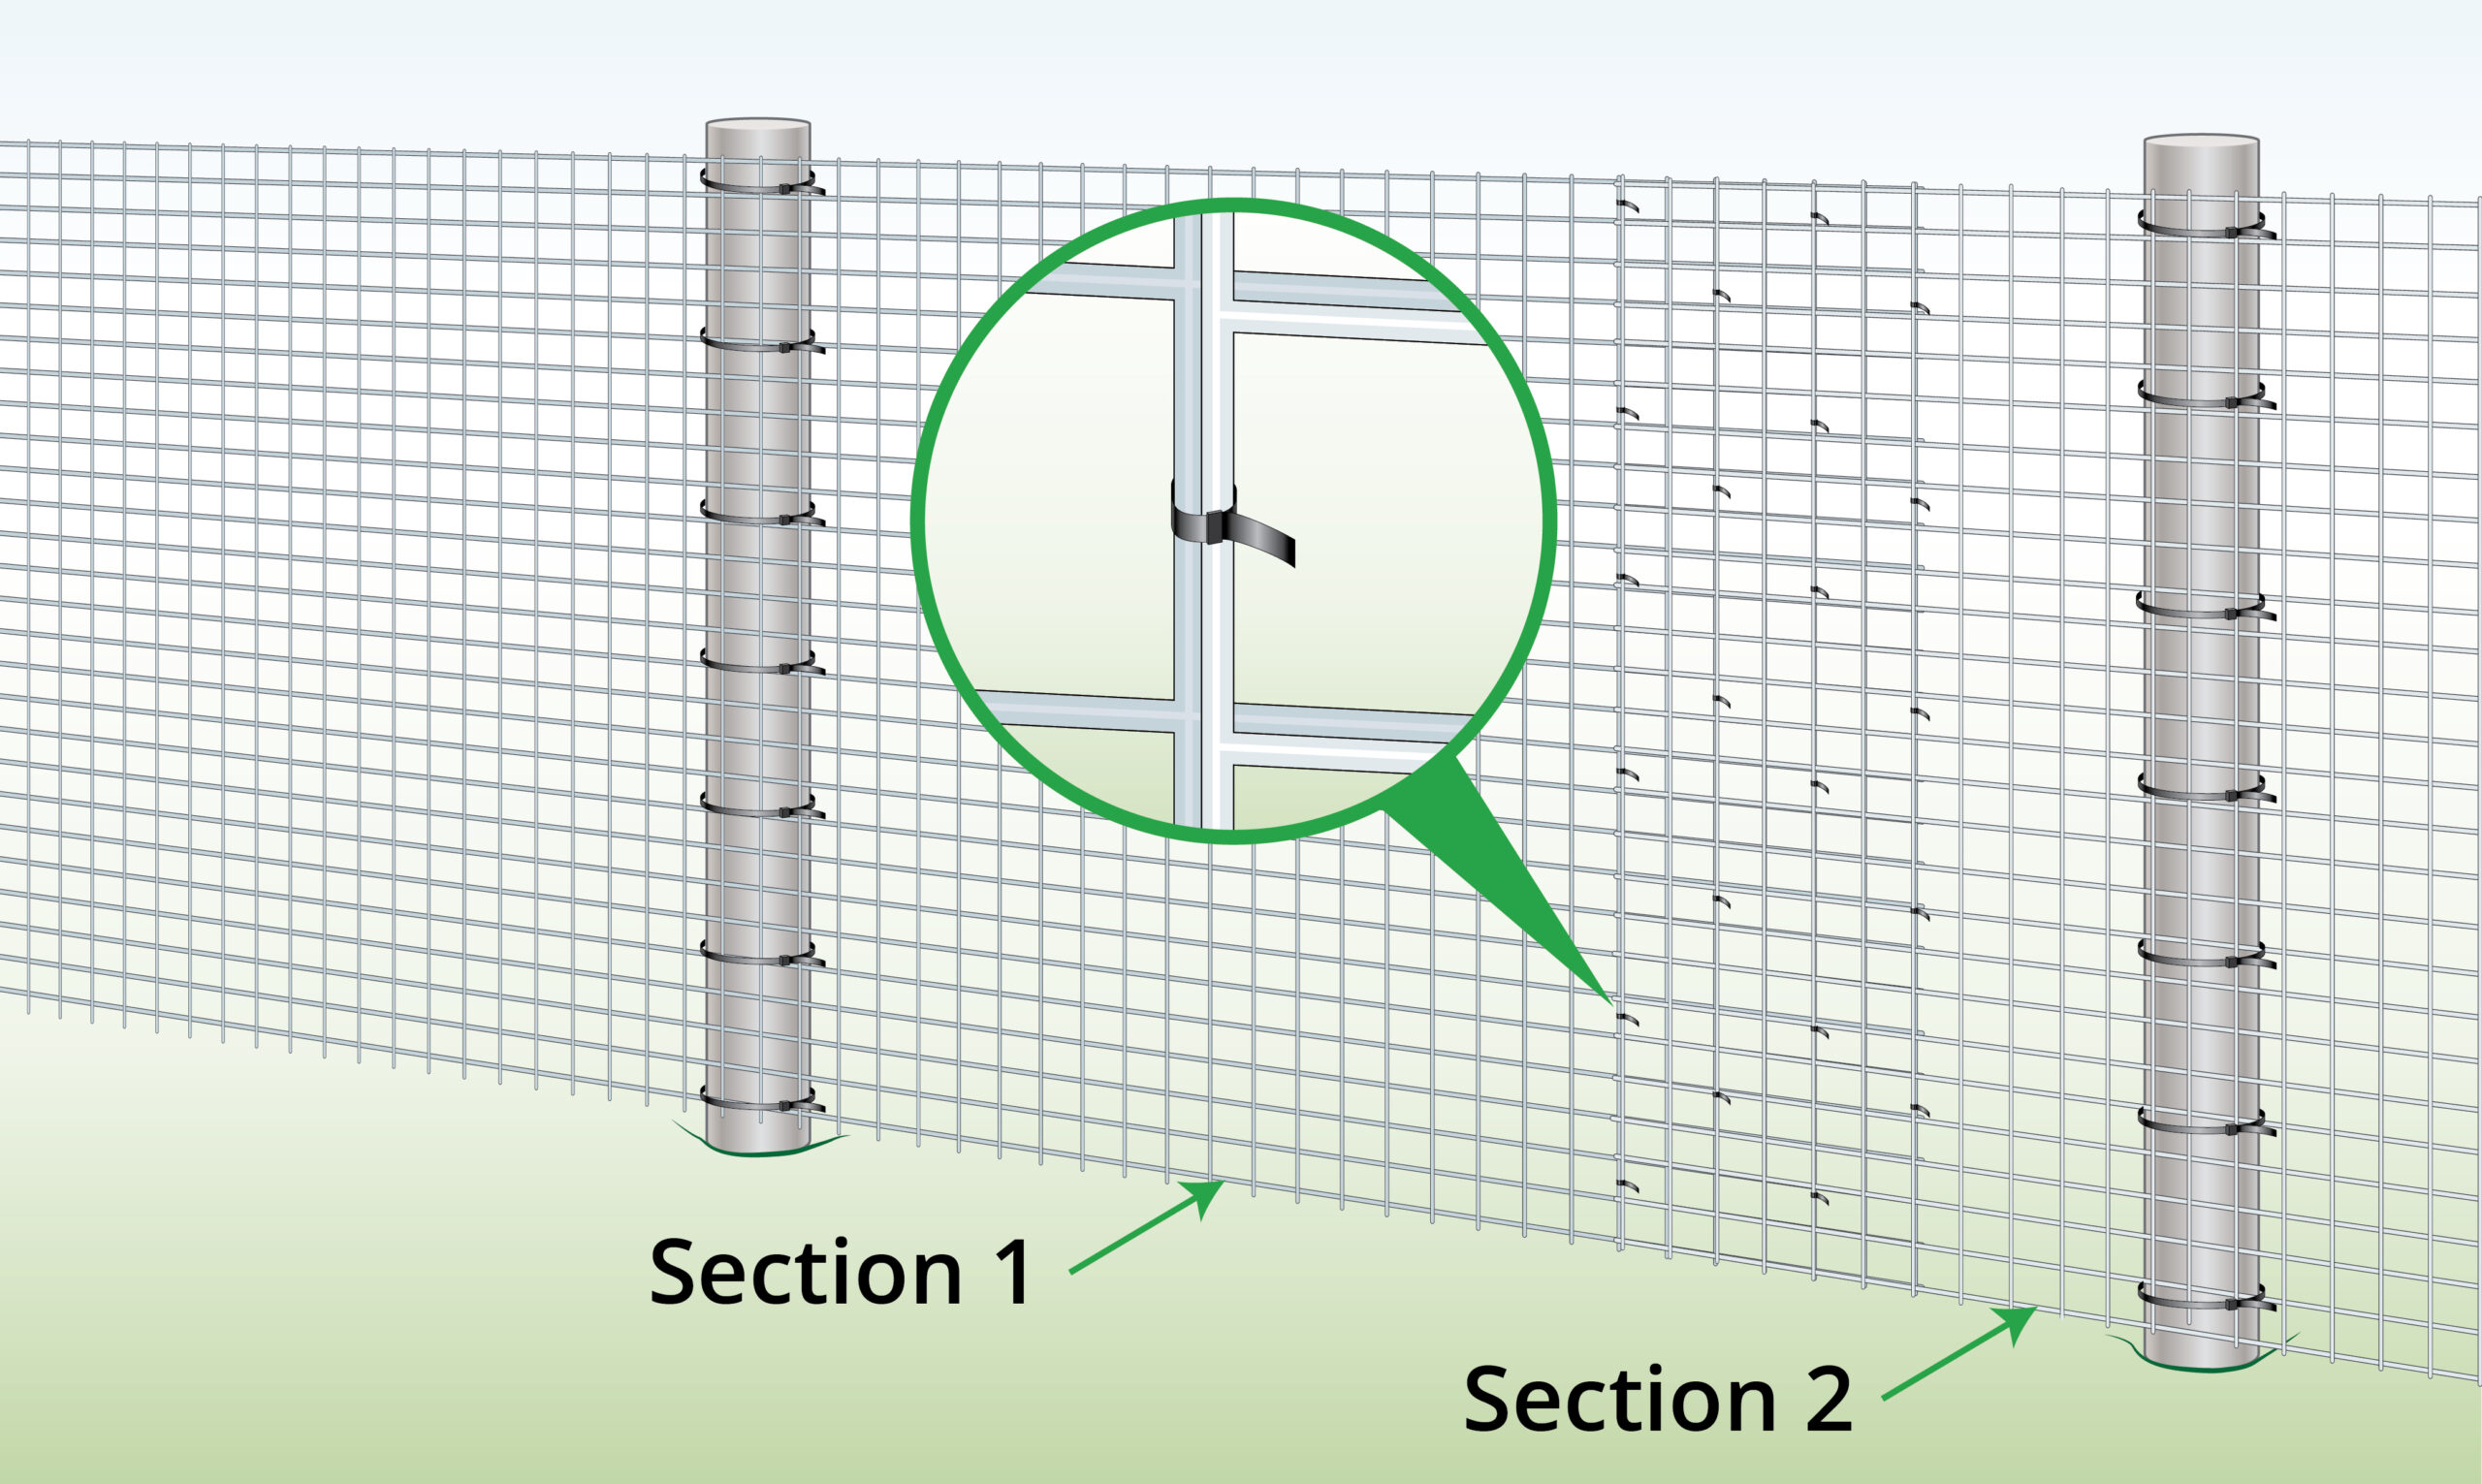
Increase the spacing between the posts by overlapping the panels. Connect them by securing them together with cable ties. |


Attachments
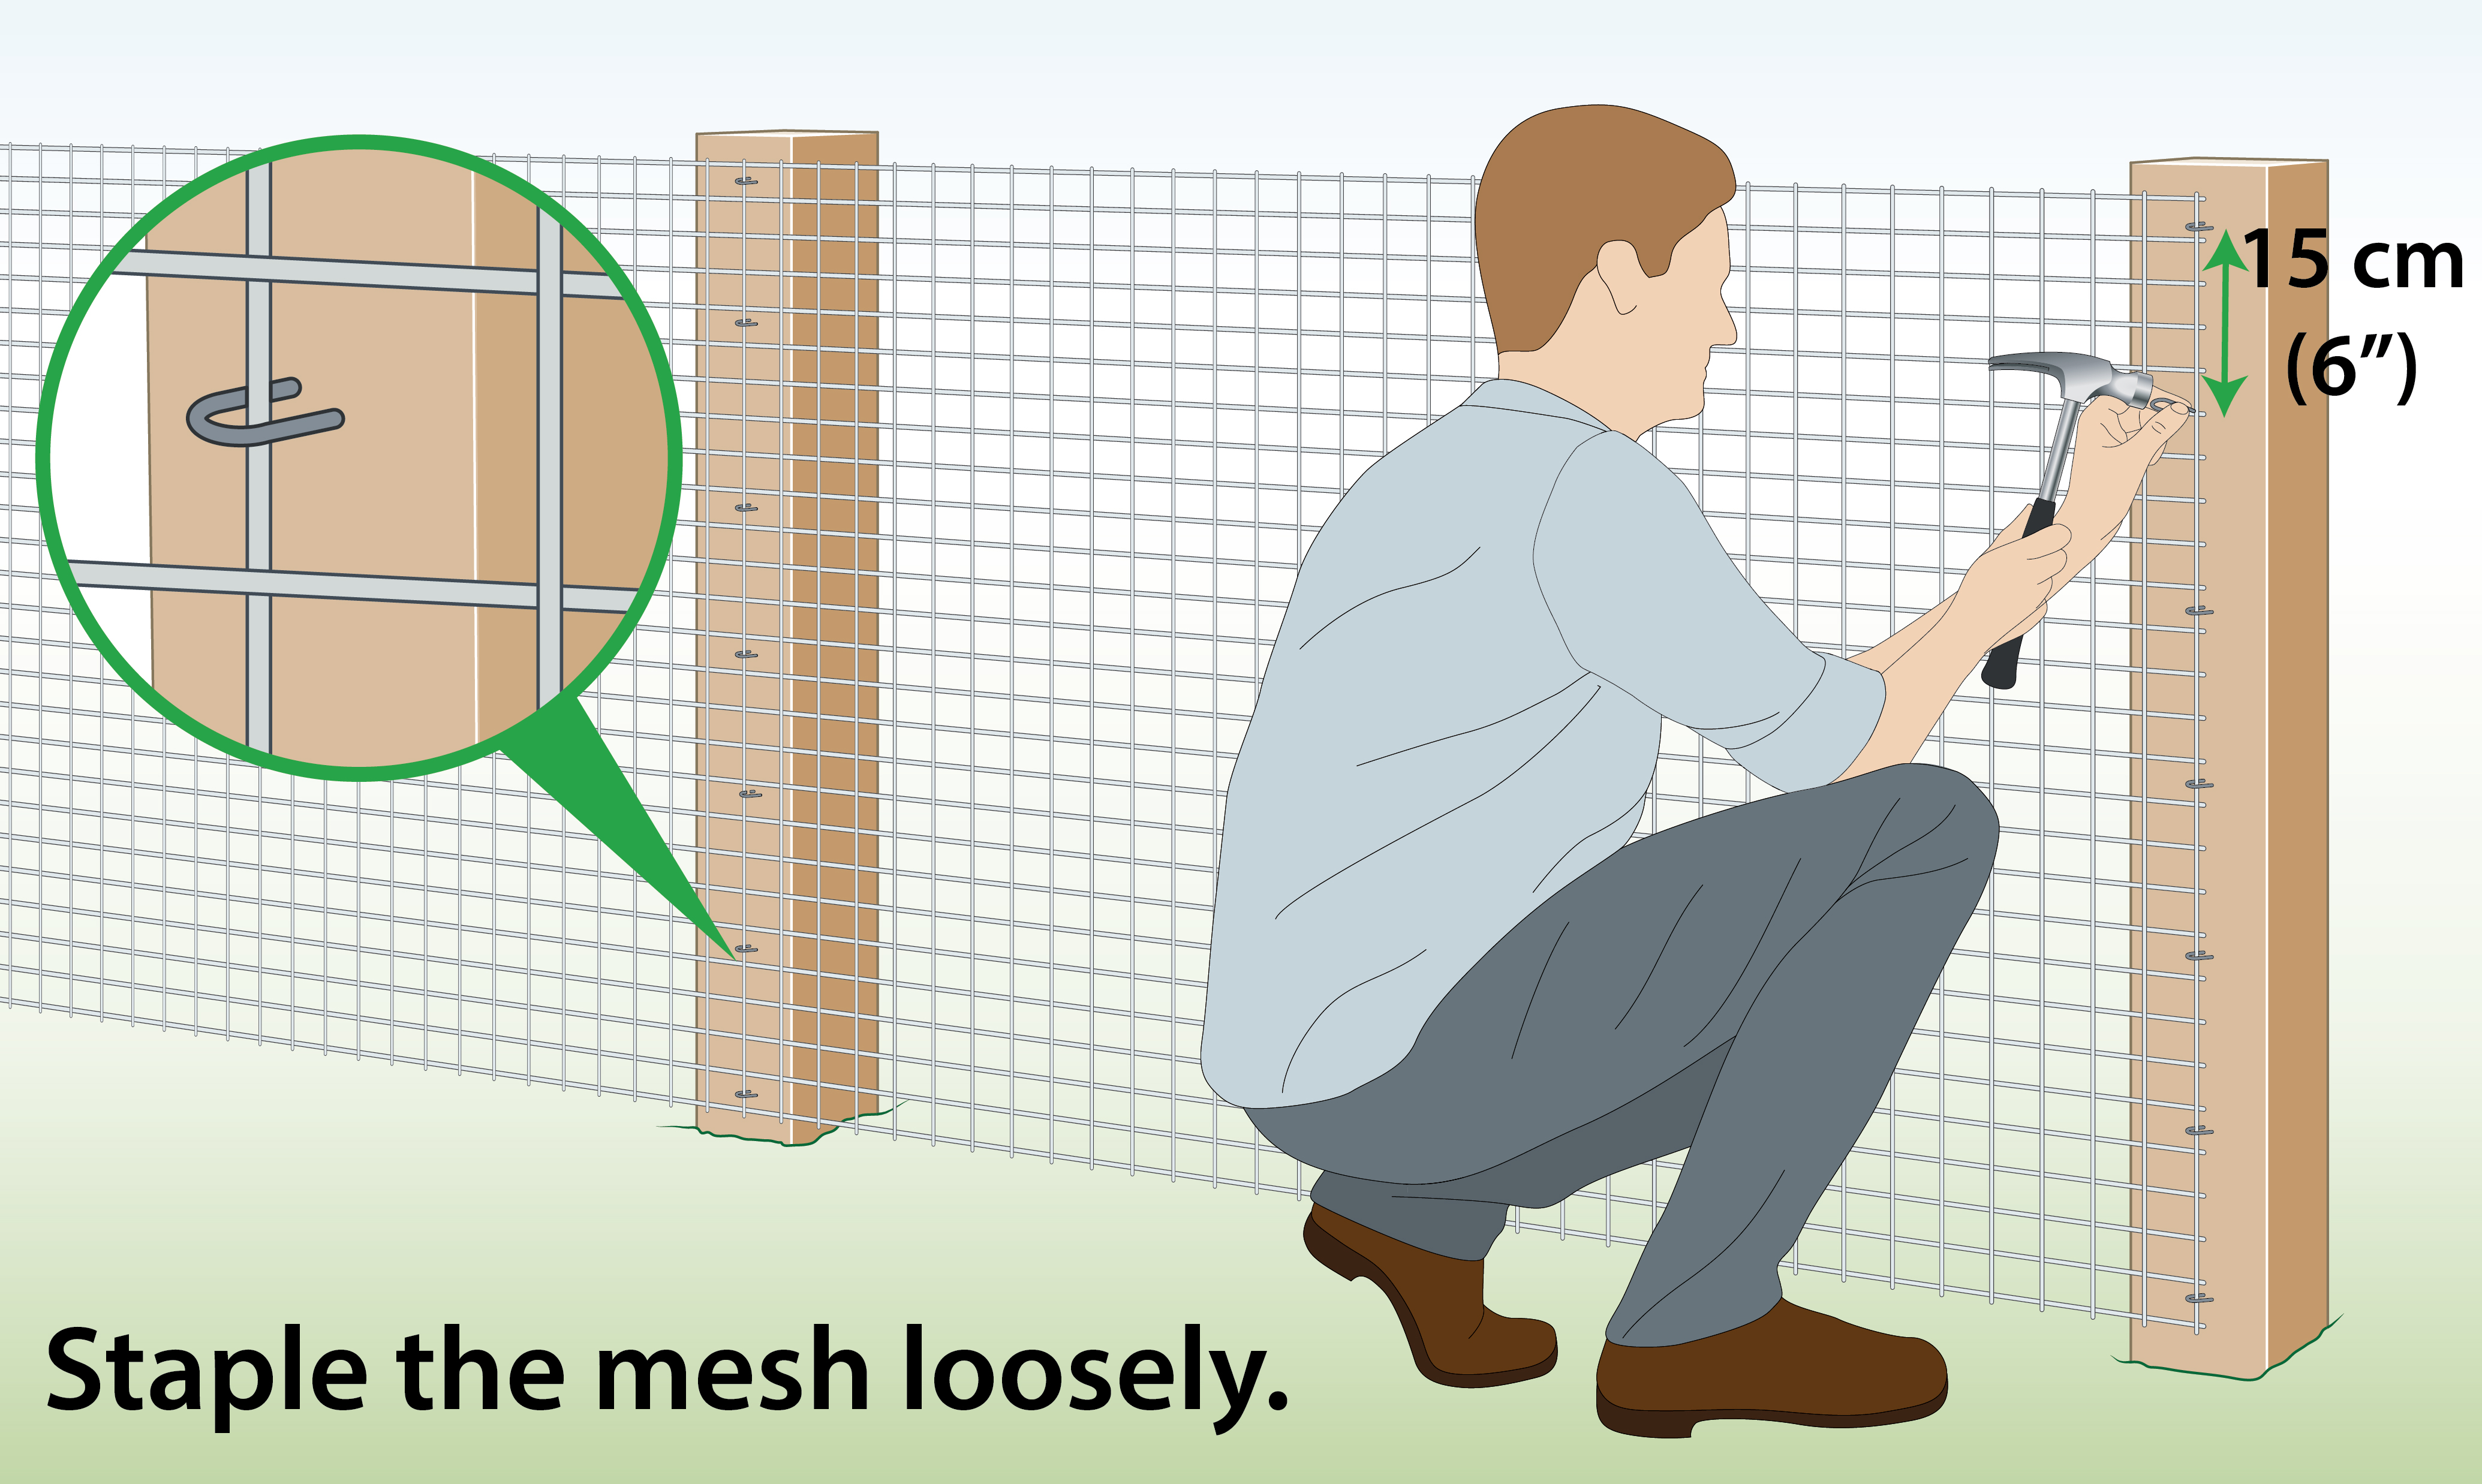
| Attach to: | How to: |
| Wood/ Wooden Posts (Staples) |
 |
| Metal/ Metal Posts |
 |
|
Concrete Posts |
 |
|
Soil (Pegs) |
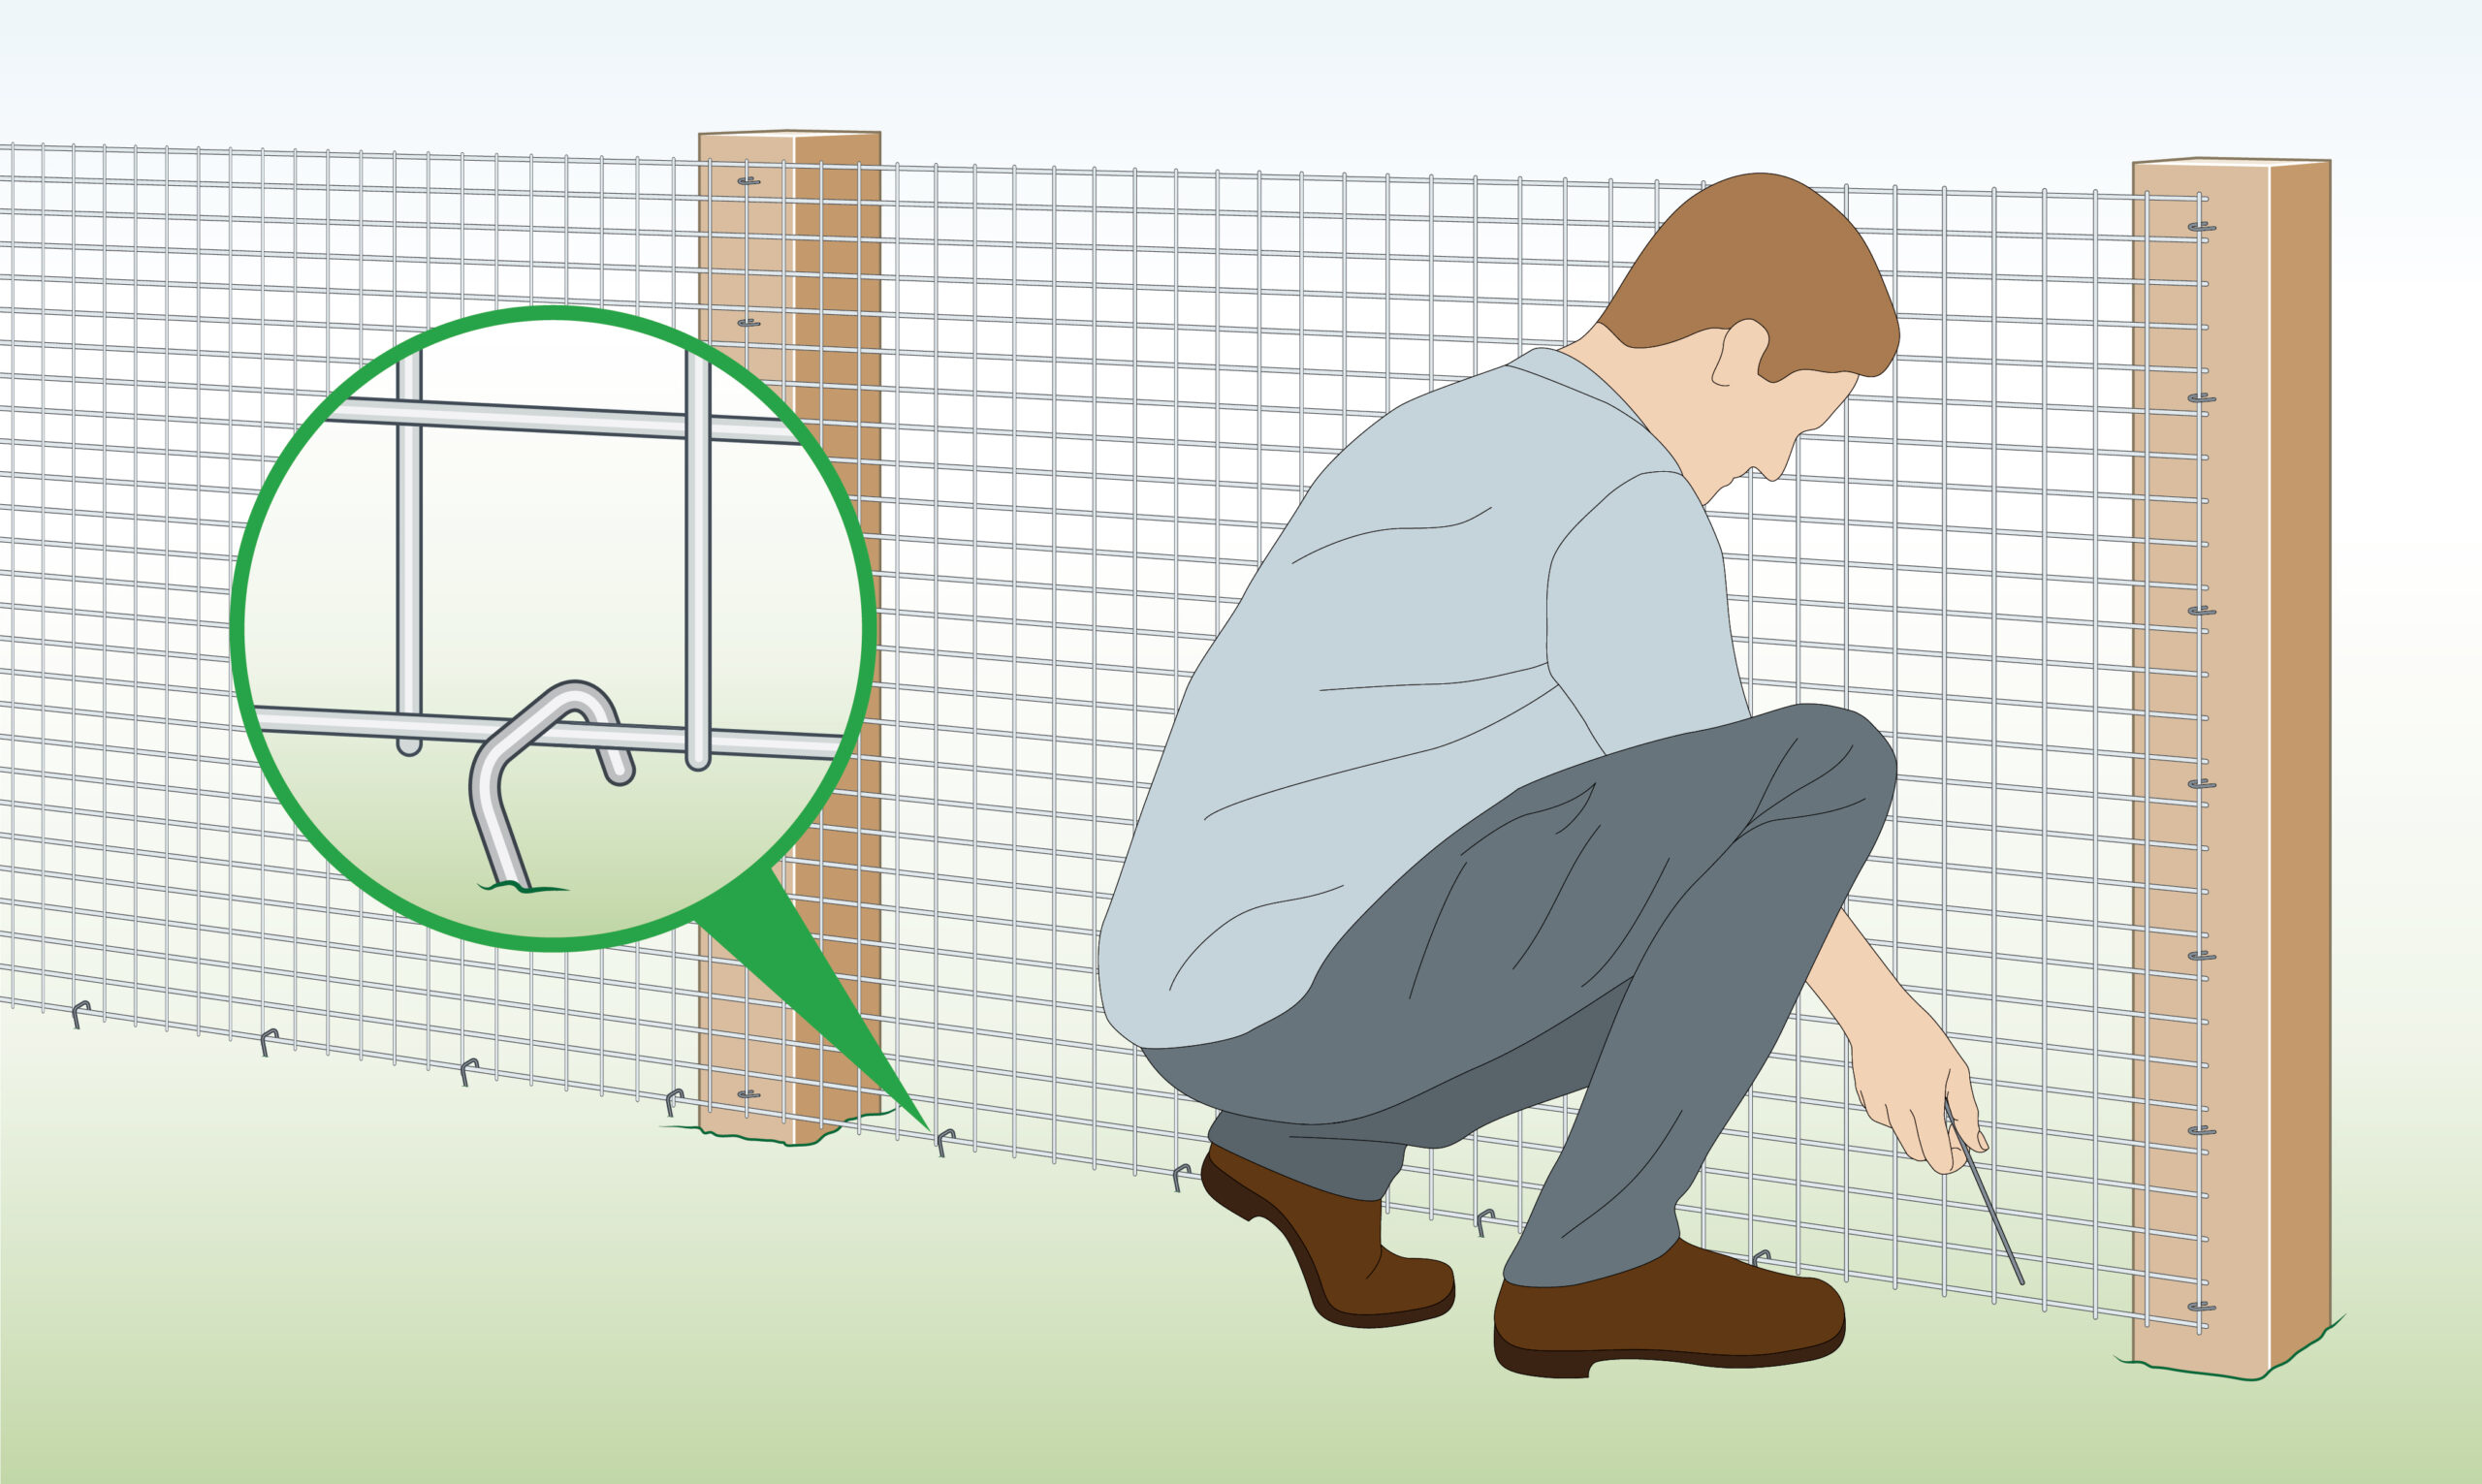 |
|
Wire Fence
|
 |
